
:max_bytes(150000):strip_icc():format(webp)/GettyImages-1302402871-ea3debd2e3c64ec5a78a99e580b6a8d1.jpg)
New 2024 Approved Easily Cut Large Videos Faster on Mac 7 Solutions Included
Easily Cut Large Videos Faster on Mac [7 Solutions Included]
Finding a video cutter that can easily cut large videos on Mac can be difficult. The right video cutter for Mac will make it easy to cut and share videos. It will also be easy to use and offer basic and advanced editing features. Fortunately, some video editing software we found can help you cut and easily edit your videos. These video cutters reviewed in this article cut across different experience levels and are categorized between free and paid. Let’s take a look at the best video cutter for large videos on Mac we could find.
Best Large Video Cutter on Mac - Filmroa Video Editor

Supported System: Mac and Windows
Cutting large videos is not easy if you don’t have the right tools to achieve that. That’s where Filmora Video Editor enters the picture. It combines simplicity and several excellent features to offer you the best video cutter for Mac. It doesn’t just provide you with the basic cutting features but also several editing tools to create fantastic videos. In addition, its user interface is intuitive and easy to navigate by new editors and professionals.
Filmora Video Editor offers several customization features and advanced features to make your video look sleek and professional. This means it provides motion tracking, the addition of images, filters, effects, texts, and several other tools. When exporting your files, you have a wide variety of options as this large video cutter offers different output formats to select from. It also allows you to share your video directly to any social media network you would prefer. Most importantly, it is compatible with every version of MacOS.
For Win 7 or later (64-bit)
For macOS 10.14 or later
Features
- It supports various video formats like AVI, MOV, MP4, MKV, and several others
- It only takes a few clicks to cut, trim, and split videos
- Impressive video editing features
- Intuitive and user-friendly interface that ensures a gentle learning curve
- You can cut your video without losing the quality level
- Several video effects to make your video stunning
- It offers additional features like transitions, motion elements, color corrections, animated titles, etc.
- Allows you to burn video to DVD or share directly
Cons
- It might not have the most advanced features
Steps to Easily Cut Large Videos On Mac Using Filmora Video Editor
Cutting large videos on Filmora is relatively easy when you follow the proper steps. Below, we’ve outlined the steps you should take when you want to cut large videos on Mac using Filmora Video Editor.
· Step One: Import Large Video

Once you Install Filmora on your Mac, launch and click ‘new project’ on the home screen to start your video cutting journey. Now, import the video you want to cut by selecting ‘import’ on the main interface and selecting the files from your computer. Alternatively, you can drag the large video to your timeline.

· Step Two: Manually Cut the Large Video

After adding the video to the timeline, drag the playhead at the beginning to the part you would like your large video to begin and right-click on it. You can then select ‘trim start to playhead to cut your video to your preference. Repeat this with the end of your video but select ‘trim end to playhead’ this time.
· Step Three: Export Your Newly Cut Video

After cutting your video and carrying out basic editing on your video, you can now save your video. Next, click the ‘export’ button, and you can choose the output format of your video, frame rate, and resolution. You can also share directly to YouTube, Vimeo, and other social media platforms or burn the video to a DVD.
More Free Large Video Cutter on Mac to Cut Large Videos Faster
The first large video cutters we’ll be reviewing in this article are available for free. Although they’re not professional video editing software, they can help you easily cut large videos on Mac in just a few minutes. Therefore, if you’re looking for a free video cutter for Mac, you should keep reading.
GihoSoft Free Video Cutter

Supported System: Mac and Windows
This free video cutting software helps you cut large video files within a few minutes. You can either cut the video into smaller clips or eliminate all other clips reducing the video into one little clip. This large video cutter is relatively easy to use, and it comes with a friendly user interface which makes it ideal for beginners. The best part is that it supports varying video formats and resolutions. However, as the name implies, you can only use it to cut videos. It doesn’t offer other video editing features.
Gihosoft Video cutter offers a fast processing speed and supports popular video formats like AVI, MOV, FLV, MP4, etc. It also saves your video in the same input format to maintain its quality. You can also cut different clips and join them using this video cutting software for free.
Pros
- It is free to use
- It offers a clean and intuitive user interface
- Ideal for beginners
- Supports different input and output video formats
- Allows you to join clips from various videos
Cons
- There are no editing features
- The saving process can be slow
Steps to Cut Large Videos on Mac Using Gihosoft Free Video Cutter
Gihosoft Video Cutter is relatively easy to use. Below, you’ll find the steps to cut large videos on Mac with this free cutter quickly.
- Firstly, download and install this free video cutter on your Mac. Once you do this, launch the software, and you can begin.
- Add files to the timeline by clicking the ‘add files’ to import a large video file to this video cutter.

- Next, set the start and endpoint of your video by moving the two sliders in the timeline. Alternatively, you can manually enter the beginning and end times you want.

- Hit the ‘cut’ button once you’re satisfied with the timing.
- After cutting, you can save your video in your preferred location on your PC

iMovie

Supported System: Mac
iMovie is a household name in the Apple family due to its popularity amongst Mac owners. Apple device owners commonly use it for editing videos. It is pretty functional and great for making your video clips look professional. Cutting large videos on Mac using iMovie is quite a simple process. This is the best option if you’re using Mac and looking for a free and straightforward video cutter.
One of the reasons this large video cutter is a good choice because it supports high resolutions. This Mac video cutter supports up to 4k video resolution. It also supports different input and output video formats. In addition, its intuitive and user-friendly interface makes it an excellent choice for beginners. However, it lacks advanced editing features if that’s what you’re looking for.
Pros
- It is free to use
- It supports high video resolutions
- Its simple user interface makes it ideal for beginners
- It offers various preset templates to enhance your video
- It supports several input and output formats
Cons
- Lacks advanced editing features
Steps to Cut Large Video on Mac Using iMovie
iMovie is quite a simple editing software that makes it easy for users with little editing experience to cut large videos on Mac. Follow the steps below to cut videos on Mac easily.
- Open iMovie on your Mac and select ‘file’ on the menu; choose ‘open project’ from the dropdown menu.

- Next, select the video you would like to cut. Alternatively, you can simply drag it to the timeline to start editing.

- Drag the playhead to mark off where you would like to cut; repeat this process at the end of the video.

- Afterward, click ‘edit’ and choose ‘split video clip’ to split the clip.

- Next, select the parts you don’t want and hit ‘delete’ on your keyword.
- You can split and delete clips ad many times as you want till you have the portion you’re looking for.
- Afterward, save your file, and you can also share it directly to your social media accounts.

Tuneskit

Supported System: Mac and Windows
A free video cutter that’s quite useful for cutting large video files is Tuneskit. It is free to use and allows you to cut large video files into smaller clips while maintaining its high quality. It is easy to utilize, and you can cut and trim your videos within a few minutes. The best bast is the lossless quality feature after cutting or combining several clips.
This video cutting tool supports various popular formats like AVI, MP4, FLV, MPEG, etc. The video joining feature also allows you to merge multiple videos you cut without losing the quality of the original quality. You can also convert the video to a new format when saving your video. Tuneskit also allows users to share cut videos to user platforms. You can also utilize its editing tools to customize your videos and add a personalized touch. However, this video cutter only offers essential editing tools, which is ideal for beginners.
Pros
- Superfast video processing
- It supports several input and output video format
- Maintains video quality after editing
- Offers basic editing video
- Simple user interface for easy navigation
Cons
- It only offers basic editing features
Steps to Cut Large Videos on Mac Using Tuneskit
You have to download Tuneskit on your Mac device to get started. Next, install the app and then launch it to begin. Once you launch the app, follow the steps below to cut large videos on Mac.
- Firstly, you have to import the video you want to cut by clicking ‘import’ on the file tab.

- Next, edit the file by clicking ‘edit,’ which is an icon you can find next to every video segment.
- Now, move the slider at the beginning of the video to your preference. Carry out the same action for the end of the video till you have your desired cut.

- Now, click ‘cut’ to cut your video. Afterward, save the video and choose the output format you want.

More Paid Large Video Cutter on Mac to Cut Large Videos Faster
Now that you know the best free large video cutter on Mac to cut large videos faster, below are the top three paid large video cutters on Mac.
Final Cut Pro

Supported System: Mac and Windows
Final Cut Pro is a video cutting software released by Apple, and it is one of the best professional large video cutters you can find. Despite its professionalism, it offers you a basic user interface that makes it easy to navigate the video editor. It is also relatively easy and allows users to efficiently advance their skills to a professional level while using the editing software. Additionally, you can easily add your social media accounts to share edited videos to each platform directly.
Apart from the easy cutting of large videos on Mac, Final Cut Pro offers cutting-edge editing tools that ensure smooth and professional results. Final Cut Pro’s features include project workflow, color correction, trimming, closed caption, audio enhancement, etc. In addition, Final Cut Pro supports various video formats and resolutions to work with. However, it is not a suitable option if you have no previous video editing, as there’s a steep learning curve involved.
Pros
- It provides users with 360-degree video editing
- Final Cut Pro supports various video formats and resolutions
- It offers an intuitive user interface
- It offers fast video processing and saving process
- It provides basic and advanced editing tools
Cons
- It is quite pricey
- It is not the best choice for beginners
Steps to Easily Cut Large Videos on Mac Using Final Cut Pro
- First, download and install Final Cut Pro on your device, and then launch to start the video cutting process.
- Next, import the media you would like to cut by clicking ‘import media file’ and choosing the file you want to edit. You can also drag the video directly to your timeline to start editing.

- Once you identify the part you would like to edit, drag the tail of the clip to where you would prefer. Repeat this process at the beginning and the end of the video. Afterward, click ‘cut’ to cut the clip.

- Now you can save the cut video to your Mac by clicking ‘file’ and choosing ‘save’ from the dropdown menu.

You can also share your cut video directly from Final Cut Pro to your preferred destination. You can change the output video format if you prefer.
VideoPad Video Editor

Supported System: Mac and Windows
Some large video cutters can be frustrating for new editors; you won’t have that problem with VideoPad. This tool is easy to use even with no prior editing experience. It contains all the essential tools to cut and edit your video. It also supports different file types, including AVI, MOV, MP4, MPEG, etc. It also allows you to change the output format of your video and share it directly on social media platforms. You can also burn the newly cut video to DVD or CD.
With VideoPad Video Editor, you don’t have to worry about losing the quality of your large video after cutting. It offers impressive video editing features like transitions, color correcting, speed adjustment, and various visual elements. You can split large videos easily with its fast-processing system. Its intuitive user interface makes it quite easy to navigate.
Apart from basic editing, professionals would also find this large video cutter impressive as it offers 3D editing, green screen support, 360-degree editing, and video stabilization. Overall, this is an excellent video cutter if you want a versatile editor that offers tools to enhance your video.
Pros
- Ideal for beginners and professionals
- It supports common file types
- Intuitive user interface
- Offers basic and advanced editing tools
Cons
- Relatively high price
Steps to Easily Cut Large Videos on Mac Using VideoPad Video Editor
- First, you have to download and install VideoPad on your device.
- Next, launch the app and click ‘open’ on the home tab. This will allow you to add the video you would like to edit. Alternatively, click Cmd+O or drag the video to the media bin.

- After adding the video, drag it to the sequence timeline to start cutting your large video.
- To cut a part of the video, select it by placing a cursor at the start of the video. Hover over the red line till it changes to a double-sided arrow. Drag the pointer to where you would like the video to begin; repeat this for the end of the video. Right-click over the region and click ‘split’ to separate the clip from other parts.

- Select the fragments and click the trash can button next to the cursor to delete them. Repeat this for all pieces till only your video is left.

- Once you’re done, click ‘save project’ to save the newly edited video. You can also export the video by clicking ‘export video’ and choosing the platform to which you would like to export.

Adobe Premiere Pro

Supported System: Windows and Mac
One of the best large video cutters for Mac that you’ll find out there is Adobe Premiere Pro. This video cutting software supports a vast number of video formats and resolutions. It also offers users built-in editing tools that you can use to enhance your video. Most cinematographers find this tool quite useful due to its advanced editing features. It also ensures your video quality is not lost after editing.
Adobe Premiere Pro allows you to add filters, trim audio and video, and add texts and other visual elements to your video. It has an impressive media library that gives you access to a vast range of effects. You can also modify the output format of your video or use any of the existing presets to enhance your video. However, Adobe Premiere Pro has a steep learning curve and might not be suitable for beginners.
Pros
- It offers high-quality tools to edit your video
- Fast processing feature
- Supports vast video formats and resolutions
- Offers basic and advanced editing tools
- Allows you to share your video directly to social media platforms
Cons
- It is too advanced for beginners
Steps for Cutting Large Video on Mac Using Adobe Premiere Pro
Cutting large videos on Adobe Premiere Pro is relatively easy with the steps below.
- Firstly, download and install Adobe Premiere Pro on your Mac. After installation, launch the app to begin.
- Next, create a new Premiere Pro project and create the right name you would like to save it as.

- Now, import the large video you want to cut into Adobe Premiere Pro. You can either drag the video into the project clip tab or go to ‘file’ and choose ‘import’ from the menu. Navigate to the file’s location and choose the video.

- Now select the video on the timeline; a white border will appear around the clip to show your selection.

- Pick the razor tool on the menu or press C on your keyboard to start cutting the large file.

- To cut the video clip, hover the razor over any part of the video and split wherever you prefer. You can make multiple cuts on the video. However, if you want an accurate cut, simply move the playhead to the part you’ll like to begin the cut and then use the razor to cut.

- Now you can delete any fragment you want by selecting it and pressing delete on your PC.

Once you have a clean-cut, you can save or share your video.

Which Should I Choose, Free or Paid Large Video Cutter on Mac?
There are different video-cutting software available that offer varying editing features to enhance your video. However, some are free, while others require a subscription. Therefore, it can be pretty challenging to figure out the best option for your video cutting needs. Below are some factors to consider when choosing between a paid or free video cutter on Mac.
· Intuitive Workflow
Some software is quite difficult to operate, and you could spend hours figuring out how each tool works. An efficient video cutting software makes all tools easy to use. Ensure the large video cutter you choose ensures a seamless workflow to improve your efficiency. In addition, a fast-processing feature is necessary to reduce the editing time significantly.
· Budget
Another factor that’s important to consider is your budget. You can use free software, but you need to note that the features are limited. If the tool doesn’t offer you the features you’re looking for, you might need to subscribe to a paid video cutter. Always choose a video cutter that falls within your budget.
· Experience Level
Are you looking to develop your editing skills? Then a paid large video cutter is the best option for you. There are usually advanced and basic tools available to help you edit your skills. However, a paid video cutter also offers you more functionality that can help you learn how to create impressive edited videos.
Overall, you want a video editor with an easy learning curve and one that meets your needs effectively. The goal is to get a video editor that will provide you with more editing tools to enhance your video. It is pretty easy to outgrow free video cutters because of their limited features. However, if you’re choosing a paid video cutter, ensure it isn’t made for professionals and, therefore, is challenging to navigate.
FAQs About Cutting Large Videos
- What is video cutting software? This software allows you cut a video into different parts without changing the video quality. This type of software will enable you to cut large-sized videos in no time; you can choose from the video cutters above.
- Does cutting videos affect its quality? This depends on the video cutter used. While some video cutters allow a loss of video quality when cutting videos, some ensure the video quality remains the same throughout the cutting process.
- Are video cutters safe? Yes, most video cutters are safe. The options above are secure and prevent malware attacks on your PC.
Final Thoughts
You’ll find the best large video cutters to cut videos on your Mac above. Most of the video cutters above support various video formats and ensure your video remains in the original quality after saving. Several software reviewed above also offers additional features you can use to upgrade your videos. Finally, we recommend Filmora Video Editor as it provides several basic and advanced features to help you create the best videos.
Supported System: Mac and Windows
Cutting large videos is not easy if you don’t have the right tools to achieve that. That’s where Filmora Video Editor enters the picture. It combines simplicity and several excellent features to offer you the best video cutter for Mac. It doesn’t just provide you with the basic cutting features but also several editing tools to create fantastic videos. In addition, its user interface is intuitive and easy to navigate by new editors and professionals.
Filmora Video Editor offers several customization features and advanced features to make your video look sleek and professional. This means it provides motion tracking, the addition of images, filters, effects, texts, and several other tools. When exporting your files, you have a wide variety of options as this large video cutter offers different output formats to select from. It also allows you to share your video directly to any social media network you would prefer. Most importantly, it is compatible with every version of MacOS.
For Win 7 or later (64-bit)
For macOS 10.14 or later
Features
- It supports various video formats like AVI, MOV, MP4, MKV, and several others
- It only takes a few clicks to cut, trim, and split videos
- Impressive video editing features
- Intuitive and user-friendly interface that ensures a gentle learning curve
- You can cut your video without losing the quality level
- Several video effects to make your video stunning
- It offers additional features like transitions, motion elements, color corrections, animated titles, etc.
- Allows you to burn video to DVD or share directly
Cons
- It might not have the most advanced features
Steps to Easily Cut Large Videos On Mac Using Filmora Video Editor
Cutting large videos on Filmora is relatively easy when you follow the proper steps. Below, we’ve outlined the steps you should take when you want to cut large videos on Mac using Filmora Video Editor.
· Step One: Import Large Video
Once you Install Filmora on your Mac, launch and click ‘new project’ on the home screen to start your video cutting journey. Now, import the video you want to cut by selecting ‘import’ on the main interface and selecting the files from your computer. Alternatively, you can drag the large video to your timeline.
· Step Two: Manually Cut the Large Video
After adding the video to the timeline, drag the playhead at the beginning to the part you would like your large video to begin and right-click on it. You can then select ‘trim start to playhead to cut your video to your preference. Repeat this with the end of your video but select ‘trim end to playhead’ this time.
· Step Three: Export Your Newly Cut Video
After cutting your video and carrying out basic editing on your video, you can now save your video. Next, click the ‘export’ button, and you can choose the output format of your video, frame rate, and resolution. You can also share directly to YouTube, Vimeo, and other social media platforms or burn the video to a DVD.
More Free Large Video Cutter on Mac to Cut Large Videos Faster
The first large video cutters we’ll be reviewing in this article are available for free. Although they’re not professional video editing software, they can help you easily cut large videos on Mac in just a few minutes. Therefore, if you’re looking for a free video cutter for Mac, you should keep reading.
GihoSoft Free Video Cutter
Supported System: Mac and Windows
This free video cutting software helps you cut large video files within a few minutes. You can either cut the video into smaller clips or eliminate all other clips reducing the video into one little clip. This large video cutter is relatively easy to use, and it comes with a friendly user interface which makes it ideal for beginners. The best part is that it supports varying video formats and resolutions. However, as the name implies, you can only use it to cut videos. It doesn’t offer other video editing features.
Gihosoft Video cutter offers a fast processing speed and supports popular video formats like AVI, MOV, FLV, MP4, etc. It also saves your video in the same input format to maintain its quality. You can also cut different clips and join them using this video cutting software for free.
Pros
- It is free to use
- It offers a clean and intuitive user interface
- Ideal for beginners
- Supports different input and output video formats
- Allows you to join clips from various videos
Cons
- There are no editing features
- The saving process can be slow
Steps to Cut Large Videos on Mac Using Gihosoft Free Video Cutter
Gihosoft Video Cutter is relatively easy to use. Below, you’ll find the steps to cut large videos on Mac with this free cutter quickly.
- Firstly, download and install this free video cutter on your Mac. Once you do this, launch the software, and you can begin.
- Add files to the timeline by clicking the ‘add files’ to import a large video file to this video cutter.
- Next, set the start and endpoint of your video by moving the two sliders in the timeline. Alternatively, you can manually enter the beginning and end times you want.
- Hit the ‘cut’ button once you’re satisfied with the timing.
- After cutting, you can save your video in your preferred location on your PC
iMovie
Supported System: Mac
iMovie is a household name in the Apple family due to its popularity amongst Mac owners. Apple device owners commonly use it for editing videos. It is pretty functional and great for making your video clips look professional. Cutting large videos on Mac using iMovie is quite a simple process. This is the best option if you’re using Mac and looking for a free and straightforward video cutter.
One of the reasons this large video cutter is a good choice because it supports high resolutions. This Mac video cutter supports up to 4k video resolution. It also supports different input and output video formats. In addition, its intuitive and user-friendly interface makes it an excellent choice for beginners. However, it lacks advanced editing features if that’s what you’re looking for.
Pros
- It is free to use
- It supports high video resolutions
- Its simple user interface makes it ideal for beginners
- It offers various preset templates to enhance your video
- It supports several input and output formats
Cons
- Lacks advanced editing features
Steps to Cut Large Video on Mac Using iMovie
iMovie is quite a simple editing software that makes it easy for users with little editing experience to cut large videos on Mac. Follow the steps below to cut videos on Mac easily.
- Open iMovie on your Mac and select ‘file’ on the menu; choose ‘open project’ from the dropdown menu.
- Next, select the video you would like to cut. Alternatively, you can simply drag it to the timeline to start editing.
- Drag the playhead to mark off where you would like to cut; repeat this process at the end of the video.
- Afterward, click ‘edit’ and choose ‘split video clip’ to split the clip.
- Next, select the parts you don’t want and hit ‘delete’ on your keyword.
- You can split and delete clips ad many times as you want till you have the portion you’re looking for.
- Afterward, save your file, and you can also share it directly to your social media accounts.
Tuneskit
Supported System: Mac and Windows
A free video cutter that’s quite useful for cutting large video files is Tuneskit. It is free to use and allows you to cut large video files into smaller clips while maintaining its high quality. It is easy to utilize, and you can cut and trim your videos within a few minutes. The best bast is the lossless quality feature after cutting or combining several clips.
This video cutting tool supports various popular formats like AVI, MP4, FLV, MPEG, etc. The video joining feature also allows you to merge multiple videos you cut without losing the quality of the original quality. You can also convert the video to a new format when saving your video. Tuneskit also allows users to share cut videos to user platforms. You can also utilize its editing tools to customize your videos and add a personalized touch. However, this video cutter only offers essential editing tools, which is ideal for beginners.
Pros
- Superfast video processing
- It supports several input and output video format
- Maintains video quality after editing
- Offers basic editing video
- Simple user interface for easy navigation
Cons
- It only offers basic editing features
Steps to Cut Large Videos on Mac Using Tuneskit
You have to download Tuneskit on your Mac device to get started. Next, install the app and then launch it to begin. Once you launch the app, follow the steps below to cut large videos on Mac.
- Firstly, you have to import the video you want to cut by clicking ‘import’ on the file tab.
- Next, edit the file by clicking ‘edit,’ which is an icon you can find next to every video segment.
- Now, move the slider at the beginning of the video to your preference. Carry out the same action for the end of the video till you have your desired cut.
- Now, click ‘cut’ to cut your video. Afterward, save the video and choose the output format you want.
More Paid Large Video Cutter on Mac to Cut Large Videos Faster
Now that you know the best free large video cutter on Mac to cut large videos faster, below are the top three paid large video cutters on Mac.
Final Cut Pro
Supported System: Mac and Windows
Final Cut Pro is a video cutting software released by Apple, and it is one of the best professional large video cutters you can find. Despite its professionalism, it offers you a basic user interface that makes it easy to navigate the video editor. It is also relatively easy and allows users to efficiently advance their skills to a professional level while using the editing software. Additionally, you can easily add your social media accounts to share edited videos to each platform directly.
Apart from the easy cutting of large videos on Mac, Final Cut Pro offers cutting-edge editing tools that ensure smooth and professional results. Final Cut Pro’s features include project workflow, color correction, trimming, closed caption, audio enhancement, etc. In addition, Final Cut Pro supports various video formats and resolutions to work with. However, it is not a suitable option if you have no previous video editing, as there’s a steep learning curve involved.
Pros
- It provides users with 360-degree video editing
- Final Cut Pro supports various video formats and resolutions
- It offers an intuitive user interface
- It offers fast video processing and saving process
- It provides basic and advanced editing tools
Cons
- It is quite pricey
- It is not the best choice for beginners
Steps to Easily Cut Large Videos on Mac Using Final Cut Pro
- First, download and install Final Cut Pro on your device, and then launch to start the video cutting process.
- Next, import the media you would like to cut by clicking ‘import media file’ and choosing the file you want to edit. You can also drag the video directly to your timeline to start editing.
- Once you identify the part you would like to edit, drag the tail of the clip to where you would prefer. Repeat this process at the beginning and the end of the video. Afterward, click ‘cut’ to cut the clip.
- Now you can save the cut video to your Mac by clicking ‘file’ and choosing ‘save’ from the dropdown menu.
You can also share your cut video directly from Final Cut Pro to your preferred destination. You can change the output video format if you prefer.
VideoPad Video Editor
Supported System: Mac and Windows
Some large video cutters can be frustrating for new editors; you won’t have that problem with VideoPad. This tool is easy to use even with no prior editing experience. It contains all the essential tools to cut and edit your video. It also supports different file types, including AVI, MOV, MP4, MPEG, etc. It also allows you to change the output format of your video and share it directly on social media platforms. You can also burn the newly cut video to DVD or CD.
With VideoPad Video Editor, you don’t have to worry about losing the quality of your large video after cutting. It offers impressive video editing features like transitions, color correcting, speed adjustment, and various visual elements. You can split large videos easily with its fast-processing system. Its intuitive user interface makes it quite easy to navigate.
Apart from basic editing, professionals would also find this large video cutter impressive as it offers 3D editing, green screen support, 360-degree editing, and video stabilization. Overall, this is an excellent video cutter if you want a versatile editor that offers tools to enhance your video.
Pros
- Ideal for beginners and professionals
- It supports common file types
- Intuitive user interface
- Offers basic and advanced editing tools
Cons
- Relatively high price
Steps to Easily Cut Large Videos on Mac Using VideoPad Video Editor
- First, you have to download and install VideoPad on your device.
- Next, launch the app and click ‘open’ on the home tab. This will allow you to add the video you would like to edit. Alternatively, click Cmd+O or drag the video to the media bin.
- After adding the video, drag it to the sequence timeline to start cutting your large video.
- To cut a part of the video, select it by placing a cursor at the start of the video. Hover over the red line till it changes to a double-sided arrow. Drag the pointer to where you would like the video to begin; repeat this for the end of the video. Right-click over the region and click ‘split’ to separate the clip from other parts.
- Select the fragments and click the trash can button next to the cursor to delete them. Repeat this for all pieces till only your video is left.
- Once you’re done, click ‘save project’ to save the newly edited video. You can also export the video by clicking ‘export video’ and choosing the platform to which you would like to export.
Adobe Premiere Pro
Supported System: Windows and Mac
One of the best large video cutters for Mac that you’ll find out there is Adobe Premiere Pro. This video cutting software supports a vast number of video formats and resolutions. It also offers users built-in editing tools that you can use to enhance your video. Most cinematographers find this tool quite useful due to its advanced editing features. It also ensures your video quality is not lost after editing.
Adobe Premiere Pro allows you to add filters, trim audio and video, and add texts and other visual elements to your video. It has an impressive media library that gives you access to a vast range of effects. You can also modify the output format of your video or use any of the existing presets to enhance your video. However, Adobe Premiere Pro has a steep learning curve and might not be suitable for beginners.
Pros
- It offers high-quality tools to edit your video
- Fast processing feature
- Supports vast video formats and resolutions
- Offers basic and advanced editing tools
- Allows you to share your video directly to social media platforms
Cons
- It is too advanced for beginners
Steps for Cutting Large Video on Mac Using Adobe Premiere Pro
Cutting large videos on Adobe Premiere Pro is relatively easy with the steps below.
- Firstly, download and install Adobe Premiere Pro on your Mac. After installation, launch the app to begin.
- Next, create a new Premiere Pro project and create the right name you would like to save it as.
- Now, import the large video you want to cut into Adobe Premiere Pro. You can either drag the video into the project clip tab or go to ‘file’ and choose ‘import’ from the menu. Navigate to the file’s location and choose the video.
- Now select the video on the timeline; a white border will appear around the clip to show your selection.
- Pick the razor tool on the menu or press C on your keyboard to start cutting the large file.
- To cut the video clip, hover the razor over any part of the video and split wherever you prefer. You can make multiple cuts on the video. However, if you want an accurate cut, simply move the playhead to the part you’ll like to begin the cut and then use the razor to cut.
- Now you can delete any fragment you want by selecting it and pressing delete on your PC.
Once you have a clean-cut, you can save or share your video.
Which Should I Choose, Free or Paid Large Video Cutter on Mac?
There are different video-cutting software available that offer varying editing features to enhance your video. However, some are free, while others require a subscription. Therefore, it can be pretty challenging to figure out the best option for your video cutting needs. Below are some factors to consider when choosing between a paid or free video cutter on Mac.
· Intuitive Workflow
Some software is quite difficult to operate, and you could spend hours figuring out how each tool works. An efficient video cutting software makes all tools easy to use. Ensure the large video cutter you choose ensures a seamless workflow to improve your efficiency. In addition, a fast-processing feature is necessary to reduce the editing time significantly.
· Budget
Another factor that’s important to consider is your budget. You can use free software, but you need to note that the features are limited. If the tool doesn’t offer you the features you’re looking for, you might need to subscribe to a paid video cutter. Always choose a video cutter that falls within your budget.
· Experience Level
Are you looking to develop your editing skills? Then a paid large video cutter is the best option for you. There are usually advanced and basic tools available to help you edit your skills. However, a paid video cutter also offers you more functionality that can help you learn how to create impressive edited videos.
Overall, you want a video editor with an easy learning curve and one that meets your needs effectively. The goal is to get a video editor that will provide you with more editing tools to enhance your video. It is pretty easy to outgrow free video cutters because of their limited features. However, if you’re choosing a paid video cutter, ensure it isn’t made for professionals and, therefore, is challenging to navigate.
FAQs About Cutting Large Videos
- What is video cutting software? This software allows you cut a video into different parts without changing the video quality. This type of software will enable you to cut large-sized videos in no time; you can choose from the video cutters above.
- Does cutting videos affect its quality? This depends on the video cutter used. While some video cutters allow a loss of video quality when cutting videos, some ensure the video quality remains the same throughout the cutting process.
- Are video cutters safe? Yes, most video cutters are safe. The options above are secure and prevent malware attacks on your PC.
Final Thoughts
You’ll find the best large video cutters to cut videos on your Mac above. Most of the video cutters above support various video formats and ensure your video remains in the original quality after saving. Several software reviewed above also offers additional features you can use to upgrade your videos. Finally, we recommend Filmora Video Editor as it provides several basic and advanced features to help you create the best videos.
How Can You Deny These Best 10 Free Speech to Text Software
How Can You Deny These Best 10 Free Speech to Text Software
An easy yet powerful editor
Numerous effects to choose from
Detailed tutorials provided by the official channel
In this article
01 [What is the Speech to Text App?](#Part 1)
02 [Why is Speech to Text App Getting Popular?](#Part 2)
03 [10 Best Speech to Text Apps That Will Help Translate from Speech](#Part 3)
04 [How Can We Get Text-to-Speech Then?](#Part 4)
05 [Speech to Text Q&A](#Part 5)
Best Speech to Text Software Save plenty of time on transcribing subtitles and boost your editing efficiency by applying Filmora Speech-To-Text.
Try STT Now Try STT Now Explore STT

Part 1 What is the Speech to Text App?
In today’s busy schedules of personal and professional routines, most of us have a common habit of running away from entering lengthy text inputs to adhere specific concerns on smartphones and desktops. It is an obvious fact that given a choice to voice out or type, the former would bag in a considerably higher number of votes.
Having a technology backup, it is now practically possible to convert your voice commands into text with utmost ease, thanks to the advent of reliable speech to text applications. The utility works to transform the words you speak, into an exact text representation, thus saving both, your time and energy. Such applications work on the principle of responding to speech recognition requests and processing the same to render an equitable text output.
The required audio information is sent across a synchronous request to process the different sound pieces, one at a time. When all such pieces are processed and recognized, the text response is generated to the credit of the user. Talking of the device and platform compatibility of such applications, you can comfortably work on them in either of your system based, or mobile devices with an equal efficiency.
Browsing through the IT market, you may however land across exclusive as well as implicit choices to work on your preferred deices. While there are some smartphone specific speech-to-text applications, others may have a good compatibility with desktops and PCs. Moving ahead, there comes a third category of software ranges that is all set to work with smartphones as well as desktop systems.
Part 2 Why is Speech to Text Apps Getting Popular?
Talking in the light of personal credibility and usage, the speech to text apps may often be recognized as having limited application diversity, but the instincts are not same on the professional front. Entering deeper into the domain, there are fields like digital marketing and content planning that are reported of having a considerable dependency on such applications and utilities. Some of the pivotal reasons in support of the credibility are described as follows:
● Improving Work Efficiency
Talking specifically in line with the professional organizations that are greatly centered on text based working modules, or follow an extraneous typing and writing work pattern, the speech to text conversion facility is no less than a fantastic rescue to the tiresome sessions of spending time on fidgeting with PC and laptop keyboards.
Not only do such applications work towards lightening up the system exposure burden, but also facilitate a quick workability that further caters to increase the efficiency and work performance of the organization’s workforce. This in turn results in a fast and efficient addressing of the various types of text based operational concerns.
● Improvise Content Marketing Strategies
When the discussion is centered on devising high end and advanced level content marketing proposals and strategies, the speech to text facility can go a long way. You can work with such platforms to take quick and smart professional suggestions from the web within the blink of an eye, instead of typing the entire array of words and text to explain your point.
Such applications further work to modernize your content and data search habits, which may in most cases, can indirectly cause a refinement of your searches, thus facilitating you with a more exact and strategic content that affordably fits in the line of your market requirements. The bottom line is, such applications are on the way to increasing their professional credibility in cohesion with the modern day trends of the professional world.
● Academic and Media Centered Utilities
Speech to text application offers an extended credibility with respect to academic and educational requirements. Students can take advantage of the facility to quickly convert memos and lecture dictations into quick text files. Under the circumstances of working with audio and sound files, you can conveniently transform the audio transcriptions into viable text files with an almost instant effect.
When working on media centered projects, you can pick these applications to supplement your sound based contents with automatic titles and captions. The apps also come handy in converting lengthy dialogue audios into readable text so that you can understand and learn the same at your own convenient pace.
In the specific situations of creating text documents to supplement your project work in the absence of your PC or desktop, you can rely on these utilities to effectively create extensive text files with quick voice inputs.
Part 3 Best Speech to Text Apps That Will Help Translate from Speech
By far, you have become quite familiar with the functionality and significance of working with speech to text applications to a notable extent. While having an understanding of such utilities is one aspect, the real essence lies in having hands on experience with using the same in practical situations. When aiming to work towards the concern of using such facilities to expand your professional capabilities, it is of great important to make the right selection.
Moving along the line, here is a discussion of some top rated speech to text applications that you can choose to work with for a smart display of your professional expertise and efficiency in what follows next:
01Dragon Anywhere
Free Trial Period: days
Accuracy Rate: 99%
Starting with the list, there is the Dragon Anywhere application which you can reliably pick to effectively sort out your concern of converting text to readable text. The app is essentially a smartphone compatible utility, which was launched by the Nuances software development company as an allied facility of its desktop compatible speech to text conversion program to work on mobile devices.
The app comes to you as a complete package of dictation facilities that work well with your Android and iOS devices. Examining the app’s credibility in the line of its desktop counterpart, you may notice a minimal amount of lag between the input speech and output text. The underlying reason behind this delay is however, the obvious processing time frame of the cloud facility. Neglecting the same, the app works effectively to respond to the aforesaid conversion requirements.
The app further extends its utilities by allowing you to add text within a document file through its boilerplate functionality that creates chunks of the specific text that requires an insertion. All you need to do is enter a quick command and that’s really it. An additional appeal of working with the application is the extensive set of customized vocabularies that are rendered complementary with the app, along with having a convenient synchronization with their desktop compatible software.
Pros
● Recognizes your speech in an affordable quality
● Syncs perfectly with its desktop counterpart
● Loaded with a diverse range of functionalities
Cons
● Offers a limited dictation facility
● The speech recognition process has a logging factor
● Free version is available for a limited period.

02Otter
Free Trial Period: hours
Accuracy Rate: 99%
If you are on the search of an affordable smartphone centered solution to address your day to day business documentation and dictation requirements, this aforesaid is your go to application. Designed explicitly to cater the professional needs of experienced and mainstream corporate users, the tool is a cloud oriented mobile utility to work through real-time transcription, while catering the additional needs of editing, organizing and searching documents or playing audio files.
The major functionality of the application lies with sorting out the documentation requirements of interviews, lectures and meetings to pull off the concern of taking quick notes. You can further work with the app to run coordinated meetings and conferences with a collaborated group of members within a particular profile. This is brought about by assigning unique speaker credentials for a quick and convenient understanding of audio and text transcriptions.
You can work with the application by opting one of the 3 access options, 2 of which are paid subscriptions, while the remaining one is free for a limited period. The app comes with a comprehensive wordcloud and updated keyword summaries for an easy search through of specific subjects. The application grants you the liberty to share and organize text documents, import audio-visual elements for transcription purposes and much more.
Pros
● This speech to text app allows you to add live captions to your audio transcripted texts
● You are facilitated with a host of platform choices to export the documents directly
● The tool is readily compatible with team collaborations
Cons
● The application lacks a live chat facility
● The working interface is quite dated
● Free trial period is very short

03Verbit
Free Trial Period: hours
Accuracy Rate: 99%
Designed specifically for educational and enterprise centered applications, Verbit is a high end and intelligent speech to text converter utility that works to facilitate automatic captioning and transcriptions through artificial intelligence. Delivering a high speed transcription output, the efficiency of this upgraded application is way beyond the exclusively manual transcription facilities.
Talking of the operational methodology, the utility works to cater an excellent audio transcription by creating a mixture of speech modules through artificial intelligence algorithms and neural networks. These sophisticated models work to adapt the specific characteristics of the audio files, followed by the creation of a new series of linguistic, contextual and acoustic event modules.
Additional merits of using the application for transcribing speech centered audio are the elimination of background noise, recognition of speakers with different accents, integration of context based events, such as company information, news, etc., into recorded audio tracks. While the application hosts a free live version to caption and transcript the speech audio with an affordable accuracy rate, the paid versions promise of 100% accuracy to transcribe audio files into text.
Tracking the transcription process becomes highly convenient with the application’s real-time status update facility available through the Verbit Cloud Portal. The utility further supports a series of third party platforms that facilitate a convenient and quick distribution of the transcripted outputs.
Pros
● The application extends a high speed and accurate transcription service
● The utility houses an elaborated range of tools to caption videos
● The smart AI feature facilitates an expanded range of services to complement the transcription process
Cons
● The application’s multi-linguistic feature can be improved
● The utility’s free version is a limited period facility
● The pricing plans of the application are available on an individual basis

04Speechmatics
Free Trial Period: days for 10 hours
Accuracy Rate: 83%
Moving ahead with the list, Speechmatics is another effective speech-to-text conversion utility that works with the aid of machine learning to address the concern of transcribing audio files. Using an automated speech recognition advantage, this application is greatly preferred for creating text based transcriptions of audio-visual files on a free as well as paid subscription.
The application works in good cohesion with all popular British accents, beyond the constraints of nationality. You can prefer the utility to create audio transcriptions in British and American English, in addition to the Jamaican and South Asian accents. Offering a relatively higher count of speech to text conversion facilities and services, the Speechmatics application stays ahead of its counterparts in catering to the aforesaid concern.
A few of the major conversion services extended by the application include the transformation of phone recordings in a call center and transcribing them into Word files and text based information that can be searched across the web. You can further integrate the application to work with different types of audio-visual media to add captions and use keyword triggers for managing a series of allied operations.
Pros
● The application boasts of landing among the most power packed transcription engines
● The utility possesses the smartest integration of artificial intelligence through a responsive machine learning ability
● The application comes with a free version to examine the latter’s credibility before a purchase
Cons
● The application does render any out of the box means to carry out the audio transcription process
● The unpaid version of the tool has a limited period validity
● The paid subscription of the app is quite high on price

05Braina Pro
Free Trial Period: days
Accuracy Rate: 99%
Establishing itself as a world class speech to text converter application, Briana Pro is a web based utility that works with the Google Chrome browser. Functioning as a one stop solution for adhering to the most widespread concerns of digital assistance and dictation, ahead of the speech recognition facility, this one is quite a reliable voice recognition tool. Working with the application, you can dictate information in 90 different languages, other than English, to a varied range of third party programs.
The voice recognition capability of the app is nowhere to be questioned with a remarkable accuracy of 99%. The application additionally caters to sort out the functionalities of setting alarms, hosting a file search within your device or across the web, playing MP3 files, reading eBooks clearly, etc., along with adhering to a series of customized commands.
What’s most appealing about the program is the latter’s dual compatibility with Windows systems and Android smartphones. About the credibility of the Android application, you can work with the latter for remotely controlling your system. The utility can also be implemented to deliver function centered commands to the same through a localized Wi-Fi network.
The application grants you the liberty to test the credibility of its speech recognition tool by offering one week free trial facility. Though the free version comes with restricted functionalities, the paid subscription compensates it all.
Pros
● The application works as the most reliable digital assistant
● The utility works towards the efficient transcription of already recorded plugins
● The Android compatible module of the program aids in controlling your PC from a distance
Cons
● The application interface looks quite dated
● You cannot work with the utility on a Mac compatible device
● The recent purchase reports show a considerable increase in the application’s pricing constraints

06Amazon Transcribe
Free Trial Period: hours
Accuracy Rate: 99%
Moving further in the list, the Amazon Transcribe is a cloud centered, automated voice recognition facility, which has been created essentially to address the speech to text conversion requirements for a diversity of third party applications. Talking of the functional credibility, the audio recognition and text based outputs delivered by the platform are way ahead in terms of quality and accuracy in comparison to the most popular allies.
The platform works most efficiently to cater a precise text based output from noisy and low sound audio recording, like that within a call center. The facility works through an advanced deep learning algorithm to automatically include the necessary formatting and punctuation marks within the text output. You are further, allowed to undertake a secured live streaming for the conversion process, along with going for a batch processing of speech to text transcriptions.
Expanding the merit count of the facility, the latter provides time stamps for a quick and convenient search of specific words within the generated text output. The platform additionally caters to recognize and process a diversity of voice accents and sound channels, along with complementing the same with suitable annotations. You can also work with customizing the text transcriptions, with features like vocabulary filtering.
The platform grants you the liberty to work with word replacements for maintaining the consistency of product names, which further aids in a convenient analysis of the transcription files. All-in-all, this one is quite a credible platform to address voice to text conversion needs, though the true potential of the utility is better accessed by enterprise and business oriented users.
Pros
● The platform allows you to edit vocabularies of your preferred languages
● The audio transcription facility extends to a wide range of applications
● The utility caters to the recognition of sound channels and speakers
Cons
● The facility is not a smart choice for customer oriented usage
● The response time of the facility for a speech to text conversion is more than what can be regarded as feasible
● The platform does not recognize numeric digits

07Google Gboard
Free Trial Period: Complementary service
Accuracy Rate: 92%
This one is more of a complementary service that comes to you for free when you download the Google Keyboard application for your Android device from the Google Play Store. Functioning essentially as an instant utility to transcribe speech into text, the facility is works as a physical input keyboard. Adding further to the ease of access, the utility allows you to directly enter a speech input.
Thanks to the availability of Google’s hardware backup, you don’t have to worry about the responsiveness of the tool. The app additionally houses a heap of appealing features, like voice commands that help you to include images within the text output, and the flexibility to work with the Google Translate facility that is configured for extending a conversion support to more than 60 different languages.
Though the utility does not work as an exclusive tool for transcribing speech to text, it is still good at supporting the fundamental transcription features. Being a keyboard class application, the utility is compatible to almost any Android app you choose to work with on your device. Working with this specific facility, you can choose to save, edit and export the generated text outputs.
Pros
● The utility is packed with a lot of extra features, apart from text to speech conversion
● The application usage is not interrupted with annoying and frequent ads
● The facility extends its credibility with a diversity of Android applications
Cons
● The facility does not permit you to work with shortcut commands
● There is no ‘Undo’ button to erase wrong typing and you can only use the swipe tool to delete even the longest word strings
● The utility lags a bit to read symbolic representations

08Just Press Record
Free Trial Period: No cost utility
Accuracy Rate: 95%
This one is a Windows and iOS compatible application program that works on your PC to address the speech to text conversion requirements. Developed to essentially function as a reliable dictation utility, the app comes with a variety of additional facilities. A few of the major attractions of the tool are iCloud syncing, transcriptions and single tap recording.
What’s best is, the app can be easily understood and worked upon by all users, regardless of them being experienced or newbies to the domain. As far as the requirement of recording speech notes is concerned, the latter is confined to a single tap with a limitless record duration. You can additionally create transcribed text outputs from the audio input that is fed to the application.
The facility works to quickly and seamlessly recognize and convert voice inputs into text output that can be easily searched across the web. You are also permitted to edit the transcribed text file. For those who need to work with an overseas clientele, the app offers a commendable aid through its recognition capability across more than 30 different languages.
The application further ensures a complete absence of typographical errors from the output text files through its ability to recognize punctuation commands. The facility accommodates a cloud technology to allow an easy access of the transcribed files and notes through any device that has running internet connectivity. You can further, view the recorded text and audio files, as the app works to organize them at a single place, and share the same across a host of iOS applications.
Pros
● The app supports a multi-lingual speech recognition and audio transcription facility
● The utility works in a cloud compatible configuration to keep your transcriptions safe and secure
● The app’s working interface is easy to understand and work upon
Cons
● The facility does not support an allied application for Android smartphones
● The app often tends to skip or misidentify even the most clearly spoken words
● The utility is incompatible with background processing and hence the transcription process comes to a halt in absence of foreground running

09Speechnotes
Free Trial Period: No cost utility
Accuracy Rate: 86%
This one is another addition to the series of dictation applications, but with a highly relaxed and quick transcription process. Escaping the hustle of creating online accounts or signing up, you can simply start the speech to text conversion process by launching the app and clicking on the microphone symbol. With a dependable backup of Google’s voice recognition technology, you are granted the liberty to use voice commands or the default punctuation keyboard for dictating punctuation marks within the text output.
The app’s default keyboard comes with a set of custom keys that work to include greetings, signatures, names and other types of regularly used word strings within the output. The app also facilitates an automatic capitalization, while saving all the changes you make within a particular note on a cloud space. The output text files can be further customized with an extensive variety of text sizes and fonts.
While the app’s free version is available on the Google Play Store, the latter is known to have a restricted set of features. You can however, avail a paid subscription to the utility through the in-app purchases to work with the complete set of features.
Pros
● The application works to automatically recognize punctuation marks from the voice input
● The utility greets you with a welcoming and convenient to use workspace
● The app is available for Android as well as Chrome operating systems
Cons
● The transcribed recordings demand a paid subscription to get processed
● The app does not allow you to choose the format of the output text files, while offering a limited security to your creations
● You cannot work with the application on iOS devices.

10Windows 10 Speech Recognition
Free Trial Period: Single time free usage
Accuracy Rate: 95%
The Windows 10 operating system is packed with a good number of built in features and utilities, while the voice recognition facility being one among them. Working with the Windows Speech Recognition functionality, you can move ahead with document dictations, while simultaneously executing voice controlled commands.
You can further, work to increase the speech recognition accuracy of the application through a high tone reading of the text and granting the app permissions to access your documents for a better understanding of your vocabulary. These practices are helpful in training the application for an upgrade in the latter’s performance accuracy. It becomes additionally important to train the app in case you wish to work with the speech recognition facility of the tool in a better way.
It’s not that you cannot work with the facility while using the older versions of the Windows operating system, but the developer reports claim the recent version’s applicability to be more fruitful. The obvious reason backing up the app’s credibility is the deep neural network technology that promises of delivering increased benefits in times ahead.
You can start working with the facility by navigating to and clicking on the ‘Control Panel’ in the ‘Start Menu’. Select ‘Ease of Access’ from the list of options that follows next. The ‘Start Speech Recognition’ option appears, along with the facility for setting up a microphone, in case you have not enabled the same. Just click on the aforesaid options and that’s it! You can proceed with the conversion process right away.
Pros
● The facility has a complete integration with the Windows operating system
● The speech to text transcription process is quick and easy
● The app greets you with a responsive interface to work upon
Cons
● The utility has a wide scope of improvement in terms of performance accuracy
● The app does not have an iOS or Android compatibility
● The tool needs a recursive training to keep delivering the desired outputs with a significant accuracy

Part 4 How Can We Get Text-to-Speech Then?
Working with the text to speech facility has become quite an easy task with today’s modern day technologies that fit into a variety of apps and software programs. While such voice recognition utilities are compatible with a series of operating systems and platforms, you can work with them either through in-built features or third party applications.
As you begin with your search for affordable and accurate text to speech conversion software, these are a host of choices at your disposal. Discussing along the line, let us talk about the voice recognition and text to speech conversion credibility of some popular text to audio transcription programs in the following section:
01Converting Text to Speech in Panopreter
If you are working on a Windows desktop or PC, this one is reliable software alternative for addressing the concern of converting text based inputs into speech outputs. Before you start using the facility, it is important to note that the aforesaid program supports 2 different working modes to provide additional convenience to its users. You can pick anyone of the ‘Input and Speak’ or ‘Read Batch Files’ modes to initiate the speech to text conversion process.
Working with the Panopreter program requires you to have a running internet facility for downloading the program to your system, followed by going through an app installation procedure. Post that, all you need to do is, activate the service and adhere to the following user guide to start converting texts into audio with the program:
02User’s Guide for Converting Text to Speech in Panopreter
Step 1: Download the Converter Program
Navigate to the official Panopreter website and download the software to your system. Once then download gets completed, proceed to install the same and wait for the program’s welcome screen to appear.
Step 2: Mode Selection and Setting
As the launch screen pops up, you will be asked to choose the preferred working mode from the ‘Input and Speak’ and ‘Read Batch Files’ alternatives. You should know that the former is the default operation mode of the software and you can activate the same in a few steps.
Start with navigating to the ‘Menu Options’ tab and clicking on the ‘Settings’ option in the latter’s drop down list. The ‘Settings’ dialog box pops up, where you need to hit the ‘Speak Node’ option in the panel at the left. In the ‘Speak Window’ that appears next, click within the checkbox of your desired option and that’s it! The default ‘Input and Speak’ mode will be activated when you re-launch the software.
If, on the other hand, you desire to work in the ‘Read Batch Files’ mode, navigate to the ‘Menu Bar’ at the top of the software interface and hit the ‘File’ tab. From the list of items that drops down, select the ‘Read Batch Files’ option.
Step 3: Mode Specific Software Operation
If you are working in the ‘Input and Speak’ mode, you can proceed with typing or pasting a desired text within the ‘Text Window’ Another option is to open a desired text document or file directly from your system. As for working in the ‘Read Batch Files’ mode, you are allowed to manage your system’s text files through the ‘Open’, ‘Clear’ and ‘Delete’ buttons. You should however take caution to add all the files in a common language.
Step 4: Language Selection
Navigate to the ‘Language List’ window and pick a preferred language to convert the text files into audio transcripts. Remember to choose the same conversion language as added of the ‘Text Window’ files in Step 2, lest you would end up getting an undesirable speech output.
Step 5: Voice Selection
As you complete Step 4, a series of preset text to speech voice alternatives present within your system for the preferred language will show up in the ‘Voice Window’. Proceed to select the voice type you like.
Step 6: Read Aloud!
After you have selected the voice, tap the ‘Speak’ button and start reading your text aloud. Amid the process, you will see the ‘Stop’, ‘Resume’ and ‘Pause’ buttons getting enabled.
Step 7: Save Your Transcription
When you have finished reading the text, click on the ‘Stop’ button to end the transcription process. The ‘Save as Audio’ option gets enabled, allowing you to convert your text into speech in the MP3, OGG, WAV and FLAC file formats.
Step 8: Customize Your Audio
The Panopreter program lets you add suitable customizations to the transcribed audio to ensure affordable file size and sound quality. You can adjust the bit rate and sample rate to address the aforesaid concern. All you need to do is, head to the ‘Menu Options’ at the top of the app screen and select ‘Settings’.
Click on the ‘Audio Format’ option within the ‘Settings’ window pops up, followed by selecting a suitable format for the audio file. On most cases, the WAV format works best to address the output quality requirements in an affordable manner.

03Converting Text to Speech in Wondershare Filmora
Recognized more popularly as a top rated video editing software program, Filmora by Wondershare is a storehouse of applicational utilities that work to address a diversity of additional concerns. Speaking in the light of text to speech conversion, the software extends exceptional capabilities for working towards the requirement.
You can avail the facility to add an extra bit of convenient accessibility to your graphic and video centered projects and artworks by transcribing text based subtitles into speech with a single click. The feature is a welcome rescue for those who encounter discomfort in dubbing or voice exposure applications, like news presentations and video dubbings.
Though the software is a paid utility with a limited period of free usage, the welcoming news is that you need not to pay an extra amount to work with the feature. It is available to you as you subscribe for the video editing utilities of software. Having talked enough about the work credibility, let us now proceed with understanding the text to speech conversion process of Filmora through a stepwise guide in what follows next:
04User’s Guide for Converting Text to Speech in Wondershare Filmora Video Editor
For Win 7 or later (64-bit)
For macOS 10.12 or later
Step 1: Download and Install the Program
Navigate to the official Wondershare website and initiate a free download of the Filmora Editor program to a preferred Windows or Mac supported device. Once the download finishes, move ahead with installing the program in your system, and wait to be greeted by the software’s welcome interface.
Step 2: Select the Text to Speech Functionality
You can select the text to speech option in Wondershare Filmora through any one of the following 3 methods:
● Method 1 - Select the audio asset in the timeline, click Tools on the top menu bar, and click Audio > Speech to Text.
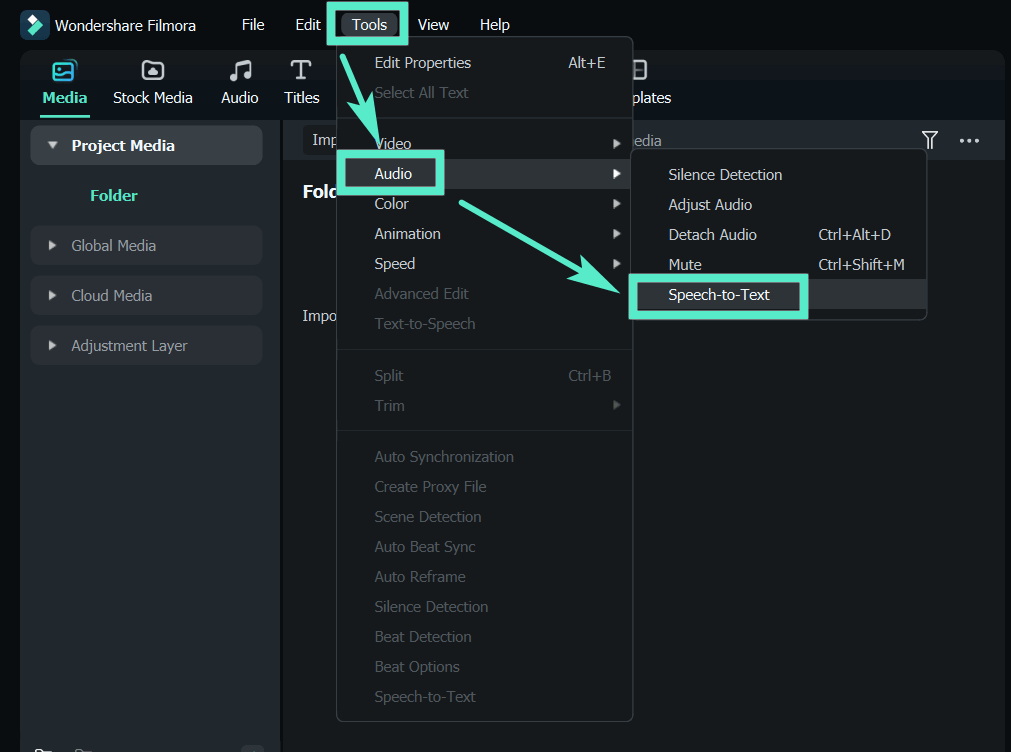
Speech to Text
● Method 2 - Select the audio asset in the timeline, and click the Speech to Text icon in the toolbar; if there is no supported file type on the timeline, it will not be displayed.

Toolbar Speech-to-Text
● Method 3 - Select the audio asset on the timeline, right-click and select Speech to Text.

Timeline Speech to Text
Parameter Settings
● In the STT parameter setting bar, select the language of the audio to be transcribed and files to be converted and check automatically match to the timeline. Now, the feature supports direct transcription of bilingual subtitles.

Part 5 Speech to Text Q&A
● How does the speech to text conversion utility work?
A conventional audio to text functionality works through listening to and recognizing a sound based input, followed by rendering a precise text centered transcript on a preferred system or device. The program’s voice recognition capability is the pivot behind this utility.
● What is the credibility of punctuation in a text transcription?
The transcription outputs rendered by a speech to text converter program use the comma to separate different elements and sections within the text, in the same way as you would normally do while writing a document with conventional methods.
● What is the significance of a clean verbatim?
A clean verbatim caters to a convenient readability of your audio-visual files through a slight customization process. This one is an accurately rendered transcription that keeps all the essential information within the recording, while eliminating the undesired, noisy background audio.
● What is the usage credibility of speech to text programs for students?
The speech to text converter programs are greatly beneficial for students in the sense that the latter works to remove a series of hindrances, like handwriting and speed matching difficulties, or transcription of thoughts during brainstorming sessions.
● Does working with a speech to text conversion facility require an internet connection?
The requirement of internet connectivity is rather selective with respect to the specific converter program or application you are working with. While some of them may require you to remain online throughout the transcription process, other may work well in the offline mode of operation.
● Ending Thoughts →
● Working with speech to text conversion software and application programs becomes quite handy in addressing a variety of personal and professional documentation needs.
● Browsing through the software market, you can select from a diversity of free and paid smartphone apps and system software utilities to transcribe text from audio files
● When looking for a dependable speech to text software program, you can pick the Wondershare Filmora editor application without having a second thought.
In this article
01 [What is the Speech to Text App?](#Part 1)
02 [Why is Speech to Text App Getting Popular?](#Part 2)
03 [10 Best Speech to Text Apps That Will Help Translate from Speech](#Part 3)
04 [How Can We Get Text-to-Speech Then?](#Part 4)
05 [Speech to Text Q&A](#Part 5)
Best Speech to Text Software Save plenty of time on transcribing subtitles and boost your editing efficiency by applying Filmora Speech-To-Text.
Try STT Now Try STT Now Explore STT
Part 1 What is the Speech to Text App?
In today’s busy schedules of personal and professional routines, most of us have a common habit of running away from entering lengthy text inputs to adhere specific concerns on smartphones and desktops. It is an obvious fact that given a choice to voice out or type, the former would bag in a considerably higher number of votes.
Having a technology backup, it is now practically possible to convert your voice commands into text with utmost ease, thanks to the advent of reliable speech to text applications. The utility works to transform the words you speak, into an exact text representation, thus saving both, your time and energy. Such applications work on the principle of responding to speech recognition requests and processing the same to render an equitable text output.
The required audio information is sent across a synchronous request to process the different sound pieces, one at a time. When all such pieces are processed and recognized, the text response is generated to the credit of the user. Talking of the device and platform compatibility of such applications, you can comfortably work on them in either of your system based, or mobile devices with an equal efficiency.
Browsing through the IT market, you may however land across exclusive as well as implicit choices to work on your preferred deices. While there are some smartphone specific speech-to-text applications, others may have a good compatibility with desktops and PCs. Moving ahead, there comes a third category of software ranges that is all set to work with smartphones as well as desktop systems.
Part 2 Why is Speech to Text Apps Getting Popular?
Talking in the light of personal credibility and usage, the speech to text apps may often be recognized as having limited application diversity, but the instincts are not same on the professional front. Entering deeper into the domain, there are fields like digital marketing and content planning that are reported of having a considerable dependency on such applications and utilities. Some of the pivotal reasons in support of the credibility are described as follows:
● Improving Work Efficiency
Talking specifically in line with the professional organizations that are greatly centered on text based working modules, or follow an extraneous typing and writing work pattern, the speech to text conversion facility is no less than a fantastic rescue to the tiresome sessions of spending time on fidgeting with PC and laptop keyboards.
Not only do such applications work towards lightening up the system exposure burden, but also facilitate a quick workability that further caters to increase the efficiency and work performance of the organization’s workforce. This in turn results in a fast and efficient addressing of the various types of text based operational concerns.
● Improvise Content Marketing Strategies
When the discussion is centered on devising high end and advanced level content marketing proposals and strategies, the speech to text facility can go a long way. You can work with such platforms to take quick and smart professional suggestions from the web within the blink of an eye, instead of typing the entire array of words and text to explain your point.
Such applications further work to modernize your content and data search habits, which may in most cases, can indirectly cause a refinement of your searches, thus facilitating you with a more exact and strategic content that affordably fits in the line of your market requirements. The bottom line is, such applications are on the way to increasing their professional credibility in cohesion with the modern day trends of the professional world.
● Academic and Media Centered Utilities
Speech to text application offers an extended credibility with respect to academic and educational requirements. Students can take advantage of the facility to quickly convert memos and lecture dictations into quick text files. Under the circumstances of working with audio and sound files, you can conveniently transform the audio transcriptions into viable text files with an almost instant effect.
When working on media centered projects, you can pick these applications to supplement your sound based contents with automatic titles and captions. The apps also come handy in converting lengthy dialogue audios into readable text so that you can understand and learn the same at your own convenient pace.
In the specific situations of creating text documents to supplement your project work in the absence of your PC or desktop, you can rely on these utilities to effectively create extensive text files with quick voice inputs.
Part 3 Best Speech to Text Apps That Will Help Translate from Speech
By far, you have become quite familiar with the functionality and significance of working with speech to text applications to a notable extent. While having an understanding of such utilities is one aspect, the real essence lies in having hands on experience with using the same in practical situations. When aiming to work towards the concern of using such facilities to expand your professional capabilities, it is of great important to make the right selection.
Moving along the line, here is a discussion of some top rated speech to text applications that you can choose to work with for a smart display of your professional expertise and efficiency in what follows next:
01Dragon Anywhere
Free Trial Period: days
Accuracy Rate: 99%
Starting with the list, there is the Dragon Anywhere application which you can reliably pick to effectively sort out your concern of converting text to readable text. The app is essentially a smartphone compatible utility, which was launched by the Nuances software development company as an allied facility of its desktop compatible speech to text conversion program to work on mobile devices.
The app comes to you as a complete package of dictation facilities that work well with your Android and iOS devices. Examining the app’s credibility in the line of its desktop counterpart, you may notice a minimal amount of lag between the input speech and output text. The underlying reason behind this delay is however, the obvious processing time frame of the cloud facility. Neglecting the same, the app works effectively to respond to the aforesaid conversion requirements.
The app further extends its utilities by allowing you to add text within a document file through its boilerplate functionality that creates chunks of the specific text that requires an insertion. All you need to do is enter a quick command and that’s really it. An additional appeal of working with the application is the extensive set of customized vocabularies that are rendered complementary with the app, along with having a convenient synchronization with their desktop compatible software.
Pros
● Recognizes your speech in an affordable quality
● Syncs perfectly with its desktop counterpart
● Loaded with a diverse range of functionalities
Cons
● Offers a limited dictation facility
● The speech recognition process has a logging factor
● Free version is available for a limited period.
02Otter
Free Trial Period: hours
Accuracy Rate: 99%
If you are on the search of an affordable smartphone centered solution to address your day to day business documentation and dictation requirements, this aforesaid is your go to application. Designed explicitly to cater the professional needs of experienced and mainstream corporate users, the tool is a cloud oriented mobile utility to work through real-time transcription, while catering the additional needs of editing, organizing and searching documents or playing audio files.
The major functionality of the application lies with sorting out the documentation requirements of interviews, lectures and meetings to pull off the concern of taking quick notes. You can further work with the app to run coordinated meetings and conferences with a collaborated group of members within a particular profile. This is brought about by assigning unique speaker credentials for a quick and convenient understanding of audio and text transcriptions.
You can work with the application by opting one of the 3 access options, 2 of which are paid subscriptions, while the remaining one is free for a limited period. The app comes with a comprehensive wordcloud and updated keyword summaries for an easy search through of specific subjects. The application grants you the liberty to share and organize text documents, import audio-visual elements for transcription purposes and much more.
Pros
● This speech to text app allows you to add live captions to your audio transcripted texts
● You are facilitated with a host of platform choices to export the documents directly
● The tool is readily compatible with team collaborations
Cons
● The application lacks a live chat facility
● The working interface is quite dated
● Free trial period is very short
03Verbit
Free Trial Period: hours
Accuracy Rate: 99%
Designed specifically for educational and enterprise centered applications, Verbit is a high end and intelligent speech to text converter utility that works to facilitate automatic captioning and transcriptions through artificial intelligence. Delivering a high speed transcription output, the efficiency of this upgraded application is way beyond the exclusively manual transcription facilities.
Talking of the operational methodology, the utility works to cater an excellent audio transcription by creating a mixture of speech modules through artificial intelligence algorithms and neural networks. These sophisticated models work to adapt the specific characteristics of the audio files, followed by the creation of a new series of linguistic, contextual and acoustic event modules.
Additional merits of using the application for transcribing speech centered audio are the elimination of background noise, recognition of speakers with different accents, integration of context based events, such as company information, news, etc., into recorded audio tracks. While the application hosts a free live version to caption and transcript the speech audio with an affordable accuracy rate, the paid versions promise of 100% accuracy to transcribe audio files into text.
Tracking the transcription process becomes highly convenient with the application’s real-time status update facility available through the Verbit Cloud Portal. The utility further supports a series of third party platforms that facilitate a convenient and quick distribution of the transcripted outputs.
Pros
● The application extends a high speed and accurate transcription service
● The utility houses an elaborated range of tools to caption videos
● The smart AI feature facilitates an expanded range of services to complement the transcription process
Cons
● The application’s multi-linguistic feature can be improved
● The utility’s free version is a limited period facility
● The pricing plans of the application are available on an individual basis
04Speechmatics
Free Trial Period: days for 10 hours
Accuracy Rate: 83%
Moving ahead with the list, Speechmatics is another effective speech-to-text conversion utility that works with the aid of machine learning to address the concern of transcribing audio files. Using an automated speech recognition advantage, this application is greatly preferred for creating text based transcriptions of audio-visual files on a free as well as paid subscription.
The application works in good cohesion with all popular British accents, beyond the constraints of nationality. You can prefer the utility to create audio transcriptions in British and American English, in addition to the Jamaican and South Asian accents. Offering a relatively higher count of speech to text conversion facilities and services, the Speechmatics application stays ahead of its counterparts in catering to the aforesaid concern.
A few of the major conversion services extended by the application include the transformation of phone recordings in a call center and transcribing them into Word files and text based information that can be searched across the web. You can further integrate the application to work with different types of audio-visual media to add captions and use keyword triggers for managing a series of allied operations.
Pros
● The application boasts of landing among the most power packed transcription engines
● The utility possesses the smartest integration of artificial intelligence through a responsive machine learning ability
● The application comes with a free version to examine the latter’s credibility before a purchase
Cons
● The application does render any out of the box means to carry out the audio transcription process
● The unpaid version of the tool has a limited period validity
● The paid subscription of the app is quite high on price
05Braina Pro
Free Trial Period: days
Accuracy Rate: 99%
Establishing itself as a world class speech to text converter application, Briana Pro is a web based utility that works with the Google Chrome browser. Functioning as a one stop solution for adhering to the most widespread concerns of digital assistance and dictation, ahead of the speech recognition facility, this one is quite a reliable voice recognition tool. Working with the application, you can dictate information in 90 different languages, other than English, to a varied range of third party programs.
The voice recognition capability of the app is nowhere to be questioned with a remarkable accuracy of 99%. The application additionally caters to sort out the functionalities of setting alarms, hosting a file search within your device or across the web, playing MP3 files, reading eBooks clearly, etc., along with adhering to a series of customized commands.
What’s most appealing about the program is the latter’s dual compatibility with Windows systems and Android smartphones. About the credibility of the Android application, you can work with the latter for remotely controlling your system. The utility can also be implemented to deliver function centered commands to the same through a localized Wi-Fi network.
The application grants you the liberty to test the credibility of its speech recognition tool by offering one week free trial facility. Though the free version comes with restricted functionalities, the paid subscription compensates it all.
Pros
● The application works as the most reliable digital assistant
● The utility works towards the efficient transcription of already recorded plugins
● The Android compatible module of the program aids in controlling your PC from a distance
Cons
● The application interface looks quite dated
● You cannot work with the utility on a Mac compatible device
● The recent purchase reports show a considerable increase in the application’s pricing constraints
06Amazon Transcribe
Free Trial Period: hours
Accuracy Rate: 99%
Moving further in the list, the Amazon Transcribe is a cloud centered, automated voice recognition facility, which has been created essentially to address the speech to text conversion requirements for a diversity of third party applications. Talking of the functional credibility, the audio recognition and text based outputs delivered by the platform are way ahead in terms of quality and accuracy in comparison to the most popular allies.
The platform works most efficiently to cater a precise text based output from noisy and low sound audio recording, like that within a call center. The facility works through an advanced deep learning algorithm to automatically include the necessary formatting and punctuation marks within the text output. You are further, allowed to undertake a secured live streaming for the conversion process, along with going for a batch processing of speech to text transcriptions.
Expanding the merit count of the facility, the latter provides time stamps for a quick and convenient search of specific words within the generated text output. The platform additionally caters to recognize and process a diversity of voice accents and sound channels, along with complementing the same with suitable annotations. You can also work with customizing the text transcriptions, with features like vocabulary filtering.
The platform grants you the liberty to work with word replacements for maintaining the consistency of product names, which further aids in a convenient analysis of the transcription files. All-in-all, this one is quite a credible platform to address voice to text conversion needs, though the true potential of the utility is better accessed by enterprise and business oriented users.
Pros
● The platform allows you to edit vocabularies of your preferred languages
● The audio transcription facility extends to a wide range of applications
● The utility caters to the recognition of sound channels and speakers
Cons
● The facility is not a smart choice for customer oriented usage
● The response time of the facility for a speech to text conversion is more than what can be regarded as feasible
● The platform does not recognize numeric digits
07Google Gboard
Free Trial Period: Complementary service
Accuracy Rate: 92%
This one is more of a complementary service that comes to you for free when you download the Google Keyboard application for your Android device from the Google Play Store. Functioning essentially as an instant utility to transcribe speech into text, the facility is works as a physical input keyboard. Adding further to the ease of access, the utility allows you to directly enter a speech input.
Thanks to the availability of Google’s hardware backup, you don’t have to worry about the responsiveness of the tool. The app additionally houses a heap of appealing features, like voice commands that help you to include images within the text output, and the flexibility to work with the Google Translate facility that is configured for extending a conversion support to more than 60 different languages.
Though the utility does not work as an exclusive tool for transcribing speech to text, it is still good at supporting the fundamental transcription features. Being a keyboard class application, the utility is compatible to almost any Android app you choose to work with on your device. Working with this specific facility, you can choose to save, edit and export the generated text outputs.
Pros
● The utility is packed with a lot of extra features, apart from text to speech conversion
● The application usage is not interrupted with annoying and frequent ads
● The facility extends its credibility with a diversity of Android applications
Cons
● The facility does not permit you to work with shortcut commands
● There is no ‘Undo’ button to erase wrong typing and you can only use the swipe tool to delete even the longest word strings
● The utility lags a bit to read symbolic representations
08Just Press Record
Free Trial Period: No cost utility
Accuracy Rate: 95%
This one is a Windows and iOS compatible application program that works on your PC to address the speech to text conversion requirements. Developed to essentially function as a reliable dictation utility, the app comes with a variety of additional facilities. A few of the major attractions of the tool are iCloud syncing, transcriptions and single tap recording.
What’s best is, the app can be easily understood and worked upon by all users, regardless of them being experienced or newbies to the domain. As far as the requirement of recording speech notes is concerned, the latter is confined to a single tap with a limitless record duration. You can additionally create transcribed text outputs from the audio input that is fed to the application.
The facility works to quickly and seamlessly recognize and convert voice inputs into text output that can be easily searched across the web. You are also permitted to edit the transcribed text file. For those who need to work with an overseas clientele, the app offers a commendable aid through its recognition capability across more than 30 different languages.
The application further ensures a complete absence of typographical errors from the output text files through its ability to recognize punctuation commands. The facility accommodates a cloud technology to allow an easy access of the transcribed files and notes through any device that has running internet connectivity. You can further, view the recorded text and audio files, as the app works to organize them at a single place, and share the same across a host of iOS applications.
Pros
● The app supports a multi-lingual speech recognition and audio transcription facility
● The utility works in a cloud compatible configuration to keep your transcriptions safe and secure
● The app’s working interface is easy to understand and work upon
Cons
● The facility does not support an allied application for Android smartphones
● The app often tends to skip or misidentify even the most clearly spoken words
● The utility is incompatible with background processing and hence the transcription process comes to a halt in absence of foreground running
09Speechnotes
Free Trial Period: No cost utility
Accuracy Rate: 86%
This one is another addition to the series of dictation applications, but with a highly relaxed and quick transcription process. Escaping the hustle of creating online accounts or signing up, you can simply start the speech to text conversion process by launching the app and clicking on the microphone symbol. With a dependable backup of Google’s voice recognition technology, you are granted the liberty to use voice commands or the default punctuation keyboard for dictating punctuation marks within the text output.
The app’s default keyboard comes with a set of custom keys that work to include greetings, signatures, names and other types of regularly used word strings within the output. The app also facilitates an automatic capitalization, while saving all the changes you make within a particular note on a cloud space. The output text files can be further customized with an extensive variety of text sizes and fonts.
While the app’s free version is available on the Google Play Store, the latter is known to have a restricted set of features. You can however, avail a paid subscription to the utility through the in-app purchases to work with the complete set of features.
Pros
● The application works to automatically recognize punctuation marks from the voice input
● The utility greets you with a welcoming and convenient to use workspace
● The app is available for Android as well as Chrome operating systems
Cons
● The transcribed recordings demand a paid subscription to get processed
● The app does not allow you to choose the format of the output text files, while offering a limited security to your creations
● You cannot work with the application on iOS devices.
10Windows 10 Speech Recognition
Free Trial Period: Single time free usage
Accuracy Rate: 95%
The Windows 10 operating system is packed with a good number of built in features and utilities, while the voice recognition facility being one among them. Working with the Windows Speech Recognition functionality, you can move ahead with document dictations, while simultaneously executing voice controlled commands.
You can further, work to increase the speech recognition accuracy of the application through a high tone reading of the text and granting the app permissions to access your documents for a better understanding of your vocabulary. These practices are helpful in training the application for an upgrade in the latter’s performance accuracy. It becomes additionally important to train the app in case you wish to work with the speech recognition facility of the tool in a better way.
It’s not that you cannot work with the facility while using the older versions of the Windows operating system, but the developer reports claim the recent version’s applicability to be more fruitful. The obvious reason backing up the app’s credibility is the deep neural network technology that promises of delivering increased benefits in times ahead.
You can start working with the facility by navigating to and clicking on the ‘Control Panel’ in the ‘Start Menu’. Select ‘Ease of Access’ from the list of options that follows next. The ‘Start Speech Recognition’ option appears, along with the facility for setting up a microphone, in case you have not enabled the same. Just click on the aforesaid options and that’s it! You can proceed with the conversion process right away.
Pros
● The facility has a complete integration with the Windows operating system
● The speech to text transcription process is quick and easy
● The app greets you with a responsive interface to work upon
Cons
● The utility has a wide scope of improvement in terms of performance accuracy
● The app does not have an iOS or Android compatibility
● The tool needs a recursive training to keep delivering the desired outputs with a significant accuracy
Part 4 How Can We Get Text-to-Speech Then?
Working with the text to speech facility has become quite an easy task with today’s modern day technologies that fit into a variety of apps and software programs. While such voice recognition utilities are compatible with a series of operating systems and platforms, you can work with them either through in-built features or third party applications.
As you begin with your search for affordable and accurate text to speech conversion software, these are a host of choices at your disposal. Discussing along the line, let us talk about the voice recognition and text to speech conversion credibility of some popular text to audio transcription programs in the following section:
01Converting Text to Speech in Panopreter
If you are working on a Windows desktop or PC, this one is reliable software alternative for addressing the concern of converting text based inputs into speech outputs. Before you start using the facility, it is important to note that the aforesaid program supports 2 different working modes to provide additional convenience to its users. You can pick anyone of the ‘Input and Speak’ or ‘Read Batch Files’ modes to initiate the speech to text conversion process.
Working with the Panopreter program requires you to have a running internet facility for downloading the program to your system, followed by going through an app installation procedure. Post that, all you need to do is, activate the service and adhere to the following user guide to start converting texts into audio with the program:
02User’s Guide for Converting Text to Speech in Panopreter
Step 1: Download the Converter Program
Navigate to the official Panopreter website and download the software to your system. Once then download gets completed, proceed to install the same and wait for the program’s welcome screen to appear.
Step 2: Mode Selection and Setting
As the launch screen pops up, you will be asked to choose the preferred working mode from the ‘Input and Speak’ and ‘Read Batch Files’ alternatives. You should know that the former is the default operation mode of the software and you can activate the same in a few steps.
Start with navigating to the ‘Menu Options’ tab and clicking on the ‘Settings’ option in the latter’s drop down list. The ‘Settings’ dialog box pops up, where you need to hit the ‘Speak Node’ option in the panel at the left. In the ‘Speak Window’ that appears next, click within the checkbox of your desired option and that’s it! The default ‘Input and Speak’ mode will be activated when you re-launch the software.
If, on the other hand, you desire to work in the ‘Read Batch Files’ mode, navigate to the ‘Menu Bar’ at the top of the software interface and hit the ‘File’ tab. From the list of items that drops down, select the ‘Read Batch Files’ option.
Step 3: Mode Specific Software Operation
If you are working in the ‘Input and Speak’ mode, you can proceed with typing or pasting a desired text within the ‘Text Window’ Another option is to open a desired text document or file directly from your system. As for working in the ‘Read Batch Files’ mode, you are allowed to manage your system’s text files through the ‘Open’, ‘Clear’ and ‘Delete’ buttons. You should however take caution to add all the files in a common language.
Step 4: Language Selection
Navigate to the ‘Language List’ window and pick a preferred language to convert the text files into audio transcripts. Remember to choose the same conversion language as added of the ‘Text Window’ files in Step 2, lest you would end up getting an undesirable speech output.
Step 5: Voice Selection
As you complete Step 4, a series of preset text to speech voice alternatives present within your system for the preferred language will show up in the ‘Voice Window’. Proceed to select the voice type you like.
Step 6: Read Aloud!
After you have selected the voice, tap the ‘Speak’ button and start reading your text aloud. Amid the process, you will see the ‘Stop’, ‘Resume’ and ‘Pause’ buttons getting enabled.
Step 7: Save Your Transcription
When you have finished reading the text, click on the ‘Stop’ button to end the transcription process. The ‘Save as Audio’ option gets enabled, allowing you to convert your text into speech in the MP3, OGG, WAV and FLAC file formats.
Step 8: Customize Your Audio
The Panopreter program lets you add suitable customizations to the transcribed audio to ensure affordable file size and sound quality. You can adjust the bit rate and sample rate to address the aforesaid concern. All you need to do is, head to the ‘Menu Options’ at the top of the app screen and select ‘Settings’.
Click on the ‘Audio Format’ option within the ‘Settings’ window pops up, followed by selecting a suitable format for the audio file. On most cases, the WAV format works best to address the output quality requirements in an affordable manner.
03Converting Text to Speech in Wondershare Filmora
Recognized more popularly as a top rated video editing software program, Filmora by Wondershare is a storehouse of applicational utilities that work to address a diversity of additional concerns. Speaking in the light of text to speech conversion, the software extends exceptional capabilities for working towards the requirement.
You can avail the facility to add an extra bit of convenient accessibility to your graphic and video centered projects and artworks by transcribing text based subtitles into speech with a single click. The feature is a welcome rescue for those who encounter discomfort in dubbing or voice exposure applications, like news presentations and video dubbings.
Though the software is a paid utility with a limited period of free usage, the welcoming news is that you need not to pay an extra amount to work with the feature. It is available to you as you subscribe for the video editing utilities of software. Having talked enough about the work credibility, let us now proceed with understanding the text to speech conversion process of Filmora through a stepwise guide in what follows next:
04User’s Guide for Converting Text to Speech in Wondershare Filmora Video Editor
For Win 7 or later (64-bit)
For macOS 10.12 or later
Step 1: Download and Install the Program
Navigate to the official Wondershare website and initiate a free download of the Filmora Editor program to a preferred Windows or Mac supported device. Once the download finishes, move ahead with installing the program in your system, and wait to be greeted by the software’s welcome interface.
Step 2: Select the Text to Speech Functionality
You can select the text to speech option in Wondershare Filmora through any one of the following 3 methods:
● Method 1 - Select the audio asset in the timeline, click Tools on the top menu bar, and click Audio > Speech to Text.
Speech to Text
● Method 2 - Select the audio asset in the timeline, and click the Speech to Text icon in the toolbar; if there is no supported file type on the timeline, it will not be displayed.
Toolbar Speech-to-Text
● Method 3 - Select the audio asset on the timeline, right-click and select Speech to Text.
Timeline Speech to Text
Parameter Settings
● In the STT parameter setting bar, select the language of the audio to be transcribed and files to be converted and check automatically match to the timeline. Now, the feature supports direct transcription of bilingual subtitles.
Part 5 Speech to Text Q&A
● How does the speech to text conversion utility work?
A conventional audio to text functionality works through listening to and recognizing a sound based input, followed by rendering a precise text centered transcript on a preferred system or device. The program’s voice recognition capability is the pivot behind this utility.
● What is the credibility of punctuation in a text transcription?
The transcription outputs rendered by a speech to text converter program use the comma to separate different elements and sections within the text, in the same way as you would normally do while writing a document with conventional methods.
● What is the significance of a clean verbatim?
A clean verbatim caters to a convenient readability of your audio-visual files through a slight customization process. This one is an accurately rendered transcription that keeps all the essential information within the recording, while eliminating the undesired, noisy background audio.
● What is the usage credibility of speech to text programs for students?
The speech to text converter programs are greatly beneficial for students in the sense that the latter works to remove a series of hindrances, like handwriting and speed matching difficulties, or transcription of thoughts during brainstorming sessions.
● Does working with a speech to text conversion facility require an internet connection?
The requirement of internet connectivity is rather selective with respect to the specific converter program or application you are working with. While some of them may require you to remain online throughout the transcription process, other may work well in the offline mode of operation.
● Ending Thoughts →
● Working with speech to text conversion software and application programs becomes quite handy in addressing a variety of personal and professional documentation needs.
● Browsing through the software market, you can select from a diversity of free and paid smartphone apps and system software utilities to transcribe text from audio files
● When looking for a dependable speech to text software program, you can pick the Wondershare Filmora editor application without having a second thought.
In This Article, We Will Show You How to Rotate Videos Using Obs
Obs is video editing software that is used to create and edit videos. It is a powerful tool that can be used to do a variety of things, such as add text, music, and special effects to videos. It also allows you to cut and trim videos, and to merge them with other videos. Additionally, obs allows you to live stream your videos, which can be a great way to share them with others. Overall, obs is a powerful tool that can be used to create and edit amazing videos.
The main interface of Obs Studio is relatively simple, and it is easy to use. The top of the screen contains a number of icons that allow you to access different features of the software, such as the video editor, the live streamer, and the settings. The bottom of the screen contains a timeline, which allows you to easily edit your videos. The timeline also contains a number of tools that allow you to trim your videos, add text and music, and more. Overall, the main interface of Obs Studio is simple and easy to use.
There are many benefits to using obs, including:
- It is free to download and use.
- It is a powerful tool that can be used to create and edit amazing videos.
- It allows you to live stream your videos, which can be a great way to share them with others.
- There are many online communities where you can find help and advice from other users.
- Overall, obs is a great program that can be used to create and edit amazing videos.
There are many reasons why you might want to rotate a video. For example, if you captured a video of a person or object upside down, you would want to rotate it so that it is right-side up. Or, if you recorded a video in landscape mode but want to view it in portrait mode, you would need to rotate the video.
Luckily, there are a number of ways to rotate videos on different devices. In this article, we will show you how to rotate videos using Obs.
Step-by-step on how to rotate videos using Obs
How to rotate using the rotate tool in the video editor?
First, to use the rotate tool in the Edit tab, simply follow the steps below:
Step 1: Open the video editor and drag your video to the editor.

Step 2: Click on the Edit > Transform > Rotate 90 degrees CW tool to rotate it 90 degrees clockwise.

Step 3: Click on the Edit > Transform > Rotate 90 degrees CW tool to rotate it 90 degrees counterclockwise.

Step 4: Click on the Edit > Transform > Rotate 180 degrees tool to rotate it 180 degrees.

How to rotate using the advance controls in obs?
Second, to use the filters in obs, follow the steps below:
Step 1: Open obs and click on the Edit tab > Transform > Edit transform. You can also click Ctrl + E.

Step 2: Go to the Rotation section.

Step 3: Select the rotation degree you want to use.

Step 4: Click on enter on your keyboard to rotate it.
How to rotate using right-clicking on the video?
Third, to use right-clicking on the video, follow the following:
Step 1: Open obs and right-click on the clip that you want to rotate.
Step 2: Click on the Transform > Rotate 90 degrees CW tool to rotate it 90 degrees clockwise.

Step 3: Click on the Transform > Rotate 90 degrees CW tool to rotate it 90 degrees counterclockwise.

Step 4: Click on the Edit > Transform > Rotate 180 degrees tool to rotate it 180 degrees.

An Easy Way to Rotate Videos Using Filmora
To conclude, there are a number of ways to rotate videos on different devices. In this article, we have shown you how to rotate videos using Obs. Meanwhile, we have another suggestion which is using Filmora Video Editor to rotate videos. Filmora is a Wondershare product that helps you to rotate videos without quality loss. With its easy-to-use interface, you can rotate videos with just a few clicks. If you are interested in it, please feel free to check the guide below:
For Win 7 or later (64-bit)
For macOS 10.14 or later
Step-by-step on how to rotate videos using Filmora
How to rotate videos using Filmora?
First, to rotate videos using Filmora, follow the steps below:
Step 1: Import the video you want to rotate into Filmora.

Step 2: Click on the “Edit” button in the toolbar.

Step 3: Go to Transform > Rotate.

Step 4: Select the rotation angle you want to use.

Step 5: Click on the ‘Ok’ to rotate it.

Second, if you want to rotate a video and flip it, follow the steps below:
Click on the flip option that you want to use, either upside down or sideways, vertically or horizontally.

Click on ‘Ok’ to apply the rotation and the flip.
Third, if you want to rotate a video by a specific number of degrees, follow the steps below:
To conclude, Filmora provides a number of ways for you to rotate your videos as well as using Obs. If you are looking for an easy way to rotate your videos without quality loss, then Filmora is the best option for you.
Step 2: Click on the Edit > Transform > Rotate 90 degrees CW tool to rotate it 90 degrees clockwise.
Step 3: Click on the Edit > Transform > Rotate 90 degrees CW tool to rotate it 90 degrees counterclockwise.
Step 4: Click on the Edit > Transform > Rotate 180 degrees tool to rotate it 180 degrees.
How to rotate using the advance controls in obs?
Second, to use the filters in obs, follow the steps below:
Step 1: Open obs and click on the Edit tab > Transform > Edit transform. You can also click Ctrl + E.
Step 2: Go to the Rotation section.
Step 3: Select the rotation degree you want to use.
Step 4: Click on enter on your keyboard to rotate it.
How to rotate using right-clicking on the video?
Third, to use right-clicking on the video, follow the following:
Step 1: Open obs and right-click on the clip that you want to rotate.
Step 2: Click on the Transform > Rotate 90 degrees CW tool to rotate it 90 degrees clockwise.
Step 3: Click on the Transform > Rotate 90 degrees CW tool to rotate it 90 degrees counterclockwise.
Step 4: Click on the Edit > Transform > Rotate 180 degrees tool to rotate it 180 degrees.
An Easy Way to Rotate Videos Using Filmora
To conclude, there are a number of ways to rotate videos on different devices. In this article, we have shown you how to rotate videos using Obs. Meanwhile, we have another suggestion which is using Filmora Video Editor to rotate videos. Filmora is a Wondershare product that helps you to rotate videos without quality loss. With its easy-to-use interface, you can rotate videos with just a few clicks. If you are interested in it, please feel free to check the guide below:
For Win 7 or later (64-bit)
For macOS 10.14 or later
Step-by-step on how to rotate videos using Filmora
How to rotate videos using Filmora?
First, to rotate videos using Filmora, follow the steps below:
Step 1: Import the video you want to rotate into Filmora.
Step 2: Click on the “Edit” button in the toolbar.
Step 3: Go to Transform > Rotate.
Step 4: Select the rotation angle you want to use.
Step 5: Click on the ‘Ok’ to rotate it.
Second, if you want to rotate a video and flip it, follow the steps below:
Click on the flip option that you want to use, either upside down or sideways, vertically or horizontally.
Click on ‘Ok’ to apply the rotation and the flip.
Third, if you want to rotate a video by a specific number of degrees, follow the steps below:
To conclude, Filmora provides a number of ways for you to rotate your videos as well as using Obs. If you are looking for an easy way to rotate your videos without quality loss, then Filmora is the best option for you.
How To Split Screen On Tiktok
TikTok is probably the most popular video-sharing app in the world right now. Many TikTokers have become famous for making videos that have a significant impact and encourage creativity and new ideas. One of the most popular TikTok trends is the split-screen effect. You’ve probably seen a lot of TikTok split-screen videos with cool effects that made you wonder how the user split their screen. Becoming skilled in using TikTok effects is not as difficult as it might look. It only requires a significant amount of practice. Read on as we show you how to make a TikTok split-screen video.
Using CapCut To Split Screen
CapCut is the official free TikTok Video Maker and Video Editor with Music for TikTok that is multifunctional. Its interface is quite similar and easy to use.
CapCut includes free advanced capabilities such as keyframe animation, stabilization, and Picture-in-Picture (PIP). These are in addition to its fundamental functions, such as video editing, adding stickers, text, and music.
Steps to Split Screen Video with CapCut On Android and IOS Devices
- To use the app, you need to install it first. iPhone and Android users can download CapCut. Navigate to the appropriate app store of your choice and download CapCut.
- After installation, launch the app.
- Then go ahead and grant CapCut permission to view your camera roll. Incorporating video clips into your project has never been easier. Go to the app’s main screen and select “New Project“ from the drop-down menu.
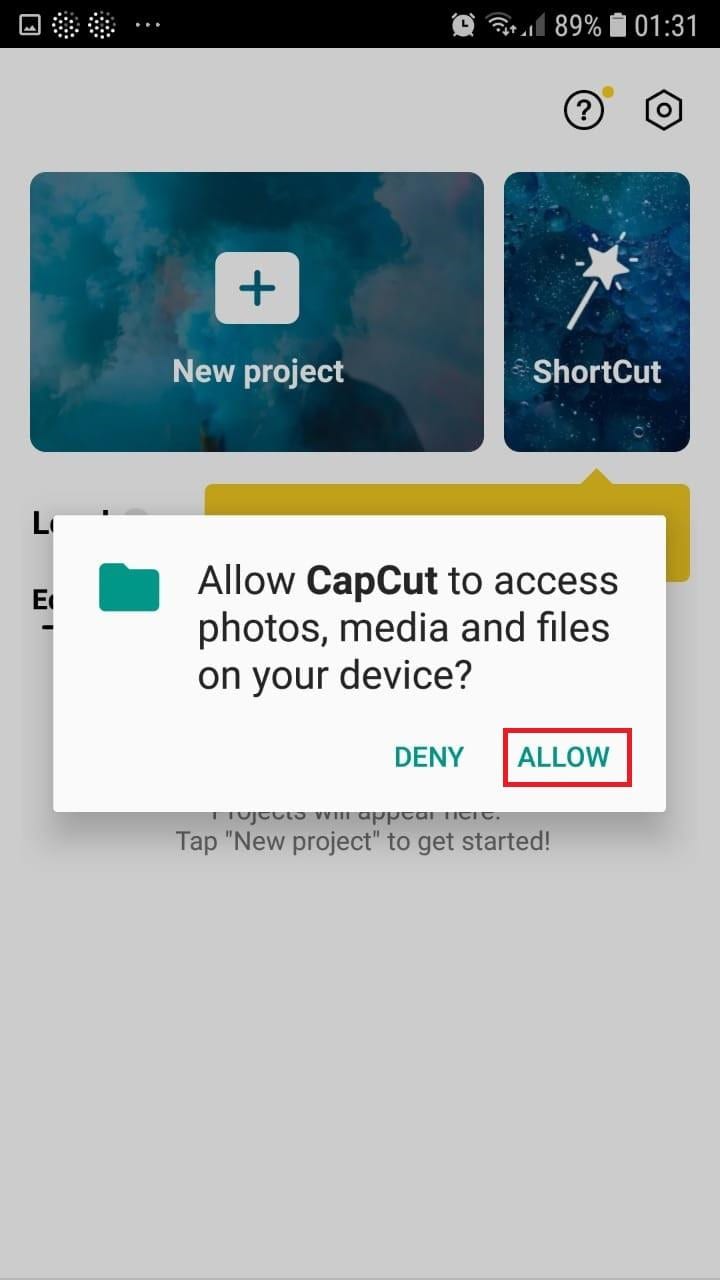
- To confirm your selection, click the green Accept This confirms that CapCut requires access to your photographs to function correctly. Tap on the button on the following pop-up window to gain access to all the photos. This is a one-time process that must be carried out the first time you launch the application.
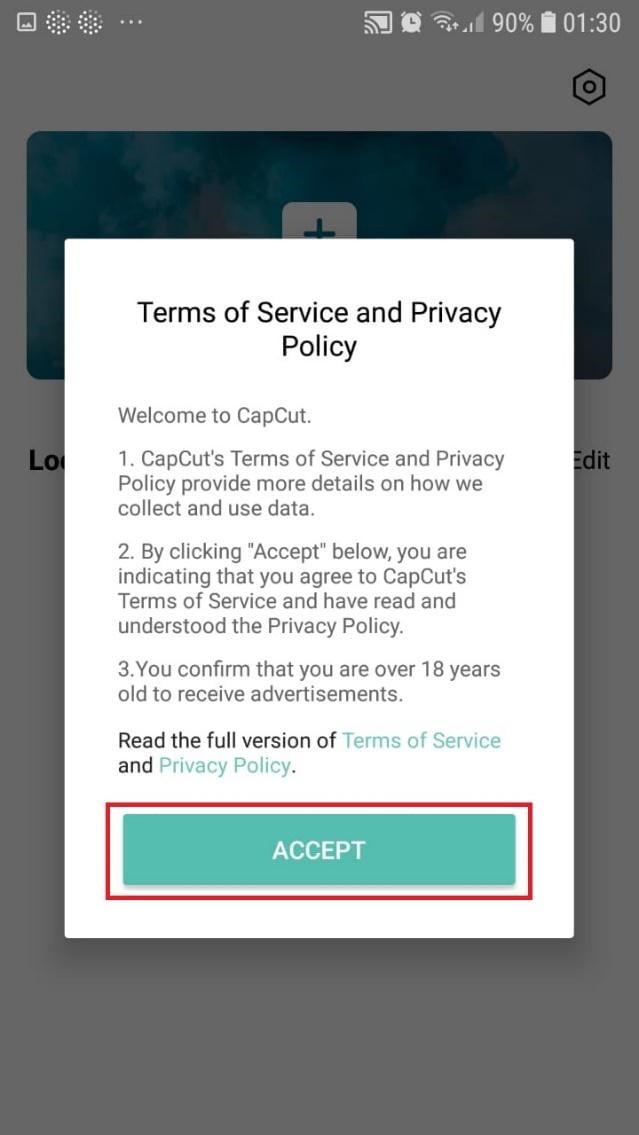
- Begin a New Project. After opening the app, press the “New Project“ icon to bring up a new screen showing your device’s videos.

- Choose a video clip. Locate the desired video clip for your project by scrolling through the pages displaying your camera roll. Tap the video’s thumbnail and then tap the “Add“ icon in the screen’s lower part.

- Get familiar with your workspace. Upon uploading your first clip, CapCut leads you to the primary workspace. This is where you will spend most of your time within the app. The preview panel, the timeline, and the toolbar are in order from top to bottom.
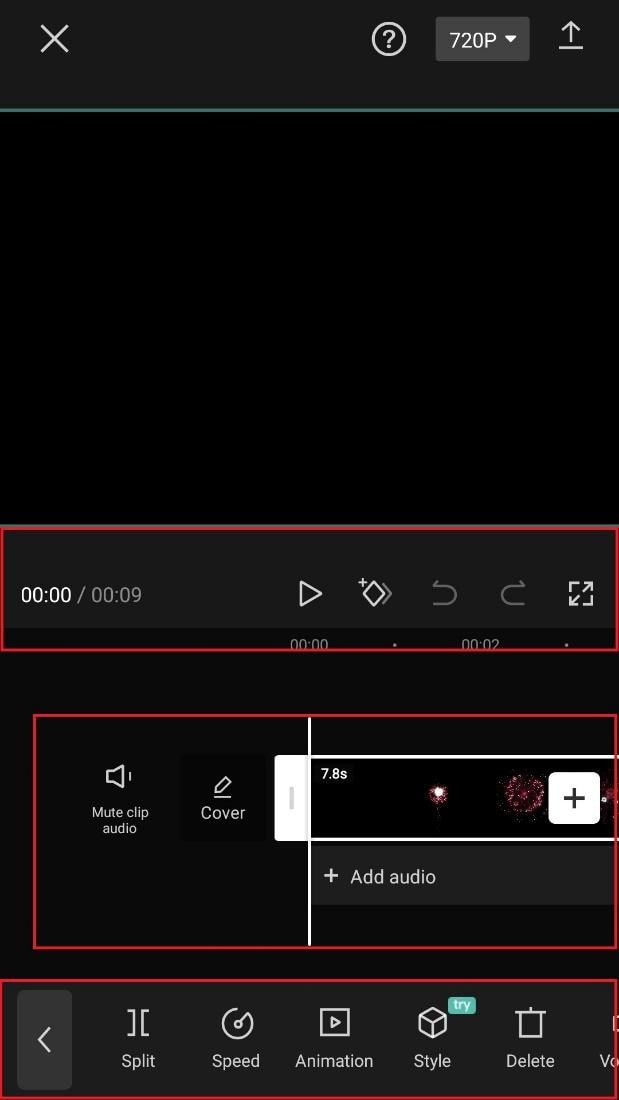
- View the toolbar and timeline. They represent your screen’s bottom half. The timeline, located below the preview panel, is where you’ll make all your adjustments. You can access all your video editing tools, including split, text, audio, effects, stickers, and more, on the toolbar at the bottom of your screen.
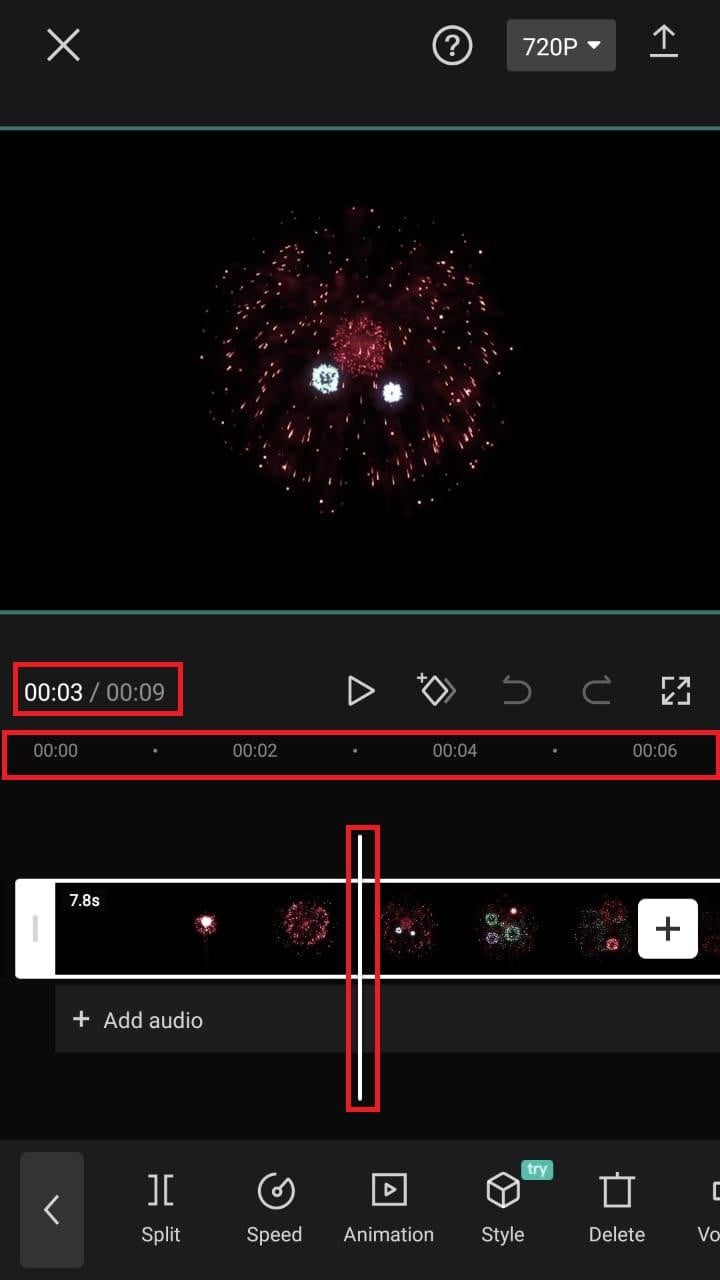
- Split video clips. To split a video clip in half, move the play head to the desired location on the timeline. Tap on your clip, then press the “Split“ toolbar icon. Your result now shows two different clips, not just one.
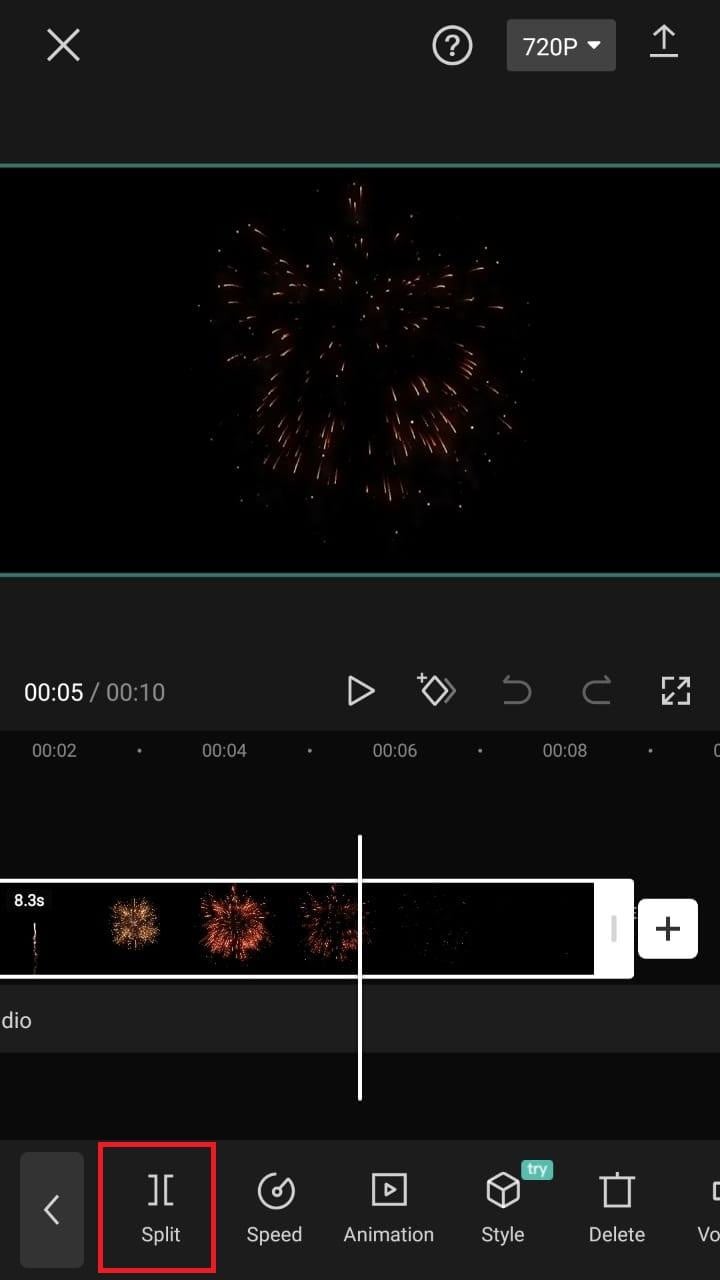
A Better Split-Screen Effect Video Editor
Filmora is one of the best free HD video makers and video editors with several functionalities, including text, backgrounds, filters, special effects, emoji, audio, and special effects.
Filmora is a feature-packed video editor which has a variety of tools to work with. With this video editor, producing memes, videos with images, pictures, music, stickers, and sound effects and editing videos for YouTube, Twitter, WhatsApp, Facebook, TikTok, and Instagram is simple and entertaining.
Free Download For Win 7 or later(64-bit)
Free Download For macOS 10.14 or later
Steps to Split Screen Video with Filmora
- Download Filmora from the App store
- After installation, launch it.
- Click on “Continue” to continue to use the app.

- Click on Allow to grant Filmora access to your photos and videos.
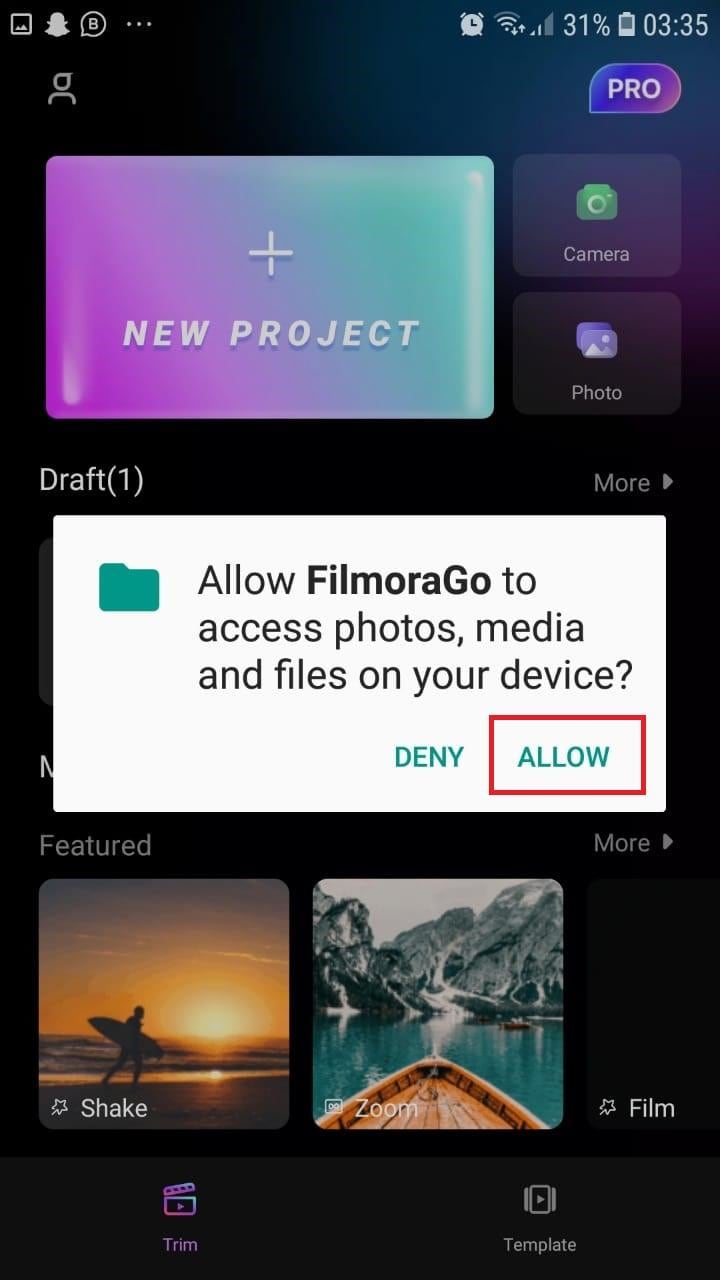
- You can now tap on “New Project” with the + Symbol.
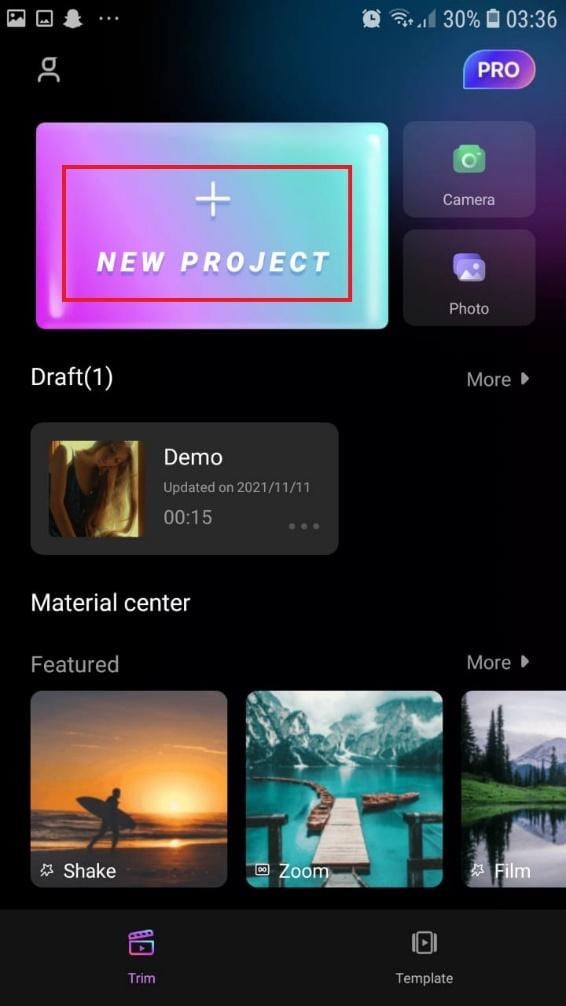
- Select your desired video and tap on “Next” at the bottom right of your screen
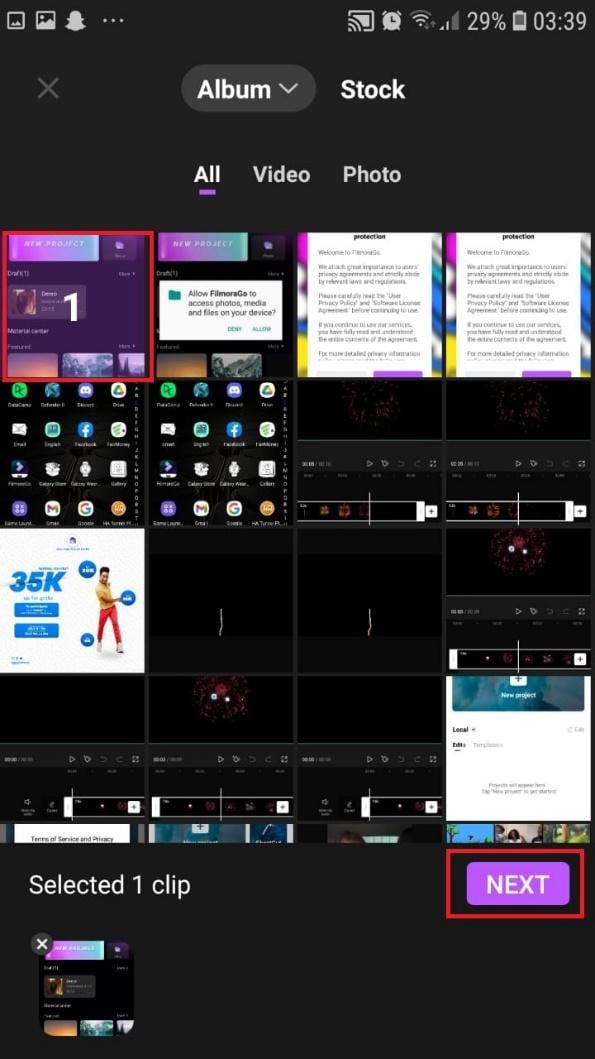
- You can select various options from the bottom of your screen to edit the selected video the way you like.

- Click on trim, and then you will see the different split-screen and collage feature options. Pick any that appeals to you.
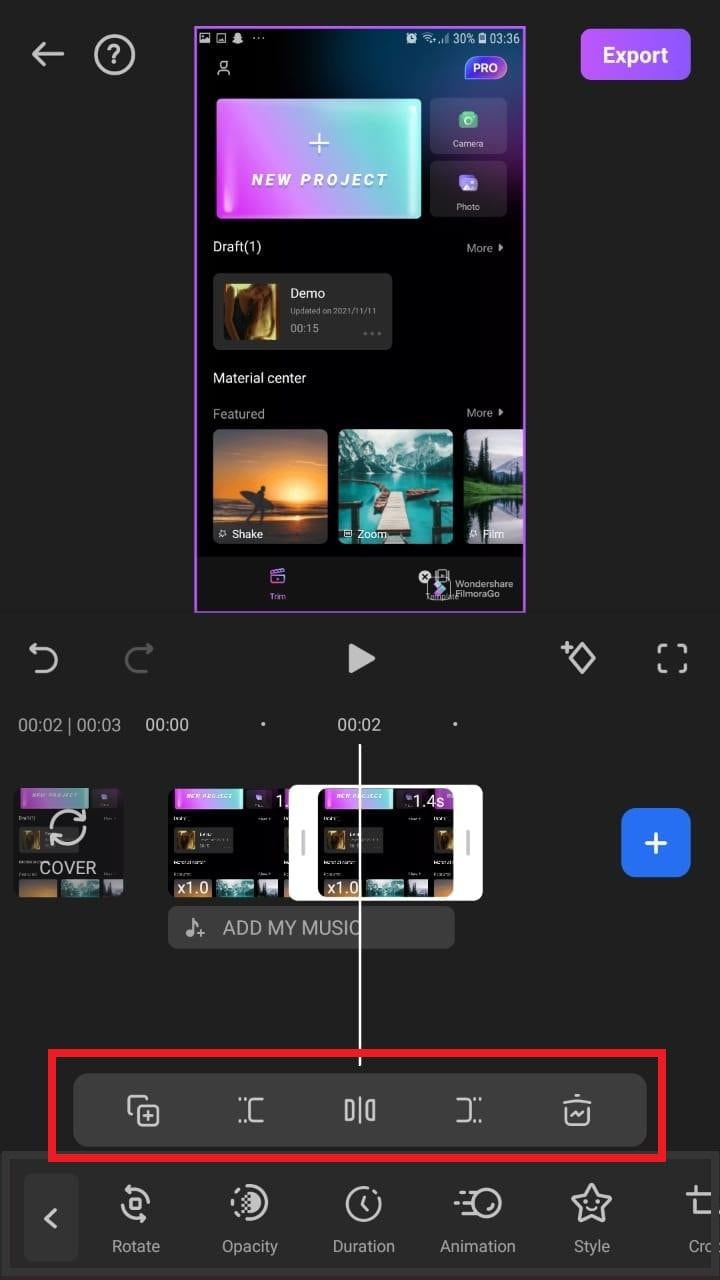
- When you are done with the editing, tap on “Export” at the top right of your screen.

- Go ahead and tap on “Export” on the next screen. Your video will be successfully exported and saved to your camera roll.
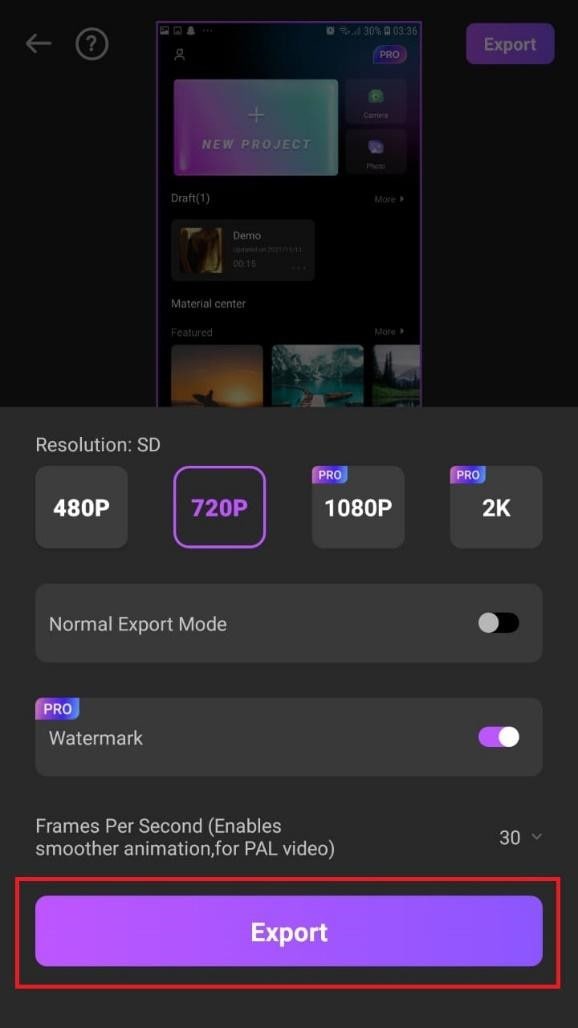
Using Filmora is very efficient in splitting your videos and making collage features for TikTok. It is a very simplified app available on both the Google Play Store and Apple Appstore.
Conclusion
TikTok is a platform that users use worldwide to create and share content. It could be pictures, videos, reels, or any other media type. Some people create videos for their audience on TikTok to educate them, while others do it to entertain them.
In any case, the goal is to build a more significant following on TikTok and garner greater attention from its users. You could even make money off the app.
One of the methods to impress your fans and explore multiple possibilities to build unique reels is to use the TikTok split-screen and collage feature effect available on TikTok. Although there are a few different ways to create a Split Screen on TikTok, the steps highlighted in this article are the most straightforward.
Free Download For macOS 10.14 or later
Steps to Split Screen Video with Filmora
- Download Filmora from the App store
- After installation, launch it.
- Click on “Continue” to continue to use the app.
- Click on Allow to grant Filmora access to your photos and videos.
- You can now tap on “New Project” with the + Symbol.
- Select your desired video and tap on “Next” at the bottom right of your screen
- You can select various options from the bottom of your screen to edit the selected video the way you like.
- Click on trim, and then you will see the different split-screen and collage feature options. Pick any that appeals to you.
- When you are done with the editing, tap on “Export” at the top right of your screen.
- Go ahead and tap on “Export” on the next screen. Your video will be successfully exported and saved to your camera roll.
Using Filmora is very efficient in splitting your videos and making collage features for TikTok. It is a very simplified app available on both the Google Play Store and Apple Appstore.
Conclusion
TikTok is a platform that users use worldwide to create and share content. It could be pictures, videos, reels, or any other media type. Some people create videos for their audience on TikTok to educate them, while others do it to entertain them.
In any case, the goal is to build a more significant following on TikTok and garner greater attention from its users. You could even make money off the app.
One of the methods to impress your fans and explore multiple possibilities to build unique reels is to use the TikTok split-screen and collage feature effect available on TikTok. Although there are a few different ways to create a Split Screen on TikTok, the steps highlighted in this article are the most straightforward.
Also read:
- Do You Want to Use a Video Editor for Your iOS Device? This Article Introduces LumaFusion, a Perfect Multi-Track Video Editor Designed to Cater to Your Needs
- Updated 2024 Approved Free Ways To Split Video For Whatsapp Status On All Platforms
- In 2024, Vegas Pro - How to Download, Install and Use It?
- Updated Bandicut Video Editor Download and Review
- New How to Color Correct in OBS
- New 2024 Approved Top 10 Free Spanish Text To Speech Converter Websites
- Updated Splitting Audio From a Video in Sony Vegas Step by Step for 2024
- Updated 15 Free Cinematic LUTs for Your Film
- 3 Best Effects to Appear on Camera for 2024
- New Srt File Creator
- Detailed Guide to Crop Videos in Sony Vegas Pro for 2024
- Best Ideas on Using Green Screen with Filmora for 2024
- Updated 2024 Approved This Article Aims to Provide a Step-by-Step Guide to Changing a Videos Speed by Using the Speed Adjustment Panel and Duration Panel on Wondershare Filmora
- Updated 2024 Approved How to Make a Smooth Speed Ramping in Premiere Pro?
- New The Power of Music in Videos (+Filmora Editing Tricks)
- New Top 10 Old Film Overlays to Make Your Videos Look Vintage
- The Best 10 AI Video Analytics Companies at a Glance
- New The Definite Guide to Craig Bot Discord
- New The Best Tools for Converting Slides to Digital - 2024 Review
- In 2024, 7 Best Green Screen Software for Beginners on Mac
- New 12 Best GIF Editors to Use
- Updated 2024 Approved Are You Looking to Make Transparent Background in Canva Then You Can Learn About It in This Article
- How to Make Custom Lower Thirds with Filmora for 2024
- Top 10 Free WhatsApp Video Converter
- New How to Add a Lower Third to Your Video for 2024
- 2024 Approved End This Problem! Make Transparent Background Video Today
- New How to Create a Special Animated Transition in Filmora in Just 2 Minutes. This Simple Step-by-Step Guide Will Show You the Easy Way for 2024
- 2024 Approved 6 Instant Mp4 to GIF Online Tools
- New In 2024, Phone Aspect Ratio Vertical Definition, Types & Tips
- Updated 2024 Approved Learn How to Slow Down Time-Lapse Videos on iPhone to Make Detailed and Captivating Slow-Motion Effects in Your Time-Lapse Captures
- What Is an Eye Zoom Transition Effect? Its a Close-Up Video Effect Allowing Viewers to Transit to the Next Clip From the Eye for 2024
- In 2024, What Are the 10 Best GIF Creator?
- New Adobe Lightroom Color Grading Tutorial
- New Confused as to How to Add Subtitles to a Video on iPhone? No Worries as We Bring You the Best Solution to Get the Task Done for 2024
- How to Make Video Fade to Black in Movie Maker for 2024
- KineMaster Templates 101 How to Get the Most Out of Video Templates
- New In 2024, 2 Methods to Crop a Video Using After Effects
- 2024 Approved Quick Answer What Is a GIF File
- In This Article, We Will Discuss How to Rotate Videos in the Lightworks Application. Below Is a Way to Rotate Videos in Lightworks Manually, Here, We Will Use the Z-Axis Rotation for 2024
- New How To Add Motion Blur On CapCut? (IPhone & Android)
- In 2024, How to Create An Eye-Catching Intro Videos with InVideo
- New 2024 Approved 3 Effective Methods to Correct Color Distortion in Videos
- New Top Fixes to Resolve Issues with Premiere Pro Slow Playback for 2024
- New In 2024, How to Control the Speed of Video
- How to Change Lava Yuva 3 Location on Skout | Dr.fone
- How to retrieve erased music from Oppo Find N3 Flip
- In 2024, Bypassing Google Account With vnROM Bypass For Xiaomi Redmi 12
- Tips and Tricks for Apple ID Locked Issue From Apple iPhone XR
- In 2024, How Can I Unlock My Apple iPhone SE After Forgetting my PIN Code? | Dr.fone
- In 2024, AddROM Bypass An Android Tool to Unlock FRP Lock Screen For your OnePlus Nord CE 3 Lite 5G
- In 2024, Guide to Mirror Your Infinix Hot 30 5G to Other Android devices | Dr.fone
- In 2024, Best Vivo Y27 5G Pattern Lock Removal Tools Remove Android Pattern Lock Without Losing Data
- How to Transfer Data from Oppo Reno 10 Pro+ 5G to Samsung Phone | Dr.fone
- In 2024, 2 Ways to Transfer Text Messages from Google Pixel 8 Pro to iPhone 15/14/13/12/11/X/8/ | Dr.fone
- Locked Out of Apple iPhone SE (2020)? 5 Ways to get into a Locked Apple iPhone SE (2020) | Dr.fone
- In 2024, How To Unlock Any Infinix Smart 8 HD Phone Password Using Emergency Call
- Top 4 SIM Location Trackers To Easily Find Your Lost Oppo Reno 11 5G Device
- Factory Reset Apple iPhone 6 Plus | Dr.fone
- In 2024, The Ultimate Guide How to Bypass Swipe Screen to Unlock on Itel Device
- Android Call History Recovery - recover deleted call logs from Vivo
- Title: New 2024 Approved Easily Cut Large Videos Faster on Mac 7 Solutions Included
- Author: Morgan
- Created at : 2024-04-24 01:05:02
- Updated at : 2024-04-25 01:05:02
- Link: https://ai-video-editing.techidaily.com/new-2024-approved-easily-cut-large-videos-faster-on-mac-7-solutions-included/
- License: This work is licensed under CC BY-NC-SA 4.0.
