
:max_bytes(150000):strip_icc():format(webp)/GettyImages-849896688-6d69f22bcf0a4ff092f444abe6e1c19f.jpg)
New 2024 Approved How to Create Chroma Key Written Text Effects in Filmora
How to Create Chroma Key Written Text Effects in Filmora
Did you know it only takes a few clicks to key out the color in Filmora? It means that you can add green screen effects to many other objects. This article will show a cool chroma key effect you can try using written text.
Part 1. What Is Chroma Key Text Effect?
Composing of the chroma key effect is widely used in the gaming and newscasting industries. In this technique, you can make layering images and videos for the text together based on color hues.

Video editors can eliminate the basis from a picture by automatically choosing a certain hue in post-production. An interactive animation results by adding different color schemes; it’s an easy way to make 3D motion videos.
To make the effects on text, we have to film the subject writing on white paper. For this, follow the below instructions:
Part 2. Filming Tips for Written Texts
To write a key text before adding the chroma effect, we have to film the writing process to understand your next project better. You can create your own by following these tips. We are just concluding a single example here.
Tip 1. A Pen and a White Paper
We need blank white paper with no boundaries and lines for writing a text. Because the chroma effect will embellish the other lines if present on paper. Make sure to choose a prominent color for writing a text.
We are using a purple color pen here for writing an essential text to make it more prominent, as shown below:

It all depends upon the contrast, and you can choose another color too but ensure that it’s more apparent during filming.
Tip 2. Different Color Paper
There are many chances that you don’t have only white paper in your studio, or your requirement is not going with a blank white sheet. Then you don’t need to worry because you can use different color papers too.
But always try to use clearer paper and a prominent pen or highlighter. See the below example of a different color paper with a different highlighter.

![]()
Note: Ensure that the colored pens have good contrast with colored paper. Don’t use dull color pens with bright color paper.
Tip 3. Camera Angles
While filming a writing process for a video, you have to take care of the alignment of the camera. First, ensure the camera is at a suitable angle so it will not block the writing letters from the left side.
Sometimes, the writer’s hand blocks the letters on the left side during writing. Take note of this tip during filming a professional video, as shown below.

After checking the alignment of the camera, it’s time to look at what size we have to use for writing!
Tip 4. Larger Size of Letters
As we already said about the prominence of written text, we have to follow one more instruction related to the structure of the letters. Use the larger size and bold words when writing from a highlighter.
It is because the effect we insert during editing will be more standing and give a professional look to the video.

![]()
Note: You can create more shots till you get the right angle for a final video. Just focus on the camera alignment and highlighted words, then it will be all set.
After filming all the clips, you must edit those shots on the Filmora to get the chroma effect. Scroll more to get the step-by-step process!
Part 3. Editing the Chroma Key Text With Filmora
We need software that will give great setting choices and stock videos for a more professional look. For this, Wondershare Filmora will work more than a robot and give high-resolution results. To do the editing process on Filmora, follow the steps below and enjoy yourself with your followers.
Free Download For Win 7 or later(64-bit)
Free Download For macOS 10.14 or later
Step1 Download and install Wondershare Filmora
Launch Wondershare Filmora on your PC or Mac after downloading.
![]()
Note: If you want to enjoy its unlimited effect, you get its premium version quickly.

Step2 Import the clips to the Filmora
First, import the best footage into the filmora which you have shot. Ensure that the clip should have the best recording angle and that every word will be prominent on the page.
For this, click on Import Media and choose from the PC library what you want to edit.

Step3 Drag the clip to the timeline
Drag and drop the clip into the timeline from the import section. If you have more clips, choose first according to your script.
Add the text-written clip into the second video track because we have to insert the background into the first video track later.

After inserting the clip into the timeline, it’s time to edit it. For this, keep following the below-mentioned steps!
Step4 Chroma key settings
To edit the chroma key, you need to open the settings. For this, follow the below instructions:
- First, double-click on the clip in the timeline of the Filmora.
- Then, the setting section of the video will pop up at the top left side.
- Mark the tick in front of the Chroma Key section, and it will show the list of different features as shown below.

Step5 Color key out
To key out the specific color for changing its background, you have to perform the following actions:
- First, find the Select color option in the settings of the clip.
- Then click on the color dropper in front of the color tab.
- After that, pick the color dropper and move it on the video to select the color from the text.
![]()
Note: Ensure to select the color from the middle of the text for better key-out accuracy.

You have to adjust the size and thickness after selecting the key-out. For this, follow the next step!
Step6 Adjust the settings
To adjust the Chroma Key’s settings, set the offset, tolerance, edge thickness, and edge feather. Increase or decrease according to your range and that suits you the best.
Then click on Alpha Channel to mark the tick in front of the option. It is due to that chroma key effects will be more clearly shown.

Now, it’s time to set the background after fixing all the settings of the chroma key effect. To perform this, scroll more to get to the next step.
Step7 Import background clips
You have to add an excellent motion background in the handwritten text video. For this, you must first import the background clip into the filmora. Then, click on Import Media and choose what you want from your PC.

Step8 Add a background clip to the timeline
After importing the background clip, now drag and drop the clip into the timeline. Finally, add the background clip to the first video track at the bottom.

Step9 Turn off the alpha channel
The last step is merging the background clip with the first clip. For this, follow the below guidelines:
- First, double-click on the handwritten text video.
- It will show the settings section at the top left corner.
- Find the chroma key section and turn Alpha Channel

Final Results
You have all done with the steps and got such a fascinating result. Following the above tricks, you can easily make your vlogs and daily videos more professional and creative. Make sure to add a great and colorful background clip.

You can also use any other motion video of scenes rather than colorful videos to give a striking look.
Conclusion
Create more attractive looks and share them with your subscribers. Mainly, vloggers can attract many viewers by making the introductory part with this effect. Then, choose hundreds of other videos from the stock media and create different looks daily.
See how you can get editing tricks on Wondershare Filmora and use them in a few clicks to get an attractive look!
Tip 3. Camera Angles
While filming a writing process for a video, you have to take care of the alignment of the camera. First, ensure the camera is at a suitable angle so it will not block the writing letters from the left side.
Sometimes, the writer’s hand blocks the letters on the left side during writing. Take note of this tip during filming a professional video, as shown below.
After checking the alignment of the camera, it’s time to look at what size we have to use for writing!
Tip 4. Larger Size of Letters
As we already said about the prominence of written text, we have to follow one more instruction related to the structure of the letters. Use the larger size and bold words when writing from a highlighter.
It is because the effect we insert during editing will be more standing and give a professional look to the video.
![]()
Note: You can create more shots till you get the right angle for a final video. Just focus on the camera alignment and highlighted words, then it will be all set.
After filming all the clips, you must edit those shots on the Filmora to get the chroma effect. Scroll more to get the step-by-step process!
Part 3. Editing the Chroma Key Text With Filmora
We need software that will give great setting choices and stock videos for a more professional look. For this, Wondershare Filmora will work more than a robot and give high-resolution results. To do the editing process on Filmora, follow the steps below and enjoy yourself with your followers.
Free Download For Win 7 or later(64-bit)
Free Download For macOS 10.14 or later
Step1 Download and install Wondershare Filmora
Launch Wondershare Filmora on your PC or Mac after downloading.
![]()
Note: If you want to enjoy its unlimited effect, you get its premium version quickly.
Step2 Import the clips to the Filmora
First, import the best footage into the filmora which you have shot. Ensure that the clip should have the best recording angle and that every word will be prominent on the page.
For this, click on Import Media and choose from the PC library what you want to edit.
Step3 Drag the clip to the timeline
Drag and drop the clip into the timeline from the import section. If you have more clips, choose first according to your script.
Add the text-written clip into the second video track because we have to insert the background into the first video track later.
After inserting the clip into the timeline, it’s time to edit it. For this, keep following the below-mentioned steps!
Step4 Chroma key settings
To edit the chroma key, you need to open the settings. For this, follow the below instructions:
- First, double-click on the clip in the timeline of the Filmora.
- Then, the setting section of the video will pop up at the top left side.
- Mark the tick in front of the Chroma Key section, and it will show the list of different features as shown below.
Step5 Color key out
To key out the specific color for changing its background, you have to perform the following actions:
- First, find the Select color option in the settings of the clip.
- Then click on the color dropper in front of the color tab.
- After that, pick the color dropper and move it on the video to select the color from the text.
![]()
Note: Ensure to select the color from the middle of the text for better key-out accuracy.
You have to adjust the size and thickness after selecting the key-out. For this, follow the next step!
Step6 Adjust the settings
To adjust the Chroma Key’s settings, set the offset, tolerance, edge thickness, and edge feather. Increase or decrease according to your range and that suits you the best.
Then click on Alpha Channel to mark the tick in front of the option. It is due to that chroma key effects will be more clearly shown.
Now, it’s time to set the background after fixing all the settings of the chroma key effect. To perform this, scroll more to get to the next step.
Step7 Import background clips
You have to add an excellent motion background in the handwritten text video. For this, you must first import the background clip into the filmora. Then, click on Import Media and choose what you want from your PC.
Step8 Add a background clip to the timeline
After importing the background clip, now drag and drop the clip into the timeline. Finally, add the background clip to the first video track at the bottom.
Step9 Turn off the alpha channel
The last step is merging the background clip with the first clip. For this, follow the below guidelines:
- First, double-click on the handwritten text video.
- It will show the settings section at the top left corner.
- Find the chroma key section and turn Alpha Channel
Final Results
You have all done with the steps and got such a fascinating result. Following the above tricks, you can easily make your vlogs and daily videos more professional and creative. Make sure to add a great and colorful background clip.
You can also use any other motion video of scenes rather than colorful videos to give a striking look.
Conclusion
Create more attractive looks and share them with your subscribers. Mainly, vloggers can attract many viewers by making the introductory part with this effect. Then, choose hundreds of other videos from the stock media and create different looks daily.
See how you can get editing tricks on Wondershare Filmora and use them in a few clicks to get an attractive look!
Guide: Add LUTs in Premiere Pro with Ease
LUTs, fully known as look-up tables, are essential video editing elements. By using LUTs, you can enhance your video quality with improved color grading. Talking about its configuration, LUTs are made of different effects and styles for providing unique visualization.
There is a buzz around adding LUTs to Premiere Pro. Many people often fail to use LUTs due to their complexities. This article comprises detailed information and steps to add LUTs with ease.
Part 1: Why are LUTs Important in Video Editing?
Video editing becomes easier and smarter with LUTs. This specific utility can ensure upscaling video content with improved quality. But why are LUTs important? Here is why:
1. Creative Color Grading
LUTs are known to provide consistent color grading within a video. There are color palettes that are applied to every visual part. Thus, an appropriate visual style is applied to your content, making it more impressive. Moreover, with several creative options, LUTs are adjusted and enhanced to perfection. Color grading becomes special with them.
2. Flexibility and Accuracy
You can change LUTs within desired intensity, blur, sharpness, and lightning. There are also color adjustments with the most flexibility. You can transform your video color gradients as required. The important thing is colors are applied with accuracy and proper details. This way, your video will be more consistent in colors.
3. Advanced AI Functionality
With technological advancement, LUTs are also upgrading with time. The implementation of AI functionality into LUTs makes them more special. The color grading process is fully automated. Thus, videos are analyzed, and LUTs are applied based on the required color criteria. LUTs are also integrated with AI augmented reality to provide realistic experiences.
4. Saves Time
Applying LUT doesn’t take time, and it instantly improves color grading. This way, you don’t need to spend hours on video editing. After all, with LUTs, you can effortlessly upscale video colors and quality. The pre-designed color presets are effective and efficient.
Empower your videos with a new mood using different LUTs. Filmora now offers 100+ top-quality 3D LUTs cover a broad range of scenarios. Transform your videos with Filmora’s powerful 3D LUTs.
Apply LUT on Videos Apply LUT on Videos Learn More


Part 2: How to Add LUTs in Premiere Pro?
LUTs are great video editing tools with extended color grading and schemas. Premiere Pro is a commonly consumed video editing tool with extensive features. Being a new user, you might not be aware of the functionality of LUTs in the platform. To add LUTs to Premiere Pro, you need to follow simple steps:
Step 1: Launch and open Adobe Premiere Pro on your device. Proceed to add the video clip that needs to be edited on the timeline. Navigate to the “Color” workspace from the screen’s top.

Step 2: From the project window on the bottom left, press the “New Item” tab and choose “Adjustment Layer.” Adjust video settings from the available panel, including the “Width,” “Height,” “Timebase,” and “Pixel Aspect Ratio,” and click “OK.”

Step 3: Drag and drop the created adjustment layer from the project window into the timeline and set the length adjacent to the video. Select the adjustment layer, and press “Lumetri Color” from the top in the right-hand panel. From the “Basic Correction” category, set “Input LUT” and proceed to click the “Browse” option from the drop-down menu. Navigate your LUT from the folder and click “Open” to apply desired LUT to the video.

Part 3: What are the Future Prospects of LUTs in Video Editing?
LUTs are already transforming video editing functionalities with automated color grading. This means users don’t have to edit colors, styles, and other elements manually. In the future, LUTs will have amazing prospects. Let’s discuss some of them:
- Cloud Infrastructure: Sharing and collaboration on customized LUTs will be easier in the future. This will be possible due to cloud infrastructure. Hence, video editors worldwide can collaborate and share color insights on projects.
- User-Friendly Interface: LUTs will become more user-friendly in the future. This will make them easy to use and implement in projects. Even beginners will minimal editing knowledge will be able to use them. In contrast, professional editors will streamline their workflows with fast processing.
- Real-time Preview: Using LUTs, users would be able to preview color grading. This way, they will know what their video after LUT would look like. Hence, they can preview different LUT presets and proceed with the desired one.
- Wide Compatibility: The platform compatibility of LUTs will also enhance. After all, you will access them on mobile, web, and desktop devices without problems. You can use LUTs in everyday life by applying them to visual content.
Bonus Part: Wondershare Filmora – An Alternative Haven for Adding LUTs
LUTs are great utility when it comes to video editing environments. Apart from Premiere Pro, several other tools are working to improve the industry. Wondershare Filmora is a video editing software where you can upgrade your videos. You can add different elements, effects, and transitions in Filmora. You can also use and apply LUT presets within Filmora.
Add LUTs on Video For Win 7 or later(64-bit)
Add LUTs on Video For macOS 10.14 or later
There are approximately 100+ LUTs presets in the current version of Filmora. Users can use them to enlighten the colors of videos. Meanwhile, in the new version, there would be additional 100 LUTs. So, in total, you will be getting 200+ LUTs in the new updates provided by Wondershare Filmora. Each LUT is unique in its kind and style.

Key Features of Wondershare Filmora
- Intensity Setting: You can also modify the intensity of your applied colors. This way, you can adjust color saturation on a 0 – 100% scale range. With intensity, there is an option to customize color grading.
- Color Wheel: Within Wondershare Filmora, there is a color wheel for adjusting video colors. Thus, users can set color pallets within their required style. The color grading is then enhanced with the desired customization.
- Optimized Export: The video export facility is optimized with fast processing. You can also set the video format, select resolution, and adjust other settings. The video is exported in the highest of qualities.
- Preview Render: After editing your videos with LUT presets, check color styles using render preview. Render preview allows previewing your final project before exporting it to the device.
Conclusion
Videos are close to all of us, as they store our important visual data. This is why video editing is essential to enhance color grading and schemas. Meanwhile, installing LUTs in Premiere Pro can help improve video quality with minimal effort. A good tool for using LUTs is Wondershare Filmora. After all, Filmora offers 100+ LUT presets, with 100 more to follow soon.
Add LUTs on Video For Win 7 or later(64-bit)
Add LUTs on Video For macOS 10.14 or later
Apply LUT on Videos Apply LUT on Videos Learn More
Part 2: How to Add LUTs in Premiere Pro?
LUTs are great video editing tools with extended color grading and schemas. Premiere Pro is a commonly consumed video editing tool with extensive features. Being a new user, you might not be aware of the functionality of LUTs in the platform. To add LUTs to Premiere Pro, you need to follow simple steps:
Step 1: Launch and open Adobe Premiere Pro on your device. Proceed to add the video clip that needs to be edited on the timeline. Navigate to the “Color” workspace from the screen’s top.
Step 2: From the project window on the bottom left, press the “New Item” tab and choose “Adjustment Layer.” Adjust video settings from the available panel, including the “Width,” “Height,” “Timebase,” and “Pixel Aspect Ratio,” and click “OK.”
Step 3: Drag and drop the created adjustment layer from the project window into the timeline and set the length adjacent to the video. Select the adjustment layer, and press “Lumetri Color” from the top in the right-hand panel. From the “Basic Correction” category, set “Input LUT” and proceed to click the “Browse” option from the drop-down menu. Navigate your LUT from the folder and click “Open” to apply desired LUT to the video.
Part 3: What are the Future Prospects of LUTs in Video Editing?
LUTs are already transforming video editing functionalities with automated color grading. This means users don’t have to edit colors, styles, and other elements manually. In the future, LUTs will have amazing prospects. Let’s discuss some of them:
- Cloud Infrastructure: Sharing and collaboration on customized LUTs will be easier in the future. This will be possible due to cloud infrastructure. Hence, video editors worldwide can collaborate and share color insights on projects.
- User-Friendly Interface: LUTs will become more user-friendly in the future. This will make them easy to use and implement in projects. Even beginners will minimal editing knowledge will be able to use them. In contrast, professional editors will streamline their workflows with fast processing.
- Real-time Preview: Using LUTs, users would be able to preview color grading. This way, they will know what their video after LUT would look like. Hence, they can preview different LUT presets and proceed with the desired one.
- Wide Compatibility: The platform compatibility of LUTs will also enhance. After all, you will access them on mobile, web, and desktop devices without problems. You can use LUTs in everyday life by applying them to visual content.
Bonus Part: Wondershare Filmora – An Alternative Haven for Adding LUTs
LUTs are great utility when it comes to video editing environments. Apart from Premiere Pro, several other tools are working to improve the industry. Wondershare Filmora is a video editing software where you can upgrade your videos. You can add different elements, effects, and transitions in Filmora. You can also use and apply LUT presets within Filmora.
Add LUTs on Video For Win 7 or later(64-bit)
Add LUTs on Video For macOS 10.14 or later
There are approximately 100+ LUTs presets in the current version of Filmora. Users can use them to enlighten the colors of videos. Meanwhile, in the new version, there would be additional 100 LUTs. So, in total, you will be getting 200+ LUTs in the new updates provided by Wondershare Filmora. Each LUT is unique in its kind and style.
Key Features of Wondershare Filmora
- Intensity Setting: You can also modify the intensity of your applied colors. This way, you can adjust color saturation on a 0 – 100% scale range. With intensity, there is an option to customize color grading.
- Color Wheel: Within Wondershare Filmora, there is a color wheel for adjusting video colors. Thus, users can set color pallets within their required style. The color grading is then enhanced with the desired customization.
- Optimized Export: The video export facility is optimized with fast processing. You can also set the video format, select resolution, and adjust other settings. The video is exported in the highest of qualities.
- Preview Render: After editing your videos with LUT presets, check color styles using render preview. Render preview allows previewing your final project before exporting it to the device.
Conclusion
Videos are close to all of us, as they store our important visual data. This is why video editing is essential to enhance color grading and schemas. Meanwhile, installing LUTs in Premiere Pro can help improve video quality with minimal effort. A good tool for using LUTs is Wondershare Filmora. After all, Filmora offers 100+ LUT presets, with 100 more to follow soon.
Add LUTs on Video For Win 7 or later(64-bit)
Add LUTs on Video For macOS 10.14 or later
How Did AI Video Games Act More Human Than Human?
How Did AI Video Games Act More Human Than Human?
An easy yet powerful editor
Numerous effects to choose from
Detailed tutorials provided by the official channel
The gaming world is ever-changing, with developers looking to create innovative ways to immerse players into their digital worlds. One such technology that has begun to sweep is AI in the game industry.
AI is a powerful tool in many ways to improve the gaming experience. It can make artificial intelligence in computer games more believable and add replayability and immersion to games, and we can expect to see even more impressive applications in the future.
In this article
01 [What Is AI in Gaming?](#Part 1)
02 [Why Does AI in Gaming Matter?](#Part 2)
03 [How AI Will Completely Change Video Games](#Part 3)
04 [8 Games with Incredible Artificial Intelligence](#Part 4)
05 [What AI Video Games Assets Do Filmora Have?](#Part 5)
Part 1 What Is AI in Gaming?
In simple terms, AI is a set of algorithms that allow a computer to learn and improve from experience. Although you can apply it in many ways, artificial intelligence in video games is usually helpful to create more intelligent and more believable non-player characters (NPCs).
For example, an AI system might be helpful to determine how an NPC reacts to the player’s actions. If the player tries to steal from an NPC, the AI might make the NPC angry and more likely to attack the player. Alternatively, if the player is friendly to an NPC, the AI game playing might make the NPC more likely to help the player in future interactions.
Part 2 Why Does AI in Gaming Matter?
One of the most vital aspects of AI in video games is that it can make games more believable and immersive for players. When games can convincingly simulate human-like behavior, it can be a much more enjoyable experience for gamers. AI can make NPCs seem more lifelike and make the game world feel more believable.
AI is also becoming increasingly important for creating procedural content. This is where the game generates content on its own, rather than relying on pre-made assets. For example, a game might use procedural generation to create random dungeons or quests that the player can explore. This can add a lot of replayability to a game, as the player never knows what they will encounter next.
Part 3 How AI Will Completely Change Video Games
It is not a secret that AI is changing the world as we know it. With its ability to enable computers to learn and improve from experience, AI is paving the way for a future where machines can handle more complex tasks. And nowhere is this more apparent than in the world of video gaming.
In the past, developers brought in AI primarily for simple things like making certain NPCs (non-player characters) move and act realistically. But now, artificial intelligence in video games is being used for much more complex tasks like generating procedural content and creating believable human-like behavior. This results in a new generation of AI game playing that are more immersive and playable.
Part 4 Games with Incredible Artificial Intelligence
Now, we will look into eight video games that signify why we need the best ai in video games.
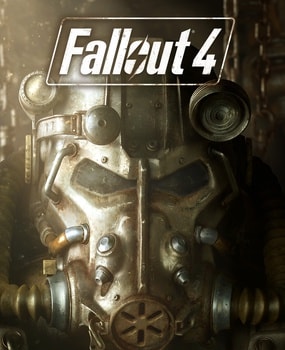
01Fallout 4
One of the most attractive examples of AI in video gaming is Fallout 4. This post-apocalyptic RPG features some of the most believable NPCs ever seen in a game. Each character is fully voiced, and they all have their unique personalities and backstories. The AI generates procedural content, meaning that the game world is always different each time you play.
02The Witcher 3: Wild Hunt
The Witcher 3: Wild Hunt is one more great example of an AI video game. This open-world RPG features a vast array of believable NPCs, each with unique personality traits and motivations. The AI is also used to generate procedural content, resulting in a different game world every time you play.

03Grand Theft Auto V
Grand Theft Auto V is yet another example of AI being used to create believable human-like behavior. The NPCs in this play are some of the most lifelike and realistic ever seen. They react to the player’s actions in believable ways, and the AI is used to generate procedural content, resulting in a game world that is always different.

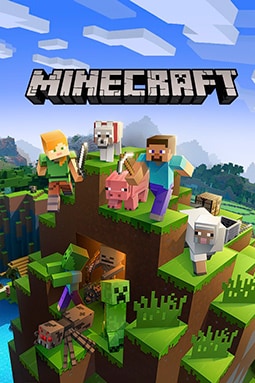
04Minecraft
Minecraft is a game that heavily uses procedural generation to create its content. The terrain and structures in the game are all generated on the fly by the AI, resulting in a different game world every time you play. What’s more, AI is also used to generate the behaviors of mobs (hostile creatures), making them more believable and lifelike.
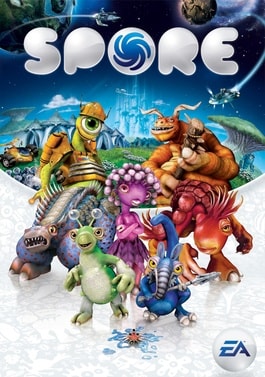
05Spore
Spore is an AI game play that is all about procedural generation. Every creature in the game is generated by AI, meaning that there are many possible creature designs. What’s more, AI is used to create creatures’ behaviors, making them more believable and lifelike.
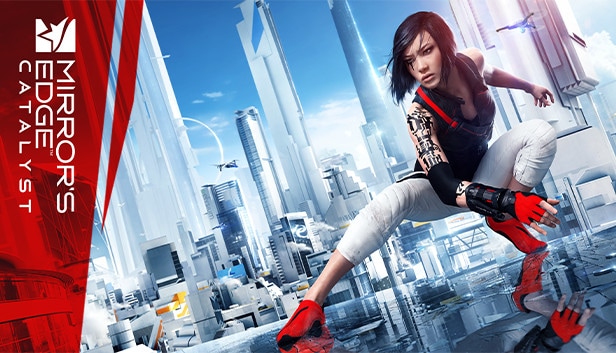
06Mirror’s Edge Catalyst
Mirror’s Edge Catalyst is a game that heavily uses AI to create its content. The levels in the game are all procedurally generated, meaning that they are different every time you play. This is made possible by the game’s AI, which produces the level layouts and obstacles on the fly.
07Civilization VI
One of the most incredible examples of AI in video gaming is Civilization VI. This turn-based strategy game features some of the most believable NPCs ever seen in a game. Each character has its voice fully, and they all have unique personalities and backstories.
08Elite Dangerous
Elite Dangerous is a space simulation game that uses advanced AI to create believable and realistic human-like behavior. The NPCs in the game are some of the most lifelike and realistic ever seen. They react to the player’s actions in believable ways, and the AI is used to generate procedural content, resulting in a game world that is always different.
Part 5 What AI Video Games Assets Do Wondershare Filmora Video Editor Have?
With the increased use of AI in video games, most gamers have found gaming more enjoyable. However, an outstanding video editor has some assets that can significantly make AI video games better and more human. This video editor is one of the most sorted for and is called Filmora. Filmora is a great video editing software for creating stunning videos. It’s effortless to use and has various features to create professional-looking videos. It’s perfect for making videos for social media, YouTube, and other online platforms.
Its many features have a touch of artificial intelligence, making this program stand out from the other video editors and valuable for editing during ai video games creation.
Screen Recording
The Filmora screen recorder allows the user to concurrently record the screen and camera and the system and microphone audio. You can quickly record games, tutorials, YouTube videos, and other videos and then export them to YouTube, Vimeo, and other devices.
AI Portrait
The AI portrait function in Filmora video editor allows you to locate the human in your movie effortlessly and erase the background with a simple drag and click. There are also several portrait effects and AR stickers to add to your video editing enjoyment.
For Win 7 or later (64-bit)
For macOS 10.12 or later
Video Effects
Filmora customers can choose from various effects to utilize in their video editing software. It’s simple to create whatever effect you want with over 900 free effects, including drag-and-drop transitions, titles, filters, and motion components.
Do visit Wondershare Filmora exclusive website to know more about its latest upgrade and new features launch.
● Ending Thoughts →
● Thus, that was about what an ai video game is and why the characters act more like humans.
● So, as a video game lover, you can now explore the best of ai playing video games to have a personal experience of this new video gaming trend. Also, do try the Filmora software to see how you can change the looks and feel of your video game creation.
The gaming world is ever-changing, with developers looking to create innovative ways to immerse players into their digital worlds. One such technology that has begun to sweep is AI in the game industry.
AI is a powerful tool in many ways to improve the gaming experience. It can make artificial intelligence in computer games more believable and add replayability and immersion to games, and we can expect to see even more impressive applications in the future.
In this article
01 [What Is AI in Gaming?](#Part 1)
02 [Why Does AI in Gaming Matter?](#Part 2)
03 [How AI Will Completely Change Video Games](#Part 3)
04 [8 Games with Incredible Artificial Intelligence](#Part 4)
05 [What AI Video Games Assets Do Filmora Have?](#Part 5)
Part 1 What Is AI in Gaming?
In simple terms, AI is a set of algorithms that allow a computer to learn and improve from experience. Although you can apply it in many ways, artificial intelligence in video games is usually helpful to create more intelligent and more believable non-player characters (NPCs).
For example, an AI system might be helpful to determine how an NPC reacts to the player’s actions. If the player tries to steal from an NPC, the AI might make the NPC angry and more likely to attack the player. Alternatively, if the player is friendly to an NPC, the AI game playing might make the NPC more likely to help the player in future interactions.
Part 2 Why Does AI in Gaming Matter?
One of the most vital aspects of AI in video games is that it can make games more believable and immersive for players. When games can convincingly simulate human-like behavior, it can be a much more enjoyable experience for gamers. AI can make NPCs seem more lifelike and make the game world feel more believable.
AI is also becoming increasingly important for creating procedural content. This is where the game generates content on its own, rather than relying on pre-made assets. For example, a game might use procedural generation to create random dungeons or quests that the player can explore. This can add a lot of replayability to a game, as the player never knows what they will encounter next.
Part 3 How AI Will Completely Change Video Games
It is not a secret that AI is changing the world as we know it. With its ability to enable computers to learn and improve from experience, AI is paving the way for a future where machines can handle more complex tasks. And nowhere is this more apparent than in the world of video gaming.
In the past, developers brought in AI primarily for simple things like making certain NPCs (non-player characters) move and act realistically. But now, artificial intelligence in video games is being used for much more complex tasks like generating procedural content and creating believable human-like behavior. This results in a new generation of AI game playing that are more immersive and playable.
Part 4 Games with Incredible Artificial Intelligence
Now, we will look into eight video games that signify why we need the best ai in video games.
01Fallout 4
One of the most attractive examples of AI in video gaming is Fallout 4. This post-apocalyptic RPG features some of the most believable NPCs ever seen in a game. Each character is fully voiced, and they all have their unique personalities and backstories. The AI generates procedural content, meaning that the game world is always different each time you play.
02The Witcher 3: Wild Hunt
The Witcher 3: Wild Hunt is one more great example of an AI video game. This open-world RPG features a vast array of believable NPCs, each with unique personality traits and motivations. The AI is also used to generate procedural content, resulting in a different game world every time you play.
03Grand Theft Auto V
Grand Theft Auto V is yet another example of AI being used to create believable human-like behavior. The NPCs in this play are some of the most lifelike and realistic ever seen. They react to the player’s actions in believable ways, and the AI is used to generate procedural content, resulting in a game world that is always different.
04Minecraft
Minecraft is a game that heavily uses procedural generation to create its content. The terrain and structures in the game are all generated on the fly by the AI, resulting in a different game world every time you play. What’s more, AI is also used to generate the behaviors of mobs (hostile creatures), making them more believable and lifelike.
05Spore
Spore is an AI game play that is all about procedural generation. Every creature in the game is generated by AI, meaning that there are many possible creature designs. What’s more, AI is used to create creatures’ behaviors, making them more believable and lifelike.
06Mirror’s Edge Catalyst
Mirror’s Edge Catalyst is a game that heavily uses AI to create its content. The levels in the game are all procedurally generated, meaning that they are different every time you play. This is made possible by the game’s AI, which produces the level layouts and obstacles on the fly.
07Civilization VI
One of the most incredible examples of AI in video gaming is Civilization VI. This turn-based strategy game features some of the most believable NPCs ever seen in a game. Each character has its voice fully, and they all have unique personalities and backstories.
08Elite Dangerous
Elite Dangerous is a space simulation game that uses advanced AI to create believable and realistic human-like behavior. The NPCs in the game are some of the most lifelike and realistic ever seen. They react to the player’s actions in believable ways, and the AI is used to generate procedural content, resulting in a game world that is always different.
Part 5 What AI Video Games Assets Do Wondershare Filmora Video Editor Have?
With the increased use of AI in video games, most gamers have found gaming more enjoyable. However, an outstanding video editor has some assets that can significantly make AI video games better and more human. This video editor is one of the most sorted for and is called Filmora. Filmora is a great video editing software for creating stunning videos. It’s effortless to use and has various features to create professional-looking videos. It’s perfect for making videos for social media, YouTube, and other online platforms.
Its many features have a touch of artificial intelligence, making this program stand out from the other video editors and valuable for editing during ai video games creation.
Screen Recording
The Filmora screen recorder allows the user to concurrently record the screen and camera and the system and microphone audio. You can quickly record games, tutorials, YouTube videos, and other videos and then export them to YouTube, Vimeo, and other devices.
AI Portrait
The AI portrait function in Filmora video editor allows you to locate the human in your movie effortlessly and erase the background with a simple drag and click. There are also several portrait effects and AR stickers to add to your video editing enjoyment.
For Win 7 or later (64-bit)
For macOS 10.12 or later
Video Effects
Filmora customers can choose from various effects to utilize in their video editing software. It’s simple to create whatever effect you want with over 900 free effects, including drag-and-drop transitions, titles, filters, and motion components.
Do visit Wondershare Filmora exclusive website to know more about its latest upgrade and new features launch.
● Ending Thoughts →
● Thus, that was about what an ai video game is and why the characters act more like humans.
● So, as a video game lover, you can now explore the best of ai playing video games to have a personal experience of this new video gaming trend. Also, do try the Filmora software to see how you can change the looks and feel of your video game creation.
Frame Rates, Speed, and Wondershare Filmora
Ensuring smoother playback along with enhanced fluidity is a crucial part of boosting the engagement of videos. You also need to add the slow-motion effect at some points in videos. Along with this, syncing audio to video is also essential. Thus, you can take assistance from frame rates and speed to ensure you have these key features in the videos.
There is no need to be concerned about what video editor to choose because Wondershare Filmora can help you with this issue. In this article, you will find basic information about Filmora and the uses of frame rate and speed ramping. We will also provide the procedure for changing video frame rates with Filmora.
- Part 1: What is Frame Rate and How Important It Is In Videos?
- Part 2: What Are The Different Uses of Speed Ramping in Video Editing?
- Part 3: Perform Basic Speed Adjustments and Speed Ramping on Wondershare Filmora
- Part 4: [Basic] How to Change The Frame Rate in Wondershare Filmora?
- Conclusion
Part 1: What is Frame Rate and How Important It Is In Videos?
One of the most important metrics in videos is the frame rate. This term refers to the individual frames present in the video. While the frame represents a single second, this defines the frequency of the video. This is the display of consecutive frames every second, which brings up the illusion of motion for the viewers. In this way, the entire frame rate is explained as terminology to users new to video editing.
Importance of Frame Rate in Videos
We will highlight some prominent points explaining the importance of video frame rates. Continuing with these points, this will help users understand how essential video frame rate is:
01of 04Defines Smoothness in Videos
Having a higher frame rate in a video is equivalent to a smooth video. Users who consider having smoothness in their videos always consider the frame rates. Higher frame rates have better transitions and seamless motion.
02of 04The detail in the Video
If you have a low frame rate in your video, you cannot observe the details in the fast-moving objects. In such a scenario, you need to have a video with a good frame rate. This will help display the explicit details of the video, which cannot be viewed under every frame rate quality.
03of 04Realistic Effects
Old videos never had the kick that made them feel real. Videos with higher frame rates have changed the dynamics in the current system. Realism and immersive video experience are prominent getaways achieved with better frame rates.
04of 04Realistic Effects
The use of better frame rates gives the option of improving the effects of the video. Videos that did not have impressive frame rates are not able to display the mood or atmosphere. Better frame rates help display the environment better, thus explaining the importance.
Changing Video Frame Rates And Speed Editor A wonderful video editor - Wondershare Filmora providing frame rate and speed ramping features for all creators.
Free Download Free Download Learn More
Part 2: What Are The Different Uses of Speed Ramping in Video Editing?
Speed ramping and video frame rate are one of the most known techniques which are widely used in video editing. You must be wondering why paying attention to speed ramping is so important. Nothing to worry about because this part will give you the most implementable uses of speed ramping in video editing. Have a look below to discover further information about this:
Highlighting Actions and Dramas
You can use speed ramping to emphasize the actional and dramatic sequences. It also helps you draw the audience’s attention and make the essential factors more notable. Above all, the speed ramping also integrates the useable effects which can add a drastic touch of drama to your videos,
Transitions and Motion Tracking
With the good use of speed ramping, you can achieve a smooth transition in videos. It also helps you add seamless transitions in the videos to add a sense of consistency. One of the best things is adding slow-motion and motion-tracking effects in simple videos.
Syncing Audios
Syncing the audio beats with videos is crucial to enhance the user experience. Speed ramping offers capabilities through which you can easily sync the audio to the length of videos. As it never compromises the content or layout of videos, you don’t have to worry about anything.
Emphasized Storytelling
If you need to induce a sense of storytelling and optimize the video quality, consider speed ramping. You can control the overall speed of actions and dramas and convey a particular narrative to add depth to videos. It also helps to increase the frame rate of video.
Part 3: Perform Basic Speed Adjustments and Speed Ramping on Wondershare Filmora
Wondershare Filmora is a great video editor providing exquisite features and details to users. It embeds simple video editing tools and AI functionalities to provide a quick editing experience. However, the focus on the details is not lacking in this tool. Filmora provides a comprehensive set of effects, transitions, and elements to induce in videos.
Free Download For Win 7 or later(64-bit)
Free Download For macOS 10.14 or later
Along with that, it also includes multiple functionalities which cannot be observed in many video editors. However, since we are putting our focus on discussing the speed adjustments in Filmora, let’s look at the comprehensive steps explained below:
Method 1: Uniform Speed Adjustments in Videos
Step 1Import Video on Filmora for Speed Adjustments
Firstly, launch Wondershare Filmora on your computer and continue to open a new project. Once a window enters the display, lead into the “Import” section for importing the media files that need adjustment.

Step 2Select the Speed Option
After adding the videos and dragging them to the timeline, continue to locate the “Speed “ option in the bar above the timeline. This opens a drop-down menu where you have to select “Uniform Speed” or use “Ctrl + R.”

Step 3Manage Speed Uniformly
A new section opens on the video editor where you can define the speed using the slider. Also, you can activate options like “Reverse Speed,” “Ripple Edit,” and “Maintain Pitch,” if needed.

Method 2: Utilize the Option of Speed Ramping
Step 1Access Speed Ramping Option
Once you have opened Filmora and imported a video on the timeline, lead to the “Speed” button again. Select the option of “Speed Ramping ” in the drop-down to continue.

Step 2Manage Speed Ramping of Video
As you find a new screen on your front, select the type of Speed Ramping you want to perform. Adjust the speed ramp on the line graph that comes in display and click “OK” to conclude.

Step 3Export the Final Video
Once you are done editing your videos, lead to the “Export” button to save the videos on the device.

Part 4: [Basic] How to Change The Frame Rate in Wondershare Filmora?
While you find out the ways to change the speed of your videos, you can also change their frame rate. Filmora offers dedicated options on its platform to its users, which can be understood in the steps below:
Free Download For Win 7 or later(64-bit)
Free Download For macOS 10.14 or later
Step 1Open Settings For Changing Frame Rate
As you open Filmora and import a video, drag it to the timeline. Once the video is imported, lead to the “Preview quality and display settings” button on the right side of the screen.

Step 2Manage Speed Ramping of Video
This opens a drop-down menu where you have to select the option “Change Project Aspect Ratio.”

Step 3Change Frame Rate Successfully
You will be led to a new screen where you can find the option of “Frame Rate” in the list. Change the frame rate according to the requirements and options available and click “OK.” The frame rate of your video will be changed using Filmora.

Conclusion
This article has displayed a conspicuous detail of what the frame rate in the video is and how it implicates video editing. Wondershare Filmora has been observed as the perfect way to manage the speeds of videos. Video frame rates can also be managed using the exquisite video editor. Those who wish to manage such features of the videos should consider using this tool.
Part 1: What is Frame Rate and How Important It Is In Videos?
One of the most important metrics in videos is the frame rate. This term refers to the individual frames present in the video. While the frame represents a single second, this defines the frequency of the video. This is the display of consecutive frames every second, which brings up the illusion of motion for the viewers. In this way, the entire frame rate is explained as terminology to users new to video editing.
Importance of Frame Rate in Videos
We will highlight some prominent points explaining the importance of video frame rates. Continuing with these points, this will help users understand how essential video frame rate is:
01of 04Defines Smoothness in Videos
Having a higher frame rate in a video is equivalent to a smooth video. Users who consider having smoothness in their videos always consider the frame rates. Higher frame rates have better transitions and seamless motion.
02of 04The detail in the Video
If you have a low frame rate in your video, you cannot observe the details in the fast-moving objects. In such a scenario, you need to have a video with a good frame rate. This will help display the explicit details of the video, which cannot be viewed under every frame rate quality.
03of 04Realistic Effects
Old videos never had the kick that made them feel real. Videos with higher frame rates have changed the dynamics in the current system. Realism and immersive video experience are prominent getaways achieved with better frame rates.
04of 04Realistic Effects
The use of better frame rates gives the option of improving the effects of the video. Videos that did not have impressive frame rates are not able to display the mood or atmosphere. Better frame rates help display the environment better, thus explaining the importance.
Changing Video Frame Rates And Speed Editor A wonderful video editor - Wondershare Filmora providing frame rate and speed ramping features for all creators.
Free Download Free Download Learn More
Part 2: What Are The Different Uses of Speed Ramping in Video Editing?
Speed ramping and video frame rate are one of the most known techniques which are widely used in video editing. You must be wondering why paying attention to speed ramping is so important. Nothing to worry about because this part will give you the most implementable uses of speed ramping in video editing. Have a look below to discover further information about this:
Highlighting Actions and Dramas
You can use speed ramping to emphasize the actional and dramatic sequences. It also helps you draw the audience’s attention and make the essential factors more notable. Above all, the speed ramping also integrates the useable effects which can add a drastic touch of drama to your videos,
Transitions and Motion Tracking
With the good use of speed ramping, you can achieve a smooth transition in videos. It also helps you add seamless transitions in the videos to add a sense of consistency. One of the best things is adding slow-motion and motion-tracking effects in simple videos.
Syncing Audios
Syncing the audio beats with videos is crucial to enhance the user experience. Speed ramping offers capabilities through which you can easily sync the audio to the length of videos. As it never compromises the content or layout of videos, you don’t have to worry about anything.
Emphasized Storytelling
If you need to induce a sense of storytelling and optimize the video quality, consider speed ramping. You can control the overall speed of actions and dramas and convey a particular narrative to add depth to videos. It also helps to increase the frame rate of video.
Part 3: Perform Basic Speed Adjustments and Speed Ramping on Wondershare Filmora
Wondershare Filmora is a great video editor providing exquisite features and details to users. It embeds simple video editing tools and AI functionalities to provide a quick editing experience. However, the focus on the details is not lacking in this tool. Filmora provides a comprehensive set of effects, transitions, and elements to induce in videos.
Free Download For Win 7 or later(64-bit)
Free Download For macOS 10.14 or later
Along with that, it also includes multiple functionalities which cannot be observed in many video editors. However, since we are putting our focus on discussing the speed adjustments in Filmora, let’s look at the comprehensive steps explained below:
Method 1: Uniform Speed Adjustments in Videos
Step 1Import Video on Filmora for Speed Adjustments
Firstly, launch Wondershare Filmora on your computer and continue to open a new project. Once a window enters the display, lead into the “Import” section for importing the media files that need adjustment.
Step 2Select the Speed Option
After adding the videos and dragging them to the timeline, continue to locate the “Speed “ option in the bar above the timeline. This opens a drop-down menu where you have to select “Uniform Speed” or use “Ctrl + R.”
Step 3Manage Speed Uniformly
A new section opens on the video editor where you can define the speed using the slider. Also, you can activate options like “Reverse Speed,” “Ripple Edit,” and “Maintain Pitch,” if needed.
Method 2: Utilize the Option of Speed Ramping
Step 1Access Speed Ramping Option
Once you have opened Filmora and imported a video on the timeline, lead to the “Speed” button again. Select the option of “Speed Ramping ” in the drop-down to continue.
Step 2Manage Speed Ramping of Video
As you find a new screen on your front, select the type of Speed Ramping you want to perform. Adjust the speed ramp on the line graph that comes in display and click “OK” to conclude.
Step 3Export the Final Video
Once you are done editing your videos, lead to the “Export” button to save the videos on the device.
Part 4: [Basic] How to Change The Frame Rate in Wondershare Filmora?
While you find out the ways to change the speed of your videos, you can also change their frame rate. Filmora offers dedicated options on its platform to its users, which can be understood in the steps below:
Free Download For Win 7 or later(64-bit)
Free Download For macOS 10.14 or later
Step 1Open Settings For Changing Frame Rate
As you open Filmora and import a video, drag it to the timeline. Once the video is imported, lead to the “Preview quality and display settings” button on the right side of the screen.
Step 2Manage Speed Ramping of Video
This opens a drop-down menu where you have to select the option “Change Project Aspect Ratio.”
Step 3Change Frame Rate Successfully
You will be led to a new screen where you can find the option of “Frame Rate” in the list. Change the frame rate according to the requirements and options available and click “OK.” The frame rate of your video will be changed using Filmora.
Conclusion
This article has displayed a conspicuous detail of what the frame rate in the video is and how it implicates video editing. Wondershare Filmora has been observed as the perfect way to manage the speeds of videos. Video frame rates can also be managed using the exquisite video editor. Those who wish to manage such features of the videos should consider using this tool.
Also read:
- New How to Use Canva Color Match for 2024
- New 2024 Approved What Anime Character Are You Look Like?
- New In 2024, Are You Also Facing a Problem with the Snapchat Camera Zoomed In? Find Out the Easiest Methods to Fix This Error without Installing a Third-Party Tool
- Updated Color Lut in Video - Color Grade Your Video for 2024
- New In 2024, The Best Cinematic LUTs in The Market
- 2024 Approved Are You Eager to Discover the Method of Video Scaling in Filmora? You Are in the Right Place because This Discussion Will Cover the Content on This Matter
- Updated Have You Ever Wanted to Speed up or Slow Down a Video? Maybe It Was Too Long, or You Wanted to Draw Out an Exciting Part of the Video without Having to Watch the Boring Parts for 2024
- New The Complete Guide to Slideshow Maker with Music for 2024
- New In 2024, Step-by-Step Guide | Control Playback Speed in Premiere Pro
- Updated How to Add Slideshow in PowerPoint for 2024
- 2024 Approved Top Fixes to Resolve Issues with Premiere Pro Slow Playback
- New Looking for a Full Guide on Removing the Background From PNG Images? Do You Want to Transform JPG to PNG Transparent? If so, Take some Time to Read This Article
- Updated In 2024, 7 Best MP4 Editors on Mac Edit MP4 in Mac
- 2024 Approved How to Become a Youtuber
- New Quick Answer What Is a Transparent Logo and Why Do You Need It for 2024
- New 8 Frame Rate Video Converters You Must Try
- In 2024, Lets Learn How to Convert a Normal Video Into a Film Shot in the 1920S with Wondershare Filmora
- Best Cinematic LUTs For Premiere Pro You Can Come Across
- New In 2024, Focusing On The Best Ways To Convert Slow-Motion Video to Normal
- New 12 Top Picks of Video Enhancer Software
- New In 2024, How to Do Censor Effects with Filmora
- Learn How to Make Interactive and Fun Video Collages Using Kapwing Collage Maker, an Easy-to-Use Tool for All Your Collage-Making Needs for 2024
- New How Long Does It Take To Edit Videos for 2024
- Updated In 2024, Best Ideas on Using Green Screen with Filmora
- 2024 Approved Exploring the Top Professional Tools to Perform Mask Tracking
- 2024 Approved How to Remove Audio From Videos with FFmpeg?
- Updated In 2024, Top 15 LUTS to Buy
- Step by Step to Rotate Videos Using OBS
- Tips That Show Anybody How To Create Youtube Slideshow – Guaranteed
- New In 2024, Explore Your Skills in Dimensional Graphic Editing and Animation with Blender. The Software Lands Among the Best Platforms for Art Enthusiasts with Its Stunning Transparent Backgrounds
- Step by Step to Cut Videos in Lightworks
- Updated 4 Simple Methods for Making a High-Quality Recap Video
- New Having Difficulty in Choosing the Most Affordable 3D Slideshow Software? Stay Here for the Best Application Choices of All Times to Create the Most Stunning Slideshows Ever for 2024
- Updated In 2024, How to Create Emoji on Mac That Take Less Than 10 Mins
- New In 2024, Are You a Teacher? Are You Looking for Educational Background Music? This Article Has Everything You Will Need to Know for Creating Outstanding Educational Teaching Videos
- In 2024, Cropping Video in VLC Step by Step
- New In 2024, Top Fixes to Resolve Issues with Premiere Pro Slow Playback
- New How to Make a Slideshow with Movavi Slideshow Maker for 2024
- Updated Top 7 Best GoPro Video Editors for Mac for 2024
- Updated This Article Presents the Guide to Using Magic Effects for Creating Competent Films with Step-by-Step Instructions and Filmoras Grow and Win Program Contest
- Top 10 AirPlay Apps in Honor X8b for Streaming | Dr.fone
- Ways To Find Unlocking Codes For Motorola Moto G13 Phones
- Restore Missing App Icon on Nokia C12 Pro Step-by-Step Solutions | Dr.fone
- How To Unlock Apple iPhone SE Without Swiping Up? 6 Ways | Dr.fone
- Top 7 Phone Number Locators To Track Samsung Galaxy A23 5G Location | Dr.fone
- How to Fix It Oppo Find X6 Wont Turn On | Dr.fone
- How To Transfer Data From iPhone 13 mini To Other iPhone? | Dr.fone
- 4 Ways to Transfer Music from Oppo Find X6 Pro to iPhone | Dr.fone
- How to Transfer Photos from Vivo S17e to Laptop Without USB | Dr.fone
- In 2024, How Can Xiaomi Redmi 13C 5GMirror Share to PC? | Dr.fone
- How to Change GPS Location on Tecno Pop 7 Pro Easily & Safely | Dr.fone
- Overview of the Best Xiaomi 14 Screen Mirroring App | Dr.fone
- Where Is the Best Place to Catch Dratini On Apple iPhone 6 Plus | Dr.fone
- In 2024, What Legendaries Are In Pokemon Platinum On Poco C51? | Dr.fone
- 5 Hassle-Free Solutions to Fake Location on Find My Friends Of Nokia C210 | Dr.fone
- Disable screen lock on Redmi Note 12 5G
- How to Screen Mirroring Honor X50i+ to PC? | Dr.fone
- Heres Everything You Should Know About Pokemon Stops in Detail On Apple iPhone XS | Dr.fone
- Complete guide for recovering pictures files on Lava Blaze 2.
- In 2024, How Poco M6 Pro 4G Mirror Screen to PC? | Dr.fone
- New Making Triggered Memes with Filmora Video Editor
- Where Is the Best Place to Catch Dratini On Apple iPhone 15 Plus | Dr.fone
- In 2024, How to Unlock Xiaomi 13T Phone Password Without Factory Reset?
- How To Fix iPhone SE (2020) Unavailable Issue With Ease
- New In 2024, How to Make Explainer Videos—Step by Step Guide
- How To Check if Your Lava Agni 2 5G Is Unlocked
- In 2024, PassFab Apple iPhone SE (2020) Backup Unlocker Top 4 Alternatives | Dr.fone
- In 2024, Unlock Poco X5 Phone Password Without Factory Reset Full Guide Here
- In 2024, Does Airplane Mode Turn off GPS Location On Oppo Find X7? | Dr.fone
- In 2024, Here are Some of the Best Pokemon Discord Servers to Join On Samsung Galaxy S24 Ultra | Dr.fone
- In 2024, Detailed Guide on Removing iPhone 14 Pro Activation Lock without Previous Owner?
- In 2024, iPogo will be the new iSpoofer On Vivo Y27s? | Dr.fone
- Repair damaged, unplayable video files of Lava
- In 2024, How to Bypass FRP on Vivo S18?
- How to get back lost contacts from Y78 5G.
- Updated 2024 Approved Narakeet Review Text to Speech Convenient Voice Maker
- Fake the Location to Get Around the MLB Blackouts on Apple iPhone 13 Pro Max | Dr.fone
- In 2024, 2 Ways to Monitor Vivo Y78+ Activity | Dr.fone
- In 2024, How to Transfer Data from Itel S23+ to Samsung Phone | Dr.fone
- How do I reset my Lava Agni 2 5G Phone without technical knowledge? | Dr.fone
- Title: New 2024 Approved How to Create Chroma Key Written Text Effects in Filmora
- Author: Morgan
- Created at : 2024-04-24 01:05:41
- Updated at : 2024-04-25 01:05:41
- Link: https://ai-video-editing.techidaily.com/new-2024-approved-how-to-create-chroma-key-written-text-effects-in-filmora/
- License: This work is licensed under CC BY-NC-SA 4.0.
