
:max_bytes(150000):strip_icc():format(webp)/Flack-6b3c3167132c467db22bae39689c44ef.jpg)
New 2024 Approved How to Make After Effects Gifs
How to Make After Effects Gifs
How to Create After Effects Gifs
An easy yet powerful editor
Numerous effects to choose from
Detailed tutorials provided by the official channel
GIFs have been around for quite some time but as the flow of content continues to plummet on popular social media platforms like Facebook or Instagram, the demand for GIFs would continue to increase.
Unfortunately, you won’t be able to make a gif in after effects directly, unless with the help of a plug-in like GIFGun.
Before moving forward, keep in mind that using Adobe Media Encoder is an easier method for compressing your exports rather than any third-party compressor.
In this article, you will find easy to follow methods using which you can create after effects GIFs within a matter of minutes.
In this article
01 [General Knowledge on GIF Animation](#Part 1)
02 [What Is the Difference Between After Effects Gifs’ Making and Photoshop Gifs’ Making?](#Part 2)
03 [How to Create After Effects Gifs](#Part 3)
Part 1 General Knowledge on GIF Animation
01What is a GIF?
The acronym GIF stands for Graphics Interchange Format and the file is created in bitmap image format. This was developed back in 1987 by a working in CompuServe.
This format was incredibly successful on the WEB due to benefits like smaller file sizes, broader support, and its easy compatibility with Operating Systems.
However, GIFs are much more suitable as simple graphics and logos rather than Live Action Videos with its palette limitation of 256 per image.
Creating a GIF is like looping an animation or animated elements. You can use these animated GIFs in banners to engage your audience or even create fun sharable content for your Facebook pages.
You can start by creating basic easy animations in Photoshop and then elevate them by using After Effects.
02Why create a GIF?
Here are a handful of things you can keep your eye on if you are just starting on making GIFs;
● Simple Product Demonstrations. With simple 3 to 4 step GIFs, you can briefly introduce steps on how to use a product.
● You can provide instructions in a short span of time.
● UX designers use GIFs to show the functioning of certain digital experiences.
● You can introduce GIFs on your page to keep followers engaged.
● You can display some amazing things on your website.
Part 2 Difference between making GIFs in After Effects and Photoshop
Creating GIFs in After Effects and Photoshop are both one in the same thing but the results may vary depending on which choice of tools and features suits you better.
Now, for those who are learning Photoshop and After Effects for the first time, to understand the difference in results between both these software lets familiarize you with their features in brief.
01What’s Similar?
Since both are designed by Adobe, there are bound to be similarities in the tools and interface they use. Both these software enables you to use layers of editing from the layer panel where you separate the blending or transform multiple layers. You can apply masks to these layers in different ways on both software.
02Groups (PS) and Nested (AE) Composition
In Photoshop, you can group layers together and apply styles, blends, and transformations together. However, in After Effects, this is called Nesting.
Both are in a way similar to each other but Nesting Comps give users more functionality as it interprets probable compositions during the nesting process.
Smart objects used in PS are also comparable to Nested Comps as you can apply filters over one while applying effects to the other.
03Vector and Shapes
You can use the Pen tool or Shape tool in both PS and AE that creates shape layers without losing any integrity. Both the applications support Bezier which lets you control curves between anchor points in PS and vertices in AE.
04Destructive Effects
After Effects does not provide you with destructive effects while in Photoshop you can apply non-destructive filters. You can also combine several layers to apply changes or distort your images but these permanent changes cannot be made in After Effects.
You will also notice that although there are several similarities, there are tools and features which are not shared between both applications. The types of tool categories would also vary. Like with After Effects, you can create paragraph and character styles that you can apply to texts.
Part 3 How to Create After Effects Gifs
After Effects harbors greater video editing capabilities rather than the basic animating options you can try on Photoshop. In creating a GIF, you would want to leverage the combination of tools offered on both After Effects and Photoshop.
Let’s first get into how you can create an animated video on After Effects and then convert it into an animated GIF in Photoshop.
01Animating in After Effects
Step 1: Open After Effects, go to ‘Composition’ and create ‘New Composition’. You will need to fill out the dimensions and specs for your project on the window that pops up. For example, 300x250 px at 30 fps and 6 sec duration.

Step 2: You can import assets by dragging and dropping, or by going to the ‘Project Panel’ in the After Effects Workspace as shown in the image.

Step 3: Now, you can begin animating your Assets. Drag them and add them to the ‘Composition’ panel or ‘Timeline’ panel. Placing them in either one will make them appear on both. Adjust the layers according to the topmost layer on the panel.

Dial down the scale of every animation to 0% so that can be animated in a growing sequence. Select the layer you wish to adjust and click on ‘Transform’. Click on ‘Scale’ to give that layer an active marker on the timeline. Set the scale to 0%.

You can now begin animating the first item by moving the current time indicator to 06f (the 6th frame on the 30fps timeline). Scale the item back to 100% and the marker will reappear.

Repeat this for the other items. Keep in mind that each item has a 06f space between them for later adjustability.

Your equation is now complete and all that is left to do is animate your CTA button. Adjust the position of the top layer on your CTA and set the current time indicator to start time on the button animation. Click on ‘position’ to set up a marker on your Timeline. Forward the 04f then nudge the button and reverse back to the original position so that it looks like a button clicking animation.

Your animation is now complete. Now go to ‘Composition’ and shorten the time in the ‘Duration’ panel.
Step 4: Go to Composition. Click on Pre-Render and a new selection will pop up. Now click on ‘Render’. Your output will be a .mov file.

If you find exporting gifs from After Effects too complicated, you can also upload and loop videos using Wondershare Filmora Video Editor which has plenty of other amazing video editing features you can drag and drop to create.

Wondershare Filmora - Best Video Editor for Mac/Windows
5,481,435 people have downloaded it.
Build unique custom animations without breaking a sweat.
Focus on creating epic stories and leave the details to Filmora’s auto features.
Start a creative adventure with drag & drop effects and endless possibilities.
Filmora simplifies advanced features to save you time and effort.
Filmora cuts out repetition so you can move on to your next creative breakthrough.
02Converting Animation to GIF in Photoshop
Step 1: Create a new file in Photoshop with the same specs as you did in After Effects. Now go to ‘File’ > ‘Import’ > ‘Frames to Layers’ and import the saved .mov file.

Step 2: If you don’t automatically see the timeline, go to Windows > Timeline.

Step 3: Decide on how many loops you want in your animation. Once you are done with your GIF, go to ‘File’ > Export. Apply the Legacy Save for Web and choose the format for your GIF.

Step 4: In Export options, you can gain access to several presets to apply to your animated GIFs. The more color displayed in your GIF, the larger its size. You can use Dethering to smoothen gradients and shades. Looping is also turned off on Photoshop but you can apply looping from the ‘Options’ shown at the bottom of the menu.
Part 1 Ending Thoughts
● GIFs are a popular type of media that is quite trendy and easy to make using Adobe after effects gifs or Photoshop. They are called Graphics Interchange Format and are best used as simple graphic images.
● You require a combination of both Photoshop and After Effects, though both share similar interfaces, tools, and effects. You can group or nest compositions, apply filters or effects, and adjust vectors and shapes.
● After Effects is better than Photoshop in terms of creating videos, so you can first create a project in AE and then import the project onto PS after exporting after effects to gif. You can also use Filmora for the first step of this process.
GIFs have been around for quite some time but as the flow of content continues to plummet on popular social media platforms like Facebook or Instagram, the demand for GIFs would continue to increase.
Unfortunately, you won’t be able to make a gif in after effects directly, unless with the help of a plug-in like GIFGun.
Before moving forward, keep in mind that using Adobe Media Encoder is an easier method for compressing your exports rather than any third-party compressor.
In this article, you will find easy to follow methods using which you can create after effects GIFs within a matter of minutes.
In this article
01 [General Knowledge on GIF Animation](#Part 1)
02 [What Is the Difference Between After Effects Gifs’ Making and Photoshop Gifs’ Making?](#Part 2)
03 [How to Create After Effects Gifs](#Part 3)
Part 1 General Knowledge on GIF Animation
01What is a GIF?
The acronym GIF stands for Graphics Interchange Format and the file is created in bitmap image format. This was developed back in 1987 by a working in CompuServe.
This format was incredibly successful on the WEB due to benefits like smaller file sizes, broader support, and its easy compatibility with Operating Systems.
However, GIFs are much more suitable as simple graphics and logos rather than Live Action Videos with its palette limitation of 256 per image.
Creating a GIF is like looping an animation or animated elements. You can use these animated GIFs in banners to engage your audience or even create fun sharable content for your Facebook pages.
You can start by creating basic easy animations in Photoshop and then elevate them by using After Effects.
02Why create a GIF?
Here are a handful of things you can keep your eye on if you are just starting on making GIFs;
● Simple Product Demonstrations. With simple 3 to 4 step GIFs, you can briefly introduce steps on how to use a product.
● You can provide instructions in a short span of time.
● UX designers use GIFs to show the functioning of certain digital experiences.
● You can introduce GIFs on your page to keep followers engaged.
● You can display some amazing things on your website.
Part 2 Difference between making GIFs in After Effects and Photoshop
Creating GIFs in After Effects and Photoshop are both one in the same thing but the results may vary depending on which choice of tools and features suits you better.
Now, for those who are learning Photoshop and After Effects for the first time, to understand the difference in results between both these software lets familiarize you with their features in brief.
01What’s Similar?
Since both are designed by Adobe, there are bound to be similarities in the tools and interface they use. Both these software enables you to use layers of editing from the layer panel where you separate the blending or transform multiple layers. You can apply masks to these layers in different ways on both software.
02Groups (PS) and Nested (AE) Composition
In Photoshop, you can group layers together and apply styles, blends, and transformations together. However, in After Effects, this is called Nesting.
Both are in a way similar to each other but Nesting Comps give users more functionality as it interprets probable compositions during the nesting process.
Smart objects used in PS are also comparable to Nested Comps as you can apply filters over one while applying effects to the other.
03Vector and Shapes
You can use the Pen tool or Shape tool in both PS and AE that creates shape layers without losing any integrity. Both the applications support Bezier which lets you control curves between anchor points in PS and vertices in AE.
04Destructive Effects
After Effects does not provide you with destructive effects while in Photoshop you can apply non-destructive filters. You can also combine several layers to apply changes or distort your images but these permanent changes cannot be made in After Effects.
You will also notice that although there are several similarities, there are tools and features which are not shared between both applications. The types of tool categories would also vary. Like with After Effects, you can create paragraph and character styles that you can apply to texts.
Part 3 How to Create After Effects Gifs
After Effects harbors greater video editing capabilities rather than the basic animating options you can try on Photoshop. In creating a GIF, you would want to leverage the combination of tools offered on both After Effects and Photoshop.
Let’s first get into how you can create an animated video on After Effects and then convert it into an animated GIF in Photoshop.
01Animating in After Effects
Step 1: Open After Effects, go to ‘Composition’ and create ‘New Composition’. You will need to fill out the dimensions and specs for your project on the window that pops up. For example, 300x250 px at 30 fps and 6 sec duration.
Step 2: You can import assets by dragging and dropping, or by going to the ‘Project Panel’ in the After Effects Workspace as shown in the image.
Step 3: Now, you can begin animating your Assets. Drag them and add them to the ‘Composition’ panel or ‘Timeline’ panel. Placing them in either one will make them appear on both. Adjust the layers according to the topmost layer on the panel.
Dial down the scale of every animation to 0% so that can be animated in a growing sequence. Select the layer you wish to adjust and click on ‘Transform’. Click on ‘Scale’ to give that layer an active marker on the timeline. Set the scale to 0%.
You can now begin animating the first item by moving the current time indicator to 06f (the 6th frame on the 30fps timeline). Scale the item back to 100% and the marker will reappear.
Repeat this for the other items. Keep in mind that each item has a 06f space between them for later adjustability.
Your equation is now complete and all that is left to do is animate your CTA button. Adjust the position of the top layer on your CTA and set the current time indicator to start time on the button animation. Click on ‘position’ to set up a marker on your Timeline. Forward the 04f then nudge the button and reverse back to the original position so that it looks like a button clicking animation.
Your animation is now complete. Now go to ‘Composition’ and shorten the time in the ‘Duration’ panel.
Step 4: Go to Composition. Click on Pre-Render and a new selection will pop up. Now click on ‘Render’. Your output will be a .mov file.
If you find exporting gifs from After Effects too complicated, you can also upload and loop videos using Wondershare Filmora Video Editor which has plenty of other amazing video editing features you can drag and drop to create.
Wondershare Filmora - Best Video Editor for Mac/Windows
5,481,435 people have downloaded it.
Build unique custom animations without breaking a sweat.
Focus on creating epic stories and leave the details to Filmora’s auto features.
Start a creative adventure with drag & drop effects and endless possibilities.
Filmora simplifies advanced features to save you time and effort.
Filmora cuts out repetition so you can move on to your next creative breakthrough.
02Converting Animation to GIF in Photoshop
Step 1: Create a new file in Photoshop with the same specs as you did in After Effects. Now go to ‘File’ > ‘Import’ > ‘Frames to Layers’ and import the saved .mov file.
Step 2: If you don’t automatically see the timeline, go to Windows > Timeline.
Step 3: Decide on how many loops you want in your animation. Once you are done with your GIF, go to ‘File’ > Export. Apply the Legacy Save for Web and choose the format for your GIF.
Step 4: In Export options, you can gain access to several presets to apply to your animated GIFs. The more color displayed in your GIF, the larger its size. You can use Dethering to smoothen gradients and shades. Looping is also turned off on Photoshop but you can apply looping from the ‘Options’ shown at the bottom of the menu.
Part 1 Ending Thoughts
● GIFs are a popular type of media that is quite trendy and easy to make using Adobe after effects gifs or Photoshop. They are called Graphics Interchange Format and are best used as simple graphic images.
● You require a combination of both Photoshop and After Effects, though both share similar interfaces, tools, and effects. You can group or nest compositions, apply filters or effects, and adjust vectors and shapes.
● After Effects is better than Photoshop in terms of creating videos, so you can first create a project in AE and then import the project onto PS after exporting after effects to gif. You can also use Filmora for the first step of this process.
Are You Looking to Find Out How to Loop YouTube Videos on iPhone? Learn How to Loop Your Favorite YouTube Video on Your iPhone, so You Can Play that Part over and Over
YouTube videos are a great way to get information fast. But there are times when you want to watch a video over and over again without having to go back to the YouTube app. Here is how you can loop YouTube videos on your iPhone. There are 2 ways to loop YouTube videos on iPhone. One is through the YouTube app and using third-party apps.
There are many reasons why you might want to loop a video on your iPhone. Maybe you’re trying to learn a dance routine, or you want to listen to a song on repeat. You’ve probably seen those cool looping videos on Instagram and Facebook and wondered how people make them. YouTube is a great place to find videos on any topic.
The YouTube app on the iPhone is a great way to watch videos, but it doesn’t have a repeat or loop feature. This means that if you are watching a long video, you will have to keep your phone on and continue watching the video. YouTube is the world’s most popular video-sharing platform with approx. 1.9 billion monthly active users.
Part 1: How to loop YouTube videos on iPhone
Step 1: Open the YouTube app on your iPhone
Install YouTube on your iPhone after that open it. Search your desired video on the YouTube search bar.

Step 2: Tap the video you want to repeat
Click on the three dots or click on the save button to create a new playlist for your video. If you want to listen to or see the existing videos you can also add your videos to your old playlist.

Step 3: Create a playlist and start playing it
Click on New Playlist then give any name to your playlist. Give any name to your playlist and select whether you want to make it private or public.

Step 4: Click on the library
After creating a playlist click on the library which is placed at the bottom. After clicking on it you can see your all playlists.

Step 5: Play the playlist on the loop
Click on your desired playlist which you want to play after that you’ll see two options on the screen Play and Shuffle. Select the Play option, your playlist will start.

Step 6: Play your favorite video first and put the playlist on the loop
When you start playing your playlist, you can start it with your favorite video or you can also put your playlist on a loop. So that you can watch your videos on a loop.
Benefits of looping YouTube videos on iPhone
If you are a YouTube addict, then you might be pleased to know that your iPhone has a built-in feature that allows for the video to loop back to the beginning. This feature is an excellent way of saving time and maximizing your viewing pleasure. Looping videos on iPhone is a great way of saving time and maximizing your viewing pleasure.
Looping videos on your phone can be a great way to kill time. Watching the same video over and over again can be tiring, but if you do it on your phone, you don’t have to worry about that. You can change the video at any point in time, so if you find that you are getting bored with it, then just find another one.
Over a billion hours of video are watched every day. The app is available for both iOS and Android devices, which means that you can watch YouTube videos on your phone no matter where you are. This can be useful if you want to listen to music or watch a tutorial while doing something else on your phone, like checking Facebook or browsing the web.
Part 2: How to Edit Time-lapse Video on Computer
Time-lapse videos are becoming more and more popular nowadays. They are a great way to show the passage of time, but editing them on a computer is not an easy task. Editing time-lapse videos on a computer is not an easy task because it requires you to have the right software and know how to use it.
It can be quite time-consuming and tedious work, which is why we need a proper editing program that can help us through this process. It’s just about learning the basics of editing and then adding a few effects to make your video more interesting. Here are some tips on how you can edit time-lapse videos on your computer:
- The first thing you need to do is download and install a video editor for your computer.
- Import the timelapse footage into the video editing program that you have downloaded and installed, such as Adobe Premiere Pro or Sony Vegas Pro, etc.
- Now you need to trim out any unwanted footage at the beginning or end of the clip so that what remains is just what you want to show in your final video.
- The next step is to add transitions between scenes, such as fades, wipes, dissolves, or cuts between shots - this will help transition between scenes smoothly and seamlessly without any abrupt jumps in time or space between them while also adding an extra level of polish.
Time-lapse videos can help you produce stunning results, no matter what your creative goals may be. If you want to create a time-lapse video, there are many things you need to consider. Time-lapse videos are not just a series of photos strung together. And the most important thing you need to consider is the format of the video you’ll need to take.
Choosing the right editing software is also important if you’re using a camera that shoots time-lapse videos. And if you’re using a DSLR camera, there is a chance that your time-lapse videos are in MOV format. If that’s the case, then you’re in luck. Filmora can help you edit your time-lapse video with ease.
Edit Time-lapse video on Filmora software
Filmora is a video editor that lets you easily create and edit time-lapse videos. With Filmora, you can add music, filters, and effects to your videos to give them a unique look and feel. You can also trim and cut your videos, and merge them to create longer videos. Filmora is perfect for creating professional-looking time-lapse videos.
Filmora has an easy-to-use timeline that makes it easy to sequence your videos and create smooth transitions. This makes it easy to create high-quality time-lapse videos that look like they were filmed in a single take. Filmora has a built-in editor that lets you easily add music and sound effects to your videos. This means that you can create videos that look and sound like professional movies.
How to edit a video in Filmora:
Filmora’s time-lapse feature is free, which is a great start. However, you do need to do a few things to make it work. First, you need to make sure that your phone is compatible with Filmora. You’ll also need a connection to the Internet and a working camera on your phone. There are a few things that you’ll need to know to start editing videos on Filmora.
Step 1: Download Filmora and create a new project
Download Filmora on your desktop and click on the “New Project” button. This will open up a new window where you can name your project and choose a video file to start working with.

Free Download For Win 7 or later(64-bit)
Free Download For macOS 10.14 or later
Step 2: Select media and place it on the timeline
Click on the “Media” tab and select your video file. You’ll now see the video timeline on the left side of the window. Use the video timeline to drag and drop video clips into the timeline. You can also use the buttons on the timeline to change the speed, direction, and audio volume of the video clips.

Step 3: Select the speed you want the video to play at and click on the “OK” button.
You set the duration and speed of your video according to your requirements. You can edit the speed of your video individually. If you put your first video on high speed then you can slow down your second video.

Step 4: Click on the “Effects” button and select the “Special Effects” tab
You have undoubtedly seen those videos, full of special effects and transitions. These effects are the result of good video editing software, like Filmora. This software is designed to be used by anyone, from beginners to expert editors. You can add effects to your time-lapse video. Click on the Effects on the top bar of Filmora. You can also add various transitions in your time-lapse video.

Step 5: Export your time-lapse video
As a user of Filmora, you can export a time-lapse video onto your computer. This feature is one of the best features Filmora has to offer. You can export your edited time-lapse video on Filmora. When you are done with your time-lapse editing export the video on your desktop, drive, or anywhere you want

The Bottom Line
Since most people own an iPhone, it’s very useful to know some tricks to be more productive. As you have seen, the utility of looping a video is not something to be scoffed at. If you need to keep watching a video over and over again, on iPhone looping a video is one of the best ways to do so.
We hope the content above has been useful to you, and that you can see how looping YouTube videos on your iPhone could improve your iPhone experience. On the other hand, you can use Filmora software for your video or photo editing. Filmora is user-friendly software and you can easily install it from a browser. You just need a piece of basic knowledge to use Filmora.
Free Download For macOS 10.14 or later
Step 2: Select media and place it on the timeline
Click on the “Media” tab and select your video file. You’ll now see the video timeline on the left side of the window. Use the video timeline to drag and drop video clips into the timeline. You can also use the buttons on the timeline to change the speed, direction, and audio volume of the video clips.
Step 3: Select the speed you want the video to play at and click on the “OK” button.
You set the duration and speed of your video according to your requirements. You can edit the speed of your video individually. If you put your first video on high speed then you can slow down your second video.
Step 4: Click on the “Effects” button and select the “Special Effects” tab
You have undoubtedly seen those videos, full of special effects and transitions. These effects are the result of good video editing software, like Filmora. This software is designed to be used by anyone, from beginners to expert editors. You can add effects to your time-lapse video. Click on the Effects on the top bar of Filmora. You can also add various transitions in your time-lapse video.
Step 5: Export your time-lapse video
As a user of Filmora, you can export a time-lapse video onto your computer. This feature is one of the best features Filmora has to offer. You can export your edited time-lapse video on Filmora. When you are done with your time-lapse editing export the video on your desktop, drive, or anywhere you want
The Bottom Line
Since most people own an iPhone, it’s very useful to know some tricks to be more productive. As you have seen, the utility of looping a video is not something to be scoffed at. If you need to keep watching a video over and over again, on iPhone looping a video is one of the best ways to do so.
We hope the content above has been useful to you, and that you can see how looping YouTube videos on your iPhone could improve your iPhone experience. On the other hand, you can use Filmora software for your video or photo editing. Filmora is user-friendly software and you can easily install it from a browser. You just need a piece of basic knowledge to use Filmora.
Top GIF to MP4 Converters
Great Video Converter - Wondershare Filmora
Provide abundant video effects - A creative video editor
Powerful color correction and grading
Detailed tutorials provided by the official channel
Introduction.
Many people have been searching online for the best GIF to MP4 converter that will help them playback their GIF files on their media player. It is easier for GIF animated files to be converted to MP4 files, as Mp4 is the most popular file format compatible with many devices. Some compatible devices include iOS devices, Mac, Android devices, Windows, etc.
By converting GIF into video, you make a wise move as an encoded MP4 video contains richer colors and higher resolutions, weighs 5 to 10 times lighter in file size, and has engaging audio compared to the GIF. In addition, MP4 is also a wide-known and accepted format for social sharing videos across the web. So, whether you want to convert your Gif to Mp4 for Instagram or you intend to add songs to your animated texts and convert to Mp4, this article will help you out.
We shall explore:
In this article
Part 1: Best Online GIF to MP4 Converters
Part 2: Top GIF to MP4 Software
Part 3: How to Convert GIF to MP4

Part 1: Best Online GIF to MP4 Converters
GIF pictures are a perfect source of entertainment and can also be helpful as memes on the internet. Those wondering what a GIF picture is all about are small videos without sound. They can be used in the comment section of the internet or sent as memes in messages on smartphones.
However, due to third-party keyboard applications, the use and sending of GIFs have become very easy. Thus, many people are trying to migrate from GIF to MP4, and this article is for them. We will give you the best four (4) GIFs to video converter online that you can use.
1. Ezgif
Ezgif is a free GIF to MP4 online converter that allows you to turn your ezGif GIF into MP4 videos with a single click leaving no watermark on your video. The process is relatively easy as you just need to upload a GIF file up to 35MB, then click the “Convert to MP4” button, and your MP4 video will be ready. Besides, it supports the conversions of WEBP and APNG to MP4.
Pros
It is super-fast and free.
It does not have a watermark.
There is no advert on the site.
It does not require any software to download.
Cons
It allows you to convert one file at a time.

2. Adobe Creative Cloud Express
Adobe Creative Cloud Express is a collection of mobile app-based and web-based video editing tools that all content creators use. It allows you to upload GIFs online and then convert GIFs to MP4. It also allows you to trim the GIF and directly download the MP4 to the local PC.
Pros
It is very free to use
it allows you to trim the GIF
it is available online and on App Store
it does not require any software to download.
Cons
Allows you to upload one GIF at a time
It has limited features


3. FlexClip
This tool is a feature-packed online video maker and GIF to MP4 converter. It allows users to easily upload GIFs from either their mobile phones or PC to FlexClip’s in-browser editor and also make some edits with both the GIFs and videos before you can convert them.
Pros
No software downloads are required
No experience is needed.
There are tons of features available
Cons
GIFs are irreversible
You cannot change GIFs speed

4. Convertio
This online conversion tool has made GIFs to MP4 conversion much more effortless. This free GIF to video converter has a simple interface and easy-to-use tools that help you turn GIF files to MP4 in a few clicks.
Pros
It is swift and free.
You can convert several files at once.
It does not require any download.
Cons
There are loads of ads on the site.
You can only use 2 concurrent conversions for the free account.

Part 2: Top GIF to MP4 Software
Many people have tried different software to convert GIFs into MP4 that have proven abortive. Most software on the internet only allows you to convert MPEG to GIF, WMV to GIF, or images to GIF files. Only a few software allows the conversion from GIF to videos.
Here are some of the top 4 GIF to MP4 Conversion software:
1. Filmora
Filmora Video Editor is the best software to convert any GIF picture to an MP4 video file. The best part is that you do not need to use the internet, and it works perfectly for all users. In addition, the software is super stable and does not crash even if you load more than ten video files on it. However, the Filmora video editor is a complete package that allows users to edit and convert any video with many accessible features. More so, you are not required to be a professional video editor to be able to convert the GIF image to a professional video.
With the Filmora software, you do not have to download and pay for the music, as the editor also has a great music library from which you can choose to add music within seconds. Moreover, the software has more than 100 different text styles and effects to make your GIF into MP4 videos more beautiful.
Pros
Available for both Windows and Mac Users
Beginners can also use it
It is free and easy to use
You don’t have to use the internet for it to work
Cons
It requires you to download it on your PC

2. Cloudconvert
This free online service tool allows users to convert any GIF image to an MP4 file. In addition, the user interface is quite tricky, but you can edit the videos, trim the videos, and crop them. Users can add subtitles to videos using the SRT files, and finally, you can export files directly to the Dropbox account.
Pros
It is free to use
It helps you export videos directly to your Dropbox
It provides you with a ton of audio and video editing features
Use SRT to add subtitles to your videos
Cons
It has a complicated user-interface
It does not support uploading to video sharing websites

3. Online-Convert
This is a perfect tool to convert GIF image to an MP4 file. In addition, this is a complete online video editor that allows users to perform various kinds of basic video converting options on their files. Users can rotate or crop the videos and extract the unwanted parts from the screen. Once the videos convert successfully, they can be downloaded or directly exported to Google Drive or Dropbox.
Pros
Users can directly export the converted files to the Cloud services
It allows users to convert different files to MP4
It provides users with files settings for basic video editing
Cons
No interactive interface
Many ads on the website

4. File-Conversion
One of the most popular file conversion websites offers this video editing software. In addition, it provides various video editing services rather than just converting GIFs to MP4 video files. It also provides a few settings, including size, resolution, and frame rate.
Pros
· It is user friendly
· It is free to use
· Allows users to change the quality of the output videos
Cons
· Using the service requires sign-up
It does not have an option to crop the Mp4 Videos or edit the frame rate
It does not have an option to export the videos to the third-party cloud services

Part 3: How to Convert GIF to MP4
Here are the quick and easy steps to Ezgif GIF to MP4 online conversion:
>
Step1: Choose File to Browse or Copy-Paste URL to Upload
Upload a GIF file to your timeline or paste an image URL that is up to 35MB and Click the “Upload” button

Step 2: Tap on Convert GIF to MP4
After the upload, click Convert GIF to MP4, and it will automatically get converted.

Step 3: Download the MP4
Export your video and download it on your device
Here is how to convert GIF to MP4 using Filmora software
Step 1: Install Filmora and Choose New Project
Open your Filmora software, click on New Project import GIF, or drag and drop them to your timeline.
Step 2: Import Media
If the media aspect ratio and resolution do not match when importing a file, a popup will appear. Make sure you click on DON’T CHANGE.

Step 3: Convert GIF to MP4
Click on export, then you rename and select your desired file format (MP4), and your GIFs will automatically convert.

Step 4: Export and Save
Finally, you can save the file on your device once the conversion process is complete.
Conclusion
From this article, we can pick that Ezgif is the best online tool and Filmora video editor is the easiest and perfect software that is good for GIF converter to MP4. This article also listed other video editors that can help you make GIFs from MP4 quickly and without stress.
Introduction.
Many people have been searching online for the best GIF to MP4 converter that will help them playback their GIF files on their media player. It is easier for GIF animated files to be converted to MP4 files, as Mp4 is the most popular file format compatible with many devices. Some compatible devices include iOS devices, Mac, Android devices, Windows, etc.
By converting GIF into video, you make a wise move as an encoded MP4 video contains richer colors and higher resolutions, weighs 5 to 10 times lighter in file size, and has engaging audio compared to the GIF. In addition, MP4 is also a wide-known and accepted format for social sharing videos across the web. So, whether you want to convert your Gif to Mp4 for Instagram or you intend to add songs to your animated texts and convert to Mp4, this article will help you out.
We shall explore:
In this article
Part 1: Best Online GIF to MP4 Converters
Part 2: Top GIF to MP4 Software
Part 3: How to Convert GIF to MP4
Part 1: Best Online GIF to MP4 Converters
GIF pictures are a perfect source of entertainment and can also be helpful as memes on the internet. Those wondering what a GIF picture is all about are small videos without sound. They can be used in the comment section of the internet or sent as memes in messages on smartphones.
However, due to third-party keyboard applications, the use and sending of GIFs have become very easy. Thus, many people are trying to migrate from GIF to MP4, and this article is for them. We will give you the best four (4) GIFs to video converter online that you can use.
1. Ezgif
Ezgif is a free GIF to MP4 online converter that allows you to turn your ezGif GIF into MP4 videos with a single click leaving no watermark on your video. The process is relatively easy as you just need to upload a GIF file up to 35MB, then click the “Convert to MP4” button, and your MP4 video will be ready. Besides, it supports the conversions of WEBP and APNG to MP4.
Pros
It is super-fast and free.
It does not have a watermark.
There is no advert on the site.
It does not require any software to download.
Cons
It allows you to convert one file at a time.
2. Adobe Creative Cloud Express
Adobe Creative Cloud Express is a collection of mobile app-based and web-based video editing tools that all content creators use. It allows you to upload GIFs online and then convert GIFs to MP4. It also allows you to trim the GIF and directly download the MP4 to the local PC.
Pros
It is very free to use
it allows you to trim the GIF
it is available online and on App Store
it does not require any software to download.
Cons
Allows you to upload one GIF at a time
It has limited features
3. FlexClip
This tool is a feature-packed online video maker and GIF to MP4 converter. It allows users to easily upload GIFs from either their mobile phones or PC to FlexClip’s in-browser editor and also make some edits with both the GIFs and videos before you can convert them.
Pros
No software downloads are required
No experience is needed.
There are tons of features available
Cons
GIFs are irreversible
You cannot change GIFs speed
4. Convertio
This online conversion tool has made GIFs to MP4 conversion much more effortless. This free GIF to video converter has a simple interface and easy-to-use tools that help you turn GIF files to MP4 in a few clicks.
Pros
It is swift and free.
You can convert several files at once.
It does not require any download.
Cons
There are loads of ads on the site.
You can only use 2 concurrent conversions for the free account.
Part 2: Top GIF to MP4 Software
Many people have tried different software to convert GIFs into MP4 that have proven abortive. Most software on the internet only allows you to convert MPEG to GIF, WMV to GIF, or images to GIF files. Only a few software allows the conversion from GIF to videos.
Here are some of the top 4 GIF to MP4 Conversion software:
1. Filmora
Filmora Video Editor is the best software to convert any GIF picture to an MP4 video file. The best part is that you do not need to use the internet, and it works perfectly for all users. In addition, the software is super stable and does not crash even if you load more than ten video files on it. However, the Filmora video editor is a complete package that allows users to edit and convert any video with many accessible features. More so, you are not required to be a professional video editor to be able to convert the GIF image to a professional video.
With the Filmora software, you do not have to download and pay for the music, as the editor also has a great music library from which you can choose to add music within seconds. Moreover, the software has more than 100 different text styles and effects to make your GIF into MP4 videos more beautiful.
Pros
Available for both Windows and Mac Users
Beginners can also use it
It is free and easy to use
You don’t have to use the internet for it to work
Cons
It requires you to download it on your PC
2. Cloudconvert
This free online service tool allows users to convert any GIF image to an MP4 file. In addition, the user interface is quite tricky, but you can edit the videos, trim the videos, and crop them. Users can add subtitles to videos using the SRT files, and finally, you can export files directly to the Dropbox account.
Pros
It is free to use
It helps you export videos directly to your Dropbox
It provides you with a ton of audio and video editing features
Use SRT to add subtitles to your videos
Cons
It has a complicated user-interface
It does not support uploading to video sharing websites
3. Online-Convert
This is a perfect tool to convert GIF image to an MP4 file. In addition, this is a complete online video editor that allows users to perform various kinds of basic video converting options on their files. Users can rotate or crop the videos and extract the unwanted parts from the screen. Once the videos convert successfully, they can be downloaded or directly exported to Google Drive or Dropbox.
Pros
Users can directly export the converted files to the Cloud services
It allows users to convert different files to MP4
It provides users with files settings for basic video editing
Cons
No interactive interface
Many ads on the website
4. File-Conversion
One of the most popular file conversion websites offers this video editing software. In addition, it provides various video editing services rather than just converting GIFs to MP4 video files. It also provides a few settings, including size, resolution, and frame rate.
Pros
· It is user friendly
· It is free to use
· Allows users to change the quality of the output videos
Cons
· Using the service requires sign-up
It does not have an option to crop the Mp4 Videos or edit the frame rate
It does not have an option to export the videos to the third-party cloud services
Part 3: How to Convert GIF to MP4
Here are the quick and easy steps to Ezgif GIF to MP4 online conversion:
>
Step1: Choose File to Browse or Copy-Paste URL to Upload
Upload a GIF file to your timeline or paste an image URL that is up to 35MB and Click the “Upload” button
Step 2: Tap on Convert GIF to MP4
After the upload, click Convert GIF to MP4, and it will automatically get converted.
Step 3: Download the MP4
Export your video and download it on your device
Here is how to convert GIF to MP4 using Filmora software
Step 1: Install Filmora and Choose New Project
Open your Filmora software, click on New Project import GIF, or drag and drop them to your timeline.
Step 2: Import Media
If the media aspect ratio and resolution do not match when importing a file, a popup will appear. Make sure you click on DON’T CHANGE.
Step 3: Convert GIF to MP4
Click on export, then you rename and select your desired file format (MP4), and your GIFs will automatically convert.
Step 4: Export and Save
Finally, you can save the file on your device once the conversion process is complete.
Conclusion
From this article, we can pick that Ezgif is the best online tool and Filmora video editor is the easiest and perfect software that is good for GIF converter to MP4. This article also listed other video editors that can help you make GIFs from MP4 quickly and without stress.
Top 7 Easy Ways to Convert a Video to a GIF Online
Looking for the best video to gif online conversion tools? No worries, as we have done all the research work and have shortlisted the best tools that can assist you with the task. GIF is short and cute animated files that help in interestingly conveying a message. These short-animated visuals help in reaching and creating an impact on the target audience. So, if you have some videos, GIF animations can be created from them using a good converter tool which can be an online program or system software.
Online programs are preferred by the users owing to their simple and hassle-free use, support for basic features, and cost-saving options. So, here in this topic, we will discuss the top and easy ways to convert video to GIF online.

Part 1: Top 7 Easy Ways to Convert a Video to a GIF Online
Several online tools can be used for converting a video file into GIF, but all do not stand up to the tall claims it makes. So, if you are in search of an easy yet effective tool, shortlisted below are the top 7 tools for video into GIF online conversion.
1. Adobe Express
Powered by Adobe Premiere, this is an excellent online tool that allows converting videos in all key formats in GIF format. The free version allows adding videos for up to 1 hour and the processed files can be downloaded to the local system.
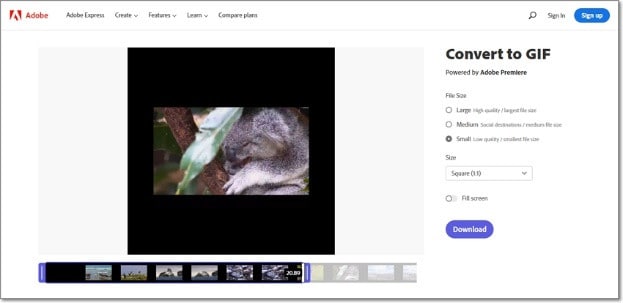
Key features
- Video files in all key formats can be converted to GIF.
- Allows selecting the aspect ratio and the file size of the target file.
- This video to GIF converter online tool support drag and drop feature.
- Allows trimming the video so that the file portion can be selected.
Pros:
- Simple and clean interface.
- Quick file processing.
- Allows selecting aspect ratio and file size.
Cons:
- Only one file at a time can be processed.
- Only desktop files can be added.
- To download the file, you need to free sign-up.
User Review:
A good online multi-platform service that works with interesting features. -TechRadar
This is one of the best programs that comes packed with wide range of features that can assist you in getting the target customized files.
2. Ezgif
Using this browser-based tool, local as well as online videos in key formats can be converted to GIFs. The interface is simple where you just need to add the file and the conversion will be done automatically.
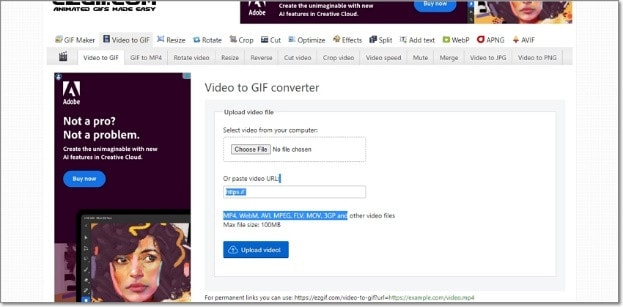
Key features
- GIF can be created from the local and online video files in all key formats.
- Choose the video part for creating the GIF file else by default, the first 5 seconds of the video are used.
Pros:
- All popular video formats like MP4, MPEG, FLV, MOV, and others are supported for conversion to GIF.
- Local, as well as file links in case of online files, can be added.
- Allows selecting the video part for which the GIF has to be created.
- Allows choosing the frame rate, and the size of the video.
This online GIF converter has an option to set static background.
Cons:
- File size limitation of 100 MB.
- Internet dependency.
User Review
“A website with many important and good tools that facilitates making your task easier. You get all features in one place. -Sasa011, Mywot.
This simple online tool is a pocket friendly option for converting your videos into GIF with added option for editing them. Supporting all key formats, the program supports additional tools as well.
3. Img2Go
Your videos on the system, cloud storage, as well as using URLs can be added to this online tool for conversion to GIF format. The look and the quality of GIFs can be adjusted by making changes in the file parameters.

Key features
- Convert all key video files like MP4, MOV, MPEG, and others to GIF.
- Customize the GIF look by editing the file size and applying the color filter.
- This online video to GIF converter allows to choose to enhance, sharpen, equalize, and edit files in other ways.
- Files to be converted can be added from the desktop, Google Drive, Dropbox, as well as URL.
- Processed files can be saved to the cloud storage in addition to the local system.
Pros:
- Multiple sources to add the video file.
- Customize the file parameters and enhance its look.
- Converted file is downloaded automatically to the local system.
Cons:
- Free version allows converting only 3 files at a time.
- Dependency on internet connectivity.
User review:
“This is the best online converter app I have discovered. It is really easy and fast to use. I absolutely recommend it and it really works.”-Maria Ancil, ChromeStats
When you need to convert only a few files at a time in a hassle-free manner consider this simple online tool. After the conversion is done, you would not have any hassles of file downloading as it is automatically saved to the system.
4. CloudConvert
Convert your videos in MP4, FLV, WebM, and other key formats to GIF using this browser-based tool that is simple and free to use. Multiple file parameters can be changed using the tool to get the desired file.

Key Features:
- Allows converting all key video formats.
- Files to be converted can be added from the desktop, URL, Dropbox, Google Drive, and OneDrive.
- Allows adjusting the fit, codec, resolution, aspect ratio, and fps.
- Option to trim the file and also add a watermark.
Pros:
- Files to be converted can be added from multiple sources.
- All key video formats supported.
- Option to control the video size, quality, and aspect ratio.
Cons:
- Free version allows only 25 conversions per day.
- Converted files need to be downloaded.
User Review
“Instant way of converting small-sized files online in many different formats.”
-Sushil, SoftwareAdvice
When conversion of cloud-based files is needed, this works a good online tool that also allows you to edit and change the key file parameters.
5. io
This is a free browser-based tool that allows creating of animated GIF files from videos. There are several video editing options also supported by the tool like split, cut, adding text, and more. You can even add a YouTube video or its link to create a GIF.

Key features:
- Free online tool for creating a GIF file.
- Support all key video formats like MP4, MOV, FLV, and others.
- Local, YouTube as well as videos from Dropbox can be added.
- Option to record the video and create its GIF.
- ‘Allows choosing the size, duration, background color, and several other file parameters.
Pros:
- Videos from multiple sources can be added.
- YouTube videos can also be converted to GIFs.
- Option to record the video and create its GIF.
- Support multiple video editing options.
Cons:
- Slow processing speed.
- Files processed through the free version have a watermark.
- Free version allows processing files under 10 minutes and of 250Mb in size.
User Review:
“It is just a perfect tool and easy to use. It supports a wide variety of media files.” - Koi, Trustpilot.
Option to convert the YouTube videos as well as the recorded videos make this tool different from the others. All popular file formats are supported and you can even customize and change the file parameters as per your requirements.
6. VistaCreate
This is another simple-to-use tool that allows converting all key video formats to a GIF file. The program allows setting various parameters as needed.
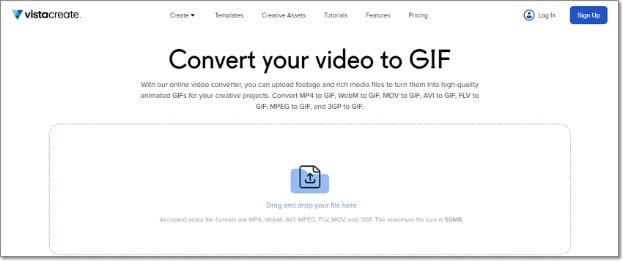
Key Features
- Convert MP4, WebM, AVI, MPEG, FLV, MOV, and 3GP to GIF.
- Support Drag and Drop feature.
- Videos up to 50MB can be processed.
- Allows choosing the video start and the end time for which GIF is to be created. If no time is selected, the first 5 seconds of the video are used.
Pros:
- Simple user interface.
- Allows selecting the video part for which GIF is to be created.
- Choose the frame rate and the speed.
Cons:
- Limited format support.
- Free version has a limitation of 50Mb file size.
- Processing speed is slow.
User Review:
“It is a simple and fast online tool that works. The program allows creating eye-catchy visuals and is free to use.”-Kshitij T, G2. Com
Simple to use, this online tool is apt when you need selected parts of the video for creating a GIF. Though it is compatible with a few selected formats, the process of conversion is simple.
7. XConvert
This online tool support conversion of wide range of file types and formats including videos to GIF. The supported video formats are MP4, WebM, MOV, and MKV. The tool also allows changing the target file parameters.

Key Features
- Free to use online tool with a simple interface.
- Allows converting MO4, MOV, WebM, and MKV videos to GIF.
- Frame Rate and resolution of the target GIF file can be selected.
- Allows adding local as well as files saved to the cloud storage.
Pros:
- Add videos from the desktop, Google Drive, and Dropbox.
- Choose the desired frame rate and resolution.
- Option to save the processed file to the system or Dropbox. Option to get the converted file download link.
Cons:
- Limited file support.
- Converted files need to be downloaded.
- Internet dependency.
User Review:
Portable, nice UI, cross-platform tool and has a lot of actions and run fast. -Roflpancake, Alternativeto
When simple conversion with basic file editing is needed, consider this online tool for your task. In addition to the local system, you can even save the files to your cloud storage.
Part 2: Comparison Table of the Best Video to GIF Converters
The table below compares the above 7 listed tools based on the formats supports, speed of file processing, and the watermark on the processed files.
| Features/Tool | Supported Format | Free Version with watermark or not | Speed of conversion |
|---|---|---|---|
| Adobe Express | All key video formats | No watermark | 2 (Fast) |
| Ezgif | All key formats including MP4, MPEG, FLV, MOV, and others. | No watermark. | 4 (Slow) |
| Img2Go | MP4, FLV, MOV, and all key video formats. | No Watermark | 2 (Fast) |
| CloudConvert | All popular video formats including MP4, MOV, FLV, MPEG, and more. | No Watermark | 2(Fast) |
| Veed.io | All key formats | Yes, free version has a watermark. | 5 (very Slow) |
| VistaCreate | MP4, WebM, AVI, MPEG, FLV, MOV, and 3GP. | No watermark | 5 (Very Slow) |
| XConvert | MP4, WebM, MOV, MKV. | No watermark | 3 (Average) |
Part 3: Best Solution to Convert Video to GIF on Windows/Mac
To convert videos to GIF on your Windows and Mac without worrying about any limitations or internet dependency, desktop software works as the best option. If you too have been looking for one such desktop program, we recommend Filmora Video Editor as the best choice. Though the software is used majorly for advanced video editing options, it is capable of performing a variety of other tasks as well including video to GIF conversion. The software allows file conversion through its export feature.
For Win 7 or later (64-bit)
For macOS 10.14 or later
Key Features
- Almost all video formats like MOV, MP4, MKV, FLV, and others can be converted to GIF.
- High-quality conversion at a fast speed.
- Support batch processing so that multiple files can be processed at a time.
- Allows editing and customizing videos using the built-in features of the software like effects, subtitles, crop, cut, and more.
Pros:
- The interface is simple which makes the software suitable even for beginners.
- Almost all popular video formats are supported.
- High-quality conversion in a hassle-free manner.
- Windows and Mac support.
Cons:
- Being a desktop software, it needs download and installation.
- Need to purchase the software subscription.
Steps to convert videos to GIF using Wondershare Filmora
Step 1. Launch the installed software on your system and the main interface select Create Project > New Project.

Step 2. Click on Import Media Files Here option under the Media tab to browse and add the local video file. Multiple files for batch processing can be added here.

Step 3. After the files are added, now it’s time to move them to the time and for this, you can simply drag and drop them to the bottom. Now at the timeline, using the built-in editing features, customization can be done as required.

Step 4. Finally, tap on the Export button and then choose GIF as the desired target format and also the location to save the converted files.

Conclusion
If one of the above-listed online tools serves your videos for GIF conversion purposes, it’s great. If not, you can use the Wondershare Filmora software. Once downloaded, the software can be used for several editing and other video-related tasks.
For macOS 10.14 or later
Key Features
- Almost all video formats like MOV, MP4, MKV, FLV, and others can be converted to GIF.
- High-quality conversion at a fast speed.
- Support batch processing so that multiple files can be processed at a time.
- Allows editing and customizing videos using the built-in features of the software like effects, subtitles, crop, cut, and more.
Pros:
- The interface is simple which makes the software suitable even for beginners.
- Almost all popular video formats are supported.
- High-quality conversion in a hassle-free manner.
- Windows and Mac support.
Cons:
- Being a desktop software, it needs download and installation.
- Need to purchase the software subscription.
Steps to convert videos to GIF using Wondershare Filmora
Step 1. Launch the installed software on your system and the main interface select Create Project > New Project.
Step 2. Click on Import Media Files Here option under the Media tab to browse and add the local video file. Multiple files for batch processing can be added here.
Step 3. After the files are added, now it’s time to move them to the time and for this, you can simply drag and drop them to the bottom. Now at the timeline, using the built-in editing features, customization can be done as required.
Step 4. Finally, tap on the Export button and then choose GIF as the desired target format and also the location to save the converted files.
Conclusion
If one of the above-listed online tools serves your videos for GIF conversion purposes, it’s great. If not, you can use the Wondershare Filmora software. Once downloaded, the software can be used for several editing and other video-related tasks.
Also read:
- Updated 2024 Approved Do You Have a Sony Camera and Want to Try Different LUTs on Your Digital Content? Youre at the Right Place, as You Can Apply Sony HLG LUTs to Your Media
- Updated Competitive Guide To Use Slow Motion in After Effects
- In 2024, Discord Is Becoming More Popular with Time with Millions of Users. Are You Thinking of Getting a GIF for Discord Profile? If Yes, Learn From This Piece Since We Have a Conclusive Summary of Getting a GIF Profile Picture for Discord
- Updated In This Guidepost, Youll Learn What an HDRI Photo Is and How to Use the Best Free HDRI Program to Edit Photos. Youll Also Know the Difference Between HDR and HDRI
- New How to Create Cooking Video Intro and Outro for YouTube Channel, In 2024
- Updated Dollar-Store DIY Hacks to Use for Filmmaking for 2024
- Little Tricks to Make Canva Slideshow No One Is Telling You for 2024
- Updated 2024 Approved Bored of Extraneous Software Downloads and Program Installations to Edit Your Videos? The Best Video Editing Online Utilities Are Here at Your Rescue
- Updated In 2024, How to Choose A Nice GoPro for Vlogging?
- Updated Easy Steps to Slow Down a Video on iPhone and Android for 2024
- Updated If You Want to Record Video Streams on Windows or Mac Using FFmpeg, Read Our Guide and Learn How to Do This with Easy Step-by-Step Instructions for 2024
- How to Make Animated Text Video on Computer/iPhone/Android/Online
- New Learn Color Correction in After Effects with These YouTube Videos for 2024
- Updated 15 Must-Use Gifs Editors
- Updated Detailed Guide to Merge Videos in VLC Media Player for 2024
- New 2024 Approved Top 10 Online And PC Cartoon Video Maker 2022 For Beginner
- In 2024, Live Stream on YouTube Using Zoom
- 2024 Approved MP3 Cutter Download
- New 2024 Approved Top Free LUTs To Use in Shotcut An Overview
- New In 2024, Best Cloud Storage Service for Videos
- Updated In 2024, How to Change Video Thumbnail on Google Drive
- New 2024 Approved 10 Matching Color Combination That Works Together
- New Do You Have a Sony Camera and Want to Try Different LUTs on Your Digital Content? Youre at the Right Place, as You Can Apply Sony HLG LUTs to Your Media for 2024
- 2024 Approved How to Add Green Screen Effects In Phhotoshop
- Updated 2024 Approved The Best Way to Remove Audio From Your Videos
- New In 2024, Step by Step to Rotate Video Using KMPlayer
- New In 2024, How to Change Aspect Ratio of Video?
- In 2024, Learn How to Slow Down Time-Lapse Videos on Your iPhone to Make Detailed Slow-Motion Effects in Your Time-Lapse Captures
- Updated In 2024, 5 Tried-And-True Methods to GIF Making
- Updated How to Concatenate Videos Using FFmpeg
- Updated In 2024, How to Use Twixtor Effect to Add Slow-Motion Effect to Video?
- Updated How to Fade to Black Premiere Pro
- Updated Create Photoshop GIFs with Zero Hustle for 2024
- Updated In 2024, Create an Awesome Logo Reveal with Logo Intro Templates
- Top 10 Free WhatsApp Video Converter 2023 for 2024
- How to Create a Freeze Frame Sequence Effect for 2024
- Updated Discover How to Change Sky Background with The Best Applications? A Review
- 2024 Approved How to Take Slow Motion Videos
- Updated In 2024, Do You Want to Watch Videos in QuickTime with Subtitles in Your Desired Language? Here Are Different Ways to Add Subtitles in QuickTime Player
- New 2024 Approved For Artists Who Are Making Videos for Show Their Knowledge or Projects, Add some Effects for the Video Can Always Provoke Interests and Attention. This Article Will Show You How to Do that Easily
- Updated In 2024, To Closely Observe the Content on Screen, We Often Zoom in to Catch the Details. This Article Will Provide You with a Brief Note on How to Zoom in on YouTube Videos Quickly on Your Devices
- New In 2024, How to Choose A Nice GoPro for Vlogging?
- Updated 2024 Approved How to Add Subtitles in QuickTime Player?
- New Blender Green Screen Effects for 2024
- In 2024, How to Transfer Data from Honor Magic5 Ultimate to Other Android Devices? | Dr.fone
- In 2024, A Working Guide For Pachirisu Pokemon Go Map On Oppo Find X6 | Dr.fone
- Complete guide for recovering call logs on Realme C51
- Unlock Apple ID without Phone Number From Apple iPhone 15 Plus
- In 2024, 2 Ways to Transfer Text Messages from Infinix Note 30i to iPhone 15/14/13/12/11/X/8/ | Dr.fone
- Why Is My Oppo Find X7 Ultra Offline? Troubleshooting Guide | Dr.fone
- Catch or Beat Sleeping Snorlax on Pokemon Go For Google Pixel Fold | Dr.fone
- How To Erase Private Data From iPhone 15 Plus | Dr.fone
- Proven Ways in How To Hide Location on Life360 For Apple iPhone 13 Pro Max | Dr.fone
- Unlocking the Power of Smart Lock A Beginners Guide for Itel A05s Users
- 3 Ways for Android Pokemon Go Spoofing On Realme Narzo 60 5G | Dr.fone
- In 2024, How to Unlock T-Mobile Apple iPhone 15 Pro Max online without SIM Card?
- In 2024, Full Guide to Unlock iPhone X with iTunes
- Title: New 2024 Approved How to Make After Effects Gifs
- Author: Morgan
- Created at : 2024-05-19 05:12:57
- Updated at : 2024-05-20 05:12:57
- Link: https://ai-video-editing.techidaily.com/new-2024-approved-how-to-make-after-effects-gifs/
- License: This work is licensed under CC BY-NC-SA 4.0.
