

New 2024 Approved Start Making Procreate GIFs and Take Your Editing Creativity to the Next Level
Start Making Procreate GIFs and Take Your Editing Creativity to the Next Level
Easy Ways to Make Procreate GIFs
An easy yet powerful editor
Numerous effects to choose from
Detailed tutorials provided by the official channel
Stay tuned for a complete know-how into making Procreate GIFs.
In this article
01 [How Animation Works in Procreate](#Part 1)
02 [How to Make Animated Gifs in Procreate](#Part 2)
Part 1 How Animation Works in Procreate
GIFs are known to be the top ranked and most intuitive trendsetters in the world of infotainment and media service tools. Be it for fun or a targeted market influence, you can depend on GIFs for a variety of information solutions. Moving to the creative aspect, the experimentation belt with creating GIFs is huge. From making simple static and animated GIFs to creating professionally sound market promotion tools; you can play with your editing skills to extract just anything from these quick snippets.
Having said that, let’s take a dive into creating animated Procreate GIFs. Being a relatively new dimension of GIF editing, a merge of the two produces matchless and classic results. Read through the further article to get a complete guide for working on GIF creation and editing with Procreate.
● Underlying Concept
Before you begin creating a Procreate GIF, let’s get a bit familiar with the concept behind this GIF creation utility. This one is an excellent and advanced means of exploring your skills in digital drawing and animations. It is one of the easiest GIF maker software that helps you to become a pro in animation creativity even if you are beginner and for the ones already into the skill, Procreate is simply heaven.
Procreate allows you to work with animation in its ‘Animation Assist’ tool, where you get a generous workspace with the perfect editing canvas to experiment with a plethora of tools, effects and filters to create exciting GIFs with basic and complex animation craft.
The software allows frame-by-frame animation that refers to working with different frames of a particular illustration, while making minimal changes in each frame. Once you finish, your final creation gets played in a motion loop.
Part 1 How to Make Animated Gifs in Procreate
As is already stated, Procreate is among the most affordable GIF creator and editing software. Creating GIFs here is a few minute stuff within a span of counted steps. Let’s have a broader see through of the creation process. Take the following quick steps and get started to make your exclusive Procreate GIF:
● Step 1: Select an Artwork
Launch the software in your device to reach the Procreate welcome screen, where you need to select an existing static GIF to work on from your device. You can also create a fresh one if you like. Having done that, make a right swipe on the ‘Canvas’ icon and select ‘Duplicate’. This creates a copy of your artwork, preserving all of its layers, so that you are free to make changes or stick to the original one according to your preference.
If you want to use a specific section of your image to animate, you can use the crop tool to remove unwanted portions. Next, you need to put together the specific layers you wish to animate and also remove any unwanted layers you don’t want to use.

● Step 2: Enable Animation Assist Tool
From the Procreate tool gallery at the top, click on the ‘Wrench’ icon and select ‘Canvas’ from the ’Actions’ menu that drops down. In the interface that appears, enable the ‘Animation Assist’ tool with a right toggle. This will cause the ‘Animation Toolbar’ to appear at the bottom of the interface.

● Step 3: Add Frames and Make Image Adjustments
At this instant, you need to make additional adjustments in your selected image and create a copy of the image frames. To get this done, navigate to the ‘Animation Assist Toolbar’ and long press the ‘Add Frame’ button. A duplicate frame will now appear on the screen. Within this frame, you need to move the image elements that you wish to animate. To do this, select an element and drag it to a convenient spot of your choice.
While you go through with object movement, the software simultaneously shows you a semi-transparent preview of your creation through its unique ‘Onion-skin’ feature. You can enjoy playing your animation at this very stage, or continue to create something more exciting.
● Step 4: Enjoying? Let’s Continue.
Repeat Step 3 to create long and smooth GIFs with additional frames. Take caution to create a copy of your latest frame (not the original one), in case you need to make any adjustments later on. Consider playing your GIF to see if you need to add extra frames or implement further changes.
Step 5: Almost There.
You may notice a jerky movement of your final image frames. This is on account of the ‘Default Play’ feature of the Procreate software that initiates a run of your creation from the beginning to end and loops on the same fashion.
To set this right, navigate to the ‘Settings’ tool of the ‘Animation Assist Toolbar’ and tap ‘Ping-Pong’ on the opening interface. Your animated Gif will now play in a forward to backward loop, resulting in a smooth frame movement.
● Step 6: Time to Share.
Once you are happy with your artwork, you can share it across different media platforms. To export your creation, navigate to the Procreate tool gallery and tap the ‘Wrench’ icon and select ‘Share’. In the ‘Sharing Options’ menu, you will be asked to make a format selection. You can share your creation in either of the GIF, PNG or MP4 formats.
You may even require a size modification in the created file with respect to specific sharing platforms. You can either select a web compatible resolution to shrink your file, or create a copy of the file to resize the same.
Once you get familiar with Procreate and its GIF creation basics, you have the liberty to explore the huge effects library offered by the software to give your animated GIFs the classy, professional touch. So why wait? Just get the software and start a never ending spree of Procreating GIFs.
Procreate is undoubtedly an excellent tool for creating animated GIFs, but if you are looking for alternatives, another software to rely on is Wondershare Filmora Video Editor GIF creator.

Wondershare Filmora - Best Video Editor for Mac/Windows
5,481,435 people have downloaded it.
Build unique custom animations without breaking a sweat.
Focus on creating epic stories and leave the details to Filmora’s auto features.
Start a creative adventure with drag & drop effects and endless possibilities.
Filmora simplifies advanced features to save you time and effort.
Filmora cuts out repetition so you can move on to your next creative breakthrough.
● Filmora GIF Maker
Launched by Wondershare, this one is something you can blindly count upon for creating stunning animated GIFs from image and video files. Packed with tons of amazing features, Filmora is an inventory of audio-visual effects and filters that never runs out of fresh and appealing choices. Available to you as free and clean GIF generator software, this is easily compatible to almost any smart device. Working with Filmora will certainly make you admit that creating GIFs was never easier.

To start creating GIFs with this awesome tool, here’s what you need to do:
● Step 1: Import Necessary Media Files
Either a funny video or a group of stunning still images, you can choose any suitable media to make GIFs in Filmora. All you need to do is import the desired files from your PC or smartphone to the software’s timeline.
● Step 2: Timeline Dragging
Once you are done with importing the required files, you need to drag and drop the same to the ‘Editor Timeline’ of the GIF maker tool, where can improvise them to your heart’s content.

● Step 3: Time to Edit.
The Filmora effects library is simply heaven for the ones with creative instincts. Getting a liberty to browse and apply a glut of effects and filters, you are at the perfect place to create professionally sound and next level animated GIFs. Try hands on creating classy backgrounds with overlays, crop and trim clips to the perfect shot, make frame and time adjustments, add text to intensify your message, or pick up just anything you like, to create magic with your creativity.

● Step 4: Show it to the World.
When finally satisfied, save your artwork file to your device using the .gif extension and receive compliments from friends and peers by sharing it on your Instagram or other social media handles.

● Key Takeaways from This Episode →
● Animated GIFs are among the latest social media frenzy. These short, moving clips are nothing less than a complete entertainment roll-on. When it comes to creating animated GIFs, you can certainly take the Procreate software as a worthy choice.
● This one is a super easy and exciting means of working on animation GIFs that are by default, captivating for every onlooker. Talking of competing alternatives, you can trust on Wondershare Filmora, a handy, quick and clean solution to animated GIF creation.
Stay tuned for a complete know-how into making Procreate GIFs.
In this article
01 [How Animation Works in Procreate](#Part 1)
02 [How to Make Animated Gifs in Procreate](#Part 2)
Part 1 How Animation Works in Procreate
GIFs are known to be the top ranked and most intuitive trendsetters in the world of infotainment and media service tools. Be it for fun or a targeted market influence, you can depend on GIFs for a variety of information solutions. Moving to the creative aspect, the experimentation belt with creating GIFs is huge. From making simple static and animated GIFs to creating professionally sound market promotion tools; you can play with your editing skills to extract just anything from these quick snippets.
Having said that, let’s take a dive into creating animated Procreate GIFs. Being a relatively new dimension of GIF editing, a merge of the two produces matchless and classic results. Read through the further article to get a complete guide for working on GIF creation and editing with Procreate.
● Underlying Concept
Before you begin creating a Procreate GIF, let’s get a bit familiar with the concept behind this GIF creation utility. This one is an excellent and advanced means of exploring your skills in digital drawing and animations. It is one of the easiest GIF maker software that helps you to become a pro in animation creativity even if you are beginner and for the ones already into the skill, Procreate is simply heaven.
Procreate allows you to work with animation in its ‘Animation Assist’ tool, where you get a generous workspace with the perfect editing canvas to experiment with a plethora of tools, effects and filters to create exciting GIFs with basic and complex animation craft.
The software allows frame-by-frame animation that refers to working with different frames of a particular illustration, while making minimal changes in each frame. Once you finish, your final creation gets played in a motion loop.
Part 1 How to Make Animated Gifs in Procreate
As is already stated, Procreate is among the most affordable GIF creator and editing software. Creating GIFs here is a few minute stuff within a span of counted steps. Let’s have a broader see through of the creation process. Take the following quick steps and get started to make your exclusive Procreate GIF:
● Step 1: Select an Artwork
Launch the software in your device to reach the Procreate welcome screen, where you need to select an existing static GIF to work on from your device. You can also create a fresh one if you like. Having done that, make a right swipe on the ‘Canvas’ icon and select ‘Duplicate’. This creates a copy of your artwork, preserving all of its layers, so that you are free to make changes or stick to the original one according to your preference.
If you want to use a specific section of your image to animate, you can use the crop tool to remove unwanted portions. Next, you need to put together the specific layers you wish to animate and also remove any unwanted layers you don’t want to use.
● Step 2: Enable Animation Assist Tool
From the Procreate tool gallery at the top, click on the ‘Wrench’ icon and select ‘Canvas’ from the ’Actions’ menu that drops down. In the interface that appears, enable the ‘Animation Assist’ tool with a right toggle. This will cause the ‘Animation Toolbar’ to appear at the bottom of the interface.
● Step 3: Add Frames and Make Image Adjustments
At this instant, you need to make additional adjustments in your selected image and create a copy of the image frames. To get this done, navigate to the ‘Animation Assist Toolbar’ and long press the ‘Add Frame’ button. A duplicate frame will now appear on the screen. Within this frame, you need to move the image elements that you wish to animate. To do this, select an element and drag it to a convenient spot of your choice.
While you go through with object movement, the software simultaneously shows you a semi-transparent preview of your creation through its unique ‘Onion-skin’ feature. You can enjoy playing your animation at this very stage, or continue to create something more exciting.
● Step 4: Enjoying? Let’s Continue.
Repeat Step 3 to create long and smooth GIFs with additional frames. Take caution to create a copy of your latest frame (not the original one), in case you need to make any adjustments later on. Consider playing your GIF to see if you need to add extra frames or implement further changes.
Step 5: Almost There.
You may notice a jerky movement of your final image frames. This is on account of the ‘Default Play’ feature of the Procreate software that initiates a run of your creation from the beginning to end and loops on the same fashion.
To set this right, navigate to the ‘Settings’ tool of the ‘Animation Assist Toolbar’ and tap ‘Ping-Pong’ on the opening interface. Your animated Gif will now play in a forward to backward loop, resulting in a smooth frame movement.
● Step 6: Time to Share.
Once you are happy with your artwork, you can share it across different media platforms. To export your creation, navigate to the Procreate tool gallery and tap the ‘Wrench’ icon and select ‘Share’. In the ‘Sharing Options’ menu, you will be asked to make a format selection. You can share your creation in either of the GIF, PNG or MP4 formats.
You may even require a size modification in the created file with respect to specific sharing platforms. You can either select a web compatible resolution to shrink your file, or create a copy of the file to resize the same.
Once you get familiar with Procreate and its GIF creation basics, you have the liberty to explore the huge effects library offered by the software to give your animated GIFs the classy, professional touch. So why wait? Just get the software and start a never ending spree of Procreating GIFs.
Procreate is undoubtedly an excellent tool for creating animated GIFs, but if you are looking for alternatives, another software to rely on is Wondershare Filmora Video Editor GIF creator.
Wondershare Filmora - Best Video Editor for Mac/Windows
5,481,435 people have downloaded it.
Build unique custom animations without breaking a sweat.
Focus on creating epic stories and leave the details to Filmora’s auto features.
Start a creative adventure with drag & drop effects and endless possibilities.
Filmora simplifies advanced features to save you time and effort.
Filmora cuts out repetition so you can move on to your next creative breakthrough.
● Filmora GIF Maker
Launched by Wondershare, this one is something you can blindly count upon for creating stunning animated GIFs from image and video files. Packed with tons of amazing features, Filmora is an inventory of audio-visual effects and filters that never runs out of fresh and appealing choices. Available to you as free and clean GIF generator software, this is easily compatible to almost any smart device. Working with Filmora will certainly make you admit that creating GIFs was never easier.
To start creating GIFs with this awesome tool, here’s what you need to do:
● Step 1: Import Necessary Media Files
Either a funny video or a group of stunning still images, you can choose any suitable media to make GIFs in Filmora. All you need to do is import the desired files from your PC or smartphone to the software’s timeline.
● Step 2: Timeline Dragging
Once you are done with importing the required files, you need to drag and drop the same to the ‘Editor Timeline’ of the GIF maker tool, where can improvise them to your heart’s content.
● Step 3: Time to Edit.
The Filmora effects library is simply heaven for the ones with creative instincts. Getting a liberty to browse and apply a glut of effects and filters, you are at the perfect place to create professionally sound and next level animated GIFs. Try hands on creating classy backgrounds with overlays, crop and trim clips to the perfect shot, make frame and time adjustments, add text to intensify your message, or pick up just anything you like, to create magic with your creativity.
● Step 4: Show it to the World.
When finally satisfied, save your artwork file to your device using the .gif extension and receive compliments from friends and peers by sharing it on your Instagram or other social media handles.
● Key Takeaways from This Episode →
● Animated GIFs are among the latest social media frenzy. These short, moving clips are nothing less than a complete entertainment roll-on. When it comes to creating animated GIFs, you can certainly take the Procreate software as a worthy choice.
● This one is a super easy and exciting means of working on animation GIFs that are by default, captivating for every onlooker. Talking of competing alternatives, you can trust on Wondershare Filmora, a handy, quick and clean solution to animated GIF creation.
Splice App for Android - How to Download & Use
Create High-Quality Video - Wondershare Filmora
An easy and powerful YouTube video editor
Numerous video and audio effects to choose from
Detailed tutorials provided by the official channel
The ease of use and ready availability push most people to choose Android phones. Likewise, they are compatible with many devices, needing just a simple plug-and-play action. Besides, you can perform various actions with your Android device, like taking photos, capturing videos, and sharing them with friends.
You may also wish to combine your videos and compile a beautiful story. You also need to make your videos stand out and engage your viewers. Well, several apps are available to splice Android and make an interesting single video. Find how to use various apps in this article to splice your videos on Android.

In this article
01 Is Splice available on Android?
02 How to Use Splice for Android Video Editing
03Additional Video Splice Apps for Android
Is Splice available on Android?
Yes! The Android operating system can facilitate the splicing of videos. Even though it may not be available on some older versions by default, you can incorporate and install apps to use for Android splicing. By this, you’ll be able to add various effects to your videos, such as incorporating music, adding text, including titles, and other effects. You can also crop and trim your clip to a desirable play level. Nonetheless, you can use online methods to splice your videos instantly without installing any app.
This article proves that apart from using Splice video editor for Android, you can use other engaging apps to merge your videos. And it doesn’t end there!
Easily share your spliced clips on other platforms. To do this, ensure you set the output format and other settings to suit specific platforms like YouTube, WhatsApp, and Twitter. Check out the steps to follow to splice Android with various apps.
How to Use Splice for Android Video Editing
The Splice Video Editor is a powerful tool that is also easy to use. It suits on-the-go editing action, enabling you to capture and edit your videos without the need to transfer them to a computer. It also brings you various simple editing features like cropping, muting, adding audio, reversing video, merging, blurring, fast and slow motion, among many other effects.
More so, it will effectively convert your video into several output formats like MP3 and GIF. It works pretty fast, and you have a perfect chance to directly share your edited videos on media sites like Facebook, WhatsApp, Instagram, Twitter, and many others.
Step-by-step instructions for using the Splice app on Android to splice videos together
The Splice video editor for Android is at your reach to merge several videos in simple steps. And with the escalating rate of technology usage, Splice has just got you covered. You can use it for free with limited features. Follow these steps to splice the apk.
Step 1: Begin a new project
Ensure you have installed the Splice app for Android on your device. Once launched, go to the app screen and press the “+” button. You can then give your project a name before you continue with some other settings of the project. These include the transition selection, the orientation of the project, border options, etc. Next, click on the “Done” button to confirm your selections.

Step 2: Begin your project
Begin the creation of your project and choose the purpose of your video. Enter the title of your project, then continue to set room for your photos or videos. You can also set the text and zoom options.
Step 3: Insert your videos
Next, add the “+” button to the title’s right side. Likewise, add the video button to enable you to include the videos for splicing. You should notice the album screen opening up. Now, select the videos you wish to add to the project from the album screen. Ensure you put them in the order you want them to appear once sliced. Next, indicate the transition to be applied to your videos and wait for the chosen videos to be uploaded into the project. The Spice app allows you to view your project before exporting it.
Step 4. Edit and export
Most importantly, you should edit your video and make it splendid for your viewers. To do so, click on the “Pencil” button to unleash other editing options. Among the edits you can make include cropping, adjusting speed, trimming, and much more. Likewise, utilize the slider points to edit the start and endpoints of your video. You can also edit the audio and adjust the volumes where necessary.

Additional Video Splice Apps for Android
You can’t run out of options when it comes to splicing video. Here are some useful video splice apps for Android at your reach.
• Filmora
Filmora is suitable for mobile phone editing. It is rich in editing features to record, select a theme, apply effects, and easily share your video on other platforms. With this app, you can add animated text, adjust video color and brightness, customize watermarks, and much more. It is, however, slow and often crashes when dealing with larger files. Follow these steps to splice Android.
Step 1. Once successfully downloaded and installed, launch the app on your Android phone and select a built-in template to use.
Step 2. Then go to your Android gallery and choose the videos you wish to splice. Remember, you can add several clips for merging. Remember to load your videos in the order you wish them to appear in the spliced video.

Step 3. Merge the videos and then start to edit your video clips. You can trim, add filters, overlays, music, and much more. It is also important to add some background music to make your video engaging and attractive to your audience.
Step 4. The final step is to click on the “Export” tab to save your spliced video and share it on social media platforms. You can directly share your videos on YouTube, Facebook, and Twitter, among others.
• Vimeo Create
Vimeo supports mobile applications and can be used to splice Android. Sign up for the app on your Android, and launch it. Then follow these steps to merge the video.
Step 1. To begin splicing your video, select the “Start” button, then compose the main interface. Then go to the “Storyboard” and begin to choose the videos you wish to combine.

Step 2. Head on over to the “Style” area and choose one to use, then click on the “Next” button.
Step 3. Additionally, you can easily add background music to make it more engaging. Vimeo doesn’t allow you to add music from other sites. However, it brings you a rich catalog from which to choose any kind of music.

Step 4. Preview and export your video. You can see what your video looks like before sharing it. Use the “Preview” feature to check if your video is good enough or needs amendments. Next, select the “Save” option to save and share your video.
Conclusion
● It is worthwhile to produce quality and engaging videos for your audience. One aspect always stands out – combining the best videos for a detailed message. You have learned about the best splice video editor for Android to compose any kind of video. Besides, these apps let you edit your video by adding quality precepts, transitions, and other effects for a professional-looking piece./p>
The ease of use and ready availability push most people to choose Android phones. Likewise, they are compatible with many devices, needing just a simple plug-and-play action. Besides, you can perform various actions with your Android device, like taking photos, capturing videos, and sharing them with friends.
You may also wish to combine your videos and compile a beautiful story. You also need to make your videos stand out and engage your viewers. Well, several apps are available to splice Android and make an interesting single video. Find how to use various apps in this article to splice your videos on Android.
In this article
01 Is Splice available on Android?
02 How to Use Splice for Android Video Editing
03Additional Video Splice Apps for Android
Is Splice available on Android?
Yes! The Android operating system can facilitate the splicing of videos. Even though it may not be available on some older versions by default, you can incorporate and install apps to use for Android splicing. By this, you’ll be able to add various effects to your videos, such as incorporating music, adding text, including titles, and other effects. You can also crop and trim your clip to a desirable play level. Nonetheless, you can use online methods to splice your videos instantly without installing any app.
This article proves that apart from using Splice video editor for Android, you can use other engaging apps to merge your videos. And it doesn’t end there!
Easily share your spliced clips on other platforms. To do this, ensure you set the output format and other settings to suit specific platforms like YouTube, WhatsApp, and Twitter. Check out the steps to follow to splice Android with various apps.
How to Use Splice for Android Video Editing
The Splice Video Editor is a powerful tool that is also easy to use. It suits on-the-go editing action, enabling you to capture and edit your videos without the need to transfer them to a computer. It also brings you various simple editing features like cropping, muting, adding audio, reversing video, merging, blurring, fast and slow motion, among many other effects.
More so, it will effectively convert your video into several output formats like MP3 and GIF. It works pretty fast, and you have a perfect chance to directly share your edited videos on media sites like Facebook, WhatsApp, Instagram, Twitter, and many others.
Step-by-step instructions for using the Splice app on Android to splice videos together
The Splice video editor for Android is at your reach to merge several videos in simple steps. And with the escalating rate of technology usage, Splice has just got you covered. You can use it for free with limited features. Follow these steps to splice the apk.
Step 1: Begin a new project
Ensure you have installed the Splice app for Android on your device. Once launched, go to the app screen and press the “+” button. You can then give your project a name before you continue with some other settings of the project. These include the transition selection, the orientation of the project, border options, etc. Next, click on the “Done” button to confirm your selections.
Step 2: Begin your project
Begin the creation of your project and choose the purpose of your video. Enter the title of your project, then continue to set room for your photos or videos. You can also set the text and zoom options.
Step 3: Insert your videos
Next, add the “+” button to the title’s right side. Likewise, add the video button to enable you to include the videos for splicing. You should notice the album screen opening up. Now, select the videos you wish to add to the project from the album screen. Ensure you put them in the order you want them to appear once sliced. Next, indicate the transition to be applied to your videos and wait for the chosen videos to be uploaded into the project. The Spice app allows you to view your project before exporting it.
Step 4. Edit and export
Most importantly, you should edit your video and make it splendid for your viewers. To do so, click on the “Pencil” button to unleash other editing options. Among the edits you can make include cropping, adjusting speed, trimming, and much more. Likewise, utilize the slider points to edit the start and endpoints of your video. You can also edit the audio and adjust the volumes where necessary.
Additional Video Splice Apps for Android
You can’t run out of options when it comes to splicing video. Here are some useful video splice apps for Android at your reach.
• Filmora
Filmora is suitable for mobile phone editing. It is rich in editing features to record, select a theme, apply effects, and easily share your video on other platforms. With this app, you can add animated text, adjust video color and brightness, customize watermarks, and much more. It is, however, slow and often crashes when dealing with larger files. Follow these steps to splice Android.
Step 1. Once successfully downloaded and installed, launch the app on your Android phone and select a built-in template to use.
Step 2. Then go to your Android gallery and choose the videos you wish to splice. Remember, you can add several clips for merging. Remember to load your videos in the order you wish them to appear in the spliced video.
Step 3. Merge the videos and then start to edit your video clips. You can trim, add filters, overlays, music, and much more. It is also important to add some background music to make your video engaging and attractive to your audience.
Step 4. The final step is to click on the “Export” tab to save your spliced video and share it on social media platforms. You can directly share your videos on YouTube, Facebook, and Twitter, among others.
• Vimeo Create
Vimeo supports mobile applications and can be used to splice Android. Sign up for the app on your Android, and launch it. Then follow these steps to merge the video.
Step 1. To begin splicing your video, select the “Start” button, then compose the main interface. Then go to the “Storyboard” and begin to choose the videos you wish to combine.
Step 2. Head on over to the “Style” area and choose one to use, then click on the “Next” button.
Step 3. Additionally, you can easily add background music to make it more engaging. Vimeo doesn’t allow you to add music from other sites. However, it brings you a rich catalog from which to choose any kind of music.
Step 4. Preview and export your video. You can see what your video looks like before sharing it. Use the “Preview” feature to check if your video is good enough or needs amendments. Next, select the “Save” option to save and share your video.
Conclusion
● It is worthwhile to produce quality and engaging videos for your audience. One aspect always stands out – combining the best videos for a detailed message. You have learned about the best splice video editor for Android to compose any kind of video. Besides, these apps let you edit your video by adding quality precepts, transitions, and other effects for a professional-looking piece./p>
WMV File Format Has Many Benefits over the Video Industry. If You Are Excited to Know More About the Format and Its Pros and Cons, Then Let’s Start the Discussion
WMV is the default file format for Windows Media Player. It was developed as an alternative to the RealVideo codec for web streaming purposes. WMV can be streamed on the internet and played by various media players. YouTube allows the users to upload WMV file format content.
Now that you know this about WMV format, there are some more details to share, so let’s start. The article understudy will discuss everything in detail; buckle up!
In this article
02 Advantage and Disadvantage of WMV Video Format
03 Best MMV Video Editor - Wondershare Filmora
04 How to Edit WMV Video File?
05 WMV VS. MP4: What’s the Difference?
Part 1. What Is WMV File?
WMV file format is from a sequence of video codecs, and it was developed by Microsoft. The full abbreviation of WMV is ‘Windows Media Video.’ WMV is a compressed file container that was made for the Windows Media Framework. It is mainly used for the video content that is to be sold either online or through HD DVDs and Blu-ray Discs.

WMV format files support the encryption for the use with Digital Rights Management (DRM) systems, protecting the content from copywriting and any unlawful production. The WMV file may contain animation, high-definition videos, TV episodes, or video clips.
WMV compresses large files for better data transmission over a network while maintaining quality standards. It is specifically designed to run on all Windows devices. After standardization by the Society of Motion Pictures and Television Engineering (SMPTE), WMV is now considered to be an open standard format.
Part 2. Advantage and Disadvantage of WMV Video Format
Like everything, the WMV file format has its benefits and drawbacks, but not everyone knows much about them. The following section of this article will talk about the benefits and drawbacks; let’s get started!
Advantages of WMV Format
- WMV format is excellent for web videos as it acquires little disc memory space and thus takes less time in loading.
- The files are compressed and have reduced size; hence it is easy to transfer WMV file format via emails etc.
- The format is widely used on Windows and is suitable for storing short animations as well as compressed videos.
- Do you know anything about the compression ratio? Well, if we compare WMV to MPEG-4, WMV format has a 2x compression ratio.
- The format also works on the Web through Google Drive. Also, the quality of the video is maintained with Windows video format.
Disadvantages of WMV Format
- Although the small size is better but not, every application works with the tiny file size as offered by WMV format.
- If you are a Mac user and wish to play WMV files on your Mac, you need plugins like Flip4Mac.
Part 3. Best MMV Video Editor -Wondershare Filmora
Wondershare Filmora has always been on the top of the list whenever we talk about video editing. The software is used worldwide by professionals and also newbies. This is because Filmora provides an endless range of features that can create captivating videos. Let’s share a few features:
- Stabilize Video: Your video might be shaky, or maybe single footage can be shaky. Do you know a way to fix this? Try Stabilize Video feature from Filmora. This feature helps you to smooth all the shaky scenes in your video.
- Motion Tracking: In the editing world, Motion Tracking is the most fun type of feature. With this feature, you can move objects like text, audio, video, elements, etc., by tracking the movements in your video.
- Auto Highlight: Do you know a feature that will save your time and effort? It’s Auto Highlight. The feature spontaneously extracts the highlight from the clip and saves your video trimming time.
For Win 7 or later (64-bit)
For macOS 10.12 or later
Part 4. How to Edit WMV Video File?
For editing, Wondershare Filmora is an ideal software to use. Now that you know about Filmora and its stunning features, do you have any knowledge about how to use it? Well, don’t worry. We are here to guide you about how you can edit WMV file format videos in Filmora. Just follow the simple steps shared below:
Step 1: Get the Media File
Start by launching the software on your respective device. Once Filmora opens, you can import the media file by drag and drop. Or else, tap on the ‘File’ tab and move to the ‘Import Media’ option. From the submenu, select the ‘Import Media Files’ option to add the WMV format file.

Step 2: Head to Editor Timeline
You should know that editing is only possible when your file is on the timeline. For that, after a successful file import, simply drag and drop the media file to the timeline and let the fun begins.

Step 3: Add Video Effects
Once the file is in the timeline, start editing. You can add various video effects to your WMV video file from this section. You can get effects like Canvas, Cool Film, Four Seasons, etc., and can also add overlays, filters, etc.

Step 4: Use Title Template
Filmora offers you so many different and cool title templates. You only have to select the best template from the options. You can go for School Pack, Channel Subscribe, Romantic Pack, etc. Moreover, add Lower Thirds, Subtitles, Openers, and a lot more.

Step 5: Export the WMV File
After all the editing is complete, get the WMV format file exported to your device. For that, hit the ‘Export’ button and from the ‘Locals’ section, select your preferred output file format.

Part 5. WMV VS. MP4: What’s the Difference?
MP4 is far more popular than the WMV file format. The world is shifting on the internet; MP4 is widely used and loved online. On the other hand, WMV is popular with Windows users, along with DVD and Blu-ray collectors.
If we talk about the supported software for MP4 and WMV, MP4 has bigger support. WMV is supported by fewer video players and online video editing tools. On the contrary, MP4 is supported by all the video players available for both Windows and Mac users; along with that, every online tool also supports MP4 format for video editing.
Now the world demands quality. In terms of quality, MP4 has better quality than WMV. WMV has lost the battle of quality provision against WMV. MP4 is a larger file than WMV in terms of file size. It is less compressed than WMV format, but the compression gives WMV an advantage over MP4.
Having a compressed file format produces files of smaller size, which can be easily stored. Easy storage of video files makes WMV a better option in places where the quality of the video can be compromised.
Bottom Line
After reading this article, we hope that you have increased your knowledge regarding the WMV file format. We talked about the pros and cons of the WMV format. Moreover, we also shared ways to edit a WMV video with the best video editor, Wondershare Filmora.
Let’s tell you more about the video editing software. Wondershare Filmora is not just a Video Editor; it’s also an Audio Editor with various diverse features like Audio Denoise, Silence Detection, etc. The software is easy to use with a drag and drop facility. You can create and edit stunning videos with the multi-track editor.
For Win 7 or later (64-bit)
For macOS 10.12 or later
02 Advantage and Disadvantage of WMV Video Format
03 Best MMV Video Editor - Wondershare Filmora
04 How to Edit WMV Video File?
05 WMV VS. MP4: What’s the Difference?
Part 1. What Is WMV File?
WMV file format is from a sequence of video codecs, and it was developed by Microsoft. The full abbreviation of WMV is ‘Windows Media Video.’ WMV is a compressed file container that was made for the Windows Media Framework. It is mainly used for the video content that is to be sold either online or through HD DVDs and Blu-ray Discs.
WMV format files support the encryption for the use with Digital Rights Management (DRM) systems, protecting the content from copywriting and any unlawful production. The WMV file may contain animation, high-definition videos, TV episodes, or video clips.
WMV compresses large files for better data transmission over a network while maintaining quality standards. It is specifically designed to run on all Windows devices. After standardization by the Society of Motion Pictures and Television Engineering (SMPTE), WMV is now considered to be an open standard format.
Part 2. Advantage and Disadvantage of WMV Video Format
Like everything, the WMV file format has its benefits and drawbacks, but not everyone knows much about them. The following section of this article will talk about the benefits and drawbacks; let’s get started!
Advantages of WMV Format
- WMV format is excellent for web videos as it acquires little disc memory space and thus takes less time in loading.
- The files are compressed and have reduced size; hence it is easy to transfer WMV file format via emails etc.
- The format is widely used on Windows and is suitable for storing short animations as well as compressed videos.
- Do you know anything about the compression ratio? Well, if we compare WMV to MPEG-4, WMV format has a 2x compression ratio.
- The format also works on the Web through Google Drive. Also, the quality of the video is maintained with Windows video format.
Disadvantages of WMV Format
- Although the small size is better but not, every application works with the tiny file size as offered by WMV format.
- If you are a Mac user and wish to play WMV files on your Mac, you need plugins like Flip4Mac.
Part 3. Best MMV Video Editor -Wondershare Filmora
Wondershare Filmora has always been on the top of the list whenever we talk about video editing. The software is used worldwide by professionals and also newbies. This is because Filmora provides an endless range of features that can create captivating videos. Let’s share a few features:
- Stabilize Video: Your video might be shaky, or maybe single footage can be shaky. Do you know a way to fix this? Try Stabilize Video feature from Filmora. This feature helps you to smooth all the shaky scenes in your video.
- Motion Tracking: In the editing world, Motion Tracking is the most fun type of feature. With this feature, you can move objects like text, audio, video, elements, etc., by tracking the movements in your video.
- Auto Highlight: Do you know a feature that will save your time and effort? It’s Auto Highlight. The feature spontaneously extracts the highlight from the clip and saves your video trimming time.
For Win 7 or later (64-bit)
For macOS 10.12 or later
Part 4. How to Edit WMV Video File?
For editing, Wondershare Filmora is an ideal software to use. Now that you know about Filmora and its stunning features, do you have any knowledge about how to use it? Well, don’t worry. We are here to guide you about how you can edit WMV file format videos in Filmora. Just follow the simple steps shared below:
Step 1: Get the Media File
Start by launching the software on your respective device. Once Filmora opens, you can import the media file by drag and drop. Or else, tap on the ‘File’ tab and move to the ‘Import Media’ option. From the submenu, select the ‘Import Media Files’ option to add the WMV format file.
Step 2: Head to Editor Timeline
You should know that editing is only possible when your file is on the timeline. For that, after a successful file import, simply drag and drop the media file to the timeline and let the fun begins.
Step 3: Add Video Effects
Once the file is in the timeline, start editing. You can add various video effects to your WMV video file from this section. You can get effects like Canvas, Cool Film, Four Seasons, etc., and can also add overlays, filters, etc.
Step 4: Use Title Template
Filmora offers you so many different and cool title templates. You only have to select the best template from the options. You can go for School Pack, Channel Subscribe, Romantic Pack, etc. Moreover, add Lower Thirds, Subtitles, Openers, and a lot more.
Step 5: Export the WMV File
After all the editing is complete, get the WMV format file exported to your device. For that, hit the ‘Export’ button and from the ‘Locals’ section, select your preferred output file format.
Part 5. WMV VS. MP4: What’s the Difference?
MP4 is far more popular than the WMV file format. The world is shifting on the internet; MP4 is widely used and loved online. On the other hand, WMV is popular with Windows users, along with DVD and Blu-ray collectors.
If we talk about the supported software for MP4 and WMV, MP4 has bigger support. WMV is supported by fewer video players and online video editing tools. On the contrary, MP4 is supported by all the video players available for both Windows and Mac users; along with that, every online tool also supports MP4 format for video editing.
Now the world demands quality. In terms of quality, MP4 has better quality than WMV. WMV has lost the battle of quality provision against WMV. MP4 is a larger file than WMV in terms of file size. It is less compressed than WMV format, but the compression gives WMV an advantage over MP4.
Having a compressed file format produces files of smaller size, which can be easily stored. Easy storage of video files makes WMV a better option in places where the quality of the video can be compromised.
Bottom Line
After reading this article, we hope that you have increased your knowledge regarding the WMV file format. We talked about the pros and cons of the WMV format. Moreover, we also shared ways to edit a WMV video with the best video editor, Wondershare Filmora.
Let’s tell you more about the video editing software. Wondershare Filmora is not just a Video Editor; it’s also an Audio Editor with various diverse features like Audio Denoise, Silence Detection, etc. The software is easy to use with a drag and drop facility. You can create and edit stunning videos with the multi-track editor.
For Win 7 or later (64-bit)
For macOS 10.12 or later
How To Fade Audio In Kinemaster
If you have been looking for video and audio editing tools then you have probably heard of Kinemaster. It is a great video editing app that allows users to edit all aspects of the video including any audio or music that may accompany the video. It has a lot of very useful features and the user interface is fairly easy to use.
One of the things that you can do with Kinemaster is to fade out audio, a useful feature that can help the ending of any video appear more authentic. In this article, we will be looking at how you can use Kinemaster to fade audio.
Kinemaster Fade Audio Steps
The following steps show you how you can easily fade audio in Kinemaster;
Step1If you don’t have Kinemaster already, start by downloading and installing the video editor on your computer.
Step2Open Kinemaster on your computer and then click on the “New Project” icon to start. Select the aspect ratio that you would like to use. If you are not sure, we recommend choosing the “16:9” aspect ratio.
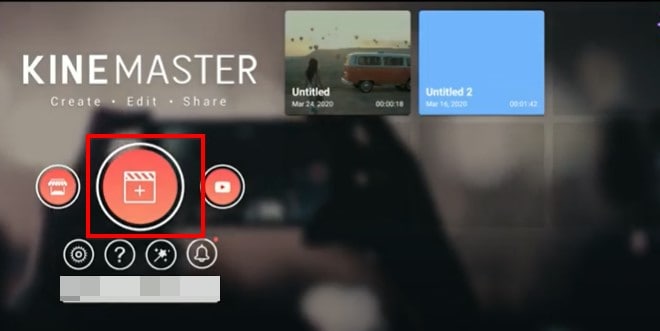
Step3In the next window, click on “Media” to select the clip you would like to add to the Kinemaster project that you have just created.
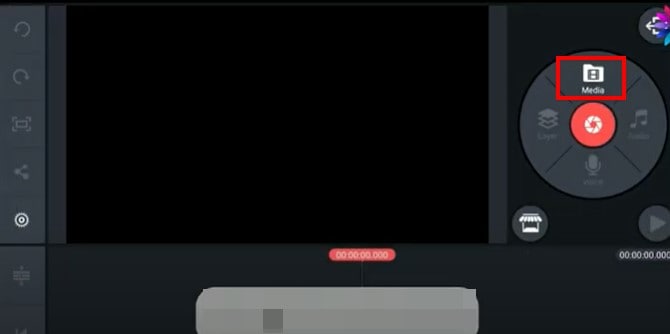
Step4To fade in and fade out the audio in the project, click on the gear icon from the options to the left of the screen.
![]()
Step5Select the “Audio” tab on the next screen and then turn on the switch next to “Audio Fade-in (Start of Project)” and “Audio Fade-out (End of Project).” This will add a fade-in and fade-out effect at the beginning of the audio and at the end of it.
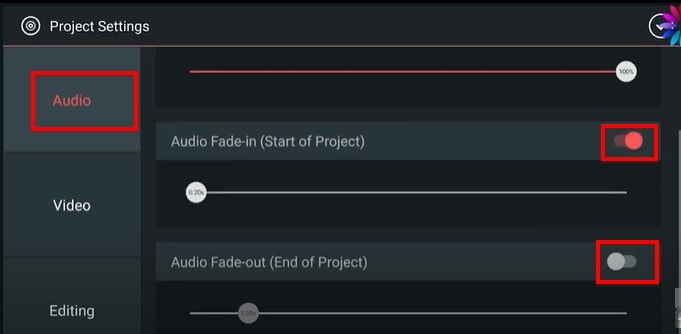
Step6You can then easily set the duration of the “Audio fade-in” and “Audio fade-out” by dragging the slider below each option. We recommend setting the duration to just a few seconds.
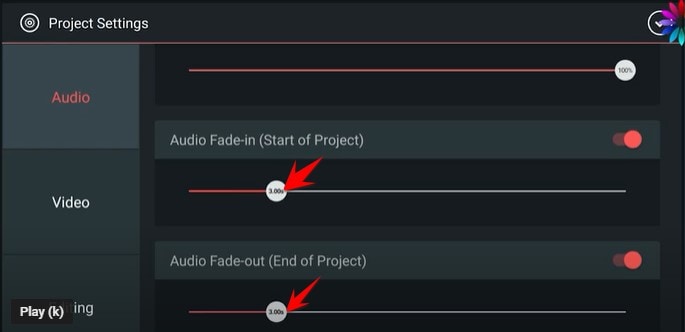
Don’t forget to save the project when you’re done.
Kinemaster Alternative to Edit Audio
Kinemaster is a good way to edit both audio and video on your computer, but the following options are just as good;
1. VideoShop
VideoShop is a simple to use and highly effective program that you can use to create and edit videos on your computer. The interface makes it easy to import any video project that you have into the program and the wealth of very useful features can help you edit the video in various ways.
For example, you can change the speed of the video, add transitions at various points in the video, add and remove text, add and remove music and so much more. Although there is a free trial version, you will only be able to access some of the more useful features when you purchase the premium version.
The Pro version of VideoShop goes for $3.99 a month, but you can get lifetime access to the program for only $39.99. One thing that VideoShop has over Kinemaster is that it is very easy to use, even beginner users find video editing a breeze with this tool.
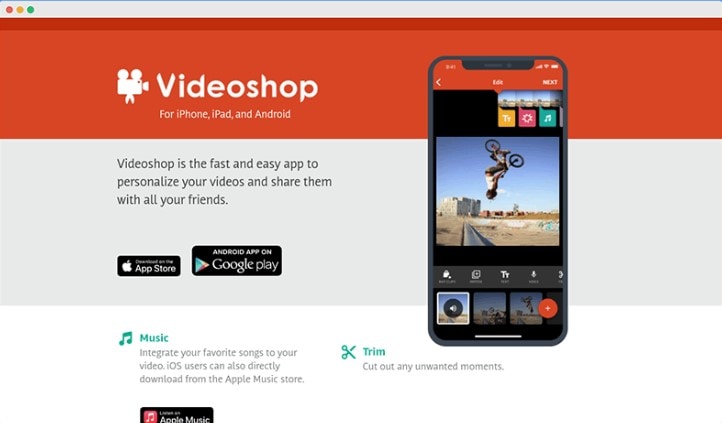
2. Filmora
If you are looking for a simple way to edit videos on Android or iOS devices, Filmora is one of the best options in the market. This mobile version of the very popular Filmora video editor is just as easy to use as its parent program. You can use it to create video projects from scratch or upload a video and make changes to it.
It offers you a lot of choices when it comes to editing features including trimming sections of the video, adding filters, adding music, adding or removing text, and even changing the canvas or the background of the video. Advanced options such as changing the speed of the video are also available.
One of the things that we love about Filmora is that you don’t even have to create an account to use it or remove the watermark added to the completed video project, watching a video ad can be enough. But this option is only available once every 24 hours, meaning that you can only remove a watermark on the free version once a day. Filmora is available for both iOS and Android and the yearly premium plan will cost you just $19.90.
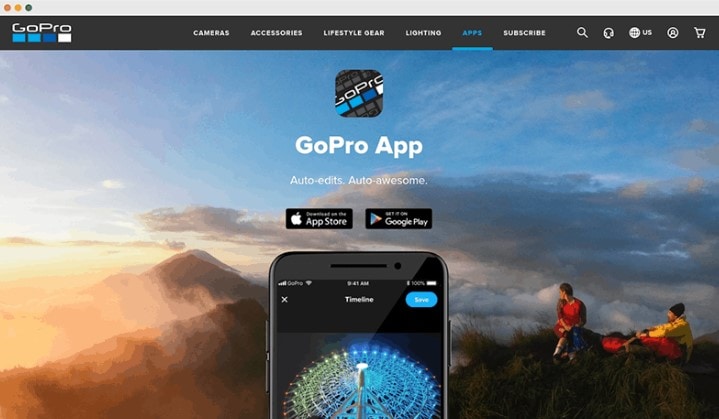
3. Quik
Quik is a video editing program created by GoPro for the purpose of editing GoPro videos, but that doesn’t mean that you will not be able to use it to edit other types of videos. You can use Quik to create a new project or edit an existing video and gives users a lot of different options when it comes to video editing.
One of the main benefits of using Quik is that you can easily add music, audio, and special effects to a video as well as change the length of the video, fade audio in and out and even change when the music starts. It is also one of the best ways to use images to create collages and slideshows very easily. There are a lot of slideshow and collage templates to choose from, and you can edit them easily by adding your music and images. Quik is completely free to use and you can upload your creation to the cloud ad share the link with others.
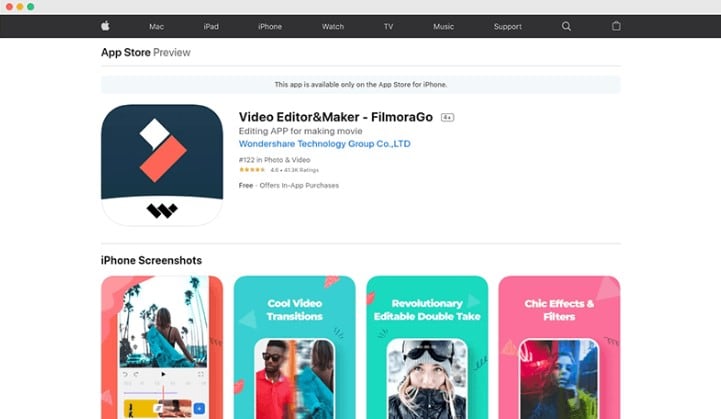
Conclusion
Kinemaster is one of the most popular video editing tools, especially since it simplifies the video editing process to make it very easy. All the alternative tools we have outlined here in this article are selected because they can make video editing quite simple.
Free Download For Win 7 or later(64-bit)
Free Download For macOS 10.14 or later
Also read:
- New Templates Increase the Editing Possibilities for Beginners and Professionals. Read This Article to Learn About some Customizable Slow-Motion CapCut Templates
- Updated Best 15 Subtitle Apps 2023 Windows, Mac, iPhone, Android & Online for 2024
- 2024 Approved How to Use Lumetri Color in Adobe After Effects
- Updated 2024 Approved 8 Tips to Apply Cinematic Color Grading to Your Videos
- Updated 2024 Approved Looking for the Best Quiz-Making Tools? Read Our Full Review to Find Out the 10 Best Video Quiz Makers Available
- New Before & After Editing Trick - Filmora for 2024
- 2024 Approved This Post Will Make You Learn Anything and Everything About Animated GIFs, the Ways to Use Cool Gifs in My Marketing, and How to Create Unique Custom Animated Gifs
- In 2024, Replacing Sky in Your Pictures Using Online and Offline Tools
- Updated Split a Video in the Lightworks Step by Step for 2024
- New Replacing the Sky in Adobe After Effects An Extensive Guide for 2024
- A Review On 3D LUT Creator
- New How to Add a Lower Third to Your Video for 2024
- Updated LumaFusion – What Is It and the Best Alternative to Use
- Updated In 2024, Ll About GIF Keyboard That You Want to Know
- 2024 Approved How to Add Subtitles to MKV Videos on All Platforms
- This Article Will Show You How to Make a Tattoo Disappear on Your Body Magically for 2024
- 2024 Approved Top 11 Best Video Editing Apps for iPhone
- In 2024, How to Bypass Google FRP Lock from Samsung Galaxy A14 4G Devices
- How to Stream Apple iPhone 11 Pro Video to Computer? | Dr.fone
- 8 Solutions to Solve YouTube App Crashing on Infinix Smart 8 Plus | Dr.fone
- In 2024, CatchEmAll Celebrate National Pokémon Day with Virtual Location On Vivo V30 Pro | Dr.fone
- 3 Ways to Fake GPS Without Root On Xiaomi 14 | Dr.fone
- How To Free Up Apple iPhone 15 Pro Max Space | Dr.fone
- How to Stop Life360 from Tracking You On Oppo Reno 11 5G? | Dr.fone
- Will MOV files play on Xiaomi Redmi K70E ?
- Best Android Data Recovery - Retrieve Lost Contacts from Tecno Camon 20 Pro 5G.
- Top 4 Android System Repair Software for Oppo A1 5G Bricked Devices | Dr.fone
- What are Location Permissions Life360 On Samsung Galaxy A05s? | Dr.fone
- In 2024, Pokemon Go Error 12 Failed to Detect Location On Realme 11 Pro+? | Dr.fone
- In 2024, Troubleshooting Error Connecting to the Apple ID Server From Apple iPhone SE
- How To Track IMEI Number Of Samsung Galaxy A15 5G Through Google Earth?
- A Quick Guide to Huawei Nova Y91 FRP Bypass Instantly
- Title: New 2024 Approved Start Making Procreate GIFs and Take Your Editing Creativity to the Next Level
- Author: Morgan
- Created at : 2024-06-08 08:36:42
- Updated at : 2024-06-09 08:36:42
- Link: https://ai-video-editing.techidaily.com/new-2024-approved-start-making-procreate-gifs-and-take-your-editing-creativity-to-the-next-level/
- License: This work is licensed under CC BY-NC-SA 4.0.
