
:max_bytes(150000):strip_icc():format(webp)/full-frame-shot-of-speakers-1138109687-33289baddc314b44ae87abc2fc8060cd-e7bccad6d81244509ed97ddf557f89e4.jpg)
New 2024 Approved Time Lapse Video Is Very Interesting and Creative, Which Usually Attracts More Attention. This Article Will Show You How to Make a Time Lapse Video with Adobe After Effects
Time Lapse Video Is Very Interesting and Creative, Which Usually Attracts More Attention. This Article Will Show You How to Make a Time Lapse Video with Adobe After Effects
Time-Lapse movies are great for a variety of projects; you can use them as establishing shots in sitcoms, corporate marketing videos, and they can make lovely backgrounds for animated slideshows. A time-lapse video is essentially a series of photographs taken at regular intervals to depict how the environment changes gradually over a shorter period of time. In this article, we’ll demonstrate how you may quickly and easily build an After Effects time-lapse effect.
With that said, let’s start!
Step 1. Create a new composition
Calculating your composition length to accommodate the frame rate and number of images is the first step in generating a time-lapse video.
- Verify the number of images you have for your Sequence.
- New Composition Creation. Selecting a frame rate: A time lapse film produced at 30 frames per second will flow smoothly, but you can select any frame rate you like.
- To determine the duration of your composition, divide the number of photographs you have by the frame rate you’ve chosen. For instance, if you use 600 photos at 30 frames per second, your composition will last 20 seconds.
Step 2. Import your images
You are prepared to make a time-lapse sequence if all of your photographs are saved to the same folder and are in the same order. If you are working directly from your Camera, you will likely have Camera Raw files, although this procedure works with PNG and JPEG sequences.
- Press Command/Control I on your keyboard or select File > Import. Find the folder holding your image sequence.
- To begin, select the first picture in the sequence. If all of your images have accurate names, After Effects will be able to identify a sequence of images.
- Make sure the Force Alphabetical Order and Camera Raw Sequence checkboxes are selected. Your Time-Lapse Sequence will display in the Project Browser Panel after you click Import.
- Once you’ve watched how it plays, you can adjust the Frame Rate by right-clicking the Sequence in the Project Browser and selecting Interpret Footage > Main.
- To update your time-lapse, modify the Frame Rate setting and click OK.

Step 3. Create movements
- After Effects’ Time-Lapse Sequence can be used just like any other standalone clip. This implies that you may give your time-lapse clip movement by adding Keyframes and Effects.
- Place your Playhead at the beginning of the clip after choosing the Image Sequence. Make a keyframe for the scale or position.
- To generate a second Keyframe for the value of your choice, move to the end of the clip. Make any necessary Clip modifications.
- Right-click on the timeline, choose New > Adjustment Layer, then add your effects to the Adjustment Layer to add effects like noise and grain.
Step 4. Create slow motion from a video
You can import your video after you’ve shot it to prepare it for editing. The same steps, including naming your photos in order, must be taken for the Time Lapse sequence. It may be advantageous to entirely rename both your Image Sequence and Performer clip.
- Drag the finished Time Lapse sequence to your Timeline after completing it as previously explained.
- Over the Time Lapse, add the Performer Clip to the Timeline.
- Choose Time>Time Stretch by performing a right-click on the performer clip.
- You can alter the Stretch Factor or Duration in the dialogue box. When you alter one parameter, the other will reflect the new Stretch Factor or Duration for you.
Step 5. Make an overlay
You can alter the Stretch Factor or Duration in the dialogue box. When you alter one parameter, the other will reflect the new Stretch Factor or Duration for you.
- Find Luma Key in the Effect Control Panel and drag it to your clip.
- Change the Key Type setting in the Effect Control Panel to Key Out Brighter.
- The Threshold, Tolerance, and Edge settings should be adjusted until only the silhouette is visible.
- Use the Pen or Mask Tool to create a circle around the parts you want to delete if you discover any corners of your clip that are still visible.
- Add any Effects, such as Light Leaks, to your Adjustment Layer by choosing “Right-click > New > Adjustment layer.”

After Effects CC must be opened, a new project must be created, the Import File menu option must be selected, and the appropriate folder containing the altered still images must be located and selected before the time-lapse photos can be turned into a film. You need to make sure that the JPEG Series box is checked, as well as the Force Alphabetical Order box.
Once you have clicked on the first image in the sequence. The time-lapse video that you uploaded appears in the project library. After performing a right-click on the filename, select “New Comp from Selection” from the context menu.
Step 6. Exporting your video
After getting our sequence to perform some kind of slow, understated animation so that it appears as though the camera is moving dramatically, we will need to export a video file. Go to File > Export > Add to Render Queue, then open the Render Queue dialog box by going to Window > Render Queue. From there, you can choose the Output Module and change the settings in the options dialog box. Finally, choose the Output To option and select the location on your computer where you would like to save the video clip that we are currently rendering and exporting.

Conclusion
No matter how you make your time lapse videos, After Effects has a ton of features you can use to modify and enhance the way they look. Now that you are familiar with the fundamentals, you can play with the Frame Rates and Composition options. Check out this helpful manual for more information on Time Stretching and Remapping in After Effects.
Free Download For Win 7 or later(64-bit)
Free Download For macOS 10.14 or later
Free Download For macOS 10.14 or later
How to Make A Funny Vlog for TikTok?
TikTok has been among the few social media platforms that have gained an exponential following in a truly short time. Regardless of this stunted digital environment, the platform made its statement of becoming part of the all-time greats.
TikTok became known as a short-video platform that influenced the making of funny vlogs. If you are interested in making a funny vlog, you are at the right place.
In this article
01 Ideas for Creating A Funny Vlog for TikTok
02 5 Popular Funny Vloggers on TikTok
Part 1: Ideas for Creating A Funny Vlog for TikTok
When creating a funny vlog across TikTok, there are numerous ideas that one can think of. However, since TikTok videos are of small lengths, achieving diversity is difficult yet possible. You’ll surely get your break if you understand the following ideas for creating a funny vlog.

React to Other Videos
While it may seem the most mainstream style of creating funny content across TikTok, it is also the most effective way of making people laugh while watching your video. This will also bring recurring viewers across your channel.
Display Failure Videos
It is always great to see people trying and doing something funny across the video. Failure videos are believed to be the other way of creating content for a funny vlog on your TikTok, which shall make people laugh hard.
Use Goofy and Peculiar Voices
Unrealistic and weird voices can make your short video seem funny. If you consider talking about something in a silly voice, it will make people burst out of laughter.
Trolling Family Members
One of the best ways to make something good out of TikTok is creating candid moments. This can always be done if you troll or prank your family members out of nowhere. Just keep reminding that you have to ensure no one gets injured due to it.
Impersonations
Making impersonated videos of major celebrities is another way of showing funny content to the viewers on TikTok. If you consider some funny examples for this, it will surely bring you effective results.
Make Puns and Funny Statements
Another great way to create a funny vlog for your TikTok is to be good at making puns. This is purely hilarious content and needs someone to be highly great in it.
Physical Challenges
This can be a bit risky, but it can become quite fun to make and show to the world if executed with care. However, this can be conducted individually or in a group of people, as you find it appropriate.
Use Effects of TikTok
TikTok makes sure to provide something funny in effects to its users. The use of effects for TikTok is an excellent technique to make funny vlogs; however, it can get funny if the elements used across it have a dubious meaning.
Run Everything in Reverse
One of the most straightforward techniques to make a funny vlog is to run everything in reverse order. The simplest thing of a video becomes the funniest to watch.
Part 2: 5 Popular Funny Vloggers on TikTok
This part will provide some popular examples of TikTokers who have made a considerate performance in providing funny content to people across the platform.
Khaby Lame
This is, without a doubt, the first-choice in TikTok accounts that would always come while relating to funny content. Khaby started his journey as a TikToker with a remarkably simple motive of pointing out the simplicity in different tasks, which were displayed to be difficult. Although it sounds pretty basic, the technique taken by Khaby has been so considerate it brought him millions of followers for creating funny content.

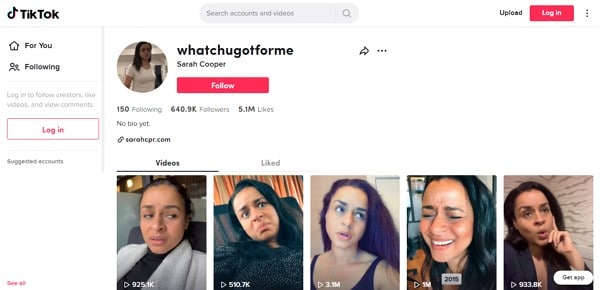
Sarah Cooper
Want to see a great impersonation of Donald Trump? It is undoubtedly great to see every time. With Sarah Cooper, it just becomes an entirely different story. Her impersonation has been so perfect that she has been referred to as one of the best funny vloggers on TikTok. Her likes across the platform may not be that great, but she has shown some stature in presenting funny content in a great way.
Dobre Twins
This twin duo is known across many social media platforms for its funny content. As the twins started using TikTok, they started creating good funny vlogs, which gained quite the traction for them. Their unique ideas to present different things have presented the following worth 23 million likes across TikTok, which is quite commendable. However, Lucas and Marcus are only known to operate this TikTok account.

Image alt: dobre twins funny tiktoker
Brittany Broski
Quite a few TikTokers actually make funny videos with impressive comedy. Brittany Broski is a celebrity in this genre, where she has taken great use of her comedy skills to present great vlogs with different and unique topics. Her take on comedy is entirely different, which makes her funny vlog unique and better than others.

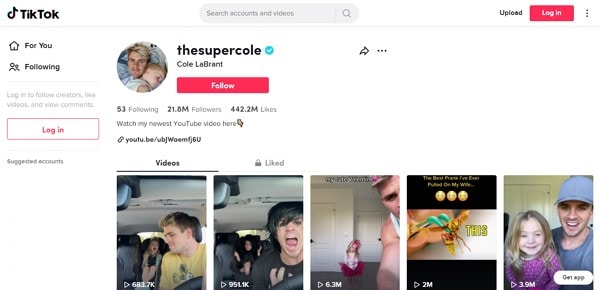
Cole LeBrant
This TikToker makes a good collection of funny vlogs across his account with his family. The variety and variability in his videos make him a different version of fun compared to other TikTokers. He has built a great reach across the account, which makes him an impressive choice.
Part 3: How to Make a Funny Vlog?
Funny vlogs are a fabulous way to interact with people of different tastes. It can be something that cherishes the moods of the viewers, regardless of their current emotions. To make this happen, you need a good platform that helps you create a video for your viewers to watch. Wondershare Filmora fulfills the needs of a video editor by providing you with the perfect options while editing the video for TikTok.
For Win 7 or later (64-bit)
For macOS 10.12 or later
If you are looking forward to understanding how to create a funny vlog for your TikTok using Filmora, you need to follow a set of simple steps. These are shown as follows:
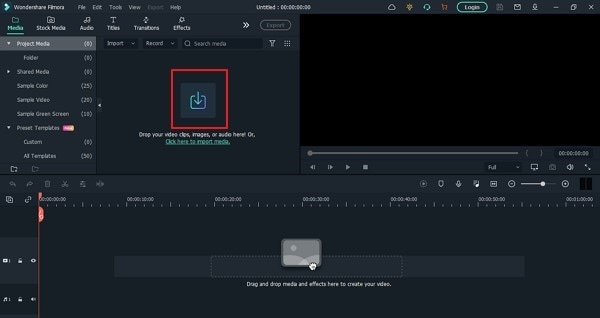
Step 1: Launch and Import Video
To start, you need to have Wondershare Filmora installed across your device. Launch the tool and click on “New Project” to start from scratch. Once the screen opens up, you need to click on the “Arrow Head” icon across the ‘Media’ Tab to import the audio you wish to amend for TikTok.
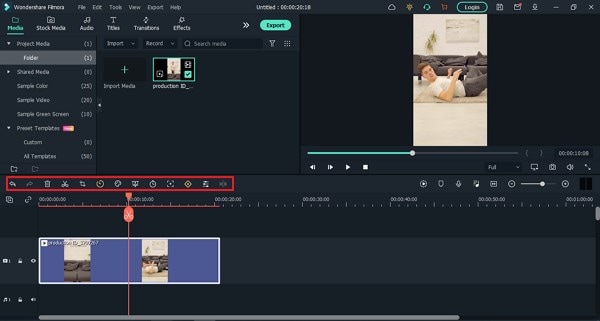
Step 2: Perform Basic Editing
Wondershare Filmora provides users with multiple options for editing their files. At first, drag the file onto the timeline. Following this, you can merge different videos or enhance the video by trimming it. Along with that, you can also consider splitting the image or changing its playback speed for different results.
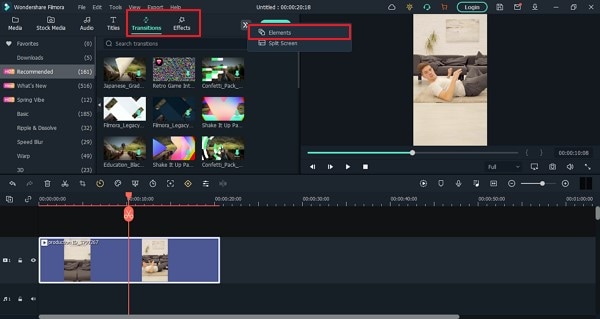
Step 3: Add Effects and Transitions
After you are done with some basic editing, you can add different effects from the “Effects” section. To make the video look exclusive, you can also include “Transitions” across it. Use the “Elements” tab to include stickers and emojis to enhance your TikTok video.
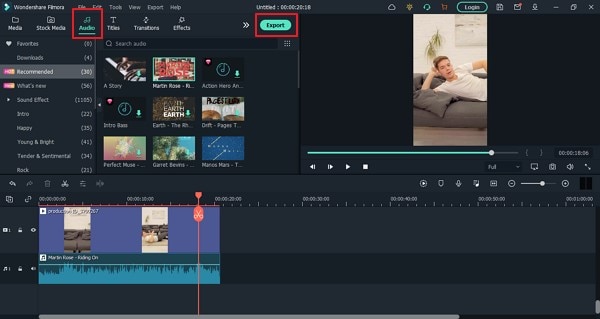
Step 4: Manage the Audio
For managing the audio of your video, you can make several changes across it. You can detach audio and change the audio with another soundtrack. Filmora also allows you to add audio from the “Audio” section, which contains royalty-free music to add. Once you are done, click on the “Export” button to set the settings of the video before exporting it back onto the device.
Closing Words
This article has presented some of the finest tips that can be utilized for creating funny vlogs on your TikTok. If you coherently use these tips, you can get significant results across your account in the name of the followers. Along with that, you can also use Filmora for making the best funny vlog with different editing tools.
Wondershare Filmora
Get started easily with Filmora’s powerful performance, intuitive interface, and countless effects!
Try It Free Try It Free Try It Free Learn More >

02 5 Popular Funny Vloggers on TikTok
Part 1: Ideas for Creating A Funny Vlog for TikTok
When creating a funny vlog across TikTok, there are numerous ideas that one can think of. However, since TikTok videos are of small lengths, achieving diversity is difficult yet possible. You’ll surely get your break if you understand the following ideas for creating a funny vlog.
React to Other Videos
While it may seem the most mainstream style of creating funny content across TikTok, it is also the most effective way of making people laugh while watching your video. This will also bring recurring viewers across your channel.
Display Failure Videos
It is always great to see people trying and doing something funny across the video. Failure videos are believed to be the other way of creating content for a funny vlog on your TikTok, which shall make people laugh hard.
Use Goofy and Peculiar Voices
Unrealistic and weird voices can make your short video seem funny. If you consider talking about something in a silly voice, it will make people burst out of laughter.
Trolling Family Members
One of the best ways to make something good out of TikTok is creating candid moments. This can always be done if you troll or prank your family members out of nowhere. Just keep reminding that you have to ensure no one gets injured due to it.
Impersonations
Making impersonated videos of major celebrities is another way of showing funny content to the viewers on TikTok. If you consider some funny examples for this, it will surely bring you effective results.
Make Puns and Funny Statements
Another great way to create a funny vlog for your TikTok is to be good at making puns. This is purely hilarious content and needs someone to be highly great in it.
Physical Challenges
This can be a bit risky, but it can become quite fun to make and show to the world if executed with care. However, this can be conducted individually or in a group of people, as you find it appropriate.
Use Effects of TikTok
TikTok makes sure to provide something funny in effects to its users. The use of effects for TikTok is an excellent technique to make funny vlogs; however, it can get funny if the elements used across it have a dubious meaning.
Run Everything in Reverse
One of the most straightforward techniques to make a funny vlog is to run everything in reverse order. The simplest thing of a video becomes the funniest to watch.
Part 2: 5 Popular Funny Vloggers on TikTok
This part will provide some popular examples of TikTokers who have made a considerate performance in providing funny content to people across the platform.
Khaby Lame
This is, without a doubt, the first-choice in TikTok accounts that would always come while relating to funny content. Khaby started his journey as a TikToker with a remarkably simple motive of pointing out the simplicity in different tasks, which were displayed to be difficult. Although it sounds pretty basic, the technique taken by Khaby has been so considerate it brought him millions of followers for creating funny content.
Sarah Cooper
Want to see a great impersonation of Donald Trump? It is undoubtedly great to see every time. With Sarah Cooper, it just becomes an entirely different story. Her impersonation has been so perfect that she has been referred to as one of the best funny vloggers on TikTok. Her likes across the platform may not be that great, but she has shown some stature in presenting funny content in a great way.
Dobre Twins
This twin duo is known across many social media platforms for its funny content. As the twins started using TikTok, they started creating good funny vlogs, which gained quite the traction for them. Their unique ideas to present different things have presented the following worth 23 million likes across TikTok, which is quite commendable. However, Lucas and Marcus are only known to operate this TikTok account.
Image alt: dobre twins funny tiktoker
Brittany Broski
Quite a few TikTokers actually make funny videos with impressive comedy. Brittany Broski is a celebrity in this genre, where she has taken great use of her comedy skills to present great vlogs with different and unique topics. Her take on comedy is entirely different, which makes her funny vlog unique and better than others.
Cole LeBrant
This TikToker makes a good collection of funny vlogs across his account with his family. The variety and variability in his videos make him a different version of fun compared to other TikTokers. He has built a great reach across the account, which makes him an impressive choice.
Part 3: How to Make a Funny Vlog?
Funny vlogs are a fabulous way to interact with people of different tastes. It can be something that cherishes the moods of the viewers, regardless of their current emotions. To make this happen, you need a good platform that helps you create a video for your viewers to watch. Wondershare Filmora fulfills the needs of a video editor by providing you with the perfect options while editing the video for TikTok.
For Win 7 or later (64-bit)
For macOS 10.12 or later
If you are looking forward to understanding how to create a funny vlog for your TikTok using Filmora, you need to follow a set of simple steps. These are shown as follows:
Step 1: Launch and Import Video
To start, you need to have Wondershare Filmora installed across your device. Launch the tool and click on “New Project” to start from scratch. Once the screen opens up, you need to click on the “Arrow Head” icon across the ‘Media’ Tab to import the audio you wish to amend for TikTok.
Step 2: Perform Basic Editing
Wondershare Filmora provides users with multiple options for editing their files. At first, drag the file onto the timeline. Following this, you can merge different videos or enhance the video by trimming it. Along with that, you can also consider splitting the image or changing its playback speed for different results.
Step 3: Add Effects and Transitions
After you are done with some basic editing, you can add different effects from the “Effects” section. To make the video look exclusive, you can also include “Transitions” across it. Use the “Elements” tab to include stickers and emojis to enhance your TikTok video.
Step 4: Manage the Audio
For managing the audio of your video, you can make several changes across it. You can detach audio and change the audio with another soundtrack. Filmora also allows you to add audio from the “Audio” section, which contains royalty-free music to add. Once you are done, click on the “Export” button to set the settings of the video before exporting it back onto the device.
Closing Words
This article has presented some of the finest tips that can be utilized for creating funny vlogs on your TikTok. If you coherently use these tips, you can get significant results across your account in the name of the followers. Along with that, you can also use Filmora for making the best funny vlog with different editing tools.
Wondershare Filmora
Get started easily with Filmora’s powerful performance, intuitive interface, and countless effects!
Try It Free Try It Free Try It Free Learn More >
Create Slow Motion Videos Using Final Cut Pro with Ease
The slow-motion effect has been used for years to add dramatic effects to movies. An important scene is always highlighted and looks better with a slow-motion effect. Applying slow motion is beneficial, too, as it can give you a better preview of the scene. The effect is easily accessible in many video editing applications.
How would you find an app that gives good final cut slow-motion results? This article has got you all covered on that. Here, you will find the Final Cut Pro slow-motion effect that works fantastic without ruining your video’s quality. So, follow the article to learn more about using FCP slow motion.
Slow Motion Video Maker Slow your video’s speed with better control of your keyframes to create unique cinematic effects!
Make A Slow Motion Video Make A Slow Motion Video More Features

Part 1: What Makes a Perfect Slow-Motion Video?
An ideal FCP slow-motion video requires careful attention to technical details and aesthetics. Below are some essential things to think about bringing perfection in slow-motion videos:
- Resolution: A slow-motion video with visual appeal and a high resolution is crucial. This is especially vital if you intend to crop or zoom in on the video while editing.
- Storytelling: Make sure the slow-motion clip supports the idea you’re attempting to portray. Your scenes will have more impact if you tell them with a thoughtful narrative.
- Editing: Try different speeds when editing your clip to achieve the best impact. Consider including sound effects or music to accompany the slow-motion images.
- Timing: Select the appropriate times to record in slow motion. You shouldn’t slow down your entire video. Instead, you can apply the effect to draw attention to acts or feelings.
- Frame Rate: Slow-motion videos are usually shot at a greater frame rate. Frame rates of 60, 120, 240, or even higher are common as they make the video look smoother.
- Shutter Speed: For precise and sharp results, use a fast shutter speed camera. This lessens the likelihood of motion blur in every slow-motion frame.
Part 2: Learning All Essential Techniques to Perform Slow Motion in Final Cut Pro X
Apple created Final Cut Pro , and it is only accessible to macOS users. Professional video editors can utilize the software’s array of capabilities. The tool offers incredible video editing functions. Its features are tailored to handle high-resolution video material. The tool has an AI object tracker that detects faces and objects. Its cinematic mode helps you create professional videos.
Final cut slow motion gives a dramatic and intense effect to your videos. You can create an entirely different video with the power of its editing features. Slow-mo Final Cut Pro gives high-resolution results. Follow the steps below to use this tool for slow-motion effects. However, you can choose any method that seems suitable and convenient to you:
Method 1
Import your video into the app and drag it into the timeline. Click on the video and select the “Speed Meter” icon from the timeline. If you want to access the retime menu directly, use the “Command+R” command. Now, select the “Slow” option, and from here, you can select the slow speed percentage at which you want your clip.

Method 2
Bring your video into the timeline and click on it. Select the “Speed Meter” icon; now, choose the “Custom” option. You can access customized settings directly using the “Control+Option+R” command to apply FCPX slow motion. Once you have opened the customization menu, manually set the speed rate and duration to how much you want.

Method 3
Drag the timeline cursor to where you want to make a speed change, select “Speed Meter,” and hit “Blade Speed” to create a cut and separate the clip. Make as many cuts as you want to, depending on how many speed changes you require. Now click on the clip whose speed you want changed and select “Custom” from the “Speed Meter” icon. Customize your clips’ speed rate and duration and save the video once you’re done.

Part 3: Wondershare Filmora: A Multi-Purpose Solution to Making Effective Slow-Motion Videos
Final Cut Pro can be difficult for beginners to understand. The tool has a variety of tutorials available online, but it’s still hard for many users to follow them. In this case, Wondershare Filmora is a great option for slow motion and other effects. It is an excellent alternative to final cut slow motion. Filmora offers many more wonderful features that will surely amaze you.
It can assist you in generating engaging content despite just cutting, trimming, and editing videos. With AI integration, this platform can automate your editing tasks.
Free Download For Win 7 or later(64-bit)
Free Download For macOS 10.14 or later
Step By Step Guide to Make Slow Motion Videos in Filmora
Unlike Final Cut Pro’s slow motion, Wondershare Filmora is more straightforward to operate. Follow the step-by-step guide below to apply slow-motion effects to your video.
Method 1: Uniform Speed
If you want to adjust the speed and retain its high quality, use the uniform speed option. You can access this option by following the stepwise method below. Using the advanced features, you don’t need any other tool to ensure the video’s original worth:
Step 1Import Your Project and Start a New Project
After launching Filmora, head to its “New Project” option from the home screen. You will enter the main editing screen this way. Import your project in the media panel and then drag it to the timeline.

Step 2Explore Uniform Speed and Adjust the Speed
Go to your video in the timeline and right-click on it. Now, explore the “Uniform Speed” option and tap on it to get an editing panel at the right. From that panel, move the “Speed” slider to the right and get a slow-motion video preview. You can see the “Duration” of the video after slowing it down and adjusting it accordingly.

Step 3Use Advanced Features to Ensure Quality of Videos
Move down and toggle the “Reverse Speed” option if required. You can enable the “Maintain Pitch” and “Ripple Edit” options to enhance the video automatically. Lastly, extend the “AI Frame Interpolation” menu using its downward symbol and choose “Optical Flow.” It will ensure that the video will remain slow with high quality.

Method 2: Speed Ramping
This method aims to bring smooth transitions in slow-motion videos. Instead of an abrupt change, a gradual increase in speed can impose a professional look. So, there are the steps to access this feature and get a preview of smooth playback.
Step 1Discover the Speed Ramping Feature
Access the Speed Ramping option next to the “Uniform Speed” in the right-side editing panel. Alternatively, you can right-click on the video and look for the “Speed Ramping” option from the list.

Step 2Pick a Template for Speed Ramping or Customize It
From the speed ramping section, you can choose any template from 6 options. Also, users can pick the “Customize” option to adjust the speed ramping as desired.

Step 3Use the Render Preview Option for Smooth Playback
To get a high-quality preview of your videos, look for Render Preview. In this regard, go to the top toolbar of the timeline section on the right side. Click the “Render Preview” icon next to the “Copilot Editor.” Wait for a while and get a smooth playback of your slow-motion video.

Integral Features of Filmora
Slowing down videos is easier than slow-mo Final Cut Pro. Filmora automates the process with an optical flow, ensuring the project’s high quality with one click. Without any wait, learn more about some top-rated features in the given section.
1. AI Thumbnail Creator
The AI Thumbnail Creator of Filmora makes thumbnail creation a matter of seconds. The tool is a treasure for YouTubers as it creates appealing thumbnails to attract viewers. It works with machine learning algorithms to detect the 3 best shots out of your video for thumbnail. Besides, there are over 58 thumbnail templates that can be customized after picking the right one.
2. AI Copilot Editing
AI Copilot is your personal assistant who guides you through everything related to Filmora. You can ask about any editing queries, and the AI will tell you the whole procedure within a second. It will also provide you with navigation towards the right feature. The tool is a big help for beginners; it makes using Filmora much faster and easier.
3. Motion Tracking
If you love giving an artistic touch to your videos, then motion tracking is exactly what you need. This feature automatically tracks the object throughout the video. You can add graphics, stickers, or even blur an object in the video. Furthermore, it allows you to add text with the tracked objects, like a name title with a running athlete.
4. Auto Reframe
With the help of the Auto Reframe feature, you can use one video on all social media platforms. The tool reframes your video in such a way that the main object doesn’t get removed. AI allows you to turn your landscape video into a vertical with a 19:6 aspect ratio. It saves you time and the trouble of creating different videos for every platform.
Conclusion
Slow-motion videos have become a trend due to social media, but they have been an essential film factor forever. Because of the rising demand for this effect, developers added the feature to their software. Many apps are developed to provide a slow-motion effect, which makes it tricky to choose one.
This article addresses your problem by showing you the use of final cut slow-motion. You have discovered a much simpler, faster, and effective platform, Wondershare Filmora. With proven statements in this article, it’s been easier to try Filmora and explore it fully instantly.
Make A Slow Motion Video Make A Slow Motion Video More Features
Part 1: What Makes a Perfect Slow-Motion Video?
An ideal FCP slow-motion video requires careful attention to technical details and aesthetics. Below are some essential things to think about bringing perfection in slow-motion videos:
- Resolution: A slow-motion video with visual appeal and a high resolution is crucial. This is especially vital if you intend to crop or zoom in on the video while editing.
- Storytelling: Make sure the slow-motion clip supports the idea you’re attempting to portray. Your scenes will have more impact if you tell them with a thoughtful narrative.
- Editing: Try different speeds when editing your clip to achieve the best impact. Consider including sound effects or music to accompany the slow-motion images.
- Timing: Select the appropriate times to record in slow motion. You shouldn’t slow down your entire video. Instead, you can apply the effect to draw attention to acts or feelings.
- Frame Rate: Slow-motion videos are usually shot at a greater frame rate. Frame rates of 60, 120, 240, or even higher are common as they make the video look smoother.
- Shutter Speed: For precise and sharp results, use a fast shutter speed camera. This lessens the likelihood of motion blur in every slow-motion frame.
Part 2: Learning All Essential Techniques to Perform Slow Motion in Final Cut Pro X
Apple created Final Cut Pro , and it is only accessible to macOS users. Professional video editors can utilize the software’s array of capabilities. The tool offers incredible video editing functions. Its features are tailored to handle high-resolution video material. The tool has an AI object tracker that detects faces and objects. Its cinematic mode helps you create professional videos.
Final cut slow motion gives a dramatic and intense effect to your videos. You can create an entirely different video with the power of its editing features. Slow-mo Final Cut Pro gives high-resolution results. Follow the steps below to use this tool for slow-motion effects. However, you can choose any method that seems suitable and convenient to you:
Method 1
Import your video into the app and drag it into the timeline. Click on the video and select the “Speed Meter” icon from the timeline. If you want to access the retime menu directly, use the “Command+R” command. Now, select the “Slow” option, and from here, you can select the slow speed percentage at which you want your clip.
Method 2
Bring your video into the timeline and click on it. Select the “Speed Meter” icon; now, choose the “Custom” option. You can access customized settings directly using the “Control+Option+R” command to apply FCPX slow motion. Once you have opened the customization menu, manually set the speed rate and duration to how much you want.
Method 3
Drag the timeline cursor to where you want to make a speed change, select “Speed Meter,” and hit “Blade Speed” to create a cut and separate the clip. Make as many cuts as you want to, depending on how many speed changes you require. Now click on the clip whose speed you want changed and select “Custom” from the “Speed Meter” icon. Customize your clips’ speed rate and duration and save the video once you’re done.
Part 3: Wondershare Filmora: A Multi-Purpose Solution to Making Effective Slow-Motion Videos
Final Cut Pro can be difficult for beginners to understand. The tool has a variety of tutorials available online, but it’s still hard for many users to follow them. In this case, Wondershare Filmora is a great option for slow motion and other effects. It is an excellent alternative to final cut slow motion. Filmora offers many more wonderful features that will surely amaze you.
It can assist you in generating engaging content despite just cutting, trimming, and editing videos. With AI integration, this platform can automate your editing tasks.
Free Download For Win 7 or later(64-bit)
Free Download For macOS 10.14 or later
Step By Step Guide to Make Slow Motion Videos in Filmora
Unlike Final Cut Pro’s slow motion, Wondershare Filmora is more straightforward to operate. Follow the step-by-step guide below to apply slow-motion effects to your video.
Method 1: Uniform Speed
If you want to adjust the speed and retain its high quality, use the uniform speed option. You can access this option by following the stepwise method below. Using the advanced features, you don’t need any other tool to ensure the video’s original worth:
Step 1Import Your Project and Start a New Project
After launching Filmora, head to its “New Project” option from the home screen. You will enter the main editing screen this way. Import your project in the media panel and then drag it to the timeline.
Step 2Explore Uniform Speed and Adjust the Speed
Go to your video in the timeline and right-click on it. Now, explore the “Uniform Speed” option and tap on it to get an editing panel at the right. From that panel, move the “Speed” slider to the right and get a slow-motion video preview. You can see the “Duration” of the video after slowing it down and adjusting it accordingly.
Step 3Use Advanced Features to Ensure Quality of Videos
Move down and toggle the “Reverse Speed” option if required. You can enable the “Maintain Pitch” and “Ripple Edit” options to enhance the video automatically. Lastly, extend the “AI Frame Interpolation” menu using its downward symbol and choose “Optical Flow.” It will ensure that the video will remain slow with high quality.
Method 2: Speed Ramping
This method aims to bring smooth transitions in slow-motion videos. Instead of an abrupt change, a gradual increase in speed can impose a professional look. So, there are the steps to access this feature and get a preview of smooth playback.
Step 1Discover the Speed Ramping Feature
Access the Speed Ramping option next to the “Uniform Speed” in the right-side editing panel. Alternatively, you can right-click on the video and look for the “Speed Ramping” option from the list.
Step 2Pick a Template for Speed Ramping or Customize It
From the speed ramping section, you can choose any template from 6 options. Also, users can pick the “Customize” option to adjust the speed ramping as desired.
Step 3Use the Render Preview Option for Smooth Playback
To get a high-quality preview of your videos, look for Render Preview. In this regard, go to the top toolbar of the timeline section on the right side. Click the “Render Preview” icon next to the “Copilot Editor.” Wait for a while and get a smooth playback of your slow-motion video.
Integral Features of Filmora
Slowing down videos is easier than slow-mo Final Cut Pro. Filmora automates the process with an optical flow, ensuring the project’s high quality with one click. Without any wait, learn more about some top-rated features in the given section.
1. AI Thumbnail Creator
The AI Thumbnail Creator of Filmora makes thumbnail creation a matter of seconds. The tool is a treasure for YouTubers as it creates appealing thumbnails to attract viewers. It works with machine learning algorithms to detect the 3 best shots out of your video for thumbnail. Besides, there are over 58 thumbnail templates that can be customized after picking the right one.
2. AI Copilot Editing
AI Copilot is your personal assistant who guides you through everything related to Filmora. You can ask about any editing queries, and the AI will tell you the whole procedure within a second. It will also provide you with navigation towards the right feature. The tool is a big help for beginners; it makes using Filmora much faster and easier.
3. Motion Tracking
If you love giving an artistic touch to your videos, then motion tracking is exactly what you need. This feature automatically tracks the object throughout the video. You can add graphics, stickers, or even blur an object in the video. Furthermore, it allows you to add text with the tracked objects, like a name title with a running athlete.
4. Auto Reframe
With the help of the Auto Reframe feature, you can use one video on all social media platforms. The tool reframes your video in such a way that the main object doesn’t get removed. AI allows you to turn your landscape video into a vertical with a 19:6 aspect ratio. It saves you time and the trouble of creating different videos for every platform.
Conclusion
Slow-motion videos have become a trend due to social media, but they have been an essential film factor forever. Because of the rising demand for this effect, developers added the feature to their software. Many apps are developed to provide a slow-motion effect, which makes it tricky to choose one.
This article addresses your problem by showing you the use of final cut slow-motion. You have discovered a much simpler, faster, and effective platform, Wondershare Filmora. With proven statements in this article, it’s been easier to try Filmora and explore it fully instantly.
Little Tricks to Create Canva Slideshow No One Is Telling You
Little Tricks to Create Canva Slideshow No One is Telling You
An easy yet powerful editor
Numerous effects to choose from
Detailed tutorials provided by the official channel
You can make slideshows in innumerable ways. And we all are aware of how important it is to present slideshows, no matter what our profession or purpose is. And one of the ways of making slideshows is by using the canvas slideshow.
You can make the best type of slideshows on any device you prefer with Canva. So, in the following discussion, we will be talking about how you can make a slideshow on a PC or Mac with Canvas. Then, we will point out the steps for adding music to your slideshow in Canva. We will also mention how you can turn a slideshow into a video with Canva.
Lastly, we will discuss the answers and solutions to some common questions regarding converting slides to digital, following with the discussion of the best video editing tool for slideshow videos. So, without o further ado, let us get started with our discussion.
In this article
01 [How to Make a Slideshow on a PC or Mac with Canva?](#Part 1)
02 [How to Add Music to Your Slideshow in This Canva?](#Part 2)
03 [How to Turn Your Slideshows into Videos with Canva?](#Part 3)
04 [FAQ of Converting Slides to Digital](#Part 4)
Part 1 How to Make a Slideshow on a PC or Mac with Canva?
You can make the best Canva slide show in just five simple steps. You can choose any device for making a slideshow with canva. The best choice is to use a PC or Mac to get the entire display, thereby helping you make better edits, changes and integrations in your slideshows.
So, let us start the discussion with the five simple steps for making a slideshow on PC or Mac with Canva. The steps are as follows.
● Step 1: Launch the application
The first step is to download, launch and install the application of Canva on your preferred device, that is, either your PC or your Mac. The application is available for free, and you need not pay any charges for downloading and installing Canva on your Mac or PC.

● Step 2: Choose the template
The next step is to choose the template you want for your sideshow. Choose from among the many canva slideshow templates that are available.

● Step 3: Make the required edits with the features of Canva.
There are numerous features available at Canva. Use them to make the necessary edits and integrations in your slideshow. Use the different features and make your slideshow the way you want. You can add images, texts and designs to your slideshow at Canva.

● Step 4: Customize accordingly
You can add your images and change the templates and designs at Canva. It helps in bringing more uniqueness, creativity and originality, as you can integrate your imagination, skills and creativity in the slideshow you are making at Canva.
● Step 5: Save your work and export
All the hard work is finfish by now. Now you have to have the slideshow that you have made so far. And then, share it in whichever file format you prefer on any social media platform or other places you want.

Part 2 How to Add Music to Your Slideshow in This Canva?
You can customize your slideshow at Canva in numerous ways. And one of the ways is by adding music to your slideshow in Canva. A slideshow in canva can have music in it, which can be any music. You can record yourself or even integrate any readymade music file.
You need only a single step to add music to your slideshow at Canva. The steps for making the slideshow remain the same, and you can refer to the steps mentioned above for reference. In the above steps, pause at Step 3.
You can add the required music file or media file at that step. In the next step, that is, in Step 4, you can customize that media file. You can integrate any audio file that you record for your slideshow.

Part 3 How to Turn Your Slideshows into Videos with Canva?
We have discussed the steps for making canva photo slideshow. The steps are simple to perform and easy to follow. But what if you need or want to turn that slideshow into a video? You definitely can do so! The steps for this, too, are straightforward and effortless.
So, now we will discuss the steps for turning slideshows at Canva into videos. There are four simple steps for this, and they are as follows.
● Step 1: Choose your preferred presentation type
By this, we mean that you must decide the size of your presentation. It is better to determine the type of presentation, for it helps in better and faster making of your presentation.
● Step 2: Integrate all the components you want in your presentation
Then, integrate all the images, soundtracks, texts, designs and templates and all the other necessary components you want to be present in your presentation. You can use numerous features in your presentation at Canva.
● Step 3: Customize the presentation based on your choice and needs
You can change the components of your presentation according to your needs and choice, and you can bring about as much customization as you want. So, customize according to and as much you want.
● Step 4: Download and share
Lastly, save the presentation. Then go to the blue bar, and in the options present in the top right corner, you will find “presenting”. You can save your file from there, and then the “Download” option will help you download the file to your device.
Part 4 FAQ of Converting Slides to Digital
Now, we will discuss solutions or answers to the common questions relating to converting slides into digital format. Here are the frequently asked issues or questions regarding this aspect.
01How do I convert my slides to digital?
We can recommend a few ways in which you can digitise your old slides. The methods are as follows.
● Hiring a proficient professional at this work is the easiest and the most effective method.
● A slide copier tool or application can also effectively serve this purpose.
● Use a device that converts the images or slides digitally.
● Use a flatbed scanner to scan your slides.
● Photographing your slides is an intelligent way to digitise your old slides.
02Can I use Filmora to turn my slides to digital?
You can readily use Filmora to transform your slideshows into slideshow videos, digitising your slides effectively. You have to make your slideshow at Filmora, edit and customise it according to your preference and then save, share or download the file. It will automatically turn your slide into digital format or help you make a successful slideshow video.
03What is the best method for turning slides into digital?
The most effortless method is to hire a professional, and it will guarantee saucerful results. But, if you want to do it yourself, you can readily opt for Filmora. It is the best video editing application that can readily help you digitise your slides.
04Can I turn my slideshow into videos?
Yes, you can effortlessly turn your slideshows into videos. You need a video editing tool that enables you to share and download your slideshow in a video format. And the best tool for it is Filmora. You can unhesitant opt for Filmora if you want to turn your slideshows into videos and share them effortlessly on any platform.
Now, we will discuss the best video editing tool or application, Wondershare Filmora Video Editor . You can use this tool to make the best slideshows and convert them into videos. You have the liberty f using any device for editing and making slideshow videos. You can customise as much you want and use the tons of features for editing available in the tool.
For Win 7 or later (64-bit)
For macOS 10.12 or later
You can opt for the free version. It has tools and features that are more than sufficient for making the most incredible slideshow videos. And when you choose its paid version, you are bestowed with the most advanced professional tools and features for editing. You can use the 800+ filters available, the texts, designs, templates, and other components for editing at Filmora.
So, if you want to make the best and the most incredible slideshows videos, you can readily opt for Filmora!
● Ending Thoughts →
● So, this was all about the different aspects and factors of a slideshow at Canva. Let us have a quick recap of the topic and discussions we have touched on in the above discussion.
● The five steps for making A slideshow in canva on your PC or Mac.
● The steps for adding music to your slideshow at Canva, also, how can you turn your slideshows into videos in Canva in four simple steps
● Lastly, we have discussed the answers or solutions to the common questions relating to converting slides to digital. And we have ended our discussion by introducing the best video editing tool, Filmora, that can help you make the most fantastic slideshows on any device, be it a PC or Mac.
You can make slideshows in innumerable ways. And we all are aware of how important it is to present slideshows, no matter what our profession or purpose is. And one of the ways of making slideshows is by using the canvas slideshow.
You can make the best type of slideshows on any device you prefer with Canva. So, in the following discussion, we will be talking about how you can make a slideshow on a PC or Mac with Canvas. Then, we will point out the steps for adding music to your slideshow in Canva. We will also mention how you can turn a slideshow into a video with Canva.
Lastly, we will discuss the answers and solutions to some common questions regarding converting slides to digital, following with the discussion of the best video editing tool for slideshow videos. So, without o further ado, let us get started with our discussion.
In this article
01 [How to Make a Slideshow on a PC or Mac with Canva?](#Part 1)
02 [How to Add Music to Your Slideshow in This Canva?](#Part 2)
03 [How to Turn Your Slideshows into Videos with Canva?](#Part 3)
04 [FAQ of Converting Slides to Digital](#Part 4)
Part 1 How to Make a Slideshow on a PC or Mac with Canva?
You can make the best Canva slide show in just five simple steps. You can choose any device for making a slideshow with canva. The best choice is to use a PC or Mac to get the entire display, thereby helping you make better edits, changes and integrations in your slideshows.
So, let us start the discussion with the five simple steps for making a slideshow on PC or Mac with Canva. The steps are as follows.
● Step 1: Launch the application
The first step is to download, launch and install the application of Canva on your preferred device, that is, either your PC or your Mac. The application is available for free, and you need not pay any charges for downloading and installing Canva on your Mac or PC.
● Step 2: Choose the template
The next step is to choose the template you want for your sideshow. Choose from among the many canva slideshow templates that are available.
● Step 3: Make the required edits with the features of Canva.
There are numerous features available at Canva. Use them to make the necessary edits and integrations in your slideshow. Use the different features and make your slideshow the way you want. You can add images, texts and designs to your slideshow at Canva.
● Step 4: Customize accordingly
You can add your images and change the templates and designs at Canva. It helps in bringing more uniqueness, creativity and originality, as you can integrate your imagination, skills and creativity in the slideshow you are making at Canva.
● Step 5: Save your work and export
All the hard work is finfish by now. Now you have to have the slideshow that you have made so far. And then, share it in whichever file format you prefer on any social media platform or other places you want.
Part 2 How to Add Music to Your Slideshow in This Canva?
You can customize your slideshow at Canva in numerous ways. And one of the ways is by adding music to your slideshow in Canva. A slideshow in canva can have music in it, which can be any music. You can record yourself or even integrate any readymade music file.
You need only a single step to add music to your slideshow at Canva. The steps for making the slideshow remain the same, and you can refer to the steps mentioned above for reference. In the above steps, pause at Step 3.
You can add the required music file or media file at that step. In the next step, that is, in Step 4, you can customize that media file. You can integrate any audio file that you record for your slideshow.
Part 3 How to Turn Your Slideshows into Videos with Canva?
We have discussed the steps for making canva photo slideshow. The steps are simple to perform and easy to follow. But what if you need or want to turn that slideshow into a video? You definitely can do so! The steps for this, too, are straightforward and effortless.
So, now we will discuss the steps for turning slideshows at Canva into videos. There are four simple steps for this, and they are as follows.
● Step 1: Choose your preferred presentation type
By this, we mean that you must decide the size of your presentation. It is better to determine the type of presentation, for it helps in better and faster making of your presentation.
● Step 2: Integrate all the components you want in your presentation
Then, integrate all the images, soundtracks, texts, designs and templates and all the other necessary components you want to be present in your presentation. You can use numerous features in your presentation at Canva.
● Step 3: Customize the presentation based on your choice and needs
You can change the components of your presentation according to your needs and choice, and you can bring about as much customization as you want. So, customize according to and as much you want.
● Step 4: Download and share
Lastly, save the presentation. Then go to the blue bar, and in the options present in the top right corner, you will find “presenting”. You can save your file from there, and then the “Download” option will help you download the file to your device.
Part 4 FAQ of Converting Slides to Digital
Now, we will discuss solutions or answers to the common questions relating to converting slides into digital format. Here are the frequently asked issues or questions regarding this aspect.
01How do I convert my slides to digital?
We can recommend a few ways in which you can digitise your old slides. The methods are as follows.
● Hiring a proficient professional at this work is the easiest and the most effective method.
● A slide copier tool or application can also effectively serve this purpose.
● Use a device that converts the images or slides digitally.
● Use a flatbed scanner to scan your slides.
● Photographing your slides is an intelligent way to digitise your old slides.
02Can I use Filmora to turn my slides to digital?
You can readily use Filmora to transform your slideshows into slideshow videos, digitising your slides effectively. You have to make your slideshow at Filmora, edit and customise it according to your preference and then save, share or download the file. It will automatically turn your slide into digital format or help you make a successful slideshow video.
03What is the best method for turning slides into digital?
The most effortless method is to hire a professional, and it will guarantee saucerful results. But, if you want to do it yourself, you can readily opt for Filmora. It is the best video editing application that can readily help you digitise your slides.
04Can I turn my slideshow into videos?
Yes, you can effortlessly turn your slideshows into videos. You need a video editing tool that enables you to share and download your slideshow in a video format. And the best tool for it is Filmora. You can unhesitant opt for Filmora if you want to turn your slideshows into videos and share them effortlessly on any platform.
Now, we will discuss the best video editing tool or application, Wondershare Filmora Video Editor . You can use this tool to make the best slideshows and convert them into videos. You have the liberty f using any device for editing and making slideshow videos. You can customise as much you want and use the tons of features for editing available in the tool.
For Win 7 or later (64-bit)
For macOS 10.12 or later
You can opt for the free version. It has tools and features that are more than sufficient for making the most incredible slideshow videos. And when you choose its paid version, you are bestowed with the most advanced professional tools and features for editing. You can use the 800+ filters available, the texts, designs, templates, and other components for editing at Filmora.
So, if you want to make the best and the most incredible slideshows videos, you can readily opt for Filmora!
● Ending Thoughts →
● So, this was all about the different aspects and factors of a slideshow at Canva. Let us have a quick recap of the topic and discussions we have touched on in the above discussion.
● The five steps for making A slideshow in canva on your PC or Mac.
● The steps for adding music to your slideshow at Canva, also, how can you turn your slideshows into videos in Canva in four simple steps
● Lastly, we have discussed the answers or solutions to the common questions relating to converting slides to digital. And we have ended our discussion by introducing the best video editing tool, Filmora, that can help you make the most fantastic slideshows on any device, be it a PC or Mac.
Also read:
- Top 10 Free Spanish Text To Speech Converter Software Windows, Mac
- New 2024 Approved How to Loop a Video in Canva Editor
- Looking for a Full Guide on Removing the Background From PNG Images? Do You Want to Transform JPG to PNG Transparent? If so, Take some Time to Read This Article
- Updated Want to Apply a Filter on Your Video Using Your iPhone or Mac? Here Are the Simple Steps to Put Add Filters on iMovie. Find Out a Better iMovie Alternative with More Filters
- In 2024, Record Slow Motion Videos With Phantom Slow-Mo Camera
- New Mix and Match The Ultimate List of 8 Video and Photo Merging Tools
- Updated 2024 Approved With This Article, We Will Be Looking at Steps to Rotate a Video in Cyberlink PowerDirector to Help You when Required. We Have Also Mentioned the Steps You Will Need to Follow in Wondershare Filmora
- 2024 Approved Interested in Adding a Cinematic Strobe Light Effect to Your Movie or Video Title? Follow the Steps Explained in Detail Here
- In 2024, Modern Silence Detection Tools Are Changing the Face of Video Editing. Use Them to Improve the Quality of Your Video Clips. Learn How These Tools Let You Detect Silence with Pinpoint Accuracy
- Learn How to Feather Shapes in After Effects and Add a Professional Touch to Your Designs. This Comprehensive Guide Covers Everything From the Basics to Advanced Techniques. Perfect for Beginners and Experts Alike for 2024
- Updated How to Split a Video Into Parts on All Platforms for 2024
- New How To Change Sky Background With Adobe Photoshop Best Ways
- Updated Do You Wish to Make Your Discord PFP an Attention-Seeker? If Yes, Try the Animated Discord PFP. Lets Go over Essential Facts on the Topic, Including How to Get an Animated Discord PFP for 2024
- Finding the Best Voice Changers for WhatsApp Free and Paid
- How to Add Expression in After Effects for 2024
- New In 2024, 7 Best MP4 Video Editors on Mac Edit MP4 Videos Easily
- New Wondershare Filmora Tutorial | Using The AI Auto Reframe Feature
- Find Out How to Create Your Own Custom Motion Graphics in Filmora. Add Unique Objects, Manipulate Text, and Animate Anything You Want for 2024
- New How To Quick Guide for Creating Google Slideshows
- New 20 Best Text To Speech Software Windows, Mac, Android, iPhone & O for 2024
- In 2024, How to Merge FLV Files Windows, Mac,Android, iPhone & Online
- Updated 2024 Approved Top 10 Video Editing Online Makers Is Worth Your Attention
- New Want to Apply a Filter on Your Video Using Your iPhone or Mac? Here Are the Simple Steps to Put Add Filters on iMovie. Find Out a Better iMovie Alternative with More Filters
- 2024 Approved Do You Know You Dont Need a PC or Mac to Apply LUTs on Your Media? You Can Use Many Smartphone Apps to Apply LUTs, Such as 3DLUT Mobile App
- How to Use Zoom in Google for 2024
- New 2024 Approved How to Use a Stabilization Tool in Filmora
- In 2024, How To Track IMEI Number Of Realme Narzo N53 Through Google Earth?
- 5 Ways to Reset Tecno Spark 20C Without Volume Buttons | Dr.fone
- Will iSpoofer update On Vivo T2 5G | Dr.fone
- How To Transfer Data From Apple iPhone XR To Other iPhone 14 devices? | Dr.fone
- Unlock Apple ID without Phone Number From Apple iPhone 8 Plus
- How to Unlock Apple ID From your iPhone 12 Pro Max without Security Questions?
- Can Life360 Track You When Your ZTE Blade A73 5G is off? | Dr.fone
- New What Is AI Voice for 2024
- Apply These Techniques to Improve How to Detect Fake GPS Location On Poco M6 Pro 4G | Dr.fone
- In 2024, Network Locked SIM Card Inserted On Your Lava Yuva 3 Phone? Unlock It Now
- In 2024, How To Leave a Life360 Group On Oppo Find N3 Flip Without Anyone Knowing? | Dr.fone
- New 2024 Approved Maximizing Yandex Translate in Video Translation and Beyond
- In 2024, How to Screen Mirroring Oppo A78 5G? | Dr.fone
- How Can I Catch the Regional Pokémon without Traveling On Samsung Galaxy F15 5G | Dr.fone
- In 2024, 4 Things You Must Know About Apple iPhone 15 Activation Lock
- How To Reset Your iPhone 6 Plus? | Dr.fone
- In 2024, How to use iSpoofer on Samsung Galaxy S21 FE 5G (2023)? | Dr.fone
- In 2024, Unlock Your Device iCloud DNS Bypass Explained and Tested, Plus Easy Alternatives On iPhone 13 Pro Max
- In 2024, New Multiple Ways How To Remove iCloud Activation Lock From your iPhone X
- Title: New 2024 Approved Time Lapse Video Is Very Interesting and Creative, Which Usually Attracts More Attention. This Article Will Show You How to Make a Time Lapse Video with Adobe After Effects
- Author: Morgan
- Created at : 2024-04-24 01:11:32
- Updated at : 2024-04-25 01:11:32
- Link: https://ai-video-editing.techidaily.com/new-2024-approved-time-lapse-video-is-very-interesting-and-creative-which-usually-attracts-more-attention-this-article-will-show-you-how-to-make-a-time-laps/
- License: This work is licensed under CC BY-NC-SA 4.0.
