
:max_bytes(150000):strip_icc():format(webp)/178665671_HighRes-56a532a83df78cf77286de1b.jpg)
New 2024 Approved Top Free Video Editing Software Enhance Your Content with These Essential Tools
Top Free Video Editing Software: Enhance Your Content with These Essential Tools
Today video content creators are more common than it ever was. The video editor tools are also more common software on the Internet and it’s also now very easy to pick one for free and utilize it for your purpose. All it needs is a little research and bingo you will get one.
So, why don’t we help you with our research to let you explore all those top 22 free video editing software tools available on different platforms such as Android, Windows, and Mac? In this article, we have got you all covered by letting you know of each of the software that you can use for editing video.
Contents
01 [Things to Consider When to Choose a Free Video Editor ](#Part 1)
02 [Free Video Editor for PC and Mac ](#Part 2)
03 [Free Video Editor for Mobile Phones](#Part 3)
04 [Tips and Tricks for Using Free Video Editing Tools ](#Part 4)
05 [Related FAQs about Free Video Editors](#Part 5)
Part 1: Things to Consider When to Choose a Free Video Editor
Before opting for a free video editing software there are many important things, we mostly miss that we should have known. But you don’t have to worry about it anymore let’s begin:
What are you planning to use it for?: You must know the use of video editing software before picking one. Whether you are using it for gaming or creating ordinary YouTube videos. These decisions are very important to take before opting for downloading it from the internet.
Learning curve: You should keep in mind which editing software is complex to learn and which one is easy in comparison with that. If you didn’t keep this in mind you might end up wasting your time by downloading and trying in vain.
Quality: Another important factor to consider in video editing software is the quality and format of the video. There are many formats and quality of video content, therefore it is important to choose the one which supports your video format.
Resources: Depending upon the requirements of the editing on your video, you should choose a video editor that should have all the video effects, music tracks, and other resources that you might need to apply to your video. Be careful not to select one with few resources.
Compatability: The most important point is whether your PC, Mac, or Android platform can run the video editor you have heard the name from your friend. Consult the internet for compatibility of the software by checking its minimum specification requirement on its manual or docs.
Part 2: Free Video Editor for PC and Mac
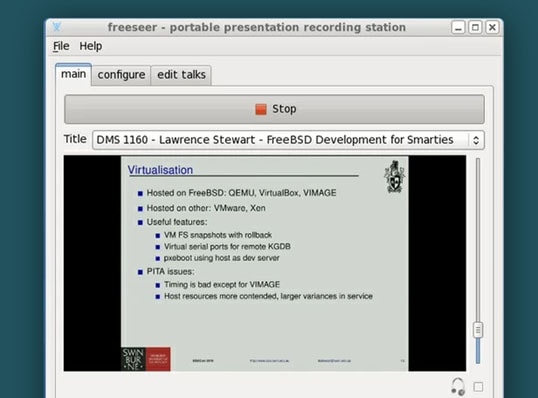
1. Active Presenter – Free video editor for eLearning purposes
Best for: Teachers and students for delivering and recording class lectures.
User rating: 4.5/5.0
System compatibility: Windows 7/ Windows 8/8.1, Windows 10, Windows 11 (only 64-bit (x64) is supported), macOS 10.12, macOS 10.13, macOS 10.14, macOS 10.15, macOS 11 (only 64-bit Intel CPU is supported)
Active Presenter is multi-functional software that edits your video as well as record it. It is equipped with a variety of tools that record screens, edit screencasts videos, and create interactive content in Html5.
Moreover, the all-in-one feature lets you record your PC screen along with audio input. You can also edit your video and voice. The app also provides eLearning authority software guides, games, and simulations.
Reason to Choose:-
- User-Friendly Interface.
- Interactive features.
- Multiple Tools in one package.
Reason to Avoid:-
- Manual volume control.
- Need amendments in volume control.
2. Blender – 3D computer graphics software for videos
Best for: Graphics Designers, Photographers, and UI/UX Designers.
User rating: 4.5/5.0
System compatibility: Windows 8.1, 10, and 11, MacOS 10.13 Intel · 11.0 Apple Silicon, Linux
Blender is an amazing 3d creation platform that is open source. The software supports modeling, 3D pipelining, rigging, animation, rendering, video editing, motion tracking, game creation, and composing.
If you are a designer of 3d graphics then this software is best suitable for you. You can also edit your videos with this software for free since it is open source. Blender 3d is a good package for all types of graphics-related activities on computers.
Reason to Choose:-
- Open-Source
- Simplest Interface
- Frequent Updates
- A vast arsenal of 3d tools.
Reason to Avoid:-
- Sometimes glitchy but overall good.
- Laggy Performance on intensive editing.
- Little Complex to learn.
3. OpenShot – a free and open-source video editor for beginners
Best for: Small Business Owners and Freelancers.
User rating: 4.4/5.0
System compatibility: Linux (most distributions are supported), Windows (version 7, 8, and 10+), OS X (version 10.15+)
OpenShot is a cross-platform video editor that trims and slices videos for you. It has an animation framework of a fade, slide, and animate anything in your project. The software has an unlimited number of tracks you can use.
Moreover, the application has video effects, audio waveforms, a title editor, slow motion, and time effects. In short, it is a wonderful package for those who are interested in their videos in animated form like small business owners and freelancers, etc.
Reason to Choose:-
- The very easy graphical interface and navigation.
- Perfect for quick edits.
- Multiple languages support.
- Open-Source.
Reason to Avoid:-
- Sometimes the software crashes.
- Poor performance in high-resolution videos.
4. Lightworks – free and easy to use a pro video editing tool
Best for: Small business owners, actors, and marketers.
User rating: 3.5/5.0
System compatibility: Windows 8, Windows 8.1, and Windows 10, Mac OS X 10.11 or higher, Linux , Ubuntu / Lubuntu / Xubuntu 20.04 or higher
Lightworks is an editing system for video edits and mastering. It is one of the oldest software developed for early computer-based non-linear editing systems. After 2010, it is also available as an open source however the source code has never been released.
Lightworks has a million users around the world since it is the oldest software. This large number of users is only due to its wide acceptance overall platform’s windows, Linux, and Mac. If you are an actor, content creator, or marketeer then this software is for you.
Reason to Choose:-
- The abundance of resources for building videos.
- Free and Open-Source.
- Better Technical Support and suggestions.
Reason to Avoid:-
- Basic Editing Features
- Limited Transitions and font settings
5. VSDC Free Video Editor – best multimedia suite for video and audio editing
Best for: Business owners, mid-marketeers, and YouTubers.
User rating: 4.0/5.0
System compatibility: Windows XP/SP3/Vista/7/8/10
VSDC is a free non-linear editing tool that can edit your videos in ultra-high definitions. It is developed by Flash-Intergro LLC. VSDC is capable of many other features that video content creators usually need such as motion tracking, liver color correction, and post-production effects.
This product is available in 13 languages which makes it an easy choice for everyone around the world. It is initially released in 2011 and has a stable release in December 2021.
Reason to Choose:-
- Good quality multimedia editing
- Free and Open-Source
- Wide acceptance of video and audio formats
- Direct publishing on social media platforms
Reason to Avoid:-
- Cannot download animated transitions
- Hight memory consumption
6. Shotcut – Free video editor with high-resolution
Best for: Graphic designers, business owners, and IT marketers.
User rating: 4.2/5.0
System compatibility: Operating system: 64-bit Windows 7 – 11, Apple macOS 10.14 - 12, 64-bit Linux with at least glibc 2.27.
Shotcut is one of the free and open-source video editing platforms that is also a cross-platform editing tool. It is available on all the operating system platforms out there. Due to this, it is widely known on the internet for video editing. This editor was first developed by Dan Dennedy and based on MLT multimedia Framework.
Reason to Choose:-
- Wide-format support
- Device and transport option
- Sleek and Intuitive Interface
- Free and Open Source
Reason to Avoid:-
- The interface is complex comparatively
- Crashing is common due to driver problems
7. Hitfilm Express – The best choice for students and projects
Best for: Gamers, Youtubers, Small business owners, entrepreneurs, and graphic designers.
User rating: 4.4/5.0
System compatibility: Apple: macOS 11.0 Big Sur, macOS 10.15 Catalina or macOS 10.14 Mojave, Windows: Microsoft Windows 10 (64-bit)

Hitfilm Express is a free and open-source amazing video editing software with professional grading VF-X tools and many awesome contents such as gaming and films. This video editor is perfect for all beginners, who have just started the editing.
Hitfilm Express is a product from the Fxhome company. Its tools are industry rated and the interface is known for its user-friendly feature. The largest VFX toolkit of Hitfilm consists of more powerful libraries and is all available for free at your service.
Reason to Choose:-
- Supports HD videos.
- Multiple imports of many audios and their mixing.
- A broad variety of tools and functions.
Reason to Avoid:-
- Animation availability is limited and repetitive.
- No Instructional videos.
8. Microsoft Video Editor 2020 – Low learning curve editor for everyone
Best for: Photographers, Freelancers, and Youtubers.
User rating: 4.0/5.0
System compatibility: Microsoft Windows 98 or later or Windows NT® 4.0 or later
The Microsoft movie maker or video editor is one of the best video editors with which you can create amazing movie clips of your pictures. You can create many slideshow pictures and play music behind them.
Microsoft video editor comes with various stickers, trimming, merging, multiple trimming and filters, etc. The application is available on the Microsoft store to download. If you want something authentic n your windows then this app is for you.
Reason to Choose:-
- Interactive and easy-to-use tools.
- Perfect for video basic editing.
- Basic and very Instinctive.
Reason to Avoid:-
- Few features in comparison with others.
- Slightly outdated interface.
9. Avidemux – video editor designed for simple cutting and encoding
Best for: Digital Marketers, web designers, and business owners.
User rating: 4.4/5.0
System compatibility: Windows OS: 98 SE, XP, 2000, Vista, 7, 8, ME, macOS X, and Linux.
Avidemux is open-source software for video editing such as simple cutting, filtering, and encoding of videos into many formats. The application let you convert to many videos encoding formats like the popular ones MPEG and ASF etc.
Moreover, Avidemux does not provide editing through basic tools only but its automated task capability through queue and power scripts lets you do anything with your video. The application works on most platforms.
Reason to Choose:-
- Sleek user interface
- Wide support of codecs
- No learning curve is necessary
Reason to Avoid:-
- Confusing options
- Very few video editing features
10. iMovie – a most well-known video editor for macOS users
Best for: Apple device users, Marketers, developers, and teachers.
User rating: 4.3/5.0
System compatibility: Microsoft Windows 7, Windows 8, Windows 10, or Windows 11, All macOS
Imoview is a read-made installed software by Apple Inc on their systems. It primarily came in macOS, iOS, and iPadOS devices. Its original release came in 1999 as MAC OS 8 bundled application.
At the start, it was given free by buying a new macOS or ios device but later, in 2013 it has been issued for free to all its users. The application is known for its editing of any type and resolution of videos.
Reason to Choose:-
- User friendly
- Open-Source
- Best for HD Videos
Reason to Avoid:-
- Some glitches have been reported while recording gameplay.
- The customer support team is not always responsive.
12. Screenrec
Best for: best premium screen recorder for beginners
User rating: 4.5/5.0
System compatibility: Windows 10/8/7/XP and Linux
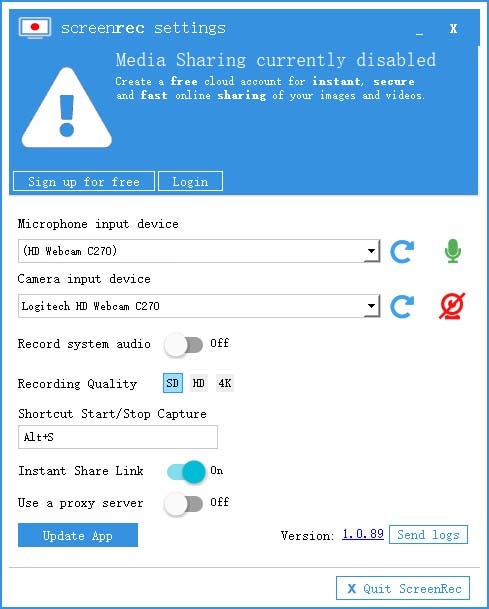
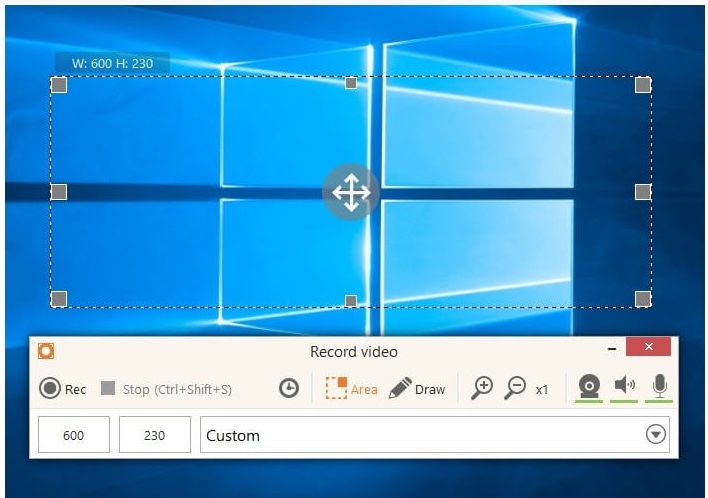
Screenrec is a premium screen recorder with a very intuitive user interface that makes it suitable for beginners. You can start and stop recording your screen with a single click. You can also record your webcam and audio from your system as well as external microphone. The software is perfect for taking screenshots and adding annotations wherever required.
The software generates a sharable link so that you can share it anywhere you want instantly. Once the link is shared, you can check its analytics. The video content management system is quite robust and the video content is fully encrypted for security and privacy.
Reason to Choose:-
- Record screen, webcam, audio with a single click.
- Very intuitive user interface with live annotation options.
- Generate instant sharable links and track analytics of videos.
- Better video content management with cloud storage.
Reason to Avoid:-
- Very limited editing options.
- Very limited customizable settings.
Part 5: Online Screen Recorders
If you do not want to install any dedicated screen recording software on your computer, you have online screen recorders to record the screen on the go. There is no software to install as you can launch the online screen recorders instantly from your web browsers. Here are the best online screen recorders for you.
1. Screencastify
Best for: best online screen recorder for those who want a browser extension.
User rating: 4.4/5.0
System compatibility: Windows, Mac and Chromebook
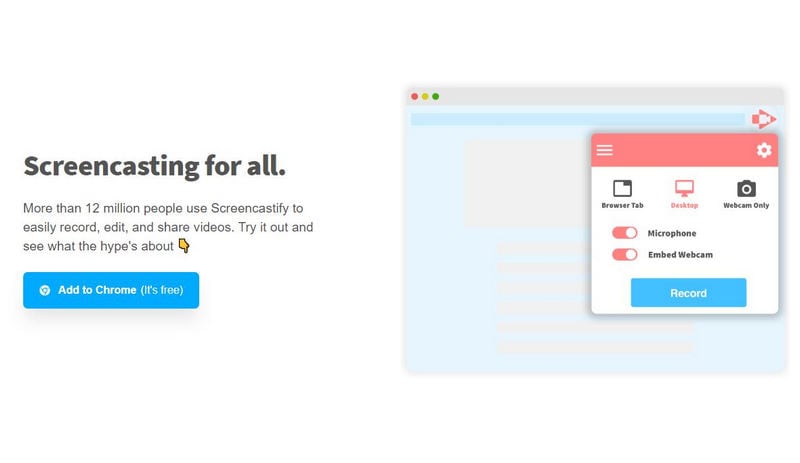
Screencastify comes in the form of a Chrome browser extension and hence, only Chrome users can use them. You can record your screen, your webcam video individually as well as together. The recording widget has options for real-time drawing while recording the video. Additionally, you can add stickers to enhance the video content.
After recording, you can upload the video on Google Drive, and you can share the video link instantly with anyone. The video editor offers you basic video editing options. You can even highlight mouse cursor. As far as saving the recorded video goes, you can export in MP4, MP3 as well as GIF file formats.
Reason to Choose:-
- Record desktop, browser, and application with webcam embedded.
- Highlight mouse movements and clicks and add stickers.
- Real-time drawing with pen and shapes and basic editing options.
- Export video to Google Drive and share video links instantly.
Reason to Avoid:-
- Limited to Chrome users only.
- Recording time limited to 5 minutes in free version.
2. Screencast-o-Matic
Best for: best online screen recorder for everyone
User rating: 4.7/5.0
System compatibility: Windows, Mac, iOS, Android and Chromebook.
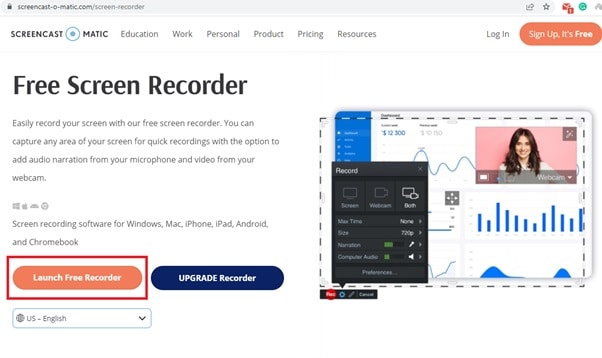
Screencast-o-Matic is the best online screen recorder in terms of features and customization. All the features are well-balanced so that everyone can use it to satisfy their requirements. You can choose screen, webcam or both for recording. You can set a maximum time so that the recording can stop automatically.
You can choose the video resolution and you can choose audio sources. You can also capture screenshots and customize the recording area. If you opt for its premium plan, you get a vast stock library to enhance your video content. In fact, you can add animations, effects, add voiceover, background audio and automated caption.
Reason to Choose:-
- Capture screen, webcam, and audio with customized recording area.
- Customize video recording parameters as per requirements.
- Real-time drawing tools and cloud hosting for instant sharing.
- Separate video editor available for free.
Reason to Avoid:-
- Advanced features are meant for premium users.
- 15-minute recording time limitation in free version.
3. Loom Online Screen Recorder
Best for: best online screen recorder for teams and collaborative works.
User rating: 4.1/5.0
System compatibility: Windows, Mac, iOS, Android and Chromebook.

Loom comes with an online screen recorder along with a Chrome extension as well as desktop app. With the online screen recorder, you can record screen only, camera only as well as screen and camera together. You can choose actual webcam as well as virtual webcam and you can select an external mic for audio recording.
The online screen recorder comes with a recording countdown and you can save your videos on the workspace that Loom provides. You can select the entire screen, the browser tab or the application window. You can instantly share the recorded video with people through emails, social media platforms and much more.
Reason to Choose:-
- Record screen and webcam together and separately.
- Save the recorded video on Loom platform and share instantly.
- Basic editing options post recording include speed change.
- Add transcription and call-to-action as well as change thumbnail.
Reason to Avoid:-
- Cannot record gameplay or select customized region.
- Very limited video parameters customization options.
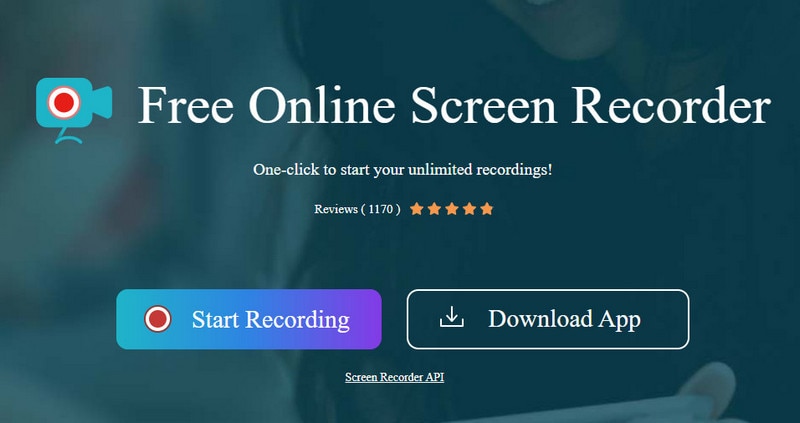
4. Screencapture.com
Best for: best online screen recorder for amateurs
User rating: 4.2/5.0
System compatibility: Windows, Mac, and Chromebook.
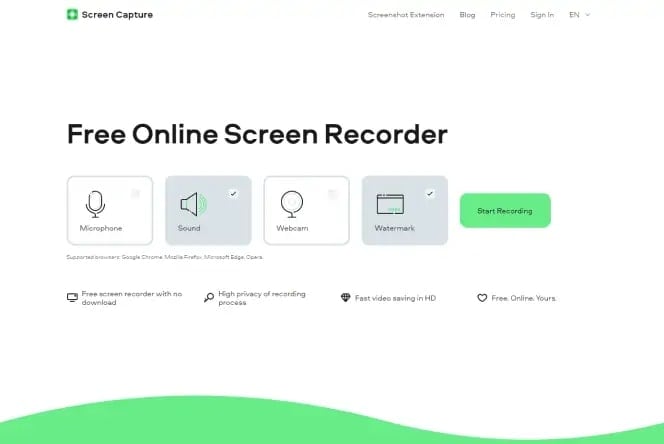
Screencapture.com is a freemium online screen recorder as it attaches a watermark to the recorded video in free mode. You can record your screen as well as your webcam and select the audio source as per your requirements. The recording is limited to HD resolution. You can capture video in Picture in Picture format.
The platforms emphasize downloading its desktop recorder where more features are available. You get the option to select the recording screen such as entire screen, browser or application window. After recording the video, you can instantly check its preview before saving or discarding. You can save the video in different file formats.
Reason to Choose:-
- Choose webcam, audio sources while recording the screen.
- Capture entire screen, application or browser screen.
- Capture video in Picture in Picture mode.
- Preview recording and save in different file formats.
Reason to Avoid:-
- Premium plan to remove watermark only.
- No customization of video parameter options.
5. Panopto
Best for: bests online screen recorder for teachers and students
User rating: 4.7/5.0
System compatibility: Windows, Mac, and Chromebook.
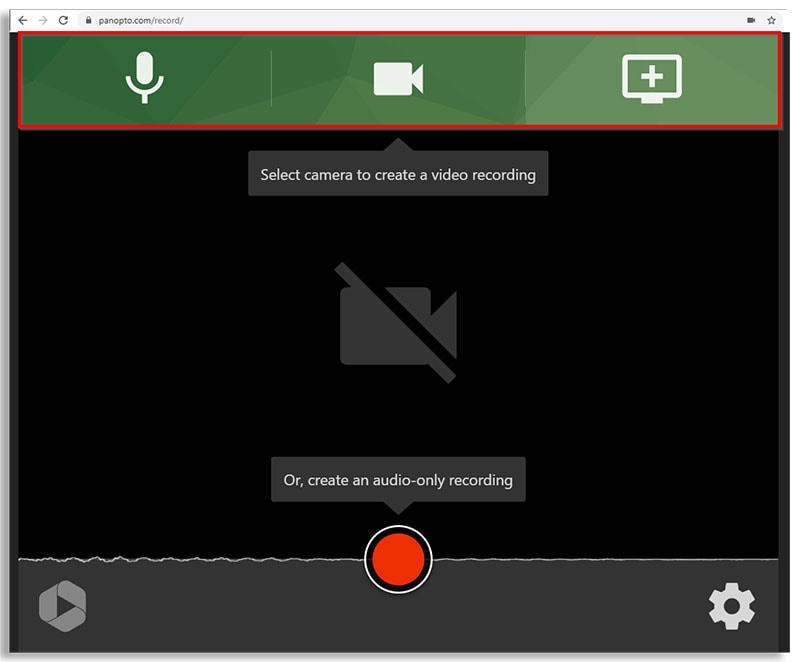
Panopto offers you a platform where you can record any video and save them on Panopto or Classroom. Therefore, it is an ideal platform for teachers and students and lecture delivery. You can even upload the recorded video on YouTube directly. You can even save the video on your local drive.
You can record any part of your screen in full HD resolution and the online recorder allows you to record webcam as well. You can also record system and external audio. The best part is that you can choose the video layout such as tile or PiP mode. Besides, you can blue the background while recording.
Reason to Choose:-
- Customize recording area and record in full HD.
- Smart camera and background selection options.
- Different saving and uploading options for recordings.
- Picture in Picture, Tile and Instant preview modes available.
Reason to Avoid:-
- The user interface is unappealing.
- No video editing options available.
6. Apowersoft Online Screen Recorder
Best for: best online screen recorder for recording demonstrative videos.
User rating: 4.8/5.0
System compatibility: Windows, Mac, and Chromebook
Apowersoft online recorder is one of the most popular and comprehensive screen recorders. You have to install its web installer on your computer for its online recorder to operate. You can record any region on your screen with the recorder. You have the option to save the recording on your local drive as well as on RecCloud. Besides, you can upload the video directly on YouTube.
The record supports different types of video output formats and you can record anything starting from live calls and video streams to demonstration videos. In fact, you can record even your webcam video along with external audio. There are also options for annotation while recording for better explanation.
Reason to Choose:-
- Record your screen, webcam, and audio smoothly.
- Customize recording area and add callouts to videos.
- Add annotation in real-time while recording.
- Save the recorded video in multiple file formats.
Reason to Avoid:-
- It lags if the computer is not a high-end one.
- No editing options are present.
Part 6: Screen Recorder for Mobile
If you want to record your mobile phone’s screen, you need to install a screen recorder app. Here is the list of the best screen video recorders for mobile users.
1. AZ screen recorder
Support OS: Android
Rating: 4.5/5.0
Download Link: https://play.google.com/store/apps/details?id=com.hecorat.screenrecorder.free&hl=en\_IN&gl=US
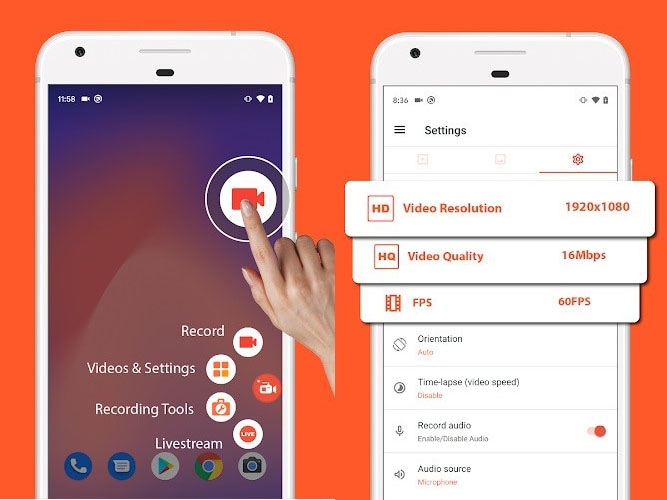
AZ screen recorder is a complete screen recorder from all perspectives. The app lets you record your screen, edit your video, go for livestream as well as take screenshots. You can record at full HD resolution and change resolution, frame rate and bitrate as required. The app can record internal sound as well as external sound through phone microphone.
You can also record your video through facecam in the overlay window. The app also comes with all the options for basic editing. You can even livestream your screen video on different video streaming platforms. Moreover, you can make GIFs from videos as well as take screenshots. The app is completely free to use without any watermark.
Reason to Choose:-
- Record screen with facecam in overlay window.
- Record gameplay with external mic audio.
- Record at 1080p resolution at 60fps.
- Floating controls, drawing tools.
- Trim, crop, merge, rotate, and convert to GIF.
Reason to Avoid:-
- It can get into glitches when recording long videos.
2. DU Recorder
Support OS: iOS and Android
Rating: 4.5/5.0
Download Link: https://apps.apple.com/us/app/du-recorder-screen-recorder/id1295647284
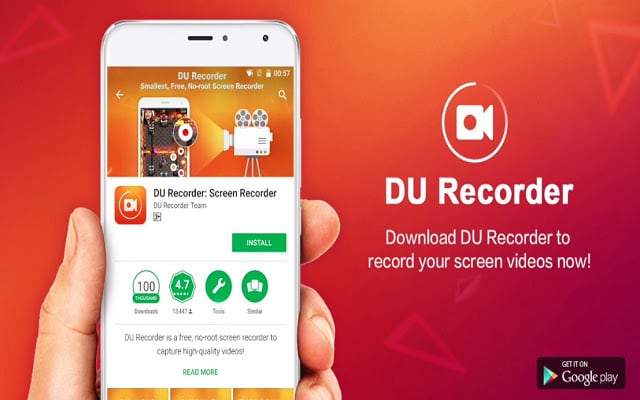
DU Recorder is a freemium app that is available for iOS and Android users. The free version attaches a watermark which is why you have to opt for DU Recorder Premium. You can record your screen and livestream your screen activities on YouTube, Twitch, and Facebook. The app can record gameplay, video calls, live shows and anything on the screen.
The recording can be in full HD resolution and you can adjust the video parameters. Besides, you can edit your video such as trimming, cropping, adding music, frames, stickers, texts and much more. Moreover, you can capture facecam video, change video speed, record internal and external audio, and convert video to GIFs. All in all, it is a great screen recorder with video editing and livestreaming features.
Reason to Choose:-
- Record screen and facecam video with internal and external audio.
- Livestream screen activities to video streaming platforms.
- Basic video editing options and insert frames, stickers, and filters.
- Add custom watermark, change speed, live themes in Pro version.
Reason to Avoid:-
- It can lag at times when you are recording high frame rate video.
- It adds watermark to your recorded video if you are using its free version.
3. XRecorder
Support OS: Android and iOS
Rating: 4.8/5.0
Download Link: https://play.google.com/store/apps/details?id=videoeditor.videorecorder.screenrecorder&hl=en\_IN&gl=US
XRecorder is a completely free screen recorder with no watermark. You can capture your screen video as well as take screenshots. The screen recorder allows you to select from 240p to 1080p resolution for video recording. The app provides you with a floating widget to record anything on the screen starting from live calls to live shows.
You can even livestream your screen and you can do basic editing on the recorded video. There is no time limit on the recording and hence, it is quite suitable for recording gameplay. You can record internal and external audio as well as record facecam in a small overlay window. Besides, you can add music as well as change video speed as per your requirements.
Reason to Choose:-
- Record screen and facecam along with system and mic audio.
- Record video at different resolutions up to 1080p.
- Floating widget, countdown buffer time, pause recording options.
- Capture screenshots, rotate video and basic video editing.
Reason to Avoid:-
- Some have reported glitches regarding audio recording.
- There could be some performance lags while recording at high resolution.
4. Mobizen Screen Recorder
Support OS: Android and iOS
Rating: 4.1/5.0
Download Link: https://play.google.com/store/apps/details?id=com.rsupport.mvagent&hl=en\_IN&gl=US
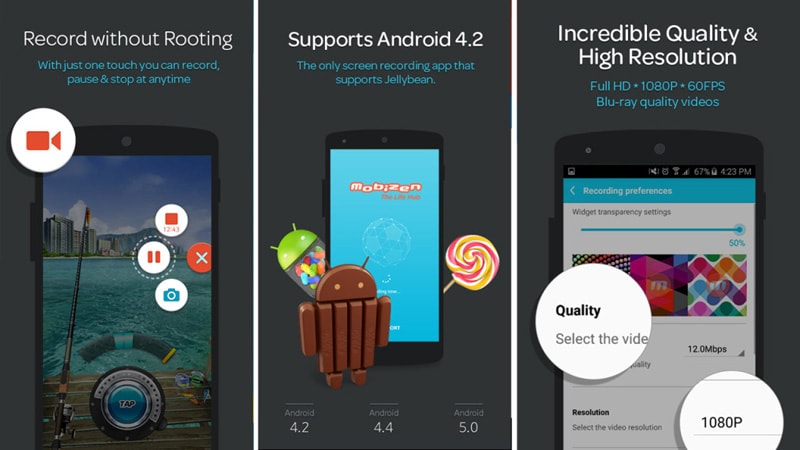
Mobizen Screen recorder belongs to the freemium app category as it adds a watermark to the recorded video in its free version. You have to purchase its premium plan to remove the watermark. Coming to its features, the app is a good combination of screen recorder and video editor. You can record your screen easily from its floating widget.
You can also add intro and outro to your recorded video as well as add background music. Besides, you can perform basic video editing. Most importantly, you can capture your screen at 2K resolution. Besides, the app allows recording through the front camera of your phone in an overlay window.
Reason to Choose:-
- Can record screen video up to 2K resolution.
- Record screen, facecam, and internal and external audio.
- Use drawing tools, control from floating widgets, and create GIFs.
- Different video editing options and customize watermark.
Reason to Avoid:-
- Free version puts a watermark on the recorded videos.
- Reports of malfunction when recording at 2K resolution.
5. ADV Screen Recorder
Support OS: Android
Rating: 4.4/5.0
Download Link: https://play.google.com/store/apps/details?id=com.blogspot.byterevapps.lollipopscreenrecorder&hl=en\_IN&gl=US
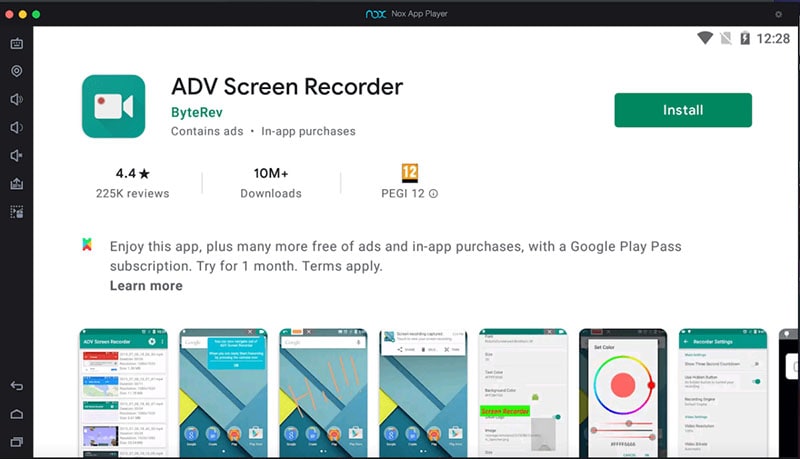
ADV screen recorder is a full-fledged app for Android users to record their screen with full customizations. You can record your front and back camera along with the screen. It operates with two different engines where the default engine has all the basic features and the advanced engine has the features for advanced users.
The app also lets you edit your recorded video and you can add texts and banners. Besides, you can draw on the video in real-time as well as trim the video as per your preference. There is also an option to pause the recording at your convenience. You can also customize the video recording parameters as required.
Reason to Choose:-
- Record your screen as well as front and back phone camera video.
- Pause recording, draw on video, and add texts.
- Trim video, add custom logo, switch between engines.
- Customize video and audio settings as required.
Reason to Avoid:-
- The user interface is not appealing.
- There are bugs reported that need to be fixed.
6. Record it
Support OS: iOS
Rating: 4.6/5.0
Download Link: https://apps.apple.com/us/app/record-it-screen-recorder/id1245356545
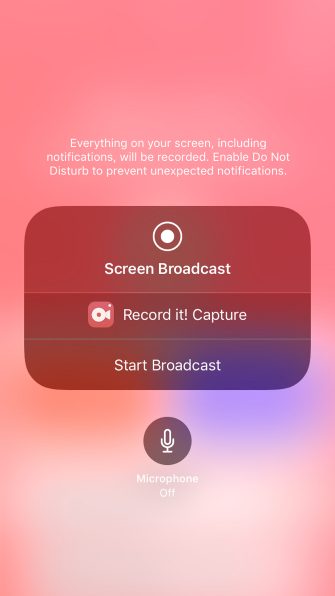
Record it! app is extremely useful in making tutorial videos where you need to record your screen. You can record the entire screen with a single tap. You can record gameplay and app screen along with your reaction through facecam. You can also customize the overlay window by changing its shape and position.
Besides, you can record your audio commentary while recording screen. It comes with video editing options to trim videos, add filters, change speed, rotate videos and much more. You can share your videos directly to YouTube as well as export through email and AirDrop. The user interface is quite intuitive and appealing.
Reason to Choose:-
- One-tap option to start recording at high resolution.
- Customization of facecam reaction overlay window.
- Support camera roll videos and add audio commentary.
- Basic video editing and instant sharing and exporting options.
Reason to Avoid:-
- It can lag at high frame rate and high resolution.
- There are reports of inconsistency with audio recording.
Part 7: How to Choose the Right Screen Recorder?
Here are the main parameters you need to keep in mind while choosing the best screen recorder for you.
1. Recording options: An ideal screen recorder should have all the different options for recording your screen, webcam, system audio, and external audio from microphone. Besides, it should offer you the option to customize the recording area by selection. You should be able to record full screen, application window, and browser tab accurately.
2. Price: If you are serious about recording your screen video and uploading the recorded video on online platforms, you have to opt for a premium screen recorder. While purchasing a proprietary screen recorder, you need to compare the software price with its peers and ensure that you are getting more features for the price you are paying.
3. Customer support: You need to ensure that the screen recorder you are purchasing, they have a highly responsive customer support. This is a highly neglected factor but users suffer a lot when the customer support team is not responsive. Be sure that you will need to contact the customer support team at some time to learn more about certain features and troubleshoot in emergency situations.
4. Sharing options: When your ultimate goal is to share your recorded video online, you should check for the sharing options available in the screen recorder. There are screen recorders that allow sharing recorded and edited videos on online platforms, cloud storage platforms, and video streaming platforms. It should also offer you options to let you export videos in different file formats.
5. Video editing tools: You have to edit your recorded video to trim out unnecessary parts and add effects and filters to enhance your video content and video quality. Besides, you may need options to add music and voiceover as well as intro and outro. That is why you should opt for a screen recorder where a great video editor is available.
6. Customer Reviews: Last but most importantly, you should check the customer review of the screen recording software. Even when a screen recorder has loads of features, if the customer reviews are not good enough, you should not choose you. Besides, the customer reviews reveal the pros and cons of a screen recorder for your better understanding.
Part 8: Screen Recording Tips and Tricks
1. Practice before recording: Unless you are a pro, you should practice at least once before the actual recording. This will help you to execute your plan according to your script smoothly when you actually start recording. Besides, you can check if the frame, the camera, the mic, and everything else are working perfectly.
2. Only record the required screen: Screen recorders offer you the option to record the entire screen, any specific application window or any specific tab of your browser. In fact, you can even customize the screen recording area as per your requirements for better focus and better visual experience.
3. Keep it short: It is always necessary to keep the length of the video as short as possible without skipping the relevant points and important explanations. That is where a proper script before recording is crucial so that you can have a plan and execute it properly without stretching your explanation unnecessarily.
4. Speak slowly and clearly: The way you speak in the video can attract as well as repel audiences. If you speak too fast and if you have a weird accent, it is going to repel audiences. That is why it is important for you to speak slowly and clearly so that everyone can understand everything you speak and negate your accent to a greater extent.
5. Use screen drawing tools: If you are recording a video where you need to explain something, it is always better if you use screen drawing tools. In fact, it is important that you choose the screen recorder that offers drawing tools so that the video gets visually pleasing and impactful for audiences to understand effectively.
6. Cut out dead moments: When you are recording screen videos, there are going to be a lot of dead moments and boring pauses. You have to cut out those boring and dead moments while editing so that the video stays interesting and the audiences do not lose concentration. This will also help to tighten the length of the video.
7. End with a summary: Last but most importantly, you should offer a proper conclusion before ending the video. You need to summarize everything you have discussed in the video so that the audience can get a revision of all the important points. Besides, a proper ending rather than an abrupt ending can leave a positive impact regarding your video.
Part 9: Frequently Asked Questions
How do I record Windows 10 screen?
You can use Windows Game Bar that comes pre-installed on Windows 10. However, for a better screen recording experience, we recommend Wondershare Filmora where you can edit the recording as well.
Can I screen record on my Mac?
You can use QuickTime that comes pre-installed on Mac. However, for professional screen recording experience, you can use Filmora or Camtasia where you will get more recording options and tools for editing after recording.
How do I screen record on my iPhone?
You can use DU Recorder app or Record it! app to record your iPhone screen video. Besides, the latest version of iOS comes with an in-built screen recorder option that can record the screen comfortably.
Which quality is best for screen recording?
The best quality for screen recording should be the same resolution as the screen. This means if you have a 4K monitor, the screen recording will be best at 4K resolution. In today’s scenario, 1080p or full HD is the optimal quality for screen recording.
What do most YouTubers use to record their screen?
Most YouTubers use Filmora or OBS Studio to record their screen. OBS Studio is mostly used by those who livestream their screen or gameplay. Filmora is mostly used by those who emphasize heavily on editing their recorded screen video for better output.
Does screen record ruin quality?
Your screen record quality can get ruined only when you use a screen recorder that records at a lower resolution due to its inability as well as to reduce file size. When you record your screen with a proprietary screen recorder, it can record the screen at exactly the same resolution as that of your screen. Hence, the video quality and resolution will stay intact.
What do gamers record their screens?
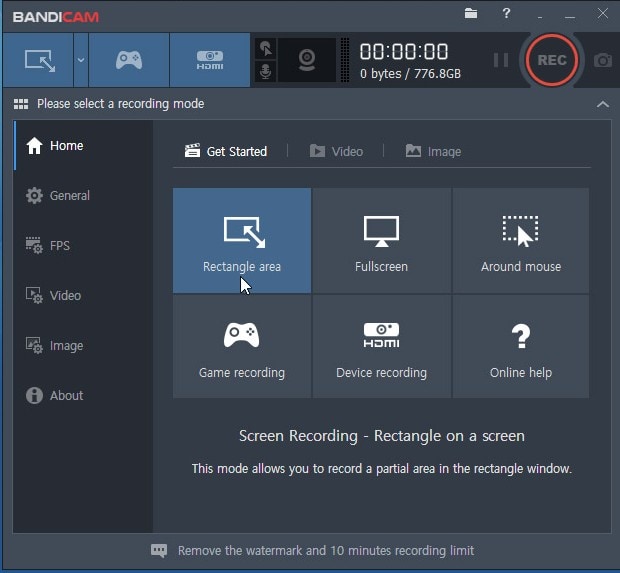
Gamers prefer Bandicam, Camtasia as well as Filmora to record their screens and showcase their gameplay to the world. Bandicam allows recording 2D and 3D games from gaming consoles at 4K resolution.
How do I make my recorded sound clear?
There are some screen recorders such as Filmora that offer you the option to remove background noise so that the recorded audio sound clearer. You can also use a pop filter to record clearer sound.
Part 4: Proprietary Screen Recorders
If you are serious about recording your screen and publishing the video online, you should invest in purchasing a premium screen recorder. A proprietary screen recorder is a video recorder where you have to purchase a premium plan to avail all the features. They offer all the required features for professional screen recording as well as editing the recording video. Here is the list of the best proprietary screen recorders for you.
7. Filmora Recorder
Best for: best screen recorder for all video creators
User rating: 4.8/5.0
System compatibility: Windows 11/10/8/7 and Mac 10.14+

Wondershare Filmora is one of the most popular screen recorders among video creators. You can record screen and webcam simultaneously as well as capture audio from system and external mic. Most importantly, you can record at 4K resolution without any performance lag. Besides, you can highlight mouse clicks and use greenscreen effect and customize background screen.
The main reason why Filmora is a preferred choice for recording video is that it comes with a world-class video editor. Therefore, you can enhance your video quality and content that will make the video stand out. Starting from adding audio and video effects to working with multiple video and audio clips, Filmora is undoubtedly the best screen recorder cum video editor for Windows and Mac users.
For Win 7 or later (64-bit)
For macOS 10.12 or later
Reason to Choose:-
- Record screen and webcam at high-resolution.
- Customize all video capturing settings and parameters.
- Edit the recorded video like a pro with its world-class video editor.
- Export the editing video in different file formats for maximum compatibility.
Reason to Avoid:-
- Takes long time to process high-resolution videos.
02 [Free Video Editor for PC and Mac ](#Part 2)
03 [Free Video Editor for Mobile Phones](#Part 3)
04 [Tips and Tricks for Using Free Video Editing Tools ](#Part 4)
05 [Related FAQs about Free Video Editors](#Part 5)
Part 1: Things to Consider When to Choose a Free Video Editor
Before opting for a free video editing software there are many important things, we mostly miss that we should have known. But you don’t have to worry about it anymore let’s begin:
What are you planning to use it for?: You must know the use of video editing software before picking one. Whether you are using it for gaming or creating ordinary YouTube videos. These decisions are very important to take before opting for downloading it from the internet.
Learning curve: You should keep in mind which editing software is complex to learn and which one is easy in comparison with that. If you didn’t keep this in mind you might end up wasting your time by downloading and trying in vain.
Quality: Another important factor to consider in video editing software is the quality and format of the video. There are many formats and quality of video content, therefore it is important to choose the one which supports your video format.
Resources: Depending upon the requirements of the editing on your video, you should choose a video editor that should have all the video effects, music tracks, and other resources that you might need to apply to your video. Be careful not to select one with few resources.
Compatability: The most important point is whether your PC, Mac, or Android platform can run the video editor you have heard the name from your friend. Consult the internet for compatibility of the software by checking its minimum specification requirement on its manual or docs.
Part 2: Free Video Editor for PC and Mac
1. Active Presenter – Free video editor for eLearning purposes
Best for: Teachers and students for delivering and recording class lectures.
User rating: 4.5/5.0
System compatibility: Windows 7/ Windows 8/8.1, Windows 10, Windows 11 (only 64-bit (x64) is supported), macOS 10.12, macOS 10.13, macOS 10.14, macOS 10.15, macOS 11 (only 64-bit Intel CPU is supported)
Active Presenter is multi-functional software that edits your video as well as record it. It is equipped with a variety of tools that record screens, edit screencasts videos, and create interactive content in Html5.
Moreover, the all-in-one feature lets you record your PC screen along with audio input. You can also edit your video and voice. The app also provides eLearning authority software guides, games, and simulations.
Reason to Choose:-
- User-Friendly Interface.
- Interactive features.
- Multiple Tools in one package.
Reason to Avoid:-
- Manual volume control.
- Need amendments in volume control.
2. Blender – 3D computer graphics software for videos
Best for: Graphics Designers, Photographers, and UI/UX Designers.
User rating: 4.5/5.0
System compatibility: Windows 8.1, 10, and 11, MacOS 10.13 Intel · 11.0 Apple Silicon, Linux
Blender is an amazing 3d creation platform that is open source. The software supports modeling, 3D pipelining, rigging, animation, rendering, video editing, motion tracking, game creation, and composing.
If you are a designer of 3d graphics then this software is best suitable for you. You can also edit your videos with this software for free since it is open source. Blender 3d is a good package for all types of graphics-related activities on computers.
Reason to Choose:-
- Open-Source
- Simplest Interface
- Frequent Updates
- A vast arsenal of 3d tools.
Reason to Avoid:-
- Sometimes glitchy but overall good.
- Laggy Performance on intensive editing.
- Little Complex to learn.
3. OpenShot – a free and open-source video editor for beginners
Best for: Small Business Owners and Freelancers.
User rating: 4.4/5.0
System compatibility: Linux (most distributions are supported), Windows (version 7, 8, and 10+), OS X (version 10.15+)
OpenShot is a cross-platform video editor that trims and slices videos for you. It has an animation framework of a fade, slide, and animate anything in your project. The software has an unlimited number of tracks you can use.
Moreover, the application has video effects, audio waveforms, a title editor, slow motion, and time effects. In short, it is a wonderful package for those who are interested in their videos in animated form like small business owners and freelancers, etc.
Reason to Choose:-
- The very easy graphical interface and navigation.
- Perfect for quick edits.
- Multiple languages support.
- Open-Source.
Reason to Avoid:-
- Sometimes the software crashes.
- Poor performance in high-resolution videos.
4. Lightworks – free and easy to use a pro video editing tool
Best for: Small business owners, actors, and marketers.
User rating: 3.5/5.0
System compatibility: Windows 8, Windows 8.1, and Windows 10, Mac OS X 10.11 or higher, Linux , Ubuntu / Lubuntu / Xubuntu 20.04 or higher
Lightworks is an editing system for video edits and mastering. It is one of the oldest software developed for early computer-based non-linear editing systems. After 2010, it is also available as an open source however the source code has never been released.
Lightworks has a million users around the world since it is the oldest software. This large number of users is only due to its wide acceptance overall platform’s windows, Linux, and Mac. If you are an actor, content creator, or marketeer then this software is for you.
Reason to Choose:-
- The abundance of resources for building videos.
- Free and Open-Source.
- Better Technical Support and suggestions.
Reason to Avoid:-
- Basic Editing Features
- Limited Transitions and font settings
5. VSDC Free Video Editor – best multimedia suite for video and audio editing
Best for: Business owners, mid-marketeers, and YouTubers.
User rating: 4.0/5.0
System compatibility: Windows XP/SP3/Vista/7/8/10
VSDC is a free non-linear editing tool that can edit your videos in ultra-high definitions. It is developed by Flash-Intergro LLC. VSDC is capable of many other features that video content creators usually need such as motion tracking, liver color correction, and post-production effects.
This product is available in 13 languages which makes it an easy choice for everyone around the world. It is initially released in 2011 and has a stable release in December 2021.
Reason to Choose:-
- Good quality multimedia editing
- Free and Open-Source
- Wide acceptance of video and audio formats
- Direct publishing on social media platforms
Reason to Avoid:-
- Cannot download animated transitions
- Hight memory consumption
6. Shotcut – Free video editor with high-resolution
Best for: Graphic designers, business owners, and IT marketers.
User rating: 4.2/5.0
System compatibility: Operating system: 64-bit Windows 7 – 11, Apple macOS 10.14 - 12, 64-bit Linux with at least glibc 2.27.
Shotcut is one of the free and open-source video editing platforms that is also a cross-platform editing tool. It is available on all the operating system platforms out there. Due to this, it is widely known on the internet for video editing. This editor was first developed by Dan Dennedy and based on MLT multimedia Framework.
Reason to Choose:-
- Wide-format support
- Device and transport option
- Sleek and Intuitive Interface
- Free and Open Source
Reason to Avoid:-
- The interface is complex comparatively
- Crashing is common due to driver problems
7. Hitfilm Express – The best choice for students and projects
Best for: Gamers, Youtubers, Small business owners, entrepreneurs, and graphic designers.
User rating: 4.4/5.0
System compatibility: Apple: macOS 11.0 Big Sur, macOS 10.15 Catalina or macOS 10.14 Mojave, Windows: Microsoft Windows 10 (64-bit)
Hitfilm Express is a free and open-source amazing video editing software with professional grading VF-X tools and many awesome contents such as gaming and films. This video editor is perfect for all beginners, who have just started the editing.
Hitfilm Express is a product from the Fxhome company. Its tools are industry rated and the interface is known for its user-friendly feature. The largest VFX toolkit of Hitfilm consists of more powerful libraries and is all available for free at your service.
Reason to Choose:-
- Supports HD videos.
- Multiple imports of many audios and their mixing.
- A broad variety of tools and functions.
Reason to Avoid:-
- Animation availability is limited and repetitive.
- No Instructional videos.
8. Microsoft Video Editor 2020 – Low learning curve editor for everyone
Best for: Photographers, Freelancers, and Youtubers.
User rating: 4.0/5.0
System compatibility: Microsoft Windows 98 or later or Windows NT® 4.0 or later
The Microsoft movie maker or video editor is one of the best video editors with which you can create amazing movie clips of your pictures. You can create many slideshow pictures and play music behind them.
Microsoft video editor comes with various stickers, trimming, merging, multiple trimming and filters, etc. The application is available on the Microsoft store to download. If you want something authentic n your windows then this app is for you.
Reason to Choose:-
- Interactive and easy-to-use tools.
- Perfect for video basic editing.
- Basic and very Instinctive.
Reason to Avoid:-
- Few features in comparison with others.
- Slightly outdated interface.
9. Avidemux – video editor designed for simple cutting and encoding
Best for: Digital Marketers, web designers, and business owners.
User rating: 4.4/5.0
System compatibility: Windows OS: 98 SE, XP, 2000, Vista, 7, 8, ME, macOS X, and Linux.
Avidemux is open-source software for video editing such as simple cutting, filtering, and encoding of videos into many formats. The application let you convert to many videos encoding formats like the popular ones MPEG and ASF etc.
Moreover, Avidemux does not provide editing through basic tools only but its automated task capability through queue and power scripts lets you do anything with your video. The application works on most platforms.
Reason to Choose:-
- Sleek user interface
- Wide support of codecs
- No learning curve is necessary
Reason to Avoid:-
- Confusing options
- Very few video editing features
10. iMovie – a most well-known video editor for macOS users
Best for: Apple device users, Marketers, developers, and teachers.
User rating: 4.3/5.0
System compatibility: Microsoft Windows 7, Windows 8, Windows 10, or Windows 11, All macOS
Imoview is a read-made installed software by Apple Inc on their systems. It primarily came in macOS, iOS, and iPadOS devices. Its original release came in 1999 as MAC OS 8 bundled application.
At the start, it was given free by buying a new macOS or ios device but later, in 2013 it has been issued for free to all its users. The application is known for its editing of any type and resolution of videos.
Reason to Choose:-
- User friendly
- Open-Source
- Best for HD Videos
Reason to Avoid:-
- Some glitches have been reported while recording gameplay.
- The customer support team is not always responsive.
12. Screenrec
Best for: best premium screen recorder for beginners
User rating: 4.5/5.0
System compatibility: Windows 10/8/7/XP and Linux
Screenrec is a premium screen recorder with a very intuitive user interface that makes it suitable for beginners. You can start and stop recording your screen with a single click. You can also record your webcam and audio from your system as well as external microphone. The software is perfect for taking screenshots and adding annotations wherever required.
The software generates a sharable link so that you can share it anywhere you want instantly. Once the link is shared, you can check its analytics. The video content management system is quite robust and the video content is fully encrypted for security and privacy.
Reason to Choose:-
- Record screen, webcam, audio with a single click.
- Very intuitive user interface with live annotation options.
- Generate instant sharable links and track analytics of videos.
- Better video content management with cloud storage.
Reason to Avoid:-
- Very limited editing options.
- Very limited customizable settings.
Part 5: Online Screen Recorders
If you do not want to install any dedicated screen recording software on your computer, you have online screen recorders to record the screen on the go. There is no software to install as you can launch the online screen recorders instantly from your web browsers. Here are the best online screen recorders for you.
1. Screencastify
Best for: best online screen recorder for those who want a browser extension.
User rating: 4.4/5.0
System compatibility: Windows, Mac and Chromebook
Screencastify comes in the form of a Chrome browser extension and hence, only Chrome users can use them. You can record your screen, your webcam video individually as well as together. The recording widget has options for real-time drawing while recording the video. Additionally, you can add stickers to enhance the video content.
After recording, you can upload the video on Google Drive, and you can share the video link instantly with anyone. The video editor offers you basic video editing options. You can even highlight mouse cursor. As far as saving the recorded video goes, you can export in MP4, MP3 as well as GIF file formats.
Reason to Choose:-
- Record desktop, browser, and application with webcam embedded.
- Highlight mouse movements and clicks and add stickers.
- Real-time drawing with pen and shapes and basic editing options.
- Export video to Google Drive and share video links instantly.
Reason to Avoid:-
- Limited to Chrome users only.
- Recording time limited to 5 minutes in free version.
2. Screencast-o-Matic
Best for: best online screen recorder for everyone
User rating: 4.7/5.0
System compatibility: Windows, Mac, iOS, Android and Chromebook.
Screencast-o-Matic is the best online screen recorder in terms of features and customization. All the features are well-balanced so that everyone can use it to satisfy their requirements. You can choose screen, webcam or both for recording. You can set a maximum time so that the recording can stop automatically.
You can choose the video resolution and you can choose audio sources. You can also capture screenshots and customize the recording area. If you opt for its premium plan, you get a vast stock library to enhance your video content. In fact, you can add animations, effects, add voiceover, background audio and automated caption.
Reason to Choose:-
- Capture screen, webcam, and audio with customized recording area.
- Customize video recording parameters as per requirements.
- Real-time drawing tools and cloud hosting for instant sharing.
- Separate video editor available for free.
Reason to Avoid:-
- Advanced features are meant for premium users.
- 15-minute recording time limitation in free version.
3. Loom Online Screen Recorder
Best for: best online screen recorder for teams and collaborative works.
User rating: 4.1/5.0
System compatibility: Windows, Mac, iOS, Android and Chromebook.
Loom comes with an online screen recorder along with a Chrome extension as well as desktop app. With the online screen recorder, you can record screen only, camera only as well as screen and camera together. You can choose actual webcam as well as virtual webcam and you can select an external mic for audio recording.
The online screen recorder comes with a recording countdown and you can save your videos on the workspace that Loom provides. You can select the entire screen, the browser tab or the application window. You can instantly share the recorded video with people through emails, social media platforms and much more.
Reason to Choose:-
- Record screen and webcam together and separately.
- Save the recorded video on Loom platform and share instantly.
- Basic editing options post recording include speed change.
- Add transcription and call-to-action as well as change thumbnail.
Reason to Avoid:-
- Cannot record gameplay or select customized region.
- Very limited video parameters customization options.
4. Screencapture.com
Best for: best online screen recorder for amateurs
User rating: 4.2/5.0
System compatibility: Windows, Mac, and Chromebook.
Screencapture.com is a freemium online screen recorder as it attaches a watermark to the recorded video in free mode. You can record your screen as well as your webcam and select the audio source as per your requirements. The recording is limited to HD resolution. You can capture video in Picture in Picture format.
The platforms emphasize downloading its desktop recorder where more features are available. You get the option to select the recording screen such as entire screen, browser or application window. After recording the video, you can instantly check its preview before saving or discarding. You can save the video in different file formats.
Reason to Choose:-
- Choose webcam, audio sources while recording the screen.
- Capture entire screen, application or browser screen.
- Capture video in Picture in Picture mode.
- Preview recording and save in different file formats.
Reason to Avoid:-
- Premium plan to remove watermark only.
- No customization of video parameter options.
5. Panopto
Best for: bests online screen recorder for teachers and students
User rating: 4.7/5.0
System compatibility: Windows, Mac, and Chromebook.
Panopto offers you a platform where you can record any video and save them on Panopto or Classroom. Therefore, it is an ideal platform for teachers and students and lecture delivery. You can even upload the recorded video on YouTube directly. You can even save the video on your local drive.
You can record any part of your screen in full HD resolution and the online recorder allows you to record webcam as well. You can also record system and external audio. The best part is that you can choose the video layout such as tile or PiP mode. Besides, you can blue the background while recording.
Reason to Choose:-
- Customize recording area and record in full HD.
- Smart camera and background selection options.
- Different saving and uploading options for recordings.
- Picture in Picture, Tile and Instant preview modes available.
Reason to Avoid:-
- The user interface is unappealing.
- No video editing options available.
6. Apowersoft Online Screen Recorder
Best for: best online screen recorder for recording demonstrative videos.
User rating: 4.8/5.0
System compatibility: Windows, Mac, and Chromebook
Apowersoft online recorder is one of the most popular and comprehensive screen recorders. You have to install its web installer on your computer for its online recorder to operate. You can record any region on your screen with the recorder. You have the option to save the recording on your local drive as well as on RecCloud. Besides, you can upload the video directly on YouTube.
The record supports different types of video output formats and you can record anything starting from live calls and video streams to demonstration videos. In fact, you can record even your webcam video along with external audio. There are also options for annotation while recording for better explanation.
Reason to Choose:-
- Record your screen, webcam, and audio smoothly.
- Customize recording area and add callouts to videos.
- Add annotation in real-time while recording.
- Save the recorded video in multiple file formats.
Reason to Avoid:-
- It lags if the computer is not a high-end one.
- No editing options are present.
Part 6: Screen Recorder for Mobile
If you want to record your mobile phone’s screen, you need to install a screen recorder app. Here is the list of the best screen video recorders for mobile users.
1. AZ screen recorder
Support OS: Android
Rating: 4.5/5.0
Download Link: https://play.google.com/store/apps/details?id=com.hecorat.screenrecorder.free&hl=en\_IN&gl=US
AZ screen recorder is a complete screen recorder from all perspectives. The app lets you record your screen, edit your video, go for livestream as well as take screenshots. You can record at full HD resolution and change resolution, frame rate and bitrate as required. The app can record internal sound as well as external sound through phone microphone.
You can also record your video through facecam in the overlay window. The app also comes with all the options for basic editing. You can even livestream your screen video on different video streaming platforms. Moreover, you can make GIFs from videos as well as take screenshots. The app is completely free to use without any watermark.
Reason to Choose:-
- Record screen with facecam in overlay window.
- Record gameplay with external mic audio.
- Record at 1080p resolution at 60fps.
- Floating controls, drawing tools.
- Trim, crop, merge, rotate, and convert to GIF.
Reason to Avoid:-
- It can get into glitches when recording long videos.
2. DU Recorder
Support OS: iOS and Android
Rating: 4.5/5.0
Download Link: https://apps.apple.com/us/app/du-recorder-screen-recorder/id1295647284
DU Recorder is a freemium app that is available for iOS and Android users. The free version attaches a watermark which is why you have to opt for DU Recorder Premium. You can record your screen and livestream your screen activities on YouTube, Twitch, and Facebook. The app can record gameplay, video calls, live shows and anything on the screen.
The recording can be in full HD resolution and you can adjust the video parameters. Besides, you can edit your video such as trimming, cropping, adding music, frames, stickers, texts and much more. Moreover, you can capture facecam video, change video speed, record internal and external audio, and convert video to GIFs. All in all, it is a great screen recorder with video editing and livestreaming features.
Reason to Choose:-
- Record screen and facecam video with internal and external audio.
- Livestream screen activities to video streaming platforms.
- Basic video editing options and insert frames, stickers, and filters.
- Add custom watermark, change speed, live themes in Pro version.
Reason to Avoid:-
- It can lag at times when you are recording high frame rate video.
- It adds watermark to your recorded video if you are using its free version.
3. XRecorder
Support OS: Android and iOS
Rating: 4.8/5.0
Download Link: https://play.google.com/store/apps/details?id=videoeditor.videorecorder.screenrecorder&hl=en\_IN&gl=US
XRecorder is a completely free screen recorder with no watermark. You can capture your screen video as well as take screenshots. The screen recorder allows you to select from 240p to 1080p resolution for video recording. The app provides you with a floating widget to record anything on the screen starting from live calls to live shows.
You can even livestream your screen and you can do basic editing on the recorded video. There is no time limit on the recording and hence, it is quite suitable for recording gameplay. You can record internal and external audio as well as record facecam in a small overlay window. Besides, you can add music as well as change video speed as per your requirements.
Reason to Choose:-
- Record screen and facecam along with system and mic audio.
- Record video at different resolutions up to 1080p.
- Floating widget, countdown buffer time, pause recording options.
- Capture screenshots, rotate video and basic video editing.
Reason to Avoid:-
- Some have reported glitches regarding audio recording.
- There could be some performance lags while recording at high resolution.
4. Mobizen Screen Recorder
Support OS: Android and iOS
Rating: 4.1/5.0
Download Link: https://play.google.com/store/apps/details?id=com.rsupport.mvagent&hl=en\_IN&gl=US
Mobizen Screen recorder belongs to the freemium app category as it adds a watermark to the recorded video in its free version. You have to purchase its premium plan to remove the watermark. Coming to its features, the app is a good combination of screen recorder and video editor. You can record your screen easily from its floating widget.
You can also add intro and outro to your recorded video as well as add background music. Besides, you can perform basic video editing. Most importantly, you can capture your screen at 2K resolution. Besides, the app allows recording through the front camera of your phone in an overlay window.
Reason to Choose:-
- Can record screen video up to 2K resolution.
- Record screen, facecam, and internal and external audio.
- Use drawing tools, control from floating widgets, and create GIFs.
- Different video editing options and customize watermark.
Reason to Avoid:-
- Free version puts a watermark on the recorded videos.
- Reports of malfunction when recording at 2K resolution.
5. ADV Screen Recorder
Support OS: Android
Rating: 4.4/5.0
Download Link: https://play.google.com/store/apps/details?id=com.blogspot.byterevapps.lollipopscreenrecorder&hl=en\_IN&gl=US
ADV screen recorder is a full-fledged app for Android users to record their screen with full customizations. You can record your front and back camera along with the screen. It operates with two different engines where the default engine has all the basic features and the advanced engine has the features for advanced users.
The app also lets you edit your recorded video and you can add texts and banners. Besides, you can draw on the video in real-time as well as trim the video as per your preference. There is also an option to pause the recording at your convenience. You can also customize the video recording parameters as required.
Reason to Choose:-
- Record your screen as well as front and back phone camera video.
- Pause recording, draw on video, and add texts.
- Trim video, add custom logo, switch between engines.
- Customize video and audio settings as required.
Reason to Avoid:-
- The user interface is not appealing.
- There are bugs reported that need to be fixed.
6. Record it
Support OS: iOS
Rating: 4.6/5.0
Download Link: https://apps.apple.com/us/app/record-it-screen-recorder/id1245356545
Record it! app is extremely useful in making tutorial videos where you need to record your screen. You can record the entire screen with a single tap. You can record gameplay and app screen along with your reaction through facecam. You can also customize the overlay window by changing its shape and position.
Besides, you can record your audio commentary while recording screen. It comes with video editing options to trim videos, add filters, change speed, rotate videos and much more. You can share your videos directly to YouTube as well as export through email and AirDrop. The user interface is quite intuitive and appealing.
Reason to Choose:-
- One-tap option to start recording at high resolution.
- Customization of facecam reaction overlay window.
- Support camera roll videos and add audio commentary.
- Basic video editing and instant sharing and exporting options.
Reason to Avoid:-
- It can lag at high frame rate and high resolution.
- There are reports of inconsistency with audio recording.
Part 7: How to Choose the Right Screen Recorder?
Here are the main parameters you need to keep in mind while choosing the best screen recorder for you.
1. Recording options: An ideal screen recorder should have all the different options for recording your screen, webcam, system audio, and external audio from microphone. Besides, it should offer you the option to customize the recording area by selection. You should be able to record full screen, application window, and browser tab accurately.
2. Price: If you are serious about recording your screen video and uploading the recorded video on online platforms, you have to opt for a premium screen recorder. While purchasing a proprietary screen recorder, you need to compare the software price with its peers and ensure that you are getting more features for the price you are paying.
3. Customer support: You need to ensure that the screen recorder you are purchasing, they have a highly responsive customer support. This is a highly neglected factor but users suffer a lot when the customer support team is not responsive. Be sure that you will need to contact the customer support team at some time to learn more about certain features and troubleshoot in emergency situations.
4. Sharing options: When your ultimate goal is to share your recorded video online, you should check for the sharing options available in the screen recorder. There are screen recorders that allow sharing recorded and edited videos on online platforms, cloud storage platforms, and video streaming platforms. It should also offer you options to let you export videos in different file formats.
5. Video editing tools: You have to edit your recorded video to trim out unnecessary parts and add effects and filters to enhance your video content and video quality. Besides, you may need options to add music and voiceover as well as intro and outro. That is why you should opt for a screen recorder where a great video editor is available.
6. Customer Reviews: Last but most importantly, you should check the customer review of the screen recording software. Even when a screen recorder has loads of features, if the customer reviews are not good enough, you should not choose you. Besides, the customer reviews reveal the pros and cons of a screen recorder for your better understanding.
Part 8: Screen Recording Tips and Tricks
1. Practice before recording: Unless you are a pro, you should practice at least once before the actual recording. This will help you to execute your plan according to your script smoothly when you actually start recording. Besides, you can check if the frame, the camera, the mic, and everything else are working perfectly.
2. Only record the required screen: Screen recorders offer you the option to record the entire screen, any specific application window or any specific tab of your browser. In fact, you can even customize the screen recording area as per your requirements for better focus and better visual experience.
3. Keep it short: It is always necessary to keep the length of the video as short as possible without skipping the relevant points and important explanations. That is where a proper script before recording is crucial so that you can have a plan and execute it properly without stretching your explanation unnecessarily.
4. Speak slowly and clearly: The way you speak in the video can attract as well as repel audiences. If you speak too fast and if you have a weird accent, it is going to repel audiences. That is why it is important for you to speak slowly and clearly so that everyone can understand everything you speak and negate your accent to a greater extent.
5. Use screen drawing tools: If you are recording a video where you need to explain something, it is always better if you use screen drawing tools. In fact, it is important that you choose the screen recorder that offers drawing tools so that the video gets visually pleasing and impactful for audiences to understand effectively.
6. Cut out dead moments: When you are recording screen videos, there are going to be a lot of dead moments and boring pauses. You have to cut out those boring and dead moments while editing so that the video stays interesting and the audiences do not lose concentration. This will also help to tighten the length of the video.
7. End with a summary: Last but most importantly, you should offer a proper conclusion before ending the video. You need to summarize everything you have discussed in the video so that the audience can get a revision of all the important points. Besides, a proper ending rather than an abrupt ending can leave a positive impact regarding your video.
Part 9: Frequently Asked Questions
How do I record Windows 10 screen?
You can use Windows Game Bar that comes pre-installed on Windows 10. However, for a better screen recording experience, we recommend Wondershare Filmora where you can edit the recording as well.
Can I screen record on my Mac?
You can use QuickTime that comes pre-installed on Mac. However, for professional screen recording experience, you can use Filmora or Camtasia where you will get more recording options and tools for editing after recording.
How do I screen record on my iPhone?
You can use DU Recorder app or Record it! app to record your iPhone screen video. Besides, the latest version of iOS comes with an in-built screen recorder option that can record the screen comfortably.
Which quality is best for screen recording?
The best quality for screen recording should be the same resolution as the screen. This means if you have a 4K monitor, the screen recording will be best at 4K resolution. In today’s scenario, 1080p or full HD is the optimal quality for screen recording.
What do most YouTubers use to record their screen?
Most YouTubers use Filmora or OBS Studio to record their screen. OBS Studio is mostly used by those who livestream their screen or gameplay. Filmora is mostly used by those who emphasize heavily on editing their recorded screen video for better output.
Does screen record ruin quality?
Your screen record quality can get ruined only when you use a screen recorder that records at a lower resolution due to its inability as well as to reduce file size. When you record your screen with a proprietary screen recorder, it can record the screen at exactly the same resolution as that of your screen. Hence, the video quality and resolution will stay intact.
What do gamers record their screens?
Gamers prefer Bandicam, Camtasia as well as Filmora to record their screens and showcase their gameplay to the world. Bandicam allows recording 2D and 3D games from gaming consoles at 4K resolution.
How do I make my recorded sound clear?
There are some screen recorders such as Filmora that offer you the option to remove background noise so that the recorded audio sound clearer. You can also use a pop filter to record clearer sound.
Part 4: Proprietary Screen Recorders
If you are serious about recording your screen and publishing the video online, you should invest in purchasing a premium screen recorder. A proprietary screen recorder is a video recorder where you have to purchase a premium plan to avail all the features. They offer all the required features for professional screen recording as well as editing the recording video. Here is the list of the best proprietary screen recorders for you.
7. Filmora Recorder
Best for: best screen recorder for all video creators
User rating: 4.8/5.0
System compatibility: Windows 11/10/8/7 and Mac 10.14+
Wondershare Filmora is one of the most popular screen recorders among video creators. You can record screen and webcam simultaneously as well as capture audio from system and external mic. Most importantly, you can record at 4K resolution without any performance lag. Besides, you can highlight mouse clicks and use greenscreen effect and customize background screen.
The main reason why Filmora is a preferred choice for recording video is that it comes with a world-class video editor. Therefore, you can enhance your video quality and content that will make the video stand out. Starting from adding audio and video effects to working with multiple video and audio clips, Filmora is undoubtedly the best screen recorder cum video editor for Windows and Mac users.
For Win 7 or later (64-bit)
For macOS 10.12 or later
Reason to Choose:-
- Record screen and webcam at high-resolution.
- Customize all video capturing settings and parameters.
- Edit the recorded video like a pro with its world-class video editor.
- Export the editing video in different file formats for maximum compatibility.
Reason to Avoid:-
- Takes long time to process high-resolution videos.
The Latest 100+ Best TikTok Captions to Improve Your Next Post
- Part 2: Creative Stimulation: A Comprehensive Inventory of Popular Titles on TikTok in 2024
- Part 3: Automatically Generate TikTok Captions using Filmora’s AI Copywriting Feature
- Part 4: Summary
Part 1: Why Videos Posted on TikTok Need a Catchy Title
Every TikTok creator, from amateur to influencer, will tell you that a caption isn’t just a few characters beneath your video; it’s the cherry on top of your content sundae. Let’s break down why:
- First Impressions Count: TikTok videos autoplay, but captions immediately catch the eye. A clever, concise caption can convince viewers to stay, engage, or share.
- Sets the Mood: Your video might be enigmatic or ambiguous. A caption gives it context. Whether you’re aiming for humor, poignancy, or sheer absurdity, the caption anchors your content.
- Boosts Discoverability: Strategic keywords in captions can make your videos more discoverable, especially as users search for specific content on TikTok.
- It’s Your Brand’s Voice: Established TikTokers have a recognizable style. Your captions can become a part of your brand’s unique voice, making you distinguishable in a sea of creators.
Part 2: Creative Stimulation: A Comprehensive Inventory of Popular Titles on TikTok in 2024
Captions aren’t just about information but about flair, wit, and personality. As TikTok evolves, so do the trends in captions. Let’s dive into some categories that are making waves this year:
TikTok Captions for Couples
- “With you, every moment is a duet 🎶”
- “Couple goals or just today’s blooper reel?”
- “He’s my favorite notification ❤️”
- “Love’s newest trendsetters 👫”
- “Two peas, one viral pod.”
- We found our perfect harmony on TikTok 🎵”
- “Dance partners for life, one TikTok at a time 💃🕺”
- “Our love story in 15-second clips 💖”
- “Capturing our love, one TikTok at a time 📸”
- “Making memories in the form of TikToks 📽️”
- “From duets to ‘I do.’ TikTok brought us together 💍”
- “Living for the trending dances and loving each other 💃❤️🕺”
- “Swipe right for our love story on TikTok ❤️”
- “Our love’s playlist: viral TikToks and sweet moments 🎥”
- “Our love shines brighter than any filter on TikTok ✨”
- “They say love is a dance. Ours is a TikTok routine 💃🕺”
- “Can’t stop the beat of our love on TikTok 🎶”
- “We’re the stars of our own TikTok romance 🌟”
- “Our hearts sync better than our choreography on TikTok 💖”
- “He’s my favorite co-star in this TikTok love story 🌟”
TikTok Captions for Friends
- “Real friends don’t let you do TikToks alone.”
- “Duo trouble. Double the fun 🎉”
- “Friendship goals, one TikTok at a time.”
- “Partners in crime and rhyme!”
- “Viral together, pals forever.”
- “Making TikToks with your bestie: 100% certified fun 🌟”
- “Double trouble, twice the laughter 😂✌️”
- “When life gives you friends, make TikToks 🎥”
- “Tag your partner in TikTok crime! 👯♂️👯♀️”
- “Filling TikTok with friendship vibes and good times 🌈”
- “Our friendship is the trending challenge we never want to end 💫”
- “Friendship + TikTok = Unstoppable duo 💥”
- “Creating TikToks that define #FriendshipGoals 🙌”
- “Friendship blooms, one TikTok dance move at a time 💃👭”
- “When the beat drops, we groove together! 🎶💃”
- “Our friendship is the real TikTok algorithm: always in sync 🔄”
- “Making memories, one TikTok dance at a time 🕺💖”
- “Friends who TikTok together, stick together 🤝”
- “Our friendship is the filter that makes life look better on TikTok ✨”
- “Shenanigans and dances with my favorite TikTok buddy! 🤪🕺”
Cool TikTok Captions
- Coolness level: Expert TikToker 😏”
- “Dropping coolness like beats in a TikTok track 🎶”
- “Living the TikTok dream, one swipe at a time 👻”
- “Chillin’ on TikTok like it’s second nature 🕶️”
- “Ice-cold moves in a world set ablaze 🔥”
- “TikTok vibes: Ice-cold, no melting allowed ❄️”
- “Cooler than the flip side of the TikTok pillow 😎”
- “Defying gravity with my TikTok cool factor 🚀”
- “When in doubt, TikTok it out with style 😏”
- “Raising the coolness quotient with every TikTok move 💯”
- “Cool kids make cool TikToks, and that’s a fact 🌟”
- “In a world of TikToks, be the coolest creator 🌍”
- “Cool, calm, and TikTok-collected 🎥✌️”
- “Living the TikTok life, one cool video at a time 🎬”
- “Keeping it cool and classy in the TikTok universe 🎩👌”
- “Cooler than a cucumber, even when the camera’s rolling 🥒”
- “TikTok: Where coolness finds its true stage 🌠”
- “Cool moves, hot content. TikTok game strong 🔥”
- “Embrace the coolness, TikTok is our canvas 🎨”
- “Coolness is an attitude, and my attitude is TikTok-fueled 😎”
Funny TikTok Captions
- “My dance moves: better than my cooking skills. Sorry, not sorry. 💃🍳”
- “Attempting to TikTok, but mostly just tripping over my own feet. 🙈”
- “I’m not clumsy, just testing gravity… a lot. 😂🌍”
- “Dancing like nobody’s watching, especially because I kicked the tripod. 🕺💥”
- “My TikToks are 10% talent, 90% pretending I know what I’m doing. 🤷♂️”
- “Making TikToks: Because embarrassing myself in person isn’t enough. 😜”
- “When life gives you lemons, make a funny TikTok. 🍋😂”
- “Dancing like nobody’s business, except TikTok’s. 🕺💼”
- “Overthinking my TikTok dances like they’re complex math problems. 🤔📚”
- “Pro tip: If in doubt, do the floss dance. It solves everything. 🦷💃”
- “Just a TikToker trapped in a human body. Send help! 🆘🤖”
- “My TikToks are like life: a mix of chaos and laughter. 🤪🎉”
- “Making faces in the mirror like I’m preparing for a TikTok masterpiece. 🤪😜”
- “Dancing to the beat of my own awkwardness. 🎶💃”
- “TikToking: The only time my ‘cool moves’ meet reality. 😎🤦”
- “Trying to dance like a TikTok star, ending up like a TikTok blooper reel. 🌟🙈”
- “Caution: May spontaneously burst into dance at any given moment. 🚀💃”
- “When TikTok dances look easier than they are… and I prove it. 🙌🕺”
- “If, at first, you don’t succeed on TikTok, laugh at yourself and try again. 😂🔄”
- “TikTok: Where ‘trending’ and ‘tripping’ have the same starting letter for a reason. 🤣🚶♂️”
Captions are more than just add-ons. They’re a part of the content’s DNA, influencing virality and engagement. The above lists are just a teaser. With so much potential, the right caption can be the difference between a few views and a few million. Stay tuned as we explore more on this topic!
Part 3: Automatically Generate TikTok Captions using Filmora’s AI Copywriting Feature
In the ever-evolving world of content creation, tech tools can be a creator’s best friend. With the overwhelming demand for frequent and catchy content, wouldn’t it be a game-changer if an AI could whip up the perfect TikTok caption for you? Enter Filmora’s AI Copywriting feature!
Create AI Captions For Win 7 or later(64-bit)
Create AI Captions For macOS 10.14 or later
Step 1: Download Filmora and Find the AI Copywriting Feature
Filmora, widely recognized for its video editing prowess, has now integrated an AI-powered copywriting feature. After downloading Filmora, navigate to the ‘Tools’ menu. Among the list, you’ll find the “AI Copywriting” option. It’s user-friendly and intuitive, making it perfect for both beginners and seasoned TikTokers.
Step 2: Enter Your Video Information
Filmora’s AI requires a bit of information to generate a caption that resonates with your content and audience:
- Select the Type of Headlines and Language: Whether you want something witty, poignant, or a mix of both, there’s an option for every mood. Plus, with multi-language support, you can cater to global audiences.
- Enter Your Video Content Topic: Give the AI a brief description of your video. It could be as simple as “a dog chasing its tail” or more abstract like “the feeling of nostalgia at a childhood park.”
After inputting the required details, Filmora’s AI will churn out multiple caption suggestions. Choose the one that best fits or use them as inspiration to craft your unique spin.
Part 4: Summary
TikTok has transformed the world of short video content, and behind each viral video is a captivating caption that perfectly captures the moment’s essence. While understanding the importance of catchy titles is crucial, having the tools and insights to generate them consistently can set you apart from the crowd.
Whether you’re brainstorming creatively or seeking assistance from innovative tools like Filmora’s AI Copywriting feature, remember that your caption is the gateway to engagement. Harness its power, and watch your TikTok presence soar!
End Screen Makers
A YouTube end screen is the final section of a YouTube video and generally makes up the final 5-20 seconds of the video. Video creators often use this section of the video to add calls-to-action, playlists, links to videos, and more.
It can therefore be a very crucial 5-20 seconds and you may want to make sure that the end screen works for your brand. To do that, you need to make use of a good end screen maker that will ensure you are taking full advantage of this final part of the video. Here, we will look at some of the best end screen makers for you to choose from.
Best End Screen Makers
The following are the best end screen makers that you can use to finish your YouTube videos in style;
Filmora
Wondershare Filmora is one of the best video creation and editing tools in the market and as such you can be sure that it has all the necessary features to help you create and edit an end screen for your YouTube video that users will interact with. It has a lot of different features that make the process easy and allows you to customize our video in so many ways.

You can add all kinds of assets to the video project including images, video clips, text, and more, and use Filmora’s filters, animated elements, and video effects to put them together. All these features come in a very simple-to-use interface that makes the often-complicated process of creating and editing videos very easy.
For Win 7 or later (64-bit)
For macOS 10.12 or later
Key Features
- You can export the completed video in very high quality
- It can be used to create and edit GIFs
- It has numerous editing tools including noise removal options, advanced color tuning, advanced text editor, scene stabilization, and more.
- You can add audio including voiceover and music to the video
- It has a very simple user interface that makes it very easy to use
Canva
Canva is a simple-to-use animated YouTube end screen maker that has a large library of resources ideal for creating different types of end screens. One of the best things about Canva is the numerous templates that you can choose from, along with effects and media files including stock photos that can be very useful when creating your video.

Although most of the features, including many of the templates, are free, the best resources are only available on the premium plan. Using a premium photo or template will mean that a watermark is added to your design.
Key Features
- Most of the resources you need to create your end screen on Canva are free
- The interface is very easy to use, with tutorials that can help when you get stuck.
- It has many great resources including stock images and unique templates
- You can add many effects to the end screen
Fotor
Fotor is another great solution that can be very useful in creating the YouTube end screen. It comes with a lot of different templates to choose from, allowing you to customize the end screen for maximum engagement. You can also upload your images to use in the project or choose from the Fotor library which offers options for different kinds of videos.

Key Features
- Most of the templates that you can choose are completely free to use
- The templates also come in different sizes to suit all needs
- You can use one of the many effects to further customize the end screen.
- The templates and effects are also customizable
Snappa
Snappa can also be a good way to create the perfect end screen for your YouTube video. It is a versatile solution with a lot of options to help you customize the end screen to suit your brand and targets. One such resource is the huge library of stock images as well as icons and shapes that you can choose from. Snappa makes the process much easier by allowing you to start from a suitable template that you can then customize as desired.

Key Features
- There are a lot of templates to choose from
- You can import your media files to customize the design
- You can also start from a blank canvas and work from there
- There is also a large library of stock photos that you can choose from
Placeit.net
This is an online solution that is one of the best ways to create an end screen for your YouTube video. The user interface is very simple to navigate and very well designed, allowing you to easily create the end screen even if you are a beginner.

You can upload your images to add to the design or choose from the large library of resources that Placeit.net provides. You also have numerous export options to choose from.
Key Features
- There are numerous templates to choose from
- You can export the end screen with transparency
- The interface is very easy to use
- Most of the resources are available for free
Kapwing
Kapwing is an online video editing solution that you can also use to create an end screen for your YouTube video. It has extensive features that can allow you to customize your end screen any way you want to. It has numerous templates to choose from and the simple drag-and-drop interface makes creating the end screen very easy.

Key Features
- You can choose the size of the end screen to use
- There are a lot of templates to choose from
- You can upload your images and other elements to the project
- You get to choose the duration of the end screen before you begin the project
How to Make an End Screen with Filmora
Creating an end screen for your YouTube video using Filmora is a very simple process. Use these steps to do it;
Step 1: The first thing you need to do is install Filmora on your computer. You can download the setup file from the main website and then follow the instructions on the setup wizard to install the program.
Once the installation is complete, open the program and click on “New Project” to start.
Step 2: Click on the “Titles” section and search for “End Screen” using the search bar. Select the best template for your end screen and drag it into the timeline.
Step 3: Now you are ready to add elements to the end screen. Add your profile picture on a new track across the timeline and stretch it to fit the screen as desired.
Step 4: Click on “Effects” and use the search function to search for the “Mask” effect. When you find it, add it across the timeline and double-click on it to open its settings and adjust the effect accordingly.
Step 5: You may also want to add your social media handles to the end screen. To do that, use the “Titles” tab to find the different social media handles and add each one to the timeline.
You are now ready to save and export the end screen and add it to your YouTube video.
Related FAQs About End Screen Maker
1. How Do You Make an End Screen?
Making an end screen is different depending on the tool that you use to create the end screen as well as the number of elements that you choose to add to it. But usually, you would start with a template and begin adding elements to the project one by one.
2.What is the Best Free Outro Maker?
The best tool to create an end screen for YouTube videos is Filmora simply because it makes the process very easy while allowing you to customize your creation as much as you need. But even though it has a free trial version, most of the features you need to create a unique end screen are not available on the free plan.
A good free solution would be Canva because it has numerous free resources that can create a decent end screen. Although we must point out that many of the best templates and elements on Canva are also not available for free.
3.How Long can a YouTube End Screen Be?
A typical end screen is often 5-20 seconds long. You don’t need any more than 20 seconds because it is only used as a way to promote additional content or add a call to action. So when creating an End screen, ensure that all elements are clear enough as your audience will have only 20 seconds to see it.
Even though it is just 20 seconds long, the end screen of your YouTube video can be the most important aspect of the entire video. It is a great way to further engage with your audience and with the tools on
this list, you can now create the best end screen for your video.
For macOS 10.12 or later
Key Features
- You can export the completed video in very high quality
- It can be used to create and edit GIFs
- It has numerous editing tools including noise removal options, advanced color tuning, advanced text editor, scene stabilization, and more.
- You can add audio including voiceover and music to the video
- It has a very simple user interface that makes it very easy to use
Canva
Canva is a simple-to-use animated YouTube end screen maker that has a large library of resources ideal for creating different types of end screens. One of the best things about Canva is the numerous templates that you can choose from, along with effects and media files including stock photos that can be very useful when creating your video.
Although most of the features, including many of the templates, are free, the best resources are only available on the premium plan. Using a premium photo or template will mean that a watermark is added to your design.
Key Features
- Most of the resources you need to create your end screen on Canva are free
- The interface is very easy to use, with tutorials that can help when you get stuck.
- It has many great resources including stock images and unique templates
- You can add many effects to the end screen
Fotor
Fotor is another great solution that can be very useful in creating the YouTube end screen. It comes with a lot of different templates to choose from, allowing you to customize the end screen for maximum engagement. You can also upload your images to use in the project or choose from the Fotor library which offers options for different kinds of videos.
Key Features
- Most of the templates that you can choose are completely free to use
- The templates also come in different sizes to suit all needs
- You can use one of the many effects to further customize the end screen.
- The templates and effects are also customizable
Snappa
Snappa can also be a good way to create the perfect end screen for your YouTube video. It is a versatile solution with a lot of options to help you customize the end screen to suit your brand and targets. One such resource is the huge library of stock images as well as icons and shapes that you can choose from. Snappa makes the process much easier by allowing you to start from a suitable template that you can then customize as desired.
Key Features
- There are a lot of templates to choose from
- You can import your media files to customize the design
- You can also start from a blank canvas and work from there
- There is also a large library of stock photos that you can choose from
Placeit.net
This is an online solution that is one of the best ways to create an end screen for your YouTube video. The user interface is very simple to navigate and very well designed, allowing you to easily create the end screen even if you are a beginner.
You can upload your images to add to the design or choose from the large library of resources that Placeit.net provides. You also have numerous export options to choose from.
Key Features
- There are numerous templates to choose from
- You can export the end screen with transparency
- The interface is very easy to use
- Most of the resources are available for free
Kapwing
Kapwing is an online video editing solution that you can also use to create an end screen for your YouTube video. It has extensive features that can allow you to customize your end screen any way you want to. It has numerous templates to choose from and the simple drag-and-drop interface makes creating the end screen very easy.
Key Features
- You can choose the size of the end screen to use
- There are a lot of templates to choose from
- You can upload your images and other elements to the project
- You get to choose the duration of the end screen before you begin the project
How to Make an End Screen with Filmora
Creating an end screen for your YouTube video using Filmora is a very simple process. Use these steps to do it;
Step 1: The first thing you need to do is install Filmora on your computer. You can download the setup file from the main website and then follow the instructions on the setup wizard to install the program.
Once the installation is complete, open the program and click on “New Project” to start.
Step 2: Click on the “Titles” section and search for “End Screen” using the search bar. Select the best template for your end screen and drag it into the timeline.
Step 3: Now you are ready to add elements to the end screen. Add your profile picture on a new track across the timeline and stretch it to fit the screen as desired.
Step 4: Click on “Effects” and use the search function to search for the “Mask” effect. When you find it, add it across the timeline and double-click on it to open its settings and adjust the effect accordingly.
Step 5: You may also want to add your social media handles to the end screen. To do that, use the “Titles” tab to find the different social media handles and add each one to the timeline.
You are now ready to save and export the end screen and add it to your YouTube video.
Related FAQs About End Screen Maker
1. How Do You Make an End Screen?
Making an end screen is different depending on the tool that you use to create the end screen as well as the number of elements that you choose to add to it. But usually, you would start with a template and begin adding elements to the project one by one.
2.What is the Best Free Outro Maker?
The best tool to create an end screen for YouTube videos is Filmora simply because it makes the process very easy while allowing you to customize your creation as much as you need. But even though it has a free trial version, most of the features you need to create a unique end screen are not available on the free plan.
A good free solution would be Canva because it has numerous free resources that can create a decent end screen. Although we must point out that many of the best templates and elements on Canva are also not available for free.
3.How Long can a YouTube End Screen Be?
A typical end screen is often 5-20 seconds long. You don’t need any more than 20 seconds because it is only used as a way to promote additional content or add a call to action. So when creating an End screen, ensure that all elements are clear enough as your audience will have only 20 seconds to see it.
Even though it is just 20 seconds long, the end screen of your YouTube video can be the most important aspect of the entire video. It is a great way to further engage with your audience and with the tools on
this list, you can now create the best end screen for your video.
Do You Want to Stream and Record at the Same Time but Can’t Find an Easy Solution? This Guide Will Help You Get This Done Using Three Easy-to-Follow Methods
The popularity of live streaming has exploded recently. A live stream is simply a video broadcast in real-time over the internet. It’s a great way to connect with people directly, whether for a gaming session, a cooking show, or a Q&A.
Many reasons are there for which why you might want to live stream and record at the same time. For instance, keep a record of your gameplay or stream highlights for future editing or use your live stream to generate content for your YouTube channel.
Whatever your reasons, this article will show you how to do live streaming and recording at the same time using three different methods.
Way 1. Use OBS To Stream And Record Video At The Same Time
OBS, or Open Broadcaster Software, is a free and open-source tool that allows you to stream and record video at the same time, which can be useful if you want to live-stream your gameplay on Twitch or record a tutorial for YouTube.
Key Features of OBS
- Compatible with Mac OS X, Linux, and Windows operating systems.
- Requires at least 4 GB of storage space and an Intel i5 2000-series processor or higher DirectX 10 capable graphics card.
- High-performance video capturing and mixing in real-time.
- With Custom Transitions, you can set up an unlimited number of scenes you can switch between seamlessly.
- Intuitive audio mixer.
- Easy-to-use and simple configuration options.
Steps
Here’s an easy and quick guide on how to use OBS Studio to stream and record videos simultaneously:
Step1 Download OBS Studio from the official website and install it on your computer or laptop.
Step2 Launch OBS Studio and go to the Settings menu. Find the Recording section under the Output tab.
Step3 Click “Start Recording” to manually start the recording or head to the General Tab and checkmark the box before “Automatically Record When Streaming.”
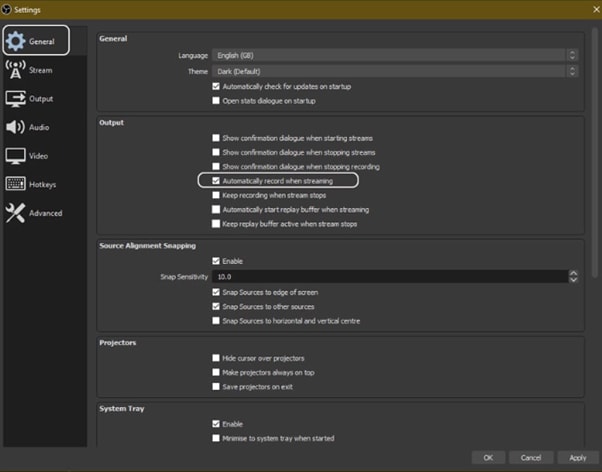
Step4 Finally, click “Apply” to save your settings. Now when you start your stream, the recording will also begin simultaneously.
Way 2. Use Twitch To Save Your Streams
Twitch is the most popular and best live streaming platform that allows gamers to broadcast their gameplay to a live audience and also gives them the ability to save their past broadcasts, or “streams.”
This feature can be useful to save your live stream for later viewing or share your stream with someone who missed it.
Features
Twitch offers a variety of features that make it a unique and powerful game streaming platform. Some of the most notable ones are:
- Live streaming: Twitch allows gamers to share their gameplay in real-time with other gamers around the world. This live aspect of the platform makes it unique and engaging.
- Social interaction: Twitch offers a variety of features that allow gamers to connect with each other, including chat rooms, forums, and user-generated content.
You can save your stream on Twitch in two ways:
- Use the “Highlights” feature, which allows you to save specific moments from your live stream.
- Download your stream’s entire VOD (video on demand) after it has ended.
Steps
Here are the quick steps to saving a stream on your PC from Twitch. But first, you need to enable Twitch VODs before starting your broadcast in the following way:
Step1 Visit Twitch and sign in to your account. Now, click the “Profile” icons and go to “Creator Dashboard.”
Step2 Head to Setting from the left-sidebar and click the “Stream” option. Scroll down and find the VOD Settings. Toggle the buttons next to “Store Past Broadcasts.”
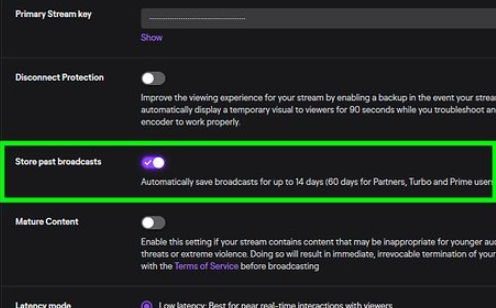
Step3 To publish your VODs instantly after broadcasting, toggle the button next to “Always Publish VODs.”
Now, to download the recordings of your broadcasts to your PC, do the following steps in sequence:
Step1 Head to the Creator Dashboard, find the “Content” section in the left sidebar, and click “Video Producer.”
Step2 Find the stream (VOD or Highlights) you want to download and on the right side, click the three dots.
Step3 Finally, click the “Download” option and let Twitch prepare your video. You will then get the stream’s recording in MP4 format.
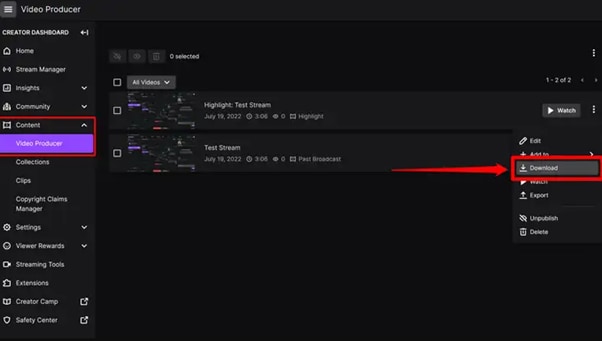
Way 3. Use Screen Recorder To Record Your Streams
Using a screen recorder is a great way to record your live stream because it lets you capture the full screen of your PC. Although there are many different screen recorders to choose from, we recommend using Filmora.
Wondershare Filmora is a powerful editor with easy-to-use screen recording capabilities, giving you everything you need to record and stream your video at the same time. The software is free to use and has an intuitive interface.
Features of Filmora
- Support for both Mac OS X and Windows operating systems.
- Ability to record your PC screen, audio, and webcam all at once
- A variety of video editing features
- An easy-to-use interface
Steps
Here’s how to use Filmora for recording while streaming:
Step1 Head to the official Filmora website, download the software and install it on your PC.
Step2 Launch Filmora 11 and click “New project” in the main interface. Click “File” from the top toolbar and scroll down to “Record media.” From the drop-down menu, select “Record PC Screen.”
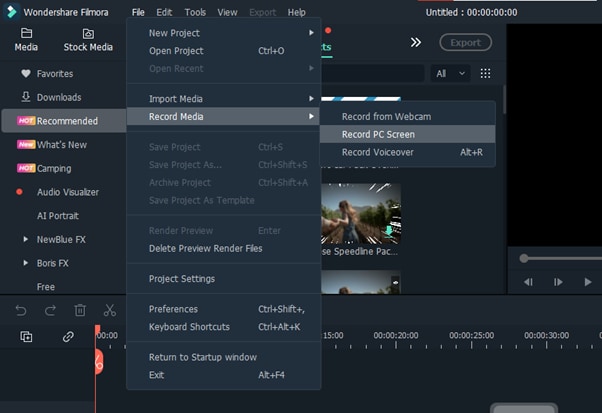
Step3 A new “Wondershare Screen Recorder” window will pop up. You can set up a full screen, custom or target screen recording, speaker, and microphone settings. If you want more Settings, click the drop-down icon.
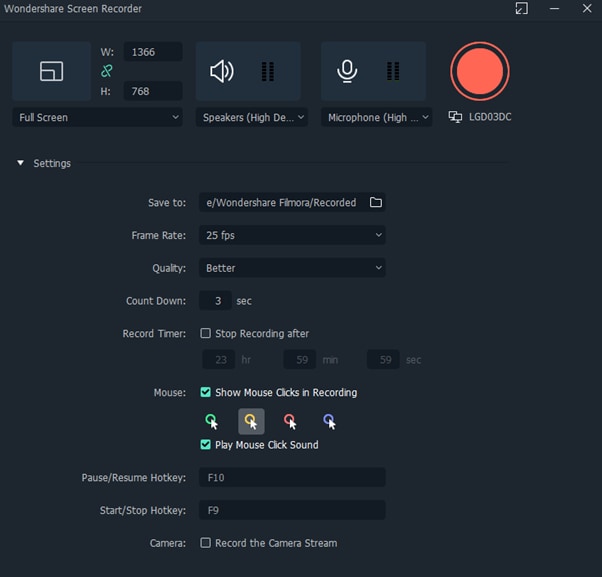
Step4 Click the Start icon to begin your recording. Afterward, click the Stop icon to stop the recording, and your stream will be saved in the selected destination.
Conclusion
In this article, we’ve discussed three step-by-step methods to help you do live streaming and recording at the same time. With these solutions at your disposal, you’ll be able to save your VODs with ease.
It is best to choose only one software to start with to avoid the time-consuming trial-and-error process. If you want to add another tool, do so later; otherwise, you will waste your precious time and resources.
Give these methods a shot, and eventually, you will find your groove—and become accustomed to just how easy it is to record and stream a video simultaneously.
Free Download For Win 7 or later(64-bit)
Free Download For macOS 10.14 or later
Free Download For macOS 10.14 or later
Also read:
- Updated 7 Best MP4 Editors on Mac Edit MP4 in Mac for 2024
- In 2024, How to Make Subtitle Videos
- Updated 2024 Approved Color Matching Is the Trickiest Part of Graphic Designing. Learn in Detail About Using Canva Color Match Ideally While Working on Your Pins, Social Media Posts, and Other Designs
- In This Guidepost, Youll Learn What an HDRI Photo Is and How to Use the Best Free HDRI Program to Edit Photos. Youll Also Know the Difference Between HDR and HDRI for 2024
- New In 2024, Here Is a Complete Overview of VSCO Video Editor; the Best Photo-Editing App that Helps You Adjust Your Pictures Right After You Capture Them
- Updated Are You Aware that You Can Create Your Own Lower Thirds for Video? Read This Article for a Tutorial on How to Customize One for 2024
- In 2024, How to Use OBS Chroma Key With/Without Green Screen Easy Solutions
- 2024 Approved The Ultimate Guide to Use LUTS to Color Grade on iPhone
- 2024 Approved Do You Have an Idea on How to Zoom in on Snapchat? Using This Article, You Will Find the Easiest Way to Zoom in and Out on Snapchat Videos for Different Purposes
- Updated Level Up Videos By Applying Keyframe with Filmora for 2024
- New 2024 Approved Designed for You! Best Image (JPG/PNG) to GIF Converters
- New How to Use LUTS to Color Grade on Your iPhone for 2024
- 2024 Approved How to Turn On/Off Motion Blur in Minecraft?
- Updated Whatre the Best Alternatives to Pexels, In 2024
- New 2024 Approved Repeated Text Animation Tutorial in Filmora
- Wish to Rock on YouTube, but Lacking Tricks? Here, We Will Tell You Everything About How the YouTube Algorithm AI Works and How You Can Perform Well According to AI for 2024
- Updated Do You Want to Know About the Photo Video Maker with Song? Are You Ready to Discover It in Detail? This Article Will Give You Valuable Insights on This Topic for 2024
- Updated Discover the Best Video Frame Rate Converters for Smooth Playback, Including Online and Offline Options. Learn How to Convert Frame Rates for Free and Elevate Your Video Quality with These Top 8 Tools for 2024
- Updated How Does the YouTube AI Algorithm Work - AI EXPLAINED
- In 2024, LumaFusion – What Is It and the Best Alternative to Use
- Updated How to Make After Effects Gifs for 2024
- Updated In 2024, Do You Need More Time to Explain a Particular Screen or Moment in Your Recording Using an Extended Freeze-Frame? Learn How to Use Camtasia Freeze-Frame to Extend Parts of a Video Effectively
- In 2024, 5 Ways To Teach You To Transfer Files from Sony Xperia 5 V to Other Android Devices Easily | Dr.fone
- How to Remove Forgotten PIN Of Your Vivo V29 Pro
- In 2024, The Ultimate Guide How to Bypass Swipe Screen to Unlock on Infinix Note 30i Device
- How to Bypass Google FRP Lock from Sony Xperia 1 V Devices
- Easy steps to recover deleted data from Asus ROG Phone 7
- How to Stop Life360 from Tracking You On Apple iPhone 12 Pro Max? | Dr.fone
- In 2024, How to Screen Mirroring Vivo Y100A? | Dr.fone
- In 2024, Why Your WhatsApp Location is Not Updating and How to Fix On Oppo A56s 5G | Dr.fone
- Turning Off Two Factor Authentication From iPhone SE (2020)? 5 Tips You Must Know
- Itel A60 Not Connecting to Wi-Fi? 12 Quick Ways to Fix | Dr.fone
- How to Cast Honor X9b Screen to PC Using WiFi | Dr.fone
- In 2024, Unlocking the Power of Smart Lock A Beginners Guide for Nokia C12 Users
- In 2024, How To Stream Anything From Samsung Galaxy A15 4G to Apple TV | Dr.fone
- About ZTE Axon 40 Lite FRP Bypass
- Bypass Tools to Bypass Lock Screen(C110)
- Title: New 2024 Approved Top Free Video Editing Software Enhance Your Content with These Essential Tools
- Author: Morgan
- Created at : 2024-04-24 01:04:01
- Updated at : 2024-04-25 01:04:01
- Link: https://ai-video-editing.techidaily.com/new-2024-approved-top-free-video-editing-software-enhance-your-content-with-these-essential-tools/
- License: This work is licensed under CC BY-NC-SA 4.0.
