
:max_bytes(150000):strip_icc():format(webp)/TheOscarsStatue-33f6c30d7ffd4694a4dd1d1113de57f5.jpg)
New 2024 Approved Understanding the Dynamics Underlying in AI Slow Motion Editing
Understanding the Dynamics Underlying in AI Slow Motion Editing
The prediction was that AI would take over the world with its advanced algorithms and efficiency. Many believe that AI can achieve task completion better than humans. Even though it hasn’t been able to replace the human race, it surpasses many fields. One such field is the media and entertainment industry for content editing. Today’s article topic revolves around AI editing and editors.
Specifically, we will dive into understanding AI slow motion in depth. We will discuss its purpose, significance, and process along the way. You can find many slow-motion AI tools to compare and choose a suitable one. The article will conclude by recommending an AI slow-motion tool that tops all.
Slow Motion Video Maker Slow your video’s speed with better control of your keyframes to create unique cinematic effects!
Make A Slow Motion Video Make A Slow Motion Video More Features

Part 1: How Does AI Improve Slow Motion Video Editing?
AI can enhance the quality of content and the mechanism of crafting slow-mo AI video. It not only contributes to task achievement but also improves various aspects. Find out about the influence that AI has in achieving a perfect slow-mo effect below:
1. Frame Interpolation
If you create an AI slow-motion video, the slow motion is often abrupt. To resolve this problem and bring smoothness to slow-mo, AI frame interpolation can help. Users must activate this function, and AI will handle all the technicalities. The AI adds extra frames to your video to ensure a smooth, slow motion.
2. Minimizing Artifacts
When you convert a video into slow motion, certain changes take place. It introduces artifacts such as motion blur or unwanted distortions. They decline the quality of content, and the view becomes distorted. Reducing these factors magnifies the slow-motion effect and brings perfection to it.
3. AI Auto Enhancement
Many slow-motion AI creators have a built-in auto enhancement feature or effect. They incorporate this function to minimize the negative elements. They increase sharpness for clarity and light settings for visual appeal. While slowing down footage, these enhancements act as a helping hand.
4. Time Remapping Option
In slow-motion AI video editors, users have the option to manipulate time at different frames. It is a video editing technique that gives you control over pacing and timing. This helps you bring precision to your slow-mo videos through detailed settings. You can manipulate video frames and speed better with this option.
5. Automated Noise Cancellation
Just when you think the AI is done for the day, it comes up with another feature. Another significance of AI in slow-motion video creation is reducing noise. Advanced AI algorithms are designed to assist in providing high-quality audio. It is because the audio track quality often declines during a slow-mo.
Part 2: Top Tools Available Online for AI Slow Motion Editing
Creating slow-motion videos enhances your video content as it emphasizes the parts of it. In addition, it contributes to creative storytelling, flashbacks, and showing emotions. In this section, discover some slow-mo AI video creators here:
1. RunwayML
Do you have a short video frame rate clip and want to convert it into a slow-mo? This slow-motion AI tool helps increase the video frames for creating a slow-mo. This tool offers an adjustable speed option to create according to your preferences. It has a Super-Slow Motion AI Magic Tool that smoothens out the video slow-mo of any duration.

Key Features
- It is a multifunctional video editor with unlimited features, so you don’t need a plugin.
- With its AI-backed algorithms, it makes rotoscoping and motion tracking easier.
- Collaborative cloud storage lets you pick from where you left editing.
Pricing
| Pricing Plans | Annual Pricing/month |
|---|---|
| Standard | $12 |
| Pro | $28 |
| Unlimited | $76 |
| Enterprise | Contact Sales |
2. Neural Love
Are you looking for an AI slow-motion tool with multiple customization options? Neural Love is the best fit as it offers naturalistic slow-mo effects and speed adjustments. In addition, the tool supports MP4 and MOV video formats to do so. You can also manipulate slow motion settings via the FPS option in it. The tool can slow down a video by 2 to 8 times and crafts realistic effects.

Key Features
- This tool offers multiple generative AI services like Avatar or Art Generation.
- It offers both audio and video enhancement functionality that you can use to enhance a slow-mo.
- You can also use its AI Face enhancement feature to improve slow-motion results.
Pricing
| Pricing Plans | Price Per 100 Credits |
|---|---|
| Subscription | $10 |
| Pay As You Go | $19 |
3. VEED.io
Creating a slow-motion video without any prior experience can be confusing. There are so many terms to learn, but with this slow-mo AI tool, anyone can do it. Whether a video clip or a GIF, it can transform both into a slow-mo. Once you upload a video, select a speed option to slow down the clip. You can start editing with this tool without any sign-up or sign-in before.

Key Features
- Users can split a clip’s frames to edit or introduce different effects and filters to a specific part.
- The editing interface of this tool to create slow motions is very easy and intuitive.
- Whether it is MP4, MOV, or AVI, it shows compatibility with all video formats.
Pricing
| Pricing Plans | Annual Pricing/month |
|---|---|
| Basic | $12 |
| Pro | $24 |
| Business | $59 |
| Enterprise | Contact Sales |
4. CapCut
With the help of this powerful AI slow-motion video generator, sit back and see the magic. Its AI algorithms analyze a clip and apply the automated slow-mo effect. Along with automated slow-motion adjustment, you can do some personalization. It has slow-motion effects like criminal investigation, cinema trailers, and smooth processing. Once you have created a slow motion, it allows you to edit it.

Key Features
- You can transform a declined video resolution to 4K with this tool.
- It also has a video resizer option to transform your video into any size.
- If you want to change a video format, this tool also offers a video converter tool to do so.
Pricing
Free
Part 3: How to Use AI Slow Motion Videos for High-Quality Edits?
Now that you have been made aware of plenty of the slow-motion AI tools, let’s move forward. Although operating all these tools is easy for proficient results, you must master them. Here is a detailed guide to two of the above AI slow-motion tools:
1. RunwayML
Editing a video from simple to slow motion is very laidback with this tool. The AI does most of the work, and you need to give a few directions. Here is a step-by-step guide to using this slow-mo AI tool:
Step 1: Once logged in and reached its editing interface, navigate towards the left panel. Then, opt for the “Edit videos” option under the “Video” section. From the display menu, locate and select the “Super-Slow Motion” option.

Step 2: In the Super Slow Motion window, click the “Upload” option and drop a file.

Step 3: Once the video has been uploaded, modify the speed of the video. You can do this by accessing the “Speed” slider at the right. After editing, click the “Process” button to finalize the slow-motion settings. The edited video will appear on the screen; play it to see if the results are satisfactory. Then, click the “Export” button at the right to download the video.

2. Neural Love
This is another slow-motion AI tool for those with little knowledge of creating slow-mo. It uses AI tech to facilitate users and automate the major editing elements. Following are the steps to operate this online tool seamlessly:
Step 1: After accessing this tool, click the “Upload Video” button to import media. Once the import progress is completed, the tool will analyze your video.

Step 2: Scroll down and set the percentage slider for slowing down the video. You can also select to upscale your video or change its frame rate. Moreover, you can select to colorize the video as well.

Step 3: Click the “Start Full Video Processing” button after setting preferences. Once you have subscribed to a plan, the video slow motion will be ready.
Part 4: Desktop Alternative: Slowing Down Videos Using AI With Wondershare Filmora
Indeed, all these tools are experts in what they do. However, they all have some drawbacks. All these slow-motion AI tools require internet access to create a slow-mo. In such circumstances, users require a desktop tool that masters this task. Wondershare Filmora is an efficient tool for creating videos slow-mo with ease. Amongst slow-motion AI, it has other AI features, a resource library, and custom setting options.
Free Download For Win 7 or later(64-bit)
Free Download For macOS 10.14 or later
Speed Ramping for Creating Slow Motion in Wondershare Filmora
This feature can do everything, whether it’s about creating slow motion or speeding up your video. You can customize the speed of your video at specific frame rates with this. In addition, there are 6 pre-assembled speed ramping presets that you can apply. All presets are popular and tailored to fit most of the video contexts.
Along with speed, you can also maintain the audio pitch to align with the speed of the video. The feature later uses AI assistance in frame interpolation to smooth the added effect. There are 3 options for AI frame interpolation, and one of them is Optical Flow. This option helps with bringing smoothness to your AI slow-motion videos. In short, Filmora offers a professional ground for making a slow-mo.
Guide to Manage Speed Ramping in Wondershare Filmora
Now that you know its speed ramping option, it is time to try it. Although Filmora rules out the technicalities, there is still much to learn. In this section, find the step-by-step guide to creating a slow-motion AI video:
Step 1Import Files and Access the Speed Ramping Option
Once you have created a new project in Filmora, use the “Ctrl + I” keys to import files. After that, bring this clip to the timeline and select it. Navigate towards the right-side panel and go to the “Speed > Speed Ramping” tab. Under this tab, choose a preset or the “Customize” option to set a speed.

Step 2Enable Optical Flow Option
Once you have set speed preferences, reach the “AI Frame Interpolation” section at the bottom. From there, select the “Optical Flow” option to add extra frames. The AI will smoothen out the slow-motion effect in your video on its own.

Step 3Enable Render Preview to See Results
Once you have enabled the Optical Flow option, go to the timeline panel and locate the respective option. Once you find the “Render Preview” icon, click it to see results.

Conclusion
Upon reaching the end, you must have gained a brief knowledge of slow-motion AI. The article discussed the advantages of AI integration in slow-motion video generators. In addition, there was a brief knowledge about some of the effective slow-mo makers. Wondershare Filmora is an AI-driven desktop tool for making such videos. If you haven’t already used it, we suggest this user-friendly tool for creation.
Make A Slow Motion Video Make A Slow Motion Video More Features
Part 1: How Does AI Improve Slow Motion Video Editing?
AI can enhance the quality of content and the mechanism of crafting slow-mo AI video. It not only contributes to task achievement but also improves various aspects. Find out about the influence that AI has in achieving a perfect slow-mo effect below:
1. Frame Interpolation
If you create an AI slow-motion video, the slow motion is often abrupt. To resolve this problem and bring smoothness to slow-mo, AI frame interpolation can help. Users must activate this function, and AI will handle all the technicalities. The AI adds extra frames to your video to ensure a smooth, slow motion.
2. Minimizing Artifacts
When you convert a video into slow motion, certain changes take place. It introduces artifacts such as motion blur or unwanted distortions. They decline the quality of content, and the view becomes distorted. Reducing these factors magnifies the slow-motion effect and brings perfection to it.
3. AI Auto Enhancement
Many slow-motion AI creators have a built-in auto enhancement feature or effect. They incorporate this function to minimize the negative elements. They increase sharpness for clarity and light settings for visual appeal. While slowing down footage, these enhancements act as a helping hand.
4. Time Remapping Option
In slow-motion AI video editors, users have the option to manipulate time at different frames. It is a video editing technique that gives you control over pacing and timing. This helps you bring precision to your slow-mo videos through detailed settings. You can manipulate video frames and speed better with this option.
5. Automated Noise Cancellation
Just when you think the AI is done for the day, it comes up with another feature. Another significance of AI in slow-motion video creation is reducing noise. Advanced AI algorithms are designed to assist in providing high-quality audio. It is because the audio track quality often declines during a slow-mo.
Part 2: Top Tools Available Online for AI Slow Motion Editing
Creating slow-motion videos enhances your video content as it emphasizes the parts of it. In addition, it contributes to creative storytelling, flashbacks, and showing emotions. In this section, discover some slow-mo AI video creators here:
1. RunwayML
Do you have a short video frame rate clip and want to convert it into a slow-mo? This slow-motion AI tool helps increase the video frames for creating a slow-mo. This tool offers an adjustable speed option to create according to your preferences. It has a Super-Slow Motion AI Magic Tool that smoothens out the video slow-mo of any duration.
Key Features
- It is a multifunctional video editor with unlimited features, so you don’t need a plugin.
- With its AI-backed algorithms, it makes rotoscoping and motion tracking easier.
- Collaborative cloud storage lets you pick from where you left editing.
Pricing
| Pricing Plans | Annual Pricing/month |
|---|---|
| Standard | $12 |
| Pro | $28 |
| Unlimited | $76 |
| Enterprise | Contact Sales |
2. Neural Love
Are you looking for an AI slow-motion tool with multiple customization options? Neural Love is the best fit as it offers naturalistic slow-mo effects and speed adjustments. In addition, the tool supports MP4 and MOV video formats to do so. You can also manipulate slow motion settings via the FPS option in it. The tool can slow down a video by 2 to 8 times and crafts realistic effects.
Key Features
- This tool offers multiple generative AI services like Avatar or Art Generation.
- It offers both audio and video enhancement functionality that you can use to enhance a slow-mo.
- You can also use its AI Face enhancement feature to improve slow-motion results.
Pricing
| Pricing Plans | Price Per 100 Credits |
|---|---|
| Subscription | $10 |
| Pay As You Go | $19 |
3. VEED.io
Creating a slow-motion video without any prior experience can be confusing. There are so many terms to learn, but with this slow-mo AI tool, anyone can do it. Whether a video clip or a GIF, it can transform both into a slow-mo. Once you upload a video, select a speed option to slow down the clip. You can start editing with this tool without any sign-up or sign-in before.
Key Features
- Users can split a clip’s frames to edit or introduce different effects and filters to a specific part.
- The editing interface of this tool to create slow motions is very easy and intuitive.
- Whether it is MP4, MOV, or AVI, it shows compatibility with all video formats.
Pricing
| Pricing Plans | Annual Pricing/month |
|---|---|
| Basic | $12 |
| Pro | $24 |
| Business | $59 |
| Enterprise | Contact Sales |
4. CapCut
With the help of this powerful AI slow-motion video generator, sit back and see the magic. Its AI algorithms analyze a clip and apply the automated slow-mo effect. Along with automated slow-motion adjustment, you can do some personalization. It has slow-motion effects like criminal investigation, cinema trailers, and smooth processing. Once you have created a slow motion, it allows you to edit it.
Key Features
- You can transform a declined video resolution to 4K with this tool.
- It also has a video resizer option to transform your video into any size.
- If you want to change a video format, this tool also offers a video converter tool to do so.
Pricing
Free
Part 3: How to Use AI Slow Motion Videos for High-Quality Edits?
Now that you have been made aware of plenty of the slow-motion AI tools, let’s move forward. Although operating all these tools is easy for proficient results, you must master them. Here is a detailed guide to two of the above AI slow-motion tools:
1. RunwayML
Editing a video from simple to slow motion is very laidback with this tool. The AI does most of the work, and you need to give a few directions. Here is a step-by-step guide to using this slow-mo AI tool:
Step 1: Once logged in and reached its editing interface, navigate towards the left panel. Then, opt for the “Edit videos” option under the “Video” section. From the display menu, locate and select the “Super-Slow Motion” option.
Step 2: In the Super Slow Motion window, click the “Upload” option and drop a file.
Step 3: Once the video has been uploaded, modify the speed of the video. You can do this by accessing the “Speed” slider at the right. After editing, click the “Process” button to finalize the slow-motion settings. The edited video will appear on the screen; play it to see if the results are satisfactory. Then, click the “Export” button at the right to download the video.
2. Neural Love
This is another slow-motion AI tool for those with little knowledge of creating slow-mo. It uses AI tech to facilitate users and automate the major editing elements. Following are the steps to operate this online tool seamlessly:
Step 1: After accessing this tool, click the “Upload Video” button to import media. Once the import progress is completed, the tool will analyze your video.
Step 2: Scroll down and set the percentage slider for slowing down the video. You can also select to upscale your video or change its frame rate. Moreover, you can select to colorize the video as well.
Step 3: Click the “Start Full Video Processing” button after setting preferences. Once you have subscribed to a plan, the video slow motion will be ready.
Part 4: Desktop Alternative: Slowing Down Videos Using AI With Wondershare Filmora
Indeed, all these tools are experts in what they do. However, they all have some drawbacks. All these slow-motion AI tools require internet access to create a slow-mo. In such circumstances, users require a desktop tool that masters this task. Wondershare Filmora is an efficient tool for creating videos slow-mo with ease. Amongst slow-motion AI, it has other AI features, a resource library, and custom setting options.
Free Download For Win 7 or later(64-bit)
Free Download For macOS 10.14 or later
Speed Ramping for Creating Slow Motion in Wondershare Filmora
This feature can do everything, whether it’s about creating slow motion or speeding up your video. You can customize the speed of your video at specific frame rates with this. In addition, there are 6 pre-assembled speed ramping presets that you can apply. All presets are popular and tailored to fit most of the video contexts.
Along with speed, you can also maintain the audio pitch to align with the speed of the video. The feature later uses AI assistance in frame interpolation to smooth the added effect. There are 3 options for AI frame interpolation, and one of them is Optical Flow. This option helps with bringing smoothness to your AI slow-motion videos. In short, Filmora offers a professional ground for making a slow-mo.
Guide to Manage Speed Ramping in Wondershare Filmora
Now that you know its speed ramping option, it is time to try it. Although Filmora rules out the technicalities, there is still much to learn. In this section, find the step-by-step guide to creating a slow-motion AI video:
Step 1Import Files and Access the Speed Ramping Option
Once you have created a new project in Filmora, use the “Ctrl + I” keys to import files. After that, bring this clip to the timeline and select it. Navigate towards the right-side panel and go to the “Speed > Speed Ramping” tab. Under this tab, choose a preset or the “Customize” option to set a speed.
Step 2Enable Optical Flow Option
Once you have set speed preferences, reach the “AI Frame Interpolation” section at the bottom. From there, select the “Optical Flow” option to add extra frames. The AI will smoothen out the slow-motion effect in your video on its own.
Step 3Enable Render Preview to See Results
Once you have enabled the Optical Flow option, go to the timeline panel and locate the respective option. Once you find the “Render Preview” icon, click it to see results.
Conclusion
Upon reaching the end, you must have gained a brief knowledge of slow-motion AI. The article discussed the advantages of AI integration in slow-motion video generators. In addition, there was a brief knowledge about some of the effective slow-mo makers. Wondershare Filmora is an AI-driven desktop tool for making such videos. If you haven’t already used it, we suggest this user-friendly tool for creation.
Best Audio Plug-Ins For Video Editors
When it comes to improving the sound of the audio in your video editing projects, you have a variety of options to choose from when approaching the editing. Most plugins that we will cover today will be helpful for many different effects instead of only one particular one.
Let’s get started!
1. Synchro Arts Revoice Pro
Let’s talk about Revoice Pro 4. This is an awesome plugin for when you are finishing complex editing projects when you work with dialogues and need to synchronize other lines to fit the shot. Revoice Pro 4 combines timing and pitch alignment technology, together with as a pair of cutting-edge tuning tools and a natural-sounding vocal doubler for people working on the narrator voice.

For the video editors working in audio post-production, the stand out new feature added to Revoice Pro is Smart Align combined with a fast workflow, meaning that you don’t need to leave Pro Tools to synchronize ADR to the location audio. Although Version 4.3 presented an ARA version of the Revoice Pro link plug-in for Logic Pro users, so providing immediate transfers back and forth between Logic Pro or higher Synchro Arts haven’t counted out Pro Tools users by preparing a new set of AudioSuite plugins.
The APT procedures, used to align the pitch and timing of multiple vocal tracks, now includes SmartAlign. When this is turned on, it can align audio with significant gaps in the guide or even dub the audio. This feature enables you to align much longer performances, which in the past had to be divided into smaller sections.
As Revoice Pro has improved over the years, the latest version is giving you the ultimate workflow it should always have had in the past. Synchro Arts have been able to create the perfect workflow with an AudioSuite plugin, that runs Revoice Pro in the background without having to have to switch back between Revoice Pro and Pro Tools. Select your audio and the desiredRevoice Pro preset, process the audio in Revoice Pro and place it directly into the timeline without having to leave Pro Tools.
Smart Align and the Quick APT AudioSuite plugin made this fairly easy, yet powerful, workflow. Synchro Arts has also been able to fix the tasks of how to handle gaps. Before V4.3, you had to make sure there weren’t any unexpected empty spots, or it was not able to work out what to do. Using Smart Align, it handles the gaps without any problems.
Whether you need to tighten any kind of pitch or timings on a vocal recording, Revoice Pro is the one for you. Revoice Pro is great for working with vocal recordings, but it’s perfectly suitable for instruments like guitars and strings too.
Synchro Arts Revoice Pro is available for $599.
2. Red Giant Magic Bullet Colorista
This is a very interesting plugin. Colorista tries to cancel out the need for a separate color-specific program by increasing more color correction options. This plugin allows you to have more color control with tools for tints, temperatures, vignetting, RGB curving, and so forth. Colorista contains a three-way color function and support for LOG clips and LUT filters. Colorista is not a stand-alone program. It’s designed to integrate into existing software and offer better functionality. Plugins let you design something that wasn’t there originally. You don’t have to load a certain project to activate them.

For years, Red Giant has been one of the biggest developers of plugins designed for video editing software. Among the other ones is the Magic bullet suite, which contains quite some plugins to solve video noise problems and do some color grading. We believe the versatility of Red Giant allow content creators and movie producers to let their ideas come to life, create dynamic art and create better content overall.
Even though Red Giant’s Magic Bullet Suite is a plugin suite created for Adobe After Effects and Premiere Pro, it also works with other video editing software such as VEGAS Pro. The suite focuses on color correction and color grading improvements. VEGAS Pro is my software of choice, but one aspect of Premiere that I’ve always thought inadequate were the color correction tools. Looks is completely customizable, and a “preset” can be built up from zero. The Colorista suite comes with a lot of other plugins that have crucial roles in the color grading aspect of video editing. Denoiser II is ideal for clearing up scratchy footage.
Red Giant Magic Bullet Colorista is available for $199.
3. Boris FX Continuum 2022
The thriving film industry’s filmmakers choose Boris FX Continuum. This package contains super strong, timesaving plugins for a smoother workflow with seventeen effects and quick fix plug-in options. Continuum Includes over 200 effects and more than 3500 presets. Each pair will be suitable for each project. Continuum 2022 is the latest biggest release of the post-production plugin collection. The release includes 6 transitions, 4 effects and nearly 100 professionally developed templates. It’s definitely worth checking it out!

This 2022 release brings 50+ film and TV-inspired color grades to assist you in transforming the clips into amazing looks. Included presets like The Wizard of Oz, E.T., Euphoria, and The Grand Budapest Hotel. BCC+Light adds 50+ digital gobos templates to have the overall number of gobos ready to over 700 options.
Boris FX Continuum is available for $495 and $2,195 depending on your payment plan.
Free Download For Win 7 or later(64-bit)
Free Download For macOS 10.14 or later
Top 7 Best GoPro Video Editors for Mac
Have you ever used or seen small box-type cameras for recording videos? Well, those are called action cameras. Action cameras are compact go. They were basically made to shoot sports or any other activities videos. They are mountable on many surfaces so you can record freely during any activity. Many of them provide 4K videos at 60 fps or higher to provide crisp video quality or low resolution at 120 or 240 fps to record smooth slow-mo videos. Most of them are waterproof and have good video stabilization so you can record any sports hassle-free.
There are many action camera companies out there in the market but the one ruling the market at the moment is GoPro. It has some best action camera models with dozens of amazing features. It can also record in RAW format and GoPro max can also shoot 360 videos.
GoPro gives amazing results but sometimes videos aren’t up to your expectations and need a little bit of refinement. From sharpening to speed ramping there are many ways to enhance your GoPro videos. And for this purpose, you need a good video editing software which has all these features plus it also supports RAW and 360 video files. Here we have mentioned some noteworthy video editing softwares for you.
Wondershare - Filmora :
It is available for both Windows and Mac.
If you are looking for professional and easy-to-use software to edit your GoPro videos then Filmora Video Editor can be the right choice for you. It has many cool features to enhance your action cam footage. From stabilization to color grading to fish eye effect all can be done in this software. It has a simple and attractive UI.
It has hundreds of effects and cool transitions. It is a paid video editor which also provides a free version to check and practice your skills on. But the main disadvantage of the free version is that it leaves a watermark on export. If you don’t want to invest money in the beginning, till then you can practice on the free version and once you are satisfied with your skills then you can upgrade to a pro version.
Pricing: Wondershare Filmora offers three different plans. Monthly one at $9.99/a month, Yearly one at $69.99, and perpetual license for $79.99 where you can own the software’s specific version for perpetual. It also provides an educational plan for students and teachers.
For Win 7 or later (64-bit)
For macOS 10.14 or later
~ Features:
- It supports 4K files and a wide range of file formats.
- It has a simple UI that is suitable for beginners.
- It Supports 360 video files (in equirectangular format).
- Supports industry-standard plugins like Boris fx.
- Have features like standard motion tracking, masking, chroma key, e.t.c.
- The paid version has more features like Speed ramping, Auto-sync, keyframing, and animation.
- Have vast stock library.
~ Cons:
- The free version leaves a watermark on export.
- Have playback issues with 4k videos.
- Lacks some standard editing features.
~ Steps:
Import: Open “Filmora” then select the desired aspect ratio and click “New Project’ to start editing. Click on the “Import panel” to import media files.

Edit: Drag and drop the clips to add them to the timeline. Drop the clips above or below to add them in layers. Click the top-left icon of the timeline to add layers. Select a clip and you will see a bunch of tools appear on the top bar of the timeline, use them to perform basic editing tasks like split, crop, speed ramping, keyframing, e.t.c.
Double-click on a clip to open its properties. . Click the blue “Ok” button to move back to the previous window.
Select the “Video” icon to transform the clip or to do motion tracking, stabilization, chroma-key, Masking, e.t.c.
Select the “Audio” icon to apply effects and enhance your audio.
Select the “Color” icon to do color correction and grading.
Select the “3D LUT” option to import a new customized lut.
Select the “Animation” icon to add preset animations or make custom animations by using keyframes.
Select the “Speed” icon to adjust the speed of the clip or to do speed ramping.

Click the blue “OK” button below to go back to the previous window.
Effects: On the horizontal bar at the top-left corner of the screen, all the effects, transitions, title present, and stock library are located. Drag and drop to apply them.

Export: Click the blue “Export” button to open export window, choose the desired settings than click “Export”. and don’t forget to save the project if you want to edit it again.
Free GoPro Video Editors for Mac:
If you are tight on budget but still want a professional video editor to edit your GoPro videos then here I have mentioned some free but powerful video editors. Whether you are a beginner or a professional content creator, these free softwares can get your job done.
Blackmagic - Davinchi Resolve:
It is available for both Windows and Mac.
Whether you are a freelance video editor or an industry-level filmmaker, if you want to step up your game and stand out from your competition then you need a powerful video editor to help you out and Davinchi Resolve can be the right choice for you. From sports vlogging using action cams to Hollywood filmmaking using Red cinema cameras, Davinchi Resolve can handle and edit all this footage easily and smoothly. It is even used in the making of several Hollywood projects including Marvels’s feature films.
It is one of the best color grading software available in the market. It has advanced color grading tools that can help color grade your GoPro raw videos easily as raw videos look dull but provide greater flexibility. It is a timeline-based editor but its Fusion and Color grading panel provides a Node-based editing system which is hard to use but provides great flexibility once mastered.
Resolve has 6 different pages to deal with different editing parts:
“Edit” and “Cut” pages to deal with simple editing tasks. Its “Fusion” page allows users to do VFX and 3D compositing. The “Color Grading” page has all the professional grading tools. While the “Fairlight” page is designed to edit and enhance audio. And the “Deliver” page to export your files.
All these features are available for free without even giving a watermark. Although it has a studio version that provides some additional features to get more out of this amazing software.

- Davinchi Resolve Studio:
The free version has almost everything a professional video editor needs. but you can purchase the Studio version to get some really juicy features to enhance your video editing experience. It includes the Davinci neural engine, stereoscopic 3D tools, Dolby atmos audio mastering,e.t.c.
Pricing: Studio version is available at $ 295 for a lifetime license and with free updates.
~ Features:
- It supports a 4K resolution at 60fps. (while the Studio version supports up to 32K resolution at 120 fps.)
- It is a multi-feature software that provides editing, color grading, VFX, 3D compositing, and audio editing all in one place.
- It has the most advanced and powerful Node-based color grading system, which is also used by Hollywood film studios.
- Supports Raw and 360 videos from GoPro or other action cameras.
- Supports multi-cam editing up to 16 camera angles.
- Can make Compound clips and add adjustment layers.
- Fairlight panel has professional audio production tools like waveform editing, audio ducking, and Channel mapping. (Dolby Vision mastering and 3D spatial Panning [audio editing in 3D space] are available in the Studio version.)
- Supports third-party plugins.
- Has a 3D workspace and provides a virtual set extension for 3D modeling and compositing.
~ Cons:
- Its node-based editing style is quite difficult for beginners.
- Requires a high-end workstation to run smoothly otherwise will often crash during editing.
- Its node-based editing system is hard to learn.
~ Steps:
Import: Open “Davinci Resolve’. Select a previously saved project or press “New project” to start a new one. Click “File” >> “Import” >> “Media” to import files or press “CTRL + I”.
Edit: Drag and drop files to add them to the timeline Use the tools present above the timeline to trim, cut or move your clips. Click the “Inspector” icon on the top-right corner of the window to open the Inspector tab. Here you will find the properties of all the clips, audio, transitions, effects, e.t.c. There are different editing tabs at the bottom of the window.
In the “Fusion” window, click “Nodes” to open the Node screen. Import a clip or use it from the editor timeline. Usually, a clip will have two nodes connected through a line. Above the nodes panel, different types of nodes are available. Drag any node in the panel and connect it through lines. or add a “merge” node to connect nodes.
Its color grading panel also has Node based editing system.

Effects: Click “Effects Library” then select any effect and drop it in the timeline to apply it. You can change its properties in the “Inspector” panel.
Click the diamond icon on the right side of the property to start keyframing then change the value of that property to add keyframes at desired time period.

Export: Open the “Deliver” window, choose the desired settings then click “Add to Render Queue” to start exporting.

FXhome - Hitfilm Express:
It is available on Windows, Mac and Linux also.
If you are looking for a free but powerful video editor to edit your GoPro clips then Hitfilm Express can be the right choice for you. It is a free timeline-based editing software with professional-grade VFX tools. It is a timeline-based editor where you can add dozens of audio, videos, and text layers.
It has a composite shot sequence where you can do complex editing like editing 3D videos and elements, lights e.t.c. It has physic-base behaviors and effects also to enhance 3D compositing. For professional-level editing almost most of the effects and properties have keyframing options. It has different workspace modes to suit your editing needs.
It can also edit 360 videos recorded from your GoPro max. It has a “GoPro Lens Reframe” effect to adjust your 360 clips, but some 360 toolkits can only be available when you purchase Hitfilm pro or buy a 360 toolkit add-on. Similarly, you can purchase more add-ons according to your editing needs or you can purchase Hitfilm Pro to gain access to all add-ons and features. But can use these pro features for free but without exporting as exporting with a paid effect can give a watermark.
Hitfilm Pro:
Although Hitfilm express doesn’t give a watermark on export, but to use more features like 3D composition, LUTs, e.t.c you need to purchase add-ons, there are over 30+ add-ons available to purchase which you can purchase depending on your needs, but if you want to get all the features than its better to get your hands on Hitfilm Pro.
Pricing: Available for purchase at £ 309 or $ 388 for a lifetime license. With 12 months of free updates. It has 3 seat license which means It can run on 3 PCs simultaneously.
~ Features:
- It is a free editing software with no watermark.
- It can edit 3D videos and it can also import and edit 3D models and tracking data.
- It can edit 360 videos also.
- You can add effects and color grades as layers in the timeline also.
- Can add adjustment layers and create nested clips within nested clips to make complex editing easier.
- It has a motion track and locked-on stabilization features.
- Can do smooth keyframing and animation with the help of value graphs.
- It supports multi-cam editing also.
- Keyboard shortcuts make workflow quite easy and quick.
~ Cons:
- It has some playback issues while using 4K videos.
- It crashes sometimes, so it’s better to save the project frequently during editing.
- Hitfilm express doesn’t have a dark mode.
- Some common features are only available on the Pro version or add-ons.
~ Steps:
Import: Open “Hitfilm”, Select “New Project” to open a blank project then click “open” to open an existing file or click “new” to create a new project. Then set project settings on pop-up then and click “ok”.
Then click the “Media” tab on the top-left corner of the screen. Then select the “Import” button to import videos, images, audio, or 3d models. You can also import previously made composite shots.
Edit: Drag and drop media files from the media tab to the timeline. or click the “New” tab to create a “Composite shot” or a solid plane layer. Right-click on the left side of the timeline to insert or delete layers. On the left side of the timeline, you will find some basic tools located on the vertical bar to do simple tasks.
In the “Viewer” tab, on the left side of the playback screen, you can find tools for masking and adding text.
In the “Controls” tab, you can adjust the properties of clips and other features related to the clip like masking, track, blend, transform, e.t.c.
Create a “Composite shot” to do complex editing like 3D compositing. Or select multiple layers then right-click and select “make Composite shot” to combine them for easy editing. Double-click the composite shot to open its contents.

Effects: From the “Effects” tab drag and drop effects on the clip to add them. Some effects can be added as layers which can affect all the layers beneath it. Properties of these effects can be adjusted in the “Control” tab.
To do keyframing, Click the circle icon on the left side of the property to start keyframing then change the values of that property to add keyframes at desired time period.
Export: Click the “Export” icon then “Export now” located at the top right side of the timeline to open the export window. The export will start automatically.
Shotcut:
It is available on Windows, Mac and Linux.
If you are making videos from your GoPro or mobile phone just for fun that doesn’t require much editing then you can look for a free and simple video editor and “Shotcut” can be the right choice for this purpose.
It is a free and open-source video editor with many cool features to get your hands on. It doesn’t have any pro version. It is simple and easy to use but takes some time to understand. It supports multi-track timeline editing. It has a basic timeline design but you can customize your timeline to meet your editing needs. It has some good color grading options, you can also import your color luts. It has many cool features and effects. It supports 360 video editing and also has a few 360 video filters. It has audio effects also.
~ Features:
- All its features are for free and it doesn’t leave any watermark.
- It supports 4K resolution and a wide range of file formats.
- It also supports 360 video files.
- Has keyframing and chroma kry features.
- It has advanced color grading features.
- It provides standard animation and keyframing features.
~ Cons:
- It is a basic video editor and lacks some professional editing features.
- Have playback issues with 4K videos.
- It does have proper text editing tools.
- It is difficult to understand as its UI is different from other familiar video editors.
~ Steps:
Import: Open “Shot Cut” then click the “Open Files” button on the top-left corner of the window to import files.
Edit: Drag and drop clips on an empty timeline panel to add tracks and drag the clip from corners to trim them. Right-click on the left side of the timeline to add a video or an audio track. You will find a bunch of tools above the timeline to do some basic tasks.
You can choose from 6 different workspace designs (available in the top-right corner of the window) to suit your editing styles.

On top of the window, you will see a bunch of icons like Timeline, filter, project, and properties. e.t.c. In the properties tab, you can change the aspect ratio and speed of the clip.
Effects: Click the “Filters” icon on top of the window to open the filters menu, Click “+” above it to add filters. Double click a filter to add it to the selected clip, then click the filter to open its properties menu. You can also add text from here.
Click the “Keyframes” icon on top of the window to open the Keyframes window. Select the “clock” icon on the filters to start keyframing then change the values at a specific time to add keyframes. Click the “Timeline” icon to go back to the previous window.

Export: Click the “Export” button on the top of the screen. Select a preset or click the “Advanced” button to change export settings then click “Export File”.

Paid GoPro Video Editor for Mac:
If you are a professional athlete or a vlogger using GoPro for all of your contents and want to invest some money on paid video editors to improve your content. Then here we have mentioned some paid video editors worthy of your investment.
Apple - Final Cut Pro:
It is available for Mac only.
If you are an Apple enthusiastic person and want everything Apple, then why look for any other video editor when you can have a powerful video editor “Final cut pro” made by Apple. It is a paid but professional software that can raise your GoPro videos to the next level. Whether it’s a 360 video or a RAW file recorded from your GoPro or from the RED cinema camera, all can be edited smoothly inside Final Cut Pro. It has dozens of useful features that a professional video editor looks for like 3D tracking, Motion Graphics, Color Grading, Audio Mixing, Multi-cam editing e.t.c.
Pricing: It is a one-time purchase software available at $ 299.9 for a lifetime license and all its future updates can be downloaded free of cost.
~ Features:
- It supports up to 8K resolution.
- Support 360 and RAW video files.
- Edit videos in complete 360 and 3D spaces.
- Supports third-party video and audio plugins.
- Supports Multi-cam editing.
- Have professional color grading tools with HDR support.
- Its UI is easy to use.
~ Cons:
- It is designed for Apple devices only.
- Requires a powerful PC.
- Its UI is a bit different from other common video editors in the market.
- ~ Steps:
Import: Open “Final Cut Pro” then click the “Files” button on the top-left corner of the screen, then select “Project” to create a new project. In the “Files” menu, click “import” then “media” to import your media files. Here most of the work is done with Keyboard commands.
Edit: Drag and Drop clips on the timeline. In the viewer panel, press “I” and “O” to add input and output points then drag the clip to add only a specific part of the clip. Press “Cmd + B” to split the clip at the desired location. Or add the clips above to add the layer.
Click the “Text” icon on the top-left corner of the screen to open the text page. Choose from presets or import your own Text presets and drag them to the timeline. Click the text to open “Text Editor” on the left side of the screen.
Select multiple clips then Right-click and select “New Compound Clip” to combine them. Double-click the compound clip to edit its components.
Effects: Click 2 icons on the top-right side of the timeline to open the effects and transition panel. Drag and drop on the clip to use them. You can change their properties in the “Effects editor” tab located in the same place as “Text Editor”.
In the editor tab, click the diamond icon beside any property to start keyframing, then change its property to add keyframes at the desired time.
Press “Cmd + 6” to open the Color Grading tab, here you can color grade your clips.
Export: To export the edited video. Click “File” >> “Share” >> “Master file” to open export window. Choose the desired settings then click “Next” then “Save” to export the video.
Adobe - Premiere Pro:
It is available for both Windows and Mac.
Whether you are a content creator or not, if you use a DSLR or an action camera for the first time, then maybe the output wouldn’t meet your expectations. In order to make it good, you need a video editor. And if you will ask your gathering about a good video editor, most of them will recommend you Adobe Premiere Pro, because it is such a versatile and well-known software available in the market. It is a subscription-based video editor.
It is an industry-level software with many professional and advanced features. From beginner video editing to film compositing, all can be done in this software. Whether you have a 360 video or a 4K video in Raw format recorded from your GoPro, just import it into premiere pro and start editing. It has a downloadable “GoPro FX Reframe” plugin to edit your 360 videos. It has different panels designed to deal with specific parts of post-production such as the Effects panel, Graphics panel, Sound panel, Colour Grading panel, e.t.c.
~ Features:
- It supports up to 8K resolution.
- Have different panels to enhance different segments of post-production.
- Have an essential Effects panel to create motion effects and animations using keyframes.
- Supports hundreds of third-party extensions.
- Have useful features like warp stabilizer and denoiser.
- You can import or create your color LUTs.
- Have a creative cloud with 100 Gb of storage.
- The bundle also includes a mobile video editor and a stock library.
~ Cons:
- Real-time rendering. It will take some time to render before exporting if you work on a mid-range PC.
- Freezes or crashes sometimes.
- Cache data fill-up quickly and eats a lot of storage. (It’s better to clear it after every project)
Pricing: It is cloud-based software, therefore it can’t be purchased one time. It has a monthly subscription starting at $ 20.99/month. It includes “premiere rush” mobile video editor and 100 GB of cloud storage within the plan. It also has a “Creative cloud All apps” plan that includes all 30+ Softwares + 100Gb cloud storage along with premiere pro for $ 54.99 only. All plans also include Behance (adobe creative community), Adobe Fonts, and Adobe stock assets for free. Adobe also provides educational access at a much discounted price.
~ Steps:
Import: Open “Premiere Pro”. Click “New Project” to start with then Click the “Files” button on the top-left corner of the window then select the “Import files” button to import files. Or press “CTRL + I” to import files or drag your files from their location to premiere pro.

Edit: Drag and Drop the files to add them to the timeline. Drop a file above a clip to add as a layer. or drop over a clip to overwrite it. On the right side of the timeline, you can find a bunch of tools to do basic edits like trimming, splitting, speed ramping, masking, or adding text.
In the “Effects Control” tab you can transform the selected clip or change its properties.
Select multiple clips then right-click and select “make Nested clip” to combine them into a single clip for easy editing.

Slide between 8 different workspace styles designed for specific post-production tasks by clicking the buttons available on the top of the window.
Effects: Go to the “Effects” panel on the bottom-left window to apply an effect or transitions. Here you can find all audio, video, 2D, and 3D effects. Drag and Drop on a clip to apply it. Change the properties of these effects in the “Effects Control” panel.
To color grade, your clips move to the “Color” workspace. Here you will find all the color grading features: correction, curves, color wheels, creative tab, e.t.c. To import a LUT click the “creative tab” then click “Browse” to import a LUT.
Export: To Export go to the “Files” tab on top of the screen then select the “Export” button to open the export tab. Select the desired settings then click “Export”.
Power Director 365 :
It is available for both Windows and Mac.
If you are looking for a budget-friendly video editor that is powerful enough to edit your GoPro videos like a content creator then Power director can be the right choice for you. It has many unique and useful features. It has different plugins and design centers to do specific post-production tasks like Ad designer, Multicam editor, AI style plugins, e.t.c.
It also has a separate action cam center to fix or enhance action cam videos. IT also has chapter and subtitle rooms to add subtitles and chapters for your Youtube videos or films. It also has a vast stock and preset library to speed up your project.
Pricing: It has a subscription plan which is available at $69/year. It is now available at 30% off till 22nd May,2022.
~ Features:
- It supports 4K videos and a wide range of import formats.
- Have many built-in plugins and design centers.
- Supports Multi-cam editing.
- Have an action cam center to deal with action cam footage.
- Have separate aspect ratio mode for 360 videos.
- Also, have a chapter and subtitle room. many recording aspects of the video.
- Have a content-aware editing feature that detects the recording aspects.
- Can import presets and color LUTs.
- Have a vast stock library.
~ Cons:
- Have some playback issues with 4K videos. (create shadow files to overcome this issue to an extent).
- Its UI is a little bit complicated for beginners.
- Not ideal for fast pace editing.
~ Steps:
Import: Open Power director and a pop-up will appear, select desired aspect ratio then click “Full mode” to open the software. Or select 360 aspect ratio if you want to edit 360 videos.

Click the “Import Media” icon below the Files tab in the top-left corner of the window to import files or press “CTRL + Q” to import files.
Edit: Drag and drop files to add them to any desired layer in the timeline. Click the icon on the top left corner of the timeline to add layers. When you select a clip in the timeline, some tools appear on the top timeline. Select any specific tool to edit your selected clip. Or click the “Plugins” button on the top-left of the window to open a specific designer tab.
Double-click on the clip to open ‘PIP designer”. Here you will find all the editing tools to edit or animate your clip.

After selecting a clip, in the “Plugins” menu click the “Action Camera Center” button to open an edit tab, Here you can fix your GoPro videos.

Effects: On the top-left corner of the window in a vertical bar you will find all the effects material lile Project library, titles, effects, transitions, overlays, e.t.c. Simply just drag and drop them on the timeline to use them. Here you can also do audio mixing and add subtitles and chapters.
Double click a clip or an overlay element to open the designer window. Here you can customize the clips and overlays to enhance your project.
Export: Click the blue “Produce” button on top of the screen to export your edited file. Select the desired mode and file format and add an export destination, then click “Start” to start exporting.
Which One Should I Choose Free or Paid GoPro Video Editor?
You can choose free or paid softwares depending on your requirements and budget. If a free software meets your requirements then stay on it otherwise move towards a paid alternative. If you have a GoPro and you make videos just for fun then use a free and simple video editor. Even if you are an experienced video editor, I would recommend you to go for free video editors which I have mentioned above as they are quite powerful and professional software but if you are harvesting a good amount of money from this field then you can upgrade to pro versions of these free softwares or get a paid software from start. As almost all of these softwares are professional and can get your job done, so it’s better to choose one, which is comfortable for you to work on.
FAQs about GoPro Video Editing:
- Q) Does GoPro has its own video editor?
Yes, GoPro has its own video editor “Quik”. It is available on mobile phones and desktops both. It is simple and easy to use. It provides basic features to edit your video. But the main disadvantage of this desktop software is that it supports only GoPro videos, you can’t import files from other devices. Although this isn’t the issue with Quik mobile app, here you can import videos from other devices also.
- Q) Can I make videos for social media with a GoPro?
It was basically made for recording sports and action videos. But as the market is revolutionized and new models are released it has covered a wide range of the video industry like vlogging, travel and cooking videos e.t.c. As new models of GoPros are waterproof, you can get some amazing underwater shots for your Instagram.
- Q) What is GoPro media format?
GoPro export files in popular file format MP4. MP4 is the most common file format and is supported by almost all the video editors. While it is efficient and takes less storage but isn’t supported in many devices.
- Q) How do I transfer files from my GoPro to Mac?
You can transfer your GoPro files through 3 methods:
- Eject the SD card from your GoPro and connect it to your Mac using a SD card adapter to transfer files.
- Connect your GoPro to Mac through USB connector and use “iphoto” or any other photo importer to import files.
For macOS 10.14 or later
~ Features:
- It supports 4K files and a wide range of file formats.
- It has a simple UI that is suitable for beginners.
- It Supports 360 video files (in equirectangular format).
- Supports industry-standard plugins like Boris fx.
- Have features like standard motion tracking, masking, chroma key, e.t.c.
- The paid version has more features like Speed ramping, Auto-sync, keyframing, and animation.
- Have vast stock library.
~ Cons:
- The free version leaves a watermark on export.
- Have playback issues with 4k videos.
- Lacks some standard editing features.
~ Steps:
Import: Open “Filmora” then select the desired aspect ratio and click “New Project’ to start editing. Click on the “Import panel” to import media files.
Edit: Drag and drop the clips to add them to the timeline. Drop the clips above or below to add them in layers. Click the top-left icon of the timeline to add layers. Select a clip and you will see a bunch of tools appear on the top bar of the timeline, use them to perform basic editing tasks like split, crop, speed ramping, keyframing, e.t.c.
Double-click on a clip to open its properties. . Click the blue “Ok” button to move back to the previous window.
Select the “Video” icon to transform the clip or to do motion tracking, stabilization, chroma-key, Masking, e.t.c.
Select the “Audio” icon to apply effects and enhance your audio.
Select the “Color” icon to do color correction and grading.
Select the “3D LUT” option to import a new customized lut.
Select the “Animation” icon to add preset animations or make custom animations by using keyframes.
Select the “Speed” icon to adjust the speed of the clip or to do speed ramping.
Click the blue “OK” button below to go back to the previous window.
Effects: On the horizontal bar at the top-left corner of the screen, all the effects, transitions, title present, and stock library are located. Drag and drop to apply them.
Export: Click the blue “Export” button to open export window, choose the desired settings than click “Export”. and don’t forget to save the project if you want to edit it again.
Free GoPro Video Editors for Mac:
If you are tight on budget but still want a professional video editor to edit your GoPro videos then here I have mentioned some free but powerful video editors. Whether you are a beginner or a professional content creator, these free softwares can get your job done.
Blackmagic - Davinchi Resolve:
It is available for both Windows and Mac.
Whether you are a freelance video editor or an industry-level filmmaker, if you want to step up your game and stand out from your competition then you need a powerful video editor to help you out and Davinchi Resolve can be the right choice for you. From sports vlogging using action cams to Hollywood filmmaking using Red cinema cameras, Davinchi Resolve can handle and edit all this footage easily and smoothly. It is even used in the making of several Hollywood projects including Marvels’s feature films.
It is one of the best color grading software available in the market. It has advanced color grading tools that can help color grade your GoPro raw videos easily as raw videos look dull but provide greater flexibility. It is a timeline-based editor but its Fusion and Color grading panel provides a Node-based editing system which is hard to use but provides great flexibility once mastered.
Resolve has 6 different pages to deal with different editing parts:
“Edit” and “Cut” pages to deal with simple editing tasks. Its “Fusion” page allows users to do VFX and 3D compositing. The “Color Grading” page has all the professional grading tools. While the “Fairlight” page is designed to edit and enhance audio. And the “Deliver” page to export your files.
All these features are available for free without even giving a watermark. Although it has a studio version that provides some additional features to get more out of this amazing software.
- Davinchi Resolve Studio:
The free version has almost everything a professional video editor needs. but you can purchase the Studio version to get some really juicy features to enhance your video editing experience. It includes the Davinci neural engine, stereoscopic 3D tools, Dolby atmos audio mastering,e.t.c.
Pricing: Studio version is available at $ 295 for a lifetime license and with free updates.
~ Features:
- It supports a 4K resolution at 60fps. (while the Studio version supports up to 32K resolution at 120 fps.)
- It is a multi-feature software that provides editing, color grading, VFX, 3D compositing, and audio editing all in one place.
- It has the most advanced and powerful Node-based color grading system, which is also used by Hollywood film studios.
- Supports Raw and 360 videos from GoPro or other action cameras.
- Supports multi-cam editing up to 16 camera angles.
- Can make Compound clips and add adjustment layers.
- Fairlight panel has professional audio production tools like waveform editing, audio ducking, and Channel mapping. (Dolby Vision mastering and 3D spatial Panning [audio editing in 3D space] are available in the Studio version.)
- Supports third-party plugins.
- Has a 3D workspace and provides a virtual set extension for 3D modeling and compositing.
~ Cons:
- Its node-based editing style is quite difficult for beginners.
- Requires a high-end workstation to run smoothly otherwise will often crash during editing.
- Its node-based editing system is hard to learn.
~ Steps:
Import: Open “Davinci Resolve’. Select a previously saved project or press “New project” to start a new one. Click “File” >> “Import” >> “Media” to import files or press “CTRL + I”.
Edit: Drag and drop files to add them to the timeline Use the tools present above the timeline to trim, cut or move your clips. Click the “Inspector” icon on the top-right corner of the window to open the Inspector tab. Here you will find the properties of all the clips, audio, transitions, effects, e.t.c. There are different editing tabs at the bottom of the window.
In the “Fusion” window, click “Nodes” to open the Node screen. Import a clip or use it from the editor timeline. Usually, a clip will have two nodes connected through a line. Above the nodes panel, different types of nodes are available. Drag any node in the panel and connect it through lines. or add a “merge” node to connect nodes.
Its color grading panel also has Node based editing system.
Effects: Click “Effects Library” then select any effect and drop it in the timeline to apply it. You can change its properties in the “Inspector” panel.
Click the diamond icon on the right side of the property to start keyframing then change the value of that property to add keyframes at desired time period.
Export: Open the “Deliver” window, choose the desired settings then click “Add to Render Queue” to start exporting.
FXhome - Hitfilm Express:
It is available on Windows, Mac and Linux also.
If you are looking for a free but powerful video editor to edit your GoPro clips then Hitfilm Express can be the right choice for you. It is a free timeline-based editing software with professional-grade VFX tools. It is a timeline-based editor where you can add dozens of audio, videos, and text layers.
It has a composite shot sequence where you can do complex editing like editing 3D videos and elements, lights e.t.c. It has physic-base behaviors and effects also to enhance 3D compositing. For professional-level editing almost most of the effects and properties have keyframing options. It has different workspace modes to suit your editing needs.
It can also edit 360 videos recorded from your GoPro max. It has a “GoPro Lens Reframe” effect to adjust your 360 clips, but some 360 toolkits can only be available when you purchase Hitfilm pro or buy a 360 toolkit add-on. Similarly, you can purchase more add-ons according to your editing needs or you can purchase Hitfilm Pro to gain access to all add-ons and features. But can use these pro features for free but without exporting as exporting with a paid effect can give a watermark.
Hitfilm Pro:
Although Hitfilm express doesn’t give a watermark on export, but to use more features like 3D composition, LUTs, e.t.c you need to purchase add-ons, there are over 30+ add-ons available to purchase which you can purchase depending on your needs, but if you want to get all the features than its better to get your hands on Hitfilm Pro.
Pricing: Available for purchase at £ 309 or $ 388 for a lifetime license. With 12 months of free updates. It has 3 seat license which means It can run on 3 PCs simultaneously.
~ Features:
- It is a free editing software with no watermark.
- It can edit 3D videos and it can also import and edit 3D models and tracking data.
- It can edit 360 videos also.
- You can add effects and color grades as layers in the timeline also.
- Can add adjustment layers and create nested clips within nested clips to make complex editing easier.
- It has a motion track and locked-on stabilization features.
- Can do smooth keyframing and animation with the help of value graphs.
- It supports multi-cam editing also.
- Keyboard shortcuts make workflow quite easy and quick.
~ Cons:
- It has some playback issues while using 4K videos.
- It crashes sometimes, so it’s better to save the project frequently during editing.
- Hitfilm express doesn’t have a dark mode.
- Some common features are only available on the Pro version or add-ons.
~ Steps:
Import: Open “Hitfilm”, Select “New Project” to open a blank project then click “open” to open an existing file or click “new” to create a new project. Then set project settings on pop-up then and click “ok”.
Then click the “Media” tab on the top-left corner of the screen. Then select the “Import” button to import videos, images, audio, or 3d models. You can also import previously made composite shots.
Edit: Drag and drop media files from the media tab to the timeline. or click the “New” tab to create a “Composite shot” or a solid plane layer. Right-click on the left side of the timeline to insert or delete layers. On the left side of the timeline, you will find some basic tools located on the vertical bar to do simple tasks.
In the “Viewer” tab, on the left side of the playback screen, you can find tools for masking and adding text.
In the “Controls” tab, you can adjust the properties of clips and other features related to the clip like masking, track, blend, transform, e.t.c.
Create a “Composite shot” to do complex editing like 3D compositing. Or select multiple layers then right-click and select “make Composite shot” to combine them for easy editing. Double-click the composite shot to open its contents.
Effects: From the “Effects” tab drag and drop effects on the clip to add them. Some effects can be added as layers which can affect all the layers beneath it. Properties of these effects can be adjusted in the “Control” tab.
To do keyframing, Click the circle icon on the left side of the property to start keyframing then change the values of that property to add keyframes at desired time period.
Export: Click the “Export” icon then “Export now” located at the top right side of the timeline to open the export window. The export will start automatically.
Shotcut:
It is available on Windows, Mac and Linux.
If you are making videos from your GoPro or mobile phone just for fun that doesn’t require much editing then you can look for a free and simple video editor and “Shotcut” can be the right choice for this purpose.
It is a free and open-source video editor with many cool features to get your hands on. It doesn’t have any pro version. It is simple and easy to use but takes some time to understand. It supports multi-track timeline editing. It has a basic timeline design but you can customize your timeline to meet your editing needs. It has some good color grading options, you can also import your color luts. It has many cool features and effects. It supports 360 video editing and also has a few 360 video filters. It has audio effects also.
~ Features:
- All its features are for free and it doesn’t leave any watermark.
- It supports 4K resolution and a wide range of file formats.
- It also supports 360 video files.
- Has keyframing and chroma kry features.
- It has advanced color grading features.
- It provides standard animation and keyframing features.
~ Cons:
- It is a basic video editor and lacks some professional editing features.
- Have playback issues with 4K videos.
- It does have proper text editing tools.
- It is difficult to understand as its UI is different from other familiar video editors.
~ Steps:
Import: Open “Shot Cut” then click the “Open Files” button on the top-left corner of the window to import files.
Edit: Drag and drop clips on an empty timeline panel to add tracks and drag the clip from corners to trim them. Right-click on the left side of the timeline to add a video or an audio track. You will find a bunch of tools above the timeline to do some basic tasks.
You can choose from 6 different workspace designs (available in the top-right corner of the window) to suit your editing styles.
On top of the window, you will see a bunch of icons like Timeline, filter, project, and properties. e.t.c. In the properties tab, you can change the aspect ratio and speed of the clip.
Effects: Click the “Filters” icon on top of the window to open the filters menu, Click “+” above it to add filters. Double click a filter to add it to the selected clip, then click the filter to open its properties menu. You can also add text from here.
Click the “Keyframes” icon on top of the window to open the Keyframes window. Select the “clock” icon on the filters to start keyframing then change the values at a specific time to add keyframes. Click the “Timeline” icon to go back to the previous window.
Export: Click the “Export” button on the top of the screen. Select a preset or click the “Advanced” button to change export settings then click “Export File”.
Paid GoPro Video Editor for Mac:
If you are a professional athlete or a vlogger using GoPro for all of your contents and want to invest some money on paid video editors to improve your content. Then here we have mentioned some paid video editors worthy of your investment.
Apple - Final Cut Pro:
It is available for Mac only.
If you are an Apple enthusiastic person and want everything Apple, then why look for any other video editor when you can have a powerful video editor “Final cut pro” made by Apple. It is a paid but professional software that can raise your GoPro videos to the next level. Whether it’s a 360 video or a RAW file recorded from your GoPro or from the RED cinema camera, all can be edited smoothly inside Final Cut Pro. It has dozens of useful features that a professional video editor looks for like 3D tracking, Motion Graphics, Color Grading, Audio Mixing, Multi-cam editing e.t.c.
Pricing: It is a one-time purchase software available at $ 299.9 for a lifetime license and all its future updates can be downloaded free of cost.
~ Features:
- It supports up to 8K resolution.
- Support 360 and RAW video files.
- Edit videos in complete 360 and 3D spaces.
- Supports third-party video and audio plugins.
- Supports Multi-cam editing.
- Have professional color grading tools with HDR support.
- Its UI is easy to use.
~ Cons:
- It is designed for Apple devices only.
- Requires a powerful PC.
- Its UI is a bit different from other common video editors in the market.
- ~ Steps:
Import: Open “Final Cut Pro” then click the “Files” button on the top-left corner of the screen, then select “Project” to create a new project. In the “Files” menu, click “import” then “media” to import your media files. Here most of the work is done with Keyboard commands.
Edit: Drag and Drop clips on the timeline. In the viewer panel, press “I” and “O” to add input and output points then drag the clip to add only a specific part of the clip. Press “Cmd + B” to split the clip at the desired location. Or add the clips above to add the layer.
Click the “Text” icon on the top-left corner of the screen to open the text page. Choose from presets or import your own Text presets and drag them to the timeline. Click the text to open “Text Editor” on the left side of the screen.
Select multiple clips then Right-click and select “New Compound Clip” to combine them. Double-click the compound clip to edit its components.
Effects: Click 2 icons on the top-right side of the timeline to open the effects and transition panel. Drag and drop on the clip to use them. You can change their properties in the “Effects editor” tab located in the same place as “Text Editor”.
In the editor tab, click the diamond icon beside any property to start keyframing, then change its property to add keyframes at the desired time.
Press “Cmd + 6” to open the Color Grading tab, here you can color grade your clips.
Export: To export the edited video. Click “File” >> “Share” >> “Master file” to open export window. Choose the desired settings then click “Next” then “Save” to export the video.
Adobe - Premiere Pro:
It is available for both Windows and Mac.
Whether you are a content creator or not, if you use a DSLR or an action camera for the first time, then maybe the output wouldn’t meet your expectations. In order to make it good, you need a video editor. And if you will ask your gathering about a good video editor, most of them will recommend you Adobe Premiere Pro, because it is such a versatile and well-known software available in the market. It is a subscription-based video editor.
It is an industry-level software with many professional and advanced features. From beginner video editing to film compositing, all can be done in this software. Whether you have a 360 video or a 4K video in Raw format recorded from your GoPro, just import it into premiere pro and start editing. It has a downloadable “GoPro FX Reframe” plugin to edit your 360 videos. It has different panels designed to deal with specific parts of post-production such as the Effects panel, Graphics panel, Sound panel, Colour Grading panel, e.t.c.
~ Features:
- It supports up to 8K resolution.
- Have different panels to enhance different segments of post-production.
- Have an essential Effects panel to create motion effects and animations using keyframes.
- Supports hundreds of third-party extensions.
- Have useful features like warp stabilizer and denoiser.
- You can import or create your color LUTs.
- Have a creative cloud with 100 Gb of storage.
- The bundle also includes a mobile video editor and a stock library.
~ Cons:
- Real-time rendering. It will take some time to render before exporting if you work on a mid-range PC.
- Freezes or crashes sometimes.
- Cache data fill-up quickly and eats a lot of storage. (It’s better to clear it after every project)
Pricing: It is cloud-based software, therefore it can’t be purchased one time. It has a monthly subscription starting at $ 20.99/month. It includes “premiere rush” mobile video editor and 100 GB of cloud storage within the plan. It also has a “Creative cloud All apps” plan that includes all 30+ Softwares + 100Gb cloud storage along with premiere pro for $ 54.99 only. All plans also include Behance (adobe creative community), Adobe Fonts, and Adobe stock assets for free. Adobe also provides educational access at a much discounted price.
~ Steps:
Import: Open “Premiere Pro”. Click “New Project” to start with then Click the “Files” button on the top-left corner of the window then select the “Import files” button to import files. Or press “CTRL + I” to import files or drag your files from their location to premiere pro.
Edit: Drag and Drop the files to add them to the timeline. Drop a file above a clip to add as a layer. or drop over a clip to overwrite it. On the right side of the timeline, you can find a bunch of tools to do basic edits like trimming, splitting, speed ramping, masking, or adding text.
In the “Effects Control” tab you can transform the selected clip or change its properties.
Select multiple clips then right-click and select “make Nested clip” to combine them into a single clip for easy editing.
Slide between 8 different workspace styles designed for specific post-production tasks by clicking the buttons available on the top of the window.
Effects: Go to the “Effects” panel on the bottom-left window to apply an effect or transitions. Here you can find all audio, video, 2D, and 3D effects. Drag and Drop on a clip to apply it. Change the properties of these effects in the “Effects Control” panel.
To color grade, your clips move to the “Color” workspace. Here you will find all the color grading features: correction, curves, color wheels, creative tab, e.t.c. To import a LUT click the “creative tab” then click “Browse” to import a LUT.
Export: To Export go to the “Files” tab on top of the screen then select the “Export” button to open the export tab. Select the desired settings then click “Export”.
Power Director 365 :
It is available for both Windows and Mac.
If you are looking for a budget-friendly video editor that is powerful enough to edit your GoPro videos like a content creator then Power director can be the right choice for you. It has many unique and useful features. It has different plugins and design centers to do specific post-production tasks like Ad designer, Multicam editor, AI style plugins, e.t.c.
It also has a separate action cam center to fix or enhance action cam videos. IT also has chapter and subtitle rooms to add subtitles and chapters for your Youtube videos or films. It also has a vast stock and preset library to speed up your project.
Pricing: It has a subscription plan which is available at $69/year. It is now available at 30% off till 22nd May,2022.
~ Features:
- It supports 4K videos and a wide range of import formats.
- Have many built-in plugins and design centers.
- Supports Multi-cam editing.
- Have an action cam center to deal with action cam footage.
- Have separate aspect ratio mode for 360 videos.
- Also, have a chapter and subtitle room. many recording aspects of the video.
- Have a content-aware editing feature that detects the recording aspects.
- Can import presets and color LUTs.
- Have a vast stock library.
~ Cons:
- Have some playback issues with 4K videos. (create shadow files to overcome this issue to an extent).
- Its UI is a little bit complicated for beginners.
- Not ideal for fast pace editing.
~ Steps:
Import: Open Power director and a pop-up will appear, select desired aspect ratio then click “Full mode” to open the software. Or select 360 aspect ratio if you want to edit 360 videos.
Click the “Import Media” icon below the Files tab in the top-left corner of the window to import files or press “CTRL + Q” to import files.
Edit: Drag and drop files to add them to any desired layer in the timeline. Click the icon on the top left corner of the timeline to add layers. When you select a clip in the timeline, some tools appear on the top timeline. Select any specific tool to edit your selected clip. Or click the “Plugins” button on the top-left of the window to open a specific designer tab.
Double-click on the clip to open ‘PIP designer”. Here you will find all the editing tools to edit or animate your clip.
After selecting a clip, in the “Plugins” menu click the “Action Camera Center” button to open an edit tab, Here you can fix your GoPro videos.
Effects: On the top-left corner of the window in a vertical bar you will find all the effects material lile Project library, titles, effects, transitions, overlays, e.t.c. Simply just drag and drop them on the timeline to use them. Here you can also do audio mixing and add subtitles and chapters.
Double click a clip or an overlay element to open the designer window. Here you can customize the clips and overlays to enhance your project.
Export: Click the blue “Produce” button on top of the screen to export your edited file. Select the desired mode and file format and add an export destination, then click “Start” to start exporting.
Which One Should I Choose Free or Paid GoPro Video Editor?
You can choose free or paid softwares depending on your requirements and budget. If a free software meets your requirements then stay on it otherwise move towards a paid alternative. If you have a GoPro and you make videos just for fun then use a free and simple video editor. Even if you are an experienced video editor, I would recommend you to go for free video editors which I have mentioned above as they are quite powerful and professional software but if you are harvesting a good amount of money from this field then you can upgrade to pro versions of these free softwares or get a paid software from start. As almost all of these softwares are professional and can get your job done, so it’s better to choose one, which is comfortable for you to work on.
FAQs about GoPro Video Editing:
- Q) Does GoPro has its own video editor?
Yes, GoPro has its own video editor “Quik”. It is available on mobile phones and desktops both. It is simple and easy to use. It provides basic features to edit your video. But the main disadvantage of this desktop software is that it supports only GoPro videos, you can’t import files from other devices. Although this isn’t the issue with Quik mobile app, here you can import videos from other devices also.
- Q) Can I make videos for social media with a GoPro?
It was basically made for recording sports and action videos. But as the market is revolutionized and new models are released it has covered a wide range of the video industry like vlogging, travel and cooking videos e.t.c. As new models of GoPros are waterproof, you can get some amazing underwater shots for your Instagram.
- Q) What is GoPro media format?
GoPro export files in popular file format MP4. MP4 is the most common file format and is supported by almost all the video editors. While it is efficient and takes less storage but isn’t supported in many devices.
- Q) How do I transfer files from my GoPro to Mac?
You can transfer your GoPro files through 3 methods:
- Eject the SD card from your GoPro and connect it to your Mac using a SD card adapter to transfer files.
- Connect your GoPro to Mac through USB connector and use “iphoto” or any other photo importer to import files.
How to Make A Jaw-Dropping Time Lapse Video?
Are you looking for a handy tutorial that will give you a full-fledged time lapse video? Well, here’s some two cents of what would be the ideal guide that you shall refer to! Learn more about the complete steps involved in making your time lapse video. Find out more here:
Part 1: What is Time Lapse?
1. Technical basics of Time Lapse Photography and Videography
Time-lapse is a specialized type of shot that can be achieved in-camera, through editing, or a combination of both. Time-lapse is a technique where frames are shot much slower than a normal rate (e.g., 24 frames per minute instead of per second).
Professional time-lapses are a series of raw photos even though they are sometimes perceived as videos. In a nutshell, a time-lapse is a short video that processes by revealing the evolution of a series of events, invisible to the eye.
The simplest and most useful formula is time per frame (TPF), multiplied by frames per second (FPS), multiplied by 60 seconds. Using this formula will tell you how long to record to end up with your desired time lapse length or “recording time” (RT). TPF x FPS x 60 = RT
2. What is a Time-lapse video used for?
The use of time-lapse photography and video is an excellent storytelling technique since compelling stories are essential to effective marketing. A time-lapse can also offer excellent insight into the advancement of developmental projects.
① Scientific research
- Time-lapses may be utilized to spread the word about scientific investigations to a wide audience. You can use time-lapse photography to gain money by selling the material of interesting scientific investigations to documentary makers or instructional websites.
- Scientists can visualize processes that would be challenging or sometimes even impossible to study in real life, thanks to time-lapse photography
② Individual enjoyment
Time-lapses are also utilized by filmmakers for scenes requiring extended durations of time with little significant activity occurring during the shot (such as night slowly turning into day).
③ Commercial use
- Time-lapse videos are a wonderful instrument for enhancing the perception of your brand because they are. As a result, many consumers find it interesting.
- Time-lapse videos are the epitome of the old saying that “good things come in small packages” for any brand.
3. How to Make a Time-lapse video?
Start with a stable tripod or surface and adjust the settings on your phone camera or DSLR. Use slow shutter speed, use still mode, and don’t forget to use the timer. Find a stable surface and place your camera this way, you can get your hands on a creative time-lapse video.
Part 2: Record or Shoot Your Time-Lapse Video
1. Select Your Subject
The best way to create a time-lapse video is to pick your subject very carefully. Movement is the most crucial factor to consider while selecting a time-lapse subject. Any movement—whether it be caused by people, animals, vehicles, water, clouds, or anything else—can create an exciting and captivating time-lapse.
- Some of the iconic ideas of filming a time-lapse include:
- A stunning glimpse of the day and night cycle of life at sea.
- Construction of a building from ground till its completion
- Capturing the traffic movement
- Ice melting
- Sun setting
- A great shot of a galaxy
2. Prepare Right Equipment
Choose your equipment before heading out to capture time lapses. There are several options available for time-lapse cameras and applications, ranging from basic and affordable to sophisticated and pricy.
① Camera
You cannot make a time-lapse without owning a camera, whether it is a mobile phone, a compact, or a DSLR. The quality of the final result will be as good as the quality of the equipment you use.
- Smartphone camera apps (iPhone/Android)
All good smartphones now possess a built-in camera with good optical quality, for example: recently Apple Company launched its new iPhone 14 with a magnificent 48-megapixel camera. By using such cameras we have been able to produce really good pictures, although not in negative conditions, such as those with low-light, etc.
For apple: use IguanaLapse or TimeLapse to create your great time-lapses
For Android: use Time-Lapse – Lite
- Point-and-shoot cameras
Even though smartphone cameras have taken over in this digital era, it is still not possible to say that point-and-shoot cameras are not doing their magic. A point-and-shoot camera is really handy.
Some examples of point-and-shoot cameras which are best for creating fun time-lapse videos include Olympus Tough TG-6, Nikon Coolpix W300, Fujifilm XP140, Panasonic Lumix ZS70 / TZ90, and many others in the list.
- Action cameras
Action cameras, also known as action cams are compact, rugged, handheld, or mountable digital cameras that are designed to capture what you see when you are immersing in a movement. The action camera is usually mounted to your helmet, chest, handlebars of a bike or motorcycle, or tripod to record life.
The best action cameras for creating time-lapses include GoPro Hero11 Black, Insta360 ONE RS Twin Edition, DJI Action 2, DJI Pocket 2, and GoPro Hero9 Black.
- DSLR cameras
This is the best choice in terms of cost/benefit: it produces excellent results and high image quality. The best and top-rated DSLRs for creating terrific time-lapses include Nikon D850, Canon 80D, Canon EOS 90D, Sony A7 III, and others.
② Tripod/Gimbal/other stabilizers
Owning a solid and stable tripod is essential for the success of a time-lapse video. A good tripod will support the load without any problems and will keep the arsenal stable for the duration of the shooting session. The best way to use a tripod for filming a time-lapse is to use orient on a tripod that is quite high (at least 170cm).
Some best tripods used to record time-lapses include BONFOTO B671c, Patekfly Flexible Tripod, Sirui Easy Traveler ET-2204, and Vanguard Alta Pro 263AB 100.
A gimbal is a tool that uses motors and intelligent sensors to support and stabilize a camera. The best gimbal and other stabilizers used to film time-lapses include Moza Air 2, DJI RS 2, Zhiyun Crane-2S, Benro RedDog R1, iKan EC1 Beholder, and Feiyu AK4500.
③ Intervalometer/other camera shutter triggers
An intervalometer is a small device able to trigger the shutter of your camera every ‘n’ second, ‘n’ times (also infinite). It can be external, or as we saw earlier, integrated into the camera.
Some of the best intervalometer include Nikon Integrated Intervalometer. With a Nikon D3, you can go into Shooting Menu, and then activate” Interval Timer Shooting”.
3. List Pro Tips for Time-lapse Recording
- Make sure batteries are fully charged
- Set interval to match the movement in the scene
- Select music before shooting the time-lapse
- Use your backup camera
- Shoot in manual mode to avoid flicker
- Lock down focus
- Shoot in RAW format
- Add motion to the time-lapse
- Get comfortable, shoot longer
- Avoid bumping or moving the tripod
- Show shadow movement
- Use apps to plan your shots
- Shoot lots of images
Part 3: Edit Your Time Lapse Video
1. 3 Best Ways to Create Time Lapse from Photos
① Windows Photos App (Windows)
If you are using Windows, you probably are familiar with the general features of the Photos App. One of its distinguishing features is to import the photos and create a mind-blowing time-lapse out of those photos. To create time-lapse on your Windows Photos App, you must follow some simple steps:
- Open the Windows Photos app and import the pictures which you want to transform into a time-lapse.
- Go to Menu > Edit > Speed. For proper time-lapse, select a speed between 4x and 12x.
- Go to Save movie > save the video on your desktop or other device and you’re done with filming a great time-lapse video.
② QuickTime Player (Mac)
In your Apple devices (iPhones, iPads, and MacBook), you can create time-lapses by converting an image sequence to a movie or time-lapse video in QuickTime Player. For this, follow the simple steps and you will get a great time-lapse at the tip of your fingertips.
- Go to QuickTime App on your mac devices and open File > open image sequence.
- Select the image sequence folder and choose media.
- Adjust the quality of the movie by clicking on the options and choosing the resolution, frame rate, and video format.
- Click ‘open’ and time-lapse will be ready for access.
③ Filmora (Windows & Mac)
Through Wondershare Filmora software, it is now possible to drag your favorite image sequence into the timeline and transform it into a cool-looking time-lapse. If you’re looking for easy and efficient software to create attractive time-lapses, Filmora is your best go-to software. Using drag-and-drop, you can create time-lapse effects with Filmora’s built-in slow/fast motion effects. Filmora has over 150 free filters available for you if you wish to apply filters to your movie.
Filmora Video Editor creates a masterpiece for your video with the easiest interface for Windows & Mac users. Wondershare created the Filmora family of video editing and production software. Products on Filmora are available for a variety of users, from novice to expert. A timeline, preview window, and effects library are some of Filmora’s common features. These may all be accessed and managed using a drag-and-drop interface. Both Windows and macOS machines can use the Filmora software library.
How to Create a Time-lapse using Filmora
To create a time-lapse from photos in Filmora software, follow the mentioned steps:
Step 1: Download and install Wondershare Filmora
Go to google chrome and download the setup for Filmora. Install into your desktop.
Free Download For Win 7 or later(64-bit)
Free Download For macOS 10.14 or later
Step 2: Launch Filmora video editor
After downloading and installing, launch the Filmora timeline and import the photos to the media library.
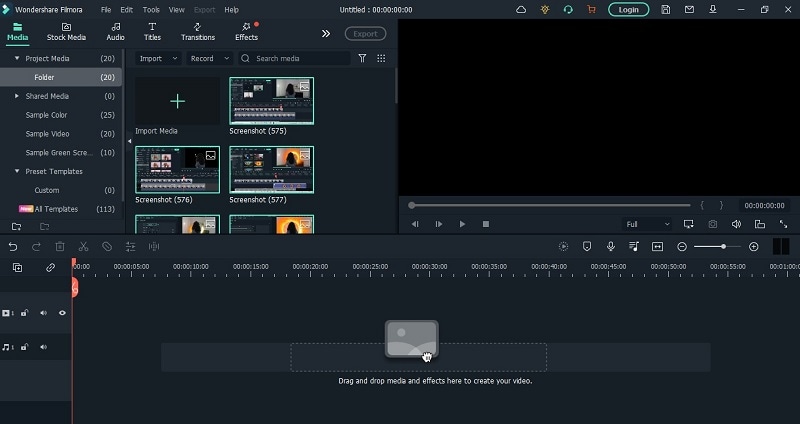
Step 3: Preview and adjust the photos.
Drag the images down to the timeline and move the pointer to reset and order the images according to your required time-lapse video. Don’t forget to resize and match the sizes of all the pictures so make a uniform time-lapse.

Step 4: Adjust the Speed
Select one of the photos in the timeline and right-click. Click on Speed and Duration > Custom Speed panel > Duration > change the duration of the photo to 00:00:00:01 and hit OK.
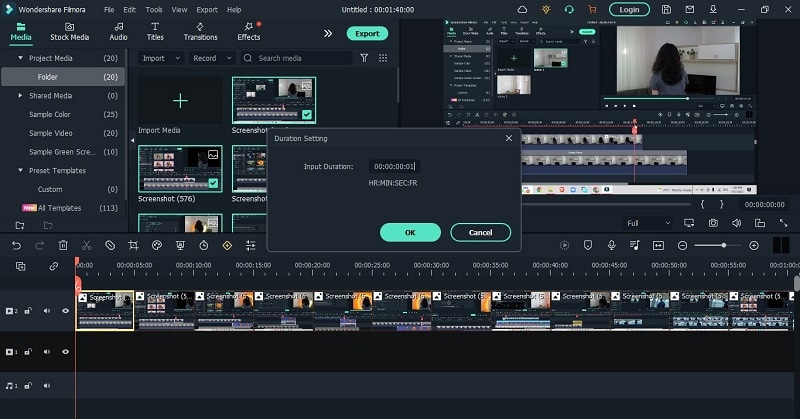
Step 5: Add effects and audio
Even though this step is optional, still it is recommended that to make your time-lapse more presentable, go to effects and choose your favorite pre-set. Go to Audio menu to choose from the music library or add your own custom audio by importing audio file into the timeline.
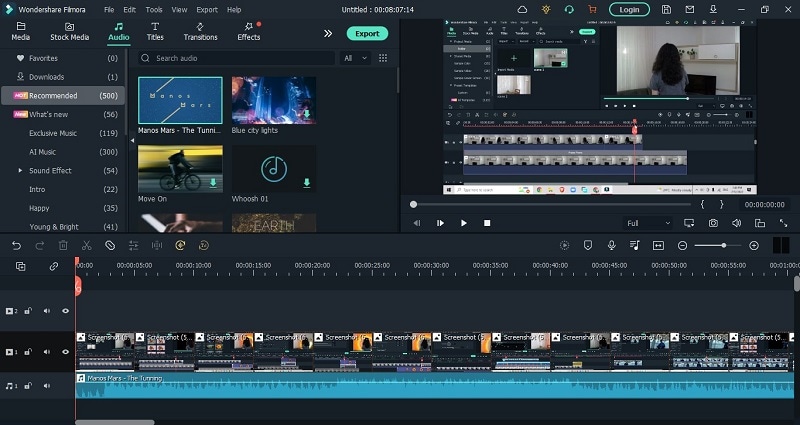
Step 6 Render and Export media
Export your file after rendering it in the full screen. Always check if there are any additional changes required before exporting the media file.

Step 7: Save into your desktop
Change the video format and video and audio parameters such as Bit Rate, Encoder, and Resolution of the video.
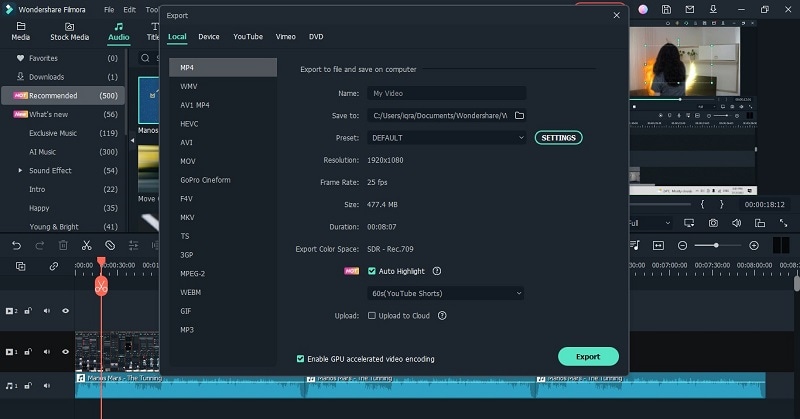
Other software for creating time-lapse
Besides Filmora, there are some interesting options for the users which involve:
o iMovie
o LRTimelapse
o Lightroom
o Adobe Premiere Pro
o After Effects
o Photoshop
2. 3 Best Ways to Convert Video to Time Lapse
① Filmora(Windows & Mac)
Filmora offers yet another very distinguishing feature through which it can convert video footage into an excellent time-lapse video. This feature of Filmora empowers the users and boosts their content and increases audience engagement as well.
In a few simple steps, you can get a creative time-lapse on your windows and mac devices.
- Download and install Filmora 11
- Launch Filmora timeline on your device and import the footage to the media library
- Drag your video onto the video column in the timeline. Select the loaded video and click the “Play” button. While playing the video, drag the slider bar at the start time and hit the “Split” icon to cut out the part you want to do time-lapse editing.
- Right-click on the video clip in the timeline to select Speed and Duration. Find the Speed option and drag the slider bar to the right to increase the speed.
- Click the Play button to preview the result. Filmora now supports up to 100x fast motion and 0.01x slow mo.
- Export your video
② Lapse It Pro (Android & iPhone)
One of the top apps for time-lapse photography is Lapse It Pro. A collection of further time lapses made by other people is available on Lapse It. You can post your videos and favorite those of others while using this social function, which also lets you watch other people’s videos. Through user control, the software makes the smartphone’s capacity to record time lapses as effective as possible.
The lapse It pro version is currently not free, although the Lapse its app is free and it is available on both, Android and Apple.
Steps to Use Lapse It Pro:
- Download the app on your android or apple device
- Configure the time interval between the shots and set a time or photo-based limit while clicking pictures.
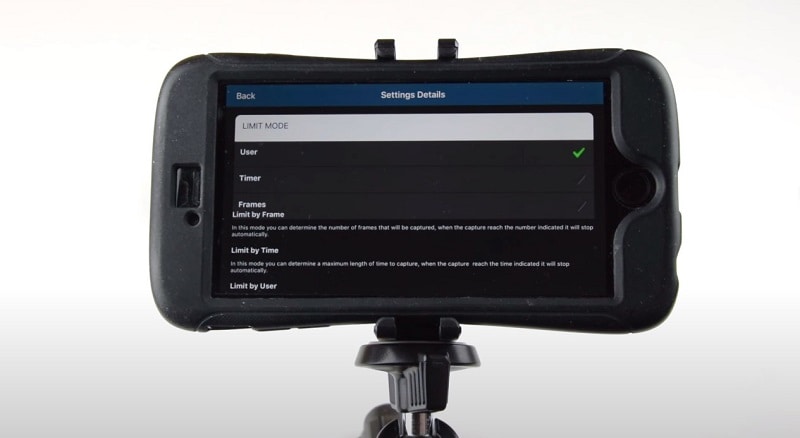
- Adjust the resolution of your camera before taking pictures.
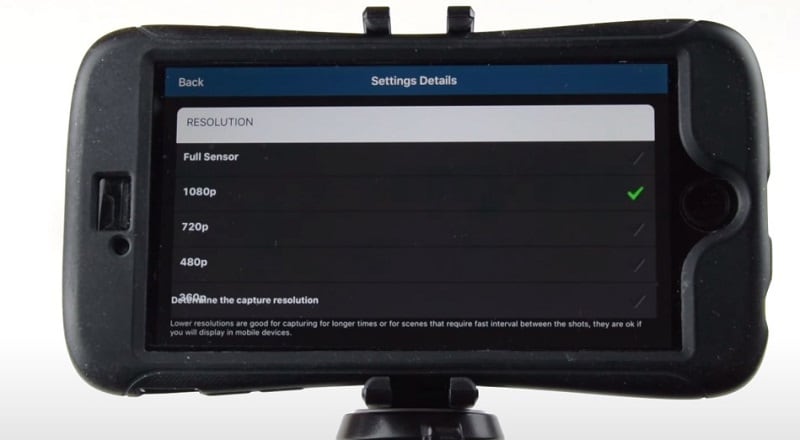
- Take a lot of pictures through the app using your device’s inbuilt camera
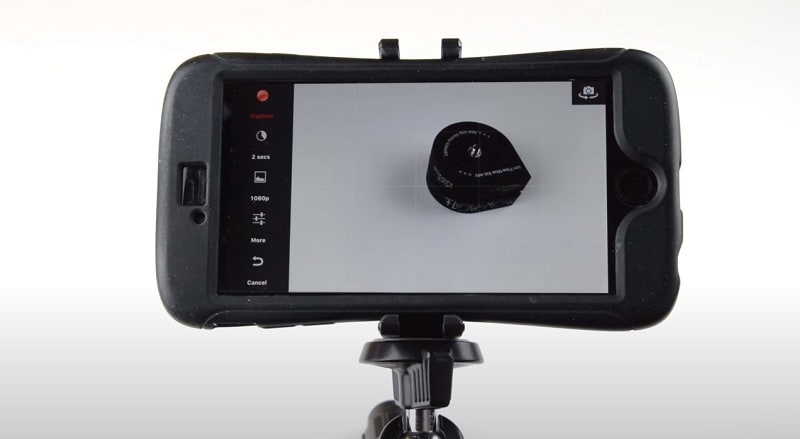
- Edit the order of the pictures
- Stitch the pictures together to form a time-lapse
- Add filters and adjust color settings
- Render and preview
- Export the file to your device
③ Invideo (Online)
InVideo is a do-it-yourself (DIY) video creation platform that enables users to turn their ideas into videos in real time. The platform lets users create, edit, preview, and share videos with team members. It’s a fantastic solution for combining your time-lapse footage into an amazing video project.
InVideo provides three distinct methods for creating videos:
- Text-to-Video: Upload your footage and let InVideo turn it into a series of scenes that you can customize
- Blank Templates: Start with a stripped-down template and craft an amazing video from scratch
- Premade Templates: Pick a template from an extensive library of premade templates
Steps to Use InVideo:
To create a time-lapse through InVideo, follow the mentioned steps:
Step 1. Download and install InVideo
Step 2. Sign up and sign in to your InVideo account
Step 3. Upload your footage to the ‘Add your media files here’ tab.
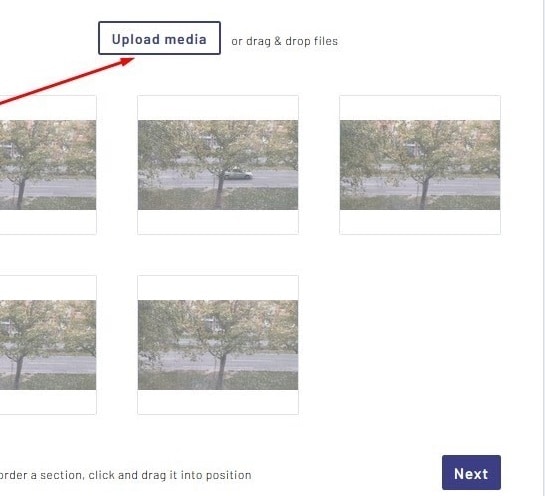
Step 4. Do not upload footage exceeding 200 MBs.
Step 5. Click ‘Next’ and you will be redirected to the Storyboard.
Step 6. Preview all your scenes in Storyboard mode. Rearrange them, add new ones in between, and delete any that you don’t want to use in your project. You can also duplicate scenes if necessary.
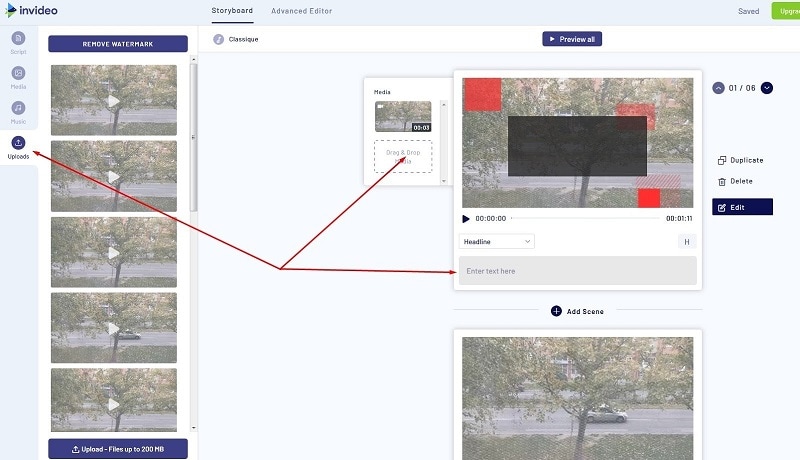
Step 7: You can also add captions to your scenes. To view all the captions you’ve created, go to the Scripts tab. You’ll be able to customize your captions further in the Advanced Editor mode.
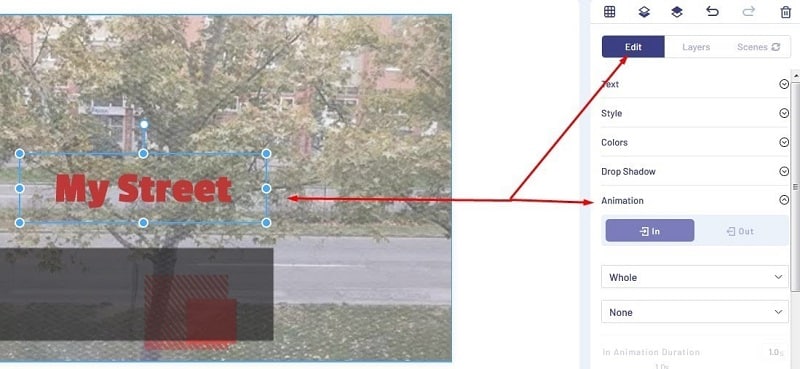
Step 8. To add audio files to your video, go to the Music tab.
Step 9. Edit your video by clicking on Advanced Editor.

Step 10. Apply filters and review the timeline, export, save the video and you’re good to go.
3. Which Way is Right for You to Edit a Time-Lapse Video?
There are many ways to edit a time-lapse video, with varying degrees of success. Each application and software has its pros and cons. Although some best and most useful methods to create and edit time-lapse videos have been discussed earlier in this essay it is crucial to highlight that Filmora is regarded as software that possesses almost all the assets that we need while we edit our time-lapse videos.
Through Filmora, you can effortlessly make a pro-level time-lapse video either from still images or existing video. Most of the software would offer only one feature at a time so it is tremendous that Filmora lets you easily access multiple options to create a seamless time-lapse video in a spur of some minutes.
Besides multiple ways to create time-lapse, Filmora also offers basic & advanced editing features for time-lapse production. After creating a time-lapse in Filmora, you can drag through the multiple post-production editing features which include: Split Screen, Keyframing, Motion Tracking, Speed Ramping, Screen Recorder, Instant Mode, Pre-set Templates, and Auto Beat Sync. And many others.
Besides these ways of editing your time-lapses, Filmora also offers no disturbing pop-up ad experience while editing which provides a smooth editing platform for editors.
Part 4: Share & Enjoy the Best Time-Lapse Video
1. Share Your Quality Time-Lapse Video Across Social Platforms
Time-lapse & social media serve as the perfect combination in today’s times when social media publicity has become an incredibly important avenue for businesses. You can share your time lapses on different social media platforms including:
- YouTube
When people talk about today’s most popular social sharing websites, YouTube often gets left out of the conversation in favor of sites like Facebook and Twitter. But don’t be fooled: YouTube has a lot going for it.
By uploading your time-lapses on YouTube, you can create a YouTube link and share it with your friends and social circle so they can easily access your content, you can get found in search by uploading your own written transcript about the time-lapse, adding an end screen or cards to promote your time-lapse video, and add creative effects to your time-lapses with YouTube Enhancements.
- TikTok
TikTok is a social media platform for creating, sharing, and discovering short videos. The app is used by young people as an outlet to express themselves through singing, dancing, comedy, and lip-syncing, and allows users to create videos and share them across a community.
Since the duration of the time-lapse videos is mostly kept short, TikTok is the best app to approach if you want to increase your audience engagement.
The Meta app, Instagram is the most used app as per 2022 statistics. Through this app, people used to update their day-to-day routine and check-ins by uploading pictures. Now, the platform has added a ‘Reels’ section which plays the short videos to keep the audience hooked to the app, more than ever.
Upload your time-lapses on Instagram as Reels and see your content boost within hours.
2. Promote Your Time-Lapse Video on Popular Websites
Professional video editors and photographers who are looking for a paid platform to promote their business can access the most widely used and reliable websites which include the following:
- Shutterstock
With this app on your mobile phones and other devices, you can Transform Your Marketing Campaigns, Social Media, Websites, and Designs. Uploading your time-lapse content to earn good money on Shutterstock will work best in your favor.
- Pond5
Pond5 is the world’s largest marketplace for HD & 4K stock video, plus millions of music tracks, SFX, motion graphics, and images. Signing up and posting your time-lapse to promote your digital work can be a good choice if you’re looking for earning money online.
- Adobe Stock
Adobe Stock is a new service that provides designers and businesses with access to millions of high-quality, curated, royalty-free images and videos. This is also a good choice for professional photographers and videographers to post their time-lapses.
- Getty
Getty is an American visual media company and is a supplier of stock images, editorial photography, video, and music for business. By uploading your time lapses on this platform, you can be provided with exceptional opportunities to engage employees, entertain clients, and promote your brand.
3. Enjoy the Attractive Time-Lapse Video Examples
Over the internet, you will find numerous creatively designed time-lapses but a few of them still top the list. Some of the iconic time-lapses created to date include the following:
- Multiverse By Hiroshi Kondo, a mind-bending TimeLapse video of Taiwan
- Paris Day & Night by Teeter-Totter-Tam is a 5-minutes TimeLapse journey through one of the prettiest cities in the world, Paris from day to night.
- Solar Panel Installation from a Crane - David Dupuy
- Death Is the Road to Awe is a sample of TimeLapse video footage from that film shot in the American Southwest.
Part 5: FAQs – Time-Lapse Video Creation
① How to easily make a time-lapse video like a pro?
Most smartphone cameras have their time-lapse feature built in. To shoot your time-lapse video, simply open up the camera on your phone and select the “Time-Lapse” feature.
Place your phone in a secure spot where it won’t move around a lot. Then, tap the record button to start recording your time-lapse. When you’re done, tap it again. Your video will play back compressed into a shorter period for a time lapse effect.
PRO TIP: If you’re planning to make a landscape video, turn your phone so your time-lapse video is wide instead of tall
② What are the best time lapse editors or software?
The top five Best Free TimeLapse Software include:
- Wondershare Filmora- Windows and Mac
- Adobe Premiere Pro – Professional software
- Final Cut Pro – Mac software for time-lapse videos
- iMovie – User-friendly
- LRTimelapse – Sophisticated tool for more experienced users
③ Can I speed up or slow down a time-lapse video using Filmora?
Filmora also allows you to adjust the duration of the video clip to change the video speed. After importing the video clip to the timeline, right-click it and choose Speed and Duration to open the custom speed pop-up. Go to the Duration section and you will see the original duration of the video. Adjusting the duration of the video longer will add a slow-motion effect to the video. Changing the duration of the video to a shorter time will speed up the playback speed of the video. Just directly input the number in the field to speed up/slow down the video.
④ How to make my time-lapse video look better?
- Using a Slow Shutter
One solution to making your time lapses look more natural is to use a slow shutter so that each frame has a bit of motion.
- Blend in Video
Capture a time-lapse with fast movement and then mask in video with slow movement, maybe I could have the best of both worlds.
- Use filters
You can use Filters to spruce up the content with the time-lapse.
- Add Audio
Audio is an essential part if you want to leverage the content reach of your time-lapse video.
Conclusion
Time lapse videos are among the most powerful marketing tactics available in the mass media age of today. Similar to aerial photography, time-lapse videos can tell an engaging story for a low production cost, and they can be viewed fast by the audience. Filmora has helped the professionals as well as the beginners in the photography and videography to boost their content through online platforms.
This article will guide you through the most useful software and ways to promote your content and boost your audience engagement through creating mind-blowing time-lapses. Software like above mentioned ones take extremely little time and focus to comprehend the tale in a time lapse, which is a huge advantage in today’s competitive industry.
Free Download For macOS 10.14 or later
Step 2: Launch Filmora video editor
After downloading and installing, launch the Filmora timeline and import the photos to the media library.
Step 3: Preview and adjust the photos.
Drag the images down to the timeline and move the pointer to reset and order the images according to your required time-lapse video. Don’t forget to resize and match the sizes of all the pictures so make a uniform time-lapse.
Step 4: Adjust the Speed
Select one of the photos in the timeline and right-click. Click on Speed and Duration > Custom Speed panel > Duration > change the duration of the photo to 00:00:00:01 and hit OK.
Step 5: Add effects and audio
Even though this step is optional, still it is recommended that to make your time-lapse more presentable, go to effects and choose your favorite pre-set. Go to Audio menu to choose from the music library or add your own custom audio by importing audio file into the timeline.
Step 6 Render and Export media
Export your file after rendering it in the full screen. Always check if there are any additional changes required before exporting the media file.
Step 7: Save into your desktop
Change the video format and video and audio parameters such as Bit Rate, Encoder, and Resolution of the video.
Other software for creating time-lapse
Besides Filmora, there are some interesting options for the users which involve:
o iMovie
o LRTimelapse
o Lightroom
o Adobe Premiere Pro
o After Effects
o Photoshop
2. 3 Best Ways to Convert Video to Time Lapse
① Filmora(Windows & Mac)
Filmora offers yet another very distinguishing feature through which it can convert video footage into an excellent time-lapse video. This feature of Filmora empowers the users and boosts their content and increases audience engagement as well.
In a few simple steps, you can get a creative time-lapse on your windows and mac devices.
- Download and install Filmora 11
- Launch Filmora timeline on your device and import the footage to the media library
- Drag your video onto the video column in the timeline. Select the loaded video and click the “Play” button. While playing the video, drag the slider bar at the start time and hit the “Split” icon to cut out the part you want to do time-lapse editing.
- Right-click on the video clip in the timeline to select Speed and Duration. Find the Speed option and drag the slider bar to the right to increase the speed.
- Click the Play button to preview the result. Filmora now supports up to 100x fast motion and 0.01x slow mo.
- Export your video
② Lapse It Pro (Android & iPhone)
One of the top apps for time-lapse photography is Lapse It Pro. A collection of further time lapses made by other people is available on Lapse It. You can post your videos and favorite those of others while using this social function, which also lets you watch other people’s videos. Through user control, the software makes the smartphone’s capacity to record time lapses as effective as possible.
The lapse It pro version is currently not free, although the Lapse its app is free and it is available on both, Android and Apple.
Steps to Use Lapse It Pro:
- Download the app on your android or apple device
- Configure the time interval between the shots and set a time or photo-based limit while clicking pictures.
- Adjust the resolution of your camera before taking pictures.
- Take a lot of pictures through the app using your device’s inbuilt camera
- Edit the order of the pictures
- Stitch the pictures together to form a time-lapse
- Add filters and adjust color settings
- Render and preview
- Export the file to your device
③ Invideo (Online)
InVideo is a do-it-yourself (DIY) video creation platform that enables users to turn their ideas into videos in real time. The platform lets users create, edit, preview, and share videos with team members. It’s a fantastic solution for combining your time-lapse footage into an amazing video project.
InVideo provides three distinct methods for creating videos:
- Text-to-Video: Upload your footage and let InVideo turn it into a series of scenes that you can customize
- Blank Templates: Start with a stripped-down template and craft an amazing video from scratch
- Premade Templates: Pick a template from an extensive library of premade templates
Steps to Use InVideo:
To create a time-lapse through InVideo, follow the mentioned steps:
Step 1. Download and install InVideo
Step 2. Sign up and sign in to your InVideo account
Step 3. Upload your footage to the ‘Add your media files here’ tab.
Step 4. Do not upload footage exceeding 200 MBs.
Step 5. Click ‘Next’ and you will be redirected to the Storyboard.
Step 6. Preview all your scenes in Storyboard mode. Rearrange them, add new ones in between, and delete any that you don’t want to use in your project. You can also duplicate scenes if necessary.
Step 7: You can also add captions to your scenes. To view all the captions you’ve created, go to the Scripts tab. You’ll be able to customize your captions further in the Advanced Editor mode.
Step 8. To add audio files to your video, go to the Music tab.
Step 9. Edit your video by clicking on Advanced Editor.
Step 10. Apply filters and review the timeline, export, save the video and you’re good to go.
3. Which Way is Right for You to Edit a Time-Lapse Video?
There are many ways to edit a time-lapse video, with varying degrees of success. Each application and software has its pros and cons. Although some best and most useful methods to create and edit time-lapse videos have been discussed earlier in this essay it is crucial to highlight that Filmora is regarded as software that possesses almost all the assets that we need while we edit our time-lapse videos.
Through Filmora, you can effortlessly make a pro-level time-lapse video either from still images or existing video. Most of the software would offer only one feature at a time so it is tremendous that Filmora lets you easily access multiple options to create a seamless time-lapse video in a spur of some minutes.
Besides multiple ways to create time-lapse, Filmora also offers basic & advanced editing features for time-lapse production. After creating a time-lapse in Filmora, you can drag through the multiple post-production editing features which include: Split Screen, Keyframing, Motion Tracking, Speed Ramping, Screen Recorder, Instant Mode, Pre-set Templates, and Auto Beat Sync. And many others.
Besides these ways of editing your time-lapses, Filmora also offers no disturbing pop-up ad experience while editing which provides a smooth editing platform for editors.
Part 4: Share & Enjoy the Best Time-Lapse Video
1. Share Your Quality Time-Lapse Video Across Social Platforms
Time-lapse & social media serve as the perfect combination in today’s times when social media publicity has become an incredibly important avenue for businesses. You can share your time lapses on different social media platforms including:
- YouTube
When people talk about today’s most popular social sharing websites, YouTube often gets left out of the conversation in favor of sites like Facebook and Twitter. But don’t be fooled: YouTube has a lot going for it.
By uploading your time-lapses on YouTube, you can create a YouTube link and share it with your friends and social circle so they can easily access your content, you can get found in search by uploading your own written transcript about the time-lapse, adding an end screen or cards to promote your time-lapse video, and add creative effects to your time-lapses with YouTube Enhancements.
- TikTok
TikTok is a social media platform for creating, sharing, and discovering short videos. The app is used by young people as an outlet to express themselves through singing, dancing, comedy, and lip-syncing, and allows users to create videos and share them across a community.
Since the duration of the time-lapse videos is mostly kept short, TikTok is the best app to approach if you want to increase your audience engagement.
The Meta app, Instagram is the most used app as per 2022 statistics. Through this app, people used to update their day-to-day routine and check-ins by uploading pictures. Now, the platform has added a ‘Reels’ section which plays the short videos to keep the audience hooked to the app, more than ever.
Upload your time-lapses on Instagram as Reels and see your content boost within hours.
2. Promote Your Time-Lapse Video on Popular Websites
Professional video editors and photographers who are looking for a paid platform to promote their business can access the most widely used and reliable websites which include the following:
- Shutterstock
With this app on your mobile phones and other devices, you can Transform Your Marketing Campaigns, Social Media, Websites, and Designs. Uploading your time-lapse content to earn good money on Shutterstock will work best in your favor.
- Pond5
Pond5 is the world’s largest marketplace for HD & 4K stock video, plus millions of music tracks, SFX, motion graphics, and images. Signing up and posting your time-lapse to promote your digital work can be a good choice if you’re looking for earning money online.
- Adobe Stock
Adobe Stock is a new service that provides designers and businesses with access to millions of high-quality, curated, royalty-free images and videos. This is also a good choice for professional photographers and videographers to post their time-lapses.
- Getty
Getty is an American visual media company and is a supplier of stock images, editorial photography, video, and music for business. By uploading your time lapses on this platform, you can be provided with exceptional opportunities to engage employees, entertain clients, and promote your brand.
3. Enjoy the Attractive Time-Lapse Video Examples
Over the internet, you will find numerous creatively designed time-lapses but a few of them still top the list. Some of the iconic time-lapses created to date include the following:
- Multiverse By Hiroshi Kondo, a mind-bending TimeLapse video of Taiwan
- Paris Day & Night by Teeter-Totter-Tam is a 5-minutes TimeLapse journey through one of the prettiest cities in the world, Paris from day to night.
- Solar Panel Installation from a Crane - David Dupuy
- Death Is the Road to Awe is a sample of TimeLapse video footage from that film shot in the American Southwest.
Part 5: FAQs – Time-Lapse Video Creation
① How to easily make a time-lapse video like a pro?
Most smartphone cameras have their time-lapse feature built in. To shoot your time-lapse video, simply open up the camera on your phone and select the “Time-Lapse” feature.
Place your phone in a secure spot where it won’t move around a lot. Then, tap the record button to start recording your time-lapse. When you’re done, tap it again. Your video will play back compressed into a shorter period for a time lapse effect.
PRO TIP: If you’re planning to make a landscape video, turn your phone so your time-lapse video is wide instead of tall
② What are the best time lapse editors or software?
The top five Best Free TimeLapse Software include:
- Wondershare Filmora- Windows and Mac
- Adobe Premiere Pro – Professional software
- Final Cut Pro – Mac software for time-lapse videos
- iMovie – User-friendly
- LRTimelapse – Sophisticated tool for more experienced users
③ Can I speed up or slow down a time-lapse video using Filmora?
Filmora also allows you to adjust the duration of the video clip to change the video speed. After importing the video clip to the timeline, right-click it and choose Speed and Duration to open the custom speed pop-up. Go to the Duration section and you will see the original duration of the video. Adjusting the duration of the video longer will add a slow-motion effect to the video. Changing the duration of the video to a shorter time will speed up the playback speed of the video. Just directly input the number in the field to speed up/slow down the video.
④ How to make my time-lapse video look better?
- Using a Slow Shutter
One solution to making your time lapses look more natural is to use a slow shutter so that each frame has a bit of motion.
- Blend in Video
Capture a time-lapse with fast movement and then mask in video with slow movement, maybe I could have the best of both worlds.
- Use filters
You can use Filters to spruce up the content with the time-lapse.
- Add Audio
Audio is an essential part if you want to leverage the content reach of your time-lapse video.
Conclusion
Time lapse videos are among the most powerful marketing tactics available in the mass media age of today. Similar to aerial photography, time-lapse videos can tell an engaging story for a low production cost, and they can be viewed fast by the audience. Filmora has helped the professionals as well as the beginners in the photography and videography to boost their content through online platforms.
This article will guide you through the most useful software and ways to promote your content and boost your audience engagement through creating mind-blowing time-lapses. Software like above mentioned ones take extremely little time and focus to comprehend the tale in a time lapse, which is a huge advantage in today’s competitive industry.
Also read:
- Guide of 8 Photo Collage Apps for PC for 2024
- New Learning The Details Of How To Replace Sky in Lightroom
- New Ways to Make Sure Your Video Editing Course Is Worthing to Watch
- In 2024, Fixing The Slow Playback Issues in DaVinci Resolve
- Can You Enhance Your Drone Footage with Cinematic Drone LUTs? This Article Discusses Top Drone LUTs Recommendations to Simplify Video Editing
- New In 2024, Best Audio Waveform Generator
- Updated In 2024, This Article Will Show You the Steps to Make Coin Magic in Videos with Filmora
- Updated The Definite Guide to Craig Bot Discord
- Updated 10 Best Free Text to Speech Software Windows, Mac,Android, iPhone & Online for 2024
- Are You an Apple User Interested in Adding a Slow-Mo to Their Videos? This Article Features an Exceptional Procedure for Creating Slow-Mo in iMovie
- New 2024 Approved Ultimate Guide To Make A Political Video
- Updated Shoot Video with Virtual Green Screen for 2024
- New 2024 Approved Modern Silence Detection Tools Are Changing the Face of Video Editing. Use Them to Improve the Quality of Your Video Clips. Learn How These Tools Let You Detect Silence with Pinpoint Accuracy
- New In 2024, Best 8 Srt File Creators
- New How to Make Video Slow Motion, In 2024
- Updated Top 5 Free Online Video Filter Editors
- Updated 2024 Approved 10+ Best Unlimited FCPX Slideshow Templates
- 2024 Approved Best Online GIF to Image (PNG/JPG) Converters
- New Finding The Finest Way to Add Subtitles to Videos | Filmora
- Updated How to Zoom Desktop Screen for 2024
- New In 2024, Find a Solution for Effortless Sky Replacement Photoshop in This Comprehensive Guide. Also, Use the Easiest Video Editing Tool to Make Your Media Stunning
- 2024 Approved How to Make Discord GIF Avatar in Depth Guide
- Top 10 Transparent Image Online Tools That Give You an Advantage for 2024
- Updated In 2024, Video Inspiration for Birthday Slideshow
- Updated Discover the Best Video Frame Rate Converters for Smooth Playback, Including Online and Offline Options. Learn How to Convert Frame Rates for Free and Elevate Your Video Quality with These Top 8 Tools for 2024
- Having Trouble with Black Backgrounds in After Effects? Land in Here to Know How You Can Quickly Escape This Glitch in the Simplest Ever Way Possible
- Thousands Already Know Ezgif and So Can You for 2024
- New In 2024, 4 Ways for Rotating Your GoPro Videos Professionally
- Updated 2024 Approved How To Create A Green Screen Video In After Effects
- Updated In 2024, GIF to JPG Is as Simple as a Blink of an Eye
- New In 2024, How to Make Video Fade to Black in Movie Maker
- In 2024, 6 Best Methods to Make a Video Longer
- New In 2024, Useful Tips for Tiktok Video Aspect Ratio Included
- Updated In 2024, A Guide to Effective Video Marketing
- Updated Detailed Steps to Add Border to Video Using Premiere Pro
- Updated In 2024, Learn How to Merge Audio and Video Like a Pro with This Step-by-Step Guide to Using FFmpeg. Create Seamless Videos and Improve Your Video Production Skills
- In 2024, How I Got Free After Effects Templates Slideshow with Simple Trick
- Updated In 2024, Best AR Video Apps
- In 2024, Whatsapp Video converterKeywords Convert Video for Whatsapp 6600; Video Converter for Whatsapp 6600; Reduce Video Size for Whatsapp 1600; Whatsapp Supported Video Formats 720; Convert Video to Whatsapp Format 590
- New 2024 Approved Do You Want Your Music Videos to Look Like Professional Music Videos? You Can Always Choose From Music Videos LUTs to Give Your Videos a Cinematic Touch
- Updated 2024 Approved What Does It Mean to Color Grade Your Images, and Why Is It so Important? Does It Mean the Same Thing as a Color Correction? Read on to Gather All the Information You Need on Color Grading Photography
- In 2024, Looking for Simple Steps to Customize the Speed of Your Video in DaVinci Resolve? Find Out How You Can Do that and Discover an Easier Alternative to DaVinci Resolve
- New In 2024, Your Search for the Best GIF Creator Tools Ends Here
- 2024 Approved How Can You Deny These Top 10 Free Speech to Text Software
- Updated 2024 Approved Splice Video Editor Online - Get Your Videos Splice
- In 2024, How to Transfer Data from Poco M6 5G to Other Android Devices? | Dr.fone
- Will Pokémon Go Ban the Account if You Use PGSharp On Samsung Galaxy S24 Ultra | Dr.fone
- How to Recover Apple iPhone 14 Plus Data From iOS iTunes? | Dr.fone
- In 2024, Additional Tips About Sinnoh Stone For Oppo Reno 10 Pro+ 5G | Dr.fone
- How to Unlock Y200 Without Password?
- Undelete lost contacts from Honor X50i.
- In 2024, Easily Unlock Your HTC U23 Device SIM
- In 2024, How to Cast Oppo K11x to Computer for iPhone and Android? | Dr.fone
- A Comprehensive Guide to iCloud Unlock On iPhone XS Max Online
- 4 Quick Ways to Transfer Contacts from Apple iPhone XR to iPhone With/Without iTunes | Dr.fone
- Authentication Error Occurred on Vivo Y100i Power 5G? Here Are 10 Proven Fixes | Dr.fone
- Title: New 2024 Approved Understanding the Dynamics Underlying in AI Slow Motion Editing
- Author: Morgan
- Created at : 2024-04-24 01:07:55
- Updated at : 2024-04-25 01:07:55
- Link: https://ai-video-editing.techidaily.com/new-2024-approved-understanding-the-dynamics-underlying-in-ai-slow-motion-editing/
- License: This work is licensed under CC BY-NC-SA 4.0.
