
:max_bytes(150000):strip_icc():format(webp)/GettyImages-1365158534-d6952b03afff43f7a1c5f0405f31dc92.jpg)
New Are You Looking for Ideas for Funny YouTube Videos? Your Search Is Over. Read the Article Below and Get the Most Information Regarding Funny Videos. You Will Also Get to Know About the Best Funny Video Background Music
Are You Looking for Ideas for Funny YouTube Videos? Your Search Is Over. Read the Article Below and Get the Most Information Regarding Funny Videos. You Will Also Get to Know About the Best Funny Video Background Music
When it comes to entertainment, YouTube always makes it to the top of the list. You can find any type of video on YouTube. Talking about entertainment, funny videos are among the most-watched. There are various types of funny videos.
Sometimes the compilation of pranks makes us laugh. Sometimes it’s the comedy that makes us laugh. In any case, we love watching funny videos. If you are in a bad mood, these videos help lighten your mood. Many YouTube channels create funny content. They are the reason you laugh and enjoy spending time on YouTube. PewDiePie, Liza Koshy is among the famous channels.
The article below will discuss more funny videos. You will also learn about funny background music from this article.
In this article
01 5 Funny Content Ideas for YouTube Videos
02 2 Tutorial to Help You Create Funny Videos for YouTube
03 Recommendation about Funny Background Music
Part 1. 5 Funny Content Ideas for YouTube Videos
Is there any constant video type that you watch daily? Any video that ever bores you? Funny videos are the answer to all these questions. Not every kind of video is watched daily except funny videos. We entertain ourselves with these fun videos.

If you ever plan to create funny videos, what are you going to do? What type of content will you make? The following section of this article will bring 5 ideas to you. With these ideas, you can create funny videos for YouTube.
1. Prank Videos
Who doesn’t enjoy pranking others? Well, we all love to play safe pranks on our loved ones. Surprisingly, people love to watch these pranks. This is the perfect idea for funny videos. You can set a hiding camera, prank someone and record it. By sharing the prank, you can make someone laugh. Pranks are not always planned. Sometimes candid things can also do the job.
2. Baby and Kids Videos
Who doesn’t like babies? One idea for funny videos is sharing your baby’s or kid’s activities. Babies and kids are very cute, adorable, and innocent. They always do cute little disasters, which are fun to watch. You can share their funny and cute moments with everyone. Kids and babies can easily make everyone laugh. Their cuteness will attract the audience.
3. Challenge Videos
Challenge videos are another type of video which are fun to watch. Simple challenges which do not harm anyone in any way are encouraged. Challenge videos automatically become funny. Things get funny when someone can’t complete the challenge and is desperate to get it done. Completing the challenge and struggling to get things done seems funny.
4. Plan a Skit
Skits are very successful. The factors that help in making unique skits are the idea and the humor. If both things are amazing and well presented, your skit will shine. The fact because skits are short comedy films, they effortlessly attract the audience. So, creating skits is another fantastic idea for funny YouTube content.
5. Blooper Videos
Blooper videos are naturally funny. You don’t have to put extra effort to make them funny. Bloopers are the funny things that take place while you try to record something. Bloopers never make it to the final video, but they are always fun to watch. So instead of watching and enjoying them alone, you can share them on YouTube so that everyone can enjoy the fun behind the scenes.
Part 2. 2 Tutorial to Help You Create Funny Videos for YouTube
Sharing ideas for funny videos is not enough. There might be people out there who don’t have a clue about creating and editing videos. For any such person, Wondershare Filmora is the best tool they will ever come across. It doesn’t matter if you are a beginner or a professional. You can easily use Filmora because of its simple process.
The following section of this article will teach you how you can create funny videos. Take help from the 2 shared tutorials below and make your own stunning funny YouTube video.
Create a Cute and Funny Pet Intro
Suppose you are a YouTuber and you want to introduce your pet on the channel. What could be the best way? Sharing a basic introduction is too mainstream. Have you ever tried to introduce someone with the coolest editing? If not, learn from us about introducing your pet in the cutest way.
For Win 7 or later (64-bit)
For macOS 10.12 or later
Step 1: To create cute pet intros, first of all, open Filmora. Then head to the ‘Titles’ tab. You can search for any pet-related title template. Select a template that you like and drag it onto the timeline. You can double-click on the template to edit and customize it as you want.

Step 2: After that, it’s time to add the media file. For that, you need to import the media file. After importing it, drag it to the timeline so that it can be edited. The media file can also be edited. You have to double-click on it to open the editing settings.

Step 3: As we are teaching to edit a cute yet funny introduction so what is editing without elements? To add cute little elements to your video, head over to the ‘Elements’ tab. Select an element and drag it to the timeline. You can also edit the element by double-clicking on it.

Step 4: Lastly, you can add background music to your video. You can either import the background music or also use the music from Filmora’s library.

Create a Funny Baby Laser Meme Video
Are you not a meme fan? It’s strange if you don’t like memes. This is because memes are entertaining and funny. The next tutorial that we are going to discuss is related to memes. We will tell you about creating a baby laser meme funny video.
For Win 7 or later (64-bit)
For macOS 10.12 or later
Step 1: To edit a funny meme video, first of all, import a baby video to Filmora. Then, you need to drag it to the timeline to start the editing.

Step 2: Now, let the fun begin. Start by double-clicking on the video part that you want to edit and animate. Then enable the ‘Motion Tracking’ option and adjust the tracker on the screen where you want the scene.

Step 3: Let us make the editing enjoyable. For that, head to the ‘Elements’ tab. Search for laser-related elements. Then, drag your selected element to the timeline. You can adjust the element in the preview window by double-clicking on it.

Step 4: Finish off by adding a cool transition to your funny meme video. This could be done from the ‘Transition’ section. You can add as many Elements and Transitions as you want.

Part 3. Recommendation about Funny Background Music
Is something left to share about funny videos? Now that you have ideas for funny videos and know how to edit them, what is left? The only missing part is suitable funny background music. Let us help you with this. In this section, we will share the best funny video background music for your videos.
| Song Name | Artist Name | Year of Publication |
|---|---|---|
| Subway System | Jimothy Lacoste | 2018 |
| Gangnam Style | PSY | 2012 |
| Amazing Horse | Jonti Picking | 2010 |
| I’m on a Boat | The Lonely Island | 2009 |
| The Duck Song | Bryant Oden | 2009 |
Bottom Line
This article holds so much information regarding funny YouTube videos. You can take help from this article to create stunning funny videos. We have also shared tutorials for making cute and funny videos. Not just this, but the best funny background music has also been discussed.
Wondershare Filmora
Get started easily with Filmora’s powerful performance, intuitive interface, and countless effects!
Try It Free Try It Free Try It Free Learn More >

02 2 Tutorial to Help You Create Funny Videos for YouTube
03 Recommendation about Funny Background Music
Part 1. 5 Funny Content Ideas for YouTube Videos
Is there any constant video type that you watch daily? Any video that ever bores you? Funny videos are the answer to all these questions. Not every kind of video is watched daily except funny videos. We entertain ourselves with these fun videos.
If you ever plan to create funny videos, what are you going to do? What type of content will you make? The following section of this article will bring 5 ideas to you. With these ideas, you can create funny videos for YouTube.
1. Prank Videos
Who doesn’t enjoy pranking others? Well, we all love to play safe pranks on our loved ones. Surprisingly, people love to watch these pranks. This is the perfect idea for funny videos. You can set a hiding camera, prank someone and record it. By sharing the prank, you can make someone laugh. Pranks are not always planned. Sometimes candid things can also do the job.
2. Baby and Kids Videos
Who doesn’t like babies? One idea for funny videos is sharing your baby’s or kid’s activities. Babies and kids are very cute, adorable, and innocent. They always do cute little disasters, which are fun to watch. You can share their funny and cute moments with everyone. Kids and babies can easily make everyone laugh. Their cuteness will attract the audience.
3. Challenge Videos
Challenge videos are another type of video which are fun to watch. Simple challenges which do not harm anyone in any way are encouraged. Challenge videos automatically become funny. Things get funny when someone can’t complete the challenge and is desperate to get it done. Completing the challenge and struggling to get things done seems funny.
4. Plan a Skit
Skits are very successful. The factors that help in making unique skits are the idea and the humor. If both things are amazing and well presented, your skit will shine. The fact because skits are short comedy films, they effortlessly attract the audience. So, creating skits is another fantastic idea for funny YouTube content.
5. Blooper Videos
Blooper videos are naturally funny. You don’t have to put extra effort to make them funny. Bloopers are the funny things that take place while you try to record something. Bloopers never make it to the final video, but they are always fun to watch. So instead of watching and enjoying them alone, you can share them on YouTube so that everyone can enjoy the fun behind the scenes.
Part 2. 2 Tutorial to Help You Create Funny Videos for YouTube
Sharing ideas for funny videos is not enough. There might be people out there who don’t have a clue about creating and editing videos. For any such person, Wondershare Filmora is the best tool they will ever come across. It doesn’t matter if you are a beginner or a professional. You can easily use Filmora because of its simple process.
The following section of this article will teach you how you can create funny videos. Take help from the 2 shared tutorials below and make your own stunning funny YouTube video.
Create a Cute and Funny Pet Intro
Suppose you are a YouTuber and you want to introduce your pet on the channel. What could be the best way? Sharing a basic introduction is too mainstream. Have you ever tried to introduce someone with the coolest editing? If not, learn from us about introducing your pet in the cutest way.
For Win 7 or later (64-bit)
For macOS 10.12 or later
Step 1: To create cute pet intros, first of all, open Filmora. Then head to the ‘Titles’ tab. You can search for any pet-related title template. Select a template that you like and drag it onto the timeline. You can double-click on the template to edit and customize it as you want.
Step 2: After that, it’s time to add the media file. For that, you need to import the media file. After importing it, drag it to the timeline so that it can be edited. The media file can also be edited. You have to double-click on it to open the editing settings.
Step 3: As we are teaching to edit a cute yet funny introduction so what is editing without elements? To add cute little elements to your video, head over to the ‘Elements’ tab. Select an element and drag it to the timeline. You can also edit the element by double-clicking on it.
Step 4: Lastly, you can add background music to your video. You can either import the background music or also use the music from Filmora’s library.
Create a Funny Baby Laser Meme Video
Are you not a meme fan? It’s strange if you don’t like memes. This is because memes are entertaining and funny. The next tutorial that we are going to discuss is related to memes. We will tell you about creating a baby laser meme funny video.
For Win 7 or later (64-bit)
For macOS 10.12 or later
Step 1: To edit a funny meme video, first of all, import a baby video to Filmora. Then, you need to drag it to the timeline to start the editing.
Step 2: Now, let the fun begin. Start by double-clicking on the video part that you want to edit and animate. Then enable the ‘Motion Tracking’ option and adjust the tracker on the screen where you want the scene.
Step 3: Let us make the editing enjoyable. For that, head to the ‘Elements’ tab. Search for laser-related elements. Then, drag your selected element to the timeline. You can adjust the element in the preview window by double-clicking on it.
Step 4: Finish off by adding a cool transition to your funny meme video. This could be done from the ‘Transition’ section. You can add as many Elements and Transitions as you want.
Part 3. Recommendation about Funny Background Music
Is something left to share about funny videos? Now that you have ideas for funny videos and know how to edit them, what is left? The only missing part is suitable funny background music. Let us help you with this. In this section, we will share the best funny video background music for your videos.
| Song Name | Artist Name | Year of Publication |
|---|---|---|
| Subway System | Jimothy Lacoste | 2018 |
| Gangnam Style | PSY | 2012 |
| Amazing Horse | Jonti Picking | 2010 |
| I’m on a Boat | The Lonely Island | 2009 |
| The Duck Song | Bryant Oden | 2009 |
Bottom Line
This article holds so much information regarding funny YouTube videos. You can take help from this article to create stunning funny videos. We have also shared tutorials for making cute and funny videos. Not just this, but the best funny background music has also been discussed.
Wondershare Filmora
Get started easily with Filmora’s powerful performance, intuitive interface, and countless effects!
Try It Free Try It Free Try It Free Learn More >
Steps to Denoise in Final Cut Pro – Reduce Video and Audio Noise
Whenever it comes to the term denoise, we usually get kind of “lost in translation” – does it mean to remove or reduce just the background noise in terms of audio, or does it intend noise effect on the actual scene which we see visually? Anyway, using video editors, denoising is possible in both ways. And why should we denoise at all? – to find out, we will touch upon both issues, and learn how to do those two things in Final Cut Pro.
How to remove background noise in Final Cut Pro?
It doesn’t really matter if you are preparing a video for youtube, a podcast, or any other content with audio in it – for your listeners to be engaged, you need a clear audio, but sometimes that is not the case. You might even find unnecessary background noise after recording the video or audio, and it can be really annoying – that kind of recording gives your audio tracks an unprofessional touch, which can lead to disengaged listeners, the viewers who just don’t want to listen to it anymore. But it’s always possible to turn the tables – and for it, using video editors might really give us a hand. So, Final Cut Pro, which is developed only for Macs (so, you will not be able to use this software on the PC), can solve this problem for you.
So, if you are using Final Cut Pro 10.6, it’s possible to achieve your goal without using any plug-ins. In such a case, there are special effects to use. First of all, let us say that you have an audio file which you want to be corrected because it has some echo, hum, background noise; so you import that one into the programme, namely, timeline.

You will need to first use Equalatization, which is under the Audio Enhancements.

You will need to check the square that opens the equalizer and shows graphics for it. The high frequencies are on the right, and the low ones you will find on the left. Lower the highs and raise the points a little on the left side.

Next step would be to level out the lows and highs of the voice using a Compressor. You will find this effect in Installed Effects, which you need to drag and drop on the audio, and it will raise the whispers and lower the shouts in the audio.

Some background noise will still be there, so you then can find Channel EQ effect you will find in the effects. You need to drag it on the clip, then click on the equalize button in the inspector, and this time, reduce the lower levels on the left, while you also lower the highs on the right.

Lastly, you will need to use the Noise Gate effect. This will cut out all of the sounds between words, so when someone in the audio is not speaking, there will be no background noise at all.

In case this kind of cutting noise out doesn’t sound natural, you can look into Noise Gate Parameters and concentrate on two of them – reduction and release. If you drag the latter right, the noise will raise, and reduction will also raise noise a little, in order to reduce the clipping.
How to denoise a video in Final Cut Pro?
But what is noise in terms of videos? It means that the video is not clear, but instead, the clip has grains on it, which is not so pleasant to see (unless you use noise/grain effect with some purpose!). the noise usually appear when the shot was taken in an environment with not enough white, or, in other cases, when the video was taken with small-sensory equipment, for example, smartphone or action camera.
And Final Cut Pro is one of the video editors where you can remove or reduce the noise and make your footage look clearer than it would have been originally, and it will guarantee that people who are interested and watch your clip will have a better experience. So, let’s learn step by step how to denoise the video in our beloved Final Cut Pro, which added this feature only starting from Final Cut Pro 10.4.4 – it means that before, the task was only done by using some expensive plug-ins, but starting from this version of the program, the software has video noise reduction effect itself.
So, choose the video which has some noise and grain and you wish to edit. Bring it in the program, and click on it in the timeline, in order to select it. The video should appear in the viewer, and you will be able to see the noise right away or whenever you zoom in a little. Then, you will need to find the Effects – you can just use the shortcut and click on Command and 5, or find the panel in the top-right corner of the timeline. Whenever Effects appear, you will need to select the Basic category, and then double-click the icon to apply the noise reduction filter, and close the window. It might take a while to analyze the clip for noise.


In the inspector, you will find the controls for noise reduction, which only include the Amount and Sharpness.

You might as well boost the amount to high, then you can take a look at the image to evaluate the result. One way to do the last step is to uncheck the box next to the Noise Reduction as well, which will disable the filter until you check the box again.
You can also change the Sharpness to Medium, which will compensate for the soft look the effect produces.
And, there is also a noise reduction effect dedicated to 360 viewers, which is called 360 Noise Reduction. As you can see, the effect removes a lot of noise and makes the grainy video look clearer and more enjoyable, besides, if you move around the sphere in the viewer, the effect seems quite seamless!


Bonus tip: how to remove audio noise in video with Filmora
In case you don’t own Mac or just want to operate in another computer program, then Wondershare Filmora would make a great alternative – it’s one of the software that can help you get rid of the background noise. How to do it there? Follow this guideline:
First off, of course, you need to drag and drop the video into the timeline. Then, in order to edit the audio of the video separately, you’ll need to right-click on the video and find Detach Audio.

Double-clicking on the audio track in the sequence will show the editing panel, where you can find – Remove background noise, which, as it is obvious, will remove the noise directly.

So, in this article, we learned how to denoise in Final Cut Pro – both in terms of audio background noise, and noise and grain on the video, and we learned how to get rid of audio noise in Wondershare Filmora in the easiest and fastest way!
You will need to first use Equalatization, which is under the Audio Enhancements.
You will need to check the square that opens the equalizer and shows graphics for it. The high frequencies are on the right, and the low ones you will find on the left. Lower the highs and raise the points a little on the left side.
Next step would be to level out the lows and highs of the voice using a Compressor. You will find this effect in Installed Effects, which you need to drag and drop on the audio, and it will raise the whispers and lower the shouts in the audio.
Some background noise will still be there, so you then can find Channel EQ effect you will find in the effects. You need to drag it on the clip, then click on the equalize button in the inspector, and this time, reduce the lower levels on the left, while you also lower the highs on the right.
Lastly, you will need to use the Noise Gate effect. This will cut out all of the sounds between words, so when someone in the audio is not speaking, there will be no background noise at all.
In case this kind of cutting noise out doesn’t sound natural, you can look into Noise Gate Parameters and concentrate on two of them – reduction and release. If you drag the latter right, the noise will raise, and reduction will also raise noise a little, in order to reduce the clipping.
How to denoise a video in Final Cut Pro?
But what is noise in terms of videos? It means that the video is not clear, but instead, the clip has grains on it, which is not so pleasant to see (unless you use noise/grain effect with some purpose!). the noise usually appear when the shot was taken in an environment with not enough white, or, in other cases, when the video was taken with small-sensory equipment, for example, smartphone or action camera.
And Final Cut Pro is one of the video editors where you can remove or reduce the noise and make your footage look clearer than it would have been originally, and it will guarantee that people who are interested and watch your clip will have a better experience. So, let’s learn step by step how to denoise the video in our beloved Final Cut Pro, which added this feature only starting from Final Cut Pro 10.4.4 – it means that before, the task was only done by using some expensive plug-ins, but starting from this version of the program, the software has video noise reduction effect itself.
So, choose the video which has some noise and grain and you wish to edit. Bring it in the program, and click on it in the timeline, in order to select it. The video should appear in the viewer, and you will be able to see the noise right away or whenever you zoom in a little. Then, you will need to find the Effects – you can just use the shortcut and click on Command and 5, or find the panel in the top-right corner of the timeline. Whenever Effects appear, you will need to select the Basic category, and then double-click the icon to apply the noise reduction filter, and close the window. It might take a while to analyze the clip for noise.
In the inspector, you will find the controls for noise reduction, which only include the Amount and Sharpness.
You might as well boost the amount to high, then you can take a look at the image to evaluate the result. One way to do the last step is to uncheck the box next to the Noise Reduction as well, which will disable the filter until you check the box again.
You can also change the Sharpness to Medium, which will compensate for the soft look the effect produces.
And, there is also a noise reduction effect dedicated to 360 viewers, which is called 360 Noise Reduction. As you can see, the effect removes a lot of noise and makes the grainy video look clearer and more enjoyable, besides, if you move around the sphere in the viewer, the effect seems quite seamless!
Bonus tip: how to remove audio noise in video with Filmora
In case you don’t own Mac or just want to operate in another computer program, then Wondershare Filmora would make a great alternative – it’s one of the software that can help you get rid of the background noise. How to do it there? Follow this guideline:
First off, of course, you need to drag and drop the video into the timeline. Then, in order to edit the audio of the video separately, you’ll need to right-click on the video and find Detach Audio.
Double-clicking on the audio track in the sequence will show the editing panel, where you can find – Remove background noise, which, as it is obvious, will remove the noise directly.
So, in this article, we learned how to denoise in Final Cut Pro – both in terms of audio background noise, and noise and grain on the video, and we learned how to get rid of audio noise in Wondershare Filmora in the easiest and fastest way!
How to Create Intro with Legend Intro Maker
What makes the viewers get hooked to a video? Experts say the intro is the decider. That is why video creators focus on creating stunning intro videos. The intro of your video creates the first impression for the viewers. How do you make an intro video stand out? You need a great intro maker and your creativity skill.
Legend Intro Maker is a popular choice among Android smartphone users. You will come across loads of intro maker apps. But Legend Intro Maker clearly stands out. That is why it is highly rated on Play Stores. You can create a high-quality intro and outro video in simple steps. We will illustrate how to create intro videos with mobile legends intro maker.
Part 1. Basic Info of Legend Intro Maker
Legend Intro Maker is an Android app available on Play Stores. You can create cool intro and outro videos. There are stunning intro video templates available. You can select and customize them to create an intro video on the go. Besides, you can design amazing animated text videos. The app is useful for creating videos from your photos.
Here are the top features of Legend Intro Maker.
- Choose from intro maker animation templates.
- Over hundred text animation presets.
- Add background photos and videos.
- Amazing text font styles and effects.
- Export videos in HD and full-HD videos.
- Super intuitive user interface.
- Easy to share on social media apps.
Here are the technical specifications of Legend Intro Maker.
App Version: 1.4
Released Date: 26-09-2018
Last Updated: 28-10-2021
Download Size: 18 MB
OS Compatibility: Android 4.4 and above
Download link: https://play.google.com/store/apps/details?id=com.textonvideo.animated.animatedtext&hl=en\_US&gl=US
Part 2. How to Create Intro with Legend Intro Maker
Legend Video Maker is a versatile intro video maker app. You can create text intro videos with cool effects and animations. The app comes with loads of intro video templates. You have to choose one to get started. Thereafter, you can customize the template as per your requirements. You can also start from scratch and add background and text. Thereafter, you can animate texts and objects easily. Here are the steps to create an intro with the Legend video intro maker app.
Step1 Go for Legend gaming intro download from Play Stores. You can also download Legend intro maker mod apk file. Thereafter, you can install the apk file on your phone.

Step2 Launch the Legend app and choose an intro video template. You will see different categories of templates. You can choose any to get started.

Step3 When you choose a template, it gets downloaded immediately. Tap on the Edit Animation button to customize the template.

Step4 Tap on the Intro option located at the bottom. Select a suitable intro video template as per your video content niche.

Step5 Go to the Text option at the bottom and edit the texts and titles. You can go to the Font option to change the text font.

Step6 Finally, check the preview and tap on the Export button. Select the video resolution as per your preference. The intro video will get saved in the Phone gallery.

Part 3. Legend Intro Maker PC Alternative
If you want to create intro videos on your PC, you need a Legend Intro Maker PC alternative. We recommend Wondershare Filmora as the best alternative to mobile Legends Intro Maker. Filmora is a popular premium video editor. Filmora comes with a wide range of intro video templates. There are loads of text effects and animations present.
You can customize all the templates and presets. The video editor allows you to make creative intro videos in simple steps. Filmora happens to be the most popular intro video maker among YouTubers. You can export intro videos in 4K resolution. Filmora is available for Windows and macOS users. Here are the steps to create intro videos with Filmora.
Free Download For Win 7 or later(64-bit)
Free Download For macOS 10.14 or later
Step1 Download and install Wondershare Filmora on your computer. Launch Filmora and click on Create New Project from the welcome screen. Otherwise, go to File> New Project and select an aspect ratio to get started.

Step2 Click on the Titles option from the top bar. Go to the Openers option from the left panel. Select any intro video template as per your preference. Drag and drop it onto the timeline.

Step3 Double-click on the intro video layer. Edit the default text and type in your titles. From the left panel, select any text style as per your preference.

Step4 You can go to the Animation tab and select any animation from the left panel. Double-click on the selected animation to apply. Thereafter, you can move around the texts on the Program window to place them properly. Finally, click on Ok button.
Conclusion
If you are looking for an intro video maker app, Legend video intro maker is a superb choice. You can create stunning intro videos in simple step by step method. If you are a computer user, you cannot use Legend app. We recommend Wondershare Filmora as the best alternative to Legend video intro maker. You can create stunning intro videos with Filmora with simple steps.
Free Download For macOS 10.14 or later
Step1 Download and install Wondershare Filmora on your computer. Launch Filmora and click on Create New Project from the welcome screen. Otherwise, go to File> New Project and select an aspect ratio to get started.
Step2 Click on the Titles option from the top bar. Go to the Openers option from the left panel. Select any intro video template as per your preference. Drag and drop it onto the timeline.
Step3 Double-click on the intro video layer. Edit the default text and type in your titles. From the left panel, select any text style as per your preference.
Step4 You can go to the Animation tab and select any animation from the left panel. Double-click on the selected animation to apply. Thereafter, you can move around the texts on the Program window to place them properly. Finally, click on Ok button.
Conclusion
If you are looking for an intro video maker app, Legend video intro maker is a superb choice. You can create stunning intro videos in simple step by step method. If you are a computer user, you cannot use Legend app. We recommend Wondershare Filmora as the best alternative to Legend video intro maker. You can create stunning intro videos with Filmora with simple steps.
How to Add Text Animation Online
Before you can publish your recorded video to your viewers, you need to polish the video so that you can get everyone’s appreciation. This is where the magic of video editing comes into the scene. Editing your video is not just about trimming unnecessary parts and adding transitions and effects. The titles and texts you display on your video play a major role in your video content. In fact, you can create a video based on texts and titles only.
Instead of showing static texts, you should create animated texts and place them in the video wherever appropriate. You do not need to download a video editor on your computer or smartphone to add animated text to your video. You can make text animation online using an online text animation maker. We will illustrate the steps to create animated text with three different online editors.
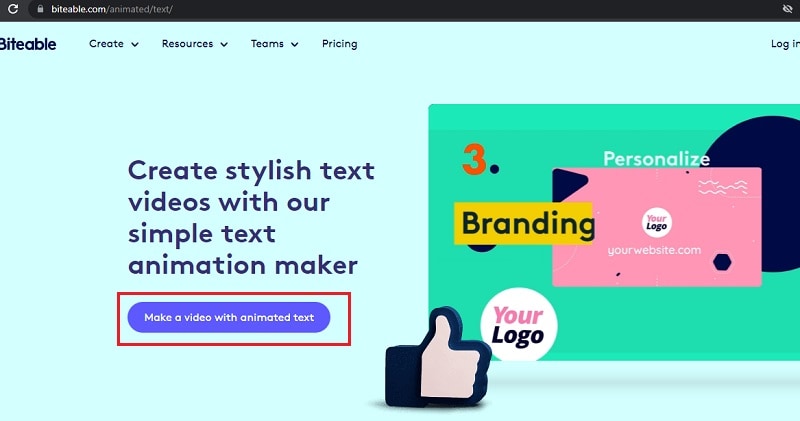
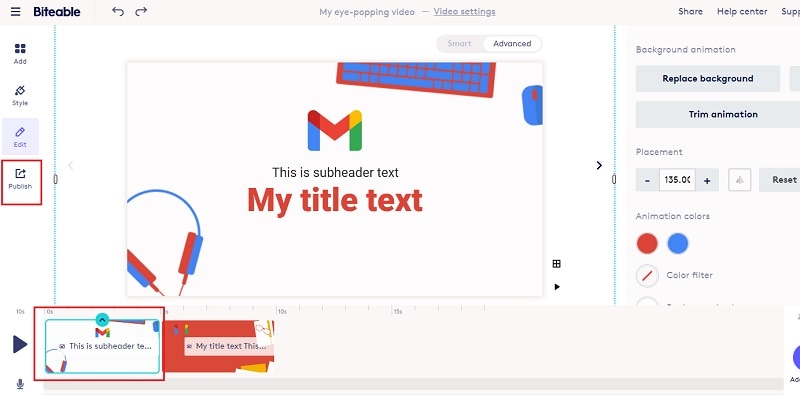
Part 1. Use Biteable Animated Text
Biteable is a popular online platform where you can create amazing animated text video using Biteable text video maker. You can add animated text to your videos as well as photos. The user interface of Biteable is extremely easy for all users. You have to first create an account for free to get started. There are various templates available to create your animated text video from scratch. Here are the steps to use Biteable online text animation maker to create a video based on animated texts.
Step1Open your web browser and visit “biteable.com/animated/text”. Click on “Make a video with animated text” button.
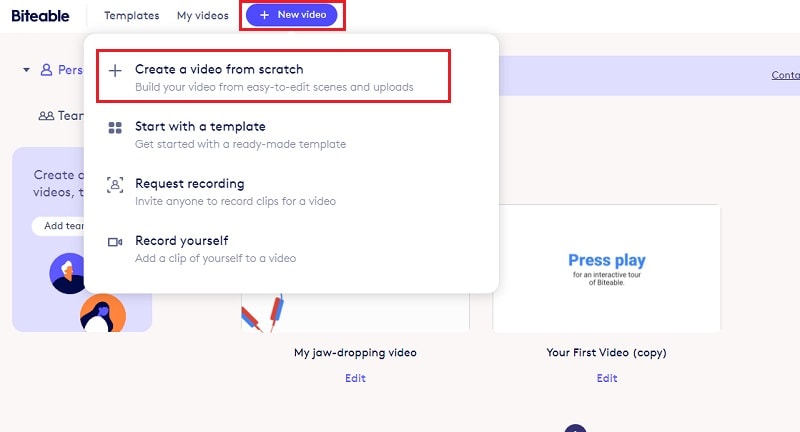
Step2Create an account by following the on-screen instructions. Click on New Video button and select “Create a video from scratch”.
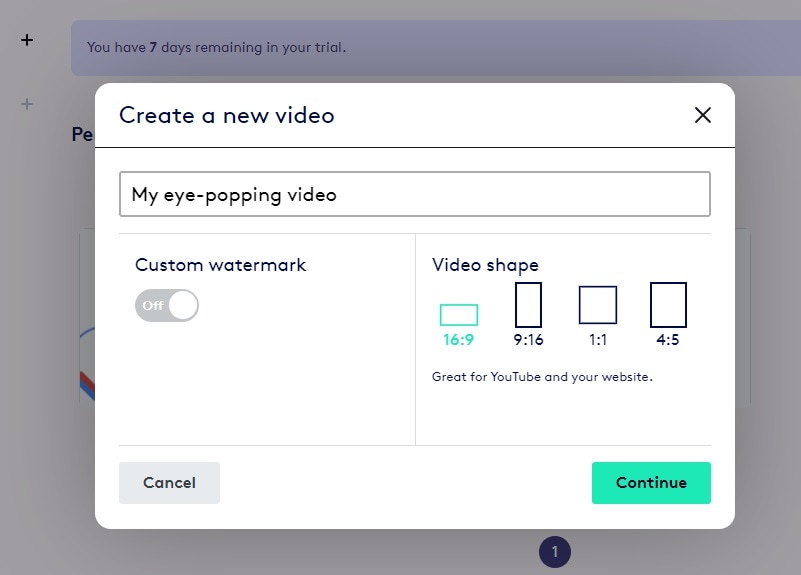
Step3Enter a name for the video and select a video shape as per your preference. Click on Continue button.
Step4Under Titles, select any template and it will be added to the Timeline. Similarly, you can add multiple titles templates, text templates, number templates and likewise. You will see them in the Timeline placed side by side. You can stretch their durations as per your requirements.
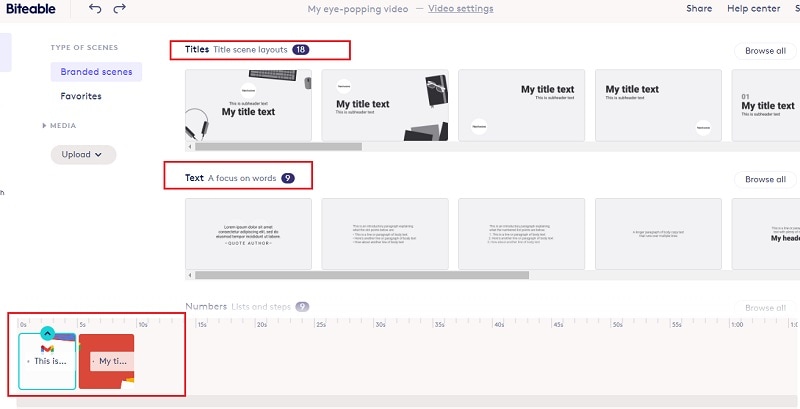
Step5Double-click on each template to edit the text in them and select the text animations as per your preference. Play the video and if you are satisfied, click on Publish button to save the video.
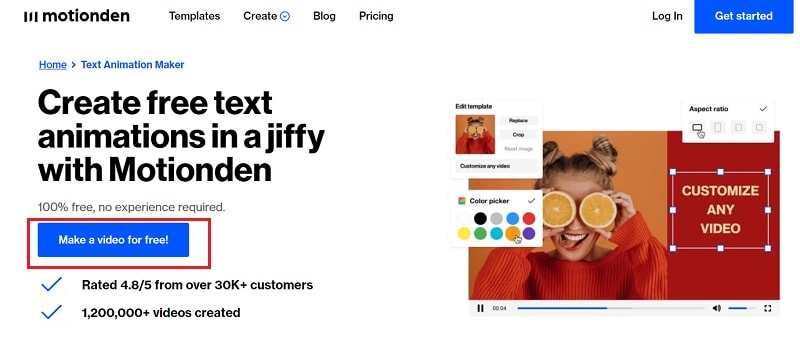
Part 2. Use Motionden Video Maker
Motionden is yet another powerful text animation maker where you can create free text animations instantly. There are over 1500 templates available to choose from in order to create text videos from scratch. You can choose video templates from any category as per the video theme you want. Besides, you can upload your video or photo and add texts and music as per your preference. Here are the steps to create animated text online using Motionden Video Maker.
Step1Open your web browser and visit “motionden.com/video-maker/text-animation”. Click on “Make a video for free” button.
Step2Go to Create menu option and select any category of video templates. You can also check out the popular video templates and select anyone as per your preference.
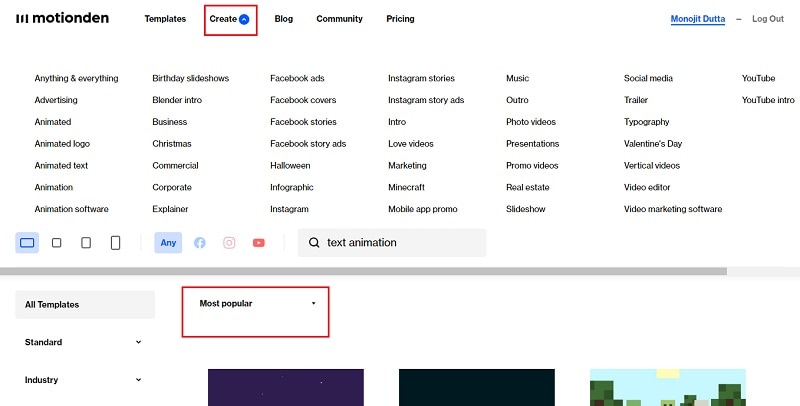
Step3For the selected category, you need to select the desired video template. Click on Edit Video and you can make changes to the template on the video editor as per your requirements. You need to sign up for free in order to continue and edit the template.
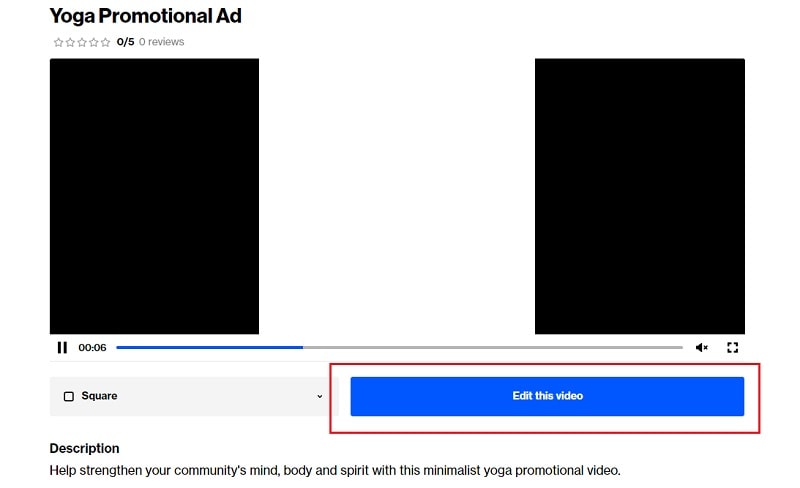
Step4Click on individual scenes and click on texts to customize them. Once the editing is done for each scene, click on Make Video button to build and save the text video.

Part 3. Use Flexclip Text Animation Tool
You can use Flexclip Text Animation Tool to create text video from scratch as well as add text to your recorded video. You should use Biteable and Motionden to create video with text effects only directly using video template while you should use Flexclip to edit your video and add text. You can add text effects to photos and videos and here are the steps to follow.
Step1Open web browser and visit “flexclip.com/features/text-animation.html”. Click on Make Animated Video button.
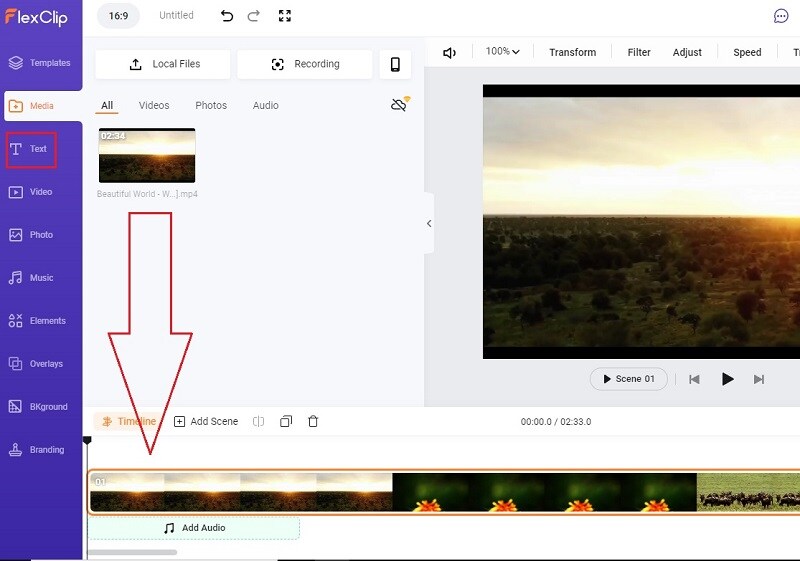
Step2You can choose from the available templates to create video with text from scratch. If you want to add text to your recorded video, go to Media tab. Click on Local Files button and upload your recorded video.

Step3Drag and drop the uploaded video into the Timeline. Thereafter, go to Text tab.
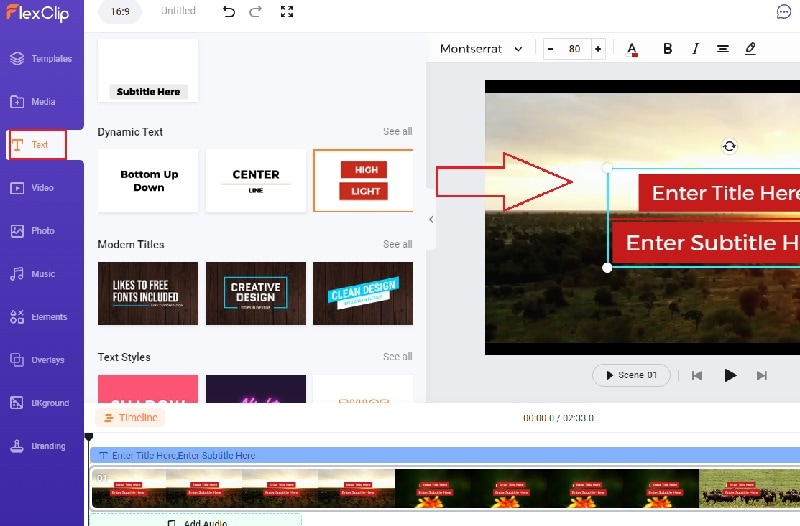
Step4You will see all the different text effects and animations. Place your mouse pointer to preview the animation. Drag and drop the select text template to the video on the Viewer. You can check the Timeline and stretch or compress the text layer as per your requirements.
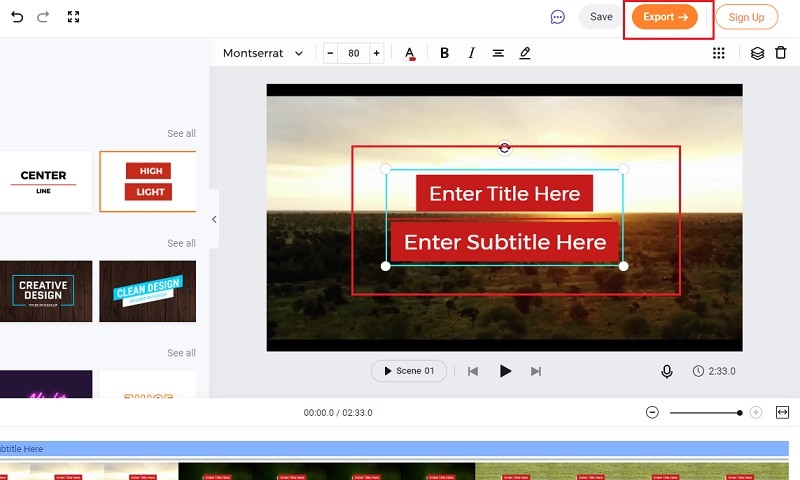
Step5Double-click on the text on Viewer window and customize the text as per your preference. Finally, click on Export button to save the edited video.
Conclusion
You can make video with animated text to make your presentation video eye-catching and attention-grabbing. We have mentioned three different online text animation makers that you can use to create animated text video from scratch by choosing different video templates. You can also edit your recorded video and add animated text wherever you want using Flexclip Text Animation Tool.
Free Download For Win 7 or later(64-bit)
Free Download For macOS 10.14 or later
Also read:
- New 2024 Approved Sometimes It May Happen to You that You Are Watching a Video that Has Very Low Graphics or, in Other Words, Low Visual Quality. You Might Wish to Change, Instead Improve the Video Quality. Here, AI Upscaling Video Comes to Use
- New Have You Ever Heard Hyperlapse and Tume Lapse Videos? Do You Know the Differences Between Them? This Article Will Introduce the Concepts, Features and Differnces of Them for 2024
- Updated Do You Want to Make Your Video Look Like Its From the 90S? Then, Make Sure to Add Vintage Overlays and VHS Sound Effects to Give It the Old Feel
- Updated How To Record Video in Slow Motion Comprehending Important Points for 2024
- Updated This Article Will Help You Understand How to Create Flying Objects Using Editing Tools Such as Wondershare Filmora for 2024
- Updated Step by Step to Rotate Videos Using Kdenlive
- 4 Solutions to Crop a Video on Android Easily for 2024
- Updated In 2024, Best Green Screen Software for Beginner on Mac
- Updated In 2024, Extracting Audio From Videos Is a Key to Better Storytelling. Learn How Filmoras Audio Removal Feature Can Enhance Your Video Stories
- Updated In 2024, Vintage Film Effect 1980S - How to Create
- Updated In 2024, Customize PowerPoint Slideshow Icon in 8 Simple Ways
- Introduction to LUTs Their Overview and Benefits
- Updated 100 Working Methods to Learn How to Rotate TikTok Video
- Updated How to Overlay Video in Premiere Pro for 2024
- 2024 Approved Efficient Ways to Change Slow Motion Video to Normal on iPhone
- Does the Customary Speed of Your TikTok Slideshow Appear to Be Slow Enough of Late? If Yes, Drop Your Worries Here with the Know-How of Increasing the TikTok Slideshow Speed
- Want to Make a Slide Show Video? Heres How for 2024
- An Ultimate Guide on the Significance of Music in Videos and How to Choose the Right Music for Your Videos with Wondershare Filmora
- Updated 2024 Approved 12 Best GIF Editors to Use
- 2024 Approved How to Stabilize Videos for Free with Google Photos App
- How Long Does It Take To Edit Videos
- Updated Do You Want to Edit a TikTok After Posting? This Article Will Provide Multiple Methods Through Which You Can Do It in No Time
- Top 5 AI Music Video Examples and Makers to Make Them
- New In 2024, How to Convert a GIF to a Video for Instagram
- Updated What If YouTube Zoom to Fill Not Working for 2024
- Updated In 2024, You Will Also Be Guided on How to Use This Software to Crop Your Videos. Dont Worry and Just Take It One Step at a Time
- Updated In 2024, How to Vlog? A Beginners Guide to Start Vlogging
- Updated Advancements in Game Recording Software A Comprehensive Overview for 2024
- Updated 4 Solutions to Add White Borders on Mobile and Desktop for 2024
- Updated Have You Ever Tried to Remove Motion Blur From Photos? This Article Will Address How to Remove the Motion Blur Effect Using Photoshop and Its Alternatives
- 2 Ways to Add Custom Subtitles to Netflix
- In 2024, 7 Ways to Unlock a Locked Realme 11 5G Phone
- How To Change Xiaomi 13 Ultra Lock Screen Clock in Seconds
- Top 10 Best Spy Watches For your Vivo S17 | Dr.fone
- In 2024, Apple iPhone 12 Pro Backup Password Never Set But Still Asking? Heres the Fix
- 5 Ways to Track Vivo X Fold 2 without App | Dr.fone
- New Talking Photo
- How to Transfer Data from Lenovo ThinkPhone to BlackBerry | Dr.fone
- In 2024, Top 7 Skype Hacker to Hack Any Skype Account On your Samsung Galaxy A14 5G | Dr.fone
- 2024 Approved How to Make GIF Stickers for WhatsApp 100 The Easy Way
- Wondering the Best Alternative to Hola On Motorola Moto G 5G (2023)? Here Is the Answer | Dr.fone
- In 2024, The Ever-Changing Era of AI Video Translation A Reality to Be Fulfilled
- In 2024, How Can We Unlock Our Nubia Red Magic 8S Pro+ Phone Screen?
- In 2024, A Comprehensive Guide to iPhone SE (2020) Blacklist Removal Tips and Tools
- How to Repair corrupt MP4 and MOV files of Nokia G42 5G using Video Repair Utility on Mac?
- How To Enable USB Debugging on a Locked Itel P55 Phone
- How Do I Stop Someone From Tracking My Vivo Y100? | Dr.fone
- A Detailed VPNa Fake GPS Location Free Review On Apple iPhone 15 Pro Max | Dr.fone
- In 2024, 10 Easy-to-Use FRP Bypass Tools for Unlocking Google Accounts On Vivo V27
- Title: New Are You Looking for Ideas for Funny YouTube Videos? Your Search Is Over. Read the Article Below and Get the Most Information Regarding Funny Videos. You Will Also Get to Know About the Best Funny Video Background Music
- Author: Morgan
- Created at : 2024-05-19 05:12:29
- Updated at : 2024-05-20 05:12:29
- Link: https://ai-video-editing.techidaily.com/new-are-you-looking-for-ideas-for-funny-youtube-videos-your-search-is-over-read-the-article-below-and-get-the-most-information-regarding-funny-videos-you-wi/
- License: This work is licensed under CC BY-NC-SA 4.0.
