
:max_bytes(150000):strip_icc():format(webp)/how-to-increase-internet-speed-5181475-b6fd84098c634a04a6934302184c5b1b.jpg)
New Basic Introduction for LumaFusion Color Grading
Basic Introduction for LumaFusion Color Grading
Create High-Quality Video - Wondershare Filmora
An easy and powerful YouTube video editor
Numerous video and audio effects to choose from
Detailed tutorials provided by the official channel
There are many reasons why video editing is essential for content creators. Regardless of your reasons for putting up video content, you’ll achieve little progress without manipulating and structuring your shots. Video editing is what helps to create an emotional connection to your content. That, in turn, is what spurs your viewers to take the action you desire.
Maybe you already know a thing or two about video editing? Good for you! However, there’s always more to learn. For example, only a few people understand the intricacies of luma fusion color grading. Meanwhile, that’s one of the significant differentiating factors between a regular video editor and a pro.
Are you tired of video editing at a basic level? Then this article is for you. It will introduce you to the basics of LumaFusion color grading. Are you ready?
In this article
02 Essential Things You Should Know About Color Grading in LumaFusion
03 Does LumaFusion Have a Desktop Version?
What Is LumaFusion?
Are you a filmmaker, video producer, or editor? Then you’ll need LumaFusion at some point in your editing journey. Whether you are a professional or not, you can use LumaFusion to tell exciting stories through your videos. It has numerous essential features to produce the precise effects you wish to achieve. What’s more, you can use this effective multitrack video editor on iPads and iPhones.
One thing you will love about LumaFusion is its user-friendliness. Even as an aspiring videographer with little experience, you can understand how to use this video editing powerhouse in an instant and with minimal supervision.

LumaFusion is affordable, especially non-linear editors (NLEs) with similar details. When it comes to robust features, LumaFusion retakes the spotlight. This video editor will become your favorite tool in no time.
Here are some exciting things you can do using LumaFusion:
● Enjoy a Simplified SSD and Cloud Storage Importing Process
One of the best things about LumaFusion is your ability to import from SSD and cloud storage seamlessly. If you’re using an external SSD for playback media, this feature will excite you. LumaFusion automatically imports media from your SSD whenever you add video clips to the timeline. There’s no need to waste time importing media by yourself.
● Switch Between Six Workspace Layouts
LumaFusion features six workspace layouts. So you can choose whatever one works best for the project you are working on. With the layout button, you can scramble the source viewer, browser, and timeline to your preference. LumaFusion also gives you the option of viewing the content in portrait or landscape modes. It’s a truly customizable and advanced multitrack video editing app for everyone who loves ease.
● Access Seamless Final Cut Pro Exporting
Do you work with Final Cut Pro X? Then there’s exciting news for you. Lumafusion allows you to export specific project files so that you can work on the NLE. Even though this feature is only available for a fee, it offers excellent value for its $20 price. You can hardly have it cheaper with other NLEs.
● Leverage Its Intuitive UI/UX
This is no hoax—LumaFusion’s intuitive design will blow your mind. If you’ve got prior knowledge or experience using other editing platforms (especially NLEs), you find LumaFusion easy to use. If not, their comprehensive reference guide can help you get acquainted with the app quickly. LumaFusion’s design gives you absolute control.
● Explore Flexibility and Amazing Effects
LumaFusion has numerous fantastic effects to appreciate. These features offer you top-notch flexibility and functionality. The clip editor’s preview window comprises four different editors—the frame and fit editor, audio editors, speed editors, and the color and effects editor. From the timeline navigator to the audio mixer and clip editor, there’s a lot to explore on LumaFusion.
● Enjoy the Automated Audio Ducking Feature
Audio ducking involves temporarily lowering a specified audio signal’s volume when another one comes up. Having to do this manually can be tiring. Fortunately, with LumaFusion’s automatic audio ducking feature, you don’t have to worry about that anymore. All you need to do is assign speakers and music tracks as master and auto track. The audio ducking feature takes it up from there.

● Easy and Direct Exportation to Youtube and Vimeo
LumaFusion comes with an option that allows you to export your edited videos directly to YouTube or Vimeo. When exporting directly to YouTube, the app will enable you to write titles and descriptions or set categories and tags. If you choose to upload your videos to YouTube directly, you can transfer it to your file folder first.
Essential Things You Should Know About Color Grading in LumaFusion
Color grading is an essential post-production process that gives your footage’s color scheme a distinctive appearance and character. This technique gives your videos some cinematic impression by painting over them.
With color grading, you can adjust your video’s color balance, saturation, contrast, luminance, black level, etc. It helps to evoke the particular emotions or moods that you want your videos to exude.
These are the essential things to note about color grading in LumaFusion:
1. Does LumaFusion Have Color Grading?
In answering this question, it’s essential to understand the difference between color correction and color grading. Both editing techniques have vital differentiating characteristics, so it’s wrong to use them interchangeably.
Color correction ensures that videos look as natural to the human eye as possible. If there’s a technical color error, for example, due to bad lighting, color correction helps fix that.
However, the aim of color grading isn’t fixing color mistakes but using colors to convey a mood, atmosphere, or style. Some videographers classify color correction as the first phase in the color grading process.
Generally, you can use LumaFusion to color correct your footage. However, you can’t color grade with the app except you decide to tamper with the color presets tab’s color sliders. Even at that, you wouldn’t get the perfect results you want.
Fortunately, LumaFusion allows you to import and apply LUT (look-up tables). With LumaFusion LUTs, you can color grade your footage to your satisfaction.
2. How To Color Grade in LumaFusion
This is how to color grade your videos:
○ First, Color Correct
When attempting to color grade your footage, it’s essential that you color correct it first. Color correction ensures that your video doesn’t remain flat or unexciting.
○ Create Your LUTs
LUT allows you to save specific color grades to use anytime you need them. This helps to save time by ensuring that you don’t develop color spaces all over again when working on various footage. You can also download as many free LUTs as you like.
○ Bring In a LUT
After creating LUTs, import and apply them to your LumaFusion. Next, blend or adjust your LUt by shifting the slider to get your desired effects. It’s that simple!
3. Can I Use Multiple LUTs in LumaFusion?
The short answer is a big YES. You can apply multiple LUTs in LumaFusion.
Here’s how t go o about it:
- Apply your first LUT
- Export the LUT
- Access rendered movies
- Apply the second LUT
There is numerous manipulation you can do with LUT. For example, you can merge two or more LUTs into one.
Does LumaFusion Have a Desktop Version?
Do you own a PC or desktop[, and you’re wondering how to access LumaFusion’s unique features on it? Unfortunately, LumaFusion is only available for iOS users and not Android or Windows PC.
However, all hope is not lost as Filmora has come to the rescue. Filmora’s video editor provides you with color matching/grading options to create the cinematic effects you want for your footage. You can use the features on your computer.
Let’s talk about Filmora’s Video Editor for Windows features in some detail:
For Win 7 or later (64-bit)
For macOS 10.12 or later
● Color Match
Do you want to achieve a similar color or consistent look for multiple clips? Then Filmora’s video editor is your best bet. The color match feature ensures color consistency throughout your video. It’s easy to use, aids efficiency, and saves your time.
● Color Correction
Color correction is one of the easiest ways to make your footage look extraordinary. With over 40 fantastic drag-and-color presets available to you, your color correction game is about to get lit. Filmora’s color correction feature also allows you to make 3D LUTs conveniently.
Filmora offers free online tools for videographers and unique products for computer software and mobile apps. You can check here to get more information about the Lumafusion alternatives on Mac .
Conclusion
● What’s worth doing is worth doing well? That’s why, as a videographer, you shouldn’t be comfortable with uploading flat, ordinary videos. It’ll help if you take your craft a notch higher by considering color grading for your footage.
● Did you fall in love with LumaFusion’s video editing app? That’s great. With your iPhone or iPad, you can get the best out of the video editor.
● Filmora offers you cool video editing features for color correcting and grading if you’re working on a desktop. There are also amazing Filmora apps for iOS and Android devices. Visit their website for more information on how these video editing features can improve your project’s quality.
There are many reasons why video editing is essential for content creators. Regardless of your reasons for putting up video content, you’ll achieve little progress without manipulating and structuring your shots. Video editing is what helps to create an emotional connection to your content. That, in turn, is what spurs your viewers to take the action you desire.
Maybe you already know a thing or two about video editing? Good for you! However, there’s always more to learn. For example, only a few people understand the intricacies of luma fusion color grading. Meanwhile, that’s one of the significant differentiating factors between a regular video editor and a pro.
Are you tired of video editing at a basic level? Then this article is for you. It will introduce you to the basics of LumaFusion color grading. Are you ready?
In this article
02 Essential Things You Should Know About Color Grading in LumaFusion
03 Does LumaFusion Have a Desktop Version?
What Is LumaFusion?
Are you a filmmaker, video producer, or editor? Then you’ll need LumaFusion at some point in your editing journey. Whether you are a professional or not, you can use LumaFusion to tell exciting stories through your videos. It has numerous essential features to produce the precise effects you wish to achieve. What’s more, you can use this effective multitrack video editor on iPads and iPhones.
One thing you will love about LumaFusion is its user-friendliness. Even as an aspiring videographer with little experience, you can understand how to use this video editing powerhouse in an instant and with minimal supervision.
LumaFusion is affordable, especially non-linear editors (NLEs) with similar details. When it comes to robust features, LumaFusion retakes the spotlight. This video editor will become your favorite tool in no time.
Here are some exciting things you can do using LumaFusion:
● Enjoy a Simplified SSD and Cloud Storage Importing Process
One of the best things about LumaFusion is your ability to import from SSD and cloud storage seamlessly. If you’re using an external SSD for playback media, this feature will excite you. LumaFusion automatically imports media from your SSD whenever you add video clips to the timeline. There’s no need to waste time importing media by yourself.
● Switch Between Six Workspace Layouts
LumaFusion features six workspace layouts. So you can choose whatever one works best for the project you are working on. With the layout button, you can scramble the source viewer, browser, and timeline to your preference. LumaFusion also gives you the option of viewing the content in portrait or landscape modes. It’s a truly customizable and advanced multitrack video editing app for everyone who loves ease.
● Access Seamless Final Cut Pro Exporting
Do you work with Final Cut Pro X? Then there’s exciting news for you. Lumafusion allows you to export specific project files so that you can work on the NLE. Even though this feature is only available for a fee, it offers excellent value for its $20 price. You can hardly have it cheaper with other NLEs.
● Leverage Its Intuitive UI/UX
This is no hoax—LumaFusion’s intuitive design will blow your mind. If you’ve got prior knowledge or experience using other editing platforms (especially NLEs), you find LumaFusion easy to use. If not, their comprehensive reference guide can help you get acquainted with the app quickly. LumaFusion’s design gives you absolute control.
● Explore Flexibility and Amazing Effects
LumaFusion has numerous fantastic effects to appreciate. These features offer you top-notch flexibility and functionality. The clip editor’s preview window comprises four different editors—the frame and fit editor, audio editors, speed editors, and the color and effects editor. From the timeline navigator to the audio mixer and clip editor, there’s a lot to explore on LumaFusion.
● Enjoy the Automated Audio Ducking Feature
Audio ducking involves temporarily lowering a specified audio signal’s volume when another one comes up. Having to do this manually can be tiring. Fortunately, with LumaFusion’s automatic audio ducking feature, you don’t have to worry about that anymore. All you need to do is assign speakers and music tracks as master and auto track. The audio ducking feature takes it up from there.
● Easy and Direct Exportation to Youtube and Vimeo
LumaFusion comes with an option that allows you to export your edited videos directly to YouTube or Vimeo. When exporting directly to YouTube, the app will enable you to write titles and descriptions or set categories and tags. If you choose to upload your videos to YouTube directly, you can transfer it to your file folder first.
Essential Things You Should Know About Color Grading in LumaFusion
Color grading is an essential post-production process that gives your footage’s color scheme a distinctive appearance and character. This technique gives your videos some cinematic impression by painting over them.
With color grading, you can adjust your video’s color balance, saturation, contrast, luminance, black level, etc. It helps to evoke the particular emotions or moods that you want your videos to exude.
These are the essential things to note about color grading in LumaFusion:
1. Does LumaFusion Have Color Grading?
In answering this question, it’s essential to understand the difference between color correction and color grading. Both editing techniques have vital differentiating characteristics, so it’s wrong to use them interchangeably.
Color correction ensures that videos look as natural to the human eye as possible. If there’s a technical color error, for example, due to bad lighting, color correction helps fix that.
However, the aim of color grading isn’t fixing color mistakes but using colors to convey a mood, atmosphere, or style. Some videographers classify color correction as the first phase in the color grading process.
Generally, you can use LumaFusion to color correct your footage. However, you can’t color grade with the app except you decide to tamper with the color presets tab’s color sliders. Even at that, you wouldn’t get the perfect results you want.
Fortunately, LumaFusion allows you to import and apply LUT (look-up tables). With LumaFusion LUTs, you can color grade your footage to your satisfaction.
2. How To Color Grade in LumaFusion
This is how to color grade your videos:
○ First, Color Correct
When attempting to color grade your footage, it’s essential that you color correct it first. Color correction ensures that your video doesn’t remain flat or unexciting.
○ Create Your LUTs
LUT allows you to save specific color grades to use anytime you need them. This helps to save time by ensuring that you don’t develop color spaces all over again when working on various footage. You can also download as many free LUTs as you like.
○ Bring In a LUT
After creating LUTs, import and apply them to your LumaFusion. Next, blend or adjust your LUt by shifting the slider to get your desired effects. It’s that simple!
3. Can I Use Multiple LUTs in LumaFusion?
The short answer is a big YES. You can apply multiple LUTs in LumaFusion.
Here’s how t go o about it:
- Apply your first LUT
- Export the LUT
- Access rendered movies
- Apply the second LUT
There is numerous manipulation you can do with LUT. For example, you can merge two or more LUTs into one.
Does LumaFusion Have a Desktop Version?
Do you own a PC or desktop[, and you’re wondering how to access LumaFusion’s unique features on it? Unfortunately, LumaFusion is only available for iOS users and not Android or Windows PC.
However, all hope is not lost as Filmora has come to the rescue. Filmora’s video editor provides you with color matching/grading options to create the cinematic effects you want for your footage. You can use the features on your computer.
Let’s talk about Filmora’s Video Editor for Windows features in some detail:
For Win 7 or later (64-bit)
For macOS 10.12 or later
● Color Match
Do you want to achieve a similar color or consistent look for multiple clips? Then Filmora’s video editor is your best bet. The color match feature ensures color consistency throughout your video. It’s easy to use, aids efficiency, and saves your time.
● Color Correction
Color correction is one of the easiest ways to make your footage look extraordinary. With over 40 fantastic drag-and-color presets available to you, your color correction game is about to get lit. Filmora’s color correction feature also allows you to make 3D LUTs conveniently.
Filmora offers free online tools for videographers and unique products for computer software and mobile apps. You can check here to get more information about the Lumafusion alternatives on Mac .
Conclusion
● What’s worth doing is worth doing well? That’s why, as a videographer, you shouldn’t be comfortable with uploading flat, ordinary videos. It’ll help if you take your craft a notch higher by considering color grading for your footage.
● Did you fall in love with LumaFusion’s video editing app? That’s great. With your iPhone or iPad, you can get the best out of the video editor.
● Filmora offers you cool video editing features for color correcting and grading if you’re working on a desktop. There are also amazing Filmora apps for iOS and Android devices. Visit their website for more information on how these video editing features can improve your project’s quality.
Do You Want to Add Subtitles to Your MKV Files Easily? This Article Will Introduce 7 Simple Ways Through Which You Can Add Subtitles to MKV on Different Devices
Many people use MKV files as it’s an open-source format and does not require licenses. This file format functions as a multimedia file container that can help you in storing audio and video tracks. However, there are some key disadvantages of using MKV files, as this format is not supported by various platforms or devices. So, the most suitable video file formats that you can use are FLV and MP4. These two formats offer high-quality results and are supported by multiple platforms.
If you still want to use MKV files and want to add subtitles, this article can assist you. By reading this article, you can learn how to add subtitles to MKV with different methods.
Part 1: How to Add Subtitles to MKV on Windows?
Are you a Windows user and want to add subtitles to MKV? Read this section to find out compatible tools that can add subtitles to your MKV videos efficiently.
1. Wondershare Filmora
Free Download For Win 7 or later(64-bit)
Free Download For macOS 10.14 or later
Wondershare Filmora is a popular tool that provides you with multiple options to edit video files. If you are interested in adding subtitles to your MKV files, you can navigate to its “Speech-to-Text” feature. This feature automatically transcribes the voice used in the video into subtitles. It supports 16 different languages for creating subtitles through this feature.
This feature can also enhance your editing efficiency as you don’t have to write the subtitles on your own. Moreover, the STT feature utilizes advanced algorithms that help the tool create subtitles with high precision. Furthermore, you can also manually add the subtitles to your MKV file using this MKV subtitle editor.
Key Features
- Filmora offers various effects, such as a green screen that can help you to change your background dramatically.
- If you want to resize your videos efficiently, this tool provides the Auto Reframe feature.
- Filmora also offers various preset templates that can help you to craft captivating videos easily.
Step-by-Step Guide to Add Subtitles Using Filmora
Step1 Create a New Filmora Project
Download and install Filmora on your PC and click “Create Project.” Afterward, import the MKV video from your PC to this tool by clicking on the “Arrow” icon.

Step2 Go to Titles Tab
After importing the video, drag it to the timeline. Once done, click on the “Titles” section given on top. Afterward, click on “Subtitles” from the left section. Now you will be able to see different types of subtitles on your screen. Select your favorite style of subtitles and tap on its “Download” icon.

Step3 Choose the Preferred Subtitle Style
After that, tap on the “Plus” icon to add your selected subtitle style to the timeline. Double-click on the added subtitles, which will open the settings. You can manually add the subtitles on the “Input Text” box easily. Moreover, you can easily change the text font, color, opacity, and alignment.

Step4 Export and Save Video
Once you have created subtitles for your imported video, click the “Export” button on top. Using this option, you can save the video file to your device or share it on other platforms.

2. Cisdem Video Converter
Cisdem is an efficient tool that can be used by content creators for various purposes. Along with editing the videos, this tool can help you add subtitles to your video files in any format. It supports various formats for adding subtitles, such as MKV, MP4, AVI, etc. This tool also offers a built-in editor to modify the MKV videos flawlessly. Hence, it’s a basic tool that generates quality results instantly.
Key Features
- Cisdem can function as a video converter that supports more than 300 file formats. You can convert to and from MKV files using this platform easily.
- Through this software, you can professionally add watermarks to your MKV files. It provides various options to add a customized watermark to your desired video files.
- It offers a built-in media player that allows you to play and watch MKV files without interruption.
Steps to Add Subtitles to MKV Using Cisdem Video Converter
Step1 Launch the Cisdem tool on your system and navigate to its “Converter”. Afterward, import the MKV file instantly. Now tap on the “Pencil” icon given on top to open the editing window.

Step2 From the editing window, go to “Subtitle and Audio” and click on “No subtitles.” From the drop-down box, click on “Load Subtitles” to upload your SRT or ASS subtitle file from your system.

Step3 Now press the “Save” button to proceed. As the default output format in this tool is MP4, navigate to the “General Video” section to change it. From this option, select “MKV Video” as the output format. Afterward, hit the “Convert” button to embed the added subtitles easily.

3. VLC Media Player
The VLC Media Player is a commonly used platform that offers various functions. It can be easily accessed and shows compatibility with tons of platforms. It has a simple interface that allows you to operate it easily. Through this tool, you can also add subtitles to MKV proficiently. This MKV subtitle editor supports various caption formats such as VobSub, SubRip, SubViewer, etc.
Key Features
- While watching a video on the VLC media player, you can take instant snapshots of your favorite moments in high resolution.
- This tool offers a screen recorder through which you can capture your activities on a desktop. You can also choose the frame rate and output format for your screen recording.
- You can enhance your video files by adding effects from this tool. Along with applying attractive video effects, you can also change the brightness and hue of your video.
Step-by-Step Guide to Add Subtitles Using VLC
Step1 Open your VLC media player and click on the “Media” tab given on top. From there, tap on the “Convert/Save” option.

Step2 A new dialogue box will open regarding “Open Media.” Now you can instantly upload your MKV file on this tool. By staying on the same window, check the box saying, “Use a subtitle file.” Afterward, browse the SRT file from your computer.

Step3 Now tap on the “Convert/Save” arrowhead and choose the “Convert” option from the drop-down menu. A new window will open from where you have to tap on the “Wretch” icon. On the “Encapsulation” section, select “MKV.”

Step4 By going to the “Audio codec” and “Video codec” sections, check the box “keep original video or audio track.” Now go to the “Subtitle” section and enable the option of “Overlay subtitles on the video.” Once done, hit the “Create” button.

Part 2: How to Add Subtitles to MKV on Mac?
Are you looking for MKV subtitle editors that are compatible with Mac? In this section, you can learn how to add subtitles to MKV on your Mac devices easily.
1. HD Video Converter Deluxe
This tool is highly compatible with Mac users and provides tons of advanced features. Besides being a great video editor, this tool can help you add subtitles to your MKV video files. It supports popular subtitle formats such as ASS, SSA, and SRT. If you want to embed hardcode subtitles into your MKV files, this is the most compatible tool.
Key Features
- If you want to decrease the video file size without harming its high quality, you can use this platform. This tool offers a video compressor through which you can reduce file sizes effectively.
- To combine your various video chunks or clips, this software offers a reliable video merger.
- If you are facing audio problems in your video, this tool can permanently adjust the volume according to your preference.
Step-by-Step Guide to Add Subtitles Using HD Video Converter Deluxe
Step1 Start by launching HD Video Converter Deluxe on your MacBook. Afterward, tap on the “+Video” button to import your MKV file.

Step2 On the Output Profile window, choose “MKV” as your output format. Click on the “OK” button to proceed. Now navigate to the “Edit” tab and select “Subtitle.” From there, check “Enable Subtitle.” Also, check “Extra” and then click on the “Add” button. Now you can import the subtitle file to this tool.

Step3 Click the “Done” button and then hit the “RUN” button to embed the subtitles.

2. Wondershare UniConverter
UniConverter is one of the famous tools that many people prefer due to its high reliability. Among its various advanced features, you can use its “Subtitle Editor” to add subtitles to MKV videos. You can create subtitles manually in your preferred font. Moreover, it provides an auto generator to create subtitles by extracting audio from the video file. This feature supports more than 100 languages to offer more diversity.
Key Features
- The MKV subtitle editor of UniConverter is also capable of converting text into subtitle lines through its TXT to SRT feature.
- You can remove backgrounds from your video and add a new one with a few clicks. This can make your video more captivating.
- It offers a vocal remover that can separate instrumental sounds and vocals from an audio or video file easily.
Step-by-Step Guide to Use the Subtitle Editor of UniConverter
Step1 Run UniConverter on your PC and click on “Subtitle Editor” from its homepage. A new window will open in which you have to import the MKV video file.

Step2 You can click on the “Manual Subtitles” button to add your subtitles with respect to the time duration. Or, you can tap on ‘Import Subtitles’ to upload the subtitles file from your MacBook. Other options are also available such as Text to Subtitles and Auto Subtitles.

Step3 You can edit the added subtitles by going to the “Styles” section. Here, you can change the font, color, and style of your subtitles. Once done, click on the “Save” button.

Part 3: How to Add Subtitles to MKV Online?
If you want to use online platforms to merge subtitles with MKV, here are the top two online tools.
1. Veed
Veed is an easy-to-use online tool that allows you to edit your video clips with high accuracy. Through this online tool, you can add subtitles to your MKV files in 3 different ways. You can upload subtitle files in formats like VVT, TXT, SSA, SRT, and ASS. Otherwise, you can enter the subtitles manually by selecting their color, font, size, and time duration. Moreover, you can use its voice recognition software to auto-create subtitles instantly.
Key Features
- To make your video clips funny and engaging, this tool enables you to add various emojis and stickers to your video files.
- You can explain the content in your video by adding annotations such as text boxes using this tool.
- To remove unwanted objects from your video, you can use the crop feature of Veed.
Step-by-Step Guide to Add Subtitles Using Veed
Step1 Access the official website of Veed and click on “Add Subtitles To video” from its tools. Afterward, click the “Choose Files” button and import your MKV file.

Step2 Once done with uploading, click on “Upload Subtitle File.” You can upload any of its supported subtitle files. Also, choose the language from the given box.

Step3 After importing the subtitles, you can modify them by altering their text color, color effect, style, and alignment. Once done, hit the “Export” button.

2. Flixier
Do you want an interesting tool to create subtitles? Flixier is an efficient online tool that can edit your video and audio files. Without making a user account, you can use this tool to add subtitles to MKV video files. You can upload MKV files from different platforms, such as your device, Google Drive, Zoom, Dropbox, etc. This tool also provides different ways to flawlessly create subtitles for your video files.
Key Features
- The subtitle editor of this tool offers more than 1000 fonts. Thus, you can make your subtitles look stylish by choosing a preferred font.
- To edit your videos, this tool allows you to collaborate with your friends in real-time.
- It offers more than 50 transitions that you can apply to your videos easily.
Step-by-Step Guide to Add Subtitles Using Flixier
Step1 Visit the website of Flixier and click on “Add subtitles to your videos” from its tools. Afterward, tap on “Get Started” to proceed. The tool will ask you to upload your video file.

Step2 Once you have uploaded the MKV video, click on “Text” given on the left side. Afterward, tap “Add Subtitle” to create subtitles for your video. You can add text to the given space to create subtitles. You can also tap on the “Import Subtitle” button to upload the subtitle file. To change the properties of your subtitles, you can edit them from the provided options on your screen.

Step3 Once done with creating and adjusting subtitles, click on the “Export” button.

Conclusion
Subtitles are shown at the bottom of a video and help make the video content comprehensive. If you are dealing with MKV files and want to add subtitles in an instant way, this article has provided all the details. By reading this guide, you can learn how to add subtitles to MKV files on different platforms.
To attain the best results and utilize advanced features, we will highly recommend you use Wondershare Filmora. This tool creates a comfortable environment and gives an intuitive interface to create subtitles.
Part 1: How to Add Subtitles to MKV on Windows?
Are you a Windows user and want to add subtitles to MKV? Read this section to find out compatible tools that can add subtitles to your MKV videos efficiently.
1. Wondershare Filmora
Free Download For Win 7 or later(64-bit)
Free Download For macOS 10.14 or later
Wondershare Filmora is a popular tool that provides you with multiple options to edit video files. If you are interested in adding subtitles to your MKV files, you can navigate to its “Speech-to-Text” feature. This feature automatically transcribes the voice used in the video into subtitles. It supports 16 different languages for creating subtitles through this feature.
This feature can also enhance your editing efficiency as you don’t have to write the subtitles on your own. Moreover, the STT feature utilizes advanced algorithms that help the tool create subtitles with high precision. Furthermore, you can also manually add the subtitles to your MKV file using this MKV subtitle editor.
Key Features
- Filmora offers various effects, such as a green screen that can help you to change your background dramatically.
- If you want to resize your videos efficiently, this tool provides the Auto Reframe feature.
- Filmora also offers various preset templates that can help you to craft captivating videos easily.
Step-by-Step Guide to Add Subtitles Using Filmora
Step1 Create a New Filmora Project
Download and install Filmora on your PC and click “Create Project.” Afterward, import the MKV video from your PC to this tool by clicking on the “Arrow” icon.
Step2 Go to Titles Tab
After importing the video, drag it to the timeline. Once done, click on the “Titles” section given on top. Afterward, click on “Subtitles” from the left section. Now you will be able to see different types of subtitles on your screen. Select your favorite style of subtitles and tap on its “Download” icon.
Step3 Choose the Preferred Subtitle Style
After that, tap on the “Plus” icon to add your selected subtitle style to the timeline. Double-click on the added subtitles, which will open the settings. You can manually add the subtitles on the “Input Text” box easily. Moreover, you can easily change the text font, color, opacity, and alignment.
Step4 Export and Save Video
Once you have created subtitles for your imported video, click the “Export” button on top. Using this option, you can save the video file to your device or share it on other platforms.
2. Cisdem Video Converter
Cisdem is an efficient tool that can be used by content creators for various purposes. Along with editing the videos, this tool can help you add subtitles to your video files in any format. It supports various formats for adding subtitles, such as MKV, MP4, AVI, etc. This tool also offers a built-in editor to modify the MKV videos flawlessly. Hence, it’s a basic tool that generates quality results instantly.
Key Features
- Cisdem can function as a video converter that supports more than 300 file formats. You can convert to and from MKV files using this platform easily.
- Through this software, you can professionally add watermarks to your MKV files. It provides various options to add a customized watermark to your desired video files.
- It offers a built-in media player that allows you to play and watch MKV files without interruption.
Steps to Add Subtitles to MKV Using Cisdem Video Converter
Step1 Launch the Cisdem tool on your system and navigate to its “Converter”. Afterward, import the MKV file instantly. Now tap on the “Pencil” icon given on top to open the editing window.
Step2 From the editing window, go to “Subtitle and Audio” and click on “No subtitles.” From the drop-down box, click on “Load Subtitles” to upload your SRT or ASS subtitle file from your system.
Step3 Now press the “Save” button to proceed. As the default output format in this tool is MP4, navigate to the “General Video” section to change it. From this option, select “MKV Video” as the output format. Afterward, hit the “Convert” button to embed the added subtitles easily.
3. VLC Media Player
The VLC Media Player is a commonly used platform that offers various functions. It can be easily accessed and shows compatibility with tons of platforms. It has a simple interface that allows you to operate it easily. Through this tool, you can also add subtitles to MKV proficiently. This MKV subtitle editor supports various caption formats such as VobSub, SubRip, SubViewer, etc.
Key Features
- While watching a video on the VLC media player, you can take instant snapshots of your favorite moments in high resolution.
- This tool offers a screen recorder through which you can capture your activities on a desktop. You can also choose the frame rate and output format for your screen recording.
- You can enhance your video files by adding effects from this tool. Along with applying attractive video effects, you can also change the brightness and hue of your video.
Step-by-Step Guide to Add Subtitles Using VLC
Step1 Open your VLC media player and click on the “Media” tab given on top. From there, tap on the “Convert/Save” option.
Step2 A new dialogue box will open regarding “Open Media.” Now you can instantly upload your MKV file on this tool. By staying on the same window, check the box saying, “Use a subtitle file.” Afterward, browse the SRT file from your computer.
Step3 Now tap on the “Convert/Save” arrowhead and choose the “Convert” option from the drop-down menu. A new window will open from where you have to tap on the “Wretch” icon. On the “Encapsulation” section, select “MKV.”
Step4 By going to the “Audio codec” and “Video codec” sections, check the box “keep original video or audio track.” Now go to the “Subtitle” section and enable the option of “Overlay subtitles on the video.” Once done, hit the “Create” button.
Part 2: How to Add Subtitles to MKV on Mac?
Are you looking for MKV subtitle editors that are compatible with Mac? In this section, you can learn how to add subtitles to MKV on your Mac devices easily.
1. HD Video Converter Deluxe
This tool is highly compatible with Mac users and provides tons of advanced features. Besides being a great video editor, this tool can help you add subtitles to your MKV video files. It supports popular subtitle formats such as ASS, SSA, and SRT. If you want to embed hardcode subtitles into your MKV files, this is the most compatible tool.
Key Features
- If you want to decrease the video file size without harming its high quality, you can use this platform. This tool offers a video compressor through which you can reduce file sizes effectively.
- To combine your various video chunks or clips, this software offers a reliable video merger.
- If you are facing audio problems in your video, this tool can permanently adjust the volume according to your preference.
Step-by-Step Guide to Add Subtitles Using HD Video Converter Deluxe
Step1 Start by launching HD Video Converter Deluxe on your MacBook. Afterward, tap on the “+Video” button to import your MKV file.
Step2 On the Output Profile window, choose “MKV” as your output format. Click on the “OK” button to proceed. Now navigate to the “Edit” tab and select “Subtitle.” From there, check “Enable Subtitle.” Also, check “Extra” and then click on the “Add” button. Now you can import the subtitle file to this tool.
Step3 Click the “Done” button and then hit the “RUN” button to embed the subtitles.
2. Wondershare UniConverter
UniConverter is one of the famous tools that many people prefer due to its high reliability. Among its various advanced features, you can use its “Subtitle Editor” to add subtitles to MKV videos. You can create subtitles manually in your preferred font. Moreover, it provides an auto generator to create subtitles by extracting audio from the video file. This feature supports more than 100 languages to offer more diversity.
Key Features
- The MKV subtitle editor of UniConverter is also capable of converting text into subtitle lines through its TXT to SRT feature.
- You can remove backgrounds from your video and add a new one with a few clicks. This can make your video more captivating.
- It offers a vocal remover that can separate instrumental sounds and vocals from an audio or video file easily.
Step-by-Step Guide to Use the Subtitle Editor of UniConverter
Step1 Run UniConverter on your PC and click on “Subtitle Editor” from its homepage. A new window will open in which you have to import the MKV video file.
Step2 You can click on the “Manual Subtitles” button to add your subtitles with respect to the time duration. Or, you can tap on ‘Import Subtitles’ to upload the subtitles file from your MacBook. Other options are also available such as Text to Subtitles and Auto Subtitles.
Step3 You can edit the added subtitles by going to the “Styles” section. Here, you can change the font, color, and style of your subtitles. Once done, click on the “Save” button.
Part 3: How to Add Subtitles to MKV Online?
If you want to use online platforms to merge subtitles with MKV, here are the top two online tools.
1. Veed
Veed is an easy-to-use online tool that allows you to edit your video clips with high accuracy. Through this online tool, you can add subtitles to your MKV files in 3 different ways. You can upload subtitle files in formats like VVT, TXT, SSA, SRT, and ASS. Otherwise, you can enter the subtitles manually by selecting their color, font, size, and time duration. Moreover, you can use its voice recognition software to auto-create subtitles instantly.
Key Features
- To make your video clips funny and engaging, this tool enables you to add various emojis and stickers to your video files.
- You can explain the content in your video by adding annotations such as text boxes using this tool.
- To remove unwanted objects from your video, you can use the crop feature of Veed.
Step-by-Step Guide to Add Subtitles Using Veed
Step1 Access the official website of Veed and click on “Add Subtitles To video” from its tools. Afterward, click the “Choose Files” button and import your MKV file.
Step2 Once done with uploading, click on “Upload Subtitle File.” You can upload any of its supported subtitle files. Also, choose the language from the given box.
Step3 After importing the subtitles, you can modify them by altering their text color, color effect, style, and alignment. Once done, hit the “Export” button.
2. Flixier
Do you want an interesting tool to create subtitles? Flixier is an efficient online tool that can edit your video and audio files. Without making a user account, you can use this tool to add subtitles to MKV video files. You can upload MKV files from different platforms, such as your device, Google Drive, Zoom, Dropbox, etc. This tool also provides different ways to flawlessly create subtitles for your video files.
Key Features
- The subtitle editor of this tool offers more than 1000 fonts. Thus, you can make your subtitles look stylish by choosing a preferred font.
- To edit your videos, this tool allows you to collaborate with your friends in real-time.
- It offers more than 50 transitions that you can apply to your videos easily.
Step-by-Step Guide to Add Subtitles Using Flixier
Step1 Visit the website of Flixier and click on “Add subtitles to your videos” from its tools. Afterward, tap on “Get Started” to proceed. The tool will ask you to upload your video file.
Step2 Once you have uploaded the MKV video, click on “Text” given on the left side. Afterward, tap “Add Subtitle” to create subtitles for your video. You can add text to the given space to create subtitles. You can also tap on the “Import Subtitle” button to upload the subtitle file. To change the properties of your subtitles, you can edit them from the provided options on your screen.
Step3 Once done with creating and adjusting subtitles, click on the “Export” button.
Conclusion
Subtitles are shown at the bottom of a video and help make the video content comprehensive. If you are dealing with MKV files and want to add subtitles in an instant way, this article has provided all the details. By reading this guide, you can learn how to add subtitles to MKV files on different platforms.
To attain the best results and utilize advanced features, we will highly recommend you use Wondershare Filmora. This tool creates a comfortable environment and gives an intuitive interface to create subtitles.
7 Solutions to Edit GoPro Video on Mac
Having a well-polished video is beyond just shooting the video. Once you shoot your GoPro videos, the next thing to do is use a video editor to make necessary corrections. These video editors’ effects and stabilizations turn your videos into a sophisticated presentation. However, there are several GoPro video editors for different video formats. So if you are thinking about how to edit GoPro videos on Mac, you’re in luck.
In this article, we’ll help you through editing your GoPro video on Mac and a list of these GoPro video editors. We will also explore paid and free GoPro video editors to help pick the right editor. So, if you are ready to impress audiences with your outstanding videos, let’s begin.
Import GoPro Videos to Mac before Editing
After filming your GoPro videos, you probably wonder how to send them to your Mac to begin editing. There are two ways you can about importing your GoPro videos to Mac before editing. The use of SD adapter and GoPro quick app. Use any of these methods to import your GoPro videos before you can begin editing. So with no further ado, let’s quickly dive into importing GoPro videos to Mac using an SD adapter and GoPro quick app.
Import GoPro Videos to Mac Before Editing – SD Adapter
This is actually one of the easiest ways to import GoPro videos to Mac. How does it work? It simply works by connecting GoPro’s SD card to the Mac. Simply remove the GoPro’s SD card and input it to Mac. By doing this, all content on the SD card will display on the Mac as external files. Let’s look at the step-by-step method of importing GoPro videos to Mac with an SD adapter.
- Step 1: First thing first, you have to power off the device
- Step 2: Next, you have to open the opening presentation just at the bottom of the GoPro camera. After successfully unlocking it, then direct access to the SD card.
- Step 3: This is where you insert the SD card into the SD card adapter or reader.
- Step 4: Now, you connect the SD card adapter or reader to your Mac
- Step 5: After a successful connection, it will display on your Mac desktop. Now, click on it to open all its content for accessibility.

- Step 6: Once you open it, two folders will display. These folders are DCIM and MISC.

- Step 7: Click on the DCIM folder to find all videos stored on the device.

- Step 8: Finally, you can now begin uploading all your GoPro videos to Mac by simply copying and pasting.

Import GoPro Videos to Mac before editing – GoPro Quick App
Another option to import GoPro videos to Mac is the GoPro Quick app. GoPro quick app is a tool by GoPro designed to help view GoPro videos on Mac and import them. Having this app on your Mac device is relatively easy. First, you have to download its setup from the GoPro website and install it. So far, this app is one of the best tools to view and import GoPro files to your Mac device. Here are the steps to importing GoPro videos to Mac while getting set to edit.
- Step 1: First thing first, Launch the app. However, if you have not installed the app, you should quickly download and install the app.

- Step 2: Now, you can connect the GoPro camera to your Mac. You can do this by using a USB cable.
- Step 3: After launching the app, you will see an icon labeled Import Filesdisplayed at the interface.

- Step 4: from here on, you will also see an icon to import the videos from your GoPro camera into your Mac device.
When the import is complete, you can now locate your GoPro videos in the folder of your choice. Now, you can close the GoPro quick app, unplug the GoPro camera and get ready to edit your videos.
Best GoPro Video Editor on Mac
A lot of people understand that GoPro is the best way to make your video look like a professional shot. After shooting the video, you’ll obviously want to make some edits to make them look more professional before sharing them. After all, no one wants to watch poor-quality videos, bad noises, and other unprofessional clips. Therefore, we have a list of the best GoPro editor for Mac in this article. Keep reading to learn about the best GoPro video editor on Mac.
Best GoPro Video Editor on Mac – Filmora Video Editor

Supported System: Mac and Windows
A lot of free video editing software usually comes as either too straightforward or too challenging to understand. While other video editing software lacks vital editing features such as color correction and audio or noise editing features. However, the Filmora Video Editor for Mac bridges the gap and is undoubtedly the best GoPro Video editor on Mac.
This video editing software is an easy-to-use editing tool totally equipped with a lot of video editing functions. With Filmora, you can edit your GoPro videos on your Mac like an expert and expect a professional outcome. Filmora offers excellent performance and enhances video quality taking the user experience to a whole new level.
Additionally, Filmora is an editing tool with helpful functionality taking the user experience to a whole new level. Finally, this tool is indispensable due to its speed, intuitive user interface, and other file format support.
For Win 7 or later (64-bit)
For macOS 10.14 or later
Filmora Features
- Filmora editing tool is versatile and supports other video formats like MP4, MOV, MKV, AVCHD, etc.
- You can cut, crop, split, trim, and even combine clips with just a few clicks.
- Filmora has access to several advanced video effects such as royalty-free music, transition, animated titles, and motion elements.
- With Filmora color tuning features, your videos can look like professional Hollywood videos.
- You can also edit sounds on your video with a noise removal feature, audio equalizer, and audio keyframing tools.
- You get 500+ free special video effects to create and customize your videos yourself.
- Filmora has access to advanced video effects like PIP, audio mixer, and green screen, which you can add to your videos.
- Access to 1000+ effects downloading resources to make videos in any desired styles.
Steps to Editing Videos on Mac Using Filmora
Want to edit your GoPro videos the right way? Editing your GoPro videos on Mac with Filmora is relatively easy and will only take a few clicks. Read and follow these steps below to learn to edit GoPro videos on Mac with this easy-to-use GoPro video editor.
- Step 1: Import the GoPro video files
First, you launch the GoPro video editor and then click the “Import Media here” button. This will upload the GoPro video clips to the program. You can save these files in a suitable location for easy access before you begin editing.

- Step 2: Edit the GoPro Video clips

Secondly, you should drag the GoPro video clips from the folder or User’s album to the timeline and begin editing.
To trim your GoPro videos, simply mouser over the clip from the beginning to the end of the video. You should do this until the trim icon is displayed. The trim icon is labeled as “I” on the editing timeline. You can drag the trim icon forward or backward to trim the video as you desire.
Aside from the trimming option, you can also apply split footage, video stabilization, and even add transitions between two clips. You can also combine GoPro videos and rotate GoPro videos by simply tapping the icons respectively.

- Step 3: Export the edited GoPro video files

Once you finish editing, you can now navigate to the “Export” icon. Furthermore, you can also select the save path and file format from the displayed output window. After this selection, you can finally choose the “Export” icon. Once you complete this, you can find your edited video file in the same path.
More Free GoPro video editor on Mac to Edit Gopro Videos
In this section, we will list out some of the best free GoPro video editors to successfully edit your videos on Mac. These programs are, but you will have to download them to enjoy all the editing tools.
PowerDirector

Supported System: Windows and Mac
We have PowerDirector as the best overall editor on our list of best free GoPro video editors on Mac. This free GoPro video editor is compatible with Mac and has a robust video editing program. If you are looking for a free GoPro video editor with a wide range of exciting editing features, this is one of the best options. One of the benefits of using this GoPro video editor is that it comes with an Action Camera Center.
It has tons of cool effects, titles, filters, and templates to explore, especially if you want to make more action camera masterpieces. In addition, this video editor has special editing and effects tools to improve your action camera video. For example, you can stabilize your shaky video, apply cool speed effects, and correct fish-eye distortion in some minutes. You can also use the slow-motion effect, zoom, correct color problems, and freeze frame with just a few clicks.
The GoPro editor also comes with noise correction and video denoise to make your video crystal clear and remove unwanted audio noise. In addition, PowerDirector has thousands of royalty-free stock assets such as sound effects and background music. In essence, PowerDirector is a GoPro video editor that offers everything you need to produce, enhance and cut thrilling action videos. It is versatile, best for action footage editing, and supports several video formats.
Pros
- It is beginner-friendly
- It comes with easy-to-use action camera-specific editing tools
Cons
- While it is free, you need a subscription to enjoy the latest features.
Steps to Edit using PowerDirector
- Step 1: Launch the app and select ‘full mode’ to begin editing your video
- Step 2: Select’ import media folder’ to get the videos you wish to edit
- Step 3: You can now browse the folder on your Mac device and select the folder with the videos. Then Click ‘Select folder’ to move them into the editor’s media library.

- Step 4: Now, the editing process can begin. You can stabilize and change the speed of your videos with PowerDirector.

- You can add title text and motion blur to your GoPro videos if you like that.

- If you want to include transitions, you can do so by selecting the transition room.
- Step 5: Next, select the ‘produce’ button to export your video once you are sure that the editing is complete.

- Step 6: Change the video format before exporting.

Once you select the video format you prefer, you will be able to save your GoPro video.
VideoProc Vlogger

Supported System: Windows and Mac
VideoProc Vlogger is the best GoPro editor for anyone looking for speed adjustment. The video editor uses visualized speed ramping to alter the speed throughout a clip. This program contains over 20-speed features to help you quickly change the tone and tempo of your GoPro video. Furthermore, VideoProc Vlogger is beginner-friendly with a lot of advanced editing features. These features include automatic keyframes and flexible Bezier curves to slow parts of a video without splitting it.
This free GoPro video editor can simulate motion roll, dolly, tilt, and even truck effects. You can also push in and out and stylize your video clips with rotation, fast zooms, and shakes. With VideoProc Vlogger, you fix grain video, remove fish-eye, extract audio and apply motion crops to your video. The video editor is best at creating new motion trails to change the action of the video.
Although VideoProc Vlogger is a free video editor, it definitely lacks some advanced editing features. For example, you can edit your videos without the annoying ads or watermarks. In addition, the video editor is designed for beginners, content creators, and hobbyists as it lacks features like video stabilization. So while the video editor is not for professionals, it’s worth trying out.
Pros
- Requires low system requirements
- It is entirely free with no ads and watermarks
Cons
- It lacks advanced editing features
- Rendering is somewhat slow
Steps to Edit using VideoProc Vlogger
- Step 1: First, import your GoPro videos from your Mac device to VideoProc Vlogger.

Simply Launch VideoProc Vlogger on your Mac, hit the plus icon in the media library, and add and import the videos.
- Step 2: Now, split and cut the GoPro Videos.

Simply drag the video clips to the timeline and begin editing. Now, put the playhead to exactly where you want to split the video and tap the split button.
- Step 3: You can also fix GoPro lens distortion.

If you feel that your video looks distorted, tick the lens distortion box to resolve the issue.

- Step 4: You can do the color correction or grading for any dark GoPro videos. Simply apply a preset aesthetic filter or simply adjust color normally.
- Step 5: Adjust the speed of the GoPro video.

To adjust the speed of the video, click speed in the toolbar to open the speed editor. Then change as you desire.
- Step 6: You can also add transitions, titles, and effects by opening the panels of transitions, effects, and tiles.

- Then drag a transition to the space between two video clips, same with titles to the subtitle and effect to the effect track.

- Step 7: Next, remove noise and background music by clicking the video track and tapping “detach” to separate the audio from the video.

- You can also add music to replace the background noise.
- Step 8: Finally, after the editing, you can export the GoPro video to your Mac device by setting the file name, format, file location, and video quality.

iMovie

Supported System: Mac only
This editor is designed to ensure an excelling editing process for Mac users. Therefore, beginners, content creators, and even hobbyists can utilize this video editor to edit their videos. Although iMovie is a free GoPro video editor, it offers incredible editing features to make your video look more professional. These features include HD and 4K video support and speed adjustment tools that can slow down or speed up your video clips.
Although it comes free on all Mac devices, iMovie also has tons of themes, templates, and presets to make editing a breeze. For example, you can select the video clips that will be automatically styled and edited with titles, transitions, and music. You can make all these changes with just a few clicks. In addition, you can also rearrange, trim, split, and even delete your ready-made video clips.
Furthermore, you can always modify the shift focus and depth of field while editing your video. However, it lacks some advanced features you will need while editing, such as Multicam, motion tracking, and 360 editing. On the other hand, it has a user-friendly interface with essential editing functions.
Pros
- It has a simple and user-friendly interface
- It is definitely beginner-friendly
Cons
- It lacks essential and advanced GoPro editing features and functions
Steps to Edit using iMovie
- Step 1: first, you have to launch the iMovie and create a video project.

- Step 2: Now, you can click the Import button to import your GoPro video files from your Mac to it.

- Step 3: Drag the video files from the program media library to the timeline for editing.

- Step 4: Load a song to the audio track if you wish to add background music to your video.
- Step 5: To split your video into smaller parts, right-click on a clip.
- Step 6: to edit your GoPro video with advanced tools like color correction, crop, grading, speed, and volume, simply move to the toolbar just above the timeline.
- Step 7: to add title, and transitions, you can drag a title and transition to the desired space between two clips.
- Step 8: preview and export your GoPro video from iMovie in the preferred format.

More Paid GoPro video editor on Mac to Cut MP4 Videos
If you desire GoPro video editors that offer more than just the basic editing features, you should try the paid GoPro video editors. The paid GoPro video editors offer more professional editing features for Mac users. In this section, you’ll learn about our top three paid GoPro video editors to edit your GoPro videos on Mac.
Adobe Premiere Pro

Supported System: Windows and Mac
This paid GoPro video editor is best for professionals who have experience creating video projects. This GoPro editing tool is compatible with Mac and Windows devices and also supports several video formats. Professionals use this video editor to edit top-notch videos such as Hollywood action movies and TV shows. In addition, it offers a long list of powerful features ideal for standard and action video editing.
Some of these professional features include Multicam, 360-degree, VR editing, and will export in up to 8k. The GoPro video editors also have a lot of sophisticated video stabilization tools, such as the warp stabilizer effect. The video stabilizer function help reduce camera shake, especially when zooming in. Other features include unlimited video tracks, lens distortion, access to the creative cloud and will match video to music.
In addition, the GoPro video editor only offers a 7-days free trial and is relatively expensive. Although Adobe Premiere Pro video editor is professional and high-quality, it has a steep learning curve. The steep learning curve is not appropriate for beginners.
Pros
- It supports all video formats
- It supports real-time video editing
Cons
- The system requirements are resource-intensive
- Not ideal for beginners
Steps to Edit using Adobe Premiere Pro
- Step 1: Import and cut your video files on PowerDirector. You can begin by cutting out any unnecessary parts from the video. You can also add text transitions, text, and other edits.

- Step 2: Next, stabilize the video using the Warp stabilizer. Double click on Warp stabilizer on the Effects menu to stabile the video.

- Step 3: Finally, you can add audio and export the edited video file. Click on file, tap on export and select the format, presets, and the location to export your file.

Adobe After Effect

Supported System: Windows and Mac
This GoPro editor is compatible with Mac and offers many basic video editing features to ensure top-notch results. This GoPro editor is great for editors who want to add special effects like motion tracking to their videos. The after-effect function allows you to add a graphical element to a moving person, animal, car, or camera. You can also create cartoon effects, logos, stickers, or text to move seamlessly with the action onscreen.
In addition to its essential editing tools, you can also remove elements from your video with the pro-level digital rotoscoping tools. You can also use the after-effect to add elements to the missing video. Other features include 360, 3D, VR editing, transitions, lens distortions, and distortion effects for professional editing.
This GoPro video editor is an effective software and is best for adding visual effects to action camera videos. However, it lacks some essential video editing tools that you might need to make your video Hollywood standard. In addition, it also has a steep learning curve which makes it not ideal for beginners. Furthermore, as a GoPro video editor looking to do just the basic edits, then the After Effects is definitely not for you.
Pros
- It comes with realistic special effects
- It has a high-quality noise reduction
Cons
- It is not for beginners due to the steep learning curve
- It comes with only a 7-day free trial
- It is quite expensive
Steps to Edit using Adobe After Effects
- Step 1: Import your video by going to ‘file’ on the menu and clicking ‘import’ from the dropdown menu.

- You can begin by cutting out any unnecessary parts from the video. You can also add text transitions, text, and other edits.

- Step 2: Next, you can apply necessary editing such as trimming, transitioning, and other edits.

- Step 3: Finally, you can add audio and export the edited video file. Click on file, tap on export and select the format, presets, and the location to export your file.

Final Cut Pro

Supported System: Mac only
The Final Cut Pro is another best-paid GoPro video editor for editing GoPro videos on Mac. This video editor is ideal for editing 360 GoPro videos. This is because it offers all the editing tools you need to edit, import, and deliver both stereoscopic and monoscopic 360 videos. The GoPro video editors come with a lot of powerful features such as background noise removal, Multicam editing, color adjustment tools, and an object tracker.
You can use the GoPro video editor to visualize, remove camera rigs, change orientation, or straighten the horizon. Final Cut Pro can also easily apply graphics and effects to 360 videos and add 360 videos to regular videos with the tiny planet effect. With electronic stabilization, you can clean up your video and enhance your audience’s viewing experience. The magnetic timeline feature eliminates clip collisions and streamlines the video editing process.
Although the GoPro video editor has some notable GoPro features, it is expensive to purchase. However, it has a generous 90-day free trial to explore. It is also not beginner-friendly and requires time to learn, especially for new GoPro editors to understand. In addition, it supports several Video formats.
Pros
- It has convenient asset management functions
- Precision editing is sure with the magnetic timeline function
Cons
- It is expensive
- It is not ideal for GoPro beginners
Steps to Edit using Final Cut Pro
- Step 1: First, Launch the program
- Step 2: Import your video files to the timeline and begin editing.

- Step 3: Next, you can apply necessary editing such as trimming, transitioning, and other edits.

- Step 4: Finally, you can add audio and export the edited video file. Click on file, tap on export and select the format, presets, and the location to export your file.

Which should I Choose: Free or Paid GoPro Video Editor?
Many of these GoPro video editors for Mac (free and paid) are available on the internet. Therefore, it can be hard sometimes to choose the right GoPro video editor for Mac. However, you’ll need to consider factors before making your choice. Here are some of these factors.
Level of Expertise
This is a vital factor you should put into consideration before choosing a GoPro video editor. As a beginner, you wouldn’t need a GoPro editor that offers complex editing functions that you can’t use. Also, as a professional, you shouldn’t go for an editor that lacks the necessary editing tools to meet your editing needs. As an editor, you should totally be on the lookout for an editor that supports both beginners and professionals. This will remove the need to search for a new video editor at any experience level.
Interface
Another factor to consider is the user interface of your chosen video editor. When you go for a more friendly user interface, you will be saving yourself the time to get familiar with the software. Is the video editor free or paid? Regardless of the answer, check out the user interface before choosing one.
Formats
You also need to ensure that the editing software doesn’t limit you to specific video formats. You should go for a GoPro video editor that supports the common and trendy video formats. This will allow you to convert your edited videos when you need to share them.
Now, most free GoPro video editors offer just limited features to users, limiting your editing course. Furthermore, most paid GoPro video editors focus on a professional level, making it difficult for new editors to use. Therefore, you should totally opt for a GoPro video editor that succinctly supports all your editing needs.
FAQs About Editing Gopro Videos
- Can I edit GoPro videos like a Professional? Yes, you can. Learn to use advanced video editing features. The ideal thing to do is pick a GoPro video editor with a user-friendly interface to enable you to learn these professional methods.
- What is the best GoPro video editor for Mac? The best GoPro video editor for Mac devices depends on your level of expertise and what you want to achieve.
- Can I edit a GoPro video? Yes, you can. Find a GoPro editing software compatible with your Mac devices and ideal for your level of experience.
Conclusion
There are several GoPro video editors, and the editor you choose depends on your needs and your budget. It also depends on your level of experience and the equipment on the ground. However, we have a list of different GoPro video editors for you. Examine our reviews of these GoPro video editors and see which is perfect for you.
- Step 6: Once you open it, two folders will display. These folders are DCIM and MISC.
- Step 7: Click on the DCIM folder to find all videos stored on the device.
- Step 8: Finally, you can now begin uploading all your GoPro videos to Mac by simply copying and pasting.
Import GoPro Videos to Mac before editing – GoPro Quick App
Another option to import GoPro videos to Mac is the GoPro Quick app. GoPro quick app is a tool by GoPro designed to help view GoPro videos on Mac and import them. Having this app on your Mac device is relatively easy. First, you have to download its setup from the GoPro website and install it. So far, this app is one of the best tools to view and import GoPro files to your Mac device. Here are the steps to importing GoPro videos to Mac while getting set to edit.
- Step 1: First thing first, Launch the app. However, if you have not installed the app, you should quickly download and install the app.
- Step 2: Now, you can connect the GoPro camera to your Mac. You can do this by using a USB cable.
- Step 3: After launching the app, you will see an icon labeled Import Filesdisplayed at the interface.
- Step 4: from here on, you will also see an icon to import the videos from your GoPro camera into your Mac device.
When the import is complete, you can now locate your GoPro videos in the folder of your choice. Now, you can close the GoPro quick app, unplug the GoPro camera and get ready to edit your videos.
Best GoPro Video Editor on Mac
A lot of people understand that GoPro is the best way to make your video look like a professional shot. After shooting the video, you’ll obviously want to make some edits to make them look more professional before sharing them. After all, no one wants to watch poor-quality videos, bad noises, and other unprofessional clips. Therefore, we have a list of the best GoPro editor for Mac in this article. Keep reading to learn about the best GoPro video editor on Mac.
Best GoPro Video Editor on Mac – Filmora Video Editor
Supported System: Mac and Windows
A lot of free video editing software usually comes as either too straightforward or too challenging to understand. While other video editing software lacks vital editing features such as color correction and audio or noise editing features. However, the Filmora Video Editor for Mac bridges the gap and is undoubtedly the best GoPro Video editor on Mac.
This video editing software is an easy-to-use editing tool totally equipped with a lot of video editing functions. With Filmora, you can edit your GoPro videos on your Mac like an expert and expect a professional outcome. Filmora offers excellent performance and enhances video quality taking the user experience to a whole new level.
Additionally, Filmora is an editing tool with helpful functionality taking the user experience to a whole new level. Finally, this tool is indispensable due to its speed, intuitive user interface, and other file format support.
For Win 7 or later (64-bit)
For macOS 10.14 or later
Filmora Features
- Filmora editing tool is versatile and supports other video formats like MP4, MOV, MKV, AVCHD, etc.
- You can cut, crop, split, trim, and even combine clips with just a few clicks.
- Filmora has access to several advanced video effects such as royalty-free music, transition, animated titles, and motion elements.
- With Filmora color tuning features, your videos can look like professional Hollywood videos.
- You can also edit sounds on your video with a noise removal feature, audio equalizer, and audio keyframing tools.
- You get 500+ free special video effects to create and customize your videos yourself.
- Filmora has access to advanced video effects like PIP, audio mixer, and green screen, which you can add to your videos.
- Access to 1000+ effects downloading resources to make videos in any desired styles.
Steps to Editing Videos on Mac Using Filmora
Want to edit your GoPro videos the right way? Editing your GoPro videos on Mac with Filmora is relatively easy and will only take a few clicks. Read and follow these steps below to learn to edit GoPro videos on Mac with this easy-to-use GoPro video editor.
- Step 1: Import the GoPro video files
First, you launch the GoPro video editor and then click the “Import Media here” button. This will upload the GoPro video clips to the program. You can save these files in a suitable location for easy access before you begin editing.
- Step 2: Edit the GoPro Video clips
Secondly, you should drag the GoPro video clips from the folder or User’s album to the timeline and begin editing.
To trim your GoPro videos, simply mouser over the clip from the beginning to the end of the video. You should do this until the trim icon is displayed. The trim icon is labeled as “I” on the editing timeline. You can drag the trim icon forward or backward to trim the video as you desire.
Aside from the trimming option, you can also apply split footage, video stabilization, and even add transitions between two clips. You can also combine GoPro videos and rotate GoPro videos by simply tapping the icons respectively.
- Step 3: Export the edited GoPro video files
Once you finish editing, you can now navigate to the “Export” icon. Furthermore, you can also select the save path and file format from the displayed output window. After this selection, you can finally choose the “Export” icon. Once you complete this, you can find your edited video file in the same path.
More Free GoPro video editor on Mac to Edit Gopro Videos
In this section, we will list out some of the best free GoPro video editors to successfully edit your videos on Mac. These programs are, but you will have to download them to enjoy all the editing tools.
PowerDirector
Supported System: Windows and Mac
We have PowerDirector as the best overall editor on our list of best free GoPro video editors on Mac. This free GoPro video editor is compatible with Mac and has a robust video editing program. If you are looking for a free GoPro video editor with a wide range of exciting editing features, this is one of the best options. One of the benefits of using this GoPro video editor is that it comes with an Action Camera Center.
It has tons of cool effects, titles, filters, and templates to explore, especially if you want to make more action camera masterpieces. In addition, this video editor has special editing and effects tools to improve your action camera video. For example, you can stabilize your shaky video, apply cool speed effects, and correct fish-eye distortion in some minutes. You can also use the slow-motion effect, zoom, correct color problems, and freeze frame with just a few clicks.
The GoPro editor also comes with noise correction and video denoise to make your video crystal clear and remove unwanted audio noise. In addition, PowerDirector has thousands of royalty-free stock assets such as sound effects and background music. In essence, PowerDirector is a GoPro video editor that offers everything you need to produce, enhance and cut thrilling action videos. It is versatile, best for action footage editing, and supports several video formats.
Pros
- It is beginner-friendly
- It comes with easy-to-use action camera-specific editing tools
Cons
- While it is free, you need a subscription to enjoy the latest features.
Steps to Edit using PowerDirector
- Step 1: Launch the app and select ‘full mode’ to begin editing your video
- Step 2: Select’ import media folder’ to get the videos you wish to edit
- Step 3: You can now browse the folder on your Mac device and select the folder with the videos. Then Click ‘Select folder’ to move them into the editor’s media library.
- Step 4: Now, the editing process can begin. You can stabilize and change the speed of your videos with PowerDirector.
- You can add title text and motion blur to your GoPro videos if you like that.
- If you want to include transitions, you can do so by selecting the transition room.
- Step 5: Next, select the ‘produce’ button to export your video once you are sure that the editing is complete.
- Step 6: Change the video format before exporting.
Once you select the video format you prefer, you will be able to save your GoPro video.
VideoProc Vlogger
Supported System: Windows and Mac
VideoProc Vlogger is the best GoPro editor for anyone looking for speed adjustment. The video editor uses visualized speed ramping to alter the speed throughout a clip. This program contains over 20-speed features to help you quickly change the tone and tempo of your GoPro video. Furthermore, VideoProc Vlogger is beginner-friendly with a lot of advanced editing features. These features include automatic keyframes and flexible Bezier curves to slow parts of a video without splitting it.
This free GoPro video editor can simulate motion roll, dolly, tilt, and even truck effects. You can also push in and out and stylize your video clips with rotation, fast zooms, and shakes. With VideoProc Vlogger, you fix grain video, remove fish-eye, extract audio and apply motion crops to your video. The video editor is best at creating new motion trails to change the action of the video.
Although VideoProc Vlogger is a free video editor, it definitely lacks some advanced editing features. For example, you can edit your videos without the annoying ads or watermarks. In addition, the video editor is designed for beginners, content creators, and hobbyists as it lacks features like video stabilization. So while the video editor is not for professionals, it’s worth trying out.
Pros
- Requires low system requirements
- It is entirely free with no ads and watermarks
Cons
- It lacks advanced editing features
- Rendering is somewhat slow
Steps to Edit using VideoProc Vlogger
- Step 1: First, import your GoPro videos from your Mac device to VideoProc Vlogger.
Simply Launch VideoProc Vlogger on your Mac, hit the plus icon in the media library, and add and import the videos.
- Step 2: Now, split and cut the GoPro Videos.
Simply drag the video clips to the timeline and begin editing. Now, put the playhead to exactly where you want to split the video and tap the split button.
- Step 3: You can also fix GoPro lens distortion.
If you feel that your video looks distorted, tick the lens distortion box to resolve the issue.
- Step 4: You can do the color correction or grading for any dark GoPro videos. Simply apply a preset aesthetic filter or simply adjust color normally.
- Step 5: Adjust the speed of the GoPro video.
To adjust the speed of the video, click speed in the toolbar to open the speed editor. Then change as you desire.
- Step 6: You can also add transitions, titles, and effects by opening the panels of transitions, effects, and tiles.
- Then drag a transition to the space between two video clips, same with titles to the subtitle and effect to the effect track.
- Step 7: Next, remove noise and background music by clicking the video track and tapping “detach” to separate the audio from the video.
- You can also add music to replace the background noise.
- Step 8: Finally, after the editing, you can export the GoPro video to your Mac device by setting the file name, format, file location, and video quality.
iMovie
Supported System: Mac only
This editor is designed to ensure an excelling editing process for Mac users. Therefore, beginners, content creators, and even hobbyists can utilize this video editor to edit their videos. Although iMovie is a free GoPro video editor, it offers incredible editing features to make your video look more professional. These features include HD and 4K video support and speed adjustment tools that can slow down or speed up your video clips.
Although it comes free on all Mac devices, iMovie also has tons of themes, templates, and presets to make editing a breeze. For example, you can select the video clips that will be automatically styled and edited with titles, transitions, and music. You can make all these changes with just a few clicks. In addition, you can also rearrange, trim, split, and even delete your ready-made video clips.
Furthermore, you can always modify the shift focus and depth of field while editing your video. However, it lacks some advanced features you will need while editing, such as Multicam, motion tracking, and 360 editing. On the other hand, it has a user-friendly interface with essential editing functions.
Pros
- It has a simple and user-friendly interface
- It is definitely beginner-friendly
Cons
- It lacks essential and advanced GoPro editing features and functions
Steps to Edit using iMovie
- Step 1: first, you have to launch the iMovie and create a video project.
- Step 2: Now, you can click the Import button to import your GoPro video files from your Mac to it.
- Step 3: Drag the video files from the program media library to the timeline for editing.
- Step 4: Load a song to the audio track if you wish to add background music to your video.
- Step 5: To split your video into smaller parts, right-click on a clip.
- Step 6: to edit your GoPro video with advanced tools like color correction, crop, grading, speed, and volume, simply move to the toolbar just above the timeline.
- Step 7: to add title, and transitions, you can drag a title and transition to the desired space between two clips.
- Step 8: preview and export your GoPro video from iMovie in the preferred format.
More Paid GoPro video editor on Mac to Cut MP4 Videos
If you desire GoPro video editors that offer more than just the basic editing features, you should try the paid GoPro video editors. The paid GoPro video editors offer more professional editing features for Mac users. In this section, you’ll learn about our top three paid GoPro video editors to edit your GoPro videos on Mac.
Adobe Premiere Pro
Supported System: Windows and Mac
This paid GoPro video editor is best for professionals who have experience creating video projects. This GoPro editing tool is compatible with Mac and Windows devices and also supports several video formats. Professionals use this video editor to edit top-notch videos such as Hollywood action movies and TV shows. In addition, it offers a long list of powerful features ideal for standard and action video editing.
Some of these professional features include Multicam, 360-degree, VR editing, and will export in up to 8k. The GoPro video editors also have a lot of sophisticated video stabilization tools, such as the warp stabilizer effect. The video stabilizer function help reduce camera shake, especially when zooming in. Other features include unlimited video tracks, lens distortion, access to the creative cloud and will match video to music.
In addition, the GoPro video editor only offers a 7-days free trial and is relatively expensive. Although Adobe Premiere Pro video editor is professional and high-quality, it has a steep learning curve. The steep learning curve is not appropriate for beginners.
Pros
- It supports all video formats
- It supports real-time video editing
Cons
- The system requirements are resource-intensive
- Not ideal for beginners
Steps to Edit using Adobe Premiere Pro
- Step 1: Import and cut your video files on PowerDirector. You can begin by cutting out any unnecessary parts from the video. You can also add text transitions, text, and other edits.
- Step 2: Next, stabilize the video using the Warp stabilizer. Double click on Warp stabilizer on the Effects menu to stabile the video.
- Step 3: Finally, you can add audio and export the edited video file. Click on file, tap on export and select the format, presets, and the location to export your file.
Adobe After Effect
Supported System: Windows and Mac
This GoPro editor is compatible with Mac and offers many basic video editing features to ensure top-notch results. This GoPro editor is great for editors who want to add special effects like motion tracking to their videos. The after-effect function allows you to add a graphical element to a moving person, animal, car, or camera. You can also create cartoon effects, logos, stickers, or text to move seamlessly with the action onscreen.
In addition to its essential editing tools, you can also remove elements from your video with the pro-level digital rotoscoping tools. You can also use the after-effect to add elements to the missing video. Other features include 360, 3D, VR editing, transitions, lens distortions, and distortion effects for professional editing.
This GoPro video editor is an effective software and is best for adding visual effects to action camera videos. However, it lacks some essential video editing tools that you might need to make your video Hollywood standard. In addition, it also has a steep learning curve which makes it not ideal for beginners. Furthermore, as a GoPro video editor looking to do just the basic edits, then the After Effects is definitely not for you.
Pros
- It comes with realistic special effects
- It has a high-quality noise reduction
Cons
- It is not for beginners due to the steep learning curve
- It comes with only a 7-day free trial
- It is quite expensive
Steps to Edit using Adobe After Effects
- Step 1: Import your video by going to ‘file’ on the menu and clicking ‘import’ from the dropdown menu.
- You can begin by cutting out any unnecessary parts from the video. You can also add text transitions, text, and other edits.
- Step 2: Next, you can apply necessary editing such as trimming, transitioning, and other edits.
- Step 3: Finally, you can add audio and export the edited video file. Click on file, tap on export and select the format, presets, and the location to export your file.
Final Cut Pro
Supported System: Mac only
The Final Cut Pro is another best-paid GoPro video editor for editing GoPro videos on Mac. This video editor is ideal for editing 360 GoPro videos. This is because it offers all the editing tools you need to edit, import, and deliver both stereoscopic and monoscopic 360 videos. The GoPro video editors come with a lot of powerful features such as background noise removal, Multicam editing, color adjustment tools, and an object tracker.
You can use the GoPro video editor to visualize, remove camera rigs, change orientation, or straighten the horizon. Final Cut Pro can also easily apply graphics and effects to 360 videos and add 360 videos to regular videos with the tiny planet effect. With electronic stabilization, you can clean up your video and enhance your audience’s viewing experience. The magnetic timeline feature eliminates clip collisions and streamlines the video editing process.
Although the GoPro video editor has some notable GoPro features, it is expensive to purchase. However, it has a generous 90-day free trial to explore. It is also not beginner-friendly and requires time to learn, especially for new GoPro editors to understand. In addition, it supports several Video formats.
Pros
- It has convenient asset management functions
- Precision editing is sure with the magnetic timeline function
Cons
- It is expensive
- It is not ideal for GoPro beginners
Steps to Edit using Final Cut Pro
- Step 1: First, Launch the program
- Step 2: Import your video files to the timeline and begin editing.
- Step 3: Next, you can apply necessary editing such as trimming, transitioning, and other edits.
- Step 4: Finally, you can add audio and export the edited video file. Click on file, tap on export and select the format, presets, and the location to export your file.
Which should I Choose: Free or Paid GoPro Video Editor?
Many of these GoPro video editors for Mac (free and paid) are available on the internet. Therefore, it can be hard sometimes to choose the right GoPro video editor for Mac. However, you’ll need to consider factors before making your choice. Here are some of these factors.
Level of Expertise
This is a vital factor you should put into consideration before choosing a GoPro video editor. As a beginner, you wouldn’t need a GoPro editor that offers complex editing functions that you can’t use. Also, as a professional, you shouldn’t go for an editor that lacks the necessary editing tools to meet your editing needs. As an editor, you should totally be on the lookout for an editor that supports both beginners and professionals. This will remove the need to search for a new video editor at any experience level.
Interface
Another factor to consider is the user interface of your chosen video editor. When you go for a more friendly user interface, you will be saving yourself the time to get familiar with the software. Is the video editor free or paid? Regardless of the answer, check out the user interface before choosing one.
Formats
You also need to ensure that the editing software doesn’t limit you to specific video formats. You should go for a GoPro video editor that supports the common and trendy video formats. This will allow you to convert your edited videos when you need to share them.
Now, most free GoPro video editors offer just limited features to users, limiting your editing course. Furthermore, most paid GoPro video editors focus on a professional level, making it difficult for new editors to use. Therefore, you should totally opt for a GoPro video editor that succinctly supports all your editing needs.
FAQs About Editing Gopro Videos
- Can I edit GoPro videos like a Professional? Yes, you can. Learn to use advanced video editing features. The ideal thing to do is pick a GoPro video editor with a user-friendly interface to enable you to learn these professional methods.
- What is the best GoPro video editor for Mac? The best GoPro video editor for Mac devices depends on your level of expertise and what you want to achieve.
- Can I edit a GoPro video? Yes, you can. Find a GoPro editing software compatible with your Mac devices and ideal for your level of experience.
Conclusion
There are several GoPro video editors, and the editor you choose depends on your needs and your budget. It also depends on your level of experience and the equipment on the ground. However, we have a list of different GoPro video editors for you. Examine our reviews of these GoPro video editors and see which is perfect for you.
15 Must-Use Gifs Editors
15 Must-Use Gifs Editors in 2024
An easy yet powerful editor
Numerous effects to choose from
Detailed tutorials provided by the official channel
Several websites and companies use the graphics interchange format that is the GIF. It can be seen to be used by a wide number of people on the internet and its format is supported by all platforms. The common goal of all the users can be satisfied.
Are you looking to create and edit gifs online or on your laptop but cannot find a suitable way out?
Finding the best and most user friendly GIF maker is not very hard, especially considering that free gif editor software is offered by so many providers. But if you’re only starting your journey with apps to make GIFs, it can be a difficult choice.
In this article
01 [How to Make GIF Interesting?](#Part 1)
02 [Top 5 Editors for Windows](#Part 2)
03 [Top 5 Editors for iPhone/Android](#Part 3)
04 [Top 5 Editors for Animated GIF Editing](#Part 4)
Part 1 How to Make GIF Interesting?
There are several ways by which a GIF can be made interesting. You can use colorful graphics and drop duplicate frames. Using fewer colors lets you make longer and more involved gifs.
Part 2 Top 5 Editors for Windows
Below are the top 5 editors which will help you to form GIFs for Windows: -
01Adobe Photoshop
Adobe Photoshop could be a useful device for making videos, image redaction, and GIF editing. This GIF code for Windows can allow you to import a GIF file so begin with the modification process.
Therefore, GIF editing is a breeze as you’ll alter the effects, modification the frame animation within the Timeline section, and do plenty a lot with this tool. You’ll simply utilize the free trial version to urge accustomed to the tool initial and then opt for the premium version to try to a lot more.
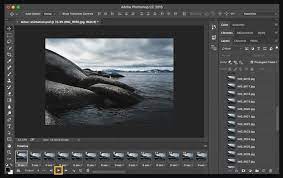
02EaseUS Video Editor
In the context of GIF makers, EaseUS Video Editor can also be said as one of the best. Free templates of texts, filters, elements, overlays, transitions, and music are available here which its users create GIF images with easily. You can also create lively and fully animated images, convert MP4 to GIFs and share it on YouTube, or other social media platforms.
The capabilities of this animated GIF maker for Windows are not restrained to this alone, as it can be used to edit all kinds of images, audio, and videos.
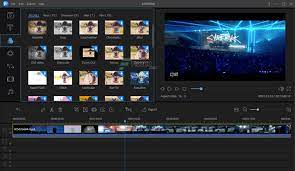
03GIF Animator
GIF animator editor is one of the first-rate GIF makers and is an awesome device for you if you desire to create GIF images, banners, buttons, and GIF videos. The device is very convenient to use and is a favorite of animators and designers.
The measurement of the photo can be modified and alongside that, it is feasible to control the frames, hastily cross texts, and enhance. Corrections to the movies can be brought and the built-in photograph editor can be used to rectify photographs and pictures, you can draw on them and you can convert movies to GIFs by the usage of the fragmented section of the video files.
04**Wondershare Filmora Video Editor **
If you are searching for nice animated GIF makers for Windows computers, then Wondershare Filmora’s animated movies and GIF editor device may want to be a brilliant choice. That’s due to the fact with this GIF maker Windows device lets you add a video, convert it to the GIF structure and then edit it later with its super features.
The interactive UI helps customers manner greater than one hundred fifty file codecs easily. With this device, you can crop, pace up a video, alter the body size, and caption it. Additionally, you add texts, add animation consequences to the images, and alter the pictures and movies in a few steps.

Wondershare Filmora - Best Video Editor for Mac/Windows
5,481,435 people have downloaded it.
Build unique custom animations without breaking a sweat.
Focus on creating epic stories and leave the details to Filmora’s auto features.
Start a creative adventure with drag & drop effects and endless possibilities.
Filmora simplifies advanced features to save you time and effort.
Filmora cuts out repetition so you can move on to your next creative breakthrough.
05Wondershare UniConverter
Wondershare UniConverter is one of the fine image, audio, and video editor and converter out there, and ranked the excellent GIF maker here. This GIF editor app is easy for customers and will furnish a pleasant platform for novices to operate their tasks. And when performed to create and edit GIF files, a person can export the GIF archives to both Android or iPhone barring having to use iTunes.
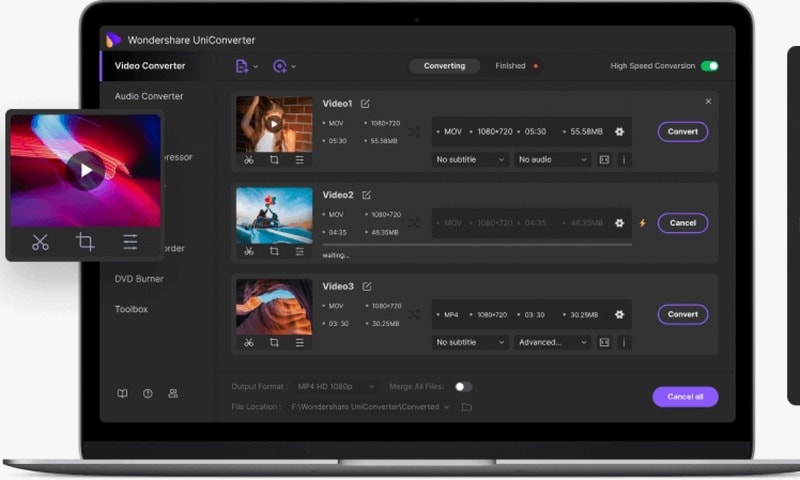
Part 3 Top 5 Editors for iPhone/Android
01PixelStudio
Pixel Studio is an animation app for pixel artwork fans. You can draw your little creations with pixel art. It additionally comes with a textual content tool, aid for matters like Samsung S-Pen, and it auto-saves so you don’t lose work. You can export your creations to GIF as nicely and that makes Pixel Studio one of the quality apps for customized GIFs. It’s normally an artwork app so meme lords may additionally want to put in a little greater effort than usual, however, the consequences are normally well worth it.
02Giphy Cam
Giphy Cam is one of the more recent gif editing apps. The digicam data is a brief phase of video. You can alter that video with lots of filters, different effects, stickers, text, and more. It additionally has a five-shot burst mode alongside its video mode. This is likely the excellent GIF/camera app hybrid. It doesn’t have any digital camera features; however, it does GIFs higher than the others by way of a large margin. It’s free with no in-app purchases.
03PowerDirector
PowerDirector is one of many videos modifying apps with GIF support. This one simply takes place to be higher than most of the different ones. It’s a video editor app. Thus, it’ll have comparable features. However, two of the export codecs encompass GIF nonetheless pix and animated GIFs. This will work first-class for turning a video into a shorter GIF. The app is free to download and play with. You may additionally want to buy extra aspects by using in-app purchases.
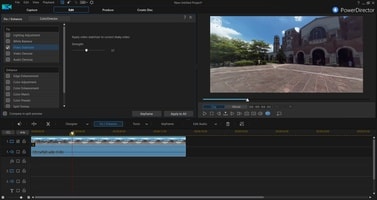
04ImgPlay – GIF Maker
ImgPlay is a popular GIF editing app that is available for Android and iOS. You have the option of using an existing video or shooting one using your phone’s camera. In GIFs, you can apply 30 effects, crop a portion of your choice, and modify the frame rate.
05Motion Stills
Motion Stills is a Google app that allows you to record short films and turn them into looping GIFs. You can use the app to take a short 3s clip with a single tap or utilize the Fast Forward feature to condense an existing video into a short one. To make yips GIFs even better, you may add motion text and emoticons. After that, save it as a GIF and send it to your friends.
Part 4 Top 5 Editors for Animated GIF Editing
01Giphy
GIPHY is a designing tool that helps customers to create extraordinary GIFs, stickers, and backdrops. You can edit your plan with filters, captions, stickers, and different plan elements. The popular codecs for GIF uploads are JPG, PNG, GIF, MP4, or MOV, whilst the conventional file codecs to convert to stickers are JPG or PNG.
GIPHY permits you to paste URLs from specific sources such as Vimeo, YouTube, GIPHY, and others. The animated GIF maker software program makes it convenient for customers to edit and organize the uploaded archives in the favored order.
02Imgur
It’s a website that makes it simple to make GIFs. Simply paste the video URL into the web app and wait for it to process. After that, all you must do now is set the start time and duration of your GIF.
03KickMyGraphics
The utility comes with a humble person interface and it approves you to create animated GIFs from neighborhood images. In addition, you can additionally paste snapshots from your clipboard at once to the application. The utility additionally helps video files; however, you want to convert the video earlier than you can edit it. The utility affords a stay preview so you can see how your animation appears at any time. You can additionally see all handy frames and dispose of useless frames with ease.
As for editing, you can’t add your textual content or alter the brightness of your frames, however, you can trade their width, peak, and zoom level. You can additionally allow Loopback or Reverse mode and set delay, step frames, and a variety of repeats. You can additionally configure output first-class right from the application.
04Instagiffer
Instagiffer is some other easy software that lets you create animated GIFs on your PC. This utility affords a humble consumer interface; however, it makes up for it with an extensive variety of features. The software approves you to convert nearby movies to GIFs, however, you can additionally paste a YouTube URL and convert an online video to GIF with ease. According to the developer, the software additionally works with different video web hosting websites.
05GIMP
The software is free, so you can download and use it except for any restrictions. GIMP is best for picture designers and it comes with all preferences that an image editor needs. You can without problems edit your images, exchange their color, hue, saturation, or brightness, and add exceptional outcomes to them.
In addition, you can create special creations thanks to the built-in layer system. It’s worth citing that the software additionally helps programming algorithms so you can effortlessly edit your photos with the use of scripts.

● Key Takeaways from This Episode →
● If you are typically worried about how you can be able to come up with fascinating GIFs, you ought to hold in thought that you don’t have to create them from scratch.
● You can be capable to advance inspiring GIFs from current movies and photos eight after GIF editor software program free download.
● Hopefully, you are now capable to pick out a perfect GIF creator to use for your modifying tasks.
Several websites and companies use the graphics interchange format that is the GIF. It can be seen to be used by a wide number of people on the internet and its format is supported by all platforms. The common goal of all the users can be satisfied.
Are you looking to create and edit gifs online or on your laptop but cannot find a suitable way out?
Finding the best and most user friendly GIF maker is not very hard, especially considering that free gif editor software is offered by so many providers. But if you’re only starting your journey with apps to make GIFs, it can be a difficult choice.
In this article
01 [How to Make GIF Interesting?](#Part 1)
02 [Top 5 Editors for Windows](#Part 2)
03 [Top 5 Editors for iPhone/Android](#Part 3)
04 [Top 5 Editors for Animated GIF Editing](#Part 4)
Part 1 How to Make GIF Interesting?
There are several ways by which a GIF can be made interesting. You can use colorful graphics and drop duplicate frames. Using fewer colors lets you make longer and more involved gifs.
Part 2 Top 5 Editors for Windows
Below are the top 5 editors which will help you to form GIFs for Windows: -
01Adobe Photoshop
Adobe Photoshop could be a useful device for making videos, image redaction, and GIF editing. This GIF code for Windows can allow you to import a GIF file so begin with the modification process.
Therefore, GIF editing is a breeze as you’ll alter the effects, modification the frame animation within the Timeline section, and do plenty a lot with this tool. You’ll simply utilize the free trial version to urge accustomed to the tool initial and then opt for the premium version to try to a lot more.
02EaseUS Video Editor
In the context of GIF makers, EaseUS Video Editor can also be said as one of the best. Free templates of texts, filters, elements, overlays, transitions, and music are available here which its users create GIF images with easily. You can also create lively and fully animated images, convert MP4 to GIFs and share it on YouTube, or other social media platforms.
The capabilities of this animated GIF maker for Windows are not restrained to this alone, as it can be used to edit all kinds of images, audio, and videos.
03GIF Animator
GIF animator editor is one of the first-rate GIF makers and is an awesome device for you if you desire to create GIF images, banners, buttons, and GIF videos. The device is very convenient to use and is a favorite of animators and designers.
The measurement of the photo can be modified and alongside that, it is feasible to control the frames, hastily cross texts, and enhance. Corrections to the movies can be brought and the built-in photograph editor can be used to rectify photographs and pictures, you can draw on them and you can convert movies to GIFs by the usage of the fragmented section of the video files.
04**Wondershare Filmora Video Editor **
If you are searching for nice animated GIF makers for Windows computers, then Wondershare Filmora’s animated movies and GIF editor device may want to be a brilliant choice. That’s due to the fact with this GIF maker Windows device lets you add a video, convert it to the GIF structure and then edit it later with its super features.
The interactive UI helps customers manner greater than one hundred fifty file codecs easily. With this device, you can crop, pace up a video, alter the body size, and caption it. Additionally, you add texts, add animation consequences to the images, and alter the pictures and movies in a few steps.
Wondershare Filmora - Best Video Editor for Mac/Windows
5,481,435 people have downloaded it.
Build unique custom animations without breaking a sweat.
Focus on creating epic stories and leave the details to Filmora’s auto features.
Start a creative adventure with drag & drop effects and endless possibilities.
Filmora simplifies advanced features to save you time and effort.
Filmora cuts out repetition so you can move on to your next creative breakthrough.
05Wondershare UniConverter
Wondershare UniConverter is one of the fine image, audio, and video editor and converter out there, and ranked the excellent GIF maker here. This GIF editor app is easy for customers and will furnish a pleasant platform for novices to operate their tasks. And when performed to create and edit GIF files, a person can export the GIF archives to both Android or iPhone barring having to use iTunes.
Part 3 Top 5 Editors for iPhone/Android
01PixelStudio
Pixel Studio is an animation app for pixel artwork fans. You can draw your little creations with pixel art. It additionally comes with a textual content tool, aid for matters like Samsung S-Pen, and it auto-saves so you don’t lose work. You can export your creations to GIF as nicely and that makes Pixel Studio one of the quality apps for customized GIFs. It’s normally an artwork app so meme lords may additionally want to put in a little greater effort than usual, however, the consequences are normally well worth it.
02Giphy Cam
Giphy Cam is one of the more recent gif editing apps. The digicam data is a brief phase of video. You can alter that video with lots of filters, different effects, stickers, text, and more. It additionally has a five-shot burst mode alongside its video mode. This is likely the excellent GIF/camera app hybrid. It doesn’t have any digital camera features; however, it does GIFs higher than the others by way of a large margin. It’s free with no in-app purchases.
03PowerDirector
PowerDirector is one of many videos modifying apps with GIF support. This one simply takes place to be higher than most of the different ones. It’s a video editor app. Thus, it’ll have comparable features. However, two of the export codecs encompass GIF nonetheless pix and animated GIFs. This will work first-class for turning a video into a shorter GIF. The app is free to download and play with. You may additionally want to buy extra aspects by using in-app purchases.
04ImgPlay – GIF Maker
ImgPlay is a popular GIF editing app that is available for Android and iOS. You have the option of using an existing video or shooting one using your phone’s camera. In GIFs, you can apply 30 effects, crop a portion of your choice, and modify the frame rate.
05Motion Stills
Motion Stills is a Google app that allows you to record short films and turn them into looping GIFs. You can use the app to take a short 3s clip with a single tap or utilize the Fast Forward feature to condense an existing video into a short one. To make yips GIFs even better, you may add motion text and emoticons. After that, save it as a GIF and send it to your friends.
Part 4 Top 5 Editors for Animated GIF Editing
01Giphy
GIPHY is a designing tool that helps customers to create extraordinary GIFs, stickers, and backdrops. You can edit your plan with filters, captions, stickers, and different plan elements. The popular codecs for GIF uploads are JPG, PNG, GIF, MP4, or MOV, whilst the conventional file codecs to convert to stickers are JPG or PNG.
GIPHY permits you to paste URLs from specific sources such as Vimeo, YouTube, GIPHY, and others. The animated GIF maker software program makes it convenient for customers to edit and organize the uploaded archives in the favored order.
02Imgur
It’s a website that makes it simple to make GIFs. Simply paste the video URL into the web app and wait for it to process. After that, all you must do now is set the start time and duration of your GIF.
03KickMyGraphics
The utility comes with a humble person interface and it approves you to create animated GIFs from neighborhood images. In addition, you can additionally paste snapshots from your clipboard at once to the application. The utility additionally helps video files; however, you want to convert the video earlier than you can edit it. The utility affords a stay preview so you can see how your animation appears at any time. You can additionally see all handy frames and dispose of useless frames with ease.
As for editing, you can’t add your textual content or alter the brightness of your frames, however, you can trade their width, peak, and zoom level. You can additionally allow Loopback or Reverse mode and set delay, step frames, and a variety of repeats. You can additionally configure output first-class right from the application.
04Instagiffer
Instagiffer is some other easy software that lets you create animated GIFs on your PC. This utility affords a humble consumer interface; however, it makes up for it with an extensive variety of features. The software approves you to convert nearby movies to GIFs, however, you can additionally paste a YouTube URL and convert an online video to GIF with ease. According to the developer, the software additionally works with different video web hosting websites.
05GIMP
The software is free, so you can download and use it except for any restrictions. GIMP is best for picture designers and it comes with all preferences that an image editor needs. You can without problems edit your images, exchange their color, hue, saturation, or brightness, and add exceptional outcomes to them.
In addition, you can create special creations thanks to the built-in layer system. It’s worth citing that the software additionally helps programming algorithms so you can effortlessly edit your photos with the use of scripts.
● Key Takeaways from This Episode →
● If you are typically worried about how you can be able to come up with fascinating GIFs, you ought to hold in thought that you don’t have to create them from scratch.
● You can be capable to advance inspiring GIFs from current movies and photos eight after GIF editor software program free download.
● Hopefully, you are now capable to pick out a perfect GIF creator to use for your modifying tasks.
Also read:
- New In 2024, Best Android Apps For Creating Slow Motion Videos
- Are You Seeking an Answer for What Is a LUT in the Video? In This Article, We Will Provide You with Detailed Information About LUTs and Their Utility
- 8 Best Sites to Get Glitch Transition for Premiere Pro for 2024
- New Convert Your Videos to 60 FPS Using These Excellent Tools
- New How Did AI Video Games Act More Human Than Human, In 2024
- New Srt File Creator
- Updated 10 Best Meme Text to Speech Tools Windows, Mac, Android, iPhone
- New 2024 Approved Guide To Scaling and Setting Videos in Filmora | Tutorial
- Updated How to Enable and Use OBS Zoom Camera for 2024
- Updated 33 Best Video Splitter Recommended
- How to Animate Your Designs With Canva GIF
- New In 2024, Easy Guide to Apply Slow Zoom Effects to Videos
- How to Crop a Video in Windows Media Player
- Updated Here, the Main Discussion Is Regarding the Split of the Audio From the Video in the Sony Vegas Pro. There Are Also some Details About the Substitute, Which Is Wondershare Filmora for 2024
- New In 2024, How To Add Scrolling Text Effect
- New 2024 Approved How Windows Movie Maker Save MP4 File
- New Ultimate Guide on How to Film Better in Public
- New In 2024, How to Create a Clideo Slideshow Simply
- New In 2024, Are You Eager to Discover All About Dynamic Videos? You Are in the Right Place because This Article Provides Insight Into Dynamic Video Collages
- Updated 8 Frame Rate Video Converters You Must Try for 2024
- New Looking for Ways to Compress Your Videos for Instagram? Keep Reading to Know About some of the Best Video Compressors for Instagram for 2024
- New In 2024, 10+ Royalty-Free 5 Second Countdown Footage HD & 4K Clips Included
- 2024 Approved This Article Will Show You the Steps to Make Coin Magic in Videos with Filmora
- In 2024, How to Add Effects in Premiere Pro
- New 2024 Approved In This Article, You Will Learn Easy Ways to Edit Videos Using a Mouse in Wondershare Filmora. You Can Do Video Editing without a Keyboard After Reading This Article
- Updated 2024 Approved Unlock Your Video Editing Potential With Filmora From Wondershare
- New In 2024, Best Movie Title Maker
- New 2024 Approved If Youre Trying to Create a Countdown Effect, but Youre Not Sure Where to Start, Then This Post Is Going to Show You some Ways to Create a Countdown Animation for Your Videos
- Updated Best Video Title Generators for 2024
- New How To Import and Adjust the Video Clips on Wondershare Filmora?
- Learn Everything About Leeming LUT Pro for 2024
- A Review of Efectum App Making Slow Motion Video
- New Quick Answer What Is a Transparent Logo and Why Do You Need It
- In 2024, How To Use Special Features - Virtual Location On Realme V30T? | Dr.fone
- In 2024, AddROM Bypass An Android Tool to Unlock FRP Lock Screen For your Oppo A78 5G
- All About Factory Reset, What Is It and What It Does to Your Nubia Z50S Pro? | Dr.fone
- 3 Best Tools to Hard Reset Realme C53 | Dr.fone
- New 2024 Approved Learn 3D Logo Animation and Templates
- Edit and Send Fake Location on Telegram For your Vivo Y27 4G in 3 Ways | Dr.fone
- In 2024, 3 Things You Must Know about Fake Snapchat Location On Oppo Reno 10 5G | Dr.fone
- How to Retrieve deleted photos on Xiaomi Redmi K70 Pro
- Google Play Services Wont Update? 12 Fixes are Here on Oppo Reno 11F 5G | Dr.fone
- Getting the Pokemon Go GPS Signal Not Found 11 Error in Lava Yuva 3 Pro | Dr.fone
- How to Transfer from Apple iPhone XS to iPhone 8/11/11 Pro | Dr.fone
- App Wont Open on Your Samsung Galaxy A24? Here Are All Fixes | Dr.fone
- Unlocking Made Easy The Best 10 Apps for Unlocking Your Vivo Y36 Device
- How To Restore a Bricked Realme 12 Pro+ 5G Back to Operation | Dr.fone
- 5 Solutions For Lenovo ThinkPhone Unlock Without Password
- 2024 Approved Talking Photo | Wondershare Virbo
- Title: New Basic Introduction for LumaFusion Color Grading
- Author: Morgan
- Created at : 2024-05-19 05:11:55
- Updated at : 2024-05-20 05:11:55
- Link: https://ai-video-editing.techidaily.com/new-basic-introduction-for-lumafusion-color-grading/
- License: This work is licensed under CC BY-NC-SA 4.0.
