
New Camtasia Review – Is It The Best Video Editor for 2024

Camtasia Review – Is It The Best Video Editor?
If you are planning to record your screen and create a tutorial video, you will need a screen recording application. After capturing your video, you need to edit your videos so that you can remove unnecessary parts and add texts and titles wherever necessary. You will need a video editor with screen recorder, and Camtasia video editor is a suitable choice.
Camtasia lets you capture your gameplay as well as create software demo videos. You can choose from video templates and themes to create professional-quality videos as per your requirements. You can add transitions, effects, and annotations to make the videos attractive and engaging. But is Camtasia editor really the best one or is there a better alternative available? Find out from our Camtasia review.
Part 1. How to Download and Install Camtasia?
TechSmith Camtasia is compatible with both Windows 10 or above and Mac 10.14 or above. Camtasia is not a lightweight video editor as it demands 8GB of RAM. As far as the processor goes, it requires at least a 6th Gen Core i3 processor or M1 Apple processor. Therefore, if you have a low-end computer, you may experience lag and crash.
Camtasia is a premium video editor, and you can download its free trial version before opting for its premium version. The price plans differ for individuals, businesses, education, and government organizations. Here are the steps to download and install Camtasia free trial version.
Step 1: Open the web browser on your computer and visit “www.techsmith.com/download/camtasia” .
Step 2: Click on Windows Download or Mac Download as per your operating system.
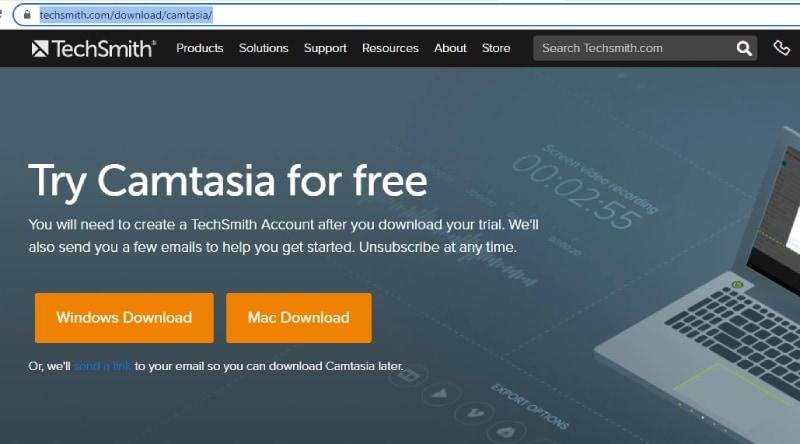
Step 3: Wait for some time for the installer software to get downloaded. Thereafter, click on the installer file to install Camtasia following the on-screen instructions.
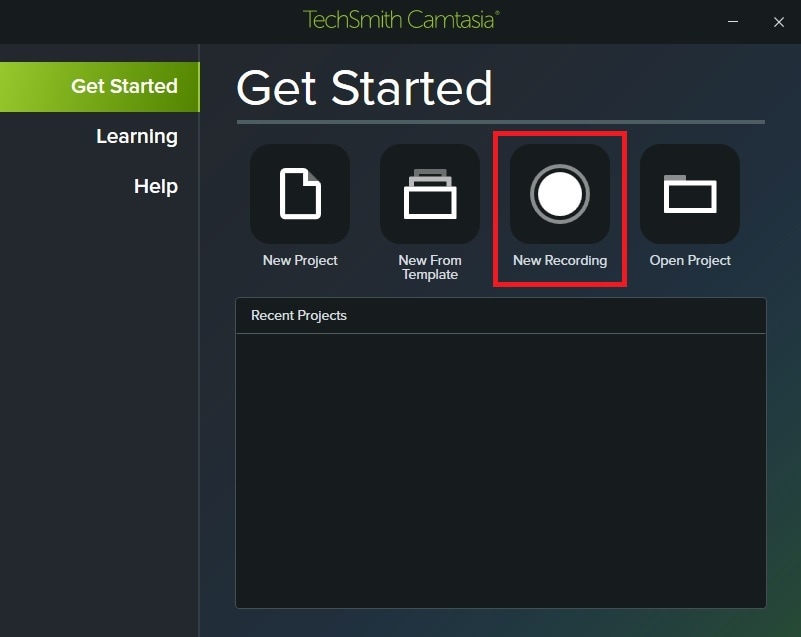
Step 4: After installation, launch Camtasia and click on New Recording option to capture your screen. If you want to edit an existing video, you need to click on New Project option.
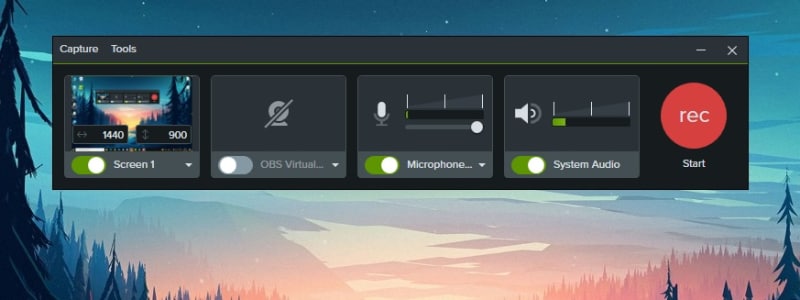
Step 5: If you have clicked on New Recording option, you will get a widget where you need to select your screen to start capturing. You can also select external webcam and microphone. Once you are ready to recording, Click on Rec red button.
Part 2. Key Features of Camtasia
Camtasia is a versatile video editor that competes with all the premium video editors in the market. Hence, there is no dearth of features and functionalities in Camtasia editor, and we are going to highlight the key features that you should be aware of.
Recording – Camtasia lets you capture your screen as well as webcam video easily. You can also record system audio as well as external mic audio. This is useful in recording gameplay with live reaction, tutorial, and training videos as well as presentation videos. You can capture any specific region of the screen as well as use greenscreen effect for webcam videos.
Templates – Camtasia is tailor-made for creating video tutorials, how-to videos, software demo videos, presentation and instructional videos, and training videos. This is why it comes with video templates that users can use immediately to create any specific type of video instantly. In fact, you can customize these templates and create your own theme so that the videos get personalized branding.
Presets and Transitions – There are loads of presents and transitions that you can include in your video to uplift the video content and quality. You can also create custom styles and configure them for regular use in your videos. Transitions are extremely useful to avoid pauses and put them in between slides.
PowerPoint Integration – You can turn your slides on PowerPoint into video instantly with Camtasia. Camtasia comes with PowerPoint integration through which you can import slides in Camtasia and create a video out of it with transitions and other effects. Alternatively, you can record your presentation in PowerPoint in video format.
Annotations and Interactivity – Camtasia lets you create videos where the viewers can interact and take actions. There are options for callouts, quizzes, textboxes, and much more so that the viewers can engage themselves in the video. Besides, you can use arrows, shapes, and other objects to highlight parts in your video for better explanation.
Audio and Cursor Effects – Camtasia has a wide range of audio effects that you apply to your audio recordings or import audio files. Besides, there are options for background noise removal, adjusting gain and pitch, compression, and emphasize. Similarly, you can highlight your cursor movement, spotlight the area as well as magnify when required.
Part 3. How to Edit Videos with Camtasia?
Camtasia is essentially a video editor where you can all types of videos as per your requirements. Camtasia has a robust timeline where you can import different types of video and audio files and arrange them sequentially. You can have multiple layers on top of another such as texts, shapes, photos, voiceover, and other media files as required. Camtasia has a powerful canvas where you can preview your edited video as well as resize and rotate the edited video. Here are the steps to edit videos with Camtasia.
Step 1: Open Camtasia and click on New Project. Sign into your Camtasia account to start editing your recorded video.

Step 2: Go to Media and click on Import Media. Import all the media files starting from video clips to audio clips and even photos.

Step 3: From Media Bin, drag and drop the media files to the timeline. Keep the video files in one track, audio files in another track, and likewise. Arrange them properly so that they are placed sequentially. You can trim them directly from the timeline and stretch the music file to cover the entire video as required.
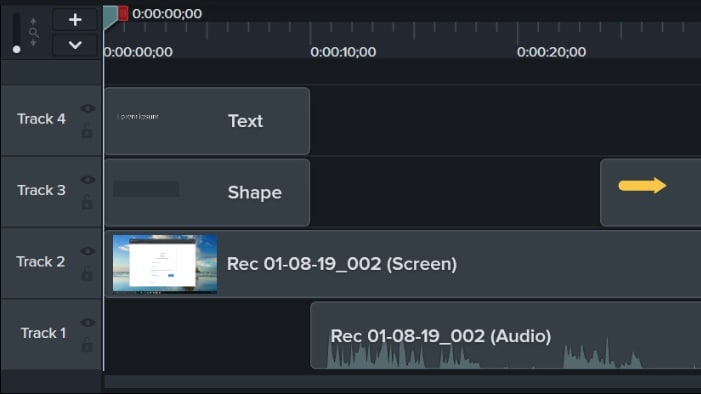
Step 4: Go to Annotation to add shapes, texts, arrows, and callouts. Go to Transitions and drag and drop transitions of your choice in between video clips on the timeline as you think perfect.
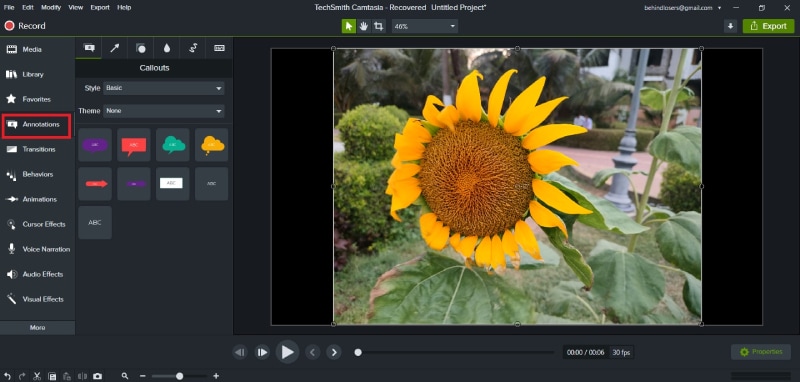
Step 5: Go to Audio Effects to enhance the audio of the video. Moreover, you can check and apply animations, behaviors(text effects), cursor effects, visual effects as well as interactivity as you think relevant.
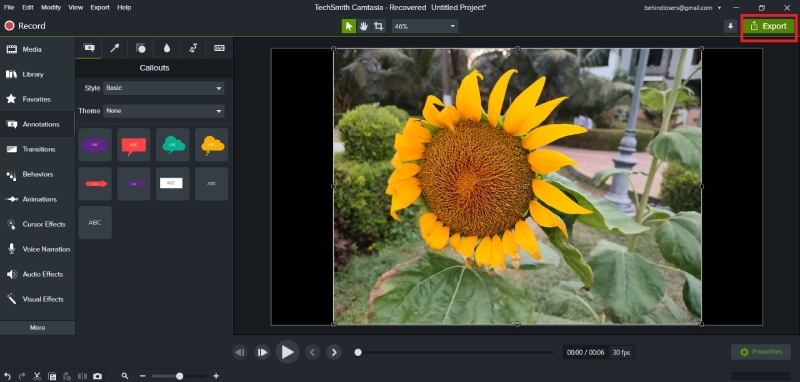
Step 6: On the canvas, check out how your edited video looks like. Once you are satisfied, click on Export button to save the video on your hard drive.
Part 4. Camtasia Alternative to Edit Videos
There are various reasons why people look for a better alternative to Camtasia after trying out its free trial. First of all, you need a high-end computer for Camtasia to run smoothly. Second, there are limited effects and animations available for a premium video editor. Users have also reported crashes and bugs while editing high-resolution videos. We recommend Wondershare Filmora as the best alternative to Camtasia edit video.
Filmora is a premium video editor with video capturing option just like Camtasia. Filmora scores over Camtasia as it has minimum system requirements, and there are loads of visual and audio effects including the trending ones. Besides, there are stock media files that you can include in your video. Moreover, Filmora supports more file formats for importing and exporting. Here are the steps to edit videos on Filmora.
For Win 7 or later (64-bit)
For macOS 10.12 or later
Step 1: Download and install Filmora on your computer. Filmora is available for Windows and Mac.
Step 2: Launch Filmora and click on New Project. Drag and drop all your media files into Project Media folder.
Step 3: Drag and place the video files one by one on the timeline as per your requirements. Place audio files in the same way on a different track.

Step 4: Go to Transitions located at the top bar and drag and drop any transition in between video clips and photos wherever required. You can also insert Titles, Effects, and Elements from the top bar.

Step 5: Go to Audio located at the top bar, and drag and drop audio effects on the audio files on the timeline. You can also check the Stock Media and use them in your video as required.
Step 6: Play the video once everything is done, and click on Export button to save the video file on your hard drive.

Part 5. FAQs about Camtasia
1. Can I use Camtasia for free?
You can download the free trial version of Camtasia and use it for a limited number of days. The free version has all the features unlocked, but the output video will have Camtasia watermark.
2. Is Camtasia good for video editing?
Camtasia is good for video editing if your video belongs to training and tutorial videos. There are templates and annotations available that are tailor-made to edit how-to videos and add interactivity for the viewers. However, for an all-rounder video editor, we recommend Filmora over Camtasia.
3. How do I trim a video in Camtasia?
Once your import the video and place it on the timeline, use green and red to select the part that you want to trim. Once the selection is done, click on Cut(scissor) icon. The portion will be cut, and you can paste it anywhere if required. Lastly, join the parts of the video on the timeline after trimming any part out.
4. Can I record my screen with Camtasia?
Yes, Camtasia allows you to record your screen, webcam, or both simultaneously. You can also capture system audio or record your own voiceover. This feature is useful for creating tutorials, demos, or presentations.
5. How do I export my videos from Camtasia?
Once you have finished editing your videos, you can export them in various formats, such as MP4, WMV, MOV, and AVI. Camtasia also allows you to customize the video settings, such as resolution, frame rate, and bitrate. You can also upload your videos directly to YouTube, Vimeo, or Screencast.com from Camtasia.
For macOS 10.12 or later
Step 1: Download and install Filmora on your computer. Filmora is available for Windows and Mac.
Step 2: Launch Filmora and click on New Project. Drag and drop all your media files into Project Media folder.
Step 3: Drag and place the video files one by one on the timeline as per your requirements. Place audio files in the same way on a different track.

Step 4: Go to Transitions located at the top bar and drag and drop any transition in between video clips and photos wherever required. You can also insert Titles, Effects, and Elements from the top bar.

Step 5: Go to Audio located at the top bar, and drag and drop audio effects on the audio files on the timeline. You can also check the Stock Media and use them in your video as required.
Step 6: Play the video once everything is done, and click on Export button to save the video file on your hard drive.

Part 5. FAQs about Camtasia
1. Can I use Camtasia for free?
You can download the free trial version of Camtasia and use it for a limited number of days. The free version has all the features unlocked, but the output video will have Camtasia watermark.
2. Is Camtasia good for video editing?
Camtasia is good for video editing if your video belongs to training and tutorial videos. There are templates and annotations available that are tailor-made to edit how-to videos and add interactivity for the viewers. However, for an all-rounder video editor, we recommend Filmora over Camtasia.
3. How do I trim a video in Camtasia?
Once your import the video and place it on the timeline, use green and red to select the part that you want to trim. Once the selection is done, click on Cut(scissor) icon. The portion will be cut, and you can paste it anywhere if required. Lastly, join the parts of the video on the timeline after trimming any part out.
4. Can I record my screen with Camtasia?
Yes, Camtasia allows you to record your screen, webcam, or both simultaneously. You can also capture system audio or record your own voiceover. This feature is useful for creating tutorials, demos, or presentations.
5. How do I export my videos from Camtasia?
Once you have finished editing your videos, you can export them in various formats, such as MP4, WMV, MOV, and AVI. Camtasia also allows you to customize the video settings, such as resolution, frame rate, and bitrate. You can also upload your videos directly to YouTube, Vimeo, or Screencast.com from Camtasia.
For macOS 10.12 or later
Step 1: Download and install Filmora on your computer. Filmora is available for Windows and Mac.
Step 2: Launch Filmora and click on New Project. Drag and drop all your media files into Project Media folder.
Step 3: Drag and place the video files one by one on the timeline as per your requirements. Place audio files in the same way on a different track.

Step 4: Go to Transitions located at the top bar and drag and drop any transition in between video clips and photos wherever required. You can also insert Titles, Effects, and Elements from the top bar.

Step 5: Go to Audio located at the top bar, and drag and drop audio effects on the audio files on the timeline. You can also check the Stock Media and use them in your video as required.
Step 6: Play the video once everything is done, and click on Export button to save the video file on your hard drive.

Part 5. FAQs about Camtasia
1. Can I use Camtasia for free?
You can download the free trial version of Camtasia and use it for a limited number of days. The free version has all the features unlocked, but the output video will have Camtasia watermark.
2. Is Camtasia good for video editing?
Camtasia is good for video editing if your video belongs to training and tutorial videos. There are templates and annotations available that are tailor-made to edit how-to videos and add interactivity for the viewers. However, for an all-rounder video editor, we recommend Filmora over Camtasia.
3. How do I trim a video in Camtasia?
Once your import the video and place it on the timeline, use green and red to select the part that you want to trim. Once the selection is done, click on Cut(scissor) icon. The portion will be cut, and you can paste it anywhere if required. Lastly, join the parts of the video on the timeline after trimming any part out.
4. Can I record my screen with Camtasia?
Yes, Camtasia allows you to record your screen, webcam, or both simultaneously. You can also capture system audio or record your own voiceover. This feature is useful for creating tutorials, demos, or presentations.
5. How do I export my videos from Camtasia?
Once you have finished editing your videos, you can export them in various formats, such as MP4, WMV, MOV, and AVI. Camtasia also allows you to customize the video settings, such as resolution, frame rate, and bitrate. You can also upload your videos directly to YouTube, Vimeo, or Screencast.com from Camtasia.
For macOS 10.12 or later
Step 1: Download and install Filmora on your computer. Filmora is available for Windows and Mac.
Step 2: Launch Filmora and click on New Project. Drag and drop all your media files into Project Media folder.
Step 3: Drag and place the video files one by one on the timeline as per your requirements. Place audio files in the same way on a different track.

Step 4: Go to Transitions located at the top bar and drag and drop any transition in between video clips and photos wherever required. You can also insert Titles, Effects, and Elements from the top bar.

Step 5: Go to Audio located at the top bar, and drag and drop audio effects on the audio files on the timeline. You can also check the Stock Media and use them in your video as required.
Step 6: Play the video once everything is done, and click on Export button to save the video file on your hard drive.

Part 5. FAQs about Camtasia
1. Can I use Camtasia for free?
You can download the free trial version of Camtasia and use it for a limited number of days. The free version has all the features unlocked, but the output video will have Camtasia watermark.
2. Is Camtasia good for video editing?
Camtasia is good for video editing if your video belongs to training and tutorial videos. There are templates and annotations available that are tailor-made to edit how-to videos and add interactivity for the viewers. However, for an all-rounder video editor, we recommend Filmora over Camtasia.
3. How do I trim a video in Camtasia?
Once your import the video and place it on the timeline, use green and red to select the part that you want to trim. Once the selection is done, click on Cut(scissor) icon. The portion will be cut, and you can paste it anywhere if required. Lastly, join the parts of the video on the timeline after trimming any part out.
4. Can I record my screen with Camtasia?
Yes, Camtasia allows you to record your screen, webcam, or both simultaneously. You can also capture system audio or record your own voiceover. This feature is useful for creating tutorials, demos, or presentations.
5. How do I export my videos from Camtasia?
Once you have finished editing your videos, you can export them in various formats, such as MP4, WMV, MOV, and AVI. Camtasia also allows you to customize the video settings, such as resolution, frame rate, and bitrate. You can also upload your videos directly to YouTube, Vimeo, or Screencast.com from Camtasia.
How To Change Font In Premiere Pro
To know how to change font Premiere Pro, A video editing program called Adobe Premiere Pro enables you to change font Premiere Pro with high resolution and broadcast quality. Using this tool, you can simply add, modify, or import visuals and text for your films. Utilizing distinctive typefaces in your project gives the video a distinctive feel and helps you create a brand image. Regardless of the operating system you’re using, Premiere Pro makes it simple to edit videos. On this program, free downloadable fonts may also be added or imported.
People that need to create and edit video often utilize Premiere Pro. Knowing how to change font in Premiere Pro is a mandatory skill set. Premiere Pro comes with all you need to create basic text. You may also need After Effects if you want to create something a bit nicer. You may edit elements like text, color, size, and certain animations with Premiere Pro. Text is always added throughout the video editing process, and if you’re using Adobe Premiere Pro, this guide explains how to change font in Premiere Pro in detail.
Part 1. Steps to Change Font on Premiere Pro
Depending on the kind of projects you want to do in the future, learning how to edit text in Premiere Pro is a basic job and a critical talent to acquire. We’ll teach you how to add and modify the pre-installed typefaces in Adobe Premiere Pro so you may utilize them in your movie clip. The tools and functions in Adobe Premiere Pro allow video editors to add, alter, or change the typeface used in their films.
Step1Add Text Template
At the top of your project, and above the preview window, the Graphics panel will appear. When you choose it, the Essentials Graphics panel will appear on the Premiere Pro software’s right side. Select Browse. By dragging them into your sequence, you may utilize the graphic templates that are shown.
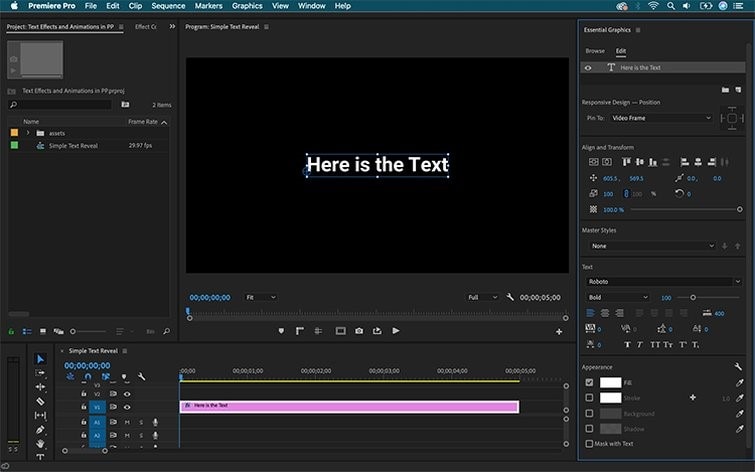
Step2Change Your Text
You may make simple text modifications, such as changing the font’s size, color, or style, by opening the Essential Graphics panel (Window > Essential Graphics).
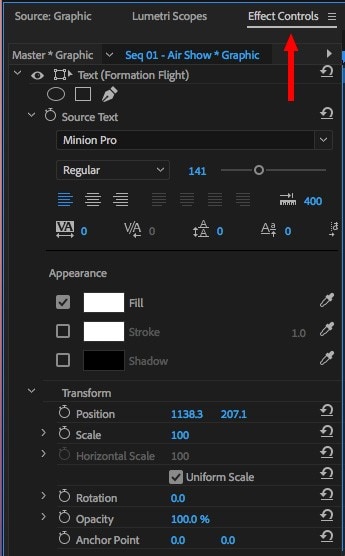
Step3Change the Font
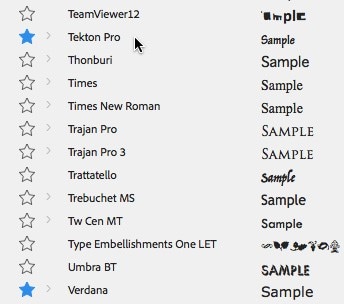
To open the title in the Monitor panel and choose the text, double-click the title under the Export view timeline. Change the font of your text by choosing a style from the Font Style option under the text tab of the Adjust panel.
Step4Export the Content
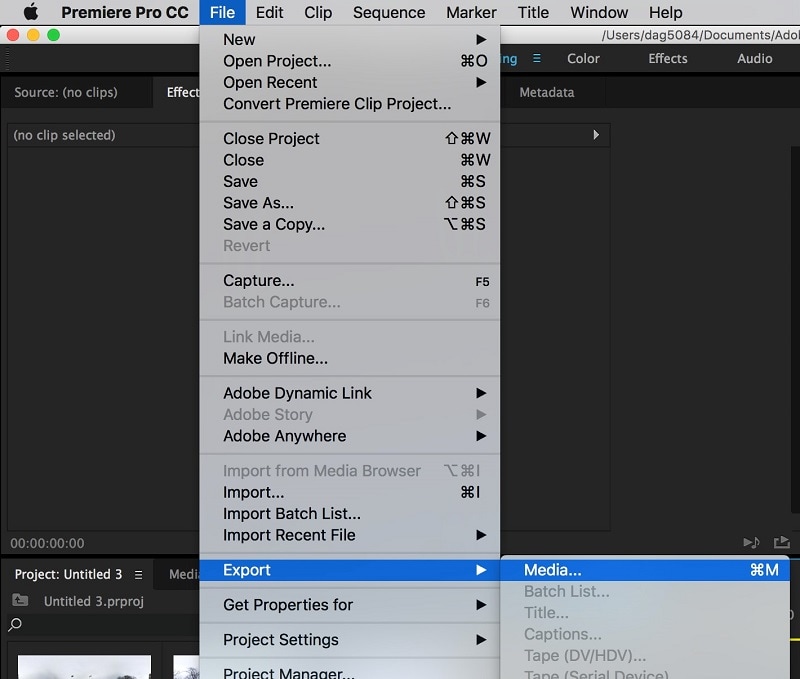
Last but not least, choose File > Export > Media in Premiere Pro to export a video. On a PC or a Mac, you might alternatively hit the shortcut key CMD + M. Your window for export settings will open as a result. Prior to submitting the movie to Media Encoder for export, you may choose your preferred parameters (or presets) for it in this window.
Part 2. Premiere Pro Alternative to Change Font in Video
That’s simple to change typefaces in Adobe Premiere Pro, and it could be all you need to do to keep your audience interested in the footage. It may not be sufficient for your requirements in terms of video editing. Having a backup plan is always beneficial, regardless of the situation. In case anything goes wrong with your initial choice, you will have a backup alternative. You thus need an option like Filmora , which comes with a variety of typefaces pre-installed.
You can simply give your films an aesthetic with Filmora by adding text in a variety of fonts and colors. It’s simple to navigate this program. The installation procedure is also fairly rapid, which is a bonus. Downloads for all of the visuals, audio, and fonts are offered. You don’t have to download everything at once because of this. In conclusion, Filmora is a fantastic substitute to utilize if you are unable to use Adobe Premiere Pro. It contains a number of features that are quite helpful while editing videos. Videos with the highest quality and frame rates are supported.
Step1Install and Import Files
You’ll get the following screen once you launch Filmora on your PC. the Editing Mode option. to open a file, choose it from the menu. Select the picture or video on which you want to add a text by choosing the Import to Add Files option.

Step2Create a Text Layout
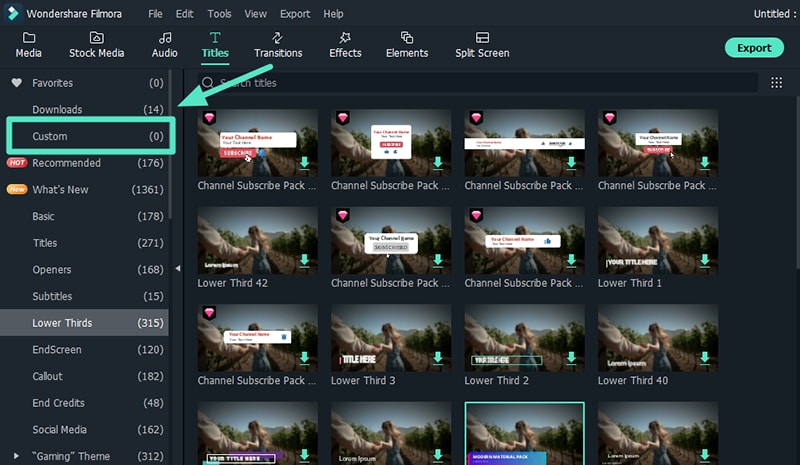
In the next step, refer to the Titles menu and from there, you can add a variety of layouts to add text into your video. For that, add the selected one inside the timeline and refer to the next step:
Step3Add and Change Text Font
On the timeline, drag the picture. Click the picture twice. Select all text by selecting it after selecting the text menu item. Choose text from the menu on the left after that, and then choose the font style you want to use for the picture. You may now alter the text’s font. The text may also be changed, and you can add animation and other styles.

Step4Export or Share Content
In the final step, you can save the photo or video now. You may choose your preferred extension by selecting the export option and saving the movie there. You can also share your content by selecting YouTube or Vimeo or any social platform available to share your edited content on the go. hhghh
Part 3. Related FAQs of Video Font Editing
1. How to change font color in Premiere Pro?
To do so, double-click the title in the timeline of the Expert view to bring up the Monitor panel. Select the text in the Monitor panel, then choose from the options below: Select a font color from the Font menu and paste it into the Text tab of the Adjust panel. Alternately, you may change the font color by pressing Alt + H, typing Font Color and then selecting a color.
2. How to fix the font in Premiere Pro?
You may even classify your excess typefaces if you have too many of them. You’ll be able to locate all of your typefaces in this method. You may use Adobe Premiere Pro’s Align and Transform feature to align the text with the screen. The text’s alignment, centering, nudge, and opacity are all editable. If you don’t want to, you are under no need to arrange your typefaces. It is, nevertheless, quite practical.
3. How to you add font in Premiere Mac?
Fonts from other sources may be downloaded and used with ease in Adobe Premiere Pro Mac. You may download other fonts if you don’t want to utilize Adobe Premiere Pro’s built-in fonts. Downloading your favorite typefaces is the first step. You may obtain fonts from a variety of websites.
Free Download For Win 7 or later(64-bit)
Free Download For macOS 10.14 or later
Want to Immediately Know All About Discord GIF?
Want to Immediately Know All About Discord GIF?
An easy yet powerful editor
Numerous effects to choose from
Detailed tutorials provided by the official channel
Discord is a digital distribution, instant messaging, and VoIP platform that allows users to communicate using text messaging, voice calls, media and files, video calls, in private chats, or as part of communities called “servers.” Also, note that a server is a collection of persistent voice chat channels and chat rooms accessible through invite links.

Discord is available to run on macOS, Windows, iOS, Android, iPads, web browsers. GIFs are a simple idea or a single clip used to express your feelings while conversing. These days, there are lots of people using this discord communication platform, including gamers, fan clubs, and other groups. They utilize GIFs for Discord to deliver the feelings quickly to each other. To make a Discord GIF, read through this article.
In this article
01 [How to Find GIFs for Discord](#Part 1)
02 [How to Use Discord GIFs](#Part 2)
03 [How to Get Discord Profile Banner GIF](#Part 3)
04 [What GIF/Video Can Crash Discord (Explained)?](#Part 4)
Part 1 How to Find Gifs for Discord
Sharing and finding GIFs for Discord is super easy, thanks to GIF Picker, link embedding, and integrations with GIF makers like Droplr. You should always find and make the perfect Discord GIF for any situation using the above tools.
Hence, here are three easy ways to find cool GIFs Discord to start using Discord like a pro:
01Search for GIFs on Discord GIF Picker
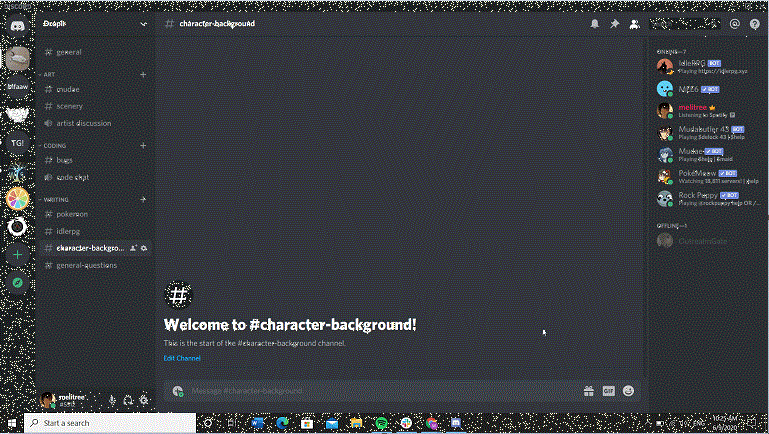
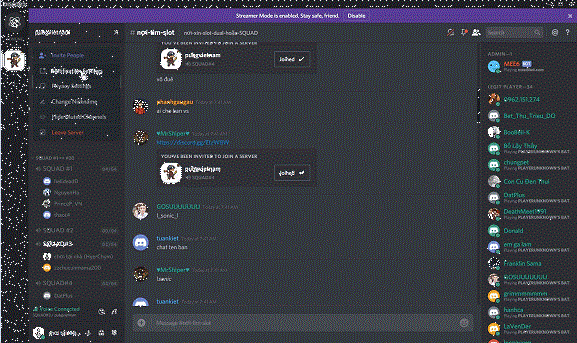
Let’scheck for a way where it is easier to find a Discord GIF by using Discord GIF Picker. This helpful tool is available on the right side of the Chatbox under the desktop app. GIF Picker gives you the option to choose from multiple collections of GIFs updated regularly based on emotions or any particular subject. There, browse over to select your desired GIF or use a search bar to search for the right one. If you find the perfect one, the star mark it from the top right end of the GIF.
02Insert Online GIF
Are you finding it difficult to find specific GIFs in the GIF picker? No worries! Discord supports GIFs from most websites. Find your preferred GIF on a website such as GIPHY and either copy and paste its associated link into a text channel or save it to your desktop.
03Make Your GIF
Finally, you can make your GIF using a discord GIF maker and then share it on Discord in the same way as above. For example, try using Droplr to form your cool discord GIFs.
Part 2 How to Use Discord GIFs
Using the three methods listed above on how to find Discord GIFs, we’ll guide you on how to use gif meme discord effectively:
01Search for GIFs on Discord GIF Picker
You can easily insert the GIF out of the keyboard’s GIF collection into a text channel on your mobile device. Though it might take a while to upload, remain with the channel for all your friends to view it.

02Insert Online GIF
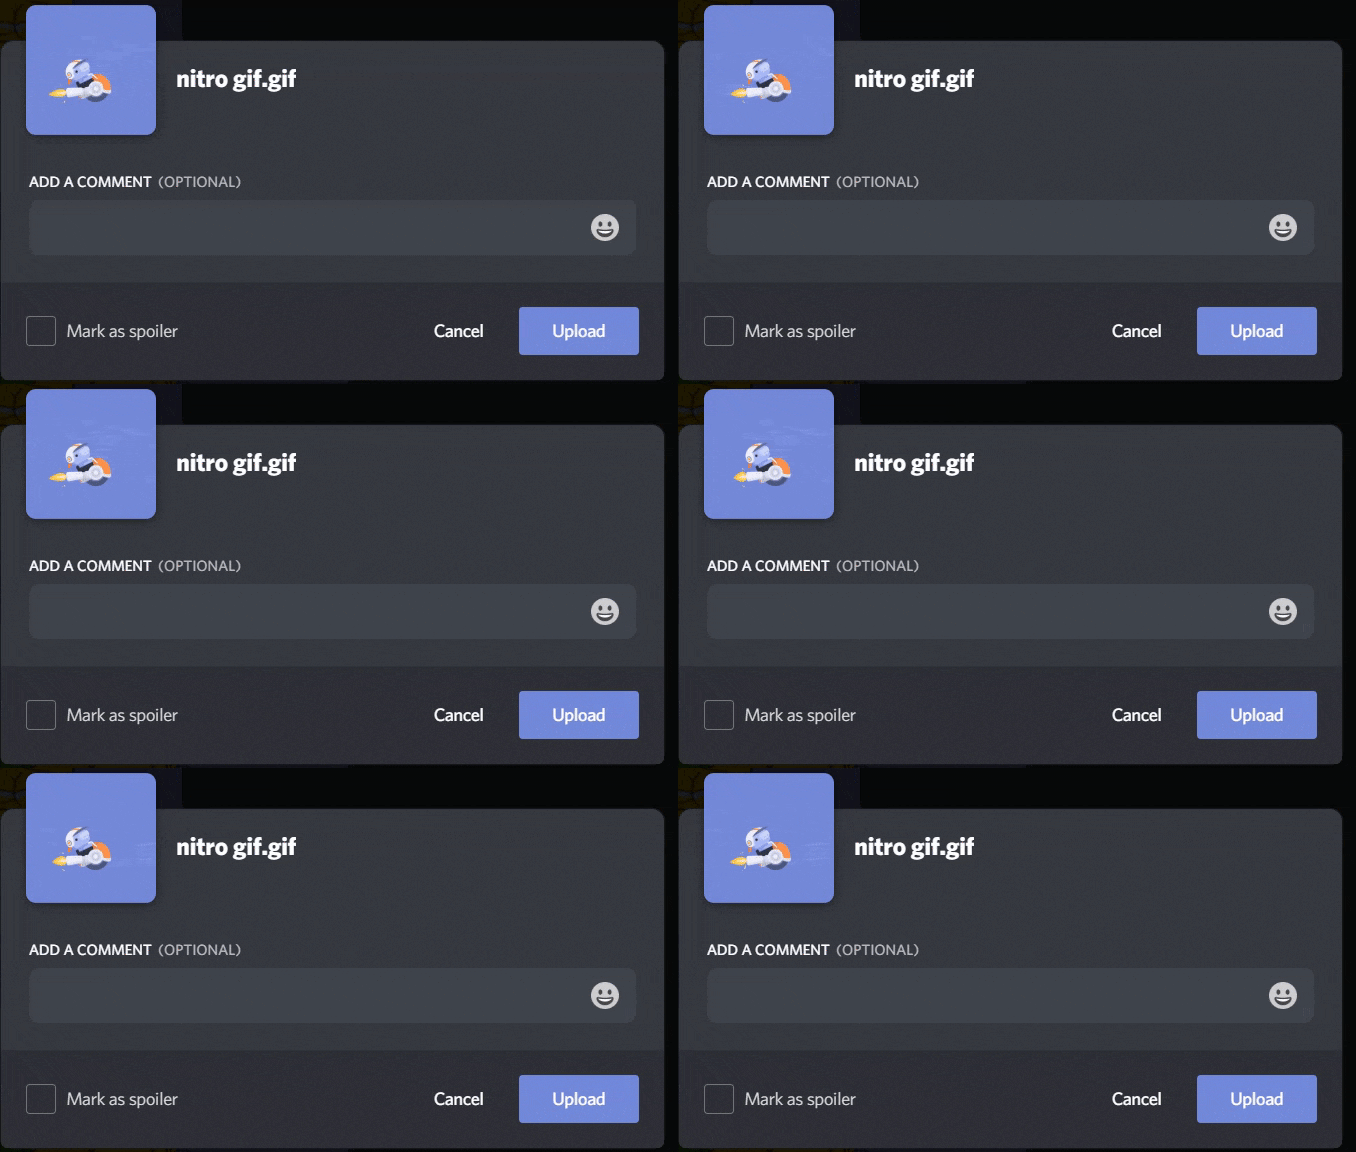
Open Chatbox. From the left end of the Chatbox, click on the + icon to upload the GIF on Discord, then click “Upload a File.” Here, you can add a comment to go with your file or mark it as a spoiler. To view any file marked as ‘Spoiler’ needs to be clicked to see it.
03Make Your GIF
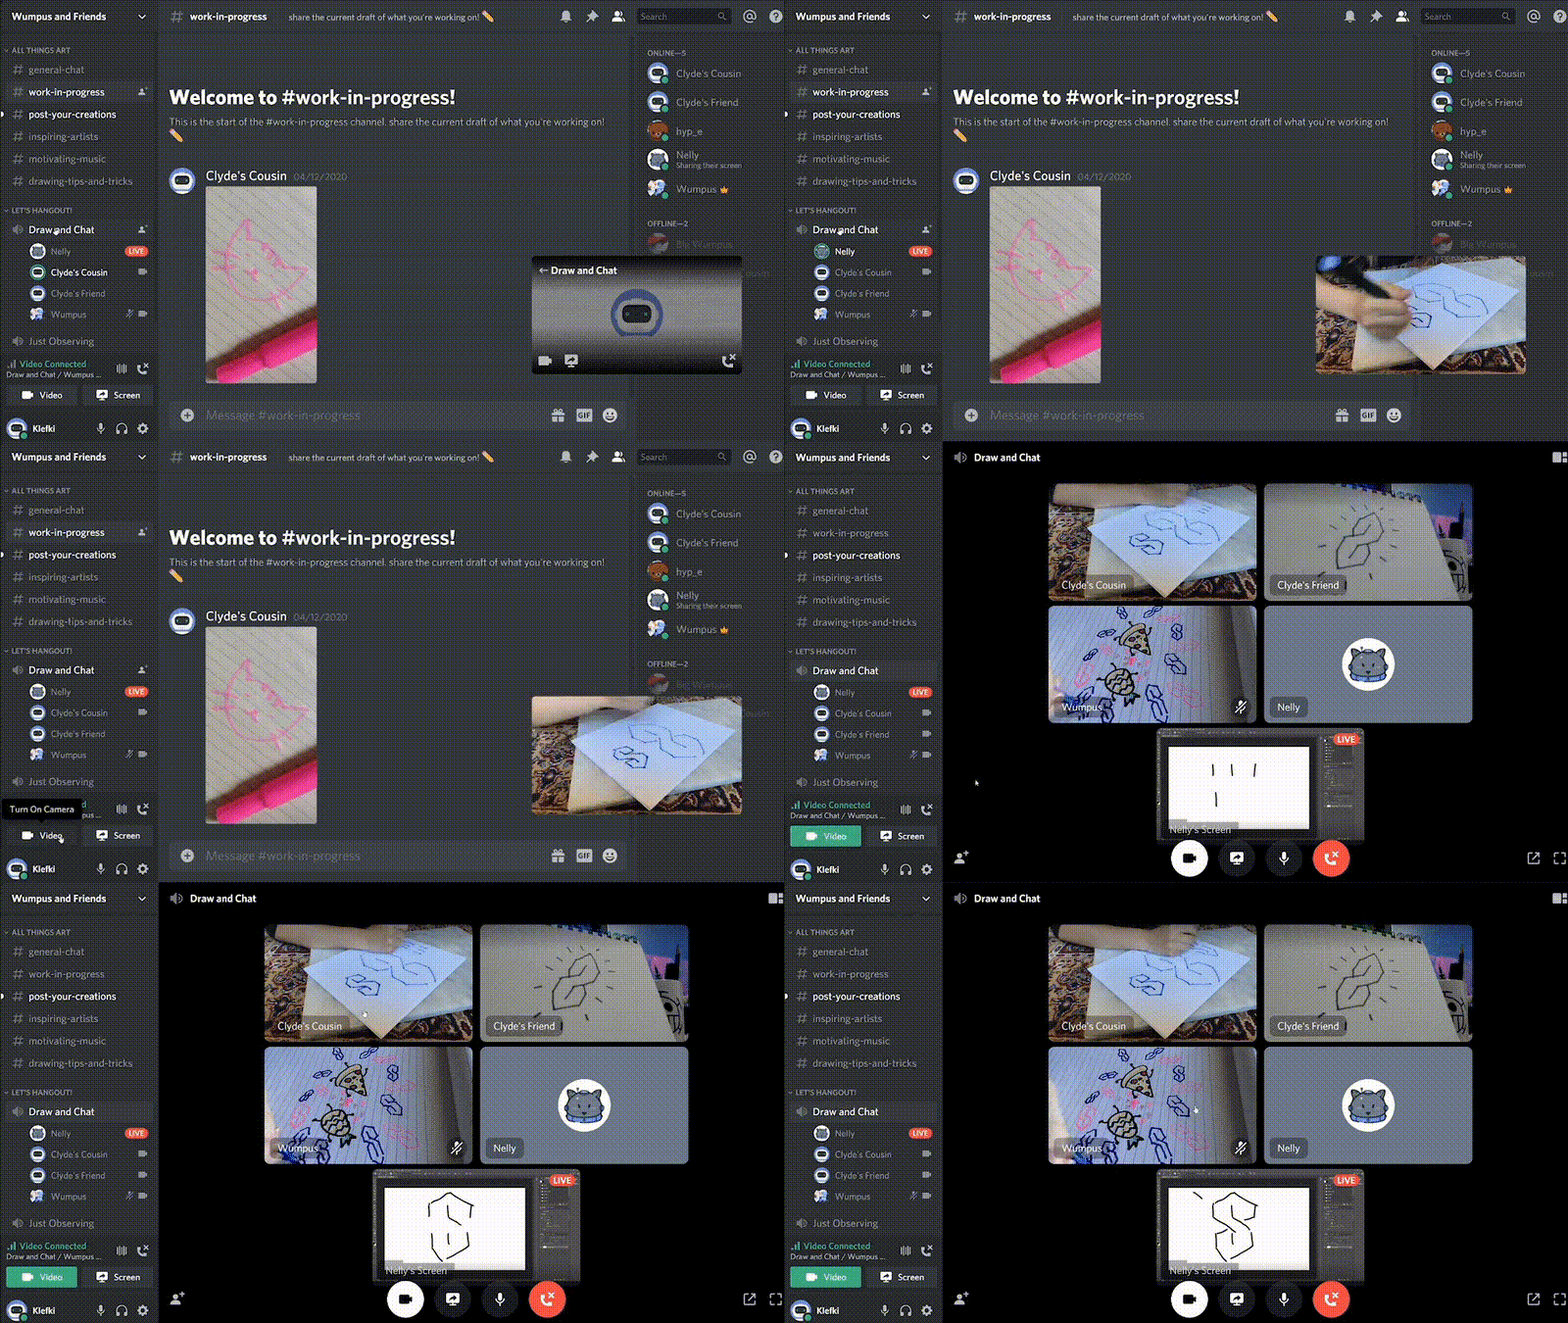
After creating GIF, you can easily share it by downloading it to your system and then using the short link to upload it. Droplr saves all GIFs, screen recordings, screenshots to the Cloud and generates a short URL for each file. You can use this link to paste into Discord (or another platform) to display the screen share into the platform.
Part 2 How to Get Discord Profile Banner GIF
01How to Get Animated Profile Banner GIF on Mobile?
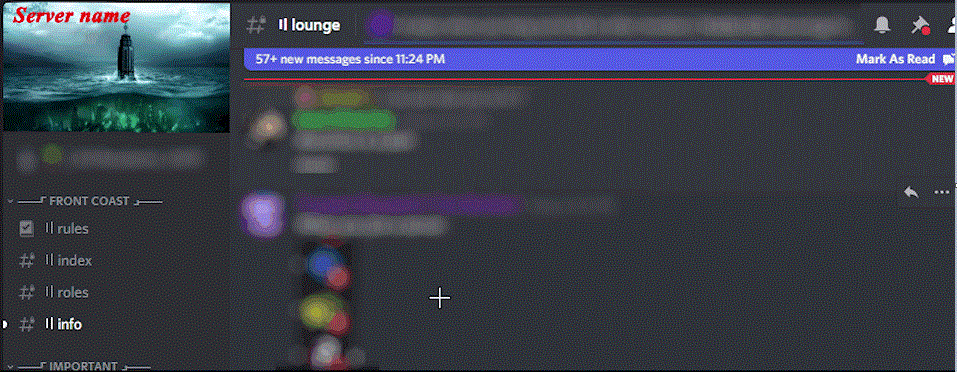
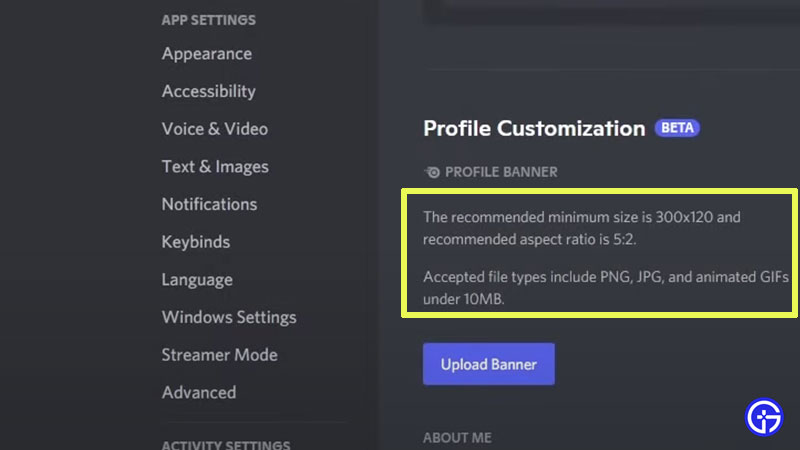
For getting an animated GIF as your profile Discord banner Gifs, you must be a GIFs Discord Nitro member, which costs about $9.99 monthly. But if you are already one, you can upload GIF format files. But take note that you can crop images after uploading them, but not GIFs.
While writing this article, this feature is only available on desktop, but mobile should be out soon.
Here is how to get the Animated Profile Discord GIFs Banner:
Step 1: Head to My Account
Step 2: Scroll to the Profile Customization section
Step 3: You will see the Profile Banner where the minimum size and recommended aspect ratio are available.
Step 4: Once you have your GIF ready, go ahead and upload the banner by clicking on the Upload Banner button.

02How to Post GIFs in a Discord Chat on a PC or Mac
Here is a step-by-step blogon how to post a Gif for discord banner effectively:
Step 1: Open Discord on your computer. You can use Discord’s desktop app or visit <www.discordapp.com> in your browser.
If you do not get automatically signed in to Discord on your device, tap the Login button in the up-right corner, and log in with your account credentials.
Step 2: Click a server on the left-hand panel to open a list of all the text and voice chat channels on the same server.
If you want to send over a GIF in a direct message, tap the figurehead icon in the up-left corner of your screen. It will open a list of all candid message conversations.
Step 3: Click a chat below TEXT CHANNELS. On the left navigation area, find the chat you want to post a GIF to and click on it to open the conversation.
Step 4: Click the File upload tab. It looks like an skyward arrow inside a square besides the message field and below of your screen. This will open a file explorer in a pop-up window.
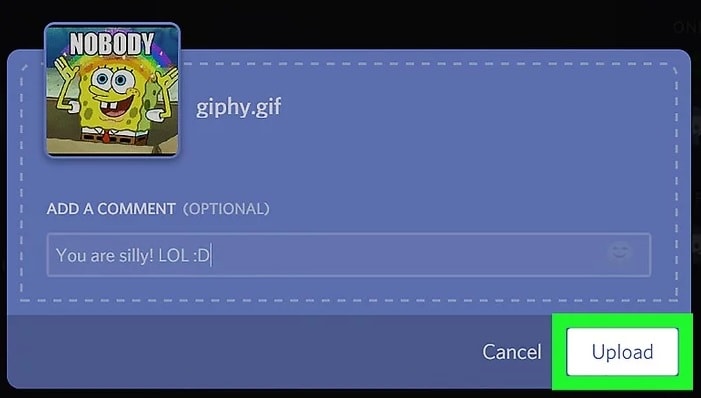
You can choose to drag-drop a GIF file from your PC without the upload option by opening the folder where your GIF is stored, and dragging the file to your Discord chat window.
Step 5: Find and pick a GIF from your PC. Browse the folders in the file explorer, and then tap on the GIF you want to send.
Step 6: Tap the Open button in the pop-up screen. It will import the GIF into your Chatbox and you can review your GIF before sending.
Step 7: Now, you may add a text to your GIF or type a line or a text in the text window right under the GIF.
You can also make use of emojis in your comment by clicking the smiley icon to the right of the text field.
Step 8: Finally, click the Upload tab, a white button in the lower-right corner of the pop-up window. This will send your GIF to the chat.
Part 1 What GIF/Video Can Crash Discord (Explained)?
As a result of the fact that some GIFs/Videos can crash Discord due to the RAM overload method within the GIF/Video file, hidden contents out of frame probably. More so, there are GIF/ Video that makes your Discord client reload. As soon as you see it play, your Discord will reload like it does when pressing “ctrl + r.” This bug does not work on the iOS client since the Gif appears as an image (so far tested in windows and iOS clients)
To solve this, we recommend that you use Wondershare Filmora Video Editor in the production of Gifs and Videos as this will help stop the Discord crash GIFs due to its exclusive features that help to prevent the crashing of Discord.

Wondershare Filmora - Best Video Editor for Mac/Windows
5,481,435 people have downloaded it.
Build unique custom animations without breaking a sweat.
Focus on creating epic stories and leave the details to Filmora’s auto features.
Start a creative adventure with drag & drop effects and endless possibilities.
Filmora simplifies advanced features to save you time and effort.
Filmora cuts out repetition so you can move on to your next creative breakthrough.
● Ending Thoughts →
● In this blog, we gave a breakdown of everything you need to know about animated GIFs Discord, and also the article gave an analysis on how to use and find cool GIFs for Discord.
● This article also explained how to make a Discord GIF banner and Filmora software in making videos and GIFs to avoid using GIF that crashes Discord.
Discord is a digital distribution, instant messaging, and VoIP platform that allows users to communicate using text messaging, voice calls, media and files, video calls, in private chats, or as part of communities called “servers.” Also, note that a server is a collection of persistent voice chat channels and chat rooms accessible through invite links.

Discord is available to run on macOS, Windows, iOS, Android, iPads, web browsers. GIFs are a simple idea or a single clip used to express your feelings while conversing. These days, there are lots of people using this discord communication platform, including gamers, fan clubs, and other groups. They utilize GIFs for Discord to deliver the feelings quickly to each other. To make a Discord GIF, read through this article.
In this article
01 [How to Find GIFs for Discord](#Part 1)
02 [How to Use Discord GIFs](#Part 2)
03 [How to Get Discord Profile Banner GIF](#Part 3)
04 [What GIF/Video Can Crash Discord (Explained)?](#Part 4)
Part 1 How to Find Gifs for Discord
Sharing and finding GIFs for Discord is super easy, thanks to GIF Picker, link embedding, and integrations with GIF makers like Droplr. You should always find and make the perfect Discord GIF for any situation using the above tools.
Hence, here are three easy ways to find cool GIFs Discord to start using Discord like a pro:
01Search for GIFs on Discord GIF Picker
Let’scheck for a way where it is easier to find a Discord GIF by using Discord GIF Picker. This helpful tool is available on the right side of the Chatbox under the desktop app. GIF Picker gives you the option to choose from multiple collections of GIFs updated regularly based on emotions or any particular subject. There, browse over to select your desired GIF or use a search bar to search for the right one. If you find the perfect one, the star mark it from the top right end of the GIF.

02Insert Online GIF
Are you finding it difficult to find specific GIFs in the GIF picker? No worries! Discord supports GIFs from most websites. Find your preferred GIF on a website such as GIPHY and either copy and paste its associated link into a text channel or save it to your desktop.

03Make Your GIF
Finally, you can make your GIF using a discord GIF maker and then share it on Discord in the same way as above. For example, try using Droplr to form your cool discord GIFs.

Part 2 How to Use Discord GIFs
Using the three methods listed above on how to find Discord GIFs, we’ll guide you on how to use gif meme discord effectively:
01Search for GIFs on Discord GIF Picker
You can easily insert the GIF out of the keyboard’s GIF collection into a text channel on your mobile device. Though it might take a while to upload, remain with the channel for all your friends to view it.

02Insert Online GIF
Open Chatbox. From the left end of the Chatbox, click on the + icon to upload the GIF on Discord, then click “Upload a File.” Here, you can add a comment to go with your file or mark it as a spoiler. To view any file marked as ‘Spoiler’ needs to be clicked to see it.

03Make Your GIF
After creating GIF, you can easily share it by downloading it to your system and then using the short link to upload it. Droplr saves all GIFs, screen recordings, screenshots to the Cloud and generates a short URL for each file. You can use this link to paste into Discord (or another platform) to display the screen share into the platform.

Part 2 How to Get Discord Profile Banner GIF
01How to Get Animated Profile Banner GIF on Mobile?
For getting an animated GIF as your profile Discord banner Gifs, you must be a GIFs Discord Nitro member, which costs about $9.99 monthly. But if you are already one, you can upload GIF format files. But take note that you can crop images after uploading them, but not GIFs.
While writing this article, this feature is only available on desktop, but mobile should be out soon.
Here is how to get the Animated Profile Discord GIFs Banner:
Step 1: Head to My Account
Step 2: Scroll to the Profile Customization section
Step 3: You will see the Profile Banner where the minimum size and recommended aspect ratio are available.
Step 4: Once you have your GIF ready, go ahead and upload the banner by clicking on the Upload Banner button.

02How to Post GIFs in a Discord Chat on a PC or Mac
Here is a step-by-step blogon how to post a Gif for discord banner effectively:
Step 1: Open Discord on your computer. You can use Discord’s desktop app or visit <www.discordapp.com> in your browser.
If you do not get automatically signed in to Discord on your device, tap the Login button in the up-right corner, and log in with your account credentials.
Step 2: Click a server on the left-hand panel to open a list of all the text and voice chat channels on the same server.
If you want to send over a GIF in a direct message, tap the figurehead icon in the up-left corner of your screen. It will open a list of all candid message conversations.
Step 3: Click a chat below TEXT CHANNELS. On the left navigation area, find the chat you want to post a GIF to and click on it to open the conversation.
Step 4: Click the File upload tab. It looks like an skyward arrow inside a square besides the message field and below of your screen. This will open a file explorer in a pop-up window.

You can choose to drag-drop a GIF file from your PC without the upload option by opening the folder where your GIF is stored, and dragging the file to your Discord chat window.
Step 5: Find and pick a GIF from your PC. Browse the folders in the file explorer, and then tap on the GIF you want to send.
Step 6: Tap the Open button in the pop-up screen. It will import the GIF into your Chatbox and you can review your GIF before sending.
Step 7: Now, you may add a text to your GIF or type a line or a text in the text window right under the GIF.
You can also make use of emojis in your comment by clicking the smiley icon to the right of the text field.
Step 8: Finally, click the Upload tab, a white button in the lower-right corner of the pop-up window. This will send your GIF to the chat.
Part 1 What GIF/Video Can Crash Discord (Explained)?
As a result of the fact that some GIFs/Videos can crash Discord due to the RAM overload method within the GIF/Video file, hidden contents out of frame probably. More so, there are GIF/ Video that makes your Discord client reload. As soon as you see it play, your Discord will reload like it does when pressing “ctrl + r.” This bug does not work on the iOS client since the Gif appears as an image (so far tested in windows and iOS clients)
To solve this, we recommend that you use Wondershare Filmora Video Editor in the production of Gifs and Videos as this will help stop the Discord crash GIFs due to its exclusive features that help to prevent the crashing of Discord.

Wondershare Filmora - Best Video Editor for Mac/Windows
5,481,435 people have downloaded it.
Build unique custom animations without breaking a sweat.
Focus on creating epic stories and leave the details to Filmora’s auto features.
Start a creative adventure with drag & drop effects and endless possibilities.
Filmora simplifies advanced features to save you time and effort.
Filmora cuts out repetition so you can move on to your next creative breakthrough.

● Ending Thoughts →
● In this blog, we gave a breakdown of everything you need to know about animated GIFs Discord, and also the article gave an analysis on how to use and find cool GIFs for Discord.
● This article also explained how to make a Discord GIF banner and Filmora software in making videos and GIFs to avoid using GIF that crashes Discord.
Discord is a digital distribution, instant messaging, and VoIP platform that allows users to communicate using text messaging, voice calls, media and files, video calls, in private chats, or as part of communities called “servers.” Also, note that a server is a collection of persistent voice chat channels and chat rooms accessible through invite links.

Discord is available to run on macOS, Windows, iOS, Android, iPads, web browsers. GIFs are a simple idea or a single clip used to express your feelings while conversing. These days, there are lots of people using this discord communication platform, including gamers, fan clubs, and other groups. They utilize GIFs for Discord to deliver the feelings quickly to each other. To make a Discord GIF, read through this article.
In this article
01 [How to Find GIFs for Discord](#Part 1)
02 [How to Use Discord GIFs](#Part 2)
03 [How to Get Discord Profile Banner GIF](#Part 3)
04 [What GIF/Video Can Crash Discord (Explained)?](#Part 4)
Part 1 How to Find Gifs for Discord
Sharing and finding GIFs for Discord is super easy, thanks to GIF Picker, link embedding, and integrations with GIF makers like Droplr. You should always find and make the perfect Discord GIF for any situation using the above tools.
Hence, here are three easy ways to find cool GIFs Discord to start using Discord like a pro:
01Search for GIFs on Discord GIF Picker
Let’scheck for a way where it is easier to find a Discord GIF by using Discord GIF Picker. This helpful tool is available on the right side of the Chatbox under the desktop app. GIF Picker gives you the option to choose from multiple collections of GIFs updated regularly based on emotions or any particular subject. There, browse over to select your desired GIF or use a search bar to search for the right one. If you find the perfect one, the star mark it from the top right end of the GIF.

02Insert Online GIF
Are you finding it difficult to find specific GIFs in the GIF picker? No worries! Discord supports GIFs from most websites. Find your preferred GIF on a website such as GIPHY and either copy and paste its associated link into a text channel or save it to your desktop.

03Make Your GIF
Finally, you can make your GIF using a discord GIF maker and then share it on Discord in the same way as above. For example, try using Droplr to form your cool discord GIFs.

Part 2 How to Use Discord GIFs
Using the three methods listed above on how to find Discord GIFs, we’ll guide you on how to use gif meme discord effectively:
01Search for GIFs on Discord GIF Picker
You can easily insert the GIF out of the keyboard’s GIF collection into a text channel on your mobile device. Though it might take a while to upload, remain with the channel for all your friends to view it.

02Insert Online GIF
Open Chatbox. From the left end of the Chatbox, click on the + icon to upload the GIF on Discord, then click “Upload a File.” Here, you can add a comment to go with your file or mark it as a spoiler. To view any file marked as ‘Spoiler’ needs to be clicked to see it.

03Make Your GIF
After creating GIF, you can easily share it by downloading it to your system and then using the short link to upload it. Droplr saves all GIFs, screen recordings, screenshots to the Cloud and generates a short URL for each file. You can use this link to paste into Discord (or another platform) to display the screen share into the platform.

Part 2 How to Get Discord Profile Banner GIF
01How to Get Animated Profile Banner GIF on Mobile?
For getting an animated GIF as your profile Discord banner Gifs, you must be a GIFs Discord Nitro member, which costs about $9.99 monthly. But if you are already one, you can upload GIF format files. But take note that you can crop images after uploading them, but not GIFs.
While writing this article, this feature is only available on desktop, but mobile should be out soon.
Here is how to get the Animated Profile Discord GIFs Banner:
Step 1: Head to My Account
Step 2: Scroll to the Profile Customization section
Step 3: You will see the Profile Banner where the minimum size and recommended aspect ratio are available.
Step 4: Once you have your GIF ready, go ahead and upload the banner by clicking on the Upload Banner button.

02How to Post GIFs in a Discord Chat on a PC or Mac
Here is a step-by-step blogon how to post a Gif for discord banner effectively:
Step 1: Open Discord on your computer. You can use Discord’s desktop app or visit <www.discordapp.com> in your browser.
If you do not get automatically signed in to Discord on your device, tap the Login button in the up-right corner, and log in with your account credentials.
Step 2: Click a server on the left-hand panel to open a list of all the text and voice chat channels on the same server.
If you want to send over a GIF in a direct message, tap the figurehead icon in the up-left corner of your screen. It will open a list of all candid message conversations.
Step 3: Click a chat below TEXT CHANNELS. On the left navigation area, find the chat you want to post a GIF to and click on it to open the conversation.
Step 4: Click the File upload tab. It looks like an skyward arrow inside a square besides the message field and below of your screen. This will open a file explorer in a pop-up window.

You can choose to drag-drop a GIF file from your PC without the upload option by opening the folder where your GIF is stored, and dragging the file to your Discord chat window.
Step 5: Find and pick a GIF from your PC. Browse the folders in the file explorer, and then tap on the GIF you want to send.
Step 6: Tap the Open button in the pop-up screen. It will import the GIF into your Chatbox and you can review your GIF before sending.
Step 7: Now, you may add a text to your GIF or type a line or a text in the text window right under the GIF.
You can also make use of emojis in your comment by clicking the smiley icon to the right of the text field.
Step 8: Finally, click the Upload tab, a white button in the lower-right corner of the pop-up window. This will send your GIF to the chat.
Part 1 What GIF/Video Can Crash Discord (Explained)?
As a result of the fact that some GIFs/Videos can crash Discord due to the RAM overload method within the GIF/Video file, hidden contents out of frame probably. More so, there are GIF/ Video that makes your Discord client reload. As soon as you see it play, your Discord will reload like it does when pressing “ctrl + r.” This bug does not work on the iOS client since the Gif appears as an image (so far tested in windows and iOS clients)
To solve this, we recommend that you use Wondershare Filmora Video Editor in the production of Gifs and Videos as this will help stop the Discord crash GIFs due to its exclusive features that help to prevent the crashing of Discord.

Wondershare Filmora - Best Video Editor for Mac/Windows
5,481,435 people have downloaded it.
Build unique custom animations without breaking a sweat.
Focus on creating epic stories and leave the details to Filmora’s auto features.
Start a creative adventure with drag & drop effects and endless possibilities.
Filmora simplifies advanced features to save you time and effort.
Filmora cuts out repetition so you can move on to your next creative breakthrough.

● Ending Thoughts →
● In this blog, we gave a breakdown of everything you need to know about animated GIFs Discord, and also the article gave an analysis on how to use and find cool GIFs for Discord.
● This article also explained how to make a Discord GIF banner and Filmora software in making videos and GIFs to avoid using GIF that crashes Discord.
Discord is a digital distribution, instant messaging, and VoIP platform that allows users to communicate using text messaging, voice calls, media and files, video calls, in private chats, or as part of communities called “servers.” Also, note that a server is a collection of persistent voice chat channels and chat rooms accessible through invite links.

Discord is available to run on macOS, Windows, iOS, Android, iPads, web browsers. GIFs are a simple idea or a single clip used to express your feelings while conversing. These days, there are lots of people using this discord communication platform, including gamers, fan clubs, and other groups. They utilize GIFs for Discord to deliver the feelings quickly to each other. To make a Discord GIF, read through this article.
In this article
01 [How to Find GIFs for Discord](#Part 1)
02 [How to Use Discord GIFs](#Part 2)
03 [How to Get Discord Profile Banner GIF](#Part 3)
04 [What GIF/Video Can Crash Discord (Explained)?](#Part 4)
Part 1 How to Find Gifs for Discord
Sharing and finding GIFs for Discord is super easy, thanks to GIF Picker, link embedding, and integrations with GIF makers like Droplr. You should always find and make the perfect Discord GIF for any situation using the above tools.
Hence, here are three easy ways to find cool GIFs Discord to start using Discord like a pro:
01Search for GIFs on Discord GIF Picker
Let’scheck for a way where it is easier to find a Discord GIF by using Discord GIF Picker. This helpful tool is available on the right side of the Chatbox under the desktop app. GIF Picker gives you the option to choose from multiple collections of GIFs updated regularly based on emotions or any particular subject. There, browse over to select your desired GIF or use a search bar to search for the right one. If you find the perfect one, the star mark it from the top right end of the GIF.

02Insert Online GIF
Are you finding it difficult to find specific GIFs in the GIF picker? No worries! Discord supports GIFs from most websites. Find your preferred GIF on a website such as GIPHY and either copy and paste its associated link into a text channel or save it to your desktop.

03Make Your GIF
Finally, you can make your GIF using a discord GIF maker and then share it on Discord in the same way as above. For example, try using Droplr to form your cool discord GIFs.

Part 2 How to Use Discord GIFs
Using the three methods listed above on how to find Discord GIFs, we’ll guide you on how to use gif meme discord effectively:
01Search for GIFs on Discord GIF Picker
You can easily insert the GIF out of the keyboard’s GIF collection into a text channel on your mobile device. Though it might take a while to upload, remain with the channel for all your friends to view it.

02Insert Online GIF
Open Chatbox. From the left end of the Chatbox, click on the + icon to upload the GIF on Discord, then click “Upload a File.” Here, you can add a comment to go with your file or mark it as a spoiler. To view any file marked as ‘Spoiler’ needs to be clicked to see it.

03Make Your GIF
After creating GIF, you can easily share it by downloading it to your system and then using the short link to upload it. Droplr saves all GIFs, screen recordings, screenshots to the Cloud and generates a short URL for each file. You can use this link to paste into Discord (or another platform) to display the screen share into the platform.

Part 2 How to Get Discord Profile Banner GIF
01How to Get Animated Profile Banner GIF on Mobile?
For getting an animated GIF as your profile Discord banner Gifs, you must be a GIFs Discord Nitro member, which costs about $9.99 monthly. But if you are already one, you can upload GIF format files. But take note that you can crop images after uploading them, but not GIFs.
While writing this article, this feature is only available on desktop, but mobile should be out soon.
Here is how to get the Animated Profile Discord GIFs Banner:
Step 1: Head to My Account
Step 2: Scroll to the Profile Customization section
Step 3: You will see the Profile Banner where the minimum size and recommended aspect ratio are available.
Step 4: Once you have your GIF ready, go ahead and upload the banner by clicking on the Upload Banner button.

02How to Post GIFs in a Discord Chat on a PC or Mac
Here is a step-by-step blogon how to post a Gif for discord banner effectively:
Step 1: Open Discord on your computer. You can use Discord’s desktop app or visit <www.discordapp.com> in your browser.
If you do not get automatically signed in to Discord on your device, tap the Login button in the up-right corner, and log in with your account credentials.
Step 2: Click a server on the left-hand panel to open a list of all the text and voice chat channels on the same server.
If you want to send over a GIF in a direct message, tap the figurehead icon in the up-left corner of your screen. It will open a list of all candid message conversations.
Step 3: Click a chat below TEXT CHANNELS. On the left navigation area, find the chat you want to post a GIF to and click on it to open the conversation.
Step 4: Click the File upload tab. It looks like an skyward arrow inside a square besides the message field and below of your screen. This will open a file explorer in a pop-up window.

You can choose to drag-drop a GIF file from your PC without the upload option by opening the folder where your GIF is stored, and dragging the file to your Discord chat window.
Step 5: Find and pick a GIF from your PC. Browse the folders in the file explorer, and then tap on the GIF you want to send.
Step 6: Tap the Open button in the pop-up screen. It will import the GIF into your Chatbox and you can review your GIF before sending.
Step 7: Now, you may add a text to your GIF or type a line or a text in the text window right under the GIF.
You can also make use of emojis in your comment by clicking the smiley icon to the right of the text field.
Step 8: Finally, click the Upload tab, a white button in the lower-right corner of the pop-up window. This will send your GIF to the chat.
Part 1 What GIF/Video Can Crash Discord (Explained)?
As a result of the fact that some GIFs/Videos can crash Discord due to the RAM overload method within the GIF/Video file, hidden contents out of frame probably. More so, there are GIF/ Video that makes your Discord client reload. As soon as you see it play, your Discord will reload like it does when pressing “ctrl + r.” This bug does not work on the iOS client since the Gif appears as an image (so far tested in windows and iOS clients)
To solve this, we recommend that you use Wondershare Filmora Video Editor in the production of Gifs and Videos as this will help stop the Discord crash GIFs due to its exclusive features that help to prevent the crashing of Discord.

Wondershare Filmora - Best Video Editor for Mac/Windows
5,481,435 people have downloaded it.
Build unique custom animations without breaking a sweat.
Focus on creating epic stories and leave the details to Filmora’s auto features.
Start a creative adventure with drag & drop effects and endless possibilities.
Filmora simplifies advanced features to save you time and effort.
Filmora cuts out repetition so you can move on to your next creative breakthrough.

● Ending Thoughts →
● In this blog, we gave a breakdown of everything you need to know about animated GIFs Discord, and also the article gave an analysis on how to use and find cool GIFs for Discord.
● This article also explained how to make a Discord GIF banner and Filmora software in making videos and GIFs to avoid using GIF that crashes Discord.
The Craziest 10 AI Editors You’ve Ever Seen
The Craziest 10 AI Editors You’ve Ever Seen
An easy yet powerful editor
Numerous effects to choose from
Detailed tutorials provided by the official channel
Technological advancements in the field of video editing have opened new opportunities and possibilities for the editors to unleash their creativity and AI-based video editors are a major contribution to the field. With these intelligent tools, the cumbersome process of video editing has not only become quick but also hassle-free and results in excellent pro videos. So, if you too have been looking for one such artificial intelligence videos editing tools, you are reading on the right page.
In this article
01 [What is AI video editing tools?](#Part 1)
02 [Things To Consider While Selecting An Ai Editing Tool](#Part 2)
03 [Top 10 AI Video Editors](#Part 3)
Part 1 What is AI video editing tools?
In simplest terms, the software that uses artificial intelligence for editing videos is termed AI editing tools. These programs make use of AI algorithms to perform advanced editing tasks for creating visually appealing and interesting videos. The AI tools have not only helped in accelerating the video editing tools but also assists in taking care of complex functions with ease. A good AI editing tool can perform multiple tasks like determining the shots, applying filters, adding transitions, proposing changes, color correction, face detection, and more.
Part 2 Things to consider while selecting an AI editing tool
An array of AI editing tools is available and selecting one can be a confusing task. So, while choosing one of these programs, several criteria can be considered and some of these are listed below.
● Allows editing videos in a hassle-free manner.
● Quick use and processing.
● User-friendly interface.
● Capability to process all types of videos in high resolution.
● Comes with all the needed features.
● The learning curve is not very steep.
Part 3 Top 10 AI Video Editors
After reviewing several AI-based editing software, we have selected the top 10 in the category. Check out the list below.
01Magisto
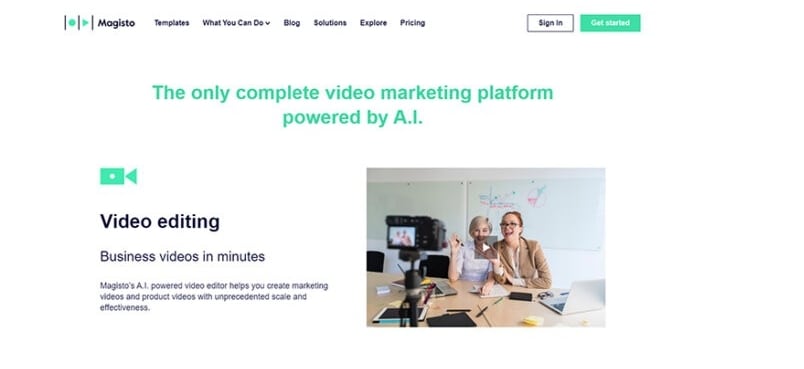
This is a powerful video editing tool that is simple and quick to use. You simply need to add the content file and select the styling type as needed along with audio and other content after which everything will be taken care by the software. The program is also capable of optimizing the video to reach the maximum number of people and this is done based on real-time analytics. This is a paid tool and is apt for creating marketing videos.
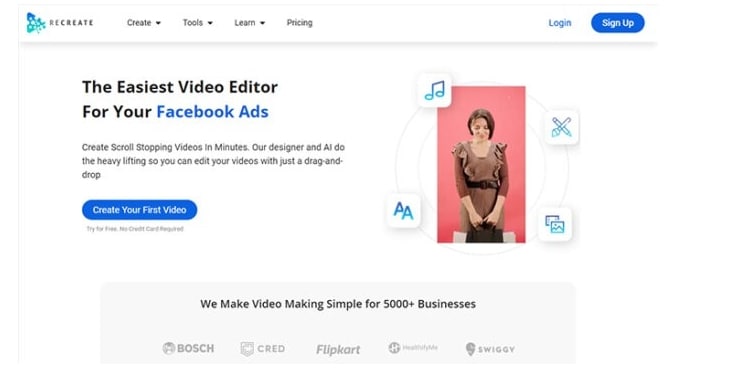
02Recreate
For creating and editing interesting videos for social media platforms, this is an apt tool that allows video customization through fonts, transitions, colors, overlays, and several other elements. Using this software, your written content can be converted into videos as the AI technology finds music as well as visuals automatically to match your requirements. Additionally, the program also supports features like recording voice-overs, removing the background, generating AI voices, and more.
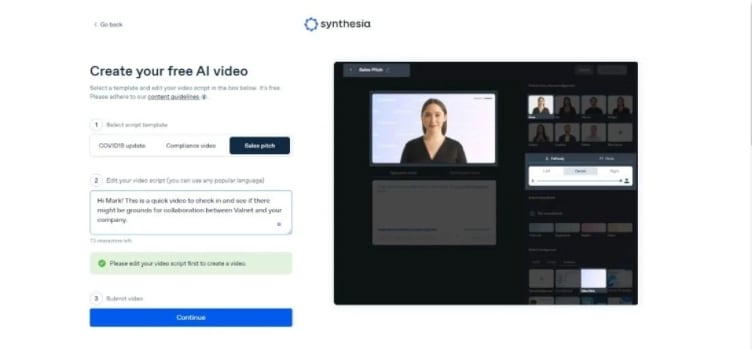
03Synthesia
This is an excellent video editing tool that is AI-based that can be used for digital marketing, training, communication, and several other tasks. The tool allows creating of interesting videos from the scripts and these footages can be up to 30 minutes long. Support for around 40 languages makes the program apt for all types of users. Some other key features of the software include duplicating the video, multi-sliding videos, customization options for voice, and more. The interface is simple and the process is also hassle-free.
04RawShorts
This is an online AI-based tool that can help convert the texts and the articles into videos for social media platforms and others. The technology of the tool will analyze your text content to know the main idea on which your video is to based. Then it automatically looks for the content needed including the voice and creates as well as edits the footage. A free trial version of the program is also available though it comes with several limitations. The drag and drop interface of the tool further makes it user-friendly.

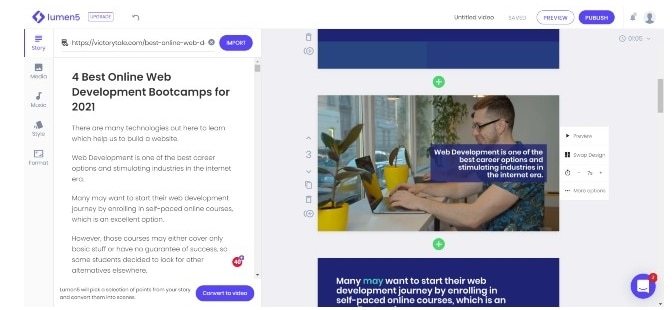
05Lumen5
For bulk editing of videos quickly, this is a good tool to consider. The interface is simple which along with the drag and drop feature makes the tool apt even for beginners. An array of video templates is available to match your theme requirements and the tool after identifying your requirements will lookout for the perfect music, content, layout, and other elements. There is also a library in the software from where you can find the desired collection of videos, images, and other media files.
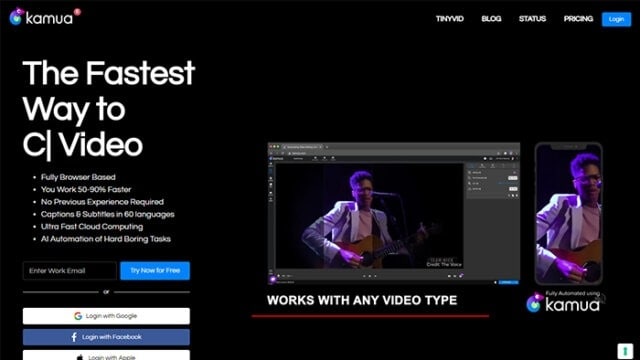
06Kamua
For simple and quick editing of your videos, Kamua is a great tool to use. This is a browser-based program that supports all basic functions like resizing, captioning, and more. With its cloud computing feature, a large number of files can be processed quickly and the tool supports adding the subtitles automatically to your project and that too in more than 60 languages. The tool also has a free version for the users who first wish to test before buying the subscription.
07InVideo
This is another widely used online tool supporting advanced video editing functions. The AI-based technology of the software will let you convert your text into the desired videos effortlessly. The Intelligent Video Assistant of the software will also check for any hidden mistakes in your videos and will also correct them. You can add multiple effects to your videos using the tool to create eye-catchy footage.

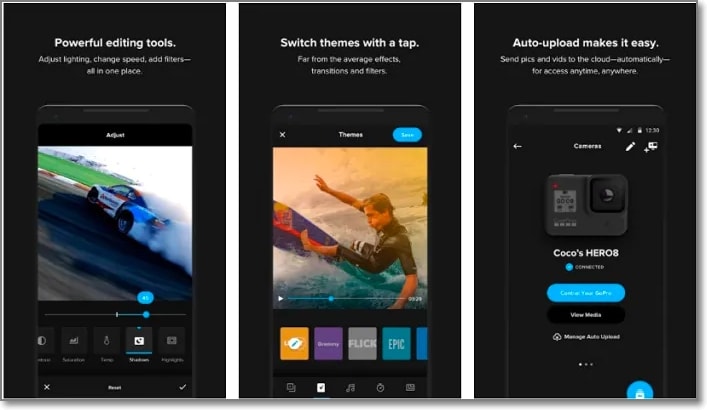
08QuickStories
Using this AI-based editing tool, your video footage captured through a camera, GoPro as well as other devices can be edited like a pro to take them to an all-new level. The software support functions like intelligent tagging, night colors, white balancing, color rendering, and much more.
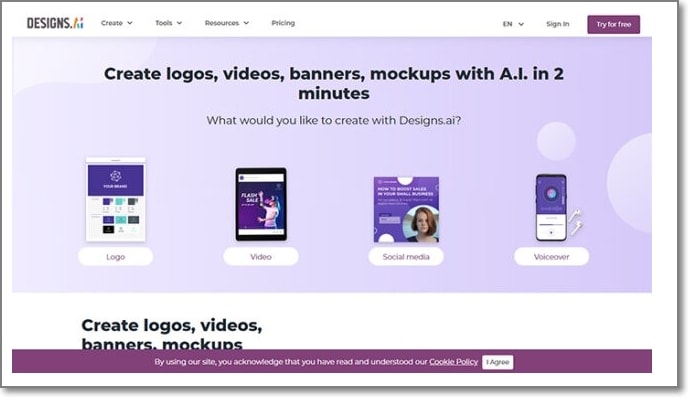
09Designs.ai
Using this online AI-based designing tool you can create posters, logos, banners, and several other videos with ease and in high quality. Text to video technology is supported by the program and you can even add voiceovers. Supporting more than 20 languages, the program also comes with a collection of images, clips, as well as audio files that can be used as needed. Transitions, animations, and other effects and elements can be added to improve the overall video look.
10**Wondershare Filmora Video Editor **
When it comes to video editing tools, the list remains incomplete without mentioning a versatile tool called Wondershare Filmora, This Windows and Mac-based software is easy and quick to install after which it is all set to create excellent videos using its extensive range of features. Using the tool, you can add transitions, effects, rotate, split, merge, and perform a host of other functions as well. Audio-based functions like audio compression, noise reduction, automatic audio syncing, and others are also supported. The interface of the tool is simple and the process of editing is hassle-free.
For Win 7 or later (64-bit)
For macOS 10.12 or later
● Ending Thoughts →
● AI-based video editing tools are intelligent programs that help in customizing the videos automatically.
● A number of these desktop and online tools are available to help you edit the footage.
● Depending on your files, editing, and other functions required, the selection of an appropriate tool can be done.
Technological advancements in the field of video editing have opened new opportunities and possibilities for the editors to unleash their creativity and AI-based video editors are a major contribution to the field. With these intelligent tools, the cumbersome process of video editing has not only become quick but also hassle-free and results in excellent pro videos. So, if you too have been looking for one such artificial intelligence videos editing tools, you are reading on the right page.

In this article
01 [What is AI video editing tools?](#Part 1)
02 [Things To Consider While Selecting An Ai Editing Tool](#Part 2)
03 [Top 10 AI Video Editors](#Part 3)
Part 1 What is AI video editing tools?
In simplest terms, the software that uses artificial intelligence for editing videos is termed AI editing tools. These programs make use of AI algorithms to perform advanced editing tasks for creating visually appealing and interesting videos. The AI tools have not only helped in accelerating the video editing tools but also assists in taking care of complex functions with ease. A good AI editing tool can perform multiple tasks like determining the shots, applying filters, adding transitions, proposing changes, color correction, face detection, and more.
Part 2 Things to consider while selecting an AI editing tool
An array of AI editing tools is available and selecting one can be a confusing task. So, while choosing one of these programs, several criteria can be considered and some of these are listed below.
● Allows editing videos in a hassle-free manner.
● Quick use and processing.
● User-friendly interface.
● Capability to process all types of videos in high resolution.
● Comes with all the needed features.
● The learning curve is not very steep.
Part 3 Top 10 AI Video Editors
After reviewing several AI-based editing software, we have selected the top 10 in the category. Check out the list below.
01Magisto
This is a powerful video editing tool that is simple and quick to use. You simply need to add the content file and select the styling type as needed along with audio and other content after which everything will be taken care by the software. The program is also capable of optimizing the video to reach the maximum number of people and this is done based on real-time analytics. This is a paid tool and is apt for creating marketing videos.

02Recreate
For creating and editing interesting videos for social media platforms, this is an apt tool that allows video customization through fonts, transitions, colors, overlays, and several other elements. Using this software, your written content can be converted into videos as the AI technology finds music as well as visuals automatically to match your requirements. Additionally, the program also supports features like recording voice-overs, removing the background, generating AI voices, and more.

03Synthesia
This is an excellent video editing tool that is AI-based that can be used for digital marketing, training, communication, and several other tasks. The tool allows creating of interesting videos from the scripts and these footages can be up to 30 minutes long. Support for around 40 languages makes the program apt for all types of users. Some other key features of the software include duplicating the video, multi-sliding videos, customization options for voice, and more. The interface is simple and the process is also hassle-free.

04RawShorts
This is an online AI-based tool that can help convert the texts and the articles into videos for social media platforms and others. The technology of the tool will analyze your text content to know the main idea on which your video is to based. Then it automatically looks for the content needed including the voice and creates as well as edits the footage. A free trial version of the program is also available though it comes with several limitations. The drag and drop interface of the tool further makes it user-friendly.

05Lumen5
For bulk editing of videos quickly, this is a good tool to consider. The interface is simple which along with the drag and drop feature makes the tool apt even for beginners. An array of video templates is available to match your theme requirements and the tool after identifying your requirements will lookout for the perfect music, content, layout, and other elements. There is also a library in the software from where you can find the desired collection of videos, images, and other media files.

06Kamua
For simple and quick editing of your videos, Kamua is a great tool to use. This is a browser-based program that supports all basic functions like resizing, captioning, and more. With its cloud computing feature, a large number of files can be processed quickly and the tool supports adding the subtitles automatically to your project and that too in more than 60 languages. The tool also has a free version for the users who first wish to test before buying the subscription.

07InVideo
This is another widely used online tool supporting advanced video editing functions. The AI-based technology of the software will let you convert your text into the desired videos effortlessly. The Intelligent Video Assistant of the software will also check for any hidden mistakes in your videos and will also correct them. You can add multiple effects to your videos using the tool to create eye-catchy footage.

08QuickStories
Using this AI-based editing tool, your video footage captured through a camera, GoPro as well as other devices can be edited like a pro to take them to an all-new level. The software support functions like intelligent tagging, night colors, white balancing, color rendering, and much more.

09Designs.ai
Using this online AI-based designing tool you can create posters, logos, banners, and several other videos with ease and in high quality. Text to video technology is supported by the program and you can even add voiceovers. Supporting more than 20 languages, the program also comes with a collection of images, clips, as well as audio files that can be used as needed. Transitions, animations, and other effects and elements can be added to improve the overall video look.

10**Wondershare Filmora Video Editor **
When it comes to video editing tools, the list remains incomplete without mentioning a versatile tool called Wondershare Filmora, This Windows and Mac-based software is easy and quick to install after which it is all set to create excellent videos using its extensive range of features. Using the tool, you can add transitions, effects, rotate, split, merge, and perform a host of other functions as well. Audio-based functions like audio compression, noise reduction, automatic audio syncing, and others are also supported. The interface of the tool is simple and the process of editing is hassle-free.
For Win 7 or later (64-bit)
For macOS 10.12 or later
● Ending Thoughts →
● AI-based video editing tools are intelligent programs that help in customizing the videos automatically.
● A number of these desktop and online tools are available to help you edit the footage.
● Depending on your files, editing, and other functions required, the selection of an appropriate tool can be done.
Technological advancements in the field of video editing have opened new opportunities and possibilities for the editors to unleash their creativity and AI-based video editors are a major contribution to the field. With these intelligent tools, the cumbersome process of video editing has not only become quick but also hassle-free and results in excellent pro videos. So, if you too have been looking for one such artificial intelligence videos editing tools, you are reading on the right page.

In this article
01 [What is AI video editing tools?](#Part 1)
02 [Things To Consider While Selecting An Ai Editing Tool](#Part 2)
03 [Top 10 AI Video Editors](#Part 3)
Part 1 What is AI video editing tools?
In simplest terms, the software that uses artificial intelligence for editing videos is termed AI editing tools. These programs make use of AI algorithms to perform advanced editing tasks for creating visually appealing and interesting videos. The AI tools have not only helped in accelerating the video editing tools but also assists in taking care of complex functions with ease. A good AI editing tool can perform multiple tasks like determining the shots, applying filters, adding transitions, proposing changes, color correction, face detection, and more.
Part 2 Things to consider while selecting an AI editing tool
An array of AI editing tools is available and selecting one can be a confusing task. So, while choosing one of these programs, several criteria can be considered and some of these are listed below.
● Allows editing videos in a hassle-free manner.
● Quick use and processing.
● User-friendly interface.
● Capability to process all types of videos in high resolution.
● Comes with all the needed features.
● The learning curve is not very steep.
Part 3 Top 10 AI Video Editors
After reviewing several AI-based editing software, we have selected the top 10 in the category. Check out the list below.
01Magisto
This is a powerful video editing tool that is simple and quick to use. You simply need to add the content file and select the styling type as needed along with audio and other content after which everything will be taken care by the software. The program is also capable of optimizing the video to reach the maximum number of people and this is done based on real-time analytics. This is a paid tool and is apt for creating marketing videos.

02Recreate
For creating and editing interesting videos for social media platforms, this is an apt tool that allows video customization through fonts, transitions, colors, overlays, and several other elements. Using this software, your written content can be converted into videos as the AI technology finds music as well as visuals automatically to match your requirements. Additionally, the program also supports features like recording voice-overs, removing the background, generating AI voices, and more.

03Synthesia
This is an excellent video editing tool that is AI-based that can be used for digital marketing, training, communication, and several other tasks. The tool allows creating of interesting videos from the scripts and these footages can be up to 30 minutes long. Support for around 40 languages makes the program apt for all types of users. Some other key features of the software include duplicating the video, multi-sliding videos, customization options for voice, and more. The interface is simple and the process is also hassle-free.

04RawShorts
This is an online AI-based tool that can help convert the texts and the articles into videos for social media platforms and others. The technology of the tool will analyze your text content to know the main idea on which your video is to based. Then it automatically looks for the content needed including the voice and creates as well as edits the footage. A free trial version of the program is also available though it comes with several limitations. The drag and drop interface of the tool further makes it user-friendly.

05Lumen5
For bulk editing of videos quickly, this is a good tool to consider. The interface is simple which along with the drag and drop feature makes the tool apt even for beginners. An array of video templates is available to match your theme requirements and the tool after identifying your requirements will lookout for the perfect music, content, layout, and other elements. There is also a library in the software from where you can find the desired collection of videos, images, and other media files.

06Kamua
For simple and quick editing of your videos, Kamua is a great tool to use. This is a browser-based program that supports all basic functions like resizing, captioning, and more. With its cloud computing feature, a large number of files can be processed quickly and the tool supports adding the subtitles automatically to your project and that too in more than 60 languages. The tool also has a free version for the users who first wish to test before buying the subscription.

07InVideo
This is another widely used online tool supporting advanced video editing functions. The AI-based technology of the software will let you convert your text into the desired videos effortlessly. The Intelligent Video Assistant of the software will also check for any hidden mistakes in your videos and will also correct them. You can add multiple effects to your videos using the tool to create eye-catchy footage.

08QuickStories
Using this AI-based editing tool, your video footage captured through a camera, GoPro as well as other devices can be edited like a pro to take them to an all-new level. The software support functions like intelligent tagging, night colors, white balancing, color rendering, and much more.

09Designs.ai
Using this online AI-based designing tool you can create posters, logos, banners, and several other videos with ease and in high quality. Text to video technology is supported by the program and you can even add voiceovers. Supporting more than 20 languages, the program also comes with a collection of images, clips, as well as audio files that can be used as needed. Transitions, animations, and other effects and elements can be added to improve the overall video look.

10**Wondershare Filmora Video Editor **
When it comes to video editing tools, the list remains incomplete without mentioning a versatile tool called Wondershare Filmora, This Windows and Mac-based software is easy and quick to install after which it is all set to create excellent videos using its extensive range of features. Using the tool, you can add transitions, effects, rotate, split, merge, and perform a host of other functions as well. Audio-based functions like audio compression, noise reduction, automatic audio syncing, and others are also supported. The interface of the tool is simple and the process of editing is hassle-free.
For Win 7 or later (64-bit)
For macOS 10.12 or later
● Ending Thoughts →
● AI-based video editing tools are intelligent programs that help in customizing the videos automatically.
● A number of these desktop and online tools are available to help you edit the footage.
● Depending on your files, editing, and other functions required, the selection of an appropriate tool can be done.
Technological advancements in the field of video editing have opened new opportunities and possibilities for the editors to unleash their creativity and AI-based video editors are a major contribution to the field. With these intelligent tools, the cumbersome process of video editing has not only become quick but also hassle-free and results in excellent pro videos. So, if you too have been looking for one such artificial intelligence videos editing tools, you are reading on the right page.

In this article
01 [What is AI video editing tools?](#Part 1)
02 [Things To Consider While Selecting An Ai Editing Tool](#Part 2)
03 [Top 10 AI Video Editors](#Part 3)
Part 1 What is AI video editing tools?
In simplest terms, the software that uses artificial intelligence for editing videos is termed AI editing tools. These programs make use of AI algorithms to perform advanced editing tasks for creating visually appealing and interesting videos. The AI tools have not only helped in accelerating the video editing tools but also assists in taking care of complex functions with ease. A good AI editing tool can perform multiple tasks like determining the shots, applying filters, adding transitions, proposing changes, color correction, face detection, and more.
Part 2 Things to consider while selecting an AI editing tool
An array of AI editing tools is available and selecting one can be a confusing task. So, while choosing one of these programs, several criteria can be considered and some of these are listed below.
● Allows editing videos in a hassle-free manner.
● Quick use and processing.
● User-friendly interface.
● Capability to process all types of videos in high resolution.
● Comes with all the needed features.
● The learning curve is not very steep.
Part 3 Top 10 AI Video Editors
After reviewing several AI-based editing software, we have selected the top 10 in the category. Check out the list below.
01Magisto
This is a powerful video editing tool that is simple and quick to use. You simply need to add the content file and select the styling type as needed along with audio and other content after which everything will be taken care by the software. The program is also capable of optimizing the video to reach the maximum number of people and this is done based on real-time analytics. This is a paid tool and is apt for creating marketing videos.

02Recreate
For creating and editing interesting videos for social media platforms, this is an apt tool that allows video customization through fonts, transitions, colors, overlays, and several other elements. Using this software, your written content can be converted into videos as the AI technology finds music as well as visuals automatically to match your requirements. Additionally, the program also supports features like recording voice-overs, removing the background, generating AI voices, and more.

03Synthesia
This is an excellent video editing tool that is AI-based that can be used for digital marketing, training, communication, and several other tasks. The tool allows creating of interesting videos from the scripts and these footages can be up to 30 minutes long. Support for around 40 languages makes the program apt for all types of users. Some other key features of the software include duplicating the video, multi-sliding videos, customization options for voice, and more. The interface is simple and the process is also hassle-free.

04RawShorts
This is an online AI-based tool that can help convert the texts and the articles into videos for social media platforms and others. The technology of the tool will analyze your text content to know the main idea on which your video is to based. Then it automatically looks for the content needed including the voice and creates as well as edits the footage. A free trial version of the program is also available though it comes with several limitations. The drag and drop interface of the tool further makes it user-friendly.

05Lumen5
For bulk editing of videos quickly, this is a good tool to consider. The interface is simple which along with the drag and drop feature makes the tool apt even for beginners. An array of video templates is available to match your theme requirements and the tool after identifying your requirements will lookout for the perfect music, content, layout, and other elements. There is also a library in the software from where you can find the desired collection of videos, images, and other media files.

06Kamua
For simple and quick editing of your videos, Kamua is a great tool to use. This is a browser-based program that supports all basic functions like resizing, captioning, and more. With its cloud computing feature, a large number of files can be processed quickly and the tool supports adding the subtitles automatically to your project and that too in more than 60 languages. The tool also has a free version for the users who first wish to test before buying the subscription.

07InVideo
This is another widely used online tool supporting advanced video editing functions. The AI-based technology of the software will let you convert your text into the desired videos effortlessly. The Intelligent Video Assistant of the software will also check for any hidden mistakes in your videos and will also correct them. You can add multiple effects to your videos using the tool to create eye-catchy footage.

08QuickStories
Using this AI-based editing tool, your video footage captured through a camera, GoPro as well as other devices can be edited like a pro to take them to an all-new level. The software support functions like intelligent tagging, night colors, white balancing, color rendering, and much more.

09Designs.ai
Using this online AI-based designing tool you can create posters, logos, banners, and several other videos with ease and in high quality. Text to video technology is supported by the program and you can even add voiceovers. Supporting more than 20 languages, the program also comes with a collection of images, clips, as well as audio files that can be used as needed. Transitions, animations, and other effects and elements can be added to improve the overall video look.

10**Wondershare Filmora Video Editor **
When it comes to video editing tools, the list remains incomplete without mentioning a versatile tool called Wondershare Filmora, This Windows and Mac-based software is easy and quick to install after which it is all set to create excellent videos using its extensive range of features. Using the tool, you can add transitions, effects, rotate, split, merge, and perform a host of other functions as well. Audio-based functions like audio compression, noise reduction, automatic audio syncing, and others are also supported. The interface of the tool is simple and the process of editing is hassle-free.
For Win 7 or later (64-bit)
For macOS 10.12 or later
● Ending Thoughts →
● AI-based video editing tools are intelligent programs that help in customizing the videos automatically.
● A number of these desktop and online tools are available to help you edit the footage.
● Depending on your files, editing, and other functions required, the selection of an appropriate tool can be done.
Also read:
- New Best Online MPEG to GIF Converters
- In 2024, Minecraft Pixel Art A Complete Guide for Die-Hard Fans
- In 2024, Zoom In and Out on Discord
- Updated In 2024, Having Difficulty in Choosing the Most Affordable 3D Slideshow Software? Stay Here for the Best Application Choices of All Times to Create the Most Stunning Slideshows Ever
- Updated 2024 Approved Whats The Best Laptops For Video Editing
- Updated Have You Ever Created a Slow Motion Video on Your Phonr or Camera? This Article Will Show You some Knowledge About Slow Motion Photography
- 2024 Approved How to Remove Audio From Videos with FFmpeg?
- New In 2024, The Complete Guide to Zoho Slides with Ease
- Updated In 2024, 10 Best Music Video Templates to Make Your Video Popular
- New In 2024, Learn About some of the Best Apps for Photo Collage for PC
- Updated In 2024, Vintage Film Effect 1980S - How to Create
- Updated Want to Play a Video on Loop on Vimeo so that It Plays Again and Again? Here Are All the Different Ways to Loop a Video on Vimeo in Simple Steps
- New In 2024, How To Quickly Create A Screen Print Effect In Photoshop Detailed Guide
- Updated The Complete Guide to Slideshow Maker with Music
- How to Add Text in Adobe Rush
- Blender - A Video Editor for Every Professional for 2024
- Updated Do You Want to Replace the Sky in Your Media? Read the Article to Learn How to Change the Sky App on Your Mobile Phone
- Updated Ultimate Guide on Magic Effects Video Making for 2024
- 2024 Approved Looking for the Best Way to Create Stunning Video Animations? Here, We Look at some of the Best Animated Video Maker Solutions to Use
- New Do You Need to Create a Video for Your Business Online but Feel You Do Not Have the Skill and Time to Do That? Try Out These AI Video Generators that Will Work for You to Carry Out Tasks Effectively for 2024
- In 2024, How to Speed Up Video with Canva Online Tool?
- Updated In 2024, Do You Want to Make TikTok Videos More Elemental by Using Countdown but Dont Know How to Do This? Here We Will Thoroughly Guide You About This
- Updated In 2024, Best 8 Online MPEG to GIF Converters
- In 2024, In This Article, You Will Learn How to Record Creative Cinematic Videos Using a Smartphone and Edit the Video with Wondershare Filmora
- 2024 Approved Color Matching Is the Trickiest Part of Graphic Designing. Learn in Detail About Using Canva Color Match Ideally While Working on Your Pins, Social Media Posts, and Other Designs
- Updated What Can Be Better than Converting Apple Video Format Into Other Formats so that You Can Use the Files Easily. We Have a Few Options that You Can Use for This Purpose for 2024
- Find The Best Free Canon LUTs for 2024
- Best 10 Tools To Make Quiz Videos for 2024
- New 2024 Approved Start Your Creative Journey Now. Follow This Step-by-Step Guide on How to Add Double Exposure Effects to Your Personal Videos by Using the Filmora Video Editor
- Free Ways to Download Mobile Phone Green Screen Videos and Pictures No Copyright for 2024
- Updated 5 Methods to Make a Fake Facetime Call Video for 2024
- Updated Want to Make a Single Video From Different Clips? Follow These Ways to Learn About How to Merge Clips in DaVinci Resolve for 2024
- Updated Google Meet Green Screen
- Updated 2024 Approved 6 Instant Ways to Create Windows 10 Slideshow
- Updated What Is a Memoji and How to Make a Memoji? You Can Learn Top 8 Memoji Makers for PC, Android, or iOS, and the Steps to Make a Memoji for 2024
- Updated In 2024, Top 10 3D Slideshow Software Review
- Updated In 2024, The Quicktime Software with Its Latest Version Gives You an Option to Change the Speed of an Audio or Video File. It Makes It Easy to Watch the Slow-Motion Video or Fast-Forward the Audio
- Updated In 2024, Have You Ever Applied the Gaussian Blur Effect to Your Videos? Read This Article to Find a Reliable and Convenient Tool to Generate the Gaussian Blur Effect
- This Article Will Show You How to Make a Tattoo Disappear on Your Body Magically
- New In 2024, Thousands Already Know What Ezgif Is and So Can You
- In 2024, 10 Best Audio Visualizers Windows, Mac, Android, iPhone & Online
- Easy Ways to Edit Recorded Video
- New Vlogs and Travel Content Are Incomplete without a Fast-Motion Effect. Learn Step-by-Step How to Make Fast Motion Video on an iPhone in This Article for 2024
- Updated How To Edit Youtube Videos In Easy Steps
- How to Repair Broken video files of M6 Pro 4G?
- How to Fix Unfortunately, Contacts Has Stopped Error on Samsung Galaxy F04 | Dr.fone
- The Best iSpoofer Alternative to Try On Oppo A79 5G | Dr.fone
- Easy Guide How To Bypass Itel S23+ FRP Android 10/11/12/13
- Video File Repair - How to Fix Corrupted video files of Lava Blaze Pro 5G?
- 10 Best Fake GPS Location Spoofers for Vivo Y36i | Dr.fone
- In 2024, The Ultimate Guide to Samsung Galaxy M14 5G Pattern Lock Screen Everything You Need to Know
- In 2024, Can I Bypass a Forgotten Phone Password Of Nubia Red Magic 8S Pro+?
- Strategies for Apps That Wont Download From Play Store On Nubia Red Magic 9 Pro | Dr.fone
- The Ultimate Guide to Get the Rare Candy on Pokemon Go Fire Red On OnePlus Ace 2V | Dr.fone
- Unlock Your Nubia Z50 Ultra Phone with Ease The 3 Best Lock Screen Removal Tools
- In 2024, Is pgsharp legal when you are playing pokemon On Oppo Find X6? | Dr.fone
- In 2024, 3 Methods to Mirror Vivo V27e to Roku | Dr.fone
- How to Remove Apple iPhone 6 Plus Activation Lock
- Proven Ways to Fix There Was A Problem Parsing the Package on Samsung Galaxy A05 | Dr.fone
- Ways to stop parent tracking your Realme 11 5G | Dr.fone
- In 2024, Hassle-Free Ways to Remove FRP Lock on Vivo Y77twith/without a PC
- In 2024, How to Unlock iCloud lock on your iPhone 12 Pro Max and iPad?
- How to Fix Pokemon Go Route Not Working On Poco C65? | Dr.fone
- Title: New Camtasia Review – Is It The Best Video Editor for 2024
- Author: Morgan
- Created at : 2024-06-15 18:56:52
- Updated at : 2024-06-16 18:56:52
- Link: https://ai-video-editing.techidaily.com/new-camtasia-review-is-it-the-best-video-editor-for-2024/
- License: This work is licensed under CC BY-NC-SA 4.0.

