
:max_bytes(150000):strip_icc():format(webp)/GettyImages-1168002788-1bccccf67a1f4988bd355c09748383ab.jpg)
New Denoise a Video in Adobe Premiere Pro – Audio and Video Noise Removal for 2024
Denoise a Video in Adobe Premiere Pro – Audio and Video Noise Removal
What’s the key to our success? And what’s the process that it takes us? How can we attract audiences and guarantee the viewers’ transition to loyalty? – these are the questions that people in the professions connected to the technology should ask. There is no recipe, but at least, we know what NOT to do – DO NOT create bad content! You will never have a desired amount of listeners for your podcasts if the voice of the actor or noise of the whole track is annoying, you will struggle to have success on Youtube if your shots are unpleasant to watch, and the list goes on – there are just too many things you should not do!
But sometimes bad quality just happens. It happens when you know you have a problem and it happens when you think everything is going well in producing. You might come back from the production and find out that every shot you took had bad lightning, or there was an almost naked guy running on the background, or there is a noise on the background that just makes the whole experience of watching and listening not worthwhile! This might be something that sinks your heart…
But the mistakes we make don’t ensure that there has been a verdict cast for our failure. Nowadays, the will is everything – if you are really willing to make something work, you will just have to find the right tools, and learn a little about them, and, Voila! – Maybe you can turn bad into something good? Unacceptable into something acceptable? Annoying into interesting, and unpleasant into enjoyable?
This is called EDITING. And Editing covers different, almost endless days – too many computer programs, too many tools, too many opportunities to modify almost anything you want to make look and sound better - All of this feels like magic!
Among many instruments and techniques, there is one thing called denoising, with two different meaning. You might find noise in two areas – video and audio. Audio denoising means to remove or reduce the background noise, such as air conditioner hum, someone screaming from far away, birds chirping, the waves, etc. the noise in photo and video terms means that the scene we are looking at is grainy and makes watching the scene a little more difficult, with a less clear picture. And whenever these kind of things appear, mostly out of the blue, – because no one wants to take a bad video or record a bad voice-over, - our magical tools and abilities come to play…
One of those is called Adobe Premiere Pro, using for video editing, viewed as the most sophisticated video editor software. So, in this article, we will learn how to handle bot noise-s – in video as well as audio terms, and how to create a better viewer/listener experience in this very program. Lastly, we’ll touch upon an alternative for background noise removal, so, there’s nothing left but tuning in!
Video denoising in Adobe Premiere Pro
Reducing the noise in the video in this software can be achieved through using effect which is called Median. Before discovering it, without any doubt, we need to add our footage into the Timeline in Premiere Pro. Then, we can proceed to finding the Effects Panel, where our wanted Median can be found – just drag and drop the effect to your clip.

In order to make sure that the Median touches the grainiest parts of the whole clip, we need to use something called masks. In the Effects Control panel, we can select the mask shape for our clip –either choose rectangle, circle, or pen tool. Pen tool is something with which we move the Mask around the screen and resize it to include the desired area and cover it.

Changing Feather setting to 100 will make sure that the effect loses a visible edge and there is some smoothness added to those edges.

There might be the need to repeat this process and create several masks, if that means to have covered all of the grainy area of the scene.
Lastly, tom reduce the noise, adjusting the effect settings is needed.

Technically, what the Median effect does is just blurring the graininess, not exactly “taking it away”. And if we play with the Radius settings there, we can find our desired look!
How to remove background noise in Adobe Premiere Pro
Removing background noise in Adobe Premiere Pro can be a pretty simple process and lead to much better results. First of all, of course, import the desired material into your software so you can see the video and audio in the sequence visually. After having the project set up, you will need to find the Efffects Panel, which might be hidden a little, but it must be on the left and bottom of the program layout; or, you can find it on the top, in the navbar.

After having located the Effects panel, go for the search bar and type: denoise, and you’ll see that DeNoise effect is under Audio Effects.

You hold onto the effect, drag and drop it on the audio track in the timeline itself! Then, you just click on the audio in the sequence and on the top right Effect Controls will appear, which we need to concentrate on. You will scroll down a little there and below Audio notice: fx DeNoise, where you hit on the Edit button. This will open the Clip Fx Editor for the Audio denoising.

Basically, it only has one, Amount scale, and if you drag the slider of it to the right at 100%, it will remove the whole noise, but setting it on 0% will not remove any noise at all. So, you need to choose your preferred percentage! Just listen what is acceptable for you, but the general suggestion here would be that you can choose as high percent as you want, but if the effect starts taking out the voice and actually wanted parts, then you will have to stop and keep it that way. So, that’s actually it!
Bonus tip: how to remove audio noise in video with Wondershare Filmora
What we have promised in the beginning in the video, we like to offer now – the alternative to reduce or remove audio noise in the video is called Wondershare Filmora, which functions in a very simple way. So, we can start using these guides:
Drag and drop your video into the timeline. Right-clicking on the video and hitting Detach Audio will enable us to separate audio and video from one another, getting us a chance to work on them individually.

Double-click on the audio track shows the editing panel, where we see Remove background noise – choosing this option removes the noise!

Though, there is another way to do this too. If you don’t want to detach the audio, then first, double-click on the video clip in the timeline and when the editing panel opens, switch to Audio. If you check the box next to Remove background noise, you will see that there are three levels – weak, mid, and strong, which determine the strength of how toe noise is going to be reduced. Choosing one of them is up to you!
In case you find that the voice sounds a little robotics, you’ll need to make it sound more natural, of course. For it, you will need to click Customize, which will take you into the Customize Equalizer department.

The low tunes are on the left, while the highs are on the right. Background noises are often the low ones, so we better lower them even more, but we would raise the middle ones to achieve a natural sound.

And, that’s it – you are done with audio background noise removal!
So, in this article, we learned how to remove the video noise and grain and audio background noise using the software Adobe Premire Pro, while we also discussed how to do the latter using Wondershare Filmora – hope you can start using your new knowledge and tools very soon and create the content you never thought you could have created!
In order to make sure that the Median touches the grainiest parts of the whole clip, we need to use something called masks. In the Effects Control panel, we can select the mask shape for our clip –either choose rectangle, circle, or pen tool. Pen tool is something with which we move the Mask around the screen and resize it to include the desired area and cover it.
Changing Feather setting to 100 will make sure that the effect loses a visible edge and there is some smoothness added to those edges.
There might be the need to repeat this process and create several masks, if that means to have covered all of the grainy area of the scene.
Lastly, tom reduce the noise, adjusting the effect settings is needed.
Technically, what the Median effect does is just blurring the graininess, not exactly “taking it away”. And if we play with the Radius settings there, we can find our desired look!
How to remove background noise in Adobe Premiere Pro
Removing background noise in Adobe Premiere Pro can be a pretty simple process and lead to much better results. First of all, of course, import the desired material into your software so you can see the video and audio in the sequence visually. After having the project set up, you will need to find the Efffects Panel, which might be hidden a little, but it must be on the left and bottom of the program layout; or, you can find it on the top, in the navbar.
After having located the Effects panel, go for the search bar and type: denoise, and you’ll see that DeNoise effect is under Audio Effects.
You hold onto the effect, drag and drop it on the audio track in the timeline itself! Then, you just click on the audio in the sequence and on the top right Effect Controls will appear, which we need to concentrate on. You will scroll down a little there and below Audio notice: fx DeNoise, where you hit on the Edit button. This will open the Clip Fx Editor for the Audio denoising.
Basically, it only has one, Amount scale, and if you drag the slider of it to the right at 100%, it will remove the whole noise, but setting it on 0% will not remove any noise at all. So, you need to choose your preferred percentage! Just listen what is acceptable for you, but the general suggestion here would be that you can choose as high percent as you want, but if the effect starts taking out the voice and actually wanted parts, then you will have to stop and keep it that way. So, that’s actually it!
Bonus tip: how to remove audio noise in video with Wondershare Filmora
What we have promised in the beginning in the video, we like to offer now – the alternative to reduce or remove audio noise in the video is called Wondershare Filmora, which functions in a very simple way. So, we can start using these guides:
Drag and drop your video into the timeline. Right-clicking on the video and hitting Detach Audio will enable us to separate audio and video from one another, getting us a chance to work on them individually.
Double-click on the audio track shows the editing panel, where we see Remove background noise – choosing this option removes the noise!
Though, there is another way to do this too. If you don’t want to detach the audio, then first, double-click on the video clip in the timeline and when the editing panel opens, switch to Audio. If you check the box next to Remove background noise, you will see that there are three levels – weak, mid, and strong, which determine the strength of how toe noise is going to be reduced. Choosing one of them is up to you!
In case you find that the voice sounds a little robotics, you’ll need to make it sound more natural, of course. For it, you will need to click Customize, which will take you into the Customize Equalizer department.
The low tunes are on the left, while the highs are on the right. Background noises are often the low ones, so we better lower them even more, but we would raise the middle ones to achieve a natural sound.
And, that’s it – you are done with audio background noise removal!
So, in this article, we learned how to remove the video noise and grain and audio background noise using the software Adobe Premire Pro, while we also discussed how to do the latter using Wondershare Filmora – hope you can start using your new knowledge and tools very soon and create the content you never thought you could have created!
How to Put Emoji on Mac That Take Less Than 10 Mins
How to Put Emoji on Mac That Take Less Than 10 Mins
An easy yet powerful editor
Numerous effects to choose from
Detailed tutorials provided by the official channel
Emojis are expressive graphic elements that backup your content for catering to an engaging information delivery. Be here to know the how’s and why’s!
In this article
01 [The Power of Emojis in Marketing](#Part 1)
02 [How to Add Emoji on MacBook Efficiently?](#Part 2)
03 [How to Enable and Access Emoji Characters on a Mac?](#Part 3)
04 [Putting Emoji on Mac Q&A](#Part 4)
Part 1 The Power of Emojis in Marketing
Emojis are one elusive means to express the feel behind a content that is being presented, regardless of the diversities in the platform and information aspects. While the common beliefs with respect these graphic uplifts are restricted within personal boundaries of fun and entertainment, the professional credibility of emojis is no less.
When the talk is about marketing and business strategies, the significance of these elements cannot be limited within the constraints of domain and time. Entering into the application varieties, you can work with emojis everywhere, from promotional advertisements to promote your brand, to devising strategic video presentations and slideshows to showcase your company utilities in front of a target audience.
Beginning our discussion towards the same, let us look through the different aspects and benefits of including emojis as a compliment to business marketing strategies in the following section:
Merits of Using Emojis as a Marketing Tactic
01Social Media Utility
Considering the fact that social media is turning into a content sharing hub, irrespective of information genres, the business marketing arena is obviously not left untouched. With the revolutionary expansion in the concept and credibility of digital marketing, social media platforms have become a significant space for product advertisement and brand promotion.
Speaking in the light of the above, the fact that emojis have long been a part of social media conversations is something that cannot be ignored. Using a combination of emojis and social media can thus, work to deliver a more effective presentation of your brands, products and company services, while keeping the audience captivated by making them connect with the feel of the utility they are viewing at.
02Making the Brand Come Alive
It is a known fact that a trusted brand name works to earn a hoard of loyal customers in the long run. Adding an emoji in your brand promotion strategies helps to establish a great deal of emotional connection of the same with your target audience, while making them relate to the regular inclusion of these graphic elements in their social media conversations.
Working towards adding emojis in your product or company presentations or ad campaigns caters to convey the product information in a unique style of its own by adding an extra bit of liveliness to your brand.
You should however, be cautious while using emojis to promote your brand, lest these may end up crowding the presentation snippet. It is a wise decision to use a single or couple of emojis at the end of a text based content, rather than stuffing the same with a series of emojis to avoid the distraction of audience.
Another way of making an impressive use of emojis in your promotional media posts is creating engaging feature lists of your brand, or adding the same to the product headlines, while giving them an extra impact. Such graphic creativity will surely put your brand ahead of the numerous counterparts on promotional business sites.
03Enhanced Viewer Engagement
It is a common practice to include emojis within personal chats and social media conversations to ensure an improved peer engagement, while uplifting the degree of fun and entertainment. The same concept can be applied to brand promotion strategies for bringing in an increased number of interested audiences.
Supplementing your promotional content with emojis helps the latter to gain a casual and informal presentation approach that suits the audience in a much better way. Speaking in the light of the current social media and digital market trends, emojis have managed to achieve a universal credibility that is far ahead of video and image centered promotional elements.
As a product or business marketer, you can work with these conveying graphic utilities to initiate thematic conversations with your viewers and potential customers. Care should however be taken to make an intelligent and smart usage of emojis, to ensure that the latter works to uplift and compliment your promotional strategies, lest you would end up distracting your audiences.
04Supplementing the Content With a Cohesive Context
When aiming at creating a brand awareness of your product or company via promotional messaging, emojis can help to convey an emotional exactness that a text based content often falls short of adhering to.
While using emojis alone can make the task a bit difficult, an intelligent combination of the latter with cohesive text elements can effectively cater towards delivering a top rated promotional output, while adding an extra bit of meaning and depth to the same.
When promoting your product across social media platforms that have a restriction on the maximum number of characters within a single post or message, using emojis can compensate for the text you would otherwise prefer to add. The additional benefit of this inclusion lies in supplementing your text with the missing emotional connect and feel that works to build an emphasis of your brand among the viewers.
Part 2 How to Add Emoji on MacBook Efficiently?
As already stated, emojis are an expressive set of graphic elements that work to enhance the context and credibility of the otherwise ordinary text messages. Whether used in casual conversations and personal chats on social media platforms for fun and entertainment, or included in promotional strategies to create brand awareness across the digital market, emojis cater to one and all concerns with the same effectiveness and credibility.
Working with emojis is one aspect, but the latter’s interface compatibility is also of considerable importance. When proceeding to use the elements, you should take care to check the accessibility of these elements with the system you are working on. While most of the emojis are platform independent, some of the latest ones may or may not be available on dated versions of applications and devices.
By now, you must have understood the significance of working with emojis to uplift the promotional content of a brand while ensuring a significant viewer engagement. Let us move ahead with our discussion to talk about the most effective ways of how to add emoji on MacBook in what follows next:
User’s Guide to Include the Emoji Picker Tool on the Menu Bar of a MacBook
Step 1: Access the Apple Icon
For a quick and convenient access to emoji elements on a MacBook, it is advisable to add the ‘Emoji Picker’ utility to the ‘Menu Bar’ of your device’s screen. To do this, start with navigating to the top left corner of the MacBook’s opening screen and clicking on the ‘Apple’ icon.

Step 2: Open System Preferences
As you click on the ‘Apple’ icon in step 1, proceed to select the ‘System Preferences’ option from the drop down menu that appears next.

Step 3: Pick the Keyboard Option
Selecting the ‘Preferences’ option caters to display a series of input choice icons on your MacBook screen. From the available options, tap on the ‘Keyboard’ icon to select the same.

Step 4: Choose the Show Option
The ‘Keyboard Options’ at the top of the screen now present a list of functions and accessibilities that you can work upon. Click the checkbox beside the ‘Show Keyboard and Emoji Viewer in Menu Bar’ option to add the ‘Emoji Picker’ tool to the ‘Menu Bar’.

Part 3 How to Enable and Access Emoji Characters on a Mac?
Emoji characters are highly effective in expressing the emotions and feel behind your message that words often fall short of conveying. While these elements are easily accessible across devices working on almost all popular operating systems, addressing the query of how to get emoticons on Mac is many a time an element of surprise.
Diving deep into the means and ways of working with emojis on a MacOS utility, let us try hands at understanding the knowhow of enabling and accessing emoji characters on Mac compatible devices in the following section:
User’s Guide to Enable and Access Emoji Characters on Mac Devices
Step 1: Launch the Application
Start with launching the preferred application in your device in which you want to use the emoji. Within the latter’s text field, drag and point the cursor to the place where the emoji needs to be added.
Step 2: Enter the Command Combination
As you complete the first step, proceed to tap the ‘Command + Ctrl + Spacebar’ key combination on your device’s keyboard to see the ‘Emoji Picker’ overlay window pop up on the screen. If your desired emoji does not seem to find a place within the displayed lists of emoji categories, head to the ‘Search Bar’ at the top and type a relatable keyword to look for the required graphic representation.
Step 3: Select the Emoji
You can now pick a desired emoji from the displayed overlay, followed by double clicking on the same to add the element at the current cursor position.

Part 4 Putting Emoji on Mac Q&A
● What is the difference between emoticons and emojis?
Graphic smiley faces that involve a keyboard character, like that of a letter, digit or punctuation, are referred to as emoticons; while the caricaturized images that do have a character or punctuation inclusion, belong to the category of emojis.
● What does the UwU emoji stand for?
This one is an emoticon that represents a cute looking face. You can use it in your conversations and social media posts to depict a happy, affectionate and warm emotional expression. You can use to this to complement your conversations and uplift the customary text messages.
● How can you avail a bank of the latest emojis for free?
When looking for convenient sources to access the latest and most expressive emojis for free, you are offered a series of graphic galleries across the web, from where you can either download the emoji package or even add the elements directly from the site to your conversations.
● Why can’t you access some of the emojis on your Mac device?
To access the latest emojis on your Mac device, make sure that the device is updated to the most recent version of the MacOs operating system. You can also opt to restart and update the device by navigating to and launching the ‘Apple Menu’, followed by selecting the ‘System the device in ‘Safe Mode’.
● What is the best software alternative access the latest emoji bank?
When looking for a software solution to sort the concern of how to put emoji on Mac, while taking suitable emoji suggestions, you can conveniently rely on the Wondershare Filmora Video Editor graphic editor program, which houses an extensive inventory of various graphic elements, including emojis. You can browse through the same and proceed to search the one that you that you like across a web utility.
For Win 7 or later (64-bit)
For macOS 10.12 or later
● Ending Thoughts →
● Emojis are an expressive element of marketing strategies aiming at brand promotion, along with establishing company credibility among the potential audience.
● Working towards the concern of MacOS insert emoji requires the inclusion of the ‘Emoji Picker’ tool on the latter’s menu bar.
● If you are in search of an affordable software program to access the latest collection of emojis, Wondershare Filmora can be a smart choice.
Emojis are expressive graphic elements that backup your content for catering to an engaging information delivery. Be here to know the how’s and why’s!
In this article
01 [The Power of Emojis in Marketing](#Part 1)
02 [How to Add Emoji on MacBook Efficiently?](#Part 2)
03 [How to Enable and Access Emoji Characters on a Mac?](#Part 3)
04 [Putting Emoji on Mac Q&A](#Part 4)
Part 1 The Power of Emojis in Marketing
Emojis are one elusive means to express the feel behind a content that is being presented, regardless of the diversities in the platform and information aspects. While the common beliefs with respect these graphic uplifts are restricted within personal boundaries of fun and entertainment, the professional credibility of emojis is no less.
When the talk is about marketing and business strategies, the significance of these elements cannot be limited within the constraints of domain and time. Entering into the application varieties, you can work with emojis everywhere, from promotional advertisements to promote your brand, to devising strategic video presentations and slideshows to showcase your company utilities in front of a target audience.
Beginning our discussion towards the same, let us look through the different aspects and benefits of including emojis as a compliment to business marketing strategies in the following section:
Merits of Using Emojis as a Marketing Tactic
01Social Media Utility
Considering the fact that social media is turning into a content sharing hub, irrespective of information genres, the business marketing arena is obviously not left untouched. With the revolutionary expansion in the concept and credibility of digital marketing, social media platforms have become a significant space for product advertisement and brand promotion.
Speaking in the light of the above, the fact that emojis have long been a part of social media conversations is something that cannot be ignored. Using a combination of emojis and social media can thus, work to deliver a more effective presentation of your brands, products and company services, while keeping the audience captivated by making them connect with the feel of the utility they are viewing at.
02Making the Brand Come Alive
It is a known fact that a trusted brand name works to earn a hoard of loyal customers in the long run. Adding an emoji in your brand promotion strategies helps to establish a great deal of emotional connection of the same with your target audience, while making them relate to the regular inclusion of these graphic elements in their social media conversations.
Working towards adding emojis in your product or company presentations or ad campaigns caters to convey the product information in a unique style of its own by adding an extra bit of liveliness to your brand.
You should however, be cautious while using emojis to promote your brand, lest these may end up crowding the presentation snippet. It is a wise decision to use a single or couple of emojis at the end of a text based content, rather than stuffing the same with a series of emojis to avoid the distraction of audience.
Another way of making an impressive use of emojis in your promotional media posts is creating engaging feature lists of your brand, or adding the same to the product headlines, while giving them an extra impact. Such graphic creativity will surely put your brand ahead of the numerous counterparts on promotional business sites.
03Enhanced Viewer Engagement
It is a common practice to include emojis within personal chats and social media conversations to ensure an improved peer engagement, while uplifting the degree of fun and entertainment. The same concept can be applied to brand promotion strategies for bringing in an increased number of interested audiences.
Supplementing your promotional content with emojis helps the latter to gain a casual and informal presentation approach that suits the audience in a much better way. Speaking in the light of the current social media and digital market trends, emojis have managed to achieve a universal credibility that is far ahead of video and image centered promotional elements.
As a product or business marketer, you can work with these conveying graphic utilities to initiate thematic conversations with your viewers and potential customers. Care should however be taken to make an intelligent and smart usage of emojis, to ensure that the latter works to uplift and compliment your promotional strategies, lest you would end up distracting your audiences.
04Supplementing the Content With a Cohesive Context
When aiming at creating a brand awareness of your product or company via promotional messaging, emojis can help to convey an emotional exactness that a text based content often falls short of adhering to.
While using emojis alone can make the task a bit difficult, an intelligent combination of the latter with cohesive text elements can effectively cater towards delivering a top rated promotional output, while adding an extra bit of meaning and depth to the same.
When promoting your product across social media platforms that have a restriction on the maximum number of characters within a single post or message, using emojis can compensate for the text you would otherwise prefer to add. The additional benefit of this inclusion lies in supplementing your text with the missing emotional connect and feel that works to build an emphasis of your brand among the viewers.
Part 2 How to Add Emoji on MacBook Efficiently?
As already stated, emojis are an expressive set of graphic elements that work to enhance the context and credibility of the otherwise ordinary text messages. Whether used in casual conversations and personal chats on social media platforms for fun and entertainment, or included in promotional strategies to create brand awareness across the digital market, emojis cater to one and all concerns with the same effectiveness and credibility.
Working with emojis is one aspect, but the latter’s interface compatibility is also of considerable importance. When proceeding to use the elements, you should take care to check the accessibility of these elements with the system you are working on. While most of the emojis are platform independent, some of the latest ones may or may not be available on dated versions of applications and devices.
By now, you must have understood the significance of working with emojis to uplift the promotional content of a brand while ensuring a significant viewer engagement. Let us move ahead with our discussion to talk about the most effective ways of how to add emoji on MacBook in what follows next:
User’s Guide to Include the Emoji Picker Tool on the Menu Bar of a MacBook
Step 1: Access the Apple Icon
For a quick and convenient access to emoji elements on a MacBook, it is advisable to add the ‘Emoji Picker’ utility to the ‘Menu Bar’ of your device’s screen. To do this, start with navigating to the top left corner of the MacBook’s opening screen and clicking on the ‘Apple’ icon.
Step 2: Open System Preferences
As you click on the ‘Apple’ icon in step 1, proceed to select the ‘System Preferences’ option from the drop down menu that appears next.
Step 3: Pick the Keyboard Option
Selecting the ‘Preferences’ option caters to display a series of input choice icons on your MacBook screen. From the available options, tap on the ‘Keyboard’ icon to select the same.
Step 4: Choose the Show Option
The ‘Keyboard Options’ at the top of the screen now present a list of functions and accessibilities that you can work upon. Click the checkbox beside the ‘Show Keyboard and Emoji Viewer in Menu Bar’ option to add the ‘Emoji Picker’ tool to the ‘Menu Bar’.
Part 3 How to Enable and Access Emoji Characters on a Mac?
Emoji characters are highly effective in expressing the emotions and feel behind your message that words often fall short of conveying. While these elements are easily accessible across devices working on almost all popular operating systems, addressing the query of how to get emoticons on Mac is many a time an element of surprise.
Diving deep into the means and ways of working with emojis on a MacOS utility, let us try hands at understanding the knowhow of enabling and accessing emoji characters on Mac compatible devices in the following section:
User’s Guide to Enable and Access Emoji Characters on Mac Devices
Step 1: Launch the Application
Start with launching the preferred application in your device in which you want to use the emoji. Within the latter’s text field, drag and point the cursor to the place where the emoji needs to be added.
Step 2: Enter the Command Combination
As you complete the first step, proceed to tap the ‘Command + Ctrl + Spacebar’ key combination on your device’s keyboard to see the ‘Emoji Picker’ overlay window pop up on the screen. If your desired emoji does not seem to find a place within the displayed lists of emoji categories, head to the ‘Search Bar’ at the top and type a relatable keyword to look for the required graphic representation.
Step 3: Select the Emoji
You can now pick a desired emoji from the displayed overlay, followed by double clicking on the same to add the element at the current cursor position.
Part 4 Putting Emoji on Mac Q&A
● What is the difference between emoticons and emojis?
Graphic smiley faces that involve a keyboard character, like that of a letter, digit or punctuation, are referred to as emoticons; while the caricaturized images that do have a character or punctuation inclusion, belong to the category of emojis.
● What does the UwU emoji stand for?
This one is an emoticon that represents a cute looking face. You can use it in your conversations and social media posts to depict a happy, affectionate and warm emotional expression. You can use to this to complement your conversations and uplift the customary text messages.
● How can you avail a bank of the latest emojis for free?
When looking for convenient sources to access the latest and most expressive emojis for free, you are offered a series of graphic galleries across the web, from where you can either download the emoji package or even add the elements directly from the site to your conversations.
● Why can’t you access some of the emojis on your Mac device?
To access the latest emojis on your Mac device, make sure that the device is updated to the most recent version of the MacOs operating system. You can also opt to restart and update the device by navigating to and launching the ‘Apple Menu’, followed by selecting the ‘System the device in ‘Safe Mode’.
● What is the best software alternative access the latest emoji bank?
When looking for a software solution to sort the concern of how to put emoji on Mac, while taking suitable emoji suggestions, you can conveniently rely on the Wondershare Filmora Video Editor graphic editor program, which houses an extensive inventory of various graphic elements, including emojis. You can browse through the same and proceed to search the one that you that you like across a web utility.
For Win 7 or later (64-bit)
For macOS 10.12 or later
● Ending Thoughts →
● Emojis are an expressive element of marketing strategies aiming at brand promotion, along with establishing company credibility among the potential audience.
● Working towards the concern of MacOS insert emoji requires the inclusion of the ‘Emoji Picker’ tool on the latter’s menu bar.
● If you are in search of an affordable software program to access the latest collection of emojis, Wondershare Filmora can be a smart choice.
7 Best GoPro Video Editors for Mac
Have you ever used or seen small box-type cameras for recording videos? Well, those are called action cameras. Action cameras are compact go. They were basically made to shoot sports or any other activities videos. They are mountable on many surfaces so you can record freely during any activity. Many of them provide 4K videos at 60 fps or higher to provide crisp video quality or low resolution at 120 or 240 fps to record smooth slow-mo videos. Most of them are waterproof and have good video stabilization so you can record any sports hassle-free.
There are many action camera companies out there in the market but the one ruling the market at the moment is GoPro. It has some best action camera models with dozens of amazing features. It can also record in RAW format and GoPro max can also shoot 360 videos.
GoPro gives amazing results but sometimes videos aren’t up to your expectations and need a little bit of refinement. From sharpening to speed ramping there are many ways to enhance your GoPro videos. And for this purpose, you need a good video editing software which has all these features plus it also supports RAW and 360 video files. Here we have mentioned some noteworthy video editing softwares for you.
Wondershare - Filmora :
It is available for both Windows and Mac.
If you are looking for professional and easy-to-use software to edit your GoPro videos then Filmora Video Editor can be the right choice for you. It has many cool features to enhance your action cam footage. From stabilization to color grading to fish eye effect all can be done in this software. It has a simple and attractive UI.
It has hundreds of effects and cool transitions. It is a paid video editor which also provides a free version to check and practice your skills on. But the main disadvantage of the free version is that it leaves a watermark on export. If you don’t want to invest money in the beginning, till then you can practice on the free version and once you are satisfied with your skills then you can upgrade to a pro version.
Pricing: Wondershare Filmora offers three different plans. Monthly one at $9.99/a month, Yearly one at $69.99, and perpetual license for $79.99 where you can own the software’s specific version for perpetual. It also provides an educational plan for students and teachers.
For Win 7 or later (64-bit)
For macOS 10.14 or later
~ Features:
- It supports 4K files and a wide range of file formats.
- It has a simple UI that is suitable for beginners.
- It Supports 360 video files (in equirectangular format).
- Supports industry-standard plugins like Boris fx.
- Have features like standard motion tracking, masking, chroma key, e.t.c.
- The paid version has more features like Speed ramping, Auto-sync, keyframing, and animation.
- Have vast stock library.
~ Cons:
- The free version leaves a watermark on export.
- Have playback issues with 4k videos.
- Lacks some standard editing features.
~ Steps:
Import: Open “Filmora” then select the desired aspect ratio and click “New Project’ to start editing. Click on the “Import panel” to import media files.

Edit: Drag and drop the clips to add them to the timeline. Drop the clips above or below to add them in layers. Click the top-left icon of the timeline to add layers. Select a clip and you will see a bunch of tools appear on the top bar of the timeline, use them to perform basic editing tasks like split, crop, speed ramping, keyframing, e.t.c.
Double-click on a clip to open its properties. . Click the blue “Ok” button to move back to the previous window.
Select the “Video” icon to transform the clip or to do motion tracking, stabilization, chroma-key, Masking, e.t.c.
Select the “Audio” icon to apply effects and enhance your audio.
Select the “Color” icon to do color correction and grading.
Select the “3D LUT” option to import a new customized lut.
Select the “Animation” icon to add preset animations or make custom animations by using keyframes.
Select the “Speed” icon to adjust the speed of the clip or to do speed ramping.

Click the blue “OK” button below to go back to the previous window.
Effects: On the horizontal bar at the top-left corner of the screen, all the effects, transitions, title present, and stock library are located. Drag and drop to apply them.

Export: Click the blue “Export” button to open export window, choose the desired settings than click “Export”. and don’t forget to save the project if you want to edit it again.
Free GoPro Video Editors for Mac:
If you are tight on budget but still want a professional video editor to edit your GoPro videos then here I have mentioned some free but powerful video editors. Whether you are a beginner or a professional content creator, these free softwares can get your job done.
Blackmagic - Davinchi Resolve:
It is available for both Windows and Mac.
Whether you are a freelance video editor or an industry-level filmmaker, if you want to step up your game and stand out from your competition then you need a powerful video editor to help you out and Davinchi Resolve can be the right choice for you. From sports vlogging using action cams to Hollywood filmmaking using Red cinema cameras, Davinchi Resolve can handle and edit all this footage easily and smoothly. It is even used in the making of several Hollywood projects including Marvels’s feature films.
It is one of the best color grading software available in the market. It has advanced color grading tools that can help color grade your GoPro raw videos easily as raw videos look dull but provide greater flexibility. It is a timeline-based editor but its Fusion and Color grading panel provides a Node-based editing system which is hard to use but provides great flexibility once mastered.
Resolve has 6 different pages to deal with different editing parts:
“Edit” and “Cut” pages to deal with simple editing tasks. Its “Fusion” page allows users to do VFX and 3D compositing. The “Color Grading” page has all the professional grading tools. While the “Fairlight” page is designed to edit and enhance audio. And the “Deliver” page to export your files.
All these features are available for free without even giving a watermark. Although it has a studio version that provides some additional features to get more out of this amazing software.

- Davinchi Resolve Studio:
The free version has almost everything a professional video editor needs. but you can purchase the Studio version to get some really juicy features to enhance your video editing experience. It includes the Davinci neural engine, stereoscopic 3D tools, Dolby atmos audio mastering,e.t.c.
Pricing: Studio version is available at $ 295 for a lifetime license and with free updates.
~ Features:
- It supports a 4K resolution at 60fps. (while the Studio version supports up to 32K resolution at 120 fps.)
- It is a multi-feature software that provides editing, color grading, VFX, 3D compositing, and audio editing all in one place.
- It has the most advanced and powerful Node-based color grading system, which is also used by Hollywood film studios.
- Supports Raw and 360 videos from GoPro or other action cameras.
- Supports multi-cam editing up to 16 camera angles.
- Can make Compound clips and add adjustment layers.
- Fairlight panel has professional audio production tools like waveform editing, audio ducking, and Channel mapping. (Dolby Vision mastering and 3D spatial Panning [audio editing in 3D space] are available in the Studio version.)
- Supports third-party plugins.
- Has a 3D workspace and provides a virtual set extension for 3D modeling and compositing.
~ Cons:
- Its node-based editing style is quite difficult for beginners.
- Requires a high-end workstation to run smoothly otherwise will often crash during editing.
- Its node-based editing system is hard to learn.
~ Steps:
Import: Open “Davinci Resolve’. Select a previously saved project or press “New project” to start a new one. Click “File” >> “Import” >> “Media” to import files or press “CTRL + I”.
Edit: Drag and drop files to add them to the timeline Use the tools present above the timeline to trim, cut or move your clips. Click the “Inspector” icon on the top-right corner of the window to open the Inspector tab. Here you will find the properties of all the clips, audio, transitions, effects, e.t.c. There are different editing tabs at the bottom of the window.
In the “Fusion” window, click “Nodes” to open the Node screen. Import a clip or use it from the editor timeline. Usually, a clip will have two nodes connected through a line. Above the nodes panel, different types of nodes are available. Drag any node in the panel and connect it through lines. or add a “merge” node to connect nodes.
Its color grading panel also has Node based editing system.

Effects: Click “Effects Library” then select any effect and drop it in the timeline to apply it. You can change its properties in the “Inspector” panel.
Click the diamond icon on the right side of the property to start keyframing then change the value of that property to add keyframes at desired time period.

Export: Open the “Deliver” window, choose the desired settings then click “Add to Render Queue” to start exporting.

FXhome - Hitfilm Express:
It is available on Windows, Mac and Linux also.
If you are looking for a free but powerful video editor to edit your GoPro clips then Hitfilm Express can be the right choice for you. It is a free timeline-based editing software with professional-grade VFX tools. It is a timeline-based editor where you can add dozens of audio, videos, and text layers.
It has a composite shot sequence where you can do complex editing like editing 3D videos and elements, lights e.t.c. It has physic-base behaviors and effects also to enhance 3D compositing. For professional-level editing almost most of the effects and properties have keyframing options. It has different workspace modes to suit your editing needs.
It can also edit 360 videos recorded from your GoPro max. It has a “GoPro Lens Reframe” effect to adjust your 360 clips, but some 360 toolkits can only be available when you purchase Hitfilm pro or buy a 360 toolkit add-on. Similarly, you can purchase more add-ons according to your editing needs or you can purchase Hitfilm Pro to gain access to all add-ons and features. But can use these pro features for free but without exporting as exporting with a paid effect can give a watermark.
Hitfilm Pro:
Although Hitfilm express doesn’t give a watermark on export, but to use more features like 3D composition, LUTs, e.t.c you need to purchase add-ons, there are over 30+ add-ons available to purchase which you can purchase depending on your needs, but if you want to get all the features than its better to get your hands on Hitfilm Pro.
Pricing: Available for purchase at £ 309 or $ 388 for a lifetime license. With 12 months of free updates. It has 3 seat license which means It can run on 3 PCs simultaneously.
~ Features:
- It is a free editing software with no watermark.
- It can edit 3D videos and it can also import and edit 3D models and tracking data.
- It can edit 360 videos also.
- You can add effects and color grades as layers in the timeline also.
- Can add adjustment layers and create nested clips within nested clips to make complex editing easier.
- It has a motion track and locked-on stabilization features.
- Can do smooth keyframing and animation with the help of value graphs.
- It supports multi-cam editing also.
- Keyboard shortcuts make workflow quite easy and quick.
~ Cons:
- It has some playback issues while using 4K videos.
- It crashes sometimes, so it’s better to save the project frequently during editing.
- Hitfilm express doesn’t have a dark mode.
- Some common features are only available on the Pro version or add-ons.
~ Steps:
Import: Open “Hitfilm”, Select “New Project” to open a blank project then click “open” to open an existing file or click “new” to create a new project. Then set project settings on pop-up then and click “ok”.
Then click the “Media” tab on the top-left corner of the screen. Then select the “Import” button to import videos, images, audio, or 3d models. You can also import previously made composite shots.
Edit: Drag and drop media files from the media tab to the timeline. or click the “New” tab to create a “Composite shot” or a solid plane layer. Right-click on the left side of the timeline to insert or delete layers. On the left side of the timeline, you will find some basic tools located on the vertical bar to do simple tasks.
In the “Viewer” tab, on the left side of the playback screen, you can find tools for masking and adding text.
In the “Controls” tab, you can adjust the properties of clips and other features related to the clip like masking, track, blend, transform, e.t.c.
Create a “Composite shot” to do complex editing like 3D compositing. Or select multiple layers then right-click and select “make Composite shot” to combine them for easy editing. Double-click the composite shot to open its contents.

Effects: From the “Effects” tab drag and drop effects on the clip to add them. Some effects can be added as layers which can affect all the layers beneath it. Properties of these effects can be adjusted in the “Control” tab.
To do keyframing, Click the circle icon on the left side of the property to start keyframing then change the values of that property to add keyframes at desired time period.
Export: Click the “Export” icon then “Export now” located at the top right side of the timeline to open the export window. The export will start automatically.
Shotcut:
It is available on Windows, Mac and Linux.
If you are making videos from your GoPro or mobile phone just for fun that doesn’t require much editing then you can look for a free and simple video editor and “Shotcut” can be the right choice for this purpose.
It is a free and open-source video editor with many cool features to get your hands on. It doesn’t have any pro version. It is simple and easy to use but takes some time to understand. It supports multi-track timeline editing. It has a basic timeline design but you can customize your timeline to meet your editing needs. It has some good color grading options, you can also import your color luts. It has many cool features and effects. It supports 360 video editing and also has a few 360 video filters. It has audio effects also.
~ Features:
- All its features are for free and it doesn’t leave any watermark.
- It supports 4K resolution and a wide range of file formats.
- It also supports 360 video files.
- Has keyframing and chroma kry features.
- It has advanced color grading features.
- It provides standard animation and keyframing features.
~ Cons:
- It is a basic video editor and lacks some professional editing features.
- Have playback issues with 4K videos.
- It does have proper text editing tools.
- It is difficult to understand as its UI is different from other familiar video editors.
~ Steps:
Import: Open “Shot Cut” then click the “Open Files” button on the top-left corner of the window to import files.
Edit: Drag and drop clips on an empty timeline panel to add tracks and drag the clip from corners to trim them. Right-click on the left side of the timeline to add a video or an audio track. You will find a bunch of tools above the timeline to do some basic tasks.
You can choose from 6 different workspace designs (available in the top-right corner of the window) to suit your editing styles.

On top of the window, you will see a bunch of icons like Timeline, filter, project, and properties. e.t.c. In the properties tab, you can change the aspect ratio and speed of the clip.
Effects: Click the “Filters” icon on top of the window to open the filters menu, Click “+” above it to add filters. Double click a filter to add it to the selected clip, then click the filter to open its properties menu. You can also add text from here.
Click the “Keyframes” icon on top of the window to open the Keyframes window. Select the “clock” icon on the filters to start keyframing then change the values at a specific time to add keyframes. Click the “Timeline” icon to go back to the previous window.

Export: Click the “Export” button on the top of the screen. Select a preset or click the “Advanced” button to change export settings then click “Export File”.

Paid GoPro Video Editor for Mac:
If you are a professional athlete or a vlogger using GoPro for all of your contents and want to invest some money on paid video editors to improve your content. Then here we have mentioned some paid video editors worthy of your investment.
Apple - Final Cut Pro:
It is available for Mac only.
If you are an Apple enthusiastic person and want everything Apple, then why look for any other video editor when you can have a powerful video editor “Final cut pro” made by Apple. It is a paid but professional software that can raise your GoPro videos to the next level. Whether it’s a 360 video or a RAW file recorded from your GoPro or from the RED cinema camera, all can be edited smoothly inside Final Cut Pro. It has dozens of useful features that a professional video editor looks for like 3D tracking, Motion Graphics, Color Grading, Audio Mixing, Multi-cam editing e.t.c.
Pricing: It is a one-time purchase software available at $ 299.9 for a lifetime license and all its future updates can be downloaded free of cost.
~ Features:
- It supports up to 8K resolution.
- Support 360 and RAW video files.
- Edit videos in complete 360 and 3D spaces.
- Supports third-party video and audio plugins.
- Supports Multi-cam editing.
- Have professional color grading tools with HDR support.
- Its UI is easy to use.
~ Cons:
- It is designed for Apple devices only.
- Requires a powerful PC.
- Its UI is a bit different from other common video editors in the market.
- ~ Steps:
Import: Open “Final Cut Pro” then click the “Files” button on the top-left corner of the screen, then select “Project” to create a new project. In the “Files” menu, click “import” then “media” to import your media files. Here most of the work is done with Keyboard commands.
Edit: Drag and Drop clips on the timeline. In the viewer panel, press “I” and “O” to add input and output points then drag the clip to add only a specific part of the clip. Press “Cmd + B” to split the clip at the desired location. Or add the clips above to add the layer.
Click the “Text” icon on the top-left corner of the screen to open the text page. Choose from presets or import your own Text presets and drag them to the timeline. Click the text to open “Text Editor” on the left side of the screen.
Select multiple clips then Right-click and select “New Compound Clip” to combine them. Double-click the compound clip to edit its components.
Effects: Click 2 icons on the top-right side of the timeline to open the effects and transition panel. Drag and drop on the clip to use them. You can change their properties in the “Effects editor” tab located in the same place as “Text Editor”.
In the editor tab, click the diamond icon beside any property to start keyframing, then change its property to add keyframes at the desired time.
Press “Cmd + 6” to open the Color Grading tab, here you can color grade your clips.
Export: To export the edited video. Click “File” >> “Share” >> “Master file” to open export window. Choose the desired settings then click “Next” then “Save” to export the video.
Adobe - Premiere Pro:
It is available for both Windows and Mac.
Whether you are a content creator or not, if you use a DSLR or an action camera for the first time, then maybe the output wouldn’t meet your expectations. In order to make it good, you need a video editor. And if you will ask your gathering about a good video editor, most of them will recommend you Adobe Premiere Pro, because it is such a versatile and well-known software available in the market. It is a subscription-based video editor.
It is an industry-level software with many professional and advanced features. From beginner video editing to film compositing, all can be done in this software. Whether you have a 360 video or a 4K video in Raw format recorded from your GoPro, just import it into premiere pro and start editing. It has a downloadable “GoPro FX Reframe” plugin to edit your 360 videos. It has different panels designed to deal with specific parts of post-production such as the Effects panel, Graphics panel, Sound panel, Colour Grading panel, e.t.c.
~ Features:
- It supports up to 8K resolution.
- Have different panels to enhance different segments of post-production.
- Have an essential Effects panel to create motion effects and animations using keyframes.
- Supports hundreds of third-party extensions.
- Have useful features like warp stabilizer and denoiser.
- You can import or create your color LUTs.
- Have a creative cloud with 100 Gb of storage.
- The bundle also includes a mobile video editor and a stock library.
~ Cons:
- Real-time rendering. It will take some time to render before exporting if you work on a mid-range PC.
- Freezes or crashes sometimes.
- Cache data fill-up quickly and eats a lot of storage. (It’s better to clear it after every project)
Pricing: It is cloud-based software, therefore it can’t be purchased one time. It has a monthly subscription starting at $ 20.99/month. It includes “premiere rush” mobile video editor and 100 GB of cloud storage within the plan. It also has a “Creative cloud All apps” plan that includes all 30+ Softwares + 100Gb cloud storage along with premiere pro for $ 54.99 only. All plans also include Behance (adobe creative community), Adobe Fonts, and Adobe stock assets for free. Adobe also provides educational access at a much discounted price.
~ Steps:
Import: Open “Premiere Pro”. Click “New Project” to start with then Click the “Files” button on the top-left corner of the window then select the “Import files” button to import files. Or press “CTRL + I” to import files or drag your files from their location to premiere pro.

Edit: Drag and Drop the files to add them to the timeline. Drop a file above a clip to add as a layer. or drop over a clip to overwrite it. On the right side of the timeline, you can find a bunch of tools to do basic edits like trimming, splitting, speed ramping, masking, or adding text.
In the “Effects Control” tab you can transform the selected clip or change its properties.
Select multiple clips then right-click and select “make Nested clip” to combine them into a single clip for easy editing.

Slide between 8 different workspace styles designed for specific post-production tasks by clicking the buttons available on the top of the window.
Effects: Go to the “Effects” panel on the bottom-left window to apply an effect or transitions. Here you can find all audio, video, 2D, and 3D effects. Drag and Drop on a clip to apply it. Change the properties of these effects in the “Effects Control” panel.
To color grade, your clips move to the “Color” workspace. Here you will find all the color grading features: correction, curves, color wheels, creative tab, e.t.c. To import a LUT click the “creative tab” then click “Browse” to import a LUT.
Export: To Export go to the “Files” tab on top of the screen then select the “Export” button to open the export tab. Select the desired settings then click “Export”.
Power Director 365 :
It is available for both Windows and Mac.
If you are looking for a budget-friendly video editor that is powerful enough to edit your GoPro videos like a content creator then Power director can be the right choice for you. It has many unique and useful features. It has different plugins and design centers to do specific post-production tasks like Ad designer, Multicam editor, AI style plugins, e.t.c.
It also has a separate action cam center to fix or enhance action cam videos. IT also has chapter and subtitle rooms to add subtitles and chapters for your Youtube videos or films. It also has a vast stock and preset library to speed up your project.
Pricing: It has a subscription plan which is available at $69/year. It is now available at 30% off till 22nd May,2022.
~ Features:
- It supports 4K videos and a wide range of import formats.
- Have many built-in plugins and design centers.
- Supports Multi-cam editing.
- Have an action cam center to deal with action cam footage.
- Have separate aspect ratio mode for 360 videos.
- Also, have a chapter and subtitle room. many recording aspects of the video.
- Have a content-aware editing feature that detects the recording aspects.
- Can import presets and color LUTs.
- Have a vast stock library.
~ Cons:
- Have some playback issues with 4K videos. (create shadow files to overcome this issue to an extent).
- Its UI is a little bit complicated for beginners.
- Not ideal for fast pace editing.
~ Steps:
Import: Open Power director and a pop-up will appear, select desired aspect ratio then click “Full mode” to open the software. Or select 360 aspect ratio if you want to edit 360 videos.

Click the “Import Media” icon below the Files tab in the top-left corner of the window to import files or press “CTRL + Q” to import files.
Edit: Drag and drop files to add them to any desired layer in the timeline. Click the icon on the top left corner of the timeline to add layers. When you select a clip in the timeline, some tools appear on the top timeline. Select any specific tool to edit your selected clip. Or click the “Plugins” button on the top-left of the window to open a specific designer tab.
Double-click on the clip to open ‘PIP designer”. Here you will find all the editing tools to edit or animate your clip.

After selecting a clip, in the “Plugins” menu click the “Action Camera Center” button to open an edit tab, Here you can fix your GoPro videos.

Effects: On the top-left corner of the window in a vertical bar you will find all the effects material lile Project library, titles, effects, transitions, overlays, e.t.c. Simply just drag and drop them on the timeline to use them. Here you can also do audio mixing and add subtitles and chapters.
Double click a clip or an overlay element to open the designer window. Here you can customize the clips and overlays to enhance your project.
Export: Click the blue “Produce” button on top of the screen to export your edited file. Select the desired mode and file format and add an export destination, then click “Start” to start exporting.
Which One Should I Choose Free or Paid GoPro Video Editor?
You can choose free or paid softwares depending on your requirements and budget. If a free software meets your requirements then stay on it otherwise move towards a paid alternative. If you have a GoPro and you make videos just for fun then use a free and simple video editor. Even if you are an experienced video editor, I would recommend you to go for free video editors which I have mentioned above as they are quite powerful and professional software but if you are harvesting a good amount of money from this field then you can upgrade to pro versions of these free softwares or get a paid software from start. As almost all of these softwares are professional and can get your job done, so it’s better to choose one, which is comfortable for you to work on.
FAQs about GoPro Video Editing:
- Q) Does GoPro has its own video editor?
Yes, GoPro has its own video editor “Quik”. It is available on mobile phones and desktops both. It is simple and easy to use. It provides basic features to edit your video. But the main disadvantage of this desktop software is that it supports only GoPro videos, you can’t import files from other devices. Although this isn’t the issue with Quik mobile app, here you can import videos from other devices also.
- Q) Can I make videos for social media with a GoPro?
It was basically made for recording sports and action videos. But as the market is revolutionized and new models are released it has covered a wide range of the video industry like vlogging, travel and cooking videos e.t.c. As new models of GoPros are waterproof, you can get some amazing underwater shots for your Instagram.
- Q) What is GoPro media format?
GoPro export files in popular file format MP4. MP4 is the most common file format and is supported by almost all the video editors. While it is efficient and takes less storage but isn’t supported in many devices.
- Q) How do I transfer files from my GoPro to Mac?
You can transfer your GoPro files through 3 methods:
- Eject the SD card from your GoPro and connect it to your Mac using a SD card adapter to transfer files.
- Connect your GoPro to Mac through USB connector and use “iphoto” or any other photo importer to import files.
For macOS 10.14 or later
~ Features:
- It supports 4K files and a wide range of file formats.
- It has a simple UI that is suitable for beginners.
- It Supports 360 video files (in equirectangular format).
- Supports industry-standard plugins like Boris fx.
- Have features like standard motion tracking, masking, chroma key, e.t.c.
- The paid version has more features like Speed ramping, Auto-sync, keyframing, and animation.
- Have vast stock library.
~ Cons:
- The free version leaves a watermark on export.
- Have playback issues with 4k videos.
- Lacks some standard editing features.
~ Steps:
Import: Open “Filmora” then select the desired aspect ratio and click “New Project’ to start editing. Click on the “Import panel” to import media files.
Edit: Drag and drop the clips to add them to the timeline. Drop the clips above or below to add them in layers. Click the top-left icon of the timeline to add layers. Select a clip and you will see a bunch of tools appear on the top bar of the timeline, use them to perform basic editing tasks like split, crop, speed ramping, keyframing, e.t.c.
Double-click on a clip to open its properties. . Click the blue “Ok” button to move back to the previous window.
Select the “Video” icon to transform the clip or to do motion tracking, stabilization, chroma-key, Masking, e.t.c.
Select the “Audio” icon to apply effects and enhance your audio.
Select the “Color” icon to do color correction and grading.
Select the “3D LUT” option to import a new customized lut.
Select the “Animation” icon to add preset animations or make custom animations by using keyframes.
Select the “Speed” icon to adjust the speed of the clip or to do speed ramping.
Click the blue “OK” button below to go back to the previous window.
Effects: On the horizontal bar at the top-left corner of the screen, all the effects, transitions, title present, and stock library are located. Drag and drop to apply them.
Export: Click the blue “Export” button to open export window, choose the desired settings than click “Export”. and don’t forget to save the project if you want to edit it again.
Free GoPro Video Editors for Mac:
If you are tight on budget but still want a professional video editor to edit your GoPro videos then here I have mentioned some free but powerful video editors. Whether you are a beginner or a professional content creator, these free softwares can get your job done.
Blackmagic - Davinchi Resolve:
It is available for both Windows and Mac.
Whether you are a freelance video editor or an industry-level filmmaker, if you want to step up your game and stand out from your competition then you need a powerful video editor to help you out and Davinchi Resolve can be the right choice for you. From sports vlogging using action cams to Hollywood filmmaking using Red cinema cameras, Davinchi Resolve can handle and edit all this footage easily and smoothly. It is even used in the making of several Hollywood projects including Marvels’s feature films.
It is one of the best color grading software available in the market. It has advanced color grading tools that can help color grade your GoPro raw videos easily as raw videos look dull but provide greater flexibility. It is a timeline-based editor but its Fusion and Color grading panel provides a Node-based editing system which is hard to use but provides great flexibility once mastered.
Resolve has 6 different pages to deal with different editing parts:
“Edit” and “Cut” pages to deal with simple editing tasks. Its “Fusion” page allows users to do VFX and 3D compositing. The “Color Grading” page has all the professional grading tools. While the “Fairlight” page is designed to edit and enhance audio. And the “Deliver” page to export your files.
All these features are available for free without even giving a watermark. Although it has a studio version that provides some additional features to get more out of this amazing software.
- Davinchi Resolve Studio:
The free version has almost everything a professional video editor needs. but you can purchase the Studio version to get some really juicy features to enhance your video editing experience. It includes the Davinci neural engine, stereoscopic 3D tools, Dolby atmos audio mastering,e.t.c.
Pricing: Studio version is available at $ 295 for a lifetime license and with free updates.
~ Features:
- It supports a 4K resolution at 60fps. (while the Studio version supports up to 32K resolution at 120 fps.)
- It is a multi-feature software that provides editing, color grading, VFX, 3D compositing, and audio editing all in one place.
- It has the most advanced and powerful Node-based color grading system, which is also used by Hollywood film studios.
- Supports Raw and 360 videos from GoPro or other action cameras.
- Supports multi-cam editing up to 16 camera angles.
- Can make Compound clips and add adjustment layers.
- Fairlight panel has professional audio production tools like waveform editing, audio ducking, and Channel mapping. (Dolby Vision mastering and 3D spatial Panning [audio editing in 3D space] are available in the Studio version.)
- Supports third-party plugins.
- Has a 3D workspace and provides a virtual set extension for 3D modeling and compositing.
~ Cons:
- Its node-based editing style is quite difficult for beginners.
- Requires a high-end workstation to run smoothly otherwise will often crash during editing.
- Its node-based editing system is hard to learn.
~ Steps:
Import: Open “Davinci Resolve’. Select a previously saved project or press “New project” to start a new one. Click “File” >> “Import” >> “Media” to import files or press “CTRL + I”.
Edit: Drag and drop files to add them to the timeline Use the tools present above the timeline to trim, cut or move your clips. Click the “Inspector” icon on the top-right corner of the window to open the Inspector tab. Here you will find the properties of all the clips, audio, transitions, effects, e.t.c. There are different editing tabs at the bottom of the window.
In the “Fusion” window, click “Nodes” to open the Node screen. Import a clip or use it from the editor timeline. Usually, a clip will have two nodes connected through a line. Above the nodes panel, different types of nodes are available. Drag any node in the panel and connect it through lines. or add a “merge” node to connect nodes.
Its color grading panel also has Node based editing system.
Effects: Click “Effects Library” then select any effect and drop it in the timeline to apply it. You can change its properties in the “Inspector” panel.
Click the diamond icon on the right side of the property to start keyframing then change the value of that property to add keyframes at desired time period.
Export: Open the “Deliver” window, choose the desired settings then click “Add to Render Queue” to start exporting.
FXhome - Hitfilm Express:
It is available on Windows, Mac and Linux also.
If you are looking for a free but powerful video editor to edit your GoPro clips then Hitfilm Express can be the right choice for you. It is a free timeline-based editing software with professional-grade VFX tools. It is a timeline-based editor where you can add dozens of audio, videos, and text layers.
It has a composite shot sequence where you can do complex editing like editing 3D videos and elements, lights e.t.c. It has physic-base behaviors and effects also to enhance 3D compositing. For professional-level editing almost most of the effects and properties have keyframing options. It has different workspace modes to suit your editing needs.
It can also edit 360 videos recorded from your GoPro max. It has a “GoPro Lens Reframe” effect to adjust your 360 clips, but some 360 toolkits can only be available when you purchase Hitfilm pro or buy a 360 toolkit add-on. Similarly, you can purchase more add-ons according to your editing needs or you can purchase Hitfilm Pro to gain access to all add-ons and features. But can use these pro features for free but without exporting as exporting with a paid effect can give a watermark.
Hitfilm Pro:
Although Hitfilm express doesn’t give a watermark on export, but to use more features like 3D composition, LUTs, e.t.c you need to purchase add-ons, there are over 30+ add-ons available to purchase which you can purchase depending on your needs, but if you want to get all the features than its better to get your hands on Hitfilm Pro.
Pricing: Available for purchase at £ 309 or $ 388 for a lifetime license. With 12 months of free updates. It has 3 seat license which means It can run on 3 PCs simultaneously.
~ Features:
- It is a free editing software with no watermark.
- It can edit 3D videos and it can also import and edit 3D models and tracking data.
- It can edit 360 videos also.
- You can add effects and color grades as layers in the timeline also.
- Can add adjustment layers and create nested clips within nested clips to make complex editing easier.
- It has a motion track and locked-on stabilization features.
- Can do smooth keyframing and animation with the help of value graphs.
- It supports multi-cam editing also.
- Keyboard shortcuts make workflow quite easy and quick.
~ Cons:
- It has some playback issues while using 4K videos.
- It crashes sometimes, so it’s better to save the project frequently during editing.
- Hitfilm express doesn’t have a dark mode.
- Some common features are only available on the Pro version or add-ons.
~ Steps:
Import: Open “Hitfilm”, Select “New Project” to open a blank project then click “open” to open an existing file or click “new” to create a new project. Then set project settings on pop-up then and click “ok”.
Then click the “Media” tab on the top-left corner of the screen. Then select the “Import” button to import videos, images, audio, or 3d models. You can also import previously made composite shots.
Edit: Drag and drop media files from the media tab to the timeline. or click the “New” tab to create a “Composite shot” or a solid plane layer. Right-click on the left side of the timeline to insert or delete layers. On the left side of the timeline, you will find some basic tools located on the vertical bar to do simple tasks.
In the “Viewer” tab, on the left side of the playback screen, you can find tools for masking and adding text.
In the “Controls” tab, you can adjust the properties of clips and other features related to the clip like masking, track, blend, transform, e.t.c.
Create a “Composite shot” to do complex editing like 3D compositing. Or select multiple layers then right-click and select “make Composite shot” to combine them for easy editing. Double-click the composite shot to open its contents.
Effects: From the “Effects” tab drag and drop effects on the clip to add them. Some effects can be added as layers which can affect all the layers beneath it. Properties of these effects can be adjusted in the “Control” tab.
To do keyframing, Click the circle icon on the left side of the property to start keyframing then change the values of that property to add keyframes at desired time period.
Export: Click the “Export” icon then “Export now” located at the top right side of the timeline to open the export window. The export will start automatically.
Shotcut:
It is available on Windows, Mac and Linux.
If you are making videos from your GoPro or mobile phone just for fun that doesn’t require much editing then you can look for a free and simple video editor and “Shotcut” can be the right choice for this purpose.
It is a free and open-source video editor with many cool features to get your hands on. It doesn’t have any pro version. It is simple and easy to use but takes some time to understand. It supports multi-track timeline editing. It has a basic timeline design but you can customize your timeline to meet your editing needs. It has some good color grading options, you can also import your color luts. It has many cool features and effects. It supports 360 video editing and also has a few 360 video filters. It has audio effects also.
~ Features:
- All its features are for free and it doesn’t leave any watermark.
- It supports 4K resolution and a wide range of file formats.
- It also supports 360 video files.
- Has keyframing and chroma kry features.
- It has advanced color grading features.
- It provides standard animation and keyframing features.
~ Cons:
- It is a basic video editor and lacks some professional editing features.
- Have playback issues with 4K videos.
- It does have proper text editing tools.
- It is difficult to understand as its UI is different from other familiar video editors.
~ Steps:
Import: Open “Shot Cut” then click the “Open Files” button on the top-left corner of the window to import files.
Edit: Drag and drop clips on an empty timeline panel to add tracks and drag the clip from corners to trim them. Right-click on the left side of the timeline to add a video or an audio track. You will find a bunch of tools above the timeline to do some basic tasks.
You can choose from 6 different workspace designs (available in the top-right corner of the window) to suit your editing styles.
On top of the window, you will see a bunch of icons like Timeline, filter, project, and properties. e.t.c. In the properties tab, you can change the aspect ratio and speed of the clip.
Effects: Click the “Filters” icon on top of the window to open the filters menu, Click “+” above it to add filters. Double click a filter to add it to the selected clip, then click the filter to open its properties menu. You can also add text from here.
Click the “Keyframes” icon on top of the window to open the Keyframes window. Select the “clock” icon on the filters to start keyframing then change the values at a specific time to add keyframes. Click the “Timeline” icon to go back to the previous window.
Export: Click the “Export” button on the top of the screen. Select a preset or click the “Advanced” button to change export settings then click “Export File”.
Paid GoPro Video Editor for Mac:
If you are a professional athlete or a vlogger using GoPro for all of your contents and want to invest some money on paid video editors to improve your content. Then here we have mentioned some paid video editors worthy of your investment.
Apple - Final Cut Pro:
It is available for Mac only.
If you are an Apple enthusiastic person and want everything Apple, then why look for any other video editor when you can have a powerful video editor “Final cut pro” made by Apple. It is a paid but professional software that can raise your GoPro videos to the next level. Whether it’s a 360 video or a RAW file recorded from your GoPro or from the RED cinema camera, all can be edited smoothly inside Final Cut Pro. It has dozens of useful features that a professional video editor looks for like 3D tracking, Motion Graphics, Color Grading, Audio Mixing, Multi-cam editing e.t.c.
Pricing: It is a one-time purchase software available at $ 299.9 for a lifetime license and all its future updates can be downloaded free of cost.
~ Features:
- It supports up to 8K resolution.
- Support 360 and RAW video files.
- Edit videos in complete 360 and 3D spaces.
- Supports third-party video and audio plugins.
- Supports Multi-cam editing.
- Have professional color grading tools with HDR support.
- Its UI is easy to use.
~ Cons:
- It is designed for Apple devices only.
- Requires a powerful PC.
- Its UI is a bit different from other common video editors in the market.
- ~ Steps:
Import: Open “Final Cut Pro” then click the “Files” button on the top-left corner of the screen, then select “Project” to create a new project. In the “Files” menu, click “import” then “media” to import your media files. Here most of the work is done with Keyboard commands.
Edit: Drag and Drop clips on the timeline. In the viewer panel, press “I” and “O” to add input and output points then drag the clip to add only a specific part of the clip. Press “Cmd + B” to split the clip at the desired location. Or add the clips above to add the layer.
Click the “Text” icon on the top-left corner of the screen to open the text page. Choose from presets or import your own Text presets and drag them to the timeline. Click the text to open “Text Editor” on the left side of the screen.
Select multiple clips then Right-click and select “New Compound Clip” to combine them. Double-click the compound clip to edit its components.
Effects: Click 2 icons on the top-right side of the timeline to open the effects and transition panel. Drag and drop on the clip to use them. You can change their properties in the “Effects editor” tab located in the same place as “Text Editor”.
In the editor tab, click the diamond icon beside any property to start keyframing, then change its property to add keyframes at the desired time.
Press “Cmd + 6” to open the Color Grading tab, here you can color grade your clips.
Export: To export the edited video. Click “File” >> “Share” >> “Master file” to open export window. Choose the desired settings then click “Next” then “Save” to export the video.
Adobe - Premiere Pro:
It is available for both Windows and Mac.
Whether you are a content creator or not, if you use a DSLR or an action camera for the first time, then maybe the output wouldn’t meet your expectations. In order to make it good, you need a video editor. And if you will ask your gathering about a good video editor, most of them will recommend you Adobe Premiere Pro, because it is such a versatile and well-known software available in the market. It is a subscription-based video editor.
It is an industry-level software with many professional and advanced features. From beginner video editing to film compositing, all can be done in this software. Whether you have a 360 video or a 4K video in Raw format recorded from your GoPro, just import it into premiere pro and start editing. It has a downloadable “GoPro FX Reframe” plugin to edit your 360 videos. It has different panels designed to deal with specific parts of post-production such as the Effects panel, Graphics panel, Sound panel, Colour Grading panel, e.t.c.
~ Features:
- It supports up to 8K resolution.
- Have different panels to enhance different segments of post-production.
- Have an essential Effects panel to create motion effects and animations using keyframes.
- Supports hundreds of third-party extensions.
- Have useful features like warp stabilizer and denoiser.
- You can import or create your color LUTs.
- Have a creative cloud with 100 Gb of storage.
- The bundle also includes a mobile video editor and a stock library.
~ Cons:
- Real-time rendering. It will take some time to render before exporting if you work on a mid-range PC.
- Freezes or crashes sometimes.
- Cache data fill-up quickly and eats a lot of storage. (It’s better to clear it after every project)
Pricing: It is cloud-based software, therefore it can’t be purchased one time. It has a monthly subscription starting at $ 20.99/month. It includes “premiere rush” mobile video editor and 100 GB of cloud storage within the plan. It also has a “Creative cloud All apps” plan that includes all 30+ Softwares + 100Gb cloud storage along with premiere pro for $ 54.99 only. All plans also include Behance (adobe creative community), Adobe Fonts, and Adobe stock assets for free. Adobe also provides educational access at a much discounted price.
~ Steps:
Import: Open “Premiere Pro”. Click “New Project” to start with then Click the “Files” button on the top-left corner of the window then select the “Import files” button to import files. Or press “CTRL + I” to import files or drag your files from their location to premiere pro.
Edit: Drag and Drop the files to add them to the timeline. Drop a file above a clip to add as a layer. or drop over a clip to overwrite it. On the right side of the timeline, you can find a bunch of tools to do basic edits like trimming, splitting, speed ramping, masking, or adding text.
In the “Effects Control” tab you can transform the selected clip or change its properties.
Select multiple clips then right-click and select “make Nested clip” to combine them into a single clip for easy editing.
Slide between 8 different workspace styles designed for specific post-production tasks by clicking the buttons available on the top of the window.
Effects: Go to the “Effects” panel on the bottom-left window to apply an effect or transitions. Here you can find all audio, video, 2D, and 3D effects. Drag and Drop on a clip to apply it. Change the properties of these effects in the “Effects Control” panel.
To color grade, your clips move to the “Color” workspace. Here you will find all the color grading features: correction, curves, color wheels, creative tab, e.t.c. To import a LUT click the “creative tab” then click “Browse” to import a LUT.
Export: To Export go to the “Files” tab on top of the screen then select the “Export” button to open the export tab. Select the desired settings then click “Export”.
Power Director 365 :
It is available for both Windows and Mac.
If you are looking for a budget-friendly video editor that is powerful enough to edit your GoPro videos like a content creator then Power director can be the right choice for you. It has many unique and useful features. It has different plugins and design centers to do specific post-production tasks like Ad designer, Multicam editor, AI style plugins, e.t.c.
It also has a separate action cam center to fix or enhance action cam videos. IT also has chapter and subtitle rooms to add subtitles and chapters for your Youtube videos or films. It also has a vast stock and preset library to speed up your project.
Pricing: It has a subscription plan which is available at $69/year. It is now available at 30% off till 22nd May,2022.
~ Features:
- It supports 4K videos and a wide range of import formats.
- Have many built-in plugins and design centers.
- Supports Multi-cam editing.
- Have an action cam center to deal with action cam footage.
- Have separate aspect ratio mode for 360 videos.
- Also, have a chapter and subtitle room. many recording aspects of the video.
- Have a content-aware editing feature that detects the recording aspects.
- Can import presets and color LUTs.
- Have a vast stock library.
~ Cons:
- Have some playback issues with 4K videos. (create shadow files to overcome this issue to an extent).
- Its UI is a little bit complicated for beginners.
- Not ideal for fast pace editing.
~ Steps:
Import: Open Power director and a pop-up will appear, select desired aspect ratio then click “Full mode” to open the software. Or select 360 aspect ratio if you want to edit 360 videos.
Click the “Import Media” icon below the Files tab in the top-left corner of the window to import files or press “CTRL + Q” to import files.
Edit: Drag and drop files to add them to any desired layer in the timeline. Click the icon on the top left corner of the timeline to add layers. When you select a clip in the timeline, some tools appear on the top timeline. Select any specific tool to edit your selected clip. Or click the “Plugins” button on the top-left of the window to open a specific designer tab.
Double-click on the clip to open ‘PIP designer”. Here you will find all the editing tools to edit or animate your clip.
After selecting a clip, in the “Plugins” menu click the “Action Camera Center” button to open an edit tab, Here you can fix your GoPro videos.
Effects: On the top-left corner of the window in a vertical bar you will find all the effects material lile Project library, titles, effects, transitions, overlays, e.t.c. Simply just drag and drop them on the timeline to use them. Here you can also do audio mixing and add subtitles and chapters.
Double click a clip or an overlay element to open the designer window. Here you can customize the clips and overlays to enhance your project.
Export: Click the blue “Produce” button on top of the screen to export your edited file. Select the desired mode and file format and add an export destination, then click “Start” to start exporting.
Which One Should I Choose Free or Paid GoPro Video Editor?
You can choose free or paid softwares depending on your requirements and budget. If a free software meets your requirements then stay on it otherwise move towards a paid alternative. If you have a GoPro and you make videos just for fun then use a free and simple video editor. Even if you are an experienced video editor, I would recommend you to go for free video editors which I have mentioned above as they are quite powerful and professional software but if you are harvesting a good amount of money from this field then you can upgrade to pro versions of these free softwares or get a paid software from start. As almost all of these softwares are professional and can get your job done, so it’s better to choose one, which is comfortable for you to work on.
FAQs about GoPro Video Editing:
- Q) Does GoPro has its own video editor?
Yes, GoPro has its own video editor “Quik”. It is available on mobile phones and desktops both. It is simple and easy to use. It provides basic features to edit your video. But the main disadvantage of this desktop software is that it supports only GoPro videos, you can’t import files from other devices. Although this isn’t the issue with Quik mobile app, here you can import videos from other devices also.
- Q) Can I make videos for social media with a GoPro?
It was basically made for recording sports and action videos. But as the market is revolutionized and new models are released it has covered a wide range of the video industry like vlogging, travel and cooking videos e.t.c. As new models of GoPros are waterproof, you can get some amazing underwater shots for your Instagram.
- Q) What is GoPro media format?
GoPro export files in popular file format MP4. MP4 is the most common file format and is supported by almost all the video editors. While it is efficient and takes less storage but isn’t supported in many devices.
- Q) How do I transfer files from my GoPro to Mac?
You can transfer your GoPro files through 3 methods:
- Eject the SD card from your GoPro and connect it to your Mac using a SD card adapter to transfer files.
- Connect your GoPro to Mac through USB connector and use “iphoto” or any other photo importer to import files.
Wondershare Filmora Has Introduced a New Feature - AI Portrait Effect that You Can Use to Remove Background From Various Videos and Images. Explore the Uses, Benefits, and Real-Life Scenarios of This Feature in a Comprehensive Guide
Quick Answer: Why Did Filmora AI Portrait Attract People?
An easy yet powerful editor
Numerous effects to choose from
Detailed tutorials provided by the official channel
In the recent few years, video editing has become one of the most-sought after professions, all thanks to the popularity of various video sharing platforms like YouTube. Today, creators don’t need big budgets to share their stories with the world. They can simply grab the camera, shoot the video, and use editing software to compile their brainchild into a dedicated movie. And, once the movie is ready, these creators can simply upload it to YouTube and gain the desired viewership. However, it’s worth noting that YouTube isn’t the only element that has helped content creators excel in their careers and follow their passion.
Editing software like Wondershare Filmora also play an equal role in the success of a creator in today’s digital world. These editing tools are equipped with a plethora of features that allow creators to unleash their creativity and compile high-quality videos for their viewers. What’s more interesting is that these tools keep receiving new updates that further streamlines the entire video editing process to help creators edit videos more conveniently.
Today, we are here to talk about one such feature - known as Filmora AI portrait - that recently got introduced to Wondershare Filmora and became an all-time favorite of many creators. We’ll be going in detail about Filmora AI portrait and how you can use it in your videos to uplift the production quality of your videos. We’ll also share some of the alternatives of this cool feature so that you can bring variety to your videos and keep the viewers engaged throughout the video.
In this article
01 [Why Did AI Portrait Become More and More Popular](#Part 1)
02 [What Scenes Apply to AI Portrait?](#Part 2)
03 [What Scenes Do Not Apply to AI Portrait?](#Part 3)
04 [Why Filmora AI Portrait Deserves to Try?](#Part 4)
05 [A Comparison to Other AI Portrait Software](#Part 5)
Part 1 Why Did AI Portrait Become More and More Popular
Let’s start with the basics first! What is Filmora AI portrait and why it has gained an immense popularity in the editing community. It’s basically an add-on effect in Wondershare Filmora X that was introduced with the latest Filmora X version 10.5.
By integrating this add-on into their video, editors can remove/change the background without losing any details of the main subject. So, let’s say if you don’t have green screen footage and still want to remove the background without affecting the foreground (a single subject), Filmora AI portrait will help you get the job done without any hassle.
Being an AI-powered feature, Filmora AI portrait automatically detects the shape and structure of the main subject and separates it from the background. This way even if you don’t have used a green screen or don’t know how to apply the Chroma key in your videos, you’ll be able to remove the background from the RAW footage and replace it with a custom background. This will allow you to make your videos more appealing and add a funny element for better engagement. For example, you can add a moving background to uplift the entire storyline to your videos.
Filmora AI portrait is a great feature for different types of creators such as gaming streamers, YouTube content creators, and daily vloggers. Regardless of your editing style, by integrating the Filmora AI portrait add-on, you’ll have the liberty to remove unwanted backgrounds from various shots and keep the production quality high.
In addition to removing the background, Filmora AI portrait is also a great tool to design thumbnails for your videos. Also, you can use this feature to apply borders, glitch effects, pixelated, noise, or segmentation video effects to your videos. All these elements will allow you to eliminate dull and low quality things from your videos and make the main characters pop-out in every frame.
Here are a few situations where one can implement the Filmora AI portrait and make the most out of its functions.
● If you livestream videos on YouTube, but don’t have a green screen yet, you can use the AI portrait feature in Filmora to remove the background and make your streaming setup look more elegant and professional.
● With the Filmora AI portrait feature, you can also design high-quality and captivating thumbnails for your videos and draw the maximum attention within YouTube’s rabbithole. Any new viewer is more likely to click on your videos when the thumbnail is engaging.
● You can also use Filmora AI portrait effect to remove background from interviews. Usually, when someone shoots an interview, they usually place a green screen behind the person. But, in case you don’t have green screen footage, you can easily make your interviews look more professional with the Filmora AI portrait effect.
● Finally, you can also use the Filmora AI portrait feature in regular YouTube vlogs. This would be applicable when there are unnecessary elements in the background of a clip that are ruining the entire frame. In this case by simply erasing the background and replacing it with a custom one, you’ll be able to keep the production quality high and keep the viewers engaged throughout the vlog.
Part 2 What Scenes Apply to AI Portrait?
While the AI portrait effect can work for all frames, there are a few situations when it delivers the best results. The designers at Wondershare Filmora claim that AI Portrait works like a charm when the frame has a single subject talking directly to the camera.
When there’s a single individual or subject in front of the camera, it’s relatively easier for the AI-algorithm to detect the edges and separate the background with high precision. Moreover, when the main subject is static, you are most likely to witness the best output in terms of background removal. Why? The reason being when there’s a single static subject, an AI-powered algorithm can precisely mark its edges and achieve relatively better results.
Let’s understand this with the help of a few examples.
One-Person Interview
Going back to the interview example - let’s say you are interviewing a person who’s sitting in a chair and talking directly to the camera in front of him. Now, since there isn’t too much movement on his side, the AI-algorithm will be able to detect his edges and remove the background accordingly. In fact, in such ideal cases, the tool will even be able to detect the hair of the subject with high precision.
Shot of a Monologue
Monologues are no longer limited to high-budget Hollywood movies only. They have become a regular part of conventional videos such as daily YouTube vlogs. Monologues boast better authenticity as the entire clip is shot in one go.
Since there are no random cuts, the presenter can easily convey his views to the viewers. But, for a monologue to work, it’s extremely crucial that it has a high-quality background otherwise it’ll fail to grab the viewer’s attention. In case you are also stuck with a monologue that has a bad background, you can use Filmora AI portrait to remove it and make the primary character of the video pop-up more effectively.
YouTube Vlogs
Again, YouTube vlogs are another great example where editors could really benefit from Filmora’s AI portrait effect. For daily vloggers, getting the perfect shot is always a challenge. And, more often than you think, they end up taking shots that have bad backgrounds. But, thanks to Filmora’s AI portrait effect, one could easily remove background from such shots and use them to convey the storyline more effectively. This won’t waste your efforts and you’ll be able to use the shot that would have otherwise gone to Trash.
So, these are a few situations where the AI portrait effect in Filmora can do wonders for your video editing process.
Part 3 What Scenes Do Not Apply to AI Portrait?

Now, as we mentioned in the previous part, the Filmora AI portrait effect works better in scenarios where there’s only a single subject in the frame. This means the effect isn’t applicable in all the situations.
If there is a lot of movement in the frame, the AI-algorithm may fail to detect the edges of the subject(s) and not deliver the expected results. For example if you are working on a vlog where you are moving the camera really fast, the AI effect will struggle to separate the background from the foreground and fail to achieve the desired precision while removing background.
Some of the other situations where you won’t be able to make the most out of the AI portrait effect include:
Shots With Multiple Moving Subjects
If you have a shot of a crowded place where too many people are moving in the frame, it’ll be challenging to detect the background properly. The movement of multiple subjects will interfere with the overall functionality of the algorithm, restricting users from achieving a background-free shot. In such a situation, you’ll either have to use the shot without removing the background or dump into the Trash folder.
Videos With Special Effects and Filters
Here’s the deal; special effects and filters have become an inevitable part of today’s social media-influenced world. People apply filters and visual effects to make their videos more appealing and grab more likes and comments on Instagram, Facebook, and Snapchat.
But, these filters are often a nightmare for video editors as it’s pretty challenging to process them in any video editing software. If you have a clip with filters or video effects, you’ll struggle to implement the Filmora AI portrait effect properly. In fact, the effect will not work as expected and you’ll be stuck with a shot that would be pretty useless for the entire storyline. So, do not apply unnecessary filters to your videos if you are planning to apply the AI portrait effect in the long run.
Videos With Backlights
The lighting setup of any video has a huge influence on how it will look at the end. Just like a human being, even the AI algorithm struggles to detect the background in a video that has poor lighting conditions or bad backlight. In such videos, it’s challenging for the algorithm to detect the main subject and then identify its edges.
To avoid such scenarios, it would be better to plan your shots in advance and shoot them when there are proper lighting conditions. In case you are going to shoot indoors, you can use a dedicated lighting setup. If anything, this will make it much easier to apply the Filmora AI portrait effect and achieve the best results in terms of background removal.
Paintings
Paintings aren’t like traditional videos. The color scheme is entirely different and it’s much challenging to identify the background and the foreground. So, if there are any images of paintings that you want to use as a thumbnail, it might get a bit challenging to remove the background. In such a scenario, it would be much better to either choose a different image for the thumbnail and use the painting without removing its background.
So, these are a few scenarios where using the Filmora AI portrait won’t be an effective solution for you. We would recommend to plan your shots in advance so that you don’t end up with random shots where it’s challenging to apply the AI portrait effect.
Part 4 Why Filmora AI Portrait Deserves to Try?
If you’ve come this far, you are most likely to be serious about video editing. So, now that we have clarified all the situations where using ****Wondershare Filmora Video Editor AI portrait** will be effective, let’s understand how you can use it in your videos.
01Are the Subscription Periods for Wondershare Filmora and the AI Portrait Add-on the Same?
So, first things first, will you get direct access to the AI portrait add-on along with your Filmora license? The answer is No! THe AI portrait add-on is available as a separate item and you’ll have to pay additional charges to use it on your videos. The default Filmora license will not give you access to the AI portrait mode whatsoever. In terms of pricing, the Filmora AI portrait is available at a pocket-friendly price.
For Win 7 or later (64-bit)
For macOS 10.12 or later
You can get this add-on by paying a minimal fee of $5.99 per month. One of the best things about choosing this add-on is that you can discontinue it whenever you want. So, let’s say you no longer need to remove backgrounds from your videos - in this situation, you can directly discontinue your subscription without affecting your regular Filmora subscription.
02How to Add AI Portrait Effects?
Now, coming to the real reason why you’ve come this far - the process to use the AI portrait effect in Filmora. To be honest, it’s a relatively easier process to add the AI portrait effect in Filmora. Even if you are not a Filmora user, you’ll be able to get the job done without any hassle. Let me quickly walk you through the step-by-step procedure of adding the AI portrait effect in Wondershare Filmora.
Step 1 - If you are not an existing user of Filmora, start by purchasing its license and install the software on your system to get started. On the other hand, if you’ve been using Filmora for a while, directly move to the next step to proceed further.
Step 2 - Now, launch the software and create a new project. You’ll be prompted to Filmora’s editing panel. At this point, you’ll have to drag the video clip (that you want to edit) to the timeline.
Step 3 - Once the video is successfully imported, switch to the “Effects” tab and search for “AI Portrait”. You’ll see a “premium” icon next to its name. Double-click on the effect and follow the on-screen instructions to complete the payment procedure.
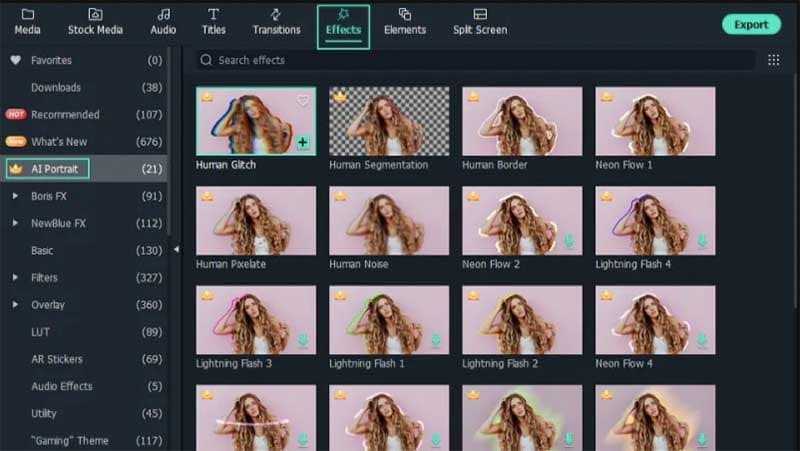
Step 4 - After you have bought the effect, just drag it to the timeline and place it above your video.

Step 5 - Based on how long you want to keep this effect, you can elongate or shorten its duration by simply stretching its duration.
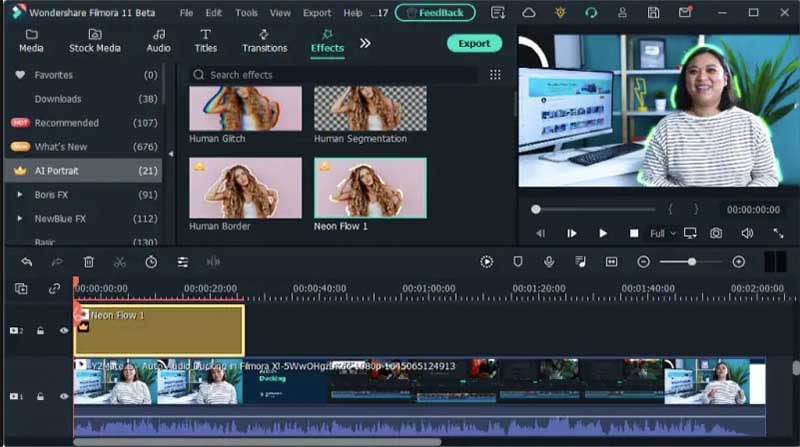
That’s it; the AI portrait effect will automatically detect and remove the background without requiring you to even lift a finger. After the background is removed, you can tap the “Export” button and choose the desired output format to save the file on your system.
03How to Adjust AI Portrait Effects?
Apart from its core ability to remove the background from a video/image, the another advantage of choosing Filmora AI portrait add-on is its fully customization support. Based on your requirements, you can adjust different parameters such as percentage, edge thickness, edge feather, etc. to achieve the desired results in the output.
Let’s have a closer look at all these parameters to understand their overall functionality more precisely.
● Percentage: By adjusting the percentage, you can decide how effective you want the AI portrait effect to appear in your videos. If you drag the slider all the way to the end, the background will be removed completely and you might not even recognize the main subject properly. On the other hand, if you keep it at a lower percentage, there will be a little bit of transparency in the background.
● Alpha: The alpha slider will decide the transparency of the portrait effect itself. You can drag this slider left or right until you have the perfect frame in front of you.
● Edge Thickness: As the name implies, edge thickness decides how thick the edges of the subject would appear in the video. A smaller percentage would mean thinner edges whereas a higher percentage would mean larger edges.
● Edge Feather: With Edge feather, you can define the blurriness of the edges themselves. The higher the value of the edge feather, the blurier the edges would appear in your videos.
Now, to access all these features, all you have to do is double-tap on the AI portrait effect within FIlmora’s timeline. This will automatically prompt you to the editing panel for this particular effect where you’ll be able to manipulate all these parameters and achieve the desired portrait results accordingly.
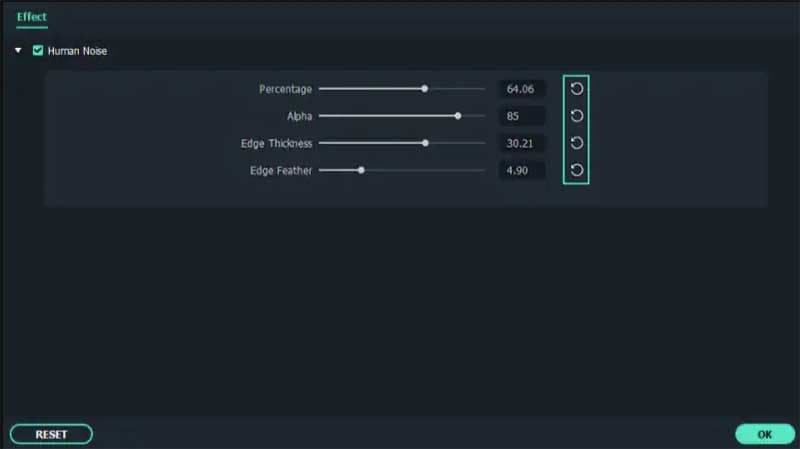
In case you are not happy with your customization, you can also tap the “Restore” button next to each parameter to restore the default value. Once you are happy with the results, just tap the “Ok” button to implement your changes.
04Why Did Filmora AI Portrait Attract People?
Apart from attracting editors, what makes Filmora AI portrait one of the best video effects that you can apply to your videos to engage viewers. Well, the answer is pretty simple; AI portrait effect makes the background of a video transparent.
It means the editors have the liberty to replace the dull boring background with a custom one and keep the engagement level high. This becomes really useful when you are trying to compile a long documentary and have a few shots with bad backgrounds. Since using such shots directly might affect the production quality of your videos, it would be better to first replace the background using the AI portrait effect.
So, regardless of your editing setup, production goals, or the type of video you want to compile at the end, you can use the AI portrait effect in Wondershare Filmora in different situations and protect the end results from becoming a failure. This will help you maximize the reach of your videos and attract more viewers more effectively. So, install Filmora today and sign up for its AI portrait effect to uplift the overall video quality of your projects.
Part 5 A Comparison to Other AI Portrait Software
Now, before saying goodbye, we also believe that it would be unfair if we only talk about a single tool and a single effect in this guide. Of course, Filmora’s AI portrait effect works like a charm in different situations, there are other tools in the market that you can try to achieve similar results. As a video editor, it’s always great to keep trying new things as it will add variation to your portfolio and make it much easier to attract new clients.
So, here’s a list of top 5 video editing software that you can use to get similar functionality like the AI portrait effect in Wondershare Filmora.
01Adobe Premiere Pro
Adobe Premiere Pro is undoubtedly one of the most popular video editing software with a strong fan base. Many industry leaders including Sam Kolder and Rory Kramer use Premier Pro to compile high-quality Hollywood-style videos for musicians as well as other clients.
Premiere Pro is more of an advanced video editing tool, which means even though it can help you remove background from portraits, you’ll have to do all the work manually. There’s no predefined add-on or effect that you can apply to the video to erase the background. Instead, you’ll have to manually mark the edges of the subject, erase the background and then, replace it with a different one to achieve the desired results.
In general, Premiere Pro is a great option for skilled editors who want to take things in their own hands to achieve the best results. If you are a beginner, you would be better off with a more user-friendly tool such as Wondershare Filmora.
Key Features:
● Extreme precision while erasing the background
● Achieve the desired results without compromising the quality of the main subject in the portrait
● An industry-preferred software
Pros:
● Existing Premiere Pro users will find it much easier to replicate the AI portrait effect
● Complete flexibility over your project
Cons:
● It can take several hours to precisely remove the background
● The entire process will be manual
02Final Cut Pro
Like Premiere Pro, Final Cut Pro is another famous video editing software that can help you replicate the results of the Filmora AI portrait effect and remove the background from different videos, images, and motion graphics. Keep in mind that Final Cut Pro is only available for macOS, which means if you own a Windows system, you won’t be able to use the software whatsoever.
Again, the only downside of using Final Cut Pro is the amount of manual effort you’ll have to put in to achieve the expected results. Being a full-scale video editing tool, there aren’t too many add-ons or predefined video effects.
Instead, you’ll have to rely on conventional methods such as keyframing to remove the background frame by frame and make your videos look professional. On the major side, Final Cut Pro will work in all situations. Even if you have a clip with too many moving objects, you’ll be able to mark the edges frame-by-frame and remove the background without losing any details from the foreground.
Key Features:
● Timeline-based interface for rapid video editing
● Exclusive macOS compatibility ensures high performance
● Ideal for experienced editors and designers
Pros:
● Final Cut Pro has an easy-to-use interface
● It’s easier to process each frame individually
Cons:
● Unlike Wondershare Filmora, there aren’t any ready-to-use add-ons
● While working on complex shots, it can take several hours to remove the background
03Unscreen Online
Unscreen is an online video background remover that’s specifically designed to remove background from videos with a single click. Being an online application, Unscreen is an ideal choice for short videos (up to 20 seconds) because longer-duration videos will likely take forever to upload. If you want to edit a video for Instagram Reels or YouTube shorts, Unscreen Online would be worth the consideration.
It’ll allow you to remove the background with one click and you won’t even need high-performance software to get the job done. The only drawback of Unscreen online is its lack of video format compatibility. Since it’s an online application, not all video formats are compatible with Unscreen Online.
Moreover, you can only use the tool to process shorter videos. In general, this is an ideal choice for an average Joe who doesn’t want to go through the hassle of installing and using a dedicated video editing software. So, if you are a professional, it would be far beneficial to stick to other premium tools like Filmora, Premiere Pro, and Final Cut Pro.
Key Features:
● You can access Unscreen Online on any device you want
● The edge detection is quite precise for videos with a single subject
● As compared to other premium options, Unscreen Online is relatively cheaper
Pros:
● Cross-platform compatibility
● Perfect for Instagram content creators
● Affordable pricing
Cons:
● Doesn’t achieve the expected results for more complex videos having too many subjects
● Can’t process videos having longer durations
04MOVAVI Video Editor
MOVAVI is another desktop-based video editing software that offers all the basic functionality one looks for in a video editing tool. The software is compatible with Windows and is an ideal choice for beginners who are just getting started on their video editing journey. You’ll find all the basic features along with a few advanced functions such as background removal. Like Filmora, MOVAVI also has a built-in add-on to remove the background from your clips. However, you might not be able to achieve the same precision, especially when we are talking about more complex frames.
Key Features:
● An ideal choice for beginners
● Compatible with Windows
● Can remove background from videos with a single subject
Pros:
● The user interface is pretty straightforward
● It’s easier to edit the videos, thanks to a timeline-based interface
Cons:
● For a beginner editing tool, the price is on the higher side
● You won’t be able to remove background from complex shots with multiple subjects in the foreground
05Kinemaster
Kinemaster is a video editing tool that’s only available on mobile devices, Android to be more specific. It boasts a plethora of features that make it one of the most sought-after editing tools among mobile users. Apart from the basic editing features, Kinemaster also has Chroma key and green screen functionality that allow users to remove background from the videos. Though it’s not as same as a professional-level video editing tool like Filmora Pro, you can still use Kinemaster to erase the background from your green screen footage to achieve the desired portrait look.
Features:
● Kinemaster is beginner-friendly
● Compatible with all Android devices
Pros:
● Green screen compatibility
● Offers advanced features such as chroma key
● Idea choice for novice video editors
Cons:
● It’s quite challenging to edit longer videos on a phone, making Kinemaster less reliable for large documentary-type videos
● Ending Thoughts →
● Wondershare Filmora has introduced a new AI Portrait feature that allows users to remove background from different video clips to shift the entire focus on the main subject.
● Filmora AI Portrait is applicable in different situations and can help editors maximize the production quality of their videos
● Apart from Filmora AI Portrait, there are several video editing tools that editors can give a try to replicate the AI portrait effect. Though, the results of such tools may differ as well.
In the recent few years, video editing has become one of the most-sought after professions, all thanks to the popularity of various video sharing platforms like YouTube. Today, creators don’t need big budgets to share their stories with the world. They can simply grab the camera, shoot the video, and use editing software to compile their brainchild into a dedicated movie. And, once the movie is ready, these creators can simply upload it to YouTube and gain the desired viewership. However, it’s worth noting that YouTube isn’t the only element that has helped content creators excel in their careers and follow their passion.
Editing software like Wondershare Filmora also play an equal role in the success of a creator in today’s digital world. These editing tools are equipped with a plethora of features that allow creators to unleash their creativity and compile high-quality videos for their viewers. What’s more interesting is that these tools keep receiving new updates that further streamlines the entire video editing process to help creators edit videos more conveniently.
Today, we are here to talk about one such feature - known as Filmora AI portrait - that recently got introduced to Wondershare Filmora and became an all-time favorite of many creators. We’ll be going in detail about Filmora AI portrait and how you can use it in your videos to uplift the production quality of your videos. We’ll also share some of the alternatives of this cool feature so that you can bring variety to your videos and keep the viewers engaged throughout the video.
In this article
01 [Why Did AI Portrait Become More and More Popular](#Part 1)
02 [What Scenes Apply to AI Portrait?](#Part 2)
03 [What Scenes Do Not Apply to AI Portrait?](#Part 3)
04 [Why Filmora AI Portrait Deserves to Try?](#Part 4)
05 [A Comparison to Other AI Portrait Software](#Part 5)
Part 1 Why Did AI Portrait Become More and More Popular
Let’s start with the basics first! What is Filmora AI portrait and why it has gained an immense popularity in the editing community. It’s basically an add-on effect in Wondershare Filmora X that was introduced with the latest Filmora X version 10.5.
By integrating this add-on into their video, editors can remove/change the background without losing any details of the main subject. So, let’s say if you don’t have green screen footage and still want to remove the background without affecting the foreground (a single subject), Filmora AI portrait will help you get the job done without any hassle.
Being an AI-powered feature, Filmora AI portrait automatically detects the shape and structure of the main subject and separates it from the background. This way even if you don’t have used a green screen or don’t know how to apply the Chroma key in your videos, you’ll be able to remove the background from the RAW footage and replace it with a custom background. This will allow you to make your videos more appealing and add a funny element for better engagement. For example, you can add a moving background to uplift the entire storyline to your videos.
Filmora AI portrait is a great feature for different types of creators such as gaming streamers, YouTube content creators, and daily vloggers. Regardless of your editing style, by integrating the Filmora AI portrait add-on, you’ll have the liberty to remove unwanted backgrounds from various shots and keep the production quality high.
In addition to removing the background, Filmora AI portrait is also a great tool to design thumbnails for your videos. Also, you can use this feature to apply borders, glitch effects, pixelated, noise, or segmentation video effects to your videos. All these elements will allow you to eliminate dull and low quality things from your videos and make the main characters pop-out in every frame.
Here are a few situations where one can implement the Filmora AI portrait and make the most out of its functions.
● If you livestream videos on YouTube, but don’t have a green screen yet, you can use the AI portrait feature in Filmora to remove the background and make your streaming setup look more elegant and professional.
● With the Filmora AI portrait feature, you can also design high-quality and captivating thumbnails for your videos and draw the maximum attention within YouTube’s rabbithole. Any new viewer is more likely to click on your videos when the thumbnail is engaging.
● You can also use Filmora AI portrait effect to remove background from interviews. Usually, when someone shoots an interview, they usually place a green screen behind the person. But, in case you don’t have green screen footage, you can easily make your interviews look more professional with the Filmora AI portrait effect.
● Finally, you can also use the Filmora AI portrait feature in regular YouTube vlogs. This would be applicable when there are unnecessary elements in the background of a clip that are ruining the entire frame. In this case by simply erasing the background and replacing it with a custom one, you’ll be able to keep the production quality high and keep the viewers engaged throughout the vlog.
Part 2 What Scenes Apply to AI Portrait?
While the AI portrait effect can work for all frames, there are a few situations when it delivers the best results. The designers at Wondershare Filmora claim that AI Portrait works like a charm when the frame has a single subject talking directly to the camera.
When there’s a single individual or subject in front of the camera, it’s relatively easier for the AI-algorithm to detect the edges and separate the background with high precision. Moreover, when the main subject is static, you are most likely to witness the best output in terms of background removal. Why? The reason being when there’s a single static subject, an AI-powered algorithm can precisely mark its edges and achieve relatively better results.
Let’s understand this with the help of a few examples.
One-Person Interview
Going back to the interview example - let’s say you are interviewing a person who’s sitting in a chair and talking directly to the camera in front of him. Now, since there isn’t too much movement on his side, the AI-algorithm will be able to detect his edges and remove the background accordingly. In fact, in such ideal cases, the tool will even be able to detect the hair of the subject with high precision.
Shot of a Monologue
Monologues are no longer limited to high-budget Hollywood movies only. They have become a regular part of conventional videos such as daily YouTube vlogs. Monologues boast better authenticity as the entire clip is shot in one go.
Since there are no random cuts, the presenter can easily convey his views to the viewers. But, for a monologue to work, it’s extremely crucial that it has a high-quality background otherwise it’ll fail to grab the viewer’s attention. In case you are also stuck with a monologue that has a bad background, you can use Filmora AI portrait to remove it and make the primary character of the video pop-up more effectively.
YouTube Vlogs
Again, YouTube vlogs are another great example where editors could really benefit from Filmora’s AI portrait effect. For daily vloggers, getting the perfect shot is always a challenge. And, more often than you think, they end up taking shots that have bad backgrounds. But, thanks to Filmora’s AI portrait effect, one could easily remove background from such shots and use them to convey the storyline more effectively. This won’t waste your efforts and you’ll be able to use the shot that would have otherwise gone to Trash.
So, these are a few situations where the AI portrait effect in Filmora can do wonders for your video editing process.
Part 3 What Scenes Do Not Apply to AI Portrait?
Now, as we mentioned in the previous part, the Filmora AI portrait effect works better in scenarios where there’s only a single subject in the frame. This means the effect isn’t applicable in all the situations.
If there is a lot of movement in the frame, the AI-algorithm may fail to detect the edges of the subject(s) and not deliver the expected results. For example if you are working on a vlog where you are moving the camera really fast, the AI effect will struggle to separate the background from the foreground and fail to achieve the desired precision while removing background.
Some of the other situations where you won’t be able to make the most out of the AI portrait effect include:
Shots With Multiple Moving Subjects
If you have a shot of a crowded place where too many people are moving in the frame, it’ll be challenging to detect the background properly. The movement of multiple subjects will interfere with the overall functionality of the algorithm, restricting users from achieving a background-free shot. In such a situation, you’ll either have to use the shot without removing the background or dump into the Trash folder.
Videos With Special Effects and Filters
Here’s the deal; special effects and filters have become an inevitable part of today’s social media-influenced world. People apply filters and visual effects to make their videos more appealing and grab more likes and comments on Instagram, Facebook, and Snapchat.
But, these filters are often a nightmare for video editors as it’s pretty challenging to process them in any video editing software. If you have a clip with filters or video effects, you’ll struggle to implement the Filmora AI portrait effect properly. In fact, the effect will not work as expected and you’ll be stuck with a shot that would be pretty useless for the entire storyline. So, do not apply unnecessary filters to your videos if you are planning to apply the AI portrait effect in the long run.
Videos With Backlights
The lighting setup of any video has a huge influence on how it will look at the end. Just like a human being, even the AI algorithm struggles to detect the background in a video that has poor lighting conditions or bad backlight. In such videos, it’s challenging for the algorithm to detect the main subject and then identify its edges.
To avoid such scenarios, it would be better to plan your shots in advance and shoot them when there are proper lighting conditions. In case you are going to shoot indoors, you can use a dedicated lighting setup. If anything, this will make it much easier to apply the Filmora AI portrait effect and achieve the best results in terms of background removal.
Paintings
Paintings aren’t like traditional videos. The color scheme is entirely different and it’s much challenging to identify the background and the foreground. So, if there are any images of paintings that you want to use as a thumbnail, it might get a bit challenging to remove the background. In such a scenario, it would be much better to either choose a different image for the thumbnail and use the painting without removing its background.
So, these are a few scenarios where using the Filmora AI portrait won’t be an effective solution for you. We would recommend to plan your shots in advance so that you don’t end up with random shots where it’s challenging to apply the AI portrait effect.
Part 4 Why Filmora AI Portrait Deserves to Try?
If you’ve come this far, you are most likely to be serious about video editing. So, now that we have clarified all the situations where using ****Wondershare Filmora Video Editor AI portrait** will be effective, let’s understand how you can use it in your videos.
01Are the Subscription Periods for Wondershare Filmora and the AI Portrait Add-on the Same?
So, first things first, will you get direct access to the AI portrait add-on along with your Filmora license? The answer is No! THe AI portrait add-on is available as a separate item and you’ll have to pay additional charges to use it on your videos. The default Filmora license will not give you access to the AI portrait mode whatsoever. In terms of pricing, the Filmora AI portrait is available at a pocket-friendly price.
For Win 7 or later (64-bit)
For macOS 10.12 or later
You can get this add-on by paying a minimal fee of $5.99 per month. One of the best things about choosing this add-on is that you can discontinue it whenever you want. So, let’s say you no longer need to remove backgrounds from your videos - in this situation, you can directly discontinue your subscription without affecting your regular Filmora subscription.
02How to Add AI Portrait Effects?
Now, coming to the real reason why you’ve come this far - the process to use the AI portrait effect in Filmora. To be honest, it’s a relatively easier process to add the AI portrait effect in Filmora. Even if you are not a Filmora user, you’ll be able to get the job done without any hassle. Let me quickly walk you through the step-by-step procedure of adding the AI portrait effect in Wondershare Filmora.
Step 1 - If you are not an existing user of Filmora, start by purchasing its license and install the software on your system to get started. On the other hand, if you’ve been using Filmora for a while, directly move to the next step to proceed further.
Step 2 - Now, launch the software and create a new project. You’ll be prompted to Filmora’s editing panel. At this point, you’ll have to drag the video clip (that you want to edit) to the timeline.
Step 3 - Once the video is successfully imported, switch to the “Effects” tab and search for “AI Portrait”. You’ll see a “premium” icon next to its name. Double-click on the effect and follow the on-screen instructions to complete the payment procedure.
Step 4 - After you have bought the effect, just drag it to the timeline and place it above your video.
Step 5 - Based on how long you want to keep this effect, you can elongate or shorten its duration by simply stretching its duration.
That’s it; the AI portrait effect will automatically detect and remove the background without requiring you to even lift a finger. After the background is removed, you can tap the “Export” button and choose the desired output format to save the file on your system.
03How to Adjust AI Portrait Effects?
Apart from its core ability to remove the background from a video/image, the another advantage of choosing Filmora AI portrait add-on is its fully customization support. Based on your requirements, you can adjust different parameters such as percentage, edge thickness, edge feather, etc. to achieve the desired results in the output.
Let’s have a closer look at all these parameters to understand their overall functionality more precisely.
● Percentage: By adjusting the percentage, you can decide how effective you want the AI portrait effect to appear in your videos. If you drag the slider all the way to the end, the background will be removed completely and you might not even recognize the main subject properly. On the other hand, if you keep it at a lower percentage, there will be a little bit of transparency in the background.
● Alpha: The alpha slider will decide the transparency of the portrait effect itself. You can drag this slider left or right until you have the perfect frame in front of you.
● Edge Thickness: As the name implies, edge thickness decides how thick the edges of the subject would appear in the video. A smaller percentage would mean thinner edges whereas a higher percentage would mean larger edges.
● Edge Feather: With Edge feather, you can define the blurriness of the edges themselves. The higher the value of the edge feather, the blurier the edges would appear in your videos.
Now, to access all these features, all you have to do is double-tap on the AI portrait effect within FIlmora’s timeline. This will automatically prompt you to the editing panel for this particular effect where you’ll be able to manipulate all these parameters and achieve the desired portrait results accordingly.
In case you are not happy with your customization, you can also tap the “Restore” button next to each parameter to restore the default value. Once you are happy with the results, just tap the “Ok” button to implement your changes.
04Why Did Filmora AI Portrait Attract People?
Apart from attracting editors, what makes Filmora AI portrait one of the best video effects that you can apply to your videos to engage viewers. Well, the answer is pretty simple; AI portrait effect makes the background of a video transparent.
It means the editors have the liberty to replace the dull boring background with a custom one and keep the engagement level high. This becomes really useful when you are trying to compile a long documentary and have a few shots with bad backgrounds. Since using such shots directly might affect the production quality of your videos, it would be better to first replace the background using the AI portrait effect.
So, regardless of your editing setup, production goals, or the type of video you want to compile at the end, you can use the AI portrait effect in Wondershare Filmora in different situations and protect the end results from becoming a failure. This will help you maximize the reach of your videos and attract more viewers more effectively. So, install Filmora today and sign up for its AI portrait effect to uplift the overall video quality of your projects.
Part 5 A Comparison to Other AI Portrait Software
Now, before saying goodbye, we also believe that it would be unfair if we only talk about a single tool and a single effect in this guide. Of course, Filmora’s AI portrait effect works like a charm in different situations, there are other tools in the market that you can try to achieve similar results. As a video editor, it’s always great to keep trying new things as it will add variation to your portfolio and make it much easier to attract new clients.
So, here’s a list of top 5 video editing software that you can use to get similar functionality like the AI portrait effect in Wondershare Filmora.
01Adobe Premiere Pro
Adobe Premiere Pro is undoubtedly one of the most popular video editing software with a strong fan base. Many industry leaders including Sam Kolder and Rory Kramer use Premier Pro to compile high-quality Hollywood-style videos for musicians as well as other clients.
Premiere Pro is more of an advanced video editing tool, which means even though it can help you remove background from portraits, you’ll have to do all the work manually. There’s no predefined add-on or effect that you can apply to the video to erase the background. Instead, you’ll have to manually mark the edges of the subject, erase the background and then, replace it with a different one to achieve the desired results.
In general, Premiere Pro is a great option for skilled editors who want to take things in their own hands to achieve the best results. If you are a beginner, you would be better off with a more user-friendly tool such as Wondershare Filmora.
Key Features:
● Extreme precision while erasing the background
● Achieve the desired results without compromising the quality of the main subject in the portrait
● An industry-preferred software
Pros:
● Existing Premiere Pro users will find it much easier to replicate the AI portrait effect
● Complete flexibility over your project
Cons:
● It can take several hours to precisely remove the background
● The entire process will be manual
02Final Cut Pro
Like Premiere Pro, Final Cut Pro is another famous video editing software that can help you replicate the results of the Filmora AI portrait effect and remove the background from different videos, images, and motion graphics. Keep in mind that Final Cut Pro is only available for macOS, which means if you own a Windows system, you won’t be able to use the software whatsoever.
Again, the only downside of using Final Cut Pro is the amount of manual effort you’ll have to put in to achieve the expected results. Being a full-scale video editing tool, there aren’t too many add-ons or predefined video effects.
Instead, you’ll have to rely on conventional methods such as keyframing to remove the background frame by frame and make your videos look professional. On the major side, Final Cut Pro will work in all situations. Even if you have a clip with too many moving objects, you’ll be able to mark the edges frame-by-frame and remove the background without losing any details from the foreground.
Key Features:
● Timeline-based interface for rapid video editing
● Exclusive macOS compatibility ensures high performance
● Ideal for experienced editors and designers
Pros:
● Final Cut Pro has an easy-to-use interface
● It’s easier to process each frame individually
Cons:
● Unlike Wondershare Filmora, there aren’t any ready-to-use add-ons
● While working on complex shots, it can take several hours to remove the background
03Unscreen Online
Unscreen is an online video background remover that’s specifically designed to remove background from videos with a single click. Being an online application, Unscreen is an ideal choice for short videos (up to 20 seconds) because longer-duration videos will likely take forever to upload. If you want to edit a video for Instagram Reels or YouTube shorts, Unscreen Online would be worth the consideration.
It’ll allow you to remove the background with one click and you won’t even need high-performance software to get the job done. The only drawback of Unscreen online is its lack of video format compatibility. Since it’s an online application, not all video formats are compatible with Unscreen Online.
Moreover, you can only use the tool to process shorter videos. In general, this is an ideal choice for an average Joe who doesn’t want to go through the hassle of installing and using a dedicated video editing software. So, if you are a professional, it would be far beneficial to stick to other premium tools like Filmora, Premiere Pro, and Final Cut Pro.
Key Features:
● You can access Unscreen Online on any device you want
● The edge detection is quite precise for videos with a single subject
● As compared to other premium options, Unscreen Online is relatively cheaper
Pros:
● Cross-platform compatibility
● Perfect for Instagram content creators
● Affordable pricing
Cons:
● Doesn’t achieve the expected results for more complex videos having too many subjects
● Can’t process videos having longer durations
04MOVAVI Video Editor
MOVAVI is another desktop-based video editing software that offers all the basic functionality one looks for in a video editing tool. The software is compatible with Windows and is an ideal choice for beginners who are just getting started on their video editing journey. You’ll find all the basic features along with a few advanced functions such as background removal. Like Filmora, MOVAVI also has a built-in add-on to remove the background from your clips. However, you might not be able to achieve the same precision, especially when we are talking about more complex frames.
Key Features:
● An ideal choice for beginners
● Compatible with Windows
● Can remove background from videos with a single subject
Pros:
● The user interface is pretty straightforward
● It’s easier to edit the videos, thanks to a timeline-based interface
Cons:
● For a beginner editing tool, the price is on the higher side
● You won’t be able to remove background from complex shots with multiple subjects in the foreground
05Kinemaster
Kinemaster is a video editing tool that’s only available on mobile devices, Android to be more specific. It boasts a plethora of features that make it one of the most sought-after editing tools among mobile users. Apart from the basic editing features, Kinemaster also has Chroma key and green screen functionality that allow users to remove background from the videos. Though it’s not as same as a professional-level video editing tool like Filmora Pro, you can still use Kinemaster to erase the background from your green screen footage to achieve the desired portrait look.
Features:
● Kinemaster is beginner-friendly
● Compatible with all Android devices
Pros:
● Green screen compatibility
● Offers advanced features such as chroma key
● Idea choice for novice video editors
Cons:
● It’s quite challenging to edit longer videos on a phone, making Kinemaster less reliable for large documentary-type videos
● Ending Thoughts →
● Wondershare Filmora has introduced a new AI Portrait feature that allows users to remove background from different video clips to shift the entire focus on the main subject.
● Filmora AI Portrait is applicable in different situations and can help editors maximize the production quality of their videos
● Apart from Filmora AI Portrait, there are several video editing tools that editors can give a try to replicate the AI portrait effect. Though, the results of such tools may differ as well.
Also read:
- Updated In 2024, If You Dont Know How to Blur a Part of a Video, Youre in the Right Place. We Have Provided All the Details You Need to Help You Blur a Still or Moving Portion of Your Video
- New 15 Best Vloggers That You Should Follow for Travel
- New 2024 Approved Best Ideas for Time Lapse Video
- New 2024 Approved Practical Ways to Resize Video in Handbrake
- In 2024, Knowing All Ways To Slow Down Video With Adobe Premiere Pro
- Updated In 2024, Convert Time-Lapse to Normal Video
- Updated In 2024, Do You Wish to Learn About some Tools to Slow Down a Video? Discover How to Slow Down Time Lapse on iPhone Throughout This Article
- 2024 Approved Discover the Best Video Frame Rate Converters for Smooth Playback, Including Online and Offline Options. Learn How to Convert Frame Rates for Free and Elevate Your Video Quality with These Top 8 Tools
- New Best Free Slow Motion Apps For Android and iPhone for 2024
- Updated 2024 Approved How to Use Rule of Thirds in Video
- Updated Its Always a Cool Thing to Use a 3D Intro Maker to Create Intro Videos for Your Clips. This Post Will Introduce You 4 of the Best Intro Video Makers to Help You Improve Your Video
- Separating Audio From Video in DaVinci Resolve Step by Step for 2024
- New In 2024, How to Make Eye Zoom Transition Effect with Filmora
- Updated 8 Free Title Makers to Use for 2024
- Updated In 2024, Can You Make an Fcpx Slideshow? Undoubtedly Yes, with the Unlimited Best Fcpx Slideshow Templates Available. To Know How to, Follow the Discussion Below
- New In 2024, Leading Applications to Create Fast Motion in iPhone
- Updated How to Be a YouTube Vlogger
- New 2024 Approved Guaranteed 10 Storyboard Creators To Make Animation Easier For You
- Updated What Are the Best Video Background Changers Online, In 2024
- New 2024 Approved Getting To Know More About the Video Editing Interface of Wondershare Filmora
- In 2024, How to Make a Slideshow GIF?
- Does the Customary Speed of Your TikTok Slideshow Appear to Be Slow Enough of Late? If Yes, Drop Your Worries Here with the Know-How of Increasing the TikTok Slideshow Speed
- New Best 7 Color Match Paint Apps
- 2024 Approved This Article Has a Detailed Description of How You Can Split the Videos in Lightworks Including the the Discussion of Splitting the Wondershare Filmora as an Alternative. It Is Also a Suitable Choice
- Updated 2024 Approved How to Color-Correct an S-Log Footage
- Updated 2024 Approved How to Use LUTS to Color Grade on Your iPhone
- Updated In 2024, How to Make After Effects Gifs
- 2024 Approved Are You Working on Editing a Video and Youd Like to Add Text to It? Learn the Various Ways that You Can Add Text to a Video
- New Tips for Choosing Location & Scheduling Music Video
- New How to Brighten a Video in Windows 10 | Step-By-Step Guide
- New This Article Discusses the Splitting of the Video Clips in DaVinci Resolve Explicitly. There Is Also a Brief Description of Its Best Alternative, Wondershare Filmora. This Is Also Practically Relevant and Reasonable as Well
- Updated 2024 Approved Add Zoom Blur Effect In Photoshop Step by Step
- 3uTools Virtual Location Not Working On Infinix Hot 30i? Fix Now | Dr.fone
- In 2024, Top 4 SIM Location Trackers To Easily Find Your Lost Realme 10T 5G Device
- How to Bypass iPhone 13 Pro Face ID?
- How to Share/Fake Location on WhatsApp for Oppo Reno 11 5G | Dr.fone
- In 2024, 3 Ways to Erase Apple iPhone 15 Pro Max When Its Locked Within Seconds
- How to Delete iCloud Account On Apple iPhone 12 without Password?
- In 2024, How to Track WhatsApp Messages on Vivo Y78+ Without Them Knowing? | Dr.fone
- How to Rescue Lost Music from Realme C67 5G
- In 2024, 10 Fake GPS Location Apps on Android Of your Lava Blaze Curve 5G | Dr.fone
- 10 Fake GPS Location Apps on Android Of your Vivo V29e | Dr.fone
- Top 5 Tracking Apps to Track Vivo Y36 without Them Knowing | Dr.fone
- In 2024, Step-by-Step Tutorial How To Bypass Itel P55 5G FRP
- In 2024, The Magnificent Art of Pokemon Go Streaming On Oppo Reno 11F 5G? | Dr.fone
- In 2024, Latest way to get Shiny Meltan Box in Pokémon Go Mystery Box On Apple iPhone 11 Pro Max | Dr.fone
- How to share/fake gps on Uber for Xiaomi 14 Ultra | Dr.fone
- 9 Quick Fixes to Unfortunately TouchWiz has stopped Of Asus ROG Phone 7 Ultimate | Dr.fone
- In 2024, How to Use Pokémon Emerald Master Ball Cheat On Honor 100 Pro | Dr.fone
- Android Screen Stuck General Honor X9a Partly Screen Unresponsive | Dr.fone
- In 2024, How To Unlock The iPhone 6 SIM Lock 4 Easy Methods
- Calls on Nubia Z50S Pro Go Straight to Voicemail? 12 Fixes | Dr.fone
- How to Fake Snapchat Location without Jailbreak On Realme 11X 5G | Dr.fone
- 9 Solutions to Fix Process System Isnt Responding Error on Infinix Hot 30 5G | Dr.fone
- Title: New Denoise a Video in Adobe Premiere Pro – Audio and Video Noise Removal for 2024
- Author: Morgan
- Created at : 2024-04-24 01:01:36
- Updated at : 2024-04-25 01:01:36
- Link: https://ai-video-editing.techidaily.com/new-denoise-a-video-in-adobe-premiere-pro-audio-and-video-noise-removal-for-2024/
- License: This work is licensed under CC BY-NC-SA 4.0.
