
New Guide To Using Luts Perfectly in Final Cut Pro
Guide To Using Luts Perfectly in Final Cut Pro
Final Cut Pro is a powerful video editing software available for Mac OS. You can create professional-looking videos using this tool. To give your videos a more professional touch, you can use LUTs as well. It is a quick way to color grade and improve the feel of your media content. They are essentially a set of instructions that apply a particular color grading to your video.
Moreover, with so many options available, you can choose from any color grading style you want. From cinematic to retro, LUTs offer you a variety of color adjustment tones and overlays. All you have to do is to choose from free LUTs for Final Cut Pro and download your preferred one.
- Part 2: How to Apply LUTs on Final Cut Pro
- Part 3: Discussing Wondershare Filmora LUTs - The Best Video Editing Platform
Part 1: Discovering The Top Best LUTs for FCPX
You are at the right place if you’re having trouble finding the best LUTs for FCPX. This section will provide you with one of the best LUTs you can choose for your videos.
1.Free Cinematic LUTs Pack for Video Editing
This free LUT pack is a perfect choice to give your videos a cinematic look. It features a soft blue color grading with high contrast that can make your footage look like it was shot on film. This LUT is especially effective for outdoor scenes and action shots. Moreover, its color grading enhances the drama and feel of your video footage.

2.10 Free Vintage Color Presets for Final Cut Pro
10 Free Vintage Color Presets for Final Cut Pro is a great pack if you’re looking for a vintage or retro feel. It has a warm, yellowish color grading that can give your videos a nostalgic look. This pack is ideal for footage shot in the 70s, 80s, or 90s. It highlights the muddiness and brown shades in your video to add a touch of authenticity to it.

3. Perfect Green Video LUT
Perfect Green Video LUT is a pack of 3 cinematic-style LUTs. This pack is ideal for travel or nature videos as it increases the green tone in your videos. It has a lush, green color grading that can make your videos look vibrant and lively. Additionally, this pack is effective for outdoor scenes as it improves your video’s natural colors and makes it look more dynamic.

4. Cyberpunk Color Grades
Cyberpunk Color Grades is a pack of modern cyberpunk-style LUTs. It is a fantastic LUT pack if you’re working on a music video or a creative project. It has a bold, colorful grading with high saturation that can make your video stand out. This LUT pack is perfect for scenes with many neon lights or bright backgrounds. Moreover, it adds an extra pop of color and makes your videos look more energetic.

5. Pro Retouching Essentials Pack by Prince Meyson
Prince Meyson offers this skin tone enhancer LUT pack. It has a neutral, balanced color grading that can make your videos look more polished and professional. This LUT is ideal for interviews, documentaries, or corporate videos. Moreover, this pack is perfect for portraits and close-up shots. It can enhance the natural colors of your footage and make it look more refined.

Part 2: How to Apply LUTs on Final Cut Pro
Now that you’ve discovered there are many Final Cut Pro LUTs free to download. The most important thing is to learn how to use these free LUTs on your video using FCPX. Here are some methods to learn to apply LUTs using Final Cut Pro in simple steps.
Method 1 Using Custom Layer
Step1
Open Final Cut Pro and import your video. Once the video is imported, click on the clip you want to apply the LUT.

Step2
Go to the “Effect Browser” and search for the LUT option from the search menu. After selecting it, you will get a “Custom LUT” layer. Select the custom LUT layer and drag and drop it onto your video clip. Then, click on the video clip and go to the “Inspector” window.

Step3
Select the “Custom LUT” option in the inspector window and choose your desired LUT from the LUT drop-down menu. Final Cut Pro will apply your desired LUT to your video clip.

Method 2 Using Adjustment Layer
Step1
Click the plugin button once you’ve imported your video clip and choose RT Adjustment Layer. Furthermore, if you don’t have this plugin, you can download it for free.

Step2
An icon will appear once you’ve selected RT Adjustment Layer. Drag and drop this icon on top of your video clip.

Step3
Drag and drop the “Custom LUT” layer onto your RT Adjustment Layer from the Effect Browser. Click on the RT Adjustment Layer and choose your desired LUT from the “Inspector” menu.

Method 3 Change Settings To Enable LUTs
Step1
Import your video into Final Cut Pro and click on your video in the library and open the inspector window.

Step2
In the section of the “Inspector” menu, click the drop-down menu and select the “General” option. It will open up new options in the menu where you have to choose the “Camera LUT” option and select your preferred LUT. After selecting your LUT, save your video by choosing the option.

Part 3: Discussing Wondershare Filmora LUTs - The Best Video Editing Platform
If you’re looking for a great video editing tool, Wondershare Filmora might be just what you need. With many features embedded in it, it makes it easy to create professional-looking videos. Moreover, you can apply LUTs to add a cinematic touch to your footage. With over 200+ LUTs available, you can improve the color grading of your videos. Additionally, this tool allows you to adjust its intensity as well.
Furthermore, Wondershare Filmora offers options for color adjustments and enhancements. You can add transitions, templates, effects, and filters to your videos. In addition to this, it offers over 10 billion free media assets that you can use to enhance your videos. With Wondershare Filmora, you can play around with different features and options to make your content look fantastic.

Empower your videos with a new mood using different LUTs. Filmora now offers 100+ top-quality 3D LUTs cover a broad range of scenarios. Transform your videos with Filmora’s powerful 3D LUTs.
Apply LUT on Videos Apply LUT on Videos Learn More


Conclusion
In conclusion, Final Cut Pro is a powerful tool for video editing. This tool allows you to make color corrections and color adjustments to your videos. Furthermore, Final Cut Pro offers the option to use LUTs for color grading. You can find many best LUTs for FCPX available online to use in this tool. However, Wondershare Filmora is another amazing tool that you use to color-grade your videos professionally.
Part 1: Discovering The Top Best LUTs for FCPX
You are at the right place if you’re having trouble finding the best LUTs for FCPX. This section will provide you with one of the best LUTs you can choose for your videos.
1.Free Cinematic LUTs Pack for Video Editing
This free LUT pack is a perfect choice to give your videos a cinematic look. It features a soft blue color grading with high contrast that can make your footage look like it was shot on film. This LUT is especially effective for outdoor scenes and action shots. Moreover, its color grading enhances the drama and feel of your video footage.
2.10 Free Vintage Color Presets for Final Cut Pro
10 Free Vintage Color Presets for Final Cut Pro is a great pack if you’re looking for a vintage or retro feel. It has a warm, yellowish color grading that can give your videos a nostalgic look. This pack is ideal for footage shot in the 70s, 80s, or 90s. It highlights the muddiness and brown shades in your video to add a touch of authenticity to it.
3. Perfect Green Video LUT
Perfect Green Video LUT is a pack of 3 cinematic-style LUTs. This pack is ideal for travel or nature videos as it increases the green tone in your videos. It has a lush, green color grading that can make your videos look vibrant and lively. Additionally, this pack is effective for outdoor scenes as it improves your video’s natural colors and makes it look more dynamic.
4. Cyberpunk Color Grades
Cyberpunk Color Grades is a pack of modern cyberpunk-style LUTs. It is a fantastic LUT pack if you’re working on a music video or a creative project. It has a bold, colorful grading with high saturation that can make your video stand out. This LUT pack is perfect for scenes with many neon lights or bright backgrounds. Moreover, it adds an extra pop of color and makes your videos look more energetic.
5. Pro Retouching Essentials Pack by Prince Meyson
Prince Meyson offers this skin tone enhancer LUT pack. It has a neutral, balanced color grading that can make your videos look more polished and professional. This LUT is ideal for interviews, documentaries, or corporate videos. Moreover, this pack is perfect for portraits and close-up shots. It can enhance the natural colors of your footage and make it look more refined.
Part 2: How to Apply LUTs on Final Cut Pro
Now that you’ve discovered there are many Final Cut Pro LUTs free to download. The most important thing is to learn how to use these free LUTs on your video using FCPX. Here are some methods to learn to apply LUTs using Final Cut Pro in simple steps.
Method 1 Using Custom Layer
Step1
Open Final Cut Pro and import your video. Once the video is imported, click on the clip you want to apply the LUT.
Step2
Go to the “Effect Browser” and search for the LUT option from the search menu. After selecting it, you will get a “Custom LUT” layer. Select the custom LUT layer and drag and drop it onto your video clip. Then, click on the video clip and go to the “Inspector” window.
Step3
Select the “Custom LUT” option in the inspector window and choose your desired LUT from the LUT drop-down menu. Final Cut Pro will apply your desired LUT to your video clip.
Method 2 Using Adjustment Layer
Step1
Click the plugin button once you’ve imported your video clip and choose RT Adjustment Layer. Furthermore, if you don’t have this plugin, you can download it for free.
Step2
An icon will appear once you’ve selected RT Adjustment Layer. Drag and drop this icon on top of your video clip.
Step3
Drag and drop the “Custom LUT” layer onto your RT Adjustment Layer from the Effect Browser. Click on the RT Adjustment Layer and choose your desired LUT from the “Inspector” menu.
Method 3 Change Settings To Enable LUTs
Step1
Import your video into Final Cut Pro and click on your video in the library and open the inspector window.
Step2
In the section of the “Inspector” menu, click the drop-down menu and select the “General” option. It will open up new options in the menu where you have to choose the “Camera LUT” option and select your preferred LUT. After selecting your LUT, save your video by choosing the option.
Part 3: Discussing Wondershare Filmora LUTs - The Best Video Editing Platform
If you’re looking for a great video editing tool, Wondershare Filmora might be just what you need. With many features embedded in it, it makes it easy to create professional-looking videos. Moreover, you can apply LUTs to add a cinematic touch to your footage. With over 200+ LUTs available, you can improve the color grading of your videos. Additionally, this tool allows you to adjust its intensity as well.
Furthermore, Wondershare Filmora offers options for color adjustments and enhancements. You can add transitions, templates, effects, and filters to your videos. In addition to this, it offers over 10 billion free media assets that you can use to enhance your videos. With Wondershare Filmora, you can play around with different features and options to make your content look fantastic.
Empower your videos with a new mood using different LUTs. Filmora now offers 100+ top-quality 3D LUTs cover a broad range of scenarios. Transform your videos with Filmora’s powerful 3D LUTs.
Apply LUT on Videos Apply LUT on Videos Learn More
Conclusion
In conclusion, Final Cut Pro is a powerful tool for video editing. This tool allows you to make color corrections and color adjustments to your videos. Furthermore, Final Cut Pro offers the option to use LUTs for color grading. You can find many best LUTs for FCPX available online to use in this tool. However, Wondershare Filmora is another amazing tool that you use to color-grade your videos professionally.
How to Shoot Cinematic Footage with Phone
Creating cinematic videos is easy if you have expensive equipment like a film set with high-quality cameras. But many of us can’t afford this, so read this article to get an alternative.
You can use smartphones to record cinematic shots if you don’t have expensive lenses. You’ll learn about filming and editing those shots into Wondershare Filmora to get professional results in the below lines.
But before we get into the filming process, having a general idea about the topic can help a lot. So first, let’s understand what cinematic videos are!
Part 1. What Is a Cinematic Video?
The world of cinema has developed and has high recording quality. A cinematic video is a video that is recorded to look more like a movie. These shots excel in all aspects of a video, such as Color, aspect ratio, and lighting techniques.
Most of the cinematic footage required unique cameras, i.e., IMAX cameras for movies. But these cameras are really costly and only suitable for large-scale production.
With the understanding of cinematic videos, you can now use alternative ways to record a cinematic video without an expensive camera. You can also record a cinematic video using only a smartphone with a few requirements.
Scroll below to learn more about what you need to record a cinematic video!
Part 2. Requirements to Record a Cinematic Video
To record a professional video with cinematic effects, you must have the following equipment in your studio:
1. A Gimbal Stabilizer
When you are recording footage from your smartphone, a significant issue that can disturb your video quality is the shaking of your phone. You may have to record while walking, or it could even be a static shot.
If the phone is held in your hands without support, you will end up with shaky footage. This will eventually ruin your video.
A gimbal stabilizer allows you to stabilize your footage with a handheld stand. Many gimbal stabilizers are available in the market, but for reference, we would be looking at the Q3 Gimbal from Zhiyun.

You can also connect the Gimbal from its app. Scroll below to learn more about the app!
Zhiyun Cami App
Zhiyun Q3 stabilizer also connects with the Zhiyun cami app. This app will allow users to access the filming features more intuitively and comprehensively. You can connect your Gimbal with the app via Bluetooth.

Zhiyun Stabilizer Shooting Modes
There are many modes on different Gimbals, but the Locking and the POV mode are the most useful, which are illustrated as shown below:
- The Locking mode: This mode allows you to lock all three motors of the Gimbal and allows your phone to remain fixed at a certain angle. Due to this, you can shoot your footage from multiple positions while keeping the camera fixed at one angle.
- The POV mode will allow you to unlock all the axes. This mode will also adjust in all three axes when moving around. This feature gives you more freedom of movement.

Extra Features of Zhiyun Q3 Stabilizer
When you are shooting a video using the Gimbal stabilizer, you come across a point where you want extra light. Thus, the Q3 stabilizer comes with a built-in flashlight.
This flashlight will not only light up those small corners of a dark room but also make a huge difference. If you are recording to focus on an object, such as a product, this flashlight will greatly help you.

You can also turn the flashlight towards yourself if you are recording a Vlog or taking a selfie. The light’s temperature is 4300K, giving a relatively warm light on the subject.

2. A Good Smartphone
Most smartphones these days are equipped with cameras with varying powers of recording. Some smartphone cameras focus on Mega Pixels, while others focus on the capture sensor. You need a smartphone camera that balances out all these qualities to record cinematic footage.
The recently released iPhone 14 pro camera is an excellent example of a good quality camera you can use to record cinematic videos.

3. Video Editing Software
There is no better software in the video editing field than the infamous Wondershare Filmora. It allows you to edit high-quality videos with creative features.
Wondershare Filmora allows access to the range of effects and filters you can apply to your videos to give them a more cinematic look. It also allows you to access the vast library of audio to utilize in your videos. Moreover, its engaging UI allows beginners to access to features of Wondershare Filmora easily.

Now that we have learned about the requirements for recording a cinematic video. Let’s look at the different cinematic movements you can use to record from your Smartphone.
Part 3. Top 3 Cinematic Movements to Record From a Smartphone
You may have watched many movies or TV shows, but the general audience usually ignores the effort put into a shot. Only an experienced videographer can detect the difference between a great cinematic shot and a poor one.
Of the great cinematic shots, some are described in this article. These shots can easily record by using a smartphone. The cinematic movements explained below are the best choice. Here we will look at the three camera movements you can record on your smartphone.
- The Reveal Movement.
- The 180° Presentation Movement.
- The Following Movement.
First, let’s take a look at the Reveal movement.
1. The Reveal Movement
This is the most popular movement used in cinematic shooting from your smartphone. With a Gimbal, the Reveal movement is one of the easiest shots to master. But for this, you will need to learn it first.
The Reveal Movement is a shot taken with an object as a perspective. The shot starts from a static object in the foreground. It could be focused at first, but as the camera moves, the focus will be diverted to reveal our target object. This is known as the Reveal Movement.
To shoot the reveal movement, follow the steps mentioned as shown:
- First, ensure your phone is connected properly to the Gimbal.
- Align your Smartphone camera behind the static object.
- Guide the target individual to be ready as you move the camera to reveal them.
- Slowly move the camera, focusing on the static object to change its focus on your main object.

![]()
Note: Make sure to practice and experiment a lot with the steps. Try to be more creative and innovative. With every video you shoot, you gain experience with the errors.
Another thing to remember is that when you are shooting a Reveal movement using the Gimbal, it is best to put it in Locking mode. This mode works the best as it allows the camera to stay fixed in one frame making your footage seem balanced and of quality.

2. The 180° Presentation Movement
The next movement we will be looking at will be the 180° presentation movement. The 180° presentation will move in a half-circle fashion. It will move from one side of the subject to the other side. This will allow you to cover the overall subject’s view.
Apart from that, it will allow you to capture the background with much clarity and detail to maintain a general sense of the ambiance. Making a 180° presentation shot is fairly easy to do so. With its multiple uses, you can use this method in any scenario.
As we will move from one side to the other in a circular manner, we need to fix the frame of our video to move along. Using the POV mode of the Zhiyun Gimbal stabilizer will be the best option in this sense.

Setting the Gimbal in POV mode will allow you to shoot the video from more than one angle while keeping the video balanced. Follow the steps mentioned to shoot a 180° presentation video:
- First, start recording from one side of the subject while keeping the Gimbal in the POV mode.
- Slowly start moving in front of the subject in an arch.
- When you face the subject, do not stop and keep moving to complete the arch.
- When you reach the end of the arch, close the video.

By following the steps mentioned, you can create the 180° presentation movement using a smartphone. Now, move forward to learn about “The Following movement.”
3. The Following Movement
You can use “The following movement” when recording a scene in which the object moves in random directions. Or when there is a high degree of movement of your object in the video, and you want to fix the focus of your footage to that object.
The Following movement is not technically a movement, but a setting that will allow you to record the footage while keeping the object and the video frame focused. In this type of footage, we will use the Zhiyun Cami app to focus on our target object.

To focus on our subject in the video by Cami app, follow the steps mentioned below:
- When recording the video, make sure to put the Gimbal on a tripod stand.
- After that, open the Cami app and draw a square over the object you want to keep in focus.
- Now, the camera will shift its angle to its perspective wherever the object goes.

This is how you will create the following movement.
Part 4. Edit the Clips with Wondershare Filmora
Now that we have recorded our footage, it is time to arrange it and apply the finishing touches. We are going to use Wondershare Filmora for editing the recorded footage.
Free Download For Win 7 or later(64-bit)
Free Download For macOS 10.14 or later
Follow the steps mentioned below to edit on Wondershare Filmora!
Step1 Download Wondershare Filmora
To download Wondershare Filmora, follow the steps outlined below:
- First, download the Wondershare Filmora.
- When the download is finished, click on the setup.
- The Wondershare Filmora installer will begin to load.
- Then you will have installed Wondershare Filmora on your PC or Mac.
If you want to purchase the premium plan’s features, check out the Wondershare Filmora Premium plans.
Step2 Add clips to the timeline
After downloading the Wondershare Filmora app, we must create a workplace. To do so, follow the steps mentioned:
- First of all, click on the import icon in the upper left corner of the home interface of Wondershare Filmora. This will open up your PC library.
- Then Import your footage in the import window.
- Click and drag to drop the footage in the Timeline.

Step3 Trim the Video Clips
After you have added the clips to the timeline, you may have some extra footage you don’t want. Go through the clips you added and trim them according to your wish.
Step4 Add The Effects
After you have trimmed the clips now, you will have to add the finishing touches. To perform this, follow the below instructions:
- Go to the effects icon on the upper bar above the import window.
- Here, you can see the range of effects Wondershare Filmora Provides. Select the one you want for your video.
- You can also search for effects from the search bar.
- Once you have found the effect you want, download it if not been downloaded before.
- Click and drag it to drop below your clips to add the effect.
- Double-click on the effect that you added to adjust its settings.
- Here, you can adjust the opacity to your liking.

Now that we have added the Effects, it is time to add the Overlays!
Step5 Add Overlays
You can also add overlays on your videos to make them pop up even more. You can add Overlays by the following steps:
- In the effects icon on the bar above the import window, you can see the multiple effects of Wondershare Filmora.
- In the left column, you can also see the Filters and Overlays.
- Go to the Overlay
- Select the Overlay that you want.
- Then click and drag it above your video.
- You can also add a border to your video by searching “Border” in the search bar and dragging it below your clips.

Step6 Add Some Music
To finish off your editing, you can also add audio music from the Wondershare Filmora Audio library:
- Before adding the audio music, make sure to lower the volume of your video clips.
- You can do so by dragging below the audio tab on your video clips in the timeline.
- Go to the Audio icon on the bar above the import window.
- Here, you can see the multiple audio available.
- Browse through the library till you find suitable audio.
- Download it and drag it below on the timeline.

Now play the Video from the beginning to see the final looks.

Congratulations! You have now successfully created a cinematic video using Wondershare Filmora.
Conclusion
Using expensive equipment to record a cinematic video can be a reliable step. But it is not in everyone’s budget. You can also use a smartphone to record a cinematic video by the steps mentioned above and give it a professional look by editing on Wondershare Filmora.
Although it might seem strange initially, but the time is close when everyone will create cinematic videos from their smartphones.
Another thing to remember is that when you are shooting a Reveal movement using the Gimbal, it is best to put it in Locking mode. This mode works the best as it allows the camera to stay fixed in one frame making your footage seem balanced and of quality.
2. The 180° Presentation Movement
The next movement we will be looking at will be the 180° presentation movement. The 180° presentation will move in a half-circle fashion. It will move from one side of the subject to the other side. This will allow you to cover the overall subject’s view.
Apart from that, it will allow you to capture the background with much clarity and detail to maintain a general sense of the ambiance. Making a 180° presentation shot is fairly easy to do so. With its multiple uses, you can use this method in any scenario.
As we will move from one side to the other in a circular manner, we need to fix the frame of our video to move along. Using the POV mode of the Zhiyun Gimbal stabilizer will be the best option in this sense.
Setting the Gimbal in POV mode will allow you to shoot the video from more than one angle while keeping the video balanced. Follow the steps mentioned to shoot a 180° presentation video:
- First, start recording from one side of the subject while keeping the Gimbal in the POV mode.
- Slowly start moving in front of the subject in an arch.
- When you face the subject, do not stop and keep moving to complete the arch.
- When you reach the end of the arch, close the video.
By following the steps mentioned, you can create the 180° presentation movement using a smartphone. Now, move forward to learn about “The Following movement.”
3. The Following Movement
You can use “The following movement” when recording a scene in which the object moves in random directions. Or when there is a high degree of movement of your object in the video, and you want to fix the focus of your footage to that object.
The Following movement is not technically a movement, but a setting that will allow you to record the footage while keeping the object and the video frame focused. In this type of footage, we will use the Zhiyun Cami app to focus on our target object.
To focus on our subject in the video by Cami app, follow the steps mentioned below:
- When recording the video, make sure to put the Gimbal on a tripod stand.
- After that, open the Cami app and draw a square over the object you want to keep in focus.
- Now, the camera will shift its angle to its perspective wherever the object goes.
This is how you will create the following movement.
Part 4. Edit the Clips with Wondershare Filmora
Now that we have recorded our footage, it is time to arrange it and apply the finishing touches. We are going to use Wondershare Filmora for editing the recorded footage.
Free Download For Win 7 or later(64-bit)
Free Download For macOS 10.14 or later
Follow the steps mentioned below to edit on Wondershare Filmora!
Step1 Download Wondershare Filmora
To download Wondershare Filmora, follow the steps outlined below:
- First, download the Wondershare Filmora.
- When the download is finished, click on the setup.
- The Wondershare Filmora installer will begin to load.
- Then you will have installed Wondershare Filmora on your PC or Mac.
If you want to purchase the premium plan’s features, check out the Wondershare Filmora Premium plans.
Step2 Add clips to the timeline
After downloading the Wondershare Filmora app, we must create a workplace. To do so, follow the steps mentioned:
- First of all, click on the import icon in the upper left corner of the home interface of Wondershare Filmora. This will open up your PC library.
- Then Import your footage in the import window.
- Click and drag to drop the footage in the Timeline.
Step3 Trim the Video Clips
After you have added the clips to the timeline, you may have some extra footage you don’t want. Go through the clips you added and trim them according to your wish.
Step4 Add The Effects
After you have trimmed the clips now, you will have to add the finishing touches. To perform this, follow the below instructions:
- Go to the effects icon on the upper bar above the import window.
- Here, you can see the range of effects Wondershare Filmora Provides. Select the one you want for your video.
- You can also search for effects from the search bar.
- Once you have found the effect you want, download it if not been downloaded before.
- Click and drag it to drop below your clips to add the effect.
- Double-click on the effect that you added to adjust its settings.
- Here, you can adjust the opacity to your liking.
Now that we have added the Effects, it is time to add the Overlays!
Step5 Add Overlays
You can also add overlays on your videos to make them pop up even more. You can add Overlays by the following steps:
- In the effects icon on the bar above the import window, you can see the multiple effects of Wondershare Filmora.
- In the left column, you can also see the Filters and Overlays.
- Go to the Overlay
- Select the Overlay that you want.
- Then click and drag it above your video.
- You can also add a border to your video by searching “Border” in the search bar and dragging it below your clips.
Step6 Add Some Music
To finish off your editing, you can also add audio music from the Wondershare Filmora Audio library:
- Before adding the audio music, make sure to lower the volume of your video clips.
- You can do so by dragging below the audio tab on your video clips in the timeline.
- Go to the Audio icon on the bar above the import window.
- Here, you can see the multiple audio available.
- Browse through the library till you find suitable audio.
- Download it and drag it below on the timeline.
Now play the Video from the beginning to see the final looks.
Congratulations! You have now successfully created a cinematic video using Wondershare Filmora.
Conclusion
Using expensive equipment to record a cinematic video can be a reliable step. But it is not in everyone’s budget. You can also use a smartphone to record a cinematic video by the steps mentioned above and give it a professional look by editing on Wondershare Filmora.
Although it might seem strange initially, but the time is close when everyone will create cinematic videos from their smartphones.
Create A Freeze Frame Sequence In Your Videos
Are you considering getting your video editing skills to a new high level? Are you worried about spicing your videos with stylish shots and bringing attention to particular aspects of your video?
Freeze frame sequence is one the most stunning effects that can help you greatly. The freeze frame sequence has been used in many classic and present-day movies. And it will never go out of fashion.
Here, we will guide you on creating freeze frame sequences in your videos using Filmora. It is critical here to know what exactly the freeze frame sequence is. So let’s jump right into it!
Part 1. What Is A Freeze Frame?
A freeze frame is a specific single frame of the video clip shown repeatedly in the video. It gives the illusion of a static picture. It is used to draw the viewers’ attention to the minute details of a specific moment, to set up a powerful narrative, or to introduce your main characters.

Content creators can also use the freeze-frame effect on fast-moving objects to draw the viewers’ attention. Have a few examples of the most popular freeze frames used in the movies.
Examples of freeze frames in popular movies
Alfred Hitchcock used the first-ever freeze-frame in his film Champagne (1928). There is a long list of many famous tv shows and movies in which the freeze frame effect has been used since then. But to count a few, three examples are given here.
1. Pulp Fiction (1994)
In the beginning scene of Pulp Fiction, where robbery is about to occur, a freeze-frame effect is used to engage the audience. Later in the movie, it was relieved what would happen next. It was a dramatic pause to draw attention. It is a strong example of the freeze-frame effect.

2. The Breakfast Club (1985)
The ending of Breakfast Club is an iconic example of the freeze-frame effect. With a powerful narration, the freeze frame conveys the movie’s central idea to the audience.

3. Suicide Squad (2016)
In the trailer of Suicide Squad, freeze frames were used by the director to introduce the characters. This trailer used stylish animations to give relevant information about the film’s main characters.

Having discussed the famous examples, let’s learn about the power of freeze frames.
The power of freeze frame
The old freeze frames give a retro vibe. However, with the advancement in editing technology, this special effect has proved that there is no end. Furthermore, it has shown that you can do many things with pauses.
Especially when you are a content creator, this effect empowers you by advertising your skills impressively. It also conveys your message convincingly.
Being a content creator, you always want to reach the maximum audience. This special effect will serve this too. It will ultimately get you more viewership, more likes, and more subscriptions. But how to create a freeze frame?
Part 2. How To Create Freeze Frame Sequence? [Step-Wise Guide]
Let’s see how to add a freeze frame sequence in your video step-wise and get started.
Step1 Download Wondershare Filmora
Wondershare Filmora is an all-in-one video editing platform. It is enhanced with multiple practical media resources. You can head to Wondershare Filmora official site to download or upgrade your Filmora.

Free Download For Win 7 or later(64-bit)
Free Download For macOS 10.14 or later
Step2 Import your clips and add them to the timeline
Open Filmora and create a new project. Import your clip into the media library. Add your clips to the first video layer on the timeline.

Step3 Apply color correction to the footage
Before we start our edit, let’s color correct our footage, so the corrected color is already applied when we take the screenshots.

Step4 Find your first action frame
Next, scrub through the clip to find your first action frame. For example, in this video, this is our first action frame.

Step5 Take a screenshot of the action frame
Let’s head to the camera icon under the preview screen and click the icon. It will take a screenshot of the current frame that the playhead is on the timeline.

Make sure to keep the playhead the same after you’ve taken the snapshot. You can find your screenshot in the media tab.
Step6 Add the screenshot to timeline
Let’s drag your screenshot onto video layer 2 and align it on the right side of the playhead. Then extend the screenshot so it lasts as long as your central clip.

Step7 Apply masks to the screenshot
Now, double-click on the screenshot. It will open the “Video” menu, then go into the “Mask” menu. Choose a mask shape and edit it so that it only covers where your subject is in the screenshot. For example, we choose the **”**Circle” mask shape in this video.

If you need help seeing what you’re masking, hide the main video layer and edit your mask like this.

Move the playhead forward and clean up your “mask.” Next, Increase the blur to soften the edges. But not too much because it may become visible on your subject.

Step8 Hide the first screenshot
Let’s layer a couple more action frames! First, hide the first screenshot so it doesn’t appear in your new screenshot.

Step9 Select your second action frame
Then, pick a new frame.

- Click the camera icon.
- Drag the screenshot at the new playhead spot.
- Extend the clip.

- Double-click to mask this frame.
- And play it back to make sure it looks good.
- It would help if you did this a couple more times until you have several frames.
Please have a look at the final product and how it looks!

And that’s how you create a freeze-frame video effect in Filmora.
Part 3. Tips To Use Freeze Frame Sequence
You’ve known how to make the freeze frame sequence. However, don’t miss essential tips to improve your video at the next stage.
Tip 1: Making a steady shot is important
First, ensure a steady shot with no camera shake while filming. You can use a tripod or a stable surface to keep your camera still.

Why is it necessary to make a steady shot?
- It helps you to make smooth, fluid shots.
- It is much more professional.
- It will take your editing skills to a new level.
- It grabs the attention of the viewers.
- It makes your editing easier.
Tip 2: No crossing over
Make sure your subject only crosses the same spot once. Otherwise, you would need help editing the video.

Why is it necessary to avoid crossing the same spot?
- It prevents misalignment of the shots, and your print won’t get damaged, primarily when you use pieces of the same image.
- It helps to create an illusion of holding specific moments.
Final Words
The Freeze Frame Sequence looks professional but much more manageable. The creator’s confidence gets to the next level when they learn how to create it. This step-wise guide using Wondershare Filmora is all for your ease.
Free Download For macOS 10.14 or later
Step2 Import your clips and add them to the timeline
Open Filmora and create a new project. Import your clip into the media library. Add your clips to the first video layer on the timeline.
Step3 Apply color correction to the footage
Before we start our edit, let’s color correct our footage, so the corrected color is already applied when we take the screenshots.
Step4 Find your first action frame
Next, scrub through the clip to find your first action frame. For example, in this video, this is our first action frame.
Step5 Take a screenshot of the action frame
Let’s head to the camera icon under the preview screen and click the icon. It will take a screenshot of the current frame that the playhead is on the timeline.
Make sure to keep the playhead the same after you’ve taken the snapshot. You can find your screenshot in the media tab.
Step6 Add the screenshot to timeline
Let’s drag your screenshot onto video layer 2 and align it on the right side of the playhead. Then extend the screenshot so it lasts as long as your central clip.
Step7 Apply masks to the screenshot
Now, double-click on the screenshot. It will open the “Video” menu, then go into the “Mask” menu. Choose a mask shape and edit it so that it only covers where your subject is in the screenshot. For example, we choose the **”**Circle” mask shape in this video.
If you need help seeing what you’re masking, hide the main video layer and edit your mask like this.
Move the playhead forward and clean up your “mask.” Next, Increase the blur to soften the edges. But not too much because it may become visible on your subject.
Step8 Hide the first screenshot
Let’s layer a couple more action frames! First, hide the first screenshot so it doesn’t appear in your new screenshot.
Step9 Select your second action frame
Then, pick a new frame.
- Click the camera icon.
- Drag the screenshot at the new playhead spot.
- Extend the clip.
- Double-click to mask this frame.
- And play it back to make sure it looks good.
- It would help if you did this a couple more times until you have several frames.
Please have a look at the final product and how it looks!
And that’s how you create a freeze-frame video effect in Filmora.
Part 3. Tips To Use Freeze Frame Sequence
You’ve known how to make the freeze frame sequence. However, don’t miss essential tips to improve your video at the next stage.
Tip 1: Making a steady shot is important
First, ensure a steady shot with no camera shake while filming. You can use a tripod or a stable surface to keep your camera still.
Why is it necessary to make a steady shot?
- It helps you to make smooth, fluid shots.
- It is much more professional.
- It will take your editing skills to a new level.
- It grabs the attention of the viewers.
- It makes your editing easier.
Tip 2: No crossing over
Make sure your subject only crosses the same spot once. Otherwise, you would need help editing the video.
Why is it necessary to avoid crossing the same spot?
- It prevents misalignment of the shots, and your print won’t get damaged, primarily when you use pieces of the same image.
- It helps to create an illusion of holding specific moments.
Final Words
The Freeze Frame Sequence looks professional but much more manageable. The creator’s confidence gets to the next level when they learn how to create it. This step-wise guide using Wondershare Filmora is all for your ease.
Top 10 Fun Discord Bots You Need
Top 10 Fun Discord Bots You Need in 2024
An easy yet powerful editor
Numerous effects to choose from
Detailed tutorials provided by the official channel
Consumers enjoy discord because it serves as a hub for their social groups and communities. It’s a haven where users can be themselves while socializing with others who share their interests and hobbies. There is no algorithm selecting what they should see, no continuous scrolling, and no news feed. Common interests fuel conversations and you can use some fun discord bots to pep up the conversation.

Fun bots to add discord with artificial intelligence (AI) technologies are among the most helpful tools available on the discord platform. Funny emojis for discord may be beneficial to greet new members and have funny light conversations! This aids in the creation and maintenance of a vibrant online community. You can add music, games, and fun memes to your server using these bots if you wish to.
In this article
01 [10 Fun Discord Bots You Need in 2024](#Part 1)
02 [Fun Discord Bots FAQs](#Part 2)
Part 1 Fun Discord Bots You Need in 2024
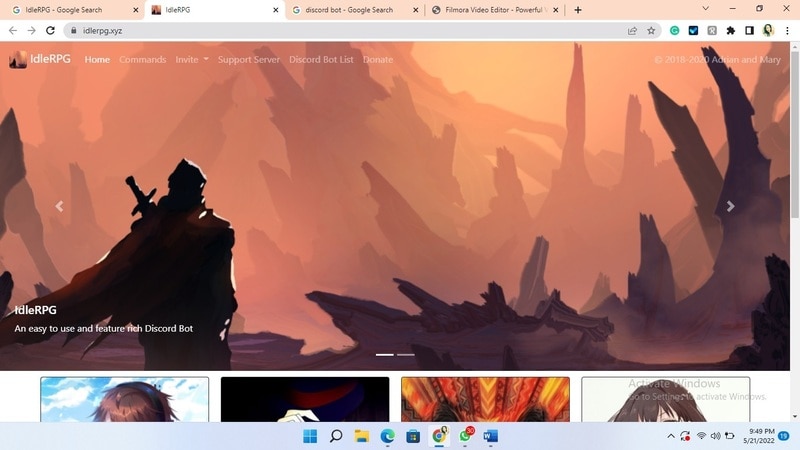
01IdleRPG
The IdleRPG is another enjoyable and engaging fun discord bot in the RPG gaming experience. It rewards server members for participating in the game while gaining XP and having fun. It offers character advancement and is comparable to other RPG games.
You may travel on a quest, trade various things, fight other players, and even find love. There’s also a scoreboard for the top ten loves, top ten PvP players, top ten wealthiest, and top ten XP players. IdleRPG also allows you to wager in various ways to help you boost your gaming money.
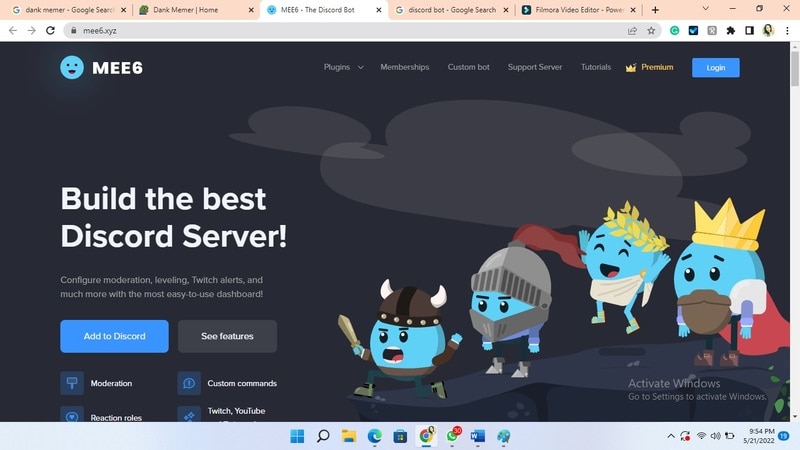
02MEE6
MEE6 is a widespread moderation and one of the greatest fun bots for discord. It takes care of many tasks that a mod team would typically do. This includes greeting new members, informing your server when you or your favorite content producers go live on Twitch or YouTube, and allowing users to assign roles depending on their reactions.
A command tool that allows you to generate custom commands and an XP leveling system that users may grind to earn access to various channels and permissions depending on activity are two of MEE6’s more complicated features. MEE6 also includes plugins for music and developing your fun discord bot.
03Dank Memer
Dank Memer is another fun bot to add to discord with a lighthearted tone. It offers one of the most extensive built-in economies, allowing participants to engage in text-based thievery, bank robbery, and gambling experiences.
As its name implies, it also offers a slew of meme-related commands. You can use simple chat instructions to create memes. Other memes automatically publish.
Even more impressive is that awesome memes are collected daily from Reddit’s top meme collections.

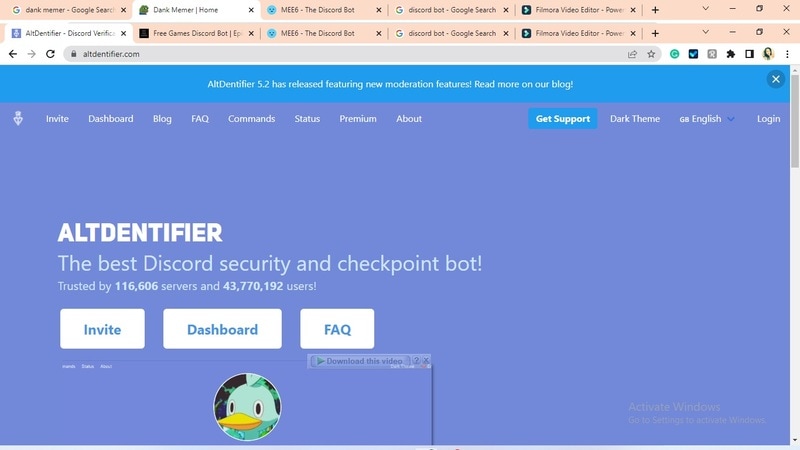
04AltDentifier
Another unique funny discord emoji bot is AltDentifier, which maintains your server clean and spam-free. It’s simple to set up and takes only a few minutes to get up and run. It now has over 35 million users spread across 100,000 servers. It also includes several more moderation commands to make administration easier.
The AltDentifier bot contains:
● An automated anti-raid system.
● A robust verification mechanism.
● Multilingual support.
● A review record.
It will also notify you if a user attempts to circumvent any limitations by utilizing a VPN.
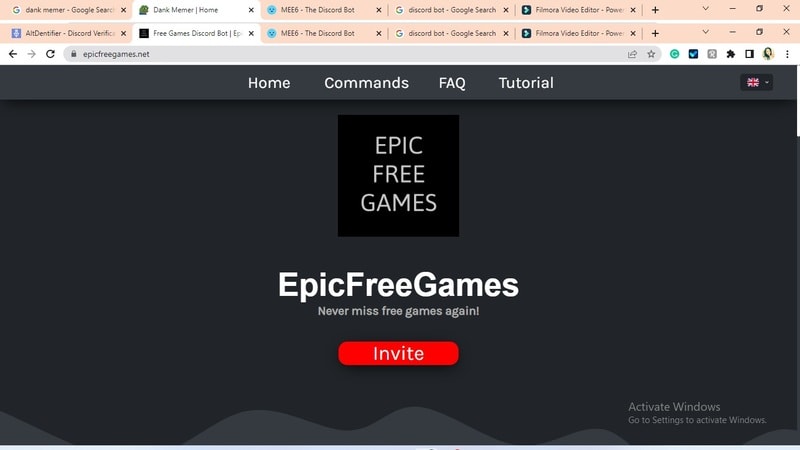
05EpicFreeGames
Over the last two years, Epic Free Games has given away thousands of free games. GTA V, Dead By Daylight, and NBA 2K21 are among the given-away titles. It even-handed away Discord Nitro lately. Have any of these free games ever escaped your notice? Fear not, for the EpicFreeGames bot has your back.
The EpicFreeGames bot delivers a message to a channel, reminding everyone of Epic’s free game(s). It only has one task, yet it can provide you with hundreds of dollars worth of games. Never miss another fantastic free Epic Games game again.
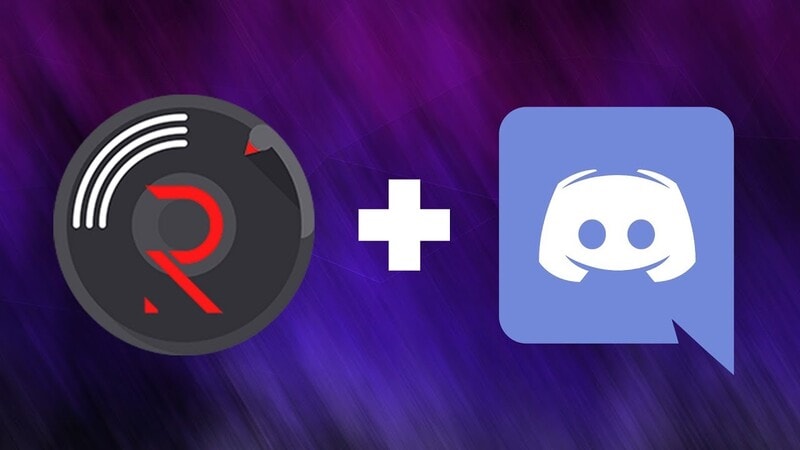
06**Rythm **
Rythm is a great fun discord bot for playing music in the voice stream of your server. This one features a beautiful user interface that includes a music player that you can interact with. This makes controlling the channel’s queue a breeze.
The options are changeable. You can designate DJ duties, prohibit the same songs from appearing in queues again, and block particular channels from playing music. Rhythm is less platform-agnostic than Groovy. Spotify, YouTube, SoundCloud, and Bandcamp are among the options. Apple Music is not currently supported.
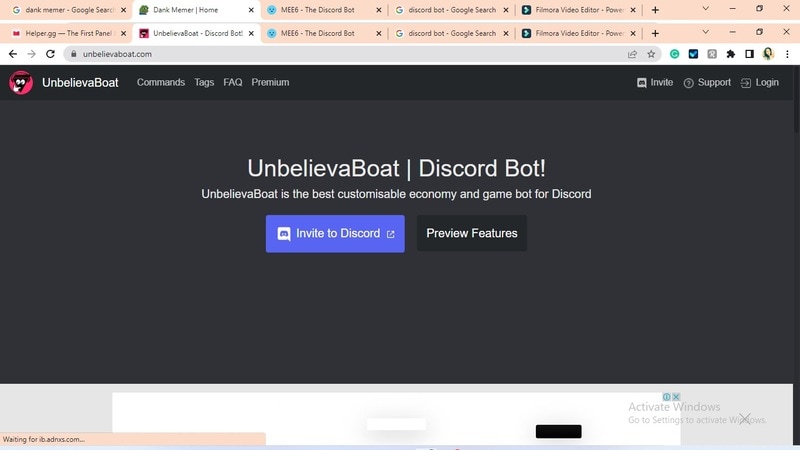
07Unbelievaboat
UnbelievaBoat is a versatile, fun bot to add to discord that uses exciting activities to keep server members engaged. These capabilities, fortunately, include a moderation mechanism that you may utilize to issue warnings and enforce bans. Your moderators may keep track of each action by assigning it a case number.
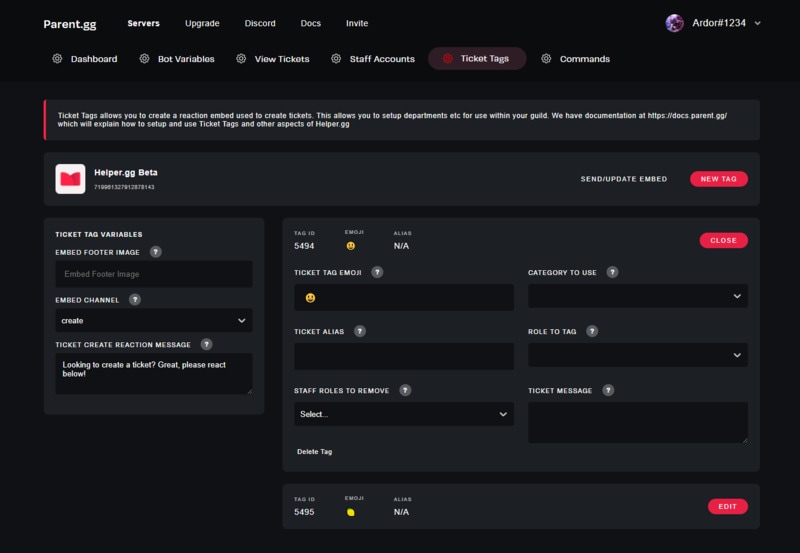
08Helper.gg
Helper.gg enables you to transform your discord server into a support ticket system. It’s a board ticket bot with a stunning UI that makes managing and responding to client tickets simple.
Create staff accounts for your company’s customer support representatives and manage their access. Ticket logging with the flexibility to rename and relocate tickets, add and delete users, and the contentment of having tickets close automatically based on the amount of time that has passed since the previous reply are all accessible.
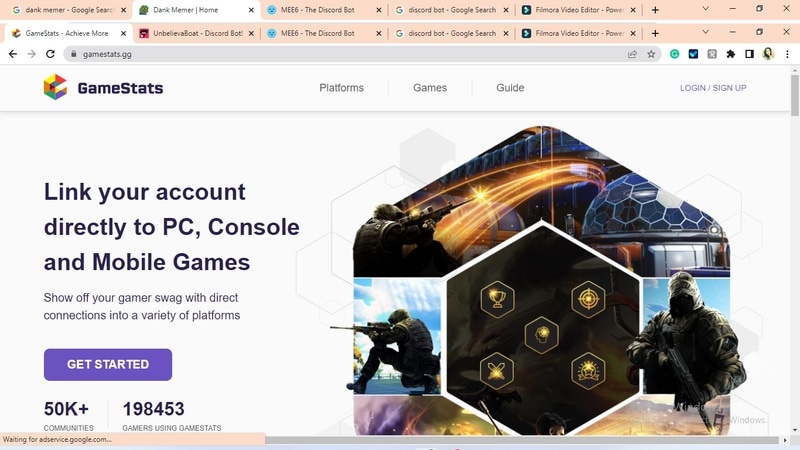
09GameStats
Next, GameStats has one-of-a-kind funny emojis for the discord bot. We all enjoy looking at our in-game statistics and comparing them. The GameStats Discord bot makes sharing and displaying your impressive numbers simple.
Connect to your game or platform, make a personalized profile card, and begin sharing your tryhard statistics.
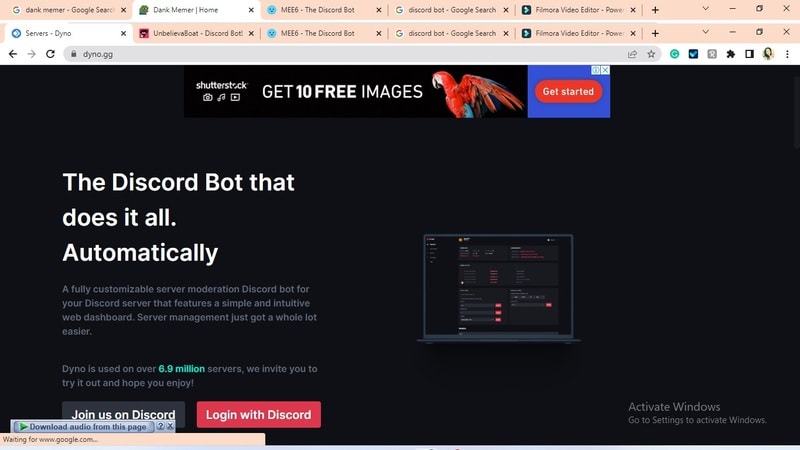
10Dyno
Dyno is another well-crafted fun discord bot. It’s an utterly customizable server moderation bot that assists with server automation. You also receive a basic online dashboard with Dyno that you can use to monitor and control your server.
It has functions such as creating positions, making announcements, banning members, and even requesting puppy or cat images. Dyno is a fun bot that allows you to automate your server management effortlessly. Premium subscriptions, which start at $4.99 per month and unlock more exclusive features, are also available.
However, if you are a creative video editor who likes sharing their experience on discord, Filmora is for you. With Filmora, you can bring your recorded experiences with funny discord emojis to life!
But Wait, What is Wondershare Filmora Video Editor ?
Filmora is a famous video editing program for those who wish to focus on editing and producing high-quality videos with the support of 4K video editing. It’s a reasonably priced software featuring tools like split, trim, add text, color, etc. When it comes to designing, adding effects, and modifying movies, it provides users with many possibilities. Users can add overlays, create animations and objects, add music, and more with Wondershare’s Filmora. It’s an excellent tool for individuals who wish to include dedications, tributes, fun emojis and anecdotes in their films. Any video can also benefit from voiceovers.
For Win 7 or later (64-bit)
For macOS 10.12 or later
Part 2 Fun Discord Bots FAQs
Q. What does MEE6 stand for?
A. MEE6 is a discord role bot that lets users assign roles to themselves via discord replies. This discord role generator will change user rights in discord automatically.
Q. Are these fun bots free?
A. Yes and no. Most fun bots for discord are free to use, although you must pay for some features.
Q. What is the top level I can reach on the MEE6 bot?
A. The maximum level accessible is 1,768,802, which would take 935 billion years if messages sent every minute.
Q. Help! My discord got hacked; how did that even happen?
A. Users may edit discord javascript files. A cybercriminal can install harmful malware to discord client files if they get user authorization. When people open the file, the code also gets executed. After then, the hacker has access to the user’s discord data.
Q. What can discord bots do?
A. On your server, the bots can conduct a variety of helpful automated chores and bot commands, like welcoming new users, monitoring content, and banning rule violators. Using fun discord bots’ instructions, you can add music, humor, games, and other emojis to your server.
● Ending Thoughts →
● In short, moderators and administrators can use funny discord emojis to administer their servers better, make them attractive, and get more users. There are many vanilla discord commands to choose from, and when you put fun bots to add to discord, the possibilities become unlimited.
● Besides, there are several funny emojis for discord to improve your discord skills and establish your discord server. Finally, Filmora can assist you in beautifying your recorded videos make funny emojis for discord.
Consumers enjoy discord because it serves as a hub for their social groups and communities. It’s a haven where users can be themselves while socializing with others who share their interests and hobbies. There is no algorithm selecting what they should see, no continuous scrolling, and no news feed. Common interests fuel conversations and you can use some fun discord bots to pep up the conversation.
Fun bots to add discord with artificial intelligence (AI) technologies are among the most helpful tools available on the discord platform. Funny emojis for discord may be beneficial to greet new members and have funny light conversations! This aids in the creation and maintenance of a vibrant online community. You can add music, games, and fun memes to your server using these bots if you wish to.
In this article
01 [10 Fun Discord Bots You Need in 2024](#Part 1)
02 [Fun Discord Bots FAQs](#Part 2)
Part 1 Fun Discord Bots You Need in 2024
01IdleRPG
The IdleRPG is another enjoyable and engaging fun discord bot in the RPG gaming experience. It rewards server members for participating in the game while gaining XP and having fun. It offers character advancement and is comparable to other RPG games.
You may travel on a quest, trade various things, fight other players, and even find love. There’s also a scoreboard for the top ten loves, top ten PvP players, top ten wealthiest, and top ten XP players. IdleRPG also allows you to wager in various ways to help you boost your gaming money.
02MEE6
MEE6 is a widespread moderation and one of the greatest fun bots for discord. It takes care of many tasks that a mod team would typically do. This includes greeting new members, informing your server when you or your favorite content producers go live on Twitch or YouTube, and allowing users to assign roles depending on their reactions.
A command tool that allows you to generate custom commands and an XP leveling system that users may grind to earn access to various channels and permissions depending on activity are two of MEE6’s more complicated features. MEE6 also includes plugins for music and developing your fun discord bot.
03Dank Memer
Dank Memer is another fun bot to add to discord with a lighthearted tone. It offers one of the most extensive built-in economies, allowing participants to engage in text-based thievery, bank robbery, and gambling experiences.
As its name implies, it also offers a slew of meme-related commands. You can use simple chat instructions to create memes. Other memes automatically publish.
Even more impressive is that awesome memes are collected daily from Reddit’s top meme collections.
04AltDentifier
Another unique funny discord emoji bot is AltDentifier, which maintains your server clean and spam-free. It’s simple to set up and takes only a few minutes to get up and run. It now has over 35 million users spread across 100,000 servers. It also includes several more moderation commands to make administration easier.
The AltDentifier bot contains:
● An automated anti-raid system.
● A robust verification mechanism.
● Multilingual support.
● A review record.
It will also notify you if a user attempts to circumvent any limitations by utilizing a VPN.
05EpicFreeGames
Over the last two years, Epic Free Games has given away thousands of free games. GTA V, Dead By Daylight, and NBA 2K21 are among the given-away titles. It even-handed away Discord Nitro lately. Have any of these free games ever escaped your notice? Fear not, for the EpicFreeGames bot has your back.
The EpicFreeGames bot delivers a message to a channel, reminding everyone of Epic’s free game(s). It only has one task, yet it can provide you with hundreds of dollars worth of games. Never miss another fantastic free Epic Games game again.
06**Rythm **
Rythm is a great fun discord bot for playing music in the voice stream of your server. This one features a beautiful user interface that includes a music player that you can interact with. This makes controlling the channel’s queue a breeze.
The options are changeable. You can designate DJ duties, prohibit the same songs from appearing in queues again, and block particular channels from playing music. Rhythm is less platform-agnostic than Groovy. Spotify, YouTube, SoundCloud, and Bandcamp are among the options. Apple Music is not currently supported.
07Unbelievaboat
UnbelievaBoat is a versatile, fun bot to add to discord that uses exciting activities to keep server members engaged. These capabilities, fortunately, include a moderation mechanism that you may utilize to issue warnings and enforce bans. Your moderators may keep track of each action by assigning it a case number.
08Helper.gg
Helper.gg enables you to transform your discord server into a support ticket system. It’s a board ticket bot with a stunning UI that makes managing and responding to client tickets simple.
Create staff accounts for your company’s customer support representatives and manage their access. Ticket logging with the flexibility to rename and relocate tickets, add and delete users, and the contentment of having tickets close automatically based on the amount of time that has passed since the previous reply are all accessible.
09GameStats
Next, GameStats has one-of-a-kind funny emojis for the discord bot. We all enjoy looking at our in-game statistics and comparing them. The GameStats Discord bot makes sharing and displaying your impressive numbers simple.
Connect to your game or platform, make a personalized profile card, and begin sharing your tryhard statistics.
10Dyno
Dyno is another well-crafted fun discord bot. It’s an utterly customizable server moderation bot that assists with server automation. You also receive a basic online dashboard with Dyno that you can use to monitor and control your server.
It has functions such as creating positions, making announcements, banning members, and even requesting puppy or cat images. Dyno is a fun bot that allows you to automate your server management effortlessly. Premium subscriptions, which start at $4.99 per month and unlock more exclusive features, are also available.
However, if you are a creative video editor who likes sharing their experience on discord, Filmora is for you. With Filmora, you can bring your recorded experiences with funny discord emojis to life!
But Wait, What is Wondershare Filmora Video Editor ?
Filmora is a famous video editing program for those who wish to focus on editing and producing high-quality videos with the support of 4K video editing. It’s a reasonably priced software featuring tools like split, trim, add text, color, etc. When it comes to designing, adding effects, and modifying movies, it provides users with many possibilities. Users can add overlays, create animations and objects, add music, and more with Wondershare’s Filmora. It’s an excellent tool for individuals who wish to include dedications, tributes, fun emojis and anecdotes in their films. Any video can also benefit from voiceovers.
For Win 7 or later (64-bit)
For macOS 10.12 or later
Part 2 Fun Discord Bots FAQs
Q. What does MEE6 stand for?
A. MEE6 is a discord role bot that lets users assign roles to themselves via discord replies. This discord role generator will change user rights in discord automatically.
Q. Are these fun bots free?
A. Yes and no. Most fun bots for discord are free to use, although you must pay for some features.
Q. What is the top level I can reach on the MEE6 bot?
A. The maximum level accessible is 1,768,802, which would take 935 billion years if messages sent every minute.
Q. Help! My discord got hacked; how did that even happen?
A. Users may edit discord javascript files. A cybercriminal can install harmful malware to discord client files if they get user authorization. When people open the file, the code also gets executed. After then, the hacker has access to the user’s discord data.
Q. What can discord bots do?
A. On your server, the bots can conduct a variety of helpful automated chores and bot commands, like welcoming new users, monitoring content, and banning rule violators. Using fun discord bots’ instructions, you can add music, humor, games, and other emojis to your server.
● Ending Thoughts →
● In short, moderators and administrators can use funny discord emojis to administer their servers better, make them attractive, and get more users. There are many vanilla discord commands to choose from, and when you put fun bots to add to discord, the possibilities become unlimited.
● Besides, there are several funny emojis for discord to improve your discord skills and establish your discord server. Finally, Filmora can assist you in beautifying your recorded videos make funny emojis for discord.
Also read:
- New Kinetic Typography Text Effect 【EASY&FAST】 for 2024
- New Top 10 Picks for Flawless Slow Motion Video Generation for 2024
- Updated What Anime Character Are You Look Like for 2024
- 2024 Approved Recommended Video Background Changers
- New In 2024, How To Create 3D Text In Video
- Updated How to Make Custom Lower Thirds with Filmora for 2024
- New Color Finale Is a Color Grading Plugin for Final Cur Pro. It Allows Users to Make Cinematic Looking Video Scenes by Adjusting the Color. Here Well Share You some Basic Information About This Plugin for 2024
- In 2024, Unlink Audio and Video in DaVinci Resolve Detailed Steps
- 15 Best LUTS to Buy for 2024
- Updated In 2024, Understanding the Dynamics Underlying in AI Slow Motion Editing
- New In 2024, Best Method to Split Video Into Parts Online
- Updated Step by Step to Split Clips in VLC for 2024
- New Discover the Top Slow Motion Camera App to Use
- Updated 2 Methods to Crop a Video Using After Effects for 2024
- Updated In 2024, Learn How to Create a Unique Repeated Text Animation in the Filmora Video Editor. Follow the Simple Step-by-Step Instructions
- New Looking for Ways to Enhance Overall Look for Your Contents Professionally? Then Coming up with These Cool PowerPoint Templates Can Help You a Lot
- New 2024 Approved Top Tips for Camtasia Freeze-Frame
- Updated A Guide to Use Distortion Effect in Premeiere Pro
- In 2024, Discover How to Change Sky Background with The Best Applications? A Review
- New 2024 Approved Top Online Video Background Changers Transform Your Videos with Ease
- Top 12 Best Freeze Frame Video Editing Examples for 2024
- TXT to SRT 3 Effective Ways to Convert TXT to SRT
- In 2024, Get Creative with These 10 Video Editing App With Templates
- 2024 Approved Vintage Film Effect 1990S - How to Make
- Updated REVIEW Whats Best 10 Software to Make AI Upscaling Video for 2024
- Are You Looking for Top AI Video Recognition Software to Choose From? Please Stay on This Article as We Look at the Current Top AI-Based Video Tools for 2024
- New Best Way To Color Grading & Color Correction in Filmora
- In 2024, 10 Best Free GIF Background Remover for PC and Online
- New How to Make Stunning Glitch Effect in Photoshop?
- New How to Create a Slideshow with Movavi Slideshow Maker for 2024
- New In 2024, How Much Wedding Videographer Cost
- Tips and Tricks for Setting Up your Vivo S17e Phone Pattern Lock
- In 2024, Does Airplane Mode Turn off GPS Location On Samsung Galaxy S23 FE? | Dr.fone
- Fixes for Apps Keep Crashing on Vivo X100 Pro | Dr.fone
- Updated 2024 Approved How To Stream Your Favorite Games Online
- 7 Solutions to Fix Error Code 963 on Google Play Of HTC U23 | Dr.fone
- Dose Life360 Notify Me When Someone Checks My Location On OnePlus Open? | Dr.fone
- Best Android Data Recovery - Retrieve Lost Photos from Xiaomi Redmi Note 13 5G.
- How To Track IMEI Number Of Xiaomi Redmi Note 12R Through Google Earth?
- What are Location Permissions Life360 On Vivo V29e? | Dr.fone
- In 2024, How To Use Special Features - Virtual Location On Nokia 105 Classic? | Dr.fone
- In 2024, The Best iSpoofer Alternative to Try On Nokia G310 | Dr.fone
- Preparation to Beat Giovani in Pokemon Go For Apple iPhone 8 | Dr.fone
- 8 Workable Fixes to the SIM not provisioned MM#2 Error on Honor X50i | Dr.fone
- What Does Enter PUK Code Mean And Why Did The Sim Get PUK Blocked On Oppo Reno 11 Pro 5G Device
- In 2024, How to Fake GPS on Android without Mock Location For your Samsung Galaxy A25 5G | Dr.fone
- In 2024, 3 Ways for Android Pokemon Go Spoofing On Honor Magic 6 Lite | Dr.fone
- Title: New Guide To Using Luts Perfectly in Final Cut Pro
- Author: Morgan
- Created at : 2024-06-15 18:56:44
- Updated at : 2024-06-16 18:56:44
- Link: https://ai-video-editing.techidaily.com/new-guide-to-using-luts-perfectly-in-final-cut-pro/
- License: This work is licensed under CC BY-NC-SA 4.0.
