:max_bytes(150000):strip_icc():format(webp)/Twitter-and-X-4c4103f6bc3c42e0b7197b60a50317ca.jpg)
New How to Create Loop Videos Using Filmora for 2024

How to Create Loop Videos Using Filmora
A loop fashion lookbook will be familiar to you if you are a fashion YouTuber. Here we will show you how to record shots and make a creative lookbook to show off your best outfits in an excellent way with Wondershare Filmora.

Shots recording for loop masking
The first and most crucial step for creating a good loop video is to record perfect shots. Here are the steps to record video shots for loop videos.
How to create a loop video
Step1 Set your camera or phone on a tripod. Make sure it stands still and does not move.

Step2 Set it so that you have a door on one side and enough room for the subject to walk through the door and move out of the frame.

Step3 Make sure all your outfits are ready.

Step4 Start recording on your camera. Walk through the door wearing the first outfit. Change your outfits and repeat the step with all your dresses. It would help if you kept the camera rolling while recording all these clips. Turning the recording on and off with every shot will result in many small movements.
Editing footage with a professional video editor - Wondershare Filmora
After recording the shots, the next step is to edit them. Wondershare Filmora is the best software for this purpose. Creating a loop video using filmora is an easy task.
Free Download For Win 7 or later(64-bit)
Free Download For macOS 10.14 or later
Below is the step-by-step guide on using Wondershare Filmora to create a loop masking or lookbook video.
How to edit a loop lookbook video
Step1 Download and install Wondershare Filmora on your PC or Mac.
Step2 Launch Wondershare Filmora, import the video clip into Filmora and place it on the first track.

Step3 Find a frame with an empty background, i.e., without the subject, and freeze the frame.

Step4 Extend the frozen frame and cut out the rest of the video.

Step5 We are done with the first track so lock it.

Step6 Import the clip again on the second track. And find the sections of the clips where the subject is walking in the video. Cut the remaining part.

Step7 It will create several small sections on the second track.

Step8 Put the first clip at the start of the timeline and move the playhead to find the frame containing enough room for the second outfit.

Step9 Move the second outfit to that playhead area.

Step10 Double-click on the clip, go to effects, and choose a single-line mask.

Step11 Drag the mask to the point where it shows the outfit on its right side.

Step12 Blur the mask edges by increasing blur numbers.

Step13 Click on the add button to add a mask keyframe and move the play head forward until the first outfit leaves the frame.

Step14 Move the mask to the left to reveal the entire frame, and repeat the same process with all outfits.

Step15 After finishing all outfits, copy the clip from the first outfit. And paste it on top of all the tracks after the last outfit. And add a mask keyframe to this section too.

Step16 Unlock the first track and move the playhead to find the point where the subject with 4th outfit moves out of the frame. Then, cut the remaining part of the freeze frame on the right.

Step17 Now move the playhead to the first frame and find where it coincides with the last part of the final frame. Cut the previous piece.

Post it on Instagram, and it will keep playing automatically and act like a loop video. Otherwise, duplicate this edited clip several times to create a longer loop video. Background music plays a vital role in these videos, setting the tone and pace. Follow all the steps in the correct order. Then, create and post loop videos on your social media platforms.
Free Download For macOS 10.14 or later
Below is the step-by-step guide on using Wondershare Filmora to create a loop masking or lookbook video.
How to edit a loop lookbook video
Step1 Download and install Wondershare Filmora on your PC or Mac.
Step2 Launch Wondershare Filmora, import the video clip into Filmora and place it on the first track.

Step3 Find a frame with an empty background, i.e., without the subject, and freeze the frame.

Step4 Extend the frozen frame and cut out the rest of the video.

Step5 We are done with the first track so lock it.

Step6 Import the clip again on the second track. And find the sections of the clips where the subject is walking in the video. Cut the remaining part.

Step7 It will create several small sections on the second track.

Step8 Put the first clip at the start of the timeline and move the playhead to find the frame containing enough room for the second outfit.

Step9 Move the second outfit to that playhead area.

Step10 Double-click on the clip, go to effects, and choose a single-line mask.

Step11 Drag the mask to the point where it shows the outfit on its right side.

Step12 Blur the mask edges by increasing blur numbers.

Step13 Click on the add button to add a mask keyframe and move the play head forward until the first outfit leaves the frame.

Step14 Move the mask to the left to reveal the entire frame, and repeat the same process with all outfits.

Step15 After finishing all outfits, copy the clip from the first outfit. And paste it on top of all the tracks after the last outfit. And add a mask keyframe to this section too.

Step16 Unlock the first track and move the playhead to find the point where the subject with 4th outfit moves out of the frame. Then, cut the remaining part of the freeze frame on the right.

Step17 Now move the playhead to the first frame and find where it coincides with the last part of the final frame. Cut the previous piece.

Post it on Instagram, and it will keep playing automatically and act like a loop video. Otherwise, duplicate this edited clip several times to create a longer loop video. Background music plays a vital role in these videos, setting the tone and pace. Follow all the steps in the correct order. Then, create and post loop videos on your social media platforms.
Step-by-Step Guide | Control Playback Speed in Premiere Pro
Versatile Video Editor - Wondershare Filmora
An easy and powerful editor
Numerous effects to choose from
Detailed tutorials are provided by the official channel
According to the business, Adobe Premiere Pro is one of the most widely used video editing products on the market today. The option to speed up or slow down individual clips is one of the most important capabilities of Premiere Pro.

In terms of video editing, Adobe Premiere Pro is one of the most powerful applications on the market, and it’s well-known for its versatility. Speeding up movies is one of the program’s many features required for the insertion of special effects and transitions. A lot of ways are there for you to pick from while using premiere pro to speed up the film as desired.

You can’t overwrite or replace your media files by doing anything in Premiere Pro, which means that nothing you do will have an effect on your media files. The point remains: a copy of your project and all its media assets should always be kept on hand just in case.
Adobe Premiere Pro is an excellent editing tool in terms of its functionality and capabilities. Still, it has a steep hill to climb that makes it difficult for newbies and users without previous editing experience. To get the most out of Adobe Premiere Pro, one must thoroughly understand the product.

No need to worry, folks; as in this article, we will be looking at how we can alter premiere pro speed.
Fast Forward or Speed up Playback Speed in Premiere Pro
On analog editing systems, the speed of film could permanently be altered; but, because of the limitations of the technology, if you slowed anything down too much, the frame rate at which it was taken may become evident, and the image quality would begin to suffer as a consequence.
Adobe Premiere Pro is a feature-rich and professional video editor designed for the Macintosh platform. It has a variety of editing features built-in. Adobe Premiere Pro lets you change and control the speed at which movies are played back.
Premiere provides three choices for adjusting the tempo of a movie or speeding it up. We’ll go over them one by one as we scroll down the page.

Method 1
- Download and Install Adobe Premiere Pro. Launch the application on your system.
- Once you’ve set up a new project in Adobe Premiere Pro, import the video you want to edit.
- In order to place the video where you want it, drag the necessary video clips into the timeline. In the end, you’ll have a new series to call your own.
- Using the right-click menu, you may choose the whole movie or only a portion of it that you wish to edit.
- The popup dialog box will display if you choose Speed/Duration from the context menu list.
- Choose Clip> Speed Duration instead from the program’s drop-down menu.
- The Speed field should be raised, and then the OK button should be pressed to accept the change.
Method 2: Rate Stretch Tool
Adobe Premiere Pro has a Rate Stretch feature that lets you manually alter the movie’s tempo by sliding the trim bar along the timeline. To utilize the Rate Stretch tool to speed up a video clip, you must first divide the movie into pieces.
Here’s a quick method for altering the video speed so that it fits under the time limit:
- Launch the application on your respective systems.
- Drag and drop the selected video onto the timeline in Premiere Pro.
- Then, choose the Ripple Edit Tool from the toolbar, followed by the Rate Stretch Tool by clicking and holding the Ripple Edit Tool. Click the Rate Stretch button on the timeline’s left side to begin a timer.
- You may also use the R key on your keyboard to activate the Rate Stretch Tool, which is a shortcut key.
- Drag the video’s start and endpoints to their respective ends on the right and left sides to prolong or reduce the duration. As a consequence, the video speed will be improved. The bigger the period of time the video is dragged inwards, the faster it rises.
Method 3: Time Remapping Tool
In Adobe Premiere Pro, the time remapping tool is where you go to speed up a selected video section. With a video clip, this function may be utilized to create the illusion of speed and slowness.
- It’s time to fire up Adobe Premiere Pro and start fiddling with your footage.
- Simply right-click on it to bring up the context menu, and then choose Show Clip Keyframes from the display list. Afterward, choose Time Remapping from the context menu that opens.
- Click on it to make it go faster. The video will be colored blue, and a horizontal rubber band line will be drawn down its center if this option is selected. One of the video’s frame rate lines may be found here.
- A white speed-control track may be seen just below the title bar in the upper part of the video. If you can’t see it well when zooming in, you may try again. The rubber band may be dragged higher in Premiere Pro to speed up the video.
The tooltip will show how long it has been since the change happened compared to the original speed. As the movie progresses, so does the speed at which it is shown, and the duration of the video fluctuates as well. The audio remains unaltered and tied to the video when using Time Remapping.
How to Slow Down A Video in Premiere Pro?
Now, let’s discuss how to slow down a video in premiere pro
Time stretch
A one-second video clip at 60 frames per second is an example of this situation. When the game is being played at a reasonable speed on any given platform or software, 60 frames will be shown. Because of this, each frame will take twice as long to play at a 0.5X slower pace.
To put it another way, you’d see 30 frames in a second that weren’t repeated. A second has been added to the video’s duration, which will now be 2 seconds instead of 1. There will be no deterioration in quality in this situation.
- Create a new project in Premiere Pro on your PC.
- To import a video file, choose Import from the File menu at the top of the screen. After that, drag the video into either the timeline or the project panel, whichever you like.
- Right-clicking and choosing the Duration/Speed option causes the video to begin playing.
- This stage necessitates a decrease in speed from 100% to a lower percentage.
Using Keyframes
When you attempt to slow down a video by adjusting the frame rate, you are essentially eliminating frames from the video stream. This procedure will allow you to slow down a movie to your desired speed without sacrificing quality.
- After downloading and installing Adobe Premiere Pro, the first step is to launch the program. Later, you’ll need to choose a specific video that you’d want to have slowed down.
- After you’ve chosen it, you may upload it to Premiere Pro. After importing the video, you must drag and drop it into the timeline in Premiere.
- By right-clicking the mouse, choose Modify > Interpret from the drop-down menu.
- You’ll need to make some changes to the frame information now. Hit the Assume this frame rate button and input a value that is lower than the original video frame rate.
Utlizing Time Remapping
The remapping tool is a very common tool for creating slow-motion videos. It may be found in many video editing programs. It gives you the option of selecting a particular section of a video clip and then slowing down the video clip.
- Launching Adobe Premiere Pro is the initial step once it has been downloaded and installed on your computer. A particular video that you’d want slow-motioned will need to be selected later on in the process.
- After dragging the video to the timeline, you’ll need to choose the area of the movie that you want to slow down.
- Now you must choose the Key Frames and Speed from your video by clicking on the video’s right-click menu.
- Only the “Pen Tool” must be used to lock the specific region you wish to slow down in order to push the Speed Line through the Selection tool to slow down the video during this phase.
Why Is Premiere Pro Playback Fast?
If this issue arises in your program, you’ll notice choppy playback, a character that speaks too rapidly, and audio that skips frames in the narration.
The multimedia editor Premiere Pro is one of the best currently available on the market. In addition to creating YouTube videos, feature films, music videos, and other sorts of content, many professionals turn to it.
It is said that Adobe Premiere Pro suffers from a playback issue. It has the ability to make the video creation process more complicated and demanding than it should be. Let me show you how to fix this easy error in just two simple steps.
Start the program on your computer’s operating system.
Select Edit from the drop-down menu.
Look towards preference
Afterward, choose audio hardware.
No input should be used as the default input, regardless of what it is currently set to.
When you click on Playback your film, you will notice that the issue has been rectified.

How can we Alter the speed of Videos in WonderShare Filmora?
Before understanding the process of speed altering in WonderShare Filmora, let’s have an overview of “what WonderShare Filmora is”.
What is Wondershare Filmora?

Wondershare Filmora is the best video editor for content creators who are just getting started and those who want to produce Hollywood-quality visuals and content without having to invest years in training and certification. WonderShare Filmora streamlines the video editing process through the use of intelligent, intuitive features that can automate repetitive tasks and save time.
Individuals can subscribe to WonderShare Filmora for a one-year fee of $68.98 per year. Filmora is well-known as a straightforward video editor designed for novice users and social media influencers who want to devote more time to their creative endeavors. A few new features have been added, and we can now create professional-looking videos without having to go through a lengthy learning curve.
Features that Stand Out
For both new and experienced film creators, WonderShare Filmora has been designed to offer a scalable environment. Even if you’ve never edited a movie before, you can start doing so right now.
Millions of Free Media to Choose From:
Over 10 million media files are available in the stock media library of WonderShare Filmora, making it easy for filmmakers to bring their visions to life. Speed ramping and auto beat sync are also included.
Toolbar Quick Access:
After the application is installed on your computer, the toolbar allows rapid access to all the program’s capabilities. These features include media and audio files, titles, effects, split-screen formatting, components, transitions, and other elements.
Quick Editing Feature:
For content producers who don’t want to spend hours on video editing and instead want to concentrate on other areas of their work, WonderShare Filmora is the appropriate solution.
Use Animated Transitions to Bring Life into Your Videos:
Your video may get tedious if you repeatedly use the same frame. Animated transitions may be added to video and photo collages using the Split Screen feature. Using this feature, you may divide your screen into as many as six individual displays.
Improved Speed Ramping Function:
WonderShare Filmora’s new speed ramping functionality is one of the most intriguing new additions. The speed of a video clip may be gradually increased or decreased with this tool, and the transition between the various speed levels is smooth.
Capture Every Scene with Ease:
Using a slew of cameras, skilled videographers may capture the same topic from a variety of vantage points. A single camera may be used in certain circumstances to record the whole scene and a close-up, while others may be used to capture a variety of views and expressions.
Automation at its Best:
With WonderShare Filmora, you don’t have to manually synchronize the audio and video from many cameras, saving you time and effort.
Enhance Your Creativity with Masking:
Masking” is a new feature that is included in this version. Using a mask to combine different clips helps you to expand your creative horizons. You could get something fantastic, particularly if you use effects that are used in commercial ads.”
Hundred’s of Themes to Choose from:
WonderShare Filmora has 115 video themes, including business, travel, vlogging, slideshows, and many more. It’s possible to make a whole movie using Filmora AI by letting it figure out the best way to edit your video.
In short, the most popular features that it offers are:
- Motion Tracking
- Split Screen
- Audio Ducking
- Speed Ramping
- Green screen
- Color Grading
- Third-Party Stock media
- Auto Synchronization
- Masking
- Color Match
How to speed up Playback in Filmora?
In Filmora, you can also modify the length of the video clip, which allows you to change the video speed.
For a “close up in time,” the slow-motion effect may be the best choice, while the fast-forward effect may be used to make dramatic or humorous videos, depending on your tastes.
Filmora’s user-friendly interface and simple editing capabilities have made it a popular choice for professionals throughout the globe. As a result, many people prefer it over alternative editing software.
Steps
- Download and Install The latest version of Filmora.
- Launch the application on your respective system

Among the many formats that Wondershare Filmora can handle are MP4 and AVI, WMV and MOV, and even FLV and M4V. Go to your computer’s media library and choose Import from the Import menu to begin the process of bringing in videos from your computer.
Alternatively, you may just drag & drop the file you want.
Drag movies from your User’s Album onto a video track on the Timeline to access the Speed and Duration settings for that track’s duration.

- A pop-up window will appear. In order to determine the speed at which a motion effect is moving, you may use the speed numbers provided. After then, it’s up to you how fast or slow you want to go. To see how sped-up or slowed-down videos will seem, just click on the preview box. It’s a good balance if you think the present speed is too high: 0.5 speed.


- The speed at which video is played back affects the speed at which audio is played back in a similar manner. Remove the video’s audio if you want the video’s audio to play at the same speed as it did before.

- You must first double-click an audio clip in the audio editing window to begin making changes to it. Fade in and out effects, as well as reducing background noise may all be added or removed. ‘

- Once you’ve finished adjusting the speed of your movie, click “Export.” When editing a movie, choose Format from the File menu to save it in a standard format.

- It can also post your videos to sites like YouTube and Vimeo, as well as create a DVD if you so like.

- Using the drop-down menu, choose the proper symbol for your iPod, iPhone, or iPad to view your new video output (if you have one of these devices).
Conclusion
This tutorial looked at how to slow down a video in Premiere Pro using the Video Speed Controller plugin for Windows. It also emphasizes how Filmora may assist you in achieving your goal in a more efficient manner.
Aside from video effects like as rapid motion and slow motion, Filmora also allows you to do some simple and complex editing tasks such as rotating, reversing, chroma-keying, etc.
WonderShare Filmora is a substantial improvement and redesign of the previous Filmora Video Editor, released in 2008. One of the most endearing aspects of Filmora has always been that, although having a robust set of functions, the developers stayed committed to making the program essential in the design and straightforward to learn and use.
A large number of new features have been included in WonderShare Filmora to meet customer demand, and it has been necessary to incorporate access to those functions into the user interface as well.
According to the business, Adobe Premiere Pro is one of the most widely used video editing products on the market today. The option to speed up or slow down individual clips is one of the most important capabilities of Premiere Pro.

In terms of video editing, Adobe Premiere Pro is one of the most powerful applications on the market, and it’s well-known for its versatility. Speeding up movies is one of the program’s many features required for the insertion of special effects and transitions. A lot of ways are there for you to pick from while using premiere pro to speed up the film as desired.

You can’t overwrite or replace your media files by doing anything in Premiere Pro, which means that nothing you do will have an effect on your media files. The point remains: a copy of your project and all its media assets should always be kept on hand just in case.
Adobe Premiere Pro is an excellent editing tool in terms of its functionality and capabilities. Still, it has a steep hill to climb that makes it difficult for newbies and users without previous editing experience. To get the most out of Adobe Premiere Pro, one must thoroughly understand the product.

No need to worry, folks; as in this article, we will be looking at how we can alter premiere pro speed.
Fast Forward or Speed up Playback Speed in Premiere Pro
On analog editing systems, the speed of film could permanently be altered; but, because of the limitations of the technology, if you slowed anything down too much, the frame rate at which it was taken may become evident, and the image quality would begin to suffer as a consequence.
Adobe Premiere Pro is a feature-rich and professional video editor designed for the Macintosh platform. It has a variety of editing features built-in. Adobe Premiere Pro lets you change and control the speed at which movies are played back.
Premiere provides three choices for adjusting the tempo of a movie or speeding it up. We’ll go over them one by one as we scroll down the page.

Method 1
- Download and Install Adobe Premiere Pro. Launch the application on your system.
- Once you’ve set up a new project in Adobe Premiere Pro, import the video you want to edit.
- In order to place the video where you want it, drag the necessary video clips into the timeline. In the end, you’ll have a new series to call your own.
- Using the right-click menu, you may choose the whole movie or only a portion of it that you wish to edit.
- The popup dialog box will display if you choose Speed/Duration from the context menu list.
- Choose Clip> Speed Duration instead from the program’s drop-down menu.
- The Speed field should be raised, and then the OK button should be pressed to accept the change.
Method 2: Rate Stretch Tool
Adobe Premiere Pro has a Rate Stretch feature that lets you manually alter the movie’s tempo by sliding the trim bar along the timeline. To utilize the Rate Stretch tool to speed up a video clip, you must first divide the movie into pieces.
Here’s a quick method for altering the video speed so that it fits under the time limit:
- Launch the application on your respective systems.
- Drag and drop the selected video onto the timeline in Premiere Pro.
- Then, choose the Ripple Edit Tool from the toolbar, followed by the Rate Stretch Tool by clicking and holding the Ripple Edit Tool. Click the Rate Stretch button on the timeline’s left side to begin a timer.
- You may also use the R key on your keyboard to activate the Rate Stretch Tool, which is a shortcut key.
- Drag the video’s start and endpoints to their respective ends on the right and left sides to prolong or reduce the duration. As a consequence, the video speed will be improved. The bigger the period of time the video is dragged inwards, the faster it rises.
Method 3: Time Remapping Tool
In Adobe Premiere Pro, the time remapping tool is where you go to speed up a selected video section. With a video clip, this function may be utilized to create the illusion of speed and slowness.
- It’s time to fire up Adobe Premiere Pro and start fiddling with your footage.
- Simply right-click on it to bring up the context menu, and then choose Show Clip Keyframes from the display list. Afterward, choose Time Remapping from the context menu that opens.
- Click on it to make it go faster. The video will be colored blue, and a horizontal rubber band line will be drawn down its center if this option is selected. One of the video’s frame rate lines may be found here.
- A white speed-control track may be seen just below the title bar in the upper part of the video. If you can’t see it well when zooming in, you may try again. The rubber band may be dragged higher in Premiere Pro to speed up the video.
The tooltip will show how long it has been since the change happened compared to the original speed. As the movie progresses, so does the speed at which it is shown, and the duration of the video fluctuates as well. The audio remains unaltered and tied to the video when using Time Remapping.
How to Slow Down A Video in Premiere Pro?
Now, let’s discuss how to slow down a video in premiere pro
Time stretch
A one-second video clip at 60 frames per second is an example of this situation. When the game is being played at a reasonable speed on any given platform or software, 60 frames will be shown. Because of this, each frame will take twice as long to play at a 0.5X slower pace.
To put it another way, you’d see 30 frames in a second that weren’t repeated. A second has been added to the video’s duration, which will now be 2 seconds instead of 1. There will be no deterioration in quality in this situation.
- Create a new project in Premiere Pro on your PC.
- To import a video file, choose Import from the File menu at the top of the screen. After that, drag the video into either the timeline or the project panel, whichever you like.
- Right-clicking and choosing the Duration/Speed option causes the video to begin playing.
- This stage necessitates a decrease in speed from 100% to a lower percentage.
Using Keyframes
When you attempt to slow down a video by adjusting the frame rate, you are essentially eliminating frames from the video stream. This procedure will allow you to slow down a movie to your desired speed without sacrificing quality.
- After downloading and installing Adobe Premiere Pro, the first step is to launch the program. Later, you’ll need to choose a specific video that you’d want to have slowed down.
- After you’ve chosen it, you may upload it to Premiere Pro. After importing the video, you must drag and drop it into the timeline in Premiere.
- By right-clicking the mouse, choose Modify > Interpret from the drop-down menu.
- You’ll need to make some changes to the frame information now. Hit the Assume this frame rate button and input a value that is lower than the original video frame rate.
Utlizing Time Remapping
The remapping tool is a very common tool for creating slow-motion videos. It may be found in many video editing programs. It gives you the option of selecting a particular section of a video clip and then slowing down the video clip.
- Launching Adobe Premiere Pro is the initial step once it has been downloaded and installed on your computer. A particular video that you’d want slow-motioned will need to be selected later on in the process.
- After dragging the video to the timeline, you’ll need to choose the area of the movie that you want to slow down.
- Now you must choose the Key Frames and Speed from your video by clicking on the video’s right-click menu.
- Only the “Pen Tool” must be used to lock the specific region you wish to slow down in order to push the Speed Line through the Selection tool to slow down the video during this phase.
Why Is Premiere Pro Playback Fast?
If this issue arises in your program, you’ll notice choppy playback, a character that speaks too rapidly, and audio that skips frames in the narration.
The multimedia editor Premiere Pro is one of the best currently available on the market. In addition to creating YouTube videos, feature films, music videos, and other sorts of content, many professionals turn to it.
It is said that Adobe Premiere Pro suffers from a playback issue. It has the ability to make the video creation process more complicated and demanding than it should be. Let me show you how to fix this easy error in just two simple steps.
Start the program on your computer’s operating system.
Select Edit from the drop-down menu.
Look towards preference
Afterward, choose audio hardware.
No input should be used as the default input, regardless of what it is currently set to.
When you click on Playback your film, you will notice that the issue has been rectified.

How can we Alter the speed of Videos in WonderShare Filmora?
Before understanding the process of speed altering in WonderShare Filmora, let’s have an overview of “what WonderShare Filmora is”.
What is Wondershare Filmora?

Wondershare Filmora is the best video editor for content creators who are just getting started and those who want to produce Hollywood-quality visuals and content without having to invest years in training and certification. WonderShare Filmora streamlines the video editing process through the use of intelligent, intuitive features that can automate repetitive tasks and save time.
Individuals can subscribe to WonderShare Filmora for a one-year fee of $68.98 per year. Filmora is well-known as a straightforward video editor designed for novice users and social media influencers who want to devote more time to their creative endeavors. A few new features have been added, and we can now create professional-looking videos without having to go through a lengthy learning curve.
Features that Stand Out
For both new and experienced film creators, WonderShare Filmora has been designed to offer a scalable environment. Even if you’ve never edited a movie before, you can start doing so right now.
Millions of Free Media to Choose From:
Over 10 million media files are available in the stock media library of WonderShare Filmora, making it easy for filmmakers to bring their visions to life. Speed ramping and auto beat sync are also included.
Toolbar Quick Access:
After the application is installed on your computer, the toolbar allows rapid access to all the program’s capabilities. These features include media and audio files, titles, effects, split-screen formatting, components, transitions, and other elements.
Quick Editing Feature:
For content producers who don’t want to spend hours on video editing and instead want to concentrate on other areas of their work, WonderShare Filmora is the appropriate solution.
Use Animated Transitions to Bring Life into Your Videos:
Your video may get tedious if you repeatedly use the same frame. Animated transitions may be added to video and photo collages using the Split Screen feature. Using this feature, you may divide your screen into as many as six individual displays.
Improved Speed Ramping Function:
WonderShare Filmora’s new speed ramping functionality is one of the most intriguing new additions. The speed of a video clip may be gradually increased or decreased with this tool, and the transition between the various speed levels is smooth.
Capture Every Scene with Ease:
Using a slew of cameras, skilled videographers may capture the same topic from a variety of vantage points. A single camera may be used in certain circumstances to record the whole scene and a close-up, while others may be used to capture a variety of views and expressions.
Automation at its Best:
With WonderShare Filmora, you don’t have to manually synchronize the audio and video from many cameras, saving you time and effort.
Enhance Your Creativity with Masking:
Masking” is a new feature that is included in this version. Using a mask to combine different clips helps you to expand your creative horizons. You could get something fantastic, particularly if you use effects that are used in commercial ads.”
Hundred’s of Themes to Choose from:
WonderShare Filmora has 115 video themes, including business, travel, vlogging, slideshows, and many more. It’s possible to make a whole movie using Filmora AI by letting it figure out the best way to edit your video.
In short, the most popular features that it offers are:
- Motion Tracking
- Split Screen
- Audio Ducking
- Speed Ramping
- Green screen
- Color Grading
- Third-Party Stock media
- Auto Synchronization
- Masking
- Color Match
How to speed up Playback in Filmora?
In Filmora, you can also modify the length of the video clip, which allows you to change the video speed.
For a “close up in time,” the slow-motion effect may be the best choice, while the fast-forward effect may be used to make dramatic or humorous videos, depending on your tastes.
Filmora’s user-friendly interface and simple editing capabilities have made it a popular choice for professionals throughout the globe. As a result, many people prefer it over alternative editing software.
Steps
- Download and Install The latest version of Filmora.
- Launch the application on your respective system

Among the many formats that Wondershare Filmora can handle are MP4 and AVI, WMV and MOV, and even FLV and M4V. Go to your computer’s media library and choose Import from the Import menu to begin the process of bringing in videos from your computer.
Alternatively, you may just drag & drop the file you want.
Drag movies from your User’s Album onto a video track on the Timeline to access the Speed and Duration settings for that track’s duration.

- A pop-up window will appear. In order to determine the speed at which a motion effect is moving, you may use the speed numbers provided. After then, it’s up to you how fast or slow you want to go. To see how sped-up or slowed-down videos will seem, just click on the preview box. It’s a good balance if you think the present speed is too high: 0.5 speed.


- The speed at which video is played back affects the speed at which audio is played back in a similar manner. Remove the video’s audio if you want the video’s audio to play at the same speed as it did before.

- You must first double-click an audio clip in the audio editing window to begin making changes to it. Fade in and out effects, as well as reducing background noise may all be added or removed. ‘

- Once you’ve finished adjusting the speed of your movie, click “Export.” When editing a movie, choose Format from the File menu to save it in a standard format.

- It can also post your videos to sites like YouTube and Vimeo, as well as create a DVD if you so like.

- Using the drop-down menu, choose the proper symbol for your iPod, iPhone, or iPad to view your new video output (if you have one of these devices).
Conclusion
This tutorial looked at how to slow down a video in Premiere Pro using the Video Speed Controller plugin for Windows. It also emphasizes how Filmora may assist you in achieving your goal in a more efficient manner.
Aside from video effects like as rapid motion and slow motion, Filmora also allows you to do some simple and complex editing tasks such as rotating, reversing, chroma-keying, etc.
WonderShare Filmora is a substantial improvement and redesign of the previous Filmora Video Editor, released in 2008. One of the most endearing aspects of Filmora has always been that, although having a robust set of functions, the developers stayed committed to making the program essential in the design and straightforward to learn and use.
A large number of new features have been included in WonderShare Filmora to meet customer demand, and it has been necessary to incorporate access to those functions into the user interface as well.
According to the business, Adobe Premiere Pro is one of the most widely used video editing products on the market today. The option to speed up or slow down individual clips is one of the most important capabilities of Premiere Pro.

In terms of video editing, Adobe Premiere Pro is one of the most powerful applications on the market, and it’s well-known for its versatility. Speeding up movies is one of the program’s many features required for the insertion of special effects and transitions. A lot of ways are there for you to pick from while using premiere pro to speed up the film as desired.

You can’t overwrite or replace your media files by doing anything in Premiere Pro, which means that nothing you do will have an effect on your media files. The point remains: a copy of your project and all its media assets should always be kept on hand just in case.
Adobe Premiere Pro is an excellent editing tool in terms of its functionality and capabilities. Still, it has a steep hill to climb that makes it difficult for newbies and users without previous editing experience. To get the most out of Adobe Premiere Pro, one must thoroughly understand the product.

No need to worry, folks; as in this article, we will be looking at how we can alter premiere pro speed.
Fast Forward or Speed up Playback Speed in Premiere Pro
On analog editing systems, the speed of film could permanently be altered; but, because of the limitations of the technology, if you slowed anything down too much, the frame rate at which it was taken may become evident, and the image quality would begin to suffer as a consequence.
Adobe Premiere Pro is a feature-rich and professional video editor designed for the Macintosh platform. It has a variety of editing features built-in. Adobe Premiere Pro lets you change and control the speed at which movies are played back.
Premiere provides three choices for adjusting the tempo of a movie or speeding it up. We’ll go over them one by one as we scroll down the page.

Method 1
- Download and Install Adobe Premiere Pro. Launch the application on your system.
- Once you’ve set up a new project in Adobe Premiere Pro, import the video you want to edit.
- In order to place the video where you want it, drag the necessary video clips into the timeline. In the end, you’ll have a new series to call your own.
- Using the right-click menu, you may choose the whole movie or only a portion of it that you wish to edit.
- The popup dialog box will display if you choose Speed/Duration from the context menu list.
- Choose Clip> Speed Duration instead from the program’s drop-down menu.
- The Speed field should be raised, and then the OK button should be pressed to accept the change.
Method 2: Rate Stretch Tool
Adobe Premiere Pro has a Rate Stretch feature that lets you manually alter the movie’s tempo by sliding the trim bar along the timeline. To utilize the Rate Stretch tool to speed up a video clip, you must first divide the movie into pieces.
Here’s a quick method for altering the video speed so that it fits under the time limit:
- Launch the application on your respective systems.
- Drag and drop the selected video onto the timeline in Premiere Pro.
- Then, choose the Ripple Edit Tool from the toolbar, followed by the Rate Stretch Tool by clicking and holding the Ripple Edit Tool. Click the Rate Stretch button on the timeline’s left side to begin a timer.
- You may also use the R key on your keyboard to activate the Rate Stretch Tool, which is a shortcut key.
- Drag the video’s start and endpoints to their respective ends on the right and left sides to prolong or reduce the duration. As a consequence, the video speed will be improved. The bigger the period of time the video is dragged inwards, the faster it rises.
Method 3: Time Remapping Tool
In Adobe Premiere Pro, the time remapping tool is where you go to speed up a selected video section. With a video clip, this function may be utilized to create the illusion of speed and slowness.
- It’s time to fire up Adobe Premiere Pro and start fiddling with your footage.
- Simply right-click on it to bring up the context menu, and then choose Show Clip Keyframes from the display list. Afterward, choose Time Remapping from the context menu that opens.
- Click on it to make it go faster. The video will be colored blue, and a horizontal rubber band line will be drawn down its center if this option is selected. One of the video’s frame rate lines may be found here.
- A white speed-control track may be seen just below the title bar in the upper part of the video. If you can’t see it well when zooming in, you may try again. The rubber band may be dragged higher in Premiere Pro to speed up the video.
The tooltip will show how long it has been since the change happened compared to the original speed. As the movie progresses, so does the speed at which it is shown, and the duration of the video fluctuates as well. The audio remains unaltered and tied to the video when using Time Remapping.
How to Slow Down A Video in Premiere Pro?
Now, let’s discuss how to slow down a video in premiere pro
Time stretch
A one-second video clip at 60 frames per second is an example of this situation. When the game is being played at a reasonable speed on any given platform or software, 60 frames will be shown. Because of this, each frame will take twice as long to play at a 0.5X slower pace.
To put it another way, you’d see 30 frames in a second that weren’t repeated. A second has been added to the video’s duration, which will now be 2 seconds instead of 1. There will be no deterioration in quality in this situation.
- Create a new project in Premiere Pro on your PC.
- To import a video file, choose Import from the File menu at the top of the screen. After that, drag the video into either the timeline or the project panel, whichever you like.
- Right-clicking and choosing the Duration/Speed option causes the video to begin playing.
- This stage necessitates a decrease in speed from 100% to a lower percentage.
Using Keyframes
When you attempt to slow down a video by adjusting the frame rate, you are essentially eliminating frames from the video stream. This procedure will allow you to slow down a movie to your desired speed without sacrificing quality.
- After downloading and installing Adobe Premiere Pro, the first step is to launch the program. Later, you’ll need to choose a specific video that you’d want to have slowed down.
- After you’ve chosen it, you may upload it to Premiere Pro. After importing the video, you must drag and drop it into the timeline in Premiere.
- By right-clicking the mouse, choose Modify > Interpret from the drop-down menu.
- You’ll need to make some changes to the frame information now. Hit the Assume this frame rate button and input a value that is lower than the original video frame rate.
Utlizing Time Remapping
The remapping tool is a very common tool for creating slow-motion videos. It may be found in many video editing programs. It gives you the option of selecting a particular section of a video clip and then slowing down the video clip.
- Launching Adobe Premiere Pro is the initial step once it has been downloaded and installed on your computer. A particular video that you’d want slow-motioned will need to be selected later on in the process.
- After dragging the video to the timeline, you’ll need to choose the area of the movie that you want to slow down.
- Now you must choose the Key Frames and Speed from your video by clicking on the video’s right-click menu.
- Only the “Pen Tool” must be used to lock the specific region you wish to slow down in order to push the Speed Line through the Selection tool to slow down the video during this phase.
Why Is Premiere Pro Playback Fast?
If this issue arises in your program, you’ll notice choppy playback, a character that speaks too rapidly, and audio that skips frames in the narration.
The multimedia editor Premiere Pro is one of the best currently available on the market. In addition to creating YouTube videos, feature films, music videos, and other sorts of content, many professionals turn to it.
It is said that Adobe Premiere Pro suffers from a playback issue. It has the ability to make the video creation process more complicated and demanding than it should be. Let me show you how to fix this easy error in just two simple steps.
Start the program on your computer’s operating system.
Select Edit from the drop-down menu.
Look towards preference
Afterward, choose audio hardware.
No input should be used as the default input, regardless of what it is currently set to.
When you click on Playback your film, you will notice that the issue has been rectified.

How can we Alter the speed of Videos in WonderShare Filmora?
Before understanding the process of speed altering in WonderShare Filmora, let’s have an overview of “what WonderShare Filmora is”.
What is Wondershare Filmora?

Wondershare Filmora is the best video editor for content creators who are just getting started and those who want to produce Hollywood-quality visuals and content without having to invest years in training and certification. WonderShare Filmora streamlines the video editing process through the use of intelligent, intuitive features that can automate repetitive tasks and save time.
Individuals can subscribe to WonderShare Filmora for a one-year fee of $68.98 per year. Filmora is well-known as a straightforward video editor designed for novice users and social media influencers who want to devote more time to their creative endeavors. A few new features have been added, and we can now create professional-looking videos without having to go through a lengthy learning curve.
Features that Stand Out
For both new and experienced film creators, WonderShare Filmora has been designed to offer a scalable environment. Even if you’ve never edited a movie before, you can start doing so right now.
Millions of Free Media to Choose From:
Over 10 million media files are available in the stock media library of WonderShare Filmora, making it easy for filmmakers to bring their visions to life. Speed ramping and auto beat sync are also included.
Toolbar Quick Access:
After the application is installed on your computer, the toolbar allows rapid access to all the program’s capabilities. These features include media and audio files, titles, effects, split-screen formatting, components, transitions, and other elements.
Quick Editing Feature:
For content producers who don’t want to spend hours on video editing and instead want to concentrate on other areas of their work, WonderShare Filmora is the appropriate solution.
Use Animated Transitions to Bring Life into Your Videos:
Your video may get tedious if you repeatedly use the same frame. Animated transitions may be added to video and photo collages using the Split Screen feature. Using this feature, you may divide your screen into as many as six individual displays.
Improved Speed Ramping Function:
WonderShare Filmora’s new speed ramping functionality is one of the most intriguing new additions. The speed of a video clip may be gradually increased or decreased with this tool, and the transition between the various speed levels is smooth.
Capture Every Scene with Ease:
Using a slew of cameras, skilled videographers may capture the same topic from a variety of vantage points. A single camera may be used in certain circumstances to record the whole scene and a close-up, while others may be used to capture a variety of views and expressions.
Automation at its Best:
With WonderShare Filmora, you don’t have to manually synchronize the audio and video from many cameras, saving you time and effort.
Enhance Your Creativity with Masking:
Masking” is a new feature that is included in this version. Using a mask to combine different clips helps you to expand your creative horizons. You could get something fantastic, particularly if you use effects that are used in commercial ads.”
Hundred’s of Themes to Choose from:
WonderShare Filmora has 115 video themes, including business, travel, vlogging, slideshows, and many more. It’s possible to make a whole movie using Filmora AI by letting it figure out the best way to edit your video.
In short, the most popular features that it offers are:
- Motion Tracking
- Split Screen
- Audio Ducking
- Speed Ramping
- Green screen
- Color Grading
- Third-Party Stock media
- Auto Synchronization
- Masking
- Color Match
How to speed up Playback in Filmora?
In Filmora, you can also modify the length of the video clip, which allows you to change the video speed.
For a “close up in time,” the slow-motion effect may be the best choice, while the fast-forward effect may be used to make dramatic or humorous videos, depending on your tastes.
Filmora’s user-friendly interface and simple editing capabilities have made it a popular choice for professionals throughout the globe. As a result, many people prefer it over alternative editing software.
Steps
- Download and Install The latest version of Filmora.
- Launch the application on your respective system

Among the many formats that Wondershare Filmora can handle are MP4 and AVI, WMV and MOV, and even FLV and M4V. Go to your computer’s media library and choose Import from the Import menu to begin the process of bringing in videos from your computer.
Alternatively, you may just drag & drop the file you want.
Drag movies from your User’s Album onto a video track on the Timeline to access the Speed and Duration settings for that track’s duration.

- A pop-up window will appear. In order to determine the speed at which a motion effect is moving, you may use the speed numbers provided. After then, it’s up to you how fast or slow you want to go. To see how sped-up or slowed-down videos will seem, just click on the preview box. It’s a good balance if you think the present speed is too high: 0.5 speed.


- The speed at which video is played back affects the speed at which audio is played back in a similar manner. Remove the video’s audio if you want the video’s audio to play at the same speed as it did before.

- You must first double-click an audio clip in the audio editing window to begin making changes to it. Fade in and out effects, as well as reducing background noise may all be added or removed. ‘

- Once you’ve finished adjusting the speed of your movie, click “Export.” When editing a movie, choose Format from the File menu to save it in a standard format.

- It can also post your videos to sites like YouTube and Vimeo, as well as create a DVD if you so like.

- Using the drop-down menu, choose the proper symbol for your iPod, iPhone, or iPad to view your new video output (if you have one of these devices).
Conclusion
This tutorial looked at how to slow down a video in Premiere Pro using the Video Speed Controller plugin for Windows. It also emphasizes how Filmora may assist you in achieving your goal in a more efficient manner.
Aside from video effects like as rapid motion and slow motion, Filmora also allows you to do some simple and complex editing tasks such as rotating, reversing, chroma-keying, etc.
WonderShare Filmora is a substantial improvement and redesign of the previous Filmora Video Editor, released in 2008. One of the most endearing aspects of Filmora has always been that, although having a robust set of functions, the developers stayed committed to making the program essential in the design and straightforward to learn and use.
A large number of new features have been included in WonderShare Filmora to meet customer demand, and it has been necessary to incorporate access to those functions into the user interface as well.
According to the business, Adobe Premiere Pro is one of the most widely used video editing products on the market today. The option to speed up or slow down individual clips is one of the most important capabilities of Premiere Pro.

In terms of video editing, Adobe Premiere Pro is one of the most powerful applications on the market, and it’s well-known for its versatility. Speeding up movies is one of the program’s many features required for the insertion of special effects and transitions. A lot of ways are there for you to pick from while using premiere pro to speed up the film as desired.

You can’t overwrite or replace your media files by doing anything in Premiere Pro, which means that nothing you do will have an effect on your media files. The point remains: a copy of your project and all its media assets should always be kept on hand just in case.
Adobe Premiere Pro is an excellent editing tool in terms of its functionality and capabilities. Still, it has a steep hill to climb that makes it difficult for newbies and users without previous editing experience. To get the most out of Adobe Premiere Pro, one must thoroughly understand the product.

No need to worry, folks; as in this article, we will be looking at how we can alter premiere pro speed.
Fast Forward or Speed up Playback Speed in Premiere Pro
On analog editing systems, the speed of film could permanently be altered; but, because of the limitations of the technology, if you slowed anything down too much, the frame rate at which it was taken may become evident, and the image quality would begin to suffer as a consequence.
Adobe Premiere Pro is a feature-rich and professional video editor designed for the Macintosh platform. It has a variety of editing features built-in. Adobe Premiere Pro lets you change and control the speed at which movies are played back.
Premiere provides three choices for adjusting the tempo of a movie or speeding it up. We’ll go over them one by one as we scroll down the page.

Method 1
- Download and Install Adobe Premiere Pro. Launch the application on your system.
- Once you’ve set up a new project in Adobe Premiere Pro, import the video you want to edit.
- In order to place the video where you want it, drag the necessary video clips into the timeline. In the end, you’ll have a new series to call your own.
- Using the right-click menu, you may choose the whole movie or only a portion of it that you wish to edit.
- The popup dialog box will display if you choose Speed/Duration from the context menu list.
- Choose Clip> Speed Duration instead from the program’s drop-down menu.
- The Speed field should be raised, and then the OK button should be pressed to accept the change.
Method 2: Rate Stretch Tool
Adobe Premiere Pro has a Rate Stretch feature that lets you manually alter the movie’s tempo by sliding the trim bar along the timeline. To utilize the Rate Stretch tool to speed up a video clip, you must first divide the movie into pieces.
Here’s a quick method for altering the video speed so that it fits under the time limit:
- Launch the application on your respective systems.
- Drag and drop the selected video onto the timeline in Premiere Pro.
- Then, choose the Ripple Edit Tool from the toolbar, followed by the Rate Stretch Tool by clicking and holding the Ripple Edit Tool. Click the Rate Stretch button on the timeline’s left side to begin a timer.
- You may also use the R key on your keyboard to activate the Rate Stretch Tool, which is a shortcut key.
- Drag the video’s start and endpoints to their respective ends on the right and left sides to prolong or reduce the duration. As a consequence, the video speed will be improved. The bigger the period of time the video is dragged inwards, the faster it rises.
Method 3: Time Remapping Tool
In Adobe Premiere Pro, the time remapping tool is where you go to speed up a selected video section. With a video clip, this function may be utilized to create the illusion of speed and slowness.
- It’s time to fire up Adobe Premiere Pro and start fiddling with your footage.
- Simply right-click on it to bring up the context menu, and then choose Show Clip Keyframes from the display list. Afterward, choose Time Remapping from the context menu that opens.
- Click on it to make it go faster. The video will be colored blue, and a horizontal rubber band line will be drawn down its center if this option is selected. One of the video’s frame rate lines may be found here.
- A white speed-control track may be seen just below the title bar in the upper part of the video. If you can’t see it well when zooming in, you may try again. The rubber band may be dragged higher in Premiere Pro to speed up the video.
The tooltip will show how long it has been since the change happened compared to the original speed. As the movie progresses, so does the speed at which it is shown, and the duration of the video fluctuates as well. The audio remains unaltered and tied to the video when using Time Remapping.
How to Slow Down A Video in Premiere Pro?
Now, let’s discuss how to slow down a video in premiere pro
Time stretch
A one-second video clip at 60 frames per second is an example of this situation. When the game is being played at a reasonable speed on any given platform or software, 60 frames will be shown. Because of this, each frame will take twice as long to play at a 0.5X slower pace.
To put it another way, you’d see 30 frames in a second that weren’t repeated. A second has been added to the video’s duration, which will now be 2 seconds instead of 1. There will be no deterioration in quality in this situation.
- Create a new project in Premiere Pro on your PC.
- To import a video file, choose Import from the File menu at the top of the screen. After that, drag the video into either the timeline or the project panel, whichever you like.
- Right-clicking and choosing the Duration/Speed option causes the video to begin playing.
- This stage necessitates a decrease in speed from 100% to a lower percentage.
Using Keyframes
When you attempt to slow down a video by adjusting the frame rate, you are essentially eliminating frames from the video stream. This procedure will allow you to slow down a movie to your desired speed without sacrificing quality.
- After downloading and installing Adobe Premiere Pro, the first step is to launch the program. Later, you’ll need to choose a specific video that you’d want to have slowed down.
- After you’ve chosen it, you may upload it to Premiere Pro. After importing the video, you must drag and drop it into the timeline in Premiere.
- By right-clicking the mouse, choose Modify > Interpret from the drop-down menu.
- You’ll need to make some changes to the frame information now. Hit the Assume this frame rate button and input a value that is lower than the original video frame rate.
Utlizing Time Remapping
The remapping tool is a very common tool for creating slow-motion videos. It may be found in many video editing programs. It gives you the option of selecting a particular section of a video clip and then slowing down the video clip.
- Launching Adobe Premiere Pro is the initial step once it has been downloaded and installed on your computer. A particular video that you’d want slow-motioned will need to be selected later on in the process.
- After dragging the video to the timeline, you’ll need to choose the area of the movie that you want to slow down.
- Now you must choose the Key Frames and Speed from your video by clicking on the video’s right-click menu.
- Only the “Pen Tool” must be used to lock the specific region you wish to slow down in order to push the Speed Line through the Selection tool to slow down the video during this phase.
Why Is Premiere Pro Playback Fast?
If this issue arises in your program, you’ll notice choppy playback, a character that speaks too rapidly, and audio that skips frames in the narration.
The multimedia editor Premiere Pro is one of the best currently available on the market. In addition to creating YouTube videos, feature films, music videos, and other sorts of content, many professionals turn to it.
It is said that Adobe Premiere Pro suffers from a playback issue. It has the ability to make the video creation process more complicated and demanding than it should be. Let me show you how to fix this easy error in just two simple steps.
Start the program on your computer’s operating system.
Select Edit from the drop-down menu.
Look towards preference
Afterward, choose audio hardware.
No input should be used as the default input, regardless of what it is currently set to.
When you click on Playback your film, you will notice that the issue has been rectified.

How can we Alter the speed of Videos in WonderShare Filmora?
Before understanding the process of speed altering in WonderShare Filmora, let’s have an overview of “what WonderShare Filmora is”.
What is Wondershare Filmora?

Wondershare Filmora is the best video editor for content creators who are just getting started and those who want to produce Hollywood-quality visuals and content without having to invest years in training and certification. WonderShare Filmora streamlines the video editing process through the use of intelligent, intuitive features that can automate repetitive tasks and save time.
Individuals can subscribe to WonderShare Filmora for a one-year fee of $68.98 per year. Filmora is well-known as a straightforward video editor designed for novice users and social media influencers who want to devote more time to their creative endeavors. A few new features have been added, and we can now create professional-looking videos without having to go through a lengthy learning curve.
Features that Stand Out
For both new and experienced film creators, WonderShare Filmora has been designed to offer a scalable environment. Even if you’ve never edited a movie before, you can start doing so right now.
Millions of Free Media to Choose From:
Over 10 million media files are available in the stock media library of WonderShare Filmora, making it easy for filmmakers to bring their visions to life. Speed ramping and auto beat sync are also included.
Toolbar Quick Access:
After the application is installed on your computer, the toolbar allows rapid access to all the program’s capabilities. These features include media and audio files, titles, effects, split-screen formatting, components, transitions, and other elements.
Quick Editing Feature:
For content producers who don’t want to spend hours on video editing and instead want to concentrate on other areas of their work, WonderShare Filmora is the appropriate solution.
Use Animated Transitions to Bring Life into Your Videos:
Your video may get tedious if you repeatedly use the same frame. Animated transitions may be added to video and photo collages using the Split Screen feature. Using this feature, you may divide your screen into as many as six individual displays.
Improved Speed Ramping Function:
WonderShare Filmora’s new speed ramping functionality is one of the most intriguing new additions. The speed of a video clip may be gradually increased or decreased with this tool, and the transition between the various speed levels is smooth.
Capture Every Scene with Ease:
Using a slew of cameras, skilled videographers may capture the same topic from a variety of vantage points. A single camera may be used in certain circumstances to record the whole scene and a close-up, while others may be used to capture a variety of views and expressions.
Automation at its Best:
With WonderShare Filmora, you don’t have to manually synchronize the audio and video from many cameras, saving you time and effort.
Enhance Your Creativity with Masking:
Masking” is a new feature that is included in this version. Using a mask to combine different clips helps you to expand your creative horizons. You could get something fantastic, particularly if you use effects that are used in commercial ads.”
Hundred’s of Themes to Choose from:
WonderShare Filmora has 115 video themes, including business, travel, vlogging, slideshows, and many more. It’s possible to make a whole movie using Filmora AI by letting it figure out the best way to edit your video.
In short, the most popular features that it offers are:
- Motion Tracking
- Split Screen
- Audio Ducking
- Speed Ramping
- Green screen
- Color Grading
- Third-Party Stock media
- Auto Synchronization
- Masking
- Color Match
How to speed up Playback in Filmora?
In Filmora, you can also modify the length of the video clip, which allows you to change the video speed.
For a “close up in time,” the slow-motion effect may be the best choice, while the fast-forward effect may be used to make dramatic or humorous videos, depending on your tastes.
Filmora’s user-friendly interface and simple editing capabilities have made it a popular choice for professionals throughout the globe. As a result, many people prefer it over alternative editing software.
Steps
- Download and Install The latest version of Filmora.
- Launch the application on your respective system

Among the many formats that Wondershare Filmora can handle are MP4 and AVI, WMV and MOV, and even FLV and M4V. Go to your computer’s media library and choose Import from the Import menu to begin the process of bringing in videos from your computer.
Alternatively, you may just drag & drop the file you want.
Drag movies from your User’s Album onto a video track on the Timeline to access the Speed and Duration settings for that track’s duration.

- A pop-up window will appear. In order to determine the speed at which a motion effect is moving, you may use the speed numbers provided. After then, it’s up to you how fast or slow you want to go. To see how sped-up or slowed-down videos will seem, just click on the preview box. It’s a good balance if you think the present speed is too high: 0.5 speed.


- The speed at which video is played back affects the speed at which audio is played back in a similar manner. Remove the video’s audio if you want the video’s audio to play at the same speed as it did before.

- You must first double-click an audio clip in the audio editing window to begin making changes to it. Fade in and out effects, as well as reducing background noise may all be added or removed. ‘

- Once you’ve finished adjusting the speed of your movie, click “Export.” When editing a movie, choose Format from the File menu to save it in a standard format.

- It can also post your videos to sites like YouTube and Vimeo, as well as create a DVD if you so like.

- Using the drop-down menu, choose the proper symbol for your iPod, iPhone, or iPad to view your new video output (if you have one of these devices).
Conclusion
This tutorial looked at how to slow down a video in Premiere Pro using the Video Speed Controller plugin for Windows. It also emphasizes how Filmora may assist you in achieving your goal in a more efficient manner.
Aside from video effects like as rapid motion and slow motion, Filmora also allows you to do some simple and complex editing tasks such as rotating, reversing, chroma-keying, etc.
WonderShare Filmora is a substantial improvement and redesign of the previous Filmora Video Editor, released in 2008. One of the most endearing aspects of Filmora has always been that, although having a robust set of functions, the developers stayed committed to making the program essential in the design and straightforward to learn and use.
A large number of new features have been included in WonderShare Filmora to meet customer demand, and it has been necessary to incorporate access to those functions into the user interface as well.
Guide To Using Free Luts for OBS
LUTs are powerful tools that can significantly enhance the visual appeal of your content. You can use this tool to change the look and feel of your images and videos. Moreover, you can use LUTs to bring out the desired mood, style, and tone to your media content. Additionally, LUTs provide endless possibilities for creativity with different color adjustments and grading.
There are many software and tools available on the market to apply LUTs. These tools let you import and apply LUTs to your images and videos. Furthermore, you can apply LUTs even using streaming software like OBS. Moreover, you can improve live streams, videos, and recordings by applying LUTs using OBS. However, many paid and free LUTs for OBS are available for usage.
Part 1: Why Do We Need to Use LUTs for Editing in OBS?
There are many free OBS LUTs available that you can download and use for your content. The real question is the utility of LUTs in OBS. Here are some of the reasons to use LUTs in this tool.
Efficiency and Consistency
LUTs provide a quick and consistent way to apply color transformations. Instead of manually adjusting individual color settings, you can use LUTs. Similarly, it allows you to instantly and precisely grade and correct colors.
Time-Saving
Using LUTs saves time because they offer pre-defined color transformations. Instead of adjusting colors for each project or image, you can use LUTs. Additionally, they allow you to match your desired look or style easily.
Artistic Control and Creative Freedom
Furthermore, it gives artists, filmmakers, and photographers more control over their work. They allow for experimentation and exploration of different looks and styles. You can be more creative by experimenting with varying tones of color to the same content.
Consistent Color Reproduction
LUTs are essential for maintaining consistent color tones. The good part is it maintains consistency across different devices, software, and platforms. They ensure that colors look the same, no matter what the viewing medium, like monitors, projectors, or mobile screens.
Film Emulation and Replication
Moreover, it can replicate classic film stocks’ characteristics and aesthetics. They allow filmmakers and photographers to recreate iconic films’ color response and tonal range. In this way, everyone can experiment with color tones inspired by famous movies.
Workflow Flexibility and Collaboration
Lookup tables offer flexibility and facilitate collaboration in post-production workflows. They can be easily shared and applied to different projects or sequences. Similarly, it ensures consistent color grading across multiple editors or teams.
Calibration and Color Management
Additionally, LUTs play an important role in color calibration and management processes. It allows you to align color spaces, correct color variations, and maintain color accuracy. Furthermore, it will maintain consistent color grading throughout the project.
Real-time Color Processing
Lastly, LUTs are valuable in applications that require real-time color processing. It can be used in live broadcasts, video streaming, or video games. You can make instant adjustments and enhancements in real time.
Empower your videos with a new mood using different LUTs. Filmora now offers 100+ top-quality 3D LUTs cover a broad range of scenarios. Transform your videos with Filmora’s powerful 3D LUTs.
Apply LUT on Videos Apply LUT on Videos Learn More

Part 2: Discussing Some Top-Notch Best LUTs for OBS?
If you are searching for the best LUTs for OBS, you’re at the right place. Here is a list of some of the best LUTs you can apply using OBS. You can choose from different styles and tones according to your preference:
1. Vintage LUTs
Take a step back in time with this pack of Vintage LUTs. This pack gives your videos and images a nostalgic, retro feel. Moreover, this pack has different classic film presets, including monochrome and b&w. It enhances warm tones, adds a vignette, and introduces a gentle fade effect. Furthermore, this pack gives your media content the perfect retro feel.

2. 13 FREE Custom LUTs for Log Footage
Using these 13 cinematic LUTs, you can unleash the power of the silver screen. With these LUTs, you can bring Hollywood magic to your videos. Additionally, this pack enhances contrast and saturation to create a dramatic and cinematic look. Moreover, it enhances your media with rich colors, deep shadows, and vibrant highlights giving them a movie-like feel.

3. Vibrant Nature LUTs for Photo & Video
Vibrant Nature LUTs is an excellent pack that enhances the beauty of nature and the outdoors. It is a pack of five different LUTs specifically used to enhance natural landscapes and environmental shots. Furthermore, this pack highlights the earthy tones, adds depth to greens, and brings out the details of nature. Additionally, you can use this pack to improve the scenery in your pictures and videos.

4. Coastal Haze
Coastal Haze is a fantastic LUT to celebrate love and romance with its color grading. It is an excellent free LUT that enhances the colors and emotions of wedding videos and romantic moments. Moreover, it adds a soft and dreamy touch by improving skin tones. Furthermore, it creates a warm and intimate atmosphere allowing you to beautify your special moments.

5. 20 Dark Moody LUTs Pack
Dive into the world of moody dark colors with this 20 Dark Moody LUTs Pack. Each LUT has a different tone and feel to it. These LUTs add darkness to create a mysterious and serious ambiance. It enhances shadows, deepens blacks, and adds a subtle color grading to create an intense look. With this Moody LUT pack, you can make more professional-looking dark videos.

Part 3: How to Use LUTs in OBS Studio Properly?
If you’ve found the best free LUTs for OBS, you can apply them directly to your video feed. Here are simple steps to apply LUTs using OBS Studio. Following these steps, you can easily apply a LUT effect to your video feed or live stream in OBS.
Step 1: Open OBS and start your video feed or live stream using a webcam or capture card. Once your video stream is running, right-click the “Video Capture Device” option. After that, select “Filters” from the options that appear. In the Filters menu, locate the “Effect Filters” section and click the “+” button. Choose the “Apply LUT” option from the options that appear to add the LUT effect to your video stream.
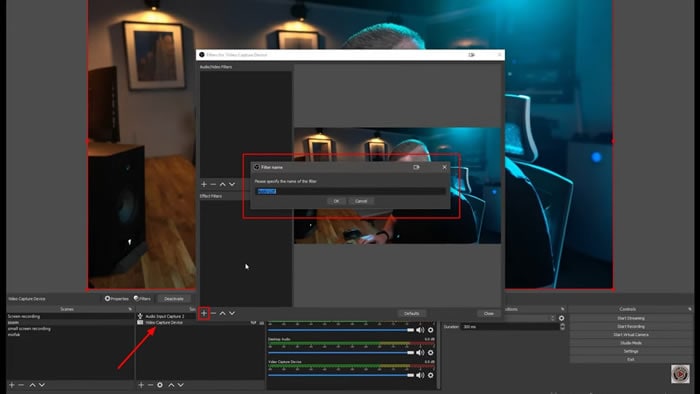
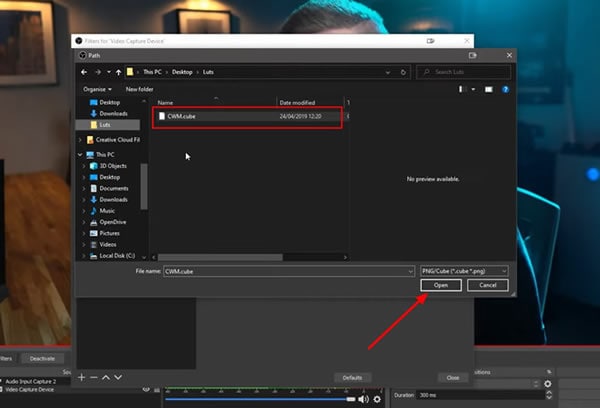
Step 2: A new window will pop up where you can specify the name of your LUT. To select your desired LUT, click the “Browse” button and navigate to its location on your device. Once you’ve found your LUT, click the “Open” button to apply it directly to your video stream. If needed, you can adjust the intensity of the LUT by making changes in the “Preview” screen.
Part 4: Wondershare Filmora: Another Efficient Platform for Adding LUTs on Videos
Wondershare Filmora is an exceptional video editing tool with the additional ability of color grading. With this powerful tool, you can color grade your videos by manually adjusting settings or applying LUTs. The latest update of Wondershare Filmora includes a library of over 200+ LUTs that you can apply to your media files. Furthermore, you can also customize the intensity of the applied LUTs.
Add LUTs on Video For Win 7 or later(64-bit)
Add LUTs on Video For macOS 10.14 or later
Besides color grading, Filmora also provides a variety of effects, filters, and overlays for your videos. These tools allow you to add artistic touches and improve the overall feel of your content. Additionally, it offers professional-grade features such as AI Cutout. This feature enables you to effortlessly select your subject in a video and change their background.

Conclusion
In conclusion, LUTs are useful tools for color-correcting live streams and video editing projects. You can apply LUTs directly to your live streams, and video feeds with OBS. Many free LUTs for OBS are available, each with a different tone and feel. Furthermore, LUTs can also be used in popular video editing tools like Wondershare Filmora. Lastly, LUTs are essential tools to make your content stand out.
Add LUTs on Video For Win 7 or later(64-bit)
Add LUTs on Video For macOS 10.14 or later
Apply LUT on Videos Apply LUT on Videos Learn More

Part 2: Discussing Some Top-Notch Best LUTs for OBS?
If you are searching for the best LUTs for OBS, you’re at the right place. Here is a list of some of the best LUTs you can apply using OBS. You can choose from different styles and tones according to your preference:
1. Vintage LUTs
Take a step back in time with this pack of Vintage LUTs. This pack gives your videos and images a nostalgic, retro feel. Moreover, this pack has different classic film presets, including monochrome and b&w. It enhances warm tones, adds a vignette, and introduces a gentle fade effect. Furthermore, this pack gives your media content the perfect retro feel.

2. 13 FREE Custom LUTs for Log Footage
Using these 13 cinematic LUTs, you can unleash the power of the silver screen. With these LUTs, you can bring Hollywood magic to your videos. Additionally, this pack enhances contrast and saturation to create a dramatic and cinematic look. Moreover, it enhances your media with rich colors, deep shadows, and vibrant highlights giving them a movie-like feel.

3. Vibrant Nature LUTs for Photo & Video
Vibrant Nature LUTs is an excellent pack that enhances the beauty of nature and the outdoors. It is a pack of five different LUTs specifically used to enhance natural landscapes and environmental shots. Furthermore, this pack highlights the earthy tones, adds depth to greens, and brings out the details of nature. Additionally, you can use this pack to improve the scenery in your pictures and videos.

4. Coastal Haze
Coastal Haze is a fantastic LUT to celebrate love and romance with its color grading. It is an excellent free LUT that enhances the colors and emotions of wedding videos and romantic moments. Moreover, it adds a soft and dreamy touch by improving skin tones. Furthermore, it creates a warm and intimate atmosphere allowing you to beautify your special moments.

5. 20 Dark Moody LUTs Pack
Dive into the world of moody dark colors with this 20 Dark Moody LUTs Pack. Each LUT has a different tone and feel to it. These LUTs add darkness to create a mysterious and serious ambiance. It enhances shadows, deepens blacks, and adds a subtle color grading to create an intense look. With this Moody LUT pack, you can make more professional-looking dark videos.

Part 3: How to Use LUTs in OBS Studio Properly?
If you’ve found the best free LUTs for OBS, you can apply them directly to your video feed. Here are simple steps to apply LUTs using OBS Studio. Following these steps, you can easily apply a LUT effect to your video feed or live stream in OBS.
Step 1: Open OBS and start your video feed or live stream using a webcam or capture card. Once your video stream is running, right-click the “Video Capture Device” option. After that, select “Filters” from the options that appear. In the Filters menu, locate the “Effect Filters” section and click the “+” button. Choose the “Apply LUT” option from the options that appear to add the LUT effect to your video stream.

Step 2: A new window will pop up where you can specify the name of your LUT. To select your desired LUT, click the “Browse” button and navigate to its location on your device. Once you’ve found your LUT, click the “Open” button to apply it directly to your video stream. If needed, you can adjust the intensity of the LUT by making changes in the “Preview” screen.

Part 4: Wondershare Filmora: Another Efficient Platform for Adding LUTs on Videos
Wondershare Filmora is an exceptional video editing tool with the additional ability of color grading. With this powerful tool, you can color grade your videos by manually adjusting settings or applying LUTs. The latest update of Wondershare Filmora includes a library of over 200+ LUTs that you can apply to your media files. Furthermore, you can also customize the intensity of the applied LUTs.
Add LUTs on Video For Win 7 or later(64-bit)
Add LUTs on Video For macOS 10.14 or later
Besides color grading, Filmora also provides a variety of effects, filters, and overlays for your videos. These tools allow you to add artistic touches and improve the overall feel of your content. Additionally, it offers professional-grade features such as AI Cutout. This feature enables you to effortlessly select your subject in a video and change their background.

Conclusion
In conclusion, LUTs are useful tools for color-correcting live streams and video editing projects. You can apply LUTs directly to your live streams, and video feeds with OBS. Many free LUTs for OBS are available, each with a different tone and feel. Furthermore, LUTs can also be used in popular video editing tools like Wondershare Filmora. Lastly, LUTs are essential tools to make your content stand out.
Add LUTs on Video For Win 7 or later(64-bit)
Add LUTs on Video For macOS 10.14 or later
Do You Need to Convert TXT to SRT to Add Subtitles to Your Videos? Here Are Three Effective Ways You Can Do It Effortlessly
Adding subtitles to your videos allow more people to understand and relate to your content.
If your video script is in a text file (.txt), and you need to convert the TXT to SRT to create a subtitles file for your video.
You can create your subtitles files just by using plain text that contains your video script. If you are wondering how you can convert text to SRT, then we have all the answers.
Let’s find out.
- Solution 3: How to Edit TXT File and Save It into .SRT Without Any Tools
- Bonus Tip: Editing SRT Subtitles with Fancy Effects to Make Your Video More Impressive
Can You Convert TXT to SRT?
Yes, you can convert .txt to .srt document. Let’s understand a little bit of context first. You can even hardcode your subtitles to your video, and automatically generate subtitle files and transcriptions from any audio and video file format. There are many online and offline tools come to help. And we’ll introduce some in detail in the following part.
Why Do You Need to Convert TXT to SRT?
A word file in TXT format or having a script of the video doesn’t indicate the start and stop time of the subtitle content. An SRT file, on the other hand, has the information about captioning and the start and stop times of the subtitles.
To put it simply, a TXT file is unformatted and needs to be converted into an SRT file so it has all the necessary information to be used as subtitles.
There are different ways to do that, and we’ll discuss three solutions in this article.
Solution 1: Get a TXT-to-SRT Converter Online
Out of the different ways to convert TXT to SRT, using an online converter is the easiest one. You can access it online without having to download it on your computer.
Most online TXT to SRT converters allow drag & drop functionality and are easy to use. While plenty of such tools are available online, we’ll review a few here.
Ebby
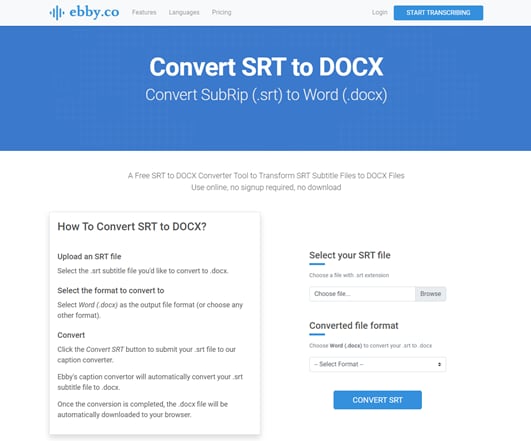
Ebby is essentially a transcription tool that converts audio to text. You can use it to create an automatic transcription and to convert one TXT to SRT format. It uses voice recognition technology to create text with timestamps, making them subtitles for your videos. It supports over 100 languages and dialects. You can export transcripts in different formats.
Pros
- Equipped with speech recognition technology
- Features playback controls
- Offers 24/7 support
- Offers a free trial
Cons
- Only available online
- Not suitable for manual transcription
Features
- You can upload both audio and video files.
- It can create automatic transcriptions.
- Supports multiple languages to produce subtitles in all popular languages.
- It’s equipped with speech recognition technology.
- Apart from subtitles, it produces closed captions as well to help deaf people.
- You can edit the text within the tool.
Best for
Podcasters, lawyers, journalists, authors, and marketing experts.
Rev
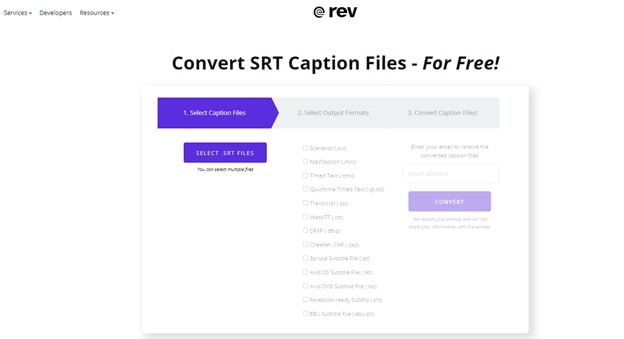
Another transcription tool, Rev is widely used by more than 170,000 users. It can cater to the growing needs of its users. Its pricing model is a bit different from other names in the industry.
Pros
- Supports both automated and manual transcription
- Up to 99% accuracy in manual transcription
- Closed captions
Cons
- Per video-based pricing model
Features
- It works on AI and Machine Learning models to produce accurate subtitles.
- It allows you to annotate subtitles for better understanding.
- File sharing is allowed on Rev.
- You can search particular text using its Full-Text Search functionality.
- It supports 16 different languages.
- It is capable of Natural Language Processing.
Best for
Rev’s users belong to a variety of industries including journalism, video production, medical, podcasters, and writers.
ToolSlick
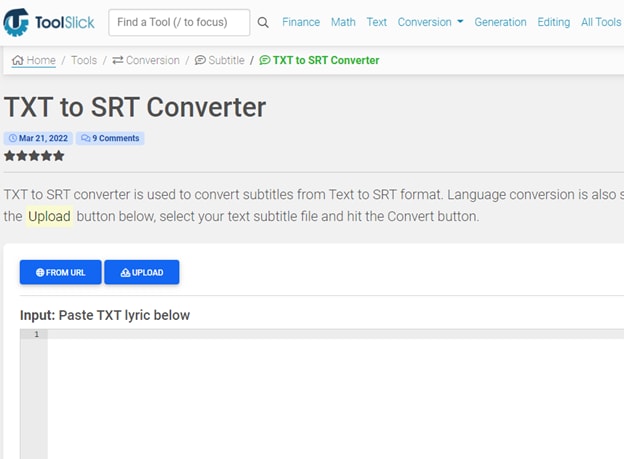
It’s an online platform dedicated to a variety of functions, and converting files from one format to another is one of them. It has tools for handling and processing finance, math, editing, and other tasks.
Pros
- Easy to use
- Supports major languages
- Manually select start and end times
Cons
- Ads on the website can be inconvenient
Features
- It has a dedicated section for financial calculations.
- You can perform mathematics calculations using its Math section.
- It allows you to generate code in different programming languages.
- It has video editing tools.
Best for
ToolSlick is an easy to use online tool to convert TXT to SRT for beginners.
How to Convert Txt to SRT Using an Online Converter
Here, we take ToolSlick as an example to show you how to use an online tool to convert text to an SRT file. Let’s get into it now.
1. Open ToolSlick online converter on your browser. In the below image, you can see how its interface looks. All you need to do is to input or paste the TXT content in the Input box. Make sure to write each line separately.
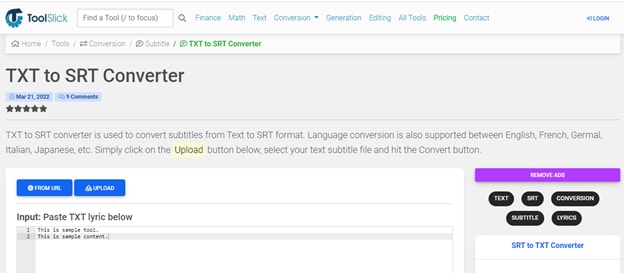
2. After writing the content, go to the Settings section and specify the subtitle’s Start Time and End Time. You can also change the target language.
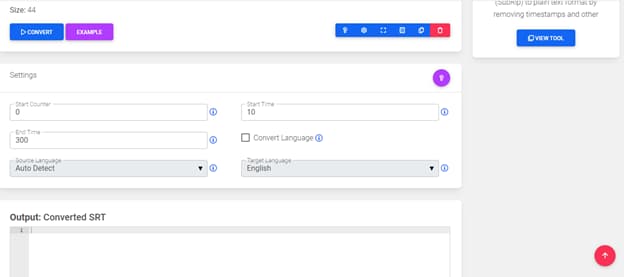
3. Now, you can hit the CONVERT button to convert TXT to SRT. The output file will be automatically downloaded to your computer. Also, the SRT file content appears in the Output box.

Solution 2: Convert TXT to SRT Using Converting Software
Having an online TXT to SRT converter means you can access it online without downloading it on your computer. But, you’ll always have to rely on an internet connection to access one. Instead, you can download and install software on your laptop or computer and have the freedom to convert TXT to SRT on the go.
There’s a variety of converting software available in the market. Let’s review some of them.
UniConverter

Formerly known as Wondershare Video Converter Ultimate, Wondershare Uniconverter is an best subtitle editor for Mac and Windows, and it enables everyone to create subtitles, add, convert subtitles for videos and movies permanently.
Besides, it is also a powerful video file converter, video compressor, video editor, DVD burner, and more.
Pros
- Support converting subtitles in more than 18 formats, export in AAS/SSA/SRT, etc
- 30x faster converting speed without losing information
- Free trial available
Cons
- Not fast while rendering big files
Features
- It’s an all-in-one tool for video, audio and subtitle compression, conversion, download, and more.
- You can preview to check the quality of the output.
- It offers 90x faster-converting speed.
- It can auto-generate subtitles and add them to the video.
- It can solve the problem of video jitter.
- You can convert normal videos to VR videos and enjoy them on your VR headset.
Best for
For download, burn, compress, and conversion.
Batch Subtitles Converter
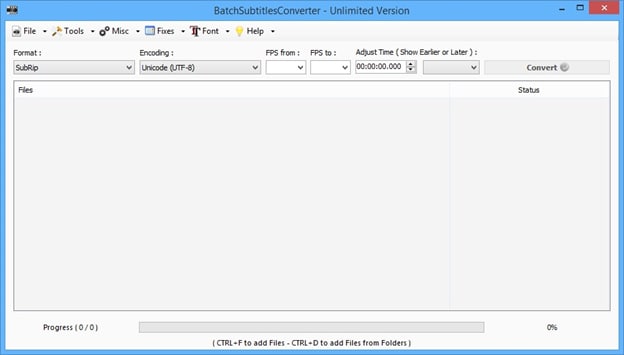
It’s a dedicated subtitles converting program. You can create subtitles in a variety of formats for videos in multiple formats. It’s very easy to use with a simple interface.
Pros
- Supports batch processing
- Free to use
- Framerate and encoding can be set as required
Cons
- It might seem like an outdated tool
Features
- It supports more than 20 output formats.
- You can set custom font sizes for the subtitles.
- You can convert 3 files simultaneously.
- It allows you to change the encoding and frame rate.
Best for
For anyone who’s looking for a free and easy tool
Jubler
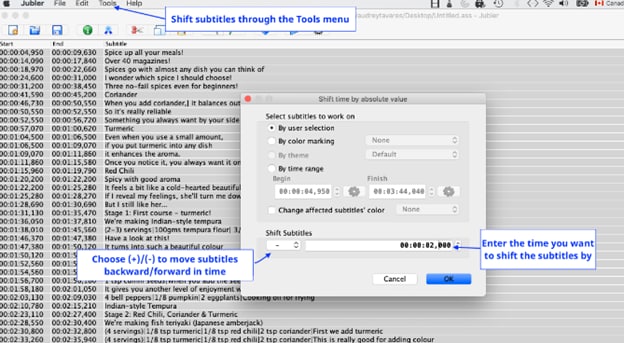
It’s a basic tool that can be used to edit text-based subtitles. You can use it to author new subtitles or convert text files to subtitles. In addition, you can transform, correct, and refine existing subtitles.
Pros
- Free to use
- A powerful tool to create and edit subtitles
Cons
- Outdated interface, not easy-to-use
Features
- It supports most of the popular formats.
- You can preview subtitles to see whether or not they serve the purpose.
- It has spell-checking capabilities to indicate mistakes in your subtitles.
- It has a translation mode to change the language.
Best for
Anyone who’s looking for a powerful and free subtitle creator.
After getting an overview of all of these txt-to-srt converting software, we are here to tell take Wondershare UniConverter as an example to show you concrete how-to steps.
Here’s how you can do it:
1. Download and install UniConverter on your computer and launch it.
2. Access the Subtitle Editor and upload the file you want to add subtitles to.
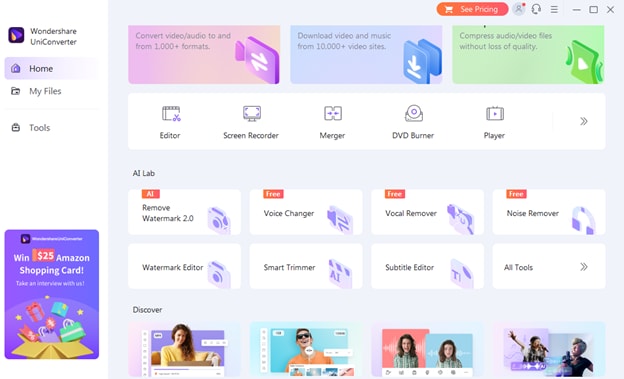
3. Here, you can either import a subtitle file, manually add subtitles, or opt for Text to Subtitles.
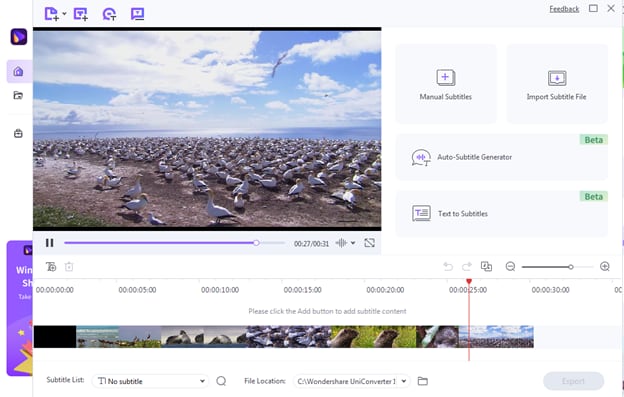
4. You can set the font style, color, size, and timeline as you want.
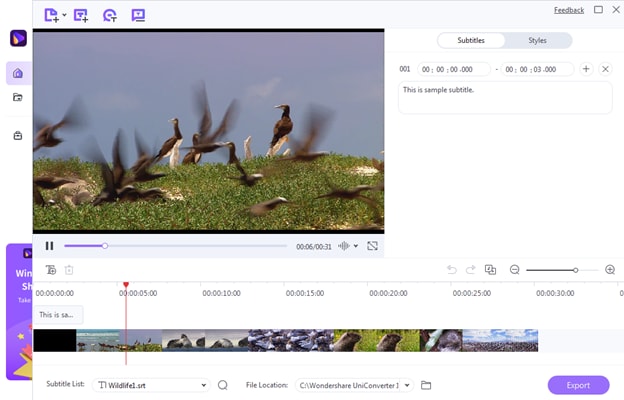
5. Now, hit the Export button and select SRT Files to download the subtitles file. You can also export it as an MP4 video file.
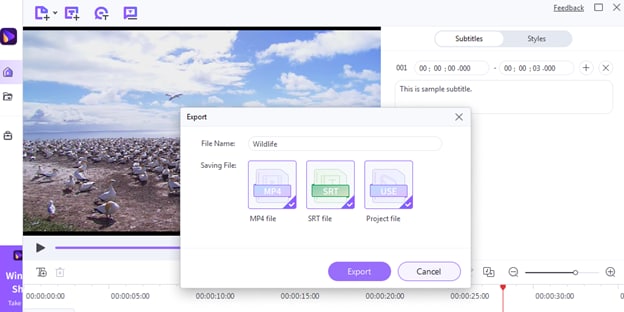
Since you selected to save the file as SRT Files, the text you wrote in the manual subtitles section will convert to an SRT file.
Solution 3: How to Edit TXT File and Save It into .SRT Without Any Tools
While there are different online and downloadable TXT to SRT converting tools available out there, you might not have access to them all the time. That’s when knowing “how to edit TXT file and save it as SRT file” would come in handy.
Here’s how you can edit the TXT file without using any external software and online tools:
- If you’re using a Windows computer, then you can open your TXT document in Microsoft Notepad. For a Mac computer, you can use TextEdit. On the very first line of the document, type a number to identify the subtitle’s section. Each section indicates an individual subtitle, which could be a sound or one sentence from a dialogue.
- The next line would be the timestamp of the subtitle. Timestamp follows this formatting: hours: minutes: seconds, milliseconds.
- In the next line, write your caption.
- Now add double space between the next section and write it as you did for the previous section.
Now that you’ve formatted the TXT file to use it as a subtitle file, let’s save it .SRT format. Here’s how to save your file as .SRT:
1. Go to the File tab and select Save as.
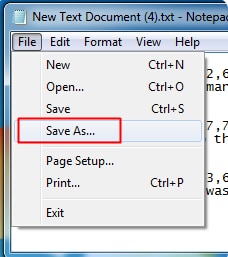
2. Now, save the document with a .**SRT** extension.
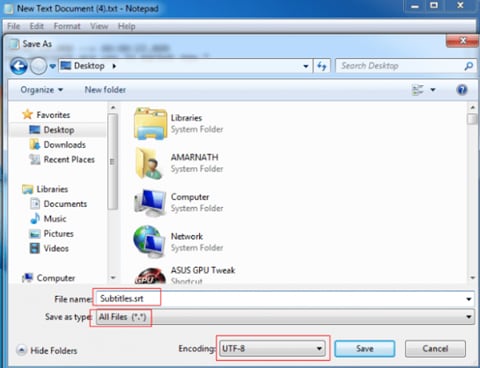
![]()
Note: the advantage of converting TXT file to SRT manually is that it does not require tools and is free, but it does have disadvantages. The bad site is that it is troublesome, time-consuming, and easy to get format mistakes. That is why we recommend professional converting tools most for TXT to SRT conversion.
Now, you can use this file as the subtitle file while watching the video on any video playback software such as the VLC media player.
Bonus Tip: Editing SRT Subtitles with Fancy Effects to Make Your Video More Impressive
When you add subtitles to your video, they typically appear in plain font. If you only need subtitles for their functionality, then a plain font would do the job. However, if you want to make your videos more appealing and engaging, then it calls for adding fancy effects to your subtitles.
No TXT-to-SRT converting tool will make your subtitles fancy by adding effects to them, so you need a professional video editing tool like Filmora .
Wondershare Filmora is a high-quality and professional video editing software with a lot of features. From cut, merge, crop, trim, to transition, effects, and more – a lot can be done using Filmora.
How to Edit SRT Subtitles with Filmora
Following are the steps to add effects to your SRT subtitles and make them look appealing:
Free Download For Win 7 or later(64-bit)
Free Download For macOS 10.14 or later
Step1 Download and install Filmora
Firstly, you need to go to Wondershare Filmora’s official website and download it on your computer. Then, launch the setup and install it on your computer.

Step2 Open Filmora and import the video
After installation, open Filmora and import the video to which you want to add subtitles.
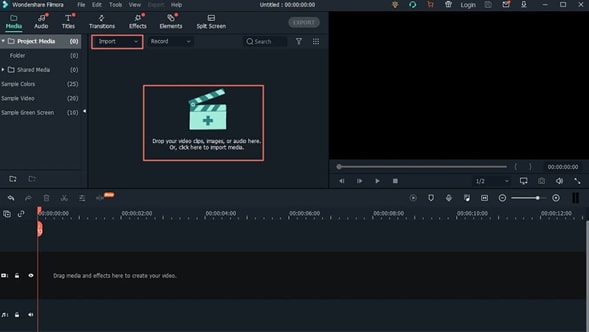
Step3 Add SRT subtitles file
Once your video is open in the editor, use the import option and select your SRT subtitle file, and choose “Advanced Edit” to change styling of the SRT subtitles.

Customize the subtitle styles and then edit it in the subtitle editing window.
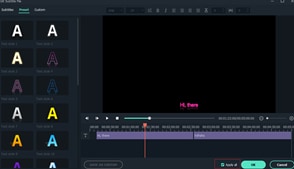
After you’re done editing, click the Export button to save the video.
Hot FAQs on Converting TXT to SRT
1. How to Open and Edit a Text File on a Mac
You can open and edit a text file on a Mac computer using its built-in TextEdit software.
2. What is the difference between SRT and TXT?
TXT is a file format for a text file or Word document. A TXT file might have caption content for a video, but it can’t be used as a subtitle file since it’s unformatted. An SRT file, on the other hand, has the information about captioning and the start and stop times of the subtitles. It’s in a proper format to be used as a subtitle file.
3. Is TXT a subtitle file?
TXT, itself isn’t a subtitle file. It might have the content for subtitles but can’t be used as a subtitle file.
Final Words
This article has shown you some best tools and a concrete step-by-step guide on how you can convert TXT to SRT and use it as your subtitle file. We hope you find it resourceful and are now aware of the different methods to TXT to SRT conversion.
- UniConverter
- Batch Subtitles Converter
- Jubler
- Solution 3: How to Edit TXT File and Save It into .SRT Without Any Tools
- Bonus Tip: Editing SRT Subtitles with Fancy Effects to Make Your Video More Impressive
Can You Convert TXT to SRT?
Yes, you can convert .txt to .srt document. Let’s understand a little bit of context first. You can even hardcode your subtitles to your video, and automatically generate subtitle files and transcriptions from any audio and video file format. There are many online and offline tools come to help. And we’ll introduce some in detail in the following part.
Why Do You Need to Convert TXT to SRT?
A word file in TXT format or having a script of the video doesn’t indicate the start and stop time of the subtitle content. An SRT file, on the other hand, has the information about captioning and the start and stop times of the subtitles.
To put it simply, a TXT file is unformatted and needs to be converted into an SRT file so it has all the necessary information to be used as subtitles.
There are different ways to do that, and we’ll discuss three solutions in this article.
Solution 1: Get a TXT-to-SRT Converter Online
Out of the different ways to convert TXT to SRT, using an online converter is the easiest one. You can access it online without having to download it on your computer.
Most online TXT to SRT converters allow drag & drop functionality and are easy to use. While plenty of such tools are available online, we’ll review a few here.
Ebby

Ebby is essentially a transcription tool that converts audio to text. You can use it to create an automatic transcription and to convert one TXT to SRT format. It uses voice recognition technology to create text with timestamps, making them subtitles for your videos. It supports over 100 languages and dialects. You can export transcripts in different formats.
Pros
- Equipped with speech recognition technology
- Features playback controls
- Offers 24/7 support
- Offers a free trial
Cons
- Only available online
- Not suitable for manual transcription
Features
- You can upload both audio and video files.
- It can create automatic transcriptions.
- Supports multiple languages to produce subtitles in all popular languages.
- It’s equipped with speech recognition technology.
- Apart from subtitles, it produces closed captions as well to help deaf people.
- You can edit the text within the tool.
Best for
Podcasters, lawyers, journalists, authors, and marketing experts.
Rev

Another transcription tool, Rev is widely used by more than 170,000 users. It can cater to the growing needs of its users. Its pricing model is a bit different from other names in the industry.
Pros
- Supports both automated and manual transcription
- Up to 99% accuracy in manual transcription
- Closed captions
Cons
- Per video-based pricing model
Features
- It works on AI and Machine Learning models to produce accurate subtitles.
- It allows you to annotate subtitles for better understanding.
- File sharing is allowed on Rev.
- You can search particular text using its Full-Text Search functionality.
- It supports 16 different languages.
- It is capable of Natural Language Processing.
Best for
Rev’s users belong to a variety of industries including journalism, video production, medical, podcasters, and writers.
ToolSlick

It’s an online platform dedicated to a variety of functions, and converting files from one format to another is one of them. It has tools for handling and processing finance, math, editing, and other tasks.
Pros
- Easy to use
- Supports major languages
- Manually select start and end times
Cons
- Ads on the website can be inconvenient
Features
- It has a dedicated section for financial calculations.
- You can perform mathematics calculations using its Math section.
- It allows you to generate code in different programming languages.
- It has video editing tools.
Best for
ToolSlick is an easy to use online tool to convert TXT to SRT for beginners.
How to Convert Txt to SRT Using an Online Converter
Here, we take ToolSlick as an example to show you how to use an online tool to convert text to an SRT file. Let’s get into it now.
1. Open ToolSlick online converter on your browser. In the below image, you can see how its interface looks. All you need to do is to input or paste the TXT content in the Input box. Make sure to write each line separately.

2. After writing the content, go to the Settings section and specify the subtitle’s Start Time and End Time. You can also change the target language.

3. Now, you can hit the CONVERT button to convert TXT to SRT. The output file will be automatically downloaded to your computer. Also, the SRT file content appears in the Output box.

Solution 2: Convert TXT to SRT Using Converting Software
Having an online TXT to SRT converter means you can access it online without downloading it on your computer. But, you’ll always have to rely on an internet connection to access one. Instead, you can download and install software on your laptop or computer and have the freedom to convert TXT to SRT on the go.
There’s a variety of converting software available in the market. Let’s review some of them.
UniConverter

Formerly known as Wondershare Video Converter Ultimate, Wondershare Uniconverter is an best subtitle editor for Mac and Windows, and it enables everyone to create subtitles, add, convert subtitles for videos and movies permanently.
Besides, it is also a powerful video file converter, video compressor, video editor, DVD burner, and more.
Pros
- Support converting subtitles in more than 18 formats, export in AAS/SSA/SRT, etc
- 30x faster converting speed without losing information
- Free trial available
Cons
- Not fast while rendering big files
Features
- It’s an all-in-one tool for video, audio and subtitle compression, conversion, download, and more.
- You can preview to check the quality of the output.
- It offers 90x faster-converting speed.
- It can auto-generate subtitles and add them to the video.
- It can solve the problem of video jitter.
- You can convert normal videos to VR videos and enjoy them on your VR headset.
Best for
For download, burn, compress, and conversion.
Batch Subtitles Converter

It’s a dedicated subtitles converting program. You can create subtitles in a variety of formats for videos in multiple formats. It’s very easy to use with a simple interface.
Pros
- Supports batch processing
- Free to use
- Framerate and encoding can be set as required
Cons
- It might seem like an outdated tool
Features
- It supports more than 20 output formats.
- You can set custom font sizes for the subtitles.
- You can convert 3 files simultaneously.
- It allows you to change the encoding and frame rate.
Best for
For anyone who’s looking for a free and easy tool
Jubler

It’s a basic tool that can be used to edit text-based subtitles. You can use it to author new subtitles or convert text files to subtitles. In addition, you can transform, correct, and refine existing subtitles.
Pros
- Free to use
- A powerful tool to create and edit subtitles
Cons
- Outdated interface, not easy-to-use
Features
- It supports most of the popular formats.
- You can preview subtitles to see whether or not they serve the purpose.
- It has spell-checking capabilities to indicate mistakes in your subtitles.
- It has a translation mode to change the language.
Best for
Anyone who’s looking for a powerful and free subtitle creator.
After getting an overview of all of these txt-to-srt converting software, we are here to tell take Wondershare UniConverter as an example to show you concrete how-to steps.
Here’s how you can do it:
1. Download and install UniConverter on your computer and launch it.
2. Access the Subtitle Editor and upload the file you want to add subtitles to.

3. Here, you can either import a subtitle file, manually add subtitles, or opt for Text to Subtitles.

4. You can set the font style, color, size, and timeline as you want.

5. Now, hit the Export button and select SRT Files to download the subtitles file. You can also export it as an MP4 video file.

Since you selected to save the file as SRT Files, the text you wrote in the manual subtitles section will convert to an SRT file.
Solution 3: How to Edit TXT File and Save It into .SRT Without Any Tools
While there are different online and downloadable TXT to SRT converting tools available out there, you might not have access to them all the time. That’s when knowing “how to edit TXT file and save it as SRT file” would come in handy.
Here’s how you can edit the TXT file without using any external software and online tools:
- If you’re using a Windows computer, then you can open your TXT document in Microsoft Notepad. For a Mac computer, you can use TextEdit. On the very first line of the document, type a number to identify the subtitle’s section. Each section indicates an individual subtitle, which could be a sound or one sentence from a dialogue.
- The next line would be the timestamp of the subtitle. Timestamp follows this formatting: hours: minutes: seconds, milliseconds.
- In the next line, write your caption.
- Now add double space between the next section and write it as you did for the previous section.
Now that you’ve formatted the TXT file to use it as a subtitle file, let’s save it .SRT format. Here’s how to save your file as .SRT:
1. Go to the File tab and select Save as.

2. Now, save the document with a .**SRT** extension.

![]()
Note: the advantage of converting TXT file to SRT manually is that it does not require tools and is free, but it does have disadvantages. The bad site is that it is troublesome, time-consuming, and easy to get format mistakes. That is why we recommend professional converting tools most for TXT to SRT conversion.
Now, you can use this file as the subtitle file while watching the video on any video playback software such as the VLC media player.
Bonus Tip: Editing SRT Subtitles with Fancy Effects to Make Your Video More Impressive
When you add subtitles to your video, they typically appear in plain font. If you only need subtitles for their functionality, then a plain font would do the job. However, if you want to make your videos more appealing and engaging, then it calls for adding fancy effects to your subtitles.
No TXT-to-SRT converting tool will make your subtitles fancy by adding effects to them, so you need a professional video editing tool like Filmora .
Wondershare Filmora is a high-quality and professional video editing software with a lot of features. From cut, merge, crop, trim, to transition, effects, and more – a lot can be done using Filmora.
How to Edit SRT Subtitles with Filmora
Following are the steps to add effects to your SRT subtitles and make them look appealing:
Free Download For Win 7 or later(64-bit)
Free Download For macOS 10.14 or later
Step1 Download and install Filmora
Firstly, you need to go to Wondershare Filmora’s official website and download it on your computer. Then, launch the setup and install it on your computer.

Step2 Open Filmora and import the video
After installation, open Filmora and import the video to which you want to add subtitles.

Step3 Add SRT subtitles file
Once your video is open in the editor, use the import option and select your SRT subtitle file, and choose “Advanced Edit” to change styling of the SRT subtitles.

Customize the subtitle styles and then edit it in the subtitle editing window.

After you’re done editing, click the Export button to save the video.
Hot FAQs on Converting TXT to SRT
1. How to Open and Edit a Text File on a Mac
You can open and edit a text file on a Mac computer using its built-in TextEdit software.
2. What is the difference between SRT and TXT?
TXT is a file format for a text file or Word document. A TXT file might have caption content for a video, but it can’t be used as a subtitle file since it’s unformatted. An SRT file, on the other hand, has the information about captioning and the start and stop times of the subtitles. It’s in a proper format to be used as a subtitle file.
3. Is TXT a subtitle file?
TXT, itself isn’t a subtitle file. It might have the content for subtitles but can’t be used as a subtitle file.
Final Words
This article has shown you some best tools and a concrete step-by-step guide on how you can convert TXT to SRT and use it as your subtitle file. We hope you find it resourceful and are now aware of the different methods to TXT to SRT conversion.
Also read:
- Updated 2024 Approved 4 Ways for Rotating Your GoPro Videos Professionally
- 2024 Approved Do You Want to Make TikTok Videos More Elemental by Using Countdown but Dont Know How to Do This? Here We Will Thoroughly Guide You About This
- New In 2024, Do You Want to Know How to Edit a Time Lapse Video on iPhone, Interesting Ideas, and some Tips and Pointers for Shooting a Professional Time Lapse Video? Find Out Everything in This Guide
- Updated 2024 Approved This Article Shares Valuable Insight Into the Best Brand Story Videos. Also, It Highlights the Importance of a Video Maker in Your Brand Story Video Ad-Making Process and Why Filmora Should Be Your Go-To Choice
- Finest Approach to Slow Down a Video CapCut All-in-One Video Editor for 2024
- What Is a Memoji and How to Make a Memoji? You Can Learn Top 8 Memoji Makers for PC, Android, or iOS, and the Steps to Make a Memoji for 2024
- In 2024, Complete Tutorial on After Effects Countdown Timer Adding
- In 2024, Step by Step to Rotate Videos in Davinci Resolve
- Updated 4 Ways to Add White Borders on Mobile and Desktop for 2024
- New 2024 Approved In This Article, We Talk About How to Add Old Film Overlays and Other Effects to Turn the Videos or Photos More Vintage and with an Older Aspect. We Take a Look at Filmora in This Guide and Give Tips on How to Create Great Retro Videos
- New 2024 Approved REVIEW Whats Top 10 Software to Make AI Upscaling Video
- New Do You Want to Make Your Video Look Like Its From the 90S? Then, Make Sure to Add Vintage Overlays and VHS Sound Effects to Give It the Old Feel for 2024
- Top 15 Slow Motion CapCut Templates to Work With
- Updated 10 Best Suggestions for AI Video Interviews for 2024
- Updated 2024 Approved How to Make Double Exposure Effect in Filmora
- 2024 Approved A Guide to Color Grade Your Picture in LightRoom
- Updated In 2024, So, in This Short Tutorial, Well Learn How to Create a Vintage 1980-Style Video with a Retro Effect that Will Leave Your Audience Yearning for More
- Updated In 2024, Wondering How to Rotate a Video in Windows at Any Desired Angle and Save It Permanently? Find Out All the Different Ways to Rotate Videos Temporarily as Well as Permanently
- Updated How to Rotate AVI in Vertical/Portrait Orientation Windows, Mac,Andro
- Updated 2024 Approved The Best Way to Remove Audio From Your Videos
- How to Put a Background on A Green Screen for 2024
- Updated 2024 Approved Are You Surfing for some Way to Make Your Animated Emoji Discord Using Videos, GIFs, Images, or Text? Read Through This Article as Well Guide You Through the Process
- 2024 Approved 8 Best Sites to Get Glitch Transition for Premiere Pro
- Updated 15 Must-Use Gifs Editors for 2024
- In 2024, Can You Make an Fcpx Slideshow? Undoubtedly Yes, with the Unlimited Best Fcpx Slideshow Templates Available. To Know How to, Follow the Discussion Below
- In 2024, Ways to Learn Discord Game Bots – Even if Youre Just Starting Out
- Split a Video in the Lightworks Step by Step for 2024
- Updated Wondershare Filmora Tutorial | Using The AI Auto Reframe Feature
- New 2024 Approved Do You Want to Get Green Screen Effects on Your Video without Green Screen Setup in Your Background? Learn How to Get Virtual Green Screen Background and Shoot Videos Like a Pro
- New In 2024, 4 Ways for Rotating Your GoPro Videos Professionally
- Wondering How to Rotate a Video in Windows at Any Desired Angle and Save It Permanently? Find Out All the Different Ways to Rotate Videos Temporarily as Well as Permanently
- New 2024 Approved How to Use iMovie Text Effects
- In 2024, If You Want to Know More About the Basics of Final Cut Pro, It Would Be Helpful to Watch a Beginner Tutorial, with the Length of only 20 Minutes, an Introduction of the Whole Program
- In 2024, Pokemon Go Error 12 Failed to Detect Location On Motorola Moto G34 5G? | Dr.fone
- In 2024, 4 solution to get rid of pokemon fail to detect location On Samsung Galaxy A05 | Dr.fone
- Easy Steps on How To Create a New Apple ID Account On iPhone 15 Pro Max
- Proven Ways to Fix There Was A Problem Parsing the Package on Realme C67 5G | Dr.fone
- Locked Out of Apple iPhone 12? 5 Ways to get into a Locked Apple iPhone 12 | Dr.fone
- In 2024, The Best iSpoofer Alternative to Try On Oppo Find N3 | Dr.fone
- The Easiest Methods to Hard Reset Samsung Galaxy A05 | Dr.fone
- Undelete lost contacts from Vivo V27e.
- In 2024, How Can I Catch the Regional Pokémon without Traveling On Apple iPhone 6 | Dr.fone
- In 2024, Top 10 Telegram Spy Tools On OnePlus Open for Parents | Dr.fone
- How to Screen Mirroring Xiaomi Mix Fold 3 to PC? | Dr.fone
- How To Fake GPS On Lenovo ThinkPhone For Mobile Legends? | Dr.fone
- 4 Ways to Transfer Music from Samsung Galaxy F04 to iPhone | Dr.fone
- Forgotten The Voicemail Password Of Samsung Galaxy F34 5G? Try These Fixes
- In 2024, Two Ways to Track My Boyfriends Realme 11 Pro without Him Knowing | Dr.fone
- In 2024, How To Unlock iPhone 11 Without Swiping Up? 6 Ways
- In 2024, The Ultimate Guide to Realme Narzo 60 Pro 5G Pattern Lock Screen Everything You Need to Know
- In 2024, How To Unlock iPhone 14 Pro Max Without Passcode? 4 Easy Methods | Dr.fone
- In 2024, Catch or Beat Sleeping Snorlax on Pokemon Go For Oppo Reno 8T | Dr.fone
- 3 Methods to Mirror Infinix Note 30 5G to Roku | Dr.fone
- How to Remove Activation Lock From the iPhone 6 Plus Without Previous Owner?
- In 2024, 3 Solutions to Find Your Gionee F3 Pro Current Location of a Mobile Number | Dr.fone
- Solved How To Transfer From Apple iPhone X to iPhone 15 | Dr.fone
- How to Fix Android App Not Installed Error on Vivo Y200 Quickly? | Dr.fone
- How To Transfer Data From Apple iPhone 13 Pro Max To Other iPhone 15 Pro Max devices? | Dr.fone
- Remove the lock of Honor 90 GT
- MOV playback issues on Samsung Galaxy A15 5G
- How Can OnePlus 11 5GMirror Share to PC? | Dr.fone
- In 2024, FRP Hijacker by Hagard Download and Bypass your Vivo Y78 5G FRP Locks
- In 2024, Ultimate Guide to Catch the Regional-Located Pokemon For Realme C51 | Dr.fone
- Bypassing Google Account With vnROM Bypass For Xiaomi Redmi Note 12R
- In 2024, 15 Best Strongest Pokémon To Use in Pokémon GO PvP Leagues For Oppo A56s 5G | Dr.fone
- How to Recover Deleted Screenshots on iPhone 11 Pro Max? | Stellar
- Title: New How to Create Loop Videos Using Filmora for 2024
- Author: Morgan
- Created at : 2024-04-24 01:02:27
- Updated at : 2024-04-25 01:02:27
- Link: https://ai-video-editing.techidaily.com/new-how-to-create-loop-videos-using-filmora-for-2024/
- License: This work is licensed under CC BY-NC-SA 4.0.


