
:max_bytes(150000):strip_icc():format(webp)/bestfirestickapps-5bcba08546e0fb005177a983-0591296fac8241ccb8497f9f29901acd.jpg)
New How to Edit A Time Lapse Video on iPhone, In 2024
How to Edit A Time Lapse Video on iPhone?
Versatile Video Editor - Wondershare Filmora
An easy and powerful editor
Numerous effects to choose from
Detailed tutorials provided by the official channel
Do you want to edit a time lapse video on an iPhone or want to know how to shoot a time-lapse video? If so, you’ve come to the right place.
Time-lapses, which show how much something changes over a period of time are some of the coolest videos you can make.
They aren’t exactly easy to make and edit at first, but we’ve put together this guide to take you through the steps. We’ll give you a few time lapse video ideas, steps to shoot them, and good practices for managing your footage after you’ve shot it.
Let’s get started.
What Is A Time Lapse Video?
In its simplest definition, a time lapse video is a cinematography technique where the frequency at which film frames are captured (the frame rate) is much lower than that used to view the sequence.
When played at normal speed, time appears to be moving faster and thus lapsing. For example, an image of a scene may be captured once every second, then played back at 30 frames per second; the result is an apparent 30 times speed increase.
Time-lapse photography can be considered to be the opposite of slow motion.
How to Shoot A Time-Lapse Video?
Subjects to shoot in a time-lapse video
Wondering what can be shot in a time-lapse video? The answer is any subject that moves, grows, decays, or changes. But what’s more important than the subject is the motion and change that it goes through.
When shooting a time-lapse video, you are composing not only the shot but also the movement of the subject. If a subject doesn’t move or change throughout your film, then it is just a regular video. So try to think of subjects that are constantly moving or changing.
Time-Lapse videos are visually appealing and easy to make. When it comes to subjects that can be chosen to shoot in a time-lapse video, the possibilities are endless. But if you’re stuck for ideas, here are 10 suggestions to get you started:
1. Sunset/Sunrise
These are quite possibly the most common subjects for timelapse videos, but there’s a reason for it! Watching the sun go up and down is always mesmerizing.
2. Clouds
Clouds move very slowly most of the time, making them perfect for time-lapse sequences. You can shoot a single cloud passing overhead, or record a passing storm front as it sweeps across the sky. Depending on the weather conditions and movement of clouds, this can look stunning or simply spectacular!
3. Starry sky
Probably one of the most fascinating time lapse videos is the ones with stars on the move. Time-lapses that capture the Milky Way or starry sky are becoming increasingly popular as camera technology improves. There are even some cameras now that have built-in settings specifically for capturing stars and other celestial bodies.
4. Flowers
Flowers blooming is another fantastic subject for time-lapse photography. The change can be incredibly subtle; however, if you shoot a timelapse over several days or weeks, you will be amazed at just how much they grow and change!
5. Season changing
The most obvious example is trees budding and shedding leaves, but all sorts of plants and animals follow seasonal cycles. You can see flowers blooming, grasses growing, and migrating birds. Even if you don’t have a chance to go somewhere exotic for your subject matter, you can find something interesting right outside your own door.
6. Cars or Pedestrians
If you want something a little more exciting then you can choose things like cars passing by or people walking on the street.
7. Cooking dinner
Got a recipe for dinner that has lots of steps? Rather than just snap photos of the process, why not make a time-lapse video instead? It’s easy and fun to do, especially if you have kids who can help you out!
8. DIY projects
Are you building something? Whether it’s a new table, shelves, or whatever else, set up your camera and take photos as you go along in a time lapse mode and you’ll get a fun time lapse video. It works well to show people how it all came together.
9. Construction work in progress
If you’re watching construction work being done on your property or nearby, consider recording its time lapse video. It’s hard to imagine the amount of resources it takes to construct an office building or skyscraper before it’s finished. Time-lapse videos have helped reveal just how much work goes into something like that.
10. A fun art project
Capturing a time lapse video of an art project can make a mesmerizing video. Whether it’s you or someone else doing the artwork, always capture its time lapse video to show to others what goes into completing an art project. All you need to do is to set your camera up on a tripod aimed at the canvas and capture one or two frames per second to get an excellent time lapse video.
Steps to shoot a time-lapse video
Time-lapse videography is something that most photographers and videographers are familiar with. But, shooting a time-lapse video needs more than setting the camera on a tripod and waiting for it to shoot for several hours.
The amazing thing about time-lapse videos is that they can be shot using your smartphone. There are apps and built-in camera settings to capture time lapse videos with just a click of the button.
If you want to create a time-lapse video that is high quality, you have to use professional cameras, and learn some important steps.
1. Decide on a subject
The movement of clouds, a sunrise or sunset, waves crashing at the beach, cars coming and going in your parking lot, people walking around your office building — all of these subjects can yield great time-lapse sequences.
2. Find a place to set up your camera on tripod
While recording a time-lapse video, it’s important to keep the camera as stable as possible. It ensures a smooth video, making it visually appealing and easy to edit post-shooting. Typically, a tripod is needed for stable recording. If you are not using a tripod, find something steady and level to set it upon.
Important tip: Shoot only with manual settings. You don’t want the camera to adjust for you; rather, you should adjust the camera settings so that it takes optimal pictures. Even if you use auto mode, make sure you take control of the camera and push it to its limits to get great shots.
3. Set the camera focus
Use either autofocus or manual focus to make sure the camera is focused on what you want to be the main subject of the video.
4. Set your exposure settings
Depending on how much the light is going to change over time, you may want to use aperture priority or shutter priority so that the camera will automatically adjust for changes in light. Or, if you know exactly how much light will be changing over time, you could set all exposure settings manually.
5. Calculate how many frames and shots are needed
For example, if you are shooting at 10 frames per second and want a total of 30 seconds of video at 24 fps (which is standard), you will need 720 frames/photos (30 seconds x 24 fps = 720 frames).
6. Import and stitch together
Once you’ve captured the images, import them into a video editing software, stitch them together, and perform necessary editing.
How to Edit The Time Lapse on iPhone?
Now that you’ve recorded a time-lapse video, you might watch it and think it’s slower or faster than you want it to be. Fortunately, you can speed up and slow down the time lapse video on iPhone using iMovie.
Let’s see how to slow down time lapse on iPhone iMovie.
1. Speed up The Time Lapse on iPhone
So you’ve taken a time lapse video on your iPhone and now you’re trying to get it to speed up in iMovie but it looks a little jumpy or there is too much footage. Here’s how to do it in iMovie for iOS.
- Launch iMovie on your iPhone and start a new project to speed up the captured time-lapse video.
- Now, tap the plus sign visible at the start of the Projects screen, then select Movie.

- From the next window, find and select the recorded time-lapse video you want to speed up.

- Tap Create Movie button at the center-bottom of the screen.

- Now move the playhead to the start of the timeline and tap to select the video. At this point, you’ll see the timeline highlighted in yellow color.
- Look at the bottom of the screen and you’ll find the Speed icon. Tap the Speed icon and a sliding bar will appear with tortoise on its left side and hare on the right side.

- To speed up the time-lapse video, move the slider to the right side and you’ll see the duration of the video reduced, indicating time-lapse video has been sped up.

- Now click the Play button to preview and then tap Done.
Once you’ve increased the speed of time-lapse video, you can share it and post it where you want.
2. Slow Down The Time Lapse on iPhone
Just like you can speed up the time-lapse video on an iPhone, iMovie lets you slow down the time-lapse video.
Here’s how you can do it:
- Launch iMovie on your iPhone and start a new project to speed up the captured time-lapse video.
- Now, tap the plus sign visible at the start of the Projects screen, then select Movie.

- From the next window, find and select your recorded time-lapse video you want to speed up.

- Tap Create Movie button at the center-bottom of the screen.

- Now move the playhead to the start of the timeline and tap to select the video. At this point, you’ll see the timeline highlighted in yellow color.
- Look at the bottom of the screen and you’ll find the Speed icon. Tap the Speed icon and a sliding bar will appear with tortoise on its left side and hare on the right side.

- To slow down the time-lapse video, move the slider to the left side and you’ll see the duration of the video increased, indicating time-lapse video has been slowed down.

- Now click the Play button to preview and then tap Done.
Advanced Software: Edit A Time Lapse Video in Wondershare Filmora
If you have professionally captured RAW images of the time-lapse video, you need to use advanced software to stitch them together. That’s where Wondershare Filmora comes into play.
Wondershare Filmore is a professional video editing software with a wide variety of basic to advanced-level editing tools. It allows for turning RAW videos into fun, engaging, and professional videos.
If you need to refine your time-lapse video, you can use it and benefit from its capabilities. Similarly, you can use it to speed up or slow down your time-lapse video.
Let’s see how you can do both with Filmora.
Speed up your time-lapse video
Why speed up a time-lapse in the first place? There are a couple of reasons you might want to speed up your time-lapse.
When shooting with a fast lens, you might want to dial down the shutter speed to achieve more motion blur, to make the scenes more interesting. However, doing so can also create motion blur on time-lapse footage when sped up.
Another reason you might want to speed up your time-lapse is when you have too many frames. When you shoot at low frame rate (e.g. 15 FPS), not everyone will experience the same viewing quality if they don’t have high frame rate monitors. Speeding up the footage is one way to reduce the number of frames without compromising the quality of your video.
Follow these steps to speed up the time-lapse video using Filmora:
- Download and install Wondershare Filmora on your computer.
- Launch Filmora and click the New project button to open the video editor or drag and drop the file directly.

- Once imported, drag the file to the timeline.

- Click the Speed icon and select the Fast option. Select 2x, 4x, 8x, etc, depending on how much you want to speed up.

- Save the file and use it the way you want.
Slow down your time-lapse video
As the speed at which your time-lapse moves increases, so does the amount of motion blur. This can make for an undesirable look, especially in shots where there is already a lot of movement.
The best way to avoid this is to slow down your time-lapse as much as possible while still maintaining an interesting level of movement within your shot.
You can slow down your time-lapse video in Filmora following the same process as you’d do for speeding-up the video (Explained above). However, there’s only one catch; instead of opting for the Fast option choose Slow when you’re at step 4.
Conclusion
Hopefully, this guide has provided a good knowledge of how to put together your own time lapse video – and how to edit it on iPhone and Wondershare Filmora. It’s easier than you may think, and the resulting videos are quite impressive.
Take your time with it, record your movies from different angles, and don’t be afraid to create something unique and experimental.
Do you want to edit a time lapse video on an iPhone or want to know how to shoot a time-lapse video? If so, you’ve come to the right place.
Time-lapses, which show how much something changes over a period of time are some of the coolest videos you can make.
They aren’t exactly easy to make and edit at first, but we’ve put together this guide to take you through the steps. We’ll give you a few time lapse video ideas, steps to shoot them, and good practices for managing your footage after you’ve shot it.
Let’s get started.
What Is A Time Lapse Video?
In its simplest definition, a time lapse video is a cinematography technique where the frequency at which film frames are captured (the frame rate) is much lower than that used to view the sequence.
When played at normal speed, time appears to be moving faster and thus lapsing. For example, an image of a scene may be captured once every second, then played back at 30 frames per second; the result is an apparent 30 times speed increase.
Time-lapse photography can be considered to be the opposite of slow motion.
How to Shoot A Time-Lapse Video?
Subjects to shoot in a time-lapse video
Wondering what can be shot in a time-lapse video? The answer is any subject that moves, grows, decays, or changes. But what’s more important than the subject is the motion and change that it goes through.
When shooting a time-lapse video, you are composing not only the shot but also the movement of the subject. If a subject doesn’t move or change throughout your film, then it is just a regular video. So try to think of subjects that are constantly moving or changing.
Time-Lapse videos are visually appealing and easy to make. When it comes to subjects that can be chosen to shoot in a time-lapse video, the possibilities are endless. But if you’re stuck for ideas, here are 10 suggestions to get you started:
1. Sunset/Sunrise
These are quite possibly the most common subjects for timelapse videos, but there’s a reason for it! Watching the sun go up and down is always mesmerizing.
2. Clouds
Clouds move very slowly most of the time, making them perfect for time-lapse sequences. You can shoot a single cloud passing overhead, or record a passing storm front as it sweeps across the sky. Depending on the weather conditions and movement of clouds, this can look stunning or simply spectacular!
3. Starry sky
Probably one of the most fascinating time lapse videos is the ones with stars on the move. Time-lapses that capture the Milky Way or starry sky are becoming increasingly popular as camera technology improves. There are even some cameras now that have built-in settings specifically for capturing stars and other celestial bodies.
4. Flowers
Flowers blooming is another fantastic subject for time-lapse photography. The change can be incredibly subtle; however, if you shoot a timelapse over several days or weeks, you will be amazed at just how much they grow and change!
5. Season changing
The most obvious example is trees budding and shedding leaves, but all sorts of plants and animals follow seasonal cycles. You can see flowers blooming, grasses growing, and migrating birds. Even if you don’t have a chance to go somewhere exotic for your subject matter, you can find something interesting right outside your own door.
6. Cars or Pedestrians
If you want something a little more exciting then you can choose things like cars passing by or people walking on the street.
7. Cooking dinner
Got a recipe for dinner that has lots of steps? Rather than just snap photos of the process, why not make a time-lapse video instead? It’s easy and fun to do, especially if you have kids who can help you out!
8. DIY projects
Are you building something? Whether it’s a new table, shelves, or whatever else, set up your camera and take photos as you go along in a time lapse mode and you’ll get a fun time lapse video. It works well to show people how it all came together.
9. Construction work in progress
If you’re watching construction work being done on your property or nearby, consider recording its time lapse video. It’s hard to imagine the amount of resources it takes to construct an office building or skyscraper before it’s finished. Time-lapse videos have helped reveal just how much work goes into something like that.
10. A fun art project
Capturing a time lapse video of an art project can make a mesmerizing video. Whether it’s you or someone else doing the artwork, always capture its time lapse video to show to others what goes into completing an art project. All you need to do is to set your camera up on a tripod aimed at the canvas and capture one or two frames per second to get an excellent time lapse video.
Steps to shoot a time-lapse video
Time-lapse videography is something that most photographers and videographers are familiar with. But, shooting a time-lapse video needs more than setting the camera on a tripod and waiting for it to shoot for several hours.
The amazing thing about time-lapse videos is that they can be shot using your smartphone. There are apps and built-in camera settings to capture time lapse videos with just a click of the button.
If you want to create a time-lapse video that is high quality, you have to use professional cameras, and learn some important steps.
1. Decide on a subject
The movement of clouds, a sunrise or sunset, waves crashing at the beach, cars coming and going in your parking lot, people walking around your office building — all of these subjects can yield great time-lapse sequences.
2. Find a place to set up your camera on tripod
While recording a time-lapse video, it’s important to keep the camera as stable as possible. It ensures a smooth video, making it visually appealing and easy to edit post-shooting. Typically, a tripod is needed for stable recording. If you are not using a tripod, find something steady and level to set it upon.
Important tip: Shoot only with manual settings. You don’t want the camera to adjust for you; rather, you should adjust the camera settings so that it takes optimal pictures. Even if you use auto mode, make sure you take control of the camera and push it to its limits to get great shots.
3. Set the camera focus
Use either autofocus or manual focus to make sure the camera is focused on what you want to be the main subject of the video.
4. Set your exposure settings
Depending on how much the light is going to change over time, you may want to use aperture priority or shutter priority so that the camera will automatically adjust for changes in light. Or, if you know exactly how much light will be changing over time, you could set all exposure settings manually.
5. Calculate how many frames and shots are needed
For example, if you are shooting at 10 frames per second and want a total of 30 seconds of video at 24 fps (which is standard), you will need 720 frames/photos (30 seconds x 24 fps = 720 frames).
6. Import and stitch together
Once you’ve captured the images, import them into a video editing software, stitch them together, and perform necessary editing.
How to Edit The Time Lapse on iPhone?
Now that you’ve recorded a time-lapse video, you might watch it and think it’s slower or faster than you want it to be. Fortunately, you can speed up and slow down the time lapse video on iPhone using iMovie.
Let’s see how to slow down time lapse on iPhone iMovie.
1. Speed up The Time Lapse on iPhone
So you’ve taken a time lapse video on your iPhone and now you’re trying to get it to speed up in iMovie but it looks a little jumpy or there is too much footage. Here’s how to do it in iMovie for iOS.
- Launch iMovie on your iPhone and start a new project to speed up the captured time-lapse video.
- Now, tap the plus sign visible at the start of the Projects screen, then select Movie.
- From the next window, find and select the recorded time-lapse video you want to speed up.
- Tap Create Movie button at the center-bottom of the screen.
- Now move the playhead to the start of the timeline and tap to select the video. At this point, you’ll see the timeline highlighted in yellow color.
- Look at the bottom of the screen and you’ll find the Speed icon. Tap the Speed icon and a sliding bar will appear with tortoise on its left side and hare on the right side.
- To speed up the time-lapse video, move the slider to the right side and you’ll see the duration of the video reduced, indicating time-lapse video has been sped up.
- Now click the Play button to preview and then tap Done.
Once you’ve increased the speed of time-lapse video, you can share it and post it where you want.
2. Slow Down The Time Lapse on iPhone
Just like you can speed up the time-lapse video on an iPhone, iMovie lets you slow down the time-lapse video.
Here’s how you can do it:
- Launch iMovie on your iPhone and start a new project to speed up the captured time-lapse video.
- Now, tap the plus sign visible at the start of the Projects screen, then select Movie.
- From the next window, find and select your recorded time-lapse video you want to speed up.
- Tap Create Movie button at the center-bottom of the screen.
- Now move the playhead to the start of the timeline and tap to select the video. At this point, you’ll see the timeline highlighted in yellow color.
- Look at the bottom of the screen and you’ll find the Speed icon. Tap the Speed icon and a sliding bar will appear with tortoise on its left side and hare on the right side.
- To slow down the time-lapse video, move the slider to the left side and you’ll see the duration of the video increased, indicating time-lapse video has been slowed down.
- Now click the Play button to preview and then tap Done.
Advanced Software: Edit A Time Lapse Video in Wondershare Filmora
If you have professionally captured RAW images of the time-lapse video, you need to use advanced software to stitch them together. That’s where Wondershare Filmora comes into play.
Wondershare Filmore is a professional video editing software with a wide variety of basic to advanced-level editing tools. It allows for turning RAW videos into fun, engaging, and professional videos.
If you need to refine your time-lapse video, you can use it and benefit from its capabilities. Similarly, you can use it to speed up or slow down your time-lapse video.
Let’s see how you can do both with Filmora.
Speed up your time-lapse video
Why speed up a time-lapse in the first place? There are a couple of reasons you might want to speed up your time-lapse.
When shooting with a fast lens, you might want to dial down the shutter speed to achieve more motion blur, to make the scenes more interesting. However, doing so can also create motion blur on time-lapse footage when sped up.
Another reason you might want to speed up your time-lapse is when you have too many frames. When you shoot at low frame rate (e.g. 15 FPS), not everyone will experience the same viewing quality if they don’t have high frame rate monitors. Speeding up the footage is one way to reduce the number of frames without compromising the quality of your video.
Follow these steps to speed up the time-lapse video using Filmora:
- Download and install Wondershare Filmora on your computer.
- Launch Filmora and click the New project button to open the video editor or drag and drop the file directly.
- Once imported, drag the file to the timeline.
- Click the Speed icon and select the Fast option. Select 2x, 4x, 8x, etc, depending on how much you want to speed up.
- Save the file and use it the way you want.
Slow down your time-lapse video
As the speed at which your time-lapse moves increases, so does the amount of motion blur. This can make for an undesirable look, especially in shots where there is already a lot of movement.
The best way to avoid this is to slow down your time-lapse as much as possible while still maintaining an interesting level of movement within your shot.
You can slow down your time-lapse video in Filmora following the same process as you’d do for speeding-up the video (Explained above). However, there’s only one catch; instead of opting for the Fast option choose Slow when you’re at step 4.
Conclusion
Hopefully, this guide has provided a good knowledge of how to put together your own time lapse video – and how to edit it on iPhone and Wondershare Filmora. It’s easier than you may think, and the resulting videos are quite impressive.
Take your time with it, record your movies from different angles, and don’t be afraid to create something unique and experimental.
How to Add Text Animation Online
Before you can publish your recorded video to your viewers, you need to polish the video so that you can get everyone’s appreciation. This is where the magic of video editing comes into the scene. Editing your video is not just about trimming unnecessary parts and adding transitions and effects. The titles and texts you display on your video play a major role in your video content. In fact, you can create a video based on texts and titles only.
Instead of showing static texts, you should create animated texts and place them in the video wherever appropriate. You do not need to download a video editor on your computer or smartphone to add animated text to your video. You can make text animation online using an online text animation maker. We will illustrate the steps to create animated text with three different online editors.
Part 1. Use Biteable Animated Text
Biteable is a popular online platform where you can create amazing animated text video using Biteable text video maker. You can add animated text to your videos as well as photos. The user interface of Biteable is extremely easy for all users. You have to first create an account for free to get started. There are various templates available to create your animated text video from scratch. Here are the steps to use Biteable online text animation maker to create a video based on animated texts.
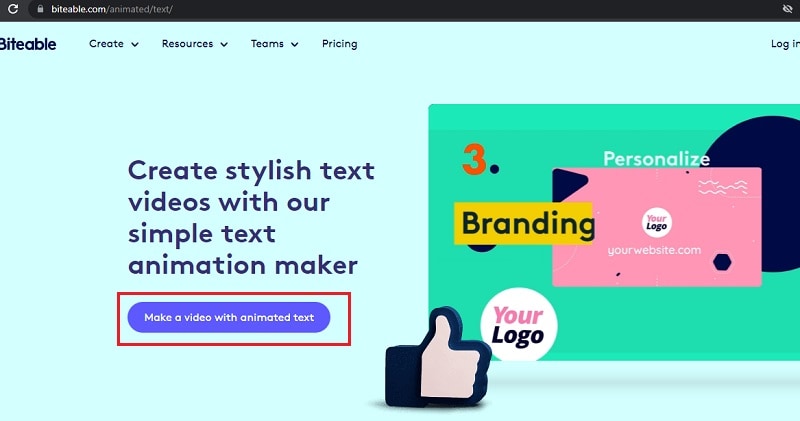
Step1Open your web browser and visit “biteable.com/animated/text”. Click on “Make a video with animated text” button.
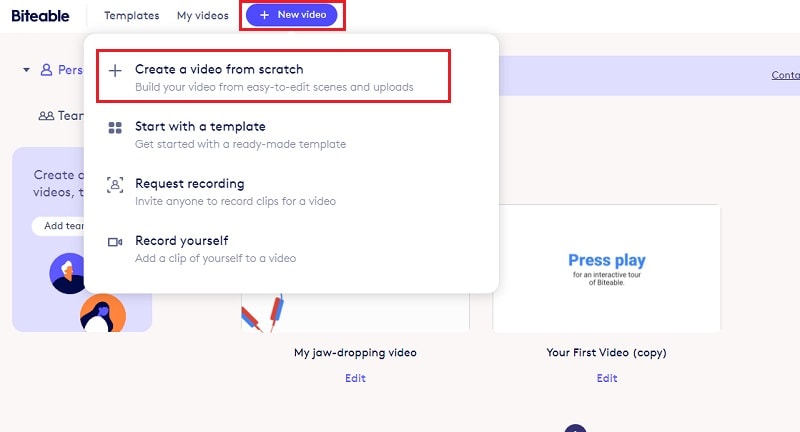
Step2Create an account by following the on-screen instructions. Click on New Video button and select “Create a video from scratch”.
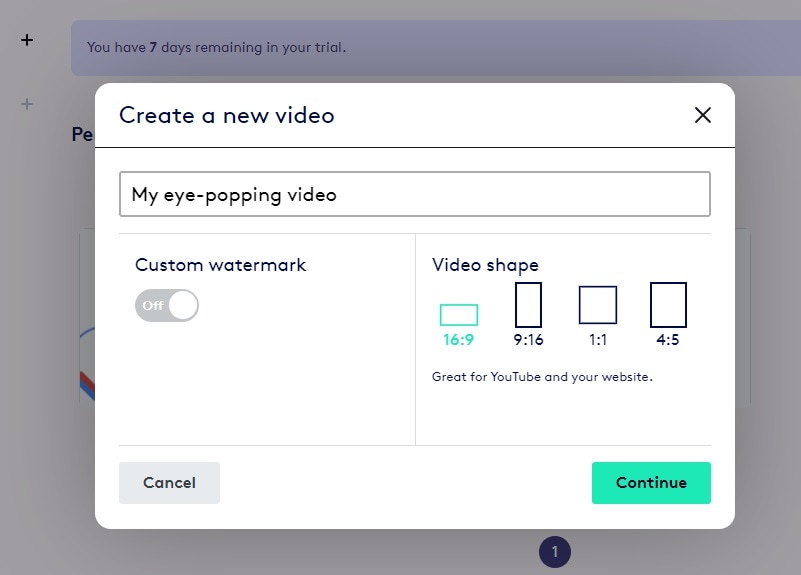
Step3Enter a name for the video and select a video shape as per your preference. Click on Continue button.
Step4Under Titles, select any template and it will be added to the Timeline. Similarly, you can add multiple titles templates, text templates, number templates and likewise. You will see them in the Timeline placed side by side. You can stretch their durations as per your requirements.
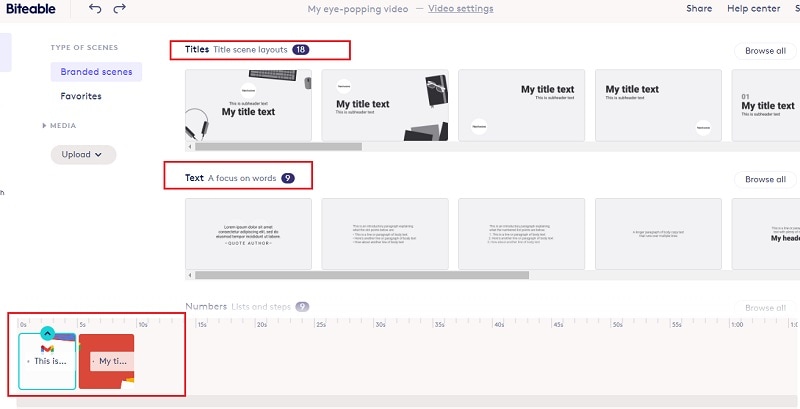
Step5Double-click on each template to edit the text in them and select the text animations as per your preference. Play the video and if you are satisfied, click on Publish button to save the video.
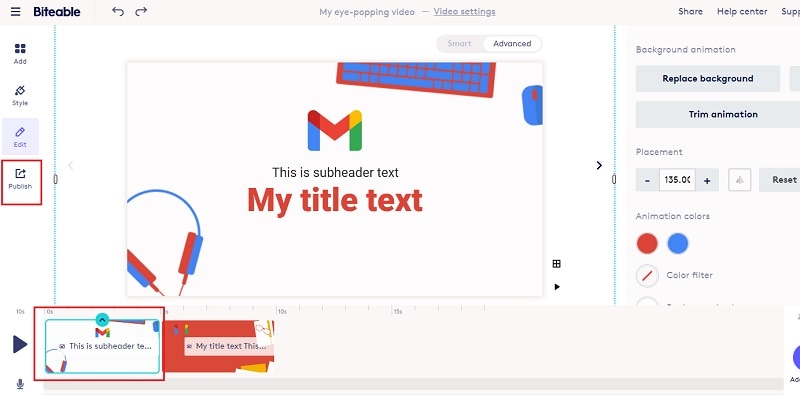
Part 2. Use Motionden Video Maker
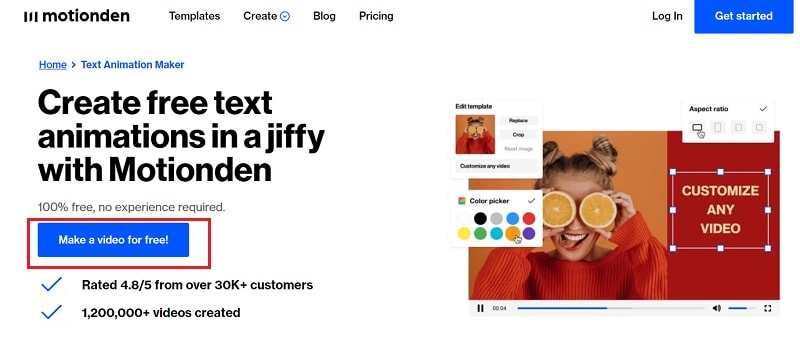
Motionden is yet another powerful text animation maker where you can create free text animations instantly. There are over 1500 templates available to choose from in order to create text videos from scratch. You can choose video templates from any category as per the video theme you want. Besides, you can upload your video or photo and add texts and music as per your preference. Here are the steps to create animated text online using Motionden Video Maker.
Step1Open your web browser and visit “motionden.com/video-maker/text-animation”. Click on “Make a video for free” button.
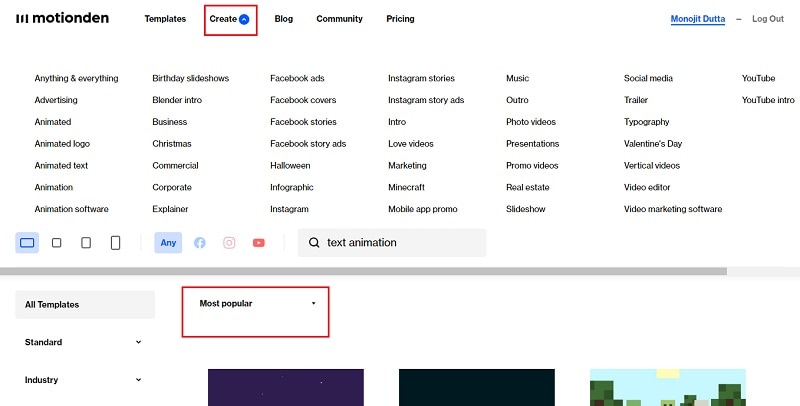
Step2Go to Create menu option and select any category of video templates. You can also check out the popular video templates and select anyone as per your preference.
Step3For the selected category, you need to select the desired video template. Click on Edit Video and you can make changes to the template on the video editor as per your requirements. You need to sign up for free in order to continue and edit the template.
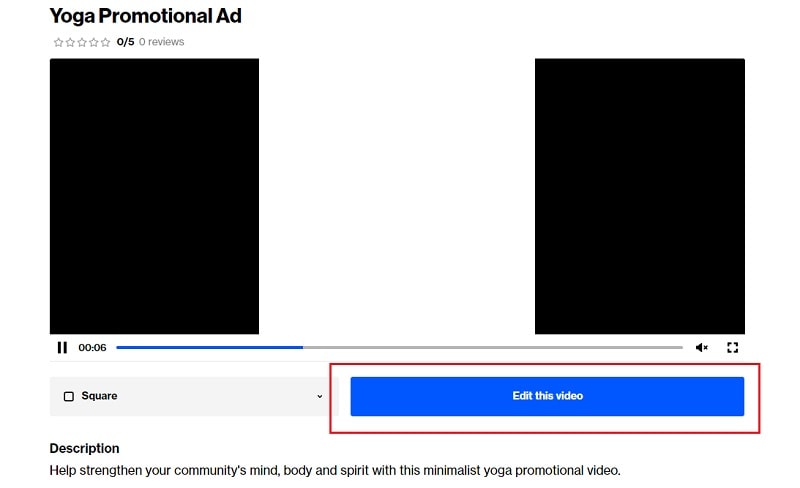
Step4Click on individual scenes and click on texts to customize them. Once the editing is done for each scene, click on Make Video button to build and save the text video.

Part 3. Use Flexclip Text Animation Tool
You can use Flexclip Text Animation Tool to create text video from scratch as well as add text to your recorded video. You should use Biteable and Motionden to create video with text effects only directly using video template while you should use Flexclip to edit your video and add text. You can add text effects to photos and videos and here are the steps to follow.
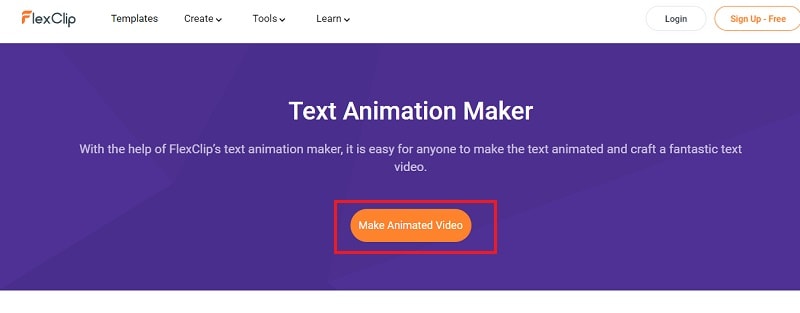
Step1Open web browser and visit “flexclip.com/features/text-animation.html”. Click on Make Animated Video button.
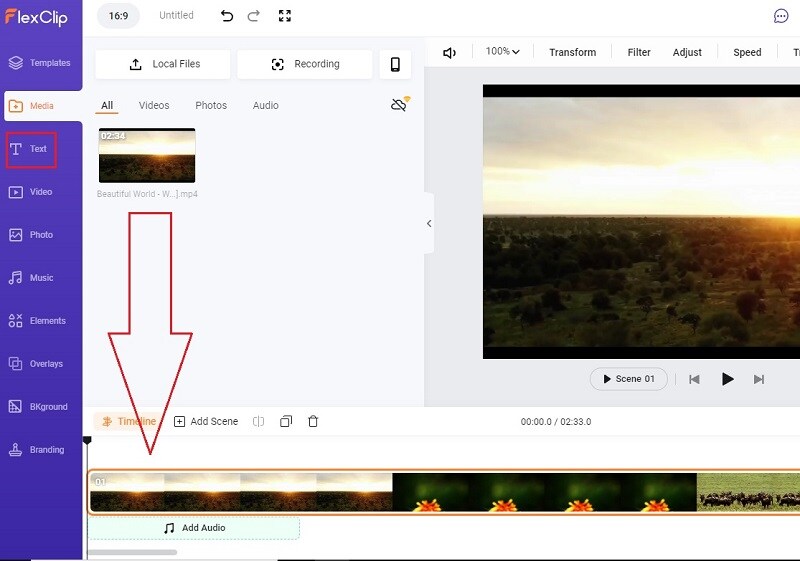
Step2You can choose from the available templates to create video with text from scratch. If you want to add text to your recorded video, go to Media tab. Click on Local Files button and upload your recorded video.

Step3Drag and drop the uploaded video into the Timeline. Thereafter, go to Text tab.
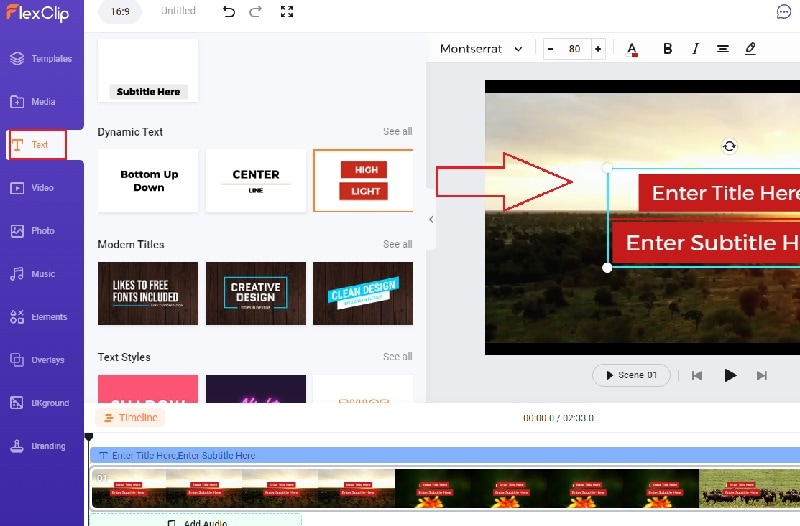
Step4You will see all the different text effects and animations. Place your mouse pointer to preview the animation. Drag and drop the select text template to the video on the Viewer. You can check the Timeline and stretch or compress the text layer as per your requirements.
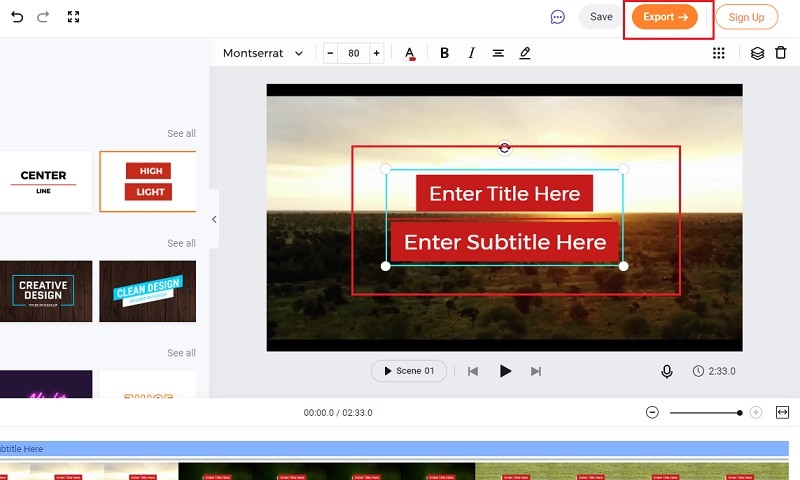
Step5Double-click on the text on Viewer window and customize the text as per your preference. Finally, click on Export button to save the edited video.
Conclusion
You can make video with animated text to make your presentation video eye-catching and attention-grabbing. We have mentioned three different online text animation makers that you can use to create animated text video from scratch by choosing different video templates. You can also edit your recorded video and add animated text wherever you want using Flexclip Text Animation Tool.
Free Download For Win 7 or later(64-bit)
Free Download For macOS 10.14 or later
How to Resize FLV Videos Efficiently[Windows, Mac, Android, iPhone & Online]
FLV Videos are Flash Video files with a .flv file extension. FLV video files were once one of the most popular video file types and the standard video format used for embedding videos on the internet and streaming. Even though video files like mp4 and mkv have gained more popularity today, you can still come across many Flv videos on the internet.
In this article, you’ll be learning How to Resize FLV Videos Efficiently on all the platforms. But wait, what exactly does the resizing mean? When you are working with videos, resizing can mean two things: one is changing the aspect ratio or resolution of the video and another is changing the file size of the video. So let’s see how we can resize the flv videos efficiently on different platforms:
Best FLV Editor to Resize FLV Videos on Windows and Mac – Filmora Video Editor [with steps]
Among many different video editors available today, Filmora Video Editor is the one that climbs up the rank to the top. It is the best FLV editor on Windows and Mac for resizing and editing flv videos. Different social media platforms require videos of different sizes, resolutions, and aspect ratios. For eg: YouTube requires horizontal video, TikTok requires vertical, Emails have a size limit for every file, etc. That’s when the Filmora Video Editor comes into play for fast and easy resizing of any video for different platforms.
For Win 7 or later (64-bit)
For macOS 10.14 or later
Why choose Filmora Video Editor for resizing FLV videos, you say?
- Simple UI and easy interface
- Easily crop or change the aspect ratio of the video
- Not all video editors support FLV video format, but the Filmora does
- Advanced export options to compress or change the file size of video
- Suitable for beginners as well as professionals
- Regular software updates and improvements
Plus, Filmora Video Editor has a free version, so you can instantly download the program, install it, and get started on resizing FLV Videos. Below is a step-by-step guide to resize FLV Videos on Windows and Mac with Wondershare Filmora Video Editor, so you can follow along!
Steps to resize FLV videos with Filmora Video Editor:
- Launch Filmora and open a new project
Run the Wondershare Filmora application on Windows or Mac after installing it. Then you should automatically be inside a new project. If not, you can manually open a new project by going to File on the top left corner and then clicking on ‘**New Project**’.

- Import the FLV video and add it to timeline
Click on ‘**Import Media Files**’ and import the flv video into project media from your computer’s file explorer. Then add the video to the timeline by dragging it inside the timeline.

- Edit and perform desired modifications (Optional)
If you are just looking to resize the FLV video file, then you can skip this step and move to step no. 4. Otherwise, you can do various editings on the video like cropping, muting, trimming, animating, etc. before resizing the video. Filmora provides a wide range of features for editing and adding effects to the video.

- Resize the video by changing the aspect ratio
Aspect ratio defines the shape of your video like if you want the video to be horizontal, vertical, square, or custom. Generally, the term ‘resizing video’ refers to changing the aspect ratio of the video. For that, go to the File and then to the Project Settings. Then on the Aspect Ratio box, select the one that you prefer or you can try custom scaling. You can choose your preferred resolution of the project too while you’re at it.

- Resize the video by cropping
When you change the aspect ratio of the project, some parts of your flv video might not fit or it might be shrunk small to fit. So you need to resize the flv video by cropping so that you can crop and focus on the part of the video you like. To crop the video, select the flv video clip in the timeline and click on the crop icon in the timeline toolbar. Now choose the ratio you want to crop and select the part you’d like to keep. Then click OK and your flv video will be resized.

- Adjust the file size of the video through export settings
After you’ve cropped and resized the Flv video, you need to export it by clicking the Export button on the top center part. There are different settings available for exporting the video. Click on the Settings button near the resolution and you’ll be shown some detailed preferences for exporting. Every setting here like frame rate, resolution, bitrate, etc. can affect the size of the output video.

Filmora Video Editor really makes the task of editing and resizing FLV videos easier, simpler, and faster. Since you now know the steps, it’s time you try it and resize your own FLV videos with this best FLV Editor for Windows and Mac.
Alternative Way to Resize FLV Videos on Windows
In case you want to try something different than Filmora, here are two alternative software (one paid and another free) that you can use to resize your FLV Videos on Windows:
- Movavi Video Editor Plus

Movavi Video Editor Plus is one of the best easy-to-use video editors that can help you to resize FLV videos as well as edit them on Windows. Its interface and functionalities are somewhat similar to that of the Filmora Video Editor. This is a paid software available for download on both Windows and Mac but you can try it for free with their 7 days trial version.
Steps to resize FLV videos on Windows with Movavi Video Editor:
- Install Movavi Video Editor and run the software on your PC. Then you should automatically be inside a new project in it.

- Import the FLV video file you want to resize through the ‘File Import’ tab on the left and drag it to the timeline.

- To resize the aspect ratio, expand the resolution options near the preview screen above the export button and select the preferred ratio.

- To crop or resize the video, select the clip in the timeline and use the crop tool to make adjustments as you wish. Then hit Apply to save changes.

- After the video is ready, export it with the Export button on the right side of the screen. Then choose your preferred settings for output and click on Start after which your video will be rendered and saved to your PC.

- VSDC Free Video Editor

VSDC Free Video Editor is another alternative to Filmora for resizing FLV videos on Windows. It is a free video editor that packs a wide range of editing features without any restrictions. However, it does have a paid version with some advanced features and hardware acceleration.
Steps to resize FLV videos on Windows with VSDC Free Video Editor:
- Install and open VSDC video editor on your PC. Then create a new project with preferred settings through the ‘Projects’ tab on the top left corner.

- Import the video file into the project by dragging and dropping it directly into the timeline.

- To resize the aspect ratio, click on the Projects Explorer and click on your project name. Then in the Properties windows on the right, manually adjust width, height, resolution, etc. according to your preferences.

- To crop and reposition your video, select the clip in the timeline and go to the Editor tab on the top. Then use the crop tool and adjust your video accordingly.

- Finally export your design through the Export project tab at the top with preferred settings.

Alternative Way to Resize FLV Videos on Mac
Wondershare Filmora Video Editor is also available for Mac operating system which is recommended to resize FLV videos but if you want to try out some other alternatives, then below are the two ways to resize FLV videos on Mac:
- VideoProc Converter

VideoProc is a powerful video editor/ converter that helps you edit, convert, and resize any kind of video. It also supports a wide range of codecs and video formats including flv. It is a paid software but you can also try their free trial version with some limitations.
Steps to resize FLV videos on Mac with VideoProc:
- Launch VideoProc on a Mac device and go inside the Video

- Add files in VideoProc by drag and drop method or directly through the ‘Add Video’ option.

- Then click on the Options (codec) on the right side of the video and change the resolutions and aspect ratio of the video as you want. You can also manage export settings like quality, codec, fps, bitrate, etc. from this tab.

- Then go to the Crop section inside the Edit Video tab and crop the video as you like with preview and different other options.

- Finally click Done to go back and hit the Run This’ll start rendering the video and will save it to your Mac device.

- Shotcut

Shotcut is another alternative to Filmora Video Editor for resizing FLV videos on Mac. It is a free, open-source, and cross-platform video editor that has a sleek and intuitive interface with many useful editing features which really makes it suitable for both beginners as well as advanced editors.
Steps to resize FLV videos on Mac with Shotcut:
- Run the Shotcut program on your Mac after installing it and create a new project.

- Import the Flv video file to the project by drag and drop method into the timeline.

- To change the resolution and aspect ratio of the video, go to the Settings tab, then Video mode, and choose the format you want.

- To crop the video, select the clip in the timeline and go to the Filters Now click on the ‘**+**’ icon and select Size, Position & Rotate under the Favorite section. Then adjust crop settings as you like.

- Finally, go to the Export section at the top and click on Advanced. Then configure the output settings as you like and click on Export File.

2 Ways to Resize FLV Videos on Android
Wouldn’t it be great if you could resize FLV videos on your android device rather than having to open your computer for every small task? Previously, this was a major issue due to a lack of good video editors for android with flv support but that’s no longer the case. Below are two ways to resize FLV videos on android:
- AndroVid – Video Editor, Video Maker

AndroVid is an easy-to-use, full-featured video editor especially developed to edit videos for social media like YouTube, TikTok, Facebook, Instagram, etc. It is not a very popular application with just over 300k+ downloads in Google Play Store, but after testing it out, we thought it deserves to be in this article. It is available for free to download from Google Play Store.
Steps to resize FLV videos on Android with AndroVid Video Editor:
- Open AndroVid Video Editor on an android phone and go inside the Videos

- Now select the FLV video file that you want to resize.

- Inside editor, tap on the Crop tool in the toolbar at the top.

- Then select the preferred Aspect ratio from the top right, reposition the video area and tap on the tick icon to save the video.

- If you need to change the resolution too, click on the three dots at the top right after the video is saved successfully. Then choose the preferred resolution, quality, and format and click on the tick icon to export.

2 Ways to Resize FLV Videos on iPhone
Like Android, you can also resize FLV videos on your iPhone on the go without needing to use your computer. Doing such editing on mobile phones can really save your time and effort, so here are 2 ways for you to resize FLV videos on iPhone:
- Cyberlink Powerdirector

Cyberlink Powerdirector is one of the most popular as well as powerful video editors for Android and iOS. It is a full-featured mobile video editor with over 130M+ downloads on the App Store which allows you to do an advanced level of editing. It is a paid software but also has a free version available for download.
Steps to resize FLV videos on iPhone with PowerDirector:
- Launch the PowerDirector app on your iPhone and create a new project. Unlike other apps, you cannot change the aspect ratio later, so you need to set the aspect ratio you want while creating a new project.

- Now add the FLV video file into the timeline by tapping on the ‘**+**’ icon on the video. Then tap on the play button at the top right to enter the editor.

- To resize the video, select the video clip in the timeline and tap on the pencil icon at the bottom left. Then use different crop tools available to resize your video as you want.

- After you resize the video, tap on the export button on the top right to export it. Then tap on Produce and Share, and produce resized video with preferred settings.

- Splice – Video Editor & Maker

Splice – Video Editor & Maker is a simple yet powerful application that makes it easy to create fully customized and professional-looking videos on iPhone. It is another great app for resizing FLV videos on iPhone with over 70M+ downloads on App Store and it is available for free.
Steps to resize FLV videos on iPhone with Splice:
- Open the Splice app on the iPhone and tap on the ‘**+**’ icon to create a new project.

- Now select the flv video file to add and start the project.

- To resize the video, tap on the gear icon at the top right corner which opens up Project settings from where you can change the aspect ratio.

- To crop the video, select the clip in the timeline and tap on the Crop option in the toolbar. You can crop and reposition the video from there.

- Then click on the Export icon at the top right corner to export the video with preferred configurations.

2 Ways to Resize FLV Videos Online
Resizing is not that big of a task and you might just want to quickly resize your Flv video and share it. So why bother installing and running large video editing programs on your computer or even mobile phones when you can easily resize your videos in the web browser? Yes, you read that right, and below are the 2 ways for you to resize FLV videos online:
- io

Veed is a simple online video editing tool that you can access from any device with the help of a web browser. It can help you resize your Flv videos easily within just a few clicks. It has a clean and beautiful interface with a responsive design which provides you with a good editing experience while using it. It is a paid tool but you can also try it for free before purchasing it.
Steps to resize FLV videos online with Veed.io:
- Go to veed.io on your web browser and click on ‘Upload Your Video’ to get started without any account.

- Now upload the FLV video or you can directly drag and drop the video there.

- After you upload the video, you’ll be taken inside the Veed editor. To change the aspect ratio, go to the Size section inside Project Settings and choose the size you want to resize to.

- To crop the video, select the clip in the timeline and directly resize the video from the preview area. And you can also use settings like ‘Fill the canvas’ and ‘Fit the canvas’ at the left side for ease.

- Then click on the Export button at the top right corner to open Export settings. Configure the settings as you like and click on ‘Export Video’ to render and download the video.

- Clideo

When it comes to resizing or editing videos online, Clideo is one of the best tools you can rely on. Like Veed.io, it has a clean and responsive interface and supports many video formats including flv. Clideo is free to use but also comes with various subscription plans for extra functionalities.
Steps to resize FLV videos online with Clideo:
- Go to clideo.com/resize-video and upload your video through ‘Choose file’ button.

- To resize the aspect ratio, choose your desired formats in the ‘Resize for’ section. You can also manually set the aspect ratio.

- Then just below that, you’ll find various cropping options. Use them to crop or resize the video as you like.

- Finally, click on the Export button at the bottom right corner to export the video. You can download the video or can directly save to cloud storage like Drive, Dropbox, etc.

FAQs about Resizing FLV Video
Here are some of the Frequently Asked Questions (FAQs) related to resizing FLV videos that you might be interested in:
- How do I make FLV files smaller?
You can make FLV files smaller with the help of any video editor that supports Flv video format by cutting and cropping out unnecessary parts, decreasing the resolution, and bitrate, and converting flv into another lighter file format.
- Which video editors support FLV file format?
There are few video editors like Filmora, Movavi, VSDC, etc. that support the FLV file format. But when it comes to editing FLV videos, Filmora Video Editor is the best choice.
- How do I view an FLV file?
FLV is one of the oldest video formats due to which most new and modern video players don’t recognize it or can’t play it. However, there are few programs like VLC media players which can help you view an FLV file. Or you can also convert the FLV file into other supported video formats with the help of a video converter.
- Can I convert a horizontal FLV video into a vertical one?
Yes, and that’s a piece of cake when you use Filmora Video Editor or other similar video editors. You just need to change the aspect ratio of the video or the project from horizontal (generally 16:9) to vertical (generally 9:16).
- Can I resize FLV video files on my mobile?
Though video editors on mobile are not as powerful as those on PC, there are some that are still capable enough to let you easily resize FLV video files on mobile devices. Some examples are Splice, Powerdirector, etc.
For macOS 10.14 or later
Why choose Filmora Video Editor for resizing FLV videos, you say?
- Simple UI and easy interface
- Easily crop or change the aspect ratio of the video
- Not all video editors support FLV video format, but the Filmora does
- Advanced export options to compress or change the file size of video
- Suitable for beginners as well as professionals
- Regular software updates and improvements
Plus, Filmora Video Editor has a free version, so you can instantly download the program, install it, and get started on resizing FLV Videos. Below is a step-by-step guide to resize FLV Videos on Windows and Mac with Wondershare Filmora Video Editor, so you can follow along!
Steps to resize FLV videos with Filmora Video Editor:
- Launch Filmora and open a new project
Run the Wondershare Filmora application on Windows or Mac after installing it. Then you should automatically be inside a new project. If not, you can manually open a new project by going to File on the top left corner and then clicking on ‘**New Project**’.
- Import the FLV video and add it to timeline
Click on ‘**Import Media Files**’ and import the flv video into project media from your computer’s file explorer. Then add the video to the timeline by dragging it inside the timeline.
- Edit and perform desired modifications (Optional)
If you are just looking to resize the FLV video file, then you can skip this step and move to step no. 4. Otherwise, you can do various editings on the video like cropping, muting, trimming, animating, etc. before resizing the video. Filmora provides a wide range of features for editing and adding effects to the video.
- Resize the video by changing the aspect ratio
Aspect ratio defines the shape of your video like if you want the video to be horizontal, vertical, square, or custom. Generally, the term ‘resizing video’ refers to changing the aspect ratio of the video. For that, go to the File and then to the Project Settings. Then on the Aspect Ratio box, select the one that you prefer or you can try custom scaling. You can choose your preferred resolution of the project too while you’re at it.
- Resize the video by cropping
When you change the aspect ratio of the project, some parts of your flv video might not fit or it might be shrunk small to fit. So you need to resize the flv video by cropping so that you can crop and focus on the part of the video you like. To crop the video, select the flv video clip in the timeline and click on the crop icon in the timeline toolbar. Now choose the ratio you want to crop and select the part you’d like to keep. Then click OK and your flv video will be resized.
- Adjust the file size of the video through export settings
After you’ve cropped and resized the Flv video, you need to export it by clicking the Export button on the top center part. There are different settings available for exporting the video. Click on the Settings button near the resolution and you’ll be shown some detailed preferences for exporting. Every setting here like frame rate, resolution, bitrate, etc. can affect the size of the output video.
Filmora Video Editor really makes the task of editing and resizing FLV videos easier, simpler, and faster. Since you now know the steps, it’s time you try it and resize your own FLV videos with this best FLV Editor for Windows and Mac.
Alternative Way to Resize FLV Videos on Windows
In case you want to try something different than Filmora, here are two alternative software (one paid and another free) that you can use to resize your FLV Videos on Windows:
- Movavi Video Editor Plus
Movavi Video Editor Plus is one of the best easy-to-use video editors that can help you to resize FLV videos as well as edit them on Windows. Its interface and functionalities are somewhat similar to that of the Filmora Video Editor. This is a paid software available for download on both Windows and Mac but you can try it for free with their 7 days trial version.
Steps to resize FLV videos on Windows with Movavi Video Editor:
- Install Movavi Video Editor and run the software on your PC. Then you should automatically be inside a new project in it.
- Import the FLV video file you want to resize through the ‘File Import’ tab on the left and drag it to the timeline.
- To resize the aspect ratio, expand the resolution options near the preview screen above the export button and select the preferred ratio.
- To crop or resize the video, select the clip in the timeline and use the crop tool to make adjustments as you wish. Then hit Apply to save changes.
- After the video is ready, export it with the Export button on the right side of the screen. Then choose your preferred settings for output and click on Start after which your video will be rendered and saved to your PC.
- VSDC Free Video Editor
VSDC Free Video Editor is another alternative to Filmora for resizing FLV videos on Windows. It is a free video editor that packs a wide range of editing features without any restrictions. However, it does have a paid version with some advanced features and hardware acceleration.
Steps to resize FLV videos on Windows with VSDC Free Video Editor:
- Install and open VSDC video editor on your PC. Then create a new project with preferred settings through the ‘Projects’ tab on the top left corner.
- Import the video file into the project by dragging and dropping it directly into the timeline.
- To resize the aspect ratio, click on the Projects Explorer and click on your project name. Then in the Properties windows on the right, manually adjust width, height, resolution, etc. according to your preferences.
- To crop and reposition your video, select the clip in the timeline and go to the Editor tab on the top. Then use the crop tool and adjust your video accordingly.
- Finally export your design through the Export project tab at the top with preferred settings.
Alternative Way to Resize FLV Videos on Mac
Wondershare Filmora Video Editor is also available for Mac operating system which is recommended to resize FLV videos but if you want to try out some other alternatives, then below are the two ways to resize FLV videos on Mac:
- VideoProc Converter
VideoProc is a powerful video editor/ converter that helps you edit, convert, and resize any kind of video. It also supports a wide range of codecs and video formats including flv. It is a paid software but you can also try their free trial version with some limitations.
Steps to resize FLV videos on Mac with VideoProc:
- Launch VideoProc on a Mac device and go inside the Video
- Add files in VideoProc by drag and drop method or directly through the ‘Add Video’ option.
- Then click on the Options (codec) on the right side of the video and change the resolutions and aspect ratio of the video as you want. You can also manage export settings like quality, codec, fps, bitrate, etc. from this tab.
- Then go to the Crop section inside the Edit Video tab and crop the video as you like with preview and different other options.
- Finally click Done to go back and hit the Run This’ll start rendering the video and will save it to your Mac device.
- Shotcut
Shotcut is another alternative to Filmora Video Editor for resizing FLV videos on Mac. It is a free, open-source, and cross-platform video editor that has a sleek and intuitive interface with many useful editing features which really makes it suitable for both beginners as well as advanced editors.
Steps to resize FLV videos on Mac with Shotcut:
- Run the Shotcut program on your Mac after installing it and create a new project.
- Import the Flv video file to the project by drag and drop method into the timeline.
- To change the resolution and aspect ratio of the video, go to the Settings tab, then Video mode, and choose the format you want.
- To crop the video, select the clip in the timeline and go to the Filters Now click on the ‘**+**’ icon and select Size, Position & Rotate under the Favorite section. Then adjust crop settings as you like.
- Finally, go to the Export section at the top and click on Advanced. Then configure the output settings as you like and click on Export File.
2 Ways to Resize FLV Videos on Android
Wouldn’t it be great if you could resize FLV videos on your android device rather than having to open your computer for every small task? Previously, this was a major issue due to a lack of good video editors for android with flv support but that’s no longer the case. Below are two ways to resize FLV videos on android:
- AndroVid – Video Editor, Video Maker
AndroVid is an easy-to-use, full-featured video editor especially developed to edit videos for social media like YouTube, TikTok, Facebook, Instagram, etc. It is not a very popular application with just over 300k+ downloads in Google Play Store, but after testing it out, we thought it deserves to be in this article. It is available for free to download from Google Play Store.
Steps to resize FLV videos on Android with AndroVid Video Editor:
- Open AndroVid Video Editor on an android phone and go inside the Videos
- Now select the FLV video file that you want to resize.
- Inside editor, tap on the Crop tool in the toolbar at the top.
- Then select the preferred Aspect ratio from the top right, reposition the video area and tap on the tick icon to save the video.
- If you need to change the resolution too, click on the three dots at the top right after the video is saved successfully. Then choose the preferred resolution, quality, and format and click on the tick icon to export.
2 Ways to Resize FLV Videos on iPhone
Like Android, you can also resize FLV videos on your iPhone on the go without needing to use your computer. Doing such editing on mobile phones can really save your time and effort, so here are 2 ways for you to resize FLV videos on iPhone:
- Cyberlink Powerdirector
Cyberlink Powerdirector is one of the most popular as well as powerful video editors for Android and iOS. It is a full-featured mobile video editor with over 130M+ downloads on the App Store which allows you to do an advanced level of editing. It is a paid software but also has a free version available for download.
Steps to resize FLV videos on iPhone with PowerDirector:
- Launch the PowerDirector app on your iPhone and create a new project. Unlike other apps, you cannot change the aspect ratio later, so you need to set the aspect ratio you want while creating a new project.
- Now add the FLV video file into the timeline by tapping on the ‘**+**’ icon on the video. Then tap on the play button at the top right to enter the editor.
- To resize the video, select the video clip in the timeline and tap on the pencil icon at the bottom left. Then use different crop tools available to resize your video as you want.
- After you resize the video, tap on the export button on the top right to export it. Then tap on Produce and Share, and produce resized video with preferred settings.
- Splice – Video Editor & Maker
Splice – Video Editor & Maker is a simple yet powerful application that makes it easy to create fully customized and professional-looking videos on iPhone. It is another great app for resizing FLV videos on iPhone with over 70M+ downloads on App Store and it is available for free.
Steps to resize FLV videos on iPhone with Splice:
- Open the Splice app on the iPhone and tap on the ‘**+**’ icon to create a new project.
- Now select the flv video file to add and start the project.
- To resize the video, tap on the gear icon at the top right corner which opens up Project settings from where you can change the aspect ratio.
- To crop the video, select the clip in the timeline and tap on the Crop option in the toolbar. You can crop and reposition the video from there.
- Then click on the Export icon at the top right corner to export the video with preferred configurations.
2 Ways to Resize FLV Videos Online
Resizing is not that big of a task and you might just want to quickly resize your Flv video and share it. So why bother installing and running large video editing programs on your computer or even mobile phones when you can easily resize your videos in the web browser? Yes, you read that right, and below are the 2 ways for you to resize FLV videos online:
- io
Veed is a simple online video editing tool that you can access from any device with the help of a web browser. It can help you resize your Flv videos easily within just a few clicks. It has a clean and beautiful interface with a responsive design which provides you with a good editing experience while using it. It is a paid tool but you can also try it for free before purchasing it.
Steps to resize FLV videos online with Veed.io:
- Go to veed.io on your web browser and click on ‘Upload Your Video’ to get started without any account.
- Now upload the FLV video or you can directly drag and drop the video there.
- After you upload the video, you’ll be taken inside the Veed editor. To change the aspect ratio, go to the Size section inside Project Settings and choose the size you want to resize to.
- To crop the video, select the clip in the timeline and directly resize the video from the preview area. And you can also use settings like ‘Fill the canvas’ and ‘Fit the canvas’ at the left side for ease.
- Then click on the Export button at the top right corner to open Export settings. Configure the settings as you like and click on ‘Export Video’ to render and download the video.
- Clideo
When it comes to resizing or editing videos online, Clideo is one of the best tools you can rely on. Like Veed.io, it has a clean and responsive interface and supports many video formats including flv. Clideo is free to use but also comes with various subscription plans for extra functionalities.
Steps to resize FLV videos online with Clideo:
- Go to clideo.com/resize-video and upload your video through ‘Choose file’ button.
- To resize the aspect ratio, choose your desired formats in the ‘Resize for’ section. You can also manually set the aspect ratio.
- Then just below that, you’ll find various cropping options. Use them to crop or resize the video as you like.
- Finally, click on the Export button at the bottom right corner to export the video. You can download the video or can directly save to cloud storage like Drive, Dropbox, etc.
FAQs about Resizing FLV Video
Here are some of the Frequently Asked Questions (FAQs) related to resizing FLV videos that you might be interested in:
- How do I make FLV files smaller?
You can make FLV files smaller with the help of any video editor that supports Flv video format by cutting and cropping out unnecessary parts, decreasing the resolution, and bitrate, and converting flv into another lighter file format.
- Which video editors support FLV file format?
There are few video editors like Filmora, Movavi, VSDC, etc. that support the FLV file format. But when it comes to editing FLV videos, Filmora Video Editor is the best choice.
- How do I view an FLV file?
FLV is one of the oldest video formats due to which most new and modern video players don’t recognize it or can’t play it. However, there are few programs like VLC media players which can help you view an FLV file. Or you can also convert the FLV file into other supported video formats with the help of a video converter.
- Can I convert a horizontal FLV video into a vertical one?
Yes, and that’s a piece of cake when you use Filmora Video Editor or other similar video editors. You just need to change the aspect ratio of the video or the project from horizontal (generally 16:9) to vertical (generally 9:16).
- Can I resize FLV video files on my mobile?
Though video editors on mobile are not as powerful as those on PC, there are some that are still capable enough to let you easily resize FLV video files on mobile devices. Some examples are Splice, Powerdirector, etc.
Best GIF to MOV Converters
Powerful Video Editor - Wondershare Filmora
Provide abundant video effects - A creative video editor
Powerful color correction and grading
Detailed tutorials provided by the official channel
Nowadays, we tend to see more GIFs in email. Many businesses incorporate video in email to promote their products, but why use a video when you can convert GIFs to MOV?
Everyone needs to convert one file type to another sometimes and it can become a bit of a hassle. A lot of conversion apps and websites aren’t free, so you might want to find out if there’s an online or offline app that can help you to do it. This article will look at some of the top options that are worth looking at.
Best 5 GIF to MOV Converter Software
Love GIFs, but worried about support on email clients? It’s time to convert your animated GIFs to MOVs, eliminating the need for MP4 conversion. Here are some of the top GIF-to-MOV converters to get you started.
1. Wondershare Filmora

You may have heard of Filmora by Wondershare , a powerful but easy-to-use video editing suite that provides animation, video effects, and editing capabilities to users. But did you know you can convert GIFs to MOV files with it?
Wondershare Filmora lets you convert animated GIF files to video files in a breeze. So if you want to turn your unforgettable GIF images into remarkable home movies or promo videos, this free GIF to MOV converter will be your best choice!
It works well in real-time and you can also create short videos with it. For a very long time, this video editor has gained popularity among millions of people.
Pros
Available for all devices
Professional to run offline
Best offline video editing tool
Supports screen recording
User-friendly interface
Cons
Free version has watermarks
A bit more expensive than others
Not sophisticated with 4k video editing
2. Adobe Premiere Pro

Adobe Premiere Pro is the top-of-the-line video editing software. It is one of the most powerful and professional applications, and it is more than able to handle even the most serious projects.
If you are a professional video editor and have all Adobe products, then you’ll find this conversion process straightforward. However, if you are an amateur and don’t have any prior experience with editing software – then converting GIF to MOV can be quite challenging.
Still, for many people, it is simply too expensive, which is why choosing a less expensive option may be appropriate. Fortunately, there are other similar programs that are excellent choices in terms of quality versus price.
Pros
Support a plethora of file formats
Very professional video editing
Runs effectively on Windows OS, macOS
Integrated VR Support
Cons
Not an easy application for non-tech users
Free for only 30 day
3. Movavi Video Editor Plus

Movavi Video Editor Plus is one of the most favorite GIF to MOV offline and online converters because it offers all the options and tools you need to make videos. It comes with a lot of useful features, including 20+ filters, 15+ transition effects, 40+ video and audio effects, 60+ built-in templates, and 34 color schemes.
You simply upload our gif file, select the format of your choice, e.g. MOV, and run the process. This tool provides immediate results and an easy-to-use interface.
It’s a great option for users who want to create quality videos from animated GIFs but don’t want to pay a lot for the software.
Pros
Chroma keying
Sharp movie-creation app
Highly adaptive
Easy functions
Cons
No advance trimming options available for editing
Doesn’t support editing on Apple Silicon M1
4. VLC

VLC has been a popular video converter for many years because it can also be used as a multimedia player, and this is why we are going to introduce you to this software. If you are looking for a free, complete, and safe converter to convert your files easily, this is the best option for you.
VLC (Videolan Media Player) is a program with a large number of use cases. It can be used to play your music and videos, but it’s also an audio and video converter as well. This Multiplatform program is available for Windows, Mac, Linux, Android, and iOS systems.
The interface is very intuitive and easy to learn. We don’t need to mention that it is constantly being updated with new features from the development team.
Pros
Simple interface
Can be installed quickly
Free to use
Best solution to play all video formats
Cons
No updated features
5. Cyberlink PowerDirector

The CyberLink PowerDirector is a complete video editing suite used for creating outstanding videos from scratch. It comes with a number of advanced editing tools and offers simple three editing modes to users that help them create compelling videos at faster speeds.
With it, you can easily create photo slideshows and turn your visual memories into video masterpieces like a pro. It has advanced video editing tools and trendy transitions and effects. Also, the tool is a good converter of all formats that you can use as better content for multiple tasks.
Pros
Support over 100 stellar audio and video editing features
Supports end-to-end 3D and 4k animations
Fast in action and functions
Friendly layout
Support amazing effects, filters, themes, and transitions
Cons
Ads creating distraction
Expensive tool
Online GIF to MOV Converter
Why go to the offline gif to MOV converter page? Online converters are far easier to use as they don’t require you to install any software. For instance, you can convert gif files to MOV files just by logging onto different websites. All that is required is a few simple clicks and you are ready for your next step.
1. CloudConvert

If you ever need to convert a gif file to MOV or one of the other formats supported by CloudConvert , you’re in luck. CloudConvert is an online platform through which you can quickly and easily convert gifs to MOV or any other format. With it, you’ll enjoy fast conversions with lossless compression and a batch conversion feature to ensure performance-friendly uploads. Best of all, the service is free for personal use, has no hidden fees, and requires no downloads or plugins.
Pros
Free to use
Interactive layout
Smooth experience
Provides extra customization of file
Cloud-based technology
Cons
Large volume files can be troubling for tool
Work pace depends on internet speed
2. EZGIF.COM

Ezgif.com is an interesting website. It helps GIF fans around the world to convert their favorite gif image to MOV or MP4. It offers a fast, efficient, and high-quality conversion service. Their commitment to customer satisfaction is genuinely remarkable and the attention they give new clients is excellent. Would recommend them highly!
Apart from converting files, Ezgif.com is an awesome animated GIF maker. It converts, resizes, edits, and creates GIF animations, and works on virtually any device or browser. Nowadays, more and more people are switching to chat applications that support animated graphics, over old email systems so it’s useful for both personal and professional use.
Pros
Absolutely safe website
Upload file from cloud, computer, or URL
Quick functionality
No need for paid subscription
Cons
The design seems outdated
No feature of file customization
3. Convertio

Whether you need to convert a GIF to an AVI, MP4, or MOV, Convertio is one of the most comprehensive online programs which can do this for you.
It is an online conversion tool that lets you choose from and convert MOV, AVI, WMV, FLV, MPEG-1, MPEG-2, ASF, QT, and DivX formats. It boasts a ton of supported formats with really fast conversion (up to 3 files per minute) that can be done by drag & dropping.
Its simple interface shows two blocks from which you can select which file will be converted to which format. Choosing files, selecting format, and converting them is all that this process is about. So here we conclude that Convertio is so far the best and easy-to-use interface for all online conversions of documents.
Pros
No guide is required for starting conversion
Fast conversion tool
Satisfied performance
Highly interactive
Affordable to experience premium features
Cons
Free trial is limited
100 MB per file is daily limit under freemium use
How to Convert GIF to MOV Using Wondershare Filmora?
Step 1: Download and install
To get started, download the software for free and install it on your computer.

Step 2: Make a new project
Click on the filmora icon to open the software interface and create a new project. On the top menu, go to File and choose “Project Settings”.

Step 3: Download GIF
Download the GIF to convert and save it to your document folder or desktop.
Step 4: Import GIF
Click on the timeline to import your GIF. Now click the highlighted “EXPORT” at the top.

Step 5: Save MOV format
On the options given, select MOV as your output video file format and tap Find Target to save your video file.
Conclusion
The two main types of GIF to MOV Converters are online ones and offline apps. The most popular offline converter is Wondershare Filmora, as it’s been around longer than most. On the other hand, the best online video editor and file converter is Convertio. It supports a wide range of input and output formats, but there are many other free converters that convert from GIF to MOV, so you might like to check them out before deciding which one to use.
Also read:
- Top 10 Secret Tips & Tricks to Use in Wondershare Filmora for 2024
- New In 2024, How to Use iMovie Text Effects
- Updated In 2024, Add Neon Effects to Your Dance Videos with the Help of Wondershare Filmora After Reading This Article. It Will Give a More Thrilling and Exciting Appearance
- Updated 2024 Approved Guaranteed 10 Storyboard Creators To Make Animation Easier
- New 2024 Approved How to Change Quicktime Player Speed on Mac?
- 2024 Approved How to Remove Audio From Videos with FFmpeg?
- New Looking for a Video Editor Where You Can Edit Your Tutorial and Training Videos? Camtasia Is a Great Choice. But Is It the Best Video Editor Available? Find Out From Our Camtasia Review for 2024
- SBV to SRT How to Convert YouTube SBV Subtitle to SRT Format
- In 2024, Adding Text to Your Collage Not only Makes It Look Sophisticated but Also Versatile. So, if You Too Are Looking for Ways to Create a Collage Text, Check Out Our Article
- New Learn How to Change Aspect Ratio in iMovie on Mac, iPad, and iPhone in This Guide. And You Can Also Use iMovie Alternatives Like Wondershare Filmora to Edit Your Videos for 2024
- New 2024 Approved 2 Solutions to Crop a Video Using After Effects
- Updated In 2024, Learn How to Merge Audio and Video Like a Pro with This Step-by-Step Guide to Using FFmpeg. Create Seamless Videos and Improve Your Video Production Skills
- New In 2024, Top 15 LUTS to Buy
- Updated 2024 Approved Find Out How to Add Subtitles in the VLC Media Player on Your Windows and Mac System with Quick and Simple Instructions
- Updated How To Change Speed of Video in Final Cut Pro, In 2024
- In 2024, Discover the Ultimate LUTs for Wondershare Filmora Uncover the Answer
- Updated How to Do Censor Effects with Filmora
- New Camtasia Review – Is It The Best Video Editor, In 2024
- Updated 7 Best MP4 Editors for Mac Edit MP4 in Mac
- Updated How to Use LUTs in Lumafusion & Free Resource for 2024
- New A Roster of 8 Best Color Match Generators
- Updated Do You Want to Give Your Videos and Photos a Cinematic Look but Couldnt Find How? Here Are Different Cinematic LUTs Discussed that You Can Try and Use
- Updated Want to Capture Captivating, Detailed Videos? If Yes, Then You Need to Learn the Recording of Super Slow Motion Videos. In This Article, I Will Show You How to Record a Super Slow-Motion Video on Your Android and iPhone
- Updated 2024 Approved 6 Instant Ways to Make Windows 10 Slideshow
- Updated Best Guide of 8 Photo Collage Apps for PC
- New 2024 Approved Add Effects to Video Online
- How To Unlock The iPhone 11 Pro SIM Lock 4 Easy Methods
- Pokémon Go Cooldown Chart On Xiaomi 13 Ultra | Dr.fone
- Forgotten The Voicemail Password Of Realme GT 5 Pro? Try These Fixes
- Apple iPhone 15 Plus Asking for Passcode after iOS 17/14 Update, What to Do? | Dr.fone
- In 2024, How To Change Your Apple ID Password On your Apple iPhone 15 Plus
- In 2024, Top 15 Apps To Hack WiFi Password On Oppo Reno 11 5G
- How To Enable USB Debugging on a Locked Samsung Galaxy S24+ Phone
- How to Screen Mirroring Oppo A38 to PC? | Dr.fone
- Use Device Manager to reinstall hardware drivers in Windows 11 & 10 & 7
- Trouble with Apple iPhone XS Max Swipe-Up? Try These 11 Solutions
- How to Change Lock Screen Wallpaper on Vivo T2x 5G
- In 2024, How to Fake GPS on Android without Mock Location For your Vivo Y55s 5G (2023) | Dr.fone
- Methods to Change GPS Location On Realme Narzo 60 Pro 5G | Dr.fone
- Pattern Locks Are Unsafe Secure Your Vivo Y100 Phone Now with These Tips
- Ways To Find Unlocking Codes For Motorola Edge 40 Neo Phones
- Title: New How to Edit A Time Lapse Video on iPhone, In 2024
- Author: Morgan
- Created at : 2024-04-24 01:02:35
- Updated at : 2024-04-25 01:02:35
- Link: https://ai-video-editing.techidaily.com/new-how-to-edit-a-time-lapse-video-on-iphone-in-2024/
- License: This work is licensed under CC BY-NC-SA 4.0.
