:max_bytes(150000):strip_icc():format(webp)/GettyImages-971165690-1e0af1d9299f4fdba1225c2d20c739f2.jpg)
New How to Rotate a Video in Windows 10

How to Rotate a Video in Windows 10
There are times where you may need to rotate a video into landscape if the video is shot in portrait. This is because watching a video in portrait orientation on a computer is horrible as the video screen size is compressed and the two sides have black screen. Instead, you can rotate video Windows into landscape, you can watch the same video comfortably. Besides, there are times when the entire video is shot at a certain angle as the video device was not properly aligned.
If you are a Windows user, rotating a video in Windows through Windows Media Player is not possible. However, Windows 10 comes with Photos app that contains a video editor to rotate a video and save it permanently. If you use VLC Media Player, you can rotate any video temporarily as well permanently at any desired angle. You can also rotate a video online without installing any software. In this article, we will illustrate how to rotate a video in Windows.
Way 1. Use Photos App
If you are a Windows 10, you can use the pre-installed Photos app to rotate a video and save it permanently. Photos app comes with an inbuilt video editor where rotating a video in Windows 10 is so easy. If you are using an older version of Windows, you can relate Photos app with Windows Movie Maker. Anyway, here are the steps to rotate any video on Photos app.
Step 1: From Start menu, search for “Photos” and open Photos app.

Step 2: Select Video Editor option which is available at the top of the screen. Once, Video Editor opens, click on New Video Project button.

Step 3: Put a name for the project and click on Ok. Thereafter, click on Add button and select the video file from your hard drive that you want to rotate.

Step 4: Drag and drop the video file into Timeline. Thereafter, Click on Rotate icon to turn the video by 90 degrees. You can click again to rotate the video further by 90 degrees again.

Step 5: Once done, click on Finish Video option and save the video file in the destination folder.
Way 2. Use Filmora
The best software on how to rotate a video in Windows 10 to Windows 7 is Wondershare Filmora . It is a professional video editor and there are loads of features to edit the video including rotation. You can make a video more attractive and crisp to publish on professional platforms like YouTube. Here are the steps to rotate a video on Filmora.
Step 1: Download and install Filmora. Open the software and import the video file that you want to rotate. Then drag and drop it on Timeline.
For Win 7 or later (64-bit)
For macOS 10.12 or later
Step 2: From Video Editing panel, expand Transform option and use the slider on Rotate option to rotate the video at any angle. Once done, click on OK button.

Step 3: Go to Export option and click on Export button. The new video files with its new rotation will be saved in the destination folder.

Way 3. Use VLC Media Player
Most Windows users generally install VLC Media Player to watch movies. This is because Windows Media Player supports only limited file formats. Most movie files that you download online are supported by VLC but not on Windows Media Player. Here are the steps on how to rotate a video in Windows temporarily using VLC Media Player.
Step 1: Open VLC Media Player. Go to Media menu and click on Open File option. Select the video file from your hard drive that you want to rotate.
Step 2: Once the video opens, go to Tools menu and click on Effects and Filters option.

Step 3: On Adjustments and Effects window, click on Video Effects tab.
Step 4: Under Video Effects tab, click on Geometry tab.
Step 5: Turn of Transform checkbox and click on drop-down menu to select the required option. You can rotate the video by 90 degrees, 180 degrees and 270 degrees.

Step 6: To rotate the video at any desired angle, turn on Rotate checkbox and select the desired angle.

Step 7: Finally, click on Save and then Close button.

Please note that when you rotate a video temporarily, it is for a one-time watch only. When you open the video again in any other media player, it will have the original orientation.
Way 4. Use EZGIF Online Tool
If you have short video files and you want to upload them on social media platforms, you can convert them into GIF files. You can convert any video file to EZGIF. Therefore, instead of video files, if you want to rotate GIF files, EZGIF is highly useful as an online tool. In fact, you can also convert GIF files into MP4 files. Here are the steps to follow to rotate short video files using EZGIF online tool.
Step 1: Open your web browser and open Ezgif.com.
Step 2: Click on Video to GIF option.
Step 3: Click on Choose File button and select the short video file from your hard drive.

Step 4: Click on Upload Video button and wait for the conversion. Thereafter, download the GIF file.
Step 5: To rotate the GIF file, go to Rotate option. Click on Choose File button.

Step 6: Select the GIF file and click on Upload.
Step 7: You can select from provided rotation options or mention rotation angle explicitly and click on Apply Rotation button.

Wait for the rotation effect and download the file on your hard drive.
FAQs about Rotate Video in Windows 10
1. How do I rotate a video in Windows 10?
To rotate a video in Windows 10, you can use the built-in Photos app. Open the app and select the video you want to rotate. Click on the Edit & Create button at the top of the screen and select Rotate left or Rotate right to adjust the video orientation.
2. Can I rotate a video in Windows Media Player?
No, you can’t rotate a video in Windows Media Player. This feature is only available in the Photos app. However, you can use a third-party video editing software to rotate your videos.
3. How do I save the rotated video?
After rotating the video in the Photos app, click on the Save a copy button at the top of the screen. You can then choose the destination folder and file name for the newly rotated video.
4. What should I do if the video is upside down after rotating it?
If the video is upside down after rotating it, you may have rotated it in the wrong direction. Try rotating it in the opposite direction and see if that fixes the issue. If not, you may need to use a third-party video editing software to rotate the video.
5. Can I rotate a video without losing quality?
Rotating a video can sometimes result in a loss of quality, especially if the video is compressed or low-resolution. However, using a good video editing software can help minimize the loss of quality. Make sure to save the rotated video in the same format and resolution as the original file to avoid further loss of quality.
Conclusion
We have provided you all the possible ways to rotate video Windows. If you want to rotate with pre-installed software, you have Photos app. If you have VLC Media Player installed, you can do the rotation temporarily and permanently. You can also use Ezgif online tool to rotate animated files without installing any
For macOS 10.12 or later
Step 2: From Video Editing panel, expand Transform option and use the slider on Rotate option to rotate the video at any angle. Once done, click on OK button.

Step 3: Go to Export option and click on Export button. The new video files with its new rotation will be saved in the destination folder.

Way 3. Use VLC Media Player
Most Windows users generally install VLC Media Player to watch movies. This is because Windows Media Player supports only limited file formats. Most movie files that you download online are supported by VLC but not on Windows Media Player. Here are the steps on how to rotate a video in Windows temporarily using VLC Media Player.
Step 1: Open VLC Media Player. Go to Media menu and click on Open File option. Select the video file from your hard drive that you want to rotate.
Step 2: Once the video opens, go to Tools menu and click on Effects and Filters option.

Step 3: On Adjustments and Effects window, click on Video Effects tab.
Step 4: Under Video Effects tab, click on Geometry tab.
Step 5: Turn of Transform checkbox and click on drop-down menu to select the required option. You can rotate the video by 90 degrees, 180 degrees and 270 degrees.

Step 6: To rotate the video at any desired angle, turn on Rotate checkbox and select the desired angle.

Step 7: Finally, click on Save and then Close button.

Please note that when you rotate a video temporarily, it is for a one-time watch only. When you open the video again in any other media player, it will have the original orientation.
Way 4. Use EZGIF Online Tool
If you have short video files and you want to upload them on social media platforms, you can convert them into GIF files. You can convert any video file to EZGIF. Therefore, instead of video files, if you want to rotate GIF files, EZGIF is highly useful as an online tool. In fact, you can also convert GIF files into MP4 files. Here are the steps to follow to rotate short video files using EZGIF online tool.
Step 1: Open your web browser and open Ezgif.com.
Step 2: Click on Video to GIF option.
Step 3: Click on Choose File button and select the short video file from your hard drive.

Step 4: Click on Upload Video button and wait for the conversion. Thereafter, download the GIF file.
Step 5: To rotate the GIF file, go to Rotate option. Click on Choose File button.

Step 6: Select the GIF file and click on Upload.
Step 7: You can select from provided rotation options or mention rotation angle explicitly and click on Apply Rotation button.

Wait for the rotation effect and download the file on your hard drive.
FAQs about Rotate Video in Windows 10
1. How do I rotate a video in Windows 10?
To rotate a video in Windows 10, you can use the built-in Photos app. Open the app and select the video you want to rotate. Click on the Edit & Create button at the top of the screen and select Rotate left or Rotate right to adjust the video orientation.
2. Can I rotate a video in Windows Media Player?
No, you can’t rotate a video in Windows Media Player. This feature is only available in the Photos app. However, you can use a third-party video editing software to rotate your videos.
3. How do I save the rotated video?
After rotating the video in the Photos app, click on the Save a copy button at the top of the screen. You can then choose the destination folder and file name for the newly rotated video.
4. What should I do if the video is upside down after rotating it?
If the video is upside down after rotating it, you may have rotated it in the wrong direction. Try rotating it in the opposite direction and see if that fixes the issue. If not, you may need to use a third-party video editing software to rotate the video.
5. Can I rotate a video without losing quality?
Rotating a video can sometimes result in a loss of quality, especially if the video is compressed or low-resolution. However, using a good video editing software can help minimize the loss of quality. Make sure to save the rotated video in the same format and resolution as the original file to avoid further loss of quality.
Conclusion
We have provided you all the possible ways to rotate video Windows. If you want to rotate with pre-installed software, you have Photos app. If you have VLC Media Player installed, you can do the rotation temporarily and permanently. You can also use Ezgif online tool to rotate animated files without installing any
For macOS 10.12 or later
Step 2: From Video Editing panel, expand Transform option and use the slider on Rotate option to rotate the video at any angle. Once done, click on OK button.

Step 3: Go to Export option and click on Export button. The new video files with its new rotation will be saved in the destination folder.

Way 3. Use VLC Media Player
Most Windows users generally install VLC Media Player to watch movies. This is because Windows Media Player supports only limited file formats. Most movie files that you download online are supported by VLC but not on Windows Media Player. Here are the steps on how to rotate a video in Windows temporarily using VLC Media Player.
Step 1: Open VLC Media Player. Go to Media menu and click on Open File option. Select the video file from your hard drive that you want to rotate.
Step 2: Once the video opens, go to Tools menu and click on Effects and Filters option.

Step 3: On Adjustments and Effects window, click on Video Effects tab.
Step 4: Under Video Effects tab, click on Geometry tab.
Step 5: Turn of Transform checkbox and click on drop-down menu to select the required option. You can rotate the video by 90 degrees, 180 degrees and 270 degrees.

Step 6: To rotate the video at any desired angle, turn on Rotate checkbox and select the desired angle.

Step 7: Finally, click on Save and then Close button.

Please note that when you rotate a video temporarily, it is for a one-time watch only. When you open the video again in any other media player, it will have the original orientation.
Way 4. Use EZGIF Online Tool
If you have short video files and you want to upload them on social media platforms, you can convert them into GIF files. You can convert any video file to EZGIF. Therefore, instead of video files, if you want to rotate GIF files, EZGIF is highly useful as an online tool. In fact, you can also convert GIF files into MP4 files. Here are the steps to follow to rotate short video files using EZGIF online tool.
Step 1: Open your web browser and open Ezgif.com.
Step 2: Click on Video to GIF option.
Step 3: Click on Choose File button and select the short video file from your hard drive.

Step 4: Click on Upload Video button and wait for the conversion. Thereafter, download the GIF file.
Step 5: To rotate the GIF file, go to Rotate option. Click on Choose File button.

Step 6: Select the GIF file and click on Upload.
Step 7: You can select from provided rotation options or mention rotation angle explicitly and click on Apply Rotation button.

Wait for the rotation effect and download the file on your hard drive.
FAQs about Rotate Video in Windows 10
1. How do I rotate a video in Windows 10?
To rotate a video in Windows 10, you can use the built-in Photos app. Open the app and select the video you want to rotate. Click on the Edit & Create button at the top of the screen and select Rotate left or Rotate right to adjust the video orientation.
2. Can I rotate a video in Windows Media Player?
No, you can’t rotate a video in Windows Media Player. This feature is only available in the Photos app. However, you can use a third-party video editing software to rotate your videos.
3. How do I save the rotated video?
After rotating the video in the Photos app, click on the Save a copy button at the top of the screen. You can then choose the destination folder and file name for the newly rotated video.
4. What should I do if the video is upside down after rotating it?
If the video is upside down after rotating it, you may have rotated it in the wrong direction. Try rotating it in the opposite direction and see if that fixes the issue. If not, you may need to use a third-party video editing software to rotate the video.
5. Can I rotate a video without losing quality?
Rotating a video can sometimes result in a loss of quality, especially if the video is compressed or low-resolution. However, using a good video editing software can help minimize the loss of quality. Make sure to save the rotated video in the same format and resolution as the original file to avoid further loss of quality.
Conclusion
We have provided you all the possible ways to rotate video Windows. If you want to rotate with pre-installed software, you have Photos app. If you have VLC Media Player installed, you can do the rotation temporarily and permanently. You can also use Ezgif online tool to rotate animated files without installing any
For macOS 10.12 or later
Step 2: From Video Editing panel, expand Transform option and use the slider on Rotate option to rotate the video at any angle. Once done, click on OK button.

Step 3: Go to Export option and click on Export button. The new video files with its new rotation will be saved in the destination folder.

Way 3. Use VLC Media Player
Most Windows users generally install VLC Media Player to watch movies. This is because Windows Media Player supports only limited file formats. Most movie files that you download online are supported by VLC but not on Windows Media Player. Here are the steps on how to rotate a video in Windows temporarily using VLC Media Player.
Step 1: Open VLC Media Player. Go to Media menu and click on Open File option. Select the video file from your hard drive that you want to rotate.
Step 2: Once the video opens, go to Tools menu and click on Effects and Filters option.

Step 3: On Adjustments and Effects window, click on Video Effects tab.
Step 4: Under Video Effects tab, click on Geometry tab.
Step 5: Turn of Transform checkbox and click on drop-down menu to select the required option. You can rotate the video by 90 degrees, 180 degrees and 270 degrees.

Step 6: To rotate the video at any desired angle, turn on Rotate checkbox and select the desired angle.

Step 7: Finally, click on Save and then Close button.

Please note that when you rotate a video temporarily, it is for a one-time watch only. When you open the video again in any other media player, it will have the original orientation.
Way 4. Use EZGIF Online Tool
If you have short video files and you want to upload them on social media platforms, you can convert them into GIF files. You can convert any video file to EZGIF. Therefore, instead of video files, if you want to rotate GIF files, EZGIF is highly useful as an online tool. In fact, you can also convert GIF files into MP4 files. Here are the steps to follow to rotate short video files using EZGIF online tool.
Step 1: Open your web browser and open Ezgif.com.
Step 2: Click on Video to GIF option.
Step 3: Click on Choose File button and select the short video file from your hard drive.

Step 4: Click on Upload Video button and wait for the conversion. Thereafter, download the GIF file.
Step 5: To rotate the GIF file, go to Rotate option. Click on Choose File button.

Step 6: Select the GIF file and click on Upload.
Step 7: You can select from provided rotation options or mention rotation angle explicitly and click on Apply Rotation button.

Wait for the rotation effect and download the file on your hard drive.
FAQs about Rotate Video in Windows 10
1. How do I rotate a video in Windows 10?
To rotate a video in Windows 10, you can use the built-in Photos app. Open the app and select the video you want to rotate. Click on the Edit & Create button at the top of the screen and select Rotate left or Rotate right to adjust the video orientation.
2. Can I rotate a video in Windows Media Player?
No, you can’t rotate a video in Windows Media Player. This feature is only available in the Photos app. However, you can use a third-party video editing software to rotate your videos.
3. How do I save the rotated video?
After rotating the video in the Photos app, click on the Save a copy button at the top of the screen. You can then choose the destination folder and file name for the newly rotated video.
4. What should I do if the video is upside down after rotating it?
If the video is upside down after rotating it, you may have rotated it in the wrong direction. Try rotating it in the opposite direction and see if that fixes the issue. If not, you may need to use a third-party video editing software to rotate the video.
5. Can I rotate a video without losing quality?
Rotating a video can sometimes result in a loss of quality, especially if the video is compressed or low-resolution. However, using a good video editing software can help minimize the loss of quality. Make sure to save the rotated video in the same format and resolution as the original file to avoid further loss of quality.
Conclusion
We have provided you all the possible ways to rotate video Windows. If you want to rotate with pre-installed software, you have Photos app. If you have VLC Media Player installed, you can do the rotation temporarily and permanently. You can also use Ezgif online tool to rotate animated files without installing any
Complete Guide to Converting GIF to SVG With Ease
The Complete Guide to Converting GIF to SVG With Ease
An easy yet powerful editor
Numerous effects to choose from
Detailed tutorials provided by the official channel
The Complete Guide to Converting GIF to SVG With Ease
Are you searching out methods to transform GIF to SVG? Then you are lucky to have found the right article. While Scalable Vector Graphics can help you scale a photograph to any length with very little distortion, editing and playing your animated SVGs documents on a few gadgets can cause compatibility issues. Moreover, SVGs aren’t well suited with all websites, so in case you need to apply it for your weblog or websites wherein they are now no longer supported, then you may want to transform it to an extra handy layout like GIF.
There is plenty of photograph conversion gear and online editors that can help you convert SVG to GIF. However, now no longer all GIF converters and editors are green and clean to apply. In this article, you’ll know about the top SVG to GIF converters that you may use to make GIF images and use them together along with your buddies quickly.
In this article
01 [8 Best Easy GIF to SVG Converters](#Part 1)
02 [5 Best SVG to GIF Converters](#Part 2)
Part 1 Best Easy GIF to SVG Converters
01INetTools.net
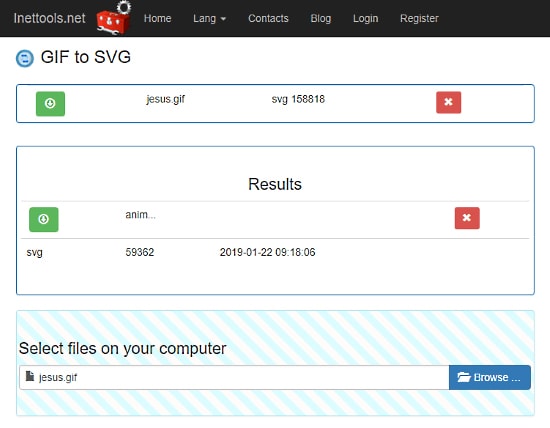
It is a very online animated GIF to SVG converter. You get the option to select and upload the GIF from your storage. After uploading, it instantly starts converting it to the SVG and shows you the results when finished. Now, the converted SVG file can be downloaded. This online converter supports multiple conversions such as uploading multiple GIF files at once and converting them to SVG simultaneously. Also, there is no maximum file size limit mentioned anywhere and the SVG has the same colors as the GIF.
02Aconvert.com
This is the next website you can use to convert GIF to SVG. Multiple input methods are supported by this website. You can upload GIF documents out of your nearby storage, Google Drive, Dropbox, or even fetch a GIF through pasting a URL to it. Apart from a couple of entering methods, this internet site offers you a choice to alternate the picture length for the SVG file. By allowing this option, you could set the scale for the SVG after which the conversion begins. This way, you could convert and resize the SVG in a single step and download the final output.

03PicSVG.com
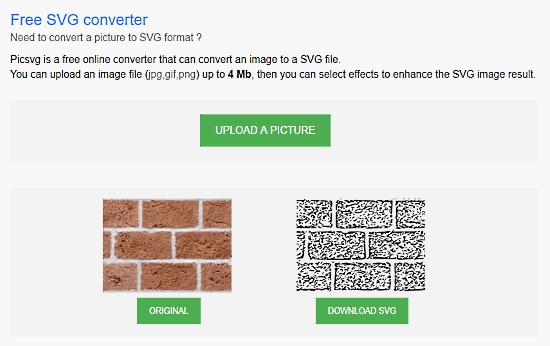
This is another free website to convert SVG to GIF animation. This website converts JPG and PNG files to SVG along with GIFs. But unlike other websites, there is a size limitation on the input file. Here, you can convert GIFs up to 4 MB in size which seems decent enough as most of the GIFs are within 1 MB of size.
04Online-Convert.com
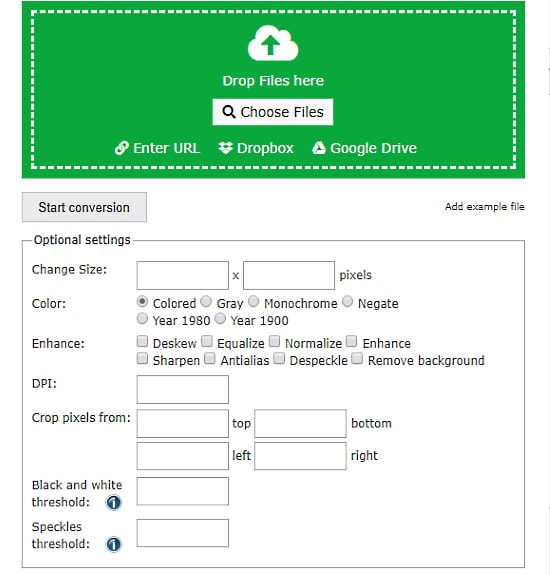
This is a free cloud converter platform that supports dozens of files types and can animate GIF to SVG. This supports batch conversions and lets you input files from many sources such as local storage, Dropbox, Google Drive, or via a URL. 100 MB is the maximum file size limit which is enough. After adding the GIF files, conversion can be started and you can get the SVGs in the output.
This website has lots of settings that will help you to customize to get the desired output. Along with all these options, you can also set the black and white threshold and speckles threshold for the final SVG output.
05Inkscape
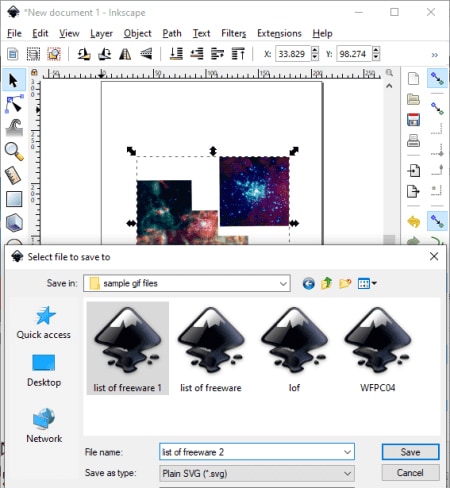
Inkscape is a GIF to SVG converter software for Windows, Mac, and Linux. Primarily it is used for designing vector graphics. The format of the images can be changed easily as you get the “save as” feature in it. This feature helps you to easily convert GIFs and other images to SVG, PDF, PNG, PS, EPS, DXF, etc. The main advantage of this is that you can convert GIF to different kinds of SVG such as Plain SVG, Optimized SVG, Compressed SVG, etc.
Before converting GIF to SVG, you can edit GIF images using various tools. A lot of filters are provided too which you can apply to the input GIF image, such as bevel, blur, color, distort, pixel tools, etc.
06RealWorld Paint
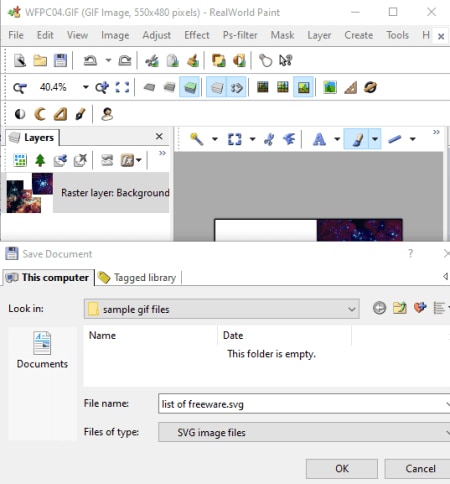
It is a nice free GIF to SVG converter desktop software. In this, you can view, create, and edit graphics in various formats such as GIF, SVG, WEBP, PNG, JPG, etc. Its “save as” feature can also be used for converting images from one supported format to another.
A good number of image modification tools are also included in it such as resize, crop, rotate, watermarking, filters, and more. Additionally, you can also draw designs over the GIF image using its painting tools.
07ImBatch
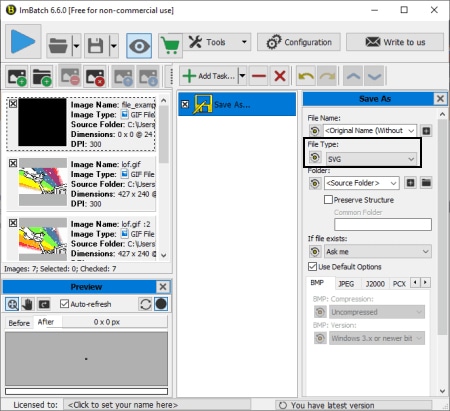
It is a batch image processor using which can also convert SVG to GIF animation and vice versa. Bulkpictures are used for editing and converting. You can easily add several GIF images to it and convert them all to SVG format at once. Since it lets you edit images, you can modify input GIF files before converting them. A wide number of image formats are supported for batch processing such as camera raw images (DNG, CR2, SR2, NEF, ARW, ORF, etc.), JPG, PNG, BMP, TIFF, and many more.
08LibreOffice Draw
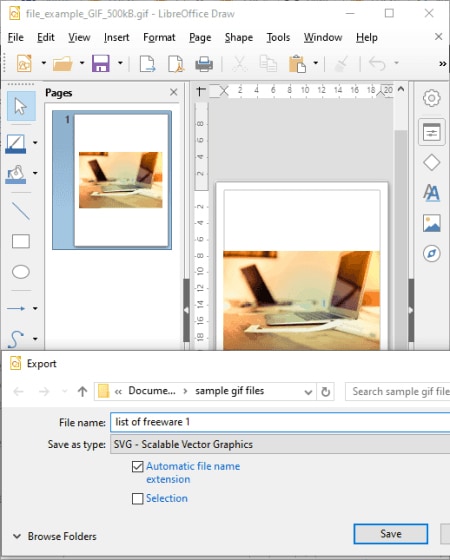
LibreOffice Draw is a free GIF to SVG converter software for your desktop. This software comes with the popular free open-source office software called LibreOffice. Many other office-related applications in this package include LibreOffice Writer, LibreOffice Calc, LibreOffice Impress, etc.
When using it, you can simply open a GIF image file in it and then save it in SVG vector format. You can easily edit the input GIF image before the conversion. For eating the image, you can use its drawing tools, transformation tools, text tools, formatting options, etc.
Part 2 Best SVG to GIF Converters
01CloudConvert
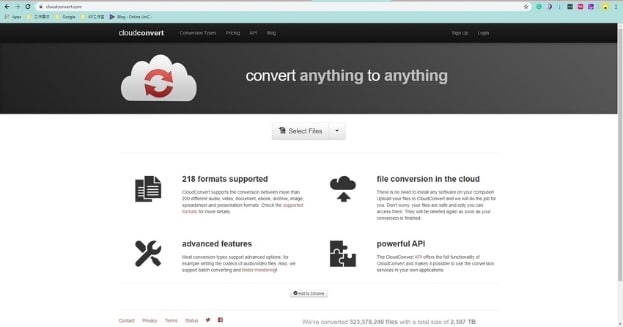
This is an easy-to-use online file conversion tool with a robust and scalable API. It is an all-in-one cloud-based converter and supports over 200 different file formats from vectors, audio, and video. With this tool, you can convert SVG to GIF in your browser and email it to yourself or transfer it to combined cloud services like Google Drive and Dropbox.CloudConvert’sfull version starts at $8. You can also use the free trial version to convert your files quickly.
02Convertio
Convertio is an easy file converter that offers both paid and free online versions to convert SVG to GIF animation. The software payment pricing system starts at $7.99and it also works with all file types. More than 300 different file format conversion is applicable and it allows you to upload your converted files to other applications such as Dropbox and Google Drive. 100MB is the maximum file memory size that you can upload to this tool.
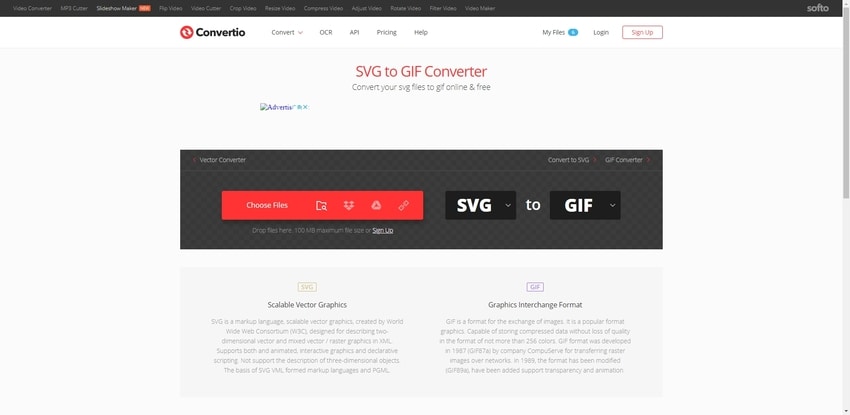
03CoolUtils
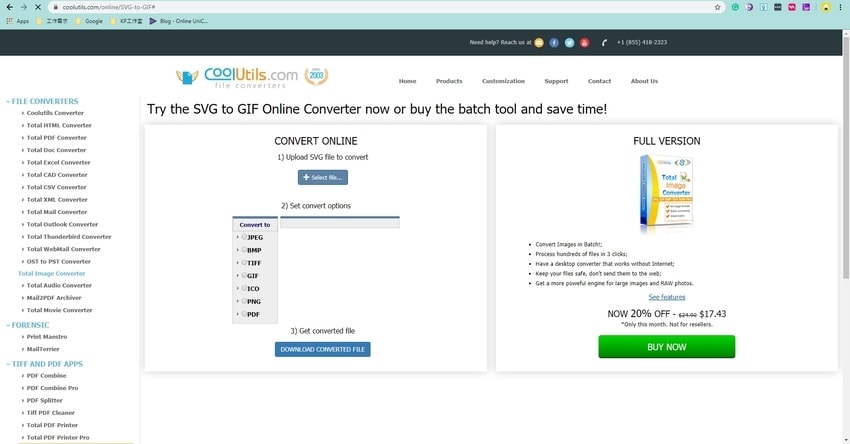
It is a powerful desktop SVG to GIF converter that offers a variety of file conversion utilities such as an online file converter to convert your animate SVG to GIF. The tool’s interface is clear and easy to understand, supports a lot of file formats, has reactive support, and features powerful engines that help to process your files in one go.
04Wondershare Filmora
It is an easy-to-use and trendy video editing software that gives power to your story and gives amazing results, regardless of you are a beginner or an expert. Wondershare Filmora Video Editor helps you to get started with any new project by importing and editing your video, adding special effects and transitions, and sharing your final creation on social media, mobile devices, or DVDs.
It is an interactive platform and editing tool that is easy to navigate. It gives lots of values and makes the process of converting SVG to GIF easier and more interesting. Filmora is free to download software. After signing up for free, you can edit videos, GIFs, and images without any watermark. It also allows the editing of GIFs to include subtitles, text, or captions.
It is a very remarkable editing tool with a wide set of attractive features that can make your image highly customized. Filmore also allows you to extract still images from video without changing the resolution.

Wondershare Filmora - Best Video Editor for Mac/Windows
5,481,435 people have downloaded it.
Build unique custom animations without breaking a sweat.
Focus on creating epic stories and leave the details to Filmora’s auto features.
Start a creative adventure with drag & drop effects and endless possibilities.
Filmora simplifies advanced features to save you time and effort.
Filmora cuts out repetition so you can move on to your next creative breakthrough.
05GIMP
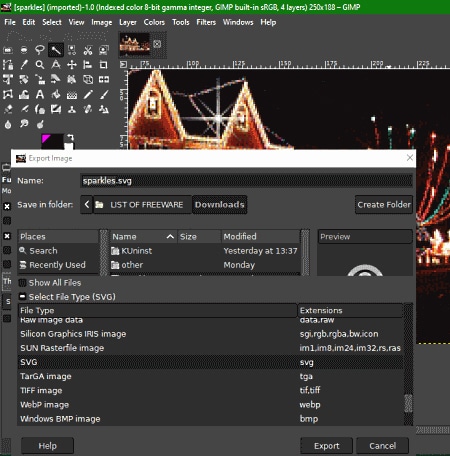
This is another free alternative to an SVG to GIF converter software for Windows, Linux, and Mac. It is a very well-known image editing software with diverse image manipulation and painting tools. By using it, the format of supported images can also be changed with the help of its export feature. Hence, you can also convert SVG to GIFin this software.
However, by default, this software does not support SVG as an output format. So, for converting GIF or any other image file to SVG, you need to install an additional plugin to it.
Part 1 Ending Thoughts
Since you are now reading the end of this article, we are hoping you now know everything about SVG to GIF converter and the best SVG and GIF converter and vice versa that you can turn to and quickly convert your image files and share them with your friends as well as the meaning of SVG.
The Complete Guide to Converting GIF to SVG With Ease
Are you searching out methods to transform GIF to SVG? Then you are lucky to have found the right article. While Scalable Vector Graphics can help you scale a photograph to any length with very little distortion, editing and playing your animated SVGs documents on a few gadgets can cause compatibility issues. Moreover, SVGs aren’t well suited with all websites, so in case you need to apply it for your weblog or websites wherein they are now no longer supported, then you may want to transform it to an extra handy layout like GIF.
There is plenty of photograph conversion gear and online editors that can help you convert SVG to GIF. However, now no longer all GIF converters and editors are green and clean to apply. In this article, you’ll know about the top SVG to GIF converters that you may use to make GIF images and use them together along with your buddies quickly.
In this article
01 [8 Best Easy GIF to SVG Converters](#Part 1)
02 [5 Best SVG to GIF Converters](#Part 2)
Part 1 Best Easy GIF to SVG Converters
01INetTools.net
It is a very online animated GIF to SVG converter. You get the option to select and upload the GIF from your storage. After uploading, it instantly starts converting it to the SVG and shows you the results when finished. Now, the converted SVG file can be downloaded. This online converter supports multiple conversions such as uploading multiple GIF files at once and converting them to SVG simultaneously. Also, there is no maximum file size limit mentioned anywhere and the SVG has the same colors as the GIF.

02Aconvert.com
This is the next website you can use to convert GIF to SVG. Multiple input methods are supported by this website. You can upload GIF documents out of your nearby storage, Google Drive, Dropbox, or even fetch a GIF through pasting a URL to it. Apart from a couple of entering methods, this internet site offers you a choice to alternate the picture length for the SVG file. By allowing this option, you could set the scale for the SVG after which the conversion begins. This way, you could convert and resize the SVG in a single step and download the final output.

03PicSVG.com
This is another free website to convert SVG to GIF animation. This website converts JPG and PNG files to SVG along with GIFs. But unlike other websites, there is a size limitation on the input file. Here, you can convert GIFs up to 4 MB in size which seems decent enough as most of the GIFs are within 1 MB of size.

04Online-Convert.com
This is a free cloud converter platform that supports dozens of files types and can animate GIF to SVG. This supports batch conversions and lets you input files from many sources such as local storage, Dropbox, Google Drive, or via a URL. 100 MB is the maximum file size limit which is enough. After adding the GIF files, conversion can be started and you can get the SVGs in the output.
This website has lots of settings that will help you to customize to get the desired output. Along with all these options, you can also set the black and white threshold and speckles threshold for the final SVG output.

05Inkscape
Inkscape is a GIF to SVG converter software for Windows, Mac, and Linux. Primarily it is used for designing vector graphics. The format of the images can be changed easily as you get the “save as” feature in it. This feature helps you to easily convert GIFs and other images to SVG, PDF, PNG, PS, EPS, DXF, etc. The main advantage of this is that you can convert GIF to different kinds of SVG such as Plain SVG, Optimized SVG, Compressed SVG, etc.
Before converting GIF to SVG, you can edit GIF images using various tools. A lot of filters are provided too which you can apply to the input GIF image, such as bevel, blur, color, distort, pixel tools, etc.

06RealWorld Paint
It is a nice free GIF to SVG converter desktop software. In this, you can view, create, and edit graphics in various formats such as GIF, SVG, WEBP, PNG, JPG, etc. Its “save as” feature can also be used for converting images from one supported format to another.
A good number of image modification tools are also included in it such as resize, crop, rotate, watermarking, filters, and more. Additionally, you can also draw designs over the GIF image using its painting tools.

07ImBatch
It is a batch image processor using which can also convert SVG to GIF animation and vice versa. Bulkpictures are used for editing and converting. You can easily add several GIF images to it and convert them all to SVG format at once. Since it lets you edit images, you can modify input GIF files before converting them. A wide number of image formats are supported for batch processing such as camera raw images (DNG, CR2, SR2, NEF, ARW, ORF, etc.), JPG, PNG, BMP, TIFF, and many more.

08LibreOffice Draw
LibreOffice Draw is a free GIF to SVG converter software for your desktop. This software comes with the popular free open-source office software called LibreOffice. Many other office-related applications in this package include LibreOffice Writer, LibreOffice Calc, LibreOffice Impress, etc.
When using it, you can simply open a GIF image file in it and then save it in SVG vector format. You can easily edit the input GIF image before the conversion. For eating the image, you can use its drawing tools, transformation tools, text tools, formatting options, etc.

Part 2 Best SVG to GIF Converters
01CloudConvert
This is an easy-to-use online file conversion tool with a robust and scalable API. It is an all-in-one cloud-based converter and supports over 200 different file formats from vectors, audio, and video. With this tool, you can convert SVG to GIF in your browser and email it to yourself or transfer it to combined cloud services like Google Drive and Dropbox.CloudConvert’sfull version starts at $8. You can also use the free trial version to convert your files quickly.

02Convertio
Convertio is an easy file converter that offers both paid and free online versions to convert SVG to GIF animation. The software payment pricing system starts at $7.99and it also works with all file types. More than 300 different file format conversion is applicable and it allows you to upload your converted files to other applications such as Dropbox and Google Drive. 100MB is the maximum file memory size that you can upload to this tool.

03CoolUtils
It is a powerful desktop SVG to GIF converter that offers a variety of file conversion utilities such as an online file converter to convert your animate SVG to GIF. The tool’s interface is clear and easy to understand, supports a lot of file formats, has reactive support, and features powerful engines that help to process your files in one go.

04Wondershare Filmora
It is an easy-to-use and trendy video editing software that gives power to your story and gives amazing results, regardless of you are a beginner or an expert. Wondershare Filmora Video Editor helps you to get started with any new project by importing and editing your video, adding special effects and transitions, and sharing your final creation on social media, mobile devices, or DVDs.
It is an interactive platform and editing tool that is easy to navigate. It gives lots of values and makes the process of converting SVG to GIF easier and more interesting. Filmora is free to download software. After signing up for free, you can edit videos, GIFs, and images without any watermark. It also allows the editing of GIFs to include subtitles, text, or captions.
It is a very remarkable editing tool with a wide set of attractive features that can make your image highly customized. Filmore also allows you to extract still images from video without changing the resolution.

Wondershare Filmora - Best Video Editor for Mac/Windows
5,481,435 people have downloaded it.
Build unique custom animations without breaking a sweat.
Focus on creating epic stories and leave the details to Filmora’s auto features.
Start a creative adventure with drag & drop effects and endless possibilities.
Filmora simplifies advanced features to save you time and effort.
Filmora cuts out repetition so you can move on to your next creative breakthrough.
05GIMP
This is another free alternative to an SVG to GIF converter software for Windows, Linux, and Mac. It is a very well-known image editing software with diverse image manipulation and painting tools. By using it, the format of supported images can also be changed with the help of its export feature. Hence, you can also convert SVG to GIFin this software.
However, by default, this software does not support SVG as an output format. So, for converting GIF or any other image file to SVG, you need to install an additional plugin to it.

Part 1 Ending Thoughts
Since you are now reading the end of this article, we are hoping you now know everything about SVG to GIF converter and the best SVG and GIF converter and vice versa that you can turn to and quickly convert your image files and share them with your friends as well as the meaning of SVG.
The Complete Guide to Converting GIF to SVG With Ease
Are you searching out methods to transform GIF to SVG? Then you are lucky to have found the right article. While Scalable Vector Graphics can help you scale a photograph to any length with very little distortion, editing and playing your animated SVGs documents on a few gadgets can cause compatibility issues. Moreover, SVGs aren’t well suited with all websites, so in case you need to apply it for your weblog or websites wherein they are now no longer supported, then you may want to transform it to an extra handy layout like GIF.
There is plenty of photograph conversion gear and online editors that can help you convert SVG to GIF. However, now no longer all GIF converters and editors are green and clean to apply. In this article, you’ll know about the top SVG to GIF converters that you may use to make GIF images and use them together along with your buddies quickly.
In this article
01 [8 Best Easy GIF to SVG Converters](#Part 1)
02 [5 Best SVG to GIF Converters](#Part 2)
Part 1 Best Easy GIF to SVG Converters
01INetTools.net
It is a very online animated GIF to SVG converter. You get the option to select and upload the GIF from your storage. After uploading, it instantly starts converting it to the SVG and shows you the results when finished. Now, the converted SVG file can be downloaded. This online converter supports multiple conversions such as uploading multiple GIF files at once and converting them to SVG simultaneously. Also, there is no maximum file size limit mentioned anywhere and the SVG has the same colors as the GIF.

02Aconvert.com
This is the next website you can use to convert GIF to SVG. Multiple input methods are supported by this website. You can upload GIF documents out of your nearby storage, Google Drive, Dropbox, or even fetch a GIF through pasting a URL to it. Apart from a couple of entering methods, this internet site offers you a choice to alternate the picture length for the SVG file. By allowing this option, you could set the scale for the SVG after which the conversion begins. This way, you could convert and resize the SVG in a single step and download the final output.

03PicSVG.com
This is another free website to convert SVG to GIF animation. This website converts JPG and PNG files to SVG along with GIFs. But unlike other websites, there is a size limitation on the input file. Here, you can convert GIFs up to 4 MB in size which seems decent enough as most of the GIFs are within 1 MB of size.

04Online-Convert.com
This is a free cloud converter platform that supports dozens of files types and can animate GIF to SVG. This supports batch conversions and lets you input files from many sources such as local storage, Dropbox, Google Drive, or via a URL. 100 MB is the maximum file size limit which is enough. After adding the GIF files, conversion can be started and you can get the SVGs in the output.
This website has lots of settings that will help you to customize to get the desired output. Along with all these options, you can also set the black and white threshold and speckles threshold for the final SVG output.

05Inkscape
Inkscape is a GIF to SVG converter software for Windows, Mac, and Linux. Primarily it is used for designing vector graphics. The format of the images can be changed easily as you get the “save as” feature in it. This feature helps you to easily convert GIFs and other images to SVG, PDF, PNG, PS, EPS, DXF, etc. The main advantage of this is that you can convert GIF to different kinds of SVG such as Plain SVG, Optimized SVG, Compressed SVG, etc.
Before converting GIF to SVG, you can edit GIF images using various tools. A lot of filters are provided too which you can apply to the input GIF image, such as bevel, blur, color, distort, pixel tools, etc.

06RealWorld Paint
It is a nice free GIF to SVG converter desktop software. In this, you can view, create, and edit graphics in various formats such as GIF, SVG, WEBP, PNG, JPG, etc. Its “save as” feature can also be used for converting images from one supported format to another.
A good number of image modification tools are also included in it such as resize, crop, rotate, watermarking, filters, and more. Additionally, you can also draw designs over the GIF image using its painting tools.

07ImBatch
It is a batch image processor using which can also convert SVG to GIF animation and vice versa. Bulkpictures are used for editing and converting. You can easily add several GIF images to it and convert them all to SVG format at once. Since it lets you edit images, you can modify input GIF files before converting them. A wide number of image formats are supported for batch processing such as camera raw images (DNG, CR2, SR2, NEF, ARW, ORF, etc.), JPG, PNG, BMP, TIFF, and many more.

08LibreOffice Draw
LibreOffice Draw is a free GIF to SVG converter software for your desktop. This software comes with the popular free open-source office software called LibreOffice. Many other office-related applications in this package include LibreOffice Writer, LibreOffice Calc, LibreOffice Impress, etc.
When using it, you can simply open a GIF image file in it and then save it in SVG vector format. You can easily edit the input GIF image before the conversion. For eating the image, you can use its drawing tools, transformation tools, text tools, formatting options, etc.

Part 2 Best SVG to GIF Converters
01CloudConvert
This is an easy-to-use online file conversion tool with a robust and scalable API. It is an all-in-one cloud-based converter and supports over 200 different file formats from vectors, audio, and video. With this tool, you can convert SVG to GIF in your browser and email it to yourself or transfer it to combined cloud services like Google Drive and Dropbox.CloudConvert’sfull version starts at $8. You can also use the free trial version to convert your files quickly.

02Convertio
Convertio is an easy file converter that offers both paid and free online versions to convert SVG to GIF animation. The software payment pricing system starts at $7.99and it also works with all file types. More than 300 different file format conversion is applicable and it allows you to upload your converted files to other applications such as Dropbox and Google Drive. 100MB is the maximum file memory size that you can upload to this tool.

03CoolUtils
It is a powerful desktop SVG to GIF converter that offers a variety of file conversion utilities such as an online file converter to convert your animate SVG to GIF. The tool’s interface is clear and easy to understand, supports a lot of file formats, has reactive support, and features powerful engines that help to process your files in one go.

04Wondershare Filmora
It is an easy-to-use and trendy video editing software that gives power to your story and gives amazing results, regardless of you are a beginner or an expert. Wondershare Filmora Video Editor helps you to get started with any new project by importing and editing your video, adding special effects and transitions, and sharing your final creation on social media, mobile devices, or DVDs.
It is an interactive platform and editing tool that is easy to navigate. It gives lots of values and makes the process of converting SVG to GIF easier and more interesting. Filmora is free to download software. After signing up for free, you can edit videos, GIFs, and images without any watermark. It also allows the editing of GIFs to include subtitles, text, or captions.
It is a very remarkable editing tool with a wide set of attractive features that can make your image highly customized. Filmore also allows you to extract still images from video without changing the resolution.

Wondershare Filmora - Best Video Editor for Mac/Windows
5,481,435 people have downloaded it.
Build unique custom animations without breaking a sweat.
Focus on creating epic stories and leave the details to Filmora’s auto features.
Start a creative adventure with drag & drop effects and endless possibilities.
Filmora simplifies advanced features to save you time and effort.
Filmora cuts out repetition so you can move on to your next creative breakthrough.
05GIMP
This is another free alternative to an SVG to GIF converter software for Windows, Linux, and Mac. It is a very well-known image editing software with diverse image manipulation and painting tools. By using it, the format of supported images can also be changed with the help of its export feature. Hence, you can also convert SVG to GIFin this software.
However, by default, this software does not support SVG as an output format. So, for converting GIF or any other image file to SVG, you need to install an additional plugin to it.

Part 1 Ending Thoughts
Since you are now reading the end of this article, we are hoping you now know everything about SVG to GIF converter and the best SVG and GIF converter and vice versa that you can turn to and quickly convert your image files and share them with your friends as well as the meaning of SVG.
The Complete Guide to Converting GIF to SVG With Ease
Are you searching out methods to transform GIF to SVG? Then you are lucky to have found the right article. While Scalable Vector Graphics can help you scale a photograph to any length with very little distortion, editing and playing your animated SVGs documents on a few gadgets can cause compatibility issues. Moreover, SVGs aren’t well suited with all websites, so in case you need to apply it for your weblog or websites wherein they are now no longer supported, then you may want to transform it to an extra handy layout like GIF.
There is plenty of photograph conversion gear and online editors that can help you convert SVG to GIF. However, now no longer all GIF converters and editors are green and clean to apply. In this article, you’ll know about the top SVG to GIF converters that you may use to make GIF images and use them together along with your buddies quickly.
In this article
01 [8 Best Easy GIF to SVG Converters](#Part 1)
02 [5 Best SVG to GIF Converters](#Part 2)
Part 1 Best Easy GIF to SVG Converters
01INetTools.net
It is a very online animated GIF to SVG converter. You get the option to select and upload the GIF from your storage. After uploading, it instantly starts converting it to the SVG and shows you the results when finished. Now, the converted SVG file can be downloaded. This online converter supports multiple conversions such as uploading multiple GIF files at once and converting them to SVG simultaneously. Also, there is no maximum file size limit mentioned anywhere and the SVG has the same colors as the GIF.

02Aconvert.com
This is the next website you can use to convert GIF to SVG. Multiple input methods are supported by this website. You can upload GIF documents out of your nearby storage, Google Drive, Dropbox, or even fetch a GIF through pasting a URL to it. Apart from a couple of entering methods, this internet site offers you a choice to alternate the picture length for the SVG file. By allowing this option, you could set the scale for the SVG after which the conversion begins. This way, you could convert and resize the SVG in a single step and download the final output.

03PicSVG.com
This is another free website to convert SVG to GIF animation. This website converts JPG and PNG files to SVG along with GIFs. But unlike other websites, there is a size limitation on the input file. Here, you can convert GIFs up to 4 MB in size which seems decent enough as most of the GIFs are within 1 MB of size.

04Online-Convert.com
This is a free cloud converter platform that supports dozens of files types and can animate GIF to SVG. This supports batch conversions and lets you input files from many sources such as local storage, Dropbox, Google Drive, or via a URL. 100 MB is the maximum file size limit which is enough. After adding the GIF files, conversion can be started and you can get the SVGs in the output.
This website has lots of settings that will help you to customize to get the desired output. Along with all these options, you can also set the black and white threshold and speckles threshold for the final SVG output.

05Inkscape
Inkscape is a GIF to SVG converter software for Windows, Mac, and Linux. Primarily it is used for designing vector graphics. The format of the images can be changed easily as you get the “save as” feature in it. This feature helps you to easily convert GIFs and other images to SVG, PDF, PNG, PS, EPS, DXF, etc. The main advantage of this is that you can convert GIF to different kinds of SVG such as Plain SVG, Optimized SVG, Compressed SVG, etc.
Before converting GIF to SVG, you can edit GIF images using various tools. A lot of filters are provided too which you can apply to the input GIF image, such as bevel, blur, color, distort, pixel tools, etc.

06RealWorld Paint
It is a nice free GIF to SVG converter desktop software. In this, you can view, create, and edit graphics in various formats such as GIF, SVG, WEBP, PNG, JPG, etc. Its “save as” feature can also be used for converting images from one supported format to another.
A good number of image modification tools are also included in it such as resize, crop, rotate, watermarking, filters, and more. Additionally, you can also draw designs over the GIF image using its painting tools.

07ImBatch
It is a batch image processor using which can also convert SVG to GIF animation and vice versa. Bulkpictures are used for editing and converting. You can easily add several GIF images to it and convert them all to SVG format at once. Since it lets you edit images, you can modify input GIF files before converting them. A wide number of image formats are supported for batch processing such as camera raw images (DNG, CR2, SR2, NEF, ARW, ORF, etc.), JPG, PNG, BMP, TIFF, and many more.

08LibreOffice Draw
LibreOffice Draw is a free GIF to SVG converter software for your desktop. This software comes with the popular free open-source office software called LibreOffice. Many other office-related applications in this package include LibreOffice Writer, LibreOffice Calc, LibreOffice Impress, etc.
When using it, you can simply open a GIF image file in it and then save it in SVG vector format. You can easily edit the input GIF image before the conversion. For eating the image, you can use its drawing tools, transformation tools, text tools, formatting options, etc.

Part 2 Best SVG to GIF Converters
01CloudConvert
This is an easy-to-use online file conversion tool with a robust and scalable API. It is an all-in-one cloud-based converter and supports over 200 different file formats from vectors, audio, and video. With this tool, you can convert SVG to GIF in your browser and email it to yourself or transfer it to combined cloud services like Google Drive and Dropbox.CloudConvert’sfull version starts at $8. You can also use the free trial version to convert your files quickly.

02Convertio
Convertio is an easy file converter that offers both paid and free online versions to convert SVG to GIF animation. The software payment pricing system starts at $7.99and it also works with all file types. More than 300 different file format conversion is applicable and it allows you to upload your converted files to other applications such as Dropbox and Google Drive. 100MB is the maximum file memory size that you can upload to this tool.

03CoolUtils
It is a powerful desktop SVG to GIF converter that offers a variety of file conversion utilities such as an online file converter to convert your animate SVG to GIF. The tool’s interface is clear and easy to understand, supports a lot of file formats, has reactive support, and features powerful engines that help to process your files in one go.

04Wondershare Filmora
It is an easy-to-use and trendy video editing software that gives power to your story and gives amazing results, regardless of you are a beginner or an expert. Wondershare Filmora Video Editor helps you to get started with any new project by importing and editing your video, adding special effects and transitions, and sharing your final creation on social media, mobile devices, or DVDs.
It is an interactive platform and editing tool that is easy to navigate. It gives lots of values and makes the process of converting SVG to GIF easier and more interesting. Filmora is free to download software. After signing up for free, you can edit videos, GIFs, and images without any watermark. It also allows the editing of GIFs to include subtitles, text, or captions.
It is a very remarkable editing tool with a wide set of attractive features that can make your image highly customized. Filmore also allows you to extract still images from video without changing the resolution.

Wondershare Filmora - Best Video Editor for Mac/Windows
5,481,435 people have downloaded it.
Build unique custom animations without breaking a sweat.
Focus on creating epic stories and leave the details to Filmora’s auto features.
Start a creative adventure with drag & drop effects and endless possibilities.
Filmora simplifies advanced features to save you time and effort.
Filmora cuts out repetition so you can move on to your next creative breakthrough.
05GIMP
This is another free alternative to an SVG to GIF converter software for Windows, Linux, and Mac. It is a very well-known image editing software with diverse image manipulation and painting tools. By using it, the format of supported images can also be changed with the help of its export feature. Hence, you can also convert SVG to GIFin this software.
However, by default, this software does not support SVG as an output format. So, for converting GIF or any other image file to SVG, you need to install an additional plugin to it.

Part 1 Ending Thoughts
Since you are now reading the end of this article, we are hoping you now know everything about SVG to GIF converter and the best SVG and GIF converter and vice versa that you can turn to and quickly convert your image files and share them with your friends as well as the meaning of SVG.
DVD Slideshow Builder Review and Tutorial
DVD Slideshow Builder 2024 Review and Tutorial
An easy yet powerful editor
Numerous effects to choose from
Detailed tutorials provided by the official channel
Exporting your creative masterpieces to an external device becomes necessary to address the diverse media sharing needs of today. Learn how to burn a slideshow with the DVD Slideshow Builder!
In this article
01 [What’s DVD Slideshow Builder?](#Part 1)
02 [How to Make a Slideshow with Music and Burn a DVD?](#Part 2)
03 [Five DVD Slide Show Builder Reviews and Tutorials](#Part 3)
Part 1 What’s DVD Slideshow Builder?
Slideshows take the leading spot in the list of interactive solutions to work on an affordable content delivery. In the light of the diversified information requirements of the modern times, it has become essential to be flexible enough with the different ways to present your content in front of the target audience.
The DVD Slideshow Builder program is one such software utility that allows you to create and share stunning slideshow presentations, while burning them into a DVD. You can work with the program to organize your images and video files into awesome slideshow presentations and complement them with appealing background music, while sparking them up with a plethora of editing features.
All said and done, you can conveniently burn your creation using the software to a DVD and make it ready for a quick and expressive display to your audience. The software works well with almost any of your preferred devices, including Windows and MacOS supported desktops and PCs, along with other iOS compatible devices.
The software finds extensive use in the domain of photography, where the latter aids creators to transform the media footage into amazing slideshows for a direct export to various social media platforms, like, YouTube, online content websites, and lots more.
Part 2 How to Make a Slideshow with Music and Burn a DVD?
Burning a slideshow on a DVD has widespread personal and professional applications, making the sharing process easy and convenient. You can give your clients the flexibility to view your creations at their comfortable time and at their own pace. The IT market offers a variety of slideshow builder programs to burn your presentations on DVDs and promote seamless information sharing.
Now that you have become familiar with the significance of the DVD Slideshow Builder program with respect to easily burning slideshows on a DVD for exporting across diverse platform ranges, let us explore the software’s credibility towards creating musically upgraded slideshow presentations and burning the same to a DVD in the following section:
Creating Slideshow Presentations in DVD Slideshow Builder Deluxe
Step 1: Download and Launch the Software
Begin with visiting the official website of the software program to initiate a free download of the same into your preferred system. Launching the software successfully, you will be asked to select a working mode from the available ‘Advanced’ and ‘Standard’ options.
Choosing the ‘Advanced’ mode will entitle you with the access to an expanded set of customization features and a flexibility to import media files from your device. The ‘Standard’ mode, on the other hand, allows you to work with preset presentation styles, while editing the same to create your slideshow.
Step 2: Software Registration
For an extensive working flexibility it is recommended to purchase a licensed version of the software program. All you need to do is, navigate to and click on the ‘Register’ option at the top right corner of the program’s launch screen, followed by choosing the ‘Buy Now’ option. Follow the successive screen to place your order.
As soon as your order gets validated, you will receive an auto-generated confirmation e-mail containing the registration code within. Proceed with copying and pasting the same, along with the licensed e-mail to see the DVD Slideshow Builder Deluxe program get activated.
Step 3: Browse Through the Program Interface
As you enter into the program’s workspace after completing the registration process, the latter’s welcome interface greets you with the following elements:
● Navigation Bar
The navigation bar at the top consists of the entire set of slideshow editing functions, including the specific effects, personalized custom styles and output options.
● Library
The program library is a host of slideshow contents that vary in accordance with the specific function of the ‘Navigation Bar’ you are working with. For instance, if you are currently within the ‘Organize’ tab, the library presents before you a list of the created slideshow projects.
Further, in the ‘Personalize’ editing tab, you get to see the variety of editing tools, like, clipart, effects, styles, intro/credit and pre-audio options, along with a set of other features. The output options and settings get displayed in the library within the ‘Create’ tab of the navigation bar.
● Preview Window
It is here that you can watch a display and run of the current slide of your created presentation on the editor’s Timeline or Storyboard.
● Storyboard/Timeline
These are the regions within the program’s workspace where you can work with creating and editing your slideshow presentation. If you choose to work in the previously explained ‘Personalize’ mode, there is an option to switch between the Storyboard and the Timeline whenever the need arises.
Step 4: Switching Between the Working Modes
True that you are asked to select the working mode before you start working with your presentation in the software program, you can switch between the available ‘Advanced’ and ‘Standard’ modes at a later stage. You can do this by reaching to and clicking on the ‘Blue Button’ at the top, beside the ‘Navigation Bar’, followed by selecting the ‘Switch to Advanced/Standard Mode’ option from the dropdown menu that appears next.
Step 5: Creating a Slideshow Presentation
Having selected the working mode as per your creation requirements, you can proceed with the slideshow design procedure. Select the ‘Advanced’ mode for better editing flexibility and click on the ‘Add Files’ option in the workspace to import the desired images and videos from your device to the editor timeline.
Navigate to the ‘Personalize’ tab to see an automatic transition effect included between two successive media files. It is here that you can start customizing your slideshow in line with your preferences. Work with changing the layouts, adding background themes and overlays, including a subtle music, annotating the slides with texts, and so on.
Step 6: Set the Slide Sequence
To arrange your slides in a particular sequence, navigate to and tap the ‘Expand’ button at the top right corner of the timeline/storyboard (whichever you are working in), followed by hitting the ‘Half Arrows’ button to select the sorting criteria from the dropdown menu that appears. You can choose to arrange the presentation slides based on name, creation date, modified date, etc., or even prefer a random sequence.
Step 7: Publish Your Presentation
When you are satisfied with your work, click on the ‘Create’ tab in the ‘Navigation Bar’ to publish the slideshow in any one of the following ways:
● To save the presentation as a DVD slideshow, navigate to the sidebar at the left and tap the ‘Burn to DVD’ option.
● To save a video presentation, select the ‘Save to Computer’ or ‘Save as HD’ in the left sidebar. Choosing the second option will retain the high quality of your added media files.
● To view the presentation on your smartphone, select any one of the ‘Save to Mobile Device’ or ‘Save to Apple Device’ options.
● For publishing your slideshow on YouTube, select the ‘Share to YouTube’ option in the left sidebar, followed by entering the required information of your YouTube account and hitting the ‘Publish’ button.
Part 3 Five DVD Slide Show Builder Reviews and Tutorials
Creating a DVD slide show comes handy when you need to address your audience with a quick showcase of your slideshow presentation in the absence of customary options. You can also create and deliver such presentation DVDs to your clients so that they can understand the contained information at their own pace. Having said that, let us proceed to examine and understand the user reviews and tutorials of some top rated DVD slideshow builder programs in the following section:
01Wondershare Filmora
When you are on a software hunt for the best slideshow creator program in the IT market or across the web, pick the Wondershare Filmora Video Editor graphic editor package needs without a second thought. Launched by Wondershare, the aforesaid video editor is a one stop solution to the most descriptive slideshow creation needs you can ever come across. Talking in reference to the concern of creating DVD slideshows, the program’s excellence is at par.
For Win 7 or later (64-bit)
For macOS 10.12 or later
Compatible with your Windows and MacOS devices, the software grants you the liberty to design high end customized presentations of professional standards. While the feature rich library of this slideshow creator software has no limit on audio-visual editing effects, some exclusive ones include the preset ‘Trimming’ feature, which allows you to stitch music pieces in the required sequence; and the ‘Motion’ effect that permits you to customize your presentations with the most cohesive titles.
As far as the video and image editing flexibilities are concerned, you are free to customize the video elements according to your specific ‘preferences, while working with the ‘Red Eye Removal’ tool to repair the reddened eyes within the images, or using the ‘Rotate’ option to revolve your photos regardless of the angle.
The ‘Pre Audio’ feature lets you supplement the slideshows with appealing background score, while the extensive range of filters promotes the finest quality slideshow extraction. The software is most efficient in creating quickest slideshow presentations that are ready to be exported across a diversity of media sharing platforms.
The software however, has some working limitations, like blurry output images, slow processing speed, and inability to undo previously made changes, or share presentations via e-mail.
User’s Guide to Build a DVD Slideshow in Filmora
Step 1: Download and Launch Wondershare Filmora
Visit the official Wondershare website to download, install and launch the Filmora DVD slideshow builder application in any of your Widows or MacOs supported devices. Post a successful launch; the welcome screen will require you to select any one from the ‘Standard’ and ‘Advanced’ working modes.
Prefer working in the ‘Advanced’ mode to access increased varieties of customization effects, while getting the liberty to import and use locally saved media files in your presentation. If you are more diverted towards creating a slideshow from the software’s inbuilt presentation templates and themes, stick to the ‘Standard’ mode.
Step 2: Software Registration
To access the complete set of features and utilities of the aforesaid slideshow builder application, go for purchasing the licensed version of the program. You can open the purchase portal of the software by navigating to and clicking on the ‘Register’ tab at the top right corner of the program’s opening screen and selecting the ‘Buy Now’ option. Your order will be placed and the screen instructions appearing henceforth will guide you through the complete purchasing process.
Post the successful validation of your purchase order; you will receive an auto-generated e-mail having the product registration code. You can simply copy-paste the code and the licensed e-mail to activate the Filmora slideshow builder program.
Step 3: Browsing the Program Interface
As soon as the software gets activated, the following elements can be seen displayed on the latter’s welcome screen:
● Navigation Bar
The complete set of slideshow creation tools and features are present in the ‘Navigation Bar’ at the top of the opening screen. It is at this very place that you get to access the presentation editing choices, personalized customization styles and themes, output flexibilities, etc.
● Library
The software’s effect library houses distinguished slideshow elements in cohesion with the selected navigation bar tab you choose to work within, like your saved slideshow projects will appear under the ‘Organize’ tab. The diversity of editing features and tools, such as, styles, clipart, effects, pre-audio and intro/credit options, etc., are present within the ‘Personalize’ tab, while the output options and settings are a part of the ‘Create’ tab.
● Preview Window
This space allows you to see a preview of your creation on the Storyboard or the editor’s Timeline, either for the entire presentation, or a currently created slide, as and when required.
● Storyboard/Timeline
These are the editing spaces within the software workspace, where you are allowed to experiment with your editing creativity to design exemplary slideshow presentations. Prefer working within the ‘Personalize’ tab to facilitate a switch over between the two spaces according to your specific creation needs.
Step 4: Swapping the Working Modes
Although you have already selected one of the ‘Standard’ and ‘Advanced’ working modes to create slideshows with the aforesaid software, there is a flexibility to change the current mode by tapping the ‘Blue Button’ near the navigation bar at the top of the program screen, and clicking on the ‘Switch to Advanced/Standard Mode’ option in the dropdown menu that follows.
Step 5: Designing a Slideshow Presentation
Before entering the slideshow creation process, choose the ‘Advanced’ mode to expand your editing skills on a wider and enhanced feature rich canvas. Head to and tap the ‘Add Files’ button within the program workspace to begin importing the required media files that you wish to include in your presentation, to the software timeline or storyboard.
Visit the ‘Personalize’ tab to customize your presentation as per your selected preferences. While you can see an automatic transition effect already added between two sequentially appearing slides, you can anyway proceed to change the slide layouts, include overlays and background themes, annotate the slides with suitable texts, adding a subtle background audio, and lots more.
Step 6: Decide the Order
Head to and tap the ‘Expand’ button at the top right corner of the storyboard/timeline (wherever you are creating the slideshow), and click on the ‘Half Arrows’ button, followed by choosing the sorting parameter from the list of options that drops down, to arrange the slides of your presentation in the desired sequence. You can set the order of appearance according to name, creation and modified dates, or choose a random arrangement.
Step 7: Publish the Presentation
When your creation makes you happy, proceed to publish the same on various media sharing platforms by heading to and clicking on the ‘Create’ tab within the navigation bar. You can try a suitable one from among the following publishing alternatives:
● Navigating to and tapping the ‘Burn to DVD’ option in the left sidebar will let you burn the slideshow to a DVD.
● If you wish to save the presentation locally to your device, select any one of the ‘Save as HD’ or ‘Save to Computer’ options, again in the left sidebar. If you prefer to save your creation in HD, the high output quality of the included images and videos will be retained.
● Once again in the left sidebar, choose one from the ‘Save to Apple Device’ or ‘Save to Mobile Device’ options to play the slideshow in your iOS or Android smartphones respectively.
● You can even publish the slideshow on your YouTube channel directly from the program’s timeline. All you have to do is, click on the ‘Share to YouTube’ option in the sidebar at the left, enter the necessary YouTube account details and tap the ‘Publish’ button.
02VideoPad Video Editor
Next in the line is the VideoPad slideshow creator software, which is an exclusively MacOs compatible software program. You can work with the application to create top quality professional presentations with the latter’s extensive library of features, effects and transitions, that are all set to add life to your otherwise customary presentation pieces. The program is known to deliver the finest slideshow outputs on MacOs X and later editions.
Working with the software is pretty simple, where all you need to do is, bring your selected images to the editor workspace by dragging them from your device gallery and dropping the same within the software’s editing timeline, followed by customizing the images with effects and transitions. Proceed to create the presentation when you are satisfied with the edits.
The program’s effect library houses over 50 different slideshow transitions and image effects, ready to spark your creation with the missing professional feel. Some additional features of the aforesaid editor software include a clean, interactive and easy to use interface, extensive input and output format support and plugin compatibility to add tons of editing tools and effects. The software is however, not completely free to use.
User’s Guide to Build a DVD Slideshow in VideoPad
Step 1: Download and Launch VideoPad
Navigate to the official website of the VideoPad slideshow builder program and initiate a free download of the software and proceed to launch the same in your MacOs device. The welcome screen opens up with the free version of the slideshow creator, which has some working limitations. You can use the software’s registration code to activate its premium account.
Step 2: Open a New Project
Launching the software in your system takes you to the latter’s main interface, where you need to click on ‘New Project’ to start working with creating a fresh slideshow presentation.
Step 3: Edit Your Presentation
Navigate to the ‘VideoPad Bin Pane’ at the left to import the desired media files. Apart from images and videos, you can supplement your creation with amazing background audio by clicking on ‘Add Stock Sound’ to select suitable music from the software’s inbuilt audio library.
When you have finished, drag the imported files to the VideoPad editor timeline for further editing. Working with the aforesaid program, you get the flexibility to level up your presentations with patterns, transitions, shapes, reveals, and many more stunning effects and features.
Step 4: Time to Save and Export!
When you are done with the editing process, navigate to the ‘Home’ tab in the toolbar at the top and tap ‘Save Project’ to save the presentation locally to your device. If you wish to export the slideshow to a DVD instead, click on ‘Export Video’ and select the ‘DVD Movie Disk’ option from the dropdown menu that appears next.
03Windows Video Editor
Released as a successor to the primitive ‘Windows Movie Maker’ tool, the aforesaid slideshow builder program is an inclusion within the ‘Photos’ app of the latest, Windows 10 operating system. You can work with the software to create and publish high end DVD slideshow presentations, exclusively on a Windows 10 compatible device.
Talking of the creation flexibility and presentation design utilities, you can play with a series of editing effects and tools to customize your slideshow with professional excellence and elegance. Some major attractions of the software include, 3D effects, slow motion videos, drawing and video annotating tools, top rated audio-visual effects and a visibly huge library of preset slideshow templates, background themes and audio tracks.
The software is extensively convenient and free to use work with, comes with a beginner compatible interface, and has a simple DVD burning process for slideshow exports, along with several other presentation sharing and saving options. The program however, is a Windows 10 utility, and can be affordably missed out if you are not aware of the latter’s exact location within the operating system interface.
User’s Guide to Build a DVD Slideshow in Windows Video Editor
Step 1: Launch the Software
In your Windows 10 device, navigate to the ‘Photos’ app and open the Video Editor program to reach to the software’s working interface.
Step 2: Start a New Slideshow Project
Navigate to the top toolbar in the workspace of the program and tap ‘Video Projects’ followed by selecting the ‘Create New Video’ option from the dropdown that appears next.
Step 3: Select Your Media Files
To import the desired images and videos to the editor timeline, navigate to the ‘Add’ button below the top toolbar and select a location to choose the media files. You can prefer to use the locally saved media on your device, browse through your online storage or even opt an import from across the web.
Step 4: Drag and Sort
Once you have selected the files, click on and drag the same to the editor storyboard. When you have imported all the files, proceed to sort them in the desired sequence.
Step 5: Edit Your Presentation Elements
Select a slide and hit the ‘Visual Effects’ tab in the top toolbar to supplement your slides with visual effects, As you click on the aforesaid tab, a series of pre made effects gets displayed in the right side pane of the interface. You can choose any one from the Motion & Fades, Artistic, Mirror, Black & White, etc., effects to uplift your slide media.
Try hands at including animated transitions in your slideshow for a seamless presentation flow, while giving a subtle look to the included contents. You can either select specific transitions for each slide, or apply the same animation to all the presentation pages.
Another way to level up your presentation is complementing it with cohesive background music and indicative voice comments. You can also play with a mixture of different visual effects and text styles to generate a more immersive viewing experience for your audience.
Step 6: Save Your Presentation
When you are happy with your creation, proceed to save the presentation locally to your device by navigating to the ‘Home’ tab and selecting the ‘Save Movie’ option. Choose ‘HD Display’ from the list of resolution options that follows next. Moving ahead, select a destination folder and an output file format for your slideshow. Lastly, tap the ‘Save’ button to export the presentation to your device.
You can additionally go for a direct share of your presentation across different media sharing platforms. To do this, head to and tap the ‘Share’ button at the top right corner of the program workspace.
Step 7: Create a DVD Slideshow Video
Navigate to the destination folder of your slideshow and insert a blank disk in your system drive. Browse for the created presentation file and right click on the same, followed by choosing the ‘Send to’ option from the menu that drops down. In the list of device options that appears, click on the name of the inserted blank disk to initiate the DVD burning process. The completion of the process may cost you a span of 2-3 minutes.
04Freemake Video Converter
Moving ahead in the list, there is the Freemake Video Converter DVD slideshow creator application program, which can certainly sort your concern of making stunning slideshow presentations within a blink. The software welcomes you with a decently laid out and organized editing workspace, is free to use, and works well with any of your favorite MacOs devices.
Using the aforesaid slideshow designer program, you can quickly make amazing presentations from the images and videos on your device in a 3-step process of uploading the media files, customize the slideshow according to your specific requirements and convert the same into a desired video format. You can further, supplement the presentations with appealing background music and adjust the screen time of the slides.
Post the creation process, you can most conveniently burn the presentation on a DVD to share the same with your friends, family and clients as and when required. Though simple to work with, the tool has a limited range of editing features and misses out the ability to add text customizations to the slides and does not support a preset library of presentation templates.
User’s Guide to Build a DVD Slideshow in Freemake Video Converter
Step 1: Download the Software Program
Start with navigating to and downloading the Freemake Video Converter program in your preferred MacOs device and launch the software to be greeted by the latter’s opening interface.
Step 2: Add Media Files
In the app’s launch screen, navigate to and tap the ‘+Photo’ or ‘+Video’ buttons at the top to import the desired media files from your device to the program’s editor timeline.
Step 3: Add Background Music
Navigate to the ‘Edit’ button near each media file to include an audio track, adjust the screen time and set the media files in a desired sequence of appearance within the presentation. When you are satisfied with your work, click on ‘OK’ to confirm and apply the changes.
Step 4: Burn the Slideshow
Reach to and click on the ‘to DVD’ button at the bottom of the program’s main interface, followed by selecting a DVD menu. In the window that appears next, give a title to your presentation, choose a destination DVD and hit ‘Burn’ to open the ‘DVD Burner Software’.
05SmartSHOW
Last in the list is the SmartSHOW application program that is definitely a revolution in the domain of slideshow creator tools. Working with the software, you can design top class photo movies and animated presentation with the locally saved media files on your device or an external camera. The best thing about the program is its smart and intuitive user interface that is a welcome treat for beginners and newbies in the graphic designing field.
Special features of the app include an object preview facility that allows a comprehensive go through the specific elements as well as the entire presentation, the flexibility to add a limitless number of media files to your slideshow and a decent set of background music choices to add that extra spunk to your presentations. The software further lets you choose from an extensive range of elegant and openly customizable preset background themes to amplify your creations.
The software is conveniently compatible with all of your Windows supported devices and works as a free DVD slideshow builder to burn your presentations on a digital video disk, so that they can be comfortably shared and exported.
User’s Guide to Build a DVD Slideshow in SmartSHOW
Step 1: Download, Install and Launch SmartSHOW
Visit the home website of the SmartSHOW software application to make a free download of the program in your preferred Windows device, followed by installing and launching the same.
Step 2: Begin Crafting the Presentation
A successful launch of the SmartSHOW program guides you to its editor workspace. You can start working on your slideshow here with importing the required media files from your system and adding them to the software’s timeline, using the ‘Drag and Drop’ method.
Once you have all the files, consider creating a wonderful collage by selecting a premade template from the editor’s library according to your specific presentation theme and adding the media files within the same to initiate an automatic collage creation.
Music is certainly an important element of your slideshow and you can use the same to complement your presentation by hitting the ‘Music’ tab to either select a matching audio track from the program’s inbuilt sounds library, or adding one of your favorites from your device’s gallery. You can further, include voice comments to expressively share some specific details about the presentation with your audience.
Step 3: Include Titles and Effects
To add more spark to the slideshow, try hand at experimenting with the diversity of effects, by choosing from over 350 different styles of animations and transitions, dynamic 3 D effects and soft gradients, while using the ‘Drag and Drop’ method to include your choices within the presentation.
You can also add suitable title clips to the slideshow to signify the occasion or theme of your slideshow. All you need to do is, select a suitable title clip from the available ones, give it a name and drag it to the editor timeline to include the same at the desired place in your presentation. Try using the feature to add rolling credits and names of event participants in your work. When you are ready with everything, tap ‘Play’ to watch a preview of your creation.
Step 4: Burn Your Presentation
In the program’s main interface, navigate to and hit the ‘Create’ tab, succeeded by choosing the ‘Create DVD Slideshow’ option from the dropdown menu that follows. You will land into the ‘Edit Menu’ window, where you can customize a selected menu layout with titles, images and cohesive background music. Tap ‘No Menu’ if you wish to launch a direct play of your slideshow.
Insert a disk in your system’s DVD player and click on ‘Burn DVD’ from the list of options that appears on the screen. Move ahead with selecting a preferred video type and output quality; and click on ‘Start’ to initiate the DVD burning process.
● Ending Thoughts →
● Burning slideshow presentations on a DVD makes it handy to share them with your audience for a comprehensive understanding of your work at their own pace.
● The IT market offers you a range DVD slideshow builder tools to create stunning presentations and easily export them on a hardware platform.
● Pick the Wondershare Filmora slideshow creator program to craft and burn your presentations on a DVD in the most flawless manner.
Start Your Creative Journey Now. Follow This Step-by-Step Guide on How to Add Double Exposure Effects to Your Personal Videos by Using the Filmora Video Editor
Are you an aspiring video creator, or do you enjoy editing videos that captivate your viewers’ attention? In this digital era, it is essential to edit your videos by using tools that can help you produce a masterpiece and will impress your audience. With Filmora Video Editor, it is easier to create polished and professional-looking videos that stand out from the rest.
Free Download For Win 7 or later(64-bit)
Free Download For macOS 10.14 or later
To start your creative journey, you can hone your skills by focusing on at least one technique and progressively learning new skills. One of the various video editing techniques you can employ is double exposure. This method is based on an old technique in photography in which a film is exposed twice to create a single image. This article shows you how to use the same method to combine two or more video clips and create a double exposure effect.
You can create artistic videos that tell various stories and captivate viewers by using Filmora. The following steps describe how to create a double exposure effect in Filmora.
Step1 Download the Filmora application

Before you start editing, click https://bit.ly/3tav2d5 to download the Filmora app. On the page that appears, click the Free Download option. Then, the Filmora installer is automatically downloaded. To start installing Filmora, double-click the installer and click Agree to agree with the terms and conditions. Then, wait for approximately 2 minutes for the installation to complete.
Step2 Start a new project in Filmora
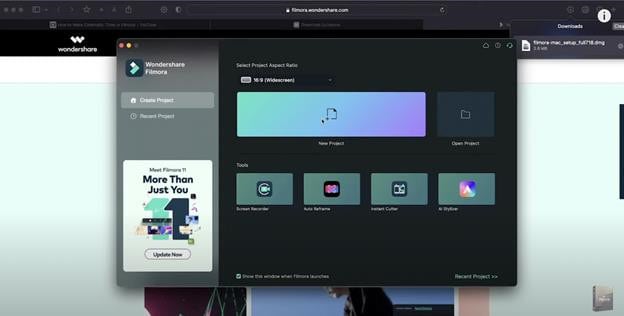
After a successful installation, the app automatically runs, and you can start editing videos. Click New Project to start a project on a clean canvas.
Before starting a new project, we recommend you plan a theme for your videos. You can incorporate different elements into your videos to convey a dramatic, light, or fun theme. This step will help you communicate the mood and message you want to convey to the audience.
Step3 Select a foreground video

To create a trendy double exposure effect, record a video clip with a white or neutral background. Then, import the specified video to Filmora. In the second layer of the video editing pane, drag the video.
The first video is called the foreground video, which serves as the base video to achieve the desired double exposure effect. It is important to choose neutral or calm colors to make it easier for you to remove the background and highlight the main subject of your video.
Step4 Edit the foreground video
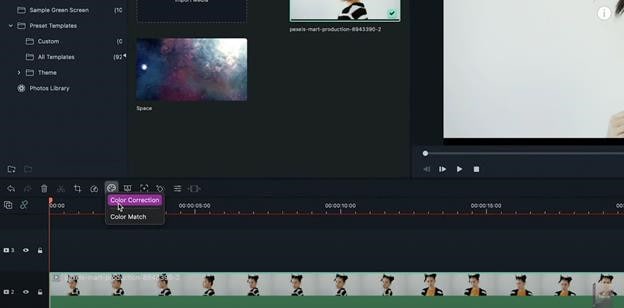
Edit the foreground video by adjusting the color settings. Click the Color Correction icon to open the color settings. In the Advanced Color Tuning box that appears, click Adjust. In this article, the value of Exposure is set to 18, and Contrast is set to 28. Then, Vibrance and Saturation are set to -100. In the Light settings, the values of Highlights and Shadows are set to -100, Whites is set to 0, and Blacks is set to -30. You can experiment and play with the settings based on the theme that you want to achieve.
Step5 Select a background video
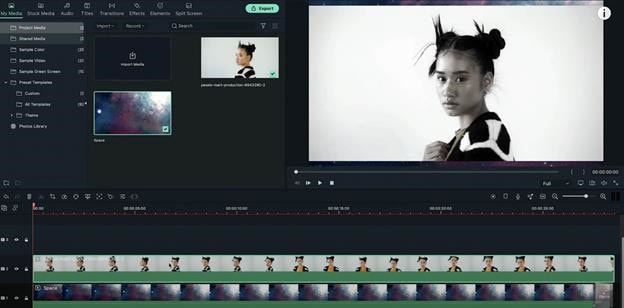
For the background video, select a video clip and import the video to Filmora. Then, drag the video in a layer below the foreground video.
When you select a background video, make sure that the video is vibrant, colorful, and has lots of texture. For example, you can select landscapes, flowers, leaves, textured patterns, city lights, sunsets, or other graphic components. The colors and lighting in the background video significantly impact the final output’s overall appearance.
Step6 Blend the foreground and background videos
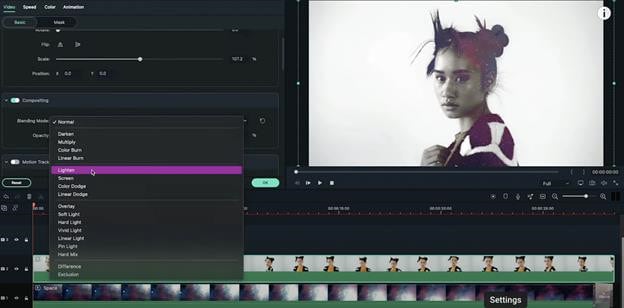
If you want to produce a perfect double-exposed video, blending layers is properly essential. To do this, double click the foreground video. Go to the Compositing option and set Blending Mode to Lighten. You can also configure Blending Mode based on your preference.
The steps that are outlined in this article can help you apply double exposure effects to your videos. You can modify your videos to your preferences by using all the resources that Filmora provides.
A simple video clip with a double-exposure effect adds a dramatic and dreamy effect to it. The creator can work with colors, exposures, and brightness to achieve a double-exposure effect. This technique provides creative results and allows the video creator to tell a story to the audience in a manner that a plain video clip cannot convey. It is useful, especially when editing personal or professional videos, such as documentaries, wedding videos, travel vlogs, and other artistic works.
Before, the double-exposure effect could only be achieved by using cameras and specialized photographic skills. These days, creators can use Filmora Video Editor to replicate the double-exposure effect in just a few simple steps. Filmora Video Editor is an easy-to-use tool that has helped over 85 million video creators from 150 countries around the world. Videos are compatible with iPhone, iPad, Samsung, Amazon, HTC, PSP, and many more. You can also watch quality videos in AVI, VOB, MP4, WMV, 3GP, MKV, AVI, and more.
To help you save time, Filmora simplifies complex features and frequently improves its services by adding new features such as speed ramping, masking, auto beat sync, and auto synchronization. The video editor also allows creators to have more creative freedom over their videos and share their outputs on different platforms such as YouTube, Facebook, and Instagram.
For more information, you can visit http://www.wondershare.com/ or visit the social media accounts of Filmora to get the most recent launches and updates.
Download Filmora Video Editor now and tell the world your creative stories.
Free Download For macOS 10.14 or later
To start your creative journey, you can hone your skills by focusing on at least one technique and progressively learning new skills. One of the various video editing techniques you can employ is double exposure. This method is based on an old technique in photography in which a film is exposed twice to create a single image. This article shows you how to use the same method to combine two or more video clips and create a double exposure effect.
You can create artistic videos that tell various stories and captivate viewers by using Filmora. The following steps describe how to create a double exposure effect in Filmora.
Step1 Download the Filmora application

Before you start editing, click https://bit.ly/3tav2d5 to download the Filmora app. On the page that appears, click the Free Download option. Then, the Filmora installer is automatically downloaded. To start installing Filmora, double-click the installer and click Agree to agree with the terms and conditions. Then, wait for approximately 2 minutes for the installation to complete.
Step2 Start a new project in Filmora

After a successful installation, the app automatically runs, and you can start editing videos. Click New Project to start a project on a clean canvas.
Before starting a new project, we recommend you plan a theme for your videos. You can incorporate different elements into your videos to convey a dramatic, light, or fun theme. This step will help you communicate the mood and message you want to convey to the audience.
Step3 Select a foreground video

To create a trendy double exposure effect, record a video clip with a white or neutral background. Then, import the specified video to Filmora. In the second layer of the video editing pane, drag the video.
The first video is called the foreground video, which serves as the base video to achieve the desired double exposure effect. It is important to choose neutral or calm colors to make it easier for you to remove the background and highlight the main subject of your video.
Step4 Edit the foreground video

Edit the foreground video by adjusting the color settings. Click the Color Correction icon to open the color settings. In the Advanced Color Tuning box that appears, click Adjust. In this article, the value of Exposure is set to 18, and Contrast is set to 28. Then, Vibrance and Saturation are set to -100. In the Light settings, the values of Highlights and Shadows are set to -100, Whites is set to 0, and Blacks is set to -30. You can experiment and play with the settings based on the theme that you want to achieve.
Step5 Select a background video

For the background video, select a video clip and import the video to Filmora. Then, drag the video in a layer below the foreground video.
When you select a background video, make sure that the video is vibrant, colorful, and has lots of texture. For example, you can select landscapes, flowers, leaves, textured patterns, city lights, sunsets, or other graphic components. The colors and lighting in the background video significantly impact the final output’s overall appearance.
Step6 Blend the foreground and background videos

If you want to produce a perfect double-exposed video, blending layers is properly essential. To do this, double click the foreground video. Go to the Compositing option and set Blending Mode to Lighten. You can also configure Blending Mode based on your preference.
The steps that are outlined in this article can help you apply double exposure effects to your videos. You can modify your videos to your preferences by using all the resources that Filmora provides.
A simple video clip with a double-exposure effect adds a dramatic and dreamy effect to it. The creator can work with colors, exposures, and brightness to achieve a double-exposure effect. This technique provides creative results and allows the video creator to tell a story to the audience in a manner that a plain video clip cannot convey. It is useful, especially when editing personal or professional videos, such as documentaries, wedding videos, travel vlogs, and other artistic works.
Before, the double-exposure effect could only be achieved by using cameras and specialized photographic skills. These days, creators can use Filmora Video Editor to replicate the double-exposure effect in just a few simple steps. Filmora Video Editor is an easy-to-use tool that has helped over 85 million video creators from 150 countries around the world. Videos are compatible with iPhone, iPad, Samsung, Amazon, HTC, PSP, and many more. You can also watch quality videos in AVI, VOB, MP4, WMV, 3GP, MKV, AVI, and more.
To help you save time, Filmora simplifies complex features and frequently improves its services by adding new features such as speed ramping, masking, auto beat sync, and auto synchronization. The video editor also allows creators to have more creative freedom over their videos and share their outputs on different platforms such as YouTube, Facebook, and Instagram.
For more information, you can visit http://www.wondershare.com/ or visit the social media accounts of Filmora to get the most recent launches and updates.
Download Filmora Video Editor now and tell the world your creative stories.
Free Download For macOS 10.14 or later
To start your creative journey, you can hone your skills by focusing on at least one technique and progressively learning new skills. One of the various video editing techniques you can employ is double exposure. This method is based on an old technique in photography in which a film is exposed twice to create a single image. This article shows you how to use the same method to combine two or more video clips and create a double exposure effect.
You can create artistic videos that tell various stories and captivate viewers by using Filmora. The following steps describe how to create a double exposure effect in Filmora.
Step1 Download the Filmora application

Before you start editing, click https://bit.ly/3tav2d5 to download the Filmora app. On the page that appears, click the Free Download option. Then, the Filmora installer is automatically downloaded. To start installing Filmora, double-click the installer and click Agree to agree with the terms and conditions. Then, wait for approximately 2 minutes for the installation to complete.
Step2 Start a new project in Filmora

After a successful installation, the app automatically runs, and you can start editing videos. Click New Project to start a project on a clean canvas.
Before starting a new project, we recommend you plan a theme for your videos. You can incorporate different elements into your videos to convey a dramatic, light, or fun theme. This step will help you communicate the mood and message you want to convey to the audience.
Step3 Select a foreground video

To create a trendy double exposure effect, record a video clip with a white or neutral background. Then, import the specified video to Filmora. In the second layer of the video editing pane, drag the video.
The first video is called the foreground video, which serves as the base video to achieve the desired double exposure effect. It is important to choose neutral or calm colors to make it easier for you to remove the background and highlight the main subject of your video.
Step4 Edit the foreground video

Edit the foreground video by adjusting the color settings. Click the Color Correction icon to open the color settings. In the Advanced Color Tuning box that appears, click Adjust. In this article, the value of Exposure is set to 18, and Contrast is set to 28. Then, Vibrance and Saturation are set to -100. In the Light settings, the values of Highlights and Shadows are set to -100, Whites is set to 0, and Blacks is set to -30. You can experiment and play with the settings based on the theme that you want to achieve.
Step5 Select a background video

For the background video, select a video clip and import the video to Filmora. Then, drag the video in a layer below the foreground video.
When you select a background video, make sure that the video is vibrant, colorful, and has lots of texture. For example, you can select landscapes, flowers, leaves, textured patterns, city lights, sunsets, or other graphic components. The colors and lighting in the background video significantly impact the final output’s overall appearance.
Step6 Blend the foreground and background videos

If you want to produce a perfect double-exposed video, blending layers is properly essential. To do this, double click the foreground video. Go to the Compositing option and set Blending Mode to Lighten. You can also configure Blending Mode based on your preference.
The steps that are outlined in this article can help you apply double exposure effects to your videos. You can modify your videos to your preferences by using all the resources that Filmora provides.
A simple video clip with a double-exposure effect adds a dramatic and dreamy effect to it. The creator can work with colors, exposures, and brightness to achieve a double-exposure effect. This technique provides creative results and allows the video creator to tell a story to the audience in a manner that a plain video clip cannot convey. It is useful, especially when editing personal or professional videos, such as documentaries, wedding videos, travel vlogs, and other artistic works.
Before, the double-exposure effect could only be achieved by using cameras and specialized photographic skills. These days, creators can use Filmora Video Editor to replicate the double-exposure effect in just a few simple steps. Filmora Video Editor is an easy-to-use tool that has helped over 85 million video creators from 150 countries around the world. Videos are compatible with iPhone, iPad, Samsung, Amazon, HTC, PSP, and many more. You can also watch quality videos in AVI, VOB, MP4, WMV, 3GP, MKV, AVI, and more.
To help you save time, Filmora simplifies complex features and frequently improves its services by adding new features such as speed ramping, masking, auto beat sync, and auto synchronization. The video editor also allows creators to have more creative freedom over their videos and share their outputs on different platforms such as YouTube, Facebook, and Instagram.
For more information, you can visit http://www.wondershare.com/ or visit the social media accounts of Filmora to get the most recent launches and updates.
Download Filmora Video Editor now and tell the world your creative stories.
Free Download For macOS 10.14 or later
To start your creative journey, you can hone your skills by focusing on at least one technique and progressively learning new skills. One of the various video editing techniques you can employ is double exposure. This method is based on an old technique in photography in which a film is exposed twice to create a single image. This article shows you how to use the same method to combine two or more video clips and create a double exposure effect.
You can create artistic videos that tell various stories and captivate viewers by using Filmora. The following steps describe how to create a double exposure effect in Filmora.
Step1 Download the Filmora application

Before you start editing, click https://bit.ly/3tav2d5 to download the Filmora app. On the page that appears, click the Free Download option. Then, the Filmora installer is automatically downloaded. To start installing Filmora, double-click the installer and click Agree to agree with the terms and conditions. Then, wait for approximately 2 minutes for the installation to complete.
Step2 Start a new project in Filmora

After a successful installation, the app automatically runs, and you can start editing videos. Click New Project to start a project on a clean canvas.
Before starting a new project, we recommend you plan a theme for your videos. You can incorporate different elements into your videos to convey a dramatic, light, or fun theme. This step will help you communicate the mood and message you want to convey to the audience.
Step3 Select a foreground video

To create a trendy double exposure effect, record a video clip with a white or neutral background. Then, import the specified video to Filmora. In the second layer of the video editing pane, drag the video.
The first video is called the foreground video, which serves as the base video to achieve the desired double exposure effect. It is important to choose neutral or calm colors to make it easier for you to remove the background and highlight the main subject of your video.
Step4 Edit the foreground video

Edit the foreground video by adjusting the color settings. Click the Color Correction icon to open the color settings. In the Advanced Color Tuning box that appears, click Adjust. In this article, the value of Exposure is set to 18, and Contrast is set to 28. Then, Vibrance and Saturation are set to -100. In the Light settings, the values of Highlights and Shadows are set to -100, Whites is set to 0, and Blacks is set to -30. You can experiment and play with the settings based on the theme that you want to achieve.
Step5 Select a background video

For the background video, select a video clip and import the video to Filmora. Then, drag the video in a layer below the foreground video.
When you select a background video, make sure that the video is vibrant, colorful, and has lots of texture. For example, you can select landscapes, flowers, leaves, textured patterns, city lights, sunsets, or other graphic components. The colors and lighting in the background video significantly impact the final output’s overall appearance.
Step6 Blend the foreground and background videos

If you want to produce a perfect double-exposed video, blending layers is properly essential. To do this, double click the foreground video. Go to the Compositing option and set Blending Mode to Lighten. You can also configure Blending Mode based on your preference.
The steps that are outlined in this article can help you apply double exposure effects to your videos. You can modify your videos to your preferences by using all the resources that Filmora provides.
A simple video clip with a double-exposure effect adds a dramatic and dreamy effect to it. The creator can work with colors, exposures, and brightness to achieve a double-exposure effect. This technique provides creative results and allows the video creator to tell a story to the audience in a manner that a plain video clip cannot convey. It is useful, especially when editing personal or professional videos, such as documentaries, wedding videos, travel vlogs, and other artistic works.
Before, the double-exposure effect could only be achieved by using cameras and specialized photographic skills. These days, creators can use Filmora Video Editor to replicate the double-exposure effect in just a few simple steps. Filmora Video Editor is an easy-to-use tool that has helped over 85 million video creators from 150 countries around the world. Videos are compatible with iPhone, iPad, Samsung, Amazon, HTC, PSP, and many more. You can also watch quality videos in AVI, VOB, MP4, WMV, 3GP, MKV, AVI, and more.
To help you save time, Filmora simplifies complex features and frequently improves its services by adding new features such as speed ramping, masking, auto beat sync, and auto synchronization. The video editor also allows creators to have more creative freedom over their videos and share their outputs on different platforms such as YouTube, Facebook, and Instagram.
For more information, you can visit http://www.wondershare.com/ or visit the social media accounts of Filmora to get the most recent launches and updates.
Download Filmora Video Editor now and tell the world your creative stories.
Also read:
- New A Complete Guide to the Best Brand Story Videos
- Updated 2024 Approved YouTube Zoom to Fill Is a Great Feature for Viewing Things in Depth. This Article Answers All Questions About Fixing YouTube Zoom to Fill Not Working on Your Device
- In 2024, Create Photoshop GIFs with Zero Hustle
- Add some Sci-Fi Touch to Your Next Video Content Using Wondershare Filmora Editing Tools to Create an Alternate Reality Effect for 2024
- New If You Are Looking for Reliable Solutions to Export Your Musical Slideshow Through a DVD Burning Process, Take a Breath, You Have Landed at the Right Place
- New Do You Want to Add Subtitles to Your Videos Efficiently? This Article Will Introduce an Online Subtitle Editor that Will Help You to Create Subtitles for Your Video for 2024
- Updated How to Create Discord Emoji GIF for 2024
- In 2024, Find The Best Free Canon LUTs
- New Clone Yourself in Videos with Filmora
- Updated In 2024, Through Speed Ramping, Create a Smooth Transition in Slow-Motion Videos. Follow This Guide and Learn About Premiere Pro Slow Motion and a Better Alternative
- New In 2024, 4 Methods How To Make a Recap Video
- Updated 2024 Approved How to Use Visual Effect for Zoom
- New 2024 Approved How to Use Motion Tracking in Video Editing
- New Detailed Steps to Rotate Videos Using Kdenlive for 2024
- Updated Online Video Makers to Use for 2024
- Updated In 2024, This Article Talks in Detail About How to Download Windows Movie Maker 2012 Version, the Key Features, How to Use It, Etc. It Further Discusses an Alternative Way to Create Videos on Windows PC. Check Out
- Updated 2024 Approved Read on to Learn About OpenCV Object Tracking, What It Is, and How to Implement It in Python, and OpenCV
- Easily Cut Large Video Faster on Mac
- New In 2024, Best 8 Online GIF to APNG Converters
- 15 Best Free Cinematic LUTs for Your Film for 2024
- Updated 2024 Approved What Is AI Composite Video App and AI Composite Video Tutorial
- New 2024 Approved Want to Know How to Slow Down a Video on iPhone or Speed It Up? This Guide Provides Step by Step Method to Do so Using Simple Techniques. Find Out More About It
- 2024 Approved Lets Create a New Premiere Pro Project, Import some Video, and Control Video Playback Speed. Also, Find Alternative Software (WonderShare Filmora) to Control Playback Speed in Minutes
- Updated In 2024, Adding Shake Effects to Your Video With Alight Motion
- How to Speed Up Video on Instagram Reels for 2024
- Create Stunning Videos Like a Pro with Filmora. Learn About Its Benefits and some Amazing Video and Audio Editing Features Such as Split Screens, Keyframing, Etc
- 2024 Approved A Review of 3D LUT Mobile App - A Composite Application for Editing Media
- Updated 2024 Approved Slow Down Videos on Instagram With Perfection A Guide
- In 2024, How to Make a Time-Lapse Video Online
- In 2024, 4 Methods to Crop a Video on Android Easily
- New Let Us Help You with Something that You Might Not Know. Have You Ever Worked with MOV File Format Before? Or Do You Know What that Is? Lets Talk About It for 2024
- Top Tricks for Learning Photo Slideshow for 2024
- 2024 Approved Do You Have an Idea on How to Zoom in on Snapchat? Using This Article, You Will Find the Easiest Way to Zoom in and Out on Snapchat Videos for Different Purposes
- Updated 2024 Approved Best Software or Website to Convert Video Format
- New In 2024, Top 6 Drones for Videography
- Updated In 2024, What Is the Best Frame Rate for 4K Videos?
- Have You a Desire to Imbibe Your PowerPoint Presentations with Custom Effects and Tools? Be There to Learn All About Creating Custom Slideshows in PowerPoint with Utmost Ease for 2024
- New In 2024, How to Convert a GIF to a Video for Instagram
- Updated Mastering OpenCV Object Tracking A Comprehensive Guide for Beginners and Experts for 2024
- Updated 2024 Approved 22 Free Video Editing Software to Save Your Money and Time
- Updated Splitting Video Into Frames with the FFmpeg Step by Step
- Updated In 2024, Google Meet Green Screen
- Updated In 2024, Want to Save Your Edited Video File in MP4 Format in Windows Movie Maker? Here Are the Simple Steps Along with a Better Alternative
- Updated A Complete Guideline About QuickTime Player for 2024
- New Are You Eager to Discover the Top-Rated and Reliable LUTs that Can Be Used in Shotcut? This Article Will Help You a Lot with This Matter
- 2024 Approved 10 Creative AR Teaching Examples to Tell You What Is AR in Teaching
- Updated In 2024, Are You Looking for the Best Way to Add Subtitles to Your Video? The Top SRT File Creators Can Help You Do That
- New How to Split a Clip in After Effects
- In 2024, How to Create an URL for Your Video?
- In 2024, How to Change GPS Location on Apple iPhone 14 Easily & Safely | Dr.fone
- In 2024, How to Change your Apple iPhone 14 Location on Twitter | Dr.fone
- Will the iPogo Get You Banned and How to Solve It On Samsung Galaxy A25 5G | Dr.fone
- How To Fix Part of the Touch Screen Not Working on HTC U23 Pro | Dr.fone
- FRP Hijacker by Hagard Download and Bypass your Samsung Galaxy Z Flip 5 FRP Locks
- In 2024, Pokémon Go Cooldown Chart On Tecno Pova 6 Pro 5G | Dr.fone
- Will iSpoofer update On Nokia C110 | Dr.fone
- Is Your Apple iPhone SE (2022) in Security Lockout? Proper Ways To Unlock | Dr.fone
- Where Is the Best Place to Catch Dratini On Vivo V27e | Dr.fone
- How can I get more stardust in pokemon go On Poco X5? | Dr.fone
- In 2024, The Ultimate Guide How to Bypass Swipe Screen to Unlock on Nokia C32 Device
- In 2024, Forgotten The Voicemail Password Of Infinix Hot 30i? Try These Fixes
- 3 Best Tools to Hard Reset Infinix Note 30 Pro | Dr.fone
- In 2024, How To Do Realme C51 Screen Sharing | Dr.fone
- How Do You Get Sun Stone Evolutions in Pokémon For Apple iPhone 12 Pro? | Dr.fone
- Top Apps and Online Tools To Track Samsung Galaxy A54 5G Phone With/Without IMEI Number
- How To Deal With the Samsung Galaxy A54 5G Screen Black But Still Works? | Dr.fone
- How to Spy on Text Messages from Computer & Apple iPhone SE (2020) | Dr.fone
- 9 Solutions to Fix Process System Isnt Responding Error on Tecno Camon 30 Pro 5G | Dr.fone
- Title: New How to Rotate a Video in Windows 10
- Author: Morgan
- Created at : 2024-05-19 05:12:03
- Updated at : 2024-05-20 05:12:03
- Link: https://ai-video-editing.techidaily.com/new-how-to-rotate-a-video-in-windows-10/
- License: This work is licensed under CC BY-NC-SA 4.0.


