
:max_bytes(150000):strip_icc():format(webp)/GettyImages-1342255561-483b636ee00f40a1b3d91d1969b1aaf6.jpg)
New How to Windows Online Movie Maker Complete Guide for 2024
How to Windows Online Movie Maker [Complete Guide]
The likelihood is that video will soon play a significant role in your content marketing approach, if it hasn’t already – and for that using windows online movie maker is inevitable. You are an emerging brand, a sole proprietor, or even a podcaster. Knowing the importance of video marketing to content producers and agencies is second nature if you’re an astute digital marketer It may be costly and challenging to utilize video editing software. Fortunately, there are free online video editors available.
Before very recently, video editing needed highly specialized skills and was done manually using different tools. Windows Movie Maker used to be a standard component of every Windows user’s toolbox and was a highly recommended video editing product for novices. With the windows movie maker online, the application was well-liked for its ease of use and entertaining special effects, but most significantly - it was free. It came pre-installed on all Windows machines. You may do that with the help of our handy list of the top three online video creators.
Part 1. How to Make a Video Online [Use Movie Maker Windows Online]
Using the help of Movie Maker, you may create videos online with your browser. It enables you to create professional-caliber videos without having to purchase video editing tools at professional-caliber costs. For every genre and need, this web program includes stock video, animated text, audio tracks, and on-screen effects. Your own video clips are uploaded. Then, use the simple drag-and-drop online video editor in Movie Maker to edit footage and add special effects and music to make your movie shine.
Making fantastic compilation films from your already-existing photographs and videos doesn’t need you to be a skilled editor. Even for amateur video makers, the platform’s UI is simple to use and straightforward to navigate. The customizing choices in Movie Maker are many. You have the option of uploading your own fonts and logos. You may also watermark your films and alter the text’s color. Additionally, there are a ton of very unique components like stickers, vector shapes, and masks that may enhance the visual appeal of your video productions and widen your creative boundaries.
Steps to Make Video with Movie Maker Online
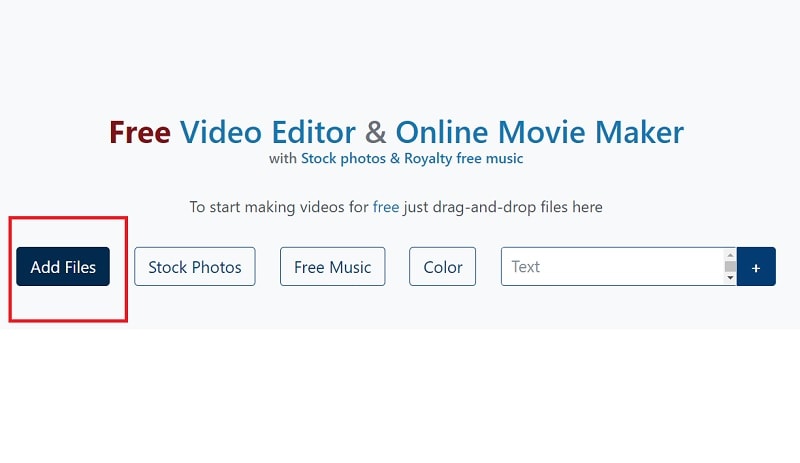
Step1 Go to Movie Maker Online
Using Movie Maker Online, you can quickly and easily make incredibly interesting compilation films using your already-posted photographs and videos. You’ll immediately be sent to the editor, where you can begin organizing your films. Here’s the official link to the toolkit:
Step2 Upload Files to Web
Your photographs, videos, and text may all be uploaded. If you like the default music, you may skip the step to change it; otherwise, you can choose another song from our library or upload your own MP3 file. Files from a variety of sources and devices may be added. Click the Import Media button to start importing your own media. Click Open after locating the video you wish to modify.
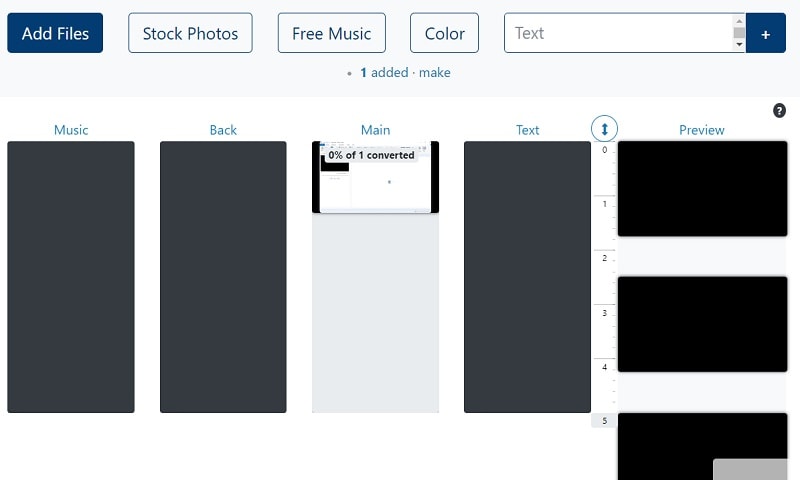
Step3 Create an online video
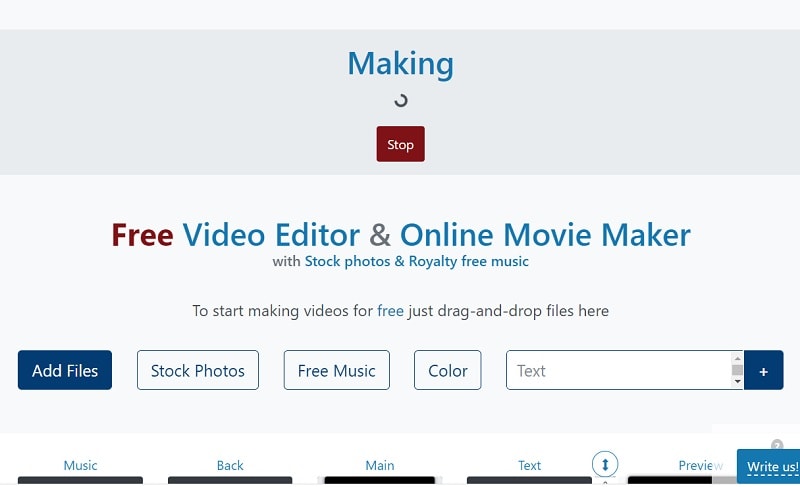
Add your music to your video compilation after all of your clips have been placed on the timeline. To accomplish that, choose a song depending on the genre or mood you want by clicking on the Music option on the left menu panel. To listen to the music track, click the little icon to the left of it. Text, colors, pictures, and video may all be customized to your heart’s delight. Add effects, drag, cut, etc. Press the Make Video button.
Step4 Save and Share with Others
Sharing your films on Facebook, Instagram, YouTube, and other platforms is made effortless. You may also send your loved ones the URLs to your videos. When you are happy with the changes, click the Save & Share option in the upper right corner, choose the quality you want to download your movie in, and then click the Export button. Download the updated video, then post it.
Part 2. Other Windows Online Movie Makers to Use [Top 3]
1. Kizoa
Link: Kizoa
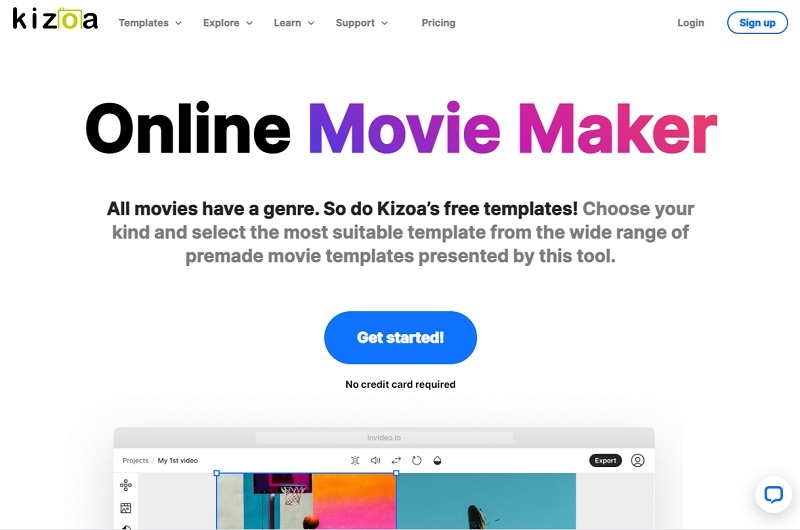
Customizing the appearance of your film is one of the finest ways to make it seem like it is your own. With the Kizoa tool, you may trim, apply a crossfade effect, choose the required resolution, and format for an output video in addition to merging files. Utilize Kizoa’s online video creator to produce eye-catching videos that will hold your audience’s attention. Create any kind of video, from personal family video slideshows to expert films to advertise your company. With the drag-and-drop movie production tool from Kizoa, you can create your very own video in a matter of minutes.
Use a video template as your starting point if you need inspiration. Key framing, animated overlays, noise reduction, transitions, and titles are just a few of the features it provides to help you produce excellent footage. For rapid video editing, there is a video production wizard. Windows Movie Maker’s auto movie themes pale in comparison to those provided by this program. Its extensive collection of stock footage and audio tracks helps you to concentrate on the crucial elements without having to drastically decrease the length of your film or the number of scenes.
2. FlexClip
Link: FlexClip
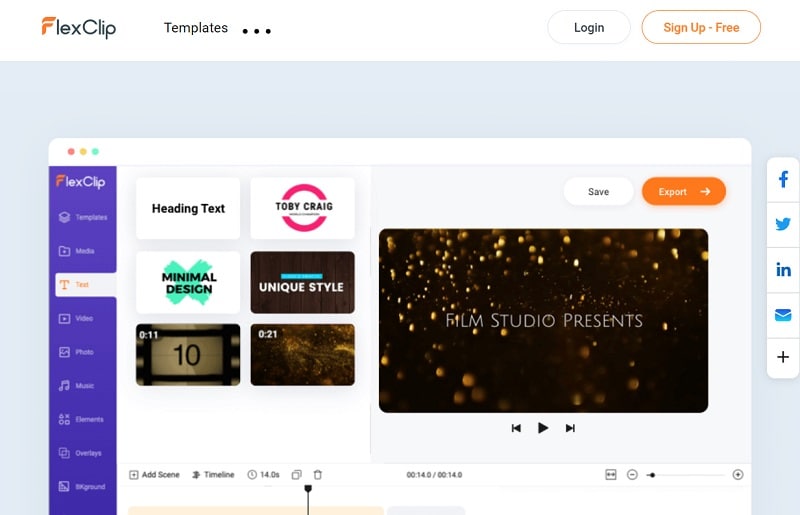
With the aid of the online video effects tool FlexClip, you may quickly and easily make entertaining short films. It has a ton of video editing features that you may use without logging in or creating an account, like merging, compressing, compiling, adding text, creating memes, etc. For those that are muted, you may use FlexClip to add animated text that blends in with the style of your film. Additionally, you may add your logo so that everyone is aware of who created the masterpiece they just saw.
An online video editor called FlexClip is mainly focused on producing high-quality marketing, advertising, and promotional films for companies. Recording a single video that will function on all social networking and video-sharing websites is almost impossible. Instagram, YouTube, and Facebook Marketing are among the partners of FlexClip that have received expert approval. It is used by marketers and enthusiasts to quickly create looping movies and stop motion animation. But as it only provides very basic functionality, it may not be the greatest choice for more intricate, demanding editing.
3. Veed.Io
Link: Veed.Io
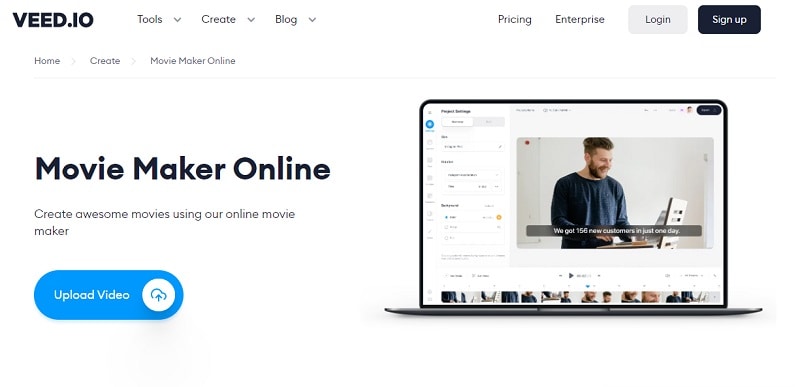
With only a few mouse clicks, users of the browser-based video editing program VEED may create professional-caliber movies. The greatest movie-making tools, including filters, effects, and stickers, are available on VEED. There are no intricate timelines, layers, or intricacy since it is a simple program that runs in your web browser. Simple drag-and-drop functionality is all you need to convey your tales. You may modify your video using its features. Using the video track below, you may combine, divide, or cut your files. Visit our website to see all of our filters, stickers, add-ons, and other tools.
Any device, whether an iPhone or Android phone, a MacBook, a Windows or Linux computer, may use VEED’s online video editor. You have access to all the resources you need to make amazing videos using VEED’s online video editor. Our user-friendly interface is very simple to use and is contemporary and intuitive. The native video sizes on each of the publishing sites, including Facebook, YouTube, and Vimeo, may all be altered using Veed. Finally, click “Export” in the editor’s upper-right corner, and your video will render quickly. Share some!
Conclusion
Use this editing list to produce more compelling video mashups for YouTube and other social media platforms in order to expand your audience, cultivate real connections with them, and eventually increase conversion rates. Because they combine the complex capabilities of the expensive, professional video suites with the user-friendliness and cost that appeal to novices, these online makers are a popular among editors of all skill levels. Make an investment in one of these video editing tools and own it.
Free Download For Win 7 or later(64-bit)
Free Download For macOS 10.14 or later
Part 1. How to Make a Video Online [Use Movie Maker Windows Online]
Using the help of Movie Maker, you may create videos online with your browser. It enables you to create professional-caliber videos without having to purchase video editing tools at professional-caliber costs. For every genre and need, this web program includes stock video, animated text, audio tracks, and on-screen effects. Your own video clips are uploaded. Then, use the simple drag-and-drop online video editor in Movie Maker to edit footage and add special effects and music to make your movie shine.
Making fantastic compilation films from your already-existing photographs and videos doesn’t need you to be a skilled editor. Even for amateur video makers, the platform’s UI is simple to use and straightforward to navigate. The customizing choices in Movie Maker are many. You have the option of uploading your own fonts and logos. You may also watermark your films and alter the text’s color. Additionally, there are a ton of very unique components like stickers, vector shapes, and masks that may enhance the visual appeal of your video productions and widen your creative boundaries.
Steps to Make Video with Movie Maker Online
Step1 Go to Movie Maker Online
Using Movie Maker Online, you can quickly and easily make incredibly interesting compilation films using your already-posted photographs and videos. You’ll immediately be sent to the editor, where you can begin organizing your films. Here’s the official link to the toolkit:
Step2 Upload Files to Web
Your photographs, videos, and text may all be uploaded. If you like the default music, you may skip the step to change it; otherwise, you can choose another song from our library or upload your own MP3 file. Files from a variety of sources and devices may be added. Click the Import Media button to start importing your own media. Click Open after locating the video you wish to modify.
Step3 Create an online video
Add your music to your video compilation after all of your clips have been placed on the timeline. To accomplish that, choose a song depending on the genre or mood you want by clicking on the Music option on the left menu panel. To listen to the music track, click the little icon to the left of it. Text, colors, pictures, and video may all be customized to your heart’s delight. Add effects, drag, cut, etc. Press the Make Video button.
Step4 Save and Share with Others
Sharing your films on Facebook, Instagram, YouTube, and other platforms is made effortless. You may also send your loved ones the URLs to your videos. When you are happy with the changes, click the Save & Share option in the upper right corner, choose the quality you want to download your movie in, and then click the Export button. Download the updated video, then post it.
Part 2. Other Windows Online Movie Makers to Use [Top 3]
1. Kizoa
Link: Kizoa
Customizing the appearance of your film is one of the finest ways to make it seem like it is your own. With the Kizoa tool, you may trim, apply a crossfade effect, choose the required resolution, and format for an output video in addition to merging files. Utilize Kizoa’s online video creator to produce eye-catching videos that will hold your audience’s attention. Create any kind of video, from personal family video slideshows to expert films to advertise your company. With the drag-and-drop movie production tool from Kizoa, you can create your very own video in a matter of minutes.
Use a video template as your starting point if you need inspiration. Key framing, animated overlays, noise reduction, transitions, and titles are just a few of the features it provides to help you produce excellent footage. For rapid video editing, there is a video production wizard. Windows Movie Maker’s auto movie themes pale in comparison to those provided by this program. Its extensive collection of stock footage and audio tracks helps you to concentrate on the crucial elements without having to drastically decrease the length of your film or the number of scenes.
2. FlexClip
Link: FlexClip
With the aid of the online video effects tool FlexClip, you may quickly and easily make entertaining short films. It has a ton of video editing features that you may use without logging in or creating an account, like merging, compressing, compiling, adding text, creating memes, etc. For those that are muted, you may use FlexClip to add animated text that blends in with the style of your film. Additionally, you may add your logo so that everyone is aware of who created the masterpiece they just saw.
An online video editor called FlexClip is mainly focused on producing high-quality marketing, advertising, and promotional films for companies. Recording a single video that will function on all social networking and video-sharing websites is almost impossible. Instagram, YouTube, and Facebook Marketing are among the partners of FlexClip that have received expert approval. It is used by marketers and enthusiasts to quickly create looping movies and stop motion animation. But as it only provides very basic functionality, it may not be the greatest choice for more intricate, demanding editing.
3. Veed.Io
Link: Veed.Io
With only a few mouse clicks, users of the browser-based video editing program VEED may create professional-caliber movies. The greatest movie-making tools, including filters, effects, and stickers, are available on VEED. There are no intricate timelines, layers, or intricacy since it is a simple program that runs in your web browser. Simple drag-and-drop functionality is all you need to convey your tales. You may modify your video using its features. Using the video track below, you may combine, divide, or cut your files. Visit our website to see all of our filters, stickers, add-ons, and other tools.
Any device, whether an iPhone or Android phone, a MacBook, a Windows or Linux computer, may use VEED’s online video editor. You have access to all the resources you need to make amazing videos using VEED’s online video editor. Our user-friendly interface is very simple to use and is contemporary and intuitive. The native video sizes on each of the publishing sites, including Facebook, YouTube, and Vimeo, may all be altered using Veed. Finally, click “Export” in the editor’s upper-right corner, and your video will render quickly. Share some!
Conclusion
Use this editing list to produce more compelling video mashups for YouTube and other social media platforms in order to expand your audience, cultivate real connections with them, and eventually increase conversion rates. Because they combine the complex capabilities of the expensive, professional video suites with the user-friendliness and cost that appeal to novices, these online makers are a popular among editors of all skill levels. Make an investment in one of these video editing tools and own it.
Free Download For Win 7 or later(64-bit)
Free Download For macOS 10.14 or later
This Article Aims to Provide a Step-by-Step Guide to Changing a Video’s Speed by Using the Speed Adjustment Panel and Duration Panel on Wondershare Filmora
Speeding and slowing down the speed of a video is a marvel in the video editing world. In the older days, this feat was accomplished only by the big-budget filming industry.
This article will dive into how you can access the modern-day features available in video editing software. From these features, you can alter the speed of your video easily. However, before we get into the step-by-step guide, let’s understand what fast and slow-mo videos are.
Part 1. What Are Fast and Slow Motion Videos?
As the name suggests, fast-motion videos are the ones that have been sped up from their average speed.

Similarly, slow-motion videos are the ones that have been slowed down from their average speed. The slow-motion effect, also known as the slow-mo effect, is widespread in modern cinema.

Now that we know what Fast and slow-motion videos are. Let’s understand their applications. Or how you can use them in your videos. Scroll below to learn more!
Part 2. Why Should You Change the Speed of Your Videos?
The answer to this question would be that it’s a personal creative decision that will allow you to make your videos more engaging.
Fast Motion Videos
Fast-motion videos are used in many areas of filming. For example, you can speed up your videos to create a funny video or shorten its length.
The fast-motion effect has many applications, such as cooking tutorial videos. For example, the step-by-step process of a cooking tutorial can be too long to fit into a single video. Or it could also help you in cases where you want to keep the length of the video short.
The fast motion of the steps will allow the viewer to quickly grasp the whole process without watching the entire video.
Slow Motion Videos
You can also slow down your videos to give the viewers a more detailed perspective of a scene. Or you can also create a slow-mo video that offers a general surreal vibe.
A famous example is in action films. The producers of the first Matrix film used the Slow-mo effect in the famous bullet dodging scene.

You may wonder how the film producers made the slow-mo effect. The technology at that time was less developed than the recent day. So, even you can create a slow-mo effect.
Before we get into the editing process, let’s first understand what you will need to change the speed of your videos!
Part 3. What Will You Need to Change the Speed of Your Videos?
You will need the following essentials to change the speed of a video:
1. Wondershare Filmora
Free Download For Win 7 or later(64-bit)
Free Download For macOS 10.14 or later
To begin, you will need a good video editor. Wondershare Filmora is the best video editing software available. It has a very engaging system UI that allows inexperienced users to learn how to use it quickly. It also has a diverse collection of stock media. And not only that! It allows you to access reliable features to change the speed of a video.
You can change the speed of the video on Filmora by the speed adjustment panel or by the duration panel present above the timeline. It will adjust in just seconds with a few clicks. This feature makes Filmora more prior with editing tools.

2. Video Clips
Well, it is evident that to change the speed of your videos, you will need video clips. But there are a few things you can keep in mind before adjusting the speed of a video.
![]()
Note: Slowing down a video requires a shot at a higher frame rate. The greater the frame rate, the better will be the slow-mo quality. On the other hand, speeding up videos does not have a strict frame rate requirement.
Part 4. How Can You Change the Speed of Your Videos?
Here you will learn two ways in which you can change the speed of your videos. The two methods to change the speed of your video are mentioned:
- The speed adjustment panel.
- Duration panel settings.
Let’s get started with the editing process. The first method we will look into is the Speed Adjustment panel.
1. Change Speed With the Speed Adjustment Panel
The Speed Adjustment panel is the speed adjuster in the Wondershare Filmora software. This feature will give you a drag bar to adjust the speed of your video.
You can move the bar to the right to increase the speed of your video. Similarly, you can move it to the left to decrease the rate.
But before we use this feature, we will need to download the Filmora video editing software. So please scroll below to learn how to download it!
Step1 Download Filmora
First and foremost, you must have access to Filmora. For this, download Wondershare Filmora. Then, activate this app or software on your PC.
Step2 Import The Video Files
The next step after downloading Filmora is to import your video clips. To accomplish this, follow the steps outlined below:
- Locate and select the Import icon on the top left side of the Filmora Home Interface.
- It takes you to your computer’s library.
- Select the videos to be edited and then click OK.

You can also import the files by another method. After you have opened Filmora, you can restore the Filmora Window size and import by dragging and dropping the clips:
- Drag the cursor to select the video clips you want.
- Then, drop them in the Filmora import window.

Filmora supports various formats for your video clips. They include the Mp4, AVI, MOV, GIFs, and more.
After you have imported your video clips, add them to the timeline as shown below!
Step3 Add The Video Clips to The Timeline
After you’ve imported clips in the Import window, drag them onto the timeline. Follow the steps outlined below to accomplish this:
- Drag the clips into the import window and select them.
- Then, insert them into the timeline.

Now that we have our video clips in the timeline, we can start adjusting the speed.
Step4 Open the Speed Adjustment Panel
The speed adjustment panel, or the Uniform Speed, is the feature of Filmora that allows you to change the speed of your video. For example, to open the Unifrom Speed panel, do as follows:
- Double-click on the video clip.
- In the pop-up column, scroll down till you see the Unifrom Speed option and click on it.
- The speed controls will be shown in the import window.

In the speed control panel, you can see the speed adjuster slider. A number will usually mark this at the end. This number tells you the current speed your video is calibrated in and how fast or slow the motion effects will be.
1.00 is always the average speed. 0.5 being half and 2.00 being double the average speed. To control the speed through the slider, you will need to do the following:
- To increase the speed: Type in the number you want your rate to be. Or, drag the slider to the right as you wish.
- To decrease the speed: Type in a number less than the standard 1.00, or you can drag the slider to the left as you wish.
The number of your speed can be an inconvenience if you have no prior experience. Instead, render the video and play it from the beginning with the changes that you made. It gives you a better idea of the speed of your video.

Step5 Detach The Audio
The corresponding audio also gets affected when you slow down or speed up a video. In this scenario, you can also choose to detach the audio beforehand. It allows you to maintain the original playback speed. To detach the audio, follow the steps as mentioned:
- Right-click on the video clip.
- In the pop-up column, scroll down to the Detach Audio option and click on it.

It will create an audio file in a separate audio tab in the timeline. You can adjust this audio according to your liking. You can edit the detached audio by:
- Double-click on the audio file.
- A settings menu will open in the import window.
- Adjust the Fade options for your Audio.
- Drag the Fade out slider to the right to Fade out your Audio.
- To Fade in your Audio, drag the Fade in slider to the right.

You can also remove the background noise and the pitch of the audio if you want. You can also replace the video’s original audio with a new one. Click on the audio file and press Del on the keyboard to delete it. To add new audio, do as mentioned ahead:
- Click on The Audio icon above the import window.
- Browse The Audio that matches the vibe of your video.
- Drag and drop it below your video clip.

Doing so would have created alternate audio for your video. Play the video from the start and confirm your changes.
Step6 Save Your Project
Saving a project on Filmora is straightforward. First, you need a few steps to proceed with it. Then, when you are done making changes to the video, simply follow as guided ahead, and you’ll be good to go.
- On the Filmora home interface, Go to > File > Save Project.

- Select the Library/Folder where you want your project to be stored.
- Type in the text box to change the name of your project.

- Click on Save.
That’s about it! You have now saved your project. Now let’s move on to export our video.
Step7 Export Your Video
After we are done with saving our project, we will now move on to export our video.
![]()
Note: Before we export our video, ensure everything is according to your wish. Play the final video again and confirm your changes.
You can export your video to many of the available video formats. And not only that, but you can also export your video to local files and a specific device. You can also export your video directly to YouTube, Vimeo, and DVD format.

To export your video, all you have to do is the following steps:
- Click on Export.
- Type in the Video name.
- Select the Directory you want your file to be stored in.
- Select the Video Format.
- Select the Resolution of your Video.
![]()
Note: If you want to export your video directly to Youtube or Vimeo, ensure you are logged in.
- Click on Export.

Wait till Wondershare Filmora finishes exporting your video. Then, another window will pop up for a reminder when the shipping is done.
These were the methods by which you can change the speed of your video using the Speed Adjustment panel. Now let’s move on to the following method to adjust the speed via the Duration panel.
2. Change Speed via the Duration Panel
The duration panel is one the most valuable features of Wondershare Filmora as it allows you to change the video speed by duration adjustment.
This feature is typically helpful when you have a space between video clips and want to fill it. By measuring the time between the two clips, you can adjust the duration of your video.
It will ultimately hasten the speed of your video. The hastening in rate will depend upon the gap. The smaller the gap, the faster the video will be. Similarly, the greater the gap is, the longer the video will be.
Apart from the Speed Adjustment Panel, the Duration Panel has the advantage of editing the speed of your video by simply typing in the text.
Step1 Import Video Clips to Timeline
After downloading Filmora, the next step is importing your video clips. To do so, follow the steps outlined below:
- Locate and click the Import icon in the upper left corner of the Filmora Home Interface.
- Choose the videos to be edited, then click OK.
Now that you have imported files into Filmora, you can add them to the Timeline. Notice the steps mentioned ahead:
- Drag the clips into the import window and select them.
- Then, insert them into the timeline.
You can begin the editing process now that the clips are in the timeline.
Step2 Open The Duration Panel
The Duration Panel comes attached to the Unifrom Speed Panel. To access the Duration Panel, follow the steps ahead:
- Right-click on the video clip.
- In the pop column, scroll below to Unifrom Speed.
It will open the uniform speed panel in the import window. Below the speed of the controls, you can notice The Duration Panel.
Step3 Change The Speed of The Video
In The Duration Panel, you can see the average speed of your video clip. Now, if you want to reduce the speed of your video, you have to increase the duration of your video. Similarly, if you’re going to increase the speed of your video, you would have to decrease the duration.
Slow Down The Video
To slow down the video clip, follow the steps mentioned below:
- In The Duration Panel, Increase the time of the video.
- Type in a number bigger than the normal value
![]()
Note: If the average speed of the video is 00:01:00:00, increasing the value of the duration to 00:02:00:00 will reduce the speed of your video by half.

Speed Up The Video
To increase the speed of your video, follow as guided ahead:
- In The Duration Panel, decrease the time of the video.
- Type in a number smaller than the normal value
![]()
Note: If the normal video speed is 00:01:00:00, decreasing the value of the duration to 00:00:30:00 will increase the speed of your video by double.

Congratulations! You have successfully learned how to change the speed of your video by Filmora. Now, you can use both the Speed Adjustment Panel and The Duration Panel to adjust the speed of your video.
Conclusion
Changing the speed of your video can be helpful in many filming scenarios. Adjusting the speed in the older days was a marvel in the video editing industry. But the technology in the present day has allowed the typical user to edit the speed of a video.
By following the steps mentioned in this article, you can now change the speed of your video by Wondershare Filmora.
Free Download For macOS 10.14 or later
To begin, you will need a good video editor. Wondershare Filmora is the best video editing software available. It has a very engaging system UI that allows inexperienced users to learn how to use it quickly. It also has a diverse collection of stock media. And not only that! It allows you to access reliable features to change the speed of a video.
You can change the speed of the video on Filmora by the speed adjustment panel or by the duration panel present above the timeline. It will adjust in just seconds with a few clicks. This feature makes Filmora more prior with editing tools.
2. Video Clips
Well, it is evident that to change the speed of your videos, you will need video clips. But there are a few things you can keep in mind before adjusting the speed of a video.
![]()
Note: Slowing down a video requires a shot at a higher frame rate. The greater the frame rate, the better will be the slow-mo quality. On the other hand, speeding up videos does not have a strict frame rate requirement.
Part 4. How Can You Change the Speed of Your Videos?
Here you will learn two ways in which you can change the speed of your videos. The two methods to change the speed of your video are mentioned:
- The speed adjustment panel.
- Duration panel settings.
Let’s get started with the editing process. The first method we will look into is the Speed Adjustment panel.
1. Change Speed With the Speed Adjustment Panel
The Speed Adjustment panel is the speed adjuster in the Wondershare Filmora software. This feature will give you a drag bar to adjust the speed of your video.
You can move the bar to the right to increase the speed of your video. Similarly, you can move it to the left to decrease the rate.
But before we use this feature, we will need to download the Filmora video editing software. So please scroll below to learn how to download it!
Step1 Download Filmora
First and foremost, you must have access to Filmora. For this, download Wondershare Filmora. Then, activate this app or software on your PC.
Step2 Import The Video Files
The next step after downloading Filmora is to import your video clips. To accomplish this, follow the steps outlined below:
- Locate and select the Import icon on the top left side of the Filmora Home Interface.
- It takes you to your computer’s library.
- Select the videos to be edited and then click OK.
You can also import the files by another method. After you have opened Filmora, you can restore the Filmora Window size and import by dragging and dropping the clips:
- Drag the cursor to select the video clips you want.
- Then, drop them in the Filmora import window.
Filmora supports various formats for your video clips. They include the Mp4, AVI, MOV, GIFs, and more.
After you have imported your video clips, add them to the timeline as shown below!
Step3 Add The Video Clips to The Timeline
After you’ve imported clips in the Import window, drag them onto the timeline. Follow the steps outlined below to accomplish this:
- Drag the clips into the import window and select them.
- Then, insert them into the timeline.
Now that we have our video clips in the timeline, we can start adjusting the speed.
Step4 Open the Speed Adjustment Panel
The speed adjustment panel, or the Uniform Speed, is the feature of Filmora that allows you to change the speed of your video. For example, to open the Unifrom Speed panel, do as follows:
- Double-click on the video clip.
- In the pop-up column, scroll down till you see the Unifrom Speed option and click on it.
- The speed controls will be shown in the import window.
In the speed control panel, you can see the speed adjuster slider. A number will usually mark this at the end. This number tells you the current speed your video is calibrated in and how fast or slow the motion effects will be.
1.00 is always the average speed. 0.5 being half and 2.00 being double the average speed. To control the speed through the slider, you will need to do the following:
- To increase the speed: Type in the number you want your rate to be. Or, drag the slider to the right as you wish.
- To decrease the speed: Type in a number less than the standard 1.00, or you can drag the slider to the left as you wish.
The number of your speed can be an inconvenience if you have no prior experience. Instead, render the video and play it from the beginning with the changes that you made. It gives you a better idea of the speed of your video.
Step5 Detach The Audio
The corresponding audio also gets affected when you slow down or speed up a video. In this scenario, you can also choose to detach the audio beforehand. It allows you to maintain the original playback speed. To detach the audio, follow the steps as mentioned:
- Right-click on the video clip.
- In the pop-up column, scroll down to the Detach Audio option and click on it.
It will create an audio file in a separate audio tab in the timeline. You can adjust this audio according to your liking. You can edit the detached audio by:
- Double-click on the audio file.
- A settings menu will open in the import window.
- Adjust the Fade options for your Audio.
- Drag the Fade out slider to the right to Fade out your Audio.
- To Fade in your Audio, drag the Fade in slider to the right.
You can also remove the background noise and the pitch of the audio if you want. You can also replace the video’s original audio with a new one. Click on the audio file and press Del on the keyboard to delete it. To add new audio, do as mentioned ahead:
- Click on The Audio icon above the import window.
- Browse The Audio that matches the vibe of your video.
- Drag and drop it below your video clip.
Doing so would have created alternate audio for your video. Play the video from the start and confirm your changes.
Step6 Save Your Project
Saving a project on Filmora is straightforward. First, you need a few steps to proceed with it. Then, when you are done making changes to the video, simply follow as guided ahead, and you’ll be good to go.
- On the Filmora home interface, Go to > File > Save Project.
- Select the Library/Folder where you want your project to be stored.
- Type in the text box to change the name of your project.
- Click on Save.
That’s about it! You have now saved your project. Now let’s move on to export our video.
Step7 Export Your Video
After we are done with saving our project, we will now move on to export our video.
![]()
Note: Before we export our video, ensure everything is according to your wish. Play the final video again and confirm your changes.
You can export your video to many of the available video formats. And not only that, but you can also export your video to local files and a specific device. You can also export your video directly to YouTube, Vimeo, and DVD format.
To export your video, all you have to do is the following steps:
- Click on Export.
- Type in the Video name.
- Select the Directory you want your file to be stored in.
- Select the Video Format.
- Select the Resolution of your Video.
![]()
Note: If you want to export your video directly to Youtube or Vimeo, ensure you are logged in.
- Click on Export.
Wait till Wondershare Filmora finishes exporting your video. Then, another window will pop up for a reminder when the shipping is done.
These were the methods by which you can change the speed of your video using the Speed Adjustment panel. Now let’s move on to the following method to adjust the speed via the Duration panel.
2. Change Speed via the Duration Panel
The duration panel is one the most valuable features of Wondershare Filmora as it allows you to change the video speed by duration adjustment.
This feature is typically helpful when you have a space between video clips and want to fill it. By measuring the time between the two clips, you can adjust the duration of your video.
It will ultimately hasten the speed of your video. The hastening in rate will depend upon the gap. The smaller the gap, the faster the video will be. Similarly, the greater the gap is, the longer the video will be.
Apart from the Speed Adjustment Panel, the Duration Panel has the advantage of editing the speed of your video by simply typing in the text.
Step1 Import Video Clips to Timeline
After downloading Filmora, the next step is importing your video clips. To do so, follow the steps outlined below:
- Locate and click the Import icon in the upper left corner of the Filmora Home Interface.
- Choose the videos to be edited, then click OK.
Now that you have imported files into Filmora, you can add them to the Timeline. Notice the steps mentioned ahead:
- Drag the clips into the import window and select them.
- Then, insert them into the timeline.
You can begin the editing process now that the clips are in the timeline.
Step2 Open The Duration Panel
The Duration Panel comes attached to the Unifrom Speed Panel. To access the Duration Panel, follow the steps ahead:
- Right-click on the video clip.
- In the pop column, scroll below to Unifrom Speed.
It will open the uniform speed panel in the import window. Below the speed of the controls, you can notice The Duration Panel.
Step3 Change The Speed of The Video
In The Duration Panel, you can see the average speed of your video clip. Now, if you want to reduce the speed of your video, you have to increase the duration of your video. Similarly, if you’re going to increase the speed of your video, you would have to decrease the duration.
Slow Down The Video
To slow down the video clip, follow the steps mentioned below:
- In The Duration Panel, Increase the time of the video.
- Type in a number bigger than the normal value
![]()
Note: If the average speed of the video is 00:01:00:00, increasing the value of the duration to 00:02:00:00 will reduce the speed of your video by half.
Speed Up The Video
To increase the speed of your video, follow as guided ahead:
- In The Duration Panel, decrease the time of the video.
- Type in a number smaller than the normal value
![]()
Note: If the normal video speed is 00:01:00:00, decreasing the value of the duration to 00:00:30:00 will increase the speed of your video by double.
Congratulations! You have successfully learned how to change the speed of your video by Filmora. Now, you can use both the Speed Adjustment Panel and The Duration Panel to adjust the speed of your video.
Conclusion
Changing the speed of your video can be helpful in many filming scenarios. Adjusting the speed in the older days was a marvel in the video editing industry. But the technology in the present day has allowed the typical user to edit the speed of a video.
By following the steps mentioned in this article, you can now change the speed of your video by Wondershare Filmora.
How to Create and Add an Adjustment Layer in Final Cut Pro
Final Cut Pro is an advanced editing software that is available for Mac users exclusively. Using this high-end software, you can create compelling storytelling in your video clips. It offers different features through which you can effortlessly add audio and motion graphics to your videos. You can also add cinematic effects to your videos using Final Cut Pro to modify their focus points.
You can also add adjustment layers in Final Cut Pro to efficiently add the effects in video clips. By reading this article, you will learn how to add an adjustment layer in Final Cut Pro.

Part 1: What is Adjustment Layer in Final Cut Pro?
The adjustment layer in video editing can provide you with great ease as you can apply effects to multiple videos using this particular layer. Using the adjustment layer, you can apply effects and color grading to your video clips that come beneath this layer. So, apart from adding effects and executing color correction to individual clips, you can use an adjustment layer to generate quicker results.
After creating an adjustment layer in any video editor, you can easily cut and extend it like any other clip. You can also remove it anytime from your timeline with a single tap. In Final Cut Pro, you cannot insert adjustment layers in its timeline directly, like in Premiere Pro or After Effects.
To do so, you have to use third-party tools to create adjustment layers from scratch in Final Cut Pro. The process of creating an adjustment layer in Final Cut Pro is a little bit longer compared to other editors. To learn more about the adjustment layer in FCPX, continue reading this article.

Part 2: How to Add an Adjustment Layer in Final Cut Pro?
Are you eager to know how to add adjustment layers in Final Cut Pro? In this section, you can find simple instructions to generate an adjustment layer in Final Cut Pro without hassle.
Step1 First, click on this link to download the adjustment layer in your MacBook. Once done, copy your “Adjustment Layer” folder to the “User” folder. Afterward, move it to “Movies” and then “Motion Templates.” Once done, copy it to the “Titles” folder eventually.

Step2 Now open Final Cut Pro and locate the “Adjustment Layer” under the “Titles” section. After locating it, drag and drop it into the timeline. This adjustment layer was created as a title layer in Apple Motion that got published in Final Cut Pro using the built-in publishing tools.

Step3 Once you have created the adjustment layer, you can apply any sort of effects to the video clips. However, you should make sure to place the adjustment layer above in the layers stack.

Bonus Tips – How to Use Adjustment Layers in the Best Alternative to FCPX?
If you want to use an alternative to Final Cut Pro for creating the adjustment layer, you can try Wondershare Filmora 12 . You can edit your videos in an advanced and secure environment using this tool. It supports all multiple platforms, such as Windows, Mac, Android, and iOS. You can do color correction in your videos to manage the saturation, brightness, contrast, exposure, and other factors in Filmora.
Free Download For Win 7 or later(64-bit)
Free Download For macOS 10.14 or later
Moreover, you can also create 3D animated titles in Filmora to give your project a unique look. It also provides a wide range of keyboard shortcut presets through which you can make your editing easier and faster. Apart from editing and modifying your videos, you can also increase their vibrancy by using Filmora effects. You can explore and select a diverse range of visual effects in Filmora to give a new dimension to your video clips.
Key Features of Filmora
- Filmora offers cloud services that allow you to collaborate with your team members effectively. On its workspace cloud platform, you can share and review the edited video clips with your team members in a comfortable environment.
- It offers a pen tool through which you can draw complex mask shapes, such as straight lines or curves around the objects.
- Using the AI Smart Cutout feature, you can use advanced technology to select people or objects in the video effectively.
- Are you annoyed by the background noises in your video clips? You can try the AI Denoise feature of Filmora that can help you to eradicate background noises from the video clips precisely.
How to Add an Adjustment Layer Using Filmora
To create and use the adjustment layer in Wondershare Filmora 12, you can proceed to the following steps:
Step1 Import the Video Clip
Launch Filmora and click on the “New Project” button. Afterward, upload the video file on the project media and then drag and drop it into the timeline.

Step2 Add the Adjustment Layer
Now head to the “Media” section on the left side, where you can find the option of the “Adjustment Layer.” Next, drag and drop the adjustment layer into the timeline. You can double-click on it to change its settings effectively.

Step3 Add Multiple Presets to Adjustment Layer
From the settings, you can change blending mode, rotation, position, and opacity easily. Moreover, you can add different presets to the adjustment layer for more modifications. You can use the color match tool to adjust the colors in your video clip. With this tool, you can also add a border across the video clips using the adjustment layer. Also, you can color code the adjustment layer to create a more attractive look in the video clip.

Conclusion
Adjustment layers can make your editing process easy and fast. If you want to pursue video editing as your profession, you should know how to use the adjustment layer in famous tools like Final Cut Pro. After reading this article, you have learned how to create an adjustment layer in Final Cut Pro without complications.
However, if you want a more compatible and easier-to-use tool to generate adjustment layers, you can try Wondershare Filmora. It’s a powerful video editor that you can use to perform professional editing using adjustment layers.
Free Download For macOS 10.14 or later
Moreover, you can also create 3D animated titles in Filmora to give your project a unique look. It also provides a wide range of keyboard shortcut presets through which you can make your editing easier and faster. Apart from editing and modifying your videos, you can also increase their vibrancy by using Filmora effects. You can explore and select a diverse range of visual effects in Filmora to give a new dimension to your video clips.
Key Features of Filmora
- Filmora offers cloud services that allow you to collaborate with your team members effectively. On its workspace cloud platform, you can share and review the edited video clips with your team members in a comfortable environment.
- It offers a pen tool through which you can draw complex mask shapes, such as straight lines or curves around the objects.
- Using the AI Smart Cutout feature, you can use advanced technology to select people or objects in the video effectively.
- Are you annoyed by the background noises in your video clips? You can try the AI Denoise feature of Filmora that can help you to eradicate background noises from the video clips precisely.
How to Add an Adjustment Layer Using Filmora
To create and use the adjustment layer in Wondershare Filmora 12, you can proceed to the following steps:
Step1 Import the Video Clip
Launch Filmora and click on the “New Project” button. Afterward, upload the video file on the project media and then drag and drop it into the timeline.
Step2 Add the Adjustment Layer
Now head to the “Media” section on the left side, where you can find the option of the “Adjustment Layer.” Next, drag and drop the adjustment layer into the timeline. You can double-click on it to change its settings effectively.
Step3 Add Multiple Presets to Adjustment Layer
From the settings, you can change blending mode, rotation, position, and opacity easily. Moreover, you can add different presets to the adjustment layer for more modifications. You can use the color match tool to adjust the colors in your video clip. With this tool, you can also add a border across the video clips using the adjustment layer. Also, you can color code the adjustment layer to create a more attractive look in the video clip.
Conclusion
Adjustment layers can make your editing process easy and fast. If you want to pursue video editing as your profession, you should know how to use the adjustment layer in famous tools like Final Cut Pro. After reading this article, you have learned how to create an adjustment layer in Final Cut Pro without complications.
However, if you want a more compatible and easier-to-use tool to generate adjustment layers, you can try Wondershare Filmora. It’s a powerful video editor that you can use to perform professional editing using adjustment layers.
Finding The Best Ways To Replace Sky in Lightroom
People look for sky replacements in their images to improve their appearance. Sometimes, we need to do this because of overexposed images in sunlight. Replacing the surroundings of images is a common post-processing technique in photography. For this purpose, advanced editing tools like Lightroom and Adobe Photoshop are required.
Lightroom Sky replacement requires certain editing skills to effectively edit the media. This article will help you to learn how to do sky replacement in Lightroom. Before delving into the steps, read the first part to know the reason for changing the surroundings in Lightroom to replace the sky system.
Sky Replacement A cross-platform works like magic for background removal or sky replacement photos!
Free Download Free Download Learn More

Part 1: Why Do Creators Look Forward to Changing the Environment Across Their Recorded or Captured Media?
Humans love to show creativity and express themselves from different perspectives. Creative works provide entertainment and prove therapeutic in some way. That’s why creators and artists try to change the surroundings of recorded media. Such changes make the captured media virtually stunning and creative. Let’s explore more reasons that push creators towards sky replacement in Lightroom:
- Artistic Storytelling: A creative art piece shows a story of a thousand words. Thus, artists look for visual elements to convey particular moods and messages in their media.
- Symbolism: In many art competitions, creators are asked to show symbolic media. For this purpose, they might replace Sky in Lightroom to symbolize rebirth and growth.
- World-Building: The science fiction and fantasy genre needs such changes to build another world. Creators turn the media into imaginative settings to inspire the audience.
- Entertainment: Another aim of the creator is to provide new and exciting content to the audience. It allows them to temporarily escape their world and enjoy it.
- Discovery: You might have seen virtual landscapes in video games that uncover hidden secrets. Such backgrounds are designed to facilitate adventure through media.
Part 2: A Guide to Replace Sky in Lightroom: Step-by-Step
As discussed earlier, changing the sky in Lightroom proves fruitful for many reasons. Altering media scenes can also create a powerful emotional impact. Likewise, shifting from a green meadow to a messy landscape can turn a calm mood into chaos. If you intend to replace your current media background, then let us help you. Here are the steps below to change the environment in Lightroom:
Step 1: Lightroom can enhance your surroundings by using certain effects. To replace the sky, right-click on your image and select the “Edit in Photoshop” option. Before that, ensure that you have Adobe Photoshop installed on your system.

Step 2: Now, go to the top toolbar and press the “Edit” option next to “File.” From the drop-down list, access the “Sky Replacement” option. Head to the “Sky Replacement” panel and click the downward icon next to the sky preview. Scroll to pick one sky of your choice and hit the “OK” button.

Step 3: To import more skies, press the “Settings” icon on the Sky Replacement panel. Select the first option of “Get More Skies” and click on “Import Images.” You can explore skies from the Blue Skies, Spectacular, and Sunsets folders from that panel.

Step 4: Bring this picture back to the Lightroom and go to its right-side panel. There, use the Exposure, Contrast, and Highlights sliders below the “Light” downward icon. After enhancing your image, right-click on it and look for the “Export” option to save the file.

Part 3: Make Background Changing Easy with Wondershare Filmora
Sky Replacement in Lightroom and Photoshop requires some basic editing skills. Not everyone has such skills, so they have to acquire skills from video tutorials. It wastes a lot of time and effort just to learn editing from scratch. As an easier solution, they should try Wondershare Filmora to change image surroundings.
Notably, it’s a better solution that accommodates all users from beginner professionals. You can use Filmora for video editing to effortlessly expand your creativity. This tool is available online for Desktop, macOS, mobile, and online with the latest AI features.
Free Download For Win 7 or later(64-bit)
Free Download For macOS 10.14 or later
Key Features Marking Filmora’s Importance
Instantly remove or change your videos and image backgrounds with Filmora. Reimagine your world by knowing the given key features of Filmora in changing backgrounds:
1. Chroma Key (Green Screen)
Applying green-screen in effect in video and images will generate professional content. With AI support, you can remove a certain color from overlay images and videos. It can make your chosen colors transparent in the imported media. To fine-tune the media, you can use Tolerance, Edge Thickness, and Feather sliders.

2. AI Portrait
If you want to focus on the portrait while ignoring the background, use this feature. It can remove the background with accuracy by recognizing the main object. Filmora detects humans with AI and allows manual adjustments after removing the background. You can change the Edge Thickness and Edge Feature to the required extent.

3. Basic Background
While editing any media, you might require a blur option to hide distortion in the background. Filmora offers background blur options with different types and styles in them. You can opt for a Pattern, Color, and blur option from blur types. Then, it allows you to choose from blur styles like Grainy, Direction, and Radial. Afterward, users can select the level of blur as per their choice.

4. AI Image Stylizer
Aside from changing background, you can unleash your creativity with an AI Image stylizer. It’s the latest feature of Filmora that can turn your image into a devil, clown, or zombie. If you want to follow certain social media trends of making anime, explore this feature. You can find 19 styles that also include soft image looks like Flower and Angel image styles.

Steps to Change Background with Different Ways Using Filmora
Instead of lightroom sky replacement, Filmora offers the simplest way to edit images and videos. Let’s explore the quickest ways to change backgrounds using Filmora.
- Method 1: Using Chroma Key
- Method 2: Accessing AI Portrait
- Method 3: Change the Background through Masking
Method 1: Using Chroma Key
Step 1: Get the Latest Version of Filmora in Your system
Successfully launch the latest version of Filmora in your system. Double-tap on it to enter the home screen. Click on “New Project” and access the editing screen of Filmora.

Step 2: Use the Chroma Key and Change the Background
From the media panel, use “Import” and bring your media to the Timeline section. Place the background video first and then bring the Main Clip below it. Head to the right-side panel and press the “AI Tools” option from the top. Now enable the “Chroma Key” option, and the background will be replaced. You can adjust the edges through “Edge Thickness” and “Edge Feather” sliders.

Step 3: Continue Editing or Export Media at Desired Location
When you have finished the editing, move to the “Export” option at the top right. Using the “Export” window, define parameters and export the file wherever you want.

Method 2: Accessing AI Portrait
Step 1: Set the Videos at the Correct Place in the Timeline
Import your Background video and main clips in the media panel. Drag the main video in the second track and the background video in the first track, respectively.

Step 2: Explore and Utilize AI Portrait for Changing Background
Head to the right-side panel and access the AI tools option for choosing “AI Portrait.” Toggle this option and get the background automatically changed. To further enhance, you can use “Edge Thickness” and “Edge Feather” sliders.

Method 3: Change the Background through Masking
Step 1: Get Stock Media and Place it in the Timeline
Drag your main video in the timeline. Then, tap the “Stock Media” icon from the toolbar of the media panel. Browse one background clip and bring it to the timeline at the second track.

Step 2: Draw a Mask to Replace the Background with Stock Media
Look for the “Mask” option before the “AI tools” option on the right-side panel. Pick the “Draw Mask” icon and try to draw the lines around the main figure. When you finish drawing, the background will be replaced. You can use the “Blur Strength” slider to give a natural look.

Conclusion
In short, sky replacement is a feature of Adobe Photoshop that turns clear skies into sunsets. To do so, you can follow the steps highlighted in this article. Changing sky in the Lightroom needs some editing skills in Photoshop, and not everyone has it. Thus, you should use Wondershare Filmora as the top-notch solution. It can change your media’s background with AI and other manual changing options.
Free Download Free Download Learn More
Part 1: Why Do Creators Look Forward to Changing the Environment Across Their Recorded or Captured Media?
Humans love to show creativity and express themselves from different perspectives. Creative works provide entertainment and prove therapeutic in some way. That’s why creators and artists try to change the surroundings of recorded media. Such changes make the captured media virtually stunning and creative. Let’s explore more reasons that push creators towards sky replacement in Lightroom:
- Artistic Storytelling: A creative art piece shows a story of a thousand words. Thus, artists look for visual elements to convey particular moods and messages in their media.
- Symbolism: In many art competitions, creators are asked to show symbolic media. For this purpose, they might replace Sky in Lightroom to symbolize rebirth and growth.
- World-Building: The science fiction and fantasy genre needs such changes to build another world. Creators turn the media into imaginative settings to inspire the audience.
- Entertainment: Another aim of the creator is to provide new and exciting content to the audience. It allows them to temporarily escape their world and enjoy it.
- Discovery: You might have seen virtual landscapes in video games that uncover hidden secrets. Such backgrounds are designed to facilitate adventure through media.
Part 2: A Guide to Replace Sky in Lightroom: Step-by-Step
As discussed earlier, changing the sky in Lightroom proves fruitful for many reasons. Altering media scenes can also create a powerful emotional impact. Likewise, shifting from a green meadow to a messy landscape can turn a calm mood into chaos. If you intend to replace your current media background, then let us help you. Here are the steps below to change the environment in Lightroom:
Step 1: Lightroom can enhance your surroundings by using certain effects. To replace the sky, right-click on your image and select the “Edit in Photoshop” option. Before that, ensure that you have Adobe Photoshop installed on your system.
Step 2: Now, go to the top toolbar and press the “Edit” option next to “File.” From the drop-down list, access the “Sky Replacement” option. Head to the “Sky Replacement” panel and click the downward icon next to the sky preview. Scroll to pick one sky of your choice and hit the “OK” button.
Step 3: To import more skies, press the “Settings” icon on the Sky Replacement panel. Select the first option of “Get More Skies” and click on “Import Images.” You can explore skies from the Blue Skies, Spectacular, and Sunsets folders from that panel.
Step 4: Bring this picture back to the Lightroom and go to its right-side panel. There, use the Exposure, Contrast, and Highlights sliders below the “Light” downward icon. After enhancing your image, right-click on it and look for the “Export” option to save the file.
Part 3: Make Background Changing Easy with Wondershare Filmora
Sky Replacement in Lightroom and Photoshop requires some basic editing skills. Not everyone has such skills, so they have to acquire skills from video tutorials. It wastes a lot of time and effort just to learn editing from scratch. As an easier solution, they should try Wondershare Filmora to change image surroundings.
Notably, it’s a better solution that accommodates all users from beginner professionals. You can use Filmora for video editing to effortlessly expand your creativity. This tool is available online for Desktop, macOS, mobile, and online with the latest AI features.
Free Download For Win 7 or later(64-bit)
Free Download For macOS 10.14 or later
Key Features Marking Filmora’s Importance
Instantly remove or change your videos and image backgrounds with Filmora. Reimagine your world by knowing the given key features of Filmora in changing backgrounds:
1. Chroma Key (Green Screen)
Applying green-screen in effect in video and images will generate professional content. With AI support, you can remove a certain color from overlay images and videos. It can make your chosen colors transparent in the imported media. To fine-tune the media, you can use Tolerance, Edge Thickness, and Feather sliders.
2. AI Portrait
If you want to focus on the portrait while ignoring the background, use this feature. It can remove the background with accuracy by recognizing the main object. Filmora detects humans with AI and allows manual adjustments after removing the background. You can change the Edge Thickness and Edge Feature to the required extent.
3. Basic Background
While editing any media, you might require a blur option to hide distortion in the background. Filmora offers background blur options with different types and styles in them. You can opt for a Pattern, Color, and blur option from blur types. Then, it allows you to choose from blur styles like Grainy, Direction, and Radial. Afterward, users can select the level of blur as per their choice.
4. AI Image Stylizer
Aside from changing background, you can unleash your creativity with an AI Image stylizer. It’s the latest feature of Filmora that can turn your image into a devil, clown, or zombie. If you want to follow certain social media trends of making anime, explore this feature. You can find 19 styles that also include soft image looks like Flower and Angel image styles.
Steps to Change Background with Different Ways Using Filmora
Instead of lightroom sky replacement, Filmora offers the simplest way to edit images and videos. Let’s explore the quickest ways to change backgrounds using Filmora.
- Method 1: Using Chroma Key
- Method 2: Accessing AI Portrait
- Method 3: Change the Background through Masking
Method 1: Using Chroma Key
Step 1: Get the Latest Version of Filmora in Your system
Successfully launch the latest version of Filmora in your system. Double-tap on it to enter the home screen. Click on “New Project” and access the editing screen of Filmora.
Step 2: Use the Chroma Key and Change the Background
From the media panel, use “Import” and bring your media to the Timeline section. Place the background video first and then bring the Main Clip below it. Head to the right-side panel and press the “AI Tools” option from the top. Now enable the “Chroma Key” option, and the background will be replaced. You can adjust the edges through “Edge Thickness” and “Edge Feather” sliders.
Step 3: Continue Editing or Export Media at Desired Location
When you have finished the editing, move to the “Export” option at the top right. Using the “Export” window, define parameters and export the file wherever you want.
Method 2: Accessing AI Portrait
Step 1: Set the Videos at the Correct Place in the Timeline
Import your Background video and main clips in the media panel. Drag the main video in the second track and the background video in the first track, respectively.
Step 2: Explore and Utilize AI Portrait for Changing Background
Head to the right-side panel and access the AI tools option for choosing “AI Portrait.” Toggle this option and get the background automatically changed. To further enhance, you can use “Edge Thickness” and “Edge Feather” sliders.
Method 3: Change the Background through Masking
Step 1: Get Stock Media and Place it in the Timeline
Drag your main video in the timeline. Then, tap the “Stock Media” icon from the toolbar of the media panel. Browse one background clip and bring it to the timeline at the second track.
Step 2: Draw a Mask to Replace the Background with Stock Media
Look for the “Mask” option before the “AI tools” option on the right-side panel. Pick the “Draw Mask” icon and try to draw the lines around the main figure. When you finish drawing, the background will be replaced. You can use the “Blur Strength” slider to give a natural look.
Conclusion
In short, sky replacement is a feature of Adobe Photoshop that turns clear skies into sunsets. To do so, you can follow the steps highlighted in this article. Changing sky in the Lightroom needs some editing skills in Photoshop, and not everyone has it. Thus, you should use Wondershare Filmora as the top-notch solution. It can change your media’s background with AI and other manual changing options.
Also read:
- Best 10 Anime Movies for All Time
- 2024 Approved How to Use Adjustment Layer in Photoshop?
- New Best GIF to MOV Converters for 2024
- Updated How to Resize FLV Video Efficiently Windows, Mac,Android, iPhone & O
- Updated How to Add Motion Titles
- Updated Discover How to Change Sky Background with The Best Applications? A Review
- New Do You Know Adding Subtitles Can Benefit Video Content? Meanwhile, for Adding Subtitles to a Video, Wondershare Filmora Can Help You for 2024
- Updated How to Add Text Animation Online for 2024
- This Article Has a Detailed Description of How You Can Split the Videos in Lightworks Including the the Discussion of Splitting the Wondershare Filmora as an Alternative. It Is Also a Suitable Choice
- Updated Ways to Make Canva Collages
- Updated How to Merge FLV Files Windows, Mac,Android, iPhone & Online for 2024
- New 2024 Approved Want to Make a Fun and Cinematic Video with an Introductory Text Title? Learn the Stages of Editing with Filmora for This Effect Here
- Updated Top 10 Best Free Video Compressors
- 10 Mind-Blowing Video Collage Maker for PC for 2024
- In 2024, How To Create The Best AI Thumbnail Using The Right Tools?
- Updated In 2024, Transparent Logo and Images Look Cool when You Are Planning to Create a Brand Identity. An Image with Unique Features Catches the Attention of Viewers and Leaves Impression
- Updated 2024 Approved Wondering How to Stand Out with Your Adobe Slideshow Presentation? Follow the Given Discussion to Learn All About the Easiest Ways of Making a Slideshow at Adobe
- What You Need To Know To Improve Your Samsung Galaxy S24 Ultra Hard Reset | Dr.fone
- Super Easy Ways To Deal with Nokia XR21 Unresponsive Screen | Dr.fone
- Top 5 Tracking Apps to Track Xiaomi 13T Pro without Them Knowing | Dr.fone
- Remove FRP Lock on Vivo Y02T
- In 2024, How Can Xiaomi Redmi 12Mirror Share to PC? | Dr.fone
- New Beginners Guide for Learning 3D Animation
- Here are Some of the Best Pokemon Discord Servers to Join On Vivo G2 | Dr.fone
- In 2024, How to Get and Use Pokemon Go Promo Codes On Samsung Galaxy F54 5G | Dr.fone
- How To Transfer Data From iPhone 12 To Other iPhone 12 Pro Max devices? | Dr.fone
- In 2024, Edit and Send Fake Location on Telegram For your Nokia C02 in 3 Ways | Dr.fone
- 8 Ultimate Fixes for Google Play Your Realme Narzo N55 Isnt Compatible | Dr.fone
- AVCHD MTS Converter for Galaxy M14 5G
- In 2024, How to Unlock iPhone 6 Plus Passcode without Computer? | Dr.fone
- Title: New How to Windows Online Movie Maker Complete Guide for 2024
- Author: Morgan
- Created at : 2024-04-24 01:06:44
- Updated at : 2024-04-25 01:06:44
- Link: https://ai-video-editing.techidaily.com/new-how-to-windows-online-movie-maker-complete-guide-for-2024/
- License: This work is licensed under CC BY-NC-SA 4.0.
