:max_bytes(150000):strip_icc():format(webp)/cq5dam.web.1280.1280-3-5c2a5dc746e0fb0001d115f0.jpeg)
New In 2024, 6 Best Methods to Make a Video Longer

6 Best Methods to Make a Video Longer
These days when you head on to social media, you can easily find 4-5 seconds video clips on the internet. However, many social media platforms like YouTube, Instagram, and other videos sharing platforms require you to make your video longer to meet the site’s minimum length requirements. So, for example, although Instagram’s minimum length is 3 seconds, you might want to find ways to engage your audience longer.
This article will describe the best ways to make a video longer. We’ll also offer a bonus tip on how you can edit your video to make it look better and attract more audience. On that note, let’s take a look.
6 Best Methods to Make a Video Longer
There are many methods out there to make your video longer. This section will touch on the six best methods to make a video longer.
Loop the Video
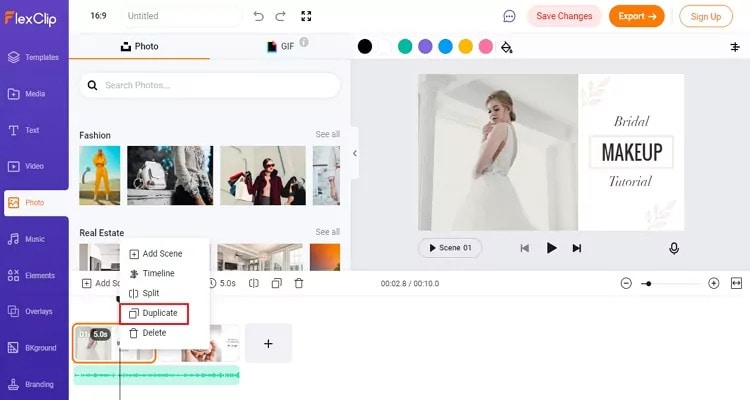
One of the best ways to make your video longer for most social media platforms is to loop the video. When you replay the video several times in a single row, it helps to multiply its length. An example is taking a 2-second video and looping it 4x. This automatically makes it into an 8-second video clip. With looping, you can simply replay the action of the clip rather than altering it in any way.
Many video editing software today allows you to loop your video for free. You have to upload the video and choose how many times you would like to loop it, and the software will get to work.
Slow Down the Video Speed

We would all agree that slow-motion makes everything seem longer automatically. You can utilize the same technique when you want to make a video longer. When you slow down a video clip, every second lasts longer. Using the slow-motion effect on a 3-second video will make the video 6 or even 9 seconds longer.
Add an Intro and Outro

Intro and outro are scenes you add before and after the video; these scenes are popular in YouTube videos. More generally, an intro is like a trailer. It shows the audience what the video is about, and the outro scene is usually used to show more information about the video maker. Adding an intro and outro to your video can add 2-4 seconds to your video clips.
It’s quite easy to add an intro and outro to any video. You can create them separately and then merge them with your video. The intro must be something relevant to the video clip; an example is adding a fast photo slideshow to the beginning of your video or a black frame. Relevant intro and outro scenes will make your video longer and maybe more engaging.
Add Images to the Video
This is another trick that most bloggers use to make their videos longer. It is an old trick in the book and makes your video significantly longer, depending on the number of videos you’re adding. A single picture can add a second or two to your video. You can simply use a video editor to merge the video clip and pictures into one seamless file.
Boomerang Your Video
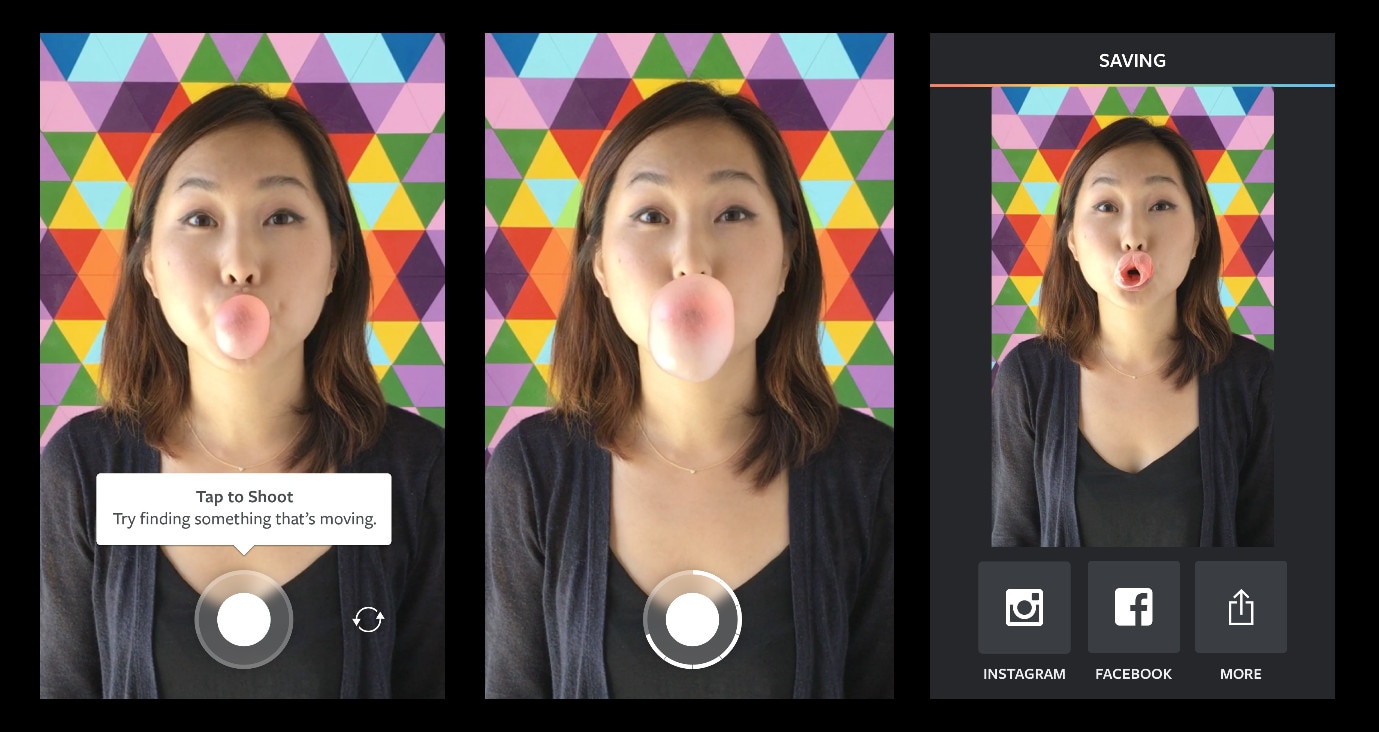
If you have plans to upload your media to Instagram, then a top feature you can use to make your video longer is the boomerang feature. Instagram introduced the Boomerang feature to play short video clips forward and then repeat their reverse. So by using the Boomerang feature, you don’t only add a memory effect to your video, but you also make your video longer.
Alternatively, you can manually append your video clip to a reversed version; this option allows you to make a boomerang from an existing clip. Apart from Instagram, you can utilize many other editing tools to create a boomerang from an existing video.
Add More Content to Your Video Clip
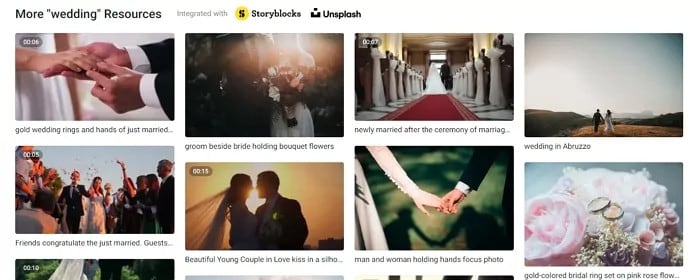
Another step you can take is to add more materials to your video. This doesn’t necessarily mean you have to get your camera out and start shooting more scenes to add to your video. Instead, you can simply access online media libraries and get amazing materials from there that are relevant to your video clip.
Today, most professional video editors offer you access to royalty-free photos and music material. You can simply browse through their collections and pick materials relevant to your video. For example, you could add a soundtrack and videos or GIFs that make your videos engaging. Adding extra content to your video clip can make it longer by 10 seconds.
Bonus Tips: How to Edit Video Easily on a Computer
Social media platforms offer you basic video editing features that you can use to optimize your video. However, these features are limited in what they can provide you with. If you want to have more control over the editing of your video clip and make it look even more professional, you should try Wondershare Filmora. This video editing tool is powerful and provides you with more editing features to ensure you get the result you want.
Filmora offers users over 300 effects like motion elements, overlays, titles, music sounds, and many more features to make your video more engaging and attractive. Using this app is relatively easy as well, and it offers users the option of changing the file format of their video if the social media platform does not support the original format.
If you would like to edit your video to give it a more engaging and professional look, follow the simple steps below.
Step 1: Import Video to Wondershare Filmora
First, you need to download the app on your device. After that, you can download it from the official website. Luckily, Wondershare Filmora supports Windows and Mac OS. Once you download the file, install and launch the app to get started.
On the menu, click on create a new project to begin. Next, click on the import button, and from the dropdown menu, choose ‘import media file.’ Alternatively, you can simply drag the video directly to the media library of this video editor. In addition, Filmora allows you to preview your video as you add different features to optimize the video.

If your video is shaky, you can use the stabilization feature to make it more stable. Simply right-click on the video in the preview window and select the option. Once you are sure, the video is ok, drag and drop it into the timeline to start editing your video.
Step 2: Cut, Slip, Rotate, or Color-Tune Your Video
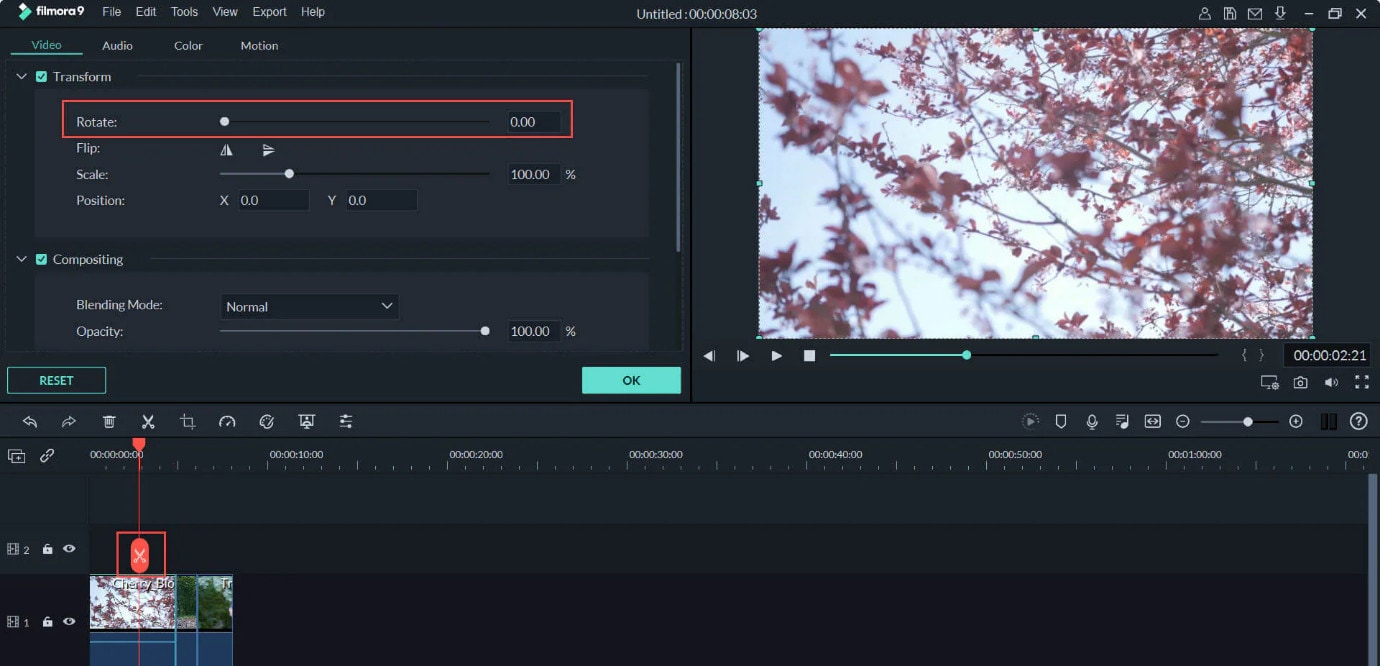
You can use many features to shape your video quickly on Wondershare Filmora. For example, you can use the scissors tool to cut or split your video. You can also use the transform tool to rotate and flip your video if you would prefer. In addition, Filmora allows you to add some advanced color tuning to your video with the color feature. This automatically makes your video even more beautiful.
Step 3: Add Filters and Effects to Your Video
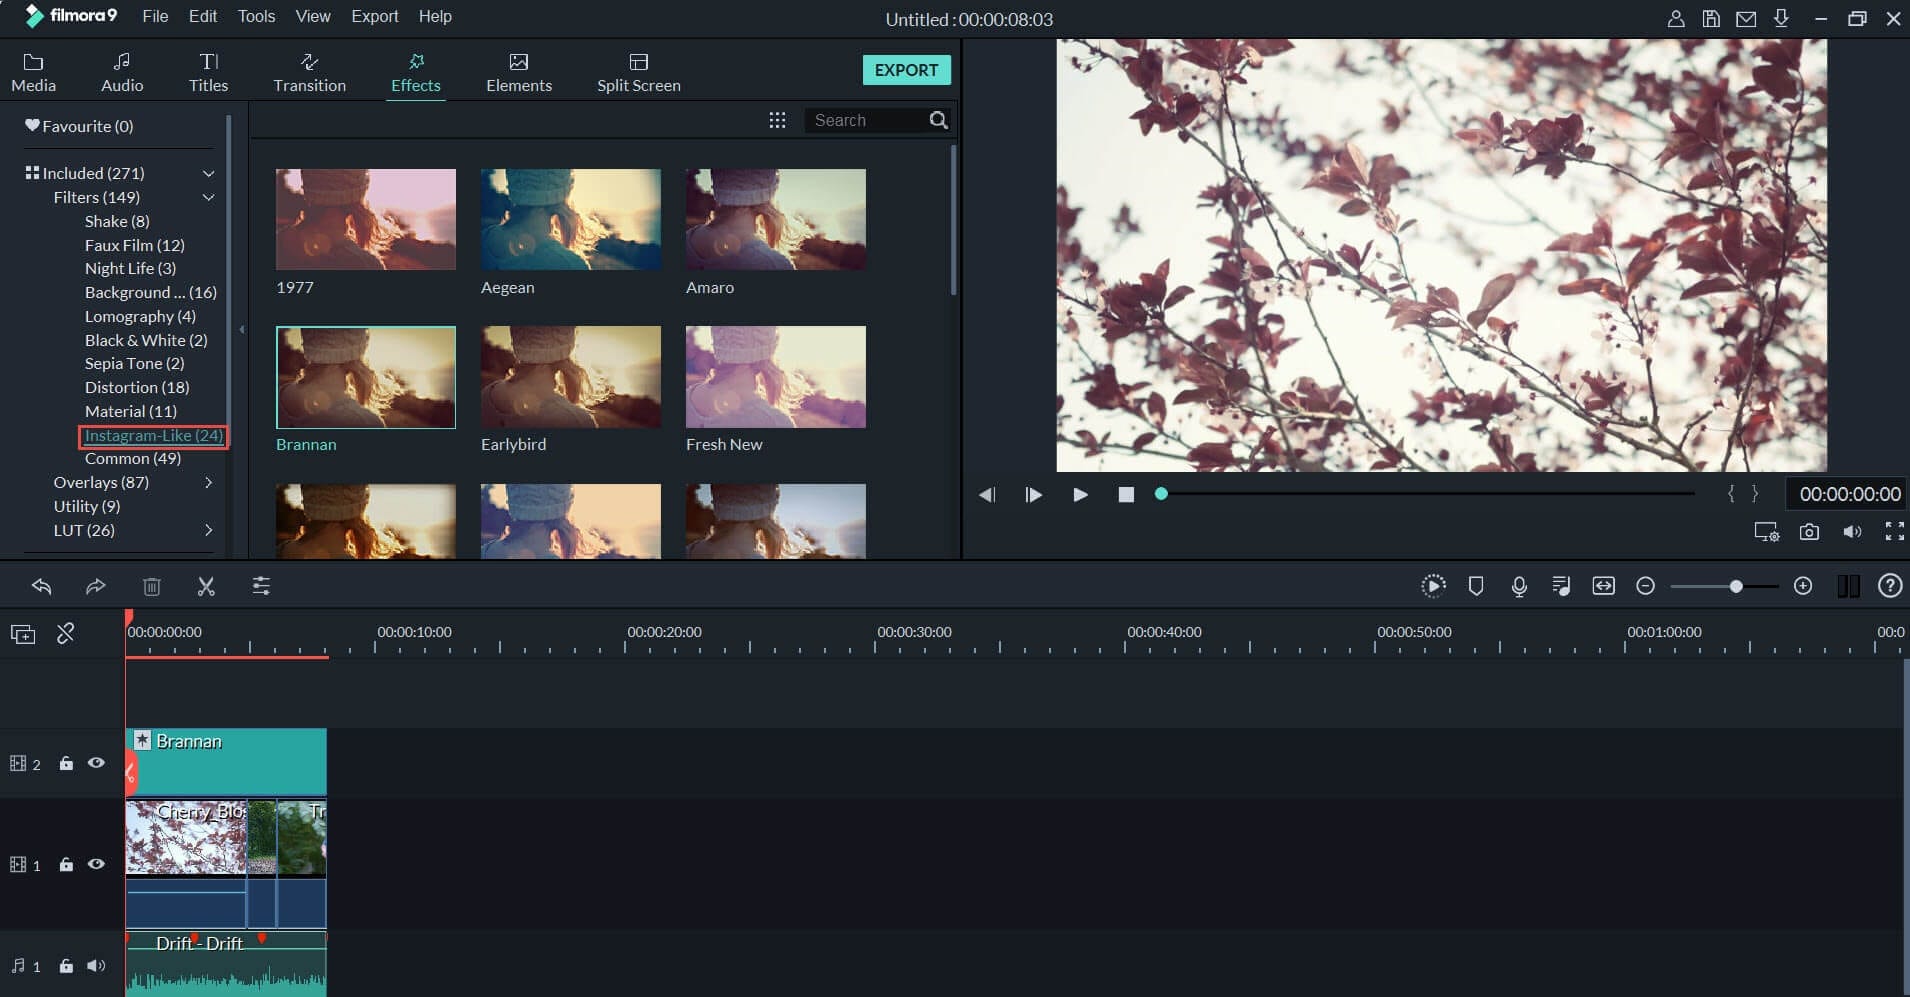
Additionally, Wondershare Filmora allows you to choose different transitions, graphics, tiles, texts, sound effects, titles, filters, overlays, and elements for your videos. With this video editing tool, you can get the exact look and sound you’re looking to achieve. In addition, there are different effect tabs above the timeline that directs you to the right feature you would like to include in your video.
You can just drag these effects and drop them on the timeline to apply to your video. Filmora has over 100 in-built filters and royalty-free music you can implement on your video. If you’re not sure which feature you’re looking for. Simply experiment and undo the effect till you find exactly what you’re looking for.
Step 4: Save and Share Edited Video

Once you’re satisfied with your video clip, you can now proceed to save it. You can choose to save the video to your local folder or a storage device you’d prefer. Wondershare Filmora allows you to save in the original format or change the format to your preferred option. Filmora also allows you to change your video’s resolution and bit rate to your preference. Alternatively, you can upload your video to video-sharing platforms like Instagram, Vimeo, YouTube, etc. You can also burn the video into a DVD collection if that’s what you’re looking for.
Final Thoughts
Social media platforms are great for gaining recognition and promoting your brand. However, there are times when you don’t meet the right video length, and you would like to make your video longer. With the six methods explained above, you can make your video as long as you want and also make your video more engaging. Additionally, you can use Wondershare Filmora to make your video more professional-looking. It offers you hundreds of effects and filters you can use to optimize your video.
Meta Description: If your video is short and you need to make it longer, this article gives you six methods to make a video longer and optimize them.
One of the best ways to make your video longer for most social media platforms is to loop the video. When you replay the video several times in a single row, it helps to multiply its length. An example is taking a 2-second video and looping it 4x. This automatically makes it into an 8-second video clip. With looping, you can simply replay the action of the clip rather than altering it in any way.
Many video editing software today allows you to loop your video for free. You have to upload the video and choose how many times you would like to loop it, and the software will get to work.
Slow Down the Video Speed

We would all agree that slow-motion makes everything seem longer automatically. You can utilize the same technique when you want to make a video longer. When you slow down a video clip, every second lasts longer. Using the slow-motion effect on a 3-second video will make the video 6 or even 9 seconds longer.
Add an Intro and Outro

Intro and outro are scenes you add before and after the video; these scenes are popular in YouTube videos. More generally, an intro is like a trailer. It shows the audience what the video is about, and the outro scene is usually used to show more information about the video maker. Adding an intro and outro to your video can add 2-4 seconds to your video clips.
It’s quite easy to add an intro and outro to any video. You can create them separately and then merge them with your video. The intro must be something relevant to the video clip; an example is adding a fast photo slideshow to the beginning of your video or a black frame. Relevant intro and outro scenes will make your video longer and maybe more engaging.
Add Images to the Video
This is another trick that most bloggers use to make their videos longer. It is an old trick in the book and makes your video significantly longer, depending on the number of videos you’re adding. A single picture can add a second or two to your video. You can simply use a video editor to merge the video clip and pictures into one seamless file.
Boomerang Your Video

If you have plans to upload your media to Instagram, then a top feature you can use to make your video longer is the boomerang feature. Instagram introduced the Boomerang feature to play short video clips forward and then repeat their reverse. So by using the Boomerang feature, you don’t only add a memory effect to your video, but you also make your video longer.
Alternatively, you can manually append your video clip to a reversed version; this option allows you to make a boomerang from an existing clip. Apart from Instagram, you can utilize many other editing tools to create a boomerang from an existing video.
Add More Content to Your Video Clip

Another step you can take is to add more materials to your video. This doesn’t necessarily mean you have to get your camera out and start shooting more scenes to add to your video. Instead, you can simply access online media libraries and get amazing materials from there that are relevant to your video clip.
Today, most professional video editors offer you access to royalty-free photos and music material. You can simply browse through their collections and pick materials relevant to your video. For example, you could add a soundtrack and videos or GIFs that make your videos engaging. Adding extra content to your video clip can make it longer by 10 seconds.
Bonus Tips: How to Edit Video Easily on a Computer
Social media platforms offer you basic video editing features that you can use to optimize your video. However, these features are limited in what they can provide you with. If you want to have more control over the editing of your video clip and make it look even more professional, you should try Wondershare Filmora. This video editing tool is powerful and provides you with more editing features to ensure you get the result you want.
Filmora offers users over 300 effects like motion elements, overlays, titles, music sounds, and many more features to make your video more engaging and attractive. Using this app is relatively easy as well, and it offers users the option of changing the file format of their video if the social media platform does not support the original format.
If you would like to edit your video to give it a more engaging and professional look, follow the simple steps below.
Step 1: Import Video to Wondershare Filmora
First, you need to download the app on your device. After that, you can download it from the official website. Luckily, Wondershare Filmora supports Windows and Mac OS. Once you download the file, install and launch the app to get started.
On the menu, click on create a new project to begin. Next, click on the import button, and from the dropdown menu, choose ‘import media file.’ Alternatively, you can simply drag the video directly to the media library of this video editor. In addition, Filmora allows you to preview your video as you add different features to optimize the video.

If your video is shaky, you can use the stabilization feature to make it more stable. Simply right-click on the video in the preview window and select the option. Once you are sure, the video is ok, drag and drop it into the timeline to start editing your video.
Step 2: Cut, Slip, Rotate, or Color-Tune Your Video

You can use many features to shape your video quickly on Wondershare Filmora. For example, you can use the scissors tool to cut or split your video. You can also use the transform tool to rotate and flip your video if you would prefer. In addition, Filmora allows you to add some advanced color tuning to your video with the color feature. This automatically makes your video even more beautiful.
Step 3: Add Filters and Effects to Your Video

Additionally, Wondershare Filmora allows you to choose different transitions, graphics, tiles, texts, sound effects, titles, filters, overlays, and elements for your videos. With this video editing tool, you can get the exact look and sound you’re looking to achieve. In addition, there are different effect tabs above the timeline that directs you to the right feature you would like to include in your video.
You can just drag these effects and drop them on the timeline to apply to your video. Filmora has over 100 in-built filters and royalty-free music you can implement on your video. If you’re not sure which feature you’re looking for. Simply experiment and undo the effect till you find exactly what you’re looking for.
Step 4: Save and Share Edited Video

Once you’re satisfied with your video clip, you can now proceed to save it. You can choose to save the video to your local folder or a storage device you’d prefer. Wondershare Filmora allows you to save in the original format or change the format to your preferred option. Filmora also allows you to change your video’s resolution and bit rate to your preference. Alternatively, you can upload your video to video-sharing platforms like Instagram, Vimeo, YouTube, etc. You can also burn the video into a DVD collection if that’s what you’re looking for.
Final Thoughts
Social media platforms are great for gaining recognition and promoting your brand. However, there are times when you don’t meet the right video length, and you would like to make your video longer. With the six methods explained above, you can make your video as long as you want and also make your video more engaging. Additionally, you can use Wondershare Filmora to make your video more professional-looking. It offers you hundreds of effects and filters you can use to optimize your video.
Meta Description: If your video is short and you need to make it longer, this article gives you six methods to make a video longer and optimize them.
One of the best ways to make your video longer for most social media platforms is to loop the video. When you replay the video several times in a single row, it helps to multiply its length. An example is taking a 2-second video and looping it 4x. This automatically makes it into an 8-second video clip. With looping, you can simply replay the action of the clip rather than altering it in any way.
Many video editing software today allows you to loop your video for free. You have to upload the video and choose how many times you would like to loop it, and the software will get to work.
Slow Down the Video Speed

We would all agree that slow-motion makes everything seem longer automatically. You can utilize the same technique when you want to make a video longer. When you slow down a video clip, every second lasts longer. Using the slow-motion effect on a 3-second video will make the video 6 or even 9 seconds longer.
Add an Intro and Outro

Intro and outro are scenes you add before and after the video; these scenes are popular in YouTube videos. More generally, an intro is like a trailer. It shows the audience what the video is about, and the outro scene is usually used to show more information about the video maker. Adding an intro and outro to your video can add 2-4 seconds to your video clips.
It’s quite easy to add an intro and outro to any video. You can create them separately and then merge them with your video. The intro must be something relevant to the video clip; an example is adding a fast photo slideshow to the beginning of your video or a black frame. Relevant intro and outro scenes will make your video longer and maybe more engaging.
Add Images to the Video
This is another trick that most bloggers use to make their videos longer. It is an old trick in the book and makes your video significantly longer, depending on the number of videos you’re adding. A single picture can add a second or two to your video. You can simply use a video editor to merge the video clip and pictures into one seamless file.
Boomerang Your Video

If you have plans to upload your media to Instagram, then a top feature you can use to make your video longer is the boomerang feature. Instagram introduced the Boomerang feature to play short video clips forward and then repeat their reverse. So by using the Boomerang feature, you don’t only add a memory effect to your video, but you also make your video longer.
Alternatively, you can manually append your video clip to a reversed version; this option allows you to make a boomerang from an existing clip. Apart from Instagram, you can utilize many other editing tools to create a boomerang from an existing video.
Add More Content to Your Video Clip

Another step you can take is to add more materials to your video. This doesn’t necessarily mean you have to get your camera out and start shooting more scenes to add to your video. Instead, you can simply access online media libraries and get amazing materials from there that are relevant to your video clip.
Today, most professional video editors offer you access to royalty-free photos and music material. You can simply browse through their collections and pick materials relevant to your video. For example, you could add a soundtrack and videos or GIFs that make your videos engaging. Adding extra content to your video clip can make it longer by 10 seconds.
Bonus Tips: How to Edit Video Easily on a Computer
Social media platforms offer you basic video editing features that you can use to optimize your video. However, these features are limited in what they can provide you with. If you want to have more control over the editing of your video clip and make it look even more professional, you should try Wondershare Filmora. This video editing tool is powerful and provides you with more editing features to ensure you get the result you want.
Filmora offers users over 300 effects like motion elements, overlays, titles, music sounds, and many more features to make your video more engaging and attractive. Using this app is relatively easy as well, and it offers users the option of changing the file format of their video if the social media platform does not support the original format.
If you would like to edit your video to give it a more engaging and professional look, follow the simple steps below.
Step 1: Import Video to Wondershare Filmora
First, you need to download the app on your device. After that, you can download it from the official website. Luckily, Wondershare Filmora supports Windows and Mac OS. Once you download the file, install and launch the app to get started.
On the menu, click on create a new project to begin. Next, click on the import button, and from the dropdown menu, choose ‘import media file.’ Alternatively, you can simply drag the video directly to the media library of this video editor. In addition, Filmora allows you to preview your video as you add different features to optimize the video.

If your video is shaky, you can use the stabilization feature to make it more stable. Simply right-click on the video in the preview window and select the option. Once you are sure, the video is ok, drag and drop it into the timeline to start editing your video.
Step 2: Cut, Slip, Rotate, or Color-Tune Your Video

You can use many features to shape your video quickly on Wondershare Filmora. For example, you can use the scissors tool to cut or split your video. You can also use the transform tool to rotate and flip your video if you would prefer. In addition, Filmora allows you to add some advanced color tuning to your video with the color feature. This automatically makes your video even more beautiful.
Step 3: Add Filters and Effects to Your Video

Additionally, Wondershare Filmora allows you to choose different transitions, graphics, tiles, texts, sound effects, titles, filters, overlays, and elements for your videos. With this video editing tool, you can get the exact look and sound you’re looking to achieve. In addition, there are different effect tabs above the timeline that directs you to the right feature you would like to include in your video.
You can just drag these effects and drop them on the timeline to apply to your video. Filmora has over 100 in-built filters and royalty-free music you can implement on your video. If you’re not sure which feature you’re looking for. Simply experiment and undo the effect till you find exactly what you’re looking for.
Step 4: Save and Share Edited Video

Once you’re satisfied with your video clip, you can now proceed to save it. You can choose to save the video to your local folder or a storage device you’d prefer. Wondershare Filmora allows you to save in the original format or change the format to your preferred option. Filmora also allows you to change your video’s resolution and bit rate to your preference. Alternatively, you can upload your video to video-sharing platforms like Instagram, Vimeo, YouTube, etc. You can also burn the video into a DVD collection if that’s what you’re looking for.
Final Thoughts
Social media platforms are great for gaining recognition and promoting your brand. However, there are times when you don’t meet the right video length, and you would like to make your video longer. With the six methods explained above, you can make your video as long as you want and also make your video more engaging. Additionally, you can use Wondershare Filmora to make your video more professional-looking. It offers you hundreds of effects and filters you can use to optimize your video.
Meta Description: If your video is short and you need to make it longer, this article gives you six methods to make a video longer and optimize them.
One of the best ways to make your video longer for most social media platforms is to loop the video. When you replay the video several times in a single row, it helps to multiply its length. An example is taking a 2-second video and looping it 4x. This automatically makes it into an 8-second video clip. With looping, you can simply replay the action of the clip rather than altering it in any way.
Many video editing software today allows you to loop your video for free. You have to upload the video and choose how many times you would like to loop it, and the software will get to work.
Slow Down the Video Speed

We would all agree that slow-motion makes everything seem longer automatically. You can utilize the same technique when you want to make a video longer. When you slow down a video clip, every second lasts longer. Using the slow-motion effect on a 3-second video will make the video 6 or even 9 seconds longer.
Add an Intro and Outro

Intro and outro are scenes you add before and after the video; these scenes are popular in YouTube videos. More generally, an intro is like a trailer. It shows the audience what the video is about, and the outro scene is usually used to show more information about the video maker. Adding an intro and outro to your video can add 2-4 seconds to your video clips.
It’s quite easy to add an intro and outro to any video. You can create them separately and then merge them with your video. The intro must be something relevant to the video clip; an example is adding a fast photo slideshow to the beginning of your video or a black frame. Relevant intro and outro scenes will make your video longer and maybe more engaging.
Add Images to the Video
This is another trick that most bloggers use to make their videos longer. It is an old trick in the book and makes your video significantly longer, depending on the number of videos you’re adding. A single picture can add a second or two to your video. You can simply use a video editor to merge the video clip and pictures into one seamless file.
Boomerang Your Video

If you have plans to upload your media to Instagram, then a top feature you can use to make your video longer is the boomerang feature. Instagram introduced the Boomerang feature to play short video clips forward and then repeat their reverse. So by using the Boomerang feature, you don’t only add a memory effect to your video, but you also make your video longer.
Alternatively, you can manually append your video clip to a reversed version; this option allows you to make a boomerang from an existing clip. Apart from Instagram, you can utilize many other editing tools to create a boomerang from an existing video.
Add More Content to Your Video Clip

Another step you can take is to add more materials to your video. This doesn’t necessarily mean you have to get your camera out and start shooting more scenes to add to your video. Instead, you can simply access online media libraries and get amazing materials from there that are relevant to your video clip.
Today, most professional video editors offer you access to royalty-free photos and music material. You can simply browse through their collections and pick materials relevant to your video. For example, you could add a soundtrack and videos or GIFs that make your videos engaging. Adding extra content to your video clip can make it longer by 10 seconds.
Bonus Tips: How to Edit Video Easily on a Computer
Social media platforms offer you basic video editing features that you can use to optimize your video. However, these features are limited in what they can provide you with. If you want to have more control over the editing of your video clip and make it look even more professional, you should try Wondershare Filmora. This video editing tool is powerful and provides you with more editing features to ensure you get the result you want.
Filmora offers users over 300 effects like motion elements, overlays, titles, music sounds, and many more features to make your video more engaging and attractive. Using this app is relatively easy as well, and it offers users the option of changing the file format of their video if the social media platform does not support the original format.
If you would like to edit your video to give it a more engaging and professional look, follow the simple steps below.
Step 1: Import Video to Wondershare Filmora
First, you need to download the app on your device. After that, you can download it from the official website. Luckily, Wondershare Filmora supports Windows and Mac OS. Once you download the file, install and launch the app to get started.
On the menu, click on create a new project to begin. Next, click on the import button, and from the dropdown menu, choose ‘import media file.’ Alternatively, you can simply drag the video directly to the media library of this video editor. In addition, Filmora allows you to preview your video as you add different features to optimize the video.

If your video is shaky, you can use the stabilization feature to make it more stable. Simply right-click on the video in the preview window and select the option. Once you are sure, the video is ok, drag and drop it into the timeline to start editing your video.
Step 2: Cut, Slip, Rotate, or Color-Tune Your Video

You can use many features to shape your video quickly on Wondershare Filmora. For example, you can use the scissors tool to cut or split your video. You can also use the transform tool to rotate and flip your video if you would prefer. In addition, Filmora allows you to add some advanced color tuning to your video with the color feature. This automatically makes your video even more beautiful.
Step 3: Add Filters and Effects to Your Video

Additionally, Wondershare Filmora allows you to choose different transitions, graphics, tiles, texts, sound effects, titles, filters, overlays, and elements for your videos. With this video editing tool, you can get the exact look and sound you’re looking to achieve. In addition, there are different effect tabs above the timeline that directs you to the right feature you would like to include in your video.
You can just drag these effects and drop them on the timeline to apply to your video. Filmora has over 100 in-built filters and royalty-free music you can implement on your video. If you’re not sure which feature you’re looking for. Simply experiment and undo the effect till you find exactly what you’re looking for.
Step 4: Save and Share Edited Video

Once you’re satisfied with your video clip, you can now proceed to save it. You can choose to save the video to your local folder or a storage device you’d prefer. Wondershare Filmora allows you to save in the original format or change the format to your preferred option. Filmora also allows you to change your video’s resolution and bit rate to your preference. Alternatively, you can upload your video to video-sharing platforms like Instagram, Vimeo, YouTube, etc. You can also burn the video into a DVD collection if that’s what you’re looking for.
Final Thoughts
Social media platforms are great for gaining recognition and promoting your brand. However, there are times when you don’t meet the right video length, and you would like to make your video longer. With the six methods explained above, you can make your video as long as you want and also make your video more engaging. Additionally, you can use Wondershare Filmora to make your video more professional-looking. It offers you hundreds of effects and filters you can use to optimize your video.
Meta Description: If your video is short and you need to make it longer, this article gives you six methods to make a video longer and optimize them.
Timeline Template Is a Visual Representation Showing the Passage of Time. It Includes Text, Diagrams, Images and Icons. They Are Perfect for Telling Stories, Events Etc
Best Shortcut Towards Timeline Template
An easy yet powerful editor
Numerous effects to choose from
Detailed tutorials provided by the official channel
In this article
01 [Best Tips To Become A Timeline Designer Now?](#Part 1)
02 [12 Editable Timeline Templates](#Part 2)
03 [How to Create a Timeline?](#Part 3)
04 [Time Template Q&A](#Part 4)
Part 1 Best Tips To Become A Timeline Designer Now?
If you desire to become an expert timeline designer, it is essential to hone your skills. Here are some tips that will help you in boosting your skills and become an expert.
01Keep it Simple
Keeping it simple looks beautiful, helps in communicating messages more clearly. Using required elements without making it look cluttered, will help to understand the messages more quickly. Adding space where it is necessary will make it look clean and you can fully focus on the content. Focus on the fonts as it will represent your content.
If you want to create some serious look, you can use black and white colors. This will make it look simpler. If you want to highlight specific content you can add your desired colors to it. This will make the specific content to stand out.
02Enlarge the images to wider dimension
Adding high quality images is not a big deal now. Images play an important role in design as they add context, and emotion and then you can communicate a message more easily. Try to display the images in full size so that it looks more impactful. Display the images as much as you can and take advantage from it, displaying them on full size gives a luxurious look.
If you want to make your images look more professional, add layers. Add an overlay to your images to change them in unicolor.
03Use simple shapes
Using simple shapes will enhance the look of the design. There are a lot of shapes from which you can choose like geometric, organic shapes etc. Geometric shapes include basic shapes like square, circle, rectangle and triangle. Circles are the best shapes as they don’t have any sharp corners or edges. Circles help to keep the content separate and look neat.
04Using dark color
Using dark color can be challenging to work on but it looks sophisticated. Using dark color with dark color text can be difficult to read and thus it should be avoided. Try to add a contrast color with a dark color background. Use dark color as your background and light color like grey, orange or yellow to highlight the specific content.
05Add borders
Borders are a set of designs shapes, boundaries of text boxes, lines, etc. that can make your document look more beautiful and attractive. Adding a border can enhance the look of the content and theme of the menu. You can customize the design and thickness of the page. It totally depends on you that if you want add colorful border, text border, picture border, text border and custom border then you can add them. Adding a border will make it look more clean and simple.
Part 2 Editable Timeline Templates
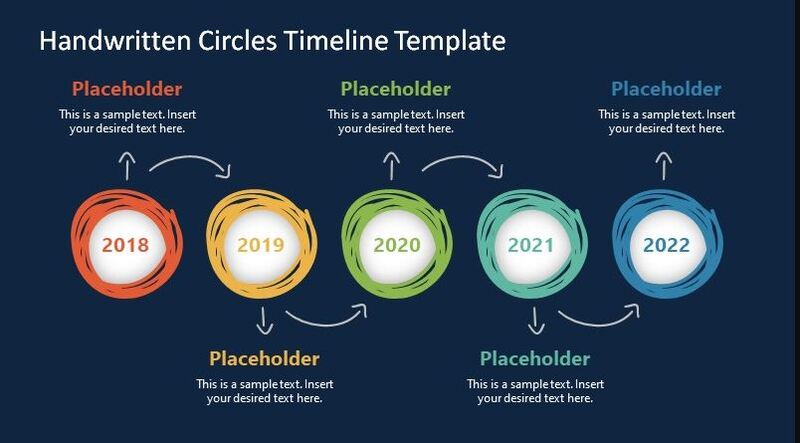
06Handwritten Circles Timeline PowerPoint Template
The handwritten circles timeline PowerPoint template is suitable for envisioning projects, goals, events etc. Business companies use this handwritten timeline template to represent business growth in their presentation. The companies use this timeline template for making their high level projects according to the schedule. Timeline template presentations are used in business, schools, organizations etc.
The timeline template of hand writing circles is editable. You can customize its colors in background, and can also change its hand drawn shapes. Inside the circle the text boxes can be switchable from the clipart icons.
07One Pager Vertical Timeline Slide Timeline
This vertical timeline template displays the connected curves as a path in vertical timeline. It is used for presenting the events, goals etc. in a sequence. A person from any field can use this curved timeline in vertical order. This one page vertical timeline slide can be used for teaching process or explaining historic events in which you can display year, decay or anything related to that event.
This is an editable PowerPoint vertical timeline and you can customize it as you want. The sky blue and white combination looks professional but if you don’t like it you can change its color according to the business presentation. Business can use this timeline template to represent their business strategy, goals or projects.
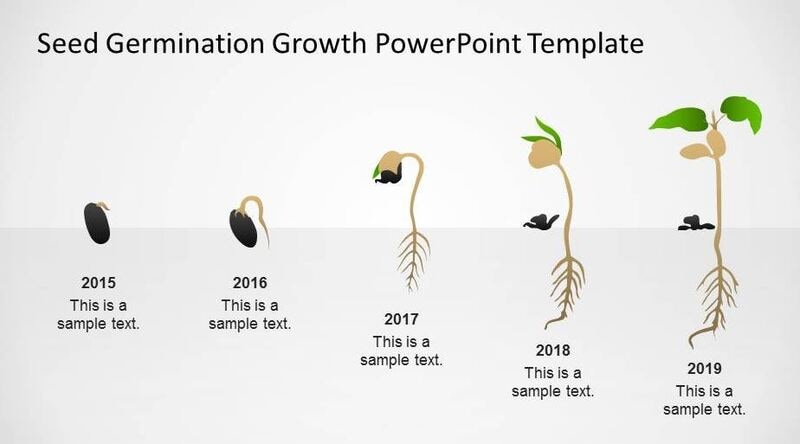
08Seed Germination Growth PowerPoint Template
Seed germination growth PowerPoint template is very innovative template which shows the growth metaphor of the seed and by using it you can make a beautiful presentation. Each and every object is created from the PowerPoint shapes so that the user can customize it according to him. You can present it to your audience in a very professional way.
09Creative Timeline Template for PowerPoint
The Creative Timeline Template for PowerPoint is a selection of milestone shapes arranged in a sequence to give you a professional timeline. You can track the growth and progress of any company by using this template. They are used to give you directions. In the other way, they can be represented in the form of events. These events are in running order, which means it can happen one after the other. Between the two milestones, a gap is been displayed. Milestone can involve the dates, people etc. The template can be customized using PowerPoint shapes. The user can change its color and texts as well using its editable features.
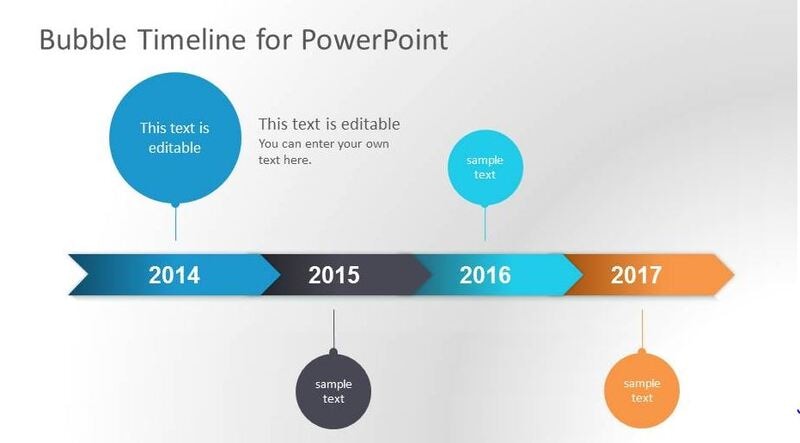
10Bubble Timeline PowerPoint Template
This timeline PowerPoint template has a bubble style and comes with a clean design. This timeline template for PowerPoint has different slides with timeline graphics. You can make changes or edit this timeline as you want. Some slides designs include a series of bars to represent the important milestones in the form of bubble.
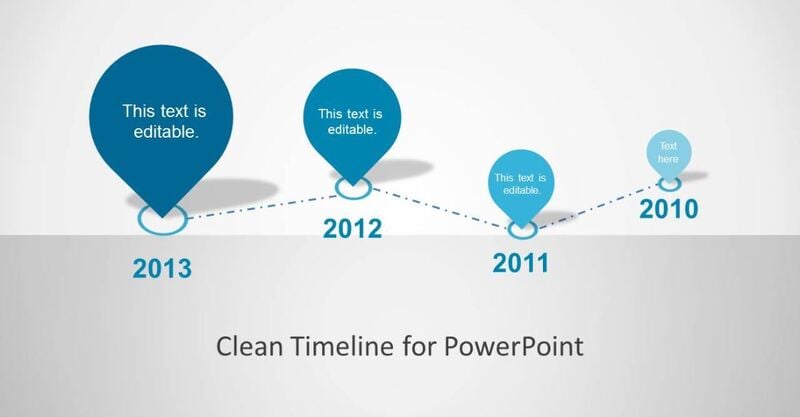
11Clean Timeline Template for PowerPoint
Clean timeline template for PowerPoint is a beautiful template with simple design. In this PowerPoint presentation template, you will get 6 slide designs with amazing layouts which have been created from the PowerPoint shapes.
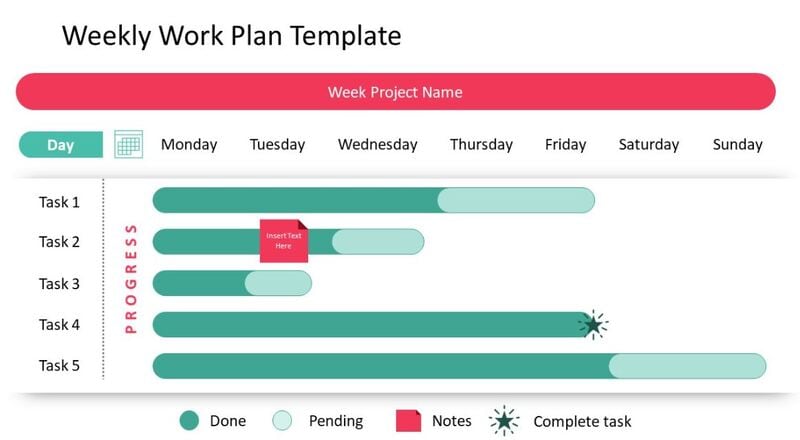
12Weekly Work Plan Template
The Weekly Work Plan Template is designed to present the progress of weekly tasks. It helps you in planning your week efficiently and also not to miss out on important tasks. The design of this template has a horizontal bar graph, with different horizontal shapes showing the progress of the particular event or task. Users can also change the colors or the objects if they wish their plan a personalized touch. It can also be used by professionals or by teachers to present their weekly goals or progress.
13Work Plan Slides PowerPoint Templates
The Work Plan Slides PowerPoint Templates come in four designs which can be used by professionals to present their work plans. Professionals can customize this Work Plan Slides PowerPoint Templates according to how they want to present their work plan. Teachers and organizations can also edit this template to design this. This There are several elements that can also be changed. Users can modify background, text font, shapes and colors as they wish.
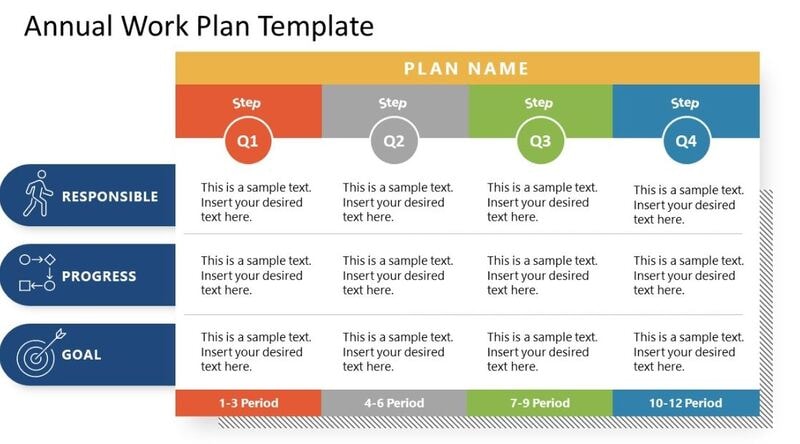
14Annual Work Plan Template for PowerPoint
You can represent the annual strategy plan by customizing the Annual Work Plan Template. The annual work plan template represents the most important achievement predicted throughout the year. It is an organization plan for 12 months which includes the budget details, responsibilities, and progress expectations.
Any changes like color, font style, design or background changes are customizable. Use this template for preparing an annual work plan for your organization.
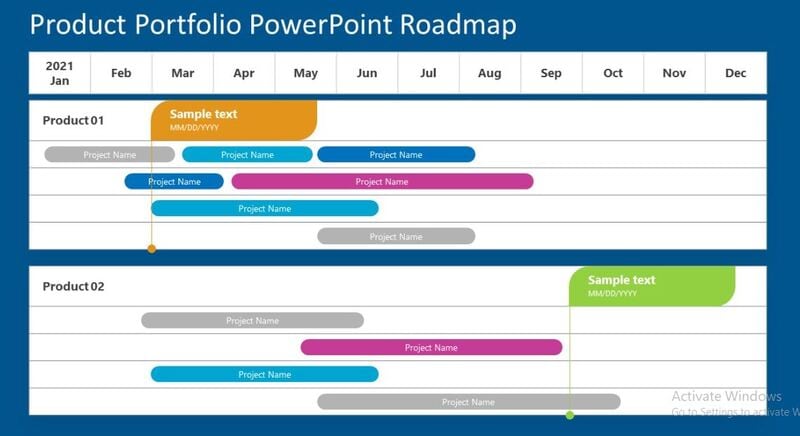
15 10. Product Portfolio Timeline Template
The Product Portfolio Timeline Template is a Gantt chart presentation for any product portfolio. The product portfolio timeline envisions the development strategy and processes to deliver a product. It gives you an overview of the product stages regarding its progress over time. This is an editable template with white and blue PowerPoint backgrounds. Users can customize the timeline according to their presentation theme.
16Arrows Milestone Timeline Template
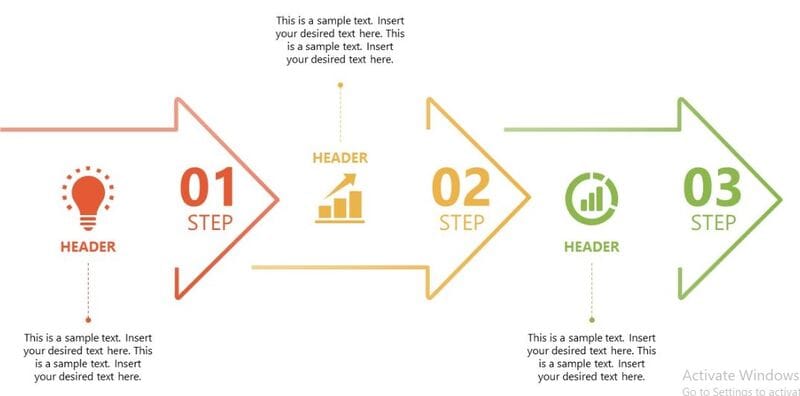
The Arrow Milestone Timeline Template is a set of arrows PowerPoint diagram. These timeline templates are very helpful in highlighting the workflow. The timeline template is convenient for providing information in order to understand the growth, change, or recurring events. Ready to use timeline templates will help you save your time and energy and by simply changing its textual content. Users can also edit the timeline by changing its color, font style, and background and shape effects.
17Scheduled Day View Calendar PowerPoint Template
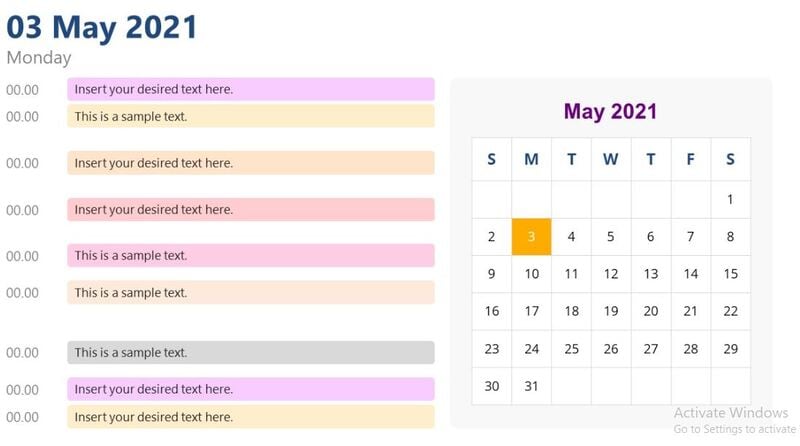
Scheduled Day View Calendar PowerPoint Template is available in three designs. These are the templates which help the individuals and corporate in time management. These templates make it easy for the busy individuals to manage their activities. It will keep you updated with all the events which are happening around you. A daily calendar PowerPoint template will help you ti make and present to- do- list. The template of day schedule will represent the day chores, activities and work which is happened throughout the day. The Schedule Day View Calendar PowerPoint Template is customizable making it easy for you to manage the tasks in a creative manner.
Part 3 How To Create A Timeline?
Creating a timeline can be easy of you use a software like Wondershare Filmora Video Editor . This software comes loaded with a lot of features that will allow you to design a creative timeline to manage your tasks. All you need to do is to go to the editor panel in which you can access different tools.
For Win 7 or later (64-bit)
For macOS 10.12 or later
Below listed are the tools and how you can use them for creating a timeline.
Working with the Time Ruler
You can check the duration of the project on the Time Ruler, which is located on the top side of the timeline. Play head’s present position will be changed when you will click on the time ruler. It allows you to select video clip which you want to be displayed on the Viewer Panel. On the Time Ruler, dragging a playhead to any particular location will let you traverse through your project and preview your clips before you make any other changes at that particular location.
Working with Scaling and Panning on Timeline
The Zoom bar is used to scale the timeline. You can zoom in or out depending on your comfortability and preview your project how it will look on the Timeline. There is no need to put the video clips onto the timeline before you scale it. Adding a video clip to a video track on a timeline will let you know how much you have to zoom in or out. You can pan the video and audio when you zoom in on a certain segment on the Timeline by using Hand Tool and Scroll Bars. Scaling and panning options in the Editor’s panel can help you in editing the video.
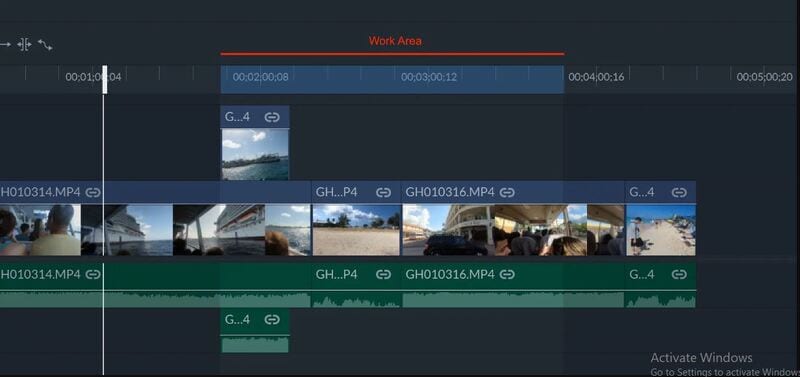
Choosing the Work Area
On the Time Ruler, you will see the light gray area which shows the selected work area. You can export only that part of the timeline, once you have selected the work area. In the viewer panel, you can also loop your selected area; it is another way to analyze your work. If you want to loop a work area, from the viewer select the loop playback icon.
Export your Video
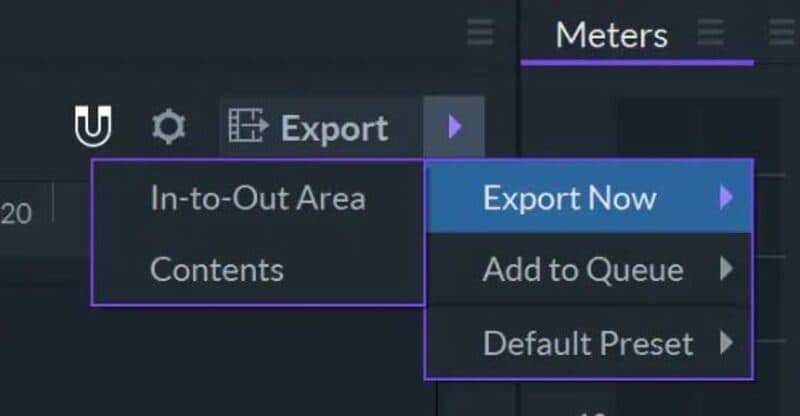
At the upper right corner of the Editor Panel, there is an Export Button which has two options which will let you choose the portion of timeline you want to add to export line.
You have to select the work area on the timeline to make use of the Export option. You can select the area by simply pressing I button then drag the slider on the point on the timeline where you want the work area to end by pressing the O button. When you are done with this, click on the Export button and select the In-Out option. From the Export Option, it will only export the section on the Timeline which is selected by the work area.
Part 4 Time template Q&A
What are the different things that should be involved in a timeline?
A. A timeline template should include the events or activities that you want represent in your presentation along with their date and time, so that audience will get the idea of when and at what time it is going to happen.
What are the most important elements of a timeline?
A. The most important elements of a timeline are:
● The task lists should be completely mentioned with all the required details.
● Mention the date and time so that audience can get an idea of when will this task take place.
● Mention the length of each task and the person who will be responsible for this task.
What is the aim of using a timeline?
A. A time is an important tool as it represents the events and activities. We use timeline for any kind of research, study, business projects or event planning. Timelines make things easier to explain it to anyone in an orderly manner.
What are the various types of timeline?
A. There are different types of timelines:
● Gantt Chart Timeline
● Chronology Chart
● Static Timeline
● Interactive timeline
● Vertical Bar Chart Timeline
In what way a timeline will help a team to achieve its goals?
A. Team members will get an idea of the events that whether they are on track or not. Setting deadlines of a project to complete it on time. Timeline will help them in making strategies for the company project if it is required.
● Ending Thoughts →
● Timeline Templates are very helpful in telling stories, any sort of development or growth which is very helpful in understanding the previous and present things.
● There are a lot of editable Timeline Templates which you can customize it according to your needs.
● Most important things of the Timeline Templates are dates and time of the tasks, and the duration of the tasks which helps you in better time management.
Color Matching Is the Trickiest Part of Graphic Designing. Learn in Detail About Using Canva Color Match Ideally While Working on Your Pins, Social Media Posts, and Other Designs
How to Perfectly Use Canva Color Match?
An easy yet powerful editor
Numerous effects to choose from
Detailed tutorials provided by the official channel
Color combination is the essential thing that you need to keep in mind designing. It helps create eye-catchy designs and can create a positive impact on the target audience.
This is the greatest secret of creating attractive and wonderful designs. Reading further will help you to understand the Canva color match in detail. So, without any further dues, let’s get started!
In this article
01 [What is the Canva Color Picker?](#Part 1)
02 [Why Use the Color Match Tool?](#Part 2)
03 [How to Use Color Match in Canva to Match Your Brand](#Part 3)
04 [Alternative to Canva Color Match](#Part 4)
Part 1 What is the Canva Color Picker?
Canva is one of the simplest and easiest ways of creating great and eye-catchy graphic designs. Color combinations help us to make these designs more attractive. But earlier, there were some limitations in Canva regarding the color picker tool; designers had to use browser extensions like ColorZilla to match the color combinations perfectly. They faced many problems while selecting the perfect color of their choice while designing their pins, social media content, logos, online invitations, etc. They had to find the perfect color code of their choice from an external source and paste it into the Canva, which was simply very time-consuming.
The most-awaited color picker tool was introduced in Canva at the end of November 202This new design tool makes the design very convenient while using Canva for graphic designing. With this tool, you don’t need to spend hours searching for the right color that matches the background. Color picker helps you to find a perfect color match according to the image, logo, or anything else uploaded on Canva.
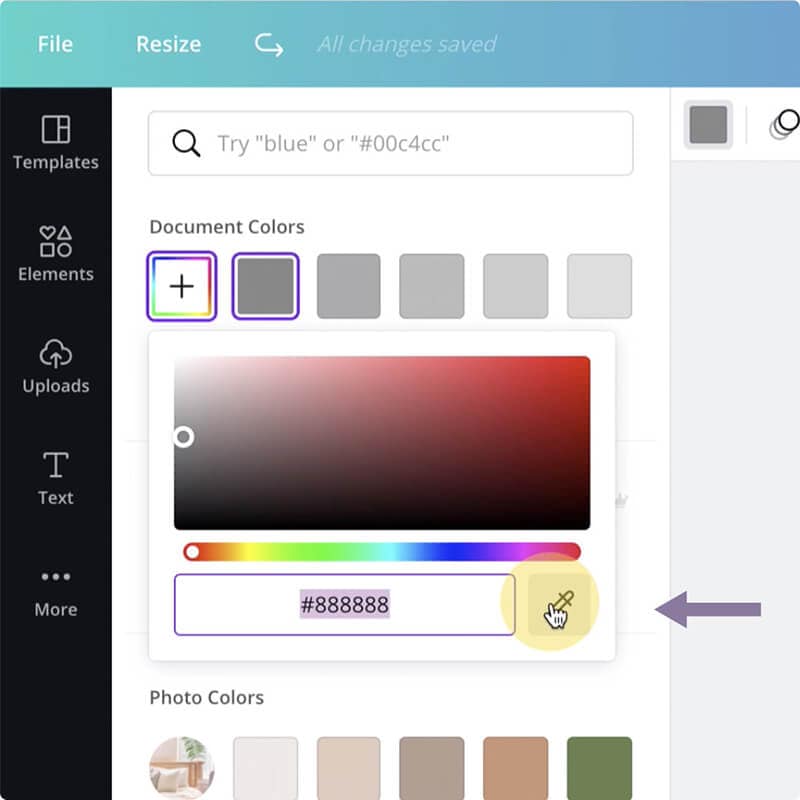
But before using this new color match tool, you must ensure that:
● You are using the updated version of the Canva desktop app.
● You have the latest version of the browsers like Chrome, Mozilla, Internet Explorer, etc.
Part 2 Why Use the Color Match Tool?
This color match tool is the most-demanded feature that has been updated on Canva. It helps choose the perfect color match very efficiently without wasting time and effort. It works like an eyedropper tool available in graphic designing software like Photoshop. It is elementary and valuable to use, and it saves a lot of time in creating attractive and wonderful designs.
It helps determine the different colors available in a particular image uploaded on the Canva app. You can easily choose the appropriate color by placing the tool in the place that has your desired color. It is a compassionate tool, so you should be very careful while choosing the color of your choice. You can press the ‘Esc’ button to exit the command without choosing any color.
This color match tool magically helps select the desired color in seconds without using any external color picker browser extension. This tool is readily available on the color pallet in the updated version of the Canva desktop app.
Part 3 How to Use Color Match in Canva to Match Your Brand
The color match tool is now inbuilt in the Canva desktop app, which is very easy and convenient. You need to download the Canva desktop app to use this feature from the official website of Canva.
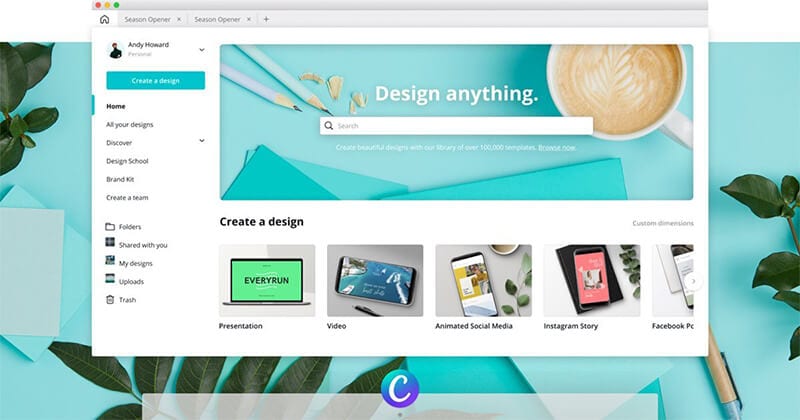
The designers need to follow the simple steps given below to use the color match tool (eyedropper tool) in the updated version of the Canva desktop app:
● First of all, open the Canva desktop app.
● After this, open any design or image of your choice that you want to edit. This color match tool can work on any type of image, regardless of the shape and size.
● Now, select the particular part of the image whose color you want to change.
● After this, click on the color block available at the top corner to open the color customization options.
● A color pallet will open.
● On the top of the color pallet, you will see a ‘+’ (add new color) button, this button has a colorful square outline.
● After this, a color chart will appear under that button. You will see the color code written over there and an eyedropper tool will be available next to that color code (hex code).
● Click on this eyedropper tool and select the color of your choice either from the image or any other color available in Canva.
● After selecting the color tap on the particular part of the image whose color you want to change.
This is how you can change the color using the new color picker tool available in Canva and enjoy editing your images using the new Canva desktop app.
Part 4 Alternative to Canva Color Match
As we all know, Canva is the most accessible online graphic designing platform used for image editing and video editing. But there are certain limitations of using it, so here we have listed some of the other graphic designing tools for both image and video editing that can be used as an alternative to the Canva app:
● Visme: It is a drag and drops editing and graphic designing tool. Using; this tool is effortless to use, and you can easily create attractive presentations, infographics, social media graphics, logos, etc. This tool can be used by anyone like students (to create their school activities), educators (to create easy to learn infographics), business people (to create attractive presentations), graphic designers (to create different content), etc.
It contains a lot of features like:
● Data Visualization Tools
● Variety of Professionally Designed Easy to Use Templates
● Infographic Maker
● A Large Number of Editing Tools
● Animation Feature with Hover Effects
● Analytics Feature
● Adobe Spark: It is an online tool launched by Adobe. Although it can’t compete with professional software like Photoshop and Illustrator, it can be treated as the best alternative for Canva. It is used to create social media posts, logos, and graphic designs easily and efficiently. The only limitation it has is that non-designers and newcomers can’t use it without any knowledge of graphic design.
● PicMonkey: PicMonkey is another great alternative to Canva, just like Visme. It has many features that help both professional and non-professional designers create attractive and wonderful designs very easily and efficiently. It has many exciting features like photo re-toucher, pattern & effects tools, etc., just like Photoshop, but it is relatively easier to use and can be used by anyone who wants to create beautiful and creative graphic designs.
● ****Wondershare Filmora Video Editor **: Filmora is a video editing software and can be used as an alternative to Canva if you create and edit the videos to medium & advanced levels. It is used to create and edit short videos for social media and ad campaigns very quickly, with many features available in professional software like Adobe Premiere Pro. It is easy-to-use with an intuitive user interface that is very helpful for non-professional and less experienced video editors.
For Win 7 or later (64-bit)
For macOS 10.12 or later
● Key Takeaways from This Episode →
● It can be concluded that Canva is a fantastic graphic designing tool for all the non-professionals and newcomers in the field of design. It helps people create attractive and creative designs with less effort and less time consumption.
● No doubt, everything has its pros and cons. Similarly, Canva also has certain limitations compared to the other professional graphic designing tools like Photoshop, Illustrator, etc.
● But still, it is continuously updating and removing those limitations. For example- the new color match tool is introduced to this platform for easy and convenient graphic designing.
● This color match tool (eyedropper tool) was demanded by the designers who use Canva for their graphics and creating attractive social media posts, infographics, video editing, etc.
Color combination is the essential thing that you need to keep in mind designing. It helps create eye-catchy designs and can create a positive impact on the target audience.

This is the greatest secret of creating attractive and wonderful designs. Reading further will help you to understand the Canva color match in detail. So, without any further dues, let’s get started!
In this article
01 [What is the Canva Color Picker?](#Part 1)
02 [Why Use the Color Match Tool?](#Part 2)
03 [How to Use Color Match in Canva to Match Your Brand](#Part 3)
04 [Alternative to Canva Color Match](#Part 4)
Part 1 What is the Canva Color Picker?
Canva is one of the simplest and easiest ways of creating great and eye-catchy graphic designs. Color combinations help us to make these designs more attractive. But earlier, there were some limitations in Canva regarding the color picker tool; designers had to use browser extensions like ColorZilla to match the color combinations perfectly. They faced many problems while selecting the perfect color of their choice while designing their pins, social media content, logos, online invitations, etc. They had to find the perfect color code of their choice from an external source and paste it into the Canva, which was simply very time-consuming.
The most-awaited color picker tool was introduced in Canva at the end of November 202This new design tool makes the design very convenient while using Canva for graphic designing. With this tool, you don’t need to spend hours searching for the right color that matches the background. Color picker helps you to find a perfect color match according to the image, logo, or anything else uploaded on Canva.

But before using this new color match tool, you must ensure that:
● You are using the updated version of the Canva desktop app.
● You have the latest version of the browsers like Chrome, Mozilla, Internet Explorer, etc.
Part 2 Why Use the Color Match Tool?

This color match tool is the most-demanded feature that has been updated on Canva. It helps choose the perfect color match very efficiently without wasting time and effort. It works like an eyedropper tool available in graphic designing software like Photoshop. It is elementary and valuable to use, and it saves a lot of time in creating attractive and wonderful designs.
It helps determine the different colors available in a particular image uploaded on the Canva app. You can easily choose the appropriate color by placing the tool in the place that has your desired color. It is a compassionate tool, so you should be very careful while choosing the color of your choice. You can press the ‘Esc’ button to exit the command without choosing any color.
This color match tool magically helps select the desired color in seconds without using any external color picker browser extension. This tool is readily available on the color pallet in the updated version of the Canva desktop app.
Part 3 How to Use Color Match in Canva to Match Your Brand
The color match tool is now inbuilt in the Canva desktop app, which is very easy and convenient. You need to download the Canva desktop app to use this feature from the official website of Canva.

The designers need to follow the simple steps given below to use the color match tool (eyedropper tool) in the updated version of the Canva desktop app:
● First of all, open the Canva desktop app.
● After this, open any design or image of your choice that you want to edit. This color match tool can work on any type of image, regardless of the shape and size.
● Now, select the particular part of the image whose color you want to change.
● After this, click on the color block available at the top corner to open the color customization options.
● A color pallet will open.
● On the top of the color pallet, you will see a ‘+’ (add new color) button, this button has a colorful square outline.
● After this, a color chart will appear under that button. You will see the color code written over there and an eyedropper tool will be available next to that color code (hex code).
● Click on this eyedropper tool and select the color of your choice either from the image or any other color available in Canva.
● After selecting the color tap on the particular part of the image whose color you want to change.
This is how you can change the color using the new color picker tool available in Canva and enjoy editing your images using the new Canva desktop app.
Part 4 Alternative to Canva Color Match
As we all know, Canva is the most accessible online graphic designing platform used for image editing and video editing. But there are certain limitations of using it, so here we have listed some of the other graphic designing tools for both image and video editing that can be used as an alternative to the Canva app:
● Visme: It is a drag and drops editing and graphic designing tool. Using; this tool is effortless to use, and you can easily create attractive presentations, infographics, social media graphics, logos, etc. This tool can be used by anyone like students (to create their school activities), educators (to create easy to learn infographics), business people (to create attractive presentations), graphic designers (to create different content), etc.
It contains a lot of features like:
● Data Visualization Tools
● Variety of Professionally Designed Easy to Use Templates
● Infographic Maker
● A Large Number of Editing Tools
● Animation Feature with Hover Effects
● Analytics Feature
● Adobe Spark: It is an online tool launched by Adobe. Although it can’t compete with professional software like Photoshop and Illustrator, it can be treated as the best alternative for Canva. It is used to create social media posts, logos, and graphic designs easily and efficiently. The only limitation it has is that non-designers and newcomers can’t use it without any knowledge of graphic design.
● PicMonkey: PicMonkey is another great alternative to Canva, just like Visme. It has many features that help both professional and non-professional designers create attractive and wonderful designs very easily and efficiently. It has many exciting features like photo re-toucher, pattern & effects tools, etc., just like Photoshop, but it is relatively easier to use and can be used by anyone who wants to create beautiful and creative graphic designs.
● ****Wondershare Filmora Video Editor **: Filmora is a video editing software and can be used as an alternative to Canva if you create and edit the videos to medium & advanced levels. It is used to create and edit short videos for social media and ad campaigns very quickly, with many features available in professional software like Adobe Premiere Pro. It is easy-to-use with an intuitive user interface that is very helpful for non-professional and less experienced video editors.
For Win 7 or later (64-bit)
For macOS 10.12 or later
● Key Takeaways from This Episode →
● It can be concluded that Canva is a fantastic graphic designing tool for all the non-professionals and newcomers in the field of design. It helps people create attractive and creative designs with less effort and less time consumption.
● No doubt, everything has its pros and cons. Similarly, Canva also has certain limitations compared to the other professional graphic designing tools like Photoshop, Illustrator, etc.
● But still, it is continuously updating and removing those limitations. For example- the new color match tool is introduced to this platform for easy and convenient graphic designing.
● This color match tool (eyedropper tool) was demanded by the designers who use Canva for their graphics and creating attractive social media posts, infographics, video editing, etc.
Color combination is the essential thing that you need to keep in mind designing. It helps create eye-catchy designs and can create a positive impact on the target audience.

This is the greatest secret of creating attractive and wonderful designs. Reading further will help you to understand the Canva color match in detail. So, without any further dues, let’s get started!
In this article
01 [What is the Canva Color Picker?](#Part 1)
02 [Why Use the Color Match Tool?](#Part 2)
03 [How to Use Color Match in Canva to Match Your Brand](#Part 3)
04 [Alternative to Canva Color Match](#Part 4)
Part 1 What is the Canva Color Picker?
Canva is one of the simplest and easiest ways of creating great and eye-catchy graphic designs. Color combinations help us to make these designs more attractive. But earlier, there were some limitations in Canva regarding the color picker tool; designers had to use browser extensions like ColorZilla to match the color combinations perfectly. They faced many problems while selecting the perfect color of their choice while designing their pins, social media content, logos, online invitations, etc. They had to find the perfect color code of their choice from an external source and paste it into the Canva, which was simply very time-consuming.
The most-awaited color picker tool was introduced in Canva at the end of November 202This new design tool makes the design very convenient while using Canva for graphic designing. With this tool, you don’t need to spend hours searching for the right color that matches the background. Color picker helps you to find a perfect color match according to the image, logo, or anything else uploaded on Canva.

But before using this new color match tool, you must ensure that:
● You are using the updated version of the Canva desktop app.
● You have the latest version of the browsers like Chrome, Mozilla, Internet Explorer, etc.
Part 2 Why Use the Color Match Tool?

This color match tool is the most-demanded feature that has been updated on Canva. It helps choose the perfect color match very efficiently without wasting time and effort. It works like an eyedropper tool available in graphic designing software like Photoshop. It is elementary and valuable to use, and it saves a lot of time in creating attractive and wonderful designs.
It helps determine the different colors available in a particular image uploaded on the Canva app. You can easily choose the appropriate color by placing the tool in the place that has your desired color. It is a compassionate tool, so you should be very careful while choosing the color of your choice. You can press the ‘Esc’ button to exit the command without choosing any color.
This color match tool magically helps select the desired color in seconds without using any external color picker browser extension. This tool is readily available on the color pallet in the updated version of the Canva desktop app.
Part 3 How to Use Color Match in Canva to Match Your Brand
The color match tool is now inbuilt in the Canva desktop app, which is very easy and convenient. You need to download the Canva desktop app to use this feature from the official website of Canva.

The designers need to follow the simple steps given below to use the color match tool (eyedropper tool) in the updated version of the Canva desktop app:
● First of all, open the Canva desktop app.
● After this, open any design or image of your choice that you want to edit. This color match tool can work on any type of image, regardless of the shape and size.
● Now, select the particular part of the image whose color you want to change.
● After this, click on the color block available at the top corner to open the color customization options.
● A color pallet will open.
● On the top of the color pallet, you will see a ‘+’ (add new color) button, this button has a colorful square outline.
● After this, a color chart will appear under that button. You will see the color code written over there and an eyedropper tool will be available next to that color code (hex code).
● Click on this eyedropper tool and select the color of your choice either from the image or any other color available in Canva.
● After selecting the color tap on the particular part of the image whose color you want to change.
This is how you can change the color using the new color picker tool available in Canva and enjoy editing your images using the new Canva desktop app.
Part 4 Alternative to Canva Color Match
As we all know, Canva is the most accessible online graphic designing platform used for image editing and video editing. But there are certain limitations of using it, so here we have listed some of the other graphic designing tools for both image and video editing that can be used as an alternative to the Canva app:
● Visme: It is a drag and drops editing and graphic designing tool. Using; this tool is effortless to use, and you can easily create attractive presentations, infographics, social media graphics, logos, etc. This tool can be used by anyone like students (to create their school activities), educators (to create easy to learn infographics), business people (to create attractive presentations), graphic designers (to create different content), etc.
It contains a lot of features like:
● Data Visualization Tools
● Variety of Professionally Designed Easy to Use Templates
● Infographic Maker
● A Large Number of Editing Tools
● Animation Feature with Hover Effects
● Analytics Feature
● Adobe Spark: It is an online tool launched by Adobe. Although it can’t compete with professional software like Photoshop and Illustrator, it can be treated as the best alternative for Canva. It is used to create social media posts, logos, and graphic designs easily and efficiently. The only limitation it has is that non-designers and newcomers can’t use it without any knowledge of graphic design.
● PicMonkey: PicMonkey is another great alternative to Canva, just like Visme. It has many features that help both professional and non-professional designers create attractive and wonderful designs very easily and efficiently. It has many exciting features like photo re-toucher, pattern & effects tools, etc., just like Photoshop, but it is relatively easier to use and can be used by anyone who wants to create beautiful and creative graphic designs.
● ****Wondershare Filmora Video Editor **: Filmora is a video editing software and can be used as an alternative to Canva if you create and edit the videos to medium & advanced levels. It is used to create and edit short videos for social media and ad campaigns very quickly, with many features available in professional software like Adobe Premiere Pro. It is easy-to-use with an intuitive user interface that is very helpful for non-professional and less experienced video editors.
For Win 7 or later (64-bit)
For macOS 10.12 or later
● Key Takeaways from This Episode →
● It can be concluded that Canva is a fantastic graphic designing tool for all the non-professionals and newcomers in the field of design. It helps people create attractive and creative designs with less effort and less time consumption.
● No doubt, everything has its pros and cons. Similarly, Canva also has certain limitations compared to the other professional graphic designing tools like Photoshop, Illustrator, etc.
● But still, it is continuously updating and removing those limitations. For example- the new color match tool is introduced to this platform for easy and convenient graphic designing.
● This color match tool (eyedropper tool) was demanded by the designers who use Canva for their graphics and creating attractive social media posts, infographics, video editing, etc.
Color combination is the essential thing that you need to keep in mind designing. It helps create eye-catchy designs and can create a positive impact on the target audience.

This is the greatest secret of creating attractive and wonderful designs. Reading further will help you to understand the Canva color match in detail. So, without any further dues, let’s get started!
In this article
01 [What is the Canva Color Picker?](#Part 1)
02 [Why Use the Color Match Tool?](#Part 2)
03 [How to Use Color Match in Canva to Match Your Brand](#Part 3)
04 [Alternative to Canva Color Match](#Part 4)
Part 1 What is the Canva Color Picker?
Canva is one of the simplest and easiest ways of creating great and eye-catchy graphic designs. Color combinations help us to make these designs more attractive. But earlier, there were some limitations in Canva regarding the color picker tool; designers had to use browser extensions like ColorZilla to match the color combinations perfectly. They faced many problems while selecting the perfect color of their choice while designing their pins, social media content, logos, online invitations, etc. They had to find the perfect color code of their choice from an external source and paste it into the Canva, which was simply very time-consuming.
The most-awaited color picker tool was introduced in Canva at the end of November 202This new design tool makes the design very convenient while using Canva for graphic designing. With this tool, you don’t need to spend hours searching for the right color that matches the background. Color picker helps you to find a perfect color match according to the image, logo, or anything else uploaded on Canva.

But before using this new color match tool, you must ensure that:
● You are using the updated version of the Canva desktop app.
● You have the latest version of the browsers like Chrome, Mozilla, Internet Explorer, etc.
Part 2 Why Use the Color Match Tool?

This color match tool is the most-demanded feature that has been updated on Canva. It helps choose the perfect color match very efficiently without wasting time and effort. It works like an eyedropper tool available in graphic designing software like Photoshop. It is elementary and valuable to use, and it saves a lot of time in creating attractive and wonderful designs.
It helps determine the different colors available in a particular image uploaded on the Canva app. You can easily choose the appropriate color by placing the tool in the place that has your desired color. It is a compassionate tool, so you should be very careful while choosing the color of your choice. You can press the ‘Esc’ button to exit the command without choosing any color.
This color match tool magically helps select the desired color in seconds without using any external color picker browser extension. This tool is readily available on the color pallet in the updated version of the Canva desktop app.
Part 3 How to Use Color Match in Canva to Match Your Brand
The color match tool is now inbuilt in the Canva desktop app, which is very easy and convenient. You need to download the Canva desktop app to use this feature from the official website of Canva.

The designers need to follow the simple steps given below to use the color match tool (eyedropper tool) in the updated version of the Canva desktop app:
● First of all, open the Canva desktop app.
● After this, open any design or image of your choice that you want to edit. This color match tool can work on any type of image, regardless of the shape and size.
● Now, select the particular part of the image whose color you want to change.
● After this, click on the color block available at the top corner to open the color customization options.
● A color pallet will open.
● On the top of the color pallet, you will see a ‘+’ (add new color) button, this button has a colorful square outline.
● After this, a color chart will appear under that button. You will see the color code written over there and an eyedropper tool will be available next to that color code (hex code).
● Click on this eyedropper tool and select the color of your choice either from the image or any other color available in Canva.
● After selecting the color tap on the particular part of the image whose color you want to change.
This is how you can change the color using the new color picker tool available in Canva and enjoy editing your images using the new Canva desktop app.
Part 4 Alternative to Canva Color Match
As we all know, Canva is the most accessible online graphic designing platform used for image editing and video editing. But there are certain limitations of using it, so here we have listed some of the other graphic designing tools for both image and video editing that can be used as an alternative to the Canva app:
● Visme: It is a drag and drops editing and graphic designing tool. Using; this tool is effortless to use, and you can easily create attractive presentations, infographics, social media graphics, logos, etc. This tool can be used by anyone like students (to create their school activities), educators (to create easy to learn infographics), business people (to create attractive presentations), graphic designers (to create different content), etc.
It contains a lot of features like:
● Data Visualization Tools
● Variety of Professionally Designed Easy to Use Templates
● Infographic Maker
● A Large Number of Editing Tools
● Animation Feature with Hover Effects
● Analytics Feature
● Adobe Spark: It is an online tool launched by Adobe. Although it can’t compete with professional software like Photoshop and Illustrator, it can be treated as the best alternative for Canva. It is used to create social media posts, logos, and graphic designs easily and efficiently. The only limitation it has is that non-designers and newcomers can’t use it without any knowledge of graphic design.
● PicMonkey: PicMonkey is another great alternative to Canva, just like Visme. It has many features that help both professional and non-professional designers create attractive and wonderful designs very easily and efficiently. It has many exciting features like photo re-toucher, pattern & effects tools, etc., just like Photoshop, but it is relatively easier to use and can be used by anyone who wants to create beautiful and creative graphic designs.
● ****Wondershare Filmora Video Editor **: Filmora is a video editing software and can be used as an alternative to Canva if you create and edit the videos to medium & advanced levels. It is used to create and edit short videos for social media and ad campaigns very quickly, with many features available in professional software like Adobe Premiere Pro. It is easy-to-use with an intuitive user interface that is very helpful for non-professional and less experienced video editors.
For Win 7 or later (64-bit)
For macOS 10.12 or later
● Key Takeaways from This Episode →
● It can be concluded that Canva is a fantastic graphic designing tool for all the non-professionals and newcomers in the field of design. It helps people create attractive and creative designs with less effort and less time consumption.
● No doubt, everything has its pros and cons. Similarly, Canva also has certain limitations compared to the other professional graphic designing tools like Photoshop, Illustrator, etc.
● But still, it is continuously updating and removing those limitations. For example- the new color match tool is introduced to this platform for easy and convenient graphic designing.
● This color match tool (eyedropper tool) was demanded by the designers who use Canva for their graphics and creating attractive social media posts, infographics, video editing, etc.
Create an Awesome Logo Reveal with Logo Intro Templates
Almost every business has a logo, which they use to depict their character and unique values. However, static logos are soon becoming a thing of the past. Companies are now turning to animated logos to wow their audience. Perhaps a logo intro is the missing piece you need to create a buzz around your brand and grab the attention of any onlooker.
The article below will discuss the importance of logo reveals, how they can benefit your company and how to make one for yourself.

Importance of Logo Reveals in Your Intro Video
- First and foremost, logo reveal add some spice to your image. A slight motion could go a long way in giving the viewer a unique perspective on your logo.
- Secondly, logo reveal intro videos set you apart from your competitors. Any slight similarities between logos can be easily forgotten when you create an animated clip of your logo. Logo reveals also boost brand awareness because the animation is etched in your clients’ minds, making it easy to remember.
- Lastly, free logo intro templates evoke positive emotions, which cause your audience to associate your brand with good things.
Benefits of Using Logo Reveal Intro Video With Templates
- The first benefit of using a logo intro template is that it is pretty fast to make. In less than 5 minutes, you will have your video ready to use. You don’t need to go through a learning curve to make the video. The pre-made templates make your work easy, taking the tedium out of the entire process.
- As you continue trying to put your business out there, it would help to consider the cost. A free logo intro template is an affordable way to spread the word about your business and won’t leave a massive dent in your pockets.
- Lastly, logo reveal intro videos with templates are fun to design. It is interesting to see all the shapes and forms come together to form the final result.
How To Make a Logo Reveal Intro Video With Templates
Now that you know what a logo reveal is and how it can benefit your company, you are probably very eager to learn how to make one for yourself. Wondershare Filmora is an example of an efficient tool you can use to create a logo reveal intro video with templates.
Free Download For Win 7 or later(64-bit)
Free Download For macOS 10.14 or later
Since this platform has numerous features, we will only discuss the template feature. Wondershare Filmora has more than 1000 templates you can use to create a stunning logo reveal video. If you are unsatisfied with the stock videos within the template, you can replace them with unique videos from your internal storage.
A bonus point is that Filmora allows you to share your favorite templates with other creators who want to give creating a logo reveal video a trial.
How-to steps
Below is a simple step-by-step guide to making a logo reveal intro video with Filmora.
Step1 Upload videos from your internal storage.
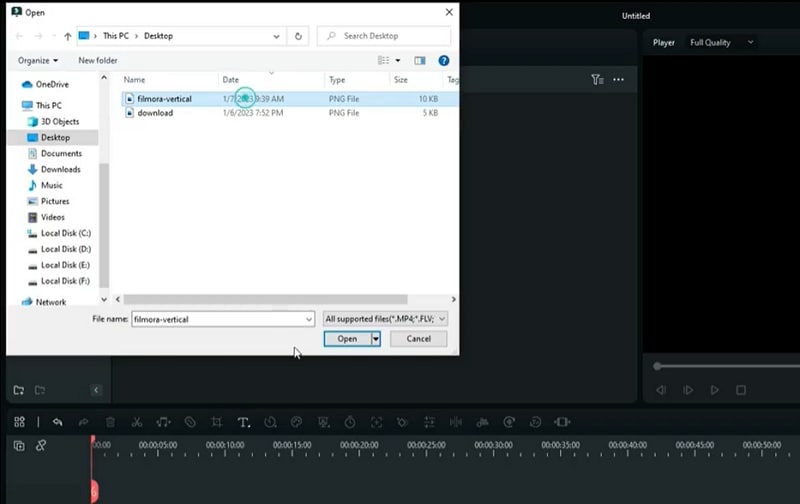
Step2 Select the “Templates” tab and type “Intro logo” in the search bar to narrow down your search.
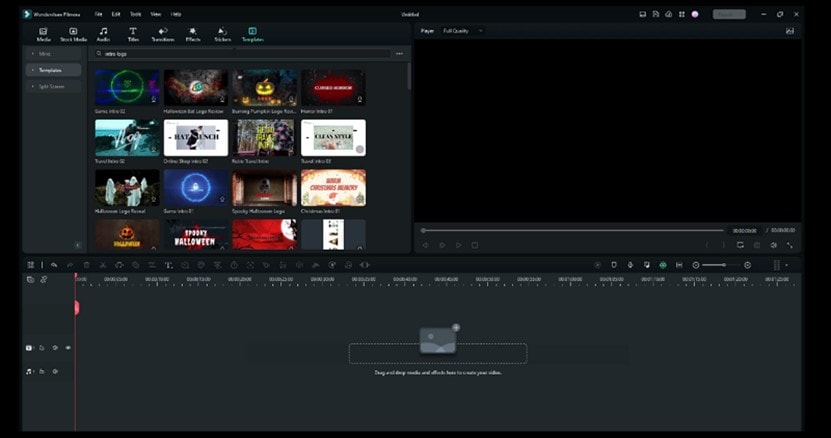
Step3 Choose a template that tickles your fancy and drag it to the track below.
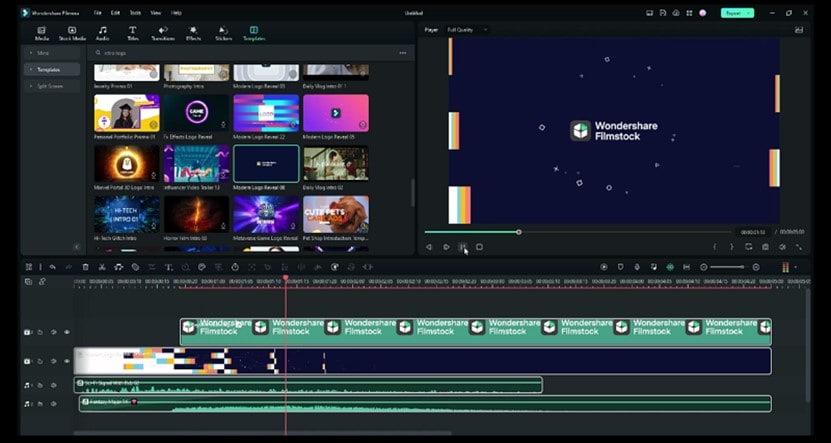
Step4 Drag your own logo to the track to replace the sample one.

Step5 Export your video as an MP4 and save a copy to your internal storage.
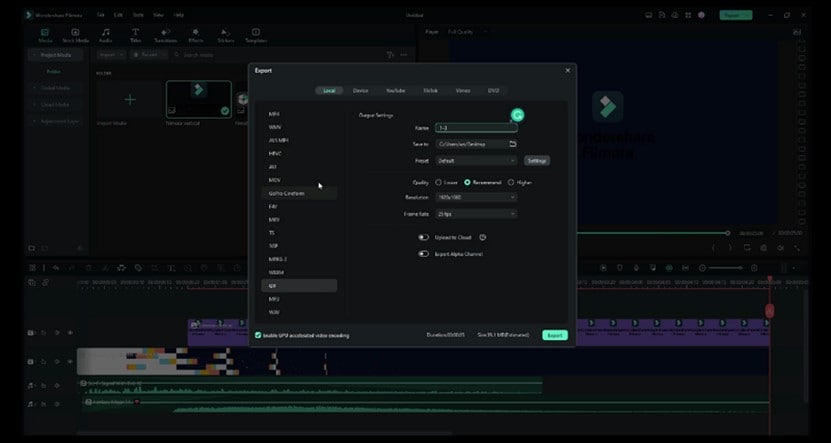
Tips for a Fantastic Logo Intro
We hope the comprehensive guide above was easy to follow and inspired you to try your hand at creating your own logo reveal video. Without further ado, let’s discuss some tips for a fantastic logo intro.
- Start by conducting ample research to find as many intro videos as possible before attempting to make your own. Watching and learning will allow you to figure out what works and what you shouldn’t do. You might also discover many resources to make a fantastic intro video you missed.
- Understand what message your company intends to send and tailor your intro video to portray it as accurately as possible. For instance, you could create a fun video to relay that your brand is easygoing.
- It wouldn’t be a great idea to show your entire logo all at once. You could create anticipation by showing tiny bits of your logo in each frame till the final logo covers the screen.
- Design your video in a manner that keeps your audience glued to the screen. The dynamism will keep the viewer watching because they don’t want to miss what comes next.
- Though it is not mandatory, you could end the video on a dark background, such as pitch black, to ensure your logo is clearly visible to your audience.
- The most important tip is to keep the video short, so you don’t bore your audience. The average attention span for most viewers is shorter than 15 seconds, meaning any video longer than that will cause them to click away from your video.
People Also Ask
Before we bid you goodbye, let’s answer some commonly asked questions about template intro logo and logo reveals.
Q1. What Is a Logo Intro?
You have probably seen a logo intro before, even though you didn’t know what you were looking at. A logo intro is a short clip of a company’s logo that features before a movie.
Recently, companies have started warming up to logo intros to create a lasting impression on their visitors and prospective clients. You could use a logo intro to portray your unique character and encapsulate what you stand for. In addition, a logo intro is a sure way to gain a competitive advantage over your rivals.
Q2. What Is a Logo Reveal?
Contrary to the logo intro that features at the beginning of the clip, a logo reveal comes at the tail end. This short animation is a depiction of your logo, which helps cement your marketing strategy and display your brand in a more interactive manner.
A logo reveal is also known as a logo stinger or sting. Since the average attention span of Internet users is pretty short, it would be a great idea to keep the logo reveal to a maximum of 10 seconds. The shorter the video, the higher the chance your audience will grasp your message and remember your brand.
Q3. What Are the 5 Rules of a Good Logo?
You cannot create an unforgettable logo reveal without designing the logo first. Since your company logo appears on almost anything concerning your business, it would be wise to make a valiant effort to ensure it fits the bill. Below are some of the qualities of a good logo.
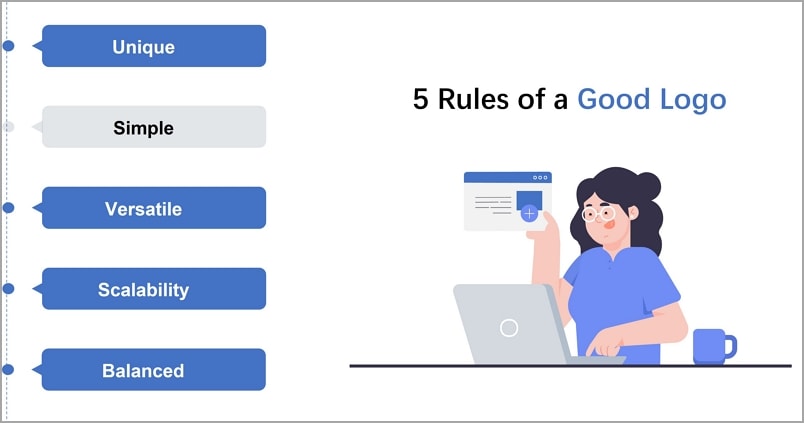
Unique
It would be a shame if your logo looked like someone else’s. Ensure your logo is your own creation and can easily be associated with your brand. Copying someone else’s logo could make your audience mistake you for someone else.
Simple
Complex logos are hard to recognize. They are also much harder to enlarge or reduce. It would help to incorporate strong lines and letters into your logo as opposed to thinner ones.
Versatile
Your logo should look good with or without colour. If you must add colour, ensure you don’t exceed four colours in the design. Remember that printing your logo when it contains too many colours becomes an expensive affair.
Scalability
It would help to ensure that your logo looks good in a big or small size. Remember that you will use your logo on letterheads and perhaps on large banners.
Balanced
Lastly, you should ensure that no element within your logo overpowers the rest. Ensure you keep all the elements in the centre because an asymmetrical logo with all the details in the corner doesn’t look aesthetically pleasing.
Q4. What Are the 7 Elements of a Good Logo?
The seven elements of a good logo include the following.

Simplicity
A simple design is far more superior to an overly complicated one. You could draw inspiration from brands like Nike.
Memorability
A good logo is one that your audience can remember off-head. Simple doesn’t always have to mean simplistic.
Timelessness
Trends come and go, but a timeless logo will remain appropriate in the years to come. It is not uncommon for some brands to retain their logos for more than a decade.
Relevance
It would be wise to ensure your logo relates to your industry in one way or the other.
High-quality typography
The wrong font on your logo can negatively impact your business. Your typography should also be easy to read from afar.
Well-balanced colors
Your choice of colors can subconsciously influence your target audience’s buying decisions and how they perceive you. For instance, blue communicates honesty and reliability, while yellow elicits feelings of happiness.
Versatility
Lastly, it would be wise to ensure that you can use your logo in numerous instances, like on a letterhead or on your social media platforms.
Conclusion
We cannot dispute a logo’s importance to your overall brand image. Your logo helps you communicate your unique message to your target audience and prospective clients. Instead of sticking with the bland, old-fashioned static logo, you have now learned a new way to animate your logo and add some spice. We hope the suggestions in this article will help you create an excellent logo reveal intro video that keeps your audience hooked and craving more.
Free Download For macOS 10.14 or later
Since this platform has numerous features, we will only discuss the template feature. Wondershare Filmora has more than 1000 templates you can use to create a stunning logo reveal video. If you are unsatisfied with the stock videos within the template, you can replace them with unique videos from your internal storage.
A bonus point is that Filmora allows you to share your favorite templates with other creators who want to give creating a logo reveal video a trial.
How-to steps
Below is a simple step-by-step guide to making a logo reveal intro video with Filmora.
Step1 Upload videos from your internal storage.

Step2 Select the “Templates” tab and type “Intro logo” in the search bar to narrow down your search.

Step3 Choose a template that tickles your fancy and drag it to the track below.

Step4 Drag your own logo to the track to replace the sample one.

Step5 Export your video as an MP4 and save a copy to your internal storage.

Tips for a Fantastic Logo Intro
We hope the comprehensive guide above was easy to follow and inspired you to try your hand at creating your own logo reveal video. Without further ado, let’s discuss some tips for a fantastic logo intro.
- Start by conducting ample research to find as many intro videos as possible before attempting to make your own. Watching and learning will allow you to figure out what works and what you shouldn’t do. You might also discover many resources to make a fantastic intro video you missed.
- Understand what message your company intends to send and tailor your intro video to portray it as accurately as possible. For instance, you could create a fun video to relay that your brand is easygoing.
- It wouldn’t be a great idea to show your entire logo all at once. You could create anticipation by showing tiny bits of your logo in each frame till the final logo covers the screen.
- Design your video in a manner that keeps your audience glued to the screen. The dynamism will keep the viewer watching because they don’t want to miss what comes next.
- Though it is not mandatory, you could end the video on a dark background, such as pitch black, to ensure your logo is clearly visible to your audience.
- The most important tip is to keep the video short, so you don’t bore your audience. The average attention span for most viewers is shorter than 15 seconds, meaning any video longer than that will cause them to click away from your video.
People Also Ask
Before we bid you goodbye, let’s answer some commonly asked questions about template intro logo and logo reveals.
Q1. What Is a Logo Intro?
You have probably seen a logo intro before, even though you didn’t know what you were looking at. A logo intro is a short clip of a company’s logo that features before a movie.
Recently, companies have started warming up to logo intros to create a lasting impression on their visitors and prospective clients. You could use a logo intro to portray your unique character and encapsulate what you stand for. In addition, a logo intro is a sure way to gain a competitive advantage over your rivals.
Q2. What Is a Logo Reveal?
Contrary to the logo intro that features at the beginning of the clip, a logo reveal comes at the tail end. This short animation is a depiction of your logo, which helps cement your marketing strategy and display your brand in a more interactive manner.
A logo reveal is also known as a logo stinger or sting. Since the average attention span of Internet users is pretty short, it would be a great idea to keep the logo reveal to a maximum of 10 seconds. The shorter the video, the higher the chance your audience will grasp your message and remember your brand.
Q3. What Are the 5 Rules of a Good Logo?
You cannot create an unforgettable logo reveal without designing the logo first. Since your company logo appears on almost anything concerning your business, it would be wise to make a valiant effort to ensure it fits the bill. Below are some of the qualities of a good logo.

Unique
It would be a shame if your logo looked like someone else’s. Ensure your logo is your own creation and can easily be associated with your brand. Copying someone else’s logo could make your audience mistake you for someone else.
Simple
Complex logos are hard to recognize. They are also much harder to enlarge or reduce. It would help to incorporate strong lines and letters into your logo as opposed to thinner ones.
Versatile
Your logo should look good with or without colour. If you must add colour, ensure you don’t exceed four colours in the design. Remember that printing your logo when it contains too many colours becomes an expensive affair.
Scalability
It would help to ensure that your logo looks good in a big or small size. Remember that you will use your logo on letterheads and perhaps on large banners.
Balanced
Lastly, you should ensure that no element within your logo overpowers the rest. Ensure you keep all the elements in the centre because an asymmetrical logo with all the details in the corner doesn’t look aesthetically pleasing.
Q4. What Are the 7 Elements of a Good Logo?
The seven elements of a good logo include the following.

Simplicity
A simple design is far more superior to an overly complicated one. You could draw inspiration from brands like Nike.
Memorability
A good logo is one that your audience can remember off-head. Simple doesn’t always have to mean simplistic.
Timelessness
Trends come and go, but a timeless logo will remain appropriate in the years to come. It is not uncommon for some brands to retain their logos for more than a decade.
Relevance
It would be wise to ensure your logo relates to your industry in one way or the other.
High-quality typography
The wrong font on your logo can negatively impact your business. Your typography should also be easy to read from afar.
Well-balanced colors
Your choice of colors can subconsciously influence your target audience’s buying decisions and how they perceive you. For instance, blue communicates honesty and reliability, while yellow elicits feelings of happiness.
Versatility
Lastly, it would be wise to ensure that you can use your logo in numerous instances, like on a letterhead or on your social media platforms.
Conclusion
We cannot dispute a logo’s importance to your overall brand image. Your logo helps you communicate your unique message to your target audience and prospective clients. Instead of sticking with the bland, old-fashioned static logo, you have now learned a new way to animate your logo and add some spice. We hope the suggestions in this article will help you create an excellent logo reveal intro video that keeps your audience hooked and craving more.
Also read:
- Updated Have You Tried Using a Craig Bot on Discord to Record Audio? Do You Have an Idea of Using a Discord Craig Bot Is Safe? Get Answers to These Questions and More From This Article as You Continue Reading for 2024
- Updated Gimp Green Screen for 2024
- Do You Want Your Video Footage to Resemble Kodak Films? You Can Get the Old Kodak Film Look by Searching for Kodak 2383 LUT Free Download on the Internet
- Updated How To Change Text In Premiere Pro for 2024
- New Learn How to Feather Shapes in After Effects and Add a Professional Touch to Your Designs. This Comprehensive Guide Covers Everything From the Basics to Advanced Techniques. Perfect for Beginners and Experts Alike for 2024
- Updated 2024 Approved Learn More About the Video Editing Interface of Wondershare Filmora
- Updated Free Drone LUTs For Perfect Drone Footage for 2024
- New Do You Want to Add a Motion Blur Effect in Valorant? Read This Guide to Find Out How to Create a Motion Blur Effect in Valorant without Any Hassle for 2024
- New In 2024, Are You Finding It Challenging to Convert GIFs Into JPG or PNG Images? Do Not Worry! The Best Free Online Tool and Software to Change Your GIF Into PNG or JPG Images Are Below
- Updated In 2024, Detailed Guide to Merge Videos in VLC Media Player
- New Best 10 iPad Slideshow Apps to Create a Slideshow for 2024
- 2024 Approved Offering The Best Understanding of Performing iMovie Slow Motion Video
- Updated How to Merge FLV Files Windows, Mac,Android, iPhone & Online for 2024
- New In 2024, AVI Editor for Windows 11/10/8.1/8/7 Easily Edit AVI Files on PC
- Updated Effective 10 Ways to Convert YouTube to MOV at Ease PC & Online
- Updated Perfecting the Art of Slowing Down Video on Instagram
- In 2024, What Are the Best Video Background Changers Online?
- Updated 2024 Approved 11 Ways To Speed Up A Video On iPhone
- Updated In 2024, How to Make a Slideshow on iPhone
- New Step-by-Step Guide | How to Edit A Time Lapse Video on iPhone for 2024
- On the Tiktok App, You Can Make a Photo Video Slideshow. You Can Make Photo Video Slideshow with Music, Animated Tiktok Templates, and Can Also Add Text to Slideshow Video for 2024
- Updated 2024 Approved Do You Have a Sony Camera and Want to Try Different LUTs on Your Digital Content? Youre at the Right Place, as You Can Apply Sony HLG LUTs to Your Media
- How to Use Rules of Thirds for 2024
- The Best Cinematic LUTs in The Market for 2024
- New 2024 Approved How to Use Rule of Thirds in Video
- 2024 Approved Best Ideas for Time Lapse Video
- Updated 2024 Approved Right Tools for Converting 60FPS Frame Rate in Videos
- Updated 100 Workable How to Mask Track with Adobe Premiere Pro for 2024
- Updated In 2024, This Easy Hack Using Wondershare Filmora New Masking Feature Will Be a Great Addition to Your Next Horror Video Content
- In 2024, How to Add Adjustment Layer in Premiere Pro
- 2024 Approved How to Create Video in Text Intro?
- New 2024 Approved How To Use Motion Blur On Video Star?
- New In 2024, Create the Night-to-Day Effect Videos
- Updated In 2024, How To Export Video in Filmora
- 2024 Approved Best 12 Sony Vegas Slideshow Templates for Free Download
- Updated 2024 Approved How to Make a Super Easy Rotating Video Effect
- Updated 2024 Approved Step by Step to Resize Video in Davinci Resolve
- New In 2024, Looking for a Way to Edit Your Profile Picture for Telegram? Heres an Easy and Quick Guide on How to Change, Delete and Hide Your Profile Picture with Simple Steps
- New Are You Looking to Finish Your YouTube Video in Style? The Following Are the Best End Screen Makers to Choose From for 2024
- 8 Best Free Photo Collage with Music Video Maker
- How to Get the Most Out of KineMaster Video Templates
- New Guaranteed 10 Storyboard Creators To Make Animation Easier For You
- New What Is TS Format and How To Play TS Files? Basic Tips
- In 2024, Unlocking Made Easy The Best 10 Apps for Unlocking Your Realme GT 5 Pro Device
- In 2024, Unlock Your Disabled Apple iPhone 11 Without iTunes in 5 Ways
- In 2024, How Can I Catch the Regional Pokémon without Traveling On Nubia Red Magic 8S Pro | Dr.fone
- In 2024, Top 15 Augmented Reality Games Like Pokémon GO To Play On Tecno Spark Go (2023) | Dr.fone
- In 2024, How to Turn Off Find My iPhone 7 when Phone is Broken?
- Your Complete Guide To Reset Samsung Galaxy A15 4G | Dr.fone
- How to Repair a Damaged video file of Xiaomi Redmi Note 13 5G using Video Repair Utility on Mac?
- The Ultimate Guide to Get the Rare Candy on Pokemon Go Fire Red On Tecno Spark 20 | Dr.fone
- How To Pause Life360 Location Sharing For Oppo Reno 11 5G | Dr.fone
- In 2024, How to Unlock Samsung Galaxy M34 5G Phone without Google Account?
- In 2024, How To Stream Anything From Google Pixel 7a to Apple TV | Dr.fone
- In 2024, How to Track Oppo K11x Location by Number | Dr.fone
- How Can We Bypass Vivo Y36 FRP?
- How To Change Your SIM PIN Code on Your Motorola Moto G24 Phone
- 10 Free Location Spoofers to Fake GPS Location on your Itel P55+ | Dr.fone
- The Ultimate Guide to Bypassing iCloud Activation Lock on iPhone 13 Pro
- How To Transfer Data From iPhone 13 mini To Other iPhone 11 Pro Max devices? | Dr.fone
- How Do I Stop Someone From Tracking My Samsung Galaxy F54 5G? | Dr.fone
- All Things You Need to Know about Wipe Data/Factory Reset For Samsung Galaxy S21 FE 5G (2023) | Dr.fone
- Title: New In 2024, 6 Best Methods to Make a Video Longer
- Author: Morgan
- Created at : 2024-05-19 05:12:52
- Updated at : 2024-05-20 05:12:52
- Link: https://ai-video-editing.techidaily.com/new-in-2024-6-best-methods-to-make-a-video-longer/
- License: This work is licensed under CC BY-NC-SA 4.0.

