
:max_bytes(150000):strip_icc():format(webp)/ArtificialIntelligence-Chatbot-6921166a1d9e447eb0251f52694d919a.jpg)
New In 2024, A Review of 3D LUT Mobile App - A Composite Application for Editing Media
A Review of 3D LUT Mobile App - A Composite Application for Editing Media
Have you ever wondered how movies, TV shows, and social media posts look so good? It’s not the video editing that makes them look good but also the color grading. The correct color grading adds a perspective to your storytelling and a feel to your media. As a matter of fact, there are many different tools for this purpose, and LUT is the most popular one.
Many people think that LUTs can only be applied using a PC or Mac. However, it’s not true because there are different mobile apps that you can use to apply LUTs. One such excellent tool is 3DLUT mobile app which is available for multiple mobile platforms.
- Part 2: How to Use LUTs on 3DLUT Mobile App for Video Editing?
- Part 3: 6 Best LUTs That Can Be Used on 3DLUT Mobile App
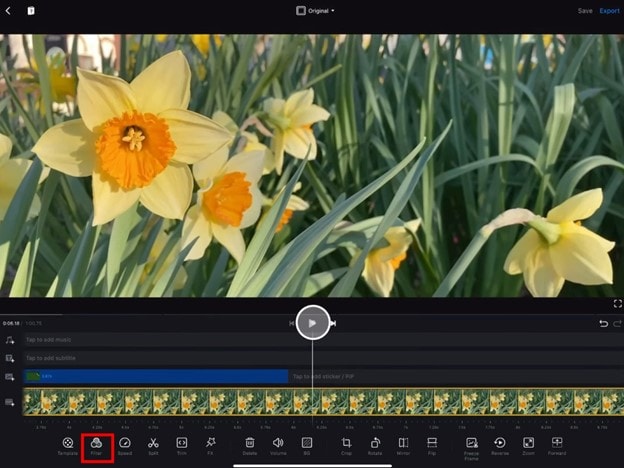
Part 1: Overviewing The Features of the 3DLUT Mobile App
If you’re looking for a simple and basic mobile application for color grading, 3DLUT mobile app is a good choice. It is an easy-to-use application that does not overcomplicate your color grading process. You can adjust the brightness and contrast of your media files with its basic tools option. Moreover, you can add white balance and saturation, brighten shadows, and sharpen your photos and videos.
Additionally, this app offers over 70 LUT presets that you can use. These LUTs can be applied directly to your media files by changing their tone and mood. In addition to this, it gives you access to the 3DLUT Creator’s library, where you can download and purchase different LUTs packs. You can download this color grading application on your iOS and Android devices.
Free Download For Win 7 or later(64-bit)
Free Download For macOS 10.14 or later
Part 2: How to Use LUTs on 3DLUT Mobile App for Video Editing?
Color grading and color correction are not only for professional pictures and portraits. You can color-correct your videos as well with your smartphones. This section will give you step-by-step guidance on how to use LUTs using the 3D LUT mobile app for your videos.
Step1Install the Application and Import Media
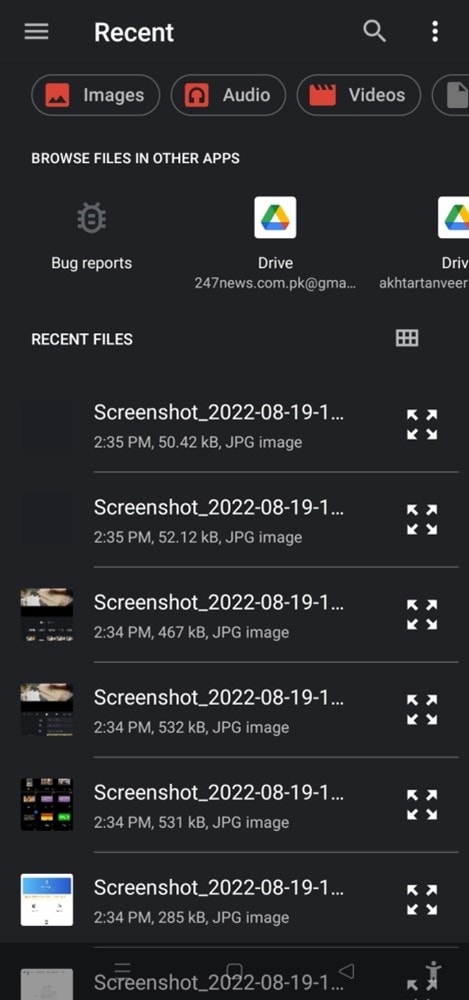
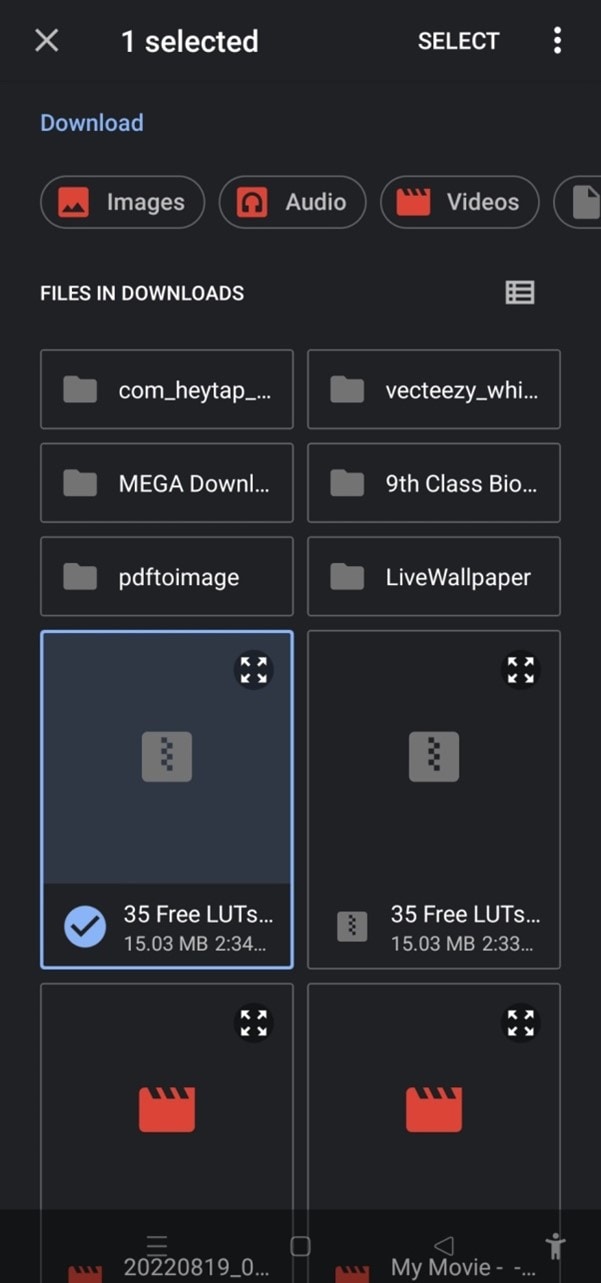
To install the application, go to the App Store/Play Store and search for the 3DLUT app. Install the application to apply LUTs to your videos. After installing the app, open the application and tap on the “Open Gallery” button to import your media files. You can choose any photo or media from your gallery.

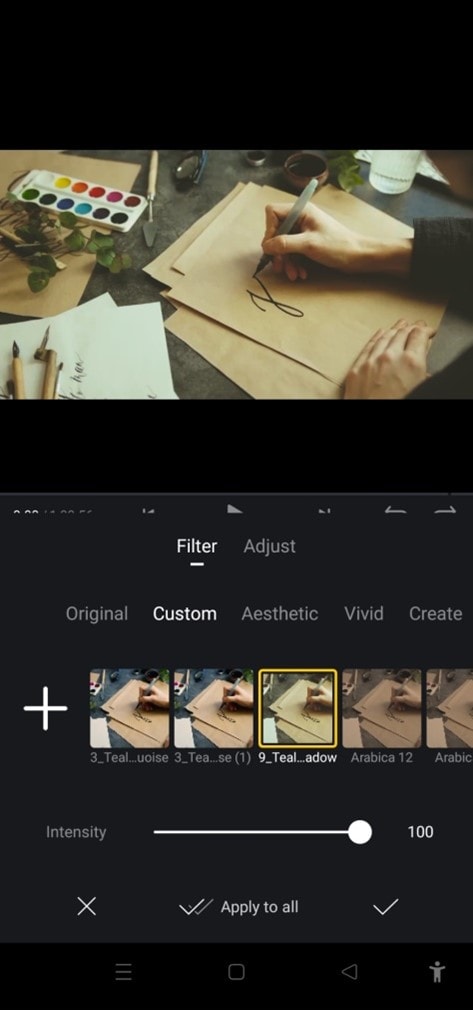
Step2Apply LUTs On Your File
Once you’ve imported your video file, it’s time to apply the LUT to your video. To do so, choose the “LUT” tab from the bottom tray and select the desired LUT.

Step3 Apply the Changes and Save Your File
When you have selected the desired LUT, tap on the “Tick” sign in the right corner of the screen. You can save your file in the gallery by tapping the same sign. Moreover, you can further adjust your file by selecting the Basic option from the bottom tray.

Part 3: 6 Best LUTs That Can Be Used on 3DLUT Mobile App
With the 3DLUT app, you can even access the LUT’s library of 3DLUT Creator. You can choose from different LUTs available according to your choice. You can always select the option for 3DLUT mobile app free download on your app’s store.
1. Speedy Grade Pack
It is a great LUT pack that you can use for your photos and videos. Speedy Grade Pack is a LUT pack that includes 10 LUTs. This color grading pack has different LUTs, each with a new style and color composition. Moreover, it is a pack that enhances color to make your videos more vibrant and livelier. It creates a more refreshing and colorful atmosphere for your viewers.

2. GoPro LUTs Color Grading Pack
Yet another fantastic LUT pack, especially for outdoor vlogging and videography, is GoPro LUTs Color Grading Pack. This pack comes with over 50 different LUTs, each suitable for GoPro videos. You can use these LUTs to give your vlogs and videos a more cinematic and professional touch. It enhances the brown and muddiness in your videos and balances the exposure to provide the perfect outdoor look.

3. Skin Tones Pack
This pack is the right choice if you want to color-grade your portraits. Skin Tones Pack has over 5 LUTs, and each one is used to fine-tune your skin complexation. With this LUT pack, you can add tan and more brightness to your photos and videos. This pack enhances your skin tone by highlighting your skin color composition. It increases brownness and saturation in your media files to give them a more natural look.

4. Zoan Cinematic Pack
Zoan Cinematic Pack is the perfect color-grading preset that gives your videos a professional-looking cinematic look. This pack has eight cinematic-rich presets you can apply to your videos and vlogs. These LUTs give the modern Hollywood-style impression. It adds richness to your videos, and it underexposes bright colors in your videos to create a modern cinematic ambiance.

5. Winter Pack
It is an exceptional and diversely influencing pack of 3DLUT Mobile. It changes your color composition to bluish to give a colder look. This pack has one LUT that comes with rich colors and deep blue color grading. These colors create an atmosphere that resembles winter and coldness. The blue tone and damping of other colors make your videos look more profound and meaningful.

6. RakhmonovFilmsLUT Pack
The last one on this list is RakhmonovFilmsLUT Pack which has over 100 LUTs. Each LUT is different from the others in style and tone. This pack gives your videos a more meaningful natural-looking color tone. These LUTs create a movie-like feel to your content by correcting colors that look more professional. It adds depth and dramatic touch to your media files with the correct exposure and white balance.

Conclusion
With new tools and applications, video editing becomes more accessible with a professional touch. Social media influencers create videos that give the feel of an expensive movie. This is how much these tools have made creating an excellent cinematic video easier. You can apply LUTs and other color grading options with your smartphone applications, such as 3DLUT mobile app.
Empower your videos with a new mood using different LUTs. Filmora now offers 100+ top-quality 3D LUTs cover a broad range of scenarios. Transform your videos with Filmora’s powerful 3D LUTs.
Apply LUT on Videos Apply LUT on Videos Learn More


Part 1: Overviewing The Features of the 3DLUT Mobile App
If you’re looking for a simple and basic mobile application for color grading, 3DLUT mobile app is a good choice. It is an easy-to-use application that does not overcomplicate your color grading process. You can adjust the brightness and contrast of your media files with its basic tools option. Moreover, you can add white balance and saturation, brighten shadows, and sharpen your photos and videos.
Additionally, this app offers over 70 LUT presets that you can use. These LUTs can be applied directly to your media files by changing their tone and mood. In addition to this, it gives you access to the 3DLUT Creator’s library, where you can download and purchase different LUTs packs. You can download this color grading application on your iOS and Android devices.
Free Download For Win 7 or later(64-bit)
Free Download For macOS 10.14 or later
Part 2: How to Use LUTs on 3DLUT Mobile App for Video Editing?
Color grading and color correction are not only for professional pictures and portraits. You can color-correct your videos as well with your smartphones. This section will give you step-by-step guidance on how to use LUTs using the 3D LUT mobile app for your videos.
Step1Install the Application and Import Media
To install the application, go to the App Store/Play Store and search for the 3DLUT app. Install the application to apply LUTs to your videos. After installing the app, open the application and tap on the “Open Gallery” button to import your media files. You can choose any photo or media from your gallery.
Step2Apply LUTs On Your File
Once you’ve imported your video file, it’s time to apply the LUT to your video. To do so, choose the “LUT” tab from the bottom tray and select the desired LUT.
Step3 Apply the Changes and Save Your File
When you have selected the desired LUT, tap on the “Tick” sign in the right corner of the screen. You can save your file in the gallery by tapping the same sign. Moreover, you can further adjust your file by selecting the Basic option from the bottom tray.
Part 3: 6 Best LUTs That Can Be Used on 3DLUT Mobile App
With the 3DLUT app, you can even access the LUT’s library of 3DLUT Creator. You can choose from different LUTs available according to your choice. You can always select the option for 3DLUT mobile app free download on your app’s store.
1. Speedy Grade Pack
It is a great LUT pack that you can use for your photos and videos. Speedy Grade Pack is a LUT pack that includes 10 LUTs. This color grading pack has different LUTs, each with a new style and color composition. Moreover, it is a pack that enhances color to make your videos more vibrant and livelier. It creates a more refreshing and colorful atmosphere for your viewers.
2. GoPro LUTs Color Grading Pack
Yet another fantastic LUT pack, especially for outdoor vlogging and videography, is GoPro LUTs Color Grading Pack. This pack comes with over 50 different LUTs, each suitable for GoPro videos. You can use these LUTs to give your vlogs and videos a more cinematic and professional touch. It enhances the brown and muddiness in your videos and balances the exposure to provide the perfect outdoor look.
3. Skin Tones Pack
This pack is the right choice if you want to color-grade your portraits. Skin Tones Pack has over 5 LUTs, and each one is used to fine-tune your skin complexation. With this LUT pack, you can add tan and more brightness to your photos and videos. This pack enhances your skin tone by highlighting your skin color composition. It increases brownness and saturation in your media files to give them a more natural look.
4. Zoan Cinematic Pack
Zoan Cinematic Pack is the perfect color-grading preset that gives your videos a professional-looking cinematic look. This pack has eight cinematic-rich presets you can apply to your videos and vlogs. These LUTs give the modern Hollywood-style impression. It adds richness to your videos, and it underexposes bright colors in your videos to create a modern cinematic ambiance.
5. Winter Pack
It is an exceptional and diversely influencing pack of 3DLUT Mobile. It changes your color composition to bluish to give a colder look. This pack has one LUT that comes with rich colors and deep blue color grading. These colors create an atmosphere that resembles winter and coldness. The blue tone and damping of other colors make your videos look more profound and meaningful.
6. RakhmonovFilmsLUT Pack
The last one on this list is RakhmonovFilmsLUT Pack which has over 100 LUTs. Each LUT is different from the others in style and tone. This pack gives your videos a more meaningful natural-looking color tone. These LUTs create a movie-like feel to your content by correcting colors that look more professional. It adds depth and dramatic touch to your media files with the correct exposure and white balance.
Conclusion
With new tools and applications, video editing becomes more accessible with a professional touch. Social media influencers create videos that give the feel of an expensive movie. This is how much these tools have made creating an excellent cinematic video easier. You can apply LUTs and other color grading options with your smartphone applications, such as 3DLUT mobile app.
Empower your videos with a new mood using different LUTs. Filmora now offers 100+ top-quality 3D LUTs cover a broad range of scenarios. Transform your videos with Filmora’s powerful 3D LUTs.
Apply LUT on Videos Apply LUT on Videos Learn More
Here Are the Steps to Crop a Video in Sony Vegas Pro: Step 1: Click on ‘Import’ and Import the Video to Be Edited. Click on It and Drag-Drop to Timeline
Sony Vegas Pro is a video editing software package for non-linear editing (NLE) originally published by Sonic Foundry, now owned and run by Magix Software GmbH. Written in the C++ programming language, the software uses the Microsoft Windows operating system and is compatible with 64-bit versions.
It has been used to produce TV shows and feature films. More recently, Sony released a consumer video-editing program known as Movie Studio Platinum 13, which was designed for consumer-level editors. In the previous year by Sonic Foundry, a division of Sony Pictures Digital. The software was re-branded as Sony Vegas following Sonic Foundry’s merger with Sony Pictures Digital in 2007, and after the latter sold off Sonic Foundry in 2008, it became a part of MAGIX.
Other video editing products from Sony include Movie Studio, Sound Forge Pro, and ACID Pro.
The original version was called Sound Forge. The software was upgraded to incorporate features of the newly acquired product Vegas, which had been released as a Windows version of the original DOS-based Non-Linear Editor (NLE) developed by US company, Canopus.
About Sony Vegas Pro
The powerful video editing software makes it easy to create professional-quality videos. It provides the users with some special features like easy trimming, splitting and merging of clips, etc. By using Vegas Pro you can easily crop your short video (a clip) and also resize it.
Sony Vegas Pro is a video editing software produced by Sony Creative Software. It is used for professional video, audio post-production and 3D animation.
Sony Vegas Pro is a video editing software that is used worldwide. It has great features and it can be utilized by individuals who are newbies in the field of creating videos. Sony Vegas Pro 12, 11, 10 have been installed many times on Windows 7, 8, 8.1 operating systems without encountering any problems. But some users face problems with the installation process of Sony Vegas Pro 13, 14 versions. Many individuals have got different difficulties.
Cropping means cutting off a part of the video. Instead of enlarging the video by moving its borders, you have to trim it from both sides. The editing procedure includes removing unwanted parts from short videos, making them shorter and more effective. It can also create suspense or interest for audiences. Here are the steps to crop a video in Sony Vegas Pro:
Step-by-step on how to crop videos using Vegas Pro?
Step 1: Click on ‘Import’ and import the video to be edited. Click on it and drag-drop to timeline. You can see a green indicator in the form of a splitter between two clips in the timeline, which shows where the clip ends and starts playing.

Step 2: Open the video you want to edit, in the timeline of your project. Right-click on the clip and select “Video Event Pan/Crop”.

Step 3: Alternatively, you can also select crop effect by pressing the icon in the clip. Or, select the Crop icon from the toolbar to add it to a track.

Step 4: The crop window will pop up. You can now drag the dotted rectangle to the ‘crop’ part of the video that you want. Press enter once done to apply the crop. You can also use the “Previous Frame” or “Next Frame” button to navigate to another frame of your video and drag the dotted rectangle from there, without changing your current frame.

Step 5: When you have finished adjusting the crop area, go to File > Export > Render Video. In the Render Video window that pops up, select the file format and quality of your render. You can also adjust the size, frame rate, and bitrate options from here. Once ready, press “Render” to begin rendering your video with the cropped area. This will give you a new output video where only the selected portion of the previous video is visible.

Sony Vegas Pro provides advanced options for users to easily crop videos in multiple formats like - HDV, AVCHD, and many more.
And… Voila! You have successfully cropped your video in Sony Vegas Pro.
Alternatively, there is a better way to crop a video and that is using the Wondershare Filmora. It is easier and user-friendly. It also has a lot of features that you can choose from.
An Easier Way to Crop a Video with Filmora
Filmora Video Editor is a free windows movie maker. It is one of the best windows movie makers available in the market. Filmora uses MPEG-4 AVC codec for editing videos and also offers many output formats like MP4, AVI, FLV, etc. In addition to these features, it includes a video stabilization algorithm, picture in picture editor, and many more. It is a free windows movie maker so anyone who has a windows computer can download and use this software.
It includes many interesting and useful features which you will not find in other movie makers like:
Support for multiple videos, audio, image formats: The program offers support for multiple videos, audio, image formats. Video stabilization algorithm: Video stabilization algorithm is used to remove unwanted shakes from your videos. Apart from this it also contains a picture-in-picture editor and many more useful features.
Filmora is an indie filmmaker’s go-to tool to create gorgeous-looking videos. No matter your skill level, it’s easy enough for beginners and powerful enough for professionals.
For Win 7 or later (64-bit)
For macOS 10.14 or later
Step-by-step on how to crop videos using Wondershare Filmora?
So, here are the steps to crop videos using Wondershare Filmora.
Step 1: Open the video you want to edit in Wondershare Filmora. Drag it and drop to timeline.

Step 2: In your timeline, select a portion of the video that needs cropping and click on ‘Crop and Zoom’ tab located at the bottom right corner of your screen. Here you can see the Crop and Zoom window where you can adjust the crop area. Adjust the size, shape of your video with these options.

Step 3: Once done with your adjustment click on ‘OK’ button to apply your crop. You can see that the selected portion of the video is now cropped.

Step 4: Finally, click on “Save” to save your video with cropping. Congratulations, you have successfully cropped your video! So, this was all about how to crop videos using Wondershare Filmora software step by step. Using these easy steps anyone can simple edit their videos and save them in multiple formats without any loss of quality or data.

Step 2: Open the video you want to edit, in the timeline of your project. Right-click on the clip and select “Video Event Pan/Crop”.
Step 3: Alternatively, you can also select crop effect by pressing the icon in the clip. Or, select the Crop icon from the toolbar to add it to a track.
Step 4: The crop window will pop up. You can now drag the dotted rectangle to the ‘crop’ part of the video that you want. Press enter once done to apply the crop. You can also use the “Previous Frame” or “Next Frame” button to navigate to another frame of your video and drag the dotted rectangle from there, without changing your current frame.
Step 5: When you have finished adjusting the crop area, go to File > Export > Render Video. In the Render Video window that pops up, select the file format and quality of your render. You can also adjust the size, frame rate, and bitrate options from here. Once ready, press “Render” to begin rendering your video with the cropped area. This will give you a new output video where only the selected portion of the previous video is visible.
Sony Vegas Pro provides advanced options for users to easily crop videos in multiple formats like - HDV, AVCHD, and many more.
And… Voila! You have successfully cropped your video in Sony Vegas Pro.
Alternatively, there is a better way to crop a video and that is using the Wondershare Filmora. It is easier and user-friendly. It also has a lot of features that you can choose from.
An Easier Way to Crop a Video with Filmora
Filmora Video Editor is a free windows movie maker. It is one of the best windows movie makers available in the market. Filmora uses MPEG-4 AVC codec for editing videos and also offers many output formats like MP4, AVI, FLV, etc. In addition to these features, it includes a video stabilization algorithm, picture in picture editor, and many more. It is a free windows movie maker so anyone who has a windows computer can download and use this software.
It includes many interesting and useful features which you will not find in other movie makers like:
Support for multiple videos, audio, image formats: The program offers support for multiple videos, audio, image formats. Video stabilization algorithm: Video stabilization algorithm is used to remove unwanted shakes from your videos. Apart from this it also contains a picture-in-picture editor and many more useful features.
Filmora is an indie filmmaker’s go-to tool to create gorgeous-looking videos. No matter your skill level, it’s easy enough for beginners and powerful enough for professionals.
For Win 7 or later (64-bit)
For macOS 10.14 or later
Step-by-step on how to crop videos using Wondershare Filmora?
So, here are the steps to crop videos using Wondershare Filmora.
Step 1: Open the video you want to edit in Wondershare Filmora. Drag it and drop to timeline.
Step 2: In your timeline, select a portion of the video that needs cropping and click on ‘Crop and Zoom’ tab located at the bottom right corner of your screen. Here you can see the Crop and Zoom window where you can adjust the crop area. Adjust the size, shape of your video with these options.
Step 3: Once done with your adjustment click on ‘OK’ button to apply your crop. You can see that the selected portion of the video is now cropped.
Step 4: Finally, click on “Save” to save your video with cropping. Congratulations, you have successfully cropped your video! So, this was all about how to crop videos using Wondershare Filmora software step by step. Using these easy steps anyone can simple edit their videos and save them in multiple formats without any loss of quality or data.
Separate Audio From Video in DaVinci Resolve [Step by Step]
The DaVinci Resolve is an excellent software for editing videos; that’s why it attracts users. They also enjoy using it due to its simplicity and availability of features. One of them is separating the audio from the video that most people are looking for. It is easy to extract from this software. But, to avail of this feature, you need to follow proper steps, and this article is all about it. There are also details regarding the Wondershare Filmora as the most appropriate alternative and simpler solution provider.
How can you separate audio from the video clips in DaVinci resolve?
The DaVinci resolve is the complete package to solve your different issues. It is a solution provider regarding the editing of the videos, extraction of audio from videos, matching, correction of the colours and many more. It also includes modification of the lens that helps analyse and correct the distortion. Even the lens analysis is also available to deliver high-quality results.
Step 1: Launch the DaVinci Resolve in your system after its installation. Import the media file from the library in your timeline from which you have to separate the audio.

Step 2: Select the Edit tab in the timeline of your project if it isn’t selected by default. You need to choose the video clip by pointing the cursor or dragging the mouse towards it.

Step 3: After its selection, untick all the clips, and this step is for separating the audio from the video just from one file. Click the video file for deselection.

Step 4: Now it is easy to select the video and click on it. Select the audio and video clips separately. Simply edit, delete or move your audio whenever you want it to.
An easier way to separate the audio from the video
However, the DaVinci Resolve is the software of advanced level and the best choice for professionals. But its pricing that is $299, is quite disturbing for most of the users. So, they are always searching for a suitable approach and reasonable as well. And that is the first and foremost Filmora Video Editor . You can split the audio and listen to your favourite track on any media player.
All the tools are readily available, and they are used without facing any issue. After editing and applying all the effects, it is easy to upload on social network platforms. it is very simple to create fast or slow-motion videos with speed controls. This software is highly supportive of editing videos of any kind. There is no need to look for the reasons to choose Wondershare Filmora; instead, it is not to choose it for editing tasks.
For Win 7 or later (64-bit)
For macOS 10.14 or later
Features:
- Extracting the audio from videos
- Controls available for videos and audios
- Number of ways to split the clips and screens
- All the functions are performed by just drag and drop
- Sharing of the videos unlimitedly on Vimeo, YouTube and others
- mixing the audio and removing the noise
To extract the audio from the video clip in Wondershare Filmora, go through the following easy steps and get your task done.
Step 1: After completing the installation of Wondershare Filmora, selection of the ratio is required whether it is 4:3 or 16:9. It is your choice and dependent on the requirements of your project. Import the video from the folder of your computer when you will click “Import”. As the default, all the files are all together in one place with no gap.

Step 2: This step separates the audio from the video in a single click. You need to right-click on the video from which you have to split the audio and select “Detach Audio”. Instantly, an audio file will appear on the screen on the audio track. Yes, you have received the original audio final from the source file.
Successfully the audio is separate from the video. Wondershare Filmora also offers to replace the audio file you want to add to the video. It can provide a few instructions, some narrations or personal, funny tunes for sharing with family and friends.
Step 3: After step2, it is simple to delete the audio clips or video that isn’t needed anymore and add your own choice. Click on “Export” to save the audio file into the new MP3 file and select “iPod” presenting to play. Even, you can save it as your project file on your system. After the completion of exporting the audio track, load the project file again with the video frame and export it as the new file of your video.

Wondershare Filmora is the most user-friendly editing software for all. Whether you want to make complex or straightforward videos, all is done in just a few steps. The best part of this software is that all the features are easily accessible to all types of users. It is very simple to start and show your creative skills and share easily if you are unfamiliar with video editing.
There is a massive range of tools in Wondershare Filmora that you are looking for in any video editor. 800+ video effects are built-in, such as effects for the text, transitions, filters, stickers, motion graphics, and overlays.
In Wondershare Filmora, there are templates for the spilt screens as well. It is best for you to handle your YouTube channels or your Instagram account. It doesn’t record screen only but as well voice-over. Even capturing the videos from frame to frame is also possible. So, what are you waiting for? Download Wondershare Filmora today and start your editing done in just a few clicks.
Step 2: Select the Edit tab in the timeline of your project if it isn’t selected by default. You need to choose the video clip by pointing the cursor or dragging the mouse towards it.
Step 3: After its selection, untick all the clips, and this step is for separating the audio from the video just from one file. Click the video file for deselection.
Step 4: Now it is easy to select the video and click on it. Select the audio and video clips separately. Simply edit, delete or move your audio whenever you want it to.
An easier way to separate the audio from the video
However, the DaVinci Resolve is the software of advanced level and the best choice for professionals. But its pricing that is $299, is quite disturbing for most of the users. So, they are always searching for a suitable approach and reasonable as well. And that is the first and foremost Filmora Video Editor . You can split the audio and listen to your favourite track on any media player.
All the tools are readily available, and they are used without facing any issue. After editing and applying all the effects, it is easy to upload on social network platforms. it is very simple to create fast or slow-motion videos with speed controls. This software is highly supportive of editing videos of any kind. There is no need to look for the reasons to choose Wondershare Filmora; instead, it is not to choose it for editing tasks.
For Win 7 or later (64-bit)
For macOS 10.14 or later
Features:
- Extracting the audio from videos
- Controls available for videos and audios
- Number of ways to split the clips and screens
- All the functions are performed by just drag and drop
- Sharing of the videos unlimitedly on Vimeo, YouTube and others
- mixing the audio and removing the noise
To extract the audio from the video clip in Wondershare Filmora, go through the following easy steps and get your task done.
Step 1: After completing the installation of Wondershare Filmora, selection of the ratio is required whether it is 4:3 or 16:9. It is your choice and dependent on the requirements of your project. Import the video from the folder of your computer when you will click “Import”. As the default, all the files are all together in one place with no gap.
Step 2: This step separates the audio from the video in a single click. You need to right-click on the video from which you have to split the audio and select “Detach Audio”. Instantly, an audio file will appear on the screen on the audio track. Yes, you have received the original audio final from the source file.
Successfully the audio is separate from the video. Wondershare Filmora also offers to replace the audio file you want to add to the video. It can provide a few instructions, some narrations or personal, funny tunes for sharing with family and friends.
Step 3: After step2, it is simple to delete the audio clips or video that isn’t needed anymore and add your own choice. Click on “Export” to save the audio file into the new MP3 file and select “iPod” presenting to play. Even, you can save it as your project file on your system. After the completion of exporting the audio track, load the project file again with the video frame and export it as the new file of your video.
Wondershare Filmora is the most user-friendly editing software for all. Whether you want to make complex or straightforward videos, all is done in just a few steps. The best part of this software is that all the features are easily accessible to all types of users. It is very simple to start and show your creative skills and share easily if you are unfamiliar with video editing.
There is a massive range of tools in Wondershare Filmora that you are looking for in any video editor. 800+ video effects are built-in, such as effects for the text, transitions, filters, stickers, motion graphics, and overlays.
In Wondershare Filmora, there are templates for the spilt screens as well. It is best for you to handle your YouTube channels or your Instagram account. It doesn’t record screen only but as well voice-over. Even capturing the videos from frame to frame is also possible. So, what are you waiting for? Download Wondershare Filmora today and start your editing done in just a few clicks.
How to Use LUTs in VN Editor – Complete Guide and Best LUTs Download
Hello and welcome to another article full of information and excitement. The topic of this article is LUT for the VN editor. So it will be exciting for those who want to use LUTs in their video to make them look nice and well. As we will discuss today that what is VN editor and how you can add LUTs to your videos using it on the devices it is compatible for. Moreover, where you can download some fantastic LUTs like moody LUTs, which help your videos to look nice, and which software you should use for this purpose if you are running a device on which the VN editor is not compatible. So let’s begin!
Part 1. What is VN editor?
VN editor is one of the best choices for video editing on mobiles and Mac. Fast editing, transitions, effects, filters, colors, subtitles, music, and many other features make the VN video editing app a great tool for producing and editing videos. It aims to make editing shorter and more feature-rich, empowering everyone to take control of their own lives. You cannot only produce great videos but good films as well. In the following, we will discuss how you can add LUTs to your videos using it.

Part 2. How to use LUTs in VN editor?
First, we must know that it is compatible with which platforms. So, it is now available for Android, iOS, and Mac OS only. However, you can also use it on Windows with some Android or iOS emulators, but it is not a very continent way in our suggestions. Even after doing this, it does not work well on your Windows. Maybe you will face some glitches or malfunctioning problems. So it is better to use it on only those platforms for which it is primarily available. Please read the instructions below since we will go through how to use LUTs in it later on.
On Mac:
First of all, we will learn how you can do it on Mac:
- Download the VN Editor for Mac and open it.
- Add your video and then tap the filters option.
- Now choose custom filters and then select the LUTs pack.

- Select the desired LUT and apply.
On Mobile:
Secondly, we will discuss how we can do this on our mobiles (Android or iOS). The procedure on both devices (Android or iOS) is almost comparable. Therefore, we will discuss the steps from the perspective of both of these here:
- First, download the VN editor from your mobile app store (Android or iOS) and the LUTs pack you want to use in your video.
- After downloading them on your mobile, open the VN editor application.
- Create a new project and add your video to it.

- Then click on the Filters option and select add external or custom filters option next to the existing filters.
- It will take you to the File manager of your mobile, from which you have to find the folder in which you have stored your LUTs.
- After finding them, you can select those LUTs you want to use in your video and then click on the done or select button.
- Your downloaded LUTs start showing in the VN editor, and you can use them in your videos as you want.
Part 3. Best LUTs resource for VN video editor
1. Presets Store
Presets Store is an online platform that helps you with various Filters, LUTs, and other presets. So you can download LUTs for your videos for the VN editor using it. However, it’s not a free service. You have to pay for the LUTs you want to download from here. You can visit their YouTube channel to follow the latest LUTs, Filters and other presets on this platform.
2. Apna Editz
Apna Editz is another online platform you can use for this purpose. It also provides you with a fantastic variety of Presets like LUTs, Filters, and many other similar effects, which you can use in your video using the VN editor. The main Pros of this recommendation are that it’s a free website. So you can download LUTs for your videos from it for free. Keep an eye on their YouTube channel to be updated about the latest LUTs.
3. Lut Preset
Lut Preset is another alternative to all the above ones. You can get almost all your favorite LUTs for VN editor for free here and then use them in your videos as you want. They also share the latest LUTs on their YouTube Channel.
4. Pencil Hub
Pencil Hub is also a good option in this concern. However, it does not have too much variety of VN LUTs, but you can still use it to download some of the best LUTs for VN editors. To get informed of their every new effect and LUTs, their YouTube channel is the primary source.
5. YRP EDITZ
YRP ETIDZ is another good option if you are still looking for some fantastic VN LUTs. They, too not have a large variety of presets and LUTs. However, if you want some most commonly used LUTs for VN Editor, then they are a good option. You’ll notify of their most website updates by checking their YouTube channel.
Part 4. How to add LUTs to the best alternative to the VN editor?
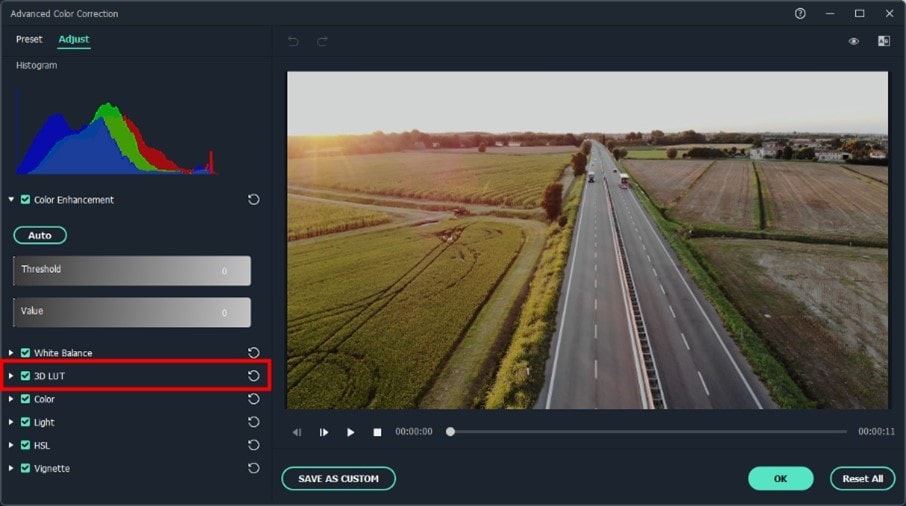
VN Editor is undoubtedly an excellent choice to add LUTs to your videos. However, the VN editor is best suitable for mobile devices. To enhance your LUTs and effects, it would be great if you used some desktop software. Wondershare Filmora offers a great variety of built-in LUTs to choose from. Let’s look at how we can use Filmora to add LUTs:
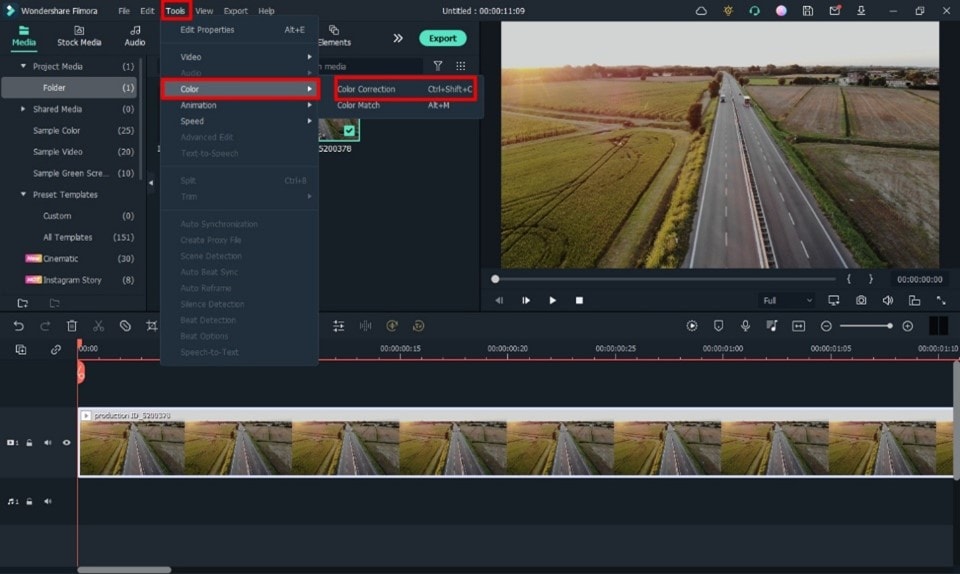
- Add your video and tap the tools, then click the Color option.
- Now select the Color Correction option and then choose 3D LUT.
- Click the drop-down menu and select the Load new LUT option. Here you can import other downloaded preset LUTs to use
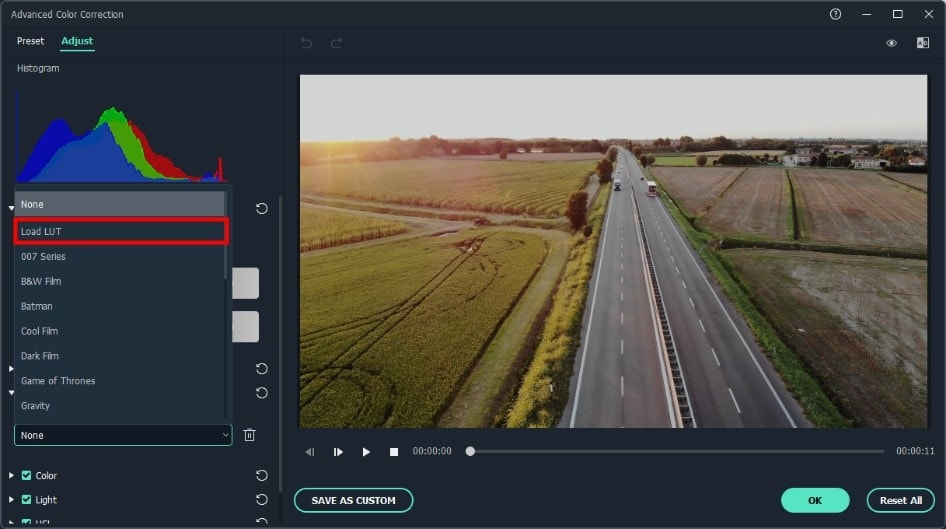
- Choose the LUT and click OK. Your new fantastic video is ready now.

Closing Thoughts
This post recommends several lut resources and demonstrates how to import them if you are a devoted user of VN editor and want to learn how to utilize it for video color grading. The more potent desktop editor Wondershare Filmora, which offers a range of built-in LUT sources and supports color grading settings, is of course recommended if you want to take your videos to the next level. Thanks for reading.
Free Download For Win 7 or later(64-bit)
Free Download For macOS 10.14 or later
2. Apna Editz
Apna Editz is another online platform you can use for this purpose. It also provides you with a fantastic variety of Presets like LUTs, Filters, and many other similar effects, which you can use in your video using the VN editor. The main Pros of this recommendation are that it’s a free website. So you can download LUTs for your videos from it for free. Keep an eye on their YouTube channel to be updated about the latest LUTs.
3. Lut Preset
Lut Preset is another alternative to all the above ones. You can get almost all your favorite LUTs for VN editor for free here and then use them in your videos as you want. They also share the latest LUTs on their YouTube Channel.
4. Pencil Hub
Pencil Hub is also a good option in this concern. However, it does not have too much variety of VN LUTs, but you can still use it to download some of the best LUTs for VN editors. To get informed of their every new effect and LUTs, their YouTube channel is the primary source.
5. YRP EDITZ
YRP ETIDZ is another good option if you are still looking for some fantastic VN LUTs. They, too not have a large variety of presets and LUTs. However, if you want some most commonly used LUTs for VN Editor, then they are a good option. You’ll notify of their most website updates by checking their YouTube channel.
Part 4. How to add LUTs to the best alternative to the VN editor?
VN Editor is undoubtedly an excellent choice to add LUTs to your videos. However, the VN editor is best suitable for mobile devices. To enhance your LUTs and effects, it would be great if you used some desktop software. Wondershare Filmora offers a great variety of built-in LUTs to choose from. Let’s look at how we can use Filmora to add LUTs:
- Add your video and tap the tools, then click the Color option.
- Now select the Color Correction option and then choose 3D LUT.
- Click the drop-down menu and select the Load new LUT option. Here you can import other downloaded preset LUTs to use
- Choose the LUT and click OK. Your new fantastic video is ready now.
Closing Thoughts
This post recommends several lut resources and demonstrates how to import them if you are a devoted user of VN editor and want to learn how to utilize it for video color grading. The more potent desktop editor Wondershare Filmora, which offers a range of built-in LUT sources and supports color grading settings, is of course recommended if you want to take your videos to the next level. Thanks for reading.
Free Download For Win 7 or later(64-bit)
Free Download For macOS 10.14 or later
Also read:
- Having GoPro Accessories Is Easy, but Editing on GoPro Quik Is Challenging. Read This Guide and, Stepwise, Learn to Use GoPro Slow-Motion for Perfect Shots for 2024
- New Are You Facing Trouble in Playing a TS File? We Got You! Read the Article Below to Learn the Most About TS Format, Pros and Cons, and More
- New In 2024, How to Use LUTs Perfectly in Final Cut Pro
- New In 2024, A Comprehensive Guide to Slow Motion YouTube Videos and How to Manage Them
- New In 2024, Detailed Steps to Rotate Videos in Davinci Resolve
- New Top 10 Video Editing Online Makers Is Worth Your Attention
- New 2024 Approved Easy Guide to Use a Stabilization Tool in Filmora
- New In 2024, Little Tricks to Create Canva Slideshow No One Is Telling You
- Updated 2024 Approved If You Want to Make an Intro Video, Then Adobe After Effects Will Be a Great Choice. This Article Will Show the Steps to Create an Intro Video with After Effects by Your Own
- New 2024 Approved Learn How to Use 3D Camera Tracking in Adobe After Effects and Take Your Skills to the Next Level
- Updated Lets Introduce the Top 5 Applications to Add a Song to a Video for Free with some Amazing Sound and Visual Effects
- Looking for Final Cut Pro Alternative App for Your Android Smartphone or iPhone? Here Is the List of the Best FCP Alternative Apps for Android and iOS Users for 2024
- New 2024 Approved A Comprehensive Review of LUTs Finding LUTs Made by Danny Gevirtz
- Updated Hyperlapse VS Timelapse Videos for 2024
- Updated 2024 Approved How to Livestream Zoom on Facebook?
- In 2024, Finding The Best LUTs for Wondershare Filmora
- Guide To Using Free Luts for OBS
- Updated Creating Flawless Slow-Motion Videos Is Every Content Creators Dream. Learn About DaVinci Resolve Slow-Motion Video Creation, Amongst Other Tools for 2024
- 2024 Approved Detailed Review of Kodak LUTs
- New Are You Surfing for some Way to Make Your Animated Emoji Discord Using Videos, GIFs, Images, or Text? Read Through This Article as Well Guide You Through the Process for 2024
- Discover the Ultimate LUTs for Wondershare Filmora Uncover the Answer for 2024
- In 2024, How to Use GIMP GREEN SCREEN
- Updated Discover the Ultimate LUTs for Wondershare Filmora Uncover the Answer for 2024
- New In 2024, Are You Tired of Long Video Edits? Do You Speed up the Video in Canva without a Hassle? Well, Stick with Us as We Guide You Through the Process Step by Step
- New How To Import and Adjust the Video Clips on Wondershare Filmora?
- New 2024 Approved Adobe After Effects Review
- Updated How to Create the Night-to-Day Effect Video for 2024
- New 2024 Approved Want to Create an Impressive Video Collage but Clueless About the Best Tools? No Worries as We Are Here and Will Help You to Learn About the Best Video Collage Maker PC Tools
- Updated 2024 Approved This Post Will Make You Learn Anything and Everything About Animated GIFs, the Ways to Use Cool Gifs in My Marketing, and How to Create Unique Custom Animated Gifs
- Updated In 2024, This Article Has a Detailed Description of How You Can Split the Videos in Lightworks Including the the Discussion of Splitting the Wondershare Filmora as an Alternative. It Is Also a Suitable Choice
- Detailed Steps to Rotate Videos Using OBS
- New Steps to Denoise in Final Cut Pro – Reduce Video and Audio Noise
- Updated This Article Describes Different Ways for Removing Gif Backgrounds, How We Can Use Them, and How This Way Differs From One Another for 2024
- Updated How to Select and Use The Best BRAW LUTs
- In 2024, How to Got Free After Effects Templates Slideshow with Simple Trick
- 10 Best Free Text to Speech Software Windows, Mac,Android, iPhone & Online
- Updated How To Quickly Create A Screen Print Effect In Photoshop Detailed Gui for 2024
- New In 2024, Top 12 Sony Vegas Slideshow Templates for Free Download
- Some Facts That Few People Know on How to Make Transparent Background in Canva
- Updated 2024 Approved How to Take Slow Motion Videos
- New Get Creative with These 10 Video Editing App With Templates for 2024
- New Are You Looking for Funny Discord Emojis to Massively Improve Your Discord Experience? Using some Fun Bots for Discord Is an Excellent Way of Doing That! Thus, We Compiled a List of 10 Fun Discord Bots You Need
- In 2024, How to Track Oppo A2 Location by Number | Dr.fone
- In 2024, Bypass Activation Lock From iPhone XR - 4 Easy Ways
- In 2024, Pokemon Go No GPS Signal? Heres Every Possible Solution On Samsung Galaxy A34 5G | Dr.fone
- How to Bypass Activation Lock on iPhone 15 Pro Max or iPad?
- Complete guide for recovering photos files on Itel S23+.
- In 2024, Does find my friends work on Vivo X Flip | Dr.fone
- Guide How To Unbrick a Bricked Oppo Find X6 Phone | Dr.fone
- 10 Fake GPS Location Apps on Android Of your Honor Magic 5 Pro | Dr.fone
- In 2024, Apple iPhone 14 Plus iCloud Activation Lock Bypass
- How to Change/Add Location Filters on Snapchat For your Oppo Reno 9A | Dr.fone
- In 2024, 9 Mind-Blowing Tricks to Hatch Eggs in Pokemon Go Without Walking On Lava Blaze Pro 5G | Dr.fone
- In 2024, Reasons why Pokémon GPS does not Work On Apple iPhone 6? | Dr.fone
- 5 Ways to Reset Honor 100 Without Volume Buttons | Dr.fone
- In 2024, How to Unlock Vivo V27 Phone Pattern Lock without Factory Reset
- 9 Best Free Android Monitoring Apps to Monitor Phone Remotely For your Nokia G22 | Dr.fone
- In 2024, How to Turn Off Google Location to Stop Tracking You on Xiaomi Redmi 12 | Dr.fone
- 4 Ways to Fix Android Blue Screen of Death On Vivo S18e | Dr.fone
- In 2024, Top 15 Augmented Reality Games Like Pokémon GO To Play On OnePlus 12R | Dr.fone
- Troubleshooting Guide How to Fix an Unresponsive Lava Storm 5G Screen | Dr.fone
- How to Reset Gmail Password on Nokia Devices
- In 2024, 5 Easy Ways to Copy Contacts from Vivo Y100i Power 5G to iPhone 14 and 15 | Dr.fone
- Your Account Has Been Disabled in the App Store and iTunes On Apple iPhone XS?
- In 2024, A Working Guide For Pachirisu Pokemon Go Map On Oppo K11 5G | Dr.fone
- In 2024, Guide to Mirror Your Honor 100 to Other Android devices | Dr.fone
- Guide How To Unbrick a Bricked Samsung Galaxy XCover 7 Phone | Dr.fone
- Pokemon Go Error 12 Failed to Detect Location On Samsung Galaxy F15 5G? | Dr.fone
- In 2024, About OnePlus Nord CE 3 Lite 5G FRP Bypass
- How to Upgrade iPhone 6s Plus without Losing Anything? | Dr.fone
- Best Ways on How to Unlock/Bypass/Swipe/Remove Realme V30 Fingerprint Lock
- In 2024, How to Change Google Play Location On Samsung Galaxy A14 5G | Dr.fone
- In 2024, Preparation to Beat Giovani in Pokemon Go For Honor Magic 6 | Dr.fone
- New In 2024, Tips for GIF to Animated PNG
- Is your Poco C51 working too slow? Heres how you can hard reset it | Dr.fone
- 3uTools Virtual Location Not Working On Oppo Reno 8T 5G? Fix Now | Dr.fone
- How To Unlock SIM Cards Of OnePlus Nord N30 SE Without PUK Codes
- How to Reset a Infinix Zero 30 5G Phone That Is Locked | Dr.fone
- iPhone Is Disabled? Here Is The Way To Unlock Disabled Apple iPhone 13 mini
- How to Share/Fake Location on WhatsApp for Tecno Pova 5 Pro | Dr.fone
- Samsung Data Retrieval tool – restore lost data from Samsung
- How to Change your Tecno Phantom V Flip Location on Twitter | Dr.fone
- 4 Ways to Transfer Music from Realme Narzo N55 to iPhone | Dr.fone
- Title: New In 2024, A Review of 3D LUT Mobile App - A Composite Application for Editing Media
- Author: Morgan
- Created at : 2024-05-19 05:12:53
- Updated at : 2024-05-20 05:12:53
- Link: https://ai-video-editing.techidaily.com/new-in-2024-a-review-of-3d-lut-mobile-app-a-composite-application-for-editing-media/
- License: This work is licensed under CC BY-NC-SA 4.0.
