New In 2024, Enhance Your Video Color Accuracy with Video Scopes

Enhance Your Video Color Accuracy with Video Scopes
All video editors have been there. You edit and color-correct your video project only to find out that the final product is not what you expected. The contract and colors dramatically shift when viewed on a different device. In most cases, this is caused by improperly calibrated monitors, but it could also be your eyes playing tricks on you. Video scopes help in preventing this problem ensuring that the color in your video is consistent across devices. With video editing scope, you get the exact representation of the elements that make up your image, including lightness and color values. In this article, we explain what video scopes are and how you can use them in your editing projects.
Color Correction Editor An easy-to-use video editor helps you make color correction and color grading experience for videos

Part 1. Introduction to Video Scopes: What are They and Why You Should Use them
When grading and color correcting your videos, it is important to accurately assess your video signal. This allows you to know whether you’re crushing the blacks in the night shot or clipping the whites in the clouds. You also get to know the exact saturation and hue your logo has. Video scopes are simply monitoring tools and measurements that are used during video editing to analyze and optimize the technical quality of video signals.
Video scopes are important because your monitor may not be properly calibrated. It will likely give you inaccurate results and cannot be trusted with the video editing process. Since our eyes will naturally adapt to the image, they cannot be trusted either. However, video scopes never lie and will let you know the exact status of your video. In fact, the scope of video editing is beneficial in several ways:
- Increased Accuracy: Color correction and grading require accurate information that cannot be guaranteed by our eyes. Video scopes are highly accurate, confirming the true color and assuring you are making the correct adjustments
- Reliability: Video scopes provide reliable verification by ensuring you are not influenced by perception or what may appear as the right color grading.
- Professional Editing: The use of scopes in video editing is professional and allows you to make precise corrections of colors.
- Matching Color Between Shots: You can easily use video scopes to match your work and access various shots.
Video scopes are indeed useful in video editing. They give you the extra reassurance that your color grading and correction are accurate and representative of what you want. While they may sound intimidating for beginners, video scopes are a useful addition to video editing once you learn how to interpret them.
Part 2. Essential Video Scopes for Beginners: A List of the Most Common Ones
Scope in video editing can be a lifesaver, especially when you know what you are doing. Some are readily available for adjustment while recording, but the post-production ones are equally important. They ensure you are making the right adjustments without being interfered with by the appearance of your monitor. The scope of video editing ensures that our video will look the same across all devices. Here are the most commonly used video scopes:
1. Waveform Scopes
Waveform video scope allows you to see how dark or light your image is. In other words, the waveform represents the luminance distribution across your image, allowing you to easily identify the bright and dark elements of your image. The lightness of the picture of the image is represented as a waveform. The rule of thumb is that black is 0 while white is 100 when you are editing HD. Levels below 0 at the bottom of the scope and those above 100 near the top of the scope will be clipped. So, you have to keep your levels within the 0-100 range, which is also the true Standard Dynamic Range (SDR) video. With Ultra-HD standard, the whites can go up to 10,000, which is the High Dynamic Range.
2. Histogram
The histogram video scope allows you to see the tonal value of your clip. Most people associate histograms with still photography, but it is also useful for video work. Specifically, the histogram represents the highlights, shadows, and midtones of your image. For a standard 8-bit image, pure white has a value of 255 while dark black has a value of 0. The histogram gives you the distribution of colored pixels in every value of lightness or darkness. Although other video scopes like the waveform and vectorscope will do much of the work, a histogram is still a useful measure in video editing.
3. RGB Parade
This is one of the most common post-production video scopes. The RGB parade allows you to see all three colors in one scope. It shows the waveform of the three colors side by side, and not on top of each other. This way, the RGB parade measures the saturation of the colors red, green, and blue in an image. It becomes clear which colors are more saturated compared to others in different areas of the image. To achieve a well-balanced image, keep each color within the lower and upper limits of the video scope. This ensures that the colors are not under or over-saturated.
4. Vector Scopes
This is another common visual post-production scope. It measures the color and color saturation of your image or video on a six-point color wheel. When working with vector scopes, you have two options to choose from: YUV and HLS vector scopes. The YUV vector scopes display the saturation and hue of the colors in the image on the circular graph. The colors in the graph include red, blue, magenta, yellow, and cyan-green. Color becomes more saturated the further it is from the center. On the other hand, the HLS vector scopes show saturation and hue, but in a more detailed picture of the number of pixels that fall into each area of the video scope.
Part 3. **Unlock the Power of Video Scopes with Filmora
The use of scope in video editing will up your game and improve the overall quality of your videos. They give you an effective way of balancing and correcting colors. For pro video scopes for Mac and Windows, Wondashare Filmora is a great choice. The professional video editor comes with four types of video scopes that provide exceptional results. In addition to a histogram, Filmora V13 offers more options for color balancing and correcting. Let’s have a look at how to use video scopes on Filmora.
Free Download For Win 7 or later(64-bit)
Free Download For macOS 10.14 or later
Using Video Scopes in Filmora
Filmora has made it easy for users to utilize video scopes in their editing projects. Once you have launched Filmora and started a New Project, video scopes are easily accessible via the highlighted icon.
The four video scopes offered by Filmora allow you to achieve specific color adjustments in your video projects. Let’s have a look at how each can be used in video editing.
1. Parade RGB
The parade RGB video scope is used to change the color channel of your visual images from RBG to YCbCr or YRGB. It displays the red, green, and blue channels of the video signal, which can be helpful when you are identifying areas of the video that are too dark or too bright. You can also use the parade to check the color balance of the video.
2. Waveform
The Waveform video scope in Filmora is used to adjust the color channels of your images or videos in different ways. It displays the brightness of the video signal, allowing you to heck the contrast level.
3. Vectorscope
The vectorscope helps to identify and adjust the skin tone of your subjects. It displays the color saturation of the video signal, helping you identify areas that are too saturated or desaturated. This way, you can easily check the skin tones in the video.
4. Histogram
The histogram, and video scope display multiple adjustments graphically while adjusting color channels. It displays the distribution of brightness values in the video, allowing you to check the overall brightness level.
Conclusion
Video scopes are important measures for tracing color elements when color correcting and enhancing your video. For an accurate and easy way of using video scopes in your projects, we highly recommend Wondershar Filmora. With the recent upgrades on Filmora, users now have access to pro video scopes that give you professional editing experience. Explore the four available video scopes, including waveform and Histogram. Parade, and vectorscope to achieve better color grading and quality of your videos.
Free Download Use Vectorscope in Filmora Try Color Correction

Part 1. Introduction to Video Scopes: What are They and Why You Should Use them
When grading and color correcting your videos, it is important to accurately assess your video signal. This allows you to know whether you’re crushing the blacks in the night shot or clipping the whites in the clouds. You also get to know the exact saturation and hue your logo has. Video scopes are simply monitoring tools and measurements that are used during video editing to analyze and optimize the technical quality of video signals.
Video scopes are important because your monitor may not be properly calibrated. It will likely give you inaccurate results and cannot be trusted with the video editing process. Since our eyes will naturally adapt to the image, they cannot be trusted either. However, video scopes never lie and will let you know the exact status of your video. In fact, the scope of video editing is beneficial in several ways:
- Increased Accuracy: Color correction and grading require accurate information that cannot be guaranteed by our eyes. Video scopes are highly accurate, confirming the true color and assuring you are making the correct adjustments
- Reliability: Video scopes provide reliable verification by ensuring you are not influenced by perception or what may appear as the right color grading.
- Professional Editing: The use of scopes in video editing is professional and allows you to make precise corrections of colors.
- Matching Color Between Shots: You can easily use video scopes to match your work and access various shots.
Video scopes are indeed useful in video editing. They give you the extra reassurance that your color grading and correction are accurate and representative of what you want. While they may sound intimidating for beginners, video scopes are a useful addition to video editing once you learn how to interpret them.
Part 2. Essential Video Scopes for Beginners: A List of the Most Common Ones
Scope in video editing can be a lifesaver, especially when you know what you are doing. Some are readily available for adjustment while recording, but the post-production ones are equally important. They ensure you are making the right adjustments without being interfered with by the appearance of your monitor. The scope of video editing ensures that our video will look the same across all devices. Here are the most commonly used video scopes:
1. Waveform Scopes
Waveform video scope allows you to see how dark or light your image is. In other words, the waveform represents the luminance distribution across your image, allowing you to easily identify the bright and dark elements of your image. The lightness of the picture of the image is represented as a waveform. The rule of thumb is that black is 0 while white is 100 when you are editing HD. Levels below 0 at the bottom of the scope and those above 100 near the top of the scope will be clipped. So, you have to keep your levels within the 0-100 range, which is also the true Standard Dynamic Range (SDR) video. With Ultra-HD standard, the whites can go up to 10,000, which is the High Dynamic Range.
2. Histogram
The histogram video scope allows you to see the tonal value of your clip. Most people associate histograms with still photography, but it is also useful for video work. Specifically, the histogram represents the highlights, shadows, and midtones of your image. For a standard 8-bit image, pure white has a value of 255 while dark black has a value of 0. The histogram gives you the distribution of colored pixels in every value of lightness or darkness. Although other video scopes like the waveform and vectorscope will do much of the work, a histogram is still a useful measure in video editing.
3. RGB Parade
This is one of the most common post-production video scopes. The RGB parade allows you to see all three colors in one scope. It shows the waveform of the three colors side by side, and not on top of each other. This way, the RGB parade measures the saturation of the colors red, green, and blue in an image. It becomes clear which colors are more saturated compared to others in different areas of the image. To achieve a well-balanced image, keep each color within the lower and upper limits of the video scope. This ensures that the colors are not under or over-saturated.
4. Vector Scopes
This is another common visual post-production scope. It measures the color and color saturation of your image or video on a six-point color wheel. When working with vector scopes, you have two options to choose from: YUV and HLS vector scopes. The YUV vector scopes display the saturation and hue of the colors in the image on the circular graph. The colors in the graph include red, blue, magenta, yellow, and cyan-green. Color becomes more saturated the further it is from the center. On the other hand, the HLS vector scopes show saturation and hue, but in a more detailed picture of the number of pixels that fall into each area of the video scope.
Part 3. **Unlock the Power of Video Scopes with Filmora
The use of scope in video editing will up your game and improve the overall quality of your videos. They give you an effective way of balancing and correcting colors. For pro video scopes for Mac and Windows, Wondashare Filmora is a great choice. The professional video editor comes with four types of video scopes that provide exceptional results. In addition to a histogram, Filmora V13 offers more options for color balancing and correcting. Let’s have a look at how to use video scopes on Filmora.
Free Download For Win 7 or later(64-bit)
Free Download For macOS 10.14 or later
Using Video Scopes in Filmora
Filmora has made it easy for users to utilize video scopes in their editing projects. Once you have launched Filmora and started a New Project, video scopes are easily accessible via the highlighted icon.
The four video scopes offered by Filmora allow you to achieve specific color adjustments in your video projects. Let’s have a look at how each can be used in video editing.
1. Parade RGB
The parade RGB video scope is used to change the color channel of your visual images from RBG to YCbCr or YRGB. It displays the red, green, and blue channels of the video signal, which can be helpful when you are identifying areas of the video that are too dark or too bright. You can also use the parade to check the color balance of the video.
2. Waveform
The Waveform video scope in Filmora is used to adjust the color channels of your images or videos in different ways. It displays the brightness of the video signal, allowing you to heck the contrast level.
3. Vectorscope
The vectorscope helps to identify and adjust the skin tone of your subjects. It displays the color saturation of the video signal, helping you identify areas that are too saturated or desaturated. This way, you can easily check the skin tones in the video.
4. Histogram
The histogram, and video scope display multiple adjustments graphically while adjusting color channels. It displays the distribution of brightness values in the video, allowing you to check the overall brightness level.
Conclusion
Video scopes are important measures for tracing color elements when color correcting and enhancing your video. For an accurate and easy way of using video scopes in your projects, we highly recommend Wondershar Filmora. With the recent upgrades on Filmora, users now have access to pro video scopes that give you professional editing experience. Explore the four available video scopes, including waveform and Histogram. Parade, and vectorscope to achieve better color grading and quality of your videos.
How to to Mimic Professional Filming Gears
The professional and expensive gears are primarily out of budget for starters. But there is no need to stop filming because household things will give good output.
In this article, you will learn 6 pro tips to make professional filming gear using cardboard, container, and tape. It will turn out into POV and barrel roll shots. Scroll more to learn the top ways, and then enjoy the rest with your audience.
Part 1. Things to Remember Before Making Gears
Before using tools for professional videos, you should remember some side effects and cautions to make everything reliable and simple. Read the below outlines!
Not Professional Results
You should remember that homemade tools will give you different results than professional gear because they are expensive for a purpose. But you can experiment and get fun during filming with these products.
Safety Measures
If you use any heavy or temperature-sensitive equipment, you should take safety before operating them.
Handle Carefully
Before experimenting, make sure that you are holding everything tightly. Ensure that no accident occurs during filming!
After taking precautions and understanding the output, it’s time to make tools and film!
Part 2. Smooth Camera Movement with A Door
With a simple mobile camera, you can make smooth shots of any action, like walking, running, and playing. There is no need to get any professional gear.
It easy to achieve by attaching a camera to the door. You can use duct or any other tape which is easily available in the home. Fasten the mobile phone to the side of the door with tape, as shown below!

Moving the door while performing any action will result in smooth shots. Check out the final results below.

Part 3. Film Shots of Underwater
Filming underwater is always a dream of any videographer, but we were limited to get shots from the water’s surface. So now it’s time to add more creativity to your video.
First, you need to take a transparent container or any glass container. Pour water according to your need in it.
![]()
Note: Ensure the container is light enough to put on the phone.
Then, place the container on the lens of the phone to make a video. Then, take care of the phone from the water.

Pro Tip: You can also shine light source in water and add glitter or colors to get more astonishing shots.
Part 4. Make Colourful Shots Without Coloured Lights
All filmmakers love party lights and want to add colors like that in the video. Different colored lights in videos usually represent different mood swings and enhance the creativity of storytellers.
Professional videographers use expensive lights to give these effects. But you don’t need to purchase any expensive gear. Because you can make colorful shots easily with colored plastic binder dividers, or you can also use cellophane wraps.
First, wrap the colored divider around the LED light or any light you use to shoot video.
![]()
Note: Check the light temperature after short intervals because it melts or burns the dividers when the light source gets hot.

Now make the video and try with different colors to add suspense, horror, and happy effects to the video.

The video still needs more creative effects and designs; scroll more to read exciting tips.
Part 5. Different Shapes of Light with Cardboard
To add a fantasy location in the video and make light effects in the form of shapes, try out easily available cardboard. Most of the time, aesthetic videos are made by these hacks, giving viewers different vibes.
Only a professional photographer and videographer know how to attract the audience to the shots by doing these simple hacks.
The interesting thing is that if light has more shape, it will precisely describe more about the scene’s backstory, location, and context. Give it a try!
Step1 Cutting of cardboards
Cut the cardboard in any shape, whatever you want. We will experiment by cutting cardboard in window blinds shape.
![]()
Note: There is no specific recommendation for the cardboard, you can use any size or shape which suits you the best.

Step2 Make shots in different shapes of light
After giving shape, now move the cardboard around the light source and make a video. It seems like the subject is sitting near the window and has aesthetic vibes.
![]()
Note: The more precise the cutting of cardboard, the more professional it looks.

Become more creative and make more shapes with cardboard because the audience always prefers new content in the market.
Part 6. Create Point of View Shots
After adding colors and shapes, now it’s time to get some Point of View (POV) shots. Most of the time, viewers become bored by watching framing and filming coverages.
POV shots are mostly captured from a specific angle to show an object’s characters. They are mostly seen in food commercials, and videographers of snacks just love to make these shots.
To make POV shots, there is nothing specific required. You just have to make a suitable position for the lens. Follow the below guidelines and capture it!
Step1 Cut ends of packet
To create POV shots of your favorite snack, first of all, cut down both ends of the packets.
Step2 Attach packet on a camera
After cutting, attach the packet of snacks to the camera lens or phone with the help of old-fashioned tape.
Ensure the camera is turned on, and then make a POV shot. Now, it’s time to enjoy the rest part with the audience. Check out the final results, as shown below!

Due to this, the food seems good, and you can notice the number of spices too. This one actually looks amazing!
What if we add the rotatory shots, too, in the video? For this, check out the last tip and try that!
Part 7. Create a Barrel Roll Shot
Barrel roll shots are the full axial shot by spinning the camera lens. Epic shots that formerly required costly gimbals and sophisticated techniques are now as simple as strolling.
It’s pretty easy to make a rotatory shot at 360° by using equipment easily available at home. Rolling may feel anxiety and disorientation. Filmmakers utilize it to confuse or unnerve audiences in movies.
There is no need to purchase expensive gambles to make barrel roll clips. Instead, try this hack by utilizing a power drill present at your home. Then, follow the below steps to give it a professional look!
Step1 Take equipment
First, take a camera lens or smartphone, whatever you are using to make a video, and a power drill as a gimbal.
Step2 Camera with drill
Attach the camera to the power drill with the help of old-fashioned tape.
![]()
Note: You should have a piece of square foam or soft block placed between the camera and drill to assist.

Now, it’s time to turn on the drill and ensure that the video option is “Turn On” in the camera. Then, enjoy the shots of 360° with your audience!

Conclusion
Finally, you get a filmy video after performing above mentioned 6 DIY hacks without expensive gear. More creativity in a video attracts more audience, which makes you more prior in the videography industry.
You can also try more tools at home and share your ideas with others to get reviews on them and make better changes. Make sure that you are taking all safety measures and precautions.
Then, place the container on the lens of the phone to make a video. Then, take care of the phone from the water.

Pro Tip: You can also shine light source in water and add glitter or colors to get more astonishing shots.
Part 4. Make Colourful Shots Without Coloured Lights
All filmmakers love party lights and want to add colors like that in the video. Different colored lights in videos usually represent different mood swings and enhance the creativity of storytellers.
Professional videographers use expensive lights to give these effects. But you don’t need to purchase any expensive gear. Because you can make colorful shots easily with colored plastic binder dividers, or you can also use cellophane wraps.
First, wrap the colored divider around the LED light or any light you use to shoot video.
![]()
Note: Check the light temperature after short intervals because it melts or burns the dividers when the light source gets hot.

Now make the video and try with different colors to add suspense, horror, and happy effects to the video.

The video still needs more creative effects and designs; scroll more to read exciting tips.
Part 5. Different Shapes of Light with Cardboard
To add a fantasy location in the video and make light effects in the form of shapes, try out easily available cardboard. Most of the time, aesthetic videos are made by these hacks, giving viewers different vibes.
Only a professional photographer and videographer know how to attract the audience to the shots by doing these simple hacks.
The interesting thing is that if light has more shape, it will precisely describe more about the scene’s backstory, location, and context. Give it a try!
Step1 Cutting of cardboards
Cut the cardboard in any shape, whatever you want. We will experiment by cutting cardboard in window blinds shape.
![]()
Note: There is no specific recommendation for the cardboard, you can use any size or shape which suits you the best.

Step2 Make shots in different shapes of light
After giving shape, now move the cardboard around the light source and make a video. It seems like the subject is sitting near the window and has aesthetic vibes.
![]()
Note: The more precise the cutting of cardboard, the more professional it looks.

Become more creative and make more shapes with cardboard because the audience always prefers new content in the market.
Part 6. Create Point of View Shots
After adding colors and shapes, now it’s time to get some Point of View (POV) shots. Most of the time, viewers become bored by watching framing and filming coverages.
POV shots are mostly captured from a specific angle to show an object’s characters. They are mostly seen in food commercials, and videographers of snacks just love to make these shots.
To make POV shots, there is nothing specific required. You just have to make a suitable position for the lens. Follow the below guidelines and capture it!
Step1 Cut ends of packet
To create POV shots of your favorite snack, first of all, cut down both ends of the packets.
Step2 Attach packet on a camera
After cutting, attach the packet of snacks to the camera lens or phone with the help of old-fashioned tape.
Ensure the camera is turned on, and then make a POV shot. Now, it’s time to enjoy the rest part with the audience. Check out the final results, as shown below!

Due to this, the food seems good, and you can notice the number of spices too. This one actually looks amazing!
What if we add the rotatory shots, too, in the video? For this, check out the last tip and try that!
Part 7. Create a Barrel Roll Shot
Barrel roll shots are the full axial shot by spinning the camera lens. Epic shots that formerly required costly gimbals and sophisticated techniques are now as simple as strolling.
It’s pretty easy to make a rotatory shot at 360° by using equipment easily available at home. Rolling may feel anxiety and disorientation. Filmmakers utilize it to confuse or unnerve audiences in movies.
There is no need to purchase expensive gambles to make barrel roll clips. Instead, try this hack by utilizing a power drill present at your home. Then, follow the below steps to give it a professional look!
Step1 Take equipment
First, take a camera lens or smartphone, whatever you are using to make a video, and a power drill as a gimbal.
Step2 Camera with drill
Attach the camera to the power drill with the help of old-fashioned tape.
![]()
Note: You should have a piece of square foam or soft block placed between the camera and drill to assist.

Now, it’s time to turn on the drill and ensure that the video option is “Turn On” in the camera. Then, enjoy the shots of 360° with your audience!

Conclusion
Finally, you get a filmy video after performing above mentioned 6 DIY hacks without expensive gear. More creativity in a video attracts more audience, which makes you more prior in the videography industry.
You can also try more tools at home and share your ideas with others to get reviews on them and make better changes. Make sure that you are taking all safety measures and precautions.
The Top Tools for Converting Slides to Digital - 2024 Review
The Best Tools for Converting Slides to Digital - Review
An easy yet powerful editor
Numerous effects to choose from
Detailed tutorials provided by the official channel
Are you looking to convert your slides into digital form at home? Are you in search of the best tools for converting old slides to digital? Here, you will get every single detail for it. These conversion tools can help you to convert your old slides into digital images just by sitting at home. In this blog, we will discuss the need, how to achieve it, and the best 8 tools for the conversion. The list of these top tools will be based on the user reviews and ratings of 2024.
In this article
01 [Why We Need to Turn Old Slides into Digital Images](#Part 1)
02 [How to Convert Slides to Digital - Step-by-Step Guide](#Part 2)
03 [Best 8 Slide to Digital Image Converters 2024](#Part 3)
04 [FAQ of Converting Slides to Digital](#Part 4)
Part 1 Why We Need to Turn Old Slides into Digital Images
In this digital era, people rather have access to projectors to view old slides. Therefore, it is beneficial to convert those slides into digital form. There are also many benefits of this conversion such as:
● Preserving the photos for future generations without the fear of getting them lost or damaged.
● Old slides might fade up and you can give them a brand new look by using new tools and technologies.
● The organization becomes much easier than the physical ones.
● It will create less clutter.
● You can share the pictures with just one click with your friends, family members, etc to flourish the memories.
● It lets you enjoy your old memories in a better and more enhanced way.
So, you might have understood why there is a need for converting slides to pictures. Now, let’s dig down more on the topic.
Part 2 How to Convert Slides to Digital - Step-by-Step Guide
Here, we will discuss step-by-step ways to turn the old slides into digital images. So, let’s begin:
Step 1: Resolution
The very first step for converting slides to digital photos is measuring and fixing the resolution of the slides. The technical measurement of image resolution is DPI (dot per inch). It helps you to predict the sharpness or clarity of the final image. The overall measurement depends on the size of the slide and the type of converter or scanner you are using. For example,
A 35 mm slide scanned at 10 MP will give you the images of size 13”*9”.
Step 2: Dust and Scratch Removal
If you have slides that have been wrapped in a box and remained untouched for so long, they might require cleaning. Such slides may develop mold buildup, age-related blemishes, or scratches. They need a cleaning process before using them to convert into slides. A lint-free cloth and an anti-static film cleaner are the best combinations to gently clean the slides and make them fresh.
Step 3: Color Correction and Restoration
Color correction and restoration is another important step when you are dealing with converting old slides into digital images. In order to correct the fading and color shift, you can use the built-in scanning software. You can also use other software for such purposes.
Wondershare Filmora is the best tool which can be used for the color correction of old slides. It is a handy tool with a variety of features. Filmora offers a number of options when it comes to color correction and grading. These options include color histogram, white balance, 3D LUT (3D Lookup table), color and light, HSL, vignette, etc.
Step 4: Using the Best Scanner cum Digital Converter
The next step is choosing the best quality scanner according to the requirement. 35 mm is the most common size of the slides. But, it does come with other uncommon formats too such as 110, 126, 120, 127, etc. You will come to know about the actual size when the image is mounted on the cardboard. Therefore, it is essential to select a quality and versatile scanner which can convert slides of any size effectively.
Part 3 Best 8 Slide to Digital Image Converters 2024
Here, you can run down the list of the best tools to convert the photo slides into digital images on the basis of user reviews and ratings.
01Wolverine Titan 8-in-1
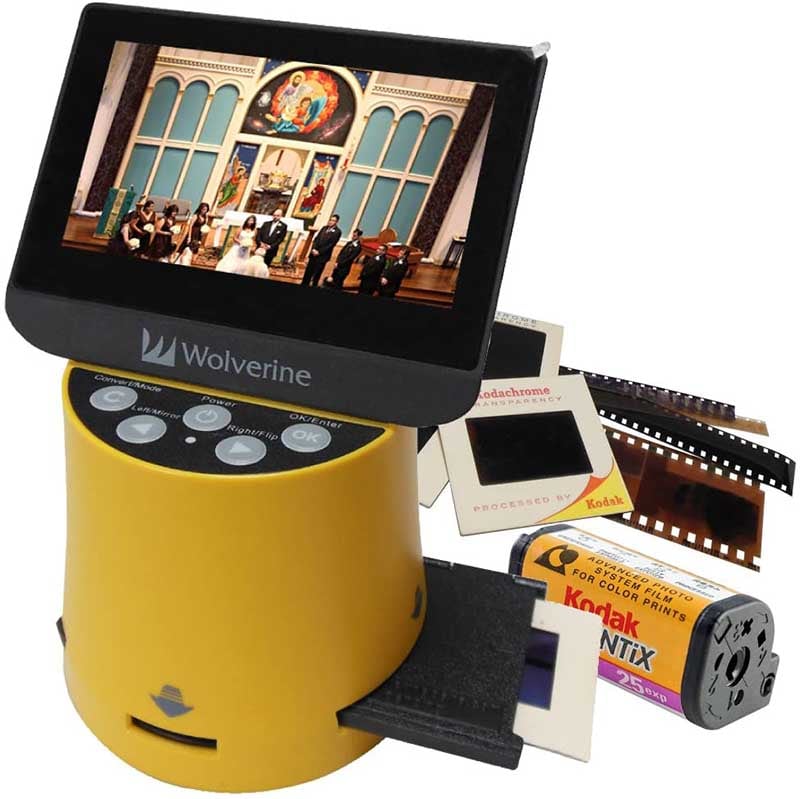
Wolverine Titan 8-in-1 is one of the top choices when it comes to converting photo slides to digital. It is easy to use the device with a fast conversion process. It provides a variety of features such as:
● High output resolution
● Large built-in display
● Wide-format compatibility
● Standalone performance
● Small, compact, and lightweight design
● Pretty fast processing
● Fast uploading slide-adapters
● 4.3-inch color display
● Contains HDMI-to-out jack
● Comes in 3 colors
● Highest quality sensors
● Available at a reasonable price
02Digitnow Film Scanner

A digitnow film scanner is a great option for converting physical photo prints or slides into digital images. The easy to use standalone device comes with a small display which can be attached to the TV screen, PC, or MacBook. It provides a lot of additional tools including
● Adapter tray frames to hold photo prints and slides.
● Slots to insert slides into the scanner.
● GB memory card to hold approximately 1000 photos.
● A disc of image retouching software for Windows users.
● A soft brush to clean dust and other debris from slides and film.
● User manual.
● TV cable.
● Standard buttons.
03Plustek ePhoto Z300
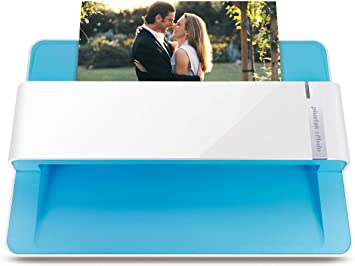
Plustek ePhoto Z300 is not just a slide converter but also a photo scanner. It has the capability to convert a photo or slide of size 6*4 in just 2 to 3 seconds. This simple and compact photo scanner can be attached to a PC or Mac. The device also has a built-in editor which provides photo editing options along with the crop and resizes. The major advantage of this tool is its fastest scanning capacity. This is a good option if you own a large collection of old photos and wish to digitize them quickly. You can use this device by combining it with others too.
04Sharper Image Slide and Negative Converter
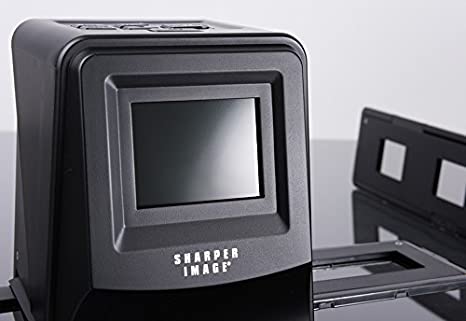
It is a lightweight slide to digital converter weighing just 0.6 pounds. The tool provides on-screen interfaces in 7 languages. Despite its small size, the tool has as many features as compared to other slide converters. Sharper image slide and negative converter are easy to use with a basic interface and clearly labeled buttons. The additional tools that come with this device are:
● Cleaning brush
● User manual
● Well designed plastic frame trays
The converter does not come with an in-built SD card and you are required to buy one.
05Kodak Scanza Digital Film and Slide Scanner
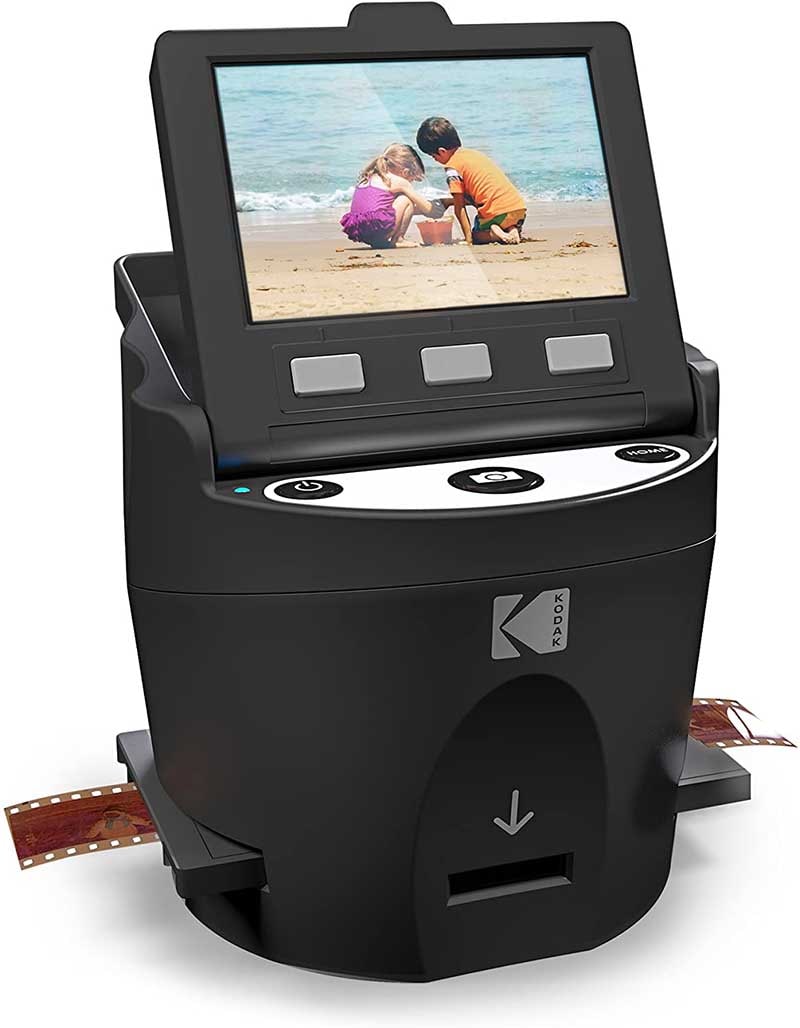
Kodak scanza digital film and slide scanner is the best tool if you have a large heap of images. It provides the largest storage option and due to which it is a little expensive. Scanza can convert images and reels into JPEG files within seconds of time. The device is an all-rounder and contains all the latest features and specifications. One can easily use this plastic design and lightweight device because of its small and sleek design. The additional features of Scanza include:
● Adjustable brightness option
● Removable SD card slot
● Powerful photo editing option
● USB power cable
● HDMI cable
● AC adapter
● Video cable
● Six adapter trays
● Film cleaning brush
● 3.5 inch TFT LCD screen
06Zonoz FS-3 22MP All-in-1
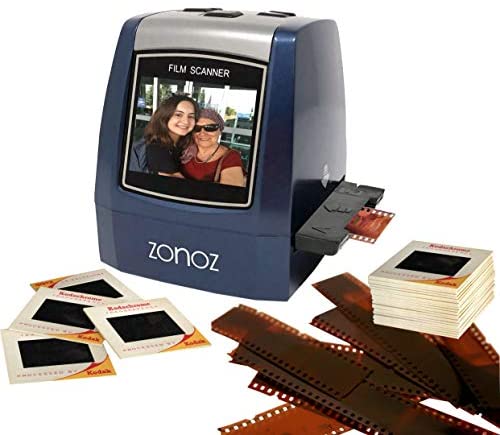
Zonoz FS-3 22 MP All-in-1 is a wonderful option if you are looking for a digital converter in an affordable range. It can convert up to 35, 110, 126 slides and negatives along with Super 8 film. One benefit of using this converter is the output images look sharper when compared to other converters. The additional features that the tool avail to its users are:
● Photo editing capabilities
● Brightness adjustment
● Mirroring or flipping
● Small built-in color display
● Adapter tray frames
● Cleaning brush
● USB and TV cables
● User manual
07Kodak Mini Digital Films and Slide Scanners
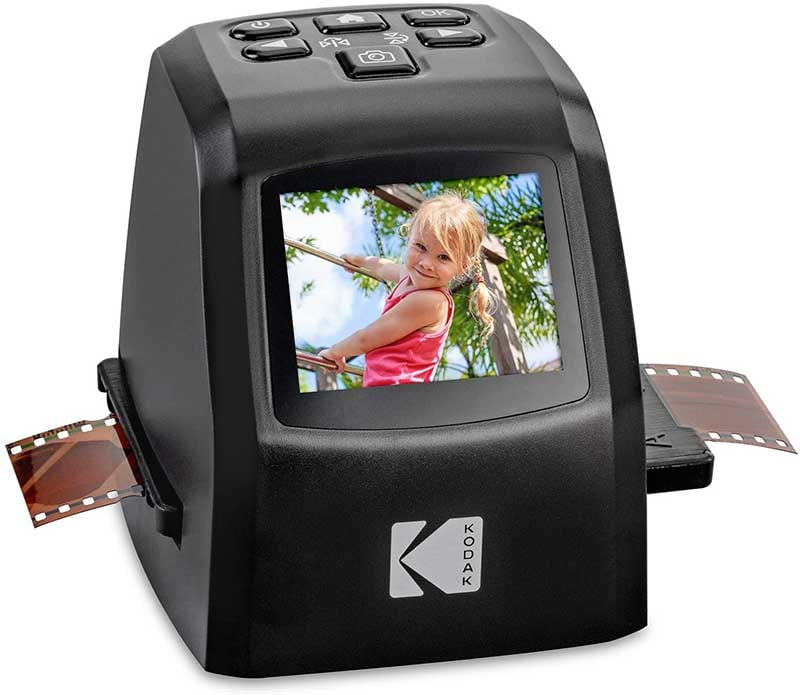
This miniature scanner model is the best selling slide scanner on the internet. Anyone can use it easily without any requirement for external extensions. With a rating of 4.2 upon 5, it is on the list of best slide scanners of 2024. It weighs around 1.4 pounds and measures 3.6*3.4*3.9 inches.
08Magnasonic
Magnasonic is named as the fastest slide scanner. The device is capable of quickly scanning the slides which saves both your time and efforts. It comes with fast scanning speed, 2.4 inch LCD screen, and 22 MP quality. The tool allows you to store upto 100 images. It also comes with some additional tools such as featured film trays etc.
Part 4 FAQ of Converting Slides to Digital
01What to do with the old slides?
Converting slides to digital images can help you to experiment a lot with them. The old slides might be faded and you can use some tools with the option color correction to make them look new and more appealing. Videos are in trend these days. You can create a video out of those slides after converting them into digital. It will help you to enjoy the old memories in the new version with new effects, songs, etc.
Wondershare Filmora Video Editor is the most powerful tool to prepare an effective video in a hassle-free manner. It has many useful features to make your video more enhanced. Also, it has the option of color correction and grading to make the faded old pics colorful and better. There is no need for professionalism to use this tool, but any beginner can also use it effectively with ease. So, make your memories everlasting with Wondershare Filmora.
For Win 7 or later (64-bit)
For macOS 10.12 or later
02Can you clean negatives with alcohol?
Yes, it is possible to clean negatives with alcohol. But make sure to use 98% isopropyl alcohol for this purpose. For cleaning, use a cotton ball and dab it on the alcohol. Then, lightly wipe the negatives and keep them to dry for some time.
● Ending Thoughts →
● So, hope you get all the required knowledge to convert the slides into digital images.
● We have shared the list of top tools for the purpose. Now, it is up to you to choose any according to your suitability and requirement.
● Just use these devices and accomplish your conversion purpose at home without the need for any professional and worrying about the cost of converting slides to digital.
● At last, with the help of Filmora create an effective video to make your memories everlasting and enhanced.
Are you looking to convert your slides into digital form at home? Are you in search of the best tools for converting old slides to digital? Here, you will get every single detail for it. These conversion tools can help you to convert your old slides into digital images just by sitting at home. In this blog, we will discuss the need, how to achieve it, and the best 8 tools for the conversion. The list of these top tools will be based on the user reviews and ratings of 2024.
In this article
01 [Why We Need to Turn Old Slides into Digital Images](#Part 1)
02 [How to Convert Slides to Digital - Step-by-Step Guide](#Part 2)
03 [Best 8 Slide to Digital Image Converters 2024](#Part 3)
04 [FAQ of Converting Slides to Digital](#Part 4)
Part 1 Why We Need to Turn Old Slides into Digital Images
In this digital era, people rather have access to projectors to view old slides. Therefore, it is beneficial to convert those slides into digital form. There are also many benefits of this conversion such as:
● Preserving the photos for future generations without the fear of getting them lost or damaged.
● Old slides might fade up and you can give them a brand new look by using new tools and technologies.
● The organization becomes much easier than the physical ones.
● It will create less clutter.
● You can share the pictures with just one click with your friends, family members, etc to flourish the memories.
● It lets you enjoy your old memories in a better and more enhanced way.
So, you might have understood why there is a need for converting slides to pictures. Now, let’s dig down more on the topic.
Part 2 How to Convert Slides to Digital - Step-by-Step Guide
Here, we will discuss step-by-step ways to turn the old slides into digital images. So, let’s begin:
Step 1: Resolution
The very first step for converting slides to digital photos is measuring and fixing the resolution of the slides. The technical measurement of image resolution is DPI (dot per inch). It helps you to predict the sharpness or clarity of the final image. The overall measurement depends on the size of the slide and the type of converter or scanner you are using. For example,
A 35 mm slide scanned at 10 MP will give you the images of size 13”*9”.
Step 2: Dust and Scratch Removal
If you have slides that have been wrapped in a box and remained untouched for so long, they might require cleaning. Such slides may develop mold buildup, age-related blemishes, or scratches. They need a cleaning process before using them to convert into slides. A lint-free cloth and an anti-static film cleaner are the best combinations to gently clean the slides and make them fresh.
Step 3: Color Correction and Restoration
Color correction and restoration is another important step when you are dealing with converting old slides into digital images. In order to correct the fading and color shift, you can use the built-in scanning software. You can also use other software for such purposes.
Wondershare Filmora is the best tool which can be used for the color correction of old slides. It is a handy tool with a variety of features. Filmora offers a number of options when it comes to color correction and grading. These options include color histogram, white balance, 3D LUT (3D Lookup table), color and light, HSL, vignette, etc.
Step 4: Using the Best Scanner cum Digital Converter
The next step is choosing the best quality scanner according to the requirement. 35 mm is the most common size of the slides. But, it does come with other uncommon formats too such as 110, 126, 120, 127, etc. You will come to know about the actual size when the image is mounted on the cardboard. Therefore, it is essential to select a quality and versatile scanner which can convert slides of any size effectively.
Part 3 Best 8 Slide to Digital Image Converters 2024
Here, you can run down the list of the best tools to convert the photo slides into digital images on the basis of user reviews and ratings.
01Wolverine Titan 8-in-1

Wolverine Titan 8-in-1 is one of the top choices when it comes to converting photo slides to digital. It is easy to use the device with a fast conversion process. It provides a variety of features such as:
● High output resolution
● Large built-in display
● Wide-format compatibility
● Standalone performance
● Small, compact, and lightweight design
● Pretty fast processing
● Fast uploading slide-adapters
● 4.3-inch color display
● Contains HDMI-to-out jack
● Comes in 3 colors
● Highest quality sensors
● Available at a reasonable price
02Digitnow Film Scanner

A digitnow film scanner is a great option for converting physical photo prints or slides into digital images. The easy to use standalone device comes with a small display which can be attached to the TV screen, PC, or MacBook. It provides a lot of additional tools including
● Adapter tray frames to hold photo prints and slides.
● Slots to insert slides into the scanner.
● GB memory card to hold approximately 1000 photos.
● A disc of image retouching software for Windows users.
● A soft brush to clean dust and other debris from slides and film.
● User manual.
● TV cable.
● Standard buttons.
03Plustek ePhoto Z300

Plustek ePhoto Z300 is not just a slide converter but also a photo scanner. It has the capability to convert a photo or slide of size 6*4 in just 2 to 3 seconds. This simple and compact photo scanner can be attached to a PC or Mac. The device also has a built-in editor which provides photo editing options along with the crop and resizes. The major advantage of this tool is its fastest scanning capacity. This is a good option if you own a large collection of old photos and wish to digitize them quickly. You can use this device by combining it with others too.
04Sharper Image Slide and Negative Converter

It is a lightweight slide to digital converter weighing just 0.6 pounds. The tool provides on-screen interfaces in 7 languages. Despite its small size, the tool has as many features as compared to other slide converters. Sharper image slide and negative converter are easy to use with a basic interface and clearly labeled buttons. The additional tools that come with this device are:
● Cleaning brush
● User manual
● Well designed plastic frame trays
The converter does not come with an in-built SD card and you are required to buy one.
05Kodak Scanza Digital Film and Slide Scanner

Kodak scanza digital film and slide scanner is the best tool if you have a large heap of images. It provides the largest storage option and due to which it is a little expensive. Scanza can convert images and reels into JPEG files within seconds of time. The device is an all-rounder and contains all the latest features and specifications. One can easily use this plastic design and lightweight device because of its small and sleek design. The additional features of Scanza include:
● Adjustable brightness option
● Removable SD card slot
● Powerful photo editing option
● USB power cable
● HDMI cable
● AC adapter
● Video cable
● Six adapter trays
● Film cleaning brush
● 3.5 inch TFT LCD screen
06Zonoz FS-3 22MP All-in-1

Zonoz FS-3 22 MP All-in-1 is a wonderful option if you are looking for a digital converter in an affordable range. It can convert up to 35, 110, 126 slides and negatives along with Super 8 film. One benefit of using this converter is the output images look sharper when compared to other converters. The additional features that the tool avail to its users are:
● Photo editing capabilities
● Brightness adjustment
● Mirroring or flipping
● Small built-in color display
● Adapter tray frames
● Cleaning brush
● USB and TV cables
● User manual
07Kodak Mini Digital Films and Slide Scanners

This miniature scanner model is the best selling slide scanner on the internet. Anyone can use it easily without any requirement for external extensions. With a rating of 4.2 upon 5, it is on the list of best slide scanners of 2024. It weighs around 1.4 pounds and measures 3.6*3.4*3.9 inches.
08Magnasonic
Magnasonic is named as the fastest slide scanner. The device is capable of quickly scanning the slides which saves both your time and efforts. It comes with fast scanning speed, 2.4 inch LCD screen, and 22 MP quality. The tool allows you to store upto 100 images. It also comes with some additional tools such as featured film trays etc.
Part 4 FAQ of Converting Slides to Digital
01What to do with the old slides?
Converting slides to digital images can help you to experiment a lot with them. The old slides might be faded and you can use some tools with the option color correction to make them look new and more appealing. Videos are in trend these days. You can create a video out of those slides after converting them into digital. It will help you to enjoy the old memories in the new version with new effects, songs, etc.
Wondershare Filmora Video Editor is the most powerful tool to prepare an effective video in a hassle-free manner. It has many useful features to make your video more enhanced. Also, it has the option of color correction and grading to make the faded old pics colorful and better. There is no need for professionalism to use this tool, but any beginner can also use it effectively with ease. So, make your memories everlasting with Wondershare Filmora.
For Win 7 or later (64-bit)
For macOS 10.12 or later
02Can you clean negatives with alcohol?
Yes, it is possible to clean negatives with alcohol. But make sure to use 98% isopropyl alcohol for this purpose. For cleaning, use a cotton ball and dab it on the alcohol. Then, lightly wipe the negatives and keep them to dry for some time.
● Ending Thoughts →
● So, hope you get all the required knowledge to convert the slides into digital images.
● We have shared the list of top tools for the purpose. Now, it is up to you to choose any according to your suitability and requirement.
● Just use these devices and accomplish your conversion purpose at home without the need for any professional and worrying about the cost of converting slides to digital.
● At last, with the help of Filmora create an effective video to make your memories everlasting and enhanced.
Are you looking to convert your slides into digital form at home? Are you in search of the best tools for converting old slides to digital? Here, you will get every single detail for it. These conversion tools can help you to convert your old slides into digital images just by sitting at home. In this blog, we will discuss the need, how to achieve it, and the best 8 tools for the conversion. The list of these top tools will be based on the user reviews and ratings of 2024.
In this article
01 [Why We Need to Turn Old Slides into Digital Images](#Part 1)
02 [How to Convert Slides to Digital - Step-by-Step Guide](#Part 2)
03 [Best 8 Slide to Digital Image Converters 2024](#Part 3)
04 [FAQ of Converting Slides to Digital](#Part 4)
Part 1 Why We Need to Turn Old Slides into Digital Images
In this digital era, people rather have access to projectors to view old slides. Therefore, it is beneficial to convert those slides into digital form. There are also many benefits of this conversion such as:
● Preserving the photos for future generations without the fear of getting them lost or damaged.
● Old slides might fade up and you can give them a brand new look by using new tools and technologies.
● The organization becomes much easier than the physical ones.
● It will create less clutter.
● You can share the pictures with just one click with your friends, family members, etc to flourish the memories.
● It lets you enjoy your old memories in a better and more enhanced way.
So, you might have understood why there is a need for converting slides to pictures. Now, let’s dig down more on the topic.
Part 2 How to Convert Slides to Digital - Step-by-Step Guide
Here, we will discuss step-by-step ways to turn the old slides into digital images. So, let’s begin:
Step 1: Resolution
The very first step for converting slides to digital photos is measuring and fixing the resolution of the slides. The technical measurement of image resolution is DPI (dot per inch). It helps you to predict the sharpness or clarity of the final image. The overall measurement depends on the size of the slide and the type of converter or scanner you are using. For example,
A 35 mm slide scanned at 10 MP will give you the images of size 13”*9”.
Step 2: Dust and Scratch Removal
If you have slides that have been wrapped in a box and remained untouched for so long, they might require cleaning. Such slides may develop mold buildup, age-related blemishes, or scratches. They need a cleaning process before using them to convert into slides. A lint-free cloth and an anti-static film cleaner are the best combinations to gently clean the slides and make them fresh.
Step 3: Color Correction and Restoration
Color correction and restoration is another important step when you are dealing with converting old slides into digital images. In order to correct the fading and color shift, you can use the built-in scanning software. You can also use other software for such purposes.
Wondershare Filmora is the best tool which can be used for the color correction of old slides. It is a handy tool with a variety of features. Filmora offers a number of options when it comes to color correction and grading. These options include color histogram, white balance, 3D LUT (3D Lookup table), color and light, HSL, vignette, etc.
Step 4: Using the Best Scanner cum Digital Converter
The next step is choosing the best quality scanner according to the requirement. 35 mm is the most common size of the slides. But, it does come with other uncommon formats too such as 110, 126, 120, 127, etc. You will come to know about the actual size when the image is mounted on the cardboard. Therefore, it is essential to select a quality and versatile scanner which can convert slides of any size effectively.
Part 3 Best 8 Slide to Digital Image Converters 2024
Here, you can run down the list of the best tools to convert the photo slides into digital images on the basis of user reviews and ratings.
01Wolverine Titan 8-in-1

Wolverine Titan 8-in-1 is one of the top choices when it comes to converting photo slides to digital. It is easy to use the device with a fast conversion process. It provides a variety of features such as:
● High output resolution
● Large built-in display
● Wide-format compatibility
● Standalone performance
● Small, compact, and lightweight design
● Pretty fast processing
● Fast uploading slide-adapters
● 4.3-inch color display
● Contains HDMI-to-out jack
● Comes in 3 colors
● Highest quality sensors
● Available at a reasonable price
02Digitnow Film Scanner

A digitnow film scanner is a great option for converting physical photo prints or slides into digital images. The easy to use standalone device comes with a small display which can be attached to the TV screen, PC, or MacBook. It provides a lot of additional tools including
● Adapter tray frames to hold photo prints and slides.
● Slots to insert slides into the scanner.
● GB memory card to hold approximately 1000 photos.
● A disc of image retouching software for Windows users.
● A soft brush to clean dust and other debris from slides and film.
● User manual.
● TV cable.
● Standard buttons.
03Plustek ePhoto Z300

Plustek ePhoto Z300 is not just a slide converter but also a photo scanner. It has the capability to convert a photo or slide of size 6*4 in just 2 to 3 seconds. This simple and compact photo scanner can be attached to a PC or Mac. The device also has a built-in editor which provides photo editing options along with the crop and resizes. The major advantage of this tool is its fastest scanning capacity. This is a good option if you own a large collection of old photos and wish to digitize them quickly. You can use this device by combining it with others too.
04Sharper Image Slide and Negative Converter

It is a lightweight slide to digital converter weighing just 0.6 pounds. The tool provides on-screen interfaces in 7 languages. Despite its small size, the tool has as many features as compared to other slide converters. Sharper image slide and negative converter are easy to use with a basic interface and clearly labeled buttons. The additional tools that come with this device are:
● Cleaning brush
● User manual
● Well designed plastic frame trays
The converter does not come with an in-built SD card and you are required to buy one.
05Kodak Scanza Digital Film and Slide Scanner

Kodak scanza digital film and slide scanner is the best tool if you have a large heap of images. It provides the largest storage option and due to which it is a little expensive. Scanza can convert images and reels into JPEG files within seconds of time. The device is an all-rounder and contains all the latest features and specifications. One can easily use this plastic design and lightweight device because of its small and sleek design. The additional features of Scanza include:
● Adjustable brightness option
● Removable SD card slot
● Powerful photo editing option
● USB power cable
● HDMI cable
● AC adapter
● Video cable
● Six adapter trays
● Film cleaning brush
● 3.5 inch TFT LCD screen
06Zonoz FS-3 22MP All-in-1

Zonoz FS-3 22 MP All-in-1 is a wonderful option if you are looking for a digital converter in an affordable range. It can convert up to 35, 110, 126 slides and negatives along with Super 8 film. One benefit of using this converter is the output images look sharper when compared to other converters. The additional features that the tool avail to its users are:
● Photo editing capabilities
● Brightness adjustment
● Mirroring or flipping
● Small built-in color display
● Adapter tray frames
● Cleaning brush
● USB and TV cables
● User manual
07Kodak Mini Digital Films and Slide Scanners

This miniature scanner model is the best selling slide scanner on the internet. Anyone can use it easily without any requirement for external extensions. With a rating of 4.2 upon 5, it is on the list of best slide scanners of 2024. It weighs around 1.4 pounds and measures 3.6*3.4*3.9 inches.
08Magnasonic
Magnasonic is named as the fastest slide scanner. The device is capable of quickly scanning the slides which saves both your time and efforts. It comes with fast scanning speed, 2.4 inch LCD screen, and 22 MP quality. The tool allows you to store upto 100 images. It also comes with some additional tools such as featured film trays etc.
Part 4 FAQ of Converting Slides to Digital
01What to do with the old slides?
Converting slides to digital images can help you to experiment a lot with them. The old slides might be faded and you can use some tools with the option color correction to make them look new and more appealing. Videos are in trend these days. You can create a video out of those slides after converting them into digital. It will help you to enjoy the old memories in the new version with new effects, songs, etc.
Wondershare Filmora Video Editor is the most powerful tool to prepare an effective video in a hassle-free manner. It has many useful features to make your video more enhanced. Also, it has the option of color correction and grading to make the faded old pics colorful and better. There is no need for professionalism to use this tool, but any beginner can also use it effectively with ease. So, make your memories everlasting with Wondershare Filmora.
For Win 7 or later (64-bit)
For macOS 10.12 or later
02Can you clean negatives with alcohol?
Yes, it is possible to clean negatives with alcohol. But make sure to use 98% isopropyl alcohol for this purpose. For cleaning, use a cotton ball and dab it on the alcohol. Then, lightly wipe the negatives and keep them to dry for some time.
● Ending Thoughts →
● So, hope you get all the required knowledge to convert the slides into digital images.
● We have shared the list of top tools for the purpose. Now, it is up to you to choose any according to your suitability and requirement.
● Just use these devices and accomplish your conversion purpose at home without the need for any professional and worrying about the cost of converting slides to digital.
● At last, with the help of Filmora create an effective video to make your memories everlasting and enhanced.
Are you looking to convert your slides into digital form at home? Are you in search of the best tools for converting old slides to digital? Here, you will get every single detail for it. These conversion tools can help you to convert your old slides into digital images just by sitting at home. In this blog, we will discuss the need, how to achieve it, and the best 8 tools for the conversion. The list of these top tools will be based on the user reviews and ratings of 2024.
In this article
01 [Why We Need to Turn Old Slides into Digital Images](#Part 1)
02 [How to Convert Slides to Digital - Step-by-Step Guide](#Part 2)
03 [Best 8 Slide to Digital Image Converters 2024](#Part 3)
04 [FAQ of Converting Slides to Digital](#Part 4)
Part 1 Why We Need to Turn Old Slides into Digital Images
In this digital era, people rather have access to projectors to view old slides. Therefore, it is beneficial to convert those slides into digital form. There are also many benefits of this conversion such as:
● Preserving the photos for future generations without the fear of getting them lost or damaged.
● Old slides might fade up and you can give them a brand new look by using new tools and technologies.
● The organization becomes much easier than the physical ones.
● It will create less clutter.
● You can share the pictures with just one click with your friends, family members, etc to flourish the memories.
● It lets you enjoy your old memories in a better and more enhanced way.
So, you might have understood why there is a need for converting slides to pictures. Now, let’s dig down more on the topic.
Part 2 How to Convert Slides to Digital - Step-by-Step Guide
Here, we will discuss step-by-step ways to turn the old slides into digital images. So, let’s begin:
Step 1: Resolution
The very first step for converting slides to digital photos is measuring and fixing the resolution of the slides. The technical measurement of image resolution is DPI (dot per inch). It helps you to predict the sharpness or clarity of the final image. The overall measurement depends on the size of the slide and the type of converter or scanner you are using. For example,
A 35 mm slide scanned at 10 MP will give you the images of size 13”*9”.
Step 2: Dust and Scratch Removal
If you have slides that have been wrapped in a box and remained untouched for so long, they might require cleaning. Such slides may develop mold buildup, age-related blemishes, or scratches. They need a cleaning process before using them to convert into slides. A lint-free cloth and an anti-static film cleaner are the best combinations to gently clean the slides and make them fresh.
Step 3: Color Correction and Restoration
Color correction and restoration is another important step when you are dealing with converting old slides into digital images. In order to correct the fading and color shift, you can use the built-in scanning software. You can also use other software for such purposes.
Wondershare Filmora is the best tool which can be used for the color correction of old slides. It is a handy tool with a variety of features. Filmora offers a number of options when it comes to color correction and grading. These options include color histogram, white balance, 3D LUT (3D Lookup table), color and light, HSL, vignette, etc.
Step 4: Using the Best Scanner cum Digital Converter
The next step is choosing the best quality scanner according to the requirement. 35 mm is the most common size of the slides. But, it does come with other uncommon formats too such as 110, 126, 120, 127, etc. You will come to know about the actual size when the image is mounted on the cardboard. Therefore, it is essential to select a quality and versatile scanner which can convert slides of any size effectively.
Part 3 Best 8 Slide to Digital Image Converters 2024
Here, you can run down the list of the best tools to convert the photo slides into digital images on the basis of user reviews and ratings.
01Wolverine Titan 8-in-1

Wolverine Titan 8-in-1 is one of the top choices when it comes to converting photo slides to digital. It is easy to use the device with a fast conversion process. It provides a variety of features such as:
● High output resolution
● Large built-in display
● Wide-format compatibility
● Standalone performance
● Small, compact, and lightweight design
● Pretty fast processing
● Fast uploading slide-adapters
● 4.3-inch color display
● Contains HDMI-to-out jack
● Comes in 3 colors
● Highest quality sensors
● Available at a reasonable price
02Digitnow Film Scanner

A digitnow film scanner is a great option for converting physical photo prints or slides into digital images. The easy to use standalone device comes with a small display which can be attached to the TV screen, PC, or MacBook. It provides a lot of additional tools including
● Adapter tray frames to hold photo prints and slides.
● Slots to insert slides into the scanner.
● GB memory card to hold approximately 1000 photos.
● A disc of image retouching software for Windows users.
● A soft brush to clean dust and other debris from slides and film.
● User manual.
● TV cable.
● Standard buttons.
03Plustek ePhoto Z300

Plustek ePhoto Z300 is not just a slide converter but also a photo scanner. It has the capability to convert a photo or slide of size 6*4 in just 2 to 3 seconds. This simple and compact photo scanner can be attached to a PC or Mac. The device also has a built-in editor which provides photo editing options along with the crop and resizes. The major advantage of this tool is its fastest scanning capacity. This is a good option if you own a large collection of old photos and wish to digitize them quickly. You can use this device by combining it with others too.
04Sharper Image Slide and Negative Converter

It is a lightweight slide to digital converter weighing just 0.6 pounds. The tool provides on-screen interfaces in 7 languages. Despite its small size, the tool has as many features as compared to other slide converters. Sharper image slide and negative converter are easy to use with a basic interface and clearly labeled buttons. The additional tools that come with this device are:
● Cleaning brush
● User manual
● Well designed plastic frame trays
The converter does not come with an in-built SD card and you are required to buy one.
05Kodak Scanza Digital Film and Slide Scanner

Kodak scanza digital film and slide scanner is the best tool if you have a large heap of images. It provides the largest storage option and due to which it is a little expensive. Scanza can convert images and reels into JPEG files within seconds of time. The device is an all-rounder and contains all the latest features and specifications. One can easily use this plastic design and lightweight device because of its small and sleek design. The additional features of Scanza include:
● Adjustable brightness option
● Removable SD card slot
● Powerful photo editing option
● USB power cable
● HDMI cable
● AC adapter
● Video cable
● Six adapter trays
● Film cleaning brush
● 3.5 inch TFT LCD screen
06Zonoz FS-3 22MP All-in-1

Zonoz FS-3 22 MP All-in-1 is a wonderful option if you are looking for a digital converter in an affordable range. It can convert up to 35, 110, 126 slides and negatives along with Super 8 film. One benefit of using this converter is the output images look sharper when compared to other converters. The additional features that the tool avail to its users are:
● Photo editing capabilities
● Brightness adjustment
● Mirroring or flipping
● Small built-in color display
● Adapter tray frames
● Cleaning brush
● USB and TV cables
● User manual
07Kodak Mini Digital Films and Slide Scanners

This miniature scanner model is the best selling slide scanner on the internet. Anyone can use it easily without any requirement for external extensions. With a rating of 4.2 upon 5, it is on the list of best slide scanners of 2024. It weighs around 1.4 pounds and measures 3.6*3.4*3.9 inches.
08Magnasonic
Magnasonic is named as the fastest slide scanner. The device is capable of quickly scanning the slides which saves both your time and efforts. It comes with fast scanning speed, 2.4 inch LCD screen, and 22 MP quality. The tool allows you to store upto 100 images. It also comes with some additional tools such as featured film trays etc.
Part 4 FAQ of Converting Slides to Digital
01What to do with the old slides?
Converting slides to digital images can help you to experiment a lot with them. The old slides might be faded and you can use some tools with the option color correction to make them look new and more appealing. Videos are in trend these days. You can create a video out of those slides after converting them into digital. It will help you to enjoy the old memories in the new version with new effects, songs, etc.
Wondershare Filmora Video Editor is the most powerful tool to prepare an effective video in a hassle-free manner. It has many useful features to make your video more enhanced. Also, it has the option of color correction and grading to make the faded old pics colorful and better. There is no need for professionalism to use this tool, but any beginner can also use it effectively with ease. So, make your memories everlasting with Wondershare Filmora.
For Win 7 or later (64-bit)
For macOS 10.12 or later
02Can you clean negatives with alcohol?
Yes, it is possible to clean negatives with alcohol. But make sure to use 98% isopropyl alcohol for this purpose. For cleaning, use a cotton ball and dab it on the alcohol. Then, lightly wipe the negatives and keep them to dry for some time.
● Ending Thoughts →
● So, hope you get all the required knowledge to convert the slides into digital images.
● We have shared the list of top tools for the purpose. Now, it is up to you to choose any according to your suitability and requirement.
● Just use these devices and accomplish your conversion purpose at home without the need for any professional and worrying about the cost of converting slides to digital.
● At last, with the help of Filmora create an effective video to make your memories everlasting and enhanced.
Best 20 Slideshow Makers for Win/Mac/Online Review
Top Slideshow Makers for WinMacOnline Review
An easy yet powerful editor
Numerous effects to choose from
Detailed tutorials provided by the official channel
To create slideshow, multiple tools and elements are required. Generally, people look for a tool that’s easy to use and that’s rich in features. Even if such a tool is found, the immediate problem is the operating system. Not every system is compatible with Windows or Mac.
Here, this article is all about cutting the efforts to search for the best app for slide show making. All the top tools are listed in this single article that can serve the purpose for Windows and Mac users along with online users.
In this article
01 [Top 10 Slideshow Makers for Windows](#Part 1)
02 [Top 5 Slideshow Makers for Mac](#Part 2)
03 [Top 5 Online Slideshow Makers](#Part 3)
Part 1 Top 10 Slideshow Makers for Windows
01Adobe Spark
Adobe Spark or Adobe Creative Cloud Express is a top-notch software for creating a slideshow in Windows 8.1 or newer versions. As Adobe is always been a promising platform to create unique designs, with this application as well, users can flaunt their thoughts through different features.
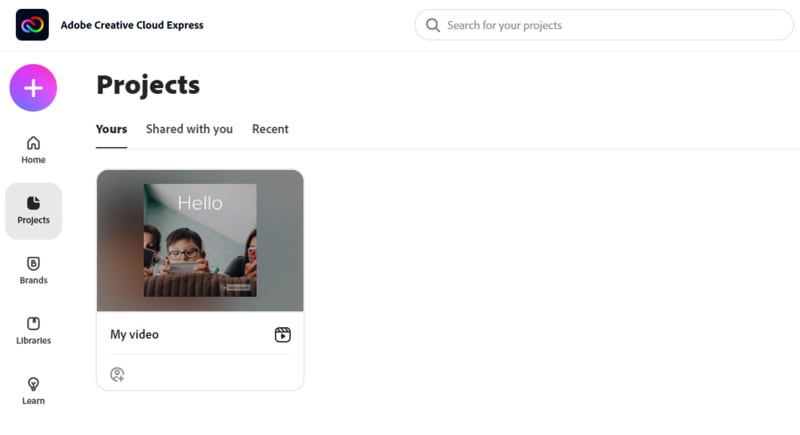
● A simple UI assists beginners to understand all the functionalities before using it without much hassle. It also increases the speed to make a slide show with simple yet efficient tools.
● It is totally compatible with other Adobe products, making it flexible for any kind of use.
● You can create slide show on your PC without any watermark and with different existing templates and elements.
02Movavi Slideshow Maker
Movavi brings some unique features to create a slideshow with enhanced video quality and modern tool arrangement for all of the people who love to create a better presentation. Even with a seamless platform, all the necessary tools are arranged in a familiar pattern to make it comfortable.
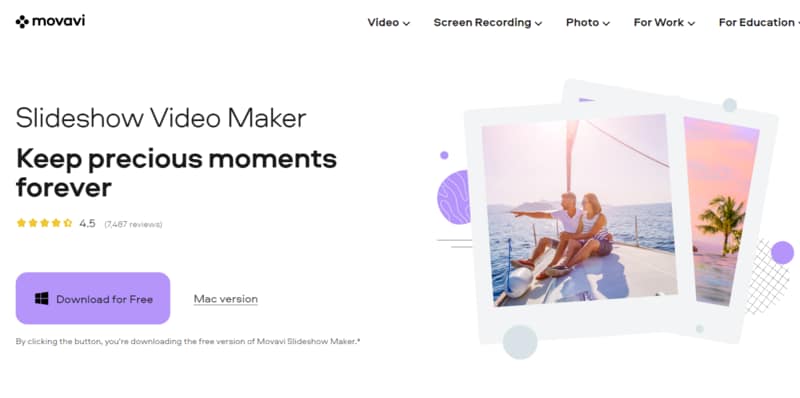
● Full slideshow wizard is available with Movavi slide show maker to assist the beginners to create a quality presentation.
● With the screen recording feature, you can add live demonstration in the presentation with 150+ filters and visual effects.
● This slide show app includes multiple ready-made templates, music functionalities, etc. for a professional slideshow-making setup.
03MiniTool MovieMaker
MiniTool MovieMaker is a comparatively new tool as a free slideshow maker for all Windows users. It consists of quirky features like cartoon clips, animated elements, etc. along with modern transition and video processing tools.
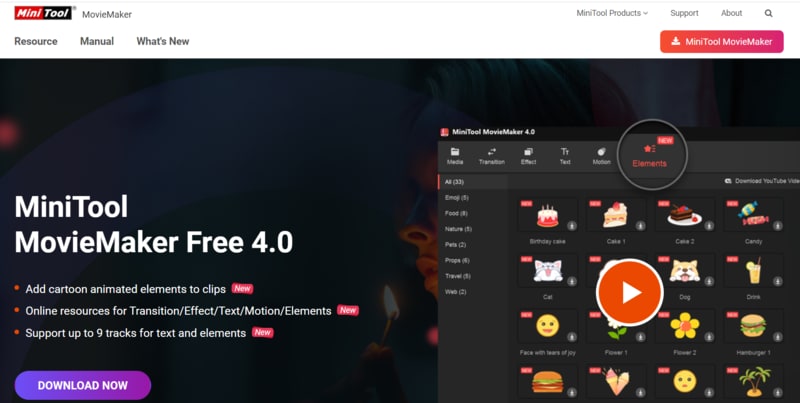
● As this is a new platform, the latest features are added on frequently and the users can apply them for an up-to-the-minute slideshow. From trimming a video to adding a transition to a photo slideshow, everything is available on a single software.
● Even if you don’t know anything about video editing or creating a slideshow, this tool would guide you through everything with a simple arrangement and a wide range of options.
● You can export a video in different formats like MP4, MOV, WMV, etc., and get watermark-free projects.
04PhotoStage Slideshow Software
To make a slide show quickly, you can go with PhotoStage Slideshow software without any doubt. This software is not only useful for beginners but has exciting features for intermediate video editors. This slideshow app is compatible with Windows XP, Vista, 7, 8, 8.1, 10, and 11.
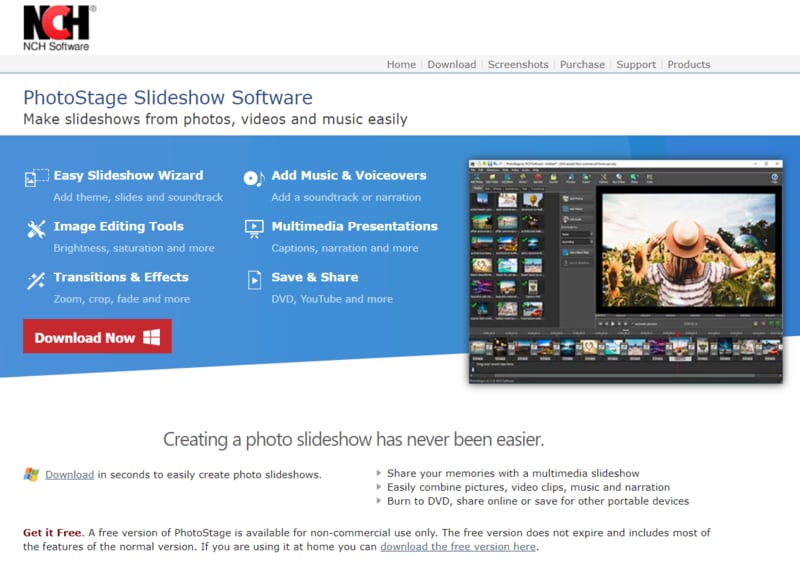
● There is a slideshow wizard feature to add themes, transitions, and music to the slides easily.
● Built-in DVD HD video authoring and YouTube sharing are available for wide usability of the slideshows for multiple purposes.
● Different audio tools and photo optimization tools are available to add a classy look to the presentation.
05Icecream Slideshow Maker
For the most simple yet efficient slideshow maker online, choose Icecream software that comes with a very beginner-friendly interface and options. For learning video editing and create a slideshow This software can be a good tool to start with. However, the features are very minimum and the professional creators might not find it very exciting. But for beginners or students, this would be a great choice.
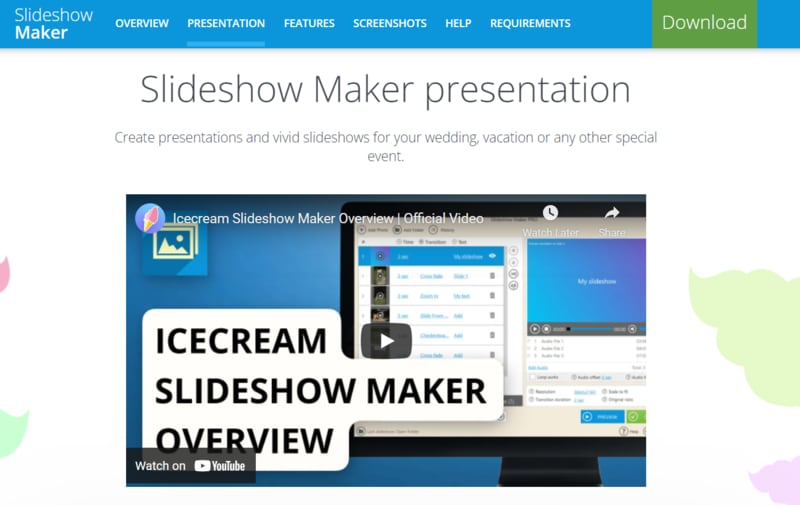
● It supports various audio formats including MP3, WAV, WMA, and TIFF. Also, image formats including JPG, JPEG, and PNG are supported.
● Along with YouTube uploading, DVD transfer, cloud storage (Dropbox or Google Drive) is supported.
● slideshow is supported in this free slide show maker.
06Kizoa
It’s become a hassle often to find the suitable aspect for a slideshow for different screens like laptops, TV, or smartphone. Kizoa slide show maker is eliminating this problem with 7 different aspect ratios for the slideshows. And this can be an effective advantage when making a slideshow for any professional purpose.
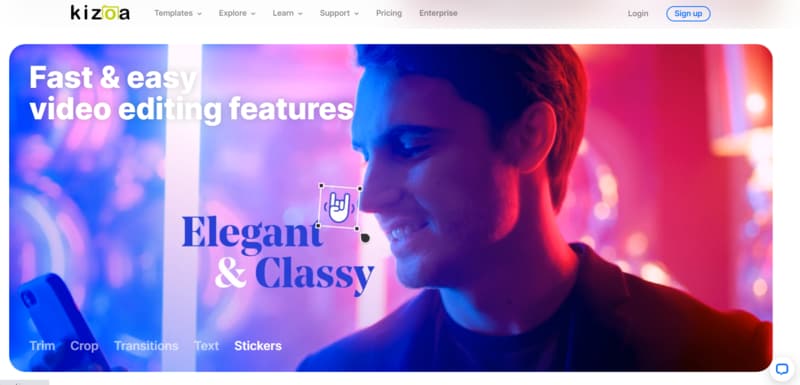
● This app for slide show is available for Windows 7 or higher versions till Windows 10. There’s not been an update till now for Windows 11.
● Bulk collection of 2D and 3D transitions, effects, and GIFs are available to use in the slides as per the requirement.
● This software is intended to create slideshow only and all the features are added according to that unlike any slideshow creator cum video editor app.
07Magix Photostory Deluxe
For a high-quality professional slideshow maker online, Magix Photostory Deluxe is a good option. This editor has almost 1,500 built-in effects, 200+ decorative elements, and 100+ pre-designed templates to assist users with the slideshows in lesser time.
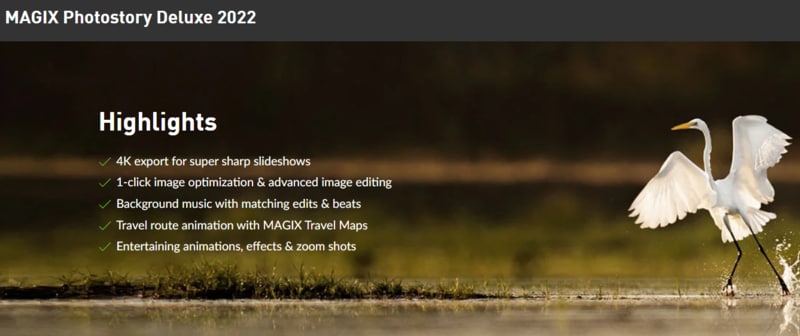
● Built-in DVD and Blu-ray burning features along with a 4K resolution feature are present with this application.
● Unique camera tracking and zooming features are available to add more latest elements to the slideshow.
● All-in-one platform to create slideshow, edit photos, and videos.
08Slideshow Maker
The name in itself defines this as one of the best slideshow makers with high-quality results. 4K Slideshow maker is available for Windows 7 and higher versions. Those who don’t want to compromise with the video resolution in the slideshow can try this slideshow app. However other features like tool arrangement and UI is slightly poor compared to other software.
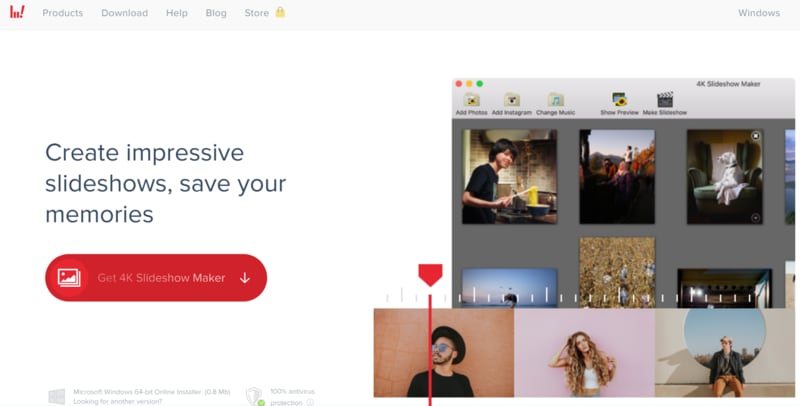
● This software supports different file formats and makes this platform flexible for multiple uses.
● All the projects are saved in high resolution, i.e., 1080p or 4K.
09SmartSHOW 3D
SmartSHOW 3D is an efficient free slideshow maker for high-quality, 3D slideshows. This is another beginner-friendly software with multiple tools and effects. Some latest addition like pan & zoom effect creation, the audio waveform in the music section, and customized picture frames would help to add extra effect to the slideshow.
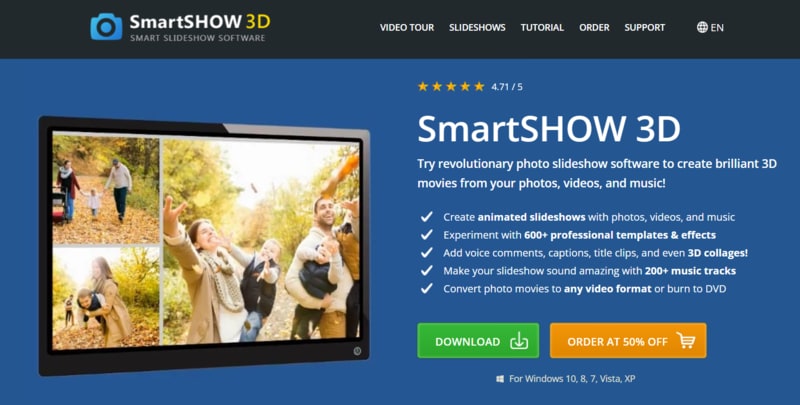
● free templates and 200+ free music tracks are available in this free slide show maker to enhance the whole presentation properly.
● You can also make mobile-optimized videos using the SmartSHOW 3D editor.
● Add a soundtrack to the slideshow and use existing templates in the free trial before buying the subscription.
● Multiple formats are supported to download the project after creating a slideshow.
Part 2 Top 5 Slideshow Makers for Mac
01PowerDirector
PowerDirector is one of the best free slideshow makers on Mac systems, enabling the pro features of the storyboard, timeline, and slideshow interfaces. There’s a wide capability of visual effects that can boost the whole quality of the slideshow in no time.
02iMovie
iMovie slide show maker is available for both macOS and iOS systems, to let the creators make some elegant and high-resolution slideshows. It includes professional-looking themes and interfaces to add a classy look to the whole presentation. It’s simple for beginners as there’s no complicated tool arrangement in the UI.
03Photostage
Photostage is a complete package for slideshow creation, including the seamless options for photo arrangement, special effects, audio set-up, etc. For beginners, it might be a bit confusing but with time, it will be easier to use. This free slide show maker is equally compatible with both Windows and Mac, unlike much other software.
04Videopad
Videopad is another top slideshow maker on Mac systems that has 50+ transition effects, third-party plugin support, and all popular file format compatibility. The slides would be made as with a movie effect on this platform with various latest templates and features.

05Keynote
For real-time collaboration and PowerPoint features, Keynote would be the best choice to create slide show. It has the integration with Adobe Photoshop which extends the creativity range more. You can also find an in-built large library for pre-made templates to apply in the slideshow. However, for beginners, Keynote can a be hurdle.
Part 3 Top 5 Online Slideshow Makers
To be independent of any system, users might also want to make slideshow online. To support this choice, the following five best slideshow creators are mentioned.
01Canva
Canva is a popular online slide show maker that has everything you need to make a perfect presentation. From various templates to elements, graphics to custom frames, special social media templates, and versatile file formats- the free version itself has many features to serve.
02Animoto
With an user-friendly interface and quick processing, Animoto is a favorite platform to make slideshow online. However, there is a problem with the watermark in some cases. You can automatically apply any modification to all the sections by applying the filters in one section. Note that, there’s no free subscription with this platform.
03FlexClip
Flexclip is a beginner-friendly online slideshow maker with numerous templates and assets to choose from. In the free version, you can download a video in 480p only. Also, there’s no undo button for slideshow creation. So, you need to be sure about any modification in this editor.

04Kapwing
Kapwing is a multipurpose online free slideshow maker for intermediate users. Different video editing tools are available along with subtitle and AI subtitle support. Note that, the content in free version is public and cannot be stored for more than 7 days.
05Visme
Visme is a quick slideshow maker with five easy steps to master. Companies like IBM and Accenture use Visme to create slideshows and infographics. Undoubtedly this can be a perfect pick for seamless, professional slideshow cration.
How to use Filmora?
Filmora is all-in-one software to create slide show for literary any purpose, in any operating system, providing all the features a creator might need while making a perfect slideshow. A slideshow can be for academic or professional purposes, to decorate some beautiful moments, or to create something unique. And for every separate aim, different tools and features are required in a slideshow maker. To fulfil all such requirements with the latest tools, Filomora has a versatile platform.
As in this article, we have already mentioned some of the best slideshow makers, you may find some restrictions like system boundaries, not being beginner-friendly, or missing the latest features in the free slideshow makers. That’s why the best possible solution is presented here with all the following advantages.
Advantages of Wondershare Filmora Video Editor Slideshow Maker:
● This software is compatible with both Windows (7 or later versions) and Mac OS (10.12 or later versions), giving flexible usability to all the slideshow enthusiasts.
For Win 7 or later (64-bit)
For macOS 10.12 or later
● It takes lesser time to create a slideshow in Filomra using the top-notch transitions and effects. Also, there’s a split-screen option to make a slideshow more efficiently.
● All the popular file formats are supported including images, audio, and video. And, it’s also easy to upload a project on any social media directly from Filmora.
● Numerous motion effects, titles, filters, effects, and overlays are available for free in this slide show app.
● The built-in audio library provides suitable music with the slideshows to make it better as a complete presentation.
● Ending Thoughts →
● This article consists of all the top slideshow makers with their features to choose the most suitable one without any doubt.
● Suggestions are available both for Windows and Mac in the case of the slideshow creators.
● You can go for any of this software based on your requirements, editing experience, and system compatibility. Gradually, the best slideshow can be created in no time.
To create slideshow, multiple tools and elements are required. Generally, people look for a tool that’s easy to use and that’s rich in features. Even if such a tool is found, the immediate problem is the operating system. Not every system is compatible with Windows or Mac.
Here, this article is all about cutting the efforts to search for the best app for slide show making. All the top tools are listed in this single article that can serve the purpose for Windows and Mac users along with online users.
In this article
01 [Top 10 Slideshow Makers for Windows](#Part 1)
02 [Top 5 Slideshow Makers for Mac](#Part 2)
03 [Top 5 Online Slideshow Makers](#Part 3)
Part 1 Top 10 Slideshow Makers for Windows
01Adobe Spark
Adobe Spark or Adobe Creative Cloud Express is a top-notch software for creating a slideshow in Windows 8.1 or newer versions. As Adobe is always been a promising platform to create unique designs, with this application as well, users can flaunt their thoughts through different features.

● A simple UI assists beginners to understand all the functionalities before using it without much hassle. It also increases the speed to make a slide show with simple yet efficient tools.
● It is totally compatible with other Adobe products, making it flexible for any kind of use.
● You can create slide show on your PC without any watermark and with different existing templates and elements.
02Movavi Slideshow Maker
Movavi brings some unique features to create a slideshow with enhanced video quality and modern tool arrangement for all of the people who love to create a better presentation. Even with a seamless platform, all the necessary tools are arranged in a familiar pattern to make it comfortable.

● Full slideshow wizard is available with Movavi slide show maker to assist the beginners to create a quality presentation.
● With the screen recording feature, you can add live demonstration in the presentation with 150+ filters and visual effects.
● This slide show app includes multiple ready-made templates, music functionalities, etc. for a professional slideshow-making setup.
03MiniTool MovieMaker
MiniTool MovieMaker is a comparatively new tool as a free slideshow maker for all Windows users. It consists of quirky features like cartoon clips, animated elements, etc. along with modern transition and video processing tools.

● As this is a new platform, the latest features are added on frequently and the users can apply them for an up-to-the-minute slideshow. From trimming a video to adding a transition to a photo slideshow, everything is available on a single software.
● Even if you don’t know anything about video editing or creating a slideshow, this tool would guide you through everything with a simple arrangement and a wide range of options.
● You can export a video in different formats like MP4, MOV, WMV, etc., and get watermark-free projects.
04PhotoStage Slideshow Software
To make a slide show quickly, you can go with PhotoStage Slideshow software without any doubt. This software is not only useful for beginners but has exciting features for intermediate video editors. This slideshow app is compatible with Windows XP, Vista, 7, 8, 8.1, 10, and 11.

● There is a slideshow wizard feature to add themes, transitions, and music to the slides easily.
● Built-in DVD HD video authoring and YouTube sharing are available for wide usability of the slideshows for multiple purposes.
● Different audio tools and photo optimization tools are available to add a classy look to the presentation.
05Icecream Slideshow Maker
For the most simple yet efficient slideshow maker online, choose Icecream software that comes with a very beginner-friendly interface and options. For learning video editing and create a slideshow This software can be a good tool to start with. However, the features are very minimum and the professional creators might not find it very exciting. But for beginners or students, this would be a great choice.

● It supports various audio formats including MP3, WAV, WMA, and TIFF. Also, image formats including JPG, JPEG, and PNG are supported.
● Along with YouTube uploading, DVD transfer, cloud storage (Dropbox or Google Drive) is supported.
● slideshow is supported in this free slide show maker.
06Kizoa
It’s become a hassle often to find the suitable aspect for a slideshow for different screens like laptops, TV, or smartphone. Kizoa slide show maker is eliminating this problem with 7 different aspect ratios for the slideshows. And this can be an effective advantage when making a slideshow for any professional purpose.

● This app for slide show is available for Windows 7 or higher versions till Windows 10. There’s not been an update till now for Windows 11.
● Bulk collection of 2D and 3D transitions, effects, and GIFs are available to use in the slides as per the requirement.
● This software is intended to create slideshow only and all the features are added according to that unlike any slideshow creator cum video editor app.
07Magix Photostory Deluxe
For a high-quality professional slideshow maker online, Magix Photostory Deluxe is a good option. This editor has almost 1,500 built-in effects, 200+ decorative elements, and 100+ pre-designed templates to assist users with the slideshows in lesser time.

● Built-in DVD and Blu-ray burning features along with a 4K resolution feature are present with this application.
● Unique camera tracking and zooming features are available to add more latest elements to the slideshow.
● All-in-one platform to create slideshow, edit photos, and videos.
08Slideshow Maker
The name in itself defines this as one of the best slideshow makers with high-quality results. 4K Slideshow maker is available for Windows 7 and higher versions. Those who don’t want to compromise with the video resolution in the slideshow can try this slideshow app. However other features like tool arrangement and UI is slightly poor compared to other software.

● This software supports different file formats and makes this platform flexible for multiple uses.
● All the projects are saved in high resolution, i.e., 1080p or 4K.
09SmartSHOW 3D
SmartSHOW 3D is an efficient free slideshow maker for high-quality, 3D slideshows. This is another beginner-friendly software with multiple tools and effects. Some latest addition like pan & zoom effect creation, the audio waveform in the music section, and customized picture frames would help to add extra effect to the slideshow.

● free templates and 200+ free music tracks are available in this free slide show maker to enhance the whole presentation properly.
● You can also make mobile-optimized videos using the SmartSHOW 3D editor.
● Add a soundtrack to the slideshow and use existing templates in the free trial before buying the subscription.
● Multiple formats are supported to download the project after creating a slideshow.
Part 2 Top 5 Slideshow Makers for Mac
01PowerDirector
PowerDirector is one of the best free slideshow makers on Mac systems, enabling the pro features of the storyboard, timeline, and slideshow interfaces. There’s a wide capability of visual effects that can boost the whole quality of the slideshow in no time.

02iMovie
iMovie slide show maker is available for both macOS and iOS systems, to let the creators make some elegant and high-resolution slideshows. It includes professional-looking themes and interfaces to add a classy look to the whole presentation. It’s simple for beginners as there’s no complicated tool arrangement in the UI.

03Photostage
Photostage is a complete package for slideshow creation, including the seamless options for photo arrangement, special effects, audio set-up, etc. For beginners, it might be a bit confusing but with time, it will be easier to use. This free slide show maker is equally compatible with both Windows and Mac, unlike much other software.

04Videopad
Videopad is another top slideshow maker on Mac systems that has 50+ transition effects, third-party plugin support, and all popular file format compatibility. The slides would be made as with a movie effect on this platform with various latest templates and features.

05Keynote
For real-time collaboration and PowerPoint features, Keynote would be the best choice to create slide show. It has the integration with Adobe Photoshop which extends the creativity range more. You can also find an in-built large library for pre-made templates to apply in the slideshow. However, for beginners, Keynote can a be hurdle.

Part 3 Top 5 Online Slideshow Makers
To be independent of any system, users might also want to make slideshow online. To support this choice, the following five best slideshow creators are mentioned.
01Canva
Canva is a popular online slide show maker that has everything you need to make a perfect presentation. From various templates to elements, graphics to custom frames, special social media templates, and versatile file formats- the free version itself has many features to serve.

02Animoto
With an user-friendly interface and quick processing, Animoto is a favorite platform to make slideshow online. However, there is a problem with the watermark in some cases. You can automatically apply any modification to all the sections by applying the filters in one section. Note that, there’s no free subscription with this platform.

03FlexClip
Flexclip is a beginner-friendly online slideshow maker with numerous templates and assets to choose from. In the free version, you can download a video in 480p only. Also, there’s no undo button for slideshow creation. So, you need to be sure about any modification in this editor.

04Kapwing
Kapwing is a multipurpose online free slideshow maker for intermediate users. Different video editing tools are available along with subtitle and AI subtitle support. Note that, the content in free version is public and cannot be stored for more than 7 days.

05Visme
Visme is a quick slideshow maker with five easy steps to master. Companies like IBM and Accenture use Visme to create slideshows and infographics. Undoubtedly this can be a perfect pick for seamless, professional slideshow cration.

How to use Filmora?
Filmora is all-in-one software to create slide show for literary any purpose, in any operating system, providing all the features a creator might need while making a perfect slideshow. A slideshow can be for academic or professional purposes, to decorate some beautiful moments, or to create something unique. And for every separate aim, different tools and features are required in a slideshow maker. To fulfil all such requirements with the latest tools, Filomora has a versatile platform.
As in this article, we have already mentioned some of the best slideshow makers, you may find some restrictions like system boundaries, not being beginner-friendly, or missing the latest features in the free slideshow makers. That’s why the best possible solution is presented here with all the following advantages.
Advantages of Wondershare Filmora Video Editor Slideshow Maker:
● This software is compatible with both Windows (7 or later versions) and Mac OS (10.12 or later versions), giving flexible usability to all the slideshow enthusiasts.
For Win 7 or later (64-bit)
For macOS 10.12 or later
● It takes lesser time to create a slideshow in Filomra using the top-notch transitions and effects. Also, there’s a split-screen option to make a slideshow more efficiently.
● All the popular file formats are supported including images, audio, and video. And, it’s also easy to upload a project on any social media directly from Filmora.
● Numerous motion effects, titles, filters, effects, and overlays are available for free in this slide show app.
● The built-in audio library provides suitable music with the slideshows to make it better as a complete presentation.
● Ending Thoughts →
● This article consists of all the top slideshow makers with their features to choose the most suitable one without any doubt.
● Suggestions are available both for Windows and Mac in the case of the slideshow creators.
● You can go for any of this software based on your requirements, editing experience, and system compatibility. Gradually, the best slideshow can be created in no time.
To create slideshow, multiple tools and elements are required. Generally, people look for a tool that’s easy to use and that’s rich in features. Even if such a tool is found, the immediate problem is the operating system. Not every system is compatible with Windows or Mac.
Here, this article is all about cutting the efforts to search for the best app for slide show making. All the top tools are listed in this single article that can serve the purpose for Windows and Mac users along with online users.
In this article
01 [Top 10 Slideshow Makers for Windows](#Part 1)
02 [Top 5 Slideshow Makers for Mac](#Part 2)
03 [Top 5 Online Slideshow Makers](#Part 3)
Part 1 Top 10 Slideshow Makers for Windows
01Adobe Spark
Adobe Spark or Adobe Creative Cloud Express is a top-notch software for creating a slideshow in Windows 8.1 or newer versions. As Adobe is always been a promising platform to create unique designs, with this application as well, users can flaunt their thoughts through different features.

● A simple UI assists beginners to understand all the functionalities before using it without much hassle. It also increases the speed to make a slide show with simple yet efficient tools.
● It is totally compatible with other Adobe products, making it flexible for any kind of use.
● You can create slide show on your PC without any watermark and with different existing templates and elements.
02Movavi Slideshow Maker
Movavi brings some unique features to create a slideshow with enhanced video quality and modern tool arrangement for all of the people who love to create a better presentation. Even with a seamless platform, all the necessary tools are arranged in a familiar pattern to make it comfortable.

● Full slideshow wizard is available with Movavi slide show maker to assist the beginners to create a quality presentation.
● With the screen recording feature, you can add live demonstration in the presentation with 150+ filters and visual effects.
● This slide show app includes multiple ready-made templates, music functionalities, etc. for a professional slideshow-making setup.
03MiniTool MovieMaker
MiniTool MovieMaker is a comparatively new tool as a free slideshow maker for all Windows users. It consists of quirky features like cartoon clips, animated elements, etc. along with modern transition and video processing tools.

● As this is a new platform, the latest features are added on frequently and the users can apply them for an up-to-the-minute slideshow. From trimming a video to adding a transition to a photo slideshow, everything is available on a single software.
● Even if you don’t know anything about video editing or creating a slideshow, this tool would guide you through everything with a simple arrangement and a wide range of options.
● You can export a video in different formats like MP4, MOV, WMV, etc., and get watermark-free projects.
04PhotoStage Slideshow Software
To make a slide show quickly, you can go with PhotoStage Slideshow software without any doubt. This software is not only useful for beginners but has exciting features for intermediate video editors. This slideshow app is compatible with Windows XP, Vista, 7, 8, 8.1, 10, and 11.

● There is a slideshow wizard feature to add themes, transitions, and music to the slides easily.
● Built-in DVD HD video authoring and YouTube sharing are available for wide usability of the slideshows for multiple purposes.
● Different audio tools and photo optimization tools are available to add a classy look to the presentation.
05Icecream Slideshow Maker
For the most simple yet efficient slideshow maker online, choose Icecream software that comes with a very beginner-friendly interface and options. For learning video editing and create a slideshow This software can be a good tool to start with. However, the features are very minimum and the professional creators might not find it very exciting. But for beginners or students, this would be a great choice.

● It supports various audio formats including MP3, WAV, WMA, and TIFF. Also, image formats including JPG, JPEG, and PNG are supported.
● Along with YouTube uploading, DVD transfer, cloud storage (Dropbox or Google Drive) is supported.
● slideshow is supported in this free slide show maker.
06Kizoa
It’s become a hassle often to find the suitable aspect for a slideshow for different screens like laptops, TV, or smartphone. Kizoa slide show maker is eliminating this problem with 7 different aspect ratios for the slideshows. And this can be an effective advantage when making a slideshow for any professional purpose.

● This app for slide show is available for Windows 7 or higher versions till Windows 10. There’s not been an update till now for Windows 11.
● Bulk collection of 2D and 3D transitions, effects, and GIFs are available to use in the slides as per the requirement.
● This software is intended to create slideshow only and all the features are added according to that unlike any slideshow creator cum video editor app.
07Magix Photostory Deluxe
For a high-quality professional slideshow maker online, Magix Photostory Deluxe is a good option. This editor has almost 1,500 built-in effects, 200+ decorative elements, and 100+ pre-designed templates to assist users with the slideshows in lesser time.

● Built-in DVD and Blu-ray burning features along with a 4K resolution feature are present with this application.
● Unique camera tracking and zooming features are available to add more latest elements to the slideshow.
● All-in-one platform to create slideshow, edit photos, and videos.
08Slideshow Maker
The name in itself defines this as one of the best slideshow makers with high-quality results. 4K Slideshow maker is available for Windows 7 and higher versions. Those who don’t want to compromise with the video resolution in the slideshow can try this slideshow app. However other features like tool arrangement and UI is slightly poor compared to other software.

● This software supports different file formats and makes this platform flexible for multiple uses.
● All the projects are saved in high resolution, i.e., 1080p or 4K.
09SmartSHOW 3D
SmartSHOW 3D is an efficient free slideshow maker for high-quality, 3D slideshows. This is another beginner-friendly software with multiple tools and effects. Some latest addition like pan & zoom effect creation, the audio waveform in the music section, and customized picture frames would help to add extra effect to the slideshow.

● free templates and 200+ free music tracks are available in this free slide show maker to enhance the whole presentation properly.
● You can also make mobile-optimized videos using the SmartSHOW 3D editor.
● Add a soundtrack to the slideshow and use existing templates in the free trial before buying the subscription.
● Multiple formats are supported to download the project after creating a slideshow.
Part 2 Top 5 Slideshow Makers for Mac
01PowerDirector
PowerDirector is one of the best free slideshow makers on Mac systems, enabling the pro features of the storyboard, timeline, and slideshow interfaces. There’s a wide capability of visual effects that can boost the whole quality of the slideshow in no time.

02iMovie
iMovie slide show maker is available for both macOS and iOS systems, to let the creators make some elegant and high-resolution slideshows. It includes professional-looking themes and interfaces to add a classy look to the whole presentation. It’s simple for beginners as there’s no complicated tool arrangement in the UI.

03Photostage
Photostage is a complete package for slideshow creation, including the seamless options for photo arrangement, special effects, audio set-up, etc. For beginners, it might be a bit confusing but with time, it will be easier to use. This free slide show maker is equally compatible with both Windows and Mac, unlike much other software.

04Videopad
Videopad is another top slideshow maker on Mac systems that has 50+ transition effects, third-party plugin support, and all popular file format compatibility. The slides would be made as with a movie effect on this platform with various latest templates and features.

05Keynote
For real-time collaboration and PowerPoint features, Keynote would be the best choice to create slide show. It has the integration with Adobe Photoshop which extends the creativity range more. You can also find an in-built large library for pre-made templates to apply in the slideshow. However, for beginners, Keynote can a be hurdle.

Part 3 Top 5 Online Slideshow Makers
To be independent of any system, users might also want to make slideshow online. To support this choice, the following five best slideshow creators are mentioned.
01Canva
Canva is a popular online slide show maker that has everything you need to make a perfect presentation. From various templates to elements, graphics to custom frames, special social media templates, and versatile file formats- the free version itself has many features to serve.

02Animoto
With an user-friendly interface and quick processing, Animoto is a favorite platform to make slideshow online. However, there is a problem with the watermark in some cases. You can automatically apply any modification to all the sections by applying the filters in one section. Note that, there’s no free subscription with this platform.

03FlexClip
Flexclip is a beginner-friendly online slideshow maker with numerous templates and assets to choose from. In the free version, you can download a video in 480p only. Also, there’s no undo button for slideshow creation. So, you need to be sure about any modification in this editor.

04Kapwing
Kapwing is a multipurpose online free slideshow maker for intermediate users. Different video editing tools are available along with subtitle and AI subtitle support. Note that, the content in free version is public and cannot be stored for more than 7 days.

05Visme
Visme is a quick slideshow maker with five easy steps to master. Companies like IBM and Accenture use Visme to create slideshows and infographics. Undoubtedly this can be a perfect pick for seamless, professional slideshow cration.

How to use Filmora?
Filmora is all-in-one software to create slide show for literary any purpose, in any operating system, providing all the features a creator might need while making a perfect slideshow. A slideshow can be for academic or professional purposes, to decorate some beautiful moments, or to create something unique. And for every separate aim, different tools and features are required in a slideshow maker. To fulfil all such requirements with the latest tools, Filomora has a versatile platform.
As in this article, we have already mentioned some of the best slideshow makers, you may find some restrictions like system boundaries, not being beginner-friendly, or missing the latest features in the free slideshow makers. That’s why the best possible solution is presented here with all the following advantages.
Advantages of Wondershare Filmora Video Editor Slideshow Maker:
● This software is compatible with both Windows (7 or later versions) and Mac OS (10.12 or later versions), giving flexible usability to all the slideshow enthusiasts.
For Win 7 or later (64-bit)
For macOS 10.12 or later
● It takes lesser time to create a slideshow in Filomra using the top-notch transitions and effects. Also, there’s a split-screen option to make a slideshow more efficiently.
● All the popular file formats are supported including images, audio, and video. And, it’s also easy to upload a project on any social media directly from Filmora.
● Numerous motion effects, titles, filters, effects, and overlays are available for free in this slide show app.
● The built-in audio library provides suitable music with the slideshows to make it better as a complete presentation.
● Ending Thoughts →
● This article consists of all the top slideshow makers with their features to choose the most suitable one without any doubt.
● Suggestions are available both for Windows and Mac in the case of the slideshow creators.
● You can go for any of this software based on your requirements, editing experience, and system compatibility. Gradually, the best slideshow can be created in no time.
To create slideshow, multiple tools and elements are required. Generally, people look for a tool that’s easy to use and that’s rich in features. Even if such a tool is found, the immediate problem is the operating system. Not every system is compatible with Windows or Mac.
Here, this article is all about cutting the efforts to search for the best app for slide show making. All the top tools are listed in this single article that can serve the purpose for Windows and Mac users along with online users.
In this article
01 [Top 10 Slideshow Makers for Windows](#Part 1)
02 [Top 5 Slideshow Makers for Mac](#Part 2)
03 [Top 5 Online Slideshow Makers](#Part 3)
Part 1 Top 10 Slideshow Makers for Windows
01Adobe Spark
Adobe Spark or Adobe Creative Cloud Express is a top-notch software for creating a slideshow in Windows 8.1 or newer versions. As Adobe is always been a promising platform to create unique designs, with this application as well, users can flaunt their thoughts through different features.

● A simple UI assists beginners to understand all the functionalities before using it without much hassle. It also increases the speed to make a slide show with simple yet efficient tools.
● It is totally compatible with other Adobe products, making it flexible for any kind of use.
● You can create slide show on your PC without any watermark and with different existing templates and elements.
02Movavi Slideshow Maker
Movavi brings some unique features to create a slideshow with enhanced video quality and modern tool arrangement for all of the people who love to create a better presentation. Even with a seamless platform, all the necessary tools are arranged in a familiar pattern to make it comfortable.

● Full slideshow wizard is available with Movavi slide show maker to assist the beginners to create a quality presentation.
● With the screen recording feature, you can add live demonstration in the presentation with 150+ filters and visual effects.
● This slide show app includes multiple ready-made templates, music functionalities, etc. for a professional slideshow-making setup.
03MiniTool MovieMaker
MiniTool MovieMaker is a comparatively new tool as a free slideshow maker for all Windows users. It consists of quirky features like cartoon clips, animated elements, etc. along with modern transition and video processing tools.

● As this is a new platform, the latest features are added on frequently and the users can apply them for an up-to-the-minute slideshow. From trimming a video to adding a transition to a photo slideshow, everything is available on a single software.
● Even if you don’t know anything about video editing or creating a slideshow, this tool would guide you through everything with a simple arrangement and a wide range of options.
● You can export a video in different formats like MP4, MOV, WMV, etc., and get watermark-free projects.
04PhotoStage Slideshow Software
To make a slide show quickly, you can go with PhotoStage Slideshow software without any doubt. This software is not only useful for beginners but has exciting features for intermediate video editors. This slideshow app is compatible with Windows XP, Vista, 7, 8, 8.1, 10, and 11.

● There is a slideshow wizard feature to add themes, transitions, and music to the slides easily.
● Built-in DVD HD video authoring and YouTube sharing are available for wide usability of the slideshows for multiple purposes.
● Different audio tools and photo optimization tools are available to add a classy look to the presentation.
05Icecream Slideshow Maker
For the most simple yet efficient slideshow maker online, choose Icecream software that comes with a very beginner-friendly interface and options. For learning video editing and create a slideshow This software can be a good tool to start with. However, the features are very minimum and the professional creators might not find it very exciting. But for beginners or students, this would be a great choice.

● It supports various audio formats including MP3, WAV, WMA, and TIFF. Also, image formats including JPG, JPEG, and PNG are supported.
● Along with YouTube uploading, DVD transfer, cloud storage (Dropbox or Google Drive) is supported.
● slideshow is supported in this free slide show maker.
06Kizoa
It’s become a hassle often to find the suitable aspect for a slideshow for different screens like laptops, TV, or smartphone. Kizoa slide show maker is eliminating this problem with 7 different aspect ratios for the slideshows. And this can be an effective advantage when making a slideshow for any professional purpose.

● This app for slide show is available for Windows 7 or higher versions till Windows 10. There’s not been an update till now for Windows 11.
● Bulk collection of 2D and 3D transitions, effects, and GIFs are available to use in the slides as per the requirement.
● This software is intended to create slideshow only and all the features are added according to that unlike any slideshow creator cum video editor app.
07Magix Photostory Deluxe
For a high-quality professional slideshow maker online, Magix Photostory Deluxe is a good option. This editor has almost 1,500 built-in effects, 200+ decorative elements, and 100+ pre-designed templates to assist users with the slideshows in lesser time.

● Built-in DVD and Blu-ray burning features along with a 4K resolution feature are present with this application.
● Unique camera tracking and zooming features are available to add more latest elements to the slideshow.
● All-in-one platform to create slideshow, edit photos, and videos.
08Slideshow Maker
The name in itself defines this as one of the best slideshow makers with high-quality results. 4K Slideshow maker is available for Windows 7 and higher versions. Those who don’t want to compromise with the video resolution in the slideshow can try this slideshow app. However other features like tool arrangement and UI is slightly poor compared to other software.

● This software supports different file formats and makes this platform flexible for multiple uses.
● All the projects are saved in high resolution, i.e., 1080p or 4K.
09SmartSHOW 3D
SmartSHOW 3D is an efficient free slideshow maker for high-quality, 3D slideshows. This is another beginner-friendly software with multiple tools and effects. Some latest addition like pan & zoom effect creation, the audio waveform in the music section, and customized picture frames would help to add extra effect to the slideshow.

● free templates and 200+ free music tracks are available in this free slide show maker to enhance the whole presentation properly.
● You can also make mobile-optimized videos using the SmartSHOW 3D editor.
● Add a soundtrack to the slideshow and use existing templates in the free trial before buying the subscription.
● Multiple formats are supported to download the project after creating a slideshow.
Part 2 Top 5 Slideshow Makers for Mac
01PowerDirector
PowerDirector is one of the best free slideshow makers on Mac systems, enabling the pro features of the storyboard, timeline, and slideshow interfaces. There’s a wide capability of visual effects that can boost the whole quality of the slideshow in no time.

02iMovie
iMovie slide show maker is available for both macOS and iOS systems, to let the creators make some elegant and high-resolution slideshows. It includes professional-looking themes and interfaces to add a classy look to the whole presentation. It’s simple for beginners as there’s no complicated tool arrangement in the UI.

03Photostage
Photostage is a complete package for slideshow creation, including the seamless options for photo arrangement, special effects, audio set-up, etc. For beginners, it might be a bit confusing but with time, it will be easier to use. This free slide show maker is equally compatible with both Windows and Mac, unlike much other software.

04Videopad
Videopad is another top slideshow maker on Mac systems that has 50+ transition effects, third-party plugin support, and all popular file format compatibility. The slides would be made as with a movie effect on this platform with various latest templates and features.

05Keynote
For real-time collaboration and PowerPoint features, Keynote would be the best choice to create slide show. It has the integration with Adobe Photoshop which extends the creativity range more. You can also find an in-built large library for pre-made templates to apply in the slideshow. However, for beginners, Keynote can a be hurdle.

Part 3 Top 5 Online Slideshow Makers
To be independent of any system, users might also want to make slideshow online. To support this choice, the following five best slideshow creators are mentioned.
01Canva
Canva is a popular online slide show maker that has everything you need to make a perfect presentation. From various templates to elements, graphics to custom frames, special social media templates, and versatile file formats- the free version itself has many features to serve.

02Animoto
With an user-friendly interface and quick processing, Animoto is a favorite platform to make slideshow online. However, there is a problem with the watermark in some cases. You can automatically apply any modification to all the sections by applying the filters in one section. Note that, there’s no free subscription with this platform.

03FlexClip
Flexclip is a beginner-friendly online slideshow maker with numerous templates and assets to choose from. In the free version, you can download a video in 480p only. Also, there’s no undo button for slideshow creation. So, you need to be sure about any modification in this editor.

04Kapwing
Kapwing is a multipurpose online free slideshow maker for intermediate users. Different video editing tools are available along with subtitle and AI subtitle support. Note that, the content in free version is public and cannot be stored for more than 7 days.

05Visme
Visme is a quick slideshow maker with five easy steps to master. Companies like IBM and Accenture use Visme to create slideshows and infographics. Undoubtedly this can be a perfect pick for seamless, professional slideshow cration.

How to use Filmora?
Filmora is all-in-one software to create slide show for literary any purpose, in any operating system, providing all the features a creator might need while making a perfect slideshow. A slideshow can be for academic or professional purposes, to decorate some beautiful moments, or to create something unique. And for every separate aim, different tools and features are required in a slideshow maker. To fulfil all such requirements with the latest tools, Filomora has a versatile platform.
As in this article, we have already mentioned some of the best slideshow makers, you may find some restrictions like system boundaries, not being beginner-friendly, or missing the latest features in the free slideshow makers. That’s why the best possible solution is presented here with all the following advantages.
Advantages of Wondershare Filmora Video Editor Slideshow Maker:
● This software is compatible with both Windows (7 or later versions) and Mac OS (10.12 or later versions), giving flexible usability to all the slideshow enthusiasts.
For Win 7 or later (64-bit)
For macOS 10.12 or later
● It takes lesser time to create a slideshow in Filomra using the top-notch transitions and effects. Also, there’s a split-screen option to make a slideshow more efficiently.
● All the popular file formats are supported including images, audio, and video. And, it’s also easy to upload a project on any social media directly from Filmora.
● Numerous motion effects, titles, filters, effects, and overlays are available for free in this slide show app.
● The built-in audio library provides suitable music with the slideshows to make it better as a complete presentation.
● Ending Thoughts →
● This article consists of all the top slideshow makers with their features to choose the most suitable one without any doubt.
● Suggestions are available both for Windows and Mac in the case of the slideshow creators.
● You can go for any of this software based on your requirements, editing experience, and system compatibility. Gradually, the best slideshow can be created in no time.
Also read:
- Updated 2024 Approved Do You Want to Use a Professional Tool to Add Subtitles? Read This Article to Discover the Best Reliable Tool to Create Subtitles in Your Desired Manner
- Updated Top 10 Free Text to Speech Software Windows, Mac,Android, iPhone & O
- Updated Discover Vintage LUTs Premiere Pro Free and Paid Options Available
- Updated Do You Like Clouds or Sky and Want to Use Them as a Video Background? Explore This Article to Learn About the Sky Change Video in Filmora
- 2024 Approved MP3 Cutter Download
- How to Add the Popular Video Text Effects to Your Video, In 2024
- Updated 2024 Approved Using Track Matte and Tracking in Adobe After Effects Reviewing All Possibilities
- Updated Add Subtitles To Videos With Kapwing Step by Step for 2024
- Updated Guaranteed 10 Storyboard Creators To Make Animation Easier for 2024
- New In 2024, How to Add Effects in Premiere Pro
- Updated 2024 Approved IMovie Review – Is It The Best Video Editor for Mac Users
- New How to Use OBS Chroma Key With/Without Green Screen Easy Solutions
- New 2024 Approved How to Use iMovie Text Effects
- Updated 2024 Approved Final Cut Pro for iPad
- New Kdenlive Video Editor Review
- New DVD Slideshow Builder 2024 Review and Tutorial
- New In 2024, Want to Come up with Exciting Sony Vegas Slideshow Templates for Your Next Project on YouTube and Other Mediums Then There Is Something for You
- Updated Cropping Videos in Final Cut Pro Step by Step
- Updated Learn How to Effectively Use Masking in After Effects with This Comprehensive Guide. Includes Step-by-Step Instructions and an Alternative Masking Technique
- New How to Edit a TikTok Video After Posting
- 2024 Approved Looking For the Best VHS Video Effect Makers? Get To Know the Top List
- Updated Tactics To Make Keynote Slideshow for 2024
- New Learn Eight Simple Steps that Will Allow You to Create a Stunning Text Reveal Animation in Filmora. Simple yet Very Professional for 2024
- Let Us Help You with Something that You Might Not Know. Have You Ever Worked with MOV File Format Before? Or Do You Know What that Is? Lets Talk About It
- In 2024, Ultimate Guide from Itel P55+ FRP Bypass
- A How-To Guide on Bypassing the Apple iPhone 6 iCloud Lock
- In 2024, 5 Ways to Transfer Music from Samsung Galaxy F14 5G to Other Android Devices Easily | Dr.fone
- In 2024, Pokemon Go No GPS Signal? Heres Every Possible Solution On Lenovo ThinkPhone | Dr.fone
- Updated 18 Best Tools and Services to Create Animated Videos for Business 2023 for 2024
- In 2024, Top 7 Skype Hacker to Hack Any Skype Account On your Oppo Reno 10 Pro 5G | Dr.fone
- In 2024, 3 Things You Must Know about Fake Snapchat Location On Apple iPhone 11 Pro Max | Dr.fone
- A Detailed Guide on Faking Your Location in Mozilla Firefox On Realme GT Neo 5 SE | Dr.fone
- How to fix iCloud lock on your Apple iPhone 11 and iPad
- Process of Screen Sharing Infinix GT 10 Pro to PC- Detailed Steps | Dr.fone
- How to Change/Fake Your Poco F5 5G Location on Viber | Dr.fone
- In 2024, 9 Best Free Android Monitoring Apps to Monitor Phone Remotely For your Xiaomi Redmi 12 | Dr.fone
- How To Upgrade or Downgrade iPhone 6s? | Dr.fone
- Top 4 Ways to Trace Apple iPhone 6s Plus Location | Dr.fone
- Title: New In 2024, Enhance Your Video Color Accuracy with Video Scopes
- Author: Morgan
- Created at : 2024-06-24 01:30:38
- Updated at : 2024-06-25 01:30:38
- Link: https://ai-video-editing.techidaily.com/new-in-2024-enhance-your-video-color-accuracy-with-video-scopes/
- License: This work is licensed under CC BY-NC-SA 4.0.


