
:max_bytes(150000):strip_icc():format(webp)/samsung-un65nu7100fxza-aaa-5b3bf3f1c9e77c00370afe54.jpg)
New In 2024, How To Add Scrolling Text Effect
How To Add Scrolling Text Effect
Almost every video has some titles and texts to show to the viewers. Instead of showing static texts on the video, everyone loves to add animated texts so that the video looks attractive and engaging. If you want to show credits and titles in intro and outro of the video, you will usually see texts scrolling vertically on the video.
If you want to show any text repeatedly, you can add horizontal scrolling text effect to your video so that the repeated text does not look weird. You will need a video editor to add scrolling rolling text effect to texts and titles in your video. We will illustrate in simple steps how to animate text on scroll using free as well as premium video editors.
Part 1. Add Scrolling Text to Video with Filmora
Wondershare Filmora is a professional video editor and if you are a Windows PC or Mac user, you can use Filmora to add scrolling text effect. In fact, Filmora is the most intuitive video editor where you can add scrolling text effect instantly without any prior experience in video editing.
Filmora has the best collection of text effects and you can add scrolling text anywhere and customize the effect as per your requirements. As a matter of fact, you can create a video with scrolling text effects only from scratch. Here are the steps to add scrolling text to video using Filmora.
Free Download For Win 7 or later(64-bit)
Free Download For macOS 10.14 or later
Step1 Download and install Filmora on your Windows PC or Mac. Launch the application and click on New Project on the welcome screen. You can also go to File> New option to get started.

Step2 Go to File> Import Media option to bring in your video file user Project Media folder. Thereafter, drag and drop the file into Timeline to get started.

Step3 Go to Titles option located at the top, and on the left panel, go to End Credits option. You will see various scrolling text effects. Place your mouse pointer on them to check their preview.

Step4 Once you are satisfied with any scrolling text effects, drag and drop it into Timeline above the video clip layer. Adjust the position of the text effect so that it appears on the video as expected. You can stretch the duration of the effect as per your preference.

Step5 Double-click on the text layer on Timeline and customize the text and style as you feel. Thereafter, you can click on Advanced button for more customization. Finally, click on OK button.

Part 2. Use After Effects to Create Scrolling Text
Adobe Affect Effects is an extremely popular video editor and there are so many different text effects available to apply to your video. After Effects scrolling text effects come with different variations so that your titles and texts look amazing on the screen. Apart from the available text effects, you can also download and get more text effects from external sources. Here are the steps to add text scroll after effects to your video.
Step1 Launch After Effects and type your text with the Text tool from the top bar.

Step2 Duplicate the written text by going to Edit> Duplicate.

Step3 Move the duplicate text out of the visible screen to the left by changing its position value.

Step4 Turn on Position option and change the duration and add a keyframe.

Step5 Right-click on Composition setting and go to New> Null Object. Change the duration and make it the same as the Duplicate layer and add a keyframe there. Besides, move the null object out of the visible screen to the right.

Step6 Select all layers and right-click and select Pre-compose.

Step7 Right-click on Pre-comp and go to Time> Enable Time Remapping. Play the video and you will see the scrolling effects that you see in end credits in videos.

The above-mentioned steps are for horizontal scrolling text effect. If you want vertical scrolling text After Effects, you have to position the duplicate text and null object vertically and the required text will scroll vertically.
Part 3. Add Scrolling Text Effect with VSDC Free Video Editor
So far, we have mentioned premium video editors to add scrolling effect to the text in your video. Now we are going to mention a free video editor where you can add scrolling effect instantly. If you are a Windows user, you can install VSDC free video editor. There are several scrolling text effects available on the video editor through which you can move the text horizontal and vertical. Here are the steps to animate text on scroll using VSDC free video editor.
Step1 Install VSDC free video editor and click on New Project option. Click on Finish button and select the video from your hard drive where you want to add text.

Step2 Select Type tool from the left panel and draw a box on the video where you can type your text. Make sure the text layer is on top of the video layer in Timeline.

Step3 Type your text and if you want to scroll it like horizontal scrolling text After Effects, place the text out of the viewer on the right side.

Step4 Double-click on text layer and go to Add Object and click on Movement.

Step5 You will find the mouse pointer change and you have to click on the spot to the left side where you want the text to go in scrolling effect.

Step6 Shorten the duration of the text layer and then copy the text layer from Timeline. Paste it again and again until you cover the video layer completely so that the scroll effect goes on as long as the video runs.

Takeaway
Adding scrolling text to your video should no more be an issue for you. If you are using After Effects, we have illustrated how you can create horizontal and vertical scrolling effect for text in your video perfectly. If you prefer a free video editor, you can use VSDC free video editor as well. But we recommend Wondershare Filmora where you can add scrolling effects to your text instantly, and there is a wide range of amazing scrolling effects available to apply to your video.
Free Download For macOS 10.14 or later
Step1 Download and install Filmora on your Windows PC or Mac. Launch the application and click on New Project on the welcome screen. You can also go to File> New option to get started.
Step2 Go to File> Import Media option to bring in your video file user Project Media folder. Thereafter, drag and drop the file into Timeline to get started.
Step3 Go to Titles option located at the top, and on the left panel, go to End Credits option. You will see various scrolling text effects. Place your mouse pointer on them to check their preview.
Step4 Once you are satisfied with any scrolling text effects, drag and drop it into Timeline above the video clip layer. Adjust the position of the text effect so that it appears on the video as expected. You can stretch the duration of the effect as per your preference.
Step5 Double-click on the text layer on Timeline and customize the text and style as you feel. Thereafter, you can click on Advanced button for more customization. Finally, click on OK button.
Part 2. Use After Effects to Create Scrolling Text
Adobe Affect Effects is an extremely popular video editor and there are so many different text effects available to apply to your video. After Effects scrolling text effects come with different variations so that your titles and texts look amazing on the screen. Apart from the available text effects, you can also download and get more text effects from external sources. Here are the steps to add text scroll after effects to your video.
Step1 Launch After Effects and type your text with the Text tool from the top bar.
Step2 Duplicate the written text by going to Edit> Duplicate.
Step3 Move the duplicate text out of the visible screen to the left by changing its position value.
Step4 Turn on Position option and change the duration and add a keyframe.
Step5 Right-click on Composition setting and go to New> Null Object. Change the duration and make it the same as the Duplicate layer and add a keyframe there. Besides, move the null object out of the visible screen to the right.
Step6 Select all layers and right-click and select Pre-compose.
Step7 Right-click on Pre-comp and go to Time> Enable Time Remapping. Play the video and you will see the scrolling effects that you see in end credits in videos.
The above-mentioned steps are for horizontal scrolling text effect. If you want vertical scrolling text After Effects, you have to position the duplicate text and null object vertically and the required text will scroll vertically.
Part 3. Add Scrolling Text Effect with VSDC Free Video Editor
So far, we have mentioned premium video editors to add scrolling effect to the text in your video. Now we are going to mention a free video editor where you can add scrolling effect instantly. If you are a Windows user, you can install VSDC free video editor. There are several scrolling text effects available on the video editor through which you can move the text horizontal and vertical. Here are the steps to animate text on scroll using VSDC free video editor.
Step1 Install VSDC free video editor and click on New Project option. Click on Finish button and select the video from your hard drive where you want to add text.
Step2 Select Type tool from the left panel and draw a box on the video where you can type your text. Make sure the text layer is on top of the video layer in Timeline.
Step3 Type your text and if you want to scroll it like horizontal scrolling text After Effects, place the text out of the viewer on the right side.
Step4 Double-click on text layer and go to Add Object and click on Movement.
Step5 You will find the mouse pointer change and you have to click on the spot to the left side where you want the text to go in scrolling effect.
Step6 Shorten the duration of the text layer and then copy the text layer from Timeline. Paste it again and again until you cover the video layer completely so that the scroll effect goes on as long as the video runs.
Takeaway
Adding scrolling text to your video should no more be an issue for you. If you are using After Effects, we have illustrated how you can create horizontal and vertical scrolling effect for text in your video perfectly. If you prefer a free video editor, you can use VSDC free video editor as well. But we recommend Wondershare Filmora where you can add scrolling effects to your text instantly, and there is a wide range of amazing scrolling effects available to apply to your video.
Hitfilm Express Video Editor Review
If you are involved in video editing, you better know the importance of using hitfilm express download. This video editing tool helps the users to perform video editing efficiently. Along with basic features, the program also provides advanced-level functionality that makes edited videos phenomenal. Every casual video editor gets attracted to the hitfilm express download for its extraordinary features. Anyone can download the video editing software from an online platform named FXHome.
The free software is so impressive that it can give tough competition to paid video editing platforms like Studio, Adobe Premiere Pro, and After Effects. For both novice and seasoned youtubers, this platform provides some amusing features like 400+ visual effects, compositing tools presets, and cinematic features to unveil their creativity at its best.
1. How to download and install Hitfilm Express?
People increasingly depend on this software since it is free to download. Available for both Mac and Windows, this software works as exceptional community support. The software comes with documentation and tutorials so that new users don’t face any difficulty getting used to the platform. You can download hitfilm express editing software from any third-party platform, but it is advisable to download the video editor from the official website directly. You only have to ensure that your internet connection is speedy enough for activation.
Here is the step-by-step process for the online installation of HitFilm Express.

- First, go to the official website of HItFilm Express and click the download button.
- You have to fill in the details directly on the registration page. You will get the download URL in your mail address by doing this. Check your inbox to download the installer.
- Now, allow the installation file to run and then follow the steps.
- Once the installation is completed, it’s time to activate the software. A dialog box will appear on opening the program with options like login and activation. Click the “Get Free License” to land on the website.
- After getting into the website, log in to your previously created FXhome account. When you have finally logged in to your account, search the serial code.
- Revert the software and hit the Activate and Unlock button to enter the serial code and opt for software activation. It is how your entire installation process will be completed.
2. Key Features of Hitfilm Express
If you want to take your video editing to the next level like a professional, hitfilm express editing software is your one-stop solution. Here is a wide array of features that provides amateurs to professionals a seamless experience.
**Professional project quality: The UHD support and RAM preview of HitFilm Express provide the users the supreme quality formats. Whatever footage you collect from documentaries captured by high-end cameras or smartphones, HItFilm will manage everything.
**Commentator recorder: Once you click the button, you will easily adjoin voiceover to the uploaded videos without leaving the HitFilm. The HitFilm Express is designed so that your recording will promptly add to a soundtrack so that you can do the finishing touches with the audio effects.
**Integrated timelines: Keep switching from one tab to another, same as you do on the browser, as per your needs. You can edit in one tab, make a composition in the other, and then get back to the editor without the necessity of loading other software.
**Customized playback: You can personalize playback. It will help you get exposed to non-stop playback in the trimmer, thus preventing lagging and making edits easier. It allows you to control the playback quality and make hasty edits.
**Smart search: With the help of HitFilm Express, you can locate your desired keyword quickly. It will also help you find properties for all the effects, media, and timelines. In case you come from a different software system, the algorithm of hitfilm express editor identifies the keyword links and assists you in finding your search.
**Numerous streams: To allow the gamers to have a rejoicing experience, HitFilm allows importing files with multiple audio streams and provides you with complete flexibility over workflow.
**Adjustable trimmer: With HitFilm Express, you can re-trim clips even after adding to the timeline. The moment you double-click the clip, it will automatically get sent to the trimmer panel to allow you to make necessary adjustments. Once you have completed the changes, the clip will be again updated.
**Cinematic outlook: You can prepare your film with the classic cine-effects of HItFilm Express. Choose your most preferred effects like Day For Night, Three-Strip Color, Film Grain, and other styles to give a cinematic edge.
3. How to edit videos with Hitfilm Express?
Editing is cutting and accumulating the selected clips to tell the story better. Editing consists of adding sound effects, transitions, and other visual elements to help it view excellent results.

You have to set up the editor timeline and start importing clips to edit your clips. Use the editor tools like roll, slip, drag, selection, ripple, and others to customize your edit.

- Choose the Set in point button from the point where you want to start the clip. In the timeline, you will notice an orange section representing the part of the clip you want to play.
- Now, skip through, and decide where you want to end the clip. You have to click the Set-out button. You can alternatively use the I and 0 keys as shortcuts.
- Once you get your selected start and endpoint, you can drag down the portion of the video into the timeline. This time, you can get a message that shows the editor settings are different from the adding clip. It is your choice how you want to keep your settings.
- If you find the selected set of a good standard, you can move forward and select “Yes” to ensure that your project gets changed into that setting.
- In the viewer section, you will get to view the final outlook of the video. Here, on the downside of the timeline, you can click on the Zoom bar to see things in detail. Your previews will depend on the selected settings that you have made beforehand.
- If you want to change your default setting, you can come to the hamburger icon for tracking and changing the size of the video to different ones.
- Add a clip to the timeline: Position the play head at the timeline point where you want to start the clip, and then hit the insert clip button.

4. Hitfilm Express Alternative to Edit Videos
Anyone who finds video editing fun filling can try out Filmora . It is an ideal alternative to hitfilm express editing tutorial. Whether you shoot in an entry-level camera or a high-end video camera, Filmora will help you create and edit the most suitable videos. During the video editing procedure, you can experience multiple challenges that help you stay patient and work slowly to come out with the project.

It is the best video editing platform for beginners since it can provide comprehensive support for creating different video formats. The user-friendly interface and powerful editing features make the video editor one of the most used video editing software.
For Win 7 or later (64-bit)
For macOS 10.12 or later
Step-by-step guide for editing videos with Filmora
Step 1: Double click on the Filmora’s icon to start working on your project. Either open the new project or click on the aspect ratio for time-saving editing.
Step 2: Select the “project setting” option to customize the aspect ratio as per your need. Next, you will go to the import media files to choose the import with the instant cutter tool and opt for easy trimming of videos.
You can also use a lens correction tool to improve the quality of videos.
Step 3: Create a new folder and organize the clips alphabetically to increase efficiency.
Step 4: Drag and drop the trimmed videos on the timeline and rearrange them to remove the unnecessary parts. Press the play button to get previews of your added video clips.
Step 5: Now, it’s time to add audio and visual effects to your trimmed footage. You can also add opening titles and subtitles and use text templates to work on the video transition.
Step 6: With the help of a color correction tool, you can make the videos look vivid. It takes enough time and dedication to master color correction for your videos.
Step 7: When you are 100% sure about the final outlook of the project, you have to export the videos on YouTube for fast uploading on social media networks. Otherwise, you can opt for saving the video on the hard drives.
5. FAQs about Hitfilm Express
1.Is Hitfilm Express still free?
Ans: HitFilm Express is still free with alternative paid add-ons. The free video editing software helps make excellent films and video games with the professional-grade VFX. From students, beginners, and gamers to you Tubers – anyone can work on their creativity without spending a penny.
2.Is Hitfilm Express safe to download?
Ans: With more than 5 million active users across 160 countries, HitFilm Express is safe and legit software to download. If you are susceptible to using this platform, it is an excellent option to experience some remarkable features and learn A to Z of video editing.
3.Is Hitfilm Express still worth it?
Ans: IF anyone opts for the paid version, it will be expensive. However, the video editing software has beginner-friendly features like different AI tools for guided editing, 4K support, and others that hardly make any sense compared with other free software.
Looking at its professional features and high-quality editing, it is the most powerful video editing platform.
Conclusion
In a nutshell, HItFilm is an entirely free version of video editing software. Beginners can quickly learn it since the editing features can be easily grasped. To create amateur videos for professional ones, HitFilm Express is your one-stop solution. The customizable effects and compositing layers provide your videos with an excellent cinematic look. Everything you will get without spending any money.
Therefore, if you want to learn the A to Z of video editing for absolutely free, you can blindly rely on the hitfilm express editor.
2. Key Features of Hitfilm Express
If you want to take your video editing to the next level like a professional, hitfilm express editing software is your one-stop solution. Here is a wide array of features that provides amateurs to professionals a seamless experience.
**Professional project quality: The UHD support and RAM preview of HitFilm Express provide the users the supreme quality formats. Whatever footage you collect from documentaries captured by high-end cameras or smartphones, HItFilm will manage everything.
**Commentator recorder: Once you click the button, you will easily adjoin voiceover to the uploaded videos without leaving the HitFilm. The HitFilm Express is designed so that your recording will promptly add to a soundtrack so that you can do the finishing touches with the audio effects.
**Integrated timelines: Keep switching from one tab to another, same as you do on the browser, as per your needs. You can edit in one tab, make a composition in the other, and then get back to the editor without the necessity of loading other software.
**Customized playback: You can personalize playback. It will help you get exposed to non-stop playback in the trimmer, thus preventing lagging and making edits easier. It allows you to control the playback quality and make hasty edits.
**Smart search: With the help of HitFilm Express, you can locate your desired keyword quickly. It will also help you find properties for all the effects, media, and timelines. In case you come from a different software system, the algorithm of hitfilm express editor identifies the keyword links and assists you in finding your search.
**Numerous streams: To allow the gamers to have a rejoicing experience, HitFilm allows importing files with multiple audio streams and provides you with complete flexibility over workflow.
**Adjustable trimmer: With HitFilm Express, you can re-trim clips even after adding to the timeline. The moment you double-click the clip, it will automatically get sent to the trimmer panel to allow you to make necessary adjustments. Once you have completed the changes, the clip will be again updated.
**Cinematic outlook: You can prepare your film with the classic cine-effects of HItFilm Express. Choose your most preferred effects like Day For Night, Three-Strip Color, Film Grain, and other styles to give a cinematic edge.
3. How to edit videos with Hitfilm Express?
Editing is cutting and accumulating the selected clips to tell the story better. Editing consists of adding sound effects, transitions, and other visual elements to help it view excellent results.
You have to set up the editor timeline and start importing clips to edit your clips. Use the editor tools like roll, slip, drag, selection, ripple, and others to customize your edit.
- Choose the Set in point button from the point where you want to start the clip. In the timeline, you will notice an orange section representing the part of the clip you want to play.
- Now, skip through, and decide where you want to end the clip. You have to click the Set-out button. You can alternatively use the I and 0 keys as shortcuts.
- Once you get your selected start and endpoint, you can drag down the portion of the video into the timeline. This time, you can get a message that shows the editor settings are different from the adding clip. It is your choice how you want to keep your settings.
- If you find the selected set of a good standard, you can move forward and select “Yes” to ensure that your project gets changed into that setting.
- In the viewer section, you will get to view the final outlook of the video. Here, on the downside of the timeline, you can click on the Zoom bar to see things in detail. Your previews will depend on the selected settings that you have made beforehand.
- If you want to change your default setting, you can come to the hamburger icon for tracking and changing the size of the video to different ones.
- Add a clip to the timeline: Position the play head at the timeline point where you want to start the clip, and then hit the insert clip button.
4. Hitfilm Express Alternative to Edit Videos
Anyone who finds video editing fun filling can try out Filmora . It is an ideal alternative to hitfilm express editing tutorial. Whether you shoot in an entry-level camera or a high-end video camera, Filmora will help you create and edit the most suitable videos. During the video editing procedure, you can experience multiple challenges that help you stay patient and work slowly to come out with the project.
It is the best video editing platform for beginners since it can provide comprehensive support for creating different video formats. The user-friendly interface and powerful editing features make the video editor one of the most used video editing software.
For Win 7 or later (64-bit)
For macOS 10.12 or later
Step-by-step guide for editing videos with Filmora
Step 1: Double click on the Filmora’s icon to start working on your project. Either open the new project or click on the aspect ratio for time-saving editing.
Step 2: Select the “project setting” option to customize the aspect ratio as per your need. Next, you will go to the import media files to choose the import with the instant cutter tool and opt for easy trimming of videos.
You can also use a lens correction tool to improve the quality of videos.
Step 3: Create a new folder and organize the clips alphabetically to increase efficiency.
Step 4: Drag and drop the trimmed videos on the timeline and rearrange them to remove the unnecessary parts. Press the play button to get previews of your added video clips.
Step 5: Now, it’s time to add audio and visual effects to your trimmed footage. You can also add opening titles and subtitles and use text templates to work on the video transition.
Step 6: With the help of a color correction tool, you can make the videos look vivid. It takes enough time and dedication to master color correction for your videos.
Step 7: When you are 100% sure about the final outlook of the project, you have to export the videos on YouTube for fast uploading on social media networks. Otherwise, you can opt for saving the video on the hard drives.
5. FAQs about Hitfilm Express
1.Is Hitfilm Express still free?
Ans: HitFilm Express is still free with alternative paid add-ons. The free video editing software helps make excellent films and video games with the professional-grade VFX. From students, beginners, and gamers to you Tubers – anyone can work on their creativity without spending a penny.
2.Is Hitfilm Express safe to download?
Ans: With more than 5 million active users across 160 countries, HitFilm Express is safe and legit software to download. If you are susceptible to using this platform, it is an excellent option to experience some remarkable features and learn A to Z of video editing.
3.Is Hitfilm Express still worth it?
Ans: IF anyone opts for the paid version, it will be expensive. However, the video editing software has beginner-friendly features like different AI tools for guided editing, 4K support, and others that hardly make any sense compared with other free software.
Looking at its professional features and high-quality editing, it is the most powerful video editing platform.
Conclusion
In a nutshell, HItFilm is an entirely free version of video editing software. Beginners can quickly learn it since the editing features can be easily grasped. To create amateur videos for professional ones, HitFilm Express is your one-stop solution. The customizable effects and compositing layers provide your videos with an excellent cinematic look. Everything you will get without spending any money.
Therefore, if you want to learn the A to Z of video editing for absolutely free, you can blindly rely on the hitfilm express editor.
How To Add Motion Blur On CapCut? (IPhone & Android)
Do you know what adds a realistic effect to videos? Professionals add various types of effects to the videos to create artistic perspective flawlessly. Usually, the process of adding effects to the videos happens in the post-production phase, where professionals utilize various software. One of the commonly added effects is the motion blur effect which creates a subtle motion in the video.
In this article, we will address how to do motion blur on CapCut with simple steps. So, continue reading this guide to learn an easy and simple way of creating motion blur in your videos.
Part 1: Why Should You Add Motion Blur to Videos?
The motion blur effect changes the perspective of moving objects in a film or video. If you have created an animated video, you must add a motion blur effect to make the movement of objects or characters natural. Moreover, it gives a realistic touch to your videos by describing a particular movement in the video. That’s why adding a motion blur effect in videos is necessary, as, without this effect, the video would look choppy.
To introduce a motion blur effect, you can find multiple tools and video editors. However, if you want to try professional software, CapCut is a trustworthy option. This tool has a pre-made motion blur effect that you can instantly add within seconds. So, if you have already downloaded CapCut, upgrade to its latest version to try its built-in motion blur effect. Continue reading this article to find out about motion blur CapCut.
Part 2: How to Add Motion Blur to Videos on CapCut?
Are you excited to add a motion blur effect using CapCut? CapCut is a popular video editor, especially for TikTok, through which you can execute professional video editing easily. In this section, we will guide you on how to add motion blur on CapCut using your iPhone and Android.
1. On iPhone
CapCut is available on App Store , through which you can easily download it on your iPhone. To add a motion blur effect to your video on iPhone, check the below steps:
Step1 After adding the desired video clip in CapCut, select it and scroll in the right direction until you can locate the “Motion Blur” option. Now tap on “Motion Blur” and increase its “Blur” and “Blend” strength according to your choice. You can also increase the Blend value accordingly.

Step2 Moreover, you can choose the direction and times of the motion blur effect. Once you are done, tap on the “Tick” icon. After some seconds, the motion blur effect will be applied to your video.

2. On Android
Android users can also take benefit from the CapCut app. Once you have successfully downloaded the CapCut app on your Android phone from Play Store , follow the below instructions:
Step1 Open the CapCut app and tap on the “New Project” option. By doing so, upload the video from your phone on its interface.

Step2 After uploading, select the clip and scroll in the right direction. From there, select the “Motion Blur” option and choose “Blur” strength and “Blend” value. You can also select the “Direction” and “Times” values from the options. Once done, tap on the “Tick” option to add a motion blur effect to your video successfully.

Part 3: The Best Alternative to CapCut to Add Motion Blur On Mobile
If you want alternatives to CapCut for creating a motion blur effect flawlessly, this part of the article can help you. You can find the best 3 apps in this section that are capable of generating a motion blur effect easily.
1. Videoleap
Videoleap is a popular editing app that is available for both iOS and Android users. Using this app, you can add text to your videos by selecting the font, color, opacity, and other elements. Moreover, you can add an audio clip to your video effectively using this app. Furthermore, you can also adjust the brightness, saturation, and other components of the video.
Besides being a powerful video editor, you can also use this tool to add a motion blur to your video. You can use its different filters and effects to create a motion blur effect. This tool offers complete customization freedom so that you can generate your preferred effect easily.

Key Features
- This tool offers over 100 different sound effects that you can add to your video for more engagement.
- You can check your final video in full screen comfortably on this tool.
- This video editor also provides multiple creator video templates through which you can create professional videos.
Pros
- This tool offers small tutorials with every feature to provide you with complete guidance.
- You can execute layer-based editing through this app to add effects, videos, images, and other elements efficiently.
Cons
- This tool does not include a built-in motion effect. Thus, you have to create a motion blur effect on this app through customization.
Tutorial: To see and learn how to use Videoleap effectively, you can see a quick tutorial following this link: https://www.youtube.com/watch?v=e7twWHCVT8U .
2. NSMB – Motion Blur Video
NSMB is a special app that can also work offline to add a motion blur effect to your videos. It has a simple interface that allows you to add a motion blur effect to your video instantly. Once you have uploaded the video on this app, you can easily apply the motion blur effect with a single tap.
Moreover, this app does not distort the quality of your video after adding the motion blur effect. Thus, it’s an efficient app that enables you to add a motion blur to your videos without manual effort.

Download: Android
Key Features
- This app easily supports Android 5.0 OS and above.
- It’s a simple and lightweight app that won’t take up storage space on your phone.
- This app has more than 1M downloads which tell its reliability.
Pros
- This app will add the function of ‘Preview,” through which you will be able to see your final results easily.
- You can adjust the strength of the added motion blur using the slider in this app.
Cons
- This app has limited options and does not offer vast features for video editing.
Tutorial: Do you want to learn how to use this app? Here is a simple and easy video tutorial that you can watch to learn how to use this tool: https://www.youtube.com/shorts/Nm%5FxEMQc6zg .
3. Node Video – Pro Video Editor
Node Video is a complete professional tool as it offers various editing features that can help you. You can discover tons of advanced editing tools on this app, such as keyframe animation, pen tool, motion tracker, puppet pin, etc. It also provides 3D renders that can assist you in mapping your videos to 3D models.
It also offers various types of effects and filters that can transform your video effectively. Moreover, you can also add a motion blur effect from this tool to your video within seconds. It has a built-in motion blur effect that can be added instantly without complications.

Key Features
- Apart from the motion blur effect, this tool contains various sorts of other effects such as gaussian blur, radial blur, cross blur, directional blur, etc.
- The rendering speed of this app is extremely fast to provide you with fast results.
- Its advanced features can automatically separate backgrounds and human faces instantly.
Pros
- Using this tool, you can edit the audio in the video clip by changing properties and effects.
- You can modify the color grading of your video by modifying lift, gamma, and gain elements.
Cons
- To continuously use this app, you have to buy its subscription plans.
Tutorial: In this video tutorial, you can find authentic instructions to use Node Video without any hassle. Thus, visit this video link to check the tutorial: https://www.youtube.com/watch?v=z9lq8XXCmss .
Comparison
Apps like NSMB and Node Video work efficiently as they contain built-in motion blur effects. They work similarly to CapCut, as you can easily add a motion blur effect to your videos automatically. However, these apps provide limited options to choose the area and amount of effect. So, if you want to add customization to your videos proficiently, you can try Videoleap.
Conclusion
Motion blur effect can immensely change the dynamic of your professional videos. If you want to instruct about specific movements in your video, the motion blur effect can enhance it easily. In this article, we have shed light on how to do motion blur on CapCut. For more options, we have also provided three alternatives to CapCut for your additional help.
Tutorial: To see and learn how to use Videoleap effectively, you can see a quick tutorial following this link: https://www.youtube.com/watch?v=e7twWHCVT8U .
2. NSMB – Motion Blur Video
NSMB is a special app that can also work offline to add a motion blur effect to your videos. It has a simple interface that allows you to add a motion blur effect to your video instantly. Once you have uploaded the video on this app, you can easily apply the motion blur effect with a single tap.
Moreover, this app does not distort the quality of your video after adding the motion blur effect. Thus, it’s an efficient app that enables you to add a motion blur to your videos without manual effort.
Download: Android
Key Features
- This app easily supports Android 5.0 OS and above.
- It’s a simple and lightweight app that won’t take up storage space on your phone.
- This app has more than 1M downloads which tell its reliability.
Pros
- This app will add the function of ‘Preview,” through which you will be able to see your final results easily.
- You can adjust the strength of the added motion blur using the slider in this app.
Cons
- This app has limited options and does not offer vast features for video editing.
Tutorial: Do you want to learn how to use this app? Here is a simple and easy video tutorial that you can watch to learn how to use this tool: https://www.youtube.com/shorts/Nm%5FxEMQc6zg .
3. Node Video – Pro Video Editor
Node Video is a complete professional tool as it offers various editing features that can help you. You can discover tons of advanced editing tools on this app, such as keyframe animation, pen tool, motion tracker, puppet pin, etc. It also provides 3D renders that can assist you in mapping your videos to 3D models.
It also offers various types of effects and filters that can transform your video effectively. Moreover, you can also add a motion blur effect from this tool to your video within seconds. It has a built-in motion blur effect that can be added instantly without complications.
Key Features
- Apart from the motion blur effect, this tool contains various sorts of other effects such as gaussian blur, radial blur, cross blur, directional blur, etc.
- The rendering speed of this app is extremely fast to provide you with fast results.
- Its advanced features can automatically separate backgrounds and human faces instantly.
Pros
- Using this tool, you can edit the audio in the video clip by changing properties and effects.
- You can modify the color grading of your video by modifying lift, gamma, and gain elements.
Cons
- To continuously use this app, you have to buy its subscription plans.
Tutorial: In this video tutorial, you can find authentic instructions to use Node Video without any hassle. Thus, visit this video link to check the tutorial: https://www.youtube.com/watch?v=z9lq8XXCmss .
Comparison
Apps like NSMB and Node Video work efficiently as they contain built-in motion blur effects. They work similarly to CapCut, as you can easily add a motion blur effect to your videos automatically. However, these apps provide limited options to choose the area and amount of effect. So, if you want to add customization to your videos proficiently, you can try Videoleap.
Conclusion
Motion blur effect can immensely change the dynamic of your professional videos. If you want to instruct about specific movements in your video, the motion blur effect can enhance it easily. In this article, we have shed light on how to do motion blur on CapCut. For more options, we have also provided three alternatives to CapCut for your additional help.
How to Windows Online Movie Maker [Complete Guide]
The likelihood is that video will soon play a significant role in your content marketing approach, if it hasn’t already – and for that using windows online movie maker is inevitable. You are an emerging brand, a sole proprietor, or even a podcaster. Knowing the importance of video marketing to content producers and agencies is second nature if you’re an astute digital marketer It may be costly and challenging to utilize video editing software. Fortunately, there are free online video editors available.
Before very recently, video editing needed highly specialized skills and was done manually using different tools. Windows Movie Maker used to be a standard component of every Windows user’s toolbox and was a highly recommended video editing product for novices. With the windows movie maker online, the application was well-liked for its ease of use and entertaining special effects, but most significantly - it was free. It came pre-installed on all Windows machines. You may do that with the help of our handy list of the top three online video creators.
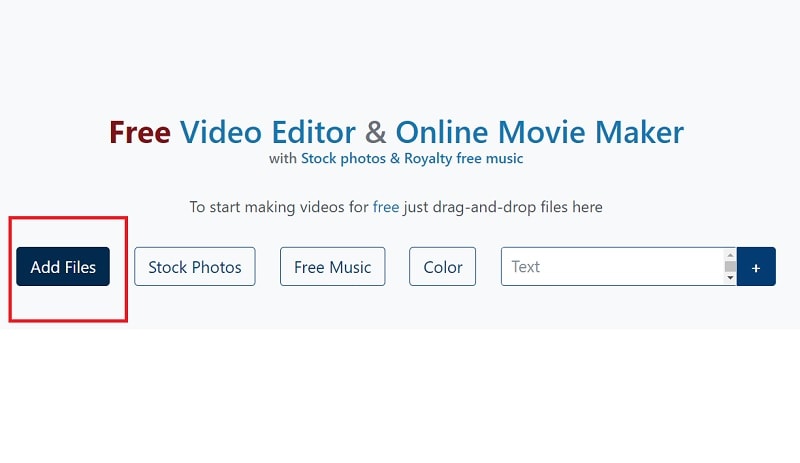
Part 1. How to Make a Video Online [Use Movie Maker Windows Online]
Using the help of Movie Maker, you may create videos online with your browser. It enables you to create professional-caliber videos without having to purchase video editing tools at professional-caliber costs. For every genre and need, this web program includes stock video, animated text, audio tracks, and on-screen effects. Your own video clips are uploaded. Then, use the simple drag-and-drop online video editor in Movie Maker to edit footage and add special effects and music to make your movie shine.
Making fantastic compilation films from your already-existing photographs and videos doesn’t need you to be a skilled editor. Even for amateur video makers, the platform’s UI is simple to use and straightforward to navigate. The customizing choices in Movie Maker are many. You have the option of uploading your own fonts and logos. You may also watermark your films and alter the text’s color. Additionally, there are a ton of very unique components like stickers, vector shapes, and masks that may enhance the visual appeal of your video productions and widen your creative boundaries.
Steps to Make Video with Movie Maker Online
Step1 Go to Movie Maker Online
Using Movie Maker Online, you can quickly and easily make incredibly interesting compilation films using your already-posted photographs and videos. You’ll immediately be sent to the editor, where you can begin organizing your films. Here’s the official link to the toolkit:
Step2 Upload Files to Web
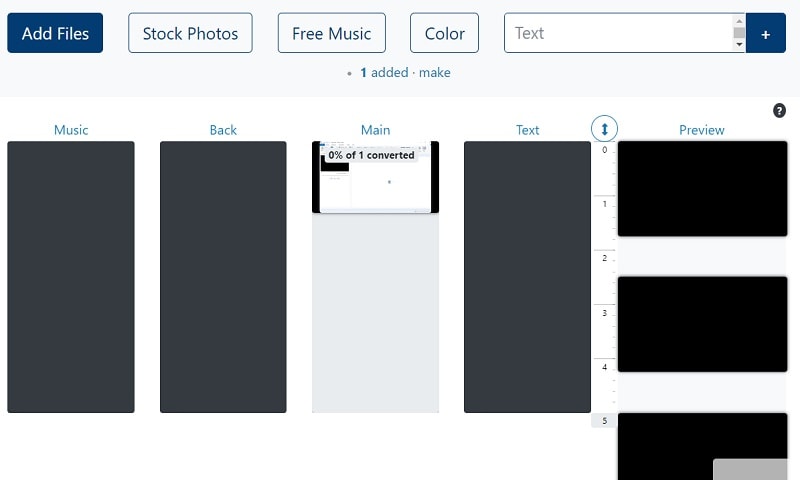
Your photographs, videos, and text may all be uploaded. If you like the default music, you may skip the step to change it; otherwise, you can choose another song from our library or upload your own MP3 file. Files from a variety of sources and devices may be added. Click the Import Media button to start importing your own media. Click Open after locating the video you wish to modify.
Step3 Create an online video
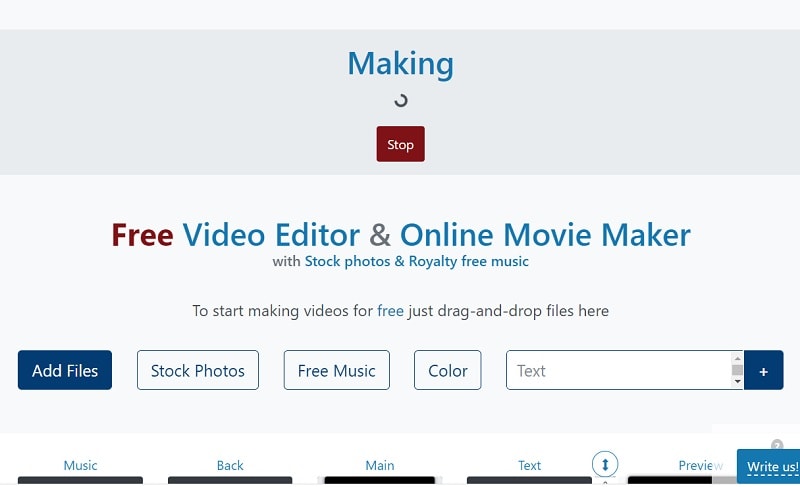
Add your music to your video compilation after all of your clips have been placed on the timeline. To accomplish that, choose a song depending on the genre or mood you want by clicking on the Music option on the left menu panel. To listen to the music track, click the little icon to the left of it. Text, colors, pictures, and video may all be customized to your heart’s delight. Add effects, drag, cut, etc. Press the Make Video button.
Step4 Save and Share with Others
Sharing your films on Facebook, Instagram, YouTube, and other platforms is made effortless. You may also send your loved ones the URLs to your videos. When you are happy with the changes, click the Save & Share option in the upper right corner, choose the quality you want to download your movie in, and then click the Export button. Download the updated video, then post it.
Part 2. Other Windows Online Movie Makers to Use [Top 3]
1. Kizoa
Link: Kizoa
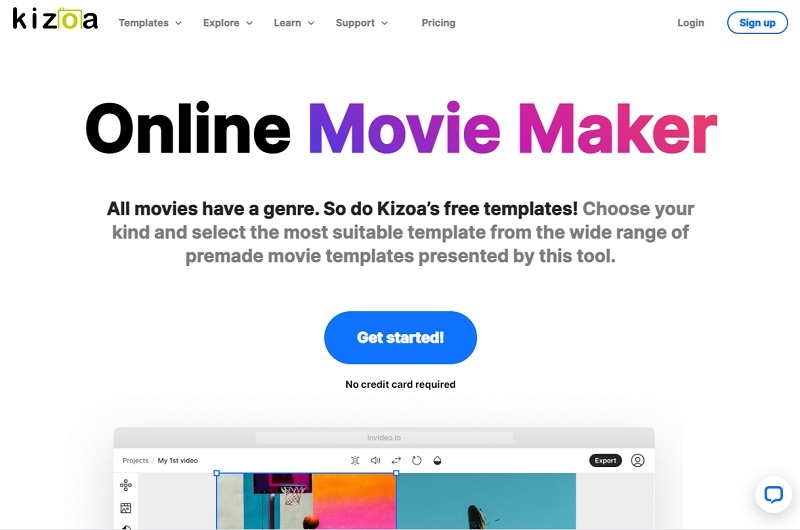
Customizing the appearance of your film is one of the finest ways to make it seem like it is your own. With the Kizoa tool, you may trim, apply a crossfade effect, choose the required resolution, and format for an output video in addition to merging files. Utilize Kizoa’s online video creator to produce eye-catching videos that will hold your audience’s attention. Create any kind of video, from personal family video slideshows to expert films to advertise your company. With the drag-and-drop movie production tool from Kizoa, you can create your very own video in a matter of minutes.
Use a video template as your starting point if you need inspiration. Key framing, animated overlays, noise reduction, transitions, and titles are just a few of the features it provides to help you produce excellent footage. For rapid video editing, there is a video production wizard. Windows Movie Maker’s auto movie themes pale in comparison to those provided by this program. Its extensive collection of stock footage and audio tracks helps you to concentrate on the crucial elements without having to drastically decrease the length of your film or the number of scenes.
2. FlexClip
Link: FlexClip
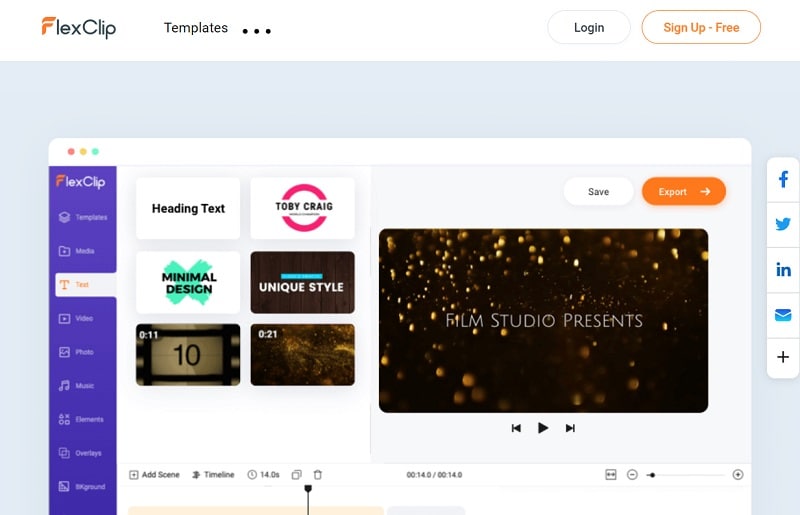
With the aid of the online video effects tool FlexClip, you may quickly and easily make entertaining short films. It has a ton of video editing features that you may use without logging in or creating an account, like merging, compressing, compiling, adding text, creating memes, etc. For those that are muted, you may use FlexClip to add animated text that blends in with the style of your film. Additionally, you may add your logo so that everyone is aware of who created the masterpiece they just saw.
An online video editor called FlexClip is mainly focused on producing high-quality marketing, advertising, and promotional films for companies. Recording a single video that will function on all social networking and video-sharing websites is almost impossible. Instagram, YouTube, and Facebook Marketing are among the partners of FlexClip that have received expert approval. It is used by marketers and enthusiasts to quickly create looping movies and stop motion animation. But as it only provides very basic functionality, it may not be the greatest choice for more intricate, demanding editing.
3. Veed.Io
Link: Veed.Io
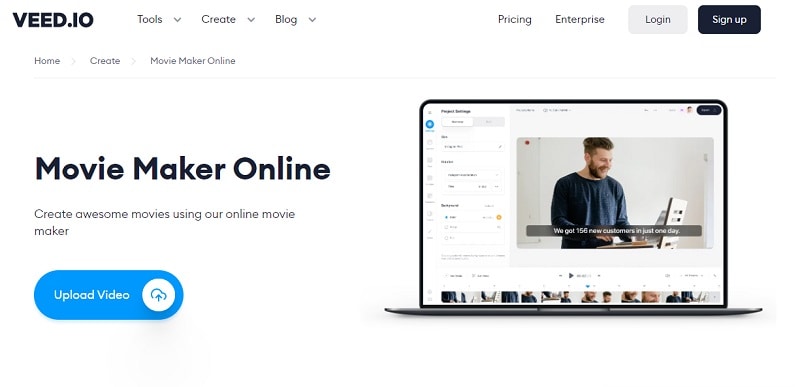
With only a few mouse clicks, users of the browser-based video editing program VEED may create professional-caliber movies. The greatest movie-making tools, including filters, effects, and stickers, are available on VEED. There are no intricate timelines, layers, or intricacy since it is a simple program that runs in your web browser. Simple drag-and-drop functionality is all you need to convey your tales. You may modify your video using its features. Using the video track below, you may combine, divide, or cut your files. Visit our website to see all of our filters, stickers, add-ons, and other tools.
Any device, whether an iPhone or Android phone, a MacBook, a Windows or Linux computer, may use VEED’s online video editor. You have access to all the resources you need to make amazing videos using VEED’s online video editor. Our user-friendly interface is very simple to use and is contemporary and intuitive. The native video sizes on each of the publishing sites, including Facebook, YouTube, and Vimeo, may all be altered using Veed. Finally, click “Export” in the editor’s upper-right corner, and your video will render quickly. Share some!
Conclusion
Use this editing list to produce more compelling video mashups for YouTube and other social media platforms in order to expand your audience, cultivate real connections with them, and eventually increase conversion rates. Because they combine the complex capabilities of the expensive, professional video suites with the user-friendliness and cost that appeal to novices, these online makers are a popular among editors of all skill levels. Make an investment in one of these video editing tools and own it.
Free Download For Win 7 or later(64-bit)
Free Download For macOS 10.14 or later
Part 1. How to Make a Video Online [Use Movie Maker Windows Online]
Using the help of Movie Maker, you may create videos online with your browser. It enables you to create professional-caliber videos without having to purchase video editing tools at professional-caliber costs. For every genre and need, this web program includes stock video, animated text, audio tracks, and on-screen effects. Your own video clips are uploaded. Then, use the simple drag-and-drop online video editor in Movie Maker to edit footage and add special effects and music to make your movie shine.
Making fantastic compilation films from your already-existing photographs and videos doesn’t need you to be a skilled editor. Even for amateur video makers, the platform’s UI is simple to use and straightforward to navigate. The customizing choices in Movie Maker are many. You have the option of uploading your own fonts and logos. You may also watermark your films and alter the text’s color. Additionally, there are a ton of very unique components like stickers, vector shapes, and masks that may enhance the visual appeal of your video productions and widen your creative boundaries.
Steps to Make Video with Movie Maker Online
Step1 Go to Movie Maker Online
Using Movie Maker Online, you can quickly and easily make incredibly interesting compilation films using your already-posted photographs and videos. You’ll immediately be sent to the editor, where you can begin organizing your films. Here’s the official link to the toolkit:
Step2 Upload Files to Web
Your photographs, videos, and text may all be uploaded. If you like the default music, you may skip the step to change it; otherwise, you can choose another song from our library or upload your own MP3 file. Files from a variety of sources and devices may be added. Click the Import Media button to start importing your own media. Click Open after locating the video you wish to modify.
Step3 Create an online video
Add your music to your video compilation after all of your clips have been placed on the timeline. To accomplish that, choose a song depending on the genre or mood you want by clicking on the Music option on the left menu panel. To listen to the music track, click the little icon to the left of it. Text, colors, pictures, and video may all be customized to your heart’s delight. Add effects, drag, cut, etc. Press the Make Video button.
Step4 Save and Share with Others
Sharing your films on Facebook, Instagram, YouTube, and other platforms is made effortless. You may also send your loved ones the URLs to your videos. When you are happy with the changes, click the Save & Share option in the upper right corner, choose the quality you want to download your movie in, and then click the Export button. Download the updated video, then post it.
Part 2. Other Windows Online Movie Makers to Use [Top 3]
1. Kizoa
Link: Kizoa
Customizing the appearance of your film is one of the finest ways to make it seem like it is your own. With the Kizoa tool, you may trim, apply a crossfade effect, choose the required resolution, and format for an output video in addition to merging files. Utilize Kizoa’s online video creator to produce eye-catching videos that will hold your audience’s attention. Create any kind of video, from personal family video slideshows to expert films to advertise your company. With the drag-and-drop movie production tool from Kizoa, you can create your very own video in a matter of minutes.
Use a video template as your starting point if you need inspiration. Key framing, animated overlays, noise reduction, transitions, and titles are just a few of the features it provides to help you produce excellent footage. For rapid video editing, there is a video production wizard. Windows Movie Maker’s auto movie themes pale in comparison to those provided by this program. Its extensive collection of stock footage and audio tracks helps you to concentrate on the crucial elements without having to drastically decrease the length of your film or the number of scenes.
2. FlexClip
Link: FlexClip
With the aid of the online video effects tool FlexClip, you may quickly and easily make entertaining short films. It has a ton of video editing features that you may use without logging in or creating an account, like merging, compressing, compiling, adding text, creating memes, etc. For those that are muted, you may use FlexClip to add animated text that blends in with the style of your film. Additionally, you may add your logo so that everyone is aware of who created the masterpiece they just saw.
An online video editor called FlexClip is mainly focused on producing high-quality marketing, advertising, and promotional films for companies. Recording a single video that will function on all social networking and video-sharing websites is almost impossible. Instagram, YouTube, and Facebook Marketing are among the partners of FlexClip that have received expert approval. It is used by marketers and enthusiasts to quickly create looping movies and stop motion animation. But as it only provides very basic functionality, it may not be the greatest choice for more intricate, demanding editing.
3. Veed.Io
Link: Veed.Io
With only a few mouse clicks, users of the browser-based video editing program VEED may create professional-caliber movies. The greatest movie-making tools, including filters, effects, and stickers, are available on VEED. There are no intricate timelines, layers, or intricacy since it is a simple program that runs in your web browser. Simple drag-and-drop functionality is all you need to convey your tales. You may modify your video using its features. Using the video track below, you may combine, divide, or cut your files. Visit our website to see all of our filters, stickers, add-ons, and other tools.
Any device, whether an iPhone or Android phone, a MacBook, a Windows or Linux computer, may use VEED’s online video editor. You have access to all the resources you need to make amazing videos using VEED’s online video editor. Our user-friendly interface is very simple to use and is contemporary and intuitive. The native video sizes on each of the publishing sites, including Facebook, YouTube, and Vimeo, may all be altered using Veed. Finally, click “Export” in the editor’s upper-right corner, and your video will render quickly. Share some!
Conclusion
Use this editing list to produce more compelling video mashups for YouTube and other social media platforms in order to expand your audience, cultivate real connections with them, and eventually increase conversion rates. Because they combine the complex capabilities of the expensive, professional video suites with the user-friendliness and cost that appeal to novices, these online makers are a popular among editors of all skill levels. Make an investment in one of these video editing tools and own it.
Free Download For Win 7 or later(64-bit)
Free Download For macOS 10.14 or later
Also read:
- New In 2024, In This Article, We Will Discuss What Lens Distortion Is, How It May Be Fixed, and the Factors You Need to Pay Attention to Avoid Lens Distortion when Taking or Recording Videos
- New In 2024, Now, You Can Also Apply the Stranger Things Upside Down Effect to Your Video! This Effect Combines Camera Tricks and Video Editing Within Filmora to Transition From the Normal World Into the Upside Down
- In 2024, Detailed Steps to Resize Video in Davinci Resolve
- New Top 10 Text to Robot Voice Generators Windows, Mac, Android, iPhone
- New How To Quick Guide for Creating Google Slideshows
- Updated Beginners Guide About WMV Format and Best WMV Video Editor for 2024
- Updated 2024 Approved Best Free Slow Motion Apps For Android and iPhone
- Updated In 2024, 10 Best Innovative AR Video Effects to Check Out
- Updated Create Glitch Text Effect for 2024
- New How to Create Discord GIF Avatar in Depth Guide for 2024
- New 2024 Approved Magic Effects Video Making How To
- In 2024, Top GIF to MP4 Converters
- Discover the Ultimate LUTs for Wondershare Filmora Uncover the Answer for 2024
- Top 5 Tips to Freeze-Frame in After Effects for 2024
- Updated 2024 Approved 10 Best Websites to Discover Free Premiere Pro Video Templates
- Updated In 2024, Looking for Simple Steps to Apply Fade in Effect to Your Text in Premiere Pro? Here Are Two Different Methods Along with an Alternative Way to Fade Text in Videos
- Updated Unraveling How the Slow Motion Guys Have Revolutionized The Slow Motion Game
- New In 2024, Here, You Will Get the Basic Steps to Use the Speed Ramping Effect in Your Videos by Wondershare Filmora Software. In This Article, You Get a Guide to Adding the BCC Glitch Effect to Give Your Sports Montages a More Professional Look
- New Discovering The Best Wedding LUTs for Premiere Pro | An Overview for 2024
- New In 2024, How to Convert Videos to Slow Motion? Complete Guide
- Updated Looking for the Simple Steps to Add a Filter to Your Video in Premiere Pro? Here Are the Complete Steps Along with the List of Free Premiere Filter Presets to Use for 2024
- X5 Pro Video Recovery - Recover Deleted Videos from X5 Pro
- In 2024, What Pokémon Evolve with A Dawn Stone For Nokia 130 Music? | Dr.fone
- In 2024, Easiest Guide How to Clone Realme Narzo N53 Phone? | Dr.fone
- In 2024, How to Make the Most of Your Apple iPhone 14 Plus Lock Screen with Notifications?
- In 2024, How Can We Bypass Xiaomi Redmi Note 12 Pro 4G FRP?
- App Wont Open on Your Xiaomi Redmi K70? Here Are All Fixes | Dr.fone
- How Do You Remove Restricted Mode on Apple iPhone 6s | Dr.fone
- In 2024, Top 4 SIM Location Trackers To Easily Find Your Lost Infinix Note 30 Pro Device
- How to Change Lock Screen Wallpaper on Vivo Y36i
- Why Your Motorola Moto G23 Screen Might be Unresponsive and How to Fix It | Dr.fone
- In 2024, Ultimate Guide from Itel S23 FRP Bypass
- Easily Unlock Your Oppo K11 5G Device SIM
- The way to recover deleted photos on Oppo F23 5G without backup.
- Title: New In 2024, How To Add Scrolling Text Effect
- Author: Morgan
- Created at : 2024-05-19 05:12:55
- Updated at : 2024-05-20 05:12:55
- Link: https://ai-video-editing.techidaily.com/new-in-2024-how-to-add-scrolling-text-effect/
- License: This work is licensed under CC BY-NC-SA 4.0.
