
New In 2024, How To Fade Audio In Kinemaster
How To Fade Audio In Kinemaster
If you have been looking for video and audio editing tools then you have probably heard of Kinemaster. It is a great video editing app that allows users to edit all aspects of the video including any audio or music that may accompany the video. It has a lot of very useful features and the user interface is fairly easy to use.
One of the things that you can do with Kinemaster is to fade out audio, a useful feature that can help the ending of any video appear more authentic. In this article, we will be looking at how you can use Kinemaster to fade audio.
Kinemaster Fade Audio Steps
The following steps show you how you can easily fade audio in Kinemaster;
Step1If you don’t have Kinemaster already, start by downloading and installing the video editor on your computer.
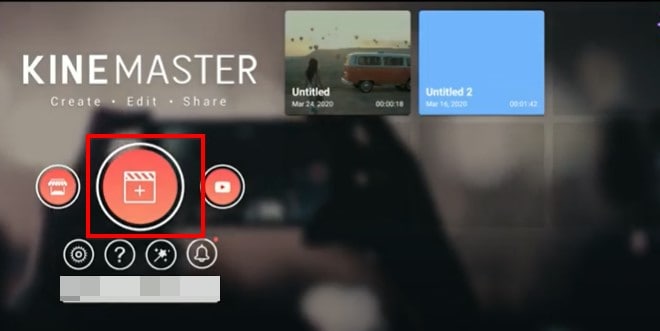
Step2Open Kinemaster on your computer and then click on the “New Project” icon to start. Select the aspect ratio that you would like to use. If you are not sure, we recommend choosing the “16:9” aspect ratio.
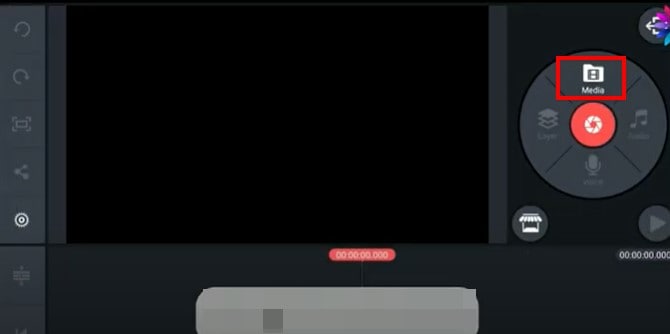
Step3In the next window, click on “Media” to select the clip you would like to add to the Kinemaster project that you have just created.
Step4To fade in and fade out the audio in the project, click on the gear icon from the options to the left of the screen.
![]()
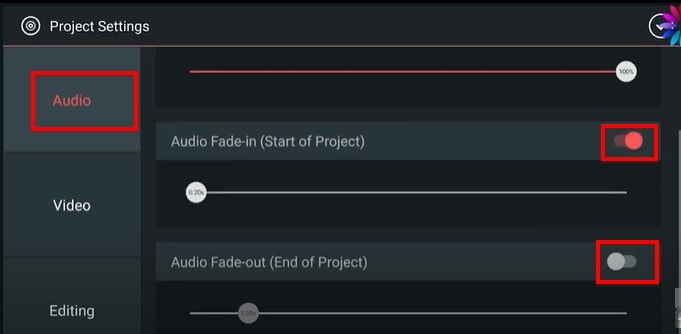
Step5Select the “Audio” tab on the next screen and then turn on the switch next to “Audio Fade-in (Start of Project)” and “Audio Fade-out (End of Project).” This will add a fade-in and fade-out effect at the beginning of the audio and at the end of it.
Step6You can then easily set the duration of the “Audio fade-in” and “Audio fade-out” by dragging the slider below each option. We recommend setting the duration to just a few seconds.
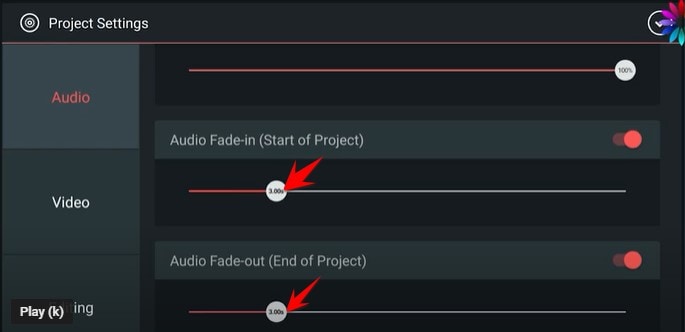
Don’t forget to save the project when you’re done.
Kinemaster Alternative to Edit Audio
Kinemaster is a good way to edit both audio and video on your computer, but the following options are just as good;
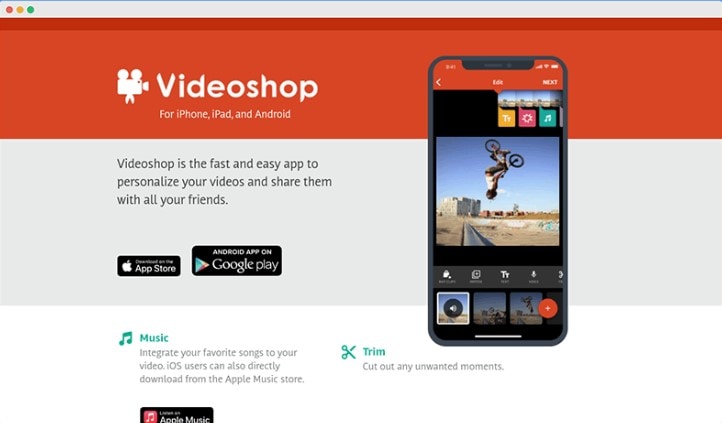
1. VideoShop
VideoShop is a simple to use and highly effective program that you can use to create and edit videos on your computer. The interface makes it easy to import any video project that you have into the program and the wealth of very useful features can help you edit the video in various ways.
For example, you can change the speed of the video, add transitions at various points in the video, add and remove text, add and remove music and so much more. Although there is a free trial version, you will only be able to access some of the more useful features when you purchase the premium version.
The Pro version of VideoShop goes for $3.99 a month, but you can get lifetime access to the program for only $39.99. One thing that VideoShop has over Kinemaster is that it is very easy to use, even beginner users find video editing a breeze with this tool.
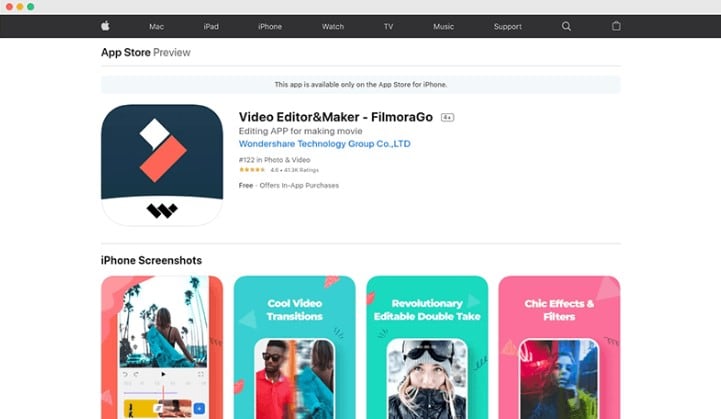
2. Filmora
If you are looking for a simple way to edit videos on Android or iOS devices, Filmora is one of the best options in the market. This mobile version of the very popular Filmora video editor is just as easy to use as its parent program. You can use it to create video projects from scratch or upload a video and make changes to it.
It offers you a lot of choices when it comes to editing features including trimming sections of the video, adding filters, adding music, adding or removing text, and even changing the canvas or the background of the video. Advanced options such as changing the speed of the video are also available.
One of the things that we love about Filmora is that you don’t even have to create an account to use it or remove the watermark added to the completed video project, watching a video ad can be enough. But this option is only available once every 24 hours, meaning that you can only remove a watermark on the free version once a day. Filmora is available for both iOS and Android and the yearly premium plan will cost you just $19.90.
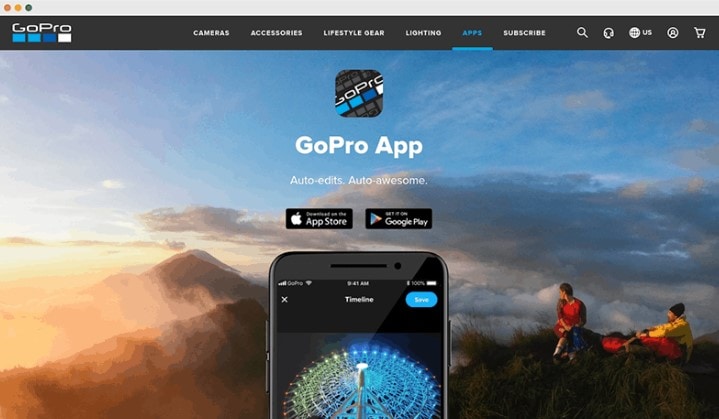
3. Quik
Quik is a video editing program created by GoPro for the purpose of editing GoPro videos, but that doesn’t mean that you will not be able to use it to edit other types of videos. You can use Quik to create a new project or edit an existing video and gives users a lot of different options when it comes to video editing.
One of the main benefits of using Quik is that you can easily add music, audio, and special effects to a video as well as change the length of the video, fade audio in and out and even change when the music starts. It is also one of the best ways to use images to create collages and slideshows very easily. There are a lot of slideshow and collage templates to choose from, and you can edit them easily by adding your music and images. Quik is completely free to use and you can upload your creation to the cloud ad share the link with others.

Conclusion
Kinemaster is one of the most popular video editing tools, especially since it simplifies the video editing process to make it very easy. All the alternative tools we have outlined here in this article are selected because they can make video editing quite simple.
Free Download For Win 7 or later(64-bit)
Free Download For macOS 10.14 or later
Best Frame Rate for 4K Video
People in the videography ad filmmaking world use complicated terminology like Ultra High Def to describe 4K videos. Even though you are not a complete stranger to the term 4K, you might still be unaware of what it means.
In a nutshell, 4K is the highest resolution you can watch your movies and videos. The details are incredibly crisp, meaning you can see pimples or the pores on an actor’s face through the screen. However, the frame rate will significantly affect how you enjoy a 4K video. Therefore, it would be wise to learn how to choose the ideal frame rate to suit your needs.
Keep reading this article to learn more about frame rates and which is suitable for a 4K video.

How Do Frame Rates Affect Video Viewing?
The motion will appear smoother if your video contains more frames per second. Even though your viewers are not tech-savvy, they will definitely notice the difference.
Consider a video of a duck drinking water from a pond. If you film and playback the same video in 24, 30, and 60fps, you will see a noticeable difference, assuming your shutter speed is set according to the 180-degree shutter rule.
If you are filming quicker motions of wildlife and birds, you are better off sticking to higher resolutions to give the viewer a pleasant experience and ensure the motion is fluid.
On the other hand, lower frame rates like 24fps are ideal for human movements, which are not as smooth as wildlife. Suppose you used 60fps for a cinematic film or a TV show. The video would look a bit odd because that is not how we see things in the natural world. In addition, your viewers aren’t used to such smoothness.
Viewing Requirements of 4K Videos
You may have heard about 4K videos and wondered what people mean by that term. In simple terms, a 4K video is a high-resolution video that is four times the usual 1080p HD video. When it comes to 4K videos, there are two standard resolutions. One of them is the standard for Digital Cinema which is 4096*2160 pixels. The other is for television and is 3840*2160 pixels.
To stream 4K content, you need a bandwidth between 10 and 20 Mbps. On the other hand, streaming platforms like Netflix require higher bandwidths of not less than 15 Mbps. In addition to the bandwidth we mentioned earlier, you need a 4KTV or 4K monitor.
This specification was brought up at the UHD Alliance, a union of more than 50 tech companies working together to support 4K content. Tech companies ought to ensure the devices they produce are compatible with 4K videos, which are becoming increasingly popular.
Below is a list of requirements any electronic device should fulfill before being termed a 4KTV or 4K monitor.

- A resolution of not less than 3840*2160.
- A 10-bit color depth that allows for 1,024 shades of red, yellow, and blue.
- A high dynamic range for color accuracy.
- An excellent combination of black level and peak brightness. The peak brightness should not exceed 1,000 nits, and the black level shouldn’t go below 0.5 nits. Alternatively, the peak brightness shouldn’t exceed 540 nits; neither should the black level plummet below 0.0005 nits.
Best Frame Rate for 4K Video
We all know that the frame rate you choose for your video will significantly impact the viewer’s experience and the overall style of your video. The frame rate will also affect how the video looks. For instance, a frame rate lower than 24fps will make your video look unprofessional and of poor quality. The content will also flicker because there aren’t many still images per second.
On the other hand, a lower FPS causes the file size to be smaller, causing it to consume a lower bandwidth. The vice versa is also true. Now that you understand these facts, you might wonder which frame rate would be best for your 4K videos.
Research reveals that the most acceptable frame rate is 30fps and 60fps. This is because the motion will appear natural to the human eye without being too fast or unrealistic.
If you are wondering what is the best frame rate for 4k videos, we urge you to select 60fps because it contains more detail. The higher frame rate also makes the motion look very smooth and crisp. Perhaps you want to shoot a slow-motion video. In that case, an even higher frame rate of 120fps would be ideal.
How To Choose The Base Frame Rates for Your Next Video
Choosing a frame rate for your videos is not complicated. However, it is not a straightforward process either. There are numerous moving parts that ought to work harmoniously for your video to turn out perfect and guarantee your audience will have a pleasant viewing experience. Before we dive into choosing the best frame rate for your 4K videos, let’s help you understand the filmmaking process.
Most filmmakers and videographers see it fit to shoot videos in 120p or 4K. This step makes their work easier during the editing process. If the raw footage is in 4K, they can de-emphasize or retain specific plot points that would look great in the final video. However, not everyone is shooting a video for Hollywood. Therefore, shooting in 4K on your laptop for your YouTube channel might be difficult.
Below are some factors you should consider when choosing the best frame rate for a 4k video.

File size
Shooting your video at a higher frame rate means more still images are packed into a single second of the video. Therefore, you will end up with a larger file size. If you want to shoot a video for your YouTube channel, it would be wise to stick to a smaller frame rate.
Purpose
It wouldn’t make sense to shoot a talking head video at more than 24fps. However, a higher frame rate would be ideal for a travel vlog, where the details need to be crisp.
Medium of delivery
The standard frame rate for television is 24fps. On the other hand, it would be best to stick to a higher frame rate of 60fps if you intend to shoot content for the silver screen.
Motion in the video
Lastly, the movement within the video will play a massive role in the frame rate you choose. The faster the motion, the higher the frame rate needs to be. For instance, action movies don’t do well in frame rates of less than 60 fps.
How To Set the Frame Rate of Your Editing Tools
Even though you didn’t use the ideal frame rate for 4k video during filming, you could use an editing tool to tweak the frame rate to where you need it to be. In our opinion, Wondershare Filmora is an excellent editing tool to set the ideal frame rate and take your videos to the next level.
Wondershare Filmora is a feature-rich platform that takes the tedium out of editing your videos and makes the outcome look spectacular. People won’t believe you when you say you edited the video yourself!
The platform is user-friendly, eliminating the need for a learning curve. You also don’t need to be an experienced editor or graphic designer to use this platform. Here is a list of nifty features you might find helpful on this platform.
- GIF support
- Audio equalizer
- Advanced text editing
- Noise removal
- Scene detection
- Audio mixer
- Color tuning
Out of all the wonderful features mentioned above, we will zero in on 4K editing support for now. You can use this feature to edit and export videos up to 4K without breaking a sweat.
Free Download For Win 7 or later(64-bit)
Free Download For macOS 10.14 or later
Wondershare Filmora allows you to customize your 4K videos by zooming in on a particular scene, tilting the video, or incorporating panning to give it a serene effect. We guarantee you will have fun using this platform and will get better at creating exquisite 4K content for your channel.
Below is a simple guide on using Wondershare Filmora to set the 4k video frame rate.
Step1 Launch the platform on your device and select the “File” tab. After a drop-down menu appears, select “Project Settings.”

Step2 In the dialogue box, select “Frame Rate” and choose the frame rate you think is ideal for your video.

Step3 Click “OK” and edit the videos as you like.
Conclusion
4K is the trend of the era, and it would be a shame if you got left behind. The viewer’s expectations are rising steadily, and they would rather skip your video to watch another if the quality is not up to par. In addition to giving you a competitive edge, 4K videos are very crisp and allow you to enjoy deep, vibrant colors.
You can also capture still photos from the video without compromising on quality. We can go on and on about the benefits of adopting 4K resolution in your videos. Therefore, it would be wise to increase your knowledge base and learn everything there is to know about 4K videos and how to set the best frame rates.
Free Download For macOS 10.14 or later
Wondershare Filmora allows you to customize your 4K videos by zooming in on a particular scene, tilting the video, or incorporating panning to give it a serene effect. We guarantee you will have fun using this platform and will get better at creating exquisite 4K content for your channel.
Below is a simple guide on using Wondershare Filmora to set the 4k video frame rate.
Step1 Launch the platform on your device and select the “File” tab. After a drop-down menu appears, select “Project Settings.”
Step2 In the dialogue box, select “Frame Rate” and choose the frame rate you think is ideal for your video.
Step3 Click “OK” and edit the videos as you like.
Conclusion
4K is the trend of the era, and it would be a shame if you got left behind. The viewer’s expectations are rising steadily, and they would rather skip your video to watch another if the quality is not up to par. In addition to giving you a competitive edge, 4K videos are very crisp and allow you to enjoy deep, vibrant colors.
You can also capture still photos from the video without compromising on quality. We can go on and on about the benefits of adopting 4K resolution in your videos. Therefore, it would be wise to increase your knowledge base and learn everything there is to know about 4K videos and how to set the best frame rates.
How to Add Filter to Video Online
When you record a video with your phone camera, digital camera, or even webcam, the color scheme in the video can differ depending on the surrounding light. If it differs a lot from the natural color scheme, it can affect the viewing experience of the audience negatively. That is why color correction is an essential part of video editing, and that is where video filters can be handy. You do not need a dedicated video editor application to add video filters as you can you can put filter on video online.
Video filters can correct color imbalances and make the video have consistent colors. For example, if you had recorded a video when the sun was setting, you can use a high saturation video filter to make the video color more vivid. You can even set the mood of a video with video filters so that the audience can get the exact emotion you want to portray through your video. We will illustrate the different ways on how to add filter to video online instantly.
Way 1. Use Clideo Filter Editor
Clideo Filter Editor is one of the fastest video editors that you can apply filters to your videos instantly. There is a wide range of different presets to apply temporarily and compare. Therefore, you can choose the best video filter and save your modified video. The user interface is super intuitive for everyone.
The platform is completely secure for uploading and editing videos, and you can upload videos in different file formats. You can use Clideo Filter Editor on your web browser from your Mac, Windows PC as well as smartphone. Here are the steps to add video filters online using Clideo Filter Editor.
Step1Open your web browser and visit “clideo.com/filter-video”.
Step2Click on Choose File button to upload your video from your hard drive. You can also upload video from Google Drive and Dropbox.

Step3After successful uploading, you will see the video filters on the right side of your video. Apply them one and one while playing your video so that you can see the changes in video color scheme instantly.

Step4Finalize a video filter to apply to your video and click on Export to save the modified video on your hard drive on any desired file format.

Way 2. Veed.io Video Filters
If you are looking for some stunning video filters to use on your video, Veed.io Video Filters is the best online platform. You can add filter to video online free, and the platform supports several video file formats. You will find color grading filters as well as effects to apply to your video and get the desired outcome. If you are going to upload videos to social media, you should definitely use Veed.io Video Filters to make your videos feel unique. Here are the steps on how to add filter video online using Veed.io Video Filters.
Step1Open your web browser and visit “veed.io/tools/video-filters”. Click on Get Started button.

Step2On the next screen, click on Browser or drag and drop your video file for adding video filters.

Step3After the video file gets uploaded, you will see Filters on the left side of the video. There are two different tabs – Color Grading and Effects available where there are different video filters available to apply to your video.

Step4Click on the filters to see how they look on your video instantly. Once you have selected a filter for the video, click on Export button to save the edited video in desired file format.

Way 3. Clipchamp Video Filter Editor
Clipchamp video filter editor has a wide range of beautiful video filters to enhance your video instantly. You can correct any color imbalance as well as set any required tone to your video. Starting from Outdoor and Portrait to Indoors and Muted, all the popular professional video filters can do the magic to your video. You can also save the edited video in different video resolution and file format as per your requirements. Here are the steps on how to add filter video online using Clipchamp video filter editor.
Step1Open your web browser and visit “clipchamp.com/en/video-filters-editor”. Click on Create with video filters now button.

Step2You have to sign up on the next screen so that you can apply the video filters.
Step3Once the video editor opens, click on Create a Video button.

Step4Drag and drop your video on the video editor and thereafter on Timeline.

Step5Click on Filters option located at the top and you will see a drop-down containing all the filters. Place your mouse pointer on the filters one by one to see how they look on your video instantly.

Step6Finally, click on the selected filter and click on Export button to save the edited video.

Way 4. FlexClip Video Filter Editor
FlexClip has a collection of online tools to edit your video instantly without installing any video editor application. FlexClip Video Filter Editor has over 20 popular video filters to apply to your video on the go. You can change the video outlook, and the platform supports different types of video file formats. You can add filter to video online free, and there is not going to be any watermark on your edited video. Here are the steps on how you can add filter to your video using FlexClip video filter editor.
Step1Open your web browser and visit “flexclip.com/tools/filter-video”.
Step2Drag and drop your video to the free video filter editor online.

Step3After successful uploading, you will see all the video filters on the left side.

Step4Click on the video filters one to one to apply them to the video and see which one suits the best. You can adjust the intensity of the filters as per your preference.

Step5Once you have applied a filter and you can satisfy with it, click on Export button to save the edited video.

Way 5. Kapwing Filter Video Editor
Kapwing is a popular online video editor, and you can add video filters to your recorded video for free. Kapwing Filter Video Editor works on all devices, and you can access it from any popular web browser. You can upload recorded video as well as paste URL of an online video stored in Google cloud platform to apply video filters. The preset filters enhance video quality starting from colors and saturation to brightness and contrast. You can also share them on social media platforms directly from Kapwing video editor. Here are the steps how to put filter on video online using Kapwing filter video editor.
Step1Open your web browser and visit “kapwing.com/tools/filter-video”. Click on Choose a video button to get started.

Step2Once Kapwing video editor opens, drag and drop your video to upload on the platform. You can also paste video URL from Google Drive or Google Photos.

Step3Click on the video and on the right side, go to Edit tab and click on Filters under Video section.

Step4You will see a host of video filters that you can apply to your video. Click on them to check them out. You can also customize the video filter by going to Adjust tab.

Step5Select the best one and click on Apply Filters button. Finally, click on Export Project button to save the edited video.

Conclusion
If you want to apply video filters to your recorded video in order to enhance the video outlook and adjust the color balance, you can use video filter editors online. We have illustrated five different ways on how to add video filters online for free. Each one of them has different sets of video filters. If you are looking for a dedicated video editor desktop application, we recommend Wondershare Filmora .
Free Download For Win 7 or later(64-bit)
Free Download For macOS 10.14 or later
Free Download For macOS 10.14 or later
2 Methods to Crop a Video in VLC
Want to crop your videos but don’t know how to start?
A video editor needs to know how he can crop his videos. There is a way to do this using the VLC that is installed in your computer. This guide will teach you a simple way to get what you want. This might appear as complicated at first sight but it will be shown to you in a digestible way. An alternative way would be to use Wondershare Filmora. You will also be guided on how to use this software to crop your videos. Don’t worry and just take it one step at a time.
Method 1: Cropping a Video using VLC
Have you ever heard of the VLC media player? If not, you can browse through it online and install it on your computer. Aside from watching content, you can also crop videos with it. Cropping is a way to remove spaces that you would not want to be included on your video.
Find the software on your computer and don’t be overwhelmed by the interface.

Then click the Media and select Open File to choose the video that you want to crop. You should prepare the videos that you want to be cropped and rename them to avoid confusion.

Click the Tools on the menu and select the Effects and Filters.

After that, click on the Video Effects and under that select Crop. Doing this, will open the cropping editor.

You need to enter specific pixels on the left, right, top and bottom. This will depend on your preferences. If it is your first time and you don’t know the exact pixels then just input what you think would be enough.

After entering your preferred pixels, you can preview it. If you would like to adjust then just simply repeat entering the specific pixels.

You decided to save the cropped video. Find the Tools menu and select Preferences.

Find the Show settings and click All. In the search bar type Croppadd then save your previous preferred pixel settings. Lastly, click Save.

In the Media menu select the Convert/Save. You can drag and drop the cropped video to the File box.

You can select your file format and codecs by clicking Convert/Save.

Find the Edit Selected Profile and click the Video Codec. Then under the Filters tab, select the Video cropping filter. Finally, click Save.

In the Destination file select where you want it to be saved.

Then click Start.

Congratulations on getting here! You finally cropped your video using the VLC media player.
Although there are disadvantages to using this as your cropping tool. Like for example you want the real-time preview of what you’ve changed in your video. This would be a turn off for some that want their outputs to be shown to them immediately. Aside from this, there is a chance that you will forget one step to make and thus, the whole process would need to start over from scratch. Lastly, is the freedom to batch crop multiple videos. This is especially important for those that need to have many clips in one video. A user might lose the continuity of the story within his video.
While one of its strong suits is the affordability of the software. It is completely free and has no additional charges that may surprise you in the future. Finally, your output won’t have watermarks that could destroy the aesthetics of your video.
What are your experiences with using it as a cropping tool? What would you recommend to improve it? It is up to you the user if you want to continue using this as your partner in removing the excess in your videos.
Method 2: Cropping a Video using Wondershare Filmora
Have you heard of an editing tool called Wondershare Filmora Video Editor ? What are your first impressions of this software? You can download this for free by going to the official site.
For Win 7 or later (64-bit)
For macOS 10.14 or later
Wondershare Filmora is a useful editor that can help you produce the content that you want. It is packed with beneficial tools that you can learn to apply. If it is already installed on your computer then proceed to opening it.

Prepare your videos that you need to crop. You can drag and drop your video or click the Import.

Select the video clip that you want to crop. Then, click the Crop tool and choose if you want the Crop or Pan & Zoom.

You can also right click the video clip .Under the Video tab you can select the Crop and Zoom or Crop to Fit then adjust to your preferred ratio.

One of the advantages of Filmora is you can preview what you have cropped immediately. This will greatly help you if you’re not sure what kind of crop that you want. If you’ve thought that you made a mistake then a simple Undo button could fix it. In short, you’re not going through the gruesome process of starting all over again. You can also do the batch cropping of multiple videos helping you ensure the smoothness of flow in the final output.
Although the Filmora is not free, there is a trial that you can use to test it to check if this video editor would meet your needs. It has tools that a beginner to expert video editor could use to produce high quality videos that would make the audience think that it was life from the movies.
The Bottom Line
The journey of exploring different options would help you make the decision. Both VLC media player and Wondershare Filmora have their great features which would aid the user to crop his videos in an efficient way. What are your thoughts on each of them? As an individual you have varied needs that a video tool should meet.
After reading this, you’ve had a clearer view of what these video softwares offers. Did this guide help you decide which would fit your needs as a video editor? What are your suggestions for improvement?
You could share with us the tips and tricks you know on cropping videos using these applications.
Then click the Media and select Open File to choose the video that you want to crop. You should prepare the videos that you want to be cropped and rename them to avoid confusion.
Click the Tools on the menu and select the Effects and Filters.
After that, click on the Video Effects and under that select Crop. Doing this, will open the cropping editor.
You need to enter specific pixels on the left, right, top and bottom. This will depend on your preferences. If it is your first time and you don’t know the exact pixels then just input what you think would be enough.
After entering your preferred pixels, you can preview it. If you would like to adjust then just simply repeat entering the specific pixels.
You decided to save the cropped video. Find the Tools menu and select Preferences.
Find the Show settings and click All. In the search bar type Croppadd then save your previous preferred pixel settings. Lastly, click Save.
In the Media menu select the Convert/Save. You can drag and drop the cropped video to the File box.
You can select your file format and codecs by clicking Convert/Save.
Find the Edit Selected Profile and click the Video Codec. Then under the Filters tab, select the Video cropping filter. Finally, click Save.
In the Destination file select where you want it to be saved.
Then click Start.
Congratulations on getting here! You finally cropped your video using the VLC media player.
Although there are disadvantages to using this as your cropping tool. Like for example you want the real-time preview of what you’ve changed in your video. This would be a turn off for some that want their outputs to be shown to them immediately. Aside from this, there is a chance that you will forget one step to make and thus, the whole process would need to start over from scratch. Lastly, is the freedom to batch crop multiple videos. This is especially important for those that need to have many clips in one video. A user might lose the continuity of the story within his video.
While one of its strong suits is the affordability of the software. It is completely free and has no additional charges that may surprise you in the future. Finally, your output won’t have watermarks that could destroy the aesthetics of your video.
What are your experiences with using it as a cropping tool? What would you recommend to improve it? It is up to you the user if you want to continue using this as your partner in removing the excess in your videos.
Method 2: Cropping a Video using Wondershare Filmora
Have you heard of an editing tool called Wondershare Filmora Video Editor ? What are your first impressions of this software? You can download this for free by going to the official site.
For Win 7 or later (64-bit)
For macOS 10.14 or later
Wondershare Filmora is a useful editor that can help you produce the content that you want. It is packed with beneficial tools that you can learn to apply. If it is already installed on your computer then proceed to opening it.
Prepare your videos that you need to crop. You can drag and drop your video or click the Import.
Select the video clip that you want to crop. Then, click the Crop tool and choose if you want the Crop or Pan & Zoom.
You can also right click the video clip .Under the Video tab you can select the Crop and Zoom or Crop to Fit then adjust to your preferred ratio.
One of the advantages of Filmora is you can preview what you have cropped immediately. This will greatly help you if you’re not sure what kind of crop that you want. If you’ve thought that you made a mistake then a simple Undo button could fix it. In short, you’re not going through the gruesome process of starting all over again. You can also do the batch cropping of multiple videos helping you ensure the smoothness of flow in the final output.
Although the Filmora is not free, there is a trial that you can use to test it to check if this video editor would meet your needs. It has tools that a beginner to expert video editor could use to produce high quality videos that would make the audience think that it was life from the movies.
The Bottom Line
The journey of exploring different options would help you make the decision. Both VLC media player and Wondershare Filmora have their great features which would aid the user to crop his videos in an efficient way. What are your thoughts on each of them? As an individual you have varied needs that a video tool should meet.
After reading this, you’ve had a clearer view of what these video softwares offers. Did this guide help you decide which would fit your needs as a video editor? What are your suggestions for improvement?
You could share with us the tips and tricks you know on cropping videos using these applications.
Also read:
- [New] 2024 Approved Integrating iMovie Productions Into YouTube
- [New] Audio Quality Boost for Skype Calls
- [Updated] TinyFlicker Log Capture & Competing Tools for 2024
- 2024 Approved Create the Stranger Things Upside Down Effect Video
- A Step-by-Step Guide to Overcoming Cannot Find Gpedit.msc
- Enhanced Engagement: Charting the 10 Paths to Better GPT
- How to Fade in Text in Adobe Premiere Pro
- New 2024 Approved 11 Tips to Make Product Ad Videos
- New Want to Apply a Filter on Your Video Using Your iPhone or Mac? Here Are the Simple Steps to Put Add Filters on iMovie. Find Out a Better iMovie Alternative with More Filters
- No More Failures - Display Settings Now Safe
- Solutions for When Your Apple Watch Touch Screen Fails to Respond
- The Intersection of Real and Virtual Defining Mixed Reality
- Title: New In 2024, How To Fade Audio In Kinemaster
- Author: Morgan
- Created at : 2024-09-23 18:44:00
- Updated at : 2024-09-30 21:47:18
- Link: https://ai-video-editing.techidaily.com/new-in-2024-how-to-fade-audio-in-kinemaster/
- License: This work is licensed under CC BY-NC-SA 4.0.