
:max_bytes(150000):strip_icc():format(webp)/ps5controller-0d702b25f7fa47b482999811cfc7af39.jpg)
New In 2024, How to Make Stunning Glitch Effect in Photoshop? Ultimate Guide
How to Make Stunning Glitch Effect in Photoshop? [Ultimate Guide]
Many of us are fascinated by glitch art. The aesthetic effect it adds to your content is unmatched. You can add color and class to your pictures with glitch picture effects. Someone who isn’t aware of the glitch effect is inspired by any technical mishap or digital error. The damage that the malfunctioning of a system causes is used as an art and an effect to beautify things.
You can add the glitch image effect to your photos easily. There are multiple cool templates available on the internet that could be used. You can also make your own stunning yet customized glitch effect Photoshop. If this has impressed you, then stay here because we will talk a lot about glitch photo editors.
In this article
01 Part 1. How Do You Do Photo Glitch Effect in Photoshop?
02 Part 2. 5 Awesome Glitch Effect Photoshop Actions.
Part 1. How Do You Do Photo Glitch Effect in Photoshop?
The jagged lines, the colorful pixels, frozen visuals, and also the distorted colors, everything perfectly blends to make a glitch effect. Usually, this is how all the glitch templates are, but if you get an opportunity to customize your image glitch effect and make your special effect, what will you do?
The best option to adopt in any such circumstances is Photoshop. With Photoshop, you can create a stunning and mind-blowing Photoshop VHS effect. If you want to learn about its steps, then continue reading.
Step 1: The process starts by importing the image to Photoshop on which you plan to add the photo glitch effect. Then you should always convert the image from colorful to black and white. This could be done quickly by going into the ‘Image’ menu from the menu bar. Next, go for the ‘Adjustments’ option and select ‘Desaturate.’

Step 2: Now duplicate the image by dragging it onto the New Layer icon in the Layers Panel. Then double click on the duplicated image. This will open a ‘Layer Style’ settings menu. Here, click on the icon for ‘R Channel’ and deselect it.

Step 3: Now, it’s time to add the first glitch element. For that, hold the ‘Shift’ key and move the image by using the left/right cursor keys on the keyboard. This will offset the image layer from the original.

Step 4: You can now select the ‘Mark’ tool from the left side. Make a rectangle anywhere on the image with the Mark tool and then switch back to the ‘Move’ tool. Then again, nudge the rectangular portion left or right to offset it. You can repeat this process multiple times on different areas of the image.

Step 5: At this point, make a New Layer and fill it with White. Now right-click on this white layer and select the option of ‘Convert to Smart Object.’

Step 6: Move to the menu bar at the top and go to the ‘Filter’ section. From there, select the option of ‘Filter Gallery.’ A new window will show up. Head to the ‘Sketch’ category, and there change the ‘Pattern Type’ to ‘Line.’ You can also play with the ‘Contrast’ and the ‘Size’ of the lines.

Step 7: Now, in the ‘Layers Panel,’ select the option of ‘Overlay’ from the dropdown menu so that the different layers can show through. You can adjust the visibility of the lines by adjusting the number on the scale.

Step 8: After setting everything for the glitch effect in your image, you can now add colors using the ‘Gradient Map.’ Or you can also import some graphic textures to Photoshop and add them to the image. Don’t forget to change the ‘Binding Mode’ to ‘Overlay.’ You can then play with the color and graphic settings.

Step 9: Once all the color adjustments have satisfied you, it’s time to add some text to your glitch image. For that, head to the ‘Text’ tool from the left menu and type in your text. Edit it as you did to your image so that you can make a cool glitch text effect Photoshop and with this, you are all done with making the most stunning glitch effect Photoshop.

Part 2. 5 Awesome Glitch Effect Photoshop Actions
With Photoshop, you can create your photo glitch effect as you prefer instead of using the available standard templates. What if you don’t have enough time to create the effect? Are you going to use the basic and standard templates?
If you are looking for some jaw-dropping glitch picture effects rather than using the basic effects, then this section of the article is perfect for you. We are going to talk about 5 fantastic glitch effects Photoshop action.
1. Distorted Glitch Photoshop Action
The first effect we will discuss is Distorted Glitch Photoshop Action. The effect is very easy to use. You can set it with just one click action. The effect allows you to do adjustment settings with very easy steps to edit it.
The effect has all the dark, distorted, and disturbance-related elements that make it an amazing effect to add glitch effect to image.

2. Geometric Glitch Photoshop Action
If glitch effect with lines is too mainstream for you, then this next effect will surely impress you. This effect is the Geometric Glitch Photoshop Action. You can edit this effect. All its colors, layers, and even elements are fully editable.
You can create a modern yet professional glitch image with this stunning effect. The effect lets you add shapes, abstract styles, and also glitch lines to make cool images.

3. Animated Glitch Photoshop Action
If you are looking for a glitch effect to add to animated content, then nothing is better than Animated Glitch Photoshop Action. The effect template is fully editable with 12 distinct color options. The animated effect has a very organized structure of layers, color coding, etc.
By using this effect, you can add a great vibe to your image. The template greatly shows the distortion, digital error, etc. You can play around with RGB to make it look crazy brilliant.

4. Futuristic Photoshop Action
The next effect in line to be discussed is Futuristic Photoshop Action. This effect has all the bright and neon colors. The effect could be added easily to your images regardless of the type of your content. Graphic designers and photographers use the Futuristic Effect to create stunning and professional glitch images.

5. Glitch Art Photoshop Action
The last effect template that we are going to shed light on is Glitch Art Photoshop Action. The effect is fully editable with 10 different abstract elements. The template has absolutely professional results. The effect delivers complete glitchy vibes.
The distortion, the abstract elements, the digital error, and everything else in effect represents all the glitchy vibes.

Final Words
This article is everything one person needs if they want to learn about glitch effect Photoshop. We have talked about creating a jaw-dropping glitch effect in Photoshop. The steps to create a stunning glitch effect have been mentioned above.
We then shared 5 incredible glitch effects that could be used in case you don’t want to create your own effect.
02 Part 2. 5 Awesome Glitch Effect Photoshop Actions.
Part 1. How Do You Do Photo Glitch Effect in Photoshop?
The jagged lines, the colorful pixels, frozen visuals, and also the distorted colors, everything perfectly blends to make a glitch effect. Usually, this is how all the glitch templates are, but if you get an opportunity to customize your image glitch effect and make your special effect, what will you do?
The best option to adopt in any such circumstances is Photoshop. With Photoshop, you can create a stunning and mind-blowing Photoshop VHS effect. If you want to learn about its steps, then continue reading.
Step 1: The process starts by importing the image to Photoshop on which you plan to add the photo glitch effect. Then you should always convert the image from colorful to black and white. This could be done quickly by going into the ‘Image’ menu from the menu bar. Next, go for the ‘Adjustments’ option and select ‘Desaturate.’
Step 2: Now duplicate the image by dragging it onto the New Layer icon in the Layers Panel. Then double click on the duplicated image. This will open a ‘Layer Style’ settings menu. Here, click on the icon for ‘R Channel’ and deselect it.
Step 3: Now, it’s time to add the first glitch element. For that, hold the ‘Shift’ key and move the image by using the left/right cursor keys on the keyboard. This will offset the image layer from the original.
Step 4: You can now select the ‘Mark’ tool from the left side. Make a rectangle anywhere on the image with the Mark tool and then switch back to the ‘Move’ tool. Then again, nudge the rectangular portion left or right to offset it. You can repeat this process multiple times on different areas of the image.
Step 5: At this point, make a New Layer and fill it with White. Now right-click on this white layer and select the option of ‘Convert to Smart Object.’
Step 6: Move to the menu bar at the top and go to the ‘Filter’ section. From there, select the option of ‘Filter Gallery.’ A new window will show up. Head to the ‘Sketch’ category, and there change the ‘Pattern Type’ to ‘Line.’ You can also play with the ‘Contrast’ and the ‘Size’ of the lines.
Step 7: Now, in the ‘Layers Panel,’ select the option of ‘Overlay’ from the dropdown menu so that the different layers can show through. You can adjust the visibility of the lines by adjusting the number on the scale.
Step 8: After setting everything for the glitch effect in your image, you can now add colors using the ‘Gradient Map.’ Or you can also import some graphic textures to Photoshop and add them to the image. Don’t forget to change the ‘Binding Mode’ to ‘Overlay.’ You can then play with the color and graphic settings.
Step 9: Once all the color adjustments have satisfied you, it’s time to add some text to your glitch image. For that, head to the ‘Text’ tool from the left menu and type in your text. Edit it as you did to your image so that you can make a cool glitch text effect Photoshop and with this, you are all done with making the most stunning glitch effect Photoshop.
Part 2. 5 Awesome Glitch Effect Photoshop Actions
With Photoshop, you can create your photo glitch effect as you prefer instead of using the available standard templates. What if you don’t have enough time to create the effect? Are you going to use the basic and standard templates?
If you are looking for some jaw-dropping glitch picture effects rather than using the basic effects, then this section of the article is perfect for you. We are going to talk about 5 fantastic glitch effects Photoshop action.
1. Distorted Glitch Photoshop Action
The first effect we will discuss is Distorted Glitch Photoshop Action. The effect is very easy to use. You can set it with just one click action. The effect allows you to do adjustment settings with very easy steps to edit it.
The effect has all the dark, distorted, and disturbance-related elements that make it an amazing effect to add glitch effect to image.
2. Geometric Glitch Photoshop Action
If glitch effect with lines is too mainstream for you, then this next effect will surely impress you. This effect is the Geometric Glitch Photoshop Action. You can edit this effect. All its colors, layers, and even elements are fully editable.
You can create a modern yet professional glitch image with this stunning effect. The effect lets you add shapes, abstract styles, and also glitch lines to make cool images.
3. Animated Glitch Photoshop Action
If you are looking for a glitch effect to add to animated content, then nothing is better than Animated Glitch Photoshop Action. The effect template is fully editable with 12 distinct color options. The animated effect has a very organized structure of layers, color coding, etc.
By using this effect, you can add a great vibe to your image. The template greatly shows the distortion, digital error, etc. You can play around with RGB to make it look crazy brilliant.
4. Futuristic Photoshop Action
The next effect in line to be discussed is Futuristic Photoshop Action. This effect has all the bright and neon colors. The effect could be added easily to your images regardless of the type of your content. Graphic designers and photographers use the Futuristic Effect to create stunning and professional glitch images.
5. Glitch Art Photoshop Action
The last effect template that we are going to shed light on is Glitch Art Photoshop Action. The effect is fully editable with 10 different abstract elements. The template has absolutely professional results. The effect delivers complete glitchy vibes.
The distortion, the abstract elements, the digital error, and everything else in effect represents all the glitchy vibes.
Final Words
This article is everything one person needs if they want to learn about glitch effect Photoshop. We have talked about creating a jaw-dropping glitch effect in Photoshop. The steps to create a stunning glitch effect have been mentioned above.
We then shared 5 incredible glitch effects that could be used in case you don’t want to create your own effect.
What Is the Best Filmora Slideshow Templates? Experts Choice
47. What is the Best Filmora Slideshow Templates Experts Choice
An easy yet powerful editor
Numerous effects to choose from
Detailed tutorials provided by the official channel
With Filmora software, present information and content through slideshows. Filmora slideshow templates are available on the website free for making effective slideshows.
Part 1 Why Filmora Slideshow Templates Are Popular?
Filmora Slideshow templates are widely used by the users for creating new and impressiveslideshows. The reason for popularity of this software is many such as:
● It is an affordable software/application available free of cost for making slideshows using templates.
● It can run on computers and cell phones also, so there is flexibility in its access.
● It is equipped with various tools and features for both video and audio applications.
● Background effects, picture effects and animation features further make it more popular than the rest of the software.
● It is a good pleasing interface suitable to all content creators whether they are beginners or professionals.
● Video and audio control and video stabilization features make it further popular.
● Advanced text-editing make it possible to add contents in the video slides.
● Templates can be created by adding titles, text, sound, filters, and transitions.
● Theme-based templates are designed and developed looking into the needs f every user for different occasions.
● It has better editing tools like split, merge, rotate, and more.
● Auto-create videos features give the users comfort for using the application by saving their time and energy. Further they can add royalty-free images, videos, and music.
● Aspect ratio for the video creation can be changed.
Part 2 Where to Download Free Filmora Slideshow Templates
To use unlimited and free Filmora slideshow templates, one is required to have the application downloaded from the website. And thereafter one can download the different styles and patterns of templates from section filmora slideshow template free download. Once you create an account in the Filmora platform, you can easily connect with various templates useful for various occasions.
Filmora software or application is the only destination for having a bunch of various templates with many tools to improve the creation of slide shows. One can see the various templates available in the official website of Filmora. One can make slideshow with the help of video maker offered by Filmora. This software is free of cost. The easy-to-use interface feature of this software is good for beginners. It has various in-built customizable templates based in various themes like project, marketing, corporate, celebration, fun, natural, family, and business. It has auto-create mode which saves time and energy of the users as it automatically plays the slides when all media files, pictures or texts are placed over the various slides. For this one is just required to select the different files and click on “Auto-create” option.
Part 3 Best 10 Filmora Slideshow Templates
Filmora has many advanced templates for presentation and slideshow. One can find different kind of templates suitable for creating content and information for various applications. Filmora templates slideshow becomes more attractive when in-built Filmora templates are used. Some of the best 10 Filmora slideshow templates are:
01Business- Proposal Presentation Template
Looking into the business need of business users and marketing professionals, Filmora has developed Business-proposal presentation template with 45 unique custom slides. Business users can create impressive business proposals with various theme and color options. One can insert pictures and text easily in this template and can edit number of times.
02Pitch Deck Template
This template is used to design a pitch deck used by the companies to present at the stage and project about the company. These templates are well designed as they are handled by professionals.
03Company Profile Google Slides Template
It is mostly useful to business professionals to prepare business portfolios. The best thing with these templates is that they are unique, elegant, professional and creative. This template is multipurpose for different business applications.
04Clean Slideshow After Effects Templates
Those who want to make simple but impressive templates, clean slideshow after effect templates are best option. Through this template, one can focus on the main content and can add transitions. Photo slideshows can be easily created through this template.
05Minimal Corporate Presentation
This template is good for the beginners who desire to prepare a simple slideshow. The advantage of this template is that it is easy to use and text can be easily edited. One can insert picture for various corporate and business presentations.
06Corporate Event Promo
A business mostly does promotions and this needs a proper preparation. Corporate event promo presentation template is the best choice for such situations. One can create creative promo slides with such template by adding title and overlays in the template. They can also be edited easily.
07Business Marketing Presentation Layout
Most of the business organizations preferto choose such a template that can present their marketing plan in the best possible way. This Business Marketing Presentation is perfect for every business concern. It comes with nine designing options, through which one can easily replace images and text.
08Event Conference
For creating information and documents over template useful in an event conference, this template of filmora is very useful. The details of event and necessary information can be put in a systematic way through this template. However when played as slideshow, it can reach to maximum number of viewers.
09Mosaic Slideshow
Display of photographs, video albums or glimpse of any events can be impressively done with the help of Mosaic slideshow template. With increasing trends of photo sharing and video making, these templates are gaining popularity.
10Old Fashion Slides
As the name suggests, the templates is good for vintage slideshow. One can use this template for photo and video slideshows. Those who love to be creative, they can use this template.
These are some filmora template slideshow available at the website; however the users can also explore the other category of templates based on occasions at the website of Filmora. Every content creator will surely get desired template to present their information, data and pictures in a unique way.
Part 4 FAQ of Filmora Slideshow Templates
Wondershare Filmora Video Editor is a popular video editing application that also supports making slideshows through the use of various templates. It offers advance editing software for those who love to be creative and present their content in an artistic way. The various features of the software like elegant transitions, beautiful slides, video effects, text, audio and background effects make it more popular among beginners and professionals.
For Win 7 or later (64-bit)
For macOS 10.12 or later
Working with Filmora is easy and time saving. One can easily drag and drop the slides made and do editing on it. Making video through templates is an easy task. Just in few simple steps one can make and export the slides and play it. Photo video slideshows can also be made by using Filmora application. It runs smoothly over various operating systems.
● Whether Filmora has slideshow templates at its site?
Yes, the official website has various online free slideshow templates for the users.
● Whether I need to pay to get sample templates from Filmora?
The trial version of the software is free and you can download the slideshow templates free of cost.
● Whether the slideshow prepared in Flimora site can be edited with other application?
Yes, you can easily do editing on the slides made with Filmora application on other applications.
● What type of slideshare is available at Filmora?
All kind of slideshare and templates are available at Filmora that are useful for business, projects, marketing and personal purposes.
● Ending Thoughts →
● Filmora is a software/application widely used as video editing software and it is getting popular among the users due to its extraordinary features. It has great video editing tools, effects and transitions that give a complete package of video, slideshow and presentation making.
● Filmora has wide range of templates developed at its site for ease of making presentation and slideshows. These are developed looking to needs of every content creator. Some of templates available at the website are clean slideshow after effects templates, Mosaic slideshow, Business- proposal presentation template and many others.
● The filmora photo slideshow template free download and other templates can be searched on the official website of Filmora and can be downloaded from there in simple steps. It can edit and saved at any operating system.
Ultimate Guidelines to Help You Use VLC Media Player Better
Video players have made it quite easy for users to watch movies and their favorite seasons whenever they wish to. While working on improving video quality, several video players have taken dominance across the current market. VLC Media Player stands among the top contenders of video players that have provided users with exceptional services. This article stands on discussing the pointers that would help you use VLC Media Player in a better way.
In this article
01 Key Features of VLC Media Player
02 List of VLC Media Player Supported Format
03 How to Play or Download Streaming Videos with VLC
04 How to Record Screen and Take Screenshots by Using VLC?
05 How to Convert Video File to Different Formats with VLC?
06 Extra Tips: Top Recommended Video Editor in 2022 – Filmora Video Editor
Part 1: Key Features of VLC Media Player
VLC Media Player is an open-source, free video player accessible for all users across major platforms. Being one of the best, it is essential to realize the features that make VLC Media Player special.

Convert Video Files
One of the most anticipated features of VLC is its conversion ability. While converting videos, users can also proceed towards audios. However, as our focus is across the video file formats, VLC offers an extensive set of formats to convert the video without compromising the quality.
Loop Parts of Video
Where most video players provide the option of looping complete files, VLC has changed the narrative of looping specific parts of a video by setting up markers across it. This helps users loop specific parts across their videos.
Stream Podcasts
VLC Media Player exempts the need to download dedicated platforms that stream podcasts for you. The video player allows you to stream podcasts across its platform without the need for any additional settings easily.
Enhance Your Videos
With VLC player, you can always consider revamping your video by adding different filters and effects across it. The user can change the brightness, contrast, colors, geometry, overlays, and several other video features across the platform.
Adding Subtitles
While watching movies and videos, you can download and add external subtitle files across the VLC player to improve your video experience.
Part 2: List of VLC Media Player Supported Format
The following VLC formats are supported across the platform. Users can consider using any of the following as per their convenience:
- AVI
- WMA
- MP4
- MOV
- 3GP
- OGG
- FLAC
- MKV
- MPEG-1/2
- DivX® (1/2/3/4/5/6)
- MPEG-4 ASP
- XviD
- 3ivX D4
- 261
- 263 / H.263i
- 264 / MPEG-4 AVC
- Cinepak
- Theora
- Dirac / VC-2
- MJPEG (A/B)
- WMV 1/2
- WMV 3 / WMV-9
- VC-1
- Sorenson 1/3
- DV
- On2 VP3/VP5/VP6
- Indeo Video v3 (IV32)
- Real Video (1/2/3/4)
Part 3: How to Play or Download Streaming Videos with VLC
As you use a video player, it is always preferable to have one that provides extensive and impressive functions. VLC Media Player for PC allows you to download and play videos across the platform. To understand the procedure, go through the steps provided below:
Step 1: Install VLC Media Player across your device. Run the video player once installed and proceed to select “Media.” Select “Open Network Stream” from the drop-down menu.

Step 2: You need to open the video’s web page that is to be downloaded through VLC. Copy and paste the video URL across the “Please enter a network URL:” box across the window that opens on the screen. Select the “ Stream “ option across the drop-down menu that appears across the “Play” option.

Step 3: On the next window, select “Add” and browse the output destination of the file along with its name.

Step 4: Following this, select the output format of the video file that you need to save your download video in. Ensure that the option of “Activate Transcoding” is enabled. Tap on “Next” to proceed.

Step 5: With all settings specified, click “Stream” to download the video across the specified destination.

Step 6: Once the video is downloaded, select “Media” and tap on “Open Files.” You can access the specific file folder and play the video from there across VLC Media Player with ease.

Part 4: How to Record Screen and Take Screenshots by Using VLC?
Being a content creator, you particularly wish to work on a low budget at the start. Recording videos and streaming them has been made easy with VLC Media Player. Follow the steps of recording screen and taking screenshots of your device with the help of VLC.
Recording Screen with VLC
Step 1: Open VLC Media Player on your device. You also need to open the platform to be recorded with VLC.

Step 2: Tap on “Media” followed by “Open Network Stream” across the drop-down menu to open a new window.

Step 3: Across the “Capture Mode” option, select “Desktop” to record the desktop screen across the player. Set up the desired frame rate for your screen recording. Tap on “Play” once you have configured all essential settings.

Taking Screenshots on VLC
Step 1: Access the “Media” section and select “Open File” to import a video across the player.

Step 2: After opening a video across VLC, you can capture your screen by proceeding to the “Video” tab and selecting the option of “Take Snapshot” to take a screenshot across VLC.

Step 3: You can also set up and use the hotkeys of “CTRL + ALT + S” and “Shift + S” for capturing the screen across the VLC player.
Part 5: How to Convert Video File to Different Formats with VLC?
If you are looking to convert your video file into different VLC formats, you can consider adopting the services of a VLC player. To cover this, look into the steps featured below:
Step 1: Open VLC Media Player on your device and navigate the “Media” tab. Select the “Convert/Save” option across the drop-down menu.

Step 2: With a new screen on the front, select “Add” to import the video file to be converted. Tap on “Convert/Save” once added.

Step 3: Once you add the video, a new screen opens containing the conversion options. Select the file format you wish to change to across the “Profile” option. Set up the output folder of the converted video across the “Destination file” option. As you have set the options, tap on “Start” to conclude the process and convert the video successfully.

Extra Tips: Top Recommended Video Editor in 2022 – Filmora Video Editor
Video editors are as important as video players within this current digital world. Content creators who have their setup across developing videos require platforms that can help them enhance their videos to perfection before playing them across video players such as VLC Media Player. Wondershare Filmora is a clear example of such video editors that provide proficient services in the video editing platform to their users.

For Win 7 or later (64-bit)
For macOS 10.12 or later
As far as the platform goes, it provides a simple and effective user interface to its users. It has tried to embed all necessary features across a simple structure to make things easier for beginners. This is how video editing is quite easy across Filmora Video Editor. With various editing options to work on, users can trim their videos, adjust their audios, add effects and transitions, and utilize visual effects to perfection.
Designing videos with Filmora is a treat for the creators. While recommending the platform for users, they can discover explicit tools for motion tracking, color matching, keyframing, and multiple other options. This is what makes Filmora an exceptional option in video editing platforms. At a price that numerous users can afford, the platform offers unique and diverse options compared to other video editors in the market.
Conclusion
This article has provided an in-depth understanding of the VLC Media Player and the feature it provides. It has also focused on discussing the details about the multiple procedures that can be tried across the player, including conversion, recording, and taking screenshots across VLC. Users new to this platform should look into these details before using it for their specific purpose.
Wondershare Filmora
Get started easily with Filmora’s powerful performance, intuitive interface, and countless effects!
Try It Free Try It Free Try It Free Learn More >

02 List of VLC Media Player Supported Format
03 How to Play or Download Streaming Videos with VLC
04 How to Record Screen and Take Screenshots by Using VLC?
05 How to Convert Video File to Different Formats with VLC?
06 Extra Tips: Top Recommended Video Editor in 2022 – Filmora Video Editor
Part 1: Key Features of VLC Media Player
VLC Media Player is an open-source, free video player accessible for all users across major platforms. Being one of the best, it is essential to realize the features that make VLC Media Player special.
Convert Video Files
One of the most anticipated features of VLC is its conversion ability. While converting videos, users can also proceed towards audios. However, as our focus is across the video file formats, VLC offers an extensive set of formats to convert the video without compromising the quality.
Loop Parts of Video
Where most video players provide the option of looping complete files, VLC has changed the narrative of looping specific parts of a video by setting up markers across it. This helps users loop specific parts across their videos.
Stream Podcasts
VLC Media Player exempts the need to download dedicated platforms that stream podcasts for you. The video player allows you to stream podcasts across its platform without the need for any additional settings easily.
Enhance Your Videos
With VLC player, you can always consider revamping your video by adding different filters and effects across it. The user can change the brightness, contrast, colors, geometry, overlays, and several other video features across the platform.
Adding Subtitles
While watching movies and videos, you can download and add external subtitle files across the VLC player to improve your video experience.
Part 2: List of VLC Media Player Supported Format
The following VLC formats are supported across the platform. Users can consider using any of the following as per their convenience:
- AVI
- WMA
- MP4
- MOV
- 3GP
- OGG
- FLAC
- MKV
- MPEG-1/2
- DivX® (1/2/3/4/5/6)
- MPEG-4 ASP
- XviD
- 3ivX D4
- 261
- 263 / H.263i
- 264 / MPEG-4 AVC
- Cinepak
- Theora
- Dirac / VC-2
- MJPEG (A/B)
- WMV 1/2
- WMV 3 / WMV-9
- VC-1
- Sorenson 1/3
- DV
- On2 VP3/VP5/VP6
- Indeo Video v3 (IV32)
- Real Video (1/2/3/4)
Part 3: How to Play or Download Streaming Videos with VLC
As you use a video player, it is always preferable to have one that provides extensive and impressive functions. VLC Media Player for PC allows you to download and play videos across the platform. To understand the procedure, go through the steps provided below:
Step 1: Install VLC Media Player across your device. Run the video player once installed and proceed to select “Media.” Select “Open Network Stream” from the drop-down menu.
Step 2: You need to open the video’s web page that is to be downloaded through VLC. Copy and paste the video URL across the “Please enter a network URL:” box across the window that opens on the screen. Select the “ Stream “ option across the drop-down menu that appears across the “Play” option.
Step 3: On the next window, select “Add” and browse the output destination of the file along with its name.
Step 4: Following this, select the output format of the video file that you need to save your download video in. Ensure that the option of “Activate Transcoding” is enabled. Tap on “Next” to proceed.
Step 5: With all settings specified, click “Stream” to download the video across the specified destination.
Step 6: Once the video is downloaded, select “Media” and tap on “Open Files.” You can access the specific file folder and play the video from there across VLC Media Player with ease.
Part 4: How to Record Screen and Take Screenshots by Using VLC?
Being a content creator, you particularly wish to work on a low budget at the start. Recording videos and streaming them has been made easy with VLC Media Player. Follow the steps of recording screen and taking screenshots of your device with the help of VLC.
Recording Screen with VLC
Step 1: Open VLC Media Player on your device. You also need to open the platform to be recorded with VLC.
Step 2: Tap on “Media” followed by “Open Network Stream” across the drop-down menu to open a new window.
Step 3: Across the “Capture Mode” option, select “Desktop” to record the desktop screen across the player. Set up the desired frame rate for your screen recording. Tap on “Play” once you have configured all essential settings.
Taking Screenshots on VLC
Step 1: Access the “Media” section and select “Open File” to import a video across the player.
Step 2: After opening a video across VLC, you can capture your screen by proceeding to the “Video” tab and selecting the option of “Take Snapshot” to take a screenshot across VLC.
Step 3: You can also set up and use the hotkeys of “CTRL + ALT + S” and “Shift + S” for capturing the screen across the VLC player.
Part 5: How to Convert Video File to Different Formats with VLC?
If you are looking to convert your video file into different VLC formats, you can consider adopting the services of a VLC player. To cover this, look into the steps featured below:
Step 1: Open VLC Media Player on your device and navigate the “Media” tab. Select the “Convert/Save” option across the drop-down menu.
Step 2: With a new screen on the front, select “Add” to import the video file to be converted. Tap on “Convert/Save” once added.
Step 3: Once you add the video, a new screen opens containing the conversion options. Select the file format you wish to change to across the “Profile” option. Set up the output folder of the converted video across the “Destination file” option. As you have set the options, tap on “Start” to conclude the process and convert the video successfully.
Extra Tips: Top Recommended Video Editor in 2022 – Filmora Video Editor
Video editors are as important as video players within this current digital world. Content creators who have their setup across developing videos require platforms that can help them enhance their videos to perfection before playing them across video players such as VLC Media Player. Wondershare Filmora is a clear example of such video editors that provide proficient services in the video editing platform to their users.
For Win 7 or later (64-bit)
For macOS 10.12 or later
As far as the platform goes, it provides a simple and effective user interface to its users. It has tried to embed all necessary features across a simple structure to make things easier for beginners. This is how video editing is quite easy across Filmora Video Editor. With various editing options to work on, users can trim their videos, adjust their audios, add effects and transitions, and utilize visual effects to perfection.
Designing videos with Filmora is a treat for the creators. While recommending the platform for users, they can discover explicit tools for motion tracking, color matching, keyframing, and multiple other options. This is what makes Filmora an exceptional option in video editing platforms. At a price that numerous users can afford, the platform offers unique and diverse options compared to other video editors in the market.
Conclusion
This article has provided an in-depth understanding of the VLC Media Player and the feature it provides. It has also focused on discussing the details about the multiple procedures that can be tried across the player, including conversion, recording, and taking screenshots across VLC. Users new to this platform should look into these details before using it for their specific purpose.
Wondershare Filmora
Get started easily with Filmora’s powerful performance, intuitive interface, and countless effects!
Try It Free Try It Free Try It Free Learn More >
Top 7 Easy Ways to Convert a Video to a GIF Online
Looking for the best video to gif online conversion tools? No worries, as we have done all the research work and have shortlisted the best tools that can assist you with the task. GIF is short and cute animated files that help in interestingly conveying a message. These short-animated visuals help in reaching and creating an impact on the target audience. So, if you have some videos, GIF animations can be created from them using a good converter tool which can be an online program or system software.
Online programs are preferred by the users owing to their simple and hassle-free use, support for basic features, and cost-saving options. So, here in this topic, we will discuss the top and easy ways to convert video to GIF online.

Part 1: Top 7 Easy Ways to Convert a Video to a GIF Online
Several online tools can be used for converting a video file into GIF, but all do not stand up to the tall claims it makes. So, if you are in search of an easy yet effective tool, shortlisted below are the top 7 tools for video into GIF online conversion.
1. Adobe Express
Powered by Adobe Premiere, this is an excellent online tool that allows converting videos in all key formats in GIF format. The free version allows adding videos for up to 1 hour and the processed files can be downloaded to the local system.
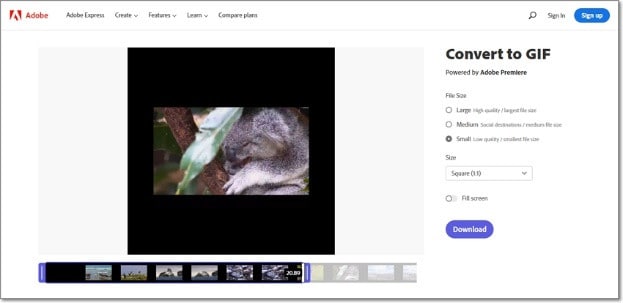
Key features
- Video files in all key formats can be converted to GIF.
- Allows selecting the aspect ratio and the file size of the target file.
- This video to GIF converter online tool support drag and drop feature.
- Allows trimming the video so that the file portion can be selected.
Pros:
- Simple and clean interface.
- Quick file processing.
- Allows selecting aspect ratio and file size.
Cons:
- Only one file at a time can be processed.
- Only desktop files can be added.
- To download the file, you need to free sign-up.
User Review:
A good online multi-platform service that works with interesting features. -TechRadar
This is one of the best programs that comes packed with wide range of features that can assist you in getting the target customized files.
2. Ezgif
Using this browser-based tool, local as well as online videos in key formats can be converted to GIFs. The interface is simple where you just need to add the file and the conversion will be done automatically.
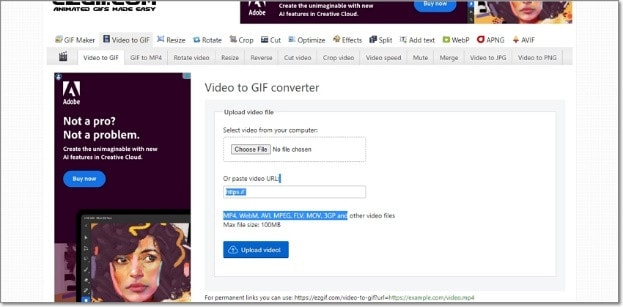
Key features
- GIF can be created from the local and online video files in all key formats.
- Choose the video part for creating the GIF file else by default, the first 5 seconds of the video are used.
Pros:
- All popular video formats like MP4, MPEG, FLV, MOV, and others are supported for conversion to GIF.
- Local, as well as file links in case of online files, can be added.
- Allows selecting the video part for which the GIF has to be created.
- Allows choosing the frame rate, and the size of the video.
This online GIF converter has an option to set static background.
Cons:
- File size limitation of 100 MB.
- Internet dependency.
User Review
“A website with many important and good tools that facilitates making your task easier. You get all features in one place. -Sasa011, Mywot.
This simple online tool is a pocket friendly option for converting your videos into GIF with added option for editing them. Supporting all key formats, the program supports additional tools as well.
3. Img2Go
Your videos on the system, cloud storage, as well as using URLs can be added to this online tool for conversion to GIF format. The look and the quality of GIFs can be adjusted by making changes in the file parameters.

Key features
- Convert all key video files like MP4, MOV, MPEG, and others to GIF.
- Customize the GIF look by editing the file size and applying the color filter.
- This online video to GIF converter allows to choose to enhance, sharpen, equalize, and edit files in other ways.
- Files to be converted can be added from the desktop, Google Drive, Dropbox, as well as URL.
- Processed files can be saved to the cloud storage in addition to the local system.
Pros:
- Multiple sources to add the video file.
- Customize the file parameters and enhance its look.
- Converted file is downloaded automatically to the local system.
Cons:
- Free version allows converting only 3 files at a time.
- Dependency on internet connectivity.
User review:
“This is the best online converter app I have discovered. It is really easy and fast to use. I absolutely recommend it and it really works.”-Maria Ancil, ChromeStats
When you need to convert only a few files at a time in a hassle-free manner consider this simple online tool. After the conversion is done, you would not have any hassles of file downloading as it is automatically saved to the system.
4. CloudConvert
Convert your videos in MP4, FLV, WebM, and other key formats to GIF using this browser-based tool that is simple and free to use. Multiple file parameters can be changed using the tool to get the desired file.

Key Features:
- Allows converting all key video formats.
- Files to be converted can be added from the desktop, URL, Dropbox, Google Drive, and OneDrive.
- Allows adjusting the fit, codec, resolution, aspect ratio, and fps.
- Option to trim the file and also add a watermark.
Pros:
- Files to be converted can be added from multiple sources.
- All key video formats supported.
- Option to control the video size, quality, and aspect ratio.
Cons:
- Free version allows only 25 conversions per day.
- Converted files need to be downloaded.
User Review
“Instant way of converting small-sized files online in many different formats.”
-Sushil, SoftwareAdvice
When conversion of cloud-based files is needed, this works a good online tool that also allows you to edit and change the key file parameters.
5. io
This is a free browser-based tool that allows creating of animated GIF files from videos. There are several video editing options also supported by the tool like split, cut, adding text, and more. You can even add a YouTube video or its link to create a GIF.

Key features:
- Free online tool for creating a GIF file.
- Support all key video formats like MP4, MOV, FLV, and others.
- Local, YouTube as well as videos from Dropbox can be added.
- Option to record the video and create its GIF.
- ‘Allows choosing the size, duration, background color, and several other file parameters.
Pros:
- Videos from multiple sources can be added.
- YouTube videos can also be converted to GIFs.
- Option to record the video and create its GIF.
- Support multiple video editing options.
Cons:
- Slow processing speed.
- Files processed through the free version have a watermark.
- Free version allows processing files under 10 minutes and of 250Mb in size.
User Review:
“It is just a perfect tool and easy to use. It supports a wide variety of media files.” - Koi, Trustpilot.
Option to convert the YouTube videos as well as the recorded videos make this tool different from the others. All popular file formats are supported and you can even customize and change the file parameters as per your requirements.
6. VistaCreate
This is another simple-to-use tool that allows converting all key video formats to a GIF file. The program allows setting various parameters as needed.
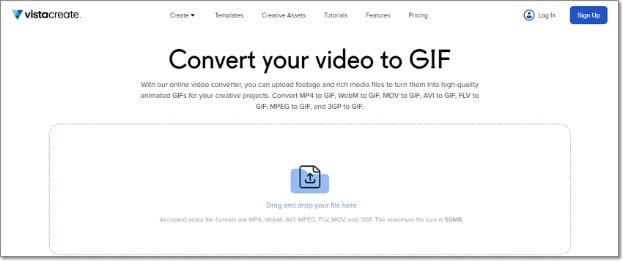
Key Features
- Convert MP4, WebM, AVI, MPEG, FLV, MOV, and 3GP to GIF.
- Support Drag and Drop feature.
- Videos up to 50MB can be processed.
- Allows choosing the video start and the end time for which GIF is to be created. If no time is selected, the first 5 seconds of the video are used.
Pros:
- Simple user interface.
- Allows selecting the video part for which GIF is to be created.
- Choose the frame rate and the speed.
Cons:
- Limited format support.
- Free version has a limitation of 50Mb file size.
- Processing speed is slow.
User Review:
“It is a simple and fast online tool that works. The program allows creating eye-catchy visuals and is free to use.”-Kshitij T, G2. Com
Simple to use, this online tool is apt when you need selected parts of the video for creating a GIF. Though it is compatible with a few selected formats, the process of conversion is simple.
7. XConvert
This online tool support conversion of wide range of file types and formats including videos to GIF. The supported video formats are MP4, WebM, MOV, and MKV. The tool also allows changing the target file parameters.

Key Features
- Free to use online tool with a simple interface.
- Allows converting MO4, MOV, WebM, and MKV videos to GIF.
- Frame Rate and resolution of the target GIF file can be selected.
- Allows adding local as well as files saved to the cloud storage.
Pros:
- Add videos from the desktop, Google Drive, and Dropbox.
- Choose the desired frame rate and resolution.
- Option to save the processed file to the system or Dropbox. Option to get the converted file download link.
Cons:
- Limited file support.
- Converted files need to be downloaded.
- Internet dependency.
User Review:
Portable, nice UI, cross-platform tool and has a lot of actions and run fast. -Roflpancake, Alternativeto
When simple conversion with basic file editing is needed, consider this online tool for your task. In addition to the local system, you can even save the files to your cloud storage.
Part 2: Comparison Table of the Best Video to GIF Converters
The table below compares the above 7 listed tools based on the formats supports, speed of file processing, and the watermark on the processed files.
| Features/Tool | Supported Format | Free Version with watermark or not | Speed of conversion |
|---|---|---|---|
| Adobe Express | All key video formats | No watermark | 2 (Fast) |
| Ezgif | All key formats including MP4, MPEG, FLV, MOV, and others. | No watermark. | 4 (Slow) |
| Img2Go | MP4, FLV, MOV, and all key video formats. | No Watermark | 2 (Fast) |
| CloudConvert | All popular video formats including MP4, MOV, FLV, MPEG, and more. | No Watermark | 2(Fast) |
| Veed.io | All key formats | Yes, free version has a watermark. | 5 (very Slow) |
| VistaCreate | MP4, WebM, AVI, MPEG, FLV, MOV, and 3GP. | No watermark | 5 (Very Slow) |
| XConvert | MP4, WebM, MOV, MKV. | No watermark | 3 (Average) |
Part 3: Best Solution to Convert Video to GIF on Windows/Mac
To convert videos to GIF on your Windows and Mac without worrying about any limitations or internet dependency, desktop software works as the best option. If you too have been looking for one such desktop program, we recommend Filmora Video Editor as the best choice. Though the software is used majorly for advanced video editing options, it is capable of performing a variety of other tasks as well including video to GIF conversion. The software allows file conversion through its export feature.
For Win 7 or later (64-bit)
For macOS 10.14 or later
Key Features
- Almost all video formats like MOV, MP4, MKV, FLV, and others can be converted to GIF.
- High-quality conversion at a fast speed.
- Support batch processing so that multiple files can be processed at a time.
- Allows editing and customizing videos using the built-in features of the software like effects, subtitles, crop, cut, and more.
Pros:
- The interface is simple which makes the software suitable even for beginners.
- Almost all popular video formats are supported.
- High-quality conversion in a hassle-free manner.
- Windows and Mac support.
Cons:
- Being a desktop software, it needs download and installation.
- Need to purchase the software subscription.
Steps to convert videos to GIF using Wondershare Filmora
Step 1. Launch the installed software on your system and the main interface select Create Project > New Project.

Step 2. Click on Import Media Files Here option under the Media tab to browse and add the local video file. Multiple files for batch processing can be added here.

Step 3. After the files are added, now it’s time to move them to the time and for this, you can simply drag and drop them to the bottom. Now at the timeline, using the built-in editing features, customization can be done as required.

Step 4. Finally, tap on the Export button and then choose GIF as the desired target format and also the location to save the converted files.

Conclusion
If one of the above-listed online tools serves your videos for GIF conversion purposes, it’s great. If not, you can use the Wondershare Filmora software. Once downloaded, the software can be used for several editing and other video-related tasks.
For macOS 10.14 or later
Key Features
- Almost all video formats like MOV, MP4, MKV, FLV, and others can be converted to GIF.
- High-quality conversion at a fast speed.
- Support batch processing so that multiple files can be processed at a time.
- Allows editing and customizing videos using the built-in features of the software like effects, subtitles, crop, cut, and more.
Pros:
- The interface is simple which makes the software suitable even for beginners.
- Almost all popular video formats are supported.
- High-quality conversion in a hassle-free manner.
- Windows and Mac support.
Cons:
- Being a desktop software, it needs download and installation.
- Need to purchase the software subscription.
Steps to convert videos to GIF using Wondershare Filmora
Step 1. Launch the installed software on your system and the main interface select Create Project > New Project.
Step 2. Click on Import Media Files Here option under the Media tab to browse and add the local video file. Multiple files for batch processing can be added here.
Step 3. After the files are added, now it’s time to move them to the time and for this, you can simply drag and drop them to the bottom. Now at the timeline, using the built-in editing features, customization can be done as required.
Step 4. Finally, tap on the Export button and then choose GIF as the desired target format and also the location to save the converted files.
Conclusion
If one of the above-listed online tools serves your videos for GIF conversion purposes, it’s great. If not, you can use the Wondershare Filmora software. Once downloaded, the software can be used for several editing and other video-related tasks.
Also read:
- Updated What Anime Character Are You Look Like, In 2024
- Are You Looking for Ways to Add Background to Green Screen Video Online? Worry Not, as in This Article; We Shall Discuss Using a Green Screen Background Adder in Filmora
- Updated How to Create Cooking Video Intro and End Screen for YouTube Channel for 2024
- New Heres All About GIF Keyboard Youll Ever Want to Know
- Updated Top LUTs for Sony HLG to Download for 2024
- Updated Detailed Guide to Rotate Videos in Blender for 2024
- 2024 Approved Have a Desire to Uplift Your Editing Creativity with Trying Hands at Working with Storyboards? Keep Reading to Have a Comprehensive Understating of the Workflow Through Stepwise User Guides
- In 2024, This Article Will Help You Understand How to Create Video Contents that Convert Sales
- Updated In 2024, Are You Interested in the Best LUTs ? Do You Want to Enhance Your Photos and Images with High-End Quality? Then, Quickly Step Into This Article for Mind-Blowing Facts on It
- Updated In 2024, CapCut Lenta Template How It Benefits Slow Motion Video
- New 2024 Approved Add Stylish Text to Videos
- New In 2024, Do You Also Use Android to Create and Edit Videos? Read About the Efectum Video Effects Editor, Which Is Available in Your App Stores for Seamless Editing
- In 2024, Guide To Using Luts Perfectly in Final Cut Pro
- How to Create Discord Logo GIF for 2024
- In 2024, Are You Looking for the Best Premiere Pro Slideshow Template Online for Free? If Yes, You Can Find a Few Exciting Slideshow Templates Here. They Are Worth Using
- Updated 2024 Approved Everything That You Need to Know About Video Montages- Ideas, Techniques, and Software
- In 2024, 3D Ray Traced Settings In After Effects
- New In 2024, How to Merge Videos in HandBrake? Expectation Vs. Reality
- In 2024, Practical Way to Resize Video in Handbrake
- New Tactics To Make Keynote Slideshow
- Updated Best PDF to GIF Converters for 2024
- In 2024, Easy Way to Apply Green Screen to YouTube Videos
- 4K Videos Are the in Thing because of Their Flexibility and High Resolution. Stick Around to Learn How to Choose the Best Frame Rate for 4K Videos
- New In 2024, An Ultimate Guide on the Significance of Music in Videos and How to Choose the Right Music for Your Videos with Wondershare Filmora
- New In 2024, Your Search for the Best GIF Creator Tools Ends Here
- New 2024 Approved 4 Ways for Rotating Your GoPro Videos Professionally
- 2024 Approved Unlock Your Video Editing Potential With Wondershare Filmora
- Updated If Youre Considering Starting a Podcast Video Recording, You Need to Read This Article and Learn All You Need to Know About Making a Successful Podcast
- 5 Simple Tools to Merge Video and Audio Online for 2024
- In 2024, Complete Tutorial to Use VPNa to Fake GPS Location On Samsung Galaxy M54 5G | Dr.fone
- Proven Ways in How To Hide Location on Life360 For Honor 90 GT | Dr.fone
- Updated 2024 Approved Introduction | Online
- How Can I Use a Fake GPS Without Mock Location On Nokia C12? | Dr.fone
- In 2024, iPhone 6s Plus Backup Password Never Set But Still Asking? Heres the Fix | Dr.fone
- How to retrieve erased videos from Xiaomi Redmi K70 Pro
- How To Unbrick a Dead Xiaomi Mix Fold 3 | Dr.fone
- How To Unlock The Apple iPhone 6s Plus SIM Lock 4 Easy Methods
- Remove Google FRP lock on X100
- How to Perform Hard Reset on Honor 90 GT? | Dr.fone
- OnePlus Nord CE 3 Lite 5G Bootloop Problem, How to Fix it Without Data Loss | Dr.fone
- Recommended Best Applications for Mirroring Your Oppo Reno 8T Screen | Dr.fone
- Updated In 2024, Best 10 Popular Cartoons You Forgot Existed
- In 2024, 4 Ways to Transfer Music from Tecno Camon 20 to iPhone | Dr.fone
- What are Location Permissions Life360 On Poco F5 5G? | Dr.fone
- How to Fix Android.Process.Media Has Stopped on Vivo Y55s 5G (2023) | Dr.fone
- Android Safe Mode - How to Turn off Safe Mode on Realme GT 3? | Dr.fone
- How to Use Pokémon Emerald Master Ball Cheat On Honor Magic 5 Pro | Dr.fone
- In 2024, Does Airplane Mode Turn off GPS Location On Realme 11X 5G? | Dr.fone
- How Can I Catch the Regional Pokémon without Traveling On Motorola Moto G23 | Dr.fone
- Ultimate Guide from Motorola Moto E13 FRP Bypass
- 2024 Approved Material Preparation
- In 2024, Delete Gmail Account With/Without Password On Itel P55+
- How to Fix Android.Process.Media Has Stopped on Oppo A78 5G | Dr.fone
- Title: New In 2024, How to Make Stunning Glitch Effect in Photoshop? Ultimate Guide
- Author: Morgan
- Created at : 2024-04-24 01:02:48
- Updated at : 2024-04-25 01:02:48
- Link: https://ai-video-editing.techidaily.com/new-in-2024-how-to-make-stunning-glitch-effect-in-photoshop-ultimate-guide/
- License: This work is licensed under CC BY-NC-SA 4.0.
