:max_bytes(150000):strip_icc():format(webp)/GettyImages-151812569-ff7311e1de18461da9f8698205953384.jpg)
New In 2024, Learn How to Create a Unique Repeated Text Animation in the Filmora Video Editor. Follow the Simple Step-by-Step Instructions

Learn How to Create a Unique Repeated Text Animation in the Filmora Video Editor. Follow the Simple Step-by-Step Instructions
Preparation
What you need to prepare:
- A computer (Windows or macOS)
- Your video materials.
- Filmora video editor
Step 1
Download Filmora . Let it install and wait for it to run. Then, click on “New Project”. Now, you’re ready to edit!
Step 2
First, go to Titles and drag the Default Title to the Timeline.

Step 3
Now, double-click on the Default Title clip. Here, change its font to any bold font. Increase the text size to 120. Type in your text in the box. Scroll a bit down and change the Text Spacing to 8. Click OK.

Step 4
Take a Snapshot of this Default Title.

Step 5
Double-click on the Default Title clip once again. This time, click on its Advanced settings. Here, turn OFF Text Fill → turn ON Outline → change the Outline color to White → reduce Thickness to 1. Click OK. Now, take another Snapshot.

Step 6
Delete the Default Title clip from the Timeline. Now, drag the Outline snapshot that we just created to the Timeline. Open the Crop tool → change the Ratio to Custom → replace “1080” with “540”. Lastly, move the highlighted crop section to the top. Click OK.

Step 7
Double-click on the Snapshot to open its settings panel. Go to the Animation tab. Here, change the value of the Y-axis to “275”**.** Click OK. Now, take a Snapshot.

Step 8
Next, click on the Crop tool again and simply move the highlighted crop section to the bottom part of the screen. Click OK. Then, double-click on the snapshot clip in the Timeline and change the value of the Y-axis from “275” to “-275”**.** Click OK. Take a Snapshot again.
Step 9
Import a background image to My Media. Drag the background image to the Timeline. Double-click on it and drag the Scale bar until the background image covers the whole screen. Click OK. You should cut the background clip to make it 3 seconds long as well.

Step 10
Lock this track in the Timeline by pressing the highlighted button on the left. Then, go to “Track Manager” and add 6 new Tracks to the Timeline. Click OK.

Step 11
Drag the first Snapshot we made before to Track 6. Cut it so it’s 3 seconds long. Then, Lock the Track.

Step 12
Set the Playhead at the 15th frame on the Timeline. Then, drag the Upward Outline snapshot to this point. Double-click on it and change the Y-axis value to “**-4%**”. Then, reduce the Opacity to 0%. Now, move the Playhead 5 frames further. Next, increase the Opacity to 100% and increase the Y-axis value to around “105”. Don’t click OK yet.
Step 13
Move the Playhead to 1 minute and 5 seconds on the Timeline. Add a keyframe by clicking on the “+Add” button. Then, move the Playhead 5 frames forward. Here, change the Zoom Level to 25%.

Step 14
Double-click on the clip in Track 5. Drag the text like in the image below. Then, delete the part of the clip on the right side after 1 minute and 15 seconds.

Step 15
Hide the clips on Track 6 and Track 1 by clicking the “eye” icons next to them. Then, take a Snapshot. Now, drag this Snapshot right next to the clip on Track 5.

Step 16
Move the Playhead 3 frames forward from the starting point of the clip you just added. Unhide Track 6. Double-click on the clip on the right side of Track 5 and click on “+Add”. Move the Playhead 5 seconds forward and adjust the Upward Outline to fit the text.

Step 17
Move the Playhead 5 frames forward again. Drag the Y-axis value to the left until the outline clip overlaps the main text. Then, reduce the Opacity to 0%. Move the Playhead to 2 minutes and 10 seconds. Cut the Track and delete the clip on the right side. Lastly, Lock Track 5.

Step 18
Drag the Downward Outline snapshot to Track 4. Then, repeat the same process as in Step 16 and Step 17.
Step 19
Drag the Upward Outline snapshot to Track 3 at the 17th frame. Double-click on it and change the Opacity to 0%.

Step 20
Now, move 5 frames forward and increase the Opacity back to 100%. Then, drag the Y-axis value to the right until the screen looks like this.

Step 21
Move the Playhead to 1 minute and 5 seconds. Click on “+Add” to add a keyframe. Then, move the Playhead 5 frames forward. Double-click on the clip and stretch it from side to side to match something like this.

Step 22
Move the Playhead to 1 minute and 16 seconds. Split the clip and delete the part on the right side. Hide Track 4, 5, and 6. Then, take a Snapshot. Drag this Snapshot next to the clip on Track 3. Place the Playhead on 1 minute and 18 seconds. Then, unhide Track 4, 5, and 6.
Step 23
Double-click on the clip on the right side of Track 3. Add a keyframe by pressing “+Add”. Move the Playhead to 1 minute and 23 seconds. Now, resize the clip back to its original size by moving the rectangle left and right. Right now, it should look like this.

Step 24
Move the Playhead 5 frames forward. Drag the Y-axis value to the left until the screen looks like this.

Step 25
Move the Playhead 5 frames forward again. Drag the value of the Y-axis to the left until the screen looks like this. Then, change the Opacity to 0%. Finally, split the clip at 2 minutes and 10 seconds. Delete the part on the right side. Lock Track 3.

Step 26
Next, drag the Downward Snapshot on Track 2 and follow the same process as in Steps 19 through 25.
Step 27
Unhide the Background clip at the bottom of the Timeline. Then, Unlock Track 6. Split the clip on Track 6 at the 15th frame.

Step 28
Move the Playhead at the beginning of the Timeline. Click on the first part of the clip on Track 6. Add a keyframe. Drag the X-axis value to the right until the word disappears out of the screen. Like this. 👇Then, move the Playhead to the 6th frame and Reset the X-axis value to 0.0.

Step 29
Take the Playhead to 2 minutes and 10 seconds. Split it. Now, move the Playhead to 2 minutes and 19 seconds and add a keyframe. Lastly, take the Playhead to the very end of the clip and drag the text to the right side until it’s out of the screen once again.

Step 30
Go to the Effects tab. Select Glitch from the panel on the left. Then, apply “Glitch Dispersion” and “Glitch Stripe 2” to the clips at the start and at the end.

Step 31
Finally, Render the video to watch the final preview. And, you’re done! Congratulations on creating a repeated text animation in Filmora.

Summary
What you’ve learned:
- How to create text animations in Filmora
- Applying animation effects
- Make advanced edits on Titles in Filmora
- Hide and lock Tracks and Clips in Filmora
What you need to prepare:
- A computer (Windows or macOS)
- Your video materials.
- Filmora video editor
Step 1
Download Filmora . Let it install and wait for it to run. Then, click on “New Project”. Now, you’re ready to edit!
Step 2
First, go to Titles and drag the Default Title to the Timeline.

Step 3
Now, double-click on the Default Title clip. Here, change its font to any bold font. Increase the text size to 120. Type in your text in the box. Scroll a bit down and change the Text Spacing to 8. Click OK.

Step 4
Take a Snapshot of this Default Title.

Step 5
Double-click on the Default Title clip once again. This time, click on its Advanced settings. Here, turn OFF Text Fill → turn ON Outline → change the Outline color to White → reduce Thickness to 1. Click OK. Now, take another Snapshot.

Step 6
Delete the Default Title clip from the Timeline. Now, drag the Outline snapshot that we just created to the Timeline. Open the Crop tool → change the Ratio to Custom → replace “1080” with “540”. Lastly, move the highlighted crop section to the top. Click OK.

Step 7
Double-click on the Snapshot to open its settings panel. Go to the Animation tab. Here, change the value of the Y-axis to “275”**.** Click OK. Now, take a Snapshot.

Step 8
Next, click on the Crop tool again and simply move the highlighted crop section to the bottom part of the screen. Click OK. Then, double-click on the snapshot clip in the Timeline and change the value of the Y-axis from “275” to “-275”**.** Click OK. Take a Snapshot again.
Step 9
Import a background image to My Media. Drag the background image to the Timeline. Double-click on it and drag the Scale bar until the background image covers the whole screen. Click OK. You should cut the background clip to make it 3 seconds long as well.

Step 10
Lock this track in the Timeline by pressing the highlighted button on the left. Then, go to “Track Manager” and add 6 new Tracks to the Timeline. Click OK.

Step 11
Drag the first Snapshot we made before to Track 6. Cut it so it’s 3 seconds long. Then, Lock the Track.

Step 12
Set the Playhead at the 15th frame on the Timeline. Then, drag the Upward Outline snapshot to this point. Double-click on it and change the Y-axis value to “**-4%**”. Then, reduce the Opacity to 0%. Now, move the Playhead 5 frames further. Next, increase the Opacity to 100% and increase the Y-axis value to around “105”. Don’t click OK yet.
Step 13
Move the Playhead to 1 minute and 5 seconds on the Timeline. Add a keyframe by clicking on the “+Add” button. Then, move the Playhead 5 frames forward. Here, change the Zoom Level to 25%.

Step 14
Double-click on the clip in Track 5. Drag the text like in the image below. Then, delete the part of the clip on the right side after 1 minute and 15 seconds.

Step 15
Hide the clips on Track 6 and Track 1 by clicking the “eye” icons next to them. Then, take a Snapshot. Now, drag this Snapshot right next to the clip on Track 5.

Step 16
Move the Playhead 3 frames forward from the starting point of the clip you just added. Unhide Track 6. Double-click on the clip on the right side of Track 5 and click on “+Add”. Move the Playhead 5 seconds forward and adjust the Upward Outline to fit the text.

Step 17
Move the Playhead 5 frames forward again. Drag the Y-axis value to the left until the outline clip overlaps the main text. Then, reduce the Opacity to 0%. Move the Playhead to 2 minutes and 10 seconds. Cut the Track and delete the clip on the right side. Lastly, Lock Track 5.

Step 18
Drag the Downward Outline snapshot to Track 4. Then, repeat the same process as in Step 16 and Step 17.
Step 19
Drag the Upward Outline snapshot to Track 3 at the 17th frame. Double-click on it and change the Opacity to 0%.

Step 20
Now, move 5 frames forward and increase the Opacity back to 100%. Then, drag the Y-axis value to the right until the screen looks like this.

Step 21
Move the Playhead to 1 minute and 5 seconds. Click on “+Add” to add a keyframe. Then, move the Playhead 5 frames forward. Double-click on the clip and stretch it from side to side to match something like this.

Step 22
Move the Playhead to 1 minute and 16 seconds. Split the clip and delete the part on the right side. Hide Track 4, 5, and 6. Then, take a Snapshot. Drag this Snapshot next to the clip on Track 3. Place the Playhead on 1 minute and 18 seconds. Then, unhide Track 4, 5, and 6.
Step 23
Double-click on the clip on the right side of Track 3. Add a keyframe by pressing “+Add”. Move the Playhead to 1 minute and 23 seconds. Now, resize the clip back to its original size by moving the rectangle left and right. Right now, it should look like this.

Step 24
Move the Playhead 5 frames forward. Drag the Y-axis value to the left until the screen looks like this.

Step 25
Move the Playhead 5 frames forward again. Drag the value of the Y-axis to the left until the screen looks like this. Then, change the Opacity to 0%. Finally, split the clip at 2 minutes and 10 seconds. Delete the part on the right side. Lock Track 3.

Step 26
Next, drag the Downward Snapshot on Track 2 and follow the same process as in Steps 19 through 25.
Step 27
Unhide the Background clip at the bottom of the Timeline. Then, Unlock Track 6. Split the clip on Track 6 at the 15th frame.

Step 28
Move the Playhead at the beginning of the Timeline. Click on the first part of the clip on Track 6. Add a keyframe. Drag the X-axis value to the right until the word disappears out of the screen. Like this. 👇Then, move the Playhead to the 6th frame and Reset the X-axis value to 0.0.

Step 29
Take the Playhead to 2 minutes and 10 seconds. Split it. Now, move the Playhead to 2 minutes and 19 seconds and add a keyframe. Lastly, take the Playhead to the very end of the clip and drag the text to the right side until it’s out of the screen once again.

Step 30
Go to the Effects tab. Select Glitch from the panel on the left. Then, apply “Glitch Dispersion” and “Glitch Stripe 2” to the clips at the start and at the end.

Step 31
Finally, Render the video to watch the final preview. And, you’re done! Congratulations on creating a repeated text animation in Filmora.

Summary
What you’ve learned:
- How to create text animations in Filmora
- Applying animation effects
- Make advanced edits on Titles in Filmora
- Hide and lock Tracks and Clips in Filmora
What you need to prepare:
- A computer (Windows or macOS)
- Your video materials.
- Filmora video editor
Step 1
Download Filmora . Let it install and wait for it to run. Then, click on “New Project”. Now, you’re ready to edit!
Step 2
First, go to Titles and drag the Default Title to the Timeline.

Step 3
Now, double-click on the Default Title clip. Here, change its font to any bold font. Increase the text size to 120. Type in your text in the box. Scroll a bit down and change the Text Spacing to 8. Click OK.

Step 4
Take a Snapshot of this Default Title.

Step 5
Double-click on the Default Title clip once again. This time, click on its Advanced settings. Here, turn OFF Text Fill → turn ON Outline → change the Outline color to White → reduce Thickness to 1. Click OK. Now, take another Snapshot.

Step 6
Delete the Default Title clip from the Timeline. Now, drag the Outline snapshot that we just created to the Timeline. Open the Crop tool → change the Ratio to Custom → replace “1080” with “540”. Lastly, move the highlighted crop section to the top. Click OK.

Step 7
Double-click on the Snapshot to open its settings panel. Go to the Animation tab. Here, change the value of the Y-axis to “275”**.** Click OK. Now, take a Snapshot.

Step 8
Next, click on the Crop tool again and simply move the highlighted crop section to the bottom part of the screen. Click OK. Then, double-click on the snapshot clip in the Timeline and change the value of the Y-axis from “275” to “-275”**.** Click OK. Take a Snapshot again.
Step 9
Import a background image to My Media. Drag the background image to the Timeline. Double-click on it and drag the Scale bar until the background image covers the whole screen. Click OK. You should cut the background clip to make it 3 seconds long as well.

Step 10
Lock this track in the Timeline by pressing the highlighted button on the left. Then, go to “Track Manager” and add 6 new Tracks to the Timeline. Click OK.

Step 11
Drag the first Snapshot we made before to Track 6. Cut it so it’s 3 seconds long. Then, Lock the Track.

Step 12
Set the Playhead at the 15th frame on the Timeline. Then, drag the Upward Outline snapshot to this point. Double-click on it and change the Y-axis value to “**-4%**”. Then, reduce the Opacity to 0%. Now, move the Playhead 5 frames further. Next, increase the Opacity to 100% and increase the Y-axis value to around “105”. Don’t click OK yet.
Step 13
Move the Playhead to 1 minute and 5 seconds on the Timeline. Add a keyframe by clicking on the “+Add” button. Then, move the Playhead 5 frames forward. Here, change the Zoom Level to 25%.

Step 14
Double-click on the clip in Track 5. Drag the text like in the image below. Then, delete the part of the clip on the right side after 1 minute and 15 seconds.

Step 15
Hide the clips on Track 6 and Track 1 by clicking the “eye” icons next to them. Then, take a Snapshot. Now, drag this Snapshot right next to the clip on Track 5.

Step 16
Move the Playhead 3 frames forward from the starting point of the clip you just added. Unhide Track 6. Double-click on the clip on the right side of Track 5 and click on “+Add”. Move the Playhead 5 seconds forward and adjust the Upward Outline to fit the text.

Step 17
Move the Playhead 5 frames forward again. Drag the Y-axis value to the left until the outline clip overlaps the main text. Then, reduce the Opacity to 0%. Move the Playhead to 2 minutes and 10 seconds. Cut the Track and delete the clip on the right side. Lastly, Lock Track 5.

Step 18
Drag the Downward Outline snapshot to Track 4. Then, repeat the same process as in Step 16 and Step 17.
Step 19
Drag the Upward Outline snapshot to Track 3 at the 17th frame. Double-click on it and change the Opacity to 0%.

Step 20
Now, move 5 frames forward and increase the Opacity back to 100%. Then, drag the Y-axis value to the right until the screen looks like this.

Step 21
Move the Playhead to 1 minute and 5 seconds. Click on “+Add” to add a keyframe. Then, move the Playhead 5 frames forward. Double-click on the clip and stretch it from side to side to match something like this.

Step 22
Move the Playhead to 1 minute and 16 seconds. Split the clip and delete the part on the right side. Hide Track 4, 5, and 6. Then, take a Snapshot. Drag this Snapshot next to the clip on Track 3. Place the Playhead on 1 minute and 18 seconds. Then, unhide Track 4, 5, and 6.
Step 23
Double-click on the clip on the right side of Track 3. Add a keyframe by pressing “+Add”. Move the Playhead to 1 minute and 23 seconds. Now, resize the clip back to its original size by moving the rectangle left and right. Right now, it should look like this.

Step 24
Move the Playhead 5 frames forward. Drag the Y-axis value to the left until the screen looks like this.

Step 25
Move the Playhead 5 frames forward again. Drag the value of the Y-axis to the left until the screen looks like this. Then, change the Opacity to 0%. Finally, split the clip at 2 minutes and 10 seconds. Delete the part on the right side. Lock Track 3.

Step 26
Next, drag the Downward Snapshot on Track 2 and follow the same process as in Steps 19 through 25.
Step 27
Unhide the Background clip at the bottom of the Timeline. Then, Unlock Track 6. Split the clip on Track 6 at the 15th frame.

Step 28
Move the Playhead at the beginning of the Timeline. Click on the first part of the clip on Track 6. Add a keyframe. Drag the X-axis value to the right until the word disappears out of the screen. Like this. 👇Then, move the Playhead to the 6th frame and Reset the X-axis value to 0.0.

Step 29
Take the Playhead to 2 minutes and 10 seconds. Split it. Now, move the Playhead to 2 minutes and 19 seconds and add a keyframe. Lastly, take the Playhead to the very end of the clip and drag the text to the right side until it’s out of the screen once again.

Step 30
Go to the Effects tab. Select Glitch from the panel on the left. Then, apply “Glitch Dispersion” and “Glitch Stripe 2” to the clips at the start and at the end.

Step 31
Finally, Render the video to watch the final preview. And, you’re done! Congratulations on creating a repeated text animation in Filmora.

Summary
What you’ve learned:
- How to create text animations in Filmora
- Applying animation effects
- Make advanced edits on Titles in Filmora
- Hide and lock Tracks and Clips in Filmora
What you need to prepare:
- A computer (Windows or macOS)
- Your video materials.
- Filmora video editor
Step 1
Download Filmora . Let it install and wait for it to run. Then, click on “New Project”. Now, you’re ready to edit!
Step 2
First, go to Titles and drag the Default Title to the Timeline.

Step 3
Now, double-click on the Default Title clip. Here, change its font to any bold font. Increase the text size to 120. Type in your text in the box. Scroll a bit down and change the Text Spacing to 8. Click OK.

Step 4
Take a Snapshot of this Default Title.

Step 5
Double-click on the Default Title clip once again. This time, click on its Advanced settings. Here, turn OFF Text Fill → turn ON Outline → change the Outline color to White → reduce Thickness to 1. Click OK. Now, take another Snapshot.

Step 6
Delete the Default Title clip from the Timeline. Now, drag the Outline snapshot that we just created to the Timeline. Open the Crop tool → change the Ratio to Custom → replace “1080” with “540”. Lastly, move the highlighted crop section to the top. Click OK.

Step 7
Double-click on the Snapshot to open its settings panel. Go to the Animation tab. Here, change the value of the Y-axis to “275”**.** Click OK. Now, take a Snapshot.

Step 8
Next, click on the Crop tool again and simply move the highlighted crop section to the bottom part of the screen. Click OK. Then, double-click on the snapshot clip in the Timeline and change the value of the Y-axis from “275” to “-275”**.** Click OK. Take a Snapshot again.
Step 9
Import a background image to My Media. Drag the background image to the Timeline. Double-click on it and drag the Scale bar until the background image covers the whole screen. Click OK. You should cut the background clip to make it 3 seconds long as well.

Step 10
Lock this track in the Timeline by pressing the highlighted button on the left. Then, go to “Track Manager” and add 6 new Tracks to the Timeline. Click OK.

Step 11
Drag the first Snapshot we made before to Track 6. Cut it so it’s 3 seconds long. Then, Lock the Track.

Step 12
Set the Playhead at the 15th frame on the Timeline. Then, drag the Upward Outline snapshot to this point. Double-click on it and change the Y-axis value to “**-4%**”. Then, reduce the Opacity to 0%. Now, move the Playhead 5 frames further. Next, increase the Opacity to 100% and increase the Y-axis value to around “105”. Don’t click OK yet.
Step 13
Move the Playhead to 1 minute and 5 seconds on the Timeline. Add a keyframe by clicking on the “+Add” button. Then, move the Playhead 5 frames forward. Here, change the Zoom Level to 25%.

Step 14
Double-click on the clip in Track 5. Drag the text like in the image below. Then, delete the part of the clip on the right side after 1 minute and 15 seconds.

Step 15
Hide the clips on Track 6 and Track 1 by clicking the “eye” icons next to them. Then, take a Snapshot. Now, drag this Snapshot right next to the clip on Track 5.

Step 16
Move the Playhead 3 frames forward from the starting point of the clip you just added. Unhide Track 6. Double-click on the clip on the right side of Track 5 and click on “+Add”. Move the Playhead 5 seconds forward and adjust the Upward Outline to fit the text.

Step 17
Move the Playhead 5 frames forward again. Drag the Y-axis value to the left until the outline clip overlaps the main text. Then, reduce the Opacity to 0%. Move the Playhead to 2 minutes and 10 seconds. Cut the Track and delete the clip on the right side. Lastly, Lock Track 5.

Step 18
Drag the Downward Outline snapshot to Track 4. Then, repeat the same process as in Step 16 and Step 17.
Step 19
Drag the Upward Outline snapshot to Track 3 at the 17th frame. Double-click on it and change the Opacity to 0%.

Step 20
Now, move 5 frames forward and increase the Opacity back to 100%. Then, drag the Y-axis value to the right until the screen looks like this.

Step 21
Move the Playhead to 1 minute and 5 seconds. Click on “+Add” to add a keyframe. Then, move the Playhead 5 frames forward. Double-click on the clip and stretch it from side to side to match something like this.

Step 22
Move the Playhead to 1 minute and 16 seconds. Split the clip and delete the part on the right side. Hide Track 4, 5, and 6. Then, take a Snapshot. Drag this Snapshot next to the clip on Track 3. Place the Playhead on 1 minute and 18 seconds. Then, unhide Track 4, 5, and 6.
Step 23
Double-click on the clip on the right side of Track 3. Add a keyframe by pressing “+Add”. Move the Playhead to 1 minute and 23 seconds. Now, resize the clip back to its original size by moving the rectangle left and right. Right now, it should look like this.

Step 24
Move the Playhead 5 frames forward. Drag the Y-axis value to the left until the screen looks like this.

Step 25
Move the Playhead 5 frames forward again. Drag the value of the Y-axis to the left until the screen looks like this. Then, change the Opacity to 0%. Finally, split the clip at 2 minutes and 10 seconds. Delete the part on the right side. Lock Track 3.

Step 26
Next, drag the Downward Snapshot on Track 2 and follow the same process as in Steps 19 through 25.
Step 27
Unhide the Background clip at the bottom of the Timeline. Then, Unlock Track 6. Split the clip on Track 6 at the 15th frame.

Step 28
Move the Playhead at the beginning of the Timeline. Click on the first part of the clip on Track 6. Add a keyframe. Drag the X-axis value to the right until the word disappears out of the screen. Like this. 👇Then, move the Playhead to the 6th frame and Reset the X-axis value to 0.0.

Step 29
Take the Playhead to 2 minutes and 10 seconds. Split it. Now, move the Playhead to 2 minutes and 19 seconds and add a keyframe. Lastly, take the Playhead to the very end of the clip and drag the text to the right side until it’s out of the screen once again.

Step 30
Go to the Effects tab. Select Glitch from the panel on the left. Then, apply “Glitch Dispersion” and “Glitch Stripe 2” to the clips at the start and at the end.

Step 31
Finally, Render the video to watch the final preview. And, you’re done! Congratulations on creating a repeated text animation in Filmora.

Summary
What you’ve learned:
- How to create text animations in Filmora
- Applying animation effects
- Make advanced edits on Titles in Filmora
- Hide and lock Tracks and Clips in Filmora
Do You Intend to Include Motion Blur on Your Video Using Video Star? This Article Explains How to Use Motion Blur on Video Star with Exquisite Control
Many smartphone video editing apps provide quick services for creating content. However, few offer privileges of including features like motion blur within the videos. The motion blur effect is one of the most recommended features in a video to give it a realistic touch. Where many tools fail to offer this effect, Video Star stands in the line of applications that do not disappoint users.
For this article, we will work on a guideline for how to use motion blur on Video Star. Through the provided details, you can verify and work through a similar model for creating a perfect video.
Part 1: What is Video Star?
We will first review the Video Star application and its features for a better overview of the tool. Video Star is a video editing tool designed to present impressive music videos with appropriate lip-syncing and fan edits. While the application is known for its music editing, Video Star has embedded a variety of features in its package that makes the process interesting.
It includes the option of managing the color and animation in the video. You can also find the tool appropriate for enhancing, combining, and timing clips. Video Star is a complete package when it comes to creating videos on smartphones. With its free features and advanced functionalities, Video Star does not disappoint.
The application has multiple power packs available that can be bought from a subscription plan. With the authoritative control and connection offered, this application makes quite a mark regardless of its mobility.

Download: App Store
Key Features
There are options available on Video Star, which makes it a great video editing option. Those who are up for quick editing should try this option. For that, let’s check out its prominent features:
- You can customize the background and mode of the application according to your needs. Personalize the outlook of your Video Star application as per your desires.
- Add multiple songs of your choice within the video to perfection.
- The tool is integrated with iCloud, providing a dedicated button for connecting the application with the assorted data.
- Features an “Insider” page showing all essential details and updates about the application.
Review
The review of Video Star is quite promising; but mixed. You can add effects within your videos, such as motion blur. But the application still has some concerns which might need some addressing.
When it comes to updating and managing it, there are some drawbacks to its operation. Sometimes, it might even lag for no reason. Along with that, there are some complaints about the text effects included in the application. An overall review might sound good, but some tweaking is needed.
Part 2: How to Use Motion Blur on Video Star?
We will now look into some details about using the motion blur effect on Video Star. While you learn how to target the Video Star motion blur effect to perfection, a comparison in procedure will also be highlighted for better understanding. Look through the details to know more about how to use motion blur to perfection:
Steps to Perform Motion Blur Through Transform on Video Star
Step1 As you download and install Video Star, launch and tap the “+” icon on the top-right to add a video. You must select the “Edit Video” option to proceed further.

Step2 After adding the video, you must use the “Set Start” and “Set End” buttons to trim out the unnecessary part of the video. Select the “Make Video” button on the top and lead to the next part.

Step3 As the video is trimmed, tap the “New” button on the bottom-right and proceed to select “Transform” from the available options.

Step4 You must select the “Motion Blur” effect from the options below. As you are led into the parameter settings of the effect, you will find multiple things to cover on the screen. While you can set the blur element using the slider, set whether the effect will be “Trailing,” “Leading,” or “Both.”

Step5 You can set the video on a lower frame rate using the “Dial” icon. Set the slider under the “Blend” option and proceed to click the “Create” button.

Steps to Perform Motion Blur Through Re-Effects on Video Star
Step1 While you try another technique to perform motion blur on Video Star, you must import the video and set its starting and ending points. As you edit the video, select “New” and find the “Re-Effect” option.

Step2 Continue to the next screen and tap the “+” icon to add an effect. You can find the “Motion Blur” effect by using the “Search” icon present on the screen. As the motion blur effect is added, you have to set the effect using the slider.

Bonus Tips – Add Motion Blur with Filmora on Desktop
What if you search for a better option than the motion blur effect on Video Star? Though there are many tools, the quickest option to look for on the desktop is Wondershare Filmora . This easy-going, effective, and diverse software provides the smoothest experience in video editing. The variety of tools offered within the platform is exquisite.
Free Download For Win 7 or later(64-bit)
Free Download For macOS 10.14 or later
To learn more about Wondershare Filmora, you can also observe the features provided below:
- While you can add effects like motion blur, Filmora provides an extended list of effects to try out.
- There are multiple video resolution qualities offered while exporting the video. It also includes setting the video parameters according to a specific device or platform.
- Wondershare Filmora induces a high-quality result for the user in a simple environment. This makes it an easy tool to use with quality adjustments.
- Along with adding effects and transitions, Filmora provides an Instant Mode to help users create videos within minutes.
Steps For Adding Motion Blur to Wondershare Filmora on Desktop
We will now direct ourselves to discuss the steps for adding motion blur on Filmora with ease:
Step1 Launch Filmora and Create Video Project
You must launch Wondershare Filmora and click the “Create New Project” button to initiate a new project. Select the folder-like icon on the screen for importing the video file that is to be edited. On adding the file, drag and drop it on the timeline.

Step2 Split Video to Add Effect
With the help of the play head offered on the timeline, lead to the specific part where you wish to start adding the motion blur effect. Use the “Scissors” icon from the timeline to cut the video from the specific part.

Step3 Add the Motion Blur Effect
On splitting, navigate to the “Effects” tab on the top and find the “Blur” effects from the “Video Effects” category. After finding the right motion blur effect, drag and drop it on the part where the video was split.

Step4 Use Dissolve Transition and Export Video
Use the “Dissolve” transition from the “Transitions” tab to add more adjustments. Once the video is smoothened, click the “Export” button to get the edited file out.

Last Words
The article has provided a complete overview of the Video Star Motion Blur effect. With the provided details and a guideline on adding motion blur to a video, it is prominent how one can add the effect to make their video look realistic. For a better editing experience, you can consider using Wondershare Filmora on your desktop for better results.
Free Download For macOS 10.14 or later
To learn more about Wondershare Filmora, you can also observe the features provided below:
- While you can add effects like motion blur, Filmora provides an extended list of effects to try out.
- There are multiple video resolution qualities offered while exporting the video. It also includes setting the video parameters according to a specific device or platform.
- Wondershare Filmora induces a high-quality result for the user in a simple environment. This makes it an easy tool to use with quality adjustments.
- Along with adding effects and transitions, Filmora provides an Instant Mode to help users create videos within minutes.
Steps For Adding Motion Blur to Wondershare Filmora on Desktop
We will now direct ourselves to discuss the steps for adding motion blur on Filmora with ease:
Step1 Launch Filmora and Create Video Project
You must launch Wondershare Filmora and click the “Create New Project” button to initiate a new project. Select the folder-like icon on the screen for importing the video file that is to be edited. On adding the file, drag and drop it on the timeline.

Step2 Split Video to Add Effect
With the help of the play head offered on the timeline, lead to the specific part where you wish to start adding the motion blur effect. Use the “Scissors” icon from the timeline to cut the video from the specific part.

Step3 Add the Motion Blur Effect
On splitting, navigate to the “Effects” tab on the top and find the “Blur” effects from the “Video Effects” category. After finding the right motion blur effect, drag and drop it on the part where the video was split.

Step4 Use Dissolve Transition and Export Video
Use the “Dissolve” transition from the “Transitions” tab to add more adjustments. Once the video is smoothened, click the “Export” button to get the edited file out.

Last Words
The article has provided a complete overview of the Video Star Motion Blur effect. With the provided details and a guideline on adding motion blur to a video, it is prominent how one can add the effect to make their video look realistic. For a better editing experience, you can consider using Wondershare Filmora on your desktop for better results.
Finding Best GIF Websites Is Easy as Pie — Here’s What You Should Know
Finding Best GIF Websites Is Easy as Pie — Here’s What You Should Know
An easy yet powerful editor
Numerous effects to choose from
Detailed tutorials provided by the official channel
Want a heap of the most exiting GIFs? Here are the best websites to visit.
In this article
01 [10 Sites for Finding the Perfect GIF](#Part 1)
02 [How to Use Animated GIF Makers](#Part 2)
03 [5 Stunning Examples of Gifs in Web Design](#Part 3)
Part 1 Sites for Finding the Perfect GIF
Information was never so expressive until GIFs came up as delivery platform. Looking through the frame of content diversity and effective delivery, there’s possibly nothing that is left untouched by these short, precise and creative snippets. When the talk is about long term user credibility, creativity is one thing, while reach is the other.
No doubt about the creative aspect, but the convenient availability holds equal importance. However captivating a utility nay be, you would certainly not be interested to spend quality time searching the apt content. Let’s take a look at some of the most popular and convenient GIF website that will surely put a full stop on your search spree for a relatable GIF.
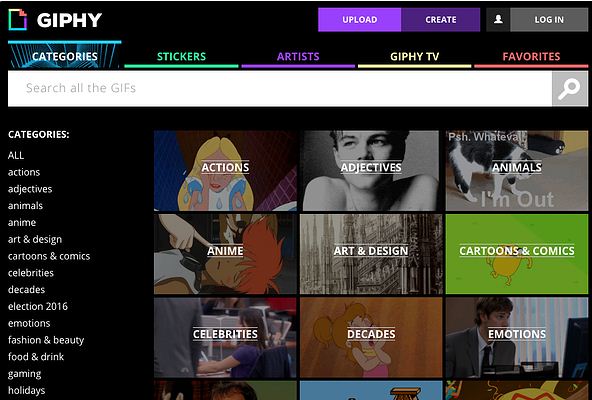
01GIPHY
Initially launched as a GIF search engine, thin is a complete storehouse on almost everything that you can possibly think of. The extensive content library of this site is all set to meet your most specific content requirements in less than a blink’s time. You get an access to quality content in music, science, nature and what not on this free GIF website.
Talking of search flexibility, GIPHY is known to have the most advanced and updated search bar that ensures that top quality and fresh content is always at the hand of its users. You can browse through the vast GIF categories of the site or look for your exact content using a specific search keyword.
02Reddit
You can regard this site as a GIF membership community, where you can find a variety of impressive sub-reddits in the GIF category. The best part is, you will never find recursive content on any two or more sub-reddits as each one is developed and updated keeping different content specifications in mind.
You are given access to even finer content libraries in some particular sub-reddits that follow a sequential guideline to filter their entries according to user preferences. Some popular sub-reddits are listed below:
03Tumblr
Originally a blogging site, Tumblr is simply heaven for creating and sharing GIFs across media platforms. What’s interesting about the site is its content categorization, where bloggers on the site group relatable content under specific categories, which facilitates an easy, quick and hassle free search. Most of the GIF content on the site is either created in Photoshop or taken from across the web.
While the site has exciting GIF content for almost every scenario, the comedy genre is the st5arb attraction of this GIF platform. The huge comic content library of the site has hilarious memes and GIFs that will certainly leave you rolling over the floor. To enjoy your favorite content daily, you just need to search a relatable hashtag and follow some blogs on your searched content.
04Gfycat
This one lands among the most preferred GIF sites and is packed with an enormous inventory of memes and GIFs. Not just this, this one is a free GIF maker website that allows you to convert videos from almost every media platform into GIFs, independent of the video file format via its ‘Video to GIF Converter’ tool.
You can set a daily dose of your favorite, exciting GIF content by using either the search bar or the ‘Selection Menu’ in the left of the site’s Home page. You can even browse through latest GIF categories by navigating to the ‘Trending’ and ‘Explore’ sections.
05Tenor
You can prefer this site to enjoy your favorite GIFs on your PC or iOS device. The site gives you the liberty to share GIFs and memes directly from its library into any of your Instant Messaging chats or community conversations on social media platforms.
All you need to do is navigate to the Tenor search bar, put in a suitable keyword and there you can see loads of GIF content on your screen in less than a second’s time. With periodic updates and a cohesive interface, this site is your storehouse of latest and trendy GIFs, anytime and anywhere.
06Reaction GIFs
This site is known for having an exact content database for almost every thought that crosses your mind. It serves you with a refined search mechanism, having a different pathway for every search, depending on the content you are looking for. This is a perfect aid to get exactly what you want, without having to fuss out with unwanted stuff.
Talking of search methods, you will find a drop-down menu at the right to search GIFs that express ‘Emotions’ or one word answers (preferably a ‘Yes’ or a ‘No’). If you want something related to a more specific category, you can browse through the ‘Galleries’ and ‘Tags’ of the site (categories, like, OMG, LOL, etc).
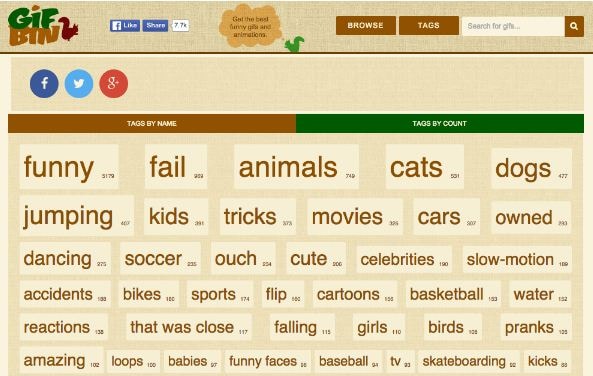
07GIFbin
This is again a trunk of latest, funny and entertaining GIFs tom watch and share. On this site, you get to add search filters, like, ‘Most Viewed’, ‘Latest’, ‘Top Rated’, etc., that refine your search to fetch exactly what you are looking for. You are also free to use ‘Search Tags’ grouped according to name and search count on the site.
The tag names are standard keywords (like, animals, sports, nature, etc.) and the count feature keeps a track of the most frequent searches, thus allowing you to find out your favorite GIFs in a more explicit manner. If you are clueless about anything specific, don’t worry. Hit the ‘Random GIFs’ button to explore a whole new world of fun and excitement.
08Imgur
This site is popular in the meme world as a GIF sub-reddit that has explicitly no text threads. You can take this one as a free, GIF hosting and sharing website. While you can find loads of quality content on the site convenient to almost any genre, it is a leader in comic and funny GIFs. You can use different search tags for hilarious movie snippets, or some other fun element of your liking. This site’s image library is a hub of latest and nostalgic content.
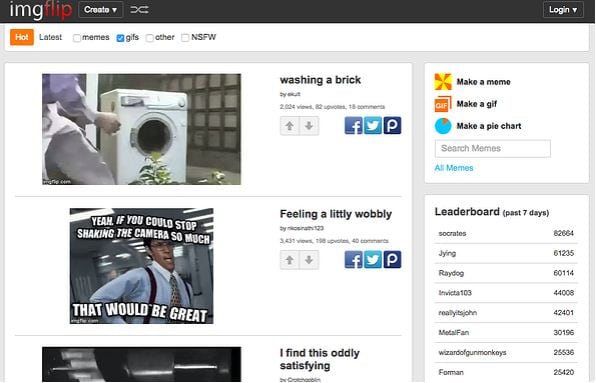
09Imgflip
This is one more hotspot for relatable GIFs and memes. The best thing about the site is that it has separate search pathways to refine your search in cohesion with your content preference. Some common pathways are explained below:
● Browse the site’s homepage for the latest and trending GIF content.
● Simplify your search on specific content pages using the ‘Random’, ‘Next’ or ‘Previous’ navigation options.
● Prefer using ‘Image Hotkeys’ on the content pages.
● Try on ‘Tagging’ specific content pages (sunrise, snowfall, cats, etc.).
If you like competing with fellow visitors on the site, you can experiment with creating GIFs of your own and get ranked on the creator scoreboard. Bag a high vote count to get your GIF trending on the site.
10Gyazo
Last on the list, this is a somewhat different site in terms of features and search constraints. The exclusively unique ’Screen Capture’ feature of this site allows you to take a video of your device screen and use it to create a GIF of your own, making itself a quick and effective ‘Video to GIF Converter’ tool.
You will require creating an account on the site to maintain a library of your searched contents, which you can either tag on the site or downloaded to your device. You can further, export and share your creations across media platforms through this site.
Part 2 How to Use Animated GIF Makers
Landing into the creative and exciting world of GIFs, you can easily get motivated to try hands on making your own GIFs. The online market is a pool of solutions that claim of adhering to this concern in the most effective ways. When looking for the best GIF maker tools and software, you can definitely count upon the following choices:
01**Wondershare Filmora Video Editor **
This one is undoubtedly the best GIF creator software in current times. Using the plethora of audio-visual features, effects and image filters that are offered by this tool, creating animated GIFs is a spic and span process. The software grants you the liberty to play with and explore your editing skills to generate professional quality GIFs within minutes.

Wondershare Filmora - Best Video Editor for Mac/Windows
5,481,435 people have downloaded it.
Build unique custom animations without breaking a sweat.
Focus on creating epic stories and leave the details to Filmora’s auto features.
Start a creative adventure with drag & drop effects and endless possibilities.
Filmora simplifies advanced features to save you time and effort.
Filmora cuts out repetition so you can move on to your next creative breakthrough.
Here’s how you can use this software to become a pro at creating GIFs:
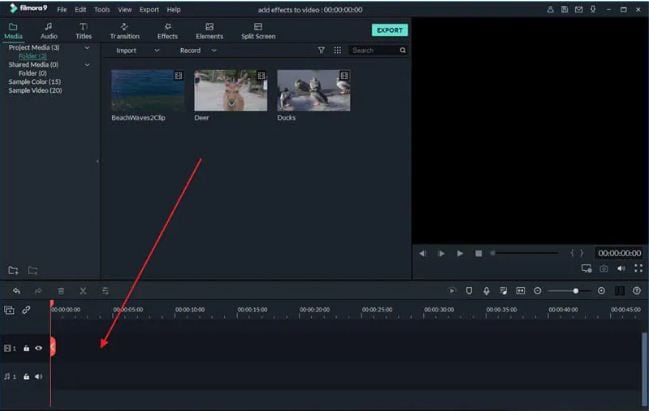
● Step 1: Import Required Media Files
To begin with, select any desired set of images or a particular video file to the Filmora timeline. You don’t need to be format specific; the software is compatible with over 150 different file formats.
● Step 2: Drag Files to Edit
Once you are done with selecting the files, you need to drag the same to the Filmora Editor Timeline, where you can transform the file contents with your editing skills.
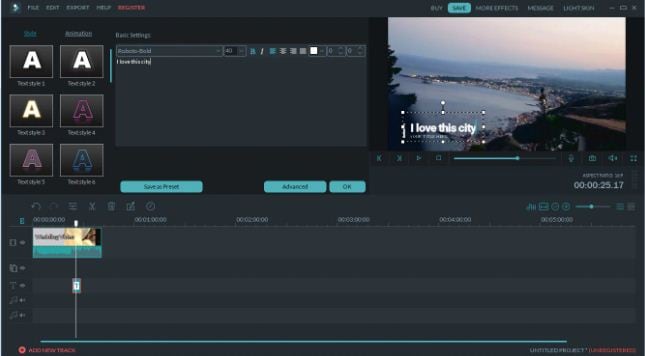
● Step 3: Let’s Get Editing.
In the editor window, you are free tom choose from a range of effects, tools and filters suitable to your GIF content to give your artwork a new and engaging look. You can experiment with the cutting, cropping and trimming tools or play with effects, like, overlays, rotation and speed adjustments and even add texts to deliver messages that intensify your GIF.
● Step 4: Time to Save and Share.
Now is the time to save your work locally to your device using the .gif extension with your created file, as well as share it among your peers on social communities.
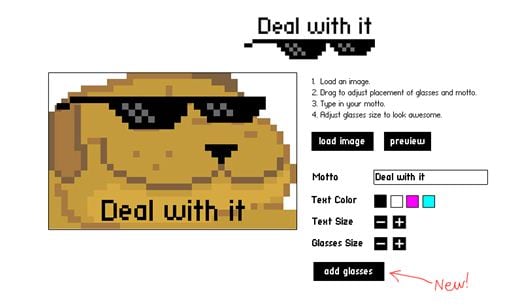
03Deal With It
This one is an online GIF maker tool that allows you to make top quality animated GIFs within a few seconds and you don’t even need to take up any third party software installation. Creating GIFs with this user friendly, clean interface and quick GIF generator utility is an absolute fun, to say the least.
Once you are done creating, the tools gives you the liberty to experiment with effects like, texts and glasses that would further intensify your GIF to the next level, and the best part is, all of this is available to you without having to spend a penny out of your pocket.
Explained below is the step wise user guide to use this tool for creating GIFs:
● Step 1:
Navigate to official website of the GIF creator tool.
● Step 2:
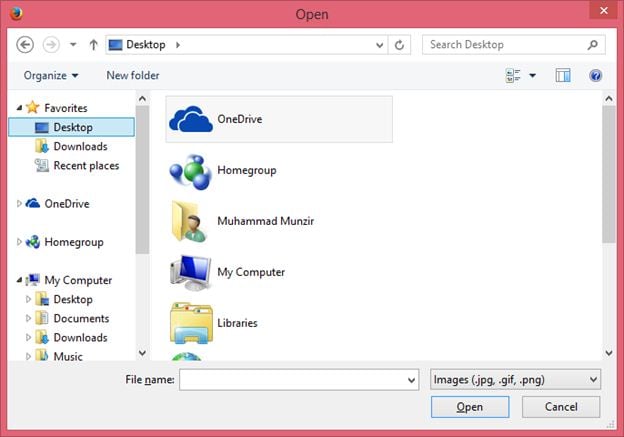
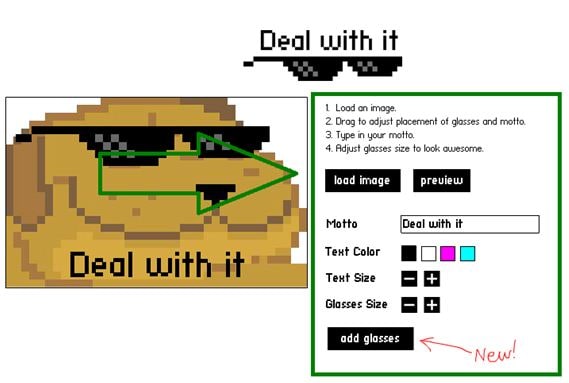
Choose a desired locally saved image from your device and upload it in the tool’s editor window. To do this, click on the ‘Load Image’ button.
● Step 3:
You can now modify the uploaded image with text and glasses. This is it. Your GIF is ready to save and export.
03LunaPic
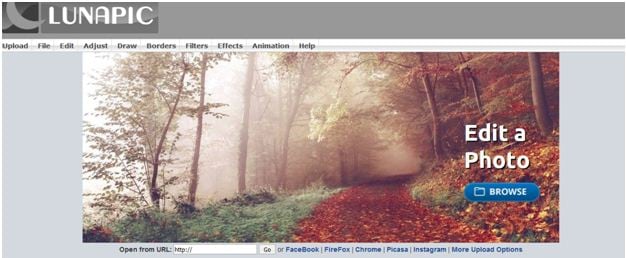
This one lands among the most preferred GIF maker tools available across the web. It comes with a clean interface, is free to use and does not require any third party software installation. You can create catchy and interesting GIF banners, or make captivating, animated GIF files with a series of still images using this tool. However, this GIF maker does not give you the liberty to take up editing and speed or accuracy modifications on your creation.
You need to follow the steps explained below to create your own GIF with LunaPic:
● Step 1:
Open the official site of LunaPic in your web browser.
● Step 2:
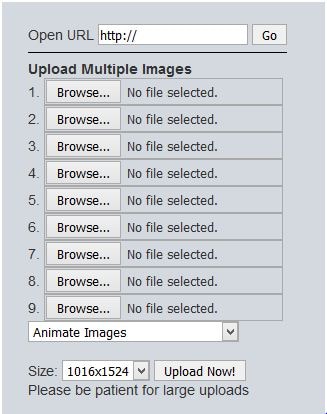
Upload a desired one or a set of images you wish to use for making your GIF on the site. To do this, select a group of images from your device and tap ‘Upload’
.
● Step 3:
Once uploaded, you can use your creativity to play with the effects library of the site and edit your images in its editing interface.
● Step 4:
When satisfied, choose the file type as GIF and hit the ‘Save’ option at the bottom. This will save your creation locally in your device, once the file conversion gets completed.
Image Name: Finding-best-gif-websites-is-easy-as-pie—here’s-what-you-should-know-22
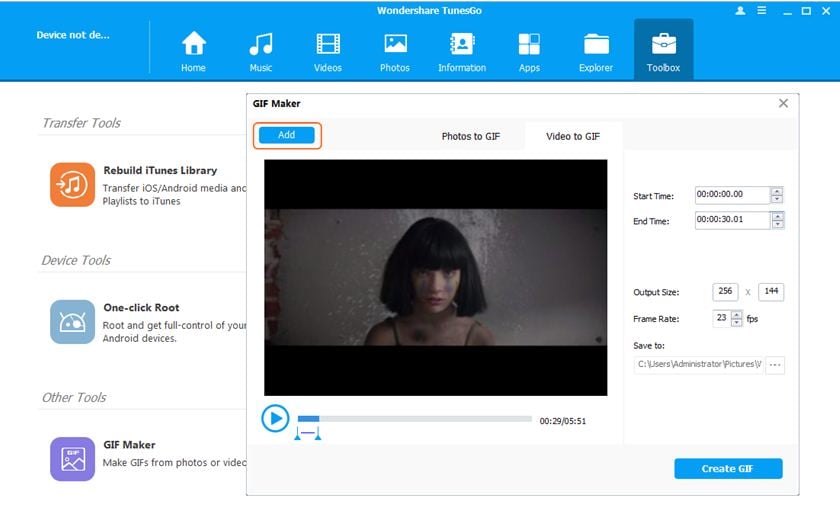
04Wondershare TunesGo
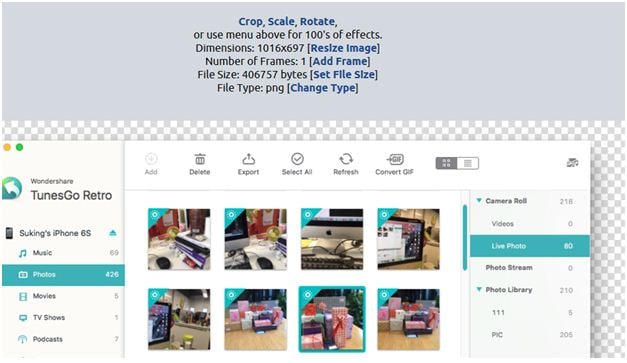
This one is another efficient animated GIF creator utility on the internet. Available to you as free online software, this tool promises you an amazing and hassle free GIF making experience. You can either create stunning GIFs of your own, or convert video files and even live photos into the same using this software. It allows you to set time slots for file conversions and make speed and flow adjustments for GIF frames, along with offering a plethora of editing effects to play with.
Here’s the know-how of using this software to create top quality animated GIFs:
● Step 1: Download and Launch the Software
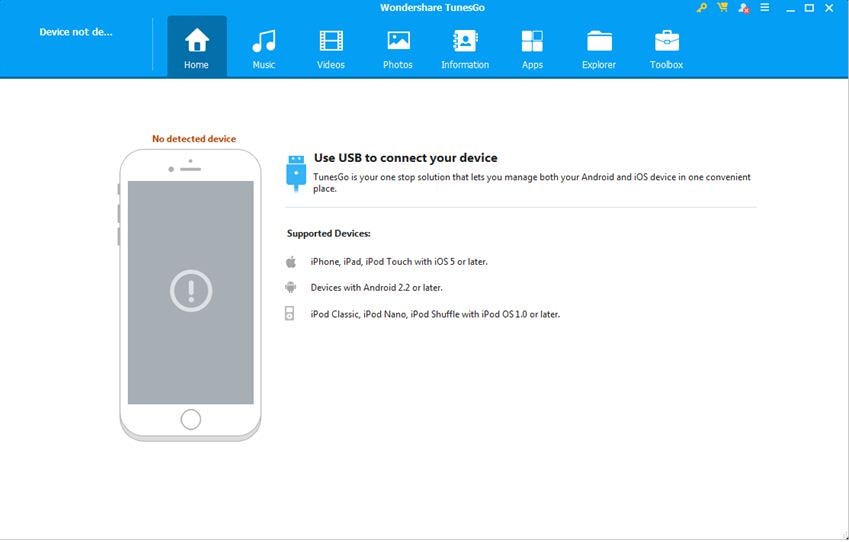
Pay a visit to the official TunesGo website to download the software. Begin with installing and launching the same on your preferred device. When you finish, click on the ‘Toolbox’ tab at the top in the welcome screen.
● Step 2: Upload Media Files
In the software’s opening interface, choose the GIF Maker tool. In the following window that pops-up, click on ‘Add’ to upload the desired media files saved in your device, you want to create a GIF with.
● Step 3: Convert to GIF
Set the media file to GIF conversion time and tap the ‘Create GIF’ button in the bottom-right to initiate the conversion process.
05Wave.video
This one is among the latest GIF maker tools that allow you to create animated GIFs from videos. What’s quite interesting about this Gif creation platform is, you can trim videos to the exact part depending on your content preference before beginning with the conversion process. You can also save your creation as a group of trimmed clips. It is a user friendly, free access online tool that does not ask you to install any third party software, and GIF creation with its mess-free interface is absolute fun.
Take the steps listed below to make GIFs with this online tool:
● Step 1: Choose a Project
To start working with this tool, you need to create an account on its official site. Having done that, just log into your account and upload a desired video you would like to use for creating a GIF. You have a choice to select a locally saved video, choose one from the templates available on the site or create something of your own.
● Step 2: Customization and Publishing
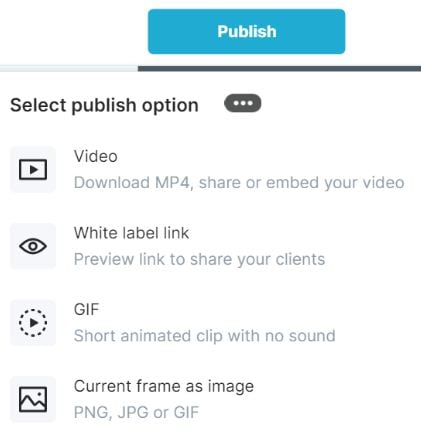
It is now time to try hands on editing your video with stunning effects like, overlays glasses, etc., or add impactful elements, such as, texts, stickers, etc., to make your artwork more impressive. When you are happy, navigate to the top-right and tap ‘Publish’. From the menu that drops down, select ‘GIF’.
● Step 3: Download Your Creation
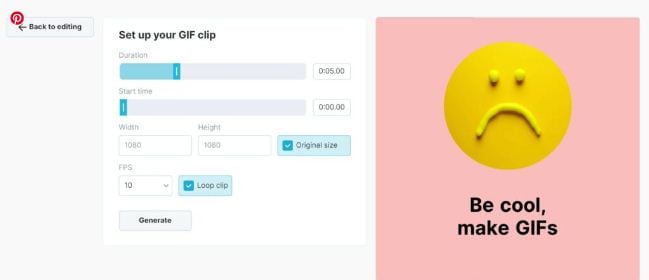
Select the section of your video you wish to convert into a GIF and proceed to fix the GIF start time and play duration. Check for any frame resize requirements, set an adequate frame rate and lastly, click on the ‘Loop Clip’ checkbox. This will produce an infinite loop GIF. When everything seems perfect, tap on ‘Generate’ followed by ‘Download’ to save your creation and share it on social media.
Part 3 5 Stunning Examples of Gifs in Web Design
The credibility of GIFs in market oriented content sharing and information publishing evidently does not require an introduction. These attractive snippets are expert means of business growth and customer appealing strategy planning to address attract a massive target audience within seconds.
Now that you are quite accustomed with the market reliability of GIFs, you may visibly feel motivated to use them to improvise your product websites for a next level market approach. However, before you plunge into using GIFs for your brand promotion, consider sparing a few minutes to browse through some top class product based GIFs to enhance your GIF creation and implementation aptitude.
Described below are some eye-catching examples of GIF for website background, you should certainly look forward to using in your business campaigns:
01Headscape
Having its roots in the United Kingdom, this is a top rated, digital media design corporation that excels in providing web design solutions to a diverse global clientele. Their unique idea of using GIFs in grayscale to depict conducive business settings is just perfect.
The monochromatic color balance with parallax scrolls makes this GIF all the more impactful. You can find impressive ways of using GIFs with a professional instinct on the company website and begin to add appeal to your market buildup strategies.
02Invision
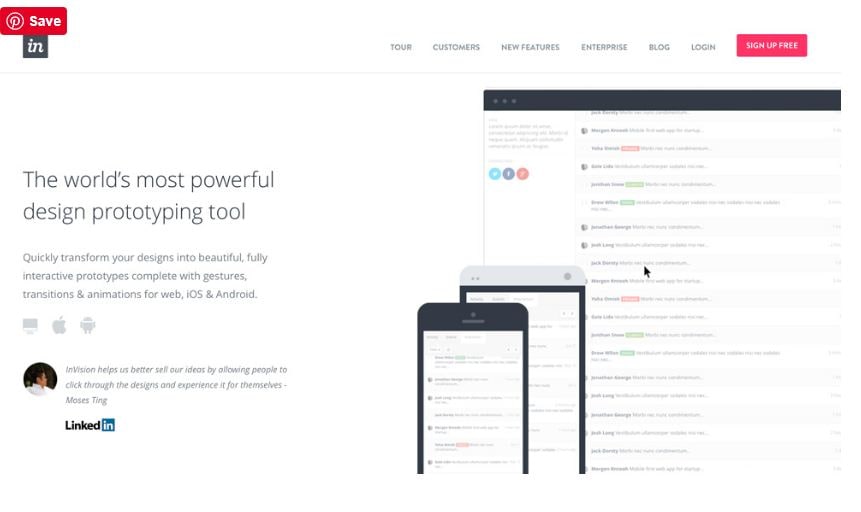
This is another high ranked application marketing site that uses GIF for website background to improvise its product promotion. Equipped with a preset world class page makeover, the site’s look and appeal simply gets a boost with floating-text animated GIFs on an otherwise normal webpage.
As you move further on the Invision homepage, you will get to see a demonstration of the site’s prototype tool through GIFs that explain its working functionalities in the most interesting and convenient manner, thus putting forward and outrageously professional and effective marketing strategy.
03Macaw
This one is an excellent design utility that is equally suited to both web designers as well as site developers. On visiting the tool’s homepage, you are welcomed with a streamlined text setting on a black and white theme. Move a bit downwards, and there you see a cluster of animated GIFs in action to get you familiar with the interface and usage pattern of the Macaw design utility with utmost ease. It is convenient enough to make you feel as if you are actually using the tool.
04Giant Ant
Established as a creative firm, this one is known for its appealing website design. As you navigate through the site, you will find a still image complemented by cohesive text overlays. Beneath that, there are caricature forms of everyday objects, but the real magic happens when you click on a particular object and woosh. It instantly turns into an animated GIF. This explicit style of infusing dynamism to your website is simply awesome, to say the least.
05Tinke
This is intuitively a fitness tracker that keeps a record of your system vitals in the most effective manner. But that’s not all. The tracker website is equally amazing, setting the perfect example of using GIFs to improve market buildup. The site majorly utilizes the parallax scroll effect with animated GIFs to facilitate a live demonstration of the tracker functionality, coupled with an iPhone user guide and ways of sharing relatable content with fellow users.
● Key Takeaways from This Episode →
● Surfing the internet, you will land across some of the best GIF creator and downloader sites that are flooded with brilliant GIF content suited for almost every purpose.
● You can create your own animated GIFs on any GIF maker website or enjoy pre-made stuff to your heart’s content, where using Filmora is certainly the best choice. To explore something more exciting, try hands on using GIFs for product marketing and brand promotions on your business sites.
Want a heap of the most exiting GIFs? Here are the best websites to visit.
In this article
01 [10 Sites for Finding the Perfect GIF](#Part 1)
02 [How to Use Animated GIF Makers](#Part 2)
03 [5 Stunning Examples of Gifs in Web Design](#Part 3)
Part 1 Sites for Finding the Perfect GIF
Information was never so expressive until GIFs came up as delivery platform. Looking through the frame of content diversity and effective delivery, there’s possibly nothing that is left untouched by these short, precise and creative snippets. When the talk is about long term user credibility, creativity is one thing, while reach is the other.
No doubt about the creative aspect, but the convenient availability holds equal importance. However captivating a utility nay be, you would certainly not be interested to spend quality time searching the apt content. Let’s take a look at some of the most popular and convenient GIF website that will surely put a full stop on your search spree for a relatable GIF.
01GIPHY
Initially launched as a GIF search engine, thin is a complete storehouse on almost everything that you can possibly think of. The extensive content library of this site is all set to meet your most specific content requirements in less than a blink’s time. You get an access to quality content in music, science, nature and what not on this free GIF website.
Talking of search flexibility, GIPHY is known to have the most advanced and updated search bar that ensures that top quality and fresh content is always at the hand of its users. You can browse through the vast GIF categories of the site or look for your exact content using a specific search keyword.
02Reddit
You can regard this site as a GIF membership community, where you can find a variety of impressive sub-reddits in the GIF category. The best part is, you will never find recursive content on any two or more sub-reddits as each one is developed and updated keeping different content specifications in mind.
You are given access to even finer content libraries in some particular sub-reddits that follow a sequential guideline to filter their entries according to user preferences. Some popular sub-reddits are listed below:
03Tumblr
Originally a blogging site, Tumblr is simply heaven for creating and sharing GIFs across media platforms. What’s interesting about the site is its content categorization, where bloggers on the site group relatable content under specific categories, which facilitates an easy, quick and hassle free search. Most of the GIF content on the site is either created in Photoshop or taken from across the web.
While the site has exciting GIF content for almost every scenario, the comedy genre is the st5arb attraction of this GIF platform. The huge comic content library of the site has hilarious memes and GIFs that will certainly leave you rolling over the floor. To enjoy your favorite content daily, you just need to search a relatable hashtag and follow some blogs on your searched content.
04Gfycat
This one lands among the most preferred GIF sites and is packed with an enormous inventory of memes and GIFs. Not just this, this one is a free GIF maker website that allows you to convert videos from almost every media platform into GIFs, independent of the video file format via its ‘Video to GIF Converter’ tool.
You can set a daily dose of your favorite, exciting GIF content by using either the search bar or the ‘Selection Menu’ in the left of the site’s Home page. You can even browse through latest GIF categories by navigating to the ‘Trending’ and ‘Explore’ sections.
05Tenor
You can prefer this site to enjoy your favorite GIFs on your PC or iOS device. The site gives you the liberty to share GIFs and memes directly from its library into any of your Instant Messaging chats or community conversations on social media platforms.
All you need to do is navigate to the Tenor search bar, put in a suitable keyword and there you can see loads of GIF content on your screen in less than a second’s time. With periodic updates and a cohesive interface, this site is your storehouse of latest and trendy GIFs, anytime and anywhere.
06Reaction GIFs
This site is known for having an exact content database for almost every thought that crosses your mind. It serves you with a refined search mechanism, having a different pathway for every search, depending on the content you are looking for. This is a perfect aid to get exactly what you want, without having to fuss out with unwanted stuff.
Talking of search methods, you will find a drop-down menu at the right to search GIFs that express ‘Emotions’ or one word answers (preferably a ‘Yes’ or a ‘No’). If you want something related to a more specific category, you can browse through the ‘Galleries’ and ‘Tags’ of the site (categories, like, OMG, LOL, etc).
07GIFbin
This is again a trunk of latest, funny and entertaining GIFs tom watch and share. On this site, you get to add search filters, like, ‘Most Viewed’, ‘Latest’, ‘Top Rated’, etc., that refine your search to fetch exactly what you are looking for. You are also free to use ‘Search Tags’ grouped according to name and search count on the site.
The tag names are standard keywords (like, animals, sports, nature, etc.) and the count feature keeps a track of the most frequent searches, thus allowing you to find out your favorite GIFs in a more explicit manner. If you are clueless about anything specific, don’t worry. Hit the ‘Random GIFs’ button to explore a whole new world of fun and excitement.
08Imgur
This site is popular in the meme world as a GIF sub-reddit that has explicitly no text threads. You can take this one as a free, GIF hosting and sharing website. While you can find loads of quality content on the site convenient to almost any genre, it is a leader in comic and funny GIFs. You can use different search tags for hilarious movie snippets, or some other fun element of your liking. This site’s image library is a hub of latest and nostalgic content.
09Imgflip
This is one more hotspot for relatable GIFs and memes. The best thing about the site is that it has separate search pathways to refine your search in cohesion with your content preference. Some common pathways are explained below:
● Browse the site’s homepage for the latest and trending GIF content.
● Simplify your search on specific content pages using the ‘Random’, ‘Next’ or ‘Previous’ navigation options.
● Prefer using ‘Image Hotkeys’ on the content pages.
● Try on ‘Tagging’ specific content pages (sunrise, snowfall, cats, etc.).
If you like competing with fellow visitors on the site, you can experiment with creating GIFs of your own and get ranked on the creator scoreboard. Bag a high vote count to get your GIF trending on the site.
10Gyazo
Last on the list, this is a somewhat different site in terms of features and search constraints. The exclusively unique ’Screen Capture’ feature of this site allows you to take a video of your device screen and use it to create a GIF of your own, making itself a quick and effective ‘Video to GIF Converter’ tool.
You will require creating an account on the site to maintain a library of your searched contents, which you can either tag on the site or downloaded to your device. You can further, export and share your creations across media platforms through this site.
Part 2 How to Use Animated GIF Makers
Landing into the creative and exciting world of GIFs, you can easily get motivated to try hands on making your own GIFs. The online market is a pool of solutions that claim of adhering to this concern in the most effective ways. When looking for the best GIF maker tools and software, you can definitely count upon the following choices:
01**Wondershare Filmora Video Editor **
This one is undoubtedly the best GIF creator software in current times. Using the plethora of audio-visual features, effects and image filters that are offered by this tool, creating animated GIFs is a spic and span process. The software grants you the liberty to play with and explore your editing skills to generate professional quality GIFs within minutes.

Wondershare Filmora - Best Video Editor for Mac/Windows
5,481,435 people have downloaded it.
Build unique custom animations without breaking a sweat.
Focus on creating epic stories and leave the details to Filmora’s auto features.
Start a creative adventure with drag & drop effects and endless possibilities.
Filmora simplifies advanced features to save you time and effort.
Filmora cuts out repetition so you can move on to your next creative breakthrough.
Here’s how you can use this software to become a pro at creating GIFs:
● Step 1: Import Required Media Files
To begin with, select any desired set of images or a particular video file to the Filmora timeline. You don’t need to be format specific; the software is compatible with over 150 different file formats.
● Step 2: Drag Files to Edit
Once you are done with selecting the files, you need to drag the same to the Filmora Editor Timeline, where you can transform the file contents with your editing skills.
● Step 3: Let’s Get Editing.
In the editor window, you are free tom choose from a range of effects, tools and filters suitable to your GIF content to give your artwork a new and engaging look. You can experiment with the cutting, cropping and trimming tools or play with effects, like, overlays, rotation and speed adjustments and even add texts to deliver messages that intensify your GIF.
● Step 4: Time to Save and Share.
Now is the time to save your work locally to your device using the .gif extension with your created file, as well as share it among your peers on social communities.
03Deal With It
This one is an online GIF maker tool that allows you to make top quality animated GIFs within a few seconds and you don’t even need to take up any third party software installation. Creating GIFs with this user friendly, clean interface and quick GIF generator utility is an absolute fun, to say the least.
Once you are done creating, the tools gives you the liberty to experiment with effects like, texts and glasses that would further intensify your GIF to the next level, and the best part is, all of this is available to you without having to spend a penny out of your pocket.
Explained below is the step wise user guide to use this tool for creating GIFs:
● Step 1:
Navigate to official website of the GIF creator tool.
● Step 2:
Choose a desired locally saved image from your device and upload it in the tool’s editor window. To do this, click on the ‘Load Image’ button.
● Step 3:
You can now modify the uploaded image with text and glasses. This is it. Your GIF is ready to save and export.
03LunaPic
This one lands among the most preferred GIF maker tools available across the web. It comes with a clean interface, is free to use and does not require any third party software installation. You can create catchy and interesting GIF banners, or make captivating, animated GIF files with a series of still images using this tool. However, this GIF maker does not give you the liberty to take up editing and speed or accuracy modifications on your creation.
You need to follow the steps explained below to create your own GIF with LunaPic:
● Step 1:
Open the official site of LunaPic in your web browser.
● Step 2:
Upload a desired one or a set of images you wish to use for making your GIF on the site. To do this, select a group of images from your device and tap ‘Upload’
.
● Step 3:
Once uploaded, you can use your creativity to play with the effects library of the site and edit your images in its editing interface.
● Step 4:
When satisfied, choose the file type as GIF and hit the ‘Save’ option at the bottom. This will save your creation locally in your device, once the file conversion gets completed.
Image Name: Finding-best-gif-websites-is-easy-as-pie—here’s-what-you-should-know-22
04Wondershare TunesGo
This one is another efficient animated GIF creator utility on the internet. Available to you as free online software, this tool promises you an amazing and hassle free GIF making experience. You can either create stunning GIFs of your own, or convert video files and even live photos into the same using this software. It allows you to set time slots for file conversions and make speed and flow adjustments for GIF frames, along with offering a plethora of editing effects to play with.
Here’s the know-how of using this software to create top quality animated GIFs:
● Step 1: Download and Launch the Software
Pay a visit to the official TunesGo website to download the software. Begin with installing and launching the same on your preferred device. When you finish, click on the ‘Toolbox’ tab at the top in the welcome screen.
● Step 2: Upload Media Files
In the software’s opening interface, choose the GIF Maker tool. In the following window that pops-up, click on ‘Add’ to upload the desired media files saved in your device, you want to create a GIF with.
● Step 3: Convert to GIF
Set the media file to GIF conversion time and tap the ‘Create GIF’ button in the bottom-right to initiate the conversion process.
05Wave.video
This one is among the latest GIF maker tools that allow you to create animated GIFs from videos. What’s quite interesting about this Gif creation platform is, you can trim videos to the exact part depending on your content preference before beginning with the conversion process. You can also save your creation as a group of trimmed clips. It is a user friendly, free access online tool that does not ask you to install any third party software, and GIF creation with its mess-free interface is absolute fun.
Take the steps listed below to make GIFs with this online tool:
● Step 1: Choose a Project
To start working with this tool, you need to create an account on its official site. Having done that, just log into your account and upload a desired video you would like to use for creating a GIF. You have a choice to select a locally saved video, choose one from the templates available on the site or create something of your own.
● Step 2: Customization and Publishing
It is now time to try hands on editing your video with stunning effects like, overlays glasses, etc., or add impactful elements, such as, texts, stickers, etc., to make your artwork more impressive. When you are happy, navigate to the top-right and tap ‘Publish’. From the menu that drops down, select ‘GIF’.
● Step 3: Download Your Creation
Select the section of your video you wish to convert into a GIF and proceed to fix the GIF start time and play duration. Check for any frame resize requirements, set an adequate frame rate and lastly, click on the ‘Loop Clip’ checkbox. This will produce an infinite loop GIF. When everything seems perfect, tap on ‘Generate’ followed by ‘Download’ to save your creation and share it on social media.
Part 3 5 Stunning Examples of Gifs in Web Design
The credibility of GIFs in market oriented content sharing and information publishing evidently does not require an introduction. These attractive snippets are expert means of business growth and customer appealing strategy planning to address attract a massive target audience within seconds.
Now that you are quite accustomed with the market reliability of GIFs, you may visibly feel motivated to use them to improvise your product websites for a next level market approach. However, before you plunge into using GIFs for your brand promotion, consider sparing a few minutes to browse through some top class product based GIFs to enhance your GIF creation and implementation aptitude.
Described below are some eye-catching examples of GIF for website background, you should certainly look forward to using in your business campaigns:
01Headscape
Having its roots in the United Kingdom, this is a top rated, digital media design corporation that excels in providing web design solutions to a diverse global clientele. Their unique idea of using GIFs in grayscale to depict conducive business settings is just perfect.
The monochromatic color balance with parallax scrolls makes this GIF all the more impactful. You can find impressive ways of using GIFs with a professional instinct on the company website and begin to add appeal to your market buildup strategies.
02Invision
This is another high ranked application marketing site that uses GIF for website background to improvise its product promotion. Equipped with a preset world class page makeover, the site’s look and appeal simply gets a boost with floating-text animated GIFs on an otherwise normal webpage.
As you move further on the Invision homepage, you will get to see a demonstration of the site’s prototype tool through GIFs that explain its working functionalities in the most interesting and convenient manner, thus putting forward and outrageously professional and effective marketing strategy.
03Macaw
This one is an excellent design utility that is equally suited to both web designers as well as site developers. On visiting the tool’s homepage, you are welcomed with a streamlined text setting on a black and white theme. Move a bit downwards, and there you see a cluster of animated GIFs in action to get you familiar with the interface and usage pattern of the Macaw design utility with utmost ease. It is convenient enough to make you feel as if you are actually using the tool.
04Giant Ant
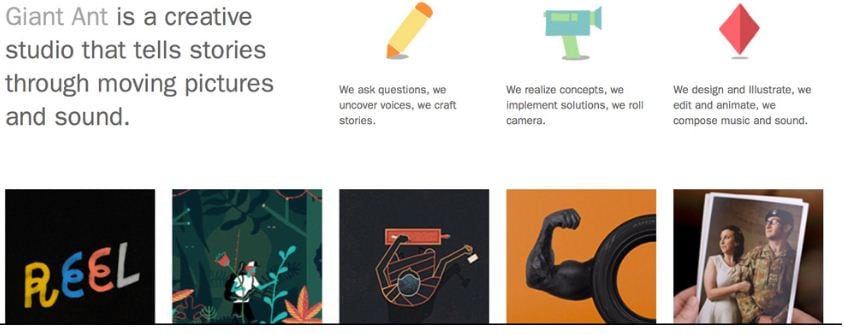
Established as a creative firm, this one is known for its appealing website design. As you navigate through the site, you will find a still image complemented by cohesive text overlays. Beneath that, there are caricature forms of everyday objects, but the real magic happens when you click on a particular object and woosh. It instantly turns into an animated GIF. This explicit style of infusing dynamism to your website is simply awesome, to say the least.
05Tinke
This is intuitively a fitness tracker that keeps a record of your system vitals in the most effective manner. But that’s not all. The tracker website is equally amazing, setting the perfect example of using GIFs to improve market buildup. The site majorly utilizes the parallax scroll effect with animated GIFs to facilitate a live demonstration of the tracker functionality, coupled with an iPhone user guide and ways of sharing relatable content with fellow users.
● Key Takeaways from This Episode →
● Surfing the internet, you will land across some of the best GIF creator and downloader sites that are flooded with brilliant GIF content suited for almost every purpose.
● You can create your own animated GIFs on any GIF maker website or enjoy pre-made stuff to your heart’s content, where using Filmora is certainly the best choice. To explore something more exciting, try hands on using GIFs for product marketing and brand promotions on your business sites.
Want a heap of the most exiting GIFs? Here are the best websites to visit.
In this article
01 [10 Sites for Finding the Perfect GIF](#Part 1)
02 [How to Use Animated GIF Makers](#Part 2)
03 [5 Stunning Examples of Gifs in Web Design](#Part 3)
Part 1 Sites for Finding the Perfect GIF
Information was never so expressive until GIFs came up as delivery platform. Looking through the frame of content diversity and effective delivery, there’s possibly nothing that is left untouched by these short, precise and creative snippets. When the talk is about long term user credibility, creativity is one thing, while reach is the other.
No doubt about the creative aspect, but the convenient availability holds equal importance. However captivating a utility nay be, you would certainly not be interested to spend quality time searching the apt content. Let’s take a look at some of the most popular and convenient GIF website that will surely put a full stop on your search spree for a relatable GIF.
01GIPHY
Initially launched as a GIF search engine, thin is a complete storehouse on almost everything that you can possibly think of. The extensive content library of this site is all set to meet your most specific content requirements in less than a blink’s time. You get an access to quality content in music, science, nature and what not on this free GIF website.
Talking of search flexibility, GIPHY is known to have the most advanced and updated search bar that ensures that top quality and fresh content is always at the hand of its users. You can browse through the vast GIF categories of the site or look for your exact content using a specific search keyword.
02Reddit
You can regard this site as a GIF membership community, where you can find a variety of impressive sub-reddits in the GIF category. The best part is, you will never find recursive content on any two or more sub-reddits as each one is developed and updated keeping different content specifications in mind.
You are given access to even finer content libraries in some particular sub-reddits that follow a sequential guideline to filter their entries according to user preferences. Some popular sub-reddits are listed below:
03Tumblr
Originally a blogging site, Tumblr is simply heaven for creating and sharing GIFs across media platforms. What’s interesting about the site is its content categorization, where bloggers on the site group relatable content under specific categories, which facilitates an easy, quick and hassle free search. Most of the GIF content on the site is either created in Photoshop or taken from across the web.
While the site has exciting GIF content for almost every scenario, the comedy genre is the st5arb attraction of this GIF platform. The huge comic content library of the site has hilarious memes and GIFs that will certainly leave you rolling over the floor. To enjoy your favorite content daily, you just need to search a relatable hashtag and follow some blogs on your searched content.
04Gfycat
This one lands among the most preferred GIF sites and is packed with an enormous inventory of memes and GIFs. Not just this, this one is a free GIF maker website that allows you to convert videos from almost every media platform into GIFs, independent of the video file format via its ‘Video to GIF Converter’ tool.
You can set a daily dose of your favorite, exciting GIF content by using either the search bar or the ‘Selection Menu’ in the left of the site’s Home page. You can even browse through latest GIF categories by navigating to the ‘Trending’ and ‘Explore’ sections.
05Tenor
You can prefer this site to enjoy your favorite GIFs on your PC or iOS device. The site gives you the liberty to share GIFs and memes directly from its library into any of your Instant Messaging chats or community conversations on social media platforms.
All you need to do is navigate to the Tenor search bar, put in a suitable keyword and there you can see loads of GIF content on your screen in less than a second’s time. With periodic updates and a cohesive interface, this site is your storehouse of latest and trendy GIFs, anytime and anywhere.
06Reaction GIFs
This site is known for having an exact content database for almost every thought that crosses your mind. It serves you with a refined search mechanism, having a different pathway for every search, depending on the content you are looking for. This is a perfect aid to get exactly what you want, without having to fuss out with unwanted stuff.
Talking of search methods, you will find a drop-down menu at the right to search GIFs that express ‘Emotions’ or one word answers (preferably a ‘Yes’ or a ‘No’). If you want something related to a more specific category, you can browse through the ‘Galleries’ and ‘Tags’ of the site (categories, like, OMG, LOL, etc).
07GIFbin
This is again a trunk of latest, funny and entertaining GIFs tom watch and share. On this site, you get to add search filters, like, ‘Most Viewed’, ‘Latest’, ‘Top Rated’, etc., that refine your search to fetch exactly what you are looking for. You are also free to use ‘Search Tags’ grouped according to name and search count on the site.
The tag names are standard keywords (like, animals, sports, nature, etc.) and the count feature keeps a track of the most frequent searches, thus allowing you to find out your favorite GIFs in a more explicit manner. If you are clueless about anything specific, don’t worry. Hit the ‘Random GIFs’ button to explore a whole new world of fun and excitement.
08Imgur
This site is popular in the meme world as a GIF sub-reddit that has explicitly no text threads. You can take this one as a free, GIF hosting and sharing website. While you can find loads of quality content on the site convenient to almost any genre, it is a leader in comic and funny GIFs. You can use different search tags for hilarious movie snippets, or some other fun element of your liking. This site’s image library is a hub of latest and nostalgic content.
09Imgflip
This is one more hotspot for relatable GIFs and memes. The best thing about the site is that it has separate search pathways to refine your search in cohesion with your content preference. Some common pathways are explained below:
● Browse the site’s homepage for the latest and trending GIF content.
● Simplify your search on specific content pages using the ‘Random’, ‘Next’ or ‘Previous’ navigation options.
● Prefer using ‘Image Hotkeys’ on the content pages.
● Try on ‘Tagging’ specific content pages (sunrise, snowfall, cats, etc.).
If you like competing with fellow visitors on the site, you can experiment with creating GIFs of your own and get ranked on the creator scoreboard. Bag a high vote count to get your GIF trending on the site.
10Gyazo
Last on the list, this is a somewhat different site in terms of features and search constraints. The exclusively unique ’Screen Capture’ feature of this site allows you to take a video of your device screen and use it to create a GIF of your own, making itself a quick and effective ‘Video to GIF Converter’ tool.
You will require creating an account on the site to maintain a library of your searched contents, which you can either tag on the site or downloaded to your device. You can further, export and share your creations across media platforms through this site.
Part 2 How to Use Animated GIF Makers
Landing into the creative and exciting world of GIFs, you can easily get motivated to try hands on making your own GIFs. The online market is a pool of solutions that claim of adhering to this concern in the most effective ways. When looking for the best GIF maker tools and software, you can definitely count upon the following choices:
01**Wondershare Filmora Video Editor **
This one is undoubtedly the best GIF creator software in current times. Using the plethora of audio-visual features, effects and image filters that are offered by this tool, creating animated GIFs is a spic and span process. The software grants you the liberty to play with and explore your editing skills to generate professional quality GIFs within minutes.

Wondershare Filmora - Best Video Editor for Mac/Windows
5,481,435 people have downloaded it.
Build unique custom animations without breaking a sweat.
Focus on creating epic stories and leave the details to Filmora’s auto features.
Start a creative adventure with drag & drop effects and endless possibilities.
Filmora simplifies advanced features to save you time and effort.
Filmora cuts out repetition so you can move on to your next creative breakthrough.
Here’s how you can use this software to become a pro at creating GIFs:
● Step 1: Import Required Media Files
To begin with, select any desired set of images or a particular video file to the Filmora timeline. You don’t need to be format specific; the software is compatible with over 150 different file formats.
● Step 2: Drag Files to Edit
Once you are done with selecting the files, you need to drag the same to the Filmora Editor Timeline, where you can transform the file contents with your editing skills.
● Step 3: Let’s Get Editing.
In the editor window, you are free tom choose from a range of effects, tools and filters suitable to your GIF content to give your artwork a new and engaging look. You can experiment with the cutting, cropping and trimming tools or play with effects, like, overlays, rotation and speed adjustments and even add texts to deliver messages that intensify your GIF.
● Step 4: Time to Save and Share.
Now is the time to save your work locally to your device using the .gif extension with your created file, as well as share it among your peers on social communities.
03Deal With It
This one is an online GIF maker tool that allows you to make top quality animated GIFs within a few seconds and you don’t even need to take up any third party software installation. Creating GIFs with this user friendly, clean interface and quick GIF generator utility is an absolute fun, to say the least.
Once you are done creating, the tools gives you the liberty to experiment with effects like, texts and glasses that would further intensify your GIF to the next level, and the best part is, all of this is available to you without having to spend a penny out of your pocket.
Explained below is the step wise user guide to use this tool for creating GIFs:
● Step 1:
Navigate to official website of the GIF creator tool.
● Step 2:
Choose a desired locally saved image from your device and upload it in the tool’s editor window. To do this, click on the ‘Load Image’ button.
● Step 3:
You can now modify the uploaded image with text and glasses. This is it. Your GIF is ready to save and export.
03LunaPic
This one lands among the most preferred GIF maker tools available across the web. It comes with a clean interface, is free to use and does not require any third party software installation. You can create catchy and interesting GIF banners, or make captivating, animated GIF files with a series of still images using this tool. However, this GIF maker does not give you the liberty to take up editing and speed or accuracy modifications on your creation.
You need to follow the steps explained below to create your own GIF with LunaPic:
● Step 1:
Open the official site of LunaPic in your web browser.
● Step 2:
Upload a desired one or a set of images you wish to use for making your GIF on the site. To do this, select a group of images from your device and tap ‘Upload’
.
● Step 3:
Once uploaded, you can use your creativity to play with the effects library of the site and edit your images in its editing interface.
● Step 4:
When satisfied, choose the file type as GIF and hit the ‘Save’ option at the bottom. This will save your creation locally in your device, once the file conversion gets completed.
Image Name: Finding-best-gif-websites-is-easy-as-pie—here’s-what-you-should-know-22
04Wondershare TunesGo
This one is another efficient animated GIF creator utility on the internet. Available to you as free online software, this tool promises you an amazing and hassle free GIF making experience. You can either create stunning GIFs of your own, or convert video files and even live photos into the same using this software. It allows you to set time slots for file conversions and make speed and flow adjustments for GIF frames, along with offering a plethora of editing effects to play with.
Here’s the know-how of using this software to create top quality animated GIFs:
● Step 1: Download and Launch the Software
Pay a visit to the official TunesGo website to download the software. Begin with installing and launching the same on your preferred device. When you finish, click on the ‘Toolbox’ tab at the top in the welcome screen.
● Step 2: Upload Media Files
In the software’s opening interface, choose the GIF Maker tool. In the following window that pops-up, click on ‘Add’ to upload the desired media files saved in your device, you want to create a GIF with.
● Step 3: Convert to GIF
Set the media file to GIF conversion time and tap the ‘Create GIF’ button in the bottom-right to initiate the conversion process.
05Wave.video
This one is among the latest GIF maker tools that allow you to create animated GIFs from videos. What’s quite interesting about this Gif creation platform is, you can trim videos to the exact part depending on your content preference before beginning with the conversion process. You can also save your creation as a group of trimmed clips. It is a user friendly, free access online tool that does not ask you to install any third party software, and GIF creation with its mess-free interface is absolute fun.
Take the steps listed below to make GIFs with this online tool:
● Step 1: Choose a Project
To start working with this tool, you need to create an account on its official site. Having done that, just log into your account and upload a desired video you would like to use for creating a GIF. You have a choice to select a locally saved video, choose one from the templates available on the site or create something of your own.
● Step 2: Customization and Publishing
It is now time to try hands on editing your video with stunning effects like, overlays glasses, etc., or add impactful elements, such as, texts, stickers, etc., to make your artwork more impressive. When you are happy, navigate to the top-right and tap ‘Publish’. From the menu that drops down, select ‘GIF’.
● Step 3: Download Your Creation
Select the section of your video you wish to convert into a GIF and proceed to fix the GIF start time and play duration. Check for any frame resize requirements, set an adequate frame rate and lastly, click on the ‘Loop Clip’ checkbox. This will produce an infinite loop GIF. When everything seems perfect, tap on ‘Generate’ followed by ‘Download’ to save your creation and share it on social media.
Part 3 5 Stunning Examples of Gifs in Web Design
The credibility of GIFs in market oriented content sharing and information publishing evidently does not require an introduction. These attractive snippets are expert means of business growth and customer appealing strategy planning to address attract a massive target audience within seconds.
Now that you are quite accustomed with the market reliability of GIFs, you may visibly feel motivated to use them to improvise your product websites for a next level market approach. However, before you plunge into using GIFs for your brand promotion, consider sparing a few minutes to browse through some top class product based GIFs to enhance your GIF creation and implementation aptitude.
Described below are some eye-catching examples of GIF for website background, you should certainly look forward to using in your business campaigns:
01Headscape
Having its roots in the United Kingdom, this is a top rated, digital media design corporation that excels in providing web design solutions to a diverse global clientele. Their unique idea of using GIFs in grayscale to depict conducive business settings is just perfect.
The monochromatic color balance with parallax scrolls makes this GIF all the more impactful. You can find impressive ways of using GIFs with a professional instinct on the company website and begin to add appeal to your market buildup strategies.
02Invision
This is another high ranked application marketing site that uses GIF for website background to improvise its product promotion. Equipped with a preset world class page makeover, the site’s look and appeal simply gets a boost with floating-text animated GIFs on an otherwise normal webpage.
As you move further on the Invision homepage, you will get to see a demonstration of the site’s prototype tool through GIFs that explain its working functionalities in the most interesting and convenient manner, thus putting forward and outrageously professional and effective marketing strategy.
03Macaw
This one is an excellent design utility that is equally suited to both web designers as well as site developers. On visiting the tool’s homepage, you are welcomed with a streamlined text setting on a black and white theme. Move a bit downwards, and there you see a cluster of animated GIFs in action to get you familiar with the interface and usage pattern of the Macaw design utility with utmost ease. It is convenient enough to make you feel as if you are actually using the tool.
04Giant Ant
Established as a creative firm, this one is known for its appealing website design. As you navigate through the site, you will find a still image complemented by cohesive text overlays. Beneath that, there are caricature forms of everyday objects, but the real magic happens when you click on a particular object and woosh. It instantly turns into an animated GIF. This explicit style of infusing dynamism to your website is simply awesome, to say the least.
05Tinke
This is intuitively a fitness tracker that keeps a record of your system vitals in the most effective manner. But that’s not all. The tracker website is equally amazing, setting the perfect example of using GIFs to improve market buildup. The site majorly utilizes the parallax scroll effect with animated GIFs to facilitate a live demonstration of the tracker functionality, coupled with an iPhone user guide and ways of sharing relatable content with fellow users.
● Key Takeaways from This Episode →
● Surfing the internet, you will land across some of the best GIF creator and downloader sites that are flooded with brilliant GIF content suited for almost every purpose.
● You can create your own animated GIFs on any GIF maker website or enjoy pre-made stuff to your heart’s content, where using Filmora is certainly the best choice. To explore something more exciting, try hands on using GIFs for product marketing and brand promotions on your business sites.
Want a heap of the most exiting GIFs? Here are the best websites to visit.
In this article
01 [10 Sites for Finding the Perfect GIF](#Part 1)
02 [How to Use Animated GIF Makers](#Part 2)
03 [5 Stunning Examples of Gifs in Web Design](#Part 3)
Part 1 Sites for Finding the Perfect GIF
Information was never so expressive until GIFs came up as delivery platform. Looking through the frame of content diversity and effective delivery, there’s possibly nothing that is left untouched by these short, precise and creative snippets. When the talk is about long term user credibility, creativity is one thing, while reach is the other.
No doubt about the creative aspect, but the convenient availability holds equal importance. However captivating a utility nay be, you would certainly not be interested to spend quality time searching the apt content. Let’s take a look at some of the most popular and convenient GIF website that will surely put a full stop on your search spree for a relatable GIF.
01GIPHY
Initially launched as a GIF search engine, thin is a complete storehouse on almost everything that you can possibly think of. The extensive content library of this site is all set to meet your most specific content requirements in less than a blink’s time. You get an access to quality content in music, science, nature and what not on this free GIF website.
Talking of search flexibility, GIPHY is known to have the most advanced and updated search bar that ensures that top quality and fresh content is always at the hand of its users. You can browse through the vast GIF categories of the site or look for your exact content using a specific search keyword.
02Reddit
You can regard this site as a GIF membership community, where you can find a variety of impressive sub-reddits in the GIF category. The best part is, you will never find recursive content on any two or more sub-reddits as each one is developed and updated keeping different content specifications in mind.
You are given access to even finer content libraries in some particular sub-reddits that follow a sequential guideline to filter their entries according to user preferences. Some popular sub-reddits are listed below:
03Tumblr
Originally a blogging site, Tumblr is simply heaven for creating and sharing GIFs across media platforms. What’s interesting about the site is its content categorization, where bloggers on the site group relatable content under specific categories, which facilitates an easy, quick and hassle free search. Most of the GIF content on the site is either created in Photoshop or taken from across the web.
While the site has exciting GIF content for almost every scenario, the comedy genre is the st5arb attraction of this GIF platform. The huge comic content library of the site has hilarious memes and GIFs that will certainly leave you rolling over the floor. To enjoy your favorite content daily, you just need to search a relatable hashtag and follow some blogs on your searched content.
04Gfycat
This one lands among the most preferred GIF sites and is packed with an enormous inventory of memes and GIFs. Not just this, this one is a free GIF maker website that allows you to convert videos from almost every media platform into GIFs, independent of the video file format via its ‘Video to GIF Converter’ tool.
You can set a daily dose of your favorite, exciting GIF content by using either the search bar or the ‘Selection Menu’ in the left of the site’s Home page. You can even browse through latest GIF categories by navigating to the ‘Trending’ and ‘Explore’ sections.
05Tenor
You can prefer this site to enjoy your favorite GIFs on your PC or iOS device. The site gives you the liberty to share GIFs and memes directly from its library into any of your Instant Messaging chats or community conversations on social media platforms.
All you need to do is navigate to the Tenor search bar, put in a suitable keyword and there you can see loads of GIF content on your screen in less than a second’s time. With periodic updates and a cohesive interface, this site is your storehouse of latest and trendy GIFs, anytime and anywhere.
06Reaction GIFs
This site is known for having an exact content database for almost every thought that crosses your mind. It serves you with a refined search mechanism, having a different pathway for every search, depending on the content you are looking for. This is a perfect aid to get exactly what you want, without having to fuss out with unwanted stuff.
Talking of search methods, you will find a drop-down menu at the right to search GIFs that express ‘Emotions’ or one word answers (preferably a ‘Yes’ or a ‘No’). If you want something related to a more specific category, you can browse through the ‘Galleries’ and ‘Tags’ of the site (categories, like, OMG, LOL, etc).
07GIFbin
This is again a trunk of latest, funny and entertaining GIFs tom watch and share. On this site, you get to add search filters, like, ‘Most Viewed’, ‘Latest’, ‘Top Rated’, etc., that refine your search to fetch exactly what you are looking for. You are also free to use ‘Search Tags’ grouped according to name and search count on the site.
The tag names are standard keywords (like, animals, sports, nature, etc.) and the count feature keeps a track of the most frequent searches, thus allowing you to find out your favorite GIFs in a more explicit manner. If you are clueless about anything specific, don’t worry. Hit the ‘Random GIFs’ button to explore a whole new world of fun and excitement.
08Imgur
This site is popular in the meme world as a GIF sub-reddit that has explicitly no text threads. You can take this one as a free, GIF hosting and sharing website. While you can find loads of quality content on the site convenient to almost any genre, it is a leader in comic and funny GIFs. You can use different search tags for hilarious movie snippets, or some other fun element of your liking. This site’s image library is a hub of latest and nostalgic content.
09Imgflip
This is one more hotspot for relatable GIFs and memes. The best thing about the site is that it has separate search pathways to refine your search in cohesion with your content preference. Some common pathways are explained below:
● Browse the site’s homepage for the latest and trending GIF content.
● Simplify your search on specific content pages using the ‘Random’, ‘Next’ or ‘Previous’ navigation options.
● Prefer using ‘Image Hotkeys’ on the content pages.
● Try on ‘Tagging’ specific content pages (sunrise, snowfall, cats, etc.).
If you like competing with fellow visitors on the site, you can experiment with creating GIFs of your own and get ranked on the creator scoreboard. Bag a high vote count to get your GIF trending on the site.
10Gyazo
Last on the list, this is a somewhat different site in terms of features and search constraints. The exclusively unique ’Screen Capture’ feature of this site allows you to take a video of your device screen and use it to create a GIF of your own, making itself a quick and effective ‘Video to GIF Converter’ tool.
You will require creating an account on the site to maintain a library of your searched contents, which you can either tag on the site or downloaded to your device. You can further, export and share your creations across media platforms through this site.
Part 2 How to Use Animated GIF Makers
Landing into the creative and exciting world of GIFs, you can easily get motivated to try hands on making your own GIFs. The online market is a pool of solutions that claim of adhering to this concern in the most effective ways. When looking for the best GIF maker tools and software, you can definitely count upon the following choices:
01**Wondershare Filmora Video Editor **
This one is undoubtedly the best GIF creator software in current times. Using the plethora of audio-visual features, effects and image filters that are offered by this tool, creating animated GIFs is a spic and span process. The software grants you the liberty to play with and explore your editing skills to generate professional quality GIFs within minutes.

Wondershare Filmora - Best Video Editor for Mac/Windows
5,481,435 people have downloaded it.
Build unique custom animations without breaking a sweat.
Focus on creating epic stories and leave the details to Filmora’s auto features.
Start a creative adventure with drag & drop effects and endless possibilities.
Filmora simplifies advanced features to save you time and effort.
Filmora cuts out repetition so you can move on to your next creative breakthrough.
Here’s how you can use this software to become a pro at creating GIFs:
● Step 1: Import Required Media Files
To begin with, select any desired set of images or a particular video file to the Filmora timeline. You don’t need to be format specific; the software is compatible with over 150 different file formats.
● Step 2: Drag Files to Edit
Once you are done with selecting the files, you need to drag the same to the Filmora Editor Timeline, where you can transform the file contents with your editing skills.
● Step 3: Let’s Get Editing.
In the editor window, you are free tom choose from a range of effects, tools and filters suitable to your GIF content to give your artwork a new and engaging look. You can experiment with the cutting, cropping and trimming tools or play with effects, like, overlays, rotation and speed adjustments and even add texts to deliver messages that intensify your GIF.
● Step 4: Time to Save and Share.
Now is the time to save your work locally to your device using the .gif extension with your created file, as well as share it among your peers on social communities.
03Deal With It
This one is an online GIF maker tool that allows you to make top quality animated GIFs within a few seconds and you don’t even need to take up any third party software installation. Creating GIFs with this user friendly, clean interface and quick GIF generator utility is an absolute fun, to say the least.
Once you are done creating, the tools gives you the liberty to experiment with effects like, texts and glasses that would further intensify your GIF to the next level, and the best part is, all of this is available to you without having to spend a penny out of your pocket.
Explained below is the step wise user guide to use this tool for creating GIFs:
● Step 1:
Navigate to official website of the GIF creator tool.
● Step 2:
Choose a desired locally saved image from your device and upload it in the tool’s editor window. To do this, click on the ‘Load Image’ button.
● Step 3:
You can now modify the uploaded image with text and glasses. This is it. Your GIF is ready to save and export.
03LunaPic
This one lands among the most preferred GIF maker tools available across the web. It comes with a clean interface, is free to use and does not require any third party software installation. You can create catchy and interesting GIF banners, or make captivating, animated GIF files with a series of still images using this tool. However, this GIF maker does not give you the liberty to take up editing and speed or accuracy modifications on your creation.
You need to follow the steps explained below to create your own GIF with LunaPic:
● Step 1:
Open the official site of LunaPic in your web browser.
● Step 2:
Upload a desired one or a set of images you wish to use for making your GIF on the site. To do this, select a group of images from your device and tap ‘Upload’
.
● Step 3:
Once uploaded, you can use your creativity to play with the effects library of the site and edit your images in its editing interface.
● Step 4:
When satisfied, choose the file type as GIF and hit the ‘Save’ option at the bottom. This will save your creation locally in your device, once the file conversion gets completed.
Image Name: Finding-best-gif-websites-is-easy-as-pie—here’s-what-you-should-know-22
04Wondershare TunesGo
This one is another efficient animated GIF creator utility on the internet. Available to you as free online software, this tool promises you an amazing and hassle free GIF making experience. You can either create stunning GIFs of your own, or convert video files and even live photos into the same using this software. It allows you to set time slots for file conversions and make speed and flow adjustments for GIF frames, along with offering a plethora of editing effects to play with.
Here’s the know-how of using this software to create top quality animated GIFs:
● Step 1: Download and Launch the Software
Pay a visit to the official TunesGo website to download the software. Begin with installing and launching the same on your preferred device. When you finish, click on the ‘Toolbox’ tab at the top in the welcome screen.
● Step 2: Upload Media Files
In the software’s opening interface, choose the GIF Maker tool. In the following window that pops-up, click on ‘Add’ to upload the desired media files saved in your device, you want to create a GIF with.
● Step 3: Convert to GIF
Set the media file to GIF conversion time and tap the ‘Create GIF’ button in the bottom-right to initiate the conversion process.
05Wave.video
This one is among the latest GIF maker tools that allow you to create animated GIFs from videos. What’s quite interesting about this Gif creation platform is, you can trim videos to the exact part depending on your content preference before beginning with the conversion process. You can also save your creation as a group of trimmed clips. It is a user friendly, free access online tool that does not ask you to install any third party software, and GIF creation with its mess-free interface is absolute fun.
Take the steps listed below to make GIFs with this online tool:
● Step 1: Choose a Project
To start working with this tool, you need to create an account on its official site. Having done that, just log into your account and upload a desired video you would like to use for creating a GIF. You have a choice to select a locally saved video, choose one from the templates available on the site or create something of your own.
● Step 2: Customization and Publishing
It is now time to try hands on editing your video with stunning effects like, overlays glasses, etc., or add impactful elements, such as, texts, stickers, etc., to make your artwork more impressive. When you are happy, navigate to the top-right and tap ‘Publish’. From the menu that drops down, select ‘GIF’.
● Step 3: Download Your Creation
Select the section of your video you wish to convert into a GIF and proceed to fix the GIF start time and play duration. Check for any frame resize requirements, set an adequate frame rate and lastly, click on the ‘Loop Clip’ checkbox. This will produce an infinite loop GIF. When everything seems perfect, tap on ‘Generate’ followed by ‘Download’ to save your creation and share it on social media.
Part 3 5 Stunning Examples of Gifs in Web Design
The credibility of GIFs in market oriented content sharing and information publishing evidently does not require an introduction. These attractive snippets are expert means of business growth and customer appealing strategy planning to address attract a massive target audience within seconds.
Now that you are quite accustomed with the market reliability of GIFs, you may visibly feel motivated to use them to improvise your product websites for a next level market approach. However, before you plunge into using GIFs for your brand promotion, consider sparing a few minutes to browse through some top class product based GIFs to enhance your GIF creation and implementation aptitude.
Described below are some eye-catching examples of GIF for website background, you should certainly look forward to using in your business campaigns:
01Headscape
Having its roots in the United Kingdom, this is a top rated, digital media design corporation that excels in providing web design solutions to a diverse global clientele. Their unique idea of using GIFs in grayscale to depict conducive business settings is just perfect.
The monochromatic color balance with parallax scrolls makes this GIF all the more impactful. You can find impressive ways of using GIFs with a professional instinct on the company website and begin to add appeal to your market buildup strategies.
02Invision
This is another high ranked application marketing site that uses GIF for website background to improvise its product promotion. Equipped with a preset world class page makeover, the site’s look and appeal simply gets a boost with floating-text animated GIFs on an otherwise normal webpage.
As you move further on the Invision homepage, you will get to see a demonstration of the site’s prototype tool through GIFs that explain its working functionalities in the most interesting and convenient manner, thus putting forward and outrageously professional and effective marketing strategy.
03Macaw
This one is an excellent design utility that is equally suited to both web designers as well as site developers. On visiting the tool’s homepage, you are welcomed with a streamlined text setting on a black and white theme. Move a bit downwards, and there you see a cluster of animated GIFs in action to get you familiar with the interface and usage pattern of the Macaw design utility with utmost ease. It is convenient enough to make you feel as if you are actually using the tool.
04Giant Ant
Established as a creative firm, this one is known for its appealing website design. As you navigate through the site, you will find a still image complemented by cohesive text overlays. Beneath that, there are caricature forms of everyday objects, but the real magic happens when you click on a particular object and woosh. It instantly turns into an animated GIF. This explicit style of infusing dynamism to your website is simply awesome, to say the least.
05Tinke
This is intuitively a fitness tracker that keeps a record of your system vitals in the most effective manner. But that’s not all. The tracker website is equally amazing, setting the perfect example of using GIFs to improve market buildup. The site majorly utilizes the parallax scroll effect with animated GIFs to facilitate a live demonstration of the tracker functionality, coupled with an iPhone user guide and ways of sharing relatable content with fellow users.
● Key Takeaways from This Episode →
● Surfing the internet, you will land across some of the best GIF creator and downloader sites that are flooded with brilliant GIF content suited for almost every purpose.
● You can create your own animated GIFs on any GIF maker website or enjoy pre-made stuff to your heart’s content, where using Filmora is certainly the best choice. To explore something more exciting, try hands on using GIFs for product marketing and brand promotions on your business sites.
How to to Mimic Professional Filming Gears
The professional and expensive gears are primarily out of budget for starters. But there is no need to stop filming because household things will give good output.
In this article, you will learn 6 pro tips to make professional filming gear using cardboard, container, and tape. It will turn out into POV and barrel roll shots. Scroll more to learn the top ways, and then enjoy the rest with your audience.
Part 1. Things to Remember Before Making Gears
Before using tools for professional videos, you should remember some side effects and cautions to make everything reliable and simple. Read the below outlines!
Not Professional Results
You should remember that homemade tools will give you different results than professional gear because they are expensive for a purpose. But you can experiment and get fun during filming with these products.
Safety Measures
If you use any heavy or temperature-sensitive equipment, you should take safety before operating them.
Handle Carefully
Before experimenting, make sure that you are holding everything tightly. Ensure that no accident occurs during filming!
After taking precautions and understanding the output, it’s time to make tools and film!
Part 2. Smooth Camera Movement with A Door
With a simple mobile camera, you can make smooth shots of any action, like walking, running, and playing. There is no need to get any professional gear.
It easy to achieve by attaching a camera to the door. You can use duct or any other tape which is easily available in the home. Fasten the mobile phone to the side of the door with tape, as shown below!

Moving the door while performing any action will result in smooth shots. Check out the final results below.
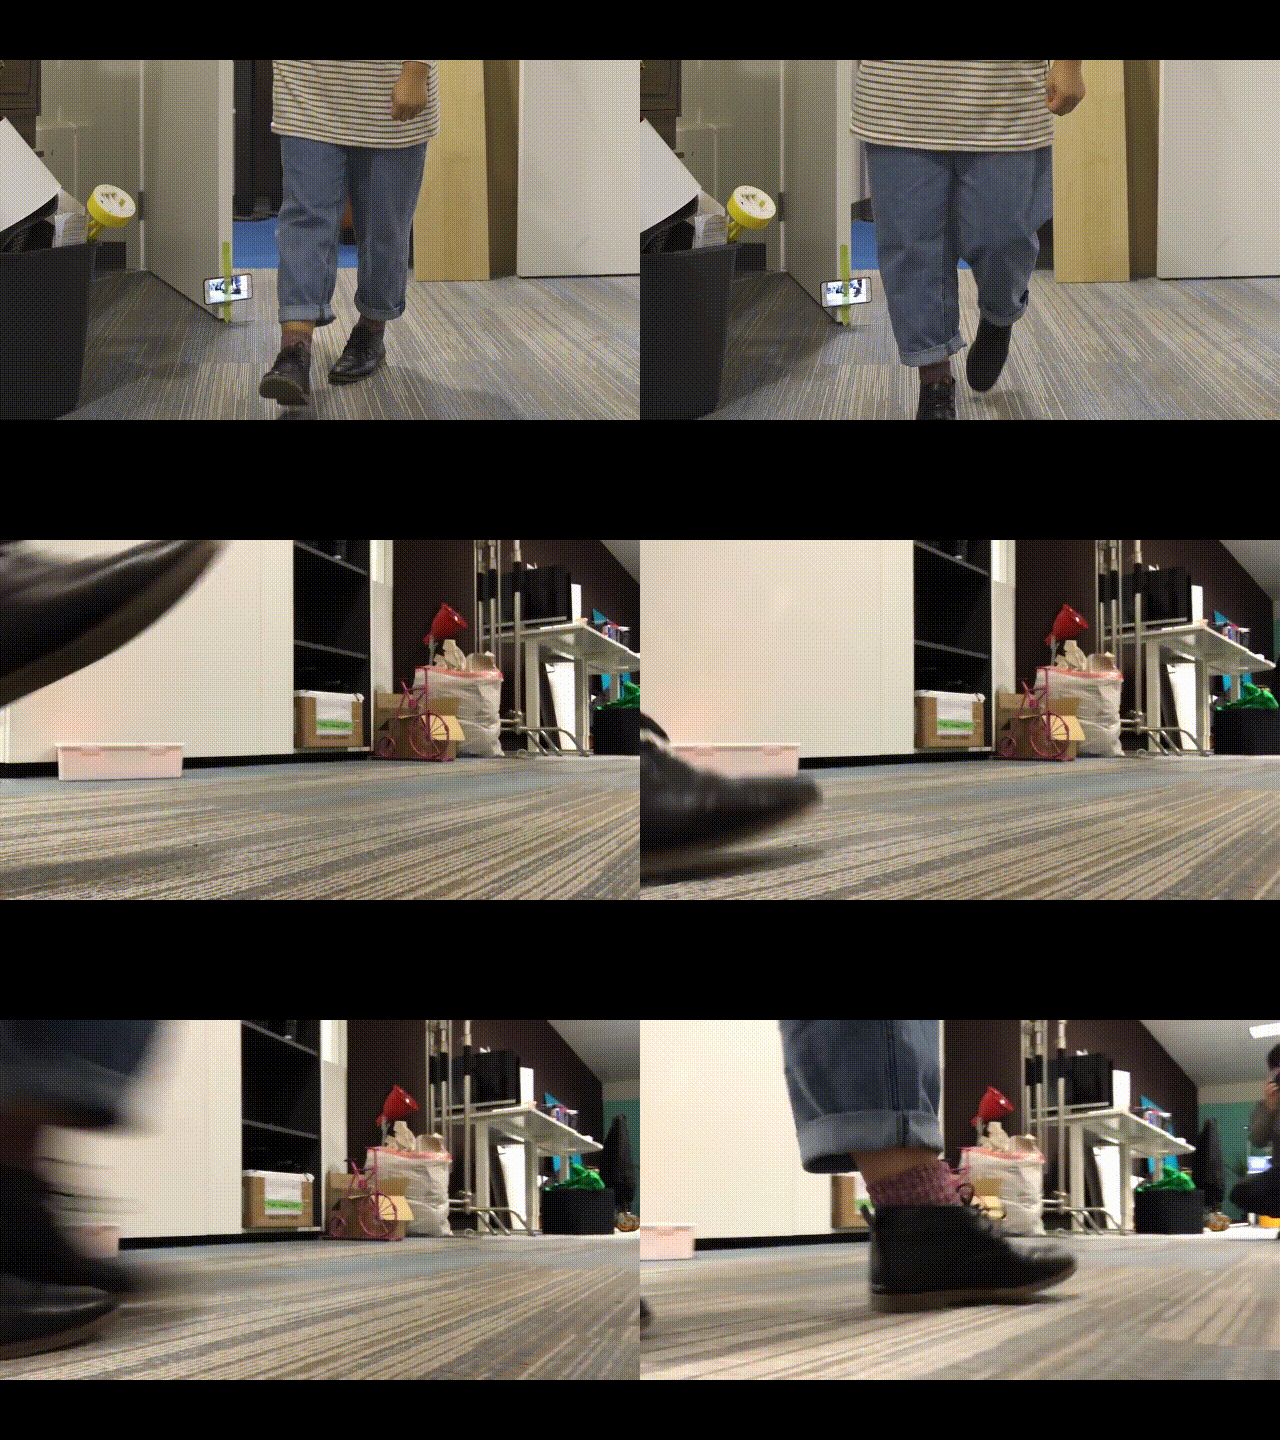
Part 3. Film Shots of Underwater
Filming underwater is always a dream of any videographer, but we were limited to get shots from the water’s surface. So now it’s time to add more creativity to your video.
First, you need to take a transparent container or any glass container. Pour water according to your need in it.
![]()
Note: Ensure the container is light enough to put on the phone.
Then, place the container on the lens of the phone to make a video. Then, take care of the phone from the water.
Pro Tip: You can also shine light source in water and add glitter or colors to get more astonishing shots.
Part 4. Make Colourful Shots Without Coloured Lights
All filmmakers love party lights and want to add colors like that in the video. Different colored lights in videos usually represent different mood swings and enhance the creativity of storytellers.
Professional videographers use expensive lights to give these effects. But you don’t need to purchase any expensive gear. Because you can make colorful shots easily with colored plastic binder dividers, or you can also use cellophane wraps.
First, wrap the colored divider around the LED light or any light you use to shoot video.
![]()
Note: Check the light temperature after short intervals because it melts or burns the dividers when the light source gets hot.
Now make the video and try with different colors to add suspense, horror, and happy effects to the video.
The video still needs more creative effects and designs; scroll more to read exciting tips.
Part 5. Different Shapes of Light with Cardboard
To add a fantasy location in the video and make light effects in the form of shapes, try out easily available cardboard. Most of the time, aesthetic videos are made by these hacks, giving viewers different vibes.
Only a professional photographer and videographer know how to attract the audience to the shots by doing these simple hacks.
The interesting thing is that if light has more shape, it will precisely describe more about the scene’s backstory, location, and context. Give it a try!
Step1 Cutting of cardboards
Cut the cardboard in any shape, whatever you want. We will experiment by cutting cardboard in window blinds shape.
![]()
Note: There is no specific recommendation for the cardboard, you can use any size or shape which suits you the best.

Step2 Make shots in different shapes of light
After giving shape, now move the cardboard around the light source and make a video. It seems like the subject is sitting near the window and has aesthetic vibes.
![]()
Note: The more precise the cutting of cardboard, the more professional it looks.

Become more creative and make more shapes with cardboard because the audience always prefers new content in the market.
Part 6. Create Point of View Shots
After adding colors and shapes, now it’s time to get some Point of View (POV) shots. Most of the time, viewers become bored by watching framing and filming coverages.
POV shots are mostly captured from a specific angle to show an object’s characters. They are mostly seen in food commercials, and videographers of snacks just love to make these shots.
To make POV shots, there is nothing specific required. You just have to make a suitable position for the lens. Follow the below guidelines and capture it!
Step1 Cut ends of packet
To create POV shots of your favorite snack, first of all, cut down both ends of the packets.
Step2 Attach packet on a camera
After cutting, attach the packet of snacks to the camera lens or phone with the help of old-fashioned tape.
Ensure the camera is turned on, and then make a POV shot. Now, it’s time to enjoy the rest part with the audience. Check out the final results, as shown below!
Due to this, the food seems good, and you can notice the number of spices too. This one actually looks amazing!
What if we add the rotatory shots, too, in the video? For this, check out the last tip and try that!
Part 7. Create a Barrel Roll Shot
Barrel roll shots are the full axial shot by spinning the camera lens. Epic shots that formerly required costly gimbals and sophisticated techniques are now as simple as strolling.
It’s pretty easy to make a rotatory shot at 360° by using equipment easily available at home. Rolling may feel anxiety and disorientation. Filmmakers utilize it to confuse or unnerve audiences in movies.
There is no need to purchase expensive gambles to make barrel roll clips. Instead, try this hack by utilizing a power drill present at your home. Then, follow the below steps to give it a professional look!
Step1 Take equipment
First, take a camera lens or smartphone, whatever you are using to make a video, and a power drill as a gimbal.
Step2 Camera with drill
Attach the camera to the power drill with the help of old-fashioned tape.
![]()
Note: You should have a piece of square foam or soft block placed between the camera and drill to assist.

Now, it’s time to turn on the drill and ensure that the video option is “Turn On” in the camera. Then, enjoy the shots of 360° with your audience!

Conclusion
Finally, you get a filmy video after performing above mentioned 6 DIY hacks without expensive gear. More creativity in a video attracts more audience, which makes you more prior in the videography industry.
You can also try more tools at home and share your ideas with others to get reviews on them and make better changes. Make sure that you are taking all safety measures and precautions.
Then, place the container on the lens of the phone to make a video. Then, take care of the phone from the water.

Pro Tip: You can also shine light source in water and add glitter or colors to get more astonishing shots.
Part 4. Make Colourful Shots Without Coloured Lights
All filmmakers love party lights and want to add colors like that in the video. Different colored lights in videos usually represent different mood swings and enhance the creativity of storytellers.
Professional videographers use expensive lights to give these effects. But you don’t need to purchase any expensive gear. Because you can make colorful shots easily with colored plastic binder dividers, or you can also use cellophane wraps.
First, wrap the colored divider around the LED light or any light you use to shoot video.
![]()
Note: Check the light temperature after short intervals because it melts or burns the dividers when the light source gets hot.

Now make the video and try with different colors to add suspense, horror, and happy effects to the video.

The video still needs more creative effects and designs; scroll more to read exciting tips.
Part 5. Different Shapes of Light with Cardboard
To add a fantasy location in the video and make light effects in the form of shapes, try out easily available cardboard. Most of the time, aesthetic videos are made by these hacks, giving viewers different vibes.
Only a professional photographer and videographer know how to attract the audience to the shots by doing these simple hacks.
The interesting thing is that if light has more shape, it will precisely describe more about the scene’s backstory, location, and context. Give it a try!
Step1 Cutting of cardboards
Cut the cardboard in any shape, whatever you want. We will experiment by cutting cardboard in window blinds shape.
![]()
Note: There is no specific recommendation for the cardboard, you can use any size or shape which suits you the best.

Step2 Make shots in different shapes of light
After giving shape, now move the cardboard around the light source and make a video. It seems like the subject is sitting near the window and has aesthetic vibes.
![]()
Note: The more precise the cutting of cardboard, the more professional it looks.

Become more creative and make more shapes with cardboard because the audience always prefers new content in the market.
Part 6. Create Point of View Shots
After adding colors and shapes, now it’s time to get some Point of View (POV) shots. Most of the time, viewers become bored by watching framing and filming coverages.
POV shots are mostly captured from a specific angle to show an object’s characters. They are mostly seen in food commercials, and videographers of snacks just love to make these shots.
To make POV shots, there is nothing specific required. You just have to make a suitable position for the lens. Follow the below guidelines and capture it!
Step1 Cut ends of packet
To create POV shots of your favorite snack, first of all, cut down both ends of the packets.
Step2 Attach packet on a camera
After cutting, attach the packet of snacks to the camera lens or phone with the help of old-fashioned tape.
Ensure the camera is turned on, and then make a POV shot. Now, it’s time to enjoy the rest part with the audience. Check out the final results, as shown below!

Due to this, the food seems good, and you can notice the number of spices too. This one actually looks amazing!
What if we add the rotatory shots, too, in the video? For this, check out the last tip and try that!
Part 7. Create a Barrel Roll Shot
Barrel roll shots are the full axial shot by spinning the camera lens. Epic shots that formerly required costly gimbals and sophisticated techniques are now as simple as strolling.
It’s pretty easy to make a rotatory shot at 360° by using equipment easily available at home. Rolling may feel anxiety and disorientation. Filmmakers utilize it to confuse or unnerve audiences in movies.
There is no need to purchase expensive gambles to make barrel roll clips. Instead, try this hack by utilizing a power drill present at your home. Then, follow the below steps to give it a professional look!
Step1 Take equipment
First, take a camera lens or smartphone, whatever you are using to make a video, and a power drill as a gimbal.
Step2 Camera with drill
Attach the camera to the power drill with the help of old-fashioned tape.
![]()
Note: You should have a piece of square foam or soft block placed between the camera and drill to assist.

Now, it’s time to turn on the drill and ensure that the video option is “Turn On” in the camera. Then, enjoy the shots of 360° with your audience!

Conclusion
Finally, you get a filmy video after performing above mentioned 6 DIY hacks without expensive gear. More creativity in a video attracts more audience, which makes you more prior in the videography industry.
You can also try more tools at home and share your ideas with others to get reviews on them and make better changes. Make sure that you are taking all safety measures and precautions.
Also read:
- Updated 2024 Approved Do You Want to Know How to Add LUTs to Premiere Pro? In This Guide, You Will Find Details and Easy Steps to Proceed with Using LUTs in Premiere Pro
- New 2024 Approved Learn How to Create Inspiring Motivational Videos Using AI. Explore Tools Like Midjourney, Runway Gen2, Chat-GPT, and Filmora AI for Seamless Content Creation. Start Your Journey
- Updated In 2024, Are You Looking for the Best Premiere Pro Slideshow Template Online for Free? If Yes, You Can Find a Few Exciting Slideshow Templates Here. They Are Worth Using
- Learning Some Perfect Ways to Convert a Slow-Motion Video to Normal for 2024
- 2024 Approved Little Tricks to Create Canva Slideshow No One Is Telling You
- 3 Actionable Ways to Create Countdown Animation for Videos
- Your Recorded Video Footage Has some Visible Grains Making Your Video Noisy and Thus Hampering the Overall Viewing Experience. No Worries, as There AI Video Denoiser and Other Software Available to Correct the Issue for 2024
- Updated Do You Like Clouds or Sky and Want to Use Them as a Video Background? Explore This Article to Learn About the Sky Change Video in Filmora
- Whatre the Best Alternatives to Pexels, In 2024
- 2024 Approved This Article Provides Helpful Tips for Creating Better Film Footage in Public Places. Learn How to Choose the Right Angle and Re-Record the Audio with Filmora
- Updated In 2024, Best Way to Freeze-Frame in Final Cut Pro
- New How to Download and Use Windows Movie Maker 10 for 2024
- Updated Looking for the Best Way to Create Stunning Video Animations? Here, We Look at some of the Best Animated Video Maker Solutions to Use
- Updated 2024 Approved Best Way to Freeze-Frame in Final Cut Pro
- Updated 4 Ways to Loop a Video on Vimeo for 2024
- Updated In 2024, An Easy-to-Understand Guide on How to Loop a Video on Canva. This Article Is Sure to Help You if This Is Your First Time Attempting a Loop Video
- How to Resize FLV Videos Efficiently Windows, Mac,Android, iPhone & Online for 2024
- How to Add Video Effects with Movavi Slideshow Maker for 2024
- Updated Best Way To Color Grading & Color Correction in Filmora
- The Complete Guide to Slideshow Maker with Music for 2024
- In 2024, How to Mirror Your Realme 12 Pro+ 5G Screen to PC with Chromecast | Dr.fone
- In 2024, CatchEmAll Celebrate National Pokémon Day with Virtual Location On Samsung Galaxy S23 FE | Dr.fone
- How to Reset Honor 90 Without the Home Button | Dr.fone
- In 2024, 10 Free Location Spoofers to Fake GPS Location on your Infinix Smart 8 HD | Dr.fone
- Restore Missing App Icon on Poco X6 Pro Step-by-Step Solutions | Dr.fone
- In 2024, Here are Different Ways to Find Pokemon Go Trainer Codes to Add to Your Account On Apple iPhone 6s | Dr.fone
- In 2024, Top 10 Telegram Spy Tools On Oppo A1x 5G for Parents | Dr.fone
- Read This Guide to Find a Reliable Alternative to Fake GPS On Infinix Smart 8 Plus | Dr.fone
- In 2024, How to Bypass FRP on Vivo Y56 5G?
- Unlocking Made Easy The Best 10 Apps for Unlocking Your Nubia Red Magic 9 Pro Device
- In 2024, What Pokémon Evolve with A Dawn Stone For Realme Note 50? | Dr.fone
- Calls on OnePlus Ace 2 Pro Go Straight to Voicemail? 12 Fixes | Dr.fone
- How to Fix It Realme 12 Pro 5G Wont Turn On | Dr.fone
- Ways To Find Unlocking Codes For Samsung Galaxy S24 Phones
- In 2024, How to Erase an iPhone 13 Pro without Apple ID?
- Fix Oppo A59 5G Android System Webview Crash 2024 Issue | Dr.fone
- Top 10 Best Spy Watches For your Realme GT 3 | Dr.fone
- Title: New In 2024, Learn How to Create a Unique Repeated Text Animation in the Filmora Video Editor. Follow the Simple Step-by-Step Instructions
- Author: Morgan
- Created at : 2024-04-24 01:10:30
- Updated at : 2024-04-25 01:10:30
- Link: https://ai-video-editing.techidaily.com/new-in-2024-learn-how-to-create-a-unique-repeated-text-animation-in-the-filmora-video-editor-follow-the-simple-step-by-step-instructions/
- License: This work is licensed under CC BY-NC-SA 4.0.

