:max_bytes(150000):strip_icc():format(webp)/Verified-badge-on-phone-658ecad4f9104dae97a969bfa2f74eb3.jpg)
New In 2024, Learn to Create Custom Sequence Presets in Premiere Pro for Efficient Video Editing. Ensure Consistency and Speed up Your Workflow with Personalized Settings

Learn to Create Custom Sequence Presets in Premiere Pro for Efficient Video Editing. Ensure Consistency and Speed up Your Workflow with Personalized Settings
You’ve probably heard of Adobe Premiere Pro – it’s a top-tier video editing software that’s widely recognized in the market. But have you delved into the nitty-gritty of sequence presets? A custom sequence preset is your best friend for maintaining consistency across projects.
It allows users to save specific settings for sequence attributes like frame rate, resolution, and audio settings. Instead of reconfiguring these settings for each new project, a custom sequence preset lets you jump right into editing. Now, how do you create one? Keep reading!
Part 1: How to Create a Custom Sequence in Premiere Pro
Creating a custom sequence is like tailoring a shirt to fit you perfectly. Here’s a step-by-step guide to help you do just that:
Step 1: Displays the New Sequence Window
Begin by launching Adobe Premiere Pro. Once opened, navigate to the top menu and select File > New > Sequence. This will open up the New Sequence window, where all the magic happens!
Step 2: Change the Editing Mode to Custom in the Settings Panel
You’ll see several tabs in the New Sequence window, but we will focus on the “Settings” tab for our purposes. Click on it.
Here, you’ll find the ‘Editing Mode’ dropdown menu. By default, it’s set to a specific format like ‘DSLR’ or ‘AVCHD.’ Change this to ‘Custom.’ This will unlock a plethora of options for you to play with.
Deep Dive into Settings:
- Frame Size: Define your video’s width and height. Remember, 1920x1080 is Full HD, and 3840x2160 is 4K. Choose based on your project needs.
- Frame Rate: 24fps is the cinematic standard, but if you’re creating content for TV or web, 30fps or 60fps might be more suitable.
- Pixel Aspect Ratio: Stick with ‘Square Pixels’ unless you have a specific reason to do otherwise.
- Fields: Choose ‘No Fields’ for progressive footage. If you’re unsure, this is a safe bet.
- Audio Settings: Here, you can configure the sample rate, among other things. 48000Hz is standard for video.
Step 3: Give the New Preset a Name and Save It
Once you’ve customized the settings to your satisfaction, it’s time to save this configuration for future use. At the bottom of the New Sequence window, you’ll see a ‘Save Preset’ button. Click on it.
A pop-up window will show up, requesting you to provide a name for your new preset. Choose something descriptive so you can easily recognize it later. Once named, click ‘OK’.
Your custom sequence preset is now saved and will appear under the ‘Custom’ folder in the ‘Sequence Presets’ tab.
Part 2: Why Custom Sequence Presets are Essential for Efficient Editing
As you delve deeper into video editing, you’ll begin to appreciate the little things that shave off minutes from your workflow, allowing you to dedicate more time to the creative process. This is precisely where the utility of custom sequence presets in Premiere Pro comes into play. But why are these presets so crucial?
- Consistency Across Projects: If you’re managing multiple projects or a series of videos, having a standard format ensures that all your content has a uniform look and feel. Consistency is a hallmark of professional-grade content. It’s not just about the visuals – maintaining a uniform audio quality and format is equally significant. With a preset, you no longer need to remember the minutiae of each setting, ensuring consistency effortlessly.
- Speed Up Your Workflow: Every minute you spend adjusting the sequence settings is a minute less you have for cutting, color correcting, audio mixing, or adding those special effects that make your videos pop. Over time, those minutes can add up to hours. By using a custom sequence preset, you can jump straight into the creative part of editing without the preliminary setup.
- Avoid Common Mistakes: Have you ever rendered an entire project only to find that the frame rate was off or the audio was set to the wrong sample rate? These kinds of errors can occur when setting up a new sequence from scratch each time. By relying on a preset, you mitigate the risks of such oversights.
- Personalized Templates for Different Platforms: Different platforms may have varying preferred settings. For instance, the ideal video format for YouTube might differ from that of Instagram or TikTok. Instead of Googling these settings each time, you can have a custom sequence preset ready for each platform, ensuring your content is optimized wherever it’s destined.
- Ease of Collaboration: If you’re working as part of a team, having standard sequence presets ensures everyone is on the same page. This is particularly handy when multiple editors are working on different segments of the same project. With custom presets, you’re not just aligning sequences but also visions.
Incorporating this practice into your editing routine might initially seem trivial, but its benefits compound with time.
Part 3: Summary
Creating a custom sequence preset in Adobe Premiere Pro isn’t just about streamlining your workflow – it’s about ensuring consistency across your projects.
By saving your most-used settings, you’re creating a base template that can be pulled up any time, granting you more time for the creative process.
Adobe Premiere Pro’s interface is designed to make tasks like these intuitive, so even if you’re a beginner, with a bit of practice, you’ll be creating custom sequence presets like a pro.
Create Promotional Video
When it comes to executing video marketing campaigns, there’s an unspoken rule that holds true no matter what your goals are. Ready for it? A great video is only as good as the brand behind it. Branding is a crucial aspect of any successful video marketing campaign because your audience needs to believe in your product or service before they will invest their time and money in you. If you want to make a real impact with your promotional videos, branding should be at the top of your mind.

What is Branding
When you think of branding, what comes to mind? Maybe it’s your favorite pair of shoes or a piece of clothing with a logo on it. Or maybe you think about big companies with catchy slogans and memorable commercials that have been around for years. But branding isn’t just about logos and slogans—it’s so much more than that.
Branding is the process of creating an identity for your product or service that differentiates itself from others in its category. This can be as simple as coming up with a name for your company, or it could mean developing an entire brand strategy that encompasses every aspect of how you present yourself to the world (and potential customers). Branding is all about finding ways to stand out from other businesses in your industry by establishing trust with consumers through consistency across all channels, including social media, websites, advertising campaigns, and more.
Why Branding is Important
Branding is vital for any business. It’s the foundation of your brand and it sets up a strong structure for your business to grow on.
Branding helps to build trust and loyalty with customers, which is crucial to gaining new customers and retaining old ones.
If you want people to remember you, then branding is important because it makes sure people will never forget about you!
With great branding comes great responsibility in terms of communicating clearly who you are as a company, what kind of products/services that you provide or sell, how those products/services will benefit consumers (or clients), etc., so make sure these things are always clear when designing promotional videos meant specifically for marketing purposes.
Branding in Video Marketing
Branding is an important part of video marketing because it helps to create a memorable video.
You should make sure you have a clear understanding of your brand before you start creating promotional videos. Your brand is the personality that people associate with your business or company, and this will help them to remember you.
For example, if you’re selling food products related to health and fitness, then having a healthy lifestyle theme throughout all aspects of the production process will be essential to getting people excited about what they see in their minds when they think about your product or service.
It can be challenging to keep track of all the aspects of your brand, but you can use Brand Guidelines to make sure that everything is aligned with your goals and values.
About Video Brand Guidelines
Video brand guidelines are a set of rules and regulations that govern how your videos should look, feel and sound. By having these in place, you can maintain a consistent style and tone across all your video content, whether that be explainer videos or social media posts.
Why do you need Video Brand Guidelines
1. Keeps your videos on-brand
The most important reason for creating video brand guidelines is to keep all your videos feeling like they come from the same place. This way, no matter what type of video it is, viewers will always know it’s from your brand.
2. Make sure everyone’s on the same page.
With so many people involved in the production of a single video, it can be hard to keep everyone on the same page. By having guidelines in place, you can make sure that everyone knows exactly what your brand’s video style is, and how to stay true to it.
3. Saves time and money.
In the long run, having video brand guidelines will save you both time and money. With a clear understanding of your brand’s video style, you can avoid costly mistakes and re-dos, and produce content faster and more efficiently.
4. Helps with planning
It can be difficult to plan video content without knowing what kind of videos you want to make. By having guidelines in place, you can map out a clear strategy for your video content, helping you to stay on track and hit your goals.
5. Improves creativity
Having video brand guidelines doesn’t mean that your videos have to be boring or formulaic. In fact, it can actually help to improve creativity, as it gives you a clear framework to work within. This way, you can experiment and try new things, safe in the knowledge that you’re still staying true to your brand.
Strong Pillars of Video Brand Guidelines
There are three strong pillars that make up a set of video brand guidelines: aesthetic (how it looks), technical (how it’s made), and messaging (what it says).
AESTHETIC
The Aesthetic Pillar is all about how your videos look, from the overall style to the specific details like color schemes and fonts. This is usually determined by your company’s branding guidelines.
TECHNICAL
The Technical Pillar covers the more practical elements of your video, such as file formats and resolution. This ensures that your videos are compatible with all kinds of devices and platforms.
MESSAGING
The Messaging Pillar deals with the actual content of your video, such as the script and narration. This is where you decide what message you want to communicate, and how you’re going to do it.
When writing your video brand standards, it’s important to keep all three pillars in mind. Each one plays a vital role in the overall impact of your video, so they should all be given equal attention.
Different Elements of Video Brand
There are several elements that make up a video that reflecting your brand. These include:
Logo
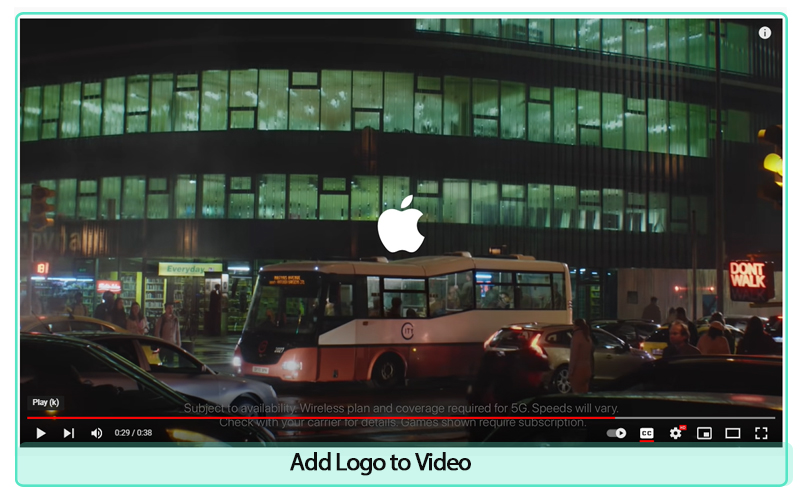
When and how should your logo be used? Should it appear at the beginning, end or throughout the video? These are just a few examples of what you might want to include in your guidelines. The important thing is to be as clear and concise as possible so that there’s no confusion about what does and doesn’t represent your brand.
Apple, for example, is a fantastic brand that uses its logo in video advertising. It may always be observed at the end of every video.
Color palette
What fonts best represent your brand and should be used in your videos?
Color has a huge impact on how people perceive your brand, so you want to choose colors that match your message and tone.

Typography choices
Typography is a key element of branding. It’s more than just picking the right typeface, though that’s important, too. Typography includes the font, size and style of your title, body copy and web copy, as well as how it’s used in your logo and all other graphics.

Imagery
If you want to use images or photos in your videos, what style should they be? And are there any specific colours that need to be used?

Voice
The way you speak to your customers is referred to as brand voice. Your brand’s communication style is what determines your brand voice. Your target audience will hear your brand voice, which can be informal or formal depending on the situation and needs of the client. It may have any tone as long as it feels genuine to your company’s principles and personality—
In terms of brand voice consistency, Apple conveys confidence, quality, and closeness. In terms of distinguishing oneself from the competition, Apple has always been the company to look up to. Many people feel welcomed and overindulged by having their own gadgets.
Graphics
If you want to use animation in your videos, you must first select a design that best represents your business. Is it going to be more cartoonish or more corporate?
It’s also crucial to provide rules for the use of certain visual components. If you want to include the speaker’s name and job title in the lower thirds, for example, you must state how that should appear.

Transitions
Transitions between shots may boost brand recognition. Consider American sports networks that frequently use a rapid logo reveal! You should decide what your branding standard for transitions will be. Will it be a basic and traditional transition, or will you utilize it to emphasize your brand?

Music and Sounds
Music can play a significant role in how your video is received. It should be used to create the right atmosphere and reinforce the tone of voice. Your brand guidelines should include examples of the types of music that would and wouldn’t be appropriate, as well as any sound effects that could be used.

Format
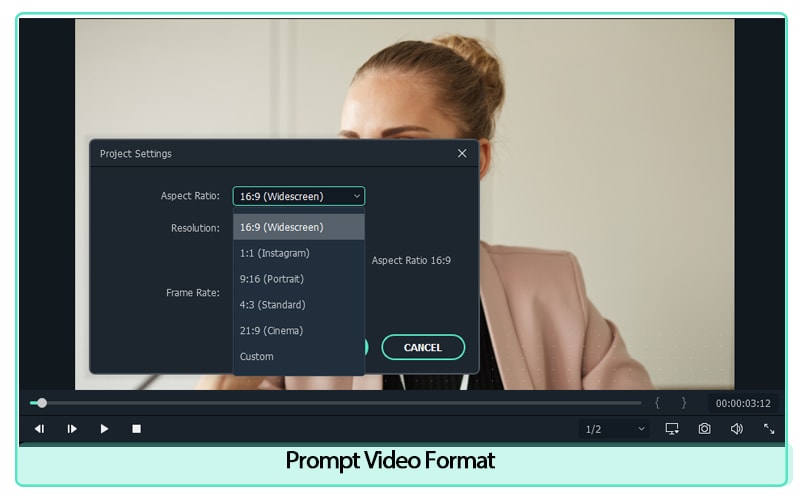
This section should detail what type of videos you want to produce. For example, do you want interview-style videos, or more dynamic explainer videos? It’s also worth including some general information about length, aspect ratio and file format.
Shooting Style
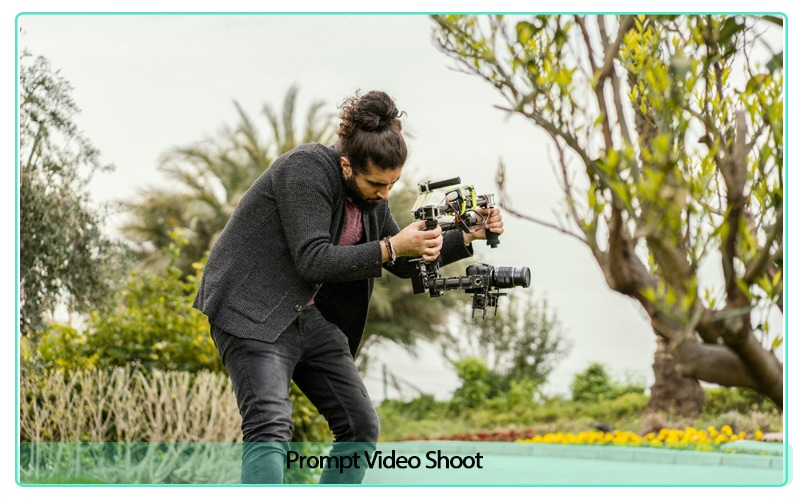
Do you want your videos to be shot in a particular way? If so, you should include information on that in your guidelines. For example, do you want close-ups or wide shots? Do you want lots of movement or static shots?
Your video brand guidelines should also consider where your videos will be shot. If you have a preferred location or style of location, such as an office or warehouse, make sure that is included.
Lighting is another important aspect of shooting style and can really affect the look and feel of a video. Consider what sort of lighting would work best with your brand - natural light, bright light, low light etc. - and include details in your guidelines.
Tagline
A tagline is a short phrase or sentence that identifies your brand. It’s often used in conjunction with a logo and other branding elements to create an overall marketing message
Nike recognized the need to appeal to a much wider audience, and transform their brand into more than simply fitness apparel. As a result of this, “Just Do It.” was created. The slogan is easy to understand and conveys the idea effectively. More significantly, it applies to everyone, not just world-class athletes
How to create Video Brand Guidelines?
Now that we’ve gone over why you need video brand guidelines, let’s take a look at how you can create them.
1. Define your brand voice
This is perhaps the most important step in creating your guidelines, as it will determine the tone and style of all your future videos. To do this, you need to think about what makes your brand unique, and how you want it to be perceived by others. Once you have a good understanding of your brand voice, you can start to put together the rest of your guidelines.
2. Choose a video style
Depending on the kind of videos you want to make, you’ll need to choose an appropriate style. This could be anything from animation to live action, so it’s important to pick something that will work well with your brand voice.
3. Decide on a look and feel
Just like with your choice of style, the look and feel of your videos should be in line with your brand identity. This means taking into account things like colour palette, typography and overall aesthetic.
4. Write a script
Once you have all the above elements in place, you can start to write a script for your video. This will act as a blueprint for the rest of the production process, so it’s important to get it right. When writing your script, be sure to keep your brand voice in mind, and make sure that the finished product stays true to your guidelines.
5. Find the right talent
To bring your script to life, you’ll need to find the right talent. This means finding voiceover artists, actors or presenters who fit with your brand identity and can help to sell your message.
6. Record and edit your video
With all the pieces in place, you’re finally ready to record and edit your video. During this process, it’s important to stick to your guidelines, so that the finished product is on-brand and consistent with your other content.
7. Publish and promote your video
Once your video is complete, it’s time to hit publish and start promoting it to your audience. Remember to use all the channels at your disposal, from social media to email marketing, to make sure that as many people as possible see your brand-new video.
Brand Guidelines Consistency
It’s important to be consistent with your brand. One of the biggest mistakes a company can make is trying to brand itself as something it isn’t. If you’re perceived as one thing and then suddenly change, it may do more harm than good for your business or organization.
The most well-known example of a company with a consistent brand is Coca Cola. It is one of the company brands with consistent brand image and a very strong reputation. This can be attributed to the company’s efforts in marketing and advertising to create a distinct brand image. The Coca Cola Company has spent millions of dollars on advertising campaigns that focus on creating a positive image for the product and reinforcing its original taste.
You need to have consistency in all aspects of your brand: logo, voice and tone (including social media), visuals (such as color scheme), and more. Your audience will immediately identify any inconsistencies between these elements - so make sure they match up well!
Wrap-up
Creating video brand guidelines may seem like a lot of work, but it’s worth it in the long run. By taking the time to put together a comprehensive guide, you can ensure that all your future videos are on-brand, efficient and effective. So what are you waiting for? Get started today! Do you have any tips for creating video brand guidelines? Let us know in the comments below!
Free Download For Win 7 or later(64-bit)
Free Download For macOS 10.14 or later
Free Download For macOS 10.14 or later
Hitfilm Express Video Editor Review
If you are involved in video editing, you better know the importance of using hitfilm express download. This video editing tool helps the users to perform video editing efficiently. Along with basic features, the program also provides advanced-level functionality that makes edited videos phenomenal. Every casual video editor gets attracted to the hitfilm express download for its extraordinary features. Anyone can download the video editing software from an online platform named FXHome.
The free software is so impressive that it can give tough competition to paid video editing platforms like Studio, Adobe Premiere Pro, and After Effects. For both novice and seasoned youtubers, this platform provides some amusing features like 400+ visual effects, compositing tools presets, and cinematic features to unveil their creativity at its best.
1. How to download and install Hitfilm Express?
People increasingly depend on this software since it is free to download. Available for both Mac and Windows, this software works as exceptional community support. The software comes with documentation and tutorials so that new users don’t face any difficulty getting used to the platform. You can download hitfilm express editing software from any third-party platform, but it is advisable to download the video editor from the official website directly. You only have to ensure that your internet connection is speedy enough for activation.
Here is the step-by-step process for the online installation of HitFilm Express.

- First, go to the official website of HItFilm Express and click the download button.
- You have to fill in the details directly on the registration page. You will get the download URL in your mail address by doing this. Check your inbox to download the installer.
- Now, allow the installation file to run and then follow the steps.
- Once the installation is completed, it’s time to activate the software. A dialog box will appear on opening the program with options like login and activation. Click the “Get Free License” to land on the website.
- After getting into the website, log in to your previously created FXhome account. When you have finally logged in to your account, search the serial code.
- Revert the software and hit the Activate and Unlock button to enter the serial code and opt for software activation. It is how your entire installation process will be completed.
2. Key Features of Hitfilm Express
If you want to take your video editing to the next level like a professional, hitfilm express editing software is your one-stop solution. Here is a wide array of features that provides amateurs to professionals a seamless experience.
**Professional project quality: The UHD support and RAM preview of HitFilm Express provide the users the supreme quality formats. Whatever footage you collect from documentaries captured by high-end cameras or smartphones, HItFilm will manage everything.
**Commentator recorder: Once you click the button, you will easily adjoin voiceover to the uploaded videos without leaving the HitFilm. The HitFilm Express is designed so that your recording will promptly add to a soundtrack so that you can do the finishing touches with the audio effects.
**Integrated timelines: Keep switching from one tab to another, same as you do on the browser, as per your needs. You can edit in one tab, make a composition in the other, and then get back to the editor without the necessity of loading other software.
**Customized playback: You can personalize playback. It will help you get exposed to non-stop playback in the trimmer, thus preventing lagging and making edits easier. It allows you to control the playback quality and make hasty edits.
**Smart search: With the help of HitFilm Express, you can locate your desired keyword quickly. It will also help you find properties for all the effects, media, and timelines. In case you come from a different software system, the algorithm of hitfilm express editor identifies the keyword links and assists you in finding your search.
**Numerous streams: To allow the gamers to have a rejoicing experience, HitFilm allows importing files with multiple audio streams and provides you with complete flexibility over workflow.
**Adjustable trimmer: With HitFilm Express, you can re-trim clips even after adding to the timeline. The moment you double-click the clip, it will automatically get sent to the trimmer panel to allow you to make necessary adjustments. Once you have completed the changes, the clip will be again updated.
**Cinematic outlook: You can prepare your film with the classic cine-effects of HItFilm Express. Choose your most preferred effects like Day For Night, Three-Strip Color, Film Grain, and other styles to give a cinematic edge.
3. How to edit videos with Hitfilm Express?
Editing is cutting and accumulating the selected clips to tell the story better. Editing consists of adding sound effects, transitions, and other visual elements to help it view excellent results.

You have to set up the editor timeline and start importing clips to edit your clips. Use the editor tools like roll, slip, drag, selection, ripple, and others to customize your edit.

- Choose the Set in point button from the point where you want to start the clip. In the timeline, you will notice an orange section representing the part of the clip you want to play.
- Now, skip through, and decide where you want to end the clip. You have to click the Set-out button. You can alternatively use the I and 0 keys as shortcuts.
- Once you get your selected start and endpoint, you can drag down the portion of the video into the timeline. This time, you can get a message that shows the editor settings are different from the adding clip. It is your choice how you want to keep your settings.
- If you find the selected set of a good standard, you can move forward and select “Yes” to ensure that your project gets changed into that setting.
- In the viewer section, you will get to view the final outlook of the video. Here, on the downside of the timeline, you can click on the Zoom bar to see things in detail. Your previews will depend on the selected settings that you have made beforehand.
- If you want to change your default setting, you can come to the hamburger icon for tracking and changing the size of the video to different ones.
- Add a clip to the timeline: Position the play head at the timeline point where you want to start the clip, and then hit the insert clip button.

4. Hitfilm Express Alternative to Edit Videos
Anyone who finds video editing fun filling can try out Filmora . It is an ideal alternative to hitfilm express editing tutorial. Whether you shoot in an entry-level camera or a high-end video camera, Filmora will help you create and edit the most suitable videos. During the video editing procedure, you can experience multiple challenges that help you stay patient and work slowly to come out with the project.

It is the best video editing platform for beginners since it can provide comprehensive support for creating different video formats. The user-friendly interface and powerful editing features make the video editor one of the most used video editing software.
For Win 7 or later (64-bit)
For macOS 10.12 or later
Step-by-step guide for editing videos with Filmora
Step 1: Double click on the Filmora’s icon to start working on your project. Either open the new project or click on the aspect ratio for time-saving editing.
Step 2: Select the “project setting” option to customize the aspect ratio as per your need. Next, you will go to the import media files to choose the import with the instant cutter tool and opt for easy trimming of videos.
You can also use a lens correction tool to improve the quality of videos.
Step 3: Create a new folder and organize the clips alphabetically to increase efficiency.
Step 4: Drag and drop the trimmed videos on the timeline and rearrange them to remove the unnecessary parts. Press the play button to get previews of your added video clips.
Step 5: Now, it’s time to add audio and visual effects to your trimmed footage. You can also add opening titles and subtitles and use text templates to work on the video transition.
Step 6: With the help of a color correction tool, you can make the videos look vivid. It takes enough time and dedication to master color correction for your videos.
Step 7: When you are 100% sure about the final outlook of the project, you have to export the videos on YouTube for fast uploading on social media networks. Otherwise, you can opt for saving the video on the hard drives.
5. FAQs about Hitfilm Express
1.Is Hitfilm Express still free?
Ans: HitFilm Express is still free with alternative paid add-ons. The free video editing software helps make excellent films and video games with the professional-grade VFX. From students, beginners, and gamers to you Tubers – anyone can work on their creativity without spending a penny.
2.Is Hitfilm Express safe to download?
Ans: With more than 5 million active users across 160 countries, HitFilm Express is safe and legit software to download. If you are susceptible to using this platform, it is an excellent option to experience some remarkable features and learn A to Z of video editing.
3.Is Hitfilm Express still worth it?
Ans: IF anyone opts for the paid version, it will be expensive. However, the video editing software has beginner-friendly features like different AI tools for guided editing, 4K support, and others that hardly make any sense compared with other free software.
Looking at its professional features and high-quality editing, it is the most powerful video editing platform.
Conclusion
In a nutshell, HItFilm is an entirely free version of video editing software. Beginners can quickly learn it since the editing features can be easily grasped. To create amateur videos for professional ones, HitFilm Express is your one-stop solution. The customizable effects and compositing layers provide your videos with an excellent cinematic look. Everything you will get without spending any money.
Therefore, if you want to learn the A to Z of video editing for absolutely free, you can blindly rely on the hitfilm express editor.
2. Key Features of Hitfilm Express
If you want to take your video editing to the next level like a professional, hitfilm express editing software is your one-stop solution. Here is a wide array of features that provides amateurs to professionals a seamless experience.
**Professional project quality: The UHD support and RAM preview of HitFilm Express provide the users the supreme quality formats. Whatever footage you collect from documentaries captured by high-end cameras or smartphones, HItFilm will manage everything.
**Commentator recorder: Once you click the button, you will easily adjoin voiceover to the uploaded videos without leaving the HitFilm. The HitFilm Express is designed so that your recording will promptly add to a soundtrack so that you can do the finishing touches with the audio effects.
**Integrated timelines: Keep switching from one tab to another, same as you do on the browser, as per your needs. You can edit in one tab, make a composition in the other, and then get back to the editor without the necessity of loading other software.
**Customized playback: You can personalize playback. It will help you get exposed to non-stop playback in the trimmer, thus preventing lagging and making edits easier. It allows you to control the playback quality and make hasty edits.
**Smart search: With the help of HitFilm Express, you can locate your desired keyword quickly. It will also help you find properties for all the effects, media, and timelines. In case you come from a different software system, the algorithm of hitfilm express editor identifies the keyword links and assists you in finding your search.
**Numerous streams: To allow the gamers to have a rejoicing experience, HitFilm allows importing files with multiple audio streams and provides you with complete flexibility over workflow.
**Adjustable trimmer: With HitFilm Express, you can re-trim clips even after adding to the timeline. The moment you double-click the clip, it will automatically get sent to the trimmer panel to allow you to make necessary adjustments. Once you have completed the changes, the clip will be again updated.
**Cinematic outlook: You can prepare your film with the classic cine-effects of HItFilm Express. Choose your most preferred effects like Day For Night, Three-Strip Color, Film Grain, and other styles to give a cinematic edge.
3. How to edit videos with Hitfilm Express?
Editing is cutting and accumulating the selected clips to tell the story better. Editing consists of adding sound effects, transitions, and other visual elements to help it view excellent results.

You have to set up the editor timeline and start importing clips to edit your clips. Use the editor tools like roll, slip, drag, selection, ripple, and others to customize your edit.

- Choose the Set in point button from the point where you want to start the clip. In the timeline, you will notice an orange section representing the part of the clip you want to play.
- Now, skip through, and decide where you want to end the clip. You have to click the Set-out button. You can alternatively use the I and 0 keys as shortcuts.
- Once you get your selected start and endpoint, you can drag down the portion of the video into the timeline. This time, you can get a message that shows the editor settings are different from the adding clip. It is your choice how you want to keep your settings.
- If you find the selected set of a good standard, you can move forward and select “Yes” to ensure that your project gets changed into that setting.
- In the viewer section, you will get to view the final outlook of the video. Here, on the downside of the timeline, you can click on the Zoom bar to see things in detail. Your previews will depend on the selected settings that you have made beforehand.
- If you want to change your default setting, you can come to the hamburger icon for tracking and changing the size of the video to different ones.
- Add a clip to the timeline: Position the play head at the timeline point where you want to start the clip, and then hit the insert clip button.

4. Hitfilm Express Alternative to Edit Videos
Anyone who finds video editing fun filling can try out Filmora . It is an ideal alternative to hitfilm express editing tutorial. Whether you shoot in an entry-level camera or a high-end video camera, Filmora will help you create and edit the most suitable videos. During the video editing procedure, you can experience multiple challenges that help you stay patient and work slowly to come out with the project.

It is the best video editing platform for beginners since it can provide comprehensive support for creating different video formats. The user-friendly interface and powerful editing features make the video editor one of the most used video editing software.
For Win 7 or later (64-bit)
For macOS 10.12 or later
Step-by-step guide for editing videos with Filmora
Step 1: Double click on the Filmora’s icon to start working on your project. Either open the new project or click on the aspect ratio for time-saving editing.
Step 2: Select the “project setting” option to customize the aspect ratio as per your need. Next, you will go to the import media files to choose the import with the instant cutter tool and opt for easy trimming of videos.
You can also use a lens correction tool to improve the quality of videos.
Step 3: Create a new folder and organize the clips alphabetically to increase efficiency.
Step 4: Drag and drop the trimmed videos on the timeline and rearrange them to remove the unnecessary parts. Press the play button to get previews of your added video clips.
Step 5: Now, it’s time to add audio and visual effects to your trimmed footage. You can also add opening titles and subtitles and use text templates to work on the video transition.
Step 6: With the help of a color correction tool, you can make the videos look vivid. It takes enough time and dedication to master color correction for your videos.
Step 7: When you are 100% sure about the final outlook of the project, you have to export the videos on YouTube for fast uploading on social media networks. Otherwise, you can opt for saving the video on the hard drives.
5. FAQs about Hitfilm Express
1.Is Hitfilm Express still free?
Ans: HitFilm Express is still free with alternative paid add-ons. The free video editing software helps make excellent films and video games with the professional-grade VFX. From students, beginners, and gamers to you Tubers – anyone can work on their creativity without spending a penny.
2.Is Hitfilm Express safe to download?
Ans: With more than 5 million active users across 160 countries, HitFilm Express is safe and legit software to download. If you are susceptible to using this platform, it is an excellent option to experience some remarkable features and learn A to Z of video editing.
3.Is Hitfilm Express still worth it?
Ans: IF anyone opts for the paid version, it will be expensive. However, the video editing software has beginner-friendly features like different AI tools for guided editing, 4K support, and others that hardly make any sense compared with other free software.
Looking at its professional features and high-quality editing, it is the most powerful video editing platform.
Conclusion
In a nutshell, HItFilm is an entirely free version of video editing software. Beginners can quickly learn it since the editing features can be easily grasped. To create amateur videos for professional ones, HitFilm Express is your one-stop solution. The customizable effects and compositing layers provide your videos with an excellent cinematic look. Everything you will get without spending any money.
Therefore, if you want to learn the A to Z of video editing for absolutely free, you can blindly rely on the hitfilm express editor.
2. Key Features of Hitfilm Express
If you want to take your video editing to the next level like a professional, hitfilm express editing software is your one-stop solution. Here is a wide array of features that provides amateurs to professionals a seamless experience.
**Professional project quality: The UHD support and RAM preview of HitFilm Express provide the users the supreme quality formats. Whatever footage you collect from documentaries captured by high-end cameras or smartphones, HItFilm will manage everything.
**Commentator recorder: Once you click the button, you will easily adjoin voiceover to the uploaded videos without leaving the HitFilm. The HitFilm Express is designed so that your recording will promptly add to a soundtrack so that you can do the finishing touches with the audio effects.
**Integrated timelines: Keep switching from one tab to another, same as you do on the browser, as per your needs. You can edit in one tab, make a composition in the other, and then get back to the editor without the necessity of loading other software.
**Customized playback: You can personalize playback. It will help you get exposed to non-stop playback in the trimmer, thus preventing lagging and making edits easier. It allows you to control the playback quality and make hasty edits.
**Smart search: With the help of HitFilm Express, you can locate your desired keyword quickly. It will also help you find properties for all the effects, media, and timelines. In case you come from a different software system, the algorithm of hitfilm express editor identifies the keyword links and assists you in finding your search.
**Numerous streams: To allow the gamers to have a rejoicing experience, HitFilm allows importing files with multiple audio streams and provides you with complete flexibility over workflow.
**Adjustable trimmer: With HitFilm Express, you can re-trim clips even after adding to the timeline. The moment you double-click the clip, it will automatically get sent to the trimmer panel to allow you to make necessary adjustments. Once you have completed the changes, the clip will be again updated.
**Cinematic outlook: You can prepare your film with the classic cine-effects of HItFilm Express. Choose your most preferred effects like Day For Night, Three-Strip Color, Film Grain, and other styles to give a cinematic edge.
3. How to edit videos with Hitfilm Express?
Editing is cutting and accumulating the selected clips to tell the story better. Editing consists of adding sound effects, transitions, and other visual elements to help it view excellent results.

You have to set up the editor timeline and start importing clips to edit your clips. Use the editor tools like roll, slip, drag, selection, ripple, and others to customize your edit.

- Choose the Set in point button from the point where you want to start the clip. In the timeline, you will notice an orange section representing the part of the clip you want to play.
- Now, skip through, and decide where you want to end the clip. You have to click the Set-out button. You can alternatively use the I and 0 keys as shortcuts.
- Once you get your selected start and endpoint, you can drag down the portion of the video into the timeline. This time, you can get a message that shows the editor settings are different from the adding clip. It is your choice how you want to keep your settings.
- If you find the selected set of a good standard, you can move forward and select “Yes” to ensure that your project gets changed into that setting.
- In the viewer section, you will get to view the final outlook of the video. Here, on the downside of the timeline, you can click on the Zoom bar to see things in detail. Your previews will depend on the selected settings that you have made beforehand.
- If you want to change your default setting, you can come to the hamburger icon for tracking and changing the size of the video to different ones.
- Add a clip to the timeline: Position the play head at the timeline point where you want to start the clip, and then hit the insert clip button.

4. Hitfilm Express Alternative to Edit Videos
Anyone who finds video editing fun filling can try out Filmora . It is an ideal alternative to hitfilm express editing tutorial. Whether you shoot in an entry-level camera or a high-end video camera, Filmora will help you create and edit the most suitable videos. During the video editing procedure, you can experience multiple challenges that help you stay patient and work slowly to come out with the project.

It is the best video editing platform for beginners since it can provide comprehensive support for creating different video formats. The user-friendly interface and powerful editing features make the video editor one of the most used video editing software.
For Win 7 or later (64-bit)
For macOS 10.12 or later
Step-by-step guide for editing videos with Filmora
Step 1: Double click on the Filmora’s icon to start working on your project. Either open the new project or click on the aspect ratio for time-saving editing.
Step 2: Select the “project setting” option to customize the aspect ratio as per your need. Next, you will go to the import media files to choose the import with the instant cutter tool and opt for easy trimming of videos.
You can also use a lens correction tool to improve the quality of videos.
Step 3: Create a new folder and organize the clips alphabetically to increase efficiency.
Step 4: Drag and drop the trimmed videos on the timeline and rearrange them to remove the unnecessary parts. Press the play button to get previews of your added video clips.
Step 5: Now, it’s time to add audio and visual effects to your trimmed footage. You can also add opening titles and subtitles and use text templates to work on the video transition.
Step 6: With the help of a color correction tool, you can make the videos look vivid. It takes enough time and dedication to master color correction for your videos.
Step 7: When you are 100% sure about the final outlook of the project, you have to export the videos on YouTube for fast uploading on social media networks. Otherwise, you can opt for saving the video on the hard drives.
5. FAQs about Hitfilm Express
1.Is Hitfilm Express still free?
Ans: HitFilm Express is still free with alternative paid add-ons. The free video editing software helps make excellent films and video games with the professional-grade VFX. From students, beginners, and gamers to you Tubers – anyone can work on their creativity without spending a penny.
2.Is Hitfilm Express safe to download?
Ans: With more than 5 million active users across 160 countries, HitFilm Express is safe and legit software to download. If you are susceptible to using this platform, it is an excellent option to experience some remarkable features and learn A to Z of video editing.
3.Is Hitfilm Express still worth it?
Ans: IF anyone opts for the paid version, it will be expensive. However, the video editing software has beginner-friendly features like different AI tools for guided editing, 4K support, and others that hardly make any sense compared with other free software.
Looking at its professional features and high-quality editing, it is the most powerful video editing platform.
Conclusion
In a nutshell, HItFilm is an entirely free version of video editing software. Beginners can quickly learn it since the editing features can be easily grasped. To create amateur videos for professional ones, HitFilm Express is your one-stop solution. The customizable effects and compositing layers provide your videos with an excellent cinematic look. Everything you will get without spending any money.
Therefore, if you want to learn the A to Z of video editing for absolutely free, you can blindly rely on the hitfilm express editor.
2. Key Features of Hitfilm Express
If you want to take your video editing to the next level like a professional, hitfilm express editing software is your one-stop solution. Here is a wide array of features that provides amateurs to professionals a seamless experience.
**Professional project quality: The UHD support and RAM preview of HitFilm Express provide the users the supreme quality formats. Whatever footage you collect from documentaries captured by high-end cameras or smartphones, HItFilm will manage everything.
**Commentator recorder: Once you click the button, you will easily adjoin voiceover to the uploaded videos without leaving the HitFilm. The HitFilm Express is designed so that your recording will promptly add to a soundtrack so that you can do the finishing touches with the audio effects.
**Integrated timelines: Keep switching from one tab to another, same as you do on the browser, as per your needs. You can edit in one tab, make a composition in the other, and then get back to the editor without the necessity of loading other software.
**Customized playback: You can personalize playback. It will help you get exposed to non-stop playback in the trimmer, thus preventing lagging and making edits easier. It allows you to control the playback quality and make hasty edits.
**Smart search: With the help of HitFilm Express, you can locate your desired keyword quickly. It will also help you find properties for all the effects, media, and timelines. In case you come from a different software system, the algorithm of hitfilm express editor identifies the keyword links and assists you in finding your search.
**Numerous streams: To allow the gamers to have a rejoicing experience, HitFilm allows importing files with multiple audio streams and provides you with complete flexibility over workflow.
**Adjustable trimmer: With HitFilm Express, you can re-trim clips even after adding to the timeline. The moment you double-click the clip, it will automatically get sent to the trimmer panel to allow you to make necessary adjustments. Once you have completed the changes, the clip will be again updated.
**Cinematic outlook: You can prepare your film with the classic cine-effects of HItFilm Express. Choose your most preferred effects like Day For Night, Three-Strip Color, Film Grain, and other styles to give a cinematic edge.
3. How to edit videos with Hitfilm Express?
Editing is cutting and accumulating the selected clips to tell the story better. Editing consists of adding sound effects, transitions, and other visual elements to help it view excellent results.

You have to set up the editor timeline and start importing clips to edit your clips. Use the editor tools like roll, slip, drag, selection, ripple, and others to customize your edit.

- Choose the Set in point button from the point where you want to start the clip. In the timeline, you will notice an orange section representing the part of the clip you want to play.
- Now, skip through, and decide where you want to end the clip. You have to click the Set-out button. You can alternatively use the I and 0 keys as shortcuts.
- Once you get your selected start and endpoint, you can drag down the portion of the video into the timeline. This time, you can get a message that shows the editor settings are different from the adding clip. It is your choice how you want to keep your settings.
- If you find the selected set of a good standard, you can move forward and select “Yes” to ensure that your project gets changed into that setting.
- In the viewer section, you will get to view the final outlook of the video. Here, on the downside of the timeline, you can click on the Zoom bar to see things in detail. Your previews will depend on the selected settings that you have made beforehand.
- If you want to change your default setting, you can come to the hamburger icon for tracking and changing the size of the video to different ones.
- Add a clip to the timeline: Position the play head at the timeline point where you want to start the clip, and then hit the insert clip button.

4. Hitfilm Express Alternative to Edit Videos
Anyone who finds video editing fun filling can try out Filmora . It is an ideal alternative to hitfilm express editing tutorial. Whether you shoot in an entry-level camera or a high-end video camera, Filmora will help you create and edit the most suitable videos. During the video editing procedure, you can experience multiple challenges that help you stay patient and work slowly to come out with the project.

It is the best video editing platform for beginners since it can provide comprehensive support for creating different video formats. The user-friendly interface and powerful editing features make the video editor one of the most used video editing software.
For Win 7 or later (64-bit)
For macOS 10.12 or later
Step-by-step guide for editing videos with Filmora
Step 1: Double click on the Filmora’s icon to start working on your project. Either open the new project or click on the aspect ratio for time-saving editing.
Step 2: Select the “project setting” option to customize the aspect ratio as per your need. Next, you will go to the import media files to choose the import with the instant cutter tool and opt for easy trimming of videos.
You can also use a lens correction tool to improve the quality of videos.
Step 3: Create a new folder and organize the clips alphabetically to increase efficiency.
Step 4: Drag and drop the trimmed videos on the timeline and rearrange them to remove the unnecessary parts. Press the play button to get previews of your added video clips.
Step 5: Now, it’s time to add audio and visual effects to your trimmed footage. You can also add opening titles and subtitles and use text templates to work on the video transition.
Step 6: With the help of a color correction tool, you can make the videos look vivid. It takes enough time and dedication to master color correction for your videos.
Step 7: When you are 100% sure about the final outlook of the project, you have to export the videos on YouTube for fast uploading on social media networks. Otherwise, you can opt for saving the video on the hard drives.
5. FAQs about Hitfilm Express
1.Is Hitfilm Express still free?
Ans: HitFilm Express is still free with alternative paid add-ons. The free video editing software helps make excellent films and video games with the professional-grade VFX. From students, beginners, and gamers to you Tubers – anyone can work on their creativity without spending a penny.
2.Is Hitfilm Express safe to download?
Ans: With more than 5 million active users across 160 countries, HitFilm Express is safe and legit software to download. If you are susceptible to using this platform, it is an excellent option to experience some remarkable features and learn A to Z of video editing.
3.Is Hitfilm Express still worth it?
Ans: IF anyone opts for the paid version, it will be expensive. However, the video editing software has beginner-friendly features like different AI tools for guided editing, 4K support, and others that hardly make any sense compared with other free software.
Looking at its professional features and high-quality editing, it is the most powerful video editing platform.
Conclusion
In a nutshell, HItFilm is an entirely free version of video editing software. Beginners can quickly learn it since the editing features can be easily grasped. To create amateur videos for professional ones, HitFilm Express is your one-stop solution. The customizable effects and compositing layers provide your videos with an excellent cinematic look. Everything you will get without spending any money.
Therefore, if you want to learn the A to Z of video editing for absolutely free, you can blindly rely on the hitfilm express editor.
LumaFusion – What Is It and the Best Alternative to Use
LumaFusion makes itself known as a multi-track video editor available for iOS users. While it presents other compatible versions, it provides some of the most professional video editing and enhancement features that make editing proficient on mobile devices. Its easy-to-use interface, combined with advanced functions of editing videos, adding audio, and adjusting speed, gives a perfect non-linear editing experience.
Pros
- Manageable and Proficient user interface
- Image stabilization is available to enhance performance
- Can add third-party plugins for video enhancement
- Trim unused media before exporting the video
- Videos can be exported directly to Final Cut Pro
Cons
- The user has to pay for the app to download
- Audio synchronization issues in large videos
- You can only add up to 6 audio/video tracks to the timeline
Part 1: What is LumaFusion?
LumaFusion is a multi-track video editing mobile application providing a professional video editing experience on portable devices. It gives uses a platform to create the perfect storyline and environments for bringing out the perfect features of the story that is held by the video. So, while you get a platform with interactive features and tools to work with, video editing simultaneously gets extensive and simple.
People who are not having the time to bring in a professional video editor to work on a task can look forward to this progressive tool designed for portable video editing. While you do not confuse it with a basic video editor, you can find tools that can help you adjust parameters such as the aspect ratio.

Download LumaFusion: Android | iOS
You can download this proficient video editor for your iPhone and iPad. It can also be enjoyed on Mac devices, which are now available on Android devices. LumaFusion has scaled its support and compatibility of devices over time.
Pricing Plan
If you intend to use the LumaFusion app to inject creativity into your videos, you must have to pay a single-time price of $19.99 to get access to the application. Apart from that, there are several in-app purchases that you can look forward to for increasing the hold on different tools and features, as per the requirement.
System Requirements of LumaFusion iOS
| iPhone | Requires iOS 15.4 or later. |
|---|---|
| iPad | Requires iPadOS 15.4 or later. |
| iPod Touch | Requires iOS 15.4 or later. |
| Mac | Requires macOS 12.3 or later and a Mac with Apple M1 chip or later. |
| Size | 192.9 MB |
Part 2: Key Features of LumaFusion Video Editor
We will now highlight some essential features that can be considered about the LumaFusion video editor. These features will give a better understanding of the tool and provide a guideline on how to utilize the best functions with ease:
1. Interface
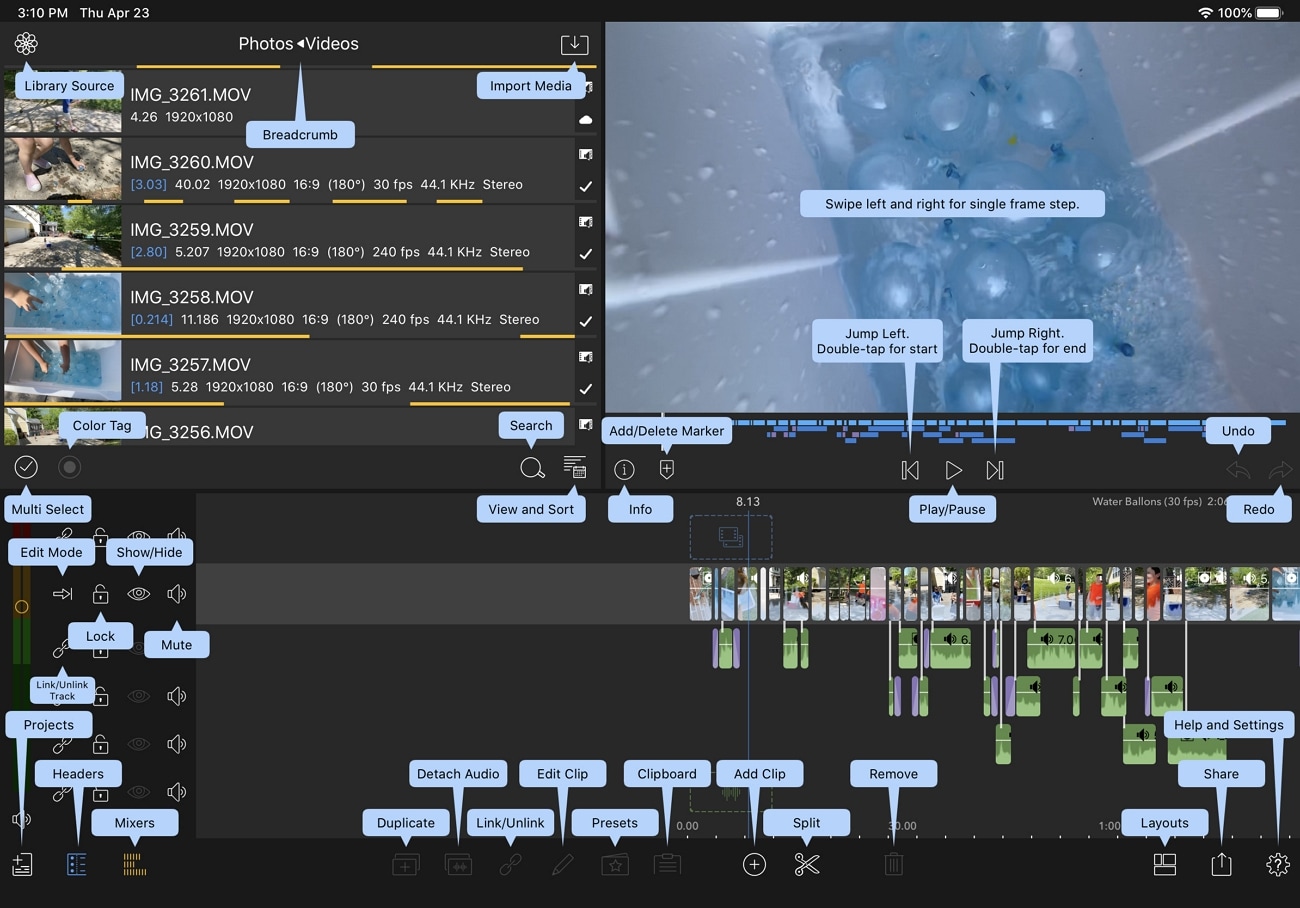
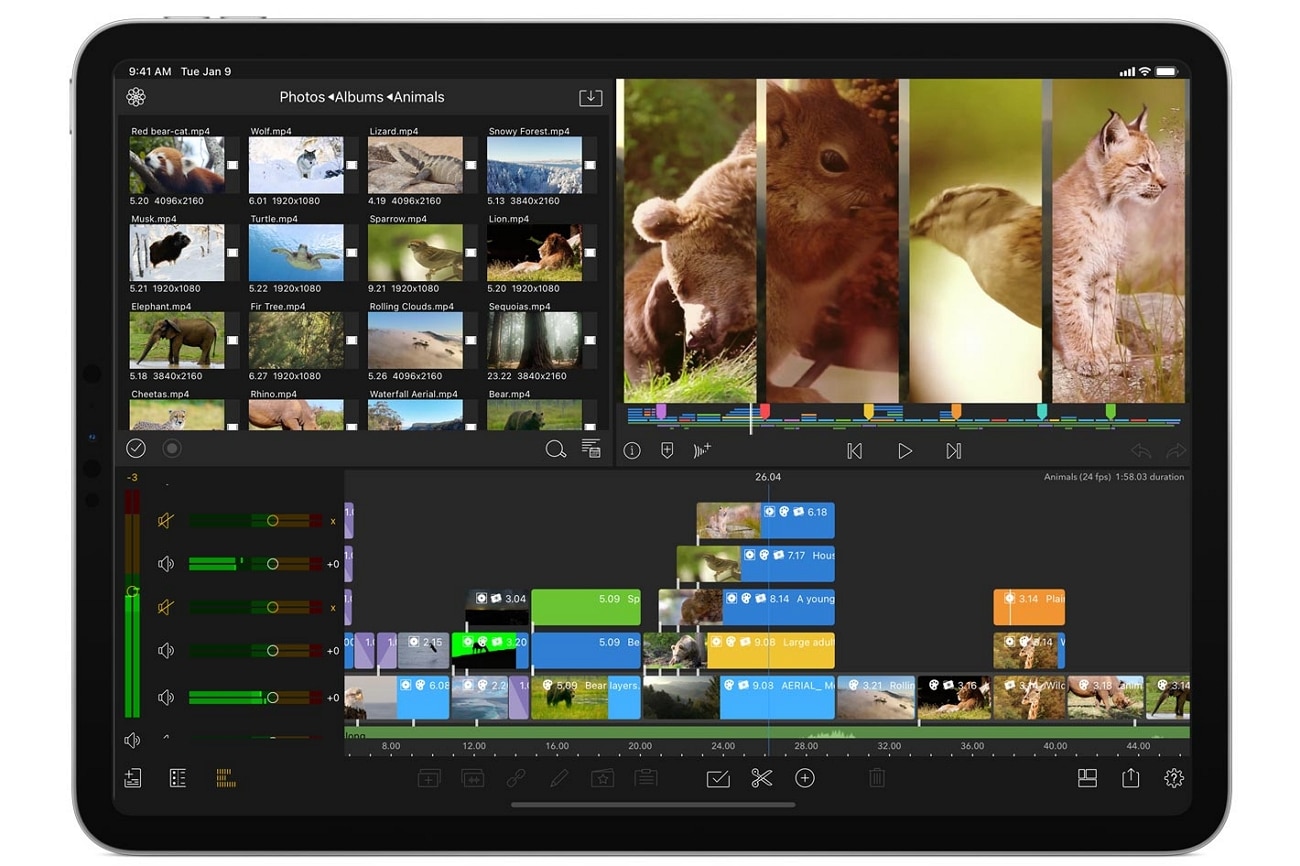
When understanding the interface of the LumaFusion app on iOS, many would think the application won’t provide extensive tools to work with. This video editor does not come with a bland user interface but provides some great functions and features on an interface that allows you to create professional-level videos.
With the option of adding titles, transitions, color grading, and effects, LumaFusion is a complete video editor that provides features that are not commonly observed in many desktop-based video editors. Regardless, it presents an efficient workspace that has managed all the functions properly in rows and different sections.
2. Video’s Layers
Creating proper movies on your iOS device is not difficult with LumaFusion. With the option of including six layers of video in the timeline, a lot can be done with them for improvising different sequences and multiple effects. Its picture-in-picture presets, layered transitions, graphic equalizer, and the use of additional plugins allow you to create complete videos with proper control.
Talking about some renowned iOS video editors in the market, you will find LumaFusion a much better option. iMovie, the dedicated video editor for iOS devices, can only embed two layers of videos in the timeline. This clearly explains why LumaFusion is a much better option with its video layers.
3. Powerful Keyframe
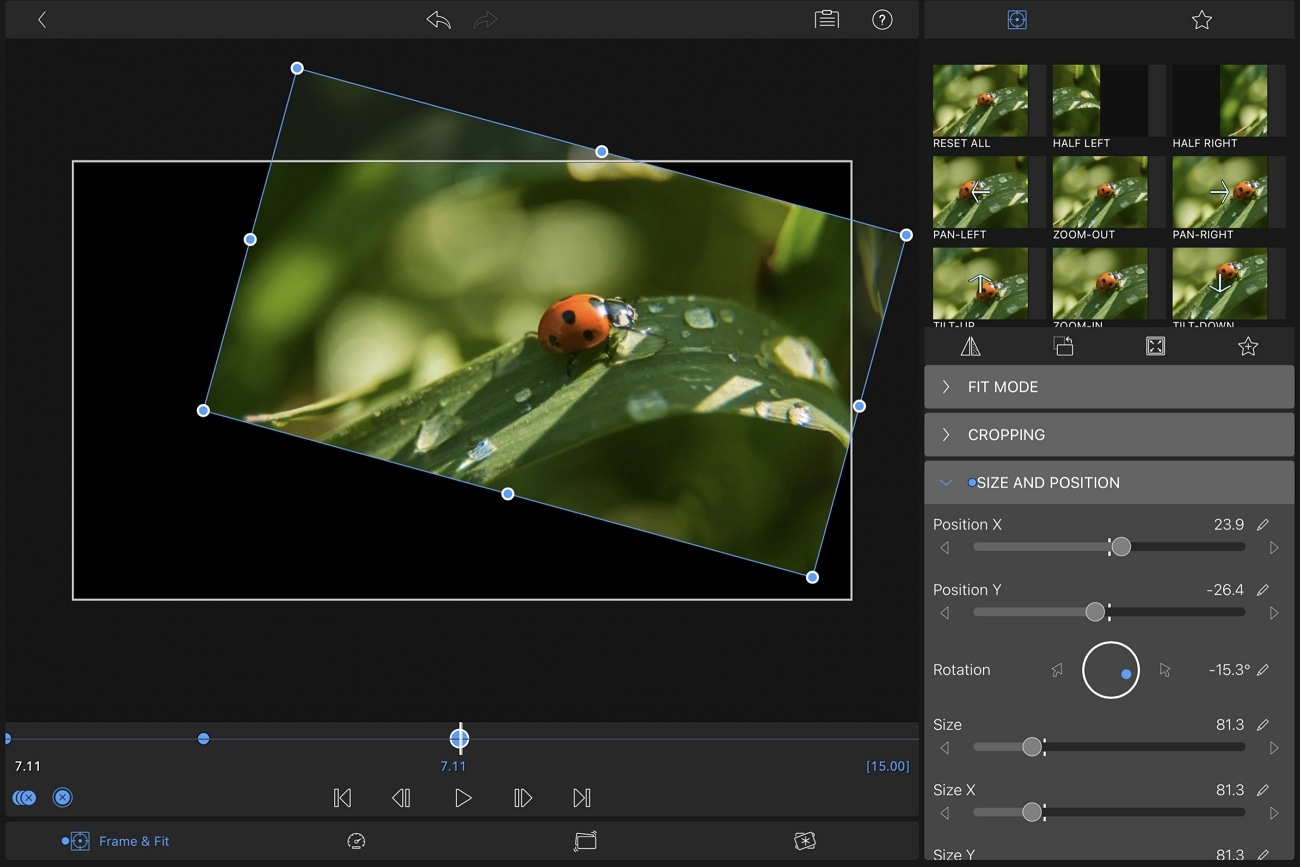
The keyframes function on LumaFusion is not challenging to work with on the video editor. You can ecstatically create animating effects with the help of the keyframe sounds within the application. These effects, once created, can be saved and used on other videos within the platform. To improve your effects on the mobile video editor, you can use the powerful keyframe feature of LumaFusion to create the best results.
With a small price to pay for the video editor, you can gain access to a diversity of keyframes that can help you design the perfect effects for your video.
4. Export to Final Cut Pro
Another impressive and touching feature this video editor provides to its users is its integration with Final Cut Pro - a proficient desktop video editor offered on macOS. You can easily export your created video to Final Cut Pro as an FCPXML.zip file directly after paying a one-time price. Users who are having a rough time editing the file on LumaFusion can easily shift to Final Cut Pro.
This process has disadvantages, regardless of the extensive control and accessibility provided between the applications. If you seek to use Final Cut Pro after editing a video on the LumaFusion app, you will have to add all the assets on FCP when you shift the file onto the platform.
Also, you might have to include many effects such as LUTs, Chroma key, and other relevant features. With this effort, you can easily put your video from LumaFusion to Final Cut Pro.
Part 3: Advantages and Disadvantages of LumaFusion Video Editor
Suppose you are considering using the LumaFusion video editor on your iOS device. In that case, there are a few advantages and disadvantages you must look into to understand more about the tool and get to an absolute decision:
Pros
- You can add third-party plugins to your video editor to enhance the video editing features. This allows you to put better effects, transitions, and enhancement elements in your video.
- It can create smooth slow-motion videos with 120fps and 240fps results.
- Multi-layer titles can be created within the platform and used in further actions.
- The display of the edited video can be previewed across an external monitor.
- It provides stability in video editing by using color tags within frame rates up to 18fps.
Cons
- For large video files, you might face lagging issues and audio synchronization within videos.
- To access the complete library of music and clips, you will have to subscribe to their additional plans.
- The tool is already available at a price tag, which is associated with more subscription plans, making it a devalued option.
Part 4: What’s New in LumaFusion 3.2 Version
The latest iteration of the LumaFusion app brings new and exciting features to the market. To learn more about these features, you will know better how the video editor is improving its operations:
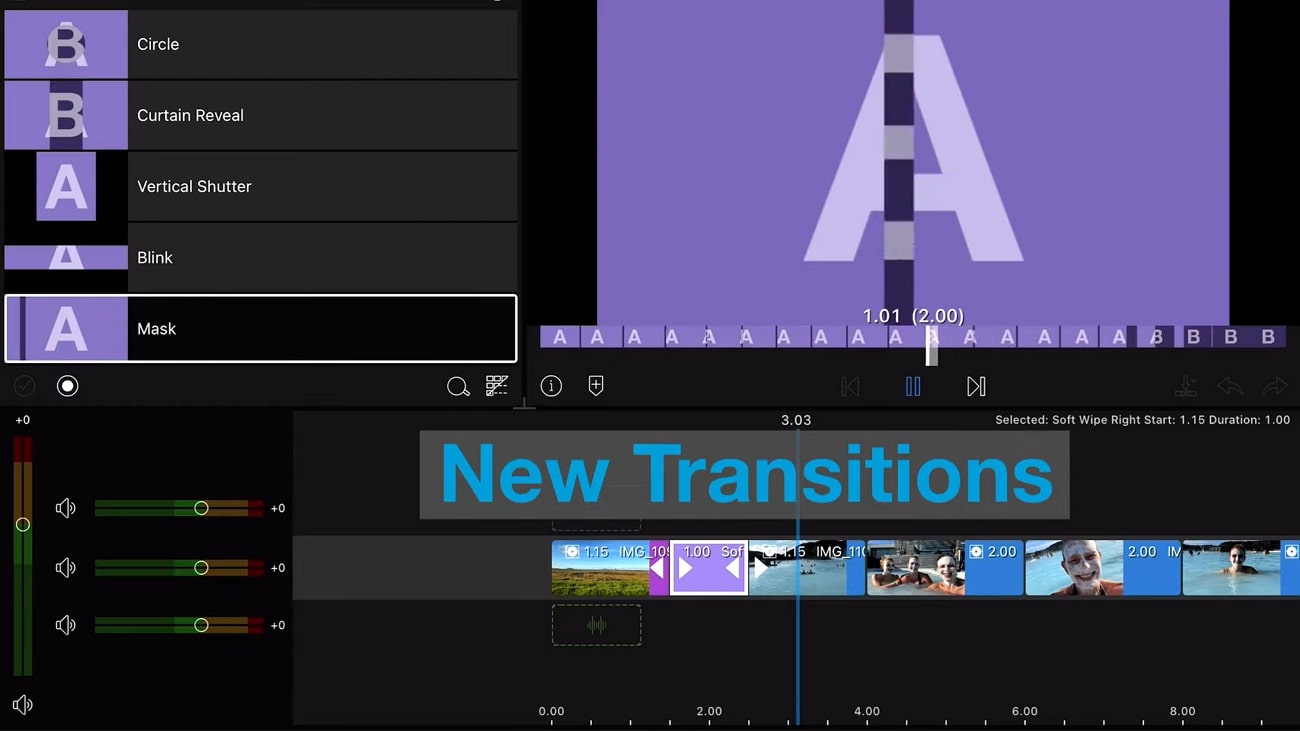
1. 35+ New Transitions
LumaFusion 3.2 comes with a new set of transitions, with almost 35 in number. With different blur transitions, there are some new introductions in the transition section that offers multiple motions.
2. iCloud Backups
If you are confused about how to sustain the storage space on your iOS device, LumaFusion now provides iCloud Drive support and allows the user to back up their data. The data from the iCloud Drive can also be restored directly from the platform.

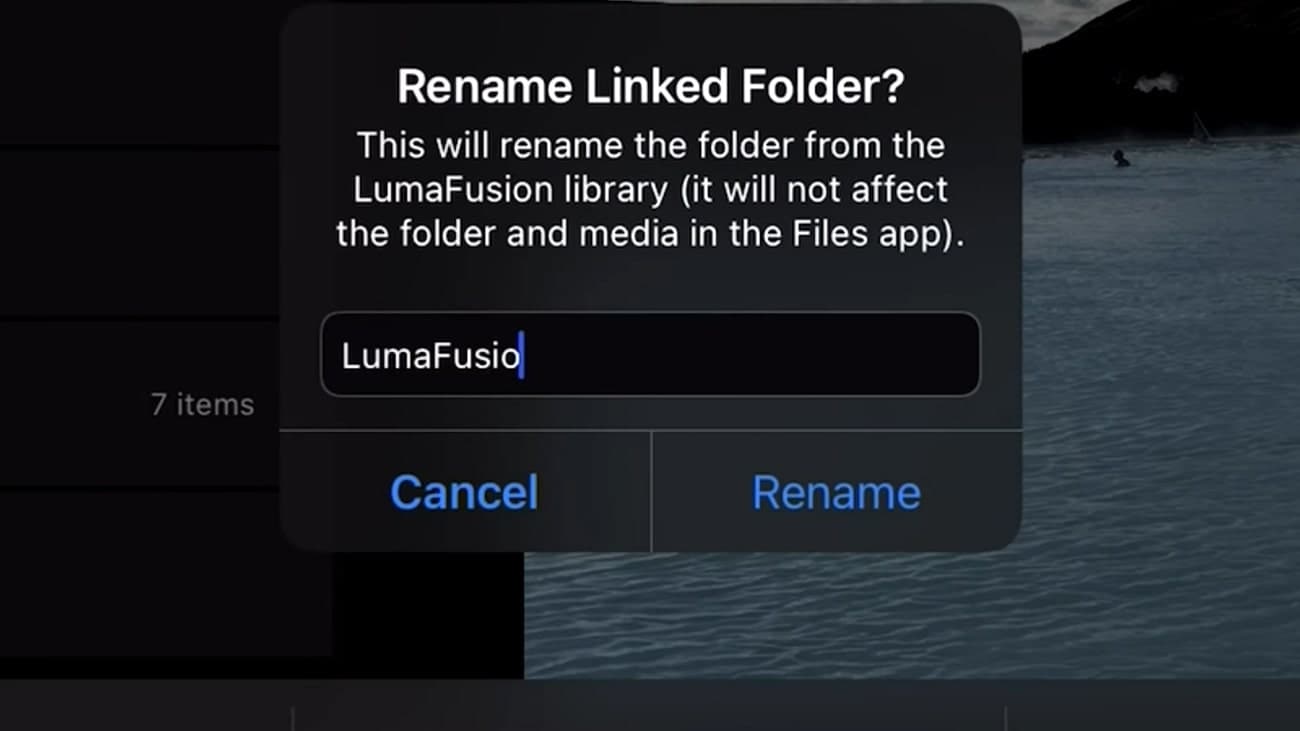
3. Rename Linked Folders
In the previous versions of LumaFusion, you could not rename the linked folders, or the platform incorrectly named them. With this update, you can now easily rename the linked folders by selecting and holding them within the interface.
4. Localizations for 2 New Versions
Traditional Chinese and Brazilian Portuguese are now among the added localizations in the video editor. The wide range of language support is helping this application set up a new precedent in the market for other mobile video editors.
Part 5: Best Alternative to LumaFusion Video Editor for iOS
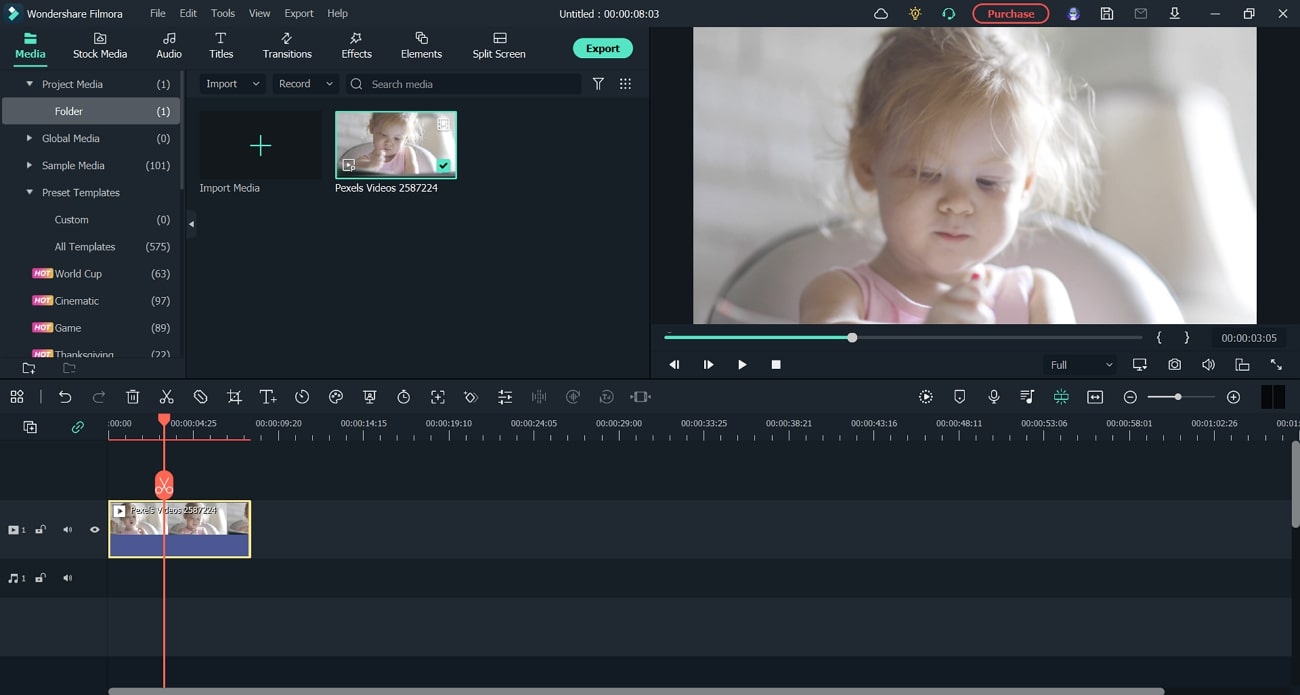
LumaFusion video editor is a great option, but its drawbacks restrict it to some extent. To answer this, Wondershare Filmora provides a better option for video editing, offering compatibility on Windows and all other platforms supported by the LumaFusion video editing application. To know more about how good Filmora is, look ahead.
Wondershare Filmora is a complete, easy-to-use video editor providing many features and creativity options. For example, you can find the perfect set of effects and transitions on the platform by supporting a diversity of filters and text overlays. With other options, such as PIP mode and video beautification, Wondershare Filmora supports many file formats for video editing.
Free Download For Win 7 or later(64-bit)
Free Download For macOS 10.14 or later
Conclusion
This article has provided a prominent overview of the LumaFusion review, a video editor that has made video editing operations easier on smartphones. While it is a great iOS video editor, you can find other prominent functions with extensive layered support, intuitive keyframes, and consolidated connectivity to other platforms. As a better option, this article has offered Wondershare Filmora as a more potent tool with better compatibility and inexpensive features.
People Also Want to Know
1. How to download LumaFusion on Windows?
LumaFusion is unavailable on the Windows platform, where you can only find it on Mac, iOS, and Android. As an alternative to this video editor, you can try using Wondershare Filmora.
2. Can LumaFusion edit 4K?
You can easily edit, manage, and export 4K videos within the platform. LumaFusion provides extensive support for managing a broad range of video resolutions.
Part 1: What is LumaFusion?
LumaFusion is a multi-track video editing mobile application providing a professional video editing experience on portable devices. It gives uses a platform to create the perfect storyline and environments for bringing out the perfect features of the story that is held by the video. So, while you get a platform with interactive features and tools to work with, video editing simultaneously gets extensive and simple.
People who are not having the time to bring in a professional video editor to work on a task can look forward to this progressive tool designed for portable video editing. While you do not confuse it with a basic video editor, you can find tools that can help you adjust parameters such as the aspect ratio.

Download LumaFusion: Android | iOS
You can download this proficient video editor for your iPhone and iPad. It can also be enjoyed on Mac devices, which are now available on Android devices. LumaFusion has scaled its support and compatibility of devices over time.
Pricing Plan
If you intend to use the LumaFusion app to inject creativity into your videos, you must have to pay a single-time price of $19.99 to get access to the application. Apart from that, there are several in-app purchases that you can look forward to for increasing the hold on different tools and features, as per the requirement.
System Requirements of LumaFusion iOS
| iPhone | Requires iOS 15.4 or later. |
|---|---|
| iPad | Requires iPadOS 15.4 or later. |
| iPod Touch | Requires iOS 15.4 or later. |
| Mac | Requires macOS 12.3 or later and a Mac with Apple M1 chip or later. |
| Size | 192.9 MB |
Part 2: Key Features of LumaFusion Video Editor
We will now highlight some essential features that can be considered about the LumaFusion video editor. These features will give a better understanding of the tool and provide a guideline on how to utilize the best functions with ease:
1. Interface
When understanding the interface of the LumaFusion app on iOS, many would think the application won’t provide extensive tools to work with. This video editor does not come with a bland user interface but provides some great functions and features on an interface that allows you to create professional-level videos.
With the option of adding titles, transitions, color grading, and effects, LumaFusion is a complete video editor that provides features that are not commonly observed in many desktop-based video editors. Regardless, it presents an efficient workspace that has managed all the functions properly in rows and different sections.

2. Video’s Layers
Creating proper movies on your iOS device is not difficult with LumaFusion. With the option of including six layers of video in the timeline, a lot can be done with them for improvising different sequences and multiple effects. Its picture-in-picture presets, layered transitions, graphic equalizer, and the use of additional plugins allow you to create complete videos with proper control.
Talking about some renowned iOS video editors in the market, you will find LumaFusion a much better option. iMovie, the dedicated video editor for iOS devices, can only embed two layers of videos in the timeline. This clearly explains why LumaFusion is a much better option with its video layers.

3. Powerful Keyframe
The keyframes function on LumaFusion is not challenging to work with on the video editor. You can ecstatically create animating effects with the help of the keyframe sounds within the application. These effects, once created, can be saved and used on other videos within the platform. To improve your effects on the mobile video editor, you can use the powerful keyframe feature of LumaFusion to create the best results.
With a small price to pay for the video editor, you can gain access to a diversity of keyframes that can help you design the perfect effects for your video.

4. Export to Final Cut Pro
Another impressive and touching feature this video editor provides to its users is its integration with Final Cut Pro - a proficient desktop video editor offered on macOS. You can easily export your created video to Final Cut Pro as an FCPXML.zip file directly after paying a one-time price. Users who are having a rough time editing the file on LumaFusion can easily shift to Final Cut Pro.
This process has disadvantages, regardless of the extensive control and accessibility provided between the applications. If you seek to use Final Cut Pro after editing a video on the LumaFusion app, you will have to add all the assets on FCP when you shift the file onto the platform.
Also, you might have to include many effects such as LUTs, Chroma key, and other relevant features. With this effort, you can easily put your video from LumaFusion to Final Cut Pro.
Part 3: Advantages and Disadvantages of LumaFusion Video Editor
Suppose you are considering using the LumaFusion video editor on your iOS device. In that case, there are a few advantages and disadvantages you must look into to understand more about the tool and get to an absolute decision:
Pros
- You can add third-party plugins to your video editor to enhance the video editing features. This allows you to put better effects, transitions, and enhancement elements in your video.
- It can create smooth slow-motion videos with 120fps and 240fps results.
- Multi-layer titles can be created within the platform and used in further actions.
- The display of the edited video can be previewed across an external monitor.
- It provides stability in video editing by using color tags within frame rates up to 18fps.
Cons
- For large video files, you might face lagging issues and audio synchronization within videos.
- To access the complete library of music and clips, you will have to subscribe to their additional plans.
- The tool is already available at a price tag, which is associated with more subscription plans, making it a devalued option.
Part 4: What’s New in LumaFusion 3.2 Version
The latest iteration of the LumaFusion app brings new and exciting features to the market. To learn more about these features, you will know better how the video editor is improving its operations:
1. 35+ New Transitions
LumaFusion 3.2 comes with a new set of transitions, with almost 35 in number. With different blur transitions, there are some new introductions in the transition section that offers multiple motions.

2. iCloud Backups
If you are confused about how to sustain the storage space on your iOS device, LumaFusion now provides iCloud Drive support and allows the user to back up their data. The data from the iCloud Drive can also be restored directly from the platform.

3. Rename Linked Folders
In the previous versions of LumaFusion, you could not rename the linked folders, or the platform incorrectly named them. With this update, you can now easily rename the linked folders by selecting and holding them within the interface.

4. Localizations for 2 New Versions
Traditional Chinese and Brazilian Portuguese are now among the added localizations in the video editor. The wide range of language support is helping this application set up a new precedent in the market for other mobile video editors.
Part 5: Best Alternative to LumaFusion Video Editor for iOS
LumaFusion video editor is a great option, but its drawbacks restrict it to some extent. To answer this, Wondershare Filmora provides a better option for video editing, offering compatibility on Windows and all other platforms supported by the LumaFusion video editing application. To know more about how good Filmora is, look ahead.
Wondershare Filmora is a complete, easy-to-use video editor providing many features and creativity options. For example, you can find the perfect set of effects and transitions on the platform by supporting a diversity of filters and text overlays. With other options, such as PIP mode and video beautification, Wondershare Filmora supports many file formats for video editing.
Free Download For Win 7 or later(64-bit)
Free Download For macOS 10.14 or later

Conclusion
This article has provided a prominent overview of the LumaFusion review, a video editor that has made video editing operations easier on smartphones. While it is a great iOS video editor, you can find other prominent functions with extensive layered support, intuitive keyframes, and consolidated connectivity to other platforms. As a better option, this article has offered Wondershare Filmora as a more potent tool with better compatibility and inexpensive features.
People Also Want to Know
1. How to download LumaFusion on Windows?
LumaFusion is unavailable on the Windows platform, where you can only find it on Mac, iOS, and Android. As an alternative to this video editor, you can try using Wondershare Filmora.
2. Can LumaFusion edit 4K?
You can easily edit, manage, and export 4K videos within the platform. LumaFusion provides extensive support for managing a broad range of video resolutions.
Also read:
- New 10+ Top Unlimited FCPX Slideshow Templates
- New Overview of Perfect Moody LUTs for VN Editor
- 2024 Approved Top 5 Video Filter Software Enhance Your Videos
- Updated Are You Looking to Freeze-Frame in FCP? If Yes, Read One, as Here Is a Guide About How to Freeze-Frame in Final Cut Pro (FCP) with Ease
- Many People Choose Video Editing or Post-Editing as Their Career in These Days. Is This a Good Choice? How to Start a Video Editing Career? This Article Will Tell You the Complete Details
- New Best 6 Online MP4 Croppers for 2024
- New Have You Ever Wondered How Those PowerPoint, Looping Slideshows You See in Conferences and Reception Areas Display and Move to the Next Slide Automatically without Clicking a Mouse? You Dont Have to Be Amazed at This for 2024
- Updated Do You Want to Use a Professional Tool to Add Subtitles? Read This Article to Discover the Best Reliable Tool to Create Subtitles in Your Desired Manner for 2024
- Updated VSDC Free Video Editor Review 2023
- New Tutorial | How to Make a Smooth Speed Ramping in Premiere Pro, In 2024
- New 2024 Approved Difference Between Time Lapse and Hyperlapse
- New 2024 Approved This Guide Is to Help You Select the Ways that Meet Your Needs, and It Is Easy for You to Combine 2 or More Videos Into One Video
- 2024 Approved How to Add Background to Video With/Without a Green Screen
- You Must Be Wondering Which the Best Online Transparent Image-Maker Is! Well, There Is No Need to Get Confused as Here; You Will Get a Curated List for the Same for 2024
- New 2024 Approved Final Cut Pro - How to Download and Install It
- Updated In 2024, Make A Tattoo Disappear Like A Magic
- How To Make Ninja Jump Effect with Filmora
- Back up and Organize Your Files to Protect Any Misfortune Befalling Them. The Article Will Guide You on How to Back up and Manage Your Footage
- In 2024, A Comprehensive Guide on VHS Technology and Its Influence on Video Editing
- Updated Learn How to Do Velocity Edits on PC to Enhance Your Videos, Adjusting Speed for Dynamic and Visually Engaging Results
- New 2024 Approved Detailed Guide to Crop Videos in Sony Vegas Pro
- Updated In 2024, 3 Different Methods to Correct Color Distortion in Videos
- Want to Make a Slide Show Video? Heres How for 2024
- Updated Looking for the Best Way to Create Stunning Video Animations? Here, We Look at some of the Best Animated Video Maker Solutions to Use for 2024
- Updated 9 Best Sparkle Effects Photo and Video Editors You Should Know for 2024
- Guide to Synchronizing Your Audio And Videos Properly?
- 2024 Approved How to Use Frame Blending in Premiere Pro
- How to Change Credit Card on Your iPhone 14 Pro Max Apple ID and Apple Pay
- In 2024, How to jailbreak iCloud locked iPhone 15 Pro
- In 2024, Unlock Your Honor X9b Phone with Ease The 3 Best Lock Screen Removal Tools
- In 2024, How To Activate and Use Life360 Ghost Mode On OnePlus 12R | Dr.fone
- Cellular Network Not Available for Voice Calls On Tecno Pova 5 Pro | Dr.fone
- Fix the Error of Unfortunately the Process.com.android.phone Has Stopped on Realme C67 4G | Dr.fone
- How Do I SIM Unlock My iPhone 15 Pro?
- Full Guide to Unlock Your Samsung Galaxy S24+
- In 2024, How to Fix when Apple Account Locked From Apple iPhone 8 Plus?
- In 2024, How to Fake GPS on Android without Mock Location For your OnePlus Nord CE 3 5G | Dr.fone
- Updated In 2024, Unlocking TalkShopLive Pros and Tips for Live Shopping Success
- In 2024, How to Transfer Contacts from Motorola Moto G 5G (2023) To Phone | Dr.fone
- Catch or Beat Sleeping Snorlax on Pokemon Go For Itel A05s | Dr.fone
- In 2024, How To Track IMEI Number Of Nokia G22 Through Google Earth?
- How to Fix Android.Process.Media Has Stopped on Tecno Pova 6 Pro 5G | Dr.fone
- Guide to Mirror Your ZTE Nubia Z60 Ultra to Other Android devices | Dr.fone
- How to Stop Life360 from Tracking You On Apple iPhone 14 Pro? | Dr.fone
- 4 Methods to Turn off Life 360 On Apple iPhone 14 Pro Max without Anyone Knowing | Dr.fone
- Lava Agni 2 5G Camera Not Working Unexpected Error? Fix It Now | Dr.fone
- Bypass/Reset ZTE Nubia Z60 Ultra Phone Screen Passcode/Pattern/Pin
- Where Is the Best Place to Catch Dratini On Samsung Galaxy F54 5G | Dr.fone
- In 2024, How to Track Poco X6 Location without Installing Software? | Dr.fone
- In 2024, Forgot Pattern Lock? Heres How You Can Unlock Nokia C32 Pattern Lock Screen
- Title: New In 2024, Learn to Create Custom Sequence Presets in Premiere Pro for Efficient Video Editing. Ensure Consistency and Speed up Your Workflow with Personalized Settings
- Author: Morgan
- Created at : 2024-04-24 01:10:38
- Updated at : 2024-04-25 01:10:38
- Link: https://ai-video-editing.techidaily.com/new-in-2024-learn-to-create-custom-sequence-presets-in-premiere-pro-for-efficient-video-editing-ensure-consistency-and-speed-up-your-workflow-with-personali/
- License: This work is licensed under CC BY-NC-SA 4.0.

