

New In 2024, Learning The Details Of How To Replace Sky in Lightroom
Learning The Details Of How To Replace Sky in Lightroom
People look for sky replacements in their images to improve their appearance. Sometimes, we need to do this because of overexposed images in sunlight. Replacing the surroundings of images is a common post-processing technique in photography. For this purpose, advanced editing tools like Lightroom and Adobe Photoshop are required.
Lightroom Sky replacement requires certain editing skills to effectively edit the media. This article will help you to learn how to do sky replacement in Lightroom. Before delving into the steps, read the first part to know the reason for changing the surroundings in Lightroom to replace the sky system.
Sky Replacement A cross-platform works like magic for background removal or sky replacement photos Free Download Learn More

Part 1: Why Do Creators Look Forward to Changing the Environment Across Their Recorded or Captured Media?
Humans love to show creativity and express themselves from different perspectives. Creative works provide entertainment and prove therapeutic in some way. That’s why creators and artists try to change the surroundings of recorded media. Such changes make the captured media virtually stunning and creative. Let’s explore more reasons that push creators towards sky replacement in Lightroom:
- Artistic Storytelling: A creative art piece shows a story of a thousand words. Thus, artists look for visual elements to convey particular moods and messages in their media.
- Symbolism: In many art competitions, creators are asked to show symbolic media. For this purpose, they might replace Sky in Lightroom to symbolize rebirth and growth.
- World-Building: The science fiction and fantasy genre needs such changes to build another world. Creators turn the media into imaginative settings to inspire the audience.
- Entertainment: Another aim of the creator is to provide new and exciting content to the audience. It allows them to temporarily escape their world and enjoy it.
- Discovery: You might have seen virtual landscapes in video games that uncover hidden secrets. Such backgrounds are designed to facilitate adventure through media.
Part 2: A Guide to Replace Sky in Lightroom: Step-by-Step
As discussed earlier, changing the sky in Lightroom proves fruitful for many reasons. Altering media scenes can also create a powerful emotional impact. Likewise, shifting from a green meadow to a messy landscape can turn a calm mood into chaos. If you intend to replace your current media background, then let us help you. Here are the steps below to change the environment in Lightroom:
Step 1: Lightroom can enhance your surroundings by using certain effects. To replace the sky, right-click on your image and select the “Edit in Photoshop” option. Before that, ensure that you have Adobe Photoshop installed on your system.

Step 2: Now, go to the top toolbar and press the “Edit” option next to “File.” From the drop-down list, access the “Sky Replacement” option. Head to the “Sky Replacement” panel and click the downward icon next to the sky preview. Scroll to pick one sky of your choice and hit the “OK” button.

Step 3: To import more skies, press the “Settings” icon on the Sky Replacement panel. Select the first option of “Get More Skies” and click on “Import Images.” You can explore skies from the Blue Skies, Spectacular, and Sunsets folders from that panel.

Step 4: Bring this picture back to the Lightroom and go to its right-side panel. There, use the Exposure, Contrast, and Highlights sliders below the “Light” downward icon. After enhancing your image, right-click on it and look for the “Export” option to save the file.

Part 3: Make Background Changing Easy with Wondershare Filmora
Sky Replacement in Lightroom and Photoshop requires some basic editing skills. Not everyone has such skills, so they have to acquire skills from video tutorials. It wastes a lot of time and effort just to learn editing from scratch. As an easier solution, they should try Wondershare Filmora to change image surroundings.
Notably, it’s a better solution that accommodates all users from beginner professionals. You can use Filmora for video editing to effortlessly expand your creativity. This tool is available online for Desktop, macOS, mobile, and online with the latest AI features.
Free Download For Win 7 or later(64-bit)
Free Download For macOS 10.14 or later
Key Features Marking Filmora’s Importance
Instantly remove or change your videos and image backgrounds with Filmora. Reimagine your world by knowing the given key features of Filmora in changing backgrounds:
1. Chroma Key (Green Screen)
Applying green-screen in effect in video and images will generate professional content. With AI support, you can remove a certain color from overlay images and videos. It can make your chosen colors transparent in the imported media. To fine-tune the media, you can use Tolerance, Edge Thickness, and Feather sliders.

2. AI Portrait
If you want to focus on the portrait while ignoring the background, use this feature. It can remove the background with accuracy by recognizing the main object. Filmora detects humans with AI and allows manual adjustments after removing the background. You can change the Edge Thickness and Edge Feature to the required extent.

3. Basic Background
While editing any media, you might require a blur option to hide distortion in the background. Filmora offers background blur options with different types and styles in them. You can opt for a Pattern, Color, and blur option from blur types. Then, it allows you to choose from blur styles like Grainy, Direction, and Radial. Afterward, users can select the level of blur as per their choice.

4. AI Image Stylizer
Aside from changing background, you can unleash your creativity with an AI Image stylizer. It’s the latest feature of Filmora that can turn your image into a devil, clown, or zombie. If you want to follow certain social media trends of making anime, explore this feature. You can find 19 styles that also include soft image looks like Flower and Angel image styles.

Steps to Change Background with Different Ways Using Filmora
Instead of lightroom sky replacement, Filmora offers the simplest way to edit images and videos. Let’s explore the quickest ways to change backgrounds using Filmora.
- Method 1: Using Chroma Key
- Method 2: Accessing AI Portrait
- Method 3: Change the Background through Masking
Method 1: Using Chroma Key
Step 1: Get the Latest Version of Filmora in Your system
Successfully launch the latest version of Filmora in your system. Double-tap on it to enter the home screen. Click on “New Project” and access the editing screen of Filmora.

Step 2: Use the Chroma Key and Change the Background
From the media panel, use “Import” and bring your media to the Timeline section. Place the background video first and then bring the Main Clip below it. Head to the right-side panel and press the “AI Tools” option from the top. Now enable the “Chroma Key” option, and the background will be replaced. You can adjust the edges through “Edge Thickness” and “Edge Feather” sliders.

Step 3: Continue Editing or Export Media at Desired Location
When you have finished the editing, move to the “Export” option at the top right. Using the “Export” window, define parameters and export the file wherever you want.

Method 2: Accessing AI Portrait
Step 1: Set the Videos at the Correct Place in the Timeline
Import your Background video and main clips in the media panel. Drag the main video in the second track and the background video in the first track, respectively.

Step 2: Explore and Utilize AI Portrait for Changing Background
Head to the right-side panel and access the AI tools option for choosing “AI Portrait.” Toggle this option and get the background automatically changed. To further enhance, you can use “Edge Thickness” and “Edge Feather” sliders.

Method 3: Change the Background through Masking
Step 1: Get Stock Media and Place it in the Timeline
Drag your main video in the timeline. Then, tap the “Stock Media” icon from the toolbar of the media panel. Browse one background clip and bring it to the timeline at the second track.

Step 2: Draw a Mask to Replace the Background with Stock Media
Look for the “Mask” option before the “AI tools” option on the right-side panel. Pick the “Draw Mask” icon and try to draw the lines around the main figure. When you finish drawing, the background will be replaced. You can use the “Blur Strength” slider to give a natural look.

Conclusion
In short, sky replacement is a feature of Adobe Photoshop that turns clear skies into sunsets. To do so, you can follow the steps highlighted in this article. Changing sky in the Lightroom needs some editing skills in Photoshop, and not everyone has it. Thus, you should use Wondershare Filmora as the top-notch solution. It can change your media’s background with AI and other manual changing options.
Free Download Free Download Learn More
Part 1: Why Do Creators Look Forward to Changing the Environment Across Their Recorded or Captured Media?
Humans love to show creativity and express themselves from different perspectives. Creative works provide entertainment and prove therapeutic in some way. That’s why creators and artists try to change the surroundings of recorded media. Such changes make the captured media virtually stunning and creative. Let’s explore more reasons that push creators towards sky replacement in Lightroom:
- Artistic Storytelling: A creative art piece shows a story of a thousand words. Thus, artists look for visual elements to convey particular moods and messages in their media.
- Symbolism: In many art competitions, creators are asked to show symbolic media. For this purpose, they might replace Sky in Lightroom to symbolize rebirth and growth.
- World-Building: The science fiction and fantasy genre needs such changes to build another world. Creators turn the media into imaginative settings to inspire the audience.
- Entertainment: Another aim of the creator is to provide new and exciting content to the audience. It allows them to temporarily escape their world and enjoy it.
- Discovery: You might have seen virtual landscapes in video games that uncover hidden secrets. Such backgrounds are designed to facilitate adventure through media.
Part 2: A Guide to Replace Sky in Lightroom: Step-by-Step
As discussed earlier, changing the sky in Lightroom proves fruitful for many reasons. Altering media scenes can also create a powerful emotional impact. Likewise, shifting from a green meadow to a messy landscape can turn a calm mood into chaos. If you intend to replace your current media background, then let us help you. Here are the steps below to change the environment in Lightroom:
Step 1: Lightroom can enhance your surroundings by using certain effects. To replace the sky, right-click on your image and select the “Edit in Photoshop” option. Before that, ensure that you have Adobe Photoshop installed on your system.
Step 2: Now, go to the top toolbar and press the “Edit” option next to “File.” From the drop-down list, access the “Sky Replacement” option. Head to the “Sky Replacement” panel and click the downward icon next to the sky preview. Scroll to pick one sky of your choice and hit the “OK” button.
Step 3: To import more skies, press the “Settings” icon on the Sky Replacement panel. Select the first option of “Get More Skies” and click on “Import Images.” You can explore skies from the Blue Skies, Spectacular, and Sunsets folders from that panel.
Step 4: Bring this picture back to the Lightroom and go to its right-side panel. There, use the Exposure, Contrast, and Highlights sliders below the “Light” downward icon. After enhancing your image, right-click on it and look for the “Export” option to save the file.
Part 3: Make Background Changing Easy with Wondershare Filmora
Sky Replacement in Lightroom and Photoshop requires some basic editing skills. Not everyone has such skills, so they have to acquire skills from video tutorials. It wastes a lot of time and effort just to learn editing from scratch. As an easier solution, they should try Wondershare Filmora to change image surroundings.
Notably, it’s a better solution that accommodates all users from beginner professionals. You can use Filmora for video editing to effortlessly expand your creativity. This tool is available online for Desktop, macOS, mobile, and online with the latest AI features.
Free Download For Win 7 or later(64-bit)
Free Download For macOS 10.14 or later
Key Features Marking Filmora’s Importance
Instantly remove or change your videos and image backgrounds with Filmora. Reimagine your world by knowing the given key features of Filmora in changing backgrounds:
1. Chroma Key (Green Screen)
Applying green-screen in effect in video and images will generate professional content. With AI support, you can remove a certain color from overlay images and videos. It can make your chosen colors transparent in the imported media. To fine-tune the media, you can use Tolerance, Edge Thickness, and Feather sliders.
2. AI Portrait
If you want to focus on the portrait while ignoring the background, use this feature. It can remove the background with accuracy by recognizing the main object. Filmora detects humans with AI and allows manual adjustments after removing the background. You can change the Edge Thickness and Edge Feature to the required extent.
3. Basic Background
While editing any media, you might require a blur option to hide distortion in the background. Filmora offers background blur options with different types and styles in them. You can opt for a Pattern, Color, and blur option from blur types. Then, it allows you to choose from blur styles like Grainy, Direction, and Radial. Afterward, users can select the level of blur as per their choice.
4. AI Image Stylizer
Aside from changing background, you can unleash your creativity with an AI Image stylizer. It’s the latest feature of Filmora that can turn your image into a devil, clown, or zombie. If you want to follow certain social media trends of making anime, explore this feature. You can find 19 styles that also include soft image looks like Flower and Angel image styles.
Steps to Change Background with Different Ways Using Filmora
Instead of lightroom sky replacement, Filmora offers the simplest way to edit images and videos. Let’s explore the quickest ways to change backgrounds using Filmora.
- Method 1: Using Chroma Key
- Method 2: Accessing AI Portrait
- Method 3: Change the Background through Masking
Method 1: Using Chroma Key
Step 1: Get the Latest Version of Filmora in Your system
Successfully launch the latest version of Filmora in your system. Double-tap on it to enter the home screen. Click on “New Project” and access the editing screen of Filmora.
Step 2: Use the Chroma Key and Change the Background
From the media panel, use “Import” and bring your media to the Timeline section. Place the background video first and then bring the Main Clip below it. Head to the right-side panel and press the “AI Tools” option from the top. Now enable the “Chroma Key” option, and the background will be replaced. You can adjust the edges through “Edge Thickness” and “Edge Feather” sliders.
Step 3: Continue Editing or Export Media at Desired Location
When you have finished the editing, move to the “Export” option at the top right. Using the “Export” window, define parameters and export the file wherever you want.
Method 2: Accessing AI Portrait
Step 1: Set the Videos at the Correct Place in the Timeline
Import your Background video and main clips in the media panel. Drag the main video in the second track and the background video in the first track, respectively.
Step 2: Explore and Utilize AI Portrait for Changing Background
Head to the right-side panel and access the AI tools option for choosing “AI Portrait.” Toggle this option and get the background automatically changed. To further enhance, you can use “Edge Thickness” and “Edge Feather” sliders.
Method 3: Change the Background through Masking
Step 1: Get Stock Media and Place it in the Timeline
Drag your main video in the timeline. Then, tap the “Stock Media” icon from the toolbar of the media panel. Browse one background clip and bring it to the timeline at the second track.
Step 2: Draw a Mask to Replace the Background with Stock Media
Look for the “Mask” option before the “AI tools” option on the right-side panel. Pick the “Draw Mask” icon and try to draw the lines around the main figure. When you finish drawing, the background will be replaced. You can use the “Blur Strength” slider to give a natural look.
Conclusion
In short, sky replacement is a feature of Adobe Photoshop that turns clear skies into sunsets. To do so, you can follow the steps highlighted in this article. Changing sky in the Lightroom needs some editing skills in Photoshop, and not everyone has it. Thus, you should use Wondershare Filmora as the top-notch solution. It can change your media’s background with AI and other manual changing options.
The Complete Guide to Converting GIF to SVG With Ease
The Complete Guide to Converting GIF to SVG With Ease
An easy yet powerful editor
Numerous effects to choose from
Detailed tutorials provided by the official channel
The Complete Guide to Converting GIF to SVG With Ease
Are you searching out methods to transform GIF to SVG? Then you are lucky to have found the right article. While Scalable Vector Graphics can help you scale a photograph to any length with very little distortion, editing and playing your animated SVGs documents on a few gadgets can cause compatibility issues. Moreover, SVGs aren’t well suited with all websites, so in case you need to apply it for your weblog or websites wherein they are now no longer supported, then you may want to transform it to an extra handy layout like GIF.
There is plenty of photograph conversion gear and online editors that can help you convert SVG to GIF. However, now no longer all GIF converters and editors are green and clean to apply. In this article, you’ll know about the top SVG to GIF converters that you may use to make GIF images and use them together along with your buddies quickly.
In this article
01 [8 Best Easy GIF to SVG Converters](#Part 1)
02 [5 Best SVG to GIF Converters](#Part 2)
Part 1 Best Easy GIF to SVG Converters
01INetTools.net
It is a very online animated GIF to SVG converter. You get the option to select and upload the GIF from your storage. After uploading, it instantly starts converting it to the SVG and shows you the results when finished. Now, the converted SVG file can be downloaded. This online converter supports multiple conversions such as uploading multiple GIF files at once and converting them to SVG simultaneously. Also, there is no maximum file size limit mentioned anywhere and the SVG has the same colors as the GIF.

02Aconvert.com
This is the next website you can use to convert GIF to SVG. Multiple input methods are supported by this website. You can upload GIF documents out of your nearby storage, Google Drive, Dropbox, or even fetch a GIF through pasting a URL to it. Apart from a couple of entering methods, this internet site offers you a choice to alternate the picture length for the SVG file. By allowing this option, you could set the scale for the SVG after which the conversion begins. This way, you could convert and resize the SVG in a single step and download the final output.

03PicSVG.com
This is another free website to convert SVG to GIF animation. This website converts JPG and PNG files to SVG along with GIFs. But unlike other websites, there is a size limitation on the input file. Here, you can convert GIFs up to 4 MB in size which seems decent enough as most of the GIFs are within 1 MB of size.

04Online-Convert.com
This is a free cloud converter platform that supports dozens of files types and can animate GIF to SVG. This supports batch conversions and lets you input files from many sources such as local storage, Dropbox, Google Drive, or via a URL. 100 MB is the maximum file size limit which is enough. After adding the GIF files, conversion can be started and you can get the SVGs in the output.
This website has lots of settings that will help you to customize to get the desired output. Along with all these options, you can also set the black and white threshold and speckles threshold for the final SVG output.

05Inkscape
Inkscape is a GIF to SVG converter software for Windows, Mac, and Linux. Primarily it is used for designing vector graphics. The format of the images can be changed easily as you get the “save as” feature in it. This feature helps you to easily convert GIFs and other images to SVG, PDF, PNG, PS, EPS, DXF, etc. The main advantage of this is that you can convert GIF to different kinds of SVG such as Plain SVG, Optimized SVG, Compressed SVG, etc.
Before converting GIF to SVG, you can edit GIF images using various tools. A lot of filters are provided too which you can apply to the input GIF image, such as bevel, blur, color, distort, pixel tools, etc.

06RealWorld Paint
It is a nice free GIF to SVG converter desktop software. In this, you can view, create, and edit graphics in various formats such as GIF, SVG, WEBP, PNG, JPG, etc. Its “save as” feature can also be used for converting images from one supported format to another.
A good number of image modification tools are also included in it such as resize, crop, rotate, watermarking, filters, and more. Additionally, you can also draw designs over the GIF image using its painting tools.

07ImBatch
It is a batch image processor using which can also convert SVG to GIF animation and vice versa. Bulkpictures are used for editing and converting. You can easily add several GIF images to it and convert them all to SVG format at once. Since it lets you edit images, you can modify input GIF files before converting them. A wide number of image formats are supported for batch processing such as camera raw images (DNG, CR2, SR2, NEF, ARW, ORF, etc.), JPG, PNG, BMP, TIFF, and many more.

08LibreOffice Draw
LibreOffice Draw is a free GIF to SVG converter software for your desktop. This software comes with the popular free open-source office software called LibreOffice. Many other office-related applications in this package include LibreOffice Writer, LibreOffice Calc, LibreOffice Impress, etc.
When using it, you can simply open a GIF image file in it and then save it in SVG vector format. You can easily edit the input GIF image before the conversion. For eating the image, you can use its drawing tools, transformation tools, text tools, formatting options, etc.

Part 2 Best SVG to GIF Converters
01CloudConvert
This is an easy-to-use online file conversion tool with a robust and scalable API. It is an all-in-one cloud-based converter and supports over 200 different file formats from vectors, audio, and video. With this tool, you can convert SVG to GIF in your browser and email it to yourself or transfer it to combined cloud services like Google Drive and Dropbox.CloudConvert’sfull version starts at $8. You can also use the free trial version to convert your files quickly.

02Convertio
Convertio is an easy file converter that offers both paid and free online versions to convert SVG to GIF animation. The software payment pricing system starts at $7.99and it also works with all file types. More than 300 different file format conversion is applicable and it allows you to upload your converted files to other applications such as Dropbox and Google Drive. 100MB is the maximum file memory size that you can upload to this tool.

03CoolUtils
It is a powerful desktop SVG to GIF converter that offers a variety of file conversion utilities such as an online file converter to convert your animate SVG to GIF. The tool’s interface is clear and easy to understand, supports a lot of file formats, has reactive support, and features powerful engines that help to process your files in one go.

04Wondershare Filmora
It is an easy-to-use and trendy video editing software that gives power to your story and gives amazing results, regardless of you are a beginner or an expert. Wondershare Filmora Video Editor helps you to get started with any new project by importing and editing your video, adding special effects and transitions, and sharing your final creation on social media, mobile devices, or DVDs.
It is an interactive platform and editing tool that is easy to navigate. It gives lots of values and makes the process of converting SVG to GIF easier and more interesting. Filmora is free to download software. After signing up for free, you can edit videos, GIFs, and images without any watermark. It also allows the editing of GIFs to include subtitles, text, or captions.
It is a very remarkable editing tool with a wide set of attractive features that can make your image highly customized. Filmore also allows you to extract still images from video without changing the resolution.

Wondershare Filmora - Best Video Editor for Mac/Windows
5,481,435 people have downloaded it.
Build unique custom animations without breaking a sweat.
Focus on creating epic stories and leave the details to Filmora’s auto features.
Start a creative adventure with drag & drop effects and endless possibilities.
Filmora simplifies advanced features to save you time and effort.
Filmora cuts out repetition so you can move on to your next creative breakthrough.
05GIMP
This is another free alternative to an SVG to GIF converter software for Windows, Linux, and Mac. It is a very well-known image editing software with diverse image manipulation and painting tools. By using it, the format of supported images can also be changed with the help of its export feature. Hence, you can also convert SVG to GIFin this software.
However, by default, this software does not support SVG as an output format. So, for converting GIF or any other image file to SVG, you need to install an additional plugin to it.

Part 1 Ending Thoughts
Since you are now reading the end of this article, we are hoping you now know everything about SVG to GIF converter and the best SVG and GIF converter and vice versa that you can turn to and quickly convert your image files and share them with your friends as well as the meaning of SVG.
The Complete Guide to Converting GIF to SVG With Ease
Are you searching out methods to transform GIF to SVG? Then you are lucky to have found the right article. While Scalable Vector Graphics can help you scale a photograph to any length with very little distortion, editing and playing your animated SVGs documents on a few gadgets can cause compatibility issues. Moreover, SVGs aren’t well suited with all websites, so in case you need to apply it for your weblog or websites wherein they are now no longer supported, then you may want to transform it to an extra handy layout like GIF.
There is plenty of photograph conversion gear and online editors that can help you convert SVG to GIF. However, now no longer all GIF converters and editors are green and clean to apply. In this article, you’ll know about the top SVG to GIF converters that you may use to make GIF images and use them together along with your buddies quickly.
In this article
01 [8 Best Easy GIF to SVG Converters](#Part 1)
02 [5 Best SVG to GIF Converters](#Part 2)
Part 1 Best Easy GIF to SVG Converters
01INetTools.net
It is a very online animated GIF to SVG converter. You get the option to select and upload the GIF from your storage. After uploading, it instantly starts converting it to the SVG and shows you the results when finished. Now, the converted SVG file can be downloaded. This online converter supports multiple conversions such as uploading multiple GIF files at once and converting them to SVG simultaneously. Also, there is no maximum file size limit mentioned anywhere and the SVG has the same colors as the GIF.
02Aconvert.com
This is the next website you can use to convert GIF to SVG. Multiple input methods are supported by this website. You can upload GIF documents out of your nearby storage, Google Drive, Dropbox, or even fetch a GIF through pasting a URL to it. Apart from a couple of entering methods, this internet site offers you a choice to alternate the picture length for the SVG file. By allowing this option, you could set the scale for the SVG after which the conversion begins. This way, you could convert and resize the SVG in a single step and download the final output.
03PicSVG.com
This is another free website to convert SVG to GIF animation. This website converts JPG and PNG files to SVG along with GIFs. But unlike other websites, there is a size limitation on the input file. Here, you can convert GIFs up to 4 MB in size which seems decent enough as most of the GIFs are within 1 MB of size.
04Online-Convert.com
This is a free cloud converter platform that supports dozens of files types and can animate GIF to SVG. This supports batch conversions and lets you input files from many sources such as local storage, Dropbox, Google Drive, or via a URL. 100 MB is the maximum file size limit which is enough. After adding the GIF files, conversion can be started and you can get the SVGs in the output.
This website has lots of settings that will help you to customize to get the desired output. Along with all these options, you can also set the black and white threshold and speckles threshold for the final SVG output.
05Inkscape
Inkscape is a GIF to SVG converter software for Windows, Mac, and Linux. Primarily it is used for designing vector graphics. The format of the images can be changed easily as you get the “save as” feature in it. This feature helps you to easily convert GIFs and other images to SVG, PDF, PNG, PS, EPS, DXF, etc. The main advantage of this is that you can convert GIF to different kinds of SVG such as Plain SVG, Optimized SVG, Compressed SVG, etc.
Before converting GIF to SVG, you can edit GIF images using various tools. A lot of filters are provided too which you can apply to the input GIF image, such as bevel, blur, color, distort, pixel tools, etc.
06RealWorld Paint
It is a nice free GIF to SVG converter desktop software. In this, you can view, create, and edit graphics in various formats such as GIF, SVG, WEBP, PNG, JPG, etc. Its “save as” feature can also be used for converting images from one supported format to another.
A good number of image modification tools are also included in it such as resize, crop, rotate, watermarking, filters, and more. Additionally, you can also draw designs over the GIF image using its painting tools.
07ImBatch
It is a batch image processor using which can also convert SVG to GIF animation and vice versa. Bulkpictures are used for editing and converting. You can easily add several GIF images to it and convert them all to SVG format at once. Since it lets you edit images, you can modify input GIF files before converting them. A wide number of image formats are supported for batch processing such as camera raw images (DNG, CR2, SR2, NEF, ARW, ORF, etc.), JPG, PNG, BMP, TIFF, and many more.
08LibreOffice Draw
LibreOffice Draw is a free GIF to SVG converter software for your desktop. This software comes with the popular free open-source office software called LibreOffice. Many other office-related applications in this package include LibreOffice Writer, LibreOffice Calc, LibreOffice Impress, etc.
When using it, you can simply open a GIF image file in it and then save it in SVG vector format. You can easily edit the input GIF image before the conversion. For eating the image, you can use its drawing tools, transformation tools, text tools, formatting options, etc.
Part 2 Best SVG to GIF Converters
01CloudConvert
This is an easy-to-use online file conversion tool with a robust and scalable API. It is an all-in-one cloud-based converter and supports over 200 different file formats from vectors, audio, and video. With this tool, you can convert SVG to GIF in your browser and email it to yourself or transfer it to combined cloud services like Google Drive and Dropbox.CloudConvert’sfull version starts at $8. You can also use the free trial version to convert your files quickly.
02Convertio
Convertio is an easy file converter that offers both paid and free online versions to convert SVG to GIF animation. The software payment pricing system starts at $7.99and it also works with all file types. More than 300 different file format conversion is applicable and it allows you to upload your converted files to other applications such as Dropbox and Google Drive. 100MB is the maximum file memory size that you can upload to this tool.
03CoolUtils
It is a powerful desktop SVG to GIF converter that offers a variety of file conversion utilities such as an online file converter to convert your animate SVG to GIF. The tool’s interface is clear and easy to understand, supports a lot of file formats, has reactive support, and features powerful engines that help to process your files in one go.
04Wondershare Filmora
It is an easy-to-use and trendy video editing software that gives power to your story and gives amazing results, regardless of you are a beginner or an expert. Wondershare Filmora Video Editor helps you to get started with any new project by importing and editing your video, adding special effects and transitions, and sharing your final creation on social media, mobile devices, or DVDs.
It is an interactive platform and editing tool that is easy to navigate. It gives lots of values and makes the process of converting SVG to GIF easier and more interesting. Filmora is free to download software. After signing up for free, you can edit videos, GIFs, and images without any watermark. It also allows the editing of GIFs to include subtitles, text, or captions.
It is a very remarkable editing tool with a wide set of attractive features that can make your image highly customized. Filmore also allows you to extract still images from video without changing the resolution.
Wondershare Filmora - Best Video Editor for Mac/Windows
5,481,435 people have downloaded it.
Build unique custom animations without breaking a sweat.
Focus on creating epic stories and leave the details to Filmora’s auto features.
Start a creative adventure with drag & drop effects and endless possibilities.
Filmora simplifies advanced features to save you time and effort.
Filmora cuts out repetition so you can move on to your next creative breakthrough.
05GIMP
This is another free alternative to an SVG to GIF converter software for Windows, Linux, and Mac. It is a very well-known image editing software with diverse image manipulation and painting tools. By using it, the format of supported images can also be changed with the help of its export feature. Hence, you can also convert SVG to GIFin this software.
However, by default, this software does not support SVG as an output format. So, for converting GIF or any other image file to SVG, you need to install an additional plugin to it.
Part 1 Ending Thoughts
Since you are now reading the end of this article, we are hoping you now know everything about SVG to GIF converter and the best SVG and GIF converter and vice versa that you can turn to and quickly convert your image files and share them with your friends as well as the meaning of SVG.
How D AI Video Games Act More Human Than Human?
How Did AI Video Games Act More Human Than Human?
An easy yet powerful editor
Numerous effects to choose from
Detailed tutorials provided by the official channel
The gaming world is ever-changing, with developers looking to create innovative ways to immerse players into their digital worlds. One such technology that has begun to sweep is AI in the game industry.
AI is a powerful tool in many ways to improve the gaming experience. It can make artificial intelligence in computer games more believable and add replayability and immersion to games, and we can expect to see even more impressive applications in the future.
In this article
01 [What Is AI in Gaming?](#Part 1)
02 [Why Does AI in Gaming Matter?](#Part 2)
03 [How AI Will Completely Change Video Games](#Part 3)
04 [8 Games with Incredible Artificial Intelligence](#Part 4)
05 [What AI Video Games Assets Do Filmora Have?](#Part 5)
Part 1 What Is AI in Gaming?
In simple terms, AI is a set of algorithms that allow a computer to learn and improve from experience. Although you can apply it in many ways, artificial intelligence in video games is usually helpful to create more intelligent and more believable non-player characters (NPCs).
For example, an AI system might be helpful to determine how an NPC reacts to the player’s actions. If the player tries to steal from an NPC, the AI might make the NPC angry and more likely to attack the player. Alternatively, if the player is friendly to an NPC, the AI game playing might make the NPC more likely to help the player in future interactions.
Part 2 Why Does AI in Gaming Matter?
One of the most vital aspects of AI in video games is that it can make games more believable and immersive for players. When games can convincingly simulate human-like behavior, it can be a much more enjoyable experience for gamers. AI can make NPCs seem more lifelike and make the game world feel more believable.
AI is also becoming increasingly important for creating procedural content. This is where the game generates content on its own, rather than relying on pre-made assets. For example, a game might use procedural generation to create random dungeons or quests that the player can explore. This can add a lot of replayability to a game, as the player never knows what they will encounter next.
Part 3 How AI Will Completely Change Video Games
It is not a secret that AI is changing the world as we know it. With its ability to enable computers to learn and improve from experience, AI is paving the way for a future where machines can handle more complex tasks. And nowhere is this more apparent than in the world of video gaming.
In the past, developers brought in AI primarily for simple things like making certain NPCs (non-player characters) move and act realistically. But now, artificial intelligence in video games is being used for much more complex tasks like generating procedural content and creating believable human-like behavior. This results in a new generation of AI game playing that are more immersive and playable.
Part 4 Games with Incredible Artificial Intelligence
Now, we will look into eight video games that signify why we need the best ai in video games.
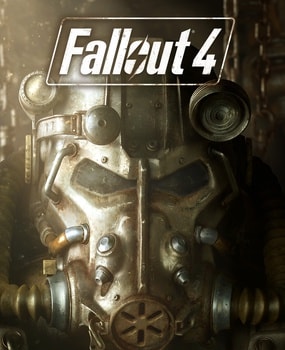
01Fallout 4
One of the most attractive examples of AI in video gaming is Fallout 4. This post-apocalyptic RPG features some of the most believable NPCs ever seen in a game. Each character is fully voiced, and they all have their unique personalities and backstories. The AI generates procedural content, meaning that the game world is always different each time you play.
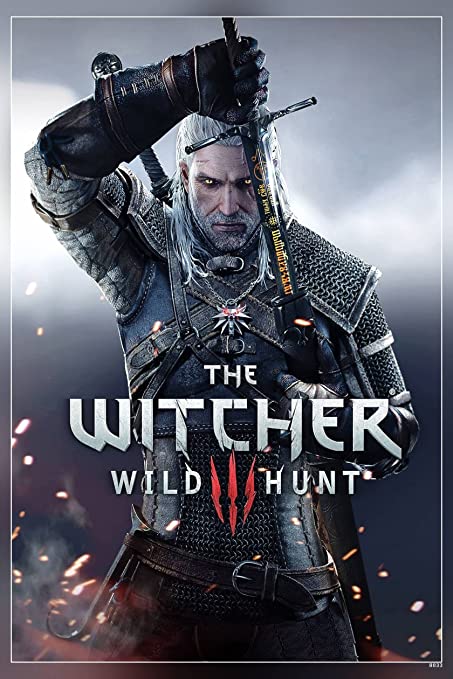
02The Witcher 3: Wild Hunt
The Witcher 3: Wild Hunt is one more great example of an AI video game. This open-world RPG features a vast array of believable NPCs, each with unique personality traits and motivations. The AI is also used to generate procedural content, resulting in a different game world every time you play.
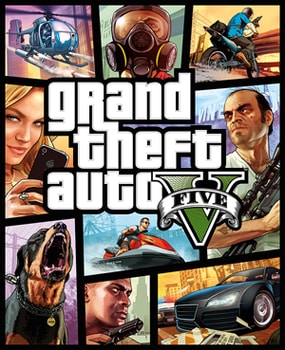
03Grand Theft Auto V
Grand Theft Auto V is yet another example of AI being used to create believable human-like behavior. The NPCs in this play are some of the most lifelike and realistic ever seen. They react to the player’s actions in believable ways, and the AI is used to generate procedural content, resulting in a game world that is always different.
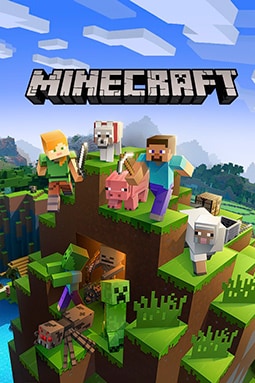
04Minecraft
Minecraft is a game that heavily uses procedural generation to create its content. The terrain and structures in the game are all generated on the fly by the AI, resulting in a different game world every time you play. What’s more, AI is also used to generate the behaviors of mobs (hostile creatures), making them more believable and lifelike.
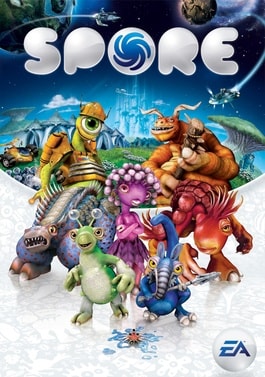
05Spore
Spore is an AI game play that is all about procedural generation. Every creature in the game is generated by AI, meaning that there are many possible creature designs. What’s more, AI is used to create creatures’ behaviors, making them more believable and lifelike.
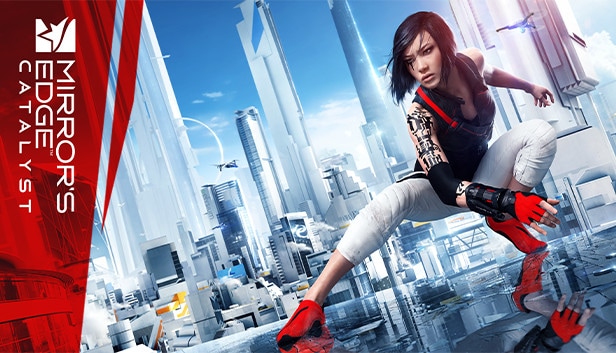
06Mirror’s Edge Catalyst
Mirror’s Edge Catalyst is a game that heavily uses AI to create its content. The levels in the game are all procedurally generated, meaning that they are different every time you play. This is made possible by the game’s AI, which produces the level layouts and obstacles on the fly.
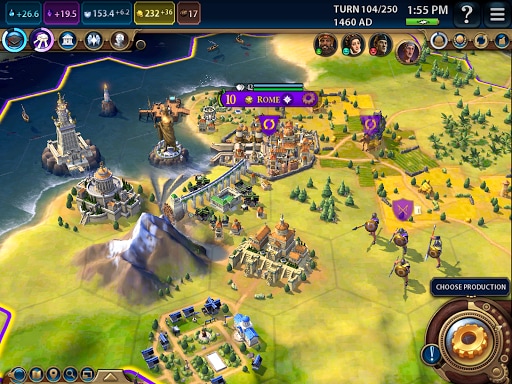
07Civilization VI
One of the most incredible examples of AI in video gaming is Civilization VI. This turn-based strategy game features some of the most believable NPCs ever seen in a game. Each character has its voice fully, and they all have unique personalities and backstories.
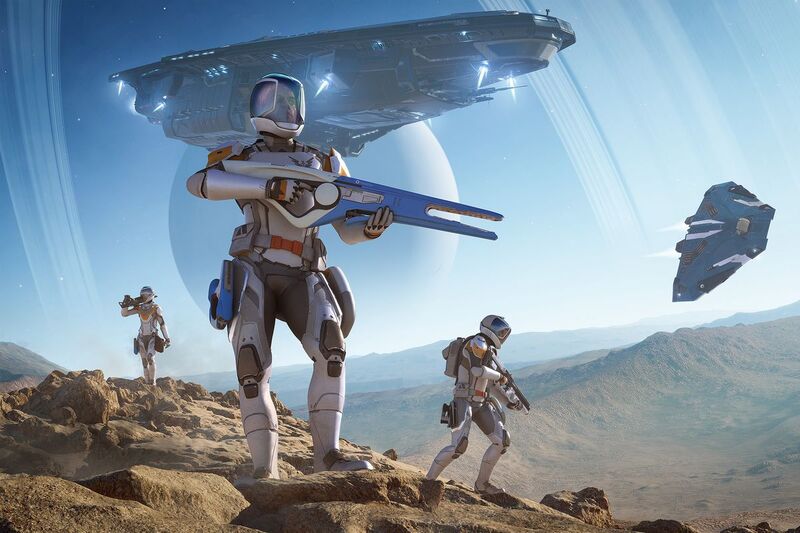
08Elite Dangerous
Elite Dangerous is a space simulation game that uses advanced AI to create believable and realistic human-like behavior. The NPCs in the game are some of the most lifelike and realistic ever seen. They react to the player’s actions in believable ways, and the AI is used to generate procedural content, resulting in a game world that is always different.
Part 5 **What AI Video Games Assets Do Wondershare Filmora Video Editor
With the increased use of AI in video games, most gamers have found gaming more enjoyable. However, an outstanding video editor has some assets that can significantly make AI video games better and more human. This video editor is one of the most sorted for and is called Filmora. Filmora is a great video editing software for creating stunning videos. It’s effortless to use and has various features to create professional-looking videos. It’s perfect for making videos for social media, YouTube, and other online platforms.
Its many features have a touch of artificial intelligence, making this program stand out from the other video editors and valuable for editing during ai video games creation.
Screen Recording
The Filmora screen recorder allows the user to concurrently record the screen and camera and the system and microphone audio. You can quickly record games, tutorials, YouTube videos, and other videos and then export them to YouTube, Vimeo, and other devices.
AI Portrait
The AI portrait function in Filmora video editor allows you to locate the human in your movie effortlessly and erase the background with a simple drag and click. There are also several portrait effects and AR stickers to add to your video editing enjoyment.
For Win 7 or later (64-bit)
For macOS 10.12 or later
Video Effects
Filmora customers can choose from various effects to utilize in their video editing software. It’s simple to create whatever effect you want with over 900 free effects, including drag-and-drop transitions, titles, filters, and motion components.
Do visit Wondershare Filmora exclusive website to know more about its latest upgrade and new features launch.
● Ending Thoughts →
● Thus, that was about what an ai video game is and why the characters act more like humans.
● So, as a video game lover, you can now explore the best of ai playing video games to have a personal experience of this new video gaming trend. Also, do try the Filmora software to see how you can change the looks and feel of your video game creation.
The gaming world is ever-changing, with developers looking to create innovative ways to immerse players into their digital worlds. One such technology that has begun to sweep is AI in the game industry.
AI is a powerful tool in many ways to improve the gaming experience. It can make artificial intelligence in computer games more believable and add replayability and immersion to games, and we can expect to see even more impressive applications in the future.
In this article
01 [What Is AI in Gaming?](#Part 1)
02 [Why Does AI in Gaming Matter?](#Part 2)
03 [How AI Will Completely Change Video Games](#Part 3)
04 [8 Games with Incredible Artificial Intelligence](#Part 4)
05 [What AI Video Games Assets Do Filmora Have?](#Part 5)
Part 1 What Is AI in Gaming?
In simple terms, AI is a set of algorithms that allow a computer to learn and improve from experience. Although you can apply it in many ways, artificial intelligence in video games is usually helpful to create more intelligent and more believable non-player characters (NPCs).
For example, an AI system might be helpful to determine how an NPC reacts to the player’s actions. If the player tries to steal from an NPC, the AI might make the NPC angry and more likely to attack the player. Alternatively, if the player is friendly to an NPC, the AI game playing might make the NPC more likely to help the player in future interactions.
Part 2 Why Does AI in Gaming Matter?
One of the most vital aspects of AI in video games is that it can make games more believable and immersive for players. When games can convincingly simulate human-like behavior, it can be a much more enjoyable experience for gamers. AI can make NPCs seem more lifelike and make the game world feel more believable.
AI is also becoming increasingly important for creating procedural content. This is where the game generates content on its own, rather than relying on pre-made assets. For example, a game might use procedural generation to create random dungeons or quests that the player can explore. This can add a lot of replayability to a game, as the player never knows what they will encounter next.
Part 3 How AI Will Completely Change Video Games
It is not a secret that AI is changing the world as we know it. With its ability to enable computers to learn and improve from experience, AI is paving the way for a future where machines can handle more complex tasks. And nowhere is this more apparent than in the world of video gaming.
In the past, developers brought in AI primarily for simple things like making certain NPCs (non-player characters) move and act realistically. But now, artificial intelligence in video games is being used for much more complex tasks like generating procedural content and creating believable human-like behavior. This results in a new generation of AI game playing that are more immersive and playable.
Part 4 Games with Incredible Artificial Intelligence
Now, we will look into eight video games that signify why we need the best ai in video games.
01Fallout 4
One of the most attractive examples of AI in video gaming is Fallout 4. This post-apocalyptic RPG features some of the most believable NPCs ever seen in a game. Each character is fully voiced, and they all have their unique personalities and backstories. The AI generates procedural content, meaning that the game world is always different each time you play.
02The Witcher 3: Wild Hunt
The Witcher 3: Wild Hunt is one more great example of an AI video game. This open-world RPG features a vast array of believable NPCs, each with unique personality traits and motivations. The AI is also used to generate procedural content, resulting in a different game world every time you play.
03Grand Theft Auto V
Grand Theft Auto V is yet another example of AI being used to create believable human-like behavior. The NPCs in this play are some of the most lifelike and realistic ever seen. They react to the player’s actions in believable ways, and the AI is used to generate procedural content, resulting in a game world that is always different.
04Minecraft
Minecraft is a game that heavily uses procedural generation to create its content. The terrain and structures in the game are all generated on the fly by the AI, resulting in a different game world every time you play. What’s more, AI is also used to generate the behaviors of mobs (hostile creatures), making them more believable and lifelike.
05Spore
Spore is an AI game play that is all about procedural generation. Every creature in the game is generated by AI, meaning that there are many possible creature designs. What’s more, AI is used to create creatures’ behaviors, making them more believable and lifelike.
06Mirror’s Edge Catalyst
Mirror’s Edge Catalyst is a game that heavily uses AI to create its content. The levels in the game are all procedurally generated, meaning that they are different every time you play. This is made possible by the game’s AI, which produces the level layouts and obstacles on the fly.
07Civilization VI
One of the most incredible examples of AI in video gaming is Civilization VI. This turn-based strategy game features some of the most believable NPCs ever seen in a game. Each character has its voice fully, and they all have unique personalities and backstories.
08Elite Dangerous
Elite Dangerous is a space simulation game that uses advanced AI to create believable and realistic human-like behavior. The NPCs in the game are some of the most lifelike and realistic ever seen. They react to the player’s actions in believable ways, and the AI is used to generate procedural content, resulting in a game world that is always different.
Part 5 **What AI Video Games Assets Do Wondershare Filmora Video Editor
With the increased use of AI in video games, most gamers have found gaming more enjoyable. However, an outstanding video editor has some assets that can significantly make AI video games better and more human. This video editor is one of the most sorted for and is called Filmora. Filmora is a great video editing software for creating stunning videos. It’s effortless to use and has various features to create professional-looking videos. It’s perfect for making videos for social media, YouTube, and other online platforms.
Its many features have a touch of artificial intelligence, making this program stand out from the other video editors and valuable for editing during ai video games creation.
Screen Recording
The Filmora screen recorder allows the user to concurrently record the screen and camera and the system and microphone audio. You can quickly record games, tutorials, YouTube videos, and other videos and then export them to YouTube, Vimeo, and other devices.
AI Portrait
The AI portrait function in Filmora video editor allows you to locate the human in your movie effortlessly and erase the background with a simple drag and click. There are also several portrait effects and AR stickers to add to your video editing enjoyment.
For Win 7 or later (64-bit)
For macOS 10.12 or later
Video Effects
Filmora customers can choose from various effects to utilize in their video editing software. It’s simple to create whatever effect you want with over 900 free effects, including drag-and-drop transitions, titles, filters, and motion components.
Do visit Wondershare Filmora exclusive website to know more about its latest upgrade and new features launch.
● Ending Thoughts →
● Thus, that was about what an ai video game is and why the characters act more like humans.
● So, as a video game lover, you can now explore the best of ai playing video games to have a personal experience of this new video gaming trend. Also, do try the Filmora software to see how you can change the looks and feel of your video game creation.
Camtasia Vs Captivate - Which to Choose?
Being a video editor, it’s critical to keep ahead of the curve in our fast-changing global world. From small enterprises to major corporations, eLearning applications have shown to be a significant tool for cutting expenses and increasing profits. Software like Camtasia and Captivate are in high demand as e-learning becomes a more vital aspect of our life. When it comes to creating a course or video instruction, these two applications are quite quick and useful. Whether you should choose a Camtasia or a Captivate relies entirely on your industry and what you want to accomplish with this application.
Often times between Camtasia vs Captivate, the question arises: “Which software is superior?” As a result, we’ve compared Camtasia and Captivate based on the software packages themselves, as well as some important features, similarities, and differences. Software stimulation, production, demonstration screencasts, and translation of PowerPoint presentations into various formats are all possible using TechSmith Camtasia and Adobe Captivate. Camtasia offers fewer online learning alternatives, but it boasts incredible screen and video capture, as well as video editing facilities. This application allows you to alter the sound and visual characteristics manually. Video artists may improve video quality by using auxiliary microphones and cameras. The editing of the video is Camtasia’s most impressive function. It allows you to cut and paste films, add transitions and subtitles to them, as well as do color grading and color correction.
Part 1. Overall Comparison
Each piece of software may be used to create eLearning and lesson material. Despite the fact that Adobe Captivate offers amazing transitional features and visual effect tools, it does not include video editing, which is, in my view, the backbone of developing eLearning material that adheres to the learning management system. As a result, Adobe Captivate needs the use of Adobe Premiere to edit and correct any problems in your films. Adobe Captivate, on the other hand, is the greatest alternative for developing quality eLearning and lesson software material. It’s an excellent tool for developing online courses and tutorials. However, as previously said, Adobe Captivate is not simple to use and is not recommended for novices. Camtasia, on the other hand, seems to be the most economical and practical alternative for you based on your abilities if you are an entry-level editor and want to master the fundamentals of video editing and lesson production on your own.
Attributes360-degree Learning Experience
| | Camtasia | Adobe Captivate | |
| ——————- | ———————————————————————- | ———————————————————————- |
| Ease of Use | Easy and simple User Interface | User-friendly and simple gestures for adding and creating |
| Requirement | Camtasia supports a dual-core processor with a clock speed of 2.0GHz. | A 1.0GHz CPU can run Captivate. |
| Special Feature | Annotations for Multi-Track Timelines Learning in all directions | |
| Support system | Camtasia is only compatible with 64-bit operating systems. | Captivate is compatible with both 32-bit and 64-bit operating systems. |
| Price | Camtasia costs $249 | Captivate comes for $34/month. |
| Best for | Best for professional video editing and production | It’s great for transferring and watching videos. |
| Value For Money | Value for Money is a bit high | It provides both monthly and one-time subscription options. |
| Recording | Camtasia features a function that allows you to record screens. | Captivate has a clever function that enables you to capture videos. |
| Overall Rating | Less than Adobe Captivate in terms of overall rating and user reviews. | Higher Rating and user feedbacks. |
Part 2. Camtasia Software Review
Camtasia by TechSmith is a straightforward video editing and screen recording application. Camtasia was created with novices in mind, allowing designers to quickly and easily make excellent instructional films. Both Windows and MacOS are supported. Camtasia is one of the most popular video editing applications on the market. Camtasia is available for both Windows and iOS. Camtasia is simple to use and supports a wide range of media formats. This software package has several features and controls. On the same platform, you can capture screens and edit movies with Camtasia. The benefits don’t stop there; you can also share your work with others through YouTube and Google Drive.

Pros:
- Camtasia is designed for video-editing novices, with a simple setup and user interface.
- The screen capture capability is fantastic. Not only is the resolution excellent, but it is also simple to operate.
- Camtasia’s built-in effects are, on the whole, minimal. Their cursor effects, on the other hand, are spectacular.
- You may use Camtasia to add interactive quizzes to your videos.
- Camtasia provides many of the fundamentals you’ll need if you’re short on time and need to search assets straight immediately.
- TechSmith is a free app for iOS and Android that allows you to make screen recordings from your smartphone or tablet.
- TechSmith offers an excellent customer service department.
Cons:
- Crashing and bugs very often
- Many instructions are missing, despite the fact that they have restricted keyboard controls.
- Camtasia is designed for novices; therefore, it does not allow for much modification.
- Camtasia makes it tough to move and animate things.
- Camtasia video encoding and exporting difficulties have been reported by certain users.
Part 3. Adobe Captivate Review
Captivate is an Adobe tool designed to make online learning more engaging and interactive. Students save time since they can take their classes with them. Captivate has no built-in video editing tools. To do so, you’ll need to use additional Adobe applications. Captivate allows students to study at any time and from any location. However, if you’re the one creating the course, Adobe Captivate could be a little frightening since it requires Adobe experience to utilize.

Pros:
- It’s quite simple to use! Each frame may be easily shortened or lengthened.
- It’s simple to record motions onscreen, and it comes with a range of choices for recording various things (the application smooths down mouse movements).
- When the user is through shooting, the video is divided into multiple frames to make editing easy.
- A built-in editor enables users to manipulate audio by cutting, pasting, altering levels, and adding silences.
- Captivate can capture what’s occurring onscreen and provide step-by-step subtitles for popular menu actions automatically.
- Captivate has some fantastic interactive elements. Tutorials may be created so that users can follow along with pre-recorded comments on the screen.
- Adding audio or importing from another source is simple.
Cons:
- The sound’s bit rate was automatically reduced, making it seem more robotic and muffled.
- It might take a long time to preview and save works-in-progress.
- The finished flash flicks are fairly big.
Part 4. Alternative Way to Edit Videos [The Best Method]
Wondershare Filmora is a robust screen capture tool that allows you to manually alter all video and audio parameters, as well as edit your recordings in the software’s video editor. By tweaking a few basic parameters and exporting your eLearning material in MP4, MOV, or GIF file formats, you may make PIP movies. Filmora is a less expensive alternative to Camtasia 9 or Adobe Captivate for creating high-quality screen recordings. Filmora has the resources to make it possible. It’s both sound and video editing software that comes with a lot of instructions and activities to help you handle the fundamentals and create excellent recordings.
For Win 7 or later (64-bit)
For macOS 10.12 or later
This video editorial manager for PC and Mac comes with a natural point of connection that makes it simple to use for both new and experienced users. Because it is a freemium instrument, the free version will allow you to examine all of the components, albeit the final video will include a watermark. Change over, chop, change the examining rate, add effects, and that’s only the beginning of what you can do with your digital recording on the app’s schedule. Wondershare Filmora is simple to use and maintains the best sound and video toolkit. It’s best suited for novice and intermediate users since it allows you to create professional recordings in seconds and supports all of the popular designs.
Steps to Edit Video using Filmora
Step 1: Download and install Filmora Toolkit.
To begin using Filmora for editing, go to the official website and download the most current version of Wondershare Filmora. Launch the software when the download is complete and click the New Project button to see the product’s underlying window interface.

Step 2: Remove Any Unnecessary Background Sounds
Filmora Audio Editor, in addition to the video editor, allowing you to enhance the sound of your video. If your voice-over has any background noise, you may simply eliminate it from the whole clip or a segment of the video where the sound is inappropriate. In Filmora, you may also add your favourite ones to the videos by importing the files and adding them to the timeline. You may also isolate the audio from your video clips and chop or sync it with the video using the timeline of this video editor.

Step 3: Perform Professional Video Editing
Right-click the video and choose edit from the menu. Then, by hitting the proper effects buttons, you may rotate the movie. You may also swivel 90 degrees anticlockwise/clockwise, flip level, or go vertical, depending on your requirements. Then, in that instance. You can also add a variety of video effects, and the greatest part is that you can use others from the standard library as well, allowing you to put it with greater adjustment. The Editor in Filmora allows you to add Animated Titles, amazing effects, Audio Enhancements, and more to your recorded video.

Step 4: Enhance Audio Quality
The Wondershare Filmora Audio Editor allows you to change the volume, add fade-in and fade-out effects, and silence audio in certain parts of the video. All of the options are easily accessible on the right side of the software interface when you click on the audio component of the movie in Wondershare Filmora’s timeline. You may check the audio sound within the application to see whether it’s in sync with your recorded video clip once you’ve made any necessary edits to your audio.
Step 5: Download/Share the video
Click “Export” in the Toolbar to export the video to the specified format and also, you may share it on-spot. Finally, when you’ve done the video editing, you may completely utilize the Filmora editor as above. And, to publish your work of art immediately to YouTube or another well-known site, select the Export option and pick the platform where you want to share your video clip. You may even alter the movie before sharing it if you desire.

Conclusion
Camtasia’s technique of making a presentation using an individual movie works well for developers who are knowledgeable with video applications. Developers inexperienced with the method may have significant trouble with the editing operation in Camtasia since screen grabs occur in real time. Editing material using slides in Captivate 2 is often less onerous than the video format utilized in Camtasia. The biggest issue is that long presentations might result in a large number of slides that can be time consuming to look through and result in a greater file size for the Flash file that user’s access. Hence, we like to advocate Filmora as a reasonable method between these two.
Part 2. Camtasia Software Review
Camtasia by TechSmith is a straightforward video editing and screen recording application. Camtasia was created with novices in mind, allowing designers to quickly and easily make excellent instructional films. Both Windows and MacOS are supported. Camtasia is one of the most popular video editing applications on the market. Camtasia is available for both Windows and iOS. Camtasia is simple to use and supports a wide range of media formats. This software package has several features and controls. On the same platform, you can capture screens and edit movies with Camtasia. The benefits don’t stop there; you can also share your work with others through YouTube and Google Drive.
Pros:
- Camtasia is designed for video-editing novices, with a simple setup and user interface.
- The screen capture capability is fantastic. Not only is the resolution excellent, but it is also simple to operate.
- Camtasia’s built-in effects are, on the whole, minimal. Their cursor effects, on the other hand, are spectacular.
- You may use Camtasia to add interactive quizzes to your videos.
- Camtasia provides many of the fundamentals you’ll need if you’re short on time and need to search assets straight immediately.
- TechSmith is a free app for iOS and Android that allows you to make screen recordings from your smartphone or tablet.
- TechSmith offers an excellent customer service department.
Cons:
- Crashing and bugs very often
- Many instructions are missing, despite the fact that they have restricted keyboard controls.
- Camtasia is designed for novices; therefore, it does not allow for much modification.
- Camtasia makes it tough to move and animate things.
- Camtasia video encoding and exporting difficulties have been reported by certain users.
Part 3. Adobe Captivate Review
Captivate is an Adobe tool designed to make online learning more engaging and interactive. Students save time since they can take their classes with them. Captivate has no built-in video editing tools. To do so, you’ll need to use additional Adobe applications. Captivate allows students to study at any time and from any location. However, if you’re the one creating the course, Adobe Captivate could be a little frightening since it requires Adobe experience to utilize.
Pros:
- It’s quite simple to use! Each frame may be easily shortened or lengthened.
- It’s simple to record motions onscreen, and it comes with a range of choices for recording various things (the application smooths down mouse movements).
- When the user is through shooting, the video is divided into multiple frames to make editing easy.
- A built-in editor enables users to manipulate audio by cutting, pasting, altering levels, and adding silences.
- Captivate can capture what’s occurring onscreen and provide step-by-step subtitles for popular menu actions automatically.
- Captivate has some fantastic interactive elements. Tutorials may be created so that users can follow along with pre-recorded comments on the screen.
- Adding audio or importing from another source is simple.
Cons:
- The sound’s bit rate was automatically reduced, making it seem more robotic and muffled.
- It might take a long time to preview and save works-in-progress.
- The finished flash flicks are fairly big.
Part 4. Alternative Way to Edit Videos [The Best Method]
Wondershare Filmora is a robust screen capture tool that allows you to manually alter all video and audio parameters, as well as edit your recordings in the software’s video editor. By tweaking a few basic parameters and exporting your eLearning material in MP4, MOV, or GIF file formats, you may make PIP movies. Filmora is a less expensive alternative to Camtasia 9 or Adobe Captivate for creating high-quality screen recordings. Filmora has the resources to make it possible. It’s both sound and video editing software that comes with a lot of instructions and activities to help you handle the fundamentals and create excellent recordings.
For Win 7 or later (64-bit)
For macOS 10.12 or later
This video editorial manager for PC and Mac comes with a natural point of connection that makes it simple to use for both new and experienced users. Because it is a freemium instrument, the free version will allow you to examine all of the components, albeit the final video will include a watermark. Change over, chop, change the examining rate, add effects, and that’s only the beginning of what you can do with your digital recording on the app’s schedule. Wondershare Filmora is simple to use and maintains the best sound and video toolkit. It’s best suited for novice and intermediate users since it allows you to create professional recordings in seconds and supports all of the popular designs.
Steps to Edit Video using Filmora
Step 1: Download and install Filmora Toolkit.
To begin using Filmora for editing, go to the official website and download the most current version of Wondershare Filmora. Launch the software when the download is complete and click the New Project button to see the product’s underlying window interface.
Step 2: Remove Any Unnecessary Background Sounds
Filmora Audio Editor, in addition to the video editor, allowing you to enhance the sound of your video. If your voice-over has any background noise, you may simply eliminate it from the whole clip or a segment of the video where the sound is inappropriate. In Filmora, you may also add your favourite ones to the videos by importing the files and adding them to the timeline. You may also isolate the audio from your video clips and chop or sync it with the video using the timeline of this video editor.
Step 3: Perform Professional Video Editing
Right-click the video and choose edit from the menu. Then, by hitting the proper effects buttons, you may rotate the movie. You may also swivel 90 degrees anticlockwise/clockwise, flip level, or go vertical, depending on your requirements. Then, in that instance. You can also add a variety of video effects, and the greatest part is that you can use others from the standard library as well, allowing you to put it with greater adjustment. The Editor in Filmora allows you to add Animated Titles, amazing effects, Audio Enhancements, and more to your recorded video.
Step 4: Enhance Audio Quality
The Wondershare Filmora Audio Editor allows you to change the volume, add fade-in and fade-out effects, and silence audio in certain parts of the video. All of the options are easily accessible on the right side of the software interface when you click on the audio component of the movie in Wondershare Filmora’s timeline. You may check the audio sound within the application to see whether it’s in sync with your recorded video clip once you’ve made any necessary edits to your audio.
Step 5: Download/Share the video
Click “Export” in the Toolbar to export the video to the specified format and also, you may share it on-spot. Finally, when you’ve done the video editing, you may completely utilize the Filmora editor as above. And, to publish your work of art immediately to YouTube or another well-known site, select the Export option and pick the platform where you want to share your video clip. You may even alter the movie before sharing it if you desire.
Conclusion
Camtasia’s technique of making a presentation using an individual movie works well for developers who are knowledgeable with video applications. Developers inexperienced with the method may have significant trouble with the editing operation in Camtasia since screen grabs occur in real time. Editing material using slides in Captivate 2 is often less onerous than the video format utilized in Camtasia. The biggest issue is that long presentations might result in a large number of slides that can be time consuming to look through and result in a greater file size for the Flash file that user’s access. Hence, we like to advocate Filmora as a reasonable method between these two.
Also read:
- Updated Best Options to Replace Sky of Any Photo Online + Offline
- Updated Looking for a Free Video Editor to Edit Videos on Mac? IMovie by Apple Is a Great Choice? But Is It the Best Video Editor or Is There a Better Alternative Available? Check Out Our iMovie Review
- New 2024 Approved Top-Rated Android Apps For Slowing Down Motion
- 2024 Approved Top LUTs for Sony HLG
- New 2024 Approved Steps To Fade Audio In Premier Pro
- How to Do Masking in After Effects Alternative Provided
- New Top 7 Best GoPro Video Editors for Mac
- Best iPhone LUTs App to Use
- Updated In 2024, Do You Want to Know About the Best Filmic Pro LUTs for Video Editing? This Article Provides Details on the Best Recommendations
- Freeze Frame Clone Effect Is a Creative Effect to Use for Many Video Creators. This Article Will Show You How to Use Filmora to Make a Frozen Frame Clone Video Effect for 2024
- New 2024 Approved How to Add Transitions in Adobe Premiere Pro
- Updated In 2024, Powerpoint Supported Video Format and User Tips
- In 2024, Srt File Creator
- Updated How to Export iMovie?
- New Do You Want to Watch Videos in QuickTime with Subtitles in Your Desired Language? Here Are Different Ways to Add Subtitles in QuickTime Player
- How Important It Is to Perform Color Correction to Your Video? Here Is a Solution with After Effects Color Correction with Illustrative Videos for 2024
- Detailed Steps to Rotate Videos Using Kdenlive
- Updated In 2024, Learn About some of the Best Apps for Photo Collage for PC
- New In 2024, How to Loop YouTube Videos on iPhone
- Separating Audio From Video in DaVinci Resolve Step by Step for 2024
- In 2024, Best MOV to GIF Converters
- New Slowing Down GIF With The Best Available Methods
- New Basic Introduction for LumaFusion Color Grading
- Updated Recording Videos with Your Smartphones Is Fun and Fantastic. But Did You Know that Recording in Slo-Mo Has Become a Trend Nowadays? Read More to Learn About How to Convert Videos to Slow Motion Here for 2024
- End This Problem! Make Transparent Background Video Today for 2024
- Updated 2024 Approved Learn About some of the Best Photo Collage with Music Tools
- Updated If You Want to Replace or Delete the Sky Pictures or Background Media, Then Give a Quick Read to This Article for Effective Solutions
- New How to Turn On/Off Motion Blur in Dying Light 2, In 2024
- New 2024 Approved Tips & Tricks To Perfectly Use the Audio Mixer in Filmora
- Updated 2024 Approved Are You Searching for the Best Cinematic LUTs for Premiere Pro? You Are in the Right Place because This Article Is Dedicated to LUTs
- New Best Practical Tips to Improve Your Lighting in the Sun
- Updated 2024 Approved Easy Steps to Slow Down a Video on iPhone and Android
- In 2024, Free Ways To Split Video For Whatsapp Status On All Platforms
- 2024 Approved Finding the Best GIF Websites Was Never Easier
- New Are You Also Facing a Problem with the Snapchat Camera Zoomed In? Find Out the Easiest Methods to Fix This Error without Installing a Third-Party Tool for 2024
- Updated 2024 Approved Discover the Best Game Recording Software for Your PC in This Developing Industry. Record Your Gameplay in Real Time and Enjoy the Benefits that Come with It
- In 2024, How To Change Realme Narzo 60 5G Lock Screen Password?
- How To Change Realme GT Neo 5 SE Lock Screen Password?
- In 2024, 5 Solutions For Samsung Galaxy S23+ Unlock Without Password
- 2024 Approved Maximizing Yandex Translate in Video Translation and Beyond
- In 2024, Top 10 Lava Yuva 3 Android SIM Unlock APK
- In 2024, How To Get the Apple ID Verification Code On Apple iPhone 13 mini in the Best Ways
- In 2024, How to Successfully Bypass iCloud Activation Lock from iPhone SE (2020)
- How to Fake GPS on Android without Mock Location For your Honor 100 Pro | Dr.fone
- In 2024, 3 Ways to Erase iPhone SE When Its Locked Within Seconds | Dr.fone
- In 2024, How Can I Use a Fake GPS Without Mock Location On Apple iPhone 8 Plus? | Dr.fone
- How to Bypass Google FRP Lock on Xiaomi Redmi K70 Devices
- Hard Reset Meizu 21 Pro in 3 Efficient Ways | Dr.fone
- How to Unlock Honor X9b Phone Pattern Lock without Factory Reset
- In 2024, What Pokémon Evolve with A Dawn Stone For Nokia G22? | Dr.fone
- In 2024, How to Transfer Contacts from Oppo Reno 8T 5G to Other Android Devices Devices? | Dr.fone
- How to Transfer Photos from Nubia Red Magic 8S Pro+ to Laptop Without USB | Dr.fone
- How To Update or Downgrade iPhone X Without Losing Data? | Dr.fone
- In 2024, How to Reset a Locked Nokia C02 Phone
- In 2024, Change Location on Yik Yak For your Honor X7b to Enjoy More Fun | Dr.fone
- In 2024, Latest Guide How To Bypass Lava Blaze Curve 5G FRP Without Computer
- Why Your WhatsApp Location is Not Updating and How to Fix On Realme C67 4G | Dr.fone
- How to Reset Google Pixel 7a Without the Home Button | Dr.fone
- How To Transfer WhatsApp From iPhone 14 Pro Max to other iPhone 11 Pro Max devices? | Dr.fone
- How to recover deleted photos on G310
- 4 Feasible Ways to Fake Location on Facebook For your Motorola Razr 40 Ultra | Dr.fone
- Possible solutions to restore deleted videos from Honor X50i
- In 2024, 10 Easy-to-Use FRP Bypass Tools for Unlocking Google Accounts On Nubia Red Magic 9 Pro+
- How can I get more stardust in pokemon go On Poco X5? | Dr.fone
- How To Reset iPhone 8 Plus? | Dr.fone
- How to Transfer from Apple iPhone 15 Plus to iPhone 8/X/11 | Dr.fone
- Title: New In 2024, Learning The Details Of How To Replace Sky in Lightroom
- Author: Morgan
- Created at : 2024-06-24 01:30:12
- Updated at : 2024-06-25 01:30:12
- Link: https://ai-video-editing.techidaily.com/new-in-2024-learning-the-details-of-how-to-replace-sky-in-lightroom/
- License: This work is licensed under CC BY-NC-SA 4.0.
