
:max_bytes(150000):strip_icc():format(webp)/airpodbatterylevelonandroid-15c1db7e9fac43248d130a42540c12a6.jpg)
New In 2024, Overview of FPS for YouTube Videos
Overview of FPS for YouTube Videos
YouTube has become one of the to go to social media platforms for internet use because it provides entertainment for people who want to get entertained, learn or catch up with their favorite personalities. This platform has also given content creators a space to showcase their talents, educate the masses or simply have a good time when playing their games.
However, being a content creator on YouTube entails more than just posting a video weekly. You ought to ensure you get the frame rate in the video right. Failure to choose the correct frame rate will affect how your audience enjoys the video, increasing the chances that you lose subscribers.
Without further ado, let’s discuss the best fps for YouTube.

How Does FPS Affect Viewing YouTube Videos?
Before we dive into how FPS affects your viewing experience on YouTube and determine the best frame rate for YouTube, let’s define what it is. FPS is short for frames per second and is the number of still images appearing on display in one second. The more frames per second you have in your video, the clearer your video will become. The vice versa is also true.
To further simplify this definition, we will use the example of a flipbook. An animator usually draws an image on each page of the book. When they flip the pages in rapid succession, the images appear to be in motion. Suppose the animator used fewer pages to make their flipbook.

The animation would not be as smooth and crisp as if they had used more pages, each with a different still image contributing to the final motion.
The human brain can easily differentiate between 12 distinct images. However, when the photos exceed 18 and move rapidly, the brain is tricked into believing that the pictures are in motion. A frame rate lower than 24FPS will make your YouTube video look choppy and unnatural, as if it lags in real time.
Ideally, 24fps is the best fps for YouTube videos featuring mundane activities that we see in daily life. However, if you want to pack more information into your video and make the motion a bit smoother, then 30fps is the best video frame rate for YouTube.
Perhaps you post fast-paced content about gaming and other live-action videos. You are better off choosing 60FPS, which makes high-speed scenes look more fluid and helps you capture double the information.
What Is the Recommended & Highest Frame Rate for YouTube Videos?
Unfortunately, there is no correct answer when it comes to the best video frame rate for YouTube videos. The controversy still continues, and everyone seems to have their own opinion.
According to Thomas Edison , anything less than 46FPS for motion pictures will strain the eyes and give an unpleasant viewing experience. At the time, filmmakers and videographers were adamant about sticking to between 22-26PFS for their videos, provided the audio adaptability remained at 35mm.
Different frame rates are used for various displays, genres, and mediums. For instance, 1-16FPS was common in silent-era movies and stop-motion movies. However, this frame rate is neither universally accepted nor widespread in the world today.

An excellent example of a frame rate that produces larger-than-life videos with exceptional detail is 24fps. However, the NTSC confirms that it is, in fact, 23.97 frames per second when you consider issues to do with color and hue.
Another universally acceptable frame rate is 30fps, which is widespread in television. Videographers also use it to make slow-motion segments in sports videos or other fast-paced content. The sweet 60fps makes any motion look smooth as butter and significantly reduces any blur in your videos. This frame rate is also characterized by super fine details you can easily miss with 24 and 30fps. It is also the highest fps video on YouTube.
120fps is synonymous with grandeur, with its monumental footage suitable for slow-motion scenes. Lastly, anything above 120fps works great with ultra-slow-motion videos. Of course, we are talking 240fps, which is rare but not uncommon. However, you would need a high-speed capture camera, which we believe doesn’t come cheap.
To sum it all up, 24fps is the recommended frame rate for YouTube. You can go higher than the baseline and use 30fps or higher if you make videos with lots of motion, like gaming videos. Most of the time, a higher frame rate is a personal choice rather than a necessity. However, we understand you want to give your viewers a pleasant experience while watching your content.
What Is the Best Frame Rate for YouTube Videos?
If you want to record a video for your YouTube channel, you might wonder what is the best fps for YouTube videos. You are better off sticking between 24fps and 60fps. The platform has only recently added 8K support for videos, which is a plus for many content creators. Below is a list of frame rates for the most popular genres on YouTube.

- Podcasts and talk shows - 30 FPS
- Gaming videos - 60 FPS
- Makeup tutorials - 60 FPS
- Educational videos - 24- 30 FPS
- Health and fitness - 24-30 FPS
- Sports - 40-60 FPS
Remember that the list above is not exhaustive and doesn’t cover all types of content on the platform. We can’t also guarantee that there is a “best” frame rate for your YouTube video. We suggest you heed our suggestion and practice to determine the best frame rate for YouTube videos.
We couldn’t fail to mention that your frame rate should match the content uploading and decoding. Since the interlaced content may experience performance issues on YouTube, it would help if you deinterlaced it.
How To Check FPS on YouTube Video?
Below is a simple guide on how to check fps on YouTube videos.
Step1 Open any video on YouTube and right-click on it. A pop-up window will appear. Select “Stats for nerds.”

Step2 Narrow down on the “Current/Optimal Res” tab. The first set of figures before the forward slash represents the current resolution, while the figures after the forward slash represent the optimal resolution for the video. For instance, the figure in the picture below indicates that the resolution is 1280*720, and the frame rate is 30FPS. The figures repeat themselves, meaning that the video is at the optimal resolution.

How To Adjust FPS When Editing a YouTube Video?
An efficient video editing tool is all you need to adjust the frame rate for a video you want to upload to YouTube. Since there are so many options in the market, it is easy to get swept away by the prospects and wonder which one to choose.
Based on our research, Wondershare Filmora is one of the most efficient editing tools to change the FPS in your video and make it more enjoyable to watch.
Free Download For Win 7 or later(64-bit)
Free Download For macOS 10.14 or later
Wondershare Filmora is highly feature-rich, making it an editor’s dream. We guarantee you don’t need to be a pro to use this platform. The user-friendly interface is the ideal choice for even the most clueless novice.
However, a little knowledge goes a long way in ensuring you don’t get stuck using it. In addition, customer support is impeccable, meaning you will always find someone to help you whenever you encounter a problem using the platform.
The split-screen icon allows you to play and edit different clips simultaneously without clicking out of the app or finishing one task before starting the next. You can also select the number of split screens you want, depending on the videos you want to edit in one go. The newer version, Filomra 12, has everything you need to edit your video and make anyone who watches it glued to the screen because of how crisp it is.

Below are some examples of key features you might find interesting.
- GIF support
- Audio equalizer
- 4K editing
- Advanced text editing
- Noise removal
- Scene detection
- Audio mixer
- Colour tuning
Here is a detailed guide on how to use Wondershare Filmora to adjust the frame rate for YouTube videos.
Step1 Launch the platform on your PC or laptop and click on the “File” tab at the top of the page. A drop-down menu will appear. Select “Project Settings.”

Step2 After a dialogue box appears, click “Frame Rate” and choose the best option.

Step3 Continue customizing your video using the other editing tools in the platform, and click “Export” to save a copy to your device.
Conclusion
Making crisp, polished-looking YouTube videos takes a lot of time and dedication. Fortunately, you knew that by the time you decided to start creating content for the platform. With all the knowledge at your fingertips, you have no reason not to broaden your knowledge base and gather enough information to help you create the best videos.
There are plenty of video editing tools to get your video to the correct resolution, so your content is above par. If you don’t know how to use a specific app or platform, you must search for a tutorial and start practicing. You could also consult other creators in your niche and ask them how they make their videos look so good.
Free Download For macOS 10.14 or later
Wondershare Filmora is highly feature-rich, making it an editor’s dream. We guarantee you don’t need to be a pro to use this platform. The user-friendly interface is the ideal choice for even the most clueless novice.
However, a little knowledge goes a long way in ensuring you don’t get stuck using it. In addition, customer support is impeccable, meaning you will always find someone to help you whenever you encounter a problem using the platform.
The split-screen icon allows you to play and edit different clips simultaneously without clicking out of the app or finishing one task before starting the next. You can also select the number of split screens you want, depending on the videos you want to edit in one go. The newer version, Filomra 12, has everything you need to edit your video and make anyone who watches it glued to the screen because of how crisp it is.
Below are some examples of key features you might find interesting.
- GIF support
- Audio equalizer
- 4K editing
- Advanced text editing
- Noise removal
- Scene detection
- Audio mixer
- Colour tuning
Here is a detailed guide on how to use Wondershare Filmora to adjust the frame rate for YouTube videos.
Step1 Launch the platform on your PC or laptop and click on the “File” tab at the top of the page. A drop-down menu will appear. Select “Project Settings.”
Step2 After a dialogue box appears, click “Frame Rate” and choose the best option.
Step3 Continue customizing your video using the other editing tools in the platform, and click “Export” to save a copy to your device.
Conclusion
Making crisp, polished-looking YouTube videos takes a lot of time and dedication. Fortunately, you knew that by the time you decided to start creating content for the platform. With all the knowledge at your fingertips, you have no reason not to broaden your knowledge base and gather enough information to help you create the best videos.
There are plenty of video editing tools to get your video to the correct resolution, so your content is above par. If you don’t know how to use a specific app or platform, you must search for a tutorial and start practicing. You could also consult other creators in your niche and ask them how they make their videos look so good.
Wondering How to Replace Sky in After Effects? Learn How
Replacing Sky After Effects can change the essence of your videos with an authentic feel. In sci-fi movies, the colors of the sky add a dramatic, intense, or soft touch to videos. In scenes of war, peace, crime, and love, skies represent the theme. Shooting outdoors cannot always capture the essence of the sky. Replacing skies can help with covering over-exposed or under-exposed skies.
In this article, the focus of the discussion is how to replace Sky After Effects. Users can also learn about the advantages of using background replacers. If you want to learn sky replacement in After Effects, there is an instruction manual. It will give you some tips and tricks for replacing and adjusting the sky. At the end, we will discuss another software for replacing video backgrounds .
Sky Replacement A cross-platform works like magic for background removal or sky replacement photos!
Free Download Free Download Learn More

Part 1: What Are the Benefits of Having Video Background Replacers?
Along with enhancing the creative element in videos, background replacers help with more. Users can integrate them for both personal and professional uses. The following section will give a sneak peek at the advantages of background removers:
1. Privacy and Concealment
Video background removers extract the real surroundings, which addresses privacy concerns. In addition, they conceal any mess or imperfections in your background.
2. Maintains Professional Appearance
They help you set up professional backgrounds for Zoom meetings or Google Classrooms. In this way, they maintain the professional element of your videos.
3. Marketing Consistency
When it comes to marketing, they help choose a reliable background for the brand. The background becomes the identity of the brand and maintains its consistency.
4. Creative Expression in Movies
In the media industry, backgrounds like the sky help express the emotion of an actor or a mass. If there is anger, the sky will turn red; if there is peace, it will have a calm outlook.
5. Audience Engagement and Focus
A well-aligned background increases the audience’s focus on the theme of the video. This is because irrelevant backgrounds can catch the audience’s interest and distract them.
Part 2: Top Guide Explaining How to Replace Sky in Adobe After Effects?
Do you want to elevate the graphics of your videos professionally? Adobe After Effects is an ideal software for it as it helps professionals to edit films. It offers multiple animations for titles and videos like revolve, rotate, and more. In addition, you can overlap videos with precision using its Rotoscope feature.
There are built-in effects and features to ease the editing process for you. In addition, you can do custom settings in it and save them as presets. One of its many specifications is that it is an elite background remover and replacement. It enables a seamless addition of the sky in the background. We have mentioned the step-by-step procedure of After Effects replace Sky below:
Procedure 1: Removing Video Background
Step 1: After bringing your video to the timeline, navigate towards the top search bar at the left. In the Effects Control option, search for the “Extractor” effect and add it. Then, change the “Channel” of this effect to your “Blue” or “Luminance.” Change the position of both sliders there to remove and feather the background.

Step 2: To avoid removing parts other than the sky, duplicate this video to the timeline. From the bottom video, eliminate the extractor effect. Navigate towards the top toolbar and select the “Mask” option. Create a mask around the ground at the bottom of the video. In the timeline, click the “Mask Path” option to create the mask throughout the video.

Step 3: Now, select the top video in the timeline and search for “Key Cleaner.” Adjust the values of options under the key cleaner for precision.

Step 4: If there are still some spaces left, use the “Simple Choker” effect to correct them. You can find it using the search bar and adjust the given values.

Procedure 2: 3D Camera Tracking
Step 1: Now, duplicate the video again on the timeline and remove all its effects. Afterward, add a “3D Camera Tracker” in it. Then click “Analyze” and let the tracker analyze your video.

Step 2: Next, select any three points from the footage and right-click on them. From the drop-down menu, select “Create Null and Camera” or “Create Solid and Camera.”

Procedure 3: Replacing the Sky
Step 1: Import the video of your sky and bring it to the timeline. Bring the sky in the back of your footage and change it to a 3D layer. Afterward, change the “Position” of your sky from the timeline. We recommend you set the values as far away as possible for realistic effect.

Step 2: Once you have set the sky’s position, navigate towards the timeline panel again. From there, change the “Scale” of the background to set according to your footage. Afterward, see if the sky needs any flipping. This is because you must align the bright parts of the sky with the bright parts of the ground.

Procedure 4: Color Matching
Step 1: Play with the color setting elements like “Saturation” or “Lightness.” Change the position of their sliders to observe the changes in your footage.

Step 2: Right-click on the timeline and add “New > Adjustment Layer” for settling colors. Afterward, see the preview of your video and export it.

Part 3: Wondershare Filmora: A Breath-taking Alternative to Replacing Backgrounds in Videos
For those who find sky replacement in After Effects difficult, there are alternatives. One of the simplest alternatives to replace sky is Wondershare Filmora . It is a video editor driven by AI technology with multiple effects and presets. Filmora keeps updating its functionalities, and it has recently launched the V13 upgrade. There was the addition of multiple AI tools and enhanced effects for creativity purposes.
Free Download For Win 7 or later(64-bit)
Free Download For macOS 10.14 or later
Filmora’s video background remover uses AI to extract the background with precision. Afterward, users can replace it with Filmora’s pre-assembled background collection. There are multiple colors, gradients, and other replacements for the background. The integration of AI has eliminated the human effort of cutting out background.
Step-by-Step Guide on Replacing Backgrounds in Filmora
Unlike replacing Sky After Effects, it keeps the background changing process simpler. In this guide, we will remove the background first and then replace it. Here is the step-by-step procedure to replace the background using this alternative:
Step 1Create a New Project to Import Media
First, install Wondershare Filmora on your device and launch it. Afterward, use the “New Project” button to start a project and enter its editing interface. Use the “Ctrl +I” keys to import your video and drop it on the timeline.

Step 2Enable the Smart Cutout Option
In the timeline panel, select the video and navigate towards the right-side settings panel. Afterwards, go to the “AI Tools” section under the “Video” tab. From there, enable the “Smart Cutout” option and click the Start button below.

Step 3Start Removing Background
In the Smart Cutout Video window, use the brush to mark the object you want in the video. The AI will auto-select the rest of the object. After that, hit the “Click to start Smart Cutout” option, and it will initiate. Then, click the “Save” button to save the background, removing settings.

Step 4Replace a Background and Export Video
Once the background has been removed, click this video in the timeline. Hover the cursor towards the right settings panel and access the “Video > Basic” tab. Scroll down to find the “Backgrounds” section and enable it. In the “Type” section, select the background type and choose from the options to add. Once you have added the background, click the “Export” button to save this video.

Conclusion
The article emphasized the importance of video background removers and their benefits. In addition, we discussed replacing sky After Effects in detail. In the end, we provided a simple alternative for those looking for it. This is because Adobe After Effects might have a technical editing interface.
Wondershare Filmora, on the other hand, can carry on the process with efficiency and simplicity. If you haven’t yet used this software, visit its website to download it. There are other features that help with uplifting the content. You will also find the detailed user guides to use those functions.
Free Download Free Download Learn More
Part 1: What Are the Benefits of Having Video Background Replacers?
Along with enhancing the creative element in videos, background replacers help with more. Users can integrate them for both personal and professional uses. The following section will give a sneak peek at the advantages of background removers:
1. Privacy and Concealment
Video background removers extract the real surroundings, which addresses privacy concerns. In addition, they conceal any mess or imperfections in your background.
2. Maintains Professional Appearance
They help you set up professional backgrounds for Zoom meetings or Google Classrooms. In this way, they maintain the professional element of your videos.
3. Marketing Consistency
When it comes to marketing, they help choose a reliable background for the brand. The background becomes the identity of the brand and maintains its consistency.
4. Creative Expression in Movies
In the media industry, backgrounds like the sky help express the emotion of an actor or a mass. If there is anger, the sky will turn red; if there is peace, it will have a calm outlook.
5. Audience Engagement and Focus
A well-aligned background increases the audience’s focus on the theme of the video. This is because irrelevant backgrounds can catch the audience’s interest and distract them.
Part 2: Top Guide Explaining How to Replace Sky in Adobe After Effects?
Do you want to elevate the graphics of your videos professionally? Adobe After Effects is an ideal software for it as it helps professionals to edit films. It offers multiple animations for titles and videos like revolve, rotate, and more. In addition, you can overlap videos with precision using its Rotoscope feature.
There are built-in effects and features to ease the editing process for you. In addition, you can do custom settings in it and save them as presets. One of its many specifications is that it is an elite background remover and replacement. It enables a seamless addition of the sky in the background. We have mentioned the step-by-step procedure of After Effects replace Sky below:
Procedure 1: Removing Video Background
Step 1: After bringing your video to the timeline, navigate towards the top search bar at the left. In the Effects Control option, search for the “Extractor” effect and add it. Then, change the “Channel” of this effect to your “Blue” or “Luminance.” Change the position of both sliders there to remove and feather the background.
Step 2: To avoid removing parts other than the sky, duplicate this video to the timeline. From the bottom video, eliminate the extractor effect. Navigate towards the top toolbar and select the “Mask” option. Create a mask around the ground at the bottom of the video. In the timeline, click the “Mask Path” option to create the mask throughout the video.
Step 3: Now, select the top video in the timeline and search for “Key Cleaner.” Adjust the values of options under the key cleaner for precision.
Step 4: If there are still some spaces left, use the “Simple Choker” effect to correct them. You can find it using the search bar and adjust the given values.
Procedure 2: 3D Camera Tracking
Step 1: Now, duplicate the video again on the timeline and remove all its effects. Afterward, add a “3D Camera Tracker” in it. Then click “Analyze” and let the tracker analyze your video.
Step 2: Next, select any three points from the footage and right-click on them. From the drop-down menu, select “Create Null and Camera” or “Create Solid and Camera.”
Procedure 3: Replacing the Sky
Step 1: Import the video of your sky and bring it to the timeline. Bring the sky in the back of your footage and change it to a 3D layer. Afterward, change the “Position” of your sky from the timeline. We recommend you set the values as far away as possible for realistic effect.
Step 2: Once you have set the sky’s position, navigate towards the timeline panel again. From there, change the “Scale” of the background to set according to your footage. Afterward, see if the sky needs any flipping. This is because you must align the bright parts of the sky with the bright parts of the ground.
Procedure 4: Color Matching
Step 1: Play with the color setting elements like “Saturation” or “Lightness.” Change the position of their sliders to observe the changes in your footage.
Step 2: Right-click on the timeline and add “New > Adjustment Layer” for settling colors. Afterward, see the preview of your video and export it.
Part 3: Wondershare Filmora: A Breath-taking Alternative to Replacing Backgrounds in Videos
For those who find sky replacement in After Effects difficult, there are alternatives. One of the simplest alternatives to replace sky is Wondershare Filmora . It is a video editor driven by AI technology with multiple effects and presets. Filmora keeps updating its functionalities, and it has recently launched the V13 upgrade. There was the addition of multiple AI tools and enhanced effects for creativity purposes.
Free Download For Win 7 or later(64-bit)
Free Download For macOS 10.14 or later
Filmora’s video background remover uses AI to extract the background with precision. Afterward, users can replace it with Filmora’s pre-assembled background collection. There are multiple colors, gradients, and other replacements for the background. The integration of AI has eliminated the human effort of cutting out background.
Step-by-Step Guide on Replacing Backgrounds in Filmora
Unlike replacing Sky After Effects, it keeps the background changing process simpler. In this guide, we will remove the background first and then replace it. Here is the step-by-step procedure to replace the background using this alternative:
Step 1Create a New Project to Import Media
First, install Wondershare Filmora on your device and launch it. Afterward, use the “New Project” button to start a project and enter its editing interface. Use the “Ctrl +I” keys to import your video and drop it on the timeline.
Step 2Enable the Smart Cutout Option
In the timeline panel, select the video and navigate towards the right-side settings panel. Afterwards, go to the “AI Tools” section under the “Video” tab. From there, enable the “Smart Cutout” option and click the Start button below.
Step 3Start Removing Background
In the Smart Cutout Video window, use the brush to mark the object you want in the video. The AI will auto-select the rest of the object. After that, hit the “Click to start Smart Cutout” option, and it will initiate. Then, click the “Save” button to save the background, removing settings.
Step 4Replace a Background and Export Video
Once the background has been removed, click this video in the timeline. Hover the cursor towards the right settings panel and access the “Video > Basic” tab. Scroll down to find the “Backgrounds” section and enable it. In the “Type” section, select the background type and choose from the options to add. Once you have added the background, click the “Export” button to save this video.
Conclusion
The article emphasized the importance of video background removers and their benefits. In addition, we discussed replacing sky After Effects in detail. In the end, we provided a simple alternative for those looking for it. This is because Adobe After Effects might have a technical editing interface.
Wondershare Filmora, on the other hand, can carry on the process with efficiency and simplicity. If you haven’t yet used this software, visit its website to download it. There are other features that help with uplifting the content. You will also find the detailed user guides to use those functions.
Add Text Animation to A Video Online
Do you want to make a creative video? Do you want your presentation or video to be easy to follow and entertaining? You can take the video to another level with the help of text animation. This article will discuss how to add text animation to online videos. You can use a good video editor from where you can select fresh styles and make the best video from there. One of the simplest ways to elevate your movie from good to excellent is with understandable text animation.
Text animation and short captions can broaden the audience for your content as more consumers view videos without sound these days. It matters what fonts you use in the videos, and they establish the mood and facilitate interaction with most viewers who rely on video captions. Add text, alter the font, add transitions, and use text effects to draw the user’s attention as they scroll. Please continue reading to discover how simple it is to make interactive video titles, words, and supers.
1. Use Kapwing animation text editor
(https://www.kapwing.com/animated-text-video-maker )
You can use the potent online editor Kapwing to add animated text to videos online, utilizing music, videos, GIFs, and images. There are no downloads required because everything is already present inside the browser. Kapwing is a capable tool for content production that is simple enough for everyone to use. The majority of video formats, GIF and image, including avi, png, jpg, gif, MOV, mp4, and more, are supported by Kapwing.
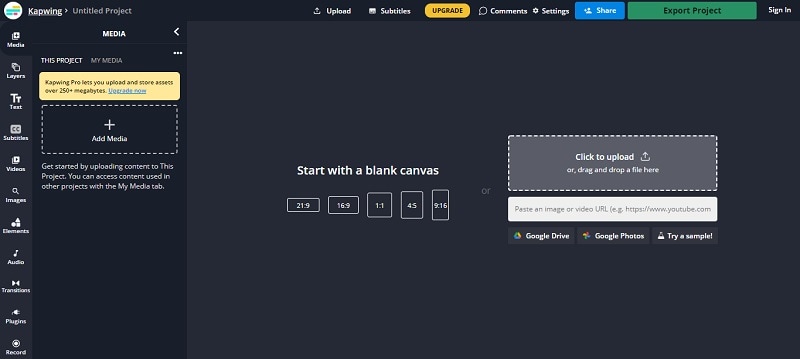
Step1 Upload the Video to Kapwing
You can open Kapwing with the device and tap on “Start Editing” to open up Kapwimg studio. After that, one can use the drag and drop option to upload the video in the studio. You can click on upload or use the link to upload.
If you have a more than 250 MB video, then you will require the Pro version.
Step2 Add the Text
When the video gets uploaded, now you can add your text. You must click the “Text” option on the left and type the text. After that, you can pick your favorite color, background, and color to add style.
You will always want that your text to get animated, but it doesn’t mean that you will have to use explosive fonts or funky or bright, which are very funky. The animation will make your text look attractive, and you can experiment with the colors and fonts to find the best combination.
Step3 Animate the Text
Now the fun part starts; choose the text box present on the right side and click on the “Animate” tab. It will allow the user to select animations like fade, flicker, hue rotates, and many more. Choose the speed according to your requirement, and if you want to change the background and color, you can do it too.
Use “Apply To” for applying this animation in the outro, intro, or both. It will help you to make the text fade out, fade in, or transition out and in with animation. Now the animation library has nine options:
- Drop: It appears on top of the text box
- Flicker: This one is like a candle’s flicker, and text flashes disappear and appear before staying.
- Fade: Opacity can be changed from 0% to 100%.
- Pop:- This grows the text more extensive than the text box and shrinks back to the place.
- Reveal:- Rolls from the left side to the right side
- Wipe:- Rolls from the left side to the right side with a colored background.
- Vibrate: The text box shakes in every direction.
- Hue rotates:- Colour of text cycles through the hue values..
You can use a timeline to adjust the animation’s termination when you set text animation. You can even drag that layer after the start time or use it on end/start time sliders to decrease or increase the time of your video. Text animation can get started when the cursor reaches the start time.
Step4 Export
The video with animated text is now ready to boom. You can click on “Export Video” present at the top and wait for the process. After that, you can download that video and use the links to share it on your social media platform.
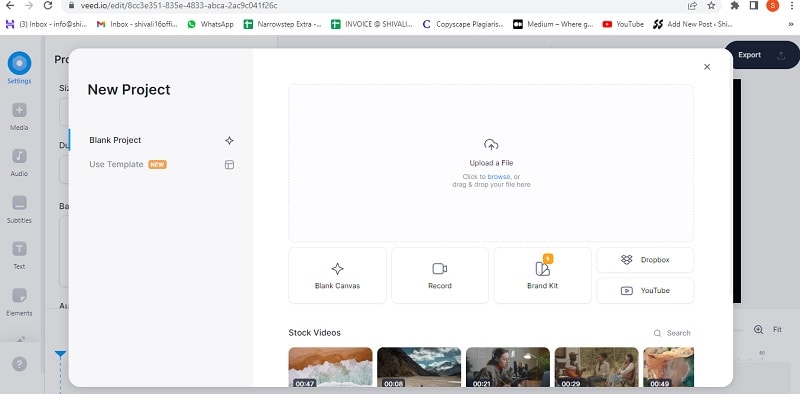
2. Use veed.io text video editor
(https://www.veed.io/create/text-video-maker )
Veed is one of the best video editor text effects online, which allows you to add text to online videos. You can easily add style, color, text, and font in a few clicks. You can upload the video and tap the text to get started. Add title and text or select handwriting font. One can select it from templates. Change transparency, alignment, and font size of the text.
This online software is perfect for creating attractive videos on social media. This is free, which omits the usage of expensive software. It is much easier to avoid many complex video editor apps. With the help of VEED, you can create an excellent video without any experience and do it with a few clicks. Let’s see how to add animated text to photos online.
Step1 Upload the video
Tap on “Choose Video” and choose the file you want to upload on VEED. One can even use the drag and drop option from the folder to the editor.
Step2 Add text
After that, you can add the text by tapping on the “Text” option on the left menu. You can select the text style and start typing.
Step3 Export
Save the video with the text you placed by tapping on “Export.” The video gets saved in an MP4 file.
3. Use Animaker text maker
(https://www.animaker.com/text-animation-maker )
The Animaker is one of the best-animated video makers. This app offers the best collection of charts, BGs, and animated characters. With the help of Animaker, you can make the text disappear or appear off-screen in the best way. After you finish your video, you can download the format in MP4.
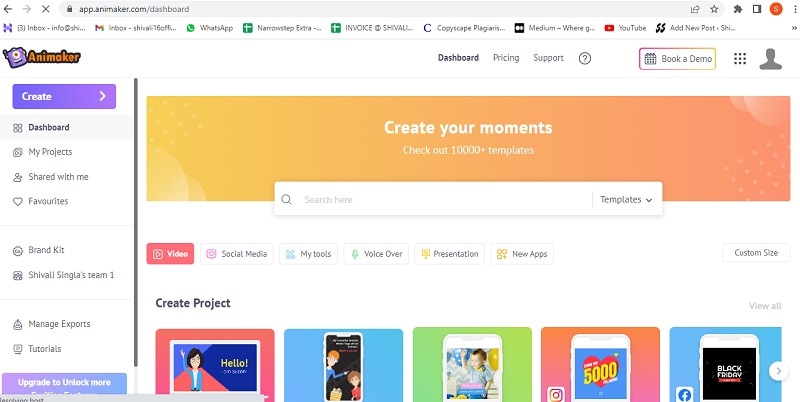
Step1 Upload the video clip
First, you can upload your video clip present on top that you wish to add text animation.
- Tap on the “Upload section” on the bottom left. You can upload your video where you wish to add the animated text.
- The video will get uploaded to “My Files.”
- Click on the uploaded video in the library to load it on the workspace.
Step2 Add text to the video
- You can add text in their text section
- In the next section, one can find two different text types. At the top, you will discover plain text options, and at the bottom, you can find pre-designed boxes seasoned at Animaker.
Let’s see how you can use pre-built text boxes.
- Tap on pre-built designs for your text animation. One can see the text appearing in the center of the workspace, and you can click it and type new text if you want to customize it.
- You can notice widespread options appearing with your text. It is known as the item menu. It will allow the user to modify their text. One can change font size, color, style, etc. Your text will come with pre-defined effects, which will help you to animate text instantly.
- You must have noticed that the purple color bar appears on the timeline, representing the duration of the text visible in the video. For example, if you want that text to get visible between 4rth to 8th seconds, then you will have to drag the edges of that purple bar to the same duration.
To see the scene, you must click on the play button on top of the timeline.
Let’s check the other ways of adding animated text to the video. In the previous one, you have seen how you can add text animation using pre-built boxes. Now you will get to know about doing it by using blank boxes.
- Start tapping the “text section”. Select the bank textbox.
- Click on them and then opt to add new text.
- Opt for clicking the cog icon that is there in the item menu.
- You will notice the settings tab that is on the screen’s right side.
- You can easily opt for the customization of the text in the way you wish. You can start by modifying the style of the font. One can change the size and color of the font as well.
- Use these options and opt for the application of enter and/or exit effects to text. Now, opt to click on the effect option to get more than 50 options. You can select the effect from there.
- Once the animation effect is applied to your timeline, you can notice the pink part in the bar i.e. purple. This completes creating text animation by using Animaker.
Step3 Download the Video
- You can visit the publish option in the right window to download the video.
- Tap on the “download video” option for downloading.
Conclusion
Now, you are aware of how to add text animation to video online and the three best video editors that will help you add animated text to your videos. At this point, you can choose the best one according to your needs and usage. These steps will help you create a unique and good video that will be easy to understand and entertaining.
Free Download For Win 7 or later(64-bit)
Free Download For macOS 10.14 or later
Free Download For macOS 10.14 or later
4 Solutions to Crop a Video on Android Easily
Nowadays, we can use our mobile phones to create almost anything – they have become an indivisible part of our lives. Most of the people check their mobile phones every 2 minutes – did they receive a new message?
What about different kinds of notifications – reactions on social network, or the ones which inform us about breaking news, or, to-do lists? People are well-connected to Facebook, Instagram, TikTok, and sometimes, we just want to update our accounts with just photos or new videos we took on the go. Sometimes, we have a perfect footage we took with our Android, but we have no idea, or just no time to edit our stunning video clips on the computer.
Yes, changing or adjusting a video shouldn’t be that hard – you shouldn’t be obligated to turn to Adobe Premiere Pro or other “heavy” software in order to have a video to your whole liking. Therefore, we have mobile applications just for editing our videos, in a simple, and fast way (thank you, mobile developers!).
In this article, we will be discussing how to crop a video on Android, but since most android devices don’t have this option, you will need to do it externally, by downloading and using different apps. So, more concretely, we will touch upon how to crop our video clips using following apps: Google Photos, Clideo, and Filmora.
Using Google Photos
In case you have Android, the Google Photos app will be there – it’s free and in most cases, already installed and ready to serve you. If you can’t find Google Photos, just find it and download it from the Google Play Store.

First off, you just open the application and allow it to access photos and media on your device. Tap the video you would like to crop. Then, click on Edit: it will launch the in-app video editor.

At the bottom, you will see the Crop option and hit on it, which will result in appearing a cropping box around your video clip.

Once you see little icons at the bottom, you need to choose the first one – it’s the Ratio button, through which you can choose the aspect you would like to apply. Your choice is between these several aspect ratios: Free, Original, Square, 5:4, 16:9, 4:3, and 3:2.

Choosing Free ratio option gives you the freedom to adjust the cropping sliders manually, in order to resize the video to any aspect ratio; it is even possible to rotate the clip, pinch, and zoom in/out.
After you are done with adjusting your video, you need to click on the Save Copy button, which will save a new edited version of your footage. And, meanwhile, don’t worry! – this will not be overwritten on the original one, which will still stand intact.
Using Clideo
Clideo is an interesting one… it doesn’t require you to download anything, because there is a way to crop your video online, through the web browser on Android.
First off, you need to click on Clideo’s Android crop video tool from the browser on the smartphone. You will see a Choose File button and hit on it – this will take you to your gallery and let you find the clip you are about to crop.

You can also upload your file from Cloud Storage. You need to click on the down-arrow on the right-hand side of the button and you’ll find the option to add a clip from your Dropbox or Google Drive account.


After your file is uploaded, Clideo will take you to the editing page, where you can select the area you would like to be in the edited version, and crop the video. Here, you will be able to choose the aspect ratio, exact size of the video and the format.

Once you have finished with the cropping and settings, you need to click on Export which will process your edited video clip.

Once it is done, you proceed on the page which lets you do 3 things: Remove watermark (for it, though, you will have to sign in), Edit again, or/and Download!

Using Filmora
Filmora is an android version of software Filmora and it also gives you the opportunity to crop videos and photos with no problem. First, of course, you have to download the application from Google Play Store, and open it;

then, after opening it, you’ll click on New Project. You can choose any photo/video from your albums or stock, you might even select multiple clips.

Once you have chosen your file, you click on Next button and you proceed to the editor itself.
There, you will see different options at the bottom of your phone, such as Trim, Music, Text, Sticker, Effect, etc.

It doesn’t show you the option Crop right away, but Crop is “hidden” behind the Trim button!

So, you choose Trim, then find Crop and hit that, and then you are free to choose any aspect ratio: 1:1; 4:5; 16:9; 9:16; and 5:4. You can crop the video manually, too, and you are able to adjust where your new “screen” might be wanted most.

After you have finished with cropping and are satisfied, you can click on Export, which will take a few seconds.

After it is done, you can find your newly-cropped video in your Camera Roll.

Using Wondershare Filmora
As mentioned, Filmora is a mobile version of its desktop edition – Wondershare Filmora Video Editor . So, you can also try your hand at this very handy software which also has a nice interface.
For Win 7 or later (64-bit)
For macOS 10.14 or later
If you download Wondershare Filmora X, you will need to click on Import Media Files Here.

You will choose your clip(s) you would like to crop and then drag and drop it in the sequence.

Above your video in the sequence you will see little icons and find a Crop one.

After clicking on it, a new window will open – it’s for Crop and Zoom, where you can choose a needed ratio or do it manually (for it, you have to select Custom first).

After clicking OK, your video will be cropped as you like. Then, you can proceed with Exporting it – click on Export, choose your preferred settings, and save the video at last.

So, that’s all for this article – you have learned how to crop a video on Android, using Google Photos, Clideo, Filmora; lastly, you have learned about how to crop a video using a desktop version of Filmora, namely, Wondershare Filmora. Hopefully, this is the information which will help you make your videos more “on spot” and be satisfied with the results, as well as satisfy your viewers!
First off, you just open the application and allow it to access photos and media on your device. Tap the video you would like to crop. Then, click on Edit: it will launch the in-app video editor.
At the bottom, you will see the Crop option and hit on it, which will result in appearing a cropping box around your video clip.
Once you see little icons at the bottom, you need to choose the first one – it’s the Ratio button, through which you can choose the aspect you would like to apply. Your choice is between these several aspect ratios: Free, Original, Square, 5:4, 16:9, 4:3, and 3:2.
Choosing Free ratio option gives you the freedom to adjust the cropping sliders manually, in order to resize the video to any aspect ratio; it is even possible to rotate the clip, pinch, and zoom in/out.
After you are done with adjusting your video, you need to click on the Save Copy button, which will save a new edited version of your footage. And, meanwhile, don’t worry! – this will not be overwritten on the original one, which will still stand intact.
Using Clideo
Clideo is an interesting one… it doesn’t require you to download anything, because there is a way to crop your video online, through the web browser on Android.
First off, you need to click on Clideo’s Android crop video tool from the browser on the smartphone. You will see a Choose File button and hit on it – this will take you to your gallery and let you find the clip you are about to crop.
You can also upload your file from Cloud Storage. You need to click on the down-arrow on the right-hand side of the button and you’ll find the option to add a clip from your Dropbox or Google Drive account.
After your file is uploaded, Clideo will take you to the editing page, where you can select the area you would like to be in the edited version, and crop the video. Here, you will be able to choose the aspect ratio, exact size of the video and the format.
Once you have finished with the cropping and settings, you need to click on Export which will process your edited video clip.
Once it is done, you proceed on the page which lets you do 3 things: Remove watermark (for it, though, you will have to sign in), Edit again, or/and Download!
Using Filmora
Filmora is an android version of software Filmora and it also gives you the opportunity to crop videos and photos with no problem. First, of course, you have to download the application from Google Play Store, and open it;
then, after opening it, you’ll click on New Project. You can choose any photo/video from your albums or stock, you might even select multiple clips.
Once you have chosen your file, you click on Next button and you proceed to the editor itself.
There, you will see different options at the bottom of your phone, such as Trim, Music, Text, Sticker, Effect, etc.
It doesn’t show you the option Crop right away, but Crop is “hidden” behind the Trim button!
So, you choose Trim, then find Crop and hit that, and then you are free to choose any aspect ratio: 1:1; 4:5; 16:9; 9:16; and 5:4. You can crop the video manually, too, and you are able to adjust where your new “screen” might be wanted most.
After you have finished with cropping and are satisfied, you can click on Export, which will take a few seconds.
After it is done, you can find your newly-cropped video in your Camera Roll.
Using Wondershare Filmora
As mentioned, Filmora is a mobile version of its desktop edition – Wondershare Filmora Video Editor . So, you can also try your hand at this very handy software which also has a nice interface.
For Win 7 or later (64-bit)
For macOS 10.14 or later
If you download Wondershare Filmora X, you will need to click on Import Media Files Here.
You will choose your clip(s) you would like to crop and then drag and drop it in the sequence.
Above your video in the sequence you will see little icons and find a Crop one.
After clicking on it, a new window will open – it’s for Crop and Zoom, where you can choose a needed ratio or do it manually (for it, you have to select Custom first).
After clicking OK, your video will be cropped as you like. Then, you can proceed with Exporting it – click on Export, choose your preferred settings, and save the video at last.
So, that’s all for this article – you have learned how to crop a video on Android, using Google Photos, Clideo, Filmora; lastly, you have learned about how to crop a video using a desktop version of Filmora, namely, Wondershare Filmora. Hopefully, this is the information which will help you make your videos more “on spot” and be satisfied with the results, as well as satisfy your viewers!
Also read:
- New How to Make a PowerPoint Looping Slideshow for 2024
- New Video Course and Online Learning Are Very Popular Nowadays. Here We Are Going to Recommend some of the Best Video Websites for Teachers to Use for 2024
- Best Love Video Maker with Music
- Updated Tactics To Make Keynote Slideshow for 2024
- Are You Eager to Discover the Method of Video Scaling in Filmora? You Are in the Right Place because This Discussion Will Cover the Content on This Matter
- Updated Ways to Find Free Online Slideshow Maker with No Watermark
- Updated How to Edit a TikTok Video After Posting
- Do You Want to Apply BRAW LUTs to Your Pictures and Video Footage? Here We Will Discuss some of the Best Options Available to Help You Choose the Right One for 2024
- Updated 2024 Approved Have You Recently Experienced Motion Blur in Games? Do You Wish to Learn More About It? This Article Provides an Overview and the Need for Motion Blur Gaming
- New 2024 Approved Complete Guide to Converting GIF to SVG With Ease
- New Top 8 Sites to Download Glitch Transition for Premiere Pro for 2024
- Updated Time Bending Brilliance The Ultimate Slow Motion Video Makers
- Updated 2024 Approved Quick Answer Why Did Filmora AI Portrait Attract People?
- New If You Do Not Know How to Blur Faces in a Video on iPhone, You Are in the Right Place. We Have Provided You with All the Details You Need to Learn How to Blur Part of Your Video on Your iOS Device
- In 2024, General Knowledge About MP4 Format and Best MP4 Video Editor
- Updated Discover the Ultimate LUTs for Wondershare Filmora Uncover the Answer for 2024
- In 2024, Adobe Premiere Pro Rec 709 LUTs Finding The Best Choices
- Updated If You Dont Know How to Blur a Part of a Video, Youre in the Right Place. We Have Provided All the Details You Need to Help You Blur a Still or Moving Portion of Your Video for 2024
- Updated In 2024, This Article Talks in Detail About How to Download Windows Movie Maker 2012 Version, the Key Features, How to Use It, Etc. It Further Discusses an Alternative Way to Create Videos on Windows PC. Check Out
- Creating a Slideshow Is Necessity of the Modern Time. Whether You Plan a Business Meeting or You Are Going to Do some Family Event with Slideshow Presentation, a Good Slideshow Maker Will Help You in This Direction
- Updated In 2024, Top GIF to MP4 Converters
- Updated 2024 Approved 10 Best Websites to Discover Free Premiere Pro Video Templates
- In 2024, How To Create The Best AI Thumbnail Using The Right Tools?
- New Do You Need to Convert TXT to SRT to Add Subtitles to Your Videos? Here Are Three Effective Ways You Can Do It Effortlessly for 2024
- New In 2024, Final Cut Pro for iPad
- Updated Ultimate Guide on Magic Effects Video Making
- New How to Make a Video Loop in QuickTime
- Updated GIF Splitting Into Frames Is an Interesting Activity to Do with the Right Tools. Convert GIFs Into Frames Easily with Tools and Use Them as Needed
- How to Use Rules of Thirds for 2024
- How I Got Free After Effects Templates Slideshow with Simple Trick for 2024
- How To Split Screen On Tiktok for 2024
- New Competitive Guide To Use Slow Motion in After Effects for 2024
- New 2024 Approved How to Color Grading in Final Cut Pro
- New 2024 Approved Want to Know How to Slow Down a Video on iPhone or Speed It Up? This Guide Provides Step by Step Method to Do so Using Simple Techniques. Find Out More About It
- Updated 2024 Approved Twitch Green Screen Guide
- New How To Fade Audio In Kinemaster
- How to Create a Freeze Frame Sequence Effect for 2024
- Separate Audio From Video in DaVinci Resolve Step by Step
- Looking for the Best Online Video Editors to Add Filter to Your Video? Here Is the List of the Best Video Editors to Add Filter Video Online in Simple Steps for 2024
- 2024 Approved Top Tools To Create Blend Image Collage
- New Detailed Steps to Rotate Videos Using Kdenlive for 2024
- In 2024, Detailed Guide to Crop Videos in Sony Vegas Pro
- New This Article Describes Different Ways for Removing Gif Backgrounds, How We Can Use Them, and How This Way Differs From One Another
- Updated If You Do Not Know How to QuickTime Trim Video Clips, You Are in the Right Place. We Have Provided Information that Will Help You Trim Videos with This Application and Make Them Engaging for Viewers
- Updated Use The Best LUTs for Lightroom
- New 2024 Approved Having Trouble with Black Backgrounds in After Effects? Land in Here to Know How You Can Quickly Escape This Glitch in the Simplest Ever Way Possible
- In 2024, How to Change Netflix Location to Get More Country Version On Honor Magic 6 | Dr.fone
- In 2024, 9 Mind-Blowing Tricks to Hatch Eggs in Pokemon Go Without Walking On Xiaomi Redmi Note 12 5G | Dr.fone
- Bypassing Google Account With vnROM Bypass For Tecno Pova 5 Pro
- List of Pokémon Go Joysticks On OnePlus 12R | Dr.fone
- In 2024, How to get the dragon scale and evolution-enabled pokemon On Honor Magic5 Ultimate? | Dr.fone
- How to Transfer Data After Switching From Motorola Moto G24 to Latest Samsung | Dr.fone
- Best Fixes For Nubia Red Magic 9 Pro Hard Reset | Dr.fone
- How to Unlock Xiaomi Phone with Broken Screen
- New In 2024, What Is AI Voice Text to Speech? | Wondershare Virbo Glossary
- 4 Feasible Ways to Fake Location on Facebook For your Samsung Galaxy S23 | Dr.fone
- How to Mirror Your Samsung Galaxy F15 5G Screen to PC with Chromecast | Dr.fone
- Which is the Best Fake GPS Joystick App On Oppo Reno 10 5G? | Dr.fone
- In 2024, How to Unlock iPhone 14 Plus Passcode without iTunes without Knowing Passcode?
- In 2024, Step-by-Step Tutorial How To Bypass Vivo Y28 5G FRP
- Fixes for Apps Keep Crashing on Motorola Edge 40 | Dr.fone
- Hassle-Free Ways to Remove FRP Lock on OnePluswith/without a PC
- Quickly Remove Google FRP Lock on Realme C67 4G
- How to Unlock Vivo V30 Phone without Google Account?
- In 2024, Additional Tips About Sinnoh Stone For Oppo Reno 11F 5G | Dr.fone
- In 2024, 7 Ways to Lock Apps on iPhone 6 Plus and iPad Securely | Dr.fone
- For People Wanting to Mock GPS on Realme Narzo N55 Devices | Dr.fone
- Recover your photos after Honor Magic5 Ultimate has been deleted.
- Online signature for PDF v1.0 document
- 7 Ways to Unlock a Locked Vivo Phone
- How to Find iSpoofer Pro Activation Key On Vivo S18 Pro? | Dr.fone
- In 2024, Does find my friends work on Oppo A78 5G | Dr.fone
- In 2024, 5 Easy Ways to Copy Contacts from Vivo Y100 to iPhone 14 and 15 | Dr.fone
- Quick Fixes for Why Is My Xiaomi 14 Black and White | Dr.fone
- In 2024, How to Transfer Contacts from Tecno Spark 10C to Other Android Devices Using Bluetooth? | Dr.fone
- How To Update or Downgrade iPhone XS Without Losing Anything? | Dr.fone
- In 2024, The Best Methods to Unlock the iPhone Locked to Owner for iPhone 15 Pro Max
- New Learn How to Create Adobe 3D Animation for 2024
- How do I play MKV movies on Samsung Galaxy A34 5G?
- In 2024, The Ultimate Guide How to Bypass Swipe Screen to Unlock on Realme V30T Device
- In 2024, Ways to stop parent tracking your Realme 11 Pro+ | Dr.fone
- Fixing Foneazy MockGo Not Working On Asus ROG Phone 7 Ultimate | Dr.fone
- How to Retrieve deleted photos on Reno 11 Pro 5G
- How To Restore a Bricked Asus ROG Phone 8 Back to Operation | Dr.fone
- Still Using Pattern Locks with Nokia C12 Plus? Tips, Tricks and Helpful Advice
- How To Fix Unresponsive Phone Touchscreen Of Oppo A18 | Dr.fone
- In 2024, Rootjunky APK To Bypass Google FRP Lock For Vivo V29
- How to Come up With the Best Pokemon Team On Realme GT 5 (240W)? | Dr.fone
- In 2024, Full Guide to Fix iToolab AnyGO Not Working On Honor Play 8T | Dr.fone
- In 2024, How to Unlock Poco F5 Pro 5G Bootloader Easily
- Full Guide on Mirroring Your Samsung Galaxy S23 FE to Your PC/Mac | Dr.fone
- In 2024, How to Spy on Text Messages from Computer & Vivo V30 | Dr.fone
- Title: New In 2024, Overview of FPS for YouTube Videos
- Author: Morgan
- Created at : 2024-04-24 01:07:03
- Updated at : 2024-04-25 01:07:03
- Link: https://ai-video-editing.techidaily.com/new-in-2024-overview-of-fps-for-youtube-videos/
- License: This work is licensed under CC BY-NC-SA 4.0.
