
:max_bytes(150000):strip_icc():format(webp)/d-link-default-password-list-2619152-d6281a924f45426f879c8707220ce92d.png)
New In 2024, Ultimate Guide on Converting Word to SRT
Ultimate Guide on Converting Word to SRT
Seems like there is no direct way to convert words into an SRT file, a format compatible with all the devices. Still, users are finding a way to convert docs into SRT. You can convert Docx into SRT by using reliable and proper converting software.
We’ll help you find a simple and easy way to convert. This article will give you the ultimate guide on converting words into SRT files.
Before diving deep into the article, let’s first understand what SRT is.
Part 1: What is SRT?
An SRT is one of the most common formats used in subtitling or captioning files. ‘SRT’ refers to a ‘SubRip Subtitle’ file, which originated from the DVD-ripping software by the same name. SubRip would extract or rip subtitles and timings from live video, recorded video, and DVDs.
SRT has four major components:
- A numeric counter indicates the number or position of the subtitle.
- A Start and end time of the subtitle which is separated by the characters.
- A Subtitle in one or more lines.
- A blank line indicates the ending of the subtitle.
Now that you know about SRT let’s understand why you should convert your Word file to SRT.
Part 2: Why Should You Convert Word to SRT?
Most subtitles on the Internet are distributed in SRT format. Moreover, media players, lecture capture software, and video recording software are compatible with the SRT format.
Also, user frequently asks from forum like:
“I received a docx. file with subtitles already translated and the corresponding YouTube video URL. I was asked to proofread and then embed the subtitles into the video.”
To solve this, you can not only save it as a TXT document and change the file extension to .SRT, but also, a much easier way, convert subtitles from Microsoft Word files to SRT format through a easy-to-use SRT converter.
Part 3: How to Convert a Word file to an SRT file without the software?
Before we dive into the concrete steps guide, here are things we need to be considered:
Timestamp issue
Timestamps identify the exact point in an audio or video where the given text was spoken.
Now we know what a timestamp is and why it’s important. Let’s find out how to add timestamps in the SRT file.
How to add timestamps:
There are two ways to add timestamps in the file.
- Either add timestamps manually in the word document.
To write timecodes, the format used is Hours:minutes:seconds,milliseconds and milliseconds being rounded to 3 decimal places. Separate each timestamp with a two-hash arrow (written as - ->) and a blank line indicates the next caption sequence. After saving, these files are named with .srt extension.
- Or edit the SRT file after creating it using a video editor which has the ability to edit SRT.
You can also edit the SRT file after creating it by using video editing software such as Happy Scribe’s . It has audio-to-text/video-to-text feature that includes multiple timestamps options.
Language Conversion Feature of SRT file
You can use this to convert each line of your subtitles from one language to another. It also supports language conversion between English, French, German, Italian, Japanese, etc. It’s an easy process.
In any of the two cases mantioned above, you need to convert Word document in to SRT. Let’s find out how can you do that without using any software.
Follow the below steps to convert a word file to SRT without any software.
Step1 Open your Docx file
For this, open the word document you want to convert.
Step2 Change it to a .TXT document
Then from the left corner, Click on File>save as> and select the “Text” to convert it.

Step3 Save an SRT file
After converting it into a TXT (text) document, rename it by replacing the suffix “Txt ‘’ with “SRT .’’
If you do not see the extension in the name of the file,
- Go to the top menu in Windows Explorer
- Go to view
- Click on the check box for “File name extensions”

Now you can easily change the extension from Txt to SRT.

Through this extension, you’ll be able to convert a Word document into SRT format without having any software.
Sometimes users face complications while converting Word to SRT without any software. Therefore, it’s better to convert Word to SRT files with the software. In the next point, we’ll explain it in detail about it.
Part 4: An Alternative Way to Convert a Word file to an SRT file
If you want to convert a word document into SRT format, the above method is straightforward without wasting time. But sometimes, it shows errors.
You might be looking for software through which you can make desired changes and edit it according to your own will. Without software, it’s impossible.
There are tons of converting software available. You can use them to transform your word file not only but also into multiple formats. You can also make changes the way you want.
We’ll guide you on converting Docx into SRT by illustrating the detailed features of one of the best converters, MConverter .
MConverter
It is an online video converter application that allows you to convert your documents, videos, audio, and images into any format. The batch can convert large files up to 200 MB. You can directly choose files to convert from other apps through their Share menu.

This software supports all popular file formats: convert in bulk between most video, audio, image, e-book, office, and archive formats. The good thing about MConverter is the browser extension. It allows you to install the extension and convert files without any hassle.
You have to right-click on the image, video, and audio to extract it automatically and then convert it to the desired format. Also, it ensures security through SSL. MConverter is also available for mobiles in the form of applications. You can get the application for Windows 10/11.
Before diving deep into how it works, let’s look at its features.
Features:
- You can also convert multiple files, including SRT, SSA, AAS, etc.
- It provides you with commendable security.
- It is cross-platforms compatible, you can use it on Windows, Android, Mac, Web, etc.
- It enables you to convert any file whenever you want, such as audio, video, image, document, etc.
Now you’ll be aware of MConverter. In the next point, we’ll discuss how to convert docs into SRT.
How to convert docs into SRT with MConverter
You convert TXT to SRT with MConverter in three easy steps without hassle. These are as follows:
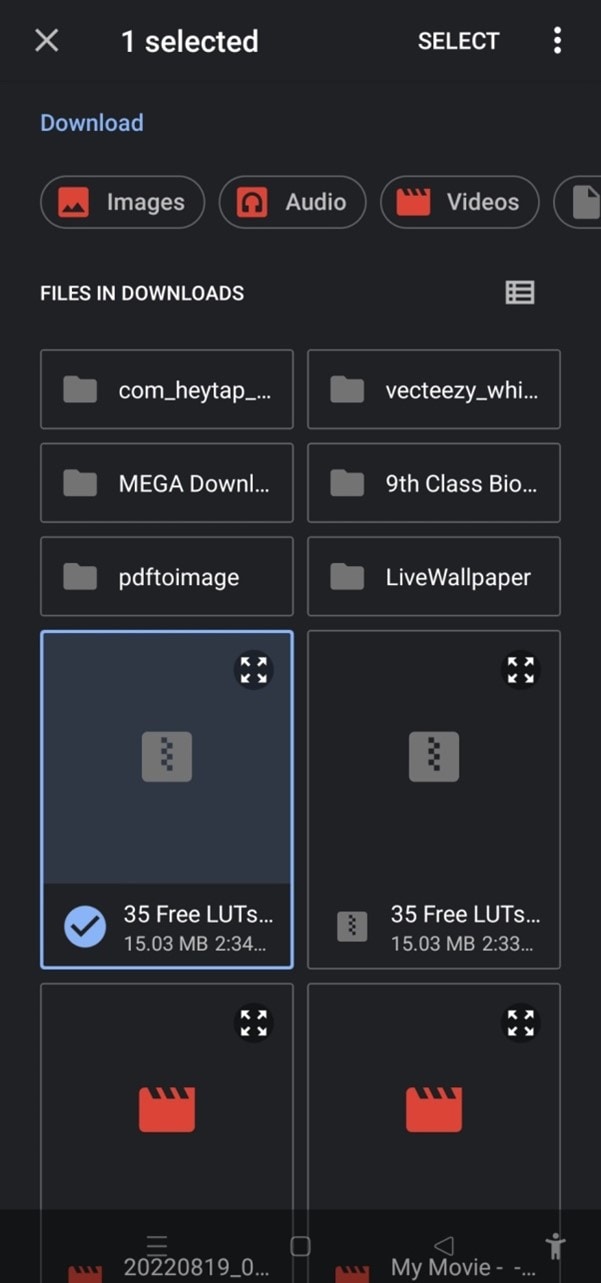
Step1 Choose Txt files from your device
From the top of this page, drag and drop your texts. Then select text files using your operating system’s file picker. Another way is to press the keyboard shortcut CTRL (⌘+V on Mac) to paste a file (txt) you have copied to the clipboard. Converting TXT files to SRT is also supported: simply paste or drag and drop it.
Step2 Click or tap on SRT from the list of target formats
Alternatively, you can also use the search field to quickly find the form you need, whether it’s SRT or something else.

Step3 After MConverter has finished processing
Download your SRT files. There’ll also be an option to download the converted SRT files automatically, so you don’t need to click the download icon for each SRT file.
On desktop platforms, by clicking on “Save to,” you can download the SRT files to a different folder. You will see a share icon as well. You can use it to directly share the SRT files with other apps.

Besides this, every software has advantages as well as disadvantages. Before using this software, you should know about its pros and cons. Let’s discuss it.
Pros
- It allows you to drag and drop entire folders for bulk conversion
- There is no need to sign up or use an email account
- MConverter can recognize corrupted and missing file extensions
- You can also delete your files instantly if you want
Cons
- It’s unable to detect whether the uploaded file is an image, document, or any other file
- No full-screen ads
As we’ve explained the method to convert Word into SRT format, now we need to edit it. To edit the converted file, all we need is good editing software. In the next point, we’ll discuss it.
Part 5: How to Merge and Edit Subtitles with Videos after Converting from Word
After converting the Word into SRT, you can also edit and merge subtitles, but for this, you’ll require software having multiple features. Multiple editing software will allow you to integrate and edit files after converting. But one of the best among them is Wondershare Filmora.
SRT files can be exported by other tools and can be imported into Filmora for further editing.
Wondershare Filmora:

It is a video editing software that allows you to create and edit amazing videos. It includes products for a range of users, from beginners to intermediates.
One of the reasons for its popularity is that it offers a wide range of features, including the ability to convert Word documents to SRT format.
If you are new to video editing, then Wondershare Filmora can be an excellent software to kick off a start. But, before sticking to this software, you must be aware of Filmora’s features.
Features of Wondershare Filmora:
- Support SRT file styling and editing including fonts, shadow, bold, italics, etc.
- Except for text editing, it also has stock media for video and audio resource.
- Enable you to use Motion Tracking, Speed Ramping and Keyframing like a pro.
- Creative transitions effects, Chroma Key (Green Screen) & Mask and Blend to your content.
- Convert the video and audio into multiple formats.
If you edit videos regularly then Filmora is best for you. Now let us walk you through the ultimate guide on how to merge and edit subtitles through Filmora. Follow the below steps to edit the converted file: SRT from word.
Free Download For Win 7 or later(64-bit)
Free Download For macOS 10.14 or later
Step1 Import the SRT subtitle files directly from the Media resource area.
Step2 Then, right-click on the timeline and select Advanced Edit or double-click the selected SRT file to clip.

You can perform the following editing operations:
- Edit the time code.
- Change the subtitles.
- Add/remove/merge the subtitle strips.
- Also, change subtitle styles (same as Filmora Advanced Edit Text)

Step3 In the end, Select the SRT file on the timeline, right-click and select Export Subtitle File.

Now you know the method of editing converted SRT files, let’s discuss the advantages and disadvantages of Filmora.
Pros
- Intuitive and easy to use interface
- Faster rendering of resource, like videos, audios, and effects
- A one-stop solution for both text, audio, video editing
- Amazing video output, 4k supported
Cons
- Only support SRT subtitles importing and editing for now
- Free version contains watermarks
- Frequent Lagging
Conclusion
As clear from the above-mentioned information, an SRT file is a plain-text file containing critical subtitles information. We’ve provided you with a complete guide on how to convert the word document into SRT.
Sometimes conversion doesn’t work without any software. For this, MConverter is the best of all. It allows you to convert your word file into the SRT files with easy steps.
After converting, you’ll need software to edit or merge the subtitles. It is time-consuming and challenging for everyone to find software that fulfills your requirements.
But no need to worry; we’ve provided you with the details of Wondershare Filmora . Give it a try.
- MConverter
- How to convert docs into SRT with MConverter
- How to Merge and Edit Subtitles with Videos after Converting from Word
Part 1: What is SRT?
An SRT is one of the most common formats used in subtitling or captioning files. ‘SRT’ refers to a ‘SubRip Subtitle’ file, which originated from the DVD-ripping software by the same name. SubRip would extract or rip subtitles and timings from live video, recorded video, and DVDs.
SRT has four major components:
- A numeric counter indicates the number or position of the subtitle.
- A Start and end time of the subtitle which is separated by the characters.
- A Subtitle in one or more lines.
- A blank line indicates the ending of the subtitle.
Now that you know about SRT let’s understand why you should convert your Word file to SRT.
Part 2: Why Should You Convert Word to SRT?
Most subtitles on the Internet are distributed in SRT format. Moreover, media players, lecture capture software, and video recording software are compatible with the SRT format.
Also, user frequently asks from forum like:
“I received a docx. file with subtitles already translated and the corresponding YouTube video URL. I was asked to proofread and then embed the subtitles into the video.”
To solve this, you can not only save it as a TXT document and change the file extension to .SRT, but also, a much easier way, convert subtitles from Microsoft Word files to SRT format through a easy-to-use SRT converter.
Part 3: How to Convert a Word file to an SRT file without the software?
Before we dive into the concrete steps guide, here are things we need to be considered:
Timestamp issue
Timestamps identify the exact point in an audio or video where the given text was spoken.
Now we know what a timestamp is and why it’s important. Let’s find out how to add timestamps in the SRT file.
How to add timestamps:
There are two ways to add timestamps in the file.
- Either add timestamps manually in the word document.
To write timecodes, the format used is Hours:minutes:seconds,milliseconds and milliseconds being rounded to 3 decimal places. Separate each timestamp with a two-hash arrow (written as - ->) and a blank line indicates the next caption sequence. After saving, these files are named with .srt extension.
- Or edit the SRT file after creating it using a video editor which has the ability to edit SRT.
You can also edit the SRT file after creating it by using video editing software such as Happy Scribe’s . It has audio-to-text/video-to-text feature that includes multiple timestamps options.
Language Conversion Feature of SRT file
You can use this to convert each line of your subtitles from one language to another. It also supports language conversion between English, French, German, Italian, Japanese, etc. It’s an easy process.
In any of the two cases mantioned above, you need to convert Word document in to SRT. Let’s find out how can you do that without using any software.
Follow the below steps to convert a word file to SRT without any software.
Step1 Open your Docx file
For this, open the word document you want to convert.
Step2 Change it to a .TXT document
Then from the left corner, Click on File>save as> and select the “Text” to convert it.
Step3 Save an SRT file
After converting it into a TXT (text) document, rename it by replacing the suffix “Txt ‘’ with “SRT .’’
If you do not see the extension in the name of the file,
- Go to the top menu in Windows Explorer
- Go to view
- Click on the check box for “File name extensions”
Now you can easily change the extension from Txt to SRT.
Through this extension, you’ll be able to convert a Word document into SRT format without having any software.
Sometimes users face complications while converting Word to SRT without any software. Therefore, it’s better to convert Word to SRT files with the software. In the next point, we’ll explain it in detail about it.
Part 4: An Alternative Way to Convert a Word file to an SRT file
If you want to convert a word document into SRT format, the above method is straightforward without wasting time. But sometimes, it shows errors.
You might be looking for software through which you can make desired changes and edit it according to your own will. Without software, it’s impossible.
There are tons of converting software available. You can use them to transform your word file not only but also into multiple formats. You can also make changes the way you want.
We’ll guide you on converting Docx into SRT by illustrating the detailed features of one of the best converters, MConverter .
MConverter
It is an online video converter application that allows you to convert your documents, videos, audio, and images into any format. The batch can convert large files up to 200 MB. You can directly choose files to convert from other apps through their Share menu.
This software supports all popular file formats: convert in bulk between most video, audio, image, e-book, office, and archive formats. The good thing about MConverter is the browser extension. It allows you to install the extension and convert files without any hassle.
You have to right-click on the image, video, and audio to extract it automatically and then convert it to the desired format. Also, it ensures security through SSL. MConverter is also available for mobiles in the form of applications. You can get the application for Windows 10/11.
Before diving deep into how it works, let’s look at its features.
Features:
- You can also convert multiple files, including SRT, SSA, AAS, etc.
- It provides you with commendable security.
- It is cross-platforms compatible, you can use it on Windows, Android, Mac, Web, etc.
- It enables you to convert any file whenever you want, such as audio, video, image, document, etc.
Now you’ll be aware of MConverter. In the next point, we’ll discuss how to convert docs into SRT.
How to convert docs into SRT with MConverter
You convert TXT to SRT with MConverter in three easy steps without hassle. These are as follows:
Step1 Choose Txt files from your device
From the top of this page, drag and drop your texts. Then select text files using your operating system’s file picker. Another way is to press the keyboard shortcut CTRL (⌘+V on Mac) to paste a file (txt) you have copied to the clipboard. Converting TXT files to SRT is also supported: simply paste or drag and drop it.
Step2 Click or tap on SRT from the list of target formats
Alternatively, you can also use the search field to quickly find the form you need, whether it’s SRT or something else.
Step3 After MConverter has finished processing
Download your SRT files. There’ll also be an option to download the converted SRT files automatically, so you don’t need to click the download icon for each SRT file.
On desktop platforms, by clicking on “Save to,” you can download the SRT files to a different folder. You will see a share icon as well. You can use it to directly share the SRT files with other apps.
Besides this, every software has advantages as well as disadvantages. Before using this software, you should know about its pros and cons. Let’s discuss it.
Pros
- It allows you to drag and drop entire folders for bulk conversion
- There is no need to sign up or use an email account
- MConverter can recognize corrupted and missing file extensions
- You can also delete your files instantly if you want
Cons
- It’s unable to detect whether the uploaded file is an image, document, or any other file
- No full-screen ads
As we’ve explained the method to convert Word into SRT format, now we need to edit it. To edit the converted file, all we need is good editing software. In the next point, we’ll discuss it.
Part 5: How to Merge and Edit Subtitles with Videos after Converting from Word
After converting the Word into SRT, you can also edit and merge subtitles, but for this, you’ll require software having multiple features. Multiple editing software will allow you to integrate and edit files after converting. But one of the best among them is Wondershare Filmora.
SRT files can be exported by other tools and can be imported into Filmora for further editing.
Wondershare Filmora:
It is a video editing software that allows you to create and edit amazing videos. It includes products for a range of users, from beginners to intermediates.
One of the reasons for its popularity is that it offers a wide range of features, including the ability to convert Word documents to SRT format.
If you are new to video editing, then Wondershare Filmora can be an excellent software to kick off a start. But, before sticking to this software, you must be aware of Filmora’s features.
Features of Wondershare Filmora:
- Support SRT file styling and editing including fonts, shadow, bold, italics, etc.
- Except for text editing, it also has stock media for video and audio resource.
- Enable you to use Motion Tracking, Speed Ramping and Keyframing like a pro.
- Creative transitions effects, Chroma Key (Green Screen) & Mask and Blend to your content.
- Convert the video and audio into multiple formats.
If you edit videos regularly then Filmora is best for you. Now let us walk you through the ultimate guide on how to merge and edit subtitles through Filmora. Follow the below steps to edit the converted file: SRT from word.
Free Download For Win 7 or later(64-bit)
Free Download For macOS 10.14 or later
Step1 Import the SRT subtitle files directly from the Media resource area.
Step2 Then, right-click on the timeline and select Advanced Edit or double-click the selected SRT file to clip.
You can perform the following editing operations:
- Edit the time code.
- Change the subtitles.
- Add/remove/merge the subtitle strips.
- Also, change subtitle styles (same as Filmora Advanced Edit Text)
Step3 In the end, Select the SRT file on the timeline, right-click and select Export Subtitle File.
Now you know the method of editing converted SRT files, let’s discuss the advantages and disadvantages of Filmora.
Pros
- Intuitive and easy to use interface
- Faster rendering of resource, like videos, audios, and effects
- A one-stop solution for both text, audio, video editing
- Amazing video output, 4k supported
Cons
- Only support SRT subtitles importing and editing for now
- Free version contains watermarks
- Frequent Lagging
Conclusion
As clear from the above-mentioned information, an SRT file is a plain-text file containing critical subtitles information. We’ve provided you with a complete guide on how to convert the word document into SRT.
Sometimes conversion doesn’t work without any software. For this, MConverter is the best of all. It allows you to convert your word file into the SRT files with easy steps.
After converting, you’ll need software to edit or merge the subtitles. It is time-consuming and challenging for everyone to find software that fulfills your requirements.
But no need to worry; we’ve provided you with the details of Wondershare Filmora . Give it a try.
How to Livestream Zoom on Facebook?
Abundant Video Effects - Wondershare Filmora
Provide abundant video effects - A creative video editor
Powerful color correction and grading
Detailed tutorials provided by the official channel
There are numerous ways to connect with viewers across the globe through online platforms. One such platform is Facebook live stream videos through which a single person can connect with the whole world and can talk to the people live. Through live stream videos on Facebook, people can show cooking or makeup tutorials that millions of people can join to watch easily.
Also, through such videos, many teachers prefer to demonstrate a particular concept so that students can respond instantly. However, if you want a clearer vision for better understanding, you can zoom on Facebook live stream videos by reading instructions from this article.
In this article
Part 1: Zoom in Facebook Livestream from Browser
Part 2: How to Zoom in Facebook Livestream on Android
Part 3: How to Zoom in Facebook Livestream on iPhone
Part 1: Zoom in Facebook Livestream from Browser
The easiest way to zoom in on Facebook Livestream videos is via browser. In this part, we will describe two methods for zooming in on Facebook Livestream videos that are manual and through a browser extension.
Method 1: Manual Method
In this first method, you can zoom on Facebook videos through your desktop manually. Read the following steps to perform this method:
Step 1: Open your Facebook account by entering your username and password. Now play the livestream video on which you want to zoom in.
Step 2: For Windows users, press the “CTRL” and “+” buttons simultaneously to zoom on the Facebook video. Whereas, for Mac users, press the “COMMAND” and “+” buttons at the same time to zoom in. A small pop-up window will display at the top right corner from where you can control the zoom value.

Method 2: Browser Extension
In this particular method, we will use a browser extension called “Zoom,” through which you can quickly enjoy the zoom experience on the Facebook live stream videos. This special browser extension is a lightweight extension that can assist you in browsing the web pages by zooming in and out conveniently. By using this extension, you can change the zoom value through its slider up to 400 easily.
Step 1: First, you need to install the browser extension of Zoom on your PC. Click on the “Add to Chrome” option to download and install this extension on your Chrome browser.

Step 2: Open your Facebook account and play your live stream video. On the top right corner, you can see the “Extension” icon where all your added extensions are pinned. Select Zoom extension, and through its displayed slider, you can increase the zoom value easily. You can also press the “+” button from your keyboard to zoom in on the Facebook video through this extension.

Part 2: How to Zoom in Facebook Livestream on Android
If you are watching live stream videos of Facebook on an Android device, you can also zoom in by modifying your phone’s settings. To do so, here are basic steps:
Step 1: From your Android phone, reach out to the “Settings” to open its menu. From this menu, find the option of “Accessibility” from “Additional Settings” and click on it.

Step 2: On the accessibility screen, tap on the option of “Vision” and then locate the section called “Display.”

Step 3: Now, find the option of “Magnification” and tap on it. Afterward, select the “Magnification Shortcut” and turn on the toggle of magnification.

Step 4: Now, go back to your Facebook account to use your accessibility feature. You have to first tap on the icon of the small person at the bottom right corner of your screen. Now you can tap anywhere on your screen to zoom in.

Step 5: To zoom in on a live stream video of Facebook, expand your two fingers by placing them on the screen. Thus you can easily zoom in on any specific part of the Facebook video easily. For zooming out, move your fingers in an inward direction to pinch the screen. Also, to zoom back into a default mode, click on the accessibility feature.

Part 3: How to Zoom in Facebook Livestream on iPhone
As Android devices give options to zoom in and out easily, iPhone users can also change their settings to use the accessibility feature quickly. To use the accessibility button on iPhone devices, use the following steps:
Step 1: On your iPhone, go to the “Settings” and scroll down its menu. Here you can find the option of “Accessibility,” so tap on it to open its menu.

Step 2: From the accessibility menu, locate the option of “Zoom” and click on it. Now tap on its toggle to turn it on.

Step 3: Afterward, click on “Zoom Region” and then tap the option of “Full Screen Zoom.” Now leave your settings and go back to your Facebook account.

Step 4: To zoom on Facebook portal, double-tap from your three fingers on any specific part of your screen that will activate the accessibility feature.
Step 5: To change the zoom value, you have to triple-tap the screen with your three fingers. Options will pop up from where you can use the magnifying slider to change the zoom level by either moving it to the right or left.

Step 6: If you want to navigate to any part of the screen while zoomed in, use your three fingers and move them around. Also, to return to the default value of the zoom, double-tap on any part of your screen using three fingers.
Conclusion
Facebook is the most popular app across the globe that offers a single and enhanced platform for sharing and posting various kinds of information. Through Facebook live stream videos, users can get details and related information instantly through a live video.
However, if you are struggling to catch a clear vision in live stream videos, you can zoom on Facebook app by using our provided guidelines in this article. Thus, you can have a clear and focused vision by zooming in on live stream videos on Facebook.
There are numerous ways to connect with viewers across the globe through online platforms. One such platform is Facebook live stream videos through which a single person can connect with the whole world and can talk to the people live. Through live stream videos on Facebook, people can show cooking or makeup tutorials that millions of people can join to watch easily.
Also, through such videos, many teachers prefer to demonstrate a particular concept so that students can respond instantly. However, if you want a clearer vision for better understanding, you can zoom on Facebook live stream videos by reading instructions from this article.
In this article
Part 1: Zoom in Facebook Livestream from Browser
Part 2: How to Zoom in Facebook Livestream on Android
Part 3: How to Zoom in Facebook Livestream on iPhone
Part 1: Zoom in Facebook Livestream from Browser
The easiest way to zoom in on Facebook Livestream videos is via browser. In this part, we will describe two methods for zooming in on Facebook Livestream videos that are manual and through a browser extension.
Method 1: Manual Method
In this first method, you can zoom on Facebook videos through your desktop manually. Read the following steps to perform this method:
Step 1: Open your Facebook account by entering your username and password. Now play the livestream video on which you want to zoom in.
Step 2: For Windows users, press the “CTRL” and “+” buttons simultaneously to zoom on the Facebook video. Whereas, for Mac users, press the “COMMAND” and “+” buttons at the same time to zoom in. A small pop-up window will display at the top right corner from where you can control the zoom value.
Method 2: Browser Extension
In this particular method, we will use a browser extension called “Zoom,” through which you can quickly enjoy the zoom experience on the Facebook live stream videos. This special browser extension is a lightweight extension that can assist you in browsing the web pages by zooming in and out conveniently. By using this extension, you can change the zoom value through its slider up to 400 easily.
Step 1: First, you need to install the browser extension of Zoom on your PC. Click on the “Add to Chrome” option to download and install this extension on your Chrome browser.
Step 2: Open your Facebook account and play your live stream video. On the top right corner, you can see the “Extension” icon where all your added extensions are pinned. Select Zoom extension, and through its displayed slider, you can increase the zoom value easily. You can also press the “+” button from your keyboard to zoom in on the Facebook video through this extension.
Part 2: How to Zoom in Facebook Livestream on Android
If you are watching live stream videos of Facebook on an Android device, you can also zoom in by modifying your phone’s settings. To do so, here are basic steps:
Step 1: From your Android phone, reach out to the “Settings” to open its menu. From this menu, find the option of “Accessibility” from “Additional Settings” and click on it.
Step 2: On the accessibility screen, tap on the option of “Vision” and then locate the section called “Display.”
Step 3: Now, find the option of “Magnification” and tap on it. Afterward, select the “Magnification Shortcut” and turn on the toggle of magnification.
Step 4: Now, go back to your Facebook account to use your accessibility feature. You have to first tap on the icon of the small person at the bottom right corner of your screen. Now you can tap anywhere on your screen to zoom in.
Step 5: To zoom in on a live stream video of Facebook, expand your two fingers by placing them on the screen. Thus you can easily zoom in on any specific part of the Facebook video easily. For zooming out, move your fingers in an inward direction to pinch the screen. Also, to zoom back into a default mode, click on the accessibility feature.
Part 3: How to Zoom in Facebook Livestream on iPhone
As Android devices give options to zoom in and out easily, iPhone users can also change their settings to use the accessibility feature quickly. To use the accessibility button on iPhone devices, use the following steps:
Step 1: On your iPhone, go to the “Settings” and scroll down its menu. Here you can find the option of “Accessibility,” so tap on it to open its menu.
Step 2: From the accessibility menu, locate the option of “Zoom” and click on it. Now tap on its toggle to turn it on.
Step 3: Afterward, click on “Zoom Region” and then tap the option of “Full Screen Zoom.” Now leave your settings and go back to your Facebook account.
Step 4: To zoom on Facebook portal, double-tap from your three fingers on any specific part of your screen that will activate the accessibility feature.
Step 5: To change the zoom value, you have to triple-tap the screen with your three fingers. Options will pop up from where you can use the magnifying slider to change the zoom level by either moving it to the right or left.
Step 6: If you want to navigate to any part of the screen while zoomed in, use your three fingers and move them around. Also, to return to the default value of the zoom, double-tap on any part of your screen using three fingers.
Conclusion
Facebook is the most popular app across the globe that offers a single and enhanced platform for sharing and posting various kinds of information. Through Facebook live stream videos, users can get details and related information instantly through a live video.
However, if you are struggling to catch a clear vision in live stream videos, you can zoom on Facebook app by using our provided guidelines in this article. Thus, you can have a clear and focused vision by zooming in on live stream videos on Facebook.
Something About Skin Care Vlog Ideas
One of the best kinds of video ideas for all the beauty gurus that they can make and upload on their YouTube Channel is the Skin Care. Reviewing products such as cosmetics, skin care and hair care products or any kind of lifestyle grooming products can be really beneficial for your viewers. Product advertisement is all over there and people are really confused and they wonder whether it is worthy enough or not if it is effective or not. That is when they take the help of internet and video to find their answer.
In this Article I’ll share to you some of the Skin Care vlog ideas for you to start doing a skin care review on your YouTube channel. But before that I’ll share with you how important is skin care?
1. How Important is Skin Care?
Good skin care is important for the following reasons: It helps your skin stay in good condition
You’re shedding skin cells throughout the day, so it’s important to keep your skin glowing and in good condition. A skin care routine is not just to help you look good, it’s essential for your skin’s health
That is why most people now a days are looking for a video or a vlog about skin care.
Here are some ideas to make for Skin Care Vlogs
- Daily Skin Care Routine Vlogs
- Skin Care Product Reviewing Vlogs
- Skin Care Unboxing Vlogs
- Empty Skin Care Vlogs
- Skin Care recommendation Vlogs
2. Daily Skin Care Routine Vlogs
This vlog can give your viewers an information on what skin care you use daily. Here you can share how you use it step by step and you can also share what products you are using for them to have an idea.
This may share to your viewers how important a daily skin care to their skin because an effective skin care may help prevent acne, treat wrinkles and help keep skin looking best.
The goal of sharing your skin care routine is to inform your viewer or subscriber the importance of taking care of your skin daily and also the good product you may use.

Daily Skin Care Routine Vlogs
3. Skin Care Product Review Vlogs
This vlog will give your viewers more knowledge about the products.
Now a days most people get all the information they want in watching YouTube videos. People often watch skin care reviews on YouTube first before they decide to buy. So, you must clearly provide a correct and honest information about the product. In reviewing a product especially skin care, you need to help the viewers understand all the information contained in the products, you must be very specific when you explaining.

Skin Care Product Review Vlogs
4. Skin Care Unboxing Vlogs
For those unfamiliar with the format, unboxing videos are when YouTubers share the unpacking of a special products. Unboxing videos are one of several formats native to YouTube that have grown up along with the YouTube generation. People wanted to share their enthusiasm for their new purchases such as beauty products or skin care products. Influencer or content creator unpacks new consumer products on camera while discussing the respective product’s features, branding, packaging, and other relevant details.
From this Vlog your viewers will have an idea what products look like or what brand of products they will buy.
5. Empty Skin Care Vlogs
I have personally watch other content creator doing this kind of vlog and for me it helps viewers to know more about beauty guru favorites skin care or their thoughts after using this kind of products.
In this vlog you will share to your audience why did you run out of products? how is the product to you, your experience while using the products, is it worth it for them to buy and if given a chance will you buy this product again? Because it is also important for them to know if the products are ok with your skin, especially sometimes the brand owner is watching the vlogs for them to have an idea about your thoughts of their products.
6. Skin Care Recommendation Vlogs
As a skin care vlogger, I often make this kind of vlog, I really enjoy doing this vlog specially when the products are effective to me, I really excited to share this information to my viewers.
Here in this vlog, you can show or recommend products that have been effective for you. Just explain in every detail how you used it and why it was effective for you. Also don’t forget your proofs of using the products, specially show them the before and after photos.

Skin Care Recommendation Vlogs
7. Choosing a Video Editing Software for You
If you’re looking for editor software that can help your skin care vlogs stand out from your competition Wondershare Filmora is one the easy-to-use editing software, a beginner in video editing can easily create a stunning and creative video.
Wondershare Filmora Video Editor has action camera tools that can fix any problem with camera, share and add effects like slow motion and reverse. These tools can really help with product review vlogs especially when doing skin care reviews.
Free Download For Win 7 or later(64-bit)
Free Download For macOS 10.14 or later

Choosing a Video Editing Software for You
It allows noise cancellation in the background of your audio so that your viewers can better understand what you are saying about the products. Doing a skin care product review is in need a clear audio because viewers focus on what your thoughts or opinion about the product for them to have some ideas.

Doing A Skin Care Product Review
Filmora has the ability to blur video, which you can use especially when you display products in the viewer, you need to blur the background to focus on the products you are showing.

Focus On The Products You Are Showing
Filmora provide the user an extraordinary feature to edit and export videos up to a resolution of 4k.
Wrap Up
- When doing any skin care vlogs, don’t forget to advice your viewers to always do a skin test before using new products, because maybe this product is effective for me and not for you, so make it a habit to do a skin test first.
- Hope this skin care vlog ideas will help you to start your own skin care vlogs or to have an idea what content you may do to start a vlogging career.
Free Download For macOS 10.14 or later
Choosing a Video Editing Software for You
It allows noise cancellation in the background of your audio so that your viewers can better understand what you are saying about the products. Doing a skin care product review is in need a clear audio because viewers focus on what your thoughts or opinion about the product for them to have some ideas.
Doing A Skin Care Product Review
Filmora has the ability to blur video, which you can use especially when you display products in the viewer, you need to blur the background to focus on the products you are showing.
Focus On The Products You Are Showing
Filmora provide the user an extraordinary feature to edit and export videos up to a resolution of 4k.
Wrap Up
- When doing any skin care vlogs, don’t forget to advice your viewers to always do a skin test before using new products, because maybe this product is effective for me and not for you, so make it a habit to do a skin test first.
- Hope this skin care vlog ideas will help you to start your own skin care vlogs or to have an idea what content you may do to start a vlogging career.
How to Use LUTs in VN Editor – Complete Guide and Best LUTs Download
Hello and welcome to another article full of information and excitement. The topic of this article is LUT for the VN editor. So it will be exciting for those who want to use LUTs in their video to make them look nice and well. As we will discuss today that what is VN editor and how you can add LUTs to your videos using it on the devices it is compatible for. Moreover, where you can download some fantastic LUTs like moody LUTs, which help your videos to look nice, and which software you should use for this purpose if you are running a device on which the VN editor is not compatible. So let’s begin!
Part 1. What is VN editor?
VN editor is one of the best choices for video editing on mobiles and Mac. Fast editing, transitions, effects, filters, colors, subtitles, music, and many other features make the VN video editing app a great tool for producing and editing videos. It aims to make editing shorter and more feature-rich, empowering everyone to take control of their own lives. You cannot only produce great videos but good films as well. In the following, we will discuss how you can add LUTs to your videos using it.

Part 2. How to use LUTs in VN editor?
First, we must know that it is compatible with which platforms. So, it is now available for Android, iOS, and Mac OS only. However, you can also use it on Windows with some Android or iOS emulators, but it is not a very continent way in our suggestions. Even after doing this, it does not work well on your Windows. Maybe you will face some glitches or malfunctioning problems. So it is better to use it on only those platforms for which it is primarily available. Please read the instructions below since we will go through how to use LUTs in it later on.
On Mac:
First of all, we will learn how you can do it on Mac:
- Download the VN Editor for Mac and open it.
- Add your video and then tap the filters option.
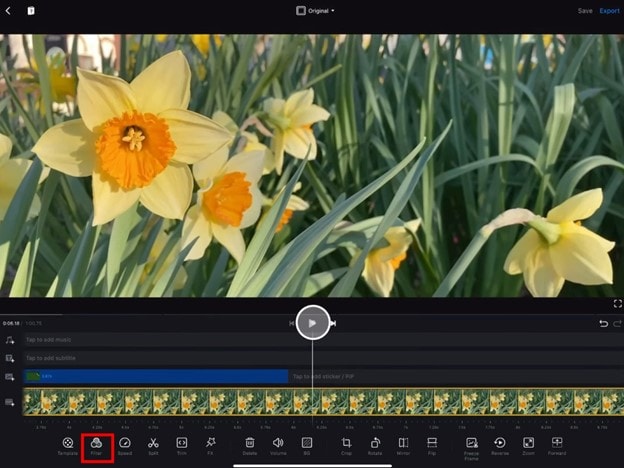
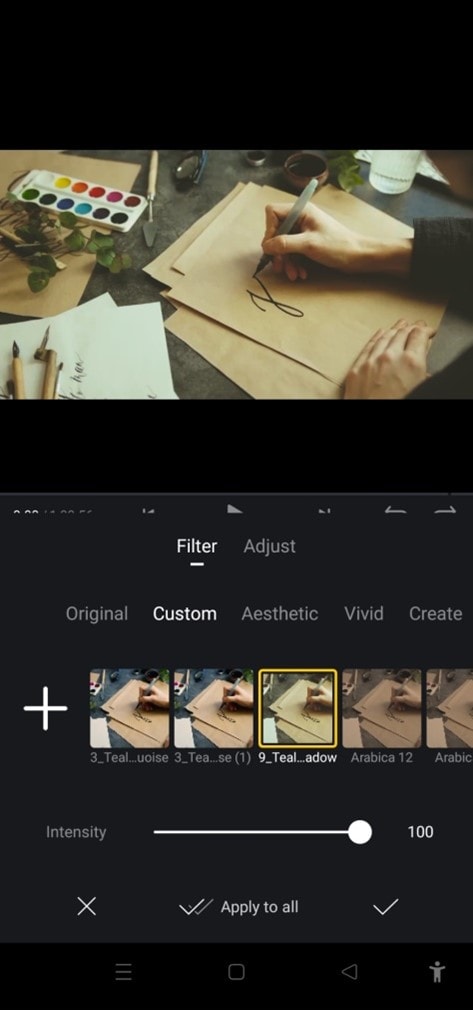
- Now choose custom filters and then select the LUTs pack.

- Select the desired LUT and apply.
On Mobile:
Secondly, we will discuss how we can do this on our mobiles (Android or iOS). The procedure on both devices (Android or iOS) is almost comparable. Therefore, we will discuss the steps from the perspective of both of these here:
- First, download the VN editor from your mobile app store (Android or iOS) and the LUTs pack you want to use in your video.
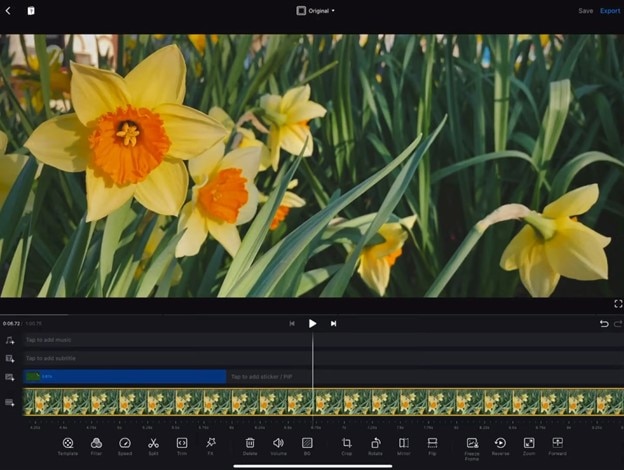
- After downloading them on your mobile, open the VN editor application.
- Create a new project and add your video to it.

- Then click on the Filters option and select add external or custom filters option next to the existing filters.
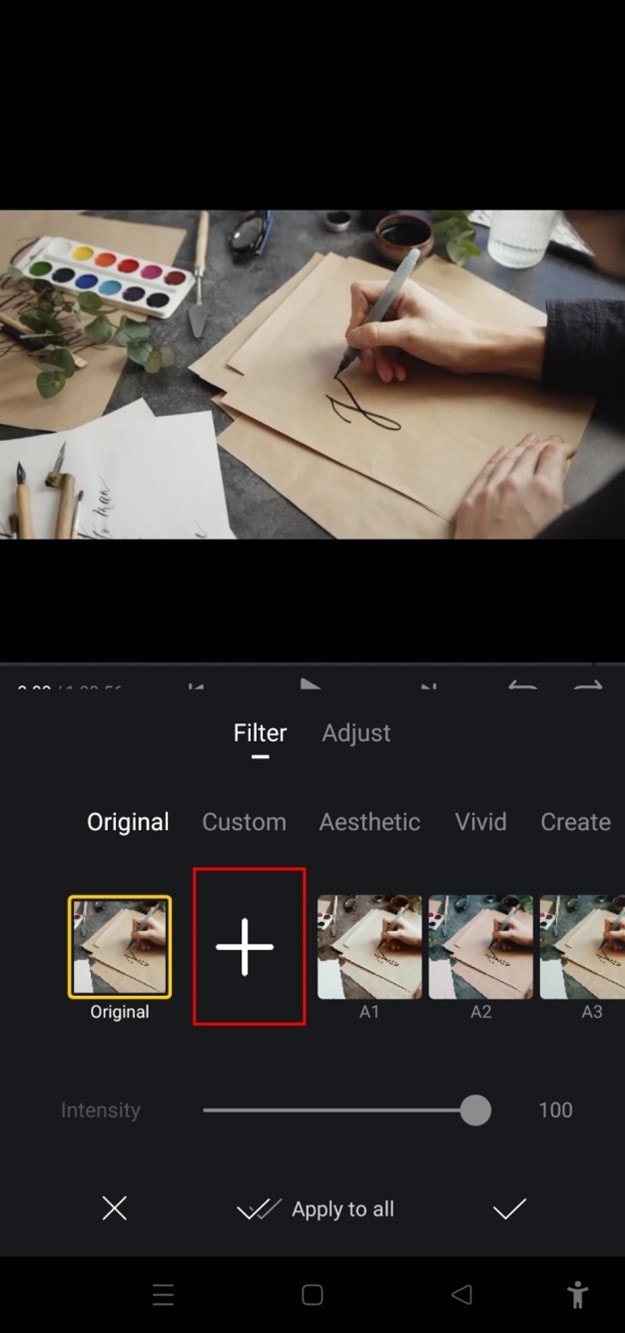
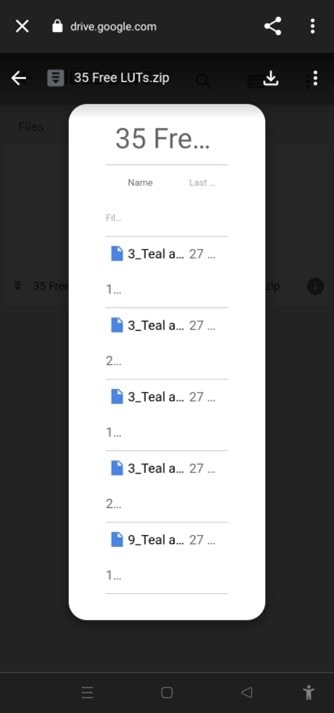
- It will take you to the File manager of your mobile, from which you have to find the folder in which you have stored your LUTs.
- After finding them, you can select those LUTs you want to use in your video and then click on the done or select button.
- Your downloaded LUTs start showing in the VN editor, and you can use them in your videos as you want.
Part 3. Best LUTs resource for VN video editor
1. Presets Store
Presets Store is an online platform that helps you with various Filters, LUTs, and other presets. So you can download LUTs for your videos for the VN editor using it. However, it’s not a free service. You have to pay for the LUTs you want to download from here. You can visit their YouTube channel to follow the latest LUTs, Filters and other presets on this platform.
2. Apna Editz
Apna Editz is another online platform you can use for this purpose. It also provides you with a fantastic variety of Presets like LUTs, Filters, and many other similar effects, which you can use in your video using the VN editor. The main Pros of this recommendation are that it’s a free website. So you can download LUTs for your videos from it for free. Keep an eye on their YouTube channel to be updated about the latest LUTs.
3. Lut Preset
Lut Preset is another alternative to all the above ones. You can get almost all your favorite LUTs for VN editor for free here and then use them in your videos as you want. They also share the latest LUTs on their YouTube Channel.
4. Pencil Hub
Pencil Hub is also a good option in this concern. However, it does not have too much variety of VN LUTs, but you can still use it to download some of the best LUTs for VN editors. To get informed of their every new effect and LUTs, their YouTube channel is the primary source.
5. YRP EDITZ
YRP ETIDZ is another good option if you are still looking for some fantastic VN LUTs. They, too not have a large variety of presets and LUTs. However, if you want some most commonly used LUTs for VN Editor, then they are a good option. You’ll notify of their most website updates by checking their YouTube channel.
Part 4. How to add LUTs to the best alternative to the VN editor?
VN Editor is undoubtedly an excellent choice to add LUTs to your videos. However, the VN editor is best suitable for mobile devices. To enhance your LUTs and effects, it would be great if you used some desktop software. Wondershare Filmora offers a great variety of built-in LUTs to choose from. Let’s look at how we can use Filmora to add LUTs:
- Add your video and tap the tools, then click the Color option.
- Now select the Color Correction option and then choose 3D LUT.
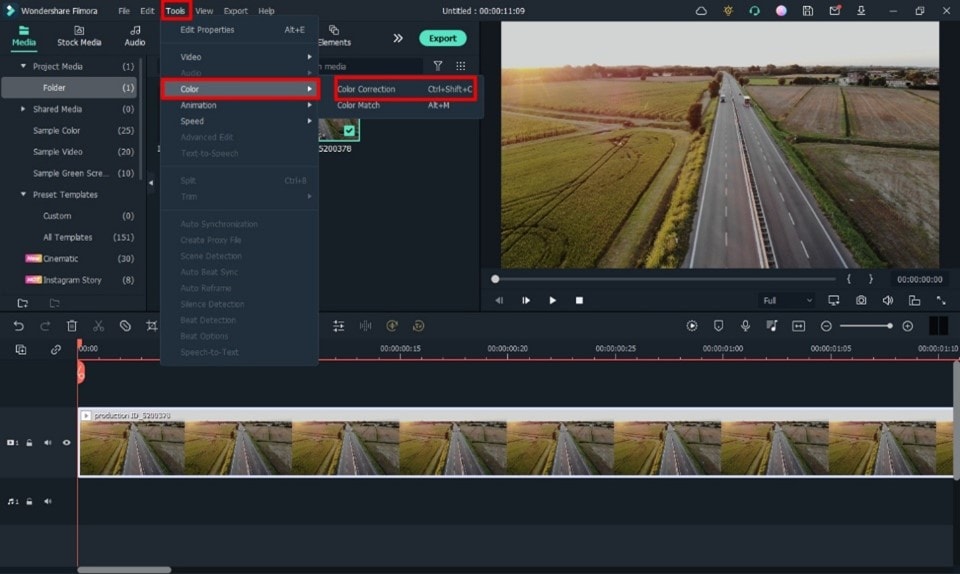
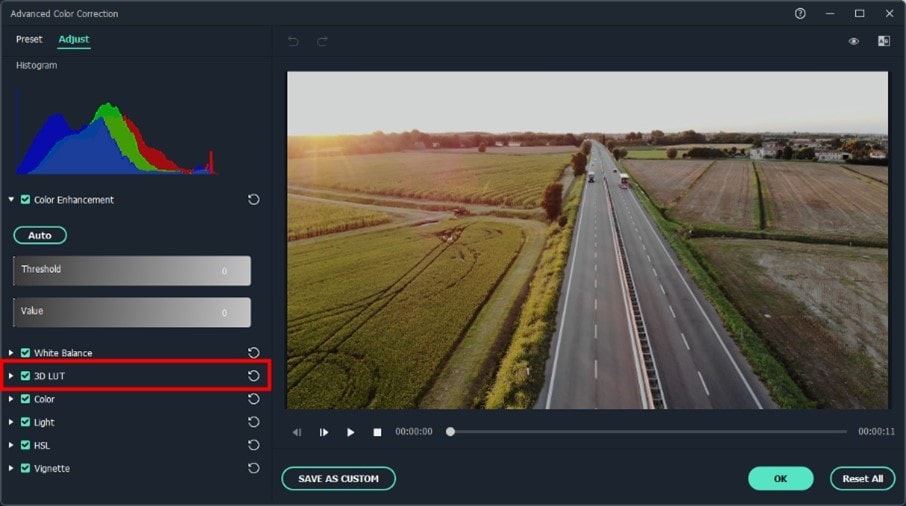
- Click the drop-down menu and select the Load new LUT option. Here you can import other downloaded preset LUTs to use
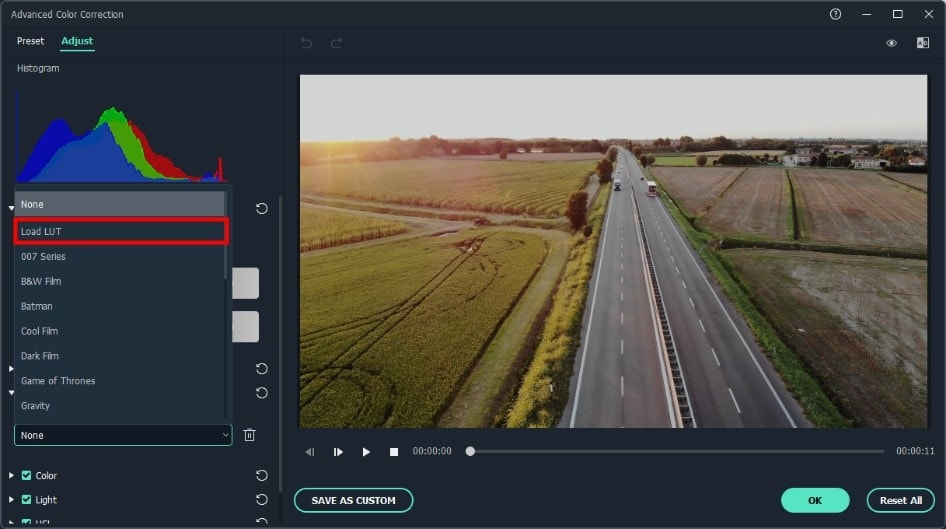
- Choose the LUT and click OK. Your new fantastic video is ready now.

Closing Thoughts
This post recommends several lut resources and demonstrates how to import them if you are a devoted user of VN editor and want to learn how to utilize it for video color grading. The more potent desktop editor Wondershare Filmora, which offers a range of built-in LUT sources and supports color grading settings, is of course recommended if you want to take your videos to the next level. Thanks for reading.
Free Download For Win 7 or later(64-bit)
Free Download For macOS 10.14 or later
2. Apna Editz
Apna Editz is another online platform you can use for this purpose. It also provides you with a fantastic variety of Presets like LUTs, Filters, and many other similar effects, which you can use in your video using the VN editor. The main Pros of this recommendation are that it’s a free website. So you can download LUTs for your videos from it for free. Keep an eye on their YouTube channel to be updated about the latest LUTs.
3. Lut Preset
Lut Preset is another alternative to all the above ones. You can get almost all your favorite LUTs for VN editor for free here and then use them in your videos as you want. They also share the latest LUTs on their YouTube Channel.
4. Pencil Hub
Pencil Hub is also a good option in this concern. However, it does not have too much variety of VN LUTs, but you can still use it to download some of the best LUTs for VN editors. To get informed of their every new effect and LUTs, their YouTube channel is the primary source.
5. YRP EDITZ
YRP ETIDZ is another good option if you are still looking for some fantastic VN LUTs. They, too not have a large variety of presets and LUTs. However, if you want some most commonly used LUTs for VN Editor, then they are a good option. You’ll notify of their most website updates by checking their YouTube channel.
Part 4. How to add LUTs to the best alternative to the VN editor?
VN Editor is undoubtedly an excellent choice to add LUTs to your videos. However, the VN editor is best suitable for mobile devices. To enhance your LUTs and effects, it would be great if you used some desktop software. Wondershare Filmora offers a great variety of built-in LUTs to choose from. Let’s look at how we can use Filmora to add LUTs:
- Add your video and tap the tools, then click the Color option.
- Now select the Color Correction option and then choose 3D LUT.
- Click the drop-down menu and select the Load new LUT option. Here you can import other downloaded preset LUTs to use
- Choose the LUT and click OK. Your new fantastic video is ready now.
Closing Thoughts
This post recommends several lut resources and demonstrates how to import them if you are a devoted user of VN editor and want to learn how to utilize it for video color grading. The more potent desktop editor Wondershare Filmora, which offers a range of built-in LUT sources and supports color grading settings, is of course recommended if you want to take your videos to the next level. Thanks for reading.
Free Download For Win 7 or later(64-bit)
Free Download For macOS 10.14 or later
Also read:
- New In 2024, This Article Will Address Your Questions About the Easiest Way to Turn a Blog Into a Podcast. Lets Begin with the Reasons Why You Should Do a Podcast
- In 2024, Time Bending Brilliance The Ultimate Slow Motion Video Makers
- Updated In 2024, 6 Instant Mp4 to GIF Online Tools
- In 2024, Do You Want to Add a Motion Blur Effect in Valorant? Read This Guide to Find Out How to Create a Motion Blur Effect in Valorant without Any Hassle
- Updated It Is Easy to Separate the Audio From the Video in DaVinci Resolve. But, to Avail of This Feature, You Need to Follow Proper Steps, and This Article Is All About It
- Updated Find Out the Best Animated Text Video Tools and Learn How to Animate Text in a Video in Simple Steps. Discover the Best Fonts to Animate Text Along with the Text Animation Templates for 2024
- 2024 Approved 2 Solutions to Crop a Video Using After Effects
- Updated 2024 Approved How to Create Photoshop GIF The Easy Way
- New How to Shoot Cinematic Footage From a Smartphone for 2024
- New Making Slow Motion Videos in Final Cut Pro The Best Methods
- If You Are a Free Video Editor Being a Windows User, VSDC Free Video Editor Is a Great Choice. But Is It the Best Video Editor You Should Use? Find Out From Our VSDC Free Video Editor Review
- Enhance Your Video Color Accuracy with Video Scopes for 2024
- Updated How to Make a Movie with Windows Movie Maker for 2024
- Discover the Ultimate LUTs for Wondershare Filmora Uncover the Answer for 2024
- In 2024, What Does It Mean to Color Grade Your Images, and Why Is It so Important? Does It Mean the Same Thing as a Color Correction? Read on to Gather All the Information You Need on Color Grading Photography
- Updated How to Change Aspect Ratio of Video for 2024
- New 2024 Approved Discover the Various Techniques of Video Framing, Which Involve Capturing the Essence of a Subject While Eliminating Distractions in the Background, Andlearn How to Apply Them Skillfully to Achieve Desired Results
- New In 2024, How To Make An Interactive Quiz Video? Step-by-Step Guide
- New 2024 Approved Do You Need to Make Your Video More Immersive? You Can Make It 60 FPS to Achieve That. And Here Are the 5 Best Tools that You Can Use
- New How to Change Video Thumbnail in Google Drive for 2024
- Updated Mastering DaVinci Resolve Scopes A Comprehensive Guide
- New Learn About Open Broadcaster Software and How to Perform Obs Color Correction. Also, Explore the Various Aspects of Color Correction Like Contrast, Brightness, Saturation, Among Others for 2024
- Track Mattes The Ultimate Guide For After Effects
- Updated If You Want to Record Video Streams on Windows or Mac Using FFmpeg, Read Our Guide and Learn How to Do This with Easy Step-by-Step Instructions
- New Do You Seek a Guide to Add Motion in Blender? This Article Explains the Blender Motion Blur Effect in Detail and Helps You Master It
- New Do You Need to Create a Video for Your Business Online but Feel You Do Not Have the Skill and Time to Do That? Try Out These AI Video Generators that Will Work for You to Carry Out Tasks Effectively
- New In 2024, What Are the 10 Best GIF Creator?
- In 2024, Simple Tricks Make 3D GIF Production of Inspiration Pop up Constantly
- New How to Make a Video Slideshow in iMovie for 2024
- New 2024 Approved Top 10 Online And PC Cartoon Video Maker 2022 For Beginner
- New 2024 Approved Best Options to Replace Sky of Any Photo Online + Offline
- Updated In 2024, Speed Control Is Frequently Used in Video Editing. By Speed up or Slow Down the Video Speed, You Can Achieve Different Visual Results. This Article Will Show You How to Control the Speed of a Video
- Srt File Creator for 2024
- Updated 2024 Approved Best Free Slow Motion Apps For Android and iPhone
- Xiaomi Data Recovery – recover lost data from Xiaomi Redmi Note 13 Pro 5G
- Best 3 Honor X9b Emulator for Mac to Run Your Wanted Android Apps | Dr.fone
- In 2024, The Best 8 Places for High-Quality Royalty Free Gifs
- The Best 8 VPN Hardware Devices Reviewed On Lava Blaze Curve 5G | Dr.fone
- How To Change Poco C50 Lock Screen Clock in Seconds
- In 2024, A Step-by-Step Guide on Using ADB and Fastboot to Remove FRP Lock from your Sony Xperia 10 V
- In 2024, How to Fake GPS on Android without Mock Location For your Lava Blaze Pro 5G | Dr.fone
- How to Upgrade iPhone 8 Plus without Data Loss? | Dr.fone
- In 2024, How to Change Lock Screen Wallpaper on Vivo Y100t
- Recover iPhone XS Max Data From iTunes Backup | Dr.fone
- Top 7 Phone Number Locators To Track Xiaomi Redmi Note 13 5G Location | Dr.fone
- How to Unlock T-Mobile Apple iPhone 6 Plus online without SIM Card?
- How to recover deleted contacts from 150 (2023).
- In 2024, Does Airplane Mode Turn off GPS Location On Vivo V29 Pro? | Dr.fone
- In 2024, Unlock Your Nubia Z50 Ultra Phone with Ease The 3 Best Lock Screen Removal Tools
- In 2024, Top 15 Apps To Hack WiFi Password On Vivo Y200e 5G
- How to Intercept Text Messages on Samsung Galaxy S23 FE | Dr.fone
- Updated The Best Translator to Translate Videos Online for 2024
- Android Screen Stuck General Samsung Galaxy A23 5G Partly Screen Unresponsive | Dr.fone
- MP4 Video Repair Tool - Repair corrupt, damaged, unplayable video files of Vivo Y27 5G
- In 2024, How to Reset Gmail Password on Realme 11X 5G Devices
- Top 10 AirPlay Apps in Oppo A78 5G for Streaming | Dr.fone
- How Tecno Spark 10 Pro Mirror Screen to PC? | Dr.fone
- How to Recover Deleted Photos from Android Gallery App on Nokia C22
- Undelete lost messages from Samsung Galaxy S23 Tactical Edition
- Title: New In 2024, Ultimate Guide on Converting Word to SRT
- Author: Morgan
- Created at : 2024-04-24 01:07:54
- Updated at : 2024-04-25 01:07:54
- Link: https://ai-video-editing.techidaily.com/new-in-2024-ultimate-guide-on-converting-word-to-srt/
- License: This work is licensed under CC BY-NC-SA 4.0.
