
:max_bytes(150000):strip_icc():format(webp)/coverjointwitter-6f13b51d1be04d8bb3f5221ef5a057c7.jpg)
New In 2024, Within the Realm of Graphic Editing, People Also Ask How to Add Emoji to Photo. Stay Tuned to Walk Through the Best Possible Solutions in the IT Market
Within the Realm of Graphic Editing, People Also Ask How to Add Emoji to Photo. Stay Tuned to Walk Through the Best Possible Solutions in the IT Market
Little Known Ways of Adding Emojis to Photos on iPhone & Android
An easy yet powerful editor
Numerous effects to choose from
Detailed tutorials provided by the official channel
Emojis are catchy graphic elements that can add life to your photos, videos and allied artworks within a wink. Be here to know about the most exciting how-tos!
In this article
01 [Best 6 Tools to Put Emojis on Pictures on iPhone](#Part 1)
02 [Best 6 Tools to Put Emojis on Pictures on Android](#Part 2)
03 [Best 5 Tools to Put Emojis on Pictures on Computer](#Part 3)
Part 1 Best 6 Tools to Put Emojis on Pictures on iPhone
Emojis have managed to secure enough significance in our social and professional lives across social media platforms in the current time. Be it a fun-filled conversation with friends and family on a chat service program, or a high end and professionally sound business strategy, these mini caricature pieces of graphic art can add the much needed highlight to almost every aspect of your digital communication concerns.
Now that you are aware of the utility of working with emojis to make your digital contents, let us take a dive into some of the best ways and means to make your iPhone images come alive in the following section:
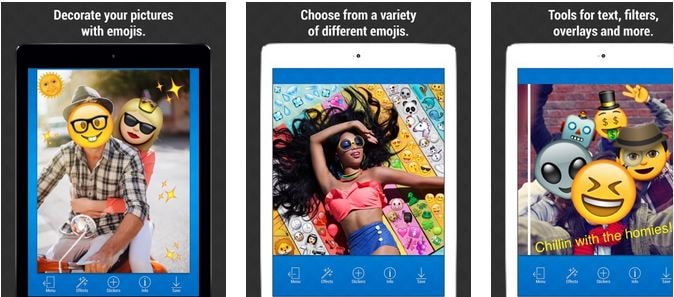
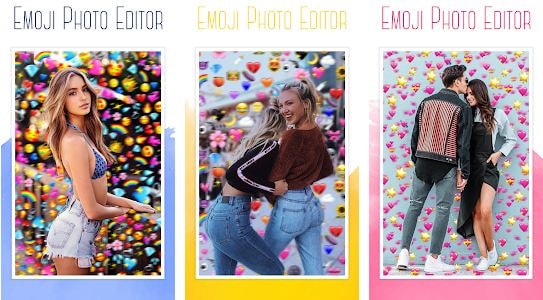
01Emoji Picture Editor- Add Emojis to Your Photos
If you like to imbibe the images on your iPhone media gallery with a hoard of funny and cool emojis, this one is a perfect app to address the concern. The tool’s library houses the latest collection of emoji categories to be in line with a diversity of photo styles, themes and backgrounds. You can take your pick from the huge inventory of over 1500 different emojis to level up your photos.
Talking about the app interface and usage controls, you are granted full liberty to add emojis to your emojis, while changing their positions through a finger drag, or scale and rotate them by expanding, pinching and twisting your fingers. The app additionally allows you to send bigger emoji stickers on chats and conversations.
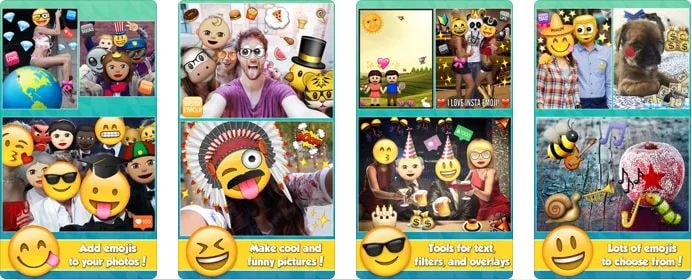
02Insta Emoji Photo Editor
When looking for an interesting and reliable application to set straight the concern of how to put emojis on pictures, the Insta Emoji Photo Editor is an affordable pick. Loaded with an enormous and updated emoji library, the app presents before you over 3200 fascinating emoji options to select from and add to your images.
The inclusion process is intuitively simple, with you just having to upload the desired images to the app’s working interface and choose from your most favorite emoji elements to make the stills come alive with added fun and spark. The app houses an interesting ’Emoji Paint’ feature for the extensively creative ones to let them create catchy drawings with the coolest emojis.
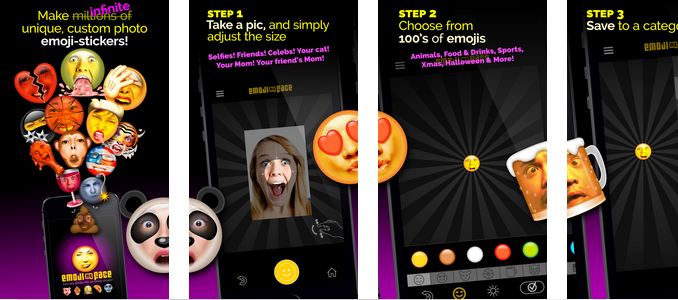
03Emoji My Face
Moving ahead in the list comes the aforesaid app, which you can conveniently rely on to get through the photo edit emoji task in less than a few seconds. What’s unique about the utility is its feature that lets you add emoji stickers on the faces of your image elements. Working with the app, you can transform the skinned appearances of your friends and family into hilarious emoji faces.
While the app permits you to pick any number of preferences from its latest and updated emoji collection, you can additionally, save and share your emoji centered image edits across a diversity of media sharing platforms and chat service programs.
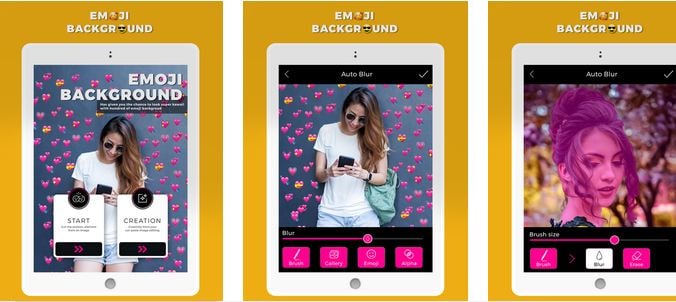
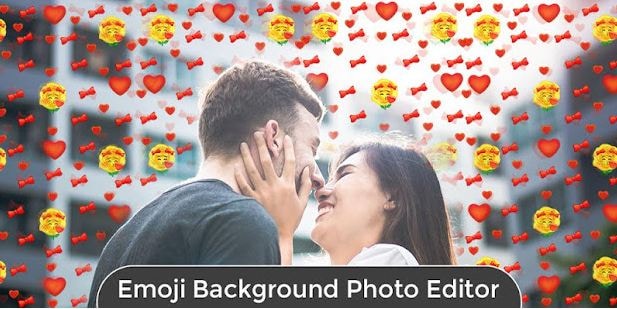
04Emoji Background Photo Maker
While there are hoards of IT alternatives to add emojis to pictures, the following utility caters to the concern in a slightly different style, ahead of just picking and pasting emojis to still captures. Working with the tool, you can experiment with changing the customary and fundamental image backgrounds into funny and appealing emoji centered themes. You are allowed to either work with a desired image from your iPhone’s media gallery, or take a fresh shot from your device’s camera, followed by uploading the same to the app’s editing interface.
Focusing on the tool’s expanse of usage features, you get tom work with a straightforward interface, and select from a wide variety of expressive and thematic emoji backgrounds. You can further, preview and save the edited images in HD quality, and share the same with friends and family across social media handles.
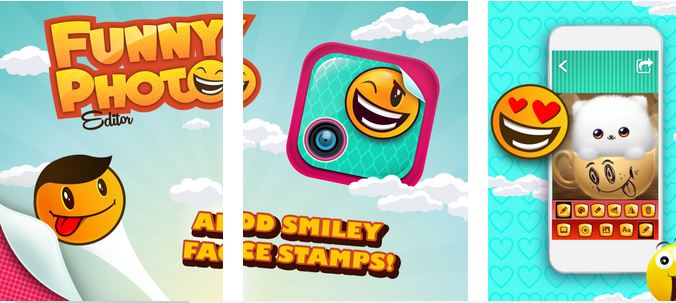
05Funny Photo Editor With Emoji Stickers Camera
This one is an innovative image editing tool that lets you create funny image transformations with classic emoji stickers, while addressing the query of how to add emojis to pictures. If your peer group consists of crazy creators who are selfie freaks, try hands at uplifting your live camera shots with this application by adding the funkiest emojis and sharing them across the regular communication platforms.
The app’s default camera feature lets you capture a straight forward image and convert the same into a hilarious edit with the latest range of free emoji stickers, caricature smileys and lots more. You can additionally beautify the edits with choosing from a decent range of emoji skin tones to suit the image background.
06Instamoji- Emoji Photo Editor
If you have been searching for an affordable solution to walk through the concern of , how to add emoji to photo on your iPhone, try working with the Instamoji application to highlight your customary images with classic emoji stickers and elements within the blink of an eye. The app welcomes you with a clean and intuitive interface to work upon, and is completely free to use.
Talking about the utility’s emoji centered image editing features, you are permitted to select from a decent collection of vibrant, funny and cool emojis, assorted under a diversity of categories to complement your images with, while exporting them across your digital communication accounts with utmost ease. The app promises you of the finest quality edited image output.
Part 2 Best 6 Tools to Put Emojis on Pictures on Android
Emojis are best known to spark up graphic artworks with an element of fun and entertainment. While the introduction of social media and digital communication utilities have brought emojis to the fingertips of modern day smartphone users, the IT market never lags behind at putting the latest transformations regarding emoji usage at your disposal.
Discussing along the line, let us talk about some interesting applications that address the concern of how to add an emoji to a photo using an Android device in what follows next:
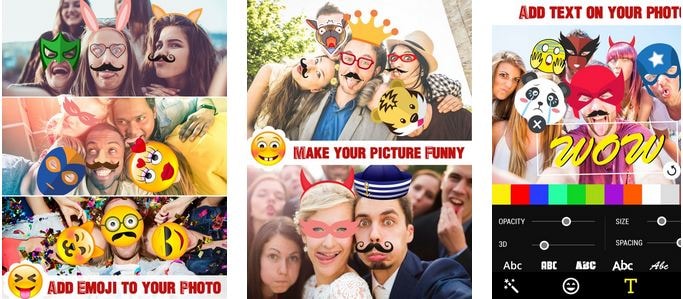
01Add Emoji Stickers- Pics Editor and Photo Maker
This one is a smart photo editing tool that you can choose to customize the otherwise ordinary images on the local media gallery of your Android smartphone. The app greets you with an extensive range of updated emoji alternatives to suit your most specific editing requirements for complementing your elementary photos with the perfect feel and emotion.
The emojis work to add the missing fun to your social media posts with image edits funny enough to make your peers roll over with laughter. Not just smiley faces, the app delivers to you a categorized set of emojis that are a perfect fit to any graphic theme. Some of the most preferred ones include Nature, Travel, Food & Drinks, and many more. So why wait? Just get the free utility and begin to edit and share!
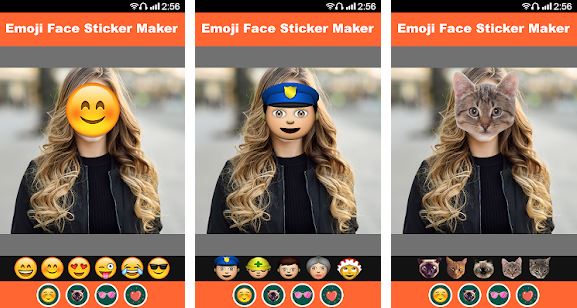
02Emoji Face Sticker
If you are creativity freak and love to experiment with your editing skills to put emoji on picture, try hands at working with this free image editor utility to add a fun element to your photos and give a laughter dose to your friends and family on social media. The app caters to transform your uploaded images faces to the cutest emoji look alike ever.
If that’s not enough, you can work with the app to change your smartphone’s regular camera into an emoji camera app that works to create the best caricature emoji montages from your snapped selfies. Navigating through the latte’s editing library, you will get to choose from among the craziest and coolest emoji stickers to create emoji photos out of normal stills. All in all, the app allows you to put forward your emotions in a relatively funnier way.
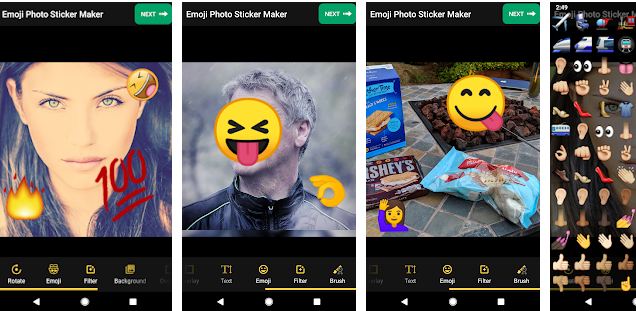
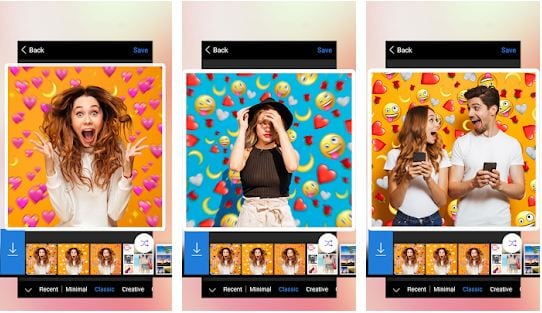
03Emoji Photo Editor
Are you bored of looking at those customary color backgrounds behind your images? Consider sparking them up with the cutest and most expressive emoji backgrounds. As you pick the app to edit your images, the latter grants you a complete access to its free emoji library that houses a decent collection of over 50 different emoji backgrounds to select from. A few of the most popular ones comprise of the flower and heart crown stickers, dog face camera among others.
Editing images within the app is seamless enough to last for a few seconds. You can use the created emoji background edits in a series of ways, like, preferring a local save or going for an image export to your favorite social media handle. Another cool way to show off your creativity can be making a device screen wallpaper of the emoji background image.
04Auto Face Stamp- Cover Face With Emoji
Looking forward to use an SNS services for media sharing purposes, but bothered about privacy concerns? While it is a common practice to share pictures via SNS and allied public platforms, most of us are often worried about keeping our faces hidden. Under normal circumstances, the face masking task is something you would ideally want to escape; the aforesaid app caters to the same in a funny and enjoyable manner.
Working with the utility, you can mask your image faces with over 100 different types of emoji stickers. The app aids you further in the task through its accurate face recognition ability that takes into consideration the smallest of faces with utmost precision. All you need to do is, select a desired emoji sticker and tap on the face you wish to mask with the same.
You can further, choose to directly export the masked images to media sharing handles right from the app’s editing workspace. The app is available to you absolutely free of cost and greets its users with a responsive working interface.

05Emoji Background Photo Editor
If the ordinary thematic backgrounds of your images do not suit you any longer, try working with this application to transmute the same into vibrant and expressive emoji alternatives. The aforesaid photo editing utility caters to make your images stand out of the crowd with beautiful emoji landscapes that render creative image edits of a matchless class, while maintaining a high-definition output image quality.
Extending the dimension of features to a longer stretch, the app grants you the liberty to adjust the position and transparency of the added emojis, set emoji frames and customize the emoji centered backgrounds with stunning effects and filters. As you finish with the editing process, the app lets you share your creations directly to a preferred social media platform, while also keeping them safe in your device’s local media gallery.
06Face Emoji Photo Effect
Reaching the end of the list, here comes the Face Emoji Photo Effect application that is all set to upgrade the level of your regular images with its classic and beautiful emoji backgrounds and stickers. The app’s editing library houses a diverse range of latest and elusive emojis to highlight your otherwise normal captures. The app additionally facilitates you with an expanded set of image editing features and effects to turn them into a graphic masterpiece.
The app welcomes you with a clean and responsive interface that makes the emoji inclusion process a quick and fun activity. All you need to do is, pick up an image from your locally saved alternatives and upload them to the app’s working interface, followed by browsing the latter’s emoji library to select a cohesive emoji background to complement the same.
You can further, download the premium emoji packs through a minimal payment to enhance the app’s library if the preset options do not match your requirements. The inbuilt emoji choices are however, free to work with.
Part 3 Best 5 Tools to Put Emojis on Pictures on Computer
All of us are familiar to and love using emojis everywhere, right from commenting on regular social media posts and chat service conversations, to creating professionally sound and strategic, business centered company presentations. While the most diverse use of these graphic utilities is reported on mobile devices, you may sometimes land across an instance that demands working with emojis on a computer.
Moving ahead with our discussion to address the aforesaid concern, let us talk about some of the prominent software and online solutions to set aside the issue of how to put emojis on photos while working on a computer in the upcoming section of this article:
01Kapwing
Entering into the domain of online image editing tools, the Kapwing website easily lands among the highly preferred choices. To address the concern of adding emojis to pictures on your PC or desktop systems, this one is an affordable tool to rely on. Talking of the underlying reasons behind the app’s high rated user preference, the latter allows you to access its huge inventory of emoji stickers, distributed across a heap of categories to choose from.
Next in the line is the tool’s spic and span editing process that lets you add and customize emojis on the uploaded images with a series of effects and filters in a matter of counted seconds. You can either pick and import images from your system, or work with the app’s in house emoji templates to edit the photos. As you are done with uploading images and adding emojis, proceed to place them at the desired position within the image.
The app allows you to add multiple emoji layers to the images by facilitating the creation of duplicate copies of your favorite emojis. Once you are done with the editing process, you are free to export your creation across media handles, or save them locally to your system.
02Editor.pho.to
If you are a newbie to the world of graphic editing and want to experiment with your creative skills to sort out the need of how to add an emoji to a picture, prefer landing on this free online website to work on your images. Considering the fact that not everyone around you is a tech savvy, the aforesaid online photo editing tool is designed to house the simplest of interfaces ever. The tool is available to you absolutely free of cost, without any unfair hidden purchases.
Ahead of the basic customization features, the tool grants you the freedom to expand your graphic skills on a wider canvas with presenting before you a plethora of emoji faces, stickers and backgrounds to complement the uploaded images with. Once you have added the emoji, the tool lets you work on the latter’s position and transparency adjustments, create emoji layers and overlays and save the edits to your system in a visibly high output quality.
03Add Emoji to Photo
When looking for dependable solutions to work towards the task of how to put an emoji on a photo, you can conveniently trust the aforementioned online tool to create classic emoji photo edits from the customary still alternatives son your computer. This one is a free to use image editor facility that allows you to decorate your otherwise unnoticed images with an extensive range of preset and custom emojis to make them expressive and speak out your emotions.
The tool caters to render a high definition edited image output within seconds through the simplest of customization processes. You just need to upload a desired image from your system to the tool’s working interface, followed by picking a suitable emoji from the tool’s editing library to add it to the image. If however, the available options don’t seem to address your specific requirements, you can proceed to create custom emojis of your own within the tool.
You can also create multiple emoji layers to add to the uploaded image and make adjustments to their transparency and position within the photo. As you finish the editing process, the tool grants you the liberty to download the customized image to your system in either of the PNG or JPG file formats.
04Image Online
Another entry into the list of solutions to answer the query of how to put emojis on a photo, the Image Online tool promises you of a quality constrained image editing process to complement the basic still captures in the local media gallery of your computer with the latest collection of emoji elements. Welcoming you with a decent interface, the tool caters to sort out your emoji centered picture editing requirements within a blink’s time.
To add emoji to image with this tool, you just need to upload the selected photo to the latter’s workspace, followed by selecting a preferred emoji from the editing library, or create a custom emoji of your own, to put on the image. You can customize the emoji settings in terms of position, size and transparency, and download the edits to your device in JPG and PNG image formats.
05Canva
Last in the list is the Canva graphic editing tool which you can conveniently work with to add an emoji to a picture. Having a slightly different image editing process in comparison to its online counterparts, the utility requires you to sign up to its working interface to begin editing your photos. To start with, you need to select a preset image template or pick customized dimensions to upload the desired image.
To add emojis to your picture, you will have to download the latter’s application by navigating to and tapping the ‘More’ icon, followed by choosing the ‘Emoji’ option from the drop down menu that appears next. Once the ‘Emoji’ tab shows up in the tool’s main interface, proceed to upload your image and pick a suitable emoji from the list to add to the uploaded image. You can further, add layers of emojis to the picture, while resizing and adjusting the skin tones of the same.

Part 4 Adding Emoji to Photo Q&A
● What is the total number of emoji characters till date?
As of September 2021, a total of 3,633 emojis are known to have been introduced so far. Talking of the latest emoji package, there comes the Emoji 14.0, adding 112 emoji variations to the existing count. The aforesaid is a cumulative figure, including the skin tone, gender and flag sequences.
● What are the different types of emoji categories?
During the current time, the emoji characterization is known to house 8 different categories, namely, Flags, Symbols, Objects, Travel, Activity, Food & Drink, Animals & Nature and Smileys & People.
● What is the difference between Emoji and Emoticons?
Emoticons are specifically, graphic interpretations of the various human emotions that come with a keyboard command combination. Emojis on the other hand, are a standard set of various characters, often having a different artwork, but a universal meaning.
● Is it possible to self-create custom emojis?
As of now, having self-created variants of emojis is not possible. If at all, you become successful in design a character that resembles an emoji, you can use it as an image at the most. In an attempt to share it as an emoji, you will end up sending text combinations.
● What is the best software alternative to add emojis to pictures?
When looking for an affordable software solution for catering to the concern of how to add emojis to a photo, you can go for picking the Wondershare Filmora Video Editor graphic editing program, whose editing library literally houses the largest and the latest collection of emoji categories and varieties for sparking up your images with the best possible customized appearance.
For Win 7 or later (64-bit)
For macOS 10.12 or later
● Ending Thoughts →
● Adding emojis to pictures has landed among the latest and most preferred graphic editing trends of current times.
● When beginning to address the concern of how do you add emojis to pictures, the IT market puts a diversity of software and online solutions before you.
● If you are confused about making the best choice, you can pick the Wondershare Filmora graphic editor program without having to think twice.
Emojis are catchy graphic elements that can add life to your photos, videos and allied artworks within a wink. Be here to know about the most exciting how-tos!
In this article
01 [Best 6 Tools to Put Emojis on Pictures on iPhone](#Part 1)
02 [Best 6 Tools to Put Emojis on Pictures on Android](#Part 2)
03 [Best 5 Tools to Put Emojis on Pictures on Computer](#Part 3)
Part 1 Best 6 Tools to Put Emojis on Pictures on iPhone
Emojis have managed to secure enough significance in our social and professional lives across social media platforms in the current time. Be it a fun-filled conversation with friends and family on a chat service program, or a high end and professionally sound business strategy, these mini caricature pieces of graphic art can add the much needed highlight to almost every aspect of your digital communication concerns.
Now that you are aware of the utility of working with emojis to make your digital contents, let us take a dive into some of the best ways and means to make your iPhone images come alive in the following section:
01Emoji Picture Editor- Add Emojis to Your Photos
If you like to imbibe the images on your iPhone media gallery with a hoard of funny and cool emojis, this one is a perfect app to address the concern. The tool’s library houses the latest collection of emoji categories to be in line with a diversity of photo styles, themes and backgrounds. You can take your pick from the huge inventory of over 1500 different emojis to level up your photos.
Talking about the app interface and usage controls, you are granted full liberty to add emojis to your emojis, while changing their positions through a finger drag, or scale and rotate them by expanding, pinching and twisting your fingers. The app additionally allows you to send bigger emoji stickers on chats and conversations.
02Insta Emoji Photo Editor
When looking for an interesting and reliable application to set straight the concern of how to put emojis on pictures, the Insta Emoji Photo Editor is an affordable pick. Loaded with an enormous and updated emoji library, the app presents before you over 3200 fascinating emoji options to select from and add to your images.
The inclusion process is intuitively simple, with you just having to upload the desired images to the app’s working interface and choose from your most favorite emoji elements to make the stills come alive with added fun and spark. The app houses an interesting ’Emoji Paint’ feature for the extensively creative ones to let them create catchy drawings with the coolest emojis.
03Emoji My Face
Moving ahead in the list comes the aforesaid app, which you can conveniently rely on to get through the photo edit emoji task in less than a few seconds. What’s unique about the utility is its feature that lets you add emoji stickers on the faces of your image elements. Working with the app, you can transform the skinned appearances of your friends and family into hilarious emoji faces.
While the app permits you to pick any number of preferences from its latest and updated emoji collection, you can additionally, save and share your emoji centered image edits across a diversity of media sharing platforms and chat service programs.
04Emoji Background Photo Maker
While there are hoards of IT alternatives to add emojis to pictures, the following utility caters to the concern in a slightly different style, ahead of just picking and pasting emojis to still captures. Working with the tool, you can experiment with changing the customary and fundamental image backgrounds into funny and appealing emoji centered themes. You are allowed to either work with a desired image from your iPhone’s media gallery, or take a fresh shot from your device’s camera, followed by uploading the same to the app’s editing interface.
Focusing on the tool’s expanse of usage features, you get tom work with a straightforward interface, and select from a wide variety of expressive and thematic emoji backgrounds. You can further, preview and save the edited images in HD quality, and share the same with friends and family across social media handles.
05Funny Photo Editor With Emoji Stickers Camera
This one is an innovative image editing tool that lets you create funny image transformations with classic emoji stickers, while addressing the query of how to add emojis to pictures. If your peer group consists of crazy creators who are selfie freaks, try hands at uplifting your live camera shots with this application by adding the funkiest emojis and sharing them across the regular communication platforms.
The app’s default camera feature lets you capture a straight forward image and convert the same into a hilarious edit with the latest range of free emoji stickers, caricature smileys and lots more. You can additionally beautify the edits with choosing from a decent range of emoji skin tones to suit the image background.
06Instamoji- Emoji Photo Editor
If you have been searching for an affordable solution to walk through the concern of , how to add emoji to photo on your iPhone, try working with the Instamoji application to highlight your customary images with classic emoji stickers and elements within the blink of an eye. The app welcomes you with a clean and intuitive interface to work upon, and is completely free to use.
Talking about the utility’s emoji centered image editing features, you are permitted to select from a decent collection of vibrant, funny and cool emojis, assorted under a diversity of categories to complement your images with, while exporting them across your digital communication accounts with utmost ease. The app promises you of the finest quality edited image output.
Part 2 Best 6 Tools to Put Emojis on Pictures on Android
Emojis are best known to spark up graphic artworks with an element of fun and entertainment. While the introduction of social media and digital communication utilities have brought emojis to the fingertips of modern day smartphone users, the IT market never lags behind at putting the latest transformations regarding emoji usage at your disposal.
Discussing along the line, let us talk about some interesting applications that address the concern of how to add an emoji to a photo using an Android device in what follows next:
01Add Emoji Stickers- Pics Editor and Photo Maker
This one is a smart photo editing tool that you can choose to customize the otherwise ordinary images on the local media gallery of your Android smartphone. The app greets you with an extensive range of updated emoji alternatives to suit your most specific editing requirements for complementing your elementary photos with the perfect feel and emotion.
The emojis work to add the missing fun to your social media posts with image edits funny enough to make your peers roll over with laughter. Not just smiley faces, the app delivers to you a categorized set of emojis that are a perfect fit to any graphic theme. Some of the most preferred ones include Nature, Travel, Food & Drinks, and many more. So why wait? Just get the free utility and begin to edit and share!
02Emoji Face Sticker
If you are creativity freak and love to experiment with your editing skills to put emoji on picture, try hands at working with this free image editor utility to add a fun element to your photos and give a laughter dose to your friends and family on social media. The app caters to transform your uploaded images faces to the cutest emoji look alike ever.
If that’s not enough, you can work with the app to change your smartphone’s regular camera into an emoji camera app that works to create the best caricature emoji montages from your snapped selfies. Navigating through the latte’s editing library, you will get to choose from among the craziest and coolest emoji stickers to create emoji photos out of normal stills. All in all, the app allows you to put forward your emotions in a relatively funnier way.
03Emoji Photo Editor
Are you bored of looking at those customary color backgrounds behind your images? Consider sparking them up with the cutest and most expressive emoji backgrounds. As you pick the app to edit your images, the latter grants you a complete access to its free emoji library that houses a decent collection of over 50 different emoji backgrounds to select from. A few of the most popular ones comprise of the flower and heart crown stickers, dog face camera among others.
Editing images within the app is seamless enough to last for a few seconds. You can use the created emoji background edits in a series of ways, like, preferring a local save or going for an image export to your favorite social media handle. Another cool way to show off your creativity can be making a device screen wallpaper of the emoji background image.
04Auto Face Stamp- Cover Face With Emoji
Looking forward to use an SNS services for media sharing purposes, but bothered about privacy concerns? While it is a common practice to share pictures via SNS and allied public platforms, most of us are often worried about keeping our faces hidden. Under normal circumstances, the face masking task is something you would ideally want to escape; the aforesaid app caters to the same in a funny and enjoyable manner.
Working with the utility, you can mask your image faces with over 100 different types of emoji stickers. The app aids you further in the task through its accurate face recognition ability that takes into consideration the smallest of faces with utmost precision. All you need to do is, select a desired emoji sticker and tap on the face you wish to mask with the same.
You can further, choose to directly export the masked images to media sharing handles right from the app’s editing workspace. The app is available to you absolutely free of cost and greets its users with a responsive working interface.
05Emoji Background Photo Editor
If the ordinary thematic backgrounds of your images do not suit you any longer, try working with this application to transmute the same into vibrant and expressive emoji alternatives. The aforesaid photo editing utility caters to make your images stand out of the crowd with beautiful emoji landscapes that render creative image edits of a matchless class, while maintaining a high-definition output image quality.
Extending the dimension of features to a longer stretch, the app grants you the liberty to adjust the position and transparency of the added emojis, set emoji frames and customize the emoji centered backgrounds with stunning effects and filters. As you finish with the editing process, the app lets you share your creations directly to a preferred social media platform, while also keeping them safe in your device’s local media gallery.
06Face Emoji Photo Effect
Reaching the end of the list, here comes the Face Emoji Photo Effect application that is all set to upgrade the level of your regular images with its classic and beautiful emoji backgrounds and stickers. The app’s editing library houses a diverse range of latest and elusive emojis to highlight your otherwise normal captures. The app additionally facilitates you with an expanded set of image editing features and effects to turn them into a graphic masterpiece.
The app welcomes you with a clean and responsive interface that makes the emoji inclusion process a quick and fun activity. All you need to do is, pick up an image from your locally saved alternatives and upload them to the app’s working interface, followed by browsing the latter’s emoji library to select a cohesive emoji background to complement the same.
You can further, download the premium emoji packs through a minimal payment to enhance the app’s library if the preset options do not match your requirements. The inbuilt emoji choices are however, free to work with.
Part 3 Best 5 Tools to Put Emojis on Pictures on Computer
All of us are familiar to and love using emojis everywhere, right from commenting on regular social media posts and chat service conversations, to creating professionally sound and strategic, business centered company presentations. While the most diverse use of these graphic utilities is reported on mobile devices, you may sometimes land across an instance that demands working with emojis on a computer.
Moving ahead with our discussion to address the aforesaid concern, let us talk about some of the prominent software and online solutions to set aside the issue of how to put emojis on photos while working on a computer in the upcoming section of this article:
01Kapwing
Entering into the domain of online image editing tools, the Kapwing website easily lands among the highly preferred choices. To address the concern of adding emojis to pictures on your PC or desktop systems, this one is an affordable tool to rely on. Talking of the underlying reasons behind the app’s high rated user preference, the latter allows you to access its huge inventory of emoji stickers, distributed across a heap of categories to choose from.
Next in the line is the tool’s spic and span editing process that lets you add and customize emojis on the uploaded images with a series of effects and filters in a matter of counted seconds. You can either pick and import images from your system, or work with the app’s in house emoji templates to edit the photos. As you are done with uploading images and adding emojis, proceed to place them at the desired position within the image.
The app allows you to add multiple emoji layers to the images by facilitating the creation of duplicate copies of your favorite emojis. Once you are done with the editing process, you are free to export your creation across media handles, or save them locally to your system.
02Editor.pho.to
If you are a newbie to the world of graphic editing and want to experiment with your creative skills to sort out the need of how to add an emoji to a picture, prefer landing on this free online website to work on your images. Considering the fact that not everyone around you is a tech savvy, the aforesaid online photo editing tool is designed to house the simplest of interfaces ever. The tool is available to you absolutely free of cost, without any unfair hidden purchases.
Ahead of the basic customization features, the tool grants you the freedom to expand your graphic skills on a wider canvas with presenting before you a plethora of emoji faces, stickers and backgrounds to complement the uploaded images with. Once you have added the emoji, the tool lets you work on the latter’s position and transparency adjustments, create emoji layers and overlays and save the edits to your system in a visibly high output quality.
03Add Emoji to Photo
When looking for dependable solutions to work towards the task of how to put an emoji on a photo, you can conveniently trust the aforementioned online tool to create classic emoji photo edits from the customary still alternatives son your computer. This one is a free to use image editor facility that allows you to decorate your otherwise unnoticed images with an extensive range of preset and custom emojis to make them expressive and speak out your emotions.
The tool caters to render a high definition edited image output within seconds through the simplest of customization processes. You just need to upload a desired image from your system to the tool’s working interface, followed by picking a suitable emoji from the tool’s editing library to add it to the image. If however, the available options don’t seem to address your specific requirements, you can proceed to create custom emojis of your own within the tool.
You can also create multiple emoji layers to add to the uploaded image and make adjustments to their transparency and position within the photo. As you finish the editing process, the tool grants you the liberty to download the customized image to your system in either of the PNG or JPG file formats.
04Image Online
Another entry into the list of solutions to answer the query of how to put emojis on a photo, the Image Online tool promises you of a quality constrained image editing process to complement the basic still captures in the local media gallery of your computer with the latest collection of emoji elements. Welcoming you with a decent interface, the tool caters to sort out your emoji centered picture editing requirements within a blink’s time.
To add emoji to image with this tool, you just need to upload the selected photo to the latter’s workspace, followed by selecting a preferred emoji from the editing library, or create a custom emoji of your own, to put on the image. You can customize the emoji settings in terms of position, size and transparency, and download the edits to your device in JPG and PNG image formats.
05Canva
Last in the list is the Canva graphic editing tool which you can conveniently work with to add an emoji to a picture. Having a slightly different image editing process in comparison to its online counterparts, the utility requires you to sign up to its working interface to begin editing your photos. To start with, you need to select a preset image template or pick customized dimensions to upload the desired image.
To add emojis to your picture, you will have to download the latter’s application by navigating to and tapping the ‘More’ icon, followed by choosing the ‘Emoji’ option from the drop down menu that appears next. Once the ‘Emoji’ tab shows up in the tool’s main interface, proceed to upload your image and pick a suitable emoji from the list to add to the uploaded image. You can further, add layers of emojis to the picture, while resizing and adjusting the skin tones of the same.
Part 4 Adding Emoji to Photo Q&A
● What is the total number of emoji characters till date?
As of September 2021, a total of 3,633 emojis are known to have been introduced so far. Talking of the latest emoji package, there comes the Emoji 14.0, adding 112 emoji variations to the existing count. The aforesaid is a cumulative figure, including the skin tone, gender and flag sequences.
● What are the different types of emoji categories?
During the current time, the emoji characterization is known to house 8 different categories, namely, Flags, Symbols, Objects, Travel, Activity, Food & Drink, Animals & Nature and Smileys & People.
● What is the difference between Emoji and Emoticons?
Emoticons are specifically, graphic interpretations of the various human emotions that come with a keyboard command combination. Emojis on the other hand, are a standard set of various characters, often having a different artwork, but a universal meaning.
● Is it possible to self-create custom emojis?
As of now, having self-created variants of emojis is not possible. If at all, you become successful in design a character that resembles an emoji, you can use it as an image at the most. In an attempt to share it as an emoji, you will end up sending text combinations.
● What is the best software alternative to add emojis to pictures?
When looking for an affordable software solution for catering to the concern of how to add emojis to a photo, you can go for picking the Wondershare Filmora Video Editor graphic editing program, whose editing library literally houses the largest and the latest collection of emoji categories and varieties for sparking up your images with the best possible customized appearance.
For Win 7 or later (64-bit)
For macOS 10.12 or later
● Ending Thoughts →
● Adding emojis to pictures has landed among the latest and most preferred graphic editing trends of current times.
● When beginning to address the concern of how do you add emojis to pictures, the IT market puts a diversity of software and online solutions before you.
● If you are confused about making the best choice, you can pick the Wondershare Filmora graphic editor program without having to think twice.
Emojis are catchy graphic elements that can add life to your photos, videos and allied artworks within a wink. Be here to know about the most exciting how-tos!
In this article
01 [Best 6 Tools to Put Emojis on Pictures on iPhone](#Part 1)
02 [Best 6 Tools to Put Emojis on Pictures on Android](#Part 2)
03 [Best 5 Tools to Put Emojis on Pictures on Computer](#Part 3)
Part 1 Best 6 Tools to Put Emojis on Pictures on iPhone
Emojis have managed to secure enough significance in our social and professional lives across social media platforms in the current time. Be it a fun-filled conversation with friends and family on a chat service program, or a high end and professionally sound business strategy, these mini caricature pieces of graphic art can add the much needed highlight to almost every aspect of your digital communication concerns.
Now that you are aware of the utility of working with emojis to make your digital contents, let us take a dive into some of the best ways and means to make your iPhone images come alive in the following section:
01Emoji Picture Editor- Add Emojis to Your Photos
If you like to imbibe the images on your iPhone media gallery with a hoard of funny and cool emojis, this one is a perfect app to address the concern. The tool’s library houses the latest collection of emoji categories to be in line with a diversity of photo styles, themes and backgrounds. You can take your pick from the huge inventory of over 1500 different emojis to level up your photos.
Talking about the app interface and usage controls, you are granted full liberty to add emojis to your emojis, while changing their positions through a finger drag, or scale and rotate them by expanding, pinching and twisting your fingers. The app additionally allows you to send bigger emoji stickers on chats and conversations.
02Insta Emoji Photo Editor
When looking for an interesting and reliable application to set straight the concern of how to put emojis on pictures, the Insta Emoji Photo Editor is an affordable pick. Loaded with an enormous and updated emoji library, the app presents before you over 3200 fascinating emoji options to select from and add to your images.
The inclusion process is intuitively simple, with you just having to upload the desired images to the app’s working interface and choose from your most favorite emoji elements to make the stills come alive with added fun and spark. The app houses an interesting ’Emoji Paint’ feature for the extensively creative ones to let them create catchy drawings with the coolest emojis.
03Emoji My Face
Moving ahead in the list comes the aforesaid app, which you can conveniently rely on to get through the photo edit emoji task in less than a few seconds. What’s unique about the utility is its feature that lets you add emoji stickers on the faces of your image elements. Working with the app, you can transform the skinned appearances of your friends and family into hilarious emoji faces.
While the app permits you to pick any number of preferences from its latest and updated emoji collection, you can additionally, save and share your emoji centered image edits across a diversity of media sharing platforms and chat service programs.
04Emoji Background Photo Maker
While there are hoards of IT alternatives to add emojis to pictures, the following utility caters to the concern in a slightly different style, ahead of just picking and pasting emojis to still captures. Working with the tool, you can experiment with changing the customary and fundamental image backgrounds into funny and appealing emoji centered themes. You are allowed to either work with a desired image from your iPhone’s media gallery, or take a fresh shot from your device’s camera, followed by uploading the same to the app’s editing interface.
Focusing on the tool’s expanse of usage features, you get tom work with a straightforward interface, and select from a wide variety of expressive and thematic emoji backgrounds. You can further, preview and save the edited images in HD quality, and share the same with friends and family across social media handles.
05Funny Photo Editor With Emoji Stickers Camera
This one is an innovative image editing tool that lets you create funny image transformations with classic emoji stickers, while addressing the query of how to add emojis to pictures. If your peer group consists of crazy creators who are selfie freaks, try hands at uplifting your live camera shots with this application by adding the funkiest emojis and sharing them across the regular communication platforms.
The app’s default camera feature lets you capture a straight forward image and convert the same into a hilarious edit with the latest range of free emoji stickers, caricature smileys and lots more. You can additionally beautify the edits with choosing from a decent range of emoji skin tones to suit the image background.
06Instamoji- Emoji Photo Editor
If you have been searching for an affordable solution to walk through the concern of , how to add emoji to photo on your iPhone, try working with the Instamoji application to highlight your customary images with classic emoji stickers and elements within the blink of an eye. The app welcomes you with a clean and intuitive interface to work upon, and is completely free to use.
Talking about the utility’s emoji centered image editing features, you are permitted to select from a decent collection of vibrant, funny and cool emojis, assorted under a diversity of categories to complement your images with, while exporting them across your digital communication accounts with utmost ease. The app promises you of the finest quality edited image output.
Part 2 Best 6 Tools to Put Emojis on Pictures on Android
Emojis are best known to spark up graphic artworks with an element of fun and entertainment. While the introduction of social media and digital communication utilities have brought emojis to the fingertips of modern day smartphone users, the IT market never lags behind at putting the latest transformations regarding emoji usage at your disposal.
Discussing along the line, let us talk about some interesting applications that address the concern of how to add an emoji to a photo using an Android device in what follows next:
01Add Emoji Stickers- Pics Editor and Photo Maker
This one is a smart photo editing tool that you can choose to customize the otherwise ordinary images on the local media gallery of your Android smartphone. The app greets you with an extensive range of updated emoji alternatives to suit your most specific editing requirements for complementing your elementary photos with the perfect feel and emotion.
The emojis work to add the missing fun to your social media posts with image edits funny enough to make your peers roll over with laughter. Not just smiley faces, the app delivers to you a categorized set of emojis that are a perfect fit to any graphic theme. Some of the most preferred ones include Nature, Travel, Food & Drinks, and many more. So why wait? Just get the free utility and begin to edit and share!
02Emoji Face Sticker
If you are creativity freak and love to experiment with your editing skills to put emoji on picture, try hands at working with this free image editor utility to add a fun element to your photos and give a laughter dose to your friends and family on social media. The app caters to transform your uploaded images faces to the cutest emoji look alike ever.
If that’s not enough, you can work with the app to change your smartphone’s regular camera into an emoji camera app that works to create the best caricature emoji montages from your snapped selfies. Navigating through the latte’s editing library, you will get to choose from among the craziest and coolest emoji stickers to create emoji photos out of normal stills. All in all, the app allows you to put forward your emotions in a relatively funnier way.
03Emoji Photo Editor
Are you bored of looking at those customary color backgrounds behind your images? Consider sparking them up with the cutest and most expressive emoji backgrounds. As you pick the app to edit your images, the latter grants you a complete access to its free emoji library that houses a decent collection of over 50 different emoji backgrounds to select from. A few of the most popular ones comprise of the flower and heart crown stickers, dog face camera among others.
Editing images within the app is seamless enough to last for a few seconds. You can use the created emoji background edits in a series of ways, like, preferring a local save or going for an image export to your favorite social media handle. Another cool way to show off your creativity can be making a device screen wallpaper of the emoji background image.
04Auto Face Stamp- Cover Face With Emoji
Looking forward to use an SNS services for media sharing purposes, but bothered about privacy concerns? While it is a common practice to share pictures via SNS and allied public platforms, most of us are often worried about keeping our faces hidden. Under normal circumstances, the face masking task is something you would ideally want to escape; the aforesaid app caters to the same in a funny and enjoyable manner.
Working with the utility, you can mask your image faces with over 100 different types of emoji stickers. The app aids you further in the task through its accurate face recognition ability that takes into consideration the smallest of faces with utmost precision. All you need to do is, select a desired emoji sticker and tap on the face you wish to mask with the same.
You can further, choose to directly export the masked images to media sharing handles right from the app’s editing workspace. The app is available to you absolutely free of cost and greets its users with a responsive working interface.
05Emoji Background Photo Editor
If the ordinary thematic backgrounds of your images do not suit you any longer, try working with this application to transmute the same into vibrant and expressive emoji alternatives. The aforesaid photo editing utility caters to make your images stand out of the crowd with beautiful emoji landscapes that render creative image edits of a matchless class, while maintaining a high-definition output image quality.
Extending the dimension of features to a longer stretch, the app grants you the liberty to adjust the position and transparency of the added emojis, set emoji frames and customize the emoji centered backgrounds with stunning effects and filters. As you finish with the editing process, the app lets you share your creations directly to a preferred social media platform, while also keeping them safe in your device’s local media gallery.
06Face Emoji Photo Effect
Reaching the end of the list, here comes the Face Emoji Photo Effect application that is all set to upgrade the level of your regular images with its classic and beautiful emoji backgrounds and stickers. The app’s editing library houses a diverse range of latest and elusive emojis to highlight your otherwise normal captures. The app additionally facilitates you with an expanded set of image editing features and effects to turn them into a graphic masterpiece.
The app welcomes you with a clean and responsive interface that makes the emoji inclusion process a quick and fun activity. All you need to do is, pick up an image from your locally saved alternatives and upload them to the app’s working interface, followed by browsing the latter’s emoji library to select a cohesive emoji background to complement the same.
You can further, download the premium emoji packs through a minimal payment to enhance the app’s library if the preset options do not match your requirements. The inbuilt emoji choices are however, free to work with.
Part 3 Best 5 Tools to Put Emojis on Pictures on Computer
All of us are familiar to and love using emojis everywhere, right from commenting on regular social media posts and chat service conversations, to creating professionally sound and strategic, business centered company presentations. While the most diverse use of these graphic utilities is reported on mobile devices, you may sometimes land across an instance that demands working with emojis on a computer.
Moving ahead with our discussion to address the aforesaid concern, let us talk about some of the prominent software and online solutions to set aside the issue of how to put emojis on photos while working on a computer in the upcoming section of this article:
01Kapwing
Entering into the domain of online image editing tools, the Kapwing website easily lands among the highly preferred choices. To address the concern of adding emojis to pictures on your PC or desktop systems, this one is an affordable tool to rely on. Talking of the underlying reasons behind the app’s high rated user preference, the latter allows you to access its huge inventory of emoji stickers, distributed across a heap of categories to choose from.
Next in the line is the tool’s spic and span editing process that lets you add and customize emojis on the uploaded images with a series of effects and filters in a matter of counted seconds. You can either pick and import images from your system, or work with the app’s in house emoji templates to edit the photos. As you are done with uploading images and adding emojis, proceed to place them at the desired position within the image.
The app allows you to add multiple emoji layers to the images by facilitating the creation of duplicate copies of your favorite emojis. Once you are done with the editing process, you are free to export your creation across media handles, or save them locally to your system.
02Editor.pho.to
If you are a newbie to the world of graphic editing and want to experiment with your creative skills to sort out the need of how to add an emoji to a picture, prefer landing on this free online website to work on your images. Considering the fact that not everyone around you is a tech savvy, the aforesaid online photo editing tool is designed to house the simplest of interfaces ever. The tool is available to you absolutely free of cost, without any unfair hidden purchases.
Ahead of the basic customization features, the tool grants you the freedom to expand your graphic skills on a wider canvas with presenting before you a plethora of emoji faces, stickers and backgrounds to complement the uploaded images with. Once you have added the emoji, the tool lets you work on the latter’s position and transparency adjustments, create emoji layers and overlays and save the edits to your system in a visibly high output quality.
03Add Emoji to Photo
When looking for dependable solutions to work towards the task of how to put an emoji on a photo, you can conveniently trust the aforementioned online tool to create classic emoji photo edits from the customary still alternatives son your computer. This one is a free to use image editor facility that allows you to decorate your otherwise unnoticed images with an extensive range of preset and custom emojis to make them expressive and speak out your emotions.
The tool caters to render a high definition edited image output within seconds through the simplest of customization processes. You just need to upload a desired image from your system to the tool’s working interface, followed by picking a suitable emoji from the tool’s editing library to add it to the image. If however, the available options don’t seem to address your specific requirements, you can proceed to create custom emojis of your own within the tool.
You can also create multiple emoji layers to add to the uploaded image and make adjustments to their transparency and position within the photo. As you finish the editing process, the tool grants you the liberty to download the customized image to your system in either of the PNG or JPG file formats.
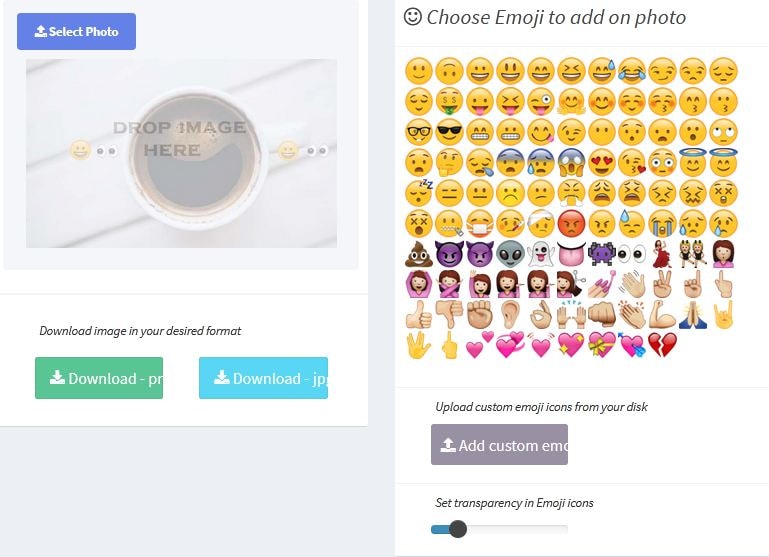
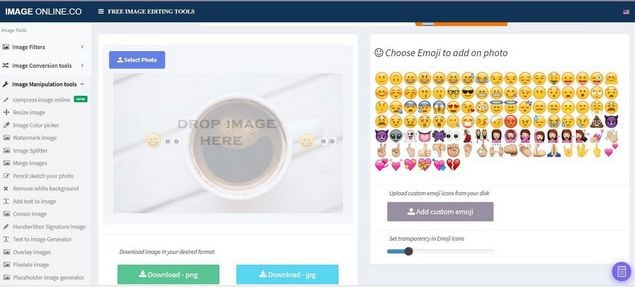
04Image Online
Another entry into the list of solutions to answer the query of how to put emojis on a photo, the Image Online tool promises you of a quality constrained image editing process to complement the basic still captures in the local media gallery of your computer with the latest collection of emoji elements. Welcoming you with a decent interface, the tool caters to sort out your emoji centered picture editing requirements within a blink’s time.
To add emoji to image with this tool, you just need to upload the selected photo to the latter’s workspace, followed by selecting a preferred emoji from the editing library, or create a custom emoji of your own, to put on the image. You can customize the emoji settings in terms of position, size and transparency, and download the edits to your device in JPG and PNG image formats.
05Canva
Last in the list is the Canva graphic editing tool which you can conveniently work with to add an emoji to a picture. Having a slightly different image editing process in comparison to its online counterparts, the utility requires you to sign up to its working interface to begin editing your photos. To start with, you need to select a preset image template or pick customized dimensions to upload the desired image.
To add emojis to your picture, you will have to download the latter’s application by navigating to and tapping the ‘More’ icon, followed by choosing the ‘Emoji’ option from the drop down menu that appears next. Once the ‘Emoji’ tab shows up in the tool’s main interface, proceed to upload your image and pick a suitable emoji from the list to add to the uploaded image. You can further, add layers of emojis to the picture, while resizing and adjusting the skin tones of the same.
Part 4 Adding Emoji to Photo Q&A
● What is the total number of emoji characters till date?
As of September 2021, a total of 3,633 emojis are known to have been introduced so far. Talking of the latest emoji package, there comes the Emoji 14.0, adding 112 emoji variations to the existing count. The aforesaid is a cumulative figure, including the skin tone, gender and flag sequences.
● What are the different types of emoji categories?
During the current time, the emoji characterization is known to house 8 different categories, namely, Flags, Symbols, Objects, Travel, Activity, Food & Drink, Animals & Nature and Smileys & People.
● What is the difference between Emoji and Emoticons?
Emoticons are specifically, graphic interpretations of the various human emotions that come with a keyboard command combination. Emojis on the other hand, are a standard set of various characters, often having a different artwork, but a universal meaning.
● Is it possible to self-create custom emojis?
As of now, having self-created variants of emojis is not possible. If at all, you become successful in design a character that resembles an emoji, you can use it as an image at the most. In an attempt to share it as an emoji, you will end up sending text combinations.
● What is the best software alternative to add emojis to pictures?
When looking for an affordable software solution for catering to the concern of how to add emojis to a photo, you can go for picking the Wondershare Filmora Video Editor graphic editing program, whose editing library literally houses the largest and the latest collection of emoji categories and varieties for sparking up your images with the best possible customized appearance.
For Win 7 or later (64-bit)
For macOS 10.12 or later
● Ending Thoughts →
● Adding emojis to pictures has landed among the latest and most preferred graphic editing trends of current times.
● When beginning to address the concern of how do you add emojis to pictures, the IT market puts a diversity of software and online solutions before you.
● If you are confused about making the best choice, you can pick the Wondershare Filmora graphic editor program without having to think twice.
How To Change Speed of Video in Final Cut Pro?
When there are certain boring but necessary parts in your video, you need to speed them up. Similarly, you may need to reduce the duration of the entire video. Speeding up the video is your only option when you do not want to cut any part. You must have also observed that certain videos look funny when you speed them up. To speed up videos, you will need a video editor that does not degrade the video quality.
Final Cut Pro is a popular choice to speed up video without distorting the pitch. Many think that the video quality can degrade when they change the speed of the video clip. This concern can be taken care of when you alter the video speed with Final Cut Pro. Instead of changing the speed of the entire video, you can change the speed of specific parts. We will illustrate how to speed up the video using Final Cut Pro and suggest a better choice than FCP.

Part I. Speed Up Video using Final Cut Pro
Final Cut Pro by Apple is one of Mac users’ most popular video editors. Many video creators purchase MacBooks for editing their videos in Final Cut Pro. The video editor is suitable for beginners as well as professionals. FCP, as a video editor, is super fast in rendering and processing video while exporting. Here are the steps for the Final Cut Pro speed-up clip.
Step1 Open FCP. Navigate to File>New> and tap Project to start a new project.

Step2 Go to File>Import> Media and fetch your video clip. After that, drag/drop the video clip into the timeline.

Step3 Choose the video clip from the timeline. Click on the Speedometer(Retime) icon at the top of the timeline.

Step4 Tap the Speedometer icon, to get the drop-drop menu. For the Final Cut Pro speed-up video, go to Fast and select the speed. You get to choose from 2X to 20X.

If you want to customize the speed-up rate, you can click on the Custom option. Enter any desired percentage speed.
Step5 Now, play the video.

Part II. Tips for Speeding Up Video in Final Cut Pro
You have to keep a few points in mind when you speed up videos in Final Cut Pro. This ensures that the video does not get distorted while speeding up a section. Here are some tips to follow to speed up the video in FCP.
Adjust The Pitch of Sped-Up Clips -
By default, Final Cut Pro preserves the pitch of the audio even when you change the speed of the video. However, you may want to change the pitch per the video’s speed. This is because you might want to make the audio sound funny. You need to turn off the Preserve Pitch option from Retime menu. Once you do that, the pitch of the sped-up clip adjusts itself as per the change in speed.
Speeding Up Video by Adjusting Frame Rate -
You can shoot at a low frame rate for the scene you want to speed up. The frame rate should be lower than the overall video project’s frame rate.
You can add the scene to your video project on the timeline. Then you need to choose Automatic Speed from Retime menu. This will increase the frame rate from the scene to the video project frame rate. Once the frame rate increases, the video will speed up automatically.

Smoothen Out the Sped-Up Video -
Sometimes, the overall video may look old when you speed up a particular portion. That is why there are two options available on Final Cut Pro. The first option is frame blending which is more suitable for the slow-motion clip.
The second option is the optical flow that smoothens out the sped-up clip. It adds in-between frames by analyzing the directional movement of pixels. You can find the option from Video Quality present in the Retime menu.
Part III. The Right Final Cut Pro Alternative for Changing Speed - Filmora
Final Cut Pro has a steep learning curve. Unless you have some experience in video editing, you will find the user interface slightly complicated. Besides, Final Cut Pro is only available for Mac users since it is an Apple product.
Many people look for a Final Cut Pro alternative to change the speed of the video. Wondershare Filmora is the best choice over Final Cut Pro to change the speed of video Final Cut Pro.
Wondershare Filmora is a professional video editor that is available for Windows and Mac users. The video editor is suitable for beginners as well as experienced video creators. The popularity of Filmora is due to its super intuitive user interface. You get almost all the features of FCP in Filmora.
In comparison, there are more video effects, elements, and stock media files available to enhance your videos. You get the latest effects from time to time so that you can have the trending elements in the video, you can also save the edited video in different video file formats as per your requirements, and even record video through a webcam and capture the screen using Filmora.
Several AI effects, stickers, and elements are available to enhance your videos. Most users find it easier to edit videos on Filmora over Final Cut Pro.
Free Download For Win 7 or later(64-bit)
Free Download For macOS 10.14 or later
How to Change Video Speed in Filmora?
Changing video speed in Filmora is super easy. You can speed up your video as per your requirements in a number of ways. That is why Filmora happens to be a better option than Final Cut Pro. We will illustrate all the different methods to change video speed in Filmora.
You can watch this video to understand how to change video speed in Filmora.
Method 1. The Simplest Way - Click “2x-100x” Speed Options
Just like Final Cut Pro, you can choose from preset speed options to change video speed. This is undoubtedly the easiest way to change video speed instantly. While Final Cut Pro offers 2X to 20X speed options, Filmora has 2X to 100X speed presets. Here are the steps to speed up video by choosing a preset speed option.
Step1 Download, install and simply Launch Filmora. Tap Create New Project option.

Step2 Go to File> Import Media> Import Media Files and choose the video file. The selected video will be imported into the Project Media folder. Alternatively, you can also use the drag/drop function.

Step3 Drag and drop the video file onto the timeline. Select the video clip from the timeline and click on the Speed (timer icon) option at the top of the timeline. If you want to speed up a portion of the video, you need to split the video clip.

Step4 From the menu, go to Fast and select any speed option as per your requirements. Thereafter, play the video to see the changes.

Step5 Press Export to save the video file in your desired file format.
Method 2. Use Uniform Speed to Change Speed
If you want to customize the video speed uniformly, there is a dedicated option called Uniform Speed in Filmora. This means you do not want to choose from the preset speed options. You may want to set the speed of the video to 3X, but it is not available in the preset options.
That is where Uniform Speed comes in handy, and you can set any speed from 0.01X to 100X. Here are the steps to follow.
Step1 Once you have dropped the video file onto the timeline, click on the Speed(timer) icon.
Step2 Click on the Uniform Speed option. This will open the Uniform Speed tab above the timeline.

Step3 Adjust the speed slider to set the desired speed as per your requirements. The duration will change as per the speed you set, and you can set the duration below the speed slider. Just like Final Cut Pro, you can turn on Ripple and Audio Pitch as per your preference.

Step4 Once you are satisfied with the speed, click on the Ok button. Thereafter, tap Export to save the edited video file.
Method 3. Use Speed Ramping to Change Speed
There is a unique way to change your video speed called speed ramping. You can speed up some parts and slow down the other parts, like crests and troughs in a graph.
The speed ramping feature comes with several graphical presets. You can choose from the presets and customize the speed as per your requirements. Check the steps to use speed ramping to change your video speed.
Step1 Drag and drop the video file onto the timeline. Click on the Speed(timer) icon at the top of the timeline.
Step2 Click on Speed Ramping option. This will open Speed Ramping above the timeline.

Step3 Select from the available preset as per your requirements. Otherwise, you can select Customize option and edit the nodes as needed.

Step4 Once satisfied with the result, click on the Ok button. Finally, tap Export
Conclusion
There are some videos where you may have to speed up certain parts. In detail, we have illustrated how to speed up the video in Final Cut Pro. However, if you do not have Final Cut Pro or are unsatisfied with FCP, Wondershare Filmora is a great choice. Most importantly, the steps for all the different methods are very simple for everyone to follow.
Free Download For macOS 10.14 or later
How to Change Video Speed in Filmora?
Changing video speed in Filmora is super easy. You can speed up your video as per your requirements in a number of ways. That is why Filmora happens to be a better option than Final Cut Pro. We will illustrate all the different methods to change video speed in Filmora.
You can watch this video to understand how to change video speed in Filmora.
Method 1. The Simplest Way - Click “2x-100x” Speed Options
Just like Final Cut Pro, you can choose from preset speed options to change video speed. This is undoubtedly the easiest way to change video speed instantly. While Final Cut Pro offers 2X to 20X speed options, Filmora has 2X to 100X speed presets. Here are the steps to speed up video by choosing a preset speed option.
Step1 Download, install and simply Launch Filmora. Tap Create New Project option.
Step2 Go to File> Import Media> Import Media Files and choose the video file. The selected video will be imported into the Project Media folder. Alternatively, you can also use the drag/drop function.
Step3 Drag and drop the video file onto the timeline. Select the video clip from the timeline and click on the Speed (timer icon) option at the top of the timeline. If you want to speed up a portion of the video, you need to split the video clip.
Step4 From the menu, go to Fast and select any speed option as per your requirements. Thereafter, play the video to see the changes.
Step5 Press Export to save the video file in your desired file format.
Method 2. Use Uniform Speed to Change Speed
If you want to customize the video speed uniformly, there is a dedicated option called Uniform Speed in Filmora. This means you do not want to choose from the preset speed options. You may want to set the speed of the video to 3X, but it is not available in the preset options.
That is where Uniform Speed comes in handy, and you can set any speed from 0.01X to 100X. Here are the steps to follow.
Step1 Once you have dropped the video file onto the timeline, click on the Speed(timer) icon.
Step2 Click on the Uniform Speed option. This will open the Uniform Speed tab above the timeline.
Step3 Adjust the speed slider to set the desired speed as per your requirements. The duration will change as per the speed you set, and you can set the duration below the speed slider. Just like Final Cut Pro, you can turn on Ripple and Audio Pitch as per your preference.
Step4 Once you are satisfied with the speed, click on the Ok button. Thereafter, tap Export to save the edited video file.
Method 3. Use Speed Ramping to Change Speed
There is a unique way to change your video speed called speed ramping. You can speed up some parts and slow down the other parts, like crests and troughs in a graph.
The speed ramping feature comes with several graphical presets. You can choose from the presets and customize the speed as per your requirements. Check the steps to use speed ramping to change your video speed.
Step1 Drag and drop the video file onto the timeline. Click on the Speed(timer) icon at the top of the timeline.
Step2 Click on Speed Ramping option. This will open Speed Ramping above the timeline.
Step3 Select from the available preset as per your requirements. Otherwise, you can select Customize option and edit the nodes as needed.
Step4 Once satisfied with the result, click on the Ok button. Finally, tap Export
Conclusion
There are some videos where you may have to speed up certain parts. In detail, we have illustrated how to speed up the video in Final Cut Pro. However, if you do not have Final Cut Pro or are unsatisfied with FCP, Wondershare Filmora is a great choice. Most importantly, the steps for all the different methods are very simple for everyone to follow.
Doable Ways to Create Transparent Background in Procreate
Doable Ways to Make Transparent Background in Procreate
An easy yet powerful editor
Numerous effects to choose from
Detailed tutorials provided by the official channel
Figuring out the crucial steps to make the canvas excellent is one of the loveliest things users are performing for exporting the closing Procreate-projects. Once after getting expert with things trick you can be able to position the canvas surprisingly on great back for a memorable moment. You can make the most of it for your procreate mission that you have created.
Out of many essentials tools you have ever used for experiencing the benefits of equipment & skills, the Procreate is a kind of solution that comes with one of the most trustworthy as well as brilliant capability to erase the undesired background from the pictures. It is more than a general tool and there are some specified approaches to do so, but in today possible scenario, you can easily focus around choice of right selections to erase a background at ease. People can explore the chances of creating various attractive methods to work in the PNG structure after removing the desired background.
In this article
01 [How to Delete a White Background with Procreate for the IPad?](#Part 1)
02 [How to Make Transparent Background with Procreate for iPhone?](#Part 2)
03 [How to Create Popping Thumbnails or Profile Photos](#Part 3)
Part 1 How to Delete a White Background with Procreate for the IPad?

In case you are facing discoloration problem too then it is always a better idea to cast image with desired background and remove the objects.
Now turning your background with a lovely image or your own is just a matter of few clicks. With great transparent background procreate, you will be heading towards the satisfaction of obtaining transparent background. With few crucial steps you can stay from the other competitors or it will make your posts viral. With stepwise guidelines on removing the background as well as replacing it with a transparent one in Procreate is what you need the most today.
When it comes to deleting the white-background with a Procreate, then with great selection of tools you can easily create amazing performance for your post. If you are still in a dilemma to make use of the white coloured Background. After tapping on the top-left corner of the screen, you can open-up brilliant level of opportunities to make the most out of it. Are you ready to begin? Next you will learn about how to turn the background into a desired canvas for all your Instagram stories.
The following steps will provide you a quick walkthrough of entire process, stepwise:-
Step 1: First you are required to open the picture with Procreate. Get your desired image for the edit or open your picture & turn-off the overall visibility of background layer by layers-icon, tap it, it is presented on the top-right corner. Here, you will see layer labelled as the background, you need to uncheck the layer’s box for turning-off overall visibility at the bottom of Layers menu.
It is an important step to perform as if you want to deleting any white background from the image otherwise background will be treated as transparent with white-background showing through, thus you will experience no changes to the document. You are not required to remove background from image procreate if your image is not having a background layer.
Step 2: Create the selection at around white area of an image & delete background
For you to perform the step of procreate remove white background, you are required to make selection around white area. For this, open-up the selection-menu and it is placed in the form round icon named ‘S’ at the top-left-corner of the screen. At this menu, choose auto & Add. To create such level of perfection in selection, just hold & tap over any area of white-background at this screen. You can also increase threshold of your selection by moving the fingers/stylus at the right. For the opposite process, you can move the same to the left.You need to adjust the desired threshold until selection-area on your screen lines-up in accordance with an edges of the subject. You are now heading towards the process of make background transparent procreatefor your desired image quickly.
With your current selection still in active state, just tap on wrench-icon it the top-left area of your screen, then navigate to Add-menu, and here tap on the Cut option. Congrats, you have effectively deleted the background from an image.
**Step 3:**Just release the selection in the form of tapping on Selection-menu icon and repeat the process again for negative space-areas & at last clean-up stray-pixels with through an Eraser. You can repeat the process further from the step-2 in case any stray pixels still remains there as it is a normal situation to face while removing the pixels background with ‘remove background on procreate’ option.You can also take the Eraser & then manually erase those stray-pixels in there is any.
Step 4: Export your final work as PNG-file to preserve the transparency
After finishing the task of deleting background from the picture you can easily export your work to a desirable file format. The image you want to export can be in the form of PNG to retain the transparency. Other useful formats you can choose is JPEG but this doesn’tsupport transparency. So, be wise & be careful while choose your file formats.You are now having procreate export transparent backgroundand can also place the same to any sort of backdrop like an app, website, or any other workspace.
Part 2 How to Make Transparent Background with Procreate for iPhone?

Let’s dive-in quickly into the process of making the background transparent with procreate, if you are an iPhone User.
● GO Into an option of Canvas
It is up-to you whether you want to create a new canvas or want to work-upon already saved canvas. In your device through procreate app, you can do the same without any worries.
● Tap onto the option of Layers Panel
This option is located at the top-right corner of your toolbar. This option looks similar to the two-squares on the top of one another.
● Replace dull looking background with transparent background
You can quickly go down to the layers-panel placed at the bottom to choose the background color.Transparent background in procreateis always a good option to consider.
● Put uncheck before the box
At the right of toolbar you can be able to see words ‘Background color’ and if it is checked then you need to uncheck it. Now your goal to make the background completely transparent with procreate make background transparent tool, will be achieved. Now your background is completely transparent and ready to use.
Part 3 How to Create Popping Thumbnails or Profile Photos

There are various tools available in the market to make a popping thumbnail for your YouTube or Instagram pages. Thumbnail maker like Filmora can be an interesting option to choose as it is quick and effective. You can also customized as well as download the thumbnails at no cost with the same. However, they comes with certain limitations like overall size of the image to be downloaded. For better versions you can use premium tools. With better creativity and great imagination you can make the thumbnail as crisp as possible.
● Upload your desired photo to Filmora’s thumbnail maker templates.
You can easily create your video thumbnail, but you need some inspiration and for that you can make use of amazing tool like Filmora. With access to more than 50 free templates you can achieve your goal of making popping thumbnails.
● Adding text, clipart, or perfect quality of background can give it a boost
After picking your template, one can make use of thumbnail to stand out different in terms of adding text, clipart or background. For adding custom background to your thumbnail you can make use of procreate that can remove the background with procreateremove white backgroundfeatures and give you better featured image with nice background. Also to clarify the objectives of your thumbnail you can add titles, and also consider placing the same on the top of any dark color background if your thumbnail is light in color. For making the background darker just choose remove white background procreateas discussed above.
● Just Download your finished product to your device
After polishing the thumbnails with creative stuff, you can download the same to your device or export it to your smartphone.
Voila, you just have create your own custom popping thumbnail. With remove background on procreate, you can never feel disappointed.
****Wondershare Filmora Video Editor App to Remove Unwanted Background Easily**
For Win 7 or later (64-bit)
For macOS 10.12 or later
In case you are searching for any professional tool to remove het background and replace the one with any of your favorite picture then there is a tool for you to consider. With greater different functionalities, you can make any Instagram post or story interesting through the help of Fillmora App. This has set of brilliant solutions to provide with most brilliant picture and video editing features. It is interesting, fun-loving as well as attractive enough to turn any moments extraordinary.
Handy features to enjoy:-
● You can make use of this tool to create custom thumbnails for your YouTube or Instagram page.
● Great varieties of templates for making popping thumbnails
● Greater capability to beautifully construct picture editing animations
● Varieties of Effects for every age group
● Attractive filters, GIFs packs and images to turn any dull looking background into an amazing moment.
● Delete white background quickly
● Right selection of tools to make the editing effective
● Flawless features to crop, cut-up, cut, trim & mix operations.
● Single click operation to turn the images into a beauty mode
● Options to save your creations into your device or virtual space
● Share your creations to your community, to your friends via Facebook, Instagram, YouTube, and Twitter quickly.
It is a greater idea to try this app for making use of its image editing features for deleting the white background in an easy manner.
● Ending Thoughts →
● With great varieties of features it is now very easy for you to create some automated selections in just single tap.
● Deleting the white background through a pro-tool like Procreate is smart, quick & seamless process.
● You are not going to get confused, even if you are using it for the very first time.
● It is the trend that every Instagram user is following for posting better images with nice background options.
Figuring out the crucial steps to make the canvas excellent is one of the loveliest things users are performing for exporting the closing Procreate-projects. Once after getting expert with things trick you can be able to position the canvas surprisingly on great back for a memorable moment. You can make the most of it for your procreate mission that you have created.
Out of many essentials tools you have ever used for experiencing the benefits of equipment & skills, the Procreate is a kind of solution that comes with one of the most trustworthy as well as brilliant capability to erase the undesired background from the pictures. It is more than a general tool and there are some specified approaches to do so, but in today possible scenario, you can easily focus around choice of right selections to erase a background at ease. People can explore the chances of creating various attractive methods to work in the PNG structure after removing the desired background.
In this article
01 [How to Delete a White Background with Procreate for the IPad?](#Part 1)
02 [How to Make Transparent Background with Procreate for iPhone?](#Part 2)
03 [How to Create Popping Thumbnails or Profile Photos](#Part 3)
Part 1 How to Delete a White Background with Procreate for the IPad?
In case you are facing discoloration problem too then it is always a better idea to cast image with desired background and remove the objects.
Now turning your background with a lovely image or your own is just a matter of few clicks. With great transparent background procreate, you will be heading towards the satisfaction of obtaining transparent background. With few crucial steps you can stay from the other competitors or it will make your posts viral. With stepwise guidelines on removing the background as well as replacing it with a transparent one in Procreate is what you need the most today.
When it comes to deleting the white-background with a Procreate, then with great selection of tools you can easily create amazing performance for your post. If you are still in a dilemma to make use of the white coloured Background. After tapping on the top-left corner of the screen, you can open-up brilliant level of opportunities to make the most out of it. Are you ready to begin? Next you will learn about how to turn the background into a desired canvas for all your Instagram stories.
The following steps will provide you a quick walkthrough of entire process, stepwise:-
Step 1: First you are required to open the picture with Procreate. Get your desired image for the edit or open your picture & turn-off the overall visibility of background layer by layers-icon, tap it, it is presented on the top-right corner. Here, you will see layer labelled as the background, you need to uncheck the layer’s box for turning-off overall visibility at the bottom of Layers menu.
It is an important step to perform as if you want to deleting any white background from the image otherwise background will be treated as transparent with white-background showing through, thus you will experience no changes to the document. You are not required to remove background from image procreate if your image is not having a background layer.
Step 2: Create the selection at around white area of an image & delete background
For you to perform the step of procreate remove white background, you are required to make selection around white area. For this, open-up the selection-menu and it is placed in the form round icon named ‘S’ at the top-left-corner of the screen. At this menu, choose auto & Add. To create such level of perfection in selection, just hold & tap over any area of white-background at this screen. You can also increase threshold of your selection by moving the fingers/stylus at the right. For the opposite process, you can move the same to the left.You need to adjust the desired threshold until selection-area on your screen lines-up in accordance with an edges of the subject. You are now heading towards the process of make background transparent procreatefor your desired image quickly.
With your current selection still in active state, just tap on wrench-icon it the top-left area of your screen, then navigate to Add-menu, and here tap on the Cut option. Congrats, you have effectively deleted the background from an image.
**Step 3:**Just release the selection in the form of tapping on Selection-menu icon and repeat the process again for negative space-areas & at last clean-up stray-pixels with through an Eraser. You can repeat the process further from the step-2 in case any stray pixels still remains there as it is a normal situation to face while removing the pixels background with ‘remove background on procreate’ option.You can also take the Eraser & then manually erase those stray-pixels in there is any.
Step 4: Export your final work as PNG-file to preserve the transparency
After finishing the task of deleting background from the picture you can easily export your work to a desirable file format. The image you want to export can be in the form of PNG to retain the transparency. Other useful formats you can choose is JPEG but this doesn’tsupport transparency. So, be wise & be careful while choose your file formats.You are now having procreate export transparent backgroundand can also place the same to any sort of backdrop like an app, website, or any other workspace.
Part 2 How to Make Transparent Background with Procreate for iPhone?
Let’s dive-in quickly into the process of making the background transparent with procreate, if you are an iPhone User.
● GO Into an option of Canvas
It is up-to you whether you want to create a new canvas or want to work-upon already saved canvas. In your device through procreate app, you can do the same without any worries.
● Tap onto the option of Layers Panel
This option is located at the top-right corner of your toolbar. This option looks similar to the two-squares on the top of one another.
● Replace dull looking background with transparent background
You can quickly go down to the layers-panel placed at the bottom to choose the background color.Transparent background in procreateis always a good option to consider.
● Put uncheck before the box
At the right of toolbar you can be able to see words ‘Background color’ and if it is checked then you need to uncheck it. Now your goal to make the background completely transparent with procreate make background transparent tool, will be achieved. Now your background is completely transparent and ready to use.
Part 3 How to Create Popping Thumbnails or Profile Photos
There are various tools available in the market to make a popping thumbnail for your YouTube or Instagram pages. Thumbnail maker like Filmora can be an interesting option to choose as it is quick and effective. You can also customized as well as download the thumbnails at no cost with the same. However, they comes with certain limitations like overall size of the image to be downloaded. For better versions you can use premium tools. With better creativity and great imagination you can make the thumbnail as crisp as possible.
● Upload your desired photo to Filmora’s thumbnail maker templates.
You can easily create your video thumbnail, but you need some inspiration and for that you can make use of amazing tool like Filmora. With access to more than 50 free templates you can achieve your goal of making popping thumbnails.
● Adding text, clipart, or perfect quality of background can give it a boost
After picking your template, one can make use of thumbnail to stand out different in terms of adding text, clipart or background. For adding custom background to your thumbnail you can make use of procreate that can remove the background with procreateremove white backgroundfeatures and give you better featured image with nice background. Also to clarify the objectives of your thumbnail you can add titles, and also consider placing the same on the top of any dark color background if your thumbnail is light in color. For making the background darker just choose remove white background procreateas discussed above.
● Just Download your finished product to your device
After polishing the thumbnails with creative stuff, you can download the same to your device or export it to your smartphone.
Voila, you just have create your own custom popping thumbnail. With remove background on procreate, you can never feel disappointed.
****Wondershare Filmora Video Editor App to Remove Unwanted Background Easily**
For Win 7 or later (64-bit)
For macOS 10.12 or later
In case you are searching for any professional tool to remove het background and replace the one with any of your favorite picture then there is a tool for you to consider. With greater different functionalities, you can make any Instagram post or story interesting through the help of Fillmora App. This has set of brilliant solutions to provide with most brilliant picture and video editing features. It is interesting, fun-loving as well as attractive enough to turn any moments extraordinary.
Handy features to enjoy:-
● You can make use of this tool to create custom thumbnails for your YouTube or Instagram page.
● Great varieties of templates for making popping thumbnails
● Greater capability to beautifully construct picture editing animations
● Varieties of Effects for every age group
● Attractive filters, GIFs packs and images to turn any dull looking background into an amazing moment.
● Delete white background quickly
● Right selection of tools to make the editing effective
● Flawless features to crop, cut-up, cut, trim & mix operations.
● Single click operation to turn the images into a beauty mode
● Options to save your creations into your device or virtual space
● Share your creations to your community, to your friends via Facebook, Instagram, YouTube, and Twitter quickly.
It is a greater idea to try this app for making use of its image editing features for deleting the white background in an easy manner.
● Ending Thoughts →
● With great varieties of features it is now very easy for you to create some automated selections in just single tap.
● Deleting the white background through a pro-tool like Procreate is smart, quick & seamless process.
● You are not going to get confused, even if you are using it for the very first time.
● It is the trend that every Instagram user is following for posting better images with nice background options.
How to Use Color Grading in Final Cut Pro
Have you ever questioned the purpose of those odd video scopes or how to build super grades from the start in Final Cut Pro? In contrast to editing talents, color grading is a technical and difficult ability that takes practice.
In order to help, we decided to compile a thorough beginner’s article to color grading in Final Cut Pro.
With that said, let’s begin!
1. Discover how you color grade in Final Cut Pro
Color grading may be a tedious and time-consuming operation, therefore it’s a skill set that calls for a lot of patience. Some editors won’t conduct any color grading or correction beyond the bare minimum. But even mundane-looking film may look remarkable if you know how to give it a dramatic touch.
A more cinematic grade requires a number of procedures, and there is no one method that works for all situations. We’ll therefore walk you through the process of creating a cinematic color grade in Final Cut Pro, but depending on your material, you might need to add or omit some phases.
Step1Filming
Since the raw video is essential for producing a cinematic image, an outstanding grade begins with the camera.
Use the greatest quality settings your camera offers while recording your video; the more information in your picture, the more you can manipulate it during grading.
While it may seem preferable to shoot with as much color as you can, using a duller color profile is very necessary. Your camera will have color settings, and although the washed-out, drab appearance may not inspire confidence in you, it will offer you a lot more editing possibility.
Step2Create a color profile
After importing your film, you may be concerned about the general dull look of your recordings. The reason for that is because you have not yet matched the color profile of your sequence to the one of your camera. To start on this process, it goes as follows.
- Drag your clip onto your timeline and make sure it is selected. Click on the Inspector icon.
- Then click on the Information tab of the clip.
- Navigate all the way down through the options to find the Color LUT option.
- Then choose the Color profile that matches your clip based on the camera it is filmed with.
- You’re done!
Step3Checking the scopes
The Scopes in Final Cut Pro are panels that display the color information of your shots. They are quite complicated and can be difficult to comprehend if you did not use them ever before. You can activate Video Scopes by clicking View > Show in Viewer > Video Scopes from the View menu. The three components of grading are the highlights, mid-tones, and shadows. Your highlights are shown at the top and your shadows are at the bottom in all grading tools and scopes.
2. Include Color Wheels
Now that your setup is complete, you can begin grading your footage. Grading is done in multiple layers stacked on top of each other. It may take multiple levels to create the desired look. Follow the instructions below to modify your settings to match your clip if you want to give your footage a cinematic look.
You may access a wider range of color manipulation tools with the built-in color wheels, exposure adjustments, including isolation of color selection, RGB modifications across tone ranges, and simple masking.
3. Color board
A vertical color spectrum is shown on the Color Board, and it is intersected by a horizontal line that features four nodes. These are the ranges of the footage that are designated as the Highlights, Midtones, and Shadows, respectively.
Adjusting a node to a new color space has an immediate and noticeable impact on the corresponding section of the image. If you move above the horizontal line, it will increase, and if you go below the line, it will decrease.
You also have control over the Saturation and Exposure settings. These are wonderful to have if you want to increase the contrast in your photographs and make particular colors more vivid or muted.
4. Masks
Using the Shape Masks feature, each of these individual effects can be perfect for particular regions of your footage. In addition, by utilizing a Color Mask, you can alter the appearance of a specific color. It is possible to apply multiple iterations of each color adjustment to a clip and find it listed under the Effect heading.
The order can be changed by dragging and dropping, and either method can be disabled or enabled. Utilizing keyframes allows for the effects of color grading to be specifically timed as well. Last but not least, keep in mind that the quality and color sample depth of the clips determine how much of an overall adjustment you are capable of making to a color.
5. Color Curves
If you are experienced with more advanced picture editing software, such as Adobe Photoshop, you will benefit greatly from using color curves. Adjustments can be made independently to both the Luma (the brightest areas) and the primary composite colors (red, blue, and green).
6. Match Colors
Match Color is an additional choice that may be made from the improvement’s menu. This function will try to replicate the visual style of one video clip in another. First, choose the clip whose color you want to change, click on that clip that has the desired appearance, and last, choose Match Color.
You will still be able to utilize these settings as shortcuts even after you have gained more experience with manual grading and are comfortable making finer adjustments manually. It is important to keep in mind that while using Final Cut Pro X for color grading, effects can be layered on top of one another.
It’s not likely that a single tool or adjustment will solve an issue or produce the desired result; rather, it’s more likely that a number of different impacts will be required. In the same way that different visual effects in Final Cut Pro X may be toggled on and off, any layers that you add to a clip can have their visibility controlled from the Inspector window.
Conclusion
In Final Cut Pro X, you may choose from a wide variety of grading plugins, ranging from more affordable solutions like FCPeffects to more expensive ones like Magic Bullet Looks, which are designed specifically for feature film-style grades.
Additionally, there is a variety of stand-alone applications for color grading, such as DaVinci Resolve and FilmConvert. You might be comfortable with their gear, but you should also know that their professional-grade color package includes some rather complex editing options.
Beginning to experiment with all of Final Cut Pro X’s functions and determining which ones are most useful to you is the best method to gain an understanding of the program’s color grading capabilities. If you don’t currently have a project that requires your attention, you can download stock footage and experiment with it.
Free Download For Win 7 or later(64-bit)
Free Download For macOS 10.14 or later
Free Download For macOS 10.14 or later
Also read:
- New 2024 Approved ReVisionFX ReelSmart Motion Blur Plugin For Premiere Pro
- Updated Sometimes It May Happen to You that You Are Watching a Video that Has Very Low Graphics or, in Other Words, Low Visual Quality. You Might Wish to Change, Instead Improve the Video Quality. Here, AI Upscaling Video Comes to Use for 2024
- In 2024, How to Make a Video Slideshow in iMovie
- Updated In 2024, Google Meet Green Screen
- New Top 7 Color Match Paint Apps for 2024
- 20 Best LUTs for Music Videos
- New Whatre the Best Alternatives to Pexels for 2024
- Updated Adobe Photoshop Is the Best Photo Editor to Add Green Screen Effect to Your Photo While Wondershare Filmora Is the Best Video Editor to Add Green Screen Effect to Your Video for 2024
- Updated 2024 Approved There Are Many Vlogging Cameras You Can Find in the Market. However, to Get a Good Start in Vlogging, some Sony Vlogging Cameras and Canon Vlog Cameras Are to Consider. This Article Introduces You to the Respective List
- In 2024, How To Fix Slow Playback Issues in DaVinci Resolve Finding the Best Solutions
- Updated REVIEW Whats Top 10 Software to Make AI Upscaling Video
- In 2024, How to Use GIMP GREEN SCREEN
- In 2024, Are You Excited to Find Out the Top-Class VHS Video Effects Maker? Put Your Worries at Rest because This Article Will Provide the Best VHS Effect Makers
- Adobe After Effects Review
- In 2024, Top 10 Voice Over Generators Windows, Mac, Android, iPhone, and Onli
- 2024 Approved How to Make a Transparent Background in Paint. How 3D Paint Transparent Background Can Be Made. How to Save an Image with Transparent Background?
- 2024 Approved All You Need to Know About Transparent Logos and How You Can Make Them. Top Transparent Logos You Can Take Inspiration From
- In 2024, Multi Object Tracking The Ultimate Guide
- Art of Time Manipulation A Guide to After Effects Slow Motion Mastery
- Updated Learning Unique Ways to Slow Down Time Lapse on iPhone for 2024
- Updated Do You Want to Add a Motion Blur Effect in Valorant? Read This Guide to Find Out How to Create a Motion Blur Effect in Valorant without Any Hassle
- Updated Use This Color Match Paint Technique to Find the Exact Shade of Any Hue You Have in Mind for Your Paint Project. Match the Paint to Your Desired Color Even without Knowing the Paint Name or Brand with Automotive Paint Matching
- Updated 2024 Approved Ways to Make Sure Your Recording Slideshow in Powerpoint Is Not Wrong
- In 2024, Complete Tutorial on After Effects Countdown Timer Adding
- New In 2024, This Review Post Introduces You to EasyHDR to Review and Customize Your HDR Photos. Youll Also Learn the Best Desktop Application to Edit Your HDR Videos Effortlessly
- 10+ Royalty-Free 5 Second Countdown Footage HD & 4K Clips Included for 2024
- The way to recover deleted pictures on Huawei Nova Y91 without backup.
- How to bypass Honor X50i+’s lock screen pattern, PIN or password
- In 2024, Why is iPogo not working On Itel P55? Fixed | Dr.fone
- Spotify Keeps Crashing A Complete List of Fixes You Can Use on Itel P55+ | Dr.fone
- In 2024, Does Honor X50 GT Have Find My Friends? | Dr.fone
- How to Unlock Vivo S18 Pro Phone without PIN
- How to Unlock a Network Locked Infinix Smart 8 HD Phone?
- How Can We Bypass Motorola Moto G04 FRP?
- New Material Preparation | Virbo AI Live Stream for 2024
- How to Easily Hard reset my Vivo T2 5G | Dr.fone
- In 2024, Unlocking Made Easy The Best 10 Apps for Unlocking Your Realme GT 5 Pro Device
- Best Apple iPhone XR & iPad Screen Mirroring App | Dr.fone
- Title: New In 2024, Within the Realm of Graphic Editing, People Also Ask How to Add Emoji to Photo. Stay Tuned to Walk Through the Best Possible Solutions in the IT Market
- Author: Morgan
- Created at : 2024-04-24 01:12:03
- Updated at : 2024-04-25 01:12:03
- Link: https://ai-video-editing.techidaily.com/new-in-2024-within-the-realm-of-graphic-editing-people-also-ask-how-to-add-emoji-to-photo-stay-tuned-to-walk-through-the-best-possible-solutions-in-the-it-m/
- License: This work is licensed under CC BY-NC-SA 4.0.
