
:max_bytes(150000):strip_icc():format(webp)/GettyImages-1253176532-e5ce8e507433489f87c8b37818c13a01.jpg)
New In This Article, We Are Going to Learn the Simplest Procedure on How to Cut And/Or Trim Videos Using VLC Media Player. Each Step Is Carefully Explained, with Screenshots Attached
In This Article, We Are Going to Learn the Simplest Procedure on How to Cut And/Or Trim Videos Using VLC Media Player. Each Step Is Carefully Explained, with Screenshots Attached
Other than playing videos and music, VLC Media Player can also be used as a video editing tool. While advanced video editing requires unconventional and powerful video editing software, VLC offers a simpler and easy-to-learn process of cutting and/or trimming videos.
You can cut a section of your video and make shorter video clips. This means that you can now get rid of parts of a video that you do not need and preserve those that you like. VLC automatically saves the video clips made, so you do not have to save them again.
In this article, we are going to learn the simplest procedure on how to cut and/or trim videos using VLC Media Player. Each step is carefully explained, with screenshots attached.
To Cut Video Using VLC Media Player
- Download VLC Media Player
You need to have the app before using it. To download it, visit Google Play Store or any other suitable app, search and download. There are a variety of versions that is, 32-bit, 64-bit and Windows ARM. You may as well narrow down your search to the version of your gadget, be it Android, iOS, Linux or Windows.
- Install and Open VLC Media Player
The installation process is simple. You click on the icon indicating ‘install’ then open. On opening, you will come across a page that looks like the one attached below.

This is the dashboard of the VLC Media Player.
- Select the file you would like to cut
On the top of the screen is the menu with ‘Media’ being the first on the far left. On clicking the ‘Media’ button, a drop-down menu will appear. Select the first option, ‘Open File’ to access your files. From the dialogue box that appears, locate your video (the one you would like to cut), select it then click to open. The video will start playing.

- Click on Advanced Controls (View > Advanced Controls)
Some videos will play automatically while others will wait for an action. In case your video plays automatically, it is advisable that you pause it.
On the menu is a tab labelled ‘View’. Choose the tab, click open it and on the drop-down menu, select ‘Advanced Options’.

On selecting ‘Advanced Options’, a red button will appear at the bottom-left corner of the VLC. This is the record button.

Its purpose is to indicate the recording of the section of the video that you would like to cut.
- Click to Cut or Trim
If you had paused your video, you can play it at this stage. If you do not want to cut/trim your video from the start, scroll to the point from which you would like to cut it. Click on the red button for the recording to start. If the video does not play automatically, click to play.
After the video has played till the point where you would like to end, click on the red button again to stop the recording. The cut section will be automatically saved on the videos’ folder on C:\Users\Username\Videos.
An easier way to cut videos with Wondershare Filmora
Wondershare Filmora Video Editor is an alternative video editor. Unlike VLC Media Player, Filmora gives you more options. It allows you to split, trim, edit, combine, and crop a video, among others. It also gives you room to add footnotes, a variety of transitions, lower thirds, among other features. You can as well resize your video and enhance its quality.
For Win 7 or later (64-bit)
For macOS 10.14 or later
To Cut/Trim Videos with Wondershare Filmora:
- Drag and Drop the Video
Assuming that you have already downloaded and installed Wondershare Filmora app, click to open. There are two ways through which you can locate your video.
One, you can opt to drag and drop the video from its location to the app’s timeline. Secondly, you can right click on the space at the top left then select the video to be edited from the dialogue box that will appear.

- Trimming the video
After dropping the video on the timeline, it is likely to take up a lot of space, especially if it is long.
To trim the video from the beginning, place your cursor at the starting point and wait for the pointer to appear. Then move the point forward. To trim from the end, place the cursor at that point, hold and move the pointer forward till the required point.


Trimming the video does not mean that you lose the parts. It is more like shortening it to fit in place.
- Cutting the video
Unlike trimming, cutting involves getting rid of a section of the video completely. To do so, you need to first of all isolate that section.
With the video on the timeline, move and point your cursor at the starting point of the video and click on the scissors icon at the top. Then move it to the end of the video section and click on the scissors icon again. By so doing, you will have selected that section.
Once the section has been selected, right click on the video, select and click to delete. You can then drag the remaining parts to make them one.

After cutting or trimming, you can choose to add several effects to the video. Transitions, watermarks, cropping, resizing, ripple effects among others are some of the changes you could make. All these appear on the menu at the top.
- Save and/or Import your video
The final step is saving or importing your file to prevent its loss. By clicking on the ‘Import’ button, you save the file to the Media Library. By selecting ‘save as’, you select the location where you want to store your file.

Conclusion
There are so many video editors, each with different features. Some are simple to use while others will require advanced software to operate. Whether you use VLC Media Player or Wondershare Filmora, the results will be the same. The difference comes in where you have the knowledge and skills to use one app better than the other one.
The above steps on how to use both VLC Media Player and Wondershare Filmora will guide you through the whole process. It is said that, ‘practice makes perfect’. So yes, keep practicing and putting these skills into use. Sooner or later you will be an expert!
This is the dashboard of the VLC Media Player.
- Select the file you would like to cut
On the top of the screen is the menu with ‘Media’ being the first on the far left. On clicking the ‘Media’ button, a drop-down menu will appear. Select the first option, ‘Open File’ to access your files. From the dialogue box that appears, locate your video (the one you would like to cut), select it then click to open. The video will start playing.
- Click on Advanced Controls (View > Advanced Controls)
Some videos will play automatically while others will wait for an action. In case your video plays automatically, it is advisable that you pause it.
On the menu is a tab labelled ‘View’. Choose the tab, click open it and on the drop-down menu, select ‘Advanced Options’.
On selecting ‘Advanced Options’, a red button will appear at the bottom-left corner of the VLC. This is the record button.
Its purpose is to indicate the recording of the section of the video that you would like to cut.
- Click to Cut or Trim
If you had paused your video, you can play it at this stage. If you do not want to cut/trim your video from the start, scroll to the point from which you would like to cut it. Click on the red button for the recording to start. If the video does not play automatically, click to play.
After the video has played till the point where you would like to end, click on the red button again to stop the recording. The cut section will be automatically saved on the videos’ folder on C:\Users\Username\Videos.
An easier way to cut videos with Wondershare Filmora
Wondershare Filmora Video Editor is an alternative video editor. Unlike VLC Media Player, Filmora gives you more options. It allows you to split, trim, edit, combine, and crop a video, among others. It also gives you room to add footnotes, a variety of transitions, lower thirds, among other features. You can as well resize your video and enhance its quality.
For Win 7 or later (64-bit)
For macOS 10.14 or later
To Cut/Trim Videos with Wondershare Filmora:
- Drag and Drop the Video
Assuming that you have already downloaded and installed Wondershare Filmora app, click to open. There are two ways through which you can locate your video.
One, you can opt to drag and drop the video from its location to the app’s timeline. Secondly, you can right click on the space at the top left then select the video to be edited from the dialogue box that will appear.
- Trimming the video
After dropping the video on the timeline, it is likely to take up a lot of space, especially if it is long.
To trim the video from the beginning, place your cursor at the starting point and wait for the pointer to appear. Then move the point forward. To trim from the end, place the cursor at that point, hold and move the pointer forward till the required point.
Trimming the video does not mean that you lose the parts. It is more like shortening it to fit in place.
- Cutting the video
Unlike trimming, cutting involves getting rid of a section of the video completely. To do so, you need to first of all isolate that section.
With the video on the timeline, move and point your cursor at the starting point of the video and click on the scissors icon at the top. Then move it to the end of the video section and click on the scissors icon again. By so doing, you will have selected that section.
Once the section has been selected, right click on the video, select and click to delete. You can then drag the remaining parts to make them one.
After cutting or trimming, you can choose to add several effects to the video. Transitions, watermarks, cropping, resizing, ripple effects among others are some of the changes you could make. All these appear on the menu at the top.
- Save and/or Import your video
The final step is saving or importing your file to prevent its loss. By clicking on the ‘Import’ button, you save the file to the Media Library. By selecting ‘save as’, you select the location where you want to store your file.
Conclusion
There are so many video editors, each with different features. Some are simple to use while others will require advanced software to operate. Whether you use VLC Media Player or Wondershare Filmora, the results will be the same. The difference comes in where you have the knowledge and skills to use one app better than the other one.
The above steps on how to use both VLC Media Player and Wondershare Filmora will guide you through the whole process. It is said that, ‘practice makes perfect’. So yes, keep practicing and putting these skills into use. Sooner or later you will be an expert!
Basic Introduction for LumaFusion Color Grading
Create High-Quality Video - Wondershare Filmora
An easy and powerful YouTube video editor
Numerous video and audio effects to choose from
Detailed tutorials provided by the official channel
There are many reasons why video editing is essential for content creators. Regardless of your reasons for putting up video content, you’ll achieve little progress without manipulating and structuring your shots. Video editing is what helps to create an emotional connection to your content. That, in turn, is what spurs your viewers to take the action you desire.
Maybe you already know a thing or two about video editing? Good for you! However, there’s always more to learn. For example, only a few people understand the intricacies of luma fusion color grading. Meanwhile, that’s one of the significant differentiating factors between a regular video editor and a pro.
Are you tired of video editing at a basic level? Then this article is for you. It will introduce you to the basics of LumaFusion color grading. Are you ready?
In this article
02 Essential Things You Should Know About Color Grading in LumaFusion
03 Does LumaFusion Have a Desktop Version?
What Is LumaFusion?
Are you a filmmaker, video producer, or editor? Then you’ll need LumaFusion at some point in your editing journey. Whether you are a professional or not, you can use LumaFusion to tell exciting stories through your videos. It has numerous essential features to produce the precise effects you wish to achieve. What’s more, you can use this effective multitrack video editor on iPads and iPhones.
One thing you will love about LumaFusion is its user-friendliness. Even as an aspiring videographer with little experience, you can understand how to use this video editing powerhouse in an instant and with minimal supervision.

LumaFusion is affordable, especially non-linear editors (NLEs) with similar details. When it comes to robust features, LumaFusion retakes the spotlight. This video editor will become your favorite tool in no time.
Here are some exciting things you can do using LumaFusion:
● Enjoy a Simplified SSD and Cloud Storage Importing Process
One of the best things about LumaFusion is your ability to import from SSD and cloud storage seamlessly. If you’re using an external SSD for playback media, this feature will excite you. LumaFusion automatically imports media from your SSD whenever you add video clips to the timeline. There’s no need to waste time importing media by yourself.
● Switch Between Six Workspace Layouts
LumaFusion features six workspace layouts. So you can choose whatever one works best for the project you are working on. With the layout button, you can scramble the source viewer, browser, and timeline to your preference. LumaFusion also gives you the option of viewing the content in portrait or landscape modes. It’s a truly customizable and advanced multitrack video editing app for everyone who loves ease.
● Access Seamless Final Cut Pro Exporting
Do you work with Final Cut Pro X? Then there’s exciting news for you. Lumafusion allows you to export specific project files so that you can work on the NLE. Even though this feature is only available for a fee, it offers excellent value for its $20 price. You can hardly have it cheaper with other NLEs.
● Leverage Its Intuitive UI/UX
This is no hoax—LumaFusion’s intuitive design will blow your mind. If you’ve got prior knowledge or experience using other editing platforms (especially NLEs), you find LumaFusion easy to use. If not, their comprehensive reference guide can help you get acquainted with the app quickly. LumaFusion’s design gives you absolute control.
● Explore Flexibility and Amazing Effects
LumaFusion has numerous fantastic effects to appreciate. These features offer you top-notch flexibility and functionality. The clip editor’s preview window comprises four different editors—the frame and fit editor, audio editors, speed editors, and the color and effects editor. From the timeline navigator to the audio mixer and clip editor, there’s a lot to explore on LumaFusion.
● Enjoy the Automated Audio Ducking Feature
Audio ducking involves temporarily lowering a specified audio signal’s volume when another one comes up. Having to do this manually can be tiring. Fortunately, with LumaFusion’s automatic audio ducking feature, you don’t have to worry about that anymore. All you need to do is assign speakers and music tracks as master and auto track. The audio ducking feature takes it up from there.

● Easy and Direct Exportation to Youtube and Vimeo
LumaFusion comes with an option that allows you to export your edited videos directly to YouTube or Vimeo. When exporting directly to YouTube, the app will enable you to write titles and descriptions or set categories and tags. If you choose to upload your videos to YouTube directly, you can transfer it to your file folder first.
Essential Things You Should Know About Color Grading in LumaFusion
Color grading is an essential post-production process that gives your footage’s color scheme a distinctive appearance and character. This technique gives your videos some cinematic impression by painting over them.
With color grading, you can adjust your video’s color balance, saturation, contrast, luminance, black level, etc. It helps to evoke the particular emotions or moods that you want your videos to exude.
These are the essential things to note about color grading in LumaFusion:
1. Does LumaFusion Have Color Grading?
In answering this question, it’s essential to understand the difference between color correction and color grading. Both editing techniques have vital differentiating characteristics, so it’s wrong to use them interchangeably.
Color correction ensures that videos look as natural to the human eye as possible. If there’s a technical color error, for example, due to bad lighting, color correction helps fix that.
However, the aim of color grading isn’t fixing color mistakes but using colors to convey a mood, atmosphere, or style. Some videographers classify color correction as the first phase in the color grading process.
Generally, you can use LumaFusion to color correct your footage. However, you can’t color grade with the app except you decide to tamper with the color presets tab’s color sliders. Even at that, you wouldn’t get the perfect results you want.
Fortunately, LumaFusion allows you to import and apply LUT (look-up tables). With LumaFusion LUTs, you can color grade your footage to your satisfaction.
2. How To Color Grade in LumaFusion
This is how to color grade your videos:
○ First, Color Correct
When attempting to color grade your footage, it’s essential that you color correct it first. Color correction ensures that your video doesn’t remain flat or unexciting.
○ Create Your LUTs
LUT allows you to save specific color grades to use anytime you need them. This helps to save time by ensuring that you don’t develop color spaces all over again when working on various footage. You can also download as many free LUTs as you like.
○ Bring In a LUT
After creating LUTs, import and apply them to your LumaFusion. Next, blend or adjust your LUt by shifting the slider to get your desired effects. It’s that simple!
3. Can I Use Multiple LUTs in LumaFusion?
The short answer is a big YES. You can apply multiple LUTs in LumaFusion.
Here’s how t go o about it:
- Apply your first LUT
- Export the LUT
- Access rendered movies
- Apply the second LUT
There is numerous manipulation you can do with LUT. For example, you can merge two or more LUTs into one.
Does LumaFusion Have a Desktop Version?
Do you own a PC or desktop[, and you’re wondering how to access LumaFusion’s unique features on it? Unfortunately, LumaFusion is only available for iOS users and not Android or Windows PC.
However, all hope is not lost as Filmora has come to the rescue. Filmora’s video editor provides you with color matching/grading options to create the cinematic effects you want for your footage. You can use the features on your computer.
Let’s talk about Filmora’s Video Editor for Windows features in some detail:
For Win 7 or later (64-bit)
For macOS 10.12 or later
● Color Match
Do you want to achieve a similar color or consistent look for multiple clips? Then Filmora’s video editor is your best bet. The color match feature ensures color consistency throughout your video. It’s easy to use, aids efficiency, and saves your time.
● Color Correction
Color correction is one of the easiest ways to make your footage look extraordinary. With over 40 fantastic drag-and-color presets available to you, your color correction game is about to get lit. Filmora’s color correction feature also allows you to make 3D LUTs conveniently.
Filmora offers free online tools for videographers and unique products for computer software and mobile apps. You can check here to get more information about the Lumafusion alternatives on Mac .
Conclusion
● What’s worth doing is worth doing well? That’s why, as a videographer, you shouldn’t be comfortable with uploading flat, ordinary videos. It’ll help if you take your craft a notch higher by considering color grading for your footage.
● Did you fall in love with LumaFusion’s video editing app? That’s great. With your iPhone or iPad, you can get the best out of the video editor.
● Filmora offers you cool video editing features for color correcting and grading if you’re working on a desktop. There are also amazing Filmora apps for iOS and Android devices. Visit their website for more information on how these video editing features can improve your project’s quality.
There are many reasons why video editing is essential for content creators. Regardless of your reasons for putting up video content, you’ll achieve little progress without manipulating and structuring your shots. Video editing is what helps to create an emotional connection to your content. That, in turn, is what spurs your viewers to take the action you desire.
Maybe you already know a thing or two about video editing? Good for you! However, there’s always more to learn. For example, only a few people understand the intricacies of luma fusion color grading. Meanwhile, that’s one of the significant differentiating factors between a regular video editor and a pro.
Are you tired of video editing at a basic level? Then this article is for you. It will introduce you to the basics of LumaFusion color grading. Are you ready?
In this article
02 Essential Things You Should Know About Color Grading in LumaFusion
03 Does LumaFusion Have a Desktop Version?
What Is LumaFusion?
Are you a filmmaker, video producer, or editor? Then you’ll need LumaFusion at some point in your editing journey. Whether you are a professional or not, you can use LumaFusion to tell exciting stories through your videos. It has numerous essential features to produce the precise effects you wish to achieve. What’s more, you can use this effective multitrack video editor on iPads and iPhones.
One thing you will love about LumaFusion is its user-friendliness. Even as an aspiring videographer with little experience, you can understand how to use this video editing powerhouse in an instant and with minimal supervision.
LumaFusion is affordable, especially non-linear editors (NLEs) with similar details. When it comes to robust features, LumaFusion retakes the spotlight. This video editor will become your favorite tool in no time.
Here are some exciting things you can do using LumaFusion:
● Enjoy a Simplified SSD and Cloud Storage Importing Process
One of the best things about LumaFusion is your ability to import from SSD and cloud storage seamlessly. If you’re using an external SSD for playback media, this feature will excite you. LumaFusion automatically imports media from your SSD whenever you add video clips to the timeline. There’s no need to waste time importing media by yourself.
● Switch Between Six Workspace Layouts
LumaFusion features six workspace layouts. So you can choose whatever one works best for the project you are working on. With the layout button, you can scramble the source viewer, browser, and timeline to your preference. LumaFusion also gives you the option of viewing the content in portrait or landscape modes. It’s a truly customizable and advanced multitrack video editing app for everyone who loves ease.
● Access Seamless Final Cut Pro Exporting
Do you work with Final Cut Pro X? Then there’s exciting news for you. Lumafusion allows you to export specific project files so that you can work on the NLE. Even though this feature is only available for a fee, it offers excellent value for its $20 price. You can hardly have it cheaper with other NLEs.
● Leverage Its Intuitive UI/UX
This is no hoax—LumaFusion’s intuitive design will blow your mind. If you’ve got prior knowledge or experience using other editing platforms (especially NLEs), you find LumaFusion easy to use. If not, their comprehensive reference guide can help you get acquainted with the app quickly. LumaFusion’s design gives you absolute control.
● Explore Flexibility and Amazing Effects
LumaFusion has numerous fantastic effects to appreciate. These features offer you top-notch flexibility and functionality. The clip editor’s preview window comprises four different editors—the frame and fit editor, audio editors, speed editors, and the color and effects editor. From the timeline navigator to the audio mixer and clip editor, there’s a lot to explore on LumaFusion.
● Enjoy the Automated Audio Ducking Feature
Audio ducking involves temporarily lowering a specified audio signal’s volume when another one comes up. Having to do this manually can be tiring. Fortunately, with LumaFusion’s automatic audio ducking feature, you don’t have to worry about that anymore. All you need to do is assign speakers and music tracks as master and auto track. The audio ducking feature takes it up from there.
● Easy and Direct Exportation to Youtube and Vimeo
LumaFusion comes with an option that allows you to export your edited videos directly to YouTube or Vimeo. When exporting directly to YouTube, the app will enable you to write titles and descriptions or set categories and tags. If you choose to upload your videos to YouTube directly, you can transfer it to your file folder first.
Essential Things You Should Know About Color Grading in LumaFusion
Color grading is an essential post-production process that gives your footage’s color scheme a distinctive appearance and character. This technique gives your videos some cinematic impression by painting over them.
With color grading, you can adjust your video’s color balance, saturation, contrast, luminance, black level, etc. It helps to evoke the particular emotions or moods that you want your videos to exude.
These are the essential things to note about color grading in LumaFusion:
1. Does LumaFusion Have Color Grading?
In answering this question, it’s essential to understand the difference between color correction and color grading. Both editing techniques have vital differentiating characteristics, so it’s wrong to use them interchangeably.
Color correction ensures that videos look as natural to the human eye as possible. If there’s a technical color error, for example, due to bad lighting, color correction helps fix that.
However, the aim of color grading isn’t fixing color mistakes but using colors to convey a mood, atmosphere, or style. Some videographers classify color correction as the first phase in the color grading process.
Generally, you can use LumaFusion to color correct your footage. However, you can’t color grade with the app except you decide to tamper with the color presets tab’s color sliders. Even at that, you wouldn’t get the perfect results you want.
Fortunately, LumaFusion allows you to import and apply LUT (look-up tables). With LumaFusion LUTs, you can color grade your footage to your satisfaction.
2. How To Color Grade in LumaFusion
This is how to color grade your videos:
○ First, Color Correct
When attempting to color grade your footage, it’s essential that you color correct it first. Color correction ensures that your video doesn’t remain flat or unexciting.
○ Create Your LUTs
LUT allows you to save specific color grades to use anytime you need them. This helps to save time by ensuring that you don’t develop color spaces all over again when working on various footage. You can also download as many free LUTs as you like.
○ Bring In a LUT
After creating LUTs, import and apply them to your LumaFusion. Next, blend or adjust your LUt by shifting the slider to get your desired effects. It’s that simple!
3. Can I Use Multiple LUTs in LumaFusion?
The short answer is a big YES. You can apply multiple LUTs in LumaFusion.
Here’s how t go o about it:
- Apply your first LUT
- Export the LUT
- Access rendered movies
- Apply the second LUT
There is numerous manipulation you can do with LUT. For example, you can merge two or more LUTs into one.
Does LumaFusion Have a Desktop Version?
Do you own a PC or desktop[, and you’re wondering how to access LumaFusion’s unique features on it? Unfortunately, LumaFusion is only available for iOS users and not Android or Windows PC.
However, all hope is not lost as Filmora has come to the rescue. Filmora’s video editor provides you with color matching/grading options to create the cinematic effects you want for your footage. You can use the features on your computer.
Let’s talk about Filmora’s Video Editor for Windows features in some detail:
For Win 7 or later (64-bit)
For macOS 10.12 or later
● Color Match
Do you want to achieve a similar color or consistent look for multiple clips? Then Filmora’s video editor is your best bet. The color match feature ensures color consistency throughout your video. It’s easy to use, aids efficiency, and saves your time.
● Color Correction
Color correction is one of the easiest ways to make your footage look extraordinary. With over 40 fantastic drag-and-color presets available to you, your color correction game is about to get lit. Filmora’s color correction feature also allows you to make 3D LUTs conveniently.
Filmora offers free online tools for videographers and unique products for computer software and mobile apps. You can check here to get more information about the Lumafusion alternatives on Mac .
Conclusion
● What’s worth doing is worth doing well? That’s why, as a videographer, you shouldn’t be comfortable with uploading flat, ordinary videos. It’ll help if you take your craft a notch higher by considering color grading for your footage.
● Did you fall in love with LumaFusion’s video editing app? That’s great. With your iPhone or iPad, you can get the best out of the video editor.
● Filmora offers you cool video editing features for color correcting and grading if you’re working on a desktop. There are also amazing Filmora apps for iOS and Android devices. Visit their website for more information on how these video editing features can improve your project’s quality.
Top 10 Fun Discord Bots You Need
Top 10 Fun Discord Bots You Need in 2024
An easy yet powerful editor
Numerous effects to choose from
Detailed tutorials provided by the official channel
Consumers enjoy discord because it serves as a hub for their social groups and communities. It’s a haven where users can be themselves while socializing with others who share their interests and hobbies. There is no algorithm selecting what they should see, no continuous scrolling, and no news feed. Common interests fuel conversations and you can use some fun discord bots to pep up the conversation.

Fun bots to add discord with artificial intelligence (AI) technologies are among the most helpful tools available on the discord platform. Funny emojis for discord may be beneficial to greet new members and have funny light conversations! This aids in the creation and maintenance of a vibrant online community. You can add music, games, and fun memes to your server using these bots if you wish to.
In this article
01 [10 Fun Discord Bots You Need in 2024](#Part 1)
02 [Fun Discord Bots FAQs](#Part 2)
Part 1 Fun Discord Bots You Need in 2024
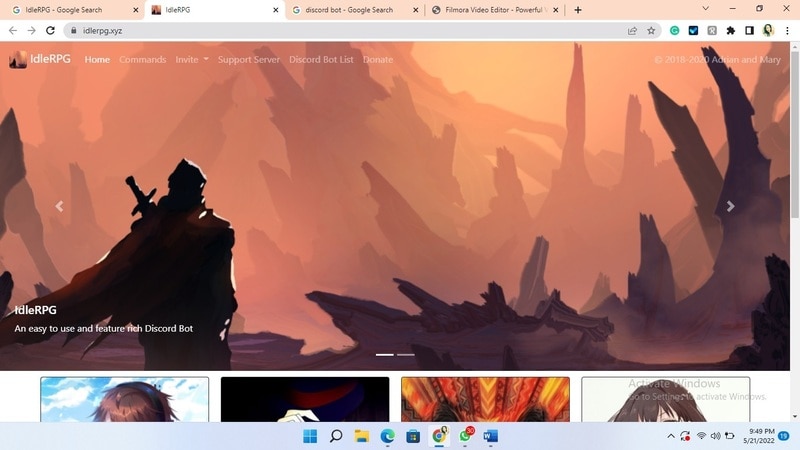
01IdleRPG
The IdleRPG is another enjoyable and engaging fun discord bot in the RPG gaming experience. It rewards server members for participating in the game while gaining XP and having fun. It offers character advancement and is comparable to other RPG games.
You may travel on a quest, trade various things, fight other players, and even find love. There’s also a scoreboard for the top ten loves, top ten PvP players, top ten wealthiest, and top ten XP players. IdleRPG also allows you to wager in various ways to help you boost your gaming money.
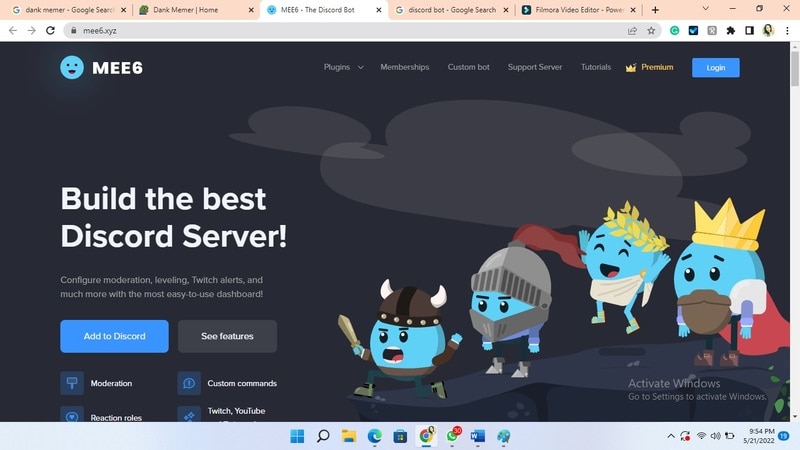
02MEE6
MEE6 is a widespread moderation and one of the greatest fun bots for discord. It takes care of many tasks that a mod team would typically do. This includes greeting new members, informing your server when you or your favorite content producers go live on Twitch or YouTube, and allowing users to assign roles depending on their reactions.
A command tool that allows you to generate custom commands and an XP leveling system that users may grind to earn access to various channels and permissions depending on activity are two of MEE6’s more complicated features. MEE6 also includes plugins for music and developing your fun discord bot.
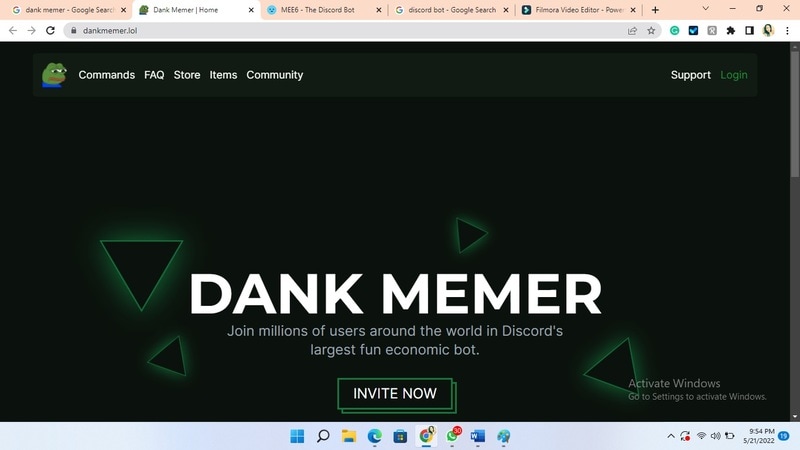
03Dank Memer
Dank Memer is another fun bot to add to discord with a lighthearted tone. It offers one of the most extensive built-in economies, allowing participants to engage in text-based thievery, bank robbery, and gambling experiences.
As its name implies, it also offers a slew of meme-related commands. You can use simple chat instructions to create memes. Other memes automatically publish.
Even more impressive is that awesome memes are collected daily from Reddit’s top meme collections.
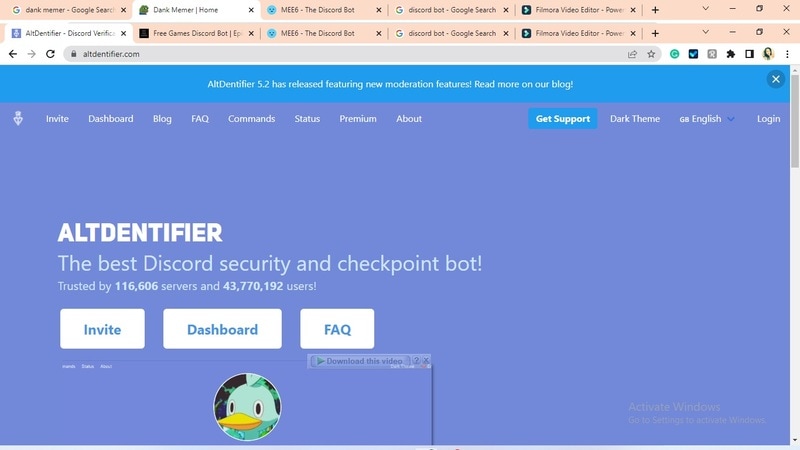
04AltDentifier
Another unique funny discord emoji bot is AltDentifier, which maintains your server clean and spam-free. It’s simple to set up and takes only a few minutes to get up and run. It now has over 35 million users spread across 100,000 servers. It also includes several more moderation commands to make administration easier.
The AltDentifier bot contains:
● An automated anti-raid system.
● A robust verification mechanism.
● Multilingual support.
● A review record.
It will also notify you if a user attempts to circumvent any limitations by utilizing a VPN.
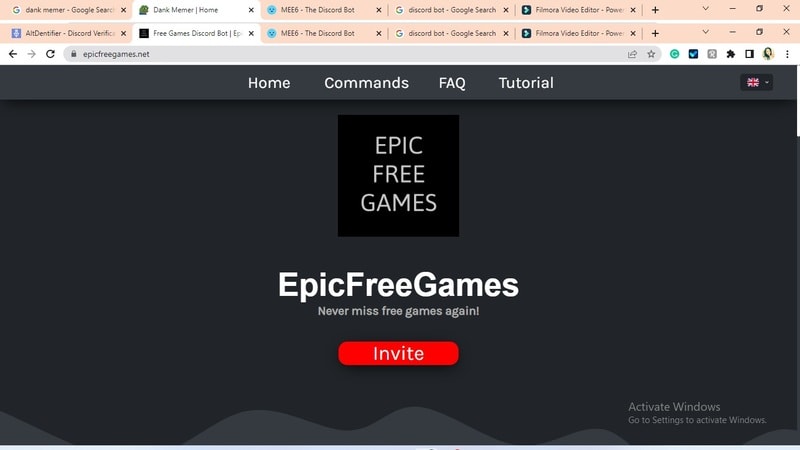
05EpicFreeGames
Over the last two years, Epic Free Games has given away thousands of free games. GTA V, Dead By Daylight, and NBA 2K21 are among the given-away titles. It even-handed away Discord Nitro lately. Have any of these free games ever escaped your notice? Fear not, for the EpicFreeGames bot has your back.
The EpicFreeGames bot delivers a message to a channel, reminding everyone of Epic’s free game(s). It only has one task, yet it can provide you with hundreds of dollars worth of games. Never miss another fantastic free Epic Games game again.
06**Rythm **
Rythm is a great fun discord bot for playing music in the voice stream of your server. This one features a beautiful user interface that includes a music player that you can interact with. This makes controlling the channel’s queue a breeze.
The options are changeable. You can designate DJ duties, prohibit the same songs from appearing in queues again, and block particular channels from playing music. Rhythm is less platform-agnostic than Groovy. Spotify, YouTube, SoundCloud, and Bandcamp are among the options. Apple Music is not currently supported.
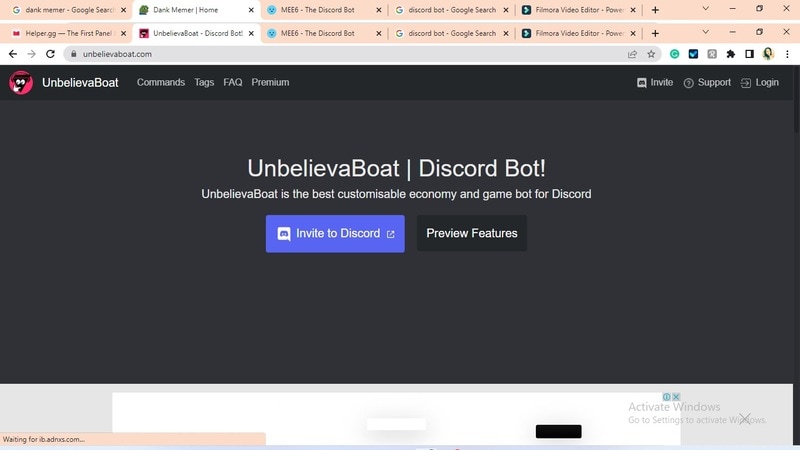
07Unbelievaboat
UnbelievaBoat is a versatile, fun bot to add to discord that uses exciting activities to keep server members engaged. These capabilities, fortunately, include a moderation mechanism that you may utilize to issue warnings and enforce bans. Your moderators may keep track of each action by assigning it a case number.
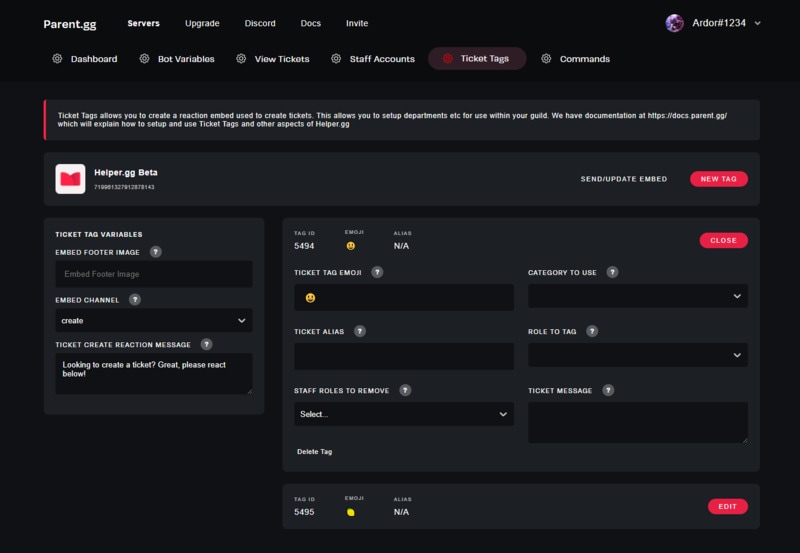
08Helper.gg
Helper.gg enables you to transform your discord server into a support ticket system. It’s a board ticket bot with a stunning UI that makes managing and responding to client tickets simple.
Create staff accounts for your company’s customer support representatives and manage their access. Ticket logging with the flexibility to rename and relocate tickets, add and delete users, and the contentment of having tickets close automatically based on the amount of time that has passed since the previous reply are all accessible.
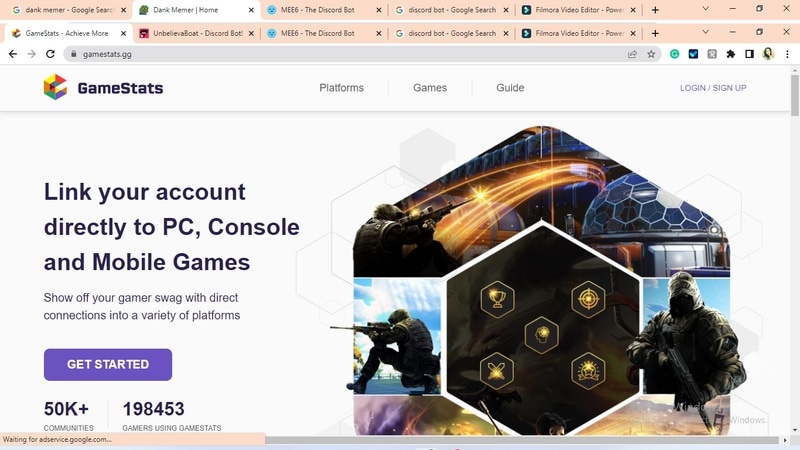
09GameStats
Next, GameStats has one-of-a-kind funny emojis for the discord bot. We all enjoy looking at our in-game statistics and comparing them. The GameStats Discord bot makes sharing and displaying your impressive numbers simple.
Connect to your game or platform, make a personalized profile card, and begin sharing your tryhard statistics.
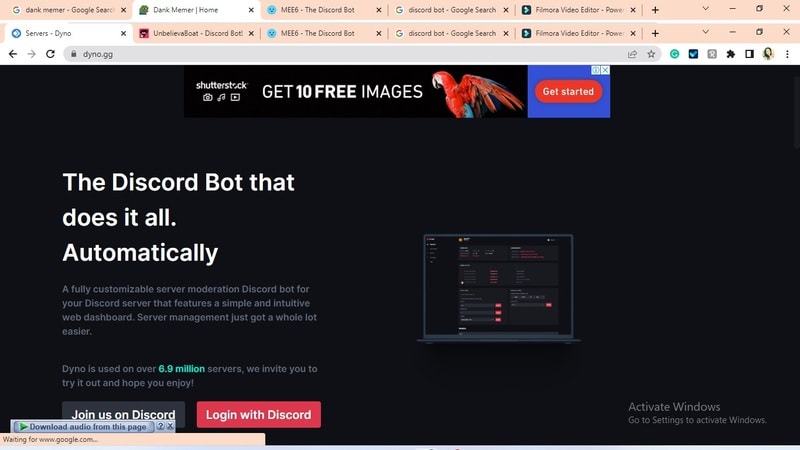
10Dyno
Dyno is another well-crafted fun discord bot. It’s an utterly customizable server moderation bot that assists with server automation. You also receive a basic online dashboard with Dyno that you can use to monitor and control your server.
It has functions such as creating positions, making announcements, banning members, and even requesting puppy or cat images. Dyno is a fun bot that allows you to automate your server management effortlessly. Premium subscriptions, which start at $4.99 per month and unlock more exclusive features, are also available.
However, if you are a creative video editor who likes sharing their experience on discord, Filmora is for you. With Filmora, you can bring your recorded experiences with funny discord emojis to life!
But Wait, What is Wondershare Filmora Video Editor ?
Filmora is a famous video editing program for those who wish to focus on editing and producing high-quality videos with the support of 4K video editing. It’s a reasonably priced software featuring tools like split, trim, add text, color, etc. When it comes to designing, adding effects, and modifying movies, it provides users with many possibilities. Users can add overlays, create animations and objects, add music, and more with Wondershare’s Filmora. It’s an excellent tool for individuals who wish to include dedications, tributes, fun emojis and anecdotes in their films. Any video can also benefit from voiceovers.
For Win 7 or later (64-bit)
For macOS 10.12 or later
Part 2 Fun Discord Bots FAQs
Q. What does MEE6 stand for?
A. MEE6 is a discord role bot that lets users assign roles to themselves via discord replies. This discord role generator will change user rights in discord automatically.
Q. Are these fun bots free?
A. Yes and no. Most fun bots for discord are free to use, although you must pay for some features.
Q. What is the top level I can reach on the MEE6 bot?
A. The maximum level accessible is 1,768,802, which would take 935 billion years if messages sent every minute.
Q. Help! My discord got hacked; how did that even happen?
A. Users may edit discord javascript files. A cybercriminal can install harmful malware to discord client files if they get user authorization. When people open the file, the code also gets executed. After then, the hacker has access to the user’s discord data.
Q. What can discord bots do?
A. On your server, the bots can conduct a variety of helpful automated chores and bot commands, like welcoming new users, monitoring content, and banning rule violators. Using fun discord bots’ instructions, you can add music, humor, games, and other emojis to your server.
● Ending Thoughts →
● In short, moderators and administrators can use funny discord emojis to administer their servers better, make them attractive, and get more users. There are many vanilla discord commands to choose from, and when you put fun bots to add to discord, the possibilities become unlimited.
● Besides, there are several funny emojis for discord to improve your discord skills and establish your discord server. Finally, Filmora can assist you in beautifying your recorded videos make funny emojis for discord.
Consumers enjoy discord because it serves as a hub for their social groups and communities. It’s a haven where users can be themselves while socializing with others who share their interests and hobbies. There is no algorithm selecting what they should see, no continuous scrolling, and no news feed. Common interests fuel conversations and you can use some fun discord bots to pep up the conversation.
Fun bots to add discord with artificial intelligence (AI) technologies are among the most helpful tools available on the discord platform. Funny emojis for discord may be beneficial to greet new members and have funny light conversations! This aids in the creation and maintenance of a vibrant online community. You can add music, games, and fun memes to your server using these bots if you wish to.
In this article
01 [10 Fun Discord Bots You Need in 2024](#Part 1)
02 [Fun Discord Bots FAQs](#Part 2)
Part 1 Fun Discord Bots You Need in 2024
01IdleRPG
The IdleRPG is another enjoyable and engaging fun discord bot in the RPG gaming experience. It rewards server members for participating in the game while gaining XP and having fun. It offers character advancement and is comparable to other RPG games.
You may travel on a quest, trade various things, fight other players, and even find love. There’s also a scoreboard for the top ten loves, top ten PvP players, top ten wealthiest, and top ten XP players. IdleRPG also allows you to wager in various ways to help you boost your gaming money.
02MEE6
MEE6 is a widespread moderation and one of the greatest fun bots for discord. It takes care of many tasks that a mod team would typically do. This includes greeting new members, informing your server when you or your favorite content producers go live on Twitch or YouTube, and allowing users to assign roles depending on their reactions.
A command tool that allows you to generate custom commands and an XP leveling system that users may grind to earn access to various channels and permissions depending on activity are two of MEE6’s more complicated features. MEE6 also includes plugins for music and developing your fun discord bot.
03Dank Memer
Dank Memer is another fun bot to add to discord with a lighthearted tone. It offers one of the most extensive built-in economies, allowing participants to engage in text-based thievery, bank robbery, and gambling experiences.
As its name implies, it also offers a slew of meme-related commands. You can use simple chat instructions to create memes. Other memes automatically publish.
Even more impressive is that awesome memes are collected daily from Reddit’s top meme collections.
04AltDentifier
Another unique funny discord emoji bot is AltDentifier, which maintains your server clean and spam-free. It’s simple to set up and takes only a few minutes to get up and run. It now has over 35 million users spread across 100,000 servers. It also includes several more moderation commands to make administration easier.
The AltDentifier bot contains:
● An automated anti-raid system.
● A robust verification mechanism.
● Multilingual support.
● A review record.
It will also notify you if a user attempts to circumvent any limitations by utilizing a VPN.
05EpicFreeGames
Over the last two years, Epic Free Games has given away thousands of free games. GTA V, Dead By Daylight, and NBA 2K21 are among the given-away titles. It even-handed away Discord Nitro lately. Have any of these free games ever escaped your notice? Fear not, for the EpicFreeGames bot has your back.
The EpicFreeGames bot delivers a message to a channel, reminding everyone of Epic’s free game(s). It only has one task, yet it can provide you with hundreds of dollars worth of games. Never miss another fantastic free Epic Games game again.
06**Rythm **
Rythm is a great fun discord bot for playing music in the voice stream of your server. This one features a beautiful user interface that includes a music player that you can interact with. This makes controlling the channel’s queue a breeze.
The options are changeable. You can designate DJ duties, prohibit the same songs from appearing in queues again, and block particular channels from playing music. Rhythm is less platform-agnostic than Groovy. Spotify, YouTube, SoundCloud, and Bandcamp are among the options. Apple Music is not currently supported.
07Unbelievaboat
UnbelievaBoat is a versatile, fun bot to add to discord that uses exciting activities to keep server members engaged. These capabilities, fortunately, include a moderation mechanism that you may utilize to issue warnings and enforce bans. Your moderators may keep track of each action by assigning it a case number.
08Helper.gg
Helper.gg enables you to transform your discord server into a support ticket system. It’s a board ticket bot with a stunning UI that makes managing and responding to client tickets simple.
Create staff accounts for your company’s customer support representatives and manage their access. Ticket logging with the flexibility to rename and relocate tickets, add and delete users, and the contentment of having tickets close automatically based on the amount of time that has passed since the previous reply are all accessible.
09GameStats
Next, GameStats has one-of-a-kind funny emojis for the discord bot. We all enjoy looking at our in-game statistics and comparing them. The GameStats Discord bot makes sharing and displaying your impressive numbers simple.
Connect to your game or platform, make a personalized profile card, and begin sharing your tryhard statistics.
10Dyno
Dyno is another well-crafted fun discord bot. It’s an utterly customizable server moderation bot that assists with server automation. You also receive a basic online dashboard with Dyno that you can use to monitor and control your server.
It has functions such as creating positions, making announcements, banning members, and even requesting puppy or cat images. Dyno is a fun bot that allows you to automate your server management effortlessly. Premium subscriptions, which start at $4.99 per month and unlock more exclusive features, are also available.
However, if you are a creative video editor who likes sharing their experience on discord, Filmora is for you. With Filmora, you can bring your recorded experiences with funny discord emojis to life!
But Wait, What is Wondershare Filmora Video Editor ?
Filmora is a famous video editing program for those who wish to focus on editing and producing high-quality videos with the support of 4K video editing. It’s a reasonably priced software featuring tools like split, trim, add text, color, etc. When it comes to designing, adding effects, and modifying movies, it provides users with many possibilities. Users can add overlays, create animations and objects, add music, and more with Wondershare’s Filmora. It’s an excellent tool for individuals who wish to include dedications, tributes, fun emojis and anecdotes in their films. Any video can also benefit from voiceovers.
For Win 7 or later (64-bit)
For macOS 10.12 or later
Part 2 Fun Discord Bots FAQs
Q. What does MEE6 stand for?
A. MEE6 is a discord role bot that lets users assign roles to themselves via discord replies. This discord role generator will change user rights in discord automatically.
Q. Are these fun bots free?
A. Yes and no. Most fun bots for discord are free to use, although you must pay for some features.
Q. What is the top level I can reach on the MEE6 bot?
A. The maximum level accessible is 1,768,802, which would take 935 billion years if messages sent every minute.
Q. Help! My discord got hacked; how did that even happen?
A. Users may edit discord javascript files. A cybercriminal can install harmful malware to discord client files if they get user authorization. When people open the file, the code also gets executed. After then, the hacker has access to the user’s discord data.
Q. What can discord bots do?
A. On your server, the bots can conduct a variety of helpful automated chores and bot commands, like welcoming new users, monitoring content, and banning rule violators. Using fun discord bots’ instructions, you can add music, humor, games, and other emojis to your server.
● Ending Thoughts →
● In short, moderators and administrators can use funny discord emojis to administer their servers better, make them attractive, and get more users. There are many vanilla discord commands to choose from, and when you put fun bots to add to discord, the possibilities become unlimited.
● Besides, there are several funny emojis for discord to improve your discord skills and establish your discord server. Finally, Filmora can assist you in beautifying your recorded videos make funny emojis for discord.
Best Ideas on Using Green Screen with Filmora
Green screener chroma key is commonly used in film, tv shows, and social media videos nowadays. This article will show you how to light film and edit a green screen. Additionally, you can have some fun ideas with a chroma key. Therefore, keep reading this article to know all the information.
Part 1: Cool Ideas to Use Green Screen
1. The Magic Box

2. Liquid Transformation

3. Key Out a Body Part

4. T-shirt TV Screen

Part 2: Setting Up The Green Screen
Filming with the green screen is getting easier and easier. Anyone can do it, but before you get started, we will share some do’s and don’ts to help you get the best results.
In fact, there are many ways to set up a green screen, but the most cost-efficient way is with a green screen fabric. If you are using a green fabric as a DIY green screen, make sure you steam or iron it out, whether taping it to a wall or hanging it off the rack. Keep in mind the green screen should not leave any wrinkles.
It is because wrinkles will make lighting the green screen a nightmare, and uneven lighting will leave you with shadows and disappointing results. It would help if you also pulled the green screen tight to get a seamless background. The better you do with the setup, the easier it will be the key it out later
Part 3: Lighting a Green Screen
It doesn’t matter how nice your green screen is. You won’t get good results if you don’t light it properly. When you light a green screen, be aware of these things.
- Make sure there are at least six feet of space between you and your green screen; therefore, you’re not casting a shadow that cannot be keyed out later.
- Remember, any shadow on the green screen is bad. The lighting on the screen should be flat, even, and one-dimensional meaning. Please don’t place the screen leaning at an angle since they’ll make it harder to light evenly.
- Do light yourself and your background separately. It will ensure your subject wouldn’t bleed into the green, which will create a halo around them.
- After you key out the green screen and lighting, your subjects should emulate the lighting from your final footage. For example, if you know sunlight is coming from the left light, your subject is from the left direction as well.
Part 4. Keying out your green screen
Once your footage is good, go into Filmora and import it into your timeline, then double-click it to find the chroma key menu. However, don’t stop there. Clicking the chroma key button is not enough to guarantee perfectly keyed footage, so play around with the offset tolerance edge thickness and edge feather. Lastly, adjust it to make sure your edit looks as good as possible.
Free Download For Win 7 or later(64-bit)
Free Download For macOS 10.14 or later

Summary
Aside from a video background, there are many things you can use chrome key effects on. For example, you can make liquid transformation, you can make a magic box, etc. In the meantime, it doesn’t matter how good your green screen, it won’t have a good results if are not light it properly. You can use Filmora to keying out your green screen. It just take a few clicks to be able keying out your green screen by following the tutorial above.
Free Download For macOS 10.14 or later
Summary
Aside from a video background, there are many things you can use chrome key effects on. For example, you can make liquid transformation, you can make a magic box, etc. In the meantime, it doesn’t matter how good your green screen, it won’t have a good results if are not light it properly. You can use Filmora to keying out your green screen. It just take a few clicks to be able keying out your green screen by following the tutorial above.
Also read:
- Updated In 2024, 22 Free Video Editing Software to Save Your Money and Time
- Updated 2024 Approved How to Add Freeze Frame to Your Video From Any Device?
- Want to Add Life to Your Customary Business Presentations and Videos on a MacOs Device with Expressive Emojis? Dive in to Have an Insight Into the Credibility of Using Emojis on a Mac
- New In 2024, How Does the YouTube AI Algorithm Work - AI EXPLAINED
- Updated In 2024, Deleting White Background in Photoshop Is Hard? No
- New 2024 Approved How to Make Random Letter Reveal Intro?
- New 2024 Approved 10 Best Suggestions for AI Video Interviews
- New In 2024, Recording Video in Slow Motion Some Considerable Points
- Updated In 2024, Its Always a Cool Thing to Use a 3D Intro Maker to Create Intro Videos for Your Clips. This Post Will Introduce You 4 of the Best Intro Video Makers to Help You Improve Your Video
- Updated 2024 Approved Find The Best LUTs for Lightroom
- Updated This Blog Post Shows How to Create an Eye-Catching Paper Rip Effect for Your Videos Using Wondershare Filmora with These Easy-to-Follow Steps
- How Did AI Video Games Act More Human Than Human, In 2024
- New How To Use Motion Blur On Video Star?
- In 2024, Guide To Make a YouTube Intro by Filmora
- 2024 Approved How to Make Text Reveal Effect Easily
- Updated In 2024, Finding The Best Ways To Replace Sky in Lightroom
- Updated In 2024, Find Out How to Add Subtitles in the VLC Media Player on Your Windows and Mac System with Quick and Simple Instructions
- 2 Effective Ways to Add Text Behind Objects
- Updated How to Split a Video Into Parts on All Platforms for 2024
- New Bored with Those Normal Background Images and that Ordinary Still Capture Feel? Take Your Creativity to the Next Level with Amazing Image Transparency Ideas
- 3D LUT Mobile App Review - A Composite Application for Editing Media for 2024
- Quick Answer Why Did Filmora AI Portrait Attract People, In 2024
- Updated Ultimate Guidelines to Help You Better Use VLC Media Player
- New How to Make Stunning Glitch Effect in Photoshop? Ultimate Guide
- New In 2024, How to Make A Fantastic Café Vlog
- Updated How to Make Double Exposure Effect in Filmora
- Best Method to Split Video Into Parts Online for 2024
- Updated Efficient Ways to Manage Your Timeline
- In 2024, Oppo F23 5G ADB Format Tool for PC vs. Other Unlocking Tools Which One is the Best?
- How to Reset Vivo V29 Pro Without the Home Button | Dr.fone
- In 2024, Easy Ways to Manage Your Nokia C32 Location Settings | Dr.fone
- Forgot Locked Apple iPhone 6s Plus Password? Learn the Best Methods To Unlock | Dr.fone
- In 2024, How To Leave a Life360 Group On Samsung Galaxy A14 4G Without Anyone Knowing? | Dr.fone
- In 2024, Can I Bypass a Forgotten Phone Password Of Poco F5 Pro 5G?
- Best Ways to Bypass iCloud Activation Lock from Apple iPhone 11 Pro Max/iPad/iPod
- In 2024, How Can I Catch the Regional Pokémon without Traveling On Apple iPhone SE (2020) | Dr.fone
- Possible ways to recover deleted files from Infinix Hot 40i
- The Updated Method to Bypass Samsung Galaxy M54 5G FRP
- Play Store Stuck on Downloading Of Vivo S17 Pro? 7 Ways to Resolve | Dr.fone
- Will Xiaomi Redmi A2 play AVCHD mts files?
- Simple ways to get lost videos back from Honor Magic 6 Lite
- In 2024, 5 Ways To Teach You To Transfer Files from Samsung Galaxy M34 to Other Android Devices Easily | Dr.fone
- Title: New In This Article, We Are Going to Learn the Simplest Procedure on How to Cut And/Or Trim Videos Using VLC Media Player. Each Step Is Carefully Explained, with Screenshots Attached
- Author: Morgan
- Created at : 2024-05-19 05:12:38
- Updated at : 2024-05-20 05:12:38
- Link: https://ai-video-editing.techidaily.com/new-in-this-article-we-are-going-to-learn-the-simplest-procedure-on-how-to-cut-andor-trim-videos-using-vlc-media-player-each-step-is-carefully-explained-wit/
- License: This work is licensed under CC BY-NC-SA 4.0.
