:max_bytes(150000):strip_icc():format(webp)/GettyImages-1369568023-c596ac8d6b5a4f3682bda2fa0feb12bd.jpg)
New Steps to Create One Click Video Reverse Effect in Filmora

Steps to Create One Click Video Reverse Effect in Filmora
All great video editors use phenomenal video effects in their videos. One of the most professional effects is the reverse video effect. This unique effect is always challenging for the makers to shoot and portray on the screen flawlessly.
At the same time, it is intriguing and always draws the audience’s attention. In this article, you will learn to shoot and edit the video for reverse effects using Filmora. But first, we will learn what does video reverse effect mean. So let us get into this!
Part 1. What Is Video Reverse Effect?
It is a special video effect in which a motion of things starts in the backward direction. This unique effect is used to intrigue the audience.
For example, if a bullet is fired from a gun. With the reverse effect, you can rewind the footage, and the shot goes back into the gun. So today, you can easily rewind fast action scenes and get a wow reaction from the audience.
Famous Examples of Reverse Effect in Films
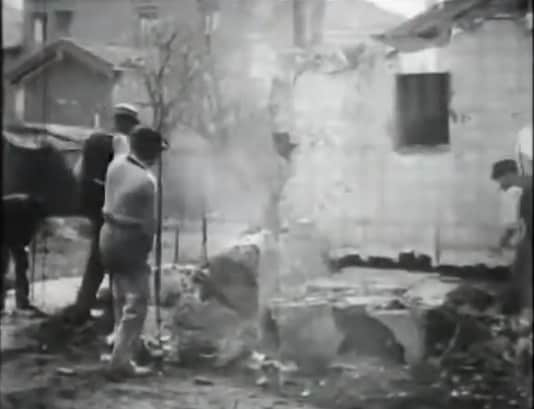
1- Demolition of a Wall (1896)
Filmmakers first used this striking effect in 1896 in a 90 seconds film, “Demolition of a wall.” Louis Lumiere was the one who made that video. Below is shown an image from the film.
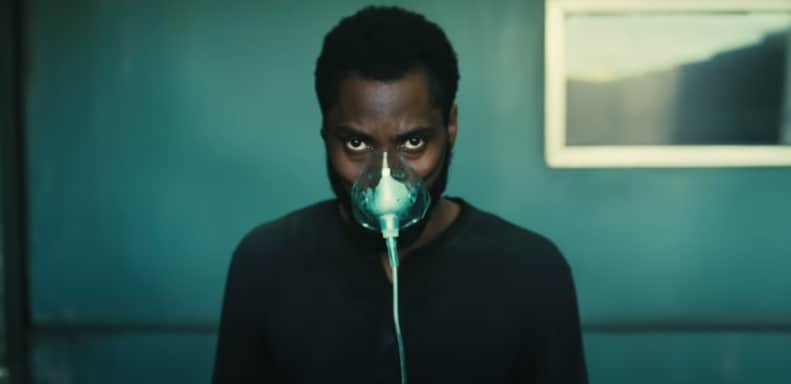
2- Tenet (2020)
It is a viral film by Christopher Nolan, which was a great success. He explained the concept of reverse entropy, in which you start moving back chronologically in time instead of forward. This concept is all shown through this special video reverse effect. Unfortunately, the audience had difficulty digesting this unique concept, which generated an awful response.
Part 2. How To Shoot Video Reverse Effect?
The reverse effect is unique, so special attention should be paid while filming a video. This section will cover some of the crucial prerequisites to film a video.
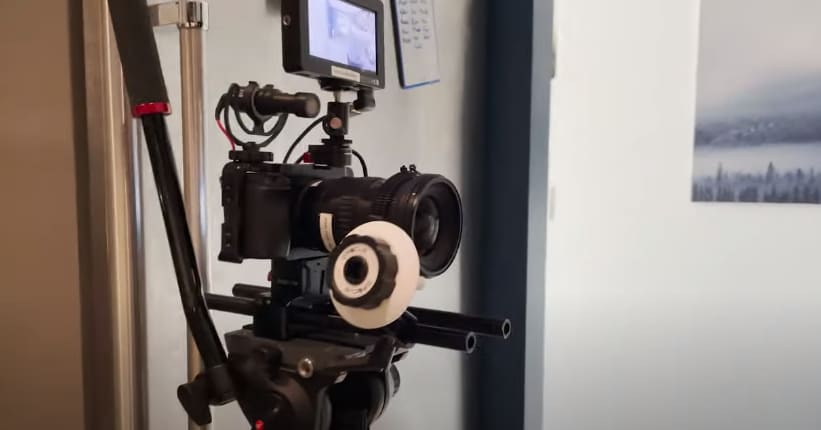
Steady Camera
It would be best to have your camera placed on a steady surface or mounted on a tripod stand to lock the focus. We will split the area and perform different tasks to make it look smooth. The audience will not get the idea that you completed the tasks separately. And it helps in the editing process as well.
A Spacious Area
You will need a spacious area in which you will perform different tasks. Make sure your camera stands still while shooting all the frames of video. In an ample space, it becomes easier to do movements freely. It also helps prevent glitches in the final product.
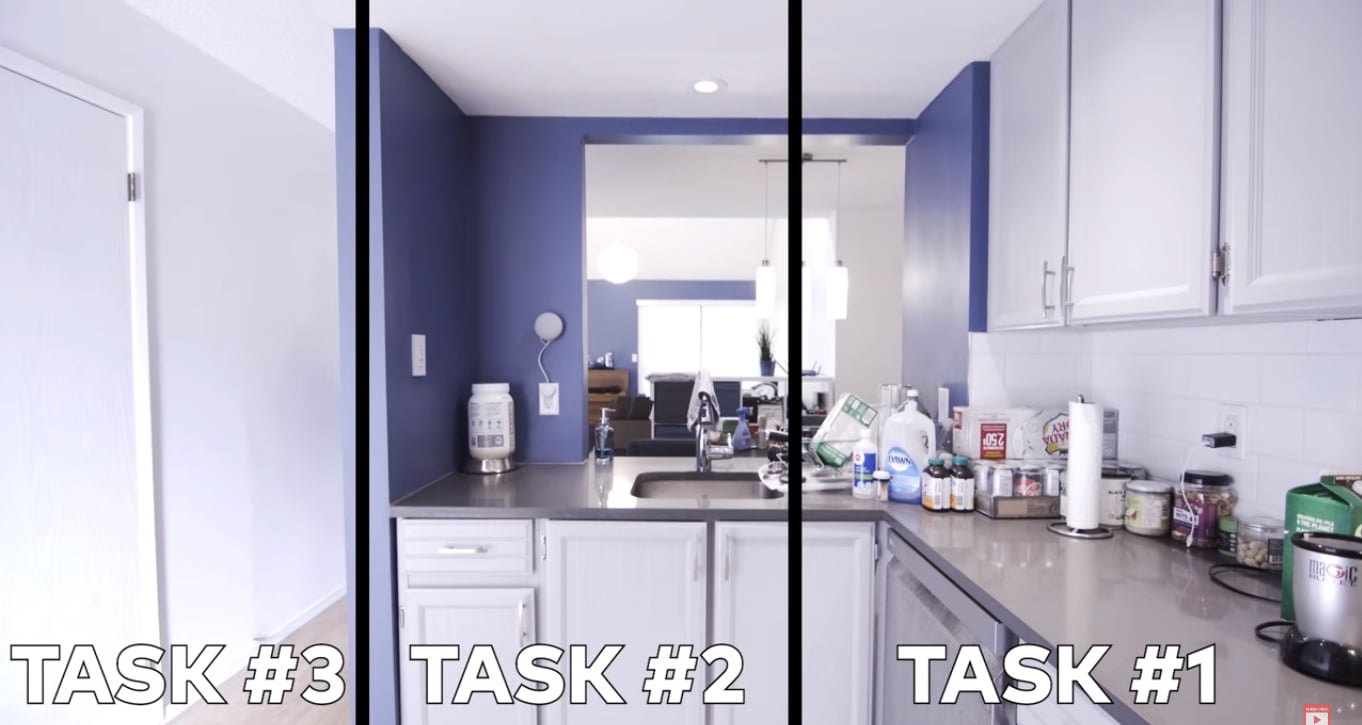
Splitting of Area into Portions
Now you have to split your area into portions. Each task is in its part of the frame, and actions in one frame should not pass over into another. You will do one activity per portion. It makes the editing process a lot easier. Finally, we get all three videos to merge and make it look like a single video.
After covering the prerequisites, we will now learn the editing process of creating a video reverse effect.
Part 3. How To Edit Video Reverse Effect In Filmora? [Stepwise Guide]
Creating video reverse effects is much easier these days. Wondershare Filmora is going to help you a lot. Filmora is an exceptional platform for creating innovative and creative videos. It has advanced editing features, which help make professional videos.
Free Download For Win 7 or later(64-bit)
Free Download For macOS 10.14 or later
Applying video reverse effects to your shots here is a wise guide. Please follow the instructions given below.
Step1 Downloading Filmora and Importing Files
- After recording your shots, you will edit them in Filmora. But first, download Filmora from the website and install it.
- After opening the software, import the recording files by clicking “Import Media.”

Step2 Drag the Shots to the Timeline
- Drag the shots to the timeline and drop it. If Filmora asks for a matching resolution on the timeline, please click “Match to Media.” It will adjust your media resolution according to the timeline.
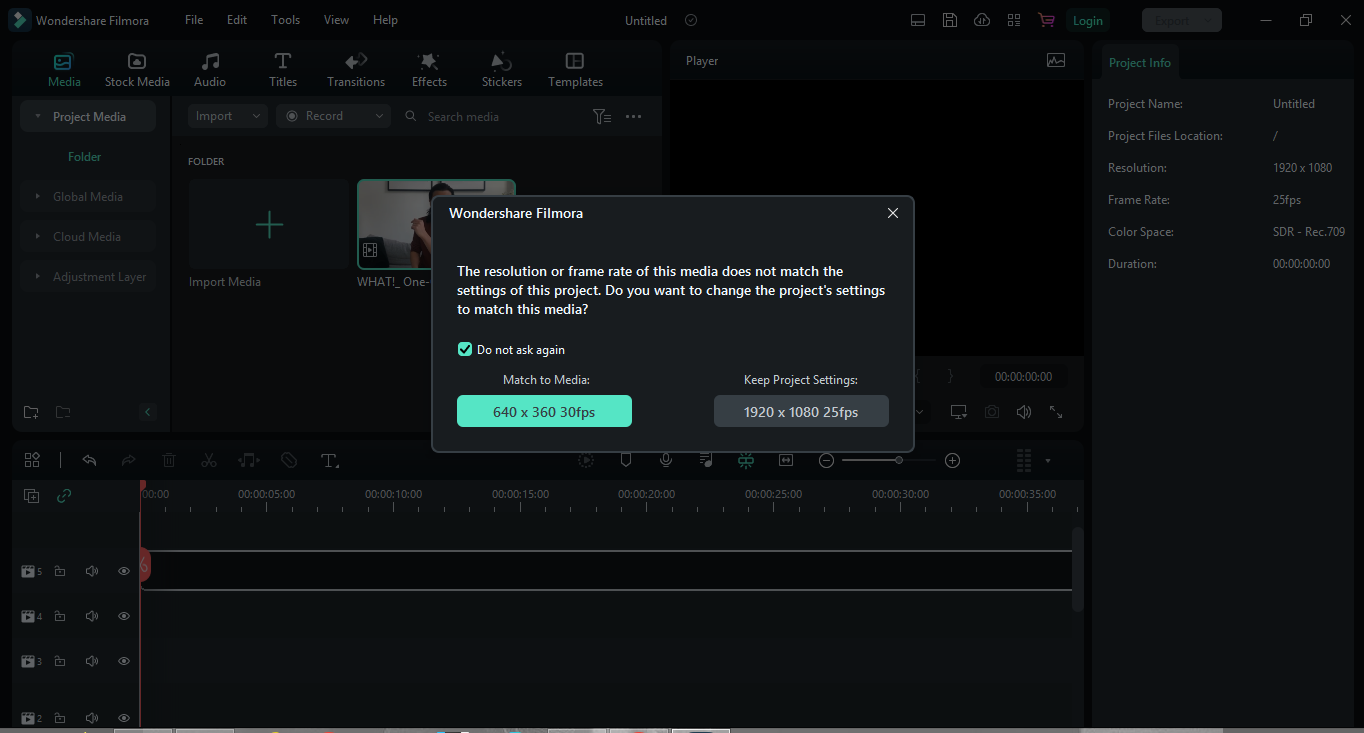
- Add videos of each action on the layers above by drag and drop.
Step3 Adding Image Mask to the Clips
- Now you will add an image mask to the clips you shot at the area’s corners.
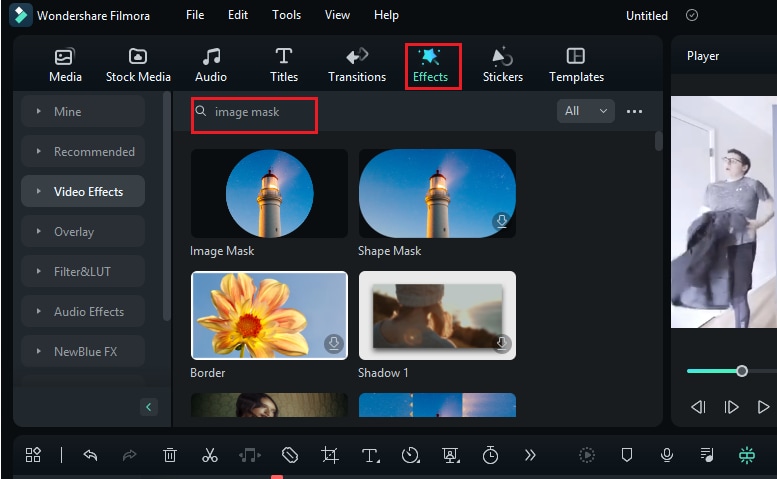
- To simultaneously show each action in the final video, go to “Effects” and click on the search tab.
- Please search “Image Mask.”
- Now drag and drop this effect to the footage shot at corners of the area.
Step4 Adjustment of the Image Mask of each Footage
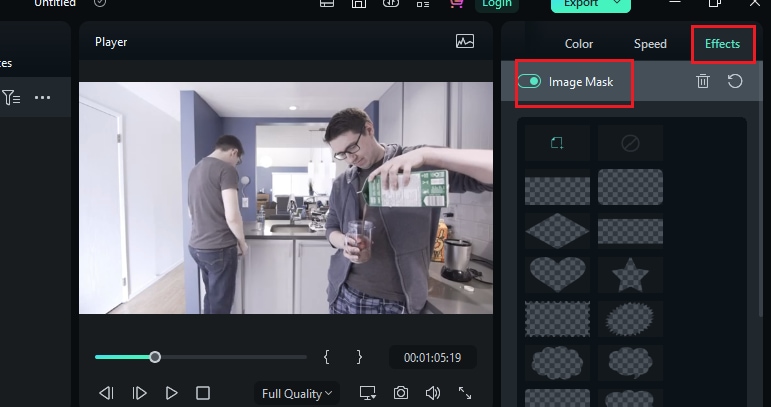
- Now we will adjust the image mask of each footage so that each will show the task without any glitches.
- For that purpose, double-click on the video. Next, click on “Effects” in the top right corner of the screen. Then select “Image Mask” and make the necessary adjustments so that each mask shows each footage.
Step5 Trimming the Video Clip
- You can trim the footage to create a smooth movement in each portion. In this way, all the clips gel together in a single frame.

- We have successfully gelled together three video clips in a single frame.
- But all these videos are moving forward. So let us now apply the reverse effect to a video clip.
Step6 Apply Reverse Speed to Video Clip
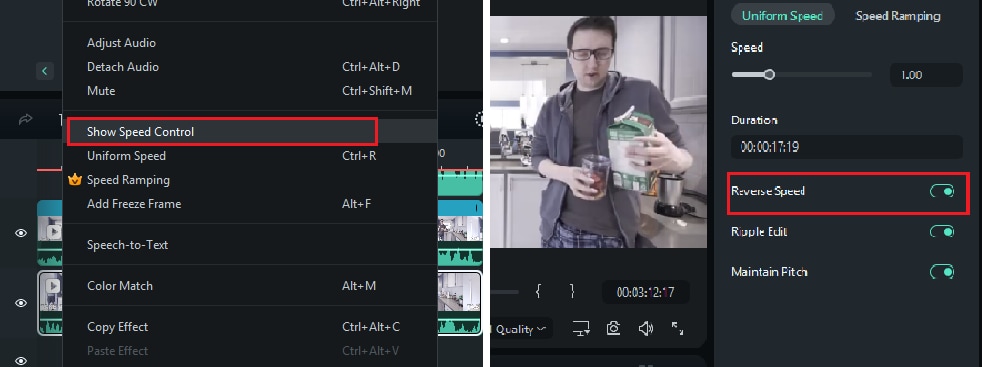
- Please right-click on the video and select “Show speed control.”
- The Control panel will open in the right corner of the screen.
- Then enable the “Reverse Speed” option. You will apply a reverse effect to that clip.
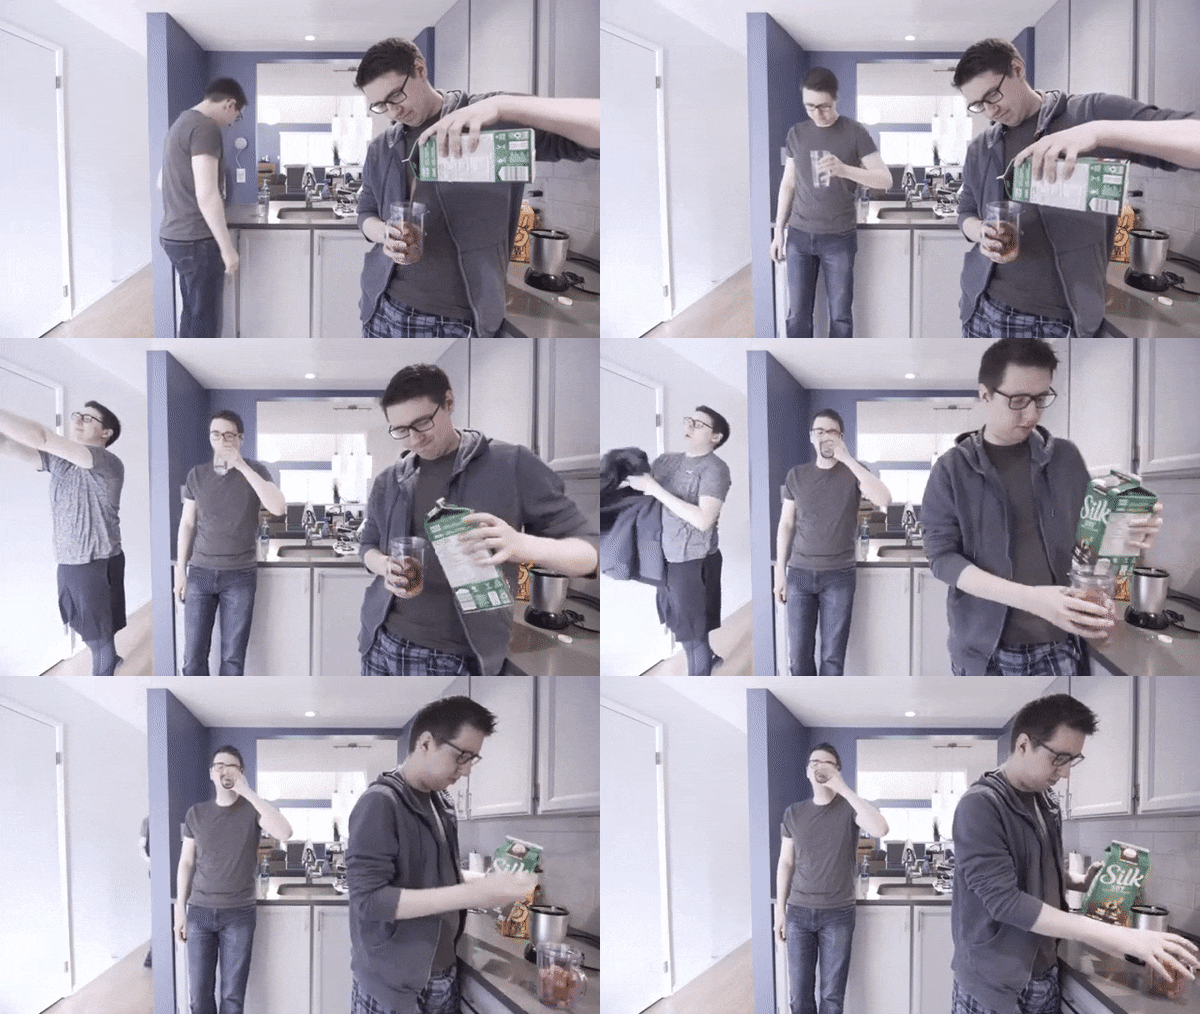
- Your video is ready now, with one clip moving in reverse and two in the forward direction.
- Take a look at the preview of your final product.
- Apply some changes to it if needed.
Step7 Export the Final Project
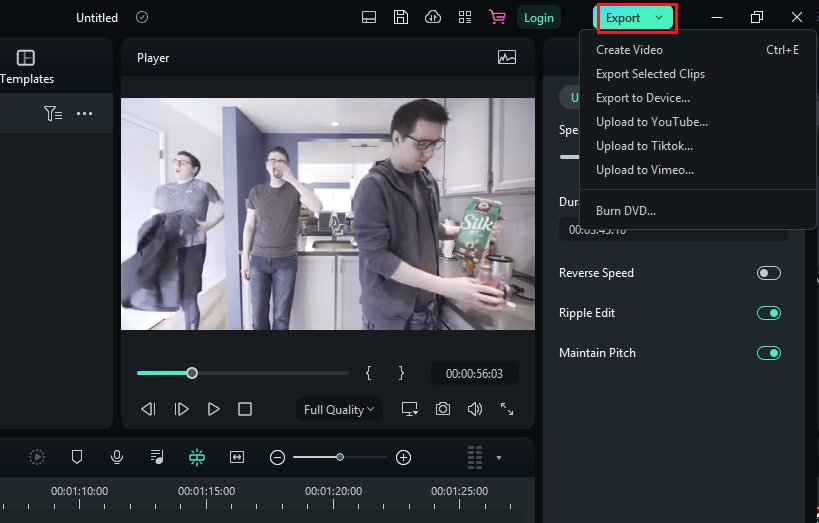
- Now it’s time to export the project to the device.
- Please select “Export” in the top right corner of the screen. And ship it to the device.
Step8 Final Video
Now have a look at the final project. How smooth and perfect it looks. That’s it!
Conclusion
The reverse video effect has a unique characteristic of its own. And it will always work when you use it in your videos. The great success of many popular films is evident by the captivating feature that this effect has got. In this article, we have discussed the prerequisites and steps of creating a reverse video effect.
If this article has helped you, please mention your experience in the comment box. Also, please share this article with your friends and colleagues. Keep creating!
Free Download For macOS 10.14 or later
Applying video reverse effects to your shots here is a wise guide. Please follow the instructions given below.
Step1 Downloading Filmora and Importing Files
- After recording your shots, you will edit them in Filmora. But first, download Filmora from the website and install it.
- After opening the software, import the recording files by clicking “Import Media.”

Step2 Drag the Shots to the Timeline
- Drag the shots to the timeline and drop it. If Filmora asks for a matching resolution on the timeline, please click “Match to Media.” It will adjust your media resolution according to the timeline.

- Add videos of each action on the layers above by drag and drop.
Step3 Adding Image Mask to the Clips
- Now you will add an image mask to the clips you shot at the area’s corners.
- To simultaneously show each action in the final video, go to “Effects” and click on the search tab.
- Please search “Image Mask.”
- Now drag and drop this effect to the footage shot at corners of the area.

Step4 Adjustment of the Image Mask of each Footage
- Now we will adjust the image mask of each footage so that each will show the task without any glitches.
- For that purpose, double-click on the video. Next, click on “Effects” in the top right corner of the screen. Then select “Image Mask” and make the necessary adjustments so that each mask shows each footage.

Step5 Trimming the Video Clip
- You can trim the footage to create a smooth movement in each portion. In this way, all the clips gel together in a single frame.

- We have successfully gelled together three video clips in a single frame.
- But all these videos are moving forward. So let us now apply the reverse effect to a video clip.
Step6 Apply Reverse Speed to Video Clip
- Please right-click on the video and select “Show speed control.”
- The Control panel will open in the right corner of the screen.
- Then enable the “Reverse Speed” option. You will apply a reverse effect to that clip.

- Your video is ready now, with one clip moving in reverse and two in the forward direction.
- Take a look at the preview of your final product.
- Apply some changes to it if needed.
Step7 Export the Final Project
- Now it’s time to export the project to the device.
- Please select “Export” in the top right corner of the screen. And ship it to the device.

Step8 Final Video
Now have a look at the final project. How smooth and perfect it looks. That’s it!

Conclusion
The reverse video effect has a unique characteristic of its own. And it will always work when you use it in your videos. The great success of many popular films is evident by the captivating feature that this effect has got. In this article, we have discussed the prerequisites and steps of creating a reverse video effect.
If this article has helped you, please mention your experience in the comment box. Also, please share this article with your friends and colleagues. Keep creating!
Are You Looking for Dark LUTs Premiere Pro Free? This Article Discusses the Dark Moody LUTs with Top Recommendations for Beginning Visual Editing
Look-up tables (LUTs) are visual editing tools used as color presets. By using LUTs, you can enhance color grading within photos and videos. This way, your visual content looks more aesthetic, engaging, and appealing. Meanwhile, within LUTs, there are several color presets to use. The most popular one is dark moody LUT. In this article, you’ll find useful information on dark moody LUTs with the best recommendations.
Part 1: What Do Dark Moody LUTs Represent?
Like another color preset, dark moody LUTs provide special and unique color grading. So, you’ll experience darkened shadows, desaturated tones, blue tints, green hues, and others. The dark preset filters offer moody looks with pitch-dark effects to your visual content. Hence, these types of LUTs add a foreboding atmosphere.
Dark and moody LUTs are used in horror films or thriller cinematography. After all, they provide dedicated dark contrast with gloomy looks to the visual content. Hence, a special dark horror effect is blended, which adds mystery, tension, and fear. For adding dark moody LUTs, several tools are available for enhancing colors.
Empower your videos with a new mood using different LUTs. Filmora now offers 100+ top-quality 3D LUTs cover a broad range of scenarios. Transform your videos with Filmora’s powerful 3D LUTs.
Apply LUT on Videos Apply LUT on Videos Learn More

Part 2: Best Dark Moody LUTs You Can Find
LUTs are perfect for enhancing color gradients with minimal effort. This means you don’t need to spend long hours on video editing. With dark moody LUTs, there is an option to make your video more cinematic. Let’s find some of the best dark moody LUTs to make things easier:
1. Dark Moody LUTS Fashion
Elevate your photos and videos with these cinematic dark moody LUTs filters. There are 4 LUT presets that could be utilized to blend dark contrast. Hence, you can provide muted looks to your visual content with a mystery tone. The LUTs are ideal for fashion use because of dark shadows. For social media content, these LUTs are ideal.
2. Dark and Moody Cinematic 3D LUTs
Videography and photography are incomplete without color enhancement through editing. Saving time, these dark and moody cinematic 3D LUTs pack is a perfect solution. If you want desaturated contrast with muted colors, there are 8 different LUTs to assist. Apply all the LUT preset filters easily without hassles. With 4 separate files, the LUTs will suit almost every editing tool.

3. Dark Moody Lightroom Presets
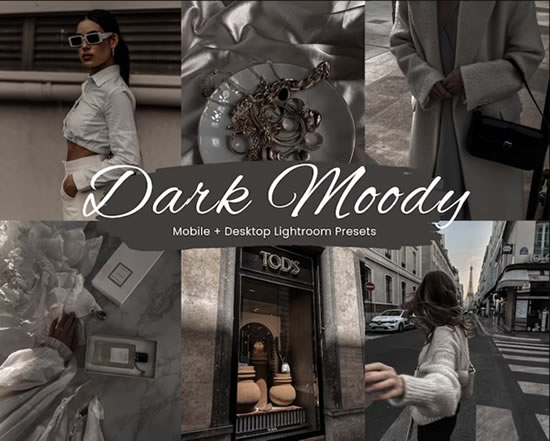
Improvise your closest visual media with dark moody Lightroom presets. You will get 20 different dark LUTs Premiere Pro free in this pack. All available LUT filter presets are unique, with different dark contrasts and tones. Thus, you can add a moody touch with desaturated color gradients. This way, your photos, and videos will enlighten with a murk appearance.
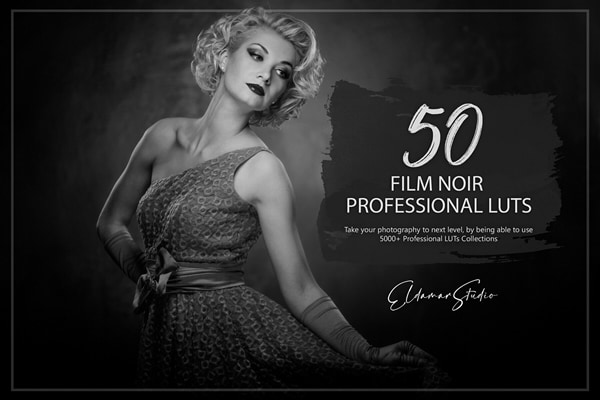
4. Film Noir LUTs and Presets Pack
Adding film-like dark cinematic looks is possible with this LUTs preset pack. The availability of 50 preset filters allows adding dark moods to your visual media. The content becomes visually appealing with crushed black hues and darker and gloomy textures. The filters are instantly applied and can be edited with desired intensity and contrast.
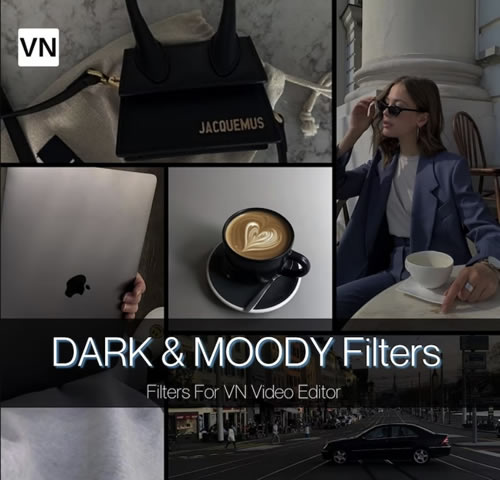
5. Dark & Moody Aesthetic Filters
This dark and moody LUTs filter pack has everything to beautify your photos and videos. With 5 different filter presets, transform color gradients with cool hues and less vibrant colors. This will provide dark aesthetic looks to your visual content with desaturated tone. This exceptional grading with moody filters allows upscaling colors for social media content.
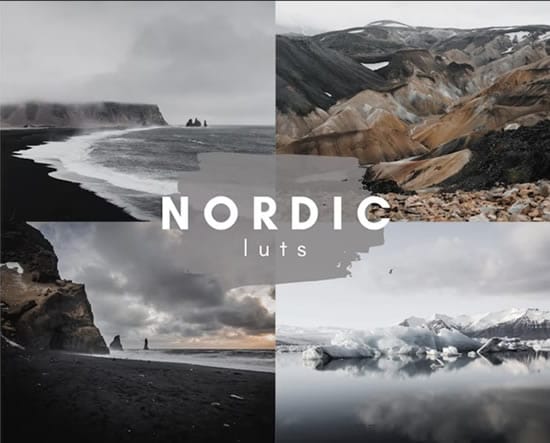
6. MOODY NORDIC LUTS
The Nordic region is known for its attractive landscapes with dark weather. Adding such LUTs to your videos enhances color hues with gloomy and dark gradients. This will provide cinematic looks to your videos in an engaging way. The available LUTs are in 5 color presets, and each one is unique. Thus, your travel videos can become more pleasing using Nordic effects.
Part 3: Wondershare Filmora: A Great Platform For Using Dark Moody LUTs
For video upgradation, editing is essential to overcome underlying visual hindrances. Meanwhile, a good video editor is necessary for this purpose. Meet Wondershare Filmora that is a creative video editing platform for content creators. Using this tool, you can use 100+ LUTs, including dark moody LUTs. You can also utilize elements, stickers, transitions, and other effects.
Add LUTs on Video For Win 7 or later(64-bit)
Add LUTs on Video For macOS 10.14 or later
Filmora is the industry-leading tool for enhancing video quality with suitable color gradients. The filters are fully creative with adjustable contrast and saturation. Meanwhile, Filmora has added 100+ LUTs in its new updates. This means there are more than 200 LUTs in Filmora. When it comes to usability, Filmora offers best-in-class tools with amazing functionalities.

Key Features Of Wondershare Filmora
Filmora is an easy-to-use platform that delivers video editing with optimized solutions. Let’s find more of its features that make it an exceptional tool:
- Audio Support: With Filmora, users can add songs, voiceovers, and music to their videos. This can make their videos more enchanting. Meanwhile, there is also an option to merge, split, crop, or customize audio speed. Using an audio visualizer is also a possibility by adjusting audio bass, treble, and frequencies.
- Color Grading: There is a color wheel by which you can set desired color palette. This way, you can transform your video into desired color contrast with necessary gradients. The color intensity could also be adjusted from 0 – 100% range. With available LUT preset filters, different color effects could be applied.
- Split Screen: The availability of a split screen function allows for playing different videos at one time. Thus, combining or comparing different videos will be easier to process. This will save you time and simplify your video editing procedure.
- Text-to-Speech: Filmora’s text-to-speech allows you to create voiceovers from text files. This will enrich your video and give useful content with more elements. The transcription process is quick and fast with more accuracy. This feature is available in up to 16 types of languages.
Conclusion
Using LUTs, you can enhance and optimize the color grading of your video. Meanwhile, if your video is horror or suspense relevant, use dark LUTs Premiere Pro free. This adds dark shades to your video with desaturated contrasts and crushed black hues. So, if you want the best dark moody LUTs free download, Filmora is the right solution. This tool provides unique and special LUTs in different categories.
Add LUTs on Video For Win 7 or later(64-bit)
Add LUTs on Video For macOS 10.14 or later
Apply LUT on Videos Apply LUT on Videos Learn More

Part 2: Best Dark Moody LUTs You Can Find
LUTs are perfect for enhancing color gradients with minimal effort. This means you don’t need to spend long hours on video editing. With dark moody LUTs, there is an option to make your video more cinematic. Let’s find some of the best dark moody LUTs to make things easier:
1. Dark Moody LUTS Fashion
Elevate your photos and videos with these cinematic dark moody LUTs filters. There are 4 LUT presets that could be utilized to blend dark contrast. Hence, you can provide muted looks to your visual content with a mystery tone. The LUTs are ideal for fashion use because of dark shadows. For social media content, these LUTs are ideal.

2. Dark and Moody Cinematic 3D LUTs
Videography and photography are incomplete without color enhancement through editing. Saving time, these dark and moody cinematic 3D LUTs pack is a perfect solution. If you want desaturated contrast with muted colors, there are 8 different LUTs to assist. Apply all the LUT preset filters easily without hassles. With 4 separate files, the LUTs will suit almost every editing tool.

3. Dark Moody Lightroom Presets
Improvise your closest visual media with dark moody Lightroom presets. You will get 20 different dark LUTs Premiere Pro free in this pack. All available LUT filter presets are unique, with different dark contrasts and tones. Thus, you can add a moody touch with desaturated color gradients. This way, your photos, and videos will enlighten with a murk appearance.

4. Film Noir LUTs and Presets Pack
Adding film-like dark cinematic looks is possible with this LUTs preset pack. The availability of 50 preset filters allows adding dark moods to your visual media. The content becomes visually appealing with crushed black hues and darker and gloomy textures. The filters are instantly applied and can be edited with desired intensity and contrast.

5. Dark & Moody Aesthetic Filters
This dark and moody LUTs filter pack has everything to beautify your photos and videos. With 5 different filter presets, transform color gradients with cool hues and less vibrant colors. This will provide dark aesthetic looks to your visual content with desaturated tone. This exceptional grading with moody filters allows upscaling colors for social media content.

6. MOODY NORDIC LUTS
The Nordic region is known for its attractive landscapes with dark weather. Adding such LUTs to your videos enhances color hues with gloomy and dark gradients. This will provide cinematic looks to your videos in an engaging way. The available LUTs are in 5 color presets, and each one is unique. Thus, your travel videos can become more pleasing using Nordic effects.

Part 3: Wondershare Filmora: A Great Platform For Using Dark Moody LUTs
For video upgradation, editing is essential to overcome underlying visual hindrances. Meanwhile, a good video editor is necessary for this purpose. Meet Wondershare Filmora that is a creative video editing platform for content creators. Using this tool, you can use 100+ LUTs, including dark moody LUTs. You can also utilize elements, stickers, transitions, and other effects.
Add LUTs on Video For Win 7 or later(64-bit)
Add LUTs on Video For macOS 10.14 or later
Filmora is the industry-leading tool for enhancing video quality with suitable color gradients. The filters are fully creative with adjustable contrast and saturation. Meanwhile, Filmora has added 100+ LUTs in its new updates. This means there are more than 200 LUTs in Filmora. When it comes to usability, Filmora offers best-in-class tools with amazing functionalities.

Key Features Of Wondershare Filmora
Filmora is an easy-to-use platform that delivers video editing with optimized solutions. Let’s find more of its features that make it an exceptional tool:
- Audio Support: With Filmora, users can add songs, voiceovers, and music to their videos. This can make their videos more enchanting. Meanwhile, there is also an option to merge, split, crop, or customize audio speed. Using an audio visualizer is also a possibility by adjusting audio bass, treble, and frequencies.
- Color Grading: There is a color wheel by which you can set desired color palette. This way, you can transform your video into desired color contrast with necessary gradients. The color intensity could also be adjusted from 0 – 100% range. With available LUT preset filters, different color effects could be applied.
- Split Screen: The availability of a split screen function allows for playing different videos at one time. Thus, combining or comparing different videos will be easier to process. This will save you time and simplify your video editing procedure.
- Text-to-Speech: Filmora’s text-to-speech allows you to create voiceovers from text files. This will enrich your video and give useful content with more elements. The transcription process is quick and fast with more accuracy. This feature is available in up to 16 types of languages.
Conclusion
Using LUTs, you can enhance and optimize the color grading of your video. Meanwhile, if your video is horror or suspense relevant, use dark LUTs Premiere Pro free. This adds dark shades to your video with desaturated contrasts and crushed black hues. So, if you want the best dark moody LUTs free download, Filmora is the right solution. This tool provides unique and special LUTs in different categories.
Add LUTs on Video For Win 7 or later(64-bit)
Add LUTs on Video For macOS 10.14 or later
Mastering the Art of Video Framing
Are you in search of the best practice to frame a video? If yes, then cheer up, as we have got you covered! In this guide, we will share the top 6 types of video framing that even novice and expert users can master.
Framing videos involves focusing on a specific subject and blocking out the irrelevant things in the background. Depending on the results you want, video framing can differ a lot. The information below will help you learn about different frames and how to utilize them effectively.
So, without further ado, let’s get into the deets.
- 01 Establishing Shots
- 02 Single Shot
- 03 Two Shot/Group Shot
- 04 Over-the-shoulder (OTS)
- 05 Insert Shot
- 06 POV Shot (OTS)
Part1 Basic Knowledge About Different Framing
Because framing is related to capturing or focusing an object by the camera lens, it can vary depending on your desired shot. Let’s start with the full-shot first and understand how it works.
01 Full Shot (FS)
Remember the shot of Marvel’s Guardians of the Galaxy, where all the players are focused in one wide frame? This excerpt is a practical example of what a full shot looks like. Full-shot video framing is particularly common in action or thriller movies where the creator wants to generate suspense in the audience.
As the name indicates, a full shot often emphasizes the scenery as your subject fills the frame. Like the background isn’t ignored or blurred out; instead, it isn’t overly stressed as well. In most cases, the camera starts with a wide-angle shot and then eventually ends with focusing on the subject.
A full-camera shot greatly emphasizes the physical presence of the character. It tracks the subject’s movements, gestures, or body language, making it the focal point. As a result, the shot obtained delivers a better understanding of actions and interactions among the character and its surroundings.
02 Medium Shot (MS)
We often see friends in movies, going to a casino, or playing cards at a bar. What do we observe in that shot? Hand movements, facial expressions, body language, and a little context of what is happening in the background. This shot is known as the medium shot and is often called the ¾ shot.
Using the medium shot video framing technique, the camera lens allows the viewers to see the background while still focusing on the main character. It’s like you will know what is happening at the back but still remain close to the character’s emotions and gestures.
A medium shot usually begins by showing the subject from the knees to his face. In other cases, the shot can also start from the character’s waist to the top of their head. Compared to long shots, a medium shot takes you closer to the subject’s emotions.
For example, in The Princess Diary, you can see how medium-shot video framing has been useful in portraying comedic scenes. You can see Mia reaching out for plates and glasses around the tables and her eyes squinting to concentrate on the process. The medium shot captures even the smallest emotions while focusing on the background.
03 Close-Up (CU)
When the subject’s head and face take up most of the frame, framing videos is known as a close-up shot. And a particular example of this shot can be spotted in the airport scene in “Casablanca.” This scene shows how the camera lens takes various shots before ending up on the actor’s face, showcasing a number of emotions and intimacy.
A close-up shot is an eye-level shot, and as a result, it takes the subject to the forefront. As a result, this shot establishes a distinct sense of connection between the audience and the character. Additionally, the environmental distraction is kept minimal throughout this shot. This setup helps maintain the emotional impact that the shot will portray.
Some of the common emotions that would be captured using close-up video framing techniques include:
- Tear-filled gaze
- Furrowed brow
- Subtle smile
Cinematographers often use such shots to intensify climaxes. These shots can be viewed as a window to the characters’ souls, allowing viewers to adapt the emotions on another level.
04 Extreme Close-Up (XCU)
To understand the extreme close-up video framing technique, let us illustrate the movie that remained our favorite action thriller while growing up: Minority Report (2002). In this movie, the shots briefly focus on the character’s eyes before hopping into the future view. This extreme close shot serves as a crucial plot to develop thematic elements in the audience.
So, an extremely close shot focuses on specific details of a character. This can be either the subject’s eyes, ears, or mouth. However, the shot is not often employed casually. Instead, it is used in a stance where it is appropriate and when there is a need to develop heightened emotion among the viewers.
You can see this shot as a magnifying glass that draws attention to even the smallest emotion that would have gone unnoticed otherwise.
Part2 Master framing types
Don’t know how to master framing types? No worries, we have a comprehensive guide on that! First of all, let’s start with the most basic way to frame a video:
01 Establishing Shots
An establishing shot is usually used to develop a context for the next upcoming scene. It is often a movie’s first scene and portrays an extremely wide shot of the context. This frame on the video indicates the location and time of the scene to the audience to engage with them on a deeper level.
One of the least-known things about an establishing shot is that it doesn’t require a narrative to explain what is happening. Instead, it is shot alone, and the context is shot so that the audience gets to know everything as soon as they see the excerpt.
An amazing example of establishing a shot can be seen in Stanely Kubrick’s horror film, The Shining. In the movie’s opening scene, the camera goes through the forest and mountains before getting onto the mountaintop hotel where the action occurs.
02 Single Shot
A single shot frames a video that includes a single subject or character. It occurs when a character is talking or reacting to a scenario. Here, remember that if the lens shifts focus from a subject, it is not a single shot.
In the movie Extraction 2020, you can see a single shot being utilized when the character goes on to rescue his son from the kidnappers. The shot extends a long way, including through a car crash, weapon chasing, and that iconic Hemsworth sliding off a building into a brutal fight. And the incredible part was that all of this was captured in a single shot.
03 Two Shot/Group Shot
As the name indicates, a two-shot or a group shot is used to frame a video that involves more than one character. It could be two people conversing or friends sitting at a cafe gossiping. This shot is particularly helpful in portraying the relationship between the characters in the frame.
A good example of two-shot video framing can be seen in the movie Silverado. During the final shooting scene, you can see two cowboys standing far apart while facing each other. Here, the two-shot technique emphasizes tension before the cowboys draw their guns.
04 Over-the-shoulder (OTS)
OTS, or Over-the-shoulder, is the most used shot in framing videos for making movies. To understand how this shot works, let us take an example of two subjects, one named A and the other named B. Now, A is sitting right in front of subject B. Here; the shot is executed by focusing on subject A from the shoulder of subject B. The basic purpose of the shot is to fill the conversation or the meeting between the subjects.
To understand this situation better, let’s take an example from the movie How to Train Your Dragon. In the scene, Hiccup is seen having a conversation with his father. Here, when Hiccup is talking, the camera is focused on him over his father’s shoulder. And when his father talks, the shot is taken over the shoulder of Hiccup.
05 Insert Shot
Insert short framing technique uses selective focus to draw the audience’s attention to the subject. Whether it be an object or merely a piece of information, insert shot has always been effective in emphasizing details.
For example, in The X-Files, an insert shot is used to provide the audience with a look at the file of Scully. This insert shot reveals the most shocking revelations in the file, including a tissue sample. Additionally, the file insert shot also shows how shady Mulder is.
06 POV Shot
A POV shot is used to frame a video in a way that shows what a character is doing. You can take this as a shot showing the world from the character’s perspective. Our modern-day games, including Call of Duty Black Ops, are a common example of such POV shots.
The movie Friday the 13th is an iconic example of a POV shot frame on video. If you remember, the movie revolved around a killer who wasn’t identified until the end. So, the audience watched the film from the killer’s perspective until he was recognized.
Conclusion
To sum it up, mastering the art of video framing, from full shots to POV shots, is an exciting journey that helps you to weave exciting stories. Understanding these techniques will empower you to craft a compelling narrative to captivate your audience, whether you are a beginner or a professional.
So, begin with framing videos now and let your work speak volumes!
How to Create a Makeup Video
This topic is one of the videos you can easily find on YouTube, apart from the fact that it’s easy to make a video like this, there are many people who want to learn how to do their own makeup, that is why this is the most search content on YouTube. Makeup tutorial is effective through video, since viewers can see exactly how makeup are executed, what products they are using and where to buy.
This kind of video is about sharing makeup techniques, makeup inspiration and beauty product reviews. So, whether you are a makeup artist or a makeup enthusiast you can surely record yourself, make a video and share to your YouTube channel to inspire everyone to be beautiful on their own.
In this article I will sharing may setup and tips on how you can create a makeup video on your YouTube channel.
How to Setup for Making a Makeup Video
You don’t need to have expensive gear to start making this kind of content, also having a small space in your room, a smart phone and a natural lighting from your window is good enough to start your video. But if you are willing to invest there are a lot of online shop selling affordable gear for your great setup.
So, let’s take a look at some of the basic gears recommended:
Smart Phone / Camera
Right now, if you don’t have a digital camera yet, cellphone or mobile phone is good enough to start making your makeup video. This is the most convenient and affordable option for filming a makeup video. I’m sure now a days most of the camera built in mobile phone are quality for making a good video.
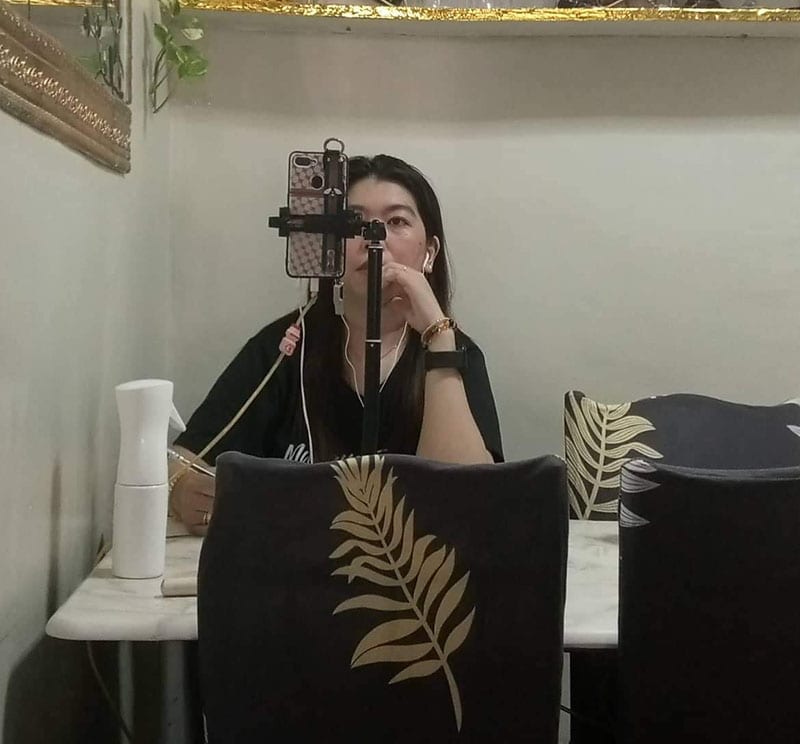
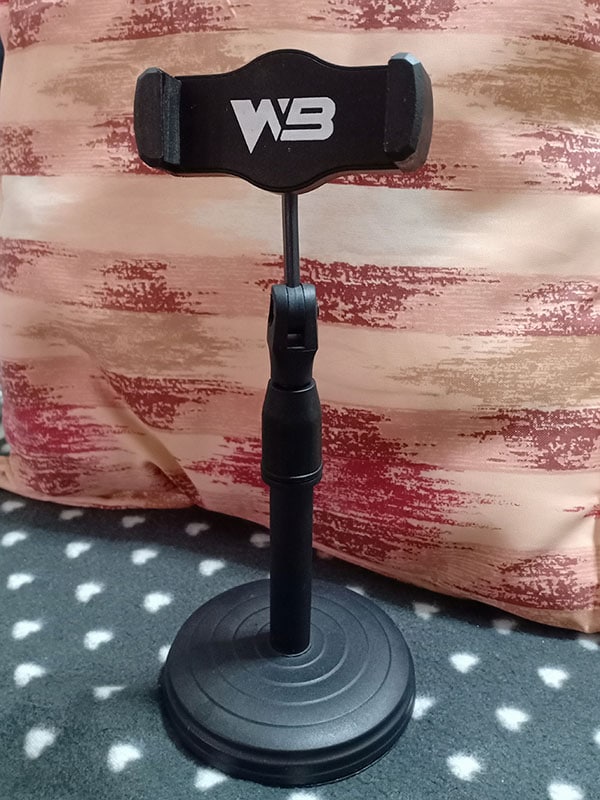
Cell Phone Stand
you must have a sturdy stand that allows to adjust height and rotation based on your needs.
If you don’t have a cell phone stand you can get anything that where you can put your camera on, but make sure that is just high enough that you can see your face for the tutorial.
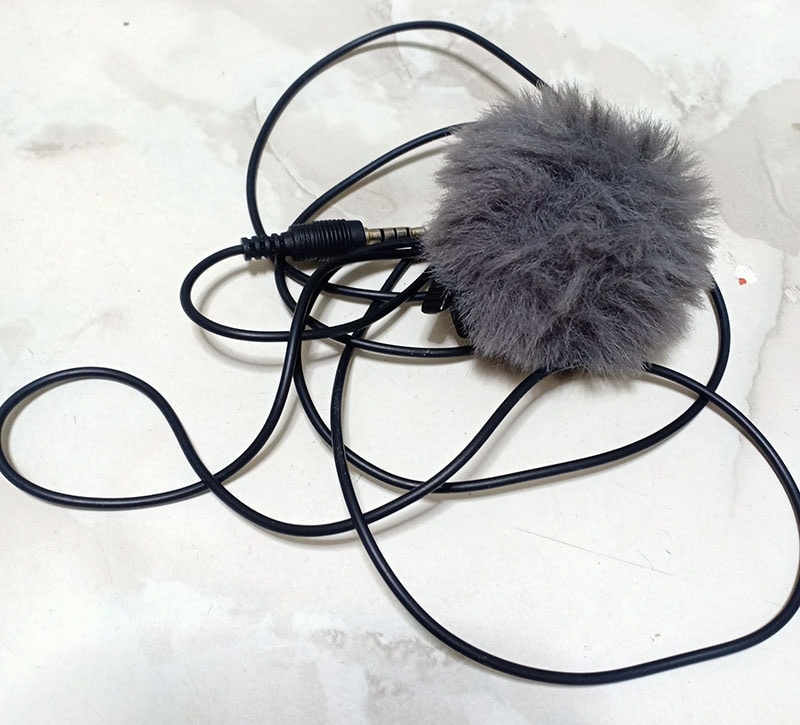
External Mic / Lapel Mic
To ensure you have both video and audio quality, it’s advisable to use an external microphone to record the audio separately, but there is lapel microphone that you can connect directly to your mobile phone make sure to use lapel mic that is compatible to your phone.
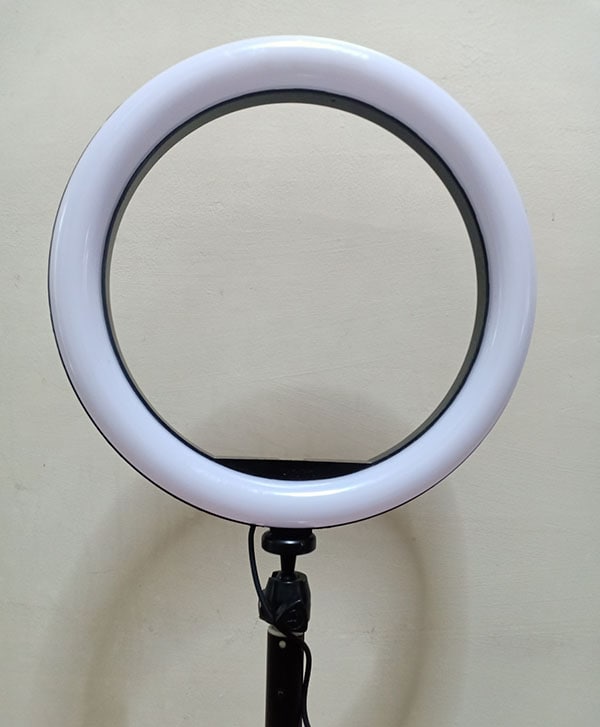
Ring Light
As I said natural lighting that comes from your window is your best friend when it comes to your lighting set up. Just find a window that the sun is shining through and use that light to your advantage.
but if you are willing to invest to have a quality video, just go with Ring Light. This light provides a soft, radial glow and its even capable as natural daylight. So, you don’t have to worry about flickers or distorts when filming, as the ring provides a continuous stream of light. Because you know lighting is one of the crucial setups for making all videos, especially to a makeup tutorial videos. You can always buy an affordable ring light online.
Editing Software
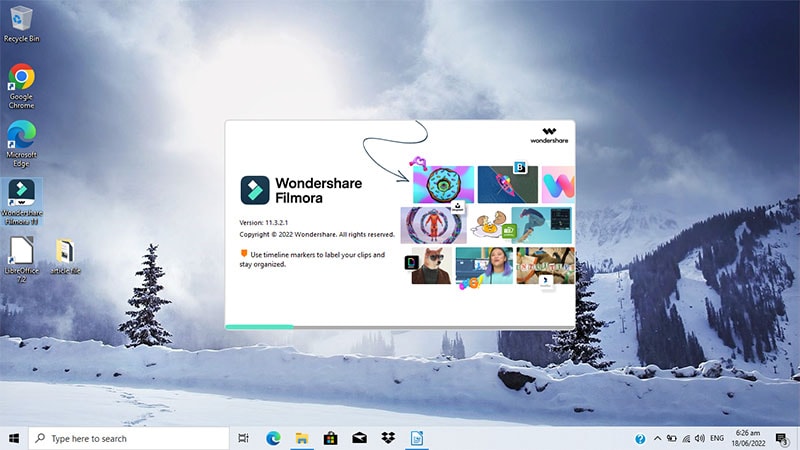
Other than the camera and the video footage itself, the video editing software is the mores essential steps as a content creator. There are usually awkward moments during filming that you may want to edit out, and you may also need to add effects and interesting transition. You can use a video editor that you can download from google.
Wondershare Filmora is a free, one of the easy-to-use software that most content creator used as their editing software. Filmora has editing tools like animation, effects, color change, transition, and overlays to make your video attractive and stands out to others.
Free Download For Win 7 or later(64-bit)
Free Download For macOS 10.14 or later
Step1Ready or set up your studio
A studio can be a corner of a room or if you have an extra space, you can dedicate an entire room to be your filming studio. Then get your camera or smart phone set up on a stable table with your cellphone stand to make it sturdy and make sure you have a suitable lighting. Dark video is not useful to anyone specially for something as detailed as applying a makeup.
Step2Create an outline
It may be helpful to create an outline or a script of your video beforehand so that you remember to do all the things your intent to do in your tutorial. This can also help you stay on track during filming so that you are remembering to demonstrate every part of your tutorial. Making a makeup tutorial video need also a step-by-step process so that you don’t forget anything that you will put or show in the video, you need to make a note or an outline for you to remember all because it so hustles to go back and record what you missed.
Step3Prepare Your Makeup
Before recording, prepare your makeup and make sure you use clean brushes. Set up the makeup you intent to use on the table or on you vanity near your filming setup. Lay out all you makeup and products that you want to use in this video. Have your makeup in front of you so that they are easily accessible during filming.
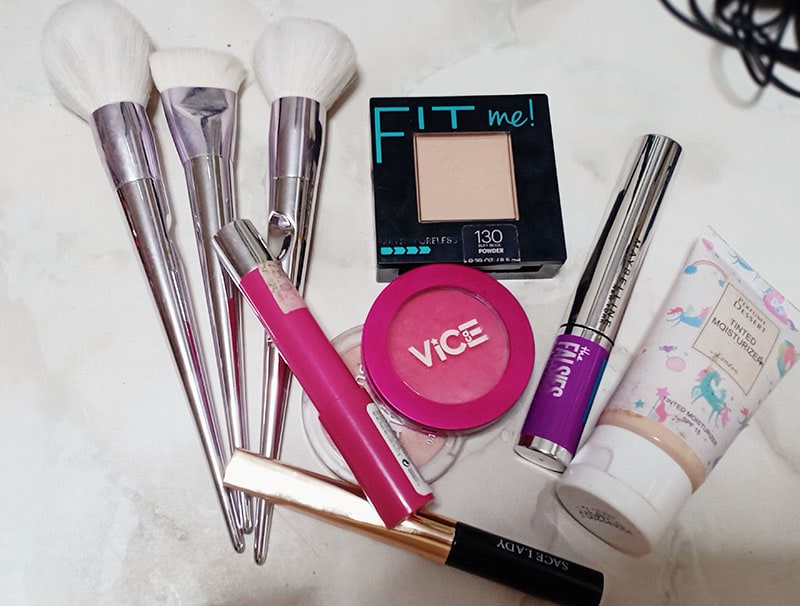
Make sure to have this thing in front of you before filming
- Makeup Brushes
- Skin and Eye Primer
- Moisturizer
- Foundation and Concealer
- Loose or Setting Powder
- Eyebrows Pencil or powder
- Contouring Palette
- Eyeshadow Palette
- Highlight powder
- Lipstick
- Setting Spray
Step4Concentrate and Film
Usually before filming I pray for guidance and knowledge. This is essential to me I do it before filming so that I can be guided and finish what I’m doing properly and less struggle.
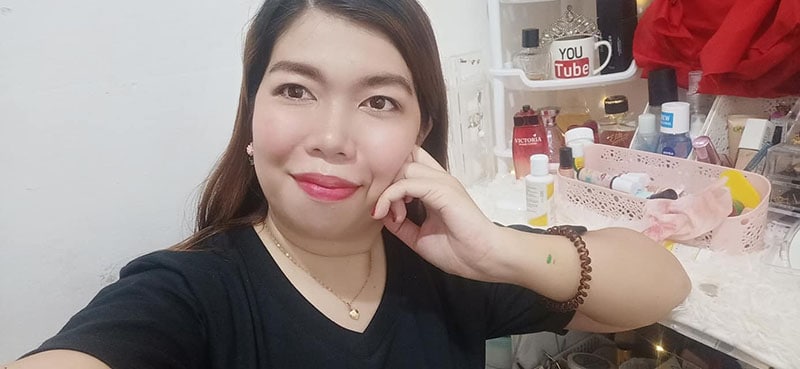
If you are done the you can now start filming. Used your script to start talking to the camera, remember to be happy mood while doing this tutorial. Make your viewers feel good while watching you and don’t forget to tell them what product you are using. Also leave some comment to where they can buy the product you are using on your video.
Step5Edit and Upload
This is the last step for making a makeup video. Edit your video properly and make your video creative to attract more viewers. Cut the unwanted clips especially the part where you’re just talking. Because sometime viewers get bored if they only see you talking. Create a nice animation or transition to make your video stands out.
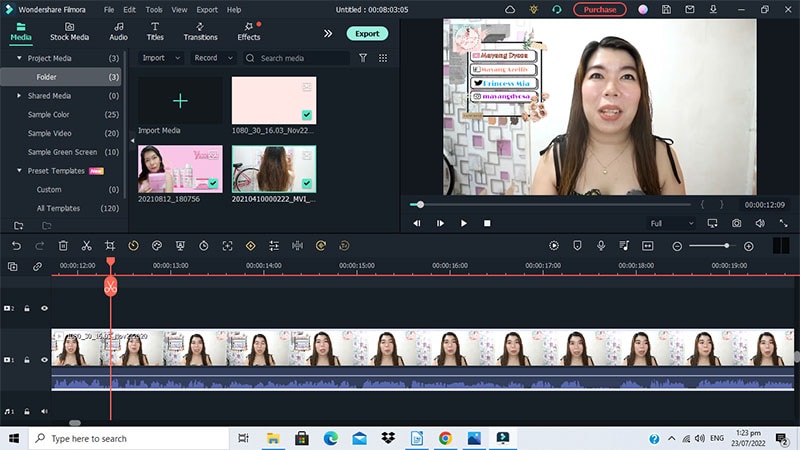
Then upload your finish video to your Youtube channel, make sure to public and promote your video so that more viewers will see how great you are in making this kind of videos. Remember to share your video to all your social media account to have more viewers and subscribers, don’t be shy to tell also your family and friends that you made a video so they can see the finished product of your hard work video tutorial and ask them to leave comment and suggestion if you have anything else to change or fix in making video, because for us content creator people’s feedback is very important so we can do better next time.
The Bottom Line
Now that you already knew the gear that you need to start setting up your studio for your makeup video and you also knew the step-by-step process, you are now ready to film a makeup video. But remember this you can’t just put makeup on your face style your hair and end the video. As a beauty vlogger, you’re an entertainer, so open dialogue is essential when filming. Ask your audience what they want to see, more importantly always remember to ask for feedback because for us content creator viewers feedback is very important so we can do better next time.If you’ve just started this inspiring journey of becoming a beauty Youtuber then hopefully these tips on how to create a makeup video will helped.
Free Download For Win 7 or later(64-bit)
Free Download For macOS 10.14 or later
Free Download For macOS 10.14 or later
Step1Ready or set up your studio
A studio can be a corner of a room or if you have an extra space, you can dedicate an entire room to be your filming studio. Then get your camera or smart phone set up on a stable table with your cellphone stand to make it sturdy and make sure you have a suitable lighting. Dark video is not useful to anyone specially for something as detailed as applying a makeup.

Step2Create an outline
It may be helpful to create an outline or a script of your video beforehand so that you remember to do all the things your intent to do in your tutorial. This can also help you stay on track during filming so that you are remembering to demonstrate every part of your tutorial. Making a makeup tutorial video need also a step-by-step process so that you don’t forget anything that you will put or show in the video, you need to make a note or an outline for you to remember all because it so hustles to go back and record what you missed.
Step3Prepare Your Makeup
Before recording, prepare your makeup and make sure you use clean brushes. Set up the makeup you intent to use on the table or on you vanity near your filming setup. Lay out all you makeup and products that you want to use in this video. Have your makeup in front of you so that they are easily accessible during filming.

Make sure to have this thing in front of you before filming
- Makeup Brushes
- Skin and Eye Primer
- Moisturizer
- Foundation and Concealer
- Loose or Setting Powder
- Eyebrows Pencil or powder
- Contouring Palette
- Eyeshadow Palette
- Highlight powder
- Lipstick
- Setting Spray
Step4Concentrate and Film
Usually before filming I pray for guidance and knowledge. This is essential to me I do it before filming so that I can be guided and finish what I’m doing properly and less struggle.
If you are done the you can now start filming. Used your script to start talking to the camera, remember to be happy mood while doing this tutorial. Make your viewers feel good while watching you and don’t forget to tell them what product you are using. Also leave some comment to where they can buy the product you are using on your video.

Step5Edit and Upload
This is the last step for making a makeup video. Edit your video properly and make your video creative to attract more viewers. Cut the unwanted clips especially the part where you’re just talking. Because sometime viewers get bored if they only see you talking. Create a nice animation or transition to make your video stands out.

Then upload your finish video to your Youtube channel, make sure to public and promote your video so that more viewers will see how great you are in making this kind of videos. Remember to share your video to all your social media account to have more viewers and subscribers, don’t be shy to tell also your family and friends that you made a video so they can see the finished product of your hard work video tutorial and ask them to leave comment and suggestion if you have anything else to change or fix in making video, because for us content creator people’s feedback is very important so we can do better next time.
The Bottom Line
Now that you already knew the gear that you need to start setting up your studio for your makeup video and you also knew the step-by-step process, you are now ready to film a makeup video. But remember this you can’t just put makeup on your face style your hair and end the video. As a beauty vlogger, you’re an entertainer, so open dialogue is essential when filming. Ask your audience what they want to see, more importantly always remember to ask for feedback because for us content creator viewers feedback is very important so we can do better next time.If you’ve just started this inspiring journey of becoming a beauty Youtuber then hopefully these tips on how to create a makeup video will helped.
Free Download For Win 7 or later(64-bit)
Free Download For macOS 10.14 or later
Free Download For macOS 10.14 or later
Step1Ready or set up your studio
A studio can be a corner of a room or if you have an extra space, you can dedicate an entire room to be your filming studio. Then get your camera or smart phone set up on a stable table with your cellphone stand to make it sturdy and make sure you have a suitable lighting. Dark video is not useful to anyone specially for something as detailed as applying a makeup.

Step2Create an outline
It may be helpful to create an outline or a script of your video beforehand so that you remember to do all the things your intent to do in your tutorial. This can also help you stay on track during filming so that you are remembering to demonstrate every part of your tutorial. Making a makeup tutorial video need also a step-by-step process so that you don’t forget anything that you will put or show in the video, you need to make a note or an outline for you to remember all because it so hustles to go back and record what you missed.
Step3Prepare Your Makeup
Before recording, prepare your makeup and make sure you use clean brushes. Set up the makeup you intent to use on the table or on you vanity near your filming setup. Lay out all you makeup and products that you want to use in this video. Have your makeup in front of you so that they are easily accessible during filming.

Make sure to have this thing in front of you before filming
- Makeup Brushes
- Skin and Eye Primer
- Moisturizer
- Foundation and Concealer
- Loose or Setting Powder
- Eyebrows Pencil or powder
- Contouring Palette
- Eyeshadow Palette
- Highlight powder
- Lipstick
- Setting Spray
Step4Concentrate and Film
Usually before filming I pray for guidance and knowledge. This is essential to me I do it before filming so that I can be guided and finish what I’m doing properly and less struggle.
If you are done the you can now start filming. Used your script to start talking to the camera, remember to be happy mood while doing this tutorial. Make your viewers feel good while watching you and don’t forget to tell them what product you are using. Also leave some comment to where they can buy the product you are using on your video.

Step5Edit and Upload
This is the last step for making a makeup video. Edit your video properly and make your video creative to attract more viewers. Cut the unwanted clips especially the part where you’re just talking. Because sometime viewers get bored if they only see you talking. Create a nice animation or transition to make your video stands out.

Then upload your finish video to your Youtube channel, make sure to public and promote your video so that more viewers will see how great you are in making this kind of videos. Remember to share your video to all your social media account to have more viewers and subscribers, don’t be shy to tell also your family and friends that you made a video so they can see the finished product of your hard work video tutorial and ask them to leave comment and suggestion if you have anything else to change or fix in making video, because for us content creator people’s feedback is very important so we can do better next time.
The Bottom Line
Now that you already knew the gear that you need to start setting up your studio for your makeup video and you also knew the step-by-step process, you are now ready to film a makeup video. But remember this you can’t just put makeup on your face style your hair and end the video. As a beauty vlogger, you’re an entertainer, so open dialogue is essential when filming. Ask your audience what they want to see, more importantly always remember to ask for feedback because for us content creator viewers feedback is very important so we can do better next time.If you’ve just started this inspiring journey of becoming a beauty Youtuber then hopefully these tips on how to create a makeup video will helped.
Free Download For Win 7 or later(64-bit)
Free Download For macOS 10.14 or later
Free Download For macOS 10.14 or later
Step1Ready or set up your studio
A studio can be a corner of a room or if you have an extra space, you can dedicate an entire room to be your filming studio. Then get your camera or smart phone set up on a stable table with your cellphone stand to make it sturdy and make sure you have a suitable lighting. Dark video is not useful to anyone specially for something as detailed as applying a makeup.

Step2Create an outline
It may be helpful to create an outline or a script of your video beforehand so that you remember to do all the things your intent to do in your tutorial. This can also help you stay on track during filming so that you are remembering to demonstrate every part of your tutorial. Making a makeup tutorial video need also a step-by-step process so that you don’t forget anything that you will put or show in the video, you need to make a note or an outline for you to remember all because it so hustles to go back and record what you missed.
Step3Prepare Your Makeup
Before recording, prepare your makeup and make sure you use clean brushes. Set up the makeup you intent to use on the table or on you vanity near your filming setup. Lay out all you makeup and products that you want to use in this video. Have your makeup in front of you so that they are easily accessible during filming.

Make sure to have this thing in front of you before filming
- Makeup Brushes
- Skin and Eye Primer
- Moisturizer
- Foundation and Concealer
- Loose or Setting Powder
- Eyebrows Pencil or powder
- Contouring Palette
- Eyeshadow Palette
- Highlight powder
- Lipstick
- Setting Spray
Step4Concentrate and Film
Usually before filming I pray for guidance and knowledge. This is essential to me I do it before filming so that I can be guided and finish what I’m doing properly and less struggle.
If you are done the you can now start filming. Used your script to start talking to the camera, remember to be happy mood while doing this tutorial. Make your viewers feel good while watching you and don’t forget to tell them what product you are using. Also leave some comment to where they can buy the product you are using on your video.

Step5Edit and Upload
This is the last step for making a makeup video. Edit your video properly and make your video creative to attract more viewers. Cut the unwanted clips especially the part where you’re just talking. Because sometime viewers get bored if they only see you talking. Create a nice animation or transition to make your video stands out.

Then upload your finish video to your Youtube channel, make sure to public and promote your video so that more viewers will see how great you are in making this kind of videos. Remember to share your video to all your social media account to have more viewers and subscribers, don’t be shy to tell also your family and friends that you made a video so they can see the finished product of your hard work video tutorial and ask them to leave comment and suggestion if you have anything else to change or fix in making video, because for us content creator people’s feedback is very important so we can do better next time.
The Bottom Line
Now that you already knew the gear that you need to start setting up your studio for your makeup video and you also knew the step-by-step process, you are now ready to film a makeup video. But remember this you can’t just put makeup on your face style your hair and end the video. As a beauty vlogger, you’re an entertainer, so open dialogue is essential when filming. Ask your audience what they want to see, more importantly always remember to ask for feedback because for us content creator viewers feedback is very important so we can do better next time.If you’ve just started this inspiring journey of becoming a beauty Youtuber then hopefully these tips on how to create a makeup video will helped.
Free Download For Win 7 or later(64-bit)
Free Download For macOS 10.14 or later
Also read:
- New 2024 Approved 2 Solutions to Cut Video in VLC on Windows
- New 2024 Approved How to Use OBS Chroma Key With/Without Green Screen Easy Solutions
- 2024 Approved Adding Shake Effects to Your Video With Alight Motion
- Best 6 WebM to GIF Converters
- In 2024, Unravel the Creative Potential of Adobe After Effects for Precise Motion Synchronization. Learn How to Use Track Matte and Tracking with a Simple Alternative
- Updated This Article Will Help You Make Cinematic Shots with Simple DIY Hacks Using Stuff From Your Nearest Dollar Store. You Can Edit Your Video to Get Pro Results by Wondershare Filmora for 2024
- How to Make a TikTok Loop Video for 2024
- New In 2024, Are You a Newbie Across YouTube? Want to Know Who the Best Vloggers Are? This Article Provides You with the Best Vloggers on YouTube
- 2024 Approved Offering The Best Understanding of Performing iMovie Slow Motion Video
- Updated How To Use Slow Zoom Effect in Your Video, In 2024
- In 2024, Storyboards Are Amazing Way if You Want to Present Your Story in a Visual Way, Like Explaining Any Process or Giving Any Information. It Is a Graphic Layout to Tell You a Story
- New 10 Best Vloggers on YouTube
- New How to Customize Your Loading Text Effect?
- New 2024 Approved Want to Add Freeze Frame Effect to Your Video on Your Device? Here Are the Steps to Add Freeze Frame on PC, Mac, Smartphone as Well as Online From Any Device
- How to Rotate Videos With Media Player Classic for 2024
- Updated VN Video Editor Templates A Game-Changer for Your Videos for 2024
- Updated Best 8 Free Video Editing Software Reddit for 2024
- Are You Finding It Difficult to Freeze-Frame in After Effects? Note that Freeze-Frame Takes only a Few Seconds, and, in This Tutorial, We Will Guide You on How to Create and Add Frame Hold in After Effects
- 2024 Approved How To Add Motion Blur On CapCut? (IPhone & Android)
- Find a Video Background Change Online that Works for You. This Article Contains Tools that Can Edit Video Backgrounds Online with Little Effort for 2024
- 2024 Approved Want to Play a Video in the Loop on Your Mac? Here Is How You Can Make a Video Loop in QuickTime in Simple Steps
- 15 Best Free MP4 Video Rotators Windows,Mac, Android, iPhone & Online for 2024
- New 2024 Approved The Power of Music in Videos (+Filmora Editing Tricks)
- Updated In 2024, The Best GIF Editors Weve Tested Heres What We Learned
- Updated VLC Media Player How to Merge Audio and Video Like a Pro
- 2024 Approved Are You Seeking Free Lumetri Presets to Enhance Your Videos? Find Out All About Lumetri Color Presets and How to Use Them in Presenting Proper Color Grading
- New In 2024, Minecraft Pixel Art Is a Trending Subject, and They Simply Consist of In-Game Pixel Artworks, Besides the Minecraft Houses, Farms, or Cities. Lets Explore the Fantastic World of Minecraft Pixel Art
- New How to Vlog? A Ultimate Guide for Beginners for 2024
- New In 2024, This Article Aims to Show You How to Export Videos in Filmora
- New How to Make Vintage Film Effect 1980S for 2024
- Updated In 2024, Make Transparent Background Video Today
- Updated In 2024, Making Slow Motion Videos in Final Cut Pro The Best Methods
- New How Can You Import and Adjust the Video Clips on Wondershare Filmora?
- Updated 2024 Approved Easy Steps to Slow Down a Video on iPhone and Android
- Updated Top 9 Sparkle Effects Photo and Video Editors You Should Know for 2024
- New In 2024, Top Best Free LUTs For Premiere Pro
- Updated In 2024, 4 Solutions to Add White Border to Video on Mobile and Desktop
- Change Background Color in After Effects for 2024
- Quick Answer Why Did Filmora AI Portrait Attract People for 2024
- Updated 2024 Approved How To Add Fade In Windows Video Editor
- New 2024 Approved 10+ Top Unlimited FCPX Slideshow Templates
- Updated How to Create OBS Slideshow for 2024
- Updated Looking Forward to Try Hands at Using the Icecream Slideshow Maker Program to Create High End Slideshow Presentations? Stay Here for a Complete Insight Into the Process
- New How to Remove or Mute Audio in Video with Android Phones, In 2024
- Updated Best Movie Title Maker
- Hey! Are You Looking for Video Reverse Effects in Your Videos? Then, You Are at the Right Place. This Article Will Guide You in Creating a Video Reverse Effect for 2024
- New In 2024, Can You Enhance Your Drone Footage with Cinematic Drone LUTs? This Article Discusses Top Drone LUTs Recommendations to Simplify Video Editing
- Discover the Top 10 Video Editing Apps with Templates for Professional-Grade Results. Edit Like a Pro with These Tools for 2024
- New If You Are Into GIFs and Want to Know a Great Extent of Information About It Then We Have Got You Covered in This Article. Here Is What We Have Learned so Far About It for 2024
- New How to Use Visual Effect for Zoom
- How to Track WhatsApp Messages on Xiaomi Redmi Note 12 4G Without Them Knowing? | Dr.fone
- How To Bypass Huawei Nova Y71 FRP In 3 Different Ways
- In 2024, Can I use iTools gpx file to catch the rare Pokemon On Apple iPhone 15 Plus | Dr.fone
- In 2024, How to Transfer Contacts from Itel A60s to Other Android Devices Devices? | Dr.fone
- Which is the Best Fake GPS Joystick App On Honor 80 Pro Straight Screen Edition? | Dr.fone
- In 2024, How to Remove the Activation Lock On your iPad and iPhone 11 without Apple Account
- Ultimate Guide on Motorola Moto G04 FRP Bypass
- Unova Stone Pokémon Go Evolution List and How Catch Them For Samsung Galaxy F34 5G | Dr.fone
- In 2024, Reasons why Pokémon GPS does not Work On Oppo Find X7? | Dr.fone
- Calls on Poco M6 Pro 5G Go Straight to Voicemail? 12 Fixes | Dr.fone
- In 2024, Wireless Methods to MirrorApple iPhone 6 & iPad to Fire Stick With Ease | Dr.fone
- In 2024, Top 9 Apple iPhone 13 mini Monitoring Apps for Parental Controls | Dr.fone
- In 2024, Top 4 SIM Location Trackers To Easily Find Your Lost Tecno Spark Go (2023) Device
- Forgot iPhone Passcode Again? Unlock iPhone 13 Pro Without Passcode Now | Dr.fone
- Top-Notch Solutions for Disabled Apple ID From Apple iPhone 14 Pro Making It Possible
- Title: New Steps to Create One Click Video Reverse Effect in Filmora
- Author: Morgan
- Created at : 2024-05-19 05:12:24
- Updated at : 2024-05-20 05:12:24
- Link: https://ai-video-editing.techidaily.com/new-steps-to-create-one-click-video-reverse-effect-in-filmora/
- License: This work is licensed under CC BY-NC-SA 4.0.


