
:max_bytes(150000):strip_icc():format(webp)/snork-fa65ca350e2243e1a2deaf6bb7b209b1.jpg)
New The Complete Guide to GIF for Discord Profile for 2024
The Complete Guide to GIF for Discord Profile
The Ultimate Guide to GIF for Discord Profile
An easy yet powerful editor
Numerous effects to choose from
Detailed tutorials provided by the official channel
Discord is the future of digital communication. After all, it is a new platform with unique and amazing features that most people need. Discord is a digital platform where users communicate via video calls, audio calls, media, files, and text in private chats. It works under multiple operating systems, including Mac, Windows, Linux, iPadOS, Web browsers, and Android. In other words, it is excellent for various users with different devices.
Discord GIF profile pic is one of the most popular topics related to the platform. Of course, the platform is new; hence developing a discord animated profile pic can be a hustle to newbies. Fortunately, this article is here with the right questions and responses. Do you wish to learn how to get a discord animated profile picture? If yes, journey with us to learn about discord GIF profile pics and get animated profile pictures on discord. Read on!
In this article
01 [What’s GIF for Discord profile?](#Part 1)
02 [How to Get Animated Profile Picture without having Discord Nitro?](#Part 2)
03 [How to make Discord PFP a GIF?](#Part 3)
04 [How to Put a GIF in Discord profile Picture?](#Part 4)
Part 1 What’s GIF for Discord profile?
Before reviewing the meaning of a GIF in Discord, it is essential to understand what it generally means. Technically, GIF in full means Graphical Interchange Format referring to an image format. In other words, it is an animated image. The file size is probably the smallest, with images looping continuously in a soundless video without the user doing much.
In this case, we are talking about discord and gifs. That is the animated profile picture discord. Think about how you have profile images for different social media accounts. It is the same case, but you settle for a GIF discord profile instead of photos**.**
Why use GIF for Discord Profile?
It is no hush-hush that many people are gradually adopting the idea of gifs in their discord profiles. After all, gifs aren’t new, and they are everywhere. This fact leaves us wondering why you should use it and its effect on your account.
● GIFs are the best way to grab attention and create a connection with your friends. From its definition, gif contains loops that quickly get the attention you wish for your work.
● They display a friendly side that helps you create a connection with people.
● It gives your account more emotion and a sense of friendliness that leaves people wanting to communicate with you.
● Gifs are the current trend; hence, they indicate a direction. In other words, you pay attention to trends.
● It provides a sense of entertainment and youthfulness in your work.
GIFs are everywhere; hence, it is fantastic to adapt to the current trends that young people follow to keep up with technological evolutions. Create a GIF profile on discord and realize the fun you miss out on discord. And if you are yet to create a discord account, ensure that you join the platform and freely communicate with your friends.
Part 2 How to Get Animated Profile Picture without having Discord Nitro?
Are you a Discord user, or are you get to create an account? If yes, you are familiar with discord nitro and all the advantages that come with it. And if you are not a user, you probably are confused about discord Nitro. Let’s start with basic information on discord nitro and its use. Discord Nitro is the genre version of discord with multiple features, making it a worthy option. It enhances your experience with discord voice, text, video, and most importantly, creating profile pictures.
The Nitro version promotes animated discord profile pics. It is a great option but, what do you do when you can’t afford it? Is it still possible to get cool animated discord profile pics? Yes. You can comfortably get a profile discord GIF without Discord Nitro. And you are lucky since this section will cover this necessary topic.
Of course, we have to thank content writer Ubaid Ullah for the article on how to get Discord GIF profile without nitro. After all, it is one of our reference points.
Step 1: Create a GIF or download one that meets your taste from different websites. Currently, we have many sites offering free GIFs; hence you don’t have to worry about copyright issues. Some top websites to consider are Giphy, Gifer, etc.
Step 2: Look for a site that can translate a GIF document to the APNG file. Don’t worry about this step since you can always google the top options. We currently have the ezgif site but technology changes every day; hence you can expect rising websites.
Step 3: Let’s use the ezgif website. Upon accessing it, ensure that you settle for the APNG maker icon. It is on the top left of the website.

Step 4: Check on the Crossfade Frames option. Note that you need to choose images with at most thirty frames. Finally, click on the Make APNG option

Step 6: You can add multiple after-effects after creating the GIF to customize the final look
Step 7: Download the final file and save it on your PC with the name you wish
Step 8: Upload on Discord
Important things to note when uploading GIFs on Discord
● Discord only allows a file that is at least 8MBs. So, if yours isn’t, you can compress it via different websites.
● A gif with nitro is neater, but a GIF without nitro works better than having an image.
● Even without discord Nitro, you still have access to the cool animated discord profile pics if you have a discord server. Suppose you have an animated discord profile, and then we can only see one frame without discord nitro.
Part 3 How to make Discord PFP a GIF?
From the beginning of this piece until now, all we have discussed is getting or making a GIF. However, we will define the simplest way to make your profile pic a GIF in Discord in this case. Ensure that you read through this section.
Generally, discord nitro users are more privileged compared to normal discord users. Of course, the Nitro subscribers pay a fee to access these privileges. There are two options:
● Making your profile picture a GIF
● Utilizing the Tenor GIFs
● Uploading them from your files
02How to create your profile picture a GIF?
Step 1: Log into your Discord account

Step 2: Visit the user settings gear icon and go to edit profile to access your account details.
Step 3: Click on your current profile or click on the Change Avatar option
Step 5: Use the available GIF search engine or upload files from your device. It depends on whether you are a Nitro subscriber or a normal user. Select your GIF and go to the Apply option to save the file
Step 6: Move to the escape button to exit the settings, and you realize that your PFP is officially a GIF.
02Key points on discord GIF profile
● You only have access to the discord nitro profile GIFs if you are a nitro subscriber. Otherwise, you need to look for GIFs from different websites and upload them.
● The maximum resolution of a GIF is 128 by 128 pixels hence you need to be careful.
● The GIF file size for discord is at most 8MBs.
● You can create a GIF instead of uploading it from free websites.
Part 4 How to Put a GIF in Discord profile Picture?
Discord is quite a popular platform with millions of users worldwide. Thanks to the user-friendly interface it includes, this number is enormous, especially when you wish to edit your profile picture. In our case, we explain facts about having a GIF as a PFP in discord.
Like most social media platforms, this process is relatively easy. It only requires you to be a discord user, and it is better if you are a nitro subscriber. Why? Because the latter have the discord GIF options easing the process. Note that you can still add a GIF even without nitro.
The first point is to log into your account, go to setting and click on the edit your profile option. Upon clicking on the available PFP, you will automatically access a file dialogue that prompts you to include your GIF. Later save these changes and get a GIF profile in discord.
GIFs are like looping or repetitive short videos; hence they need editing. Fortunately, we have the Wondershare Filmora Video Editor editor, which includes multiple features which assist in editing your work. Filmora features scene detection, video stabilization, noise removal, text editor, etc. All these features work together to deliver high-quality discord profile GIFs.

Wondershare Filmora - Best Video Editor for Mac/Windows
5,481,435 people have downloaded it.
Build unique custom animations without breaking a sweat.
Focus on creating epic stories and leave the details to Filmora’s auto features.
Start a creative adventure with drag & drop effects and endless possibilities.
Filmora simplifies advanced features to save you time and effort.
Filmora cuts out repetition so you can move on to your next creative breakthrough.
● Ending Thoughts →
● It is possible to have unique GIFs in your Discord account as a normal discord user
●> Editing Discord profile is convenient for all
● There are countless websites available that can assist you in getting a good GIF
● Generally, discord is a powerful platform with millions of users. It is pretty new but has received positive feedback from people. Discord includes amazing unique features, including animated discord profile pictures. However, there is maximum confusion on setting discord gif profiles, which is the area that this article addresses. Clear all doubts on profile discord GIFs by reading the content above.
Discord is the future of digital communication. After all, it is a new platform with unique and amazing features that most people need. Discord is a digital platform where users communicate via video calls, audio calls, media, files, and text in private chats. It works under multiple operating systems, including Mac, Windows, Linux, iPadOS, Web browsers, and Android. In other words, it is excellent for various users with different devices.
Discord GIF profile pic is one of the most popular topics related to the platform. Of course, the platform is new; hence developing a discord animated profile pic can be a hustle to newbies. Fortunately, this article is here with the right questions and responses. Do you wish to learn how to get a discord animated profile picture? If yes, journey with us to learn about discord GIF profile pics and get animated profile pictures on discord. Read on!
In this article
01 [What’s GIF for Discord profile?](#Part 1)
02 [How to Get Animated Profile Picture without having Discord Nitro?](#Part 2)
03 [How to make Discord PFP a GIF?](#Part 3)
04 [How to Put a GIF in Discord profile Picture?](#Part 4)
Part 1 What’s GIF for Discord profile?
Before reviewing the meaning of a GIF in Discord, it is essential to understand what it generally means. Technically, GIF in full means Graphical Interchange Format referring to an image format. In other words, it is an animated image. The file size is probably the smallest, with images looping continuously in a soundless video without the user doing much.
In this case, we are talking about discord and gifs. That is the animated profile picture discord. Think about how you have profile images for different social media accounts. It is the same case, but you settle for a GIF discord profile instead of photos**.**
Why use GIF for Discord Profile?
It is no hush-hush that many people are gradually adopting the idea of gifs in their discord profiles. After all, gifs aren’t new, and they are everywhere. This fact leaves us wondering why you should use it and its effect on your account.
● GIFs are the best way to grab attention and create a connection with your friends. From its definition, gif contains loops that quickly get the attention you wish for your work.
● They display a friendly side that helps you create a connection with people.
● It gives your account more emotion and a sense of friendliness that leaves people wanting to communicate with you.
● Gifs are the current trend; hence, they indicate a direction. In other words, you pay attention to trends.
● It provides a sense of entertainment and youthfulness in your work.
GIFs are everywhere; hence, it is fantastic to adapt to the current trends that young people follow to keep up with technological evolutions. Create a GIF profile on discord and realize the fun you miss out on discord. And if you are yet to create a discord account, ensure that you join the platform and freely communicate with your friends.
Part 2 How to Get Animated Profile Picture without having Discord Nitro?
Are you a Discord user, or are you get to create an account? If yes, you are familiar with discord nitro and all the advantages that come with it. And if you are not a user, you probably are confused about discord Nitro. Let’s start with basic information on discord nitro and its use. Discord Nitro is the genre version of discord with multiple features, making it a worthy option. It enhances your experience with discord voice, text, video, and most importantly, creating profile pictures.
The Nitro version promotes animated discord profile pics. It is a great option but, what do you do when you can’t afford it? Is it still possible to get cool animated discord profile pics? Yes. You can comfortably get a profile discord GIF without Discord Nitro. And you are lucky since this section will cover this necessary topic.
Of course, we have to thank content writer Ubaid Ullah for the article on how to get Discord GIF profile without nitro. After all, it is one of our reference points.
Step 1: Create a GIF or download one that meets your taste from different websites. Currently, we have many sites offering free GIFs; hence you don’t have to worry about copyright issues. Some top websites to consider are Giphy, Gifer, etc.
Step 2: Look for a site that can translate a GIF document to the APNG file. Don’t worry about this step since you can always google the top options. We currently have the ezgif site but technology changes every day; hence you can expect rising websites.
Step 3: Let’s use the ezgif website. Upon accessing it, ensure that you settle for the APNG maker icon. It is on the top left of the website.
Step 4: Check on the Crossfade Frames option. Note that you need to choose images with at most thirty frames. Finally, click on the Make APNG option
Step 6: You can add multiple after-effects after creating the GIF to customize the final look
Step 7: Download the final file and save it on your PC with the name you wish
Step 8: Upload on Discord
Important things to note when uploading GIFs on Discord
● Discord only allows a file that is at least 8MBs. So, if yours isn’t, you can compress it via different websites.
● A gif with nitro is neater, but a GIF without nitro works better than having an image.
● Even without discord Nitro, you still have access to the cool animated discord profile pics if you have a discord server. Suppose you have an animated discord profile, and then we can only see one frame without discord nitro.
Part 3 How to make Discord PFP a GIF?
From the beginning of this piece until now, all we have discussed is getting or making a GIF. However, we will define the simplest way to make your profile pic a GIF in Discord in this case. Ensure that you read through this section.
Generally, discord nitro users are more privileged compared to normal discord users. Of course, the Nitro subscribers pay a fee to access these privileges. There are two options:
● Making your profile picture a GIF
● Utilizing the Tenor GIFs
● Uploading them from your files
02How to create your profile picture a GIF?
Step 1: Log into your Discord account
Step 2: Visit the user settings gear icon and go to edit profile to access your account details.
Step 3: Click on your current profile or click on the Change Avatar option
Step 5: Use the available GIF search engine or upload files from your device. It depends on whether you are a Nitro subscriber or a normal user. Select your GIF and go to the Apply option to save the file
Step 6: Move to the escape button to exit the settings, and you realize that your PFP is officially a GIF.
02Key points on discord GIF profile
● You only have access to the discord nitro profile GIFs if you are a nitro subscriber. Otherwise, you need to look for GIFs from different websites and upload them.
● The maximum resolution of a GIF is 128 by 128 pixels hence you need to be careful.
● The GIF file size for discord is at most 8MBs.
● You can create a GIF instead of uploading it from free websites.
Part 4 How to Put a GIF in Discord profile Picture?
Discord is quite a popular platform with millions of users worldwide. Thanks to the user-friendly interface it includes, this number is enormous, especially when you wish to edit your profile picture. In our case, we explain facts about having a GIF as a PFP in discord.
Like most social media platforms, this process is relatively easy. It only requires you to be a discord user, and it is better if you are a nitro subscriber. Why? Because the latter have the discord GIF options easing the process. Note that you can still add a GIF even without nitro.
The first point is to log into your account, go to setting and click on the edit your profile option. Upon clicking on the available PFP, you will automatically access a file dialogue that prompts you to include your GIF. Later save these changes and get a GIF profile in discord.
GIFs are like looping or repetitive short videos; hence they need editing. Fortunately, we have the Wondershare Filmora Video Editor editor, which includes multiple features which assist in editing your work. Filmora features scene detection, video stabilization, noise removal, text editor, etc. All these features work together to deliver high-quality discord profile GIFs.
Wondershare Filmora - Best Video Editor for Mac/Windows
5,481,435 people have downloaded it.
Build unique custom animations without breaking a sweat.
Focus on creating epic stories and leave the details to Filmora’s auto features.
Start a creative adventure with drag & drop effects and endless possibilities.
Filmora simplifies advanced features to save you time and effort.
Filmora cuts out repetition so you can move on to your next creative breakthrough.
● Ending Thoughts →
● It is possible to have unique GIFs in your Discord account as a normal discord user
●> Editing Discord profile is convenient for all
● There are countless websites available that can assist you in getting a good GIF
● Generally, discord is a powerful platform with millions of users. It is pretty new but has received positive feedback from people. Discord includes amazing unique features, including animated discord profile pictures. However, there is maximum confusion on setting discord gif profiles, which is the area that this article addresses. Clear all doubts on profile discord GIFs by reading the content above.
Guide To Make a YouTube Intro by Filmora
You are starting a YouTube channel and looking to create a video intro. Then, this article will allow you to experience the magic of Wondershare Filmora in creating a YouTube intro. Wondershare Filmora allows you to access the range of opener templates you can edit to create engaging YouTube intros. This will help to hook up your audience till the end.
But before we learn how to create a YouTube intro, let’s understand what makes an Intro creative and exciting.
Part 1. What Is a Creative YouTube Intro?
A good intro is a crucial feature of a good YouTube video. Whenever a viewer or a subscriber clicks on your video, the YouTube intro is the first thing they see. And a successful channel’s secret is to captivate the viewer from the start.
What Goes Into a Creative YouTube Intro?
A good YouTube intro consists of the following qualities:
- Graphic: The intro text will be written on the graphics template.
- Text: This text will be your channel’s name. Or, if it’s a Vlog, it could be its number. Such as i.e., Vlog #2.
- Images: If you use plain templates, you can add pictures behind them to make them pop up even more.
- Catchy music: To spice up the video and make it more pleasing, the music will be added to hook the audience in the intro section.
You must have an engaging YouTube intro. You will need a few things to create a YouTube intro.
Part 2. What Do You Need to Make a Creative YouTube Intro?
You are all set to engage the audience, then you need the following essentials to create an exemplary YouTube intro:
Requirement 1. Wondershare Filmora
Free Download For Win 7 or later(64-bit)
Free Download For macOS 10.14 or later
First, you will need to have a good video editor. Wondershare Filmora is the best for editing your videos. It enables you to make creative and appealing videos.
It has a very engaging system UI that allows even novices to quickly get the hang of it. Also, it has a wide range of stock media. Thus, it allows you to access the intro templates and customise features.

Requirement 2. Footage for Intro
When creating content for your YouTube videos, remember that you will also need some footage for your intro. Intros need to be as captivating as possible.
So to hook the audience from the start, you will need an entertaining start. These video clips can be the exciting moments that you cut before the climax or landscapes of the scenery. The choice is yours.
Part 3. Step-by-Step Guide to Creating a YouTube Intro
You can create a YouTube intro in two ways.
- Create a YouTube intro with an opener template.
- By using video clips from your library.
To use both of these methods, you will need Wondershare Filmora. For this, read below to get your hands on it!
Create a YouTube Intro with an opener template
Opener templates are full of fancy graphics and animations that you can change according to your style. The library provides you with the most vibrant and simplest form of opener templates.
Step1 Download Wondershare Filmora
Before all, you need to have access to Filmora. If you don’t have then follow the below actions:
- First, download and install the Wondershare Filmora.
- Then, on your PC or Mac, run this application.
Step2 Preview The Intro Template
After downloading the Wondershare Filmora, you must select an intro template. To perform this action, you will need to preview it first as:
- Click on the Title icon above the Import window.
- On the left column, scroll down to Titles > Openers.
- Double-click on any intro template to preview it.
After previewing the opener, we need to insert it into the timeline. Simply click on an intro you like and place it in the timeline below. Here you can edit the Opener.
Step3 Edit The Text
After adding the opener to the timeline, your goal is to type in your text. This text will appear in the intro. To perform this action, follow the steps mentioned below:
- Double-click on the opener added to the timeline.
- This will open the settings menu in the import window.
- Type in the text box your channel’s or vlog’s name.

- Then change the font of text if you want.
- You can also edit the sub-heading. Here you can write a short description of your video.
- Once you are done typing the text, click on OK to confirm your changes.
After you have typed in the text for your opener, it is time to add some music to it.
Step4 Add Music into Clip
Music will spice up your intro video and give more pleasing effect. To proceed it further, follow the following steps:
- Click on the Audio icon above the import window and Audio library will pop up.
- Here, you can see the variety of Royalty-free music available.
- Browse through the library and choose whatever you like.
- After you have selected the music for your video, click to drop it below your opener in the timeline.
- Trim the music to the length of the opener.
- Play the opener from the start to confirm your changes.

This is how you can create an opener intro for your YouTube videos. Choose the graphics that most suit your video’s vibe.
Now that we have learned how to make an opener by template, let’s look at how to create an intro using clips in your library.
Create an Intro with Video Clips in Your Library
Wondershare Filmora also allows you to edit your videos to turn them into openers. This will enable your intros to be more personal and unique, giving you the edge of creativity.
Creating an intro by using video clips is an easy task. You just need suitable video clips to use as an intro, and you are good to go.
Follow the steps as mentioned to create an intro using Video clips:
Step1 Import the Video Clips
After downloading Wondershare Filmora, your next step is to import your video clips. To perform this, follow the steps as mentioned below:
- On the Filmora Home Interface, find the Import icon on the top left side and select it.
- This will direct you to your PC library.
- Select the photos and videos you want to edit and click OK.

Step2 Add The Video Clips to the Timeline
Once you have imported clips in the Import window, your next step is simply to add them to the timeline. For this, follow the steps mentioned below:
- Drag and select the clips in the import window.
- Then, drop them in the timeline.

Once in the timeline, your video is ready to go into editing mode. But before we insert the template of our intro, we need another step as shown!
Step3 Trim The Video Clips
As it’s the intro, we need to trim the video clips, so they are concise. You may have recorded longer video clips, but we need clips that are no longer than 5 seconds.
To trim the video clips, follow the steps mentioned:
- Move the playhead on the video clip to where you want to trim.
- Click on the scissors icon on the Playhead.
This will split your video clip into two parts. Now, you can delete whatever part you like and keep the other one.
![]()
Note: To measure the time of the video clip, keep an eye on the Time map above the Playhead.

When you have trimmed your video clips to your liking, it’s time to add the Title text that will act as an intro to your video!
Step4 Add The Title Text
You will need a title template to add text to your video clips. For this,perform the following actions:
- First, click on the Title icon above the import window.
- On the left column explore and browse the animated title as you want.
- Double-click on a title template to preview it.
- Once you have selected the Title template, drag it above the start of your timeline above the video clip and it’ll all set.
After you have added the title, the next step is to add your intro text.
Step5 Type The Intro Text
For specifications of the video and ongoing content, you have to tell the audience before starting. For this, you need to type the intro text as shown:
- Double-click on the title template.
- Type in the text you want in the text box.

Play the video clip from the beginning to confirm your changes. Now that we have created a graphic text, it’s time to add the audio.
Step6 Add Music
To give more pleasing look and effect, you must add the music into it. Follow the steps below to proceed it further:
- First select the Audio icon above the import window. This will direct you to Filmora’s Audio library.
- Browse the library and pick whatever royalty-free music you want.
- After you’ve chosen the music for your video, drag it to the timeline below the video clip.
- Cut the music to match the length of the intro and it’s all done.

Once you are done adding the music, hit the play button to ensure everything is according to your need.

Step7 Export The Video
Its time to export the video and share it with your audience. For this, check below steps:
- Click on the export icon on the top right of the import window.
- This will pop-up another window of settings.
- Select the settings your want your video to be exported in.
![]()
Note: You can also change the name of your intro.
- When you are done, click on Export.
- Wait till Filmora finishes exporting your video.

Congratulations! You have successfully created a YouTube intro. Now you can use them freely in your YouTube videos and please your audience.
Conclusion
YouTube intros are a great way to attract the viewer at first glance. The more creative the YouTube Intro is, the more the chances of your video getting views.
By following the steps mentioned in the article above, you can easily create YouTube intros by Wondershare Filmora. Try with new features and stock media to make your video more exemplary!
Free Download For macOS 10.14 or later
First, you will need to have a good video editor. Wondershare Filmora is the best for editing your videos. It enables you to make creative and appealing videos.
It has a very engaging system UI that allows even novices to quickly get the hang of it. Also, it has a wide range of stock media. Thus, it allows you to access the intro templates and customise features.
Requirement 2. Footage for Intro
When creating content for your YouTube videos, remember that you will also need some footage for your intro. Intros need to be as captivating as possible.
So to hook the audience from the start, you will need an entertaining start. These video clips can be the exciting moments that you cut before the climax or landscapes of the scenery. The choice is yours.
Part 3. Step-by-Step Guide to Creating a YouTube Intro
You can create a YouTube intro in two ways.
- Create a YouTube intro with an opener template.
- By using video clips from your library.
To use both of these methods, you will need Wondershare Filmora. For this, read below to get your hands on it!
Create a YouTube Intro with an opener template
Opener templates are full of fancy graphics and animations that you can change according to your style. The library provides you with the most vibrant and simplest form of opener templates.
Step1 Download Wondershare Filmora
Before all, you need to have access to Filmora. If you don’t have then follow the below actions:
- First, download and install the Wondershare Filmora.
- Then, on your PC or Mac, run this application.
Step2 Preview The Intro Template
After downloading the Wondershare Filmora, you must select an intro template. To perform this action, you will need to preview it first as:
- Click on the Title icon above the Import window.
- On the left column, scroll down to Titles > Openers.
- Double-click on any intro template to preview it.
After previewing the opener, we need to insert it into the timeline. Simply click on an intro you like and place it in the timeline below. Here you can edit the Opener.
Step3 Edit The Text
After adding the opener to the timeline, your goal is to type in your text. This text will appear in the intro. To perform this action, follow the steps mentioned below:
- Double-click on the opener added to the timeline.
- This will open the settings menu in the import window.
- Type in the text box your channel’s or vlog’s name.
- Then change the font of text if you want.
- You can also edit the sub-heading. Here you can write a short description of your video.
- Once you are done typing the text, click on OK to confirm your changes.
After you have typed in the text for your opener, it is time to add some music to it.
Step4 Add Music into Clip
Music will spice up your intro video and give more pleasing effect. To proceed it further, follow the following steps:
- Click on the Audio icon above the import window and Audio library will pop up.
- Here, you can see the variety of Royalty-free music available.
- Browse through the library and choose whatever you like.
- After you have selected the music for your video, click to drop it below your opener in the timeline.
- Trim the music to the length of the opener.
- Play the opener from the start to confirm your changes.
This is how you can create an opener intro for your YouTube videos. Choose the graphics that most suit your video’s vibe.
Now that we have learned how to make an opener by template, let’s look at how to create an intro using clips in your library.
Create an Intro with Video Clips in Your Library
Wondershare Filmora also allows you to edit your videos to turn them into openers. This will enable your intros to be more personal and unique, giving you the edge of creativity.
Creating an intro by using video clips is an easy task. You just need suitable video clips to use as an intro, and you are good to go.
Follow the steps as mentioned to create an intro using Video clips:
Step1 Import the Video Clips
After downloading Wondershare Filmora, your next step is to import your video clips. To perform this, follow the steps as mentioned below:
- On the Filmora Home Interface, find the Import icon on the top left side and select it.
- This will direct you to your PC library.
- Select the photos and videos you want to edit and click OK.
Step2 Add The Video Clips to the Timeline
Once you have imported clips in the Import window, your next step is simply to add them to the timeline. For this, follow the steps mentioned below:
- Drag and select the clips in the import window.
- Then, drop them in the timeline.
Once in the timeline, your video is ready to go into editing mode. But before we insert the template of our intro, we need another step as shown!
Step3 Trim The Video Clips
As it’s the intro, we need to trim the video clips, so they are concise. You may have recorded longer video clips, but we need clips that are no longer than 5 seconds.
To trim the video clips, follow the steps mentioned:
- Move the playhead on the video clip to where you want to trim.
- Click on the scissors icon on the Playhead.
This will split your video clip into two parts. Now, you can delete whatever part you like and keep the other one.
![]()
Note: To measure the time of the video clip, keep an eye on the Time map above the Playhead.
When you have trimmed your video clips to your liking, it’s time to add the Title text that will act as an intro to your video!
Step4 Add The Title Text
You will need a title template to add text to your video clips. For this,perform the following actions:
- First, click on the Title icon above the import window.
- On the left column explore and browse the animated title as you want.
- Double-click on a title template to preview it.
- Once you have selected the Title template, drag it above the start of your timeline above the video clip and it’ll all set.
After you have added the title, the next step is to add your intro text.
Step5 Type The Intro Text
For specifications of the video and ongoing content, you have to tell the audience before starting. For this, you need to type the intro text as shown:
- Double-click on the title template.
- Type in the text you want in the text box.
Play the video clip from the beginning to confirm your changes. Now that we have created a graphic text, it’s time to add the audio.
Step6 Add Music
To give more pleasing look and effect, you must add the music into it. Follow the steps below to proceed it further:
- First select the Audio icon above the import window. This will direct you to Filmora’s Audio library.
- Browse the library and pick whatever royalty-free music you want.
- After you’ve chosen the music for your video, drag it to the timeline below the video clip.
- Cut the music to match the length of the intro and it’s all done.
Once you are done adding the music, hit the play button to ensure everything is according to your need.
Step7 Export The Video
Its time to export the video and share it with your audience. For this, check below steps:
- Click on the export icon on the top right of the import window.
- This will pop-up another window of settings.
- Select the settings your want your video to be exported in.
![]()
Note: You can also change the name of your intro.
- When you are done, click on Export.
- Wait till Filmora finishes exporting your video.
Congratulations! You have successfully created a YouTube intro. Now you can use them freely in your YouTube videos and please your audience.
Conclusion
YouTube intros are a great way to attract the viewer at first glance. The more creative the YouTube Intro is, the more the chances of your video getting views.
By following the steps mentioned in the article above, you can easily create YouTube intros by Wondershare Filmora. Try with new features and stock media to make your video more exemplary!
Best Video Editors to Add Text to a Video
While it can be very easy to add text to an image, the same cannot be said when it comes to adding even the simplest text to a video. You will need video editing software that is designed with the necessary features to help you add text to your video.
There are very many programs in the market that can technically be used to add text to a video. But the ones we will look at are video editors that make the process easy, but also give you a wide range of options to customize your text in numerous ways.
Filmora
Filmora by Wondershare is one of the best video editors in the market. Its user interface is so easy to use that adding text to the video is a simple 3-step process. Aside from adding text to the video, Filmora also allows you to edit other aspects of the video including adding transitions, overlays, and animations to any section of the video.

Key Features:
- You can use Filmora to add text to any section of the video
- It gives you the freedom to move the text to any section of the video
- Customizing the text, you add to the video can be done in numerous ways including changing the color, and font and adding animations to the text.
- It offers numerous templates to choose from and different font styles that you can use
- It has a simple user interface that makes the video editing process very easy
- It has numerous other video editing capabilities that allow you to create and edit videos in different ways including splitting videos, trimming videos, and even merging videos clips into one
- You can upload the videos directly to YouTube after editing.
After Effects
Adobe After Effects is a motion picture editing program that you can also use to add text and other animations to your video. While you can use it to add simple text to the video, it is an ideal solution when your goal is to add advanced text animations. It is however by no means a simple solution, especially for beginners who may find it hard to get going with After Effects.

Key Features:
- You can add simple lines of text to any section of the video
- Text is easily customizable by changing the color, font, and size of the text
- You can also choose to change the entire text layer and add advanced animations and effects
- There are a lot of text, animations, and effects templates to choose from
- You can easily copy text from other Adobe applications to use in After Effects
Movavi Editor
Movavi video editor is another great video editor that you can use to add and edit text on a video. Like most similar tools it is designed to simplify the process, allowing you to add text to any section of the document, move the text to any location on the video and even add text effects to customize the text. It has a very simple user interface that allows you to do that quickly and easily.

Key Features:
- You can add text to any section of the video
- Customizing the text by changing the font, color and size is also very easy
- The user interface is very easy to use, allowing you to add even blocks of text very quickly
- You also have additional options to edit the video including splitting and merging the video or adjusting the brightness, saturation, and color.
iMovie
This is a built-in video editor that you will find on macOS and iOS devices. Even though it is free, iMovie has a lot of features that come in handy when you want to add and edit text on a video. The fact that it can be used on iOS devices is an added advantage when you want to edit videos on the go.

Key Features:
- It allows users to add transitions and effects to the text you add to the video
- It comes with a lot of title templates to choose from
- Adding animated text is also very simple including Sideways Drift, Lens Flare, and more
- You can customize the text in very many ways including adding fonts, drop shadows, changing the color, and even resizing or repositioning the text.
Camtasia
TechSmith Camtasia is one of the most popular tools to create and edit videos. Of the numerous features that you get when you choose to use Camtasia is adding and editing text to the video. It has numerous templates that can be used to customize the text you add in various ways.

Key Features:
- It gives you numerous options to add text to the images including text boxes, templates, and effects
- It has a speech-to-text feature that is perfect for adding captions and subtitles to the video
- You can easily customize the text by adding transitions and effects or even by simply changing the font, color, and size of the text
- The text can be moved to any section of the video
Typito
Typito is an online video editor with simple tools that can help you make changes to any video. designed to help YouTube content creators and video editors, Typito can be used to add all kinds of text and text effects to any video. It is accessible on all browsers and it is also very easy to use.
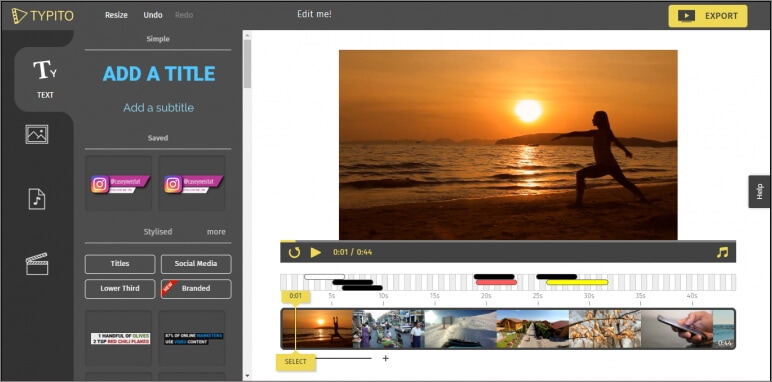
Key Features:
- It is very easy to use, allowing you to add text to any video in a few simple steps
- It has numerous templates to choose from
- Changing the font size, color, and style of the text is very easy
- You can publish videos directly to numerous video-sharing sites after editing
- It allows users to add animations, transitions, and effects to the text
Splice
Splice is an iOS app designed to help you add text to videos on iOS devices. Adding text to any video using Splice can be easily done using the overlay feature. It also has numerous other video editing features including allowing you to easily synchronize your videos and music, adding filters and transitions, and more.

Key Features:
- it has a simple user interface that makes adding text very easy
- You can customize the text in various ways including changing the font size, color and style or even adding various text effects
- Videos can be saved on the device or shared directly on social media apps like Facebook, Instagram, and YouTube
- It has numerous other video editing features including filters and animations
Clipomatic
If the text you want to add to the video is in the form of captions or subtitles, then Clipomatic is perhaps the best choice. It supports various languages including German, French, Portuguese, and even Chinese. You can also use it to add regular text to any video, reposition the text on any section of the video and customize the text in various ways.

Key Features:
- It is available for both Android and iOS
- Adding text to the video is very easy
- You can easily customize the text by changing the font color, and size and adding transitions and text effects
- It supports various languages, making it ideal for captions and subtitles
MySubtitle
MySubtitle is a simple but highly effective app that you can use to add text to your video. As the name suggests, this tool is ideal for adding subtitles and you can do that very easily by simply typing in the text and syncing the text to the video’s content.

Key Features:
- It is available for both iOS and Android devices
- You can type in your subtitles directly on the video
- Subtitles can then be paced to suit the video’s playback speed
- It is completely free to use
- You can share the videos you edit directly on various social media platforms
Free Download For Win 7 or later(64-bit)
Free Download For macOS 10.14 or later
Free Download For macOS 10.14 or later
How to Merge Audio and Video Using FFmpeg
Welcome to the world of video production! Whether you’re a beginner or an experienced video creator, one of the most important skills to master is merging audio and video seamlessly. In this article, we’ll focus on FFmpeg, a powerful command-line tool that can help you easily merge audio and video.
FFmpeg is open-source software that allows you to convert, edit, and stream multimedia files. It’s widely used by professionals and enthusiasts and has many capabilities, including merging audio and video files. This guide will walk you through merging audio and video using FFmpeg. So, whether you’re creating a YouTube video, a podcast, or a movie, you’ll have the skills to make it sound and look great.

Preparation
Are you ready to master the art of merging audio and video? Then let’s dive into the world of FFmpeg, a powerful and versatile tool that can help you achieve professional results.
With FFmpeg, you can record, convert, and stream audio and video files in any format, making it a complete and cross-platform solution. It’s also a great tool for decoding, encoding, transcoding, muxing, demuxing, streaming, filtering, and playing any media type.
But before we start merging video files using FFmpeg, it’s important to understand the basics of container formats and video codecs. These are the building blocks of your videos, and the specific types you’re working with will determine the method you’ll use to merge them. So, buckle up, and let’s get started!
How To Combine Video With Two Audio Using FFmpeg
Are you looking to add multiple audio tracks to your video? With FFmpeg, you can easily combine video with two audio streams. Whether creating a foreign-language version of your video or adding an alternate audio track, this method will help you achieve professional results. This section will guide you through combining video with two audio streams using FFmpeg’s command-line interface. So, let’s get started!
Mixing Two Audios Into a Video
Combining multiple audio tracks into one video can be done easily with FFmpeg’s command-line interface. In this example, we will combine two audio tracks into one video so that the voiceover will play over the background music. Here’s the step-by-step process:
Step1 Open your command prompt or terminal and navigate to the directory where your video and audio files are located.
Step2 Replace “video1.mp4“ and “audio1.mp3“ with the names of your actual video and audio files.
ffmpeg \
-i video1.mp4 -i audio1.mp3 \
Step3 The -c:v copy flag tells FFmpeg to copy the video stream from the source file without re-encoding it. This helps to speed up the process and avoid quality loss.
-c:v copy \
-filter_complex “ \
Step4 The command “amix=inputs=2:duration=longest“ tells amix to accept 2 inputs (0:a and 1:a) and combine them into an output stream called audio_out, with the duration of the longest input.
[0:a][1:a] amix=inputs=2:duration=longest [audio_out] \
Step5 Map the video stream (0:v) and the mixed audio stream (audio_out) into the final output video.
-map 0:v -map “[audio_out]“ \
Step6 The -y flag tells FFmpeg to overwrite the output file if it already exists.
-y output.mp4
Once complete, you’ll find the newly created video file with the mixed audio in the specified output location.
Mixing Two Audios Into a Video Adjusting Volume
We will be taking a step further and show you how to merge two audio tracks into a video while adjusting the volume of one of the audio tracks. This can be useful when you want to emphasize one audio track over the other, for example, to make the voiceover more prominent in a video.
And here’s the step-by-step process:
Step1 Start the command by specifying the input files.
ffmpeg \
-i video1.mp4 -i audio1.mp3 \
Step2 Use the filter_complex option to specify a filter graph.
-filter_complex “ \
[0:a] volume=0.5 [music];
Step3 Use the amix filter to take the “music“ stream and audio1.mp3 and mix them.
[music][1:a] amix=inputs=2:duration=longest [audio_out] \
“ \
Step4 Use the map option to specify which streams from the input files should be included in the output file.
-map 0:v -map “[audio_out]“ \
Step5 Specify the output file name as “output.mp4“ and the -y flag to overwrite the output file without asking for confirmation if it already exists.
-y output.mp4
Mixing Two Audios Into a Video With Delay
When creating videos, sometimes the audio needs to be synced with the video, or you want to add a delay to the audio track. Here’s how to add delay to an audio track using FFmpeg.
Step1 Use the adelay filter to add delay to the audio track.
[1:a] adelay=2100|2100 [voice];
Step2 Mix the delayed audio track with the original audio track
[0:a][voice] amix=inputs=2:duration=longest [audio_out]
Step3 Map the video and audio tracks to the output file
-map 0:v -map “[audio_out]“
Step4 Use the -y flag to overwrite the output file
-y output.mp4
The final command would look like this:
ffmpeg \
-i video1.mp4 -i audio1.mp3 \
-filter_complex “ \
[1:a] adelay=2100|2100 [voice]; \
[0:a][voice] amix=inputs=2:duration=longest [audio_out] \
“ \
-map 0:v -map “[audio_out]“ \
-y output.mp4
This command will delay the audio track by 2100 milliseconds and then mix it with the original audio track, resulting in a new video file with the delayed audio.
It May Interest You - Merge Audio and Video Files With Filmora
While FFmpeg is a powerful tool for merging audio and video files, its learning curve can be steep for some users. If you’re looking for an easier option, you may consider using video editing software like Filmora.
What Is Filmora?
Wondershare Filmora is a video editing software that allows users to create professional-looking videos easily. It offers a user-friendly interface, making it an excellent option for those needing a more extensive video editing experience.
Free Download For Win 7 or later(64-bit)
Free Download For macOS 10.14 or later
This software offers an intuitive interface and a wide range of features that make it easy to merge audio and video files, even for beginners. In addition, Filmora provides various options for editing and enhancing the audio and video files, giving you more control over the final output. Filmora is a great alternative to FFmpeg for those who want to merge audio and video files quickly and easily.
How To Combine Audio and Video Files Using Filmora
Filmora is a user-friendly video editing software that allows you to easily combine audio and video files to create a polished and professional final product. So here’s the step-by-step process of combining audio and video files using Filmora.
Step1 Import audio and video files into Filmora using drag-and-drop or the “Import Media“ button.

Step2 Place the media files in the timeline and align the video with the audio.

Step3 Replace the original audio by right-clicking the video, selecting “Detach Audio,” deleting the original audio, and replacing it with new audio.

Step4 Export the final video by selecting a format and clicking “Export,” or publish directly to YouTube or burn to DVD.

People Also Ask
Here are some frequently asked questions regarding the merging function of FFmpeg and other related topics:
Q1. How To Merge Image and Video in FFmpeg?
To merge an image and a video using FFmpeg, first, use the -loop option on the image to loop it for the duration of the video, then use the overlay filter to overlay the image on the video. The command would look like this:
ffmpeg -i video.mp4 -i image.jpg -filter_complex “[0:v][1:v] overlay=0:0” -pix_fmt yuv420p -c:a copy output.mp4
This command takes the input video and image, applies the overlay filter to overlay the image on the video starting at the top left corner (0:0), and outputs the result to output.mp4. The -pix_fmt yuv420p and -c:a copy options ensure compatibility with most devices.
Q2. Can I Merge 2 MP4 Files Into 1?
Yes, you can merge two MP4 files into one using Filmora. To do this, follow these steps:
Step1 Open Filmora and import the video files
Step2 Drag the videos to the timeline
Step3 Align the second video with the first without leaving any gaps
Step4 Click “Export“ and select desired settings
Step5 Click “Export“ again to save the combined video on your computer.
Q3. How Can I Merge the Video and Subtitle?
To merge video and subtitle in Filmora, follow these steps:
Step1 Open Filmora and import your SRT subtitle file.
Step2 Place the SRT file on the timeline and right-click on it. Select “Advanced Edit“ from the options.
Step3 Adjust the subtitle’s time code, text, color, font, and other settings. When finished, choose “Export Subtitle file“ to save the changes.
Still want to learn more tricks about adding subtitles to your video? Check out the video below:
Conclusion
Using FFmpeg and Filmora, you can easily combine video with audio, merge multiple video files, and add subtitles to your videos. Both tools offer different features and learning curves, so it’s important to understand what you need before choosing one. Filmora is a great option for beginners and those who want a user-friendly interface, while FFmpeg is a powerful command-line tool for advanced users.
- “-i INPUT_FILE.mp4“ flag specifies INPUT_FILE.mp4 as the input source.
- “-i AUDIO.wav,” tells FFmpeg to take AUDIO.wav as an input source.
- The “-c:v copy“ flag is a short form of “-codec:v copy,” which means to copy the video stream from the source files to the destination file.
- The “-c:a aac“ flag means selecting all the audio streams from the source files and then encoding them with the AAC encoder.
- “mp4“ specifies the name of the output file.
Step3 In case you don’t want any audio conversion, drop the aac part in the command and replace it with copy; the command would look like this:
ffmpeg -i INPUT_FILE.mp4 -i AUDIO.aac -c:v copy -c:a copy OUTPUT_FILE.mp4
-->
How To Combine Video With Two Audio Using FFmpeg
Are you looking to add multiple audio tracks to your video? With FFmpeg, you can easily combine video with two audio streams. Whether creating a foreign-language version of your video or adding an alternate audio track, this method will help you achieve professional results. This section will guide you through combining video with two audio streams using FFmpeg’s command-line interface. So, let’s get started!
Mixing Two Audios Into a Video
Combining multiple audio tracks into one video can be done easily with FFmpeg’s command-line interface. In this example, we will combine two audio tracks into one video so that the voiceover will play over the background music. Here’s the step-by-step process:
Step1 Open your command prompt or terminal and navigate to the directory where your video and audio files are located.
Step2 Replace “video1.mp4“ and “audio1.mp3“ with the names of your actual video and audio files.
ffmpeg \
-i video1.mp4 -i audio1.mp3 \
Step3 The -c:v copy flag tells FFmpeg to copy the video stream from the source file without re-encoding it. This helps to speed up the process and avoid quality loss.
-c:v copy \
-filter_complex “ \
Step4 The command “amix=inputs=2:duration=longest“ tells amix to accept 2 inputs (0:a and 1:a) and combine them into an output stream called audio_out, with the duration of the longest input.
[0:a][1:a] amix=inputs=2:duration=longest [audio_out] \
Step5 Map the video stream (0:v) and the mixed audio stream (audio_out) into the final output video.
-map 0:v -map “[audio_out]“ \
Step6 The -y flag tells FFmpeg to overwrite the output file if it already exists.
-y output.mp4
Once complete, you’ll find the newly created video file with the mixed audio in the specified output location.
Mixing Two Audios Into a Video Adjusting Volume
We will be taking a step further and show you how to merge two audio tracks into a video while adjusting the volume of one of the audio tracks. This can be useful when you want to emphasize one audio track over the other, for example, to make the voiceover more prominent in a video.
And here’s the step-by-step process:
Step1 Start the command by specifying the input files.
ffmpeg \
-i video1.mp4 -i audio1.mp3 \
Step2 Use the filter_complex option to specify a filter graph.
-filter_complex “ \
[0:a] volume=0.5 [music];
Step3 Use the amix filter to take the “music“ stream and audio1.mp3 and mix them.
[music][1:a] amix=inputs=2:duration=longest [audio_out] \
“ \
Step4 Use the map option to specify which streams from the input files should be included in the output file.
-map 0:v -map “[audio_out]“ \
Step5 Specify the output file name as “output.mp4“ and the -y flag to overwrite the output file without asking for confirmation if it already exists.
-y output.mp4
Mixing Two Audios Into a Video With Delay
When creating videos, sometimes the audio needs to be synced with the video, or you want to add a delay to the audio track. Here’s how to add delay to an audio track using FFmpeg.
Step1 Use the adelay filter to add delay to the audio track.
[1:a] adelay=2100|2100 [voice];
Step2 Mix the delayed audio track with the original audio track
[0:a][voice] amix=inputs=2:duration=longest [audio_out]
Step3 Map the video and audio tracks to the output file
-map 0:v -map “[audio_out]“
Step4 Use the -y flag to overwrite the output file
-y output.mp4
The final command would look like this:
ffmpeg \
-i video1.mp4 -i audio1.mp3 \
-filter_complex “ \
[1:a] adelay=2100|2100 [voice]; \
[0:a][voice] amix=inputs=2:duration=longest [audio_out] \
“ \
-map 0:v -map “[audio_out]“ \
-y output.mp4
This command will delay the audio track by 2100 milliseconds and then mix it with the original audio track, resulting in a new video file with the delayed audio.
It May Interest You - Merge Audio and Video Files With Filmora
While FFmpeg is a powerful tool for merging audio and video files, its learning curve can be steep for some users. If you’re looking for an easier option, you may consider using video editing software like Filmora.
What Is Filmora?
Wondershare Filmora is a video editing software that allows users to create professional-looking videos easily. It offers a user-friendly interface, making it an excellent option for those needing a more extensive video editing experience.
Free Download For Win 7 or later(64-bit)
Free Download For macOS 10.14 or later
This software offers an intuitive interface and a wide range of features that make it easy to merge audio and video files, even for beginners. In addition, Filmora provides various options for editing and enhancing the audio and video files, giving you more control over the final output. Filmora is a great alternative to FFmpeg for those who want to merge audio and video files quickly and easily.
How To Combine Audio and Video Files Using Filmora
Filmora is a user-friendly video editing software that allows you to easily combine audio and video files to create a polished and professional final product. So here’s the step-by-step process of combining audio and video files using Filmora.
Step1 Import audio and video files into Filmora using drag-and-drop or the “Import Media“ button.
Step2 Place the media files in the timeline and align the video with the audio.
Step3 Replace the original audio by right-clicking the video, selecting “Detach Audio,” deleting the original audio, and replacing it with new audio.
Step4 Export the final video by selecting a format and clicking “Export,” or publish directly to YouTube or burn to DVD.
People Also Ask
Here are some frequently asked questions regarding the merging function of FFmpeg and other related topics:
Q1. How To Merge Image and Video in FFmpeg?
To merge an image and a video using FFmpeg, first, use the -loop option on the image to loop it for the duration of the video, then use the overlay filter to overlay the image on the video. The command would look like this:
ffmpeg -i video.mp4 -i image.jpg -filter_complex “[0:v][1:v] overlay=0:0” -pix_fmt yuv420p -c:a copy output.mp4
This command takes the input video and image, applies the overlay filter to overlay the image on the video starting at the top left corner (0:0), and outputs the result to output.mp4. The -pix_fmt yuv420p and -c:a copy options ensure compatibility with most devices.
Q2. Can I Merge 2 MP4 Files Into 1?
Yes, you can merge two MP4 files into one using Filmora. To do this, follow these steps:
Step1 Open Filmora and import the video files
Step2 Drag the videos to the timeline
Step3 Align the second video with the first without leaving any gaps
Step4 Click “Export“ and select desired settings
Step5 Click “Export“ again to save the combined video on your computer.
Q3. How Can I Merge the Video and Subtitle?
To merge video and subtitle in Filmora, follow these steps:
Step1 Open Filmora and import your SRT subtitle file.
Step2 Place the SRT file on the timeline and right-click on it. Select “Advanced Edit“ from the options.
Step3 Adjust the subtitle’s time code, text, color, font, and other settings. When finished, choose “Export Subtitle file“ to save the changes.
Still want to learn more tricks about adding subtitles to your video? Check out the video below:
Conclusion
Using FFmpeg and Filmora, you can easily combine video with audio, merge multiple video files, and add subtitles to your videos. Both tools offer different features and learning curves, so it’s important to understand what you need before choosing one. Filmora is a great option for beginners and those who want a user-friendly interface, while FFmpeg is a powerful command-line tool for advanced users.
Also read:
- New 2024 Approved 4 Ways for Rotating Your GoPro Videos Professionally
- 2024 Approved How to Make A Slideshow Video (+Filmora Techniques)
- Updated VLC Media Player How to Merge Audio and Video Like a Pro
- Updated Do You Want to Print Designs Onto Your Garments or Other Fashion Accessories? Find Out How to Create a Screen Print Effect in Photoshop to Give Your Text or Graphics a Vintage or Retro Look for 2024
- Updated How to Make a Transparent Background in Paint. How 3D Paint Transparent Background Can Be Made. How to Save an Image with Transparent Background?
- Updated 2024 Approved Finding The Best Filmic Pro LUTs For Video Editing
- Updated Have You Tried Using a Craig Bot on Discord to Record Audio? Do You Have an Idea of Using a Discord Craig Bot Is Safe? Get Answers to These Questions and More From This Article as You Continue Reading for 2024
- Updated In 2024, Several Tips Can Facilitate How You Edit Videos Faster and Easier. All You Need to Do Is to Read This Article to Find Out What They Are
- New Top 10 Voice Over Generators Windows, Mac, Android, iPhone, and Onli
- In 2024, 7 Best Green Screen Software for Beginners on Mac
- Updated 2024 Approved Best 12 Sony Vegas Slideshow Templates for Free Download
- Updated In 2024, Some Top Methods to Create AI Slow Motion Videos
- Updated 2024 Approved To Add SRT to MP4 Is Not as Hard as You Might Think. All You Just Need Is the Right Tool to Help You Get the Job Done. Read This Article and Learn the 8 Latest Methods to Merge SRT with MP4 Effortlessly
- Updated Top 10 Online And PC Cartoon Video Maker 2022 For Beginner
- Top 10 Free WhatsApp Video Converter 2023 for 2024
- 2024 Approved Detailed Steps to Rotate Videos Using Kdenlive
- Perfecting the Art of Slowing Down Video on Instagram for 2024
- 2024 Approved Here We Will Investigate AI-Based Video Interview, How It Is Being Used, and How to Master an Artificial Intelligence Video Interview Act
- In 2024, Shotcut Video Editor Review
- Updated 2024 Approved The Best 10 AI Video Analytics Companies at a Glance
- New 2024 Approved Gif to Svg, Svg to Gif, Convert Gif to Svg, Animated Svg to Gif, Convert Svg to Gif, Svg to Gif Converter, Svg to Gif Animation, Svg Animation to Gif, Gif to Svg Converter
- New 2024 Approved How to Make Random Letter Reveal Intro?
- In 2024, How to Create Intro with Legend Intro Maker
- Updated In 2024, How to Stabilize Videos for Free with Google Photos App
- Updated Top Tools To Create Blend Image Collage for 2024
- Updated Merge MP4 Online? Its Easy With These 5 Tools
- New 2024 Approved How to Remove Background Noise From Video Sony Vegas
- What is Geo-Blocking and How to Bypass it On Apple iPhone 14 Plus? | Dr.fone
- In 2024, Easily Unlock Your Samsung Galaxy F34 5G Device SIM
- In 2024, Does find my friends work on Poco X5 Pro | Dr.fone
- How to Transfer Photos From Motorola Moto G84 5G to Samsung Galaxy S21 Ultra | Dr.fone
- Why Is My Lava Blaze Curve 5G Offline? Troubleshooting Guide | Dr.fone
- Bypass/Reset Note 30 VIP Phone Screen Passcode/Pattern/Pin
- In 2024, Easiest Guide How to Clone Asus ROG Phone 7 Ultimate Phone? | Dr.fone
- In 2024, How to Erase an iPhone 8 without Apple ID?
- In 2024, How to Detect and Remove Spyware on OnePlus Nord CE 3 5G? | Dr.fone
- In 2024, Top 5 Tracking Apps to Track Vivo S17t without Them Knowing | Dr.fone
- Title: New The Complete Guide to GIF for Discord Profile for 2024
- Author: Morgan
- Created at : 2024-04-24 01:07:24
- Updated at : 2024-04-25 01:07:24
- Link: https://ai-video-editing.techidaily.com/new-the-complete-guide-to-gif-for-discord-profile-for-2024/
- License: This work is licensed under CC BY-NC-SA 4.0.
