
:max_bytes(150000):strip_icc():format(webp)/lg-channels-guide-1800-x-0f720f6afeb842c299c88baa42f3bd88.jpg)
New Time Lapse Video Is Very Interesting and Creative, Which Usually Attracts More Attention. This Article Will Show You How to Make a Time Lapse Video with Adobe After Effects
Time Lapse Video Is Very Interesting and Creative, Which Usually Attracts More Attention. This Article Will Show You How to Make a Time Lapse Video with Adobe After Effects
Time-Lapse movies are great for a variety of projects; you can use them as establishing shots in sitcoms, corporate marketing videos, and they can make lovely backgrounds for animated slideshows. A time-lapse video is essentially a series of photographs taken at regular intervals to depict how the environment changes gradually over a shorter period of time. In this article, we’ll demonstrate how you may quickly and easily build an After Effects time-lapse effect.
With that said, let’s start!
Step 1. Create a new composition
Calculating your composition length to accommodate the frame rate and number of images is the first step in generating a time-lapse video.
- Verify the number of images you have for your Sequence.
- New Composition Creation. Selecting a frame rate: A time lapse film produced at 30 frames per second will flow smoothly, but you can select any frame rate you like.
- To determine the duration of your composition, divide the number of photographs you have by the frame rate you’ve chosen. For instance, if you use 600 photos at 30 frames per second, your composition will last 20 seconds.
Step 2. Import your images
You are prepared to make a time-lapse sequence if all of your photographs are saved to the same folder and are in the same order. If you are working directly from your Camera, you will likely have Camera Raw files, although this procedure works with PNG and JPEG sequences.
- Press Command/Control I on your keyboard or select File > Import. Find the folder holding your image sequence.
- To begin, select the first picture in the sequence. If all of your images have accurate names, After Effects will be able to identify a sequence of images.
- Make sure the Force Alphabetical Order and Camera Raw Sequence checkboxes are selected. Your Time-Lapse Sequence will display in the Project Browser Panel after you click Import.
- Once you’ve watched how it plays, you can adjust the Frame Rate by right-clicking the Sequence in the Project Browser and selecting Interpret Footage > Main.
- To update your time-lapse, modify the Frame Rate setting and click OK.

Step 3. Create movements
- After Effects’ Time-Lapse Sequence can be used just like any other standalone clip. This implies that you may give your time-lapse clip movement by adding Keyframes and Effects.
- Place your Playhead at the beginning of the clip after choosing the Image Sequence. Make a keyframe for the scale or position.
- To generate a second Keyframe for the value of your choice, move to the end of the clip. Make any necessary Clip modifications.
- Right-click on the timeline, choose New > Adjustment Layer, then add your effects to the Adjustment Layer to add effects like noise and grain.
Step 4. Create slow motion from a video
You can import your video after you’ve shot it to prepare it for editing. The same steps, including naming your photos in order, must be taken for the Time Lapse sequence. It may be advantageous to entirely rename both your Image Sequence and Performer clip.
- Drag the finished Time Lapse sequence to your Timeline after completing it as previously explained.
- Over the Time Lapse, add the Performer Clip to the Timeline.
- Choose Time>Time Stretch by performing a right-click on the performer clip.
- You can alter the Stretch Factor or Duration in the dialogue box. When you alter one parameter, the other will reflect the new Stretch Factor or Duration for you.
Step 5. Make an overlay
You can alter the Stretch Factor or Duration in the dialogue box. When you alter one parameter, the other will reflect the new Stretch Factor or Duration for you.
- Find Luma Key in the Effect Control Panel and drag it to your clip.
- Change the Key Type setting in the Effect Control Panel to Key Out Brighter.
- The Threshold, Tolerance, and Edge settings should be adjusted until only the silhouette is visible.
- Use the Pen or Mask Tool to create a circle around the parts you want to delete if you discover any corners of your clip that are still visible.
- Add any Effects, such as Light Leaks, to your Adjustment Layer by choosing “Right-click > New > Adjustment layer.”

After Effects CC must be opened, a new project must be created, the Import File menu option must be selected, and the appropriate folder containing the altered still images must be located and selected before the time-lapse photos can be turned into a film. You need to make sure that the JPEG Series box is checked, as well as the Force Alphabetical Order box.
Once you have clicked on the first image in the sequence. The time-lapse video that you uploaded appears in the project library. After performing a right-click on the filename, select “New Comp from Selection” from the context menu.
Step 6. Exporting your video
After getting our sequence to perform some kind of slow, understated animation so that it appears as though the camera is moving dramatically, we will need to export a video file. Go to File > Export > Add to Render Queue, then open the Render Queue dialog box by going to Window > Render Queue. From there, you can choose the Output Module and change the settings in the options dialog box. Finally, choose the Output To option and select the location on your computer where you would like to save the video clip that we are currently rendering and exporting.

Conclusion
No matter how you make your time lapse videos, After Effects has a ton of features you can use to modify and enhance the way they look. Now that you are familiar with the fundamentals, you can play with the Frame Rates and Composition options. Check out this helpful manual for more information on Time Stretching and Remapping in After Effects.
Free Download For Win 7 or later(64-bit)
Free Download For macOS 10.14 or later
Free Download For macOS 10.14 or later
Want to Make Professional-Looking Videos? Keep Reading to Give Your Videos a Cinematic Feel with the Audio Mixer of Filmora
Have you seen those classic and outstanding videos of professional YouTubers? Yeah, they feel different from the videos we usually make. The reason mainly lies within the outclass audio quality of those videos.
And now, you might think it’s impossible to mess with the audio control without the support of a professional. But believe me; it’s much simpler than you think. In this brief guide, we’ll show you how to use the audio mixer of Filmora to fine-tune all of your videos skillfully.
But let’s first see what an audio mixer is.
Part 1: What is an audio mixer?
An audio mixer is a tool that gives you control over the audio quality of your videos. Using the audio mixer, you can easily give your video a cinematic feel by controlling different modes and levels.
And that’s not where it ends!!! This mixing console also allows you to mix, combine and balance audio from different sources. So control your audio and give your video that extra bit of depth.
To your surprise, you can access this excellent tool without cost using the world’s leading video editor, Filmora . Let’s see a brief intro of Wondershare Filmora, and then we’ll show you how to use the audio mixer of Filmora in a stepwise manner.
Free Download For Win 7 or later(64-bit)
Free Download For macOS 10.14 or later
Part 2: An easy-to-use audio mixer - Wondershare Filmora
![]()
Wondershare Filmora is one of the world’s leading video-editor and is no less than a blessing for all creators. Its stunning editing features like split screen, motion tracking, speed ramping, and many others allow you to take your video to the next level. Moreover, the massive arsenal of video effects and AI portraits gives you various choices.
What’s more, you can tweak the audio using auto synchronization, audio duckling, an audio visualizer, and even an audio mixer. Isn’t it fantastic? Now let’s move forward and see how we can sharpen our video with the audio mixer of Filmora in detail steps.
Part 3: Steps to effectively use the audio mixer in Filmora
Here are the steps you need to follow to use the audio mixer of Filmora effectively.
Step1Download & install
First, you must have a suitable version of Filmora installed on your device. Here are the steps to install the free version.
- Go to the official website of Filmora and hit the “Free Download” button. Filmora is available for Windows 11 and all the previous versions, as well as for macOS 10.14 to macOS 13
Free Download For Win 7 or later(64-bit)
Free Download For macOS 10.14 or later
- When the download finishes, follow the guidelines of the installation wizard to install Filmora on your computer.
Now let’s see how to prepare our video.
Step2Prepare your video
After you have installed the latest version of Filmora, you need to prepare your video for editing.
For this,
- Launch the Filmora on your computer and click the “New Project” button from the starting interface.

- Now let’s import our video. Click on the “Import Media” section or drag and drop your video/audio file here to import it.

- Once the media file has been imported, add it to the editing panel below with the drag-and-drop method. This is important to create a workspace for your video.

- Now it’s time to edit the video. Make all the editing you want with graphics and visuals to finalize your video before using the audio mixer. And once it’s done, we can move to the first-class audio mixer of Filmora.
Bonus Tip: Before using the audio mixer, ensure you have a headphone to see the changes you are making instead of relying on your desktop speaker.
Step3Start the audio mixer
To open up the audio mixer, click on the “audio mixer” icon on the toolbar below the preview window.

This is what your audio mixer will look like at the start.

Now we can start adjusting the audio settings. Let’s go with the audio levels first.
Step4Adjust the audio levels
To adjust the audio levels, look at the left side of the audio mixer. Here you’ll see two vertical bars, which are;
- The audio levels for the video clip.
- The audio levels for the sound and music in the music track.
You can adjust the icon up or down to make these channels louder or softer.

After the audio levels, let’s see how we can change the audio channels.
Free Download For Win 7 or later(64-bit)
Free Download For macOS 10.14 or later
Step5Adjust the audio channels
See those circles above the audio levels? These are for adjusting the audio channels.
- Rotate the knob-like icon in these circles to adjust the Audio channels’ pan/bounce control. This switches the sound between the left and right channels.
- On top of that, you can see these changes on the channel control panel.

To check the effect, let’s rotate the knob to the left. And to see the result hit the “Play” button on the bottom left corner of the audio mixer interface. Here’s how it looks.

Now it’s time to select the audio mode.
Step6Select the audio mode
The audio mixer of Filmora provides you with two audio mode options. These are;
● Stereo Mode
In the Stereo mode, you can pan from left to right and control your audio just like the knob of the audio channel.
● Surround Mode
You can pan from left to right and front to back in this mode by rotating the video or music icons. This provides you with complete control over the audio positions. But remember that this mode works best if your video is played with the surround sound system.

Once you have changed the audio mode, let’s look at the master levels.
Step7Adjust the master levels
On the very left of the window, you’ll find the Master levels.
This is where you can adjust the master section or all your audio files on your timeline.
- Just drag the master level slider upward and downwards, and you’ll notice the changes right away.

So done with the changes? Let’s preview them.
Free Download For Win 7 or later(64-bit)
Free Download For macOS 10.14 or later
Step8Preview your changes
After carefully making all the changes to your audio, preview it for the last time before going with them. The “Play” button is still there in the bottom left corner.
Perfect!!! No? Make the changes again until you are satisfied and then hit the “Apply” button on the bottom right corner to adjust these changes.

And here we are, done!!! Now you can easily surprise your friends with your master-like audio handling. Before we wind up our guide, we’ll answer some of the frequently asked questions about the audio mixer of Filmora. So let’s dive right into it.
Part 4: Hot FAQs about the audio mixer of Filmora
1.How important is an audio mixer in video editing?
An audio mixer is necessary if you want to create impressive videos. This master volume control allows you to deepen the audio effect and merge two audio sources to get the maximum out of them. This is why most content creators give grave importance to audio mixers during video editing.
2.Where can we find the audio mixer in Filmora?
Like other highly advanced editing tools, you can also find the audio mixer in Filmora. After you’ve placed your media file on the editing panel, the “audio mixer” icon appears on the toolbar under the preview channel.
3.Is the audio mixer of Filmora available for free?
Yes, you can freely use the audio mixer of Filmora as much as you want without any cost. And unlike many other free sound control tools, you get all the latest and advanced features like the preview tool with the audio mixer of Filmora.
Conclusion
Every top-ranked video contains the best-suited audio tracks with it. And the audio mixer of Filmora comes in handy whenever you want to tweak the audio settings of a video.
In this article, we’ve covered everything you need to know about using the audio mixer in Filmora.
Free Download For Win 7 or later(64-bit)
Free Download For macOS 10.14 or later
Free Download For macOS 10.14 or later
Part 2: An easy-to-use audio mixer - Wondershare Filmora
![]()
Wondershare Filmora is one of the world’s leading video-editor and is no less than a blessing for all creators. Its stunning editing features like split screen, motion tracking, speed ramping, and many others allow you to take your video to the next level. Moreover, the massive arsenal of video effects and AI portraits gives you various choices.
What’s more, you can tweak the audio using auto synchronization, audio duckling, an audio visualizer, and even an audio mixer. Isn’t it fantastic? Now let’s move forward and see how we can sharpen our video with the audio mixer of Filmora in detail steps.
Part 3: Steps to effectively use the audio mixer in Filmora
Here are the steps you need to follow to use the audio mixer of Filmora effectively.
Step1Download & install
First, you must have a suitable version of Filmora installed on your device. Here are the steps to install the free version.
- Go to the official website of Filmora and hit the “Free Download” button. Filmora is available for Windows 11 and all the previous versions, as well as for macOS 10.14 to macOS 13
Free Download For Win 7 or later(64-bit)
Free Download For macOS 10.14 or later
- When the download finishes, follow the guidelines of the installation wizard to install Filmora on your computer.
Now let’s see how to prepare our video.
Step2Prepare your video
After you have installed the latest version of Filmora, you need to prepare your video for editing.
For this,
- Launch the Filmora on your computer and click the “New Project” button from the starting interface.
- Now let’s import our video. Click on the “Import Media” section or drag and drop your video/audio file here to import it.
- Once the media file has been imported, add it to the editing panel below with the drag-and-drop method. This is important to create a workspace for your video.
- Now it’s time to edit the video. Make all the editing you want with graphics and visuals to finalize your video before using the audio mixer. And once it’s done, we can move to the first-class audio mixer of Filmora.
Bonus Tip: Before using the audio mixer, ensure you have a headphone to see the changes you are making instead of relying on your desktop speaker.
Step3Start the audio mixer
To open up the audio mixer, click on the “audio mixer” icon on the toolbar below the preview window.
This is what your audio mixer will look like at the start.
Now we can start adjusting the audio settings. Let’s go with the audio levels first.
Step4Adjust the audio levels
To adjust the audio levels, look at the left side of the audio mixer. Here you’ll see two vertical bars, which are;
- The audio levels for the video clip.
- The audio levels for the sound and music in the music track.
You can adjust the icon up or down to make these channels louder or softer.
After the audio levels, let’s see how we can change the audio channels.
Free Download For Win 7 or later(64-bit)
Free Download For macOS 10.14 or later
Step5Adjust the audio channels
See those circles above the audio levels? These are for adjusting the audio channels.
- Rotate the knob-like icon in these circles to adjust the Audio channels’ pan/bounce control. This switches the sound between the left and right channels.
- On top of that, you can see these changes on the channel control panel.
To check the effect, let’s rotate the knob to the left. And to see the result hit the “Play” button on the bottom left corner of the audio mixer interface. Here’s how it looks.
Now it’s time to select the audio mode.
Step6Select the audio mode
The audio mixer of Filmora provides you with two audio mode options. These are;
● Stereo Mode
In the Stereo mode, you can pan from left to right and control your audio just like the knob of the audio channel.
● Surround Mode
You can pan from left to right and front to back in this mode by rotating the video or music icons. This provides you with complete control over the audio positions. But remember that this mode works best if your video is played with the surround sound system.
Once you have changed the audio mode, let’s look at the master levels.
Step7Adjust the master levels
On the very left of the window, you’ll find the Master levels.
This is where you can adjust the master section or all your audio files on your timeline.
- Just drag the master level slider upward and downwards, and you’ll notice the changes right away.
So done with the changes? Let’s preview them.
Free Download For Win 7 or later(64-bit)
Free Download For macOS 10.14 or later
Step8Preview your changes
After carefully making all the changes to your audio, preview it for the last time before going with them. The “Play” button is still there in the bottom left corner.
Perfect!!! No? Make the changes again until you are satisfied and then hit the “Apply” button on the bottom right corner to adjust these changes.
And here we are, done!!! Now you can easily surprise your friends with your master-like audio handling. Before we wind up our guide, we’ll answer some of the frequently asked questions about the audio mixer of Filmora. So let’s dive right into it.
Part 4: Hot FAQs about the audio mixer of Filmora
1.How important is an audio mixer in video editing?
An audio mixer is necessary if you want to create impressive videos. This master volume control allows you to deepen the audio effect and merge two audio sources to get the maximum out of them. This is why most content creators give grave importance to audio mixers during video editing.
2.Where can we find the audio mixer in Filmora?
Like other highly advanced editing tools, you can also find the audio mixer in Filmora. After you’ve placed your media file on the editing panel, the “audio mixer” icon appears on the toolbar under the preview channel.
3.Is the audio mixer of Filmora available for free?
Yes, you can freely use the audio mixer of Filmora as much as you want without any cost. And unlike many other free sound control tools, you get all the latest and advanced features like the preview tool with the audio mixer of Filmora.
Conclusion
Every top-ranked video contains the best-suited audio tracks with it. And the audio mixer of Filmora comes in handy whenever you want to tweak the audio settings of a video.
In this article, we’ve covered everything you need to know about using the audio mixer in Filmora.
Free Download For Win 7 or later(64-bit)
Free Download For macOS 10.14 or later
How to Make A Funny Vlog for TikTok?
TikTok has been among the few social media platforms that have gained an exponential following in a truly short time. Regardless of this stunted digital environment, the platform made its statement of becoming part of the all-time greats.
TikTok became known as a short-video platform that influenced the making of funny vlogs. If you are interested in making a funny vlog, you are at the right place.
In this article
01 Ideas for Creating A Funny Vlog for TikTok
02 5 Popular Funny Vloggers on TikTok
Part 1: Ideas for Creating A Funny Vlog for TikTok
When creating a funny vlog across TikTok, there are numerous ideas that one can think of. However, since TikTok videos are of small lengths, achieving diversity is difficult yet possible. You’ll surely get your break if you understand the following ideas for creating a funny vlog.

React to Other Videos
While it may seem the most mainstream style of creating funny content across TikTok, it is also the most effective way of making people laugh while watching your video. This will also bring recurring viewers across your channel.
Display Failure Videos
It is always great to see people trying and doing something funny across the video. Failure videos are believed to be the other way of creating content for a funny vlog on your TikTok, which shall make people laugh hard.
Use Goofy and Peculiar Voices
Unrealistic and weird voices can make your short video seem funny. If you consider talking about something in a silly voice, it will make people burst out of laughter.
Trolling Family Members
One of the best ways to make something good out of TikTok is creating candid moments. This can always be done if you troll or prank your family members out of nowhere. Just keep reminding that you have to ensure no one gets injured due to it.
Impersonations
Making impersonated videos of major celebrities is another way of showing funny content to the viewers on TikTok. If you consider some funny examples for this, it will surely bring you effective results.
Make Puns and Funny Statements
Another great way to create a funny vlog for your TikTok is to be good at making puns. This is purely hilarious content and needs someone to be highly great in it.
Physical Challenges
This can be a bit risky, but it can become quite fun to make and show to the world if executed with care. However, this can be conducted individually or in a group of people, as you find it appropriate.
Use Effects of TikTok
TikTok makes sure to provide something funny in effects to its users. The use of effects for TikTok is an excellent technique to make funny vlogs; however, it can get funny if the elements used across it have a dubious meaning.
Run Everything in Reverse
One of the most straightforward techniques to make a funny vlog is to run everything in reverse order. The simplest thing of a video becomes the funniest to watch.
Part 2: 5 Popular Funny Vloggers on TikTok
This part will provide some popular examples of TikTokers who have made a considerate performance in providing funny content to people across the platform.
Khaby Lame
This is, without a doubt, the first-choice in TikTok accounts that would always come while relating to funny content. Khaby started his journey as a TikToker with a remarkably simple motive of pointing out the simplicity in different tasks, which were displayed to be difficult. Although it sounds pretty basic, the technique taken by Khaby has been so considerate it brought him millions of followers for creating funny content.

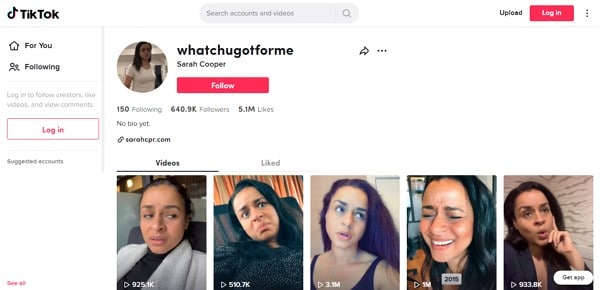
Sarah Cooper
Want to see a great impersonation of Donald Trump? It is undoubtedly great to see every time. With Sarah Cooper, it just becomes an entirely different story. Her impersonation has been so perfect that she has been referred to as one of the best funny vloggers on TikTok. Her likes across the platform may not be that great, but she has shown some stature in presenting funny content in a great way.
Dobre Twins
This twin duo is known across many social media platforms for its funny content. As the twins started using TikTok, they started creating good funny vlogs, which gained quite the traction for them. Their unique ideas to present different things have presented the following worth 23 million likes across TikTok, which is quite commendable. However, Lucas and Marcus are only known to operate this TikTok account.

Image alt: dobre twins funny tiktoker
Brittany Broski
Quite a few TikTokers actually make funny videos with impressive comedy. Brittany Broski is a celebrity in this genre, where she has taken great use of her comedy skills to present great vlogs with different and unique topics. Her take on comedy is entirely different, which makes her funny vlog unique and better than others.

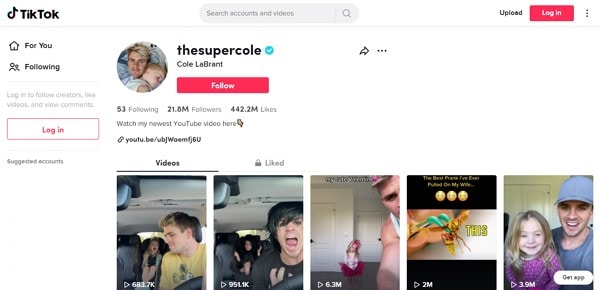
Cole LeBrant
This TikToker makes a good collection of funny vlogs across his account with his family. The variety and variability in his videos make him a different version of fun compared to other TikTokers. He has built a great reach across the account, which makes him an impressive choice.
Part 3: How to Make a Funny Vlog?
Funny vlogs are a fabulous way to interact with people of different tastes. It can be something that cherishes the moods of the viewers, regardless of their current emotions. To make this happen, you need a good platform that helps you create a video for your viewers to watch. Wondershare Filmora fulfills the needs of a video editor by providing you with the perfect options while editing the video for TikTok.
For Win 7 or later (64-bit)
For macOS 10.12 or later
If you are looking forward to understanding how to create a funny vlog for your TikTok using Filmora, you need to follow a set of simple steps. These are shown as follows:
Step 1: Launch and Import Video
To start, you need to have Wondershare Filmora installed across your device. Launch the tool and click on “New Project” to start from scratch. Once the screen opens up, you need to click on the “Arrow Head” icon across the ‘Media’ Tab to import the audio you wish to amend for TikTok.
Step 2: Perform Basic Editing
Wondershare Filmora provides users with multiple options for editing their files. At first, drag the file onto the timeline. Following this, you can merge different videos or enhance the video by trimming it. Along with that, you can also consider splitting the image or changing its playback speed for different results.
Step 3: Add Effects and Transitions
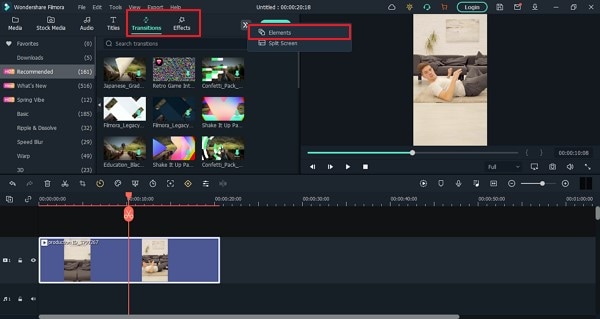
After you are done with some basic editing, you can add different effects from the “Effects” section. To make the video look exclusive, you can also include “Transitions” across it. Use the “Elements” tab to include stickers and emojis to enhance your TikTok video.
Step 4: Manage the Audio
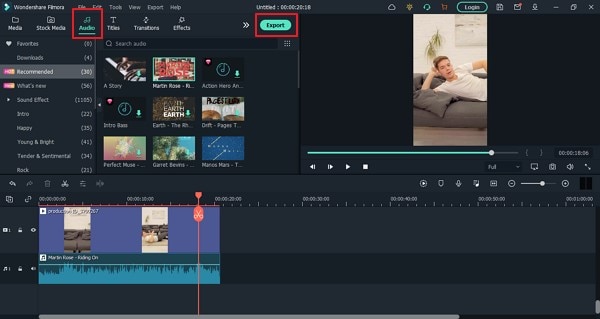
For managing the audio of your video, you can make several changes across it. You can detach audio and change the audio with another soundtrack. Filmora also allows you to add audio from the “Audio” section, which contains royalty-free music to add. Once you are done, click on the “Export” button to set the settings of the video before exporting it back onto the device.
Closing Words
This article has presented some of the finest tips that can be utilized for creating funny vlogs on your TikTok. If you coherently use these tips, you can get significant results across your account in the name of the followers. Along with that, you can also use Filmora for making the best funny vlog with different editing tools.
Wondershare Filmora
Get started easily with Filmora’s powerful performance, intuitive interface, and countless effects!
Try It Free Try It Free Try It Free Learn More >

02 5 Popular Funny Vloggers on TikTok
Part 1: Ideas for Creating A Funny Vlog for TikTok
When creating a funny vlog across TikTok, there are numerous ideas that one can think of. However, since TikTok videos are of small lengths, achieving diversity is difficult yet possible. You’ll surely get your break if you understand the following ideas for creating a funny vlog.
React to Other Videos
While it may seem the most mainstream style of creating funny content across TikTok, it is also the most effective way of making people laugh while watching your video. This will also bring recurring viewers across your channel.
Display Failure Videos
It is always great to see people trying and doing something funny across the video. Failure videos are believed to be the other way of creating content for a funny vlog on your TikTok, which shall make people laugh hard.
Use Goofy and Peculiar Voices
Unrealistic and weird voices can make your short video seem funny. If you consider talking about something in a silly voice, it will make people burst out of laughter.
Trolling Family Members
One of the best ways to make something good out of TikTok is creating candid moments. This can always be done if you troll or prank your family members out of nowhere. Just keep reminding that you have to ensure no one gets injured due to it.
Impersonations
Making impersonated videos of major celebrities is another way of showing funny content to the viewers on TikTok. If you consider some funny examples for this, it will surely bring you effective results.
Make Puns and Funny Statements
Another great way to create a funny vlog for your TikTok is to be good at making puns. This is purely hilarious content and needs someone to be highly great in it.
Physical Challenges
This can be a bit risky, but it can become quite fun to make and show to the world if executed with care. However, this can be conducted individually or in a group of people, as you find it appropriate.
Use Effects of TikTok
TikTok makes sure to provide something funny in effects to its users. The use of effects for TikTok is an excellent technique to make funny vlogs; however, it can get funny if the elements used across it have a dubious meaning.
Run Everything in Reverse
One of the most straightforward techniques to make a funny vlog is to run everything in reverse order. The simplest thing of a video becomes the funniest to watch.
Part 2: 5 Popular Funny Vloggers on TikTok
This part will provide some popular examples of TikTokers who have made a considerate performance in providing funny content to people across the platform.
Khaby Lame
This is, without a doubt, the first-choice in TikTok accounts that would always come while relating to funny content. Khaby started his journey as a TikToker with a remarkably simple motive of pointing out the simplicity in different tasks, which were displayed to be difficult. Although it sounds pretty basic, the technique taken by Khaby has been so considerate it brought him millions of followers for creating funny content.
Sarah Cooper
Want to see a great impersonation of Donald Trump? It is undoubtedly great to see every time. With Sarah Cooper, it just becomes an entirely different story. Her impersonation has been so perfect that she has been referred to as one of the best funny vloggers on TikTok. Her likes across the platform may not be that great, but she has shown some stature in presenting funny content in a great way.
Dobre Twins
This twin duo is known across many social media platforms for its funny content. As the twins started using TikTok, they started creating good funny vlogs, which gained quite the traction for them. Their unique ideas to present different things have presented the following worth 23 million likes across TikTok, which is quite commendable. However, Lucas and Marcus are only known to operate this TikTok account.
Image alt: dobre twins funny tiktoker
Brittany Broski
Quite a few TikTokers actually make funny videos with impressive comedy. Brittany Broski is a celebrity in this genre, where she has taken great use of her comedy skills to present great vlogs with different and unique topics. Her take on comedy is entirely different, which makes her funny vlog unique and better than others.
Cole LeBrant
This TikToker makes a good collection of funny vlogs across his account with his family. The variety and variability in his videos make him a different version of fun compared to other TikTokers. He has built a great reach across the account, which makes him an impressive choice.
Part 3: How to Make a Funny Vlog?
Funny vlogs are a fabulous way to interact with people of different tastes. It can be something that cherishes the moods of the viewers, regardless of their current emotions. To make this happen, you need a good platform that helps you create a video for your viewers to watch. Wondershare Filmora fulfills the needs of a video editor by providing you with the perfect options while editing the video for TikTok.
For Win 7 or later (64-bit)
For macOS 10.12 or later
If you are looking forward to understanding how to create a funny vlog for your TikTok using Filmora, you need to follow a set of simple steps. These are shown as follows:
Step 1: Launch and Import Video
To start, you need to have Wondershare Filmora installed across your device. Launch the tool and click on “New Project” to start from scratch. Once the screen opens up, you need to click on the “Arrow Head” icon across the ‘Media’ Tab to import the audio you wish to amend for TikTok.
Step 2: Perform Basic Editing
Wondershare Filmora provides users with multiple options for editing their files. At first, drag the file onto the timeline. Following this, you can merge different videos or enhance the video by trimming it. Along with that, you can also consider splitting the image or changing its playback speed for different results.
Step 3: Add Effects and Transitions
After you are done with some basic editing, you can add different effects from the “Effects” section. To make the video look exclusive, you can also include “Transitions” across it. Use the “Elements” tab to include stickers and emojis to enhance your TikTok video.
Step 4: Manage the Audio
For managing the audio of your video, you can make several changes across it. You can detach audio and change the audio with another soundtrack. Filmora also allows you to add audio from the “Audio” section, which contains royalty-free music to add. Once you are done, click on the “Export” button to set the settings of the video before exporting it back onto the device.
Closing Words
This article has presented some of the finest tips that can be utilized for creating funny vlogs on your TikTok. If you coherently use these tips, you can get significant results across your account in the name of the followers. Along with that, you can also use Filmora for making the best funny vlog with different editing tools.
Wondershare Filmora
Get started easily with Filmora’s powerful performance, intuitive interface, and countless effects!
Try It Free Try It Free Try It Free Learn More >
Best Phantom Slow-Mo Camera For Recording Slow Motion Videos
In the media industry, you can find many professional and high-end cameras. Such cameras use advanced mechanisms to create slow-motion videos. Moreover, they capture natural colors and shades in the video with precision. Phantom slow-mo cameras are one of the prominent examples of the industry’s leading camera brand. To learn more about this camera brand, this article will consist of all the details.
With a Phantom slow-motion camera, you can get high-resolution results. Through this guide, you can discover a detailed analysis of the Phantom slo-mo camera. Also, we will suggest an affordable alternative that can make slow-motion videos efficiently.
Slow Motion Video Maker Slow your video’s speed with better control of your keyframes to create unique cinematic effects!
Make A Slow Motion Video Make A Slow Motion Video More Features

Part 1: What Do You Know About Phantom Camera Company?
Vision Research manufactures a Phantom camera that can be used in many professional fields. This company first came into being in 1950 by the name of “Photographic Analysis Company .”During the initial years, the company produced many cameras that could tackle the need for high-speed photography. However, in 1992, the company decided to create a separate entity to create high-speed cameras that wouldn’t depend on photographic film for imaging.
The US Patent Office acknowledged the use of innovative technology in the Phantom high-speed cameras. The main aim of this company is to produce robust cameras that can capture faster frame rates in high-speed photography. Many industries like defense, academia, and science research use Phantom slow-motion cameras. They are used in microfluidics, transparent flows, imaging, etc.
Part 2: Best Phantom Slow Motion Camera To Try
Phantom offers many slow-motion cameras with different features. This section will list down some of the best Phantom slow-motion cameras with pricing:
- TMX 7510
- T – Series T4040
- Machine Vision S200
- VEO 710
- Micro C and N C321
- 4K and Media Production Flex4K
1. TMX 7510
The TMX 7510 is built to produce high-end videos with different speed combinations. It uses a side-illuminated camera sensor to capture high-definition images. It can deliver 75,000 FPS with 1280 x 800 resolution. It offers up to 512GB RAM to help in making high-speed images. You can use its built-in Binning Mode with flexible options. It also supports many file formats like Cine RAW, TIFF, JPEG, etc.

2. T – Series T4040
The T-Series of Phantom includes many features to capture images with precision. The T4040 camera supports 9,350 fps with 2560 x 1664 resolution. It offers a peak Quantum Efficiency rating of 90% that can produce images in low-light conditions. Moreover, this Phantom slow-motion camera uses flow visualization techniques to capture minute details with high precision. It also offers EDR that balances exposure in the saturated areas of the image.

3. Machine Vision S200
This machine vision camera applies CXP technology to capture long-duration high-speed photos. It includes GPIO for events and ready signals. It’s economical and available in a compact size. Users can also use the time stamp on the frame to check the time code. Moreover, it can reach up to 6,950 fps with full resolution. You can trigger the recording with the given software or the GPIO trigger signal.

4. VEO 710
VEO series are specifically designed for film production and science laboratories. It has 7,400fps with a 1-Mpx 35mm sensor. The sensor format used in this camera is ideal for high-quality camera lenses. There are two options for the VEO body: S (full) and L (light). By purchasing the S model, you can experience many on-camera controls. Moreover, the body of this camera is made with aluminum to increase its reliability in tougher situations.

5. Micro C and N C321
The Micro C and N series are built to meet the challenges of using a standard camera. The lightweight body and on-board protection make this camera ideal. It supports a maximum fps of 1480 with full resolution. With high sensitivity, it can capture low-noise images with vibrant colors. The advanced features of this camera can provide high-end images while preserving the natural colors.

6. 4K and Media Production Flex4K
For professional cinema, Phantom has developed the Flex4k camera. This Phantom slo-mo camera supports 4K imaging with up to 1,000 fps. It provides three battery mounts with an on-camera menu system. The produced images are compatible with many color grading and video editing tools. Furthermore, it offers many remote-control options to ease your workflow. All the images that are produced will be delivered in the Cine RAW file format.

Part 3: No Phantom Camera? Still, Create a Slow Motion Video
Are you unable to buy a Phantom slow-mo camera? No worries, as Filmora can help you generate slow-motion videos with a normal camera. After recording a video from any standard device, you can add slow-motion effects with this tool. It provides a speed ramping feature that allows you to manage the speed of your video. It contains 6 speed ramping templates that you can try for professional purposes. Moreover, it provides a drag-and-drop interface to provide you with robust controls.
Filmora can make any ordinary video look cinematic. You can incorporate special backgrounds in your video without using a green screen. Furthermore, it can remove all the production flaws from your video within a few taps.
Free Download For Win 7 or later(64-bit)
Free Download For macOS 10.14 or later
Instructions to Produce Slow Motion Video With Speed Ramping
This part of the guide will include all the basic steps to make slow-motion videos . Thus, follow the steps mentioned below:
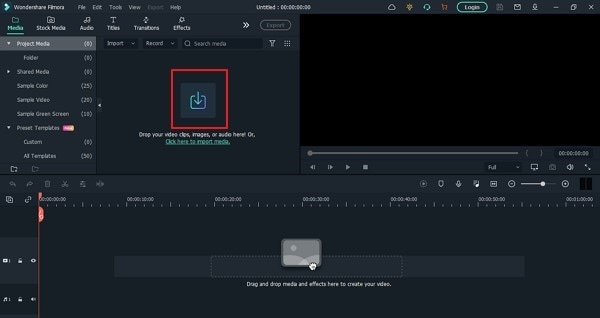
Step 1Import the Video File
Start by launching Filmora on your desktop. Select “New Project” to open its interface. Once done, press “Ctrl + I” to import the preferred video file.

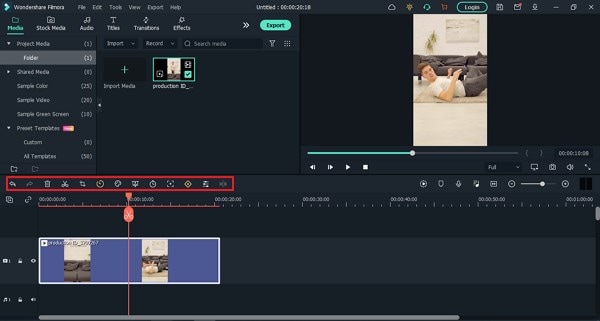
Step 2Select Speed Ramping
Once done by dragging it to the timeline, right-click on it to open a pop-up menu. Select “Speed” and then choose “Speed Ramping”. From the right panel, you can manage the speed ramping settings.

Step 3Adjust the Speed Settings
Select “Customize” for the preset and scroll a little bit. Here, you can adjust the pointers by using the cursor for speed modification. By dragging the point downwards, you will decrease the speed. In contrast, moving the points upwards will increase the speed.

Step 4Generate Final Results
Navigate into the “AI Frame Interpolation” section to smoothen the effect. From there, select “Optical Flow” to create a slow-motion effect of the best quality. To see the results, choose the “Render Preview” option given on the toolbar of the timeline. After modifying the video, save and export the results.

Key Features of Wondershare Filmora
Auto Reframe: This feature adjusts the aspect ratio of a video in an automated manner. You can make your video vertical for TikTok and YouTube Shorts. In a similar way, it can make videos horizontal to fit to Instagram.
AI Audio Denoise: The AI audio denoise feature is designed to remove specific voices from your video. You can try its AI voice enhancement option to make the vocals prominent. Moreover, it can remove reverb and hiss sounds from the audio in a natural way.
AI Smart Cutout: To remove unnecessary objects from the video, try its AI Smart Cutout feature. After selecting the area, it offers four preview modes. By using these modes, you can make adjustments according to the background.
Color Correction: Filmora provides more than 40 presets for color schemes. You can access the color correction settings to make manual changes. Moreover, you can apply advanced color tuning to adjust the colors of the video deeply.
Conclusion
Phantom slow-motion cameras offer great high-speed image details. The cameras of this brand produce high-definition results with advanced features. However, it cannot be affordable or accessible for many users. Therefore, Filmora is the best choice for students and beginners. With this software, you can make slow-motion videos in a cost-effective manner.
Make A Slow Motion Video Make A Slow Motion Video More Features
Part 1: What Do You Know About Phantom Camera Company?
Vision Research manufactures a Phantom camera that can be used in many professional fields. This company first came into being in 1950 by the name of “Photographic Analysis Company .”During the initial years, the company produced many cameras that could tackle the need for high-speed photography. However, in 1992, the company decided to create a separate entity to create high-speed cameras that wouldn’t depend on photographic film for imaging.
The US Patent Office acknowledged the use of innovative technology in the Phantom high-speed cameras. The main aim of this company is to produce robust cameras that can capture faster frame rates in high-speed photography. Many industries like defense, academia, and science research use Phantom slow-motion cameras. They are used in microfluidics, transparent flows, imaging, etc.
Part 2: Best Phantom Slow Motion Camera To Try
Phantom offers many slow-motion cameras with different features. This section will list down some of the best Phantom slow-motion cameras with pricing:
- TMX 7510
- T – Series T4040
- Machine Vision S200
- VEO 710
- Micro C and N C321
- 4K and Media Production Flex4K
1. TMX 7510
The TMX 7510 is built to produce high-end videos with different speed combinations. It uses a side-illuminated camera sensor to capture high-definition images. It can deliver 75,000 FPS with 1280 x 800 resolution. It offers up to 512GB RAM to help in making high-speed images. You can use its built-in Binning Mode with flexible options. It also supports many file formats like Cine RAW, TIFF, JPEG, etc.
2. T – Series T4040
The T-Series of Phantom includes many features to capture images with precision. The T4040 camera supports 9,350 fps with 2560 x 1664 resolution. It offers a peak Quantum Efficiency rating of 90% that can produce images in low-light conditions. Moreover, this Phantom slow-motion camera uses flow visualization techniques to capture minute details with high precision. It also offers EDR that balances exposure in the saturated areas of the image.
3. Machine Vision S200
This machine vision camera applies CXP technology to capture long-duration high-speed photos. It includes GPIO for events and ready signals. It’s economical and available in a compact size. Users can also use the time stamp on the frame to check the time code. Moreover, it can reach up to 6,950 fps with full resolution. You can trigger the recording with the given software or the GPIO trigger signal.
4. VEO 710
VEO series are specifically designed for film production and science laboratories. It has 7,400fps with a 1-Mpx 35mm sensor. The sensor format used in this camera is ideal for high-quality camera lenses. There are two options for the VEO body: S (full) and L (light). By purchasing the S model, you can experience many on-camera controls. Moreover, the body of this camera is made with aluminum to increase its reliability in tougher situations.
5. Micro C and N C321
The Micro C and N series are built to meet the challenges of using a standard camera. The lightweight body and on-board protection make this camera ideal. It supports a maximum fps of 1480 with full resolution. With high sensitivity, it can capture low-noise images with vibrant colors. The advanced features of this camera can provide high-end images while preserving the natural colors.
6. 4K and Media Production Flex4K
For professional cinema, Phantom has developed the Flex4k camera. This Phantom slo-mo camera supports 4K imaging with up to 1,000 fps. It provides three battery mounts with an on-camera menu system. The produced images are compatible with many color grading and video editing tools. Furthermore, it offers many remote-control options to ease your workflow. All the images that are produced will be delivered in the Cine RAW file format.
Part 3: No Phantom Camera? Still, Create a Slow Motion Video
Are you unable to buy a Phantom slow-mo camera? No worries, as Filmora can help you generate slow-motion videos with a normal camera. After recording a video from any standard device, you can add slow-motion effects with this tool. It provides a speed ramping feature that allows you to manage the speed of your video. It contains 6 speed ramping templates that you can try for professional purposes. Moreover, it provides a drag-and-drop interface to provide you with robust controls.
Filmora can make any ordinary video look cinematic. You can incorporate special backgrounds in your video without using a green screen. Furthermore, it can remove all the production flaws from your video within a few taps.
Free Download For Win 7 or later(64-bit)
Free Download For macOS 10.14 or later
Instructions to Produce Slow Motion Video With Speed Ramping
This part of the guide will include all the basic steps to make slow-motion videos . Thus, follow the steps mentioned below:
Step 1Import the Video File
Start by launching Filmora on your desktop. Select “New Project” to open its interface. Once done, press “Ctrl + I” to import the preferred video file.
Step 2Select Speed Ramping
Once done by dragging it to the timeline, right-click on it to open a pop-up menu. Select “Speed” and then choose “Speed Ramping”. From the right panel, you can manage the speed ramping settings.
Step 3Adjust the Speed Settings
Select “Customize” for the preset and scroll a little bit. Here, you can adjust the pointers by using the cursor for speed modification. By dragging the point downwards, you will decrease the speed. In contrast, moving the points upwards will increase the speed.
Step 4Generate Final Results
Navigate into the “AI Frame Interpolation” section to smoothen the effect. From there, select “Optical Flow” to create a slow-motion effect of the best quality. To see the results, choose the “Render Preview” option given on the toolbar of the timeline. After modifying the video, save and export the results.
Key Features of Wondershare Filmora
Auto Reframe: This feature adjusts the aspect ratio of a video in an automated manner. You can make your video vertical for TikTok and YouTube Shorts. In a similar way, it can make videos horizontal to fit to Instagram.
AI Audio Denoise: The AI audio denoise feature is designed to remove specific voices from your video. You can try its AI voice enhancement option to make the vocals prominent. Moreover, it can remove reverb and hiss sounds from the audio in a natural way.
AI Smart Cutout: To remove unnecessary objects from the video, try its AI Smart Cutout feature. After selecting the area, it offers four preview modes. By using these modes, you can make adjustments according to the background.
Color Correction: Filmora provides more than 40 presets for color schemes. You can access the color correction settings to make manual changes. Moreover, you can apply advanced color tuning to adjust the colors of the video deeply.
Conclusion
Phantom slow-motion cameras offer great high-speed image details. The cameras of this brand produce high-definition results with advanced features. However, it cannot be affordable or accessible for many users. Therefore, Filmora is the best choice for students and beginners. With this software, you can make slow-motion videos in a cost-effective manner.
Also read:
- New In 2024, DaVinci Resolve Scopes Have Undergone Significant Improvements. Find Out How to Use These Scopes and Improve Your Video Editing Skills
- Updated How to Add Custom Subtitles to Netflix
- 2024 Approved How to Polish Your Music Video Edits Using Filmora
- 2024 Approved Are You a Videographer or Video Content Creator? Is Enhancing Your Videography Skills Your Priority? Do You Want to Learn the Basics of LumaFusion Color Grading? Read on to Find All the Information You Need
- Updated Tips That Show Anybody How To Create Youtube Slideshow – Guaranteed for 2024
- New In 2024, Guide To Slowing Down Videos in Snapchat Discussing the Details
- New In 2024, How to Change Video Thumbnail on Google Drive
- In 2024, How to Add Motion Titles
- 2024 Approved How to Make a Video with My Phone
- Updated 2024 Approved The Ultimate Guide to Using AR Emoji Stickers in Your Videos
- New Step by Step to Cut Videos in Adobe Premiere Pro for 2024
- New Have You Ever Wondered How Those PowerPoint, Looping Slideshows You See in Conferences and Reception Areas Display and Move to the Next Slide Automatically without Clicking a Mouse? You Dont Have to Be Amazed at This for 2024
- New How to Enable and Use OBS Zoom Camera
- Some Facts That Few People Know on How to Make Transparent Background in Canva
- Updated If You Want to Know What to Prepare and How to Make the Wedding Video Perfect for Videographers, Check Out This Menu Here for 2024
- New 2024 Approved Make Videos with Pictures and Music-10 Apps
- 2024 Approved Knowing All Ways To Slow Down Video With Adobe Premiere Pro
- Updated In 2024, Are You a Videographer or Video Content Creator? Is Enhancing Your Videography Skills Your Priority? Do You Want to Learn the Basics of LumaFusion Color Grading? Read on to Find All the Information You Need
- New In 2024, How to Create The Best Video Collages ?
- Updated 2024 Approved There Are Many Vlogging Cameras You Can Find in the Market. However, to Get a Good Start in Vlogging, some Sony Vlogging Cameras and Canon Vlog Cameras Are to Consider. This Article Introduces You to the Respective List
- How to Add Camera Shake to Video in Adobe After Effects
- New Mastering OpenCV Object Tracking A Comprehensive Guide for Beginners and Experts for 2024
- Best 10 iPad Slideshow Apps to Create a Slideshow
- Updated | Top GIF to MP4 Converters
- Updated Step by Step to Add Border to Video Using Premiere Pro
- New 2024 Approved KineMaster Templates 101 How to Get the Most Out of Video Templates
- Best 12 Best Freeze Frame Video Editing Examples
- Updated Do You Want to Use a Professional Tool to Add Subtitles? Read This Article to Discover the Best Reliable Tool to Create Subtitles in Your Desired Manner
- New AI Features of Filmora - Silence Detection in Videos
- Updated How to Create a Glitch Text Effect, In 2024
- New 2024 Approved How to Create a Custom Slide Show in PowerPoint
- Updated Best 8 AI Video Denoise Software for 2024
- In 2024, Repeated Text Animation Tutorial
- 2024 Approved 10 Best Free Text to Speech Software Windows, Mac,Android, iPhone & Online
- In 2024, Best 8 Top Premiere Pro Slideshow Templates
- New 2024 Approved The Ultimate Guide to Countdown Animation in Videos
- In 2024, Tips & Tricks To Perfectly Use the Audio Mixer in Filmora
- Updated Wondering About How to Easily Create a Slideshow on Your iPhone? Well, Take Note of some of the Finest Apps to Turn Your Vision Into Reality for 2024
- New Within the Realm of Graphic Editing, People Also Ask How to Add Emoji to Photo. Stay Tuned to Walk Through the Best Possible Solutions in the IT Market
- New In 2024, What Is TS Format and How To Play TS Files? Basic Tips
- New 3 Best Motion Blur Plugins for Adobe After Effects
- 2024 Approved How to Create a Light Sweep (Shine) Effect with Filmora
- Updated In 2024, Backup and Organize Your Footage in Minutes
- Updated 2024 Approved 8 Ways To Live Stream Pre-Recorded Video
- New Best Practical Tips to Improve Your Lighting in the Sun
- New In 2024, Add Zoom Blur Effect In Photoshop Step by Step
- In 2024, Guide To Creating the Best Video Collages
- New How To Change Sky Background With Adobe Photoshop Best Ways for 2024
- Updated Are You Eager to Know How to Create an Adjustment Layer in Premiere Pro? This Article Will Highlight the Significance of Adding an Adjustment Layer in Premiere Pro
- In 2024, Ultimate Guide to Catch the Regional-Located Pokemon For Vivo S17 | Dr.fone
- In 2024, How To Remove Phone Number From Your Apple ID on Your iPhone 7 Plus?
- Will Pokémon Go Ban the Account if You Use PGSharp On Vivo V27 | Dr.fone
- In 2024, Apple ID Locked or Disabled From Apple iPhone X? 7 Mehtods You Cant-Miss
- In 2024, Ways to trade pokemon go from far away On Huawei P60? | Dr.fone
- Unlock Samsung Galaxy F15 5G Phone Password Without Factory Reset Full Guide Here
- In 2024, The Complete Guide to Xiaomi Civi 3 Disney 100th Anniversary Edition FRP Bypass Everything You Need to Know
- How to Factory Reset Honor Play 7T without Losing Data | Dr.fone
- Simple ways to get lost files back from C22
- In 2024, Complete Tutorial to Use GPS Joystick to Fake GPS Location On Apple iPhone 12 | Dr.fone
- Dose Life360 Notify Me When Someone Checks My Location On Honor 90 Pro? | Dr.fone
- Title: New Time Lapse Video Is Very Interesting and Creative, Which Usually Attracts More Attention. This Article Will Show You How to Make a Time Lapse Video with Adobe After Effects
- Author: Morgan
- Created at : 2024-05-19 05:12:43
- Updated at : 2024-05-20 05:12:43
- Link: https://ai-video-editing.techidaily.com/new-time-lapse-video-is-very-interesting-and-creative-which-usually-attracts-more-attention-this-article-will-show-you-how-to-make-a-time-lapse-video-with-a/
- License: This work is licensed under CC BY-NC-SA 4.0.
