
:max_bytes(150000):strip_icc():format(webp)/how-to-view-instagram-without-an-account-5271416-505eeceaf0e142ed8674d2ce2244a8be.jpg)
New Top 10 Fun Discord Bots You Need for 2024
Are You Looking for Funny Discord Emojis to Massively Improve Your Discord Experience? Using some Fun Bots for Discord Is an Excellent Way of Doing That! Thus, We Compiled a List of 10 Fun Discord Bots You Need
Top 10 Fun Discord Bots You Need in 2024
An easy yet powerful editor
Numerous effects to choose from
Detailed tutorials provided by the official channel
Consumers enjoy discord because it serves as a hub for their social groups and communities. It’s a haven where users can be themselves while socializing with others who share their interests and hobbies. There is no algorithm selecting what they should see, no continuous scrolling, and no news feed. Common interests fuel conversations and you can use some fun discord bots to pep up the conversation.

Fun bots to add discord with artificial intelligence (AI) technologies are among the most helpful tools available on the discord platform. Funny emojis for discord may be beneficial to greet new members and have funny light conversations! This aids in the creation and maintenance of a vibrant online community. You can add music, games, and fun memes to your server using these bots if you wish to.
In this article
01 [10 Fun Discord Bots You Need in 2024](#Part 1)
02 [Fun Discord Bots FAQs](#Part 2)
Part 1 Fun Discord Bots You Need in 2024
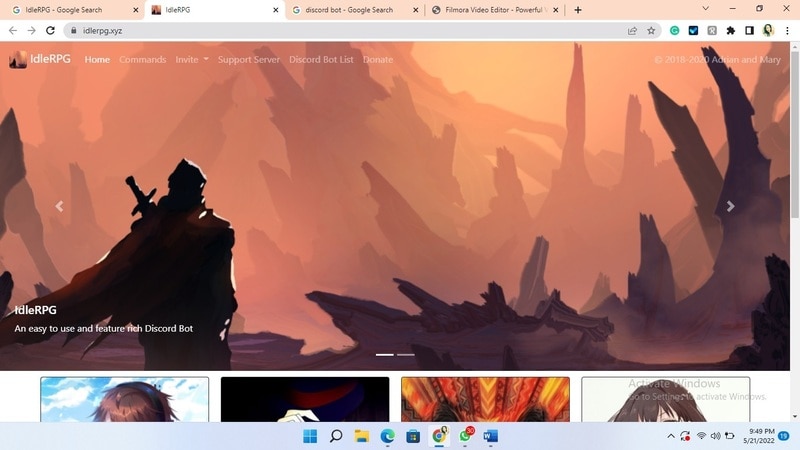
01IdleRPG
The IdleRPG is another enjoyable and engaging fun discord bot in the RPG gaming experience. It rewards server members for participating in the game while gaining XP and having fun. It offers character advancement and is comparable to other RPG games.
You may travel on a quest, trade various things, fight other players, and even find love. There’s also a scoreboard for the top ten loves, top ten PvP players, top ten wealthiest, and top ten XP players. IdleRPG also allows you to wager in various ways to help you boost your gaming money.
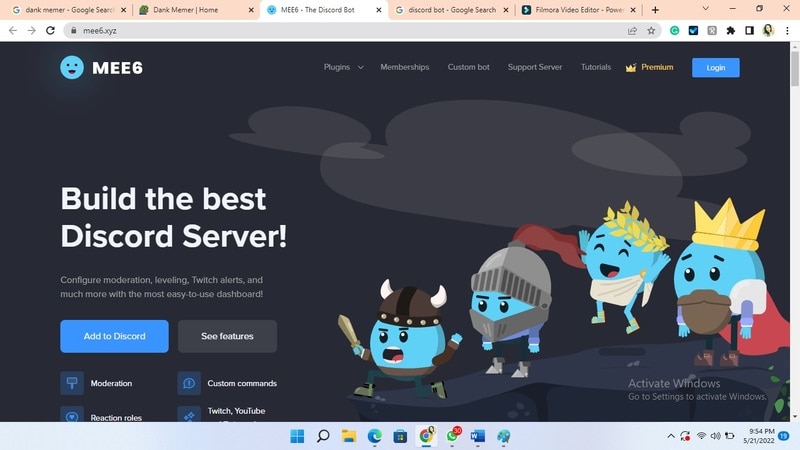
02MEE6
MEE6 is a widespread moderation and one of the greatest fun bots for discord. It takes care of many tasks that a mod team would typically do. This includes greeting new members, informing your server when you or your favorite content producers go live on Twitch or YouTube, and allowing users to assign roles depending on their reactions.
A command tool that allows you to generate custom commands and an XP leveling system that users may grind to earn access to various channels and permissions depending on activity are two of MEE6’s more complicated features. MEE6 also includes plugins for music and developing your fun discord bot.
03Dank Memer
Dank Memer is another fun bot to add to discord with a lighthearted tone. It offers one of the most extensive built-in economies, allowing participants to engage in text-based thievery, bank robbery, and gambling experiences.
As its name implies, it also offers a slew of meme-related commands. You can use simple chat instructions to create memes. Other memes automatically publish.
Even more impressive is that awesome memes are collected daily from Reddit’s top meme collections.

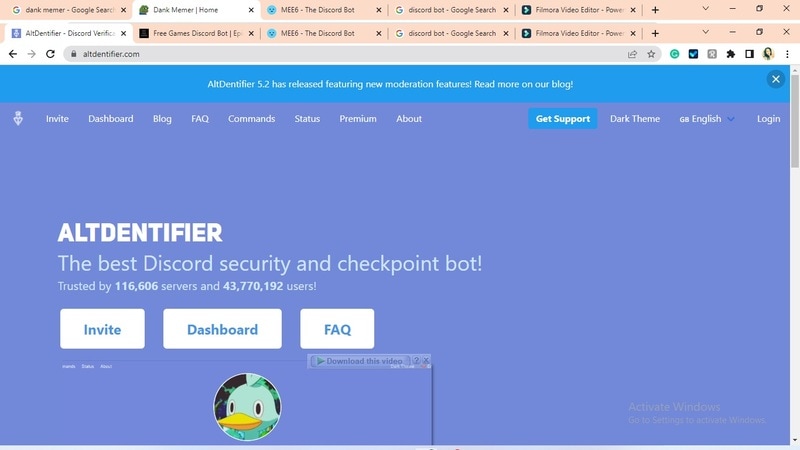
04AltDentifier
Another unique funny discord emoji bot is AltDentifier, which maintains your server clean and spam-free. It’s simple to set up and takes only a few minutes to get up and run. It now has over 35 million users spread across 100,000 servers. It also includes several more moderation commands to make administration easier.
The AltDentifier bot contains:
● An automated anti-raid system.
● A robust verification mechanism.
● Multilingual support.
● A review record.
It will also notify you if a user attempts to circumvent any limitations by utilizing a VPN.
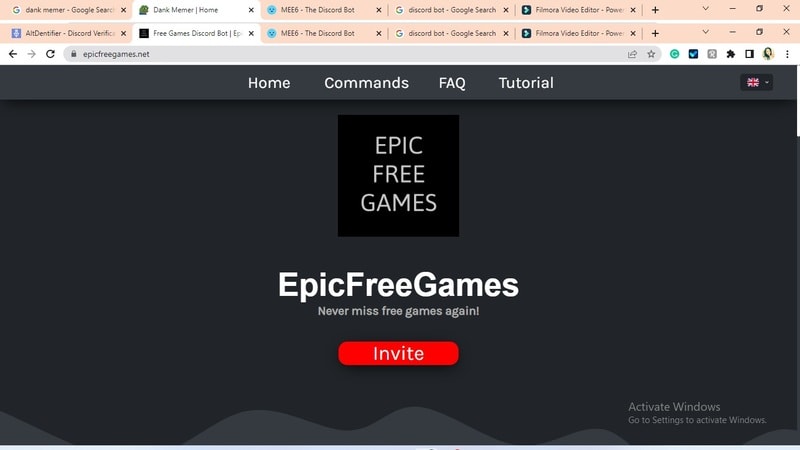
05EpicFreeGames
Over the last two years, Epic Free Games has given away thousands of free games. GTA V, Dead By Daylight, and NBA 2K21 are among the given-away titles. It even-handed away Discord Nitro lately. Have any of these free games ever escaped your notice? Fear not, for the EpicFreeGames bot has your back.
The EpicFreeGames bot delivers a message to a channel, reminding everyone of Epic’s free game(s). It only has one task, yet it can provide you with hundreds of dollars worth of games. Never miss another fantastic free Epic Games game again.
06**Rythm **
Rythm is a great fun discord bot for playing music in the voice stream of your server. This one features a beautiful user interface that includes a music player that you can interact with. This makes controlling the channel’s queue a breeze.
The options are changeable. You can designate DJ duties, prohibit the same songs from appearing in queues again, and block particular channels from playing music. Rhythm is less platform-agnostic than Groovy. Spotify, YouTube, SoundCloud, and Bandcamp are among the options. Apple Music is not currently supported.
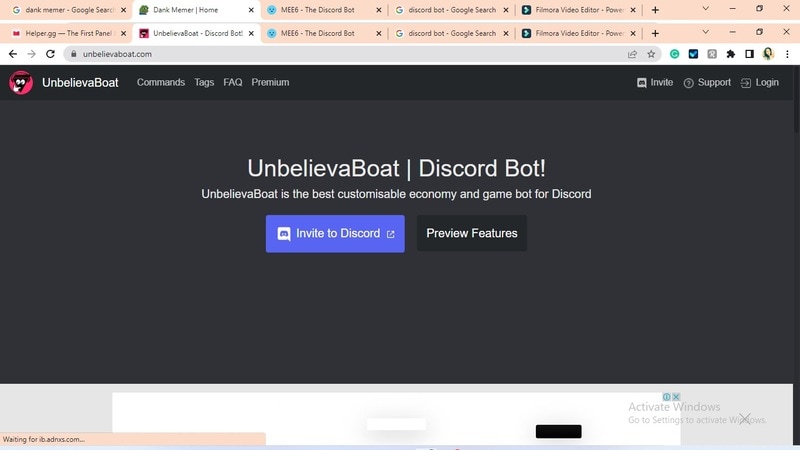
07Unbelievaboat
UnbelievaBoat is a versatile, fun bot to add to discord that uses exciting activities to keep server members engaged. These capabilities, fortunately, include a moderation mechanism that you may utilize to issue warnings and enforce bans. Your moderators may keep track of each action by assigning it a case number.
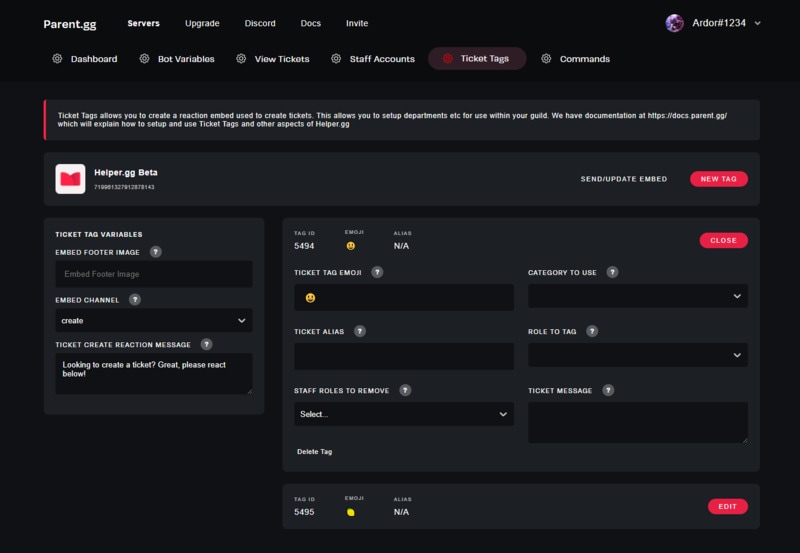
08Helper.gg
Helper.gg enables you to transform your discord server into a support ticket system. It’s a board ticket bot with a stunning UI that makes managing and responding to client tickets simple.
Create staff accounts for your company’s customer support representatives and manage their access. Ticket logging with the flexibility to rename and relocate tickets, add and delete users, and the contentment of having tickets close automatically based on the amount of time that has passed since the previous reply are all accessible.
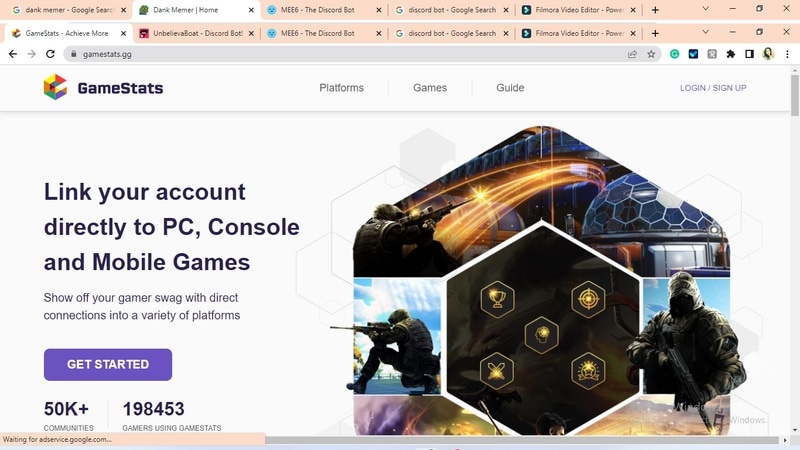
09GameStats
Next, GameStats has one-of-a-kind funny emojis for the discord bot. We all enjoy looking at our in-game statistics and comparing them. The GameStats Discord bot makes sharing and displaying your impressive numbers simple.
Connect to your game or platform, make a personalized profile card, and begin sharing your tryhard statistics.
10Dyno
Dyno is another well-crafted fun discord bot. It’s an utterly customizable server moderation bot that assists with server automation. You also receive a basic online dashboard with Dyno that you can use to monitor and control your server.
It has functions such as creating positions, making announcements, banning members, and even requesting puppy or cat images. Dyno is a fun bot that allows you to automate your server management effortlessly. Premium subscriptions, which start at $4.99 per month and unlock more exclusive features, are also available.
However, if you are a creative video editor who likes sharing their experience on discord, Filmora is for you. With Filmora, you can bring your recorded experiences with funny discord emojis to life!
But Wait, What is Wondershare Filmora Video Editor ?
Filmora is a famous video editing program for those who wish to focus on editing and producing high-quality videos with the support of 4K video editing. It’s a reasonably priced software featuring tools like split, trim, add text, color, etc. When it comes to designing, adding effects, and modifying movies, it provides users with many possibilities. Users can add overlays, create animations and objects, add music, and more with Wondershare’s Filmora. It’s an excellent tool for individuals who wish to include dedications, tributes, fun emojis and anecdotes in their films. Any video can also benefit from voiceovers.
For Win 7 or later (64-bit)
For macOS 10.12 or later
Part 2 Fun Discord Bots FAQs
Q. What does MEE6 stand for?
A. MEE6 is a discord role bot that lets users assign roles to themselves via discord replies. This discord role generator will change user rights in discord automatically.
Q. Are these fun bots free?
A. Yes and no. Most fun bots for discord are free to use, although you must pay for some features.
Q. What is the top level I can reach on the MEE6 bot?
A. The maximum level accessible is 1,768,802, which would take 935 billion years if messages sent every minute.
Q. Help! My discord got hacked; how did that even happen?
A. Users may edit discord javascript files. A cybercriminal can install harmful malware to discord client files if they get user authorization. When people open the file, the code also gets executed. After then, the hacker has access to the user’s discord data.
Q. What can discord bots do?
A. On your server, the bots can conduct a variety of helpful automated chores and bot commands, like welcoming new users, monitoring content, and banning rule violators. Using fun discord bots’ instructions, you can add music, humor, games, and other emojis to your server.
● Ending Thoughts →
● In short, moderators and administrators can use funny discord emojis to administer their servers better, make them attractive, and get more users. There are many vanilla discord commands to choose from, and when you put fun bots to add to discord, the possibilities become unlimited.
● Besides, there are several funny emojis for discord to improve your discord skills and establish your discord server. Finally, Filmora can assist you in beautifying your recorded videos make funny emojis for discord.
Consumers enjoy discord because it serves as a hub for their social groups and communities. It’s a haven where users can be themselves while socializing with others who share their interests and hobbies. There is no algorithm selecting what they should see, no continuous scrolling, and no news feed. Common interests fuel conversations and you can use some fun discord bots to pep up the conversation.
Fun bots to add discord with artificial intelligence (AI) technologies are among the most helpful tools available on the discord platform. Funny emojis for discord may be beneficial to greet new members and have funny light conversations! This aids in the creation and maintenance of a vibrant online community. You can add music, games, and fun memes to your server using these bots if you wish to.
In this article
01 [10 Fun Discord Bots You Need in 2024](#Part 1)
02 [Fun Discord Bots FAQs](#Part 2)
Part 1 Fun Discord Bots You Need in 2024
01IdleRPG
The IdleRPG is another enjoyable and engaging fun discord bot in the RPG gaming experience. It rewards server members for participating in the game while gaining XP and having fun. It offers character advancement and is comparable to other RPG games.
You may travel on a quest, trade various things, fight other players, and even find love. There’s also a scoreboard for the top ten loves, top ten PvP players, top ten wealthiest, and top ten XP players. IdleRPG also allows you to wager in various ways to help you boost your gaming money.
02MEE6
MEE6 is a widespread moderation and one of the greatest fun bots for discord. It takes care of many tasks that a mod team would typically do. This includes greeting new members, informing your server when you or your favorite content producers go live on Twitch or YouTube, and allowing users to assign roles depending on their reactions.
A command tool that allows you to generate custom commands and an XP leveling system that users may grind to earn access to various channels and permissions depending on activity are two of MEE6’s more complicated features. MEE6 also includes plugins for music and developing your fun discord bot.
03Dank Memer
Dank Memer is another fun bot to add to discord with a lighthearted tone. It offers one of the most extensive built-in economies, allowing participants to engage in text-based thievery, bank robbery, and gambling experiences.
As its name implies, it also offers a slew of meme-related commands. You can use simple chat instructions to create memes. Other memes automatically publish.
Even more impressive is that awesome memes are collected daily from Reddit’s top meme collections.
04AltDentifier
Another unique funny discord emoji bot is AltDentifier, which maintains your server clean and spam-free. It’s simple to set up and takes only a few minutes to get up and run. It now has over 35 million users spread across 100,000 servers. It also includes several more moderation commands to make administration easier.
The AltDentifier bot contains:
● An automated anti-raid system.
● A robust verification mechanism.
● Multilingual support.
● A review record.
It will also notify you if a user attempts to circumvent any limitations by utilizing a VPN.
05EpicFreeGames
Over the last two years, Epic Free Games has given away thousands of free games. GTA V, Dead By Daylight, and NBA 2K21 are among the given-away titles. It even-handed away Discord Nitro lately. Have any of these free games ever escaped your notice? Fear not, for the EpicFreeGames bot has your back.
The EpicFreeGames bot delivers a message to a channel, reminding everyone of Epic’s free game(s). It only has one task, yet it can provide you with hundreds of dollars worth of games. Never miss another fantastic free Epic Games game again.
06**Rythm **
Rythm is a great fun discord bot for playing music in the voice stream of your server. This one features a beautiful user interface that includes a music player that you can interact with. This makes controlling the channel’s queue a breeze.
The options are changeable. You can designate DJ duties, prohibit the same songs from appearing in queues again, and block particular channels from playing music. Rhythm is less platform-agnostic than Groovy. Spotify, YouTube, SoundCloud, and Bandcamp are among the options. Apple Music is not currently supported.
07Unbelievaboat
UnbelievaBoat is a versatile, fun bot to add to discord that uses exciting activities to keep server members engaged. These capabilities, fortunately, include a moderation mechanism that you may utilize to issue warnings and enforce bans. Your moderators may keep track of each action by assigning it a case number.
08Helper.gg
Helper.gg enables you to transform your discord server into a support ticket system. It’s a board ticket bot with a stunning UI that makes managing and responding to client tickets simple.
Create staff accounts for your company’s customer support representatives and manage their access. Ticket logging with the flexibility to rename and relocate tickets, add and delete users, and the contentment of having tickets close automatically based on the amount of time that has passed since the previous reply are all accessible.
09GameStats
Next, GameStats has one-of-a-kind funny emojis for the discord bot. We all enjoy looking at our in-game statistics and comparing them. The GameStats Discord bot makes sharing and displaying your impressive numbers simple.
Connect to your game or platform, make a personalized profile card, and begin sharing your tryhard statistics.
10Dyno
Dyno is another well-crafted fun discord bot. It’s an utterly customizable server moderation bot that assists with server automation. You also receive a basic online dashboard with Dyno that you can use to monitor and control your server.
It has functions such as creating positions, making announcements, banning members, and even requesting puppy or cat images. Dyno is a fun bot that allows you to automate your server management effortlessly. Premium subscriptions, which start at $4.99 per month and unlock more exclusive features, are also available.
However, if you are a creative video editor who likes sharing their experience on discord, Filmora is for you. With Filmora, you can bring your recorded experiences with funny discord emojis to life!
But Wait, What is Wondershare Filmora Video Editor ?
Filmora is a famous video editing program for those who wish to focus on editing and producing high-quality videos with the support of 4K video editing. It’s a reasonably priced software featuring tools like split, trim, add text, color, etc. When it comes to designing, adding effects, and modifying movies, it provides users with many possibilities. Users can add overlays, create animations and objects, add music, and more with Wondershare’s Filmora. It’s an excellent tool for individuals who wish to include dedications, tributes, fun emojis and anecdotes in their films. Any video can also benefit from voiceovers.
For Win 7 or later (64-bit)
For macOS 10.12 or later
Part 2 Fun Discord Bots FAQs
Q. What does MEE6 stand for?
A. MEE6 is a discord role bot that lets users assign roles to themselves via discord replies. This discord role generator will change user rights in discord automatically.
Q. Are these fun bots free?
A. Yes and no. Most fun bots for discord are free to use, although you must pay for some features.
Q. What is the top level I can reach on the MEE6 bot?
A. The maximum level accessible is 1,768,802, which would take 935 billion years if messages sent every minute.
Q. Help! My discord got hacked; how did that even happen?
A. Users may edit discord javascript files. A cybercriminal can install harmful malware to discord client files if they get user authorization. When people open the file, the code also gets executed. After then, the hacker has access to the user’s discord data.
Q. What can discord bots do?
A. On your server, the bots can conduct a variety of helpful automated chores and bot commands, like welcoming new users, monitoring content, and banning rule violators. Using fun discord bots’ instructions, you can add music, humor, games, and other emojis to your server.
● Ending Thoughts →
● In short, moderators and administrators can use funny discord emojis to administer their servers better, make them attractive, and get more users. There are many vanilla discord commands to choose from, and when you put fun bots to add to discord, the possibilities become unlimited.
● Besides, there are several funny emojis for discord to improve your discord skills and establish your discord server. Finally, Filmora can assist you in beautifying your recorded videos make funny emojis for discord.
Easy Steps to Add Miniature Effect to Videos
Want to add selective blur to make everything look smaller? Don’t have any idea how to focus on specific mini-things? Then don’t worry! In this article, you’ll get a step-by-step process to add miniature effects to your video. At the end of the process, you’ll have cinematic shots. Then start with us now! Scroll more to get pro tips!
What Is a Miniature Effect?

But first, let’s learn the logic of making the miniature effect. As many video editing pros present on Tiktok, the miniature effect is a fun way to brighten up your photography or video shots. For example, when taking a video or a time-lapse of a landscape, we always have a bigger depth of field, so most objects in the frame are in focus.
However, when we film a miniature model, the depth of field is shallow. So, we only see some objects in focus, and the rest is blurry. This visual trick makes our brain believe that the big landscape we’re seeing is actually a tiny model.

To create a miniature look, we can use specific effects to fake a shallow depth of field, and then the landscape view will look like a tiny model. While some keys to notice before making the miniature effect are:
- It utilizes selective blur to make things appear like small
- The miniature effect works best for footage filmed from a high angle.
- The tiny effect is usually used in drone footage, time lapses, or landscape photography.
Are you all set to add miniature effects to your video and make film-like shots? Then scroll more and get the step-by-step process.
How to Make a Miniature effect?
You are excited to add a miniature effect, and enjoy the rest! Without any further delay, follow the below instructions and get results!
Step1 Download the Wondershare Filmora
- First of all, you have to download the Wondershare Filmora .
- It’s packed with new features and effects plugins that make editing more filmy and fun!
![]()
Note: filmora has a unique “stock media” option that enables us to use all these elements and more to boost our videos!
Step2 Choose any stock footage
If you don’t have good-quality footage, but want to boost your video, here is how. You can get the miniature effect without a big format view camera or specialized lens.
- Open Filmora and select any stock footage in Wondershare Filmora.

Move to the stock media folder on the above bar in the Wondershare Filmora. Or you can look towards the left window, where you will see the sample videos tab.
- Click on the sample videos tab, and a new window will appear on the library screen.
Here you will see almost more than 20 videos. So, instead of using the actual recorded footage, we’ll make do with what we have by default. After selecting and adding the stock footage of your choice. Then you have to follow the below process:
- First, hold the Stock Footage as shown in the folder section.
- Then Drag and Drop it to the timeline section for further editing.

Who will get Stock Media?
Want to get stock media? You can only have access to the stock media library if you already buy the license of Wondershare Filmora.
- The latest version has an unlimited stock library.
- After purchasing any plan, you can access Stock Media (Unsplash, Giphy, Pixabay, Pixel).
Step3 Head to the effect panel
As we are working on miniature effects, what do we need first? First, we ensure that we have a Blur effect on the video.

To add a blur effect from the panel, follow the below-mentioned steps:
- First of all, move toward the above tabs.
- Then click on the 5th section, which is Effect
- After selecting the effect tab, a new window will pop up.
- In this section, we have 500+ different effects.
- Then, click on the search bar.
- Search for the Blur effect.
- After that, click on the Blur 2
- Then Download this effect if you haven’t done this already.
Step4 Add the blur effect to the video
After selecting and downloading the blur effect, it’s time to add it to the video. Again, see how precise it turned out. To add effect, follow below steps:
- First, drag and Drop the effect toward the timeline.
- Then, make sure to release the effect on the video to give it a lens blur appearance.

Step5 Add the effect multiple times
Want to get an ideal blur level? If you need more blur level in your video and make it more cinematic, then follow the below steps:
- First, ensure that the opacity of the blur effect is 100%.
- Then, if you still want more blurriness, add Blur 2 effect multiple times on the video.
- Finally, add effect by just the Drag and Drop

Step6 Drop the same video clip
- Add the same video clip 2nd time on the timeline.
- Add it by just the Drag and Drop
- Make sure you add it to 2nd video track in the timeline above the first one.

Step7 Add masks on the Video
Now, it’s time to select a specific video portion and add a mask. Due to this, we will have a selective blur portion. For this, follow the below guidelines:
- Double-click on the video present in 2nd track.
- The settings tab will be open in the top left section.
- Then find the Mask section and click on it.
- After this, click on the Double-line.
- Set the mask on video according to your style and choice.

![]()
Note: you can adjust the mask size and position by rotating and changing its shape.
Watch the rotating and adjusting actions as shown below!

For example, when we add a mask in the below time-lapse video, follow the above mask adjustments. Unfortunately, we can’t get good results. Therefore, we will apply another way to add a mask by changing shape and position. Follow the instructions for modifications:

- Make a building or any object Blurry near the camera because it is not present within the depth of field.
- While the object is far from the camera, it is focused because it is in the depth of the field.
- Then adjust the mask, as per your choice.
Want to change the shape of the mask? Then follow the below steps:

- Double-click on the video present in 2nd video track.
- Settings will activate on the top left side.
- Then click on the Mask tab to open it.
- Select the Rectangular mask from the list and apply it.
![]()
Note: make sure you are masking the same extent and excluding the object you want to be out of focus.
Now, it’s time to mask the whole object, which is far, but we want to make it in focus! For this, follow these steps:
- Add the same stock video clip a third time on the third video track of the timeline.
- Then add a mask in a Rectangle shape on the building.
- Don’t blur the edge of this mask.

Step8 Final Look
You are excited now to see the final look of your miniature effect! Finally, it’s in front of you! Just modify it more if you want to make it more precise.

Have you tried to add a miniature effect before? If yes, then share your experience with us! Try with more mask shapes and add more blur effects. Make sure that you are using Wondershare Filmora to make more filmy shots. Feel free to try out different effects and enjoy the following results!
Free Download For Win 7 or later(64-bit)
Free Download For macOS 10.14 or later
Step2 Choose any stock footage
If you don’t have good-quality footage, but want to boost your video, here is how. You can get the miniature effect without a big format view camera or specialized lens.
- Open Filmora and select any stock footage in Wondershare Filmora.
Move to the stock media folder on the above bar in the Wondershare Filmora. Or you can look towards the left window, where you will see the sample videos tab.
- Click on the sample videos tab, and a new window will appear on the library screen.
Here you will see almost more than 20 videos. So, instead of using the actual recorded footage, we’ll make do with what we have by default. After selecting and adding the stock footage of your choice. Then you have to follow the below process:
- First, hold the Stock Footage as shown in the folder section.
- Then Drag and Drop it to the timeline section for further editing.
Who will get Stock Media?
Want to get stock media? You can only have access to the stock media library if you already buy the license of Wondershare Filmora.
- The latest version has an unlimited stock library.
- After purchasing any plan, you can access Stock Media (Unsplash, Giphy, Pixabay, Pixel).
Step3 Head to the effect panel
As we are working on miniature effects, what do we need first? First, we ensure that we have a Blur effect on the video.
To add a blur effect from the panel, follow the below-mentioned steps:
- First of all, move toward the above tabs.
- Then click on the 5th section, which is Effect
- After selecting the effect tab, a new window will pop up.
- In this section, we have 500+ different effects.
- Then, click on the search bar.
- Search for the Blur effect.
- After that, click on the Blur 2
- Then Download this effect if you haven’t done this already.
Step4 Add the blur effect to the video
After selecting and downloading the blur effect, it’s time to add it to the video. Again, see how precise it turned out. To add effect, follow below steps:
- First, drag and Drop the effect toward the timeline.
- Then, make sure to release the effect on the video to give it a lens blur appearance.
Step5 Add the effect multiple times
Want to get an ideal blur level? If you need more blur level in your video and make it more cinematic, then follow the below steps:
- First, ensure that the opacity of the blur effect is 100%.
- Then, if you still want more blurriness, add Blur 2 effect multiple times on the video.
- Finally, add effect by just the Drag and Drop
Step6 Drop the same video clip
- Add the same video clip 2nd time on the timeline.
- Add it by just the Drag and Drop
- Make sure you add it to 2nd video track in the timeline above the first one.
Step7 Add masks on the Video
Now, it’s time to select a specific video portion and add a mask. Due to this, we will have a selective blur portion. For this, follow the below guidelines:
- Double-click on the video present in 2nd track.
- The settings tab will be open in the top left section.
- Then find the Mask section and click on it.
- After this, click on the Double-line.
- Set the mask on video according to your style and choice.
![]()
Note: you can adjust the mask size and position by rotating and changing its shape.
Watch the rotating and adjusting actions as shown below!
For example, when we add a mask in the below time-lapse video, follow the above mask adjustments. Unfortunately, we can’t get good results. Therefore, we will apply another way to add a mask by changing shape and position. Follow the instructions for modifications:
- Make a building or any object Blurry near the camera because it is not present within the depth of field.
- While the object is far from the camera, it is focused because it is in the depth of the field.
- Then adjust the mask, as per your choice.
Want to change the shape of the mask? Then follow the below steps:
- Double-click on the video present in 2nd video track.
- Settings will activate on the top left side.
- Then click on the Mask tab to open it.
- Select the Rectangular mask from the list and apply it.
![]()
Note: make sure you are masking the same extent and excluding the object you want to be out of focus.
Now, it’s time to mask the whole object, which is far, but we want to make it in focus! For this, follow these steps:
- Add the same stock video clip a third time on the third video track of the timeline.
- Then add a mask in a Rectangle shape on the building.
- Don’t blur the edge of this mask.
Step8 Final Look
You are excited now to see the final look of your miniature effect! Finally, it’s in front of you! Just modify it more if you want to make it more precise.
Have you tried to add a miniature effect before? If yes, then share your experience with us! Try with more mask shapes and add more blur effects. Make sure that you are using Wondershare Filmora to make more filmy shots. Feel free to try out different effects and enjoy the following results!
Free Download For Win 7 or later(64-bit)
Free Download For macOS 10.14 or later
11 Tools To Create Radial Blur Photo Mobile And Desktop
Radial blur is an effect you can use to create a sense of movement, emphasize parts of an image, add visual interest to a scene, or make a subject stand out. There are multiple apps and software programs available to achieve this effect.
But if you don’t know where to start, we’ll show you 11 ways to create radial blur images on your iPhone, Android device, Mac, or Windows PC. With these tools, you can quickly recreate your pictures to make them unique by adding visual interest.
How To Make A Radial Blur Effect On iPhone And Android?
Below we’ve provided a list of 5 apps that can help you make a radial blur photo effect on your iPhone or Android devices.
1. Design Blur: Radial Blur
Design Blur: Radial Blur is a free app available on the Play Store for Android devices that lets you add a sense of motion and depth to your picture by applying the radial effect with just a few taps.

Download:Android
Key features:
- Mainly devoted to creating radial blur and motion blur effects.
- Includes a camera to help you instantly take pictures and apply radial effects.
- Option to revert to your original picture if you don’t like the effects.
- Easier to remove the radial blur effect from parts of your image.
- Supports changing the intensity of the effect.
Pros
- Includes a redo and undo option
- Free to use
- User-friendly UI
- Applies the effect instantly
Cons
- Includes ads
2. DSLR Camera Blur Effects
With the DSLR Camera Blur Effects app, you can instantly apply a more natural-looking radial motion blur effect to your images to give them a more professional appearance. The app offers multiple image-blurring tools and adds a DSLR-like finish to your photos.

Download: Android
Key Features
- Import photos from your phone’s gallery or take a new one using the app’s camera option.
- Options to crop your image before uploading.
- Multiple types of blur effects to choose from, such as motion blur, gaussian blur, line blur, box blur, and pixel blur.
- Can change the focus from auto to circular, linear, freestyle, point focus, or point blur.
Pros
- Simple and fast to use
- Available for free
- Draws around the subject
- A quick social sharing option is available
Cons
- Shows multiple ads
- Adds a watermark to your final image
3. Image Radial Blur
The Image Radial Blur is another user-friendly app designed to create radial blur effects for Android users and has a range of blur strengths, types, and focus options, so you can create the exact look you want.

Download:Android
Key Features
- Two Focus Move options and two blur types to choose from.
- Adjusts the strength of the radial blur on your image.
- Instantly applies the radial blur effect.
Pros
- Free and easy to use
- Applies the effect with one tap
- Comes with a quick social sharing option
- Excellent UI
Cons
- Displays ads
4. Picsart
Picsart is a powerful photo editing app that lets you create beautiful images by removing backgrounds, adding text and radial blur or other effects, and even creating collages.

Key Features
- All-in-one photo and video editor.
- Supports creating slideshows, and collages, adding subtitles to your video, and more.
- Labeled as “Editor’s Choice” on Google Play Store.
- Blur parts of an image, its background, the subject’s face, or a complete photo.
Pros
- Available for free
- AI select auto-detect blur feature
- Perfect for quick and easy edits
- Gives a professional touch to images
Cons
- The app lags sometimes
5. Affinity Photo
Affinity Photo is an award-winning photo editor available for iPads offering desktop-grade basic and advanced editing tools, including the Radial Blur effect.

Download: iOS
Key Features
- Available for a one-time purchase of $2476.20.
- Creates the radial effect in concentric circle lines, giving your images a sense of rotation.
- Brings the focus point in your pictures to life.
Pros
- Creates unique motion blur effects
- Offers other editing options
- Desktop-grade editing
Cons
- No image organization feature is available
6 Ways To Radial Blur Your Images On Windows And Mac
Here are our top 5 recommended tools to radial blur your images on Windows and Mac:
1. Wondershare Filmora
Free Download For Win 7 or later(64-bit)
Free Download For macOS 10.14 or later
Price: Starts at $7.99 per month
Support System: Windows 11 and below & macOS 10.14 - macOS 12
Wondershare Filmora is an editing software recommended by many content creators and is available for Windows and macOS. The software comes with various features such as speed ramping, screen recording, a library of royalty-free music, radial blur, keyframing, numerous filters, effects, & preset templates, motion tracking, title editing, and more.
To create a radial blur effect on your photos using the Wondershare Filmora software, do the following steps:
Step1 Visit the Filmora website and download the file, depending on your system. Install the software and launch it. Click the “Create New Project” option and drag & drop your file.

Step2 Head to the “Effects” tab, choose the Tilt-shift Circle for the radial blur effect and drop it in the timeline.

Step3 Double-click the effect in the timeline and configure the size, X-axis, Y-axis, and intensity. That’s about it. You can now export your file by clicking the “Export” option.
2. Final Cut Pro
Price: $299.99/perpetual license
Support System: macOS 11.5.1 or later

Final Cut Pro is an editing software designed for Mac systems and has everything you need to create high-finished videos. This software program offers a wide range of features, including a timeline, proxy editing, Multicam editing, and support for 4K and HDR footage.
With Final Cut Pro, you can instantly apply the radial blur effect to your images and adjust it using various parameters in the Filters Inspector section, such as Center, Angle, Crop, and Mix.
3. Adobe Photoshop
Price: US$20.99/month
Support System: macOS and Windows

As one of the most popular and advanced photo editing software in the digital market, Adobe Photoshop is packed with high-end features and is used by many professionals as well as graphic designers to create stunning radial blur effects in their projects.
To add the radial blur effect on your images using Adobe Photoshop, start with converting your background image into a Smart Object and go to the “Filters” tab. Next, select “Blur” and click “Radial Blur.” Finally, you can set the parameter in the radial blur window to adjust the effect.
4. Paint.NET
Price: Free
Support System: Microsoft .NET 6, Windows XP, Vista, 7, & 8, and needs a 64-bit Windows processor

Paint.NET is an easy-to-use software developed on the .NET framework and is only compatible with Windows PCs. The software is free and has an innovative interface for novice users to create stunning image editing projects in no time.
Paint.NET also lets you quickly create the radial blur image effect using its blur effects. You can even configure the angle, center, and quality of the effect.
5. BCC FX Editor
Price: $175 per month
Support System: macOS Mojave 10.14

Yet another powerful software is the BCC FX Editor, designed with an intuitive interface where you can quickly apply the BCC+ Radial Blur effect around a specific point in your pictures.
The software also offers various parameters to help you adjust the effect on your image. These include GPU rendering, blur type, center, radial amount, rotation amount, falloff, smooth mode, edge mode, apply mode, and more.
6. VideoPad Video Editor
Price: Free, and the premium version starts at $23.16 quarterly
Support System: Windows 10, XP, Vista, 7, 8, and 8.1

Designed for Windows systems, the VideoPad Editor is an intuitive and fast software program that can help you quickly add the radial blur effect to your file. Moreover, the software comes with numerous visual effects and transitions.
You can add custom logos, texts, & overlays and create & export your file in over 60 different video formats.
Last Words
In this article, we’ve provided a list of 5 iOS and Android apps and 6 Mac and Windows software for creating the radial blur image effect. From the above list, whichever tool you choose can help you create some stunning radial blur effects that will add depth and movement to your photos.
We’ve also provided step-by-step instructions on how you can use the Filmora 11 software to add impactful effects.
Hopefully, you’ve enjoyed reading this article and can now quickly add the radial blur effect to your images without any issues.
2. DSLR Camera Blur Effects
With the DSLR Camera Blur Effects app, you can instantly apply a more natural-looking radial motion blur effect to your images to give them a more professional appearance. The app offers multiple image-blurring tools and adds a DSLR-like finish to your photos.
Download: Android
Key Features
- Import photos from your phone’s gallery or take a new one using the app’s camera option.
- Options to crop your image before uploading.
- Multiple types of blur effects to choose from, such as motion blur, gaussian blur, line blur, box blur, and pixel blur.
- Can change the focus from auto to circular, linear, freestyle, point focus, or point blur.
Pros
- Simple and fast to use
- Available for free
- Draws around the subject
- A quick social sharing option is available
Cons
- Shows multiple ads
- Adds a watermark to your final image
3. Image Radial Blur
The Image Radial Blur is another user-friendly app designed to create radial blur effects for Android users and has a range of blur strengths, types, and focus options, so you can create the exact look you want.
Download:Android
Key Features
- Two Focus Move options and two blur types to choose from.
- Adjusts the strength of the radial blur on your image.
- Instantly applies the radial blur effect.
Pros
- Free and easy to use
- Applies the effect with one tap
- Comes with a quick social sharing option
- Excellent UI
Cons
- Displays ads
4. Picsart
Picsart is a powerful photo editing app that lets you create beautiful images by removing backgrounds, adding text and radial blur or other effects, and even creating collages.
Key Features
- All-in-one photo and video editor.
- Supports creating slideshows, and collages, adding subtitles to your video, and more.
- Labeled as “Editor’s Choice” on Google Play Store.
- Blur parts of an image, its background, the subject’s face, or a complete photo.
Pros
- Available for free
- AI select auto-detect blur feature
- Perfect for quick and easy edits
- Gives a professional touch to images
Cons
- The app lags sometimes
5. Affinity Photo
Affinity Photo is an award-winning photo editor available for iPads offering desktop-grade basic and advanced editing tools, including the Radial Blur effect.
Download: iOS
Key Features
- Available for a one-time purchase of $2476.20.
- Creates the radial effect in concentric circle lines, giving your images a sense of rotation.
- Brings the focus point in your pictures to life.
Pros
- Creates unique motion blur effects
- Offers other editing options
- Desktop-grade editing
Cons
- No image organization feature is available
6 Ways To Radial Blur Your Images On Windows And Mac
Here are our top 5 recommended tools to radial blur your images on Windows and Mac:
1. Wondershare Filmora
Free Download For Win 7 or later(64-bit)
Free Download For macOS 10.14 or later
Price: Starts at $7.99 per month
Support System: Windows 11 and below & macOS 10.14 - macOS 12
Wondershare Filmora is an editing software recommended by many content creators and is available for Windows and macOS. The software comes with various features such as speed ramping, screen recording, a library of royalty-free music, radial blur, keyframing, numerous filters, effects, & preset templates, motion tracking, title editing, and more.
To create a radial blur effect on your photos using the Wondershare Filmora software, do the following steps:
Step1 Visit the Filmora website and download the file, depending on your system. Install the software and launch it. Click the “Create New Project” option and drag & drop your file.
Step2 Head to the “Effects” tab, choose the Tilt-shift Circle for the radial blur effect and drop it in the timeline.
Step3 Double-click the effect in the timeline and configure the size, X-axis, Y-axis, and intensity. That’s about it. You can now export your file by clicking the “Export” option.
2. Final Cut Pro
Price: $299.99/perpetual license
Support System: macOS 11.5.1 or later
Final Cut Pro is an editing software designed for Mac systems and has everything you need to create high-finished videos. This software program offers a wide range of features, including a timeline, proxy editing, Multicam editing, and support for 4K and HDR footage.
With Final Cut Pro, you can instantly apply the radial blur effect to your images and adjust it using various parameters in the Filters Inspector section, such as Center, Angle, Crop, and Mix.
3. Adobe Photoshop
Price: US$20.99/month
Support System: macOS and Windows
As one of the most popular and advanced photo editing software in the digital market, Adobe Photoshop is packed with high-end features and is used by many professionals as well as graphic designers to create stunning radial blur effects in their projects.
To add the radial blur effect on your images using Adobe Photoshop, start with converting your background image into a Smart Object and go to the “Filters” tab. Next, select “Blur” and click “Radial Blur.” Finally, you can set the parameter in the radial blur window to adjust the effect.
4. Paint.NET
Price: Free
Support System: Microsoft .NET 6, Windows XP, Vista, 7, & 8, and needs a 64-bit Windows processor
Paint.NET is an easy-to-use software developed on the .NET framework and is only compatible with Windows PCs. The software is free and has an innovative interface for novice users to create stunning image editing projects in no time.
Paint.NET also lets you quickly create the radial blur image effect using its blur effects. You can even configure the angle, center, and quality of the effect.
5. BCC FX Editor
Price: $175 per month
Support System: macOS Mojave 10.14
Yet another powerful software is the BCC FX Editor, designed with an intuitive interface where you can quickly apply the BCC+ Radial Blur effect around a specific point in your pictures.
The software also offers various parameters to help you adjust the effect on your image. These include GPU rendering, blur type, center, radial amount, rotation amount, falloff, smooth mode, edge mode, apply mode, and more.
6. VideoPad Video Editor
Price: Free, and the premium version starts at $23.16 quarterly
Support System: Windows 10, XP, Vista, 7, 8, and 8.1
Designed for Windows systems, the VideoPad Editor is an intuitive and fast software program that can help you quickly add the radial blur effect to your file. Moreover, the software comes with numerous visual effects and transitions.
You can add custom logos, texts, & overlays and create & export your file in over 60 different video formats.
Last Words
In this article, we’ve provided a list of 5 iOS and Android apps and 6 Mac and Windows software for creating the radial blur image effect. From the above list, whichever tool you choose can help you create some stunning radial blur effects that will add depth and movement to your photos.
We’ve also provided step-by-step instructions on how you can use the Filmora 11 software to add impactful effects.
Hopefully, you’ve enjoyed reading this article and can now quickly add the radial blur effect to your images without any issues.
Easy Way to Combine Several Xvid Files Into One [Windows, Mac,Android
Best Xvid Merger to Merge/Combine Xvid Files on Windows - Filmora Video Editor
- Importing an Xvid file
There are two ways to import a Xvid file.
Click Import to browse for Xvid videos on your computer and select all Xvid files to load while holding down the Ctrl or Shift key. Drag and drop the Xvid file directly into the program window.
If you want to add images and sounds and merge them seamlessly, do that. All regular image and audio files are supported.

- Drag and drop the Xvid video together
When you load all the Xvid files, they will appear as thumbnails in your album. To merge them, you need to drag and drop them one by one into the video timeline. They are seamlessly merged without gaps. Click the play icon to see the merged Xvid files in the screen on the right.
To change the order, simply drag the video element to the left or right. Note: Do not overlay another video clip. Otherwise, split and paste the original video in its place.

- Improve merged Xvid videos (optional)
You can also do other work to personalize your Xvid video before you export the merged Xvid video. As a powerful and easy-to-use video editor, you can use Wondershare Filmora:
for basic editing (trimming, splitting, rotating, trimming, brightness, contrast, tint adjustment, playback speed, pitch change, etc.). I can do it. Video Customization: Apply transitions, effects, subtitles, PIPs, intros / credits and add background noise. Over 300 templates are provided. Edit like a pro Take your Xvid video editing to the next level with built-in power tools such as jump cut, face off, mosaic, tilt shift, flash and hold.
- Export related Xvid files
You can preview the content you created after making the necessary changes. When you are satisfied, click the “Create” button to save. In the pop-up output window, you can choose the desired format from all common formats such as WMV, MP4, AVI, MOV, MPG, FLV. In addition, in Advanced Settings, you can further select encoder resolution settings such as 1280 x 720, 640 x 480, 1920x1080.
Would you like to burn the merged Xvid files to DVD for viewing on a regular DVD player or big screen TV? Click the DVD tab, set the aspect ratio to 16: 9 or 4: 3, set the TV standard and create a DVD video.

Film / Media File Preparation: Filmora supports a variety of file formats. You can check if your file is supported by Filmora here. Be sure to save the file to your computer or storage drive.
Review System Requirements: Review Filmora’s system requirements to ensure that your Mac meets these requirements for the best user experience.
Create a new project or open a recently used project
1 To create a new project, select a video aspect ratio and click New Project.
2 Click Open Project to open an existing project. Importing

Media Files Imports
video footage, audio, or other media files. To import media files, you can:
1 Click the “+” icon to browse to a local file on your Mac and add a file.
2 Drag and drop the media file into the Media Library area.
3 Import media files from an external device.
4 Import using the Instant Cutter tool.

Media File Placement on the Timeline To place a clip or sequence of other media files, you can:
Drag the video, audio, and images into the timeline window and place them in the order you want. Apply Transitions and Effects
Transitions and effects help make your video more eye-catching. The Transitions and Effects panel contains various transitions and effects that you can apply. Adding a title
Filmora has a number of title templates. What you can do:
1 Select an existing title template in the Title section, enter text and save.
2 Click the text to adjust the text style. You can save it as a custom for later use.

Color Editing
Filmora has multiple color editing options. You can do the following.
Improves video color.
Adjust the white balance.
Tone changes: Contrast, Saturation, Brightness.
2 Match the colors of two different clips.
To edit the color, double-click the clip, click Color, change the parameters, and then click Save. If you need more advanced editing, you can click Details. Edit Audio
Filmora has a complete audio editing solution. You can remove background noise, change audio speed, auto-normalize audio, and more.
Export videos to a supported format or post directly to the social platform.
Another way to combine multiple Xvid files into one using Avidemux
There are many different video formats, and it can be difficult to meet some of them without knowing exactly what they are. For example, Xvid files are Xviden-encoded video file formats that use the Xvid codec, rather than the formats you are used to in everyday life like the MP4 format. This program is used to compress and decompress video to the compression standard MPEG4 ASP, save disk space and file transfer speed, and open this type of file. Many modern DVD and Bluray players can play XVID files. Like a PC, any software program that can decode MPEG4 ASP-encoded video can play XVID files.
This article describes how to combine multiple Xvid files into one using Avidemux, a free video editor and encoder that supports multiple file types. Merging common video and video in Avidemux is not a big deal, but you can learn how to merge different Xvid files with this editor from the detailed article.
Therefore, first you need to change some of the settings for the selected video. Frame rate etc. Next, you need to open the first video clip, find and open the menu file option that displays the drop-down menu at the top left of the screen, and select Attach.
Step 1:
Adding Xvid Video to a program in batch
Before importing an Xvid file, you need to make sure that you have the latest version of Joyoshare Video Joiner installed on your computer. Then it’s up to you to upload the Xvid video. There are two options. Touch the Open File icon in the lower left corner, or drag directly in bulk as needed.
Step 2:
Finish setting the output format
When all the Xvid video files are loaded, click Format in the lower right corner of the main screen and select the output format. Formatting can be set in “Fast Mode” or “Encode Mode”. The only difference between the two modes is that the former is a lossless mode, which provides a 60x speed solution that stitches multiple Xvid files in their original quality, but the output format must be the same as the source video. The latter is a customizable mockup that allows you to choose any format as the output format and customize the output quality by simply clicking on the gear icon.
Step 3:
Cut Xvid Video File When you have finished setting the
output format, tap OK to save and you will be returned to the first interface. You can now crop Xvid videos as needed by simply dragging the timeline.
Step 4
Editing a Xvid file in encode mode
The Joyoshare Video Joiner is equipped with a video editor that works only in encode mode. Therefore, if you want to combine Xvid files, then click the Edit icon next to the Xvid file you just added to crop, crop, mirror, adjust brightness, watermark, apply effects, subtitles, etc. You can edit the video.
2 Ways to Merge/Combine Xvid Files on Android using Wave.video (paid software)
Wave.video allows you to easily combine two or more video clips or images to create longer videos.
To do this, go to https: //wave.video, click the New Video button and select Blank Video.

This will open a video editor and ask you to select a format.
You can then select the Upload Media (from your computer) or Select from Library (Go to Stock Library, Favorites, Purchased, Previous Uploads, and Read My Video Folders) option. The video clip is added to the editor. You can add a second clip by clicking the + sign on the timeline.

Not only can you merge original video clips, but you can also merge with stock footage, video clips, image merges or merges. Multiple images in the video.

If you add multiple video clips or images to your timeline, you can add transitions between them to “glue” them into your story. If you’re happy with how to combine video clips, go to the publishing steps to download the video or share it directly with your social media account.


2 Ways to Merge/Combine Xvid Files on Android using InShot (unpaid software)
How to merge videos on your smartphone
Smartphone apps are less functional and slower on handheld devices, so it’s usually best to edit videos on your computer.
But if you’re trying to make a simple video on the go, your smartphone will do the job. Combining videos on Android phones.
Android users, InShot is a great option for combining multiple videos.
Transitions, effects, stickers, etc. are limited by the free version of the app.
How to get started:
- Open the app and select a video option.
Other options are not related to video.

- Select the videos you want to combine from the library.
Select the videos in the order you want them to appear.

- Crop the clip to crop and polish the video
Tap the video clip section to crop the clip.
- Add a transition effect between video clips
To add a Transition, simply select the white icon on the timeline that ends one video clip and starts another.
Click to see the transitions. Only basic transitions are available in the free version. Super and glitch are available to professional users.

- Insert text to add stickers
The sticker options available in the free version of the app are limited.
- Correct the color of the clip Select the clip and click the Filter option.
Go to the Adjustment tab and modify the lighting, saturation, etc. of the clip.

- Save Video
Click Save in the upper right corner of the screen and select the desired video quality.

Merge/Combine Xvid Files on iPhone using iMovie (unpaid software)
Merge videos with iMovie on iPhone
iMovie is already installed on your iPhone.
Combine multiple video clips into one project in a few simple steps.
The method is as follows:
- Open the app and create a new project
Select Movie from the options displayed on the screen.

2nd Click Media in the upper left.
Select the video files in the order you want them to appear.

- Start editing
Click the white icon in the center of the clip to add a transition effect.

- Select Finish in the upper left corner of the screen.
Video is stored.
Note: You can apply a filter to make all video clips look the same.
Merge/Combine Xvid Files on iPhone using Biteable (paid software)
Merge videos like an expert
Biteable’s video combiner allows you to quickly merge footage and add transition effects.
From flashy dissolves to smoother slide-ins than Barry White eating ice cream, merging videos has never been easier.
Method is as follows:
- Upload video footage
First, log in to Biteable and create a new video project. Alternatively, click this link to sign up and get started in seconds.
Then select Start with Blank Video on the toolbar to start a new project or select a template. The Biteable Video Editor launches.
To add your first footage, tap the canvas, then tap Add Scene> Upload. Select the video you want to add. Then repeat this process to upload the second video.
- Merge and add transitions
This will merge the footage on the timeline. If you want to add a transition, move the mouse pointer to the area between the video clips on the timeline.
Tap the white arrow that appears and swipe up, swipe left, or select a dreamy crossfade effect.
- Click the Preview button to export the merged video
Immediately export the video and later upgrade to a premium membership to remove the small watermark.
https://biteable.com/tools/merge-videos/

Merge/Combine Xvid Files Online using ClipChamp (paid software)
Step 1. Create an account on Clipchamp
Log into your Clipchamp Create account, or join up without spending a dime to get started.

Step 2. Create a brand new task
Click on Create a Video button withinside the pinnacle proper corner. We provide plenty of codecs and templates to pick from.
Before you choose a layout or a template have a clean concept of ways you need to continue consistent with your requirement. Select an element ratio that fits the pleasant in your video.
Your element ratio can vary primarily based totally upon the platform that you`re aiming to submit the video.

Step 3. Add the motion pictures you need to merge
Now that you`ve created a brand new task at the video merger, click on the Add Media button withinside the left toolbar to import video documents into the empty task.
You can pick to tug and drop motion pictures out of your difficult drive, your phone, dropbox, google drive, or different on line storage. You may even upload inventory photos or Gifs from the inventory button at the left toolbar.
Once you`ve imported your media documents they`ll seem withinside the video merger.

Step 4. Add your motion pictures to the video merger timeline
Select the 2 movies and drag them to the editor`s timeline. After adjusting the clips to their accurate positions a inexperienced spotlight will seem round them
indicating that those documents will drop to the timeline in case you allow pass of your click on. You may also upload extra clips sequentially on your timeline relying at the requirement.
You may want to scroll beyond the clips at the timeline to alter them into areas in case your video receives longer. Your clips at the moment are located at the timeline!

Step 5. Resize and rearrange your motion pictures
We have selected a nine:sixteen ratio however our inventory photos is sixteen:nine ratio. You will want to resize your video photos. Click at the preview display then click on Crop to fill.
Drag the video throughout the display to put the video. Repeat this technique for each motion pictures. Since the motion pictures won’t be withinside the series you need them to be in,
you may have to tug and drop them to the favored series. You can trim the video without a doubt through transferring your mouse over to both give up of a clip and dragging them as consistent with your want.


Step 6. Recheck and export
Often even as enhancing or merging our motion pictures we export in a rush and recognize that we had to trim a segment a tad bit more.
This takes place to maximum folks however does now no longer fear as Clipchamp robotically saves your task and you could re-take a look at the complete video earlier than exporting it.
If you are happy with the merge of the two videos, you can click the export button in the upper right corner of the video editor.
Select the resolution for which you want to export the video file and click Next.
You can also change the aspect ratio to suit the needs of other platforms and repeat the export process.

Merge/Combine Xvid Files Online using Kapwing (unpaid software)
Step 1: Upload the video
First, upload the video to Kapwing’s video merging tool. This free tool is available for iPhone, Android, PC, or tablet in Chrome or Safari browser. Click Upload to add the videos one at a time, or select multiple clips to import them all at once.
Kapwing supports major video file types such as MP4, .FLV, .3PG. To embed a video from the web, just copy and paste the link. You can upload photos and GIFs and combine them with videos.

Think of a video that looks great when spliced together into two consecutive videos. This can be a similar color palette, an event or travel video, or a video of the same person. When
videos are uploaded, the video preview shows how they look combined. Kapwing highlights each scene with a purple box during playback.

Step 2: Place the video /photo in the desired order.
Think about which clips are next to each other and work best, and arrange them accordingly. You can drag clips to rearrange them and delete them when you no longer need them.
In the menu on the left, you can choose the format of the finished video (choose 1: 1 (square)), whether to crop the video (choose Fit to Border), and the length.

The video should be a montage photo Kapwing also has the option to crop the video clip to shorten the required section.
Creators can crop videos and remove sections from the center. To crop a clip, first select it and click Edit to open Kapwing Studio.

Drag both ends of the layer to change the timing of the start and end of the clip, or click the timing and use the arrow keys to make fine adjustments.
Besides trimming, you can look at other edits. To remove a section or add a clip in the center, use the split tool above the timeline or type “s” on your keyboard and use the shortcut.
Next, delete the layers you no longer need, drag the clips to combine them, and display them side by side on the timeline.
creators have more control over the montage by editing the scene in Studio. In Studio, you can add music to your montage,
insert title slides, attach endings, watermark corners, and animate.

Step 3: Save the merged video
When you have finished merging the video into the merged video, click Export Video in the upper right corner. Once the video is processed, you will be taken to the download page.
From here, you can save the video to your device or create a free account with your Google or Facebook login credentials to remove the watermark first.
There are two ways to import a Xvid file.
Click Import to browse for Xvid videos on your computer and select all Xvid files to load while holding down the Ctrl or Shift key. Drag and drop the Xvid file directly into the program window.
If you want to add images and sounds and merge them seamlessly, do that. All regular image and audio files are supported.
- Drag and drop the Xvid video together
When you load all the Xvid files, they will appear as thumbnails in your album. To merge them, you need to drag and drop them one by one into the video timeline. They are seamlessly merged without gaps. Click the play icon to see the merged Xvid files in the screen on the right.
To change the order, simply drag the video element to the left or right. Note: Do not overlay another video clip. Otherwise, split and paste the original video in its place.
- Improve merged Xvid videos (optional)
You can also do other work to personalize your Xvid video before you export the merged Xvid video. As a powerful and easy-to-use video editor, you can use Wondershare Filmora:
for basic editing (trimming, splitting, rotating, trimming, brightness, contrast, tint adjustment, playback speed, pitch change, etc.). I can do it. Video Customization: Apply transitions, effects, subtitles, PIPs, intros / credits and add background noise. Over 300 templates are provided. Edit like a pro Take your Xvid video editing to the next level with built-in power tools such as jump cut, face off, mosaic, tilt shift, flash and hold.
- Export related Xvid files
You can preview the content you created after making the necessary changes. When you are satisfied, click the “Create” button to save. In the pop-up output window, you can choose the desired format from all common formats such as WMV, MP4, AVI, MOV, MPG, FLV. In addition, in Advanced Settings, you can further select encoder resolution settings such as 1280 x 720, 640 x 480, 1920x1080.
Would you like to burn the merged Xvid files to DVD for viewing on a regular DVD player or big screen TV? Click the DVD tab, set the aspect ratio to 16: 9 or 4: 3, set the TV standard and create a DVD video.
Film / Media File Preparation: Filmora supports a variety of file formats. You can check if your file is supported by Filmora here. Be sure to save the file to your computer or storage drive.
Review System Requirements: Review Filmora’s system requirements to ensure that your Mac meets these requirements for the best user experience.
Create a new project or open a recently used project
1 To create a new project, select a video aspect ratio and click New Project.
2 Click Open Project to open an existing project. Importing
Media Files Imports
video footage, audio, or other media files. To import media files, you can:
1 Click the “+” icon to browse to a local file on your Mac and add a file.
2 Drag and drop the media file into the Media Library area.
3 Import media files from an external device.
4 Import using the Instant Cutter tool.
Media File Placement on the Timeline To place a clip or sequence of other media files, you can:
Drag the video, audio, and images into the timeline window and place them in the order you want. Apply Transitions and Effects
Transitions and effects help make your video more eye-catching. The Transitions and Effects panel contains various transitions and effects that you can apply. Adding a title
Filmora has a number of title templates. What you can do:
1 Select an existing title template in the Title section, enter text and save.
2 Click the text to adjust the text style. You can save it as a custom for later use.
Color Editing
Filmora has multiple color editing options. You can do the following.
Improves video color.
Adjust the white balance.
Tone changes: Contrast, Saturation, Brightness.
2 Match the colors of two different clips.
To edit the color, double-click the clip, click Color, change the parameters, and then click Save. If you need more advanced editing, you can click Details. Edit Audio
Filmora has a complete audio editing solution. You can remove background noise, change audio speed, auto-normalize audio, and more.
Export videos to a supported format or post directly to the social platform.
Another way to combine multiple Xvid files into one using Avidemux
There are many different video formats, and it can be difficult to meet some of them without knowing exactly what they are. For example, Xvid files are Xviden-encoded video file formats that use the Xvid codec, rather than the formats you are used to in everyday life like the MP4 format. This program is used to compress and decompress video to the compression standard MPEG4 ASP, save disk space and file transfer speed, and open this type of file. Many modern DVD and Bluray players can play XVID files. Like a PC, any software program that can decode MPEG4 ASP-encoded video can play XVID files.
This article describes how to combine multiple Xvid files into one using Avidemux, a free video editor and encoder that supports multiple file types. Merging common video and video in Avidemux is not a big deal, but you can learn how to merge different Xvid files with this editor from the detailed article.
Therefore, first you need to change some of the settings for the selected video. Frame rate etc. Next, you need to open the first video clip, find and open the menu file option that displays the drop-down menu at the top left of the screen, and select Attach.
Step 1:
Adding Xvid Video to a program in batch
Before importing an Xvid file, you need to make sure that you have the latest version of Joyoshare Video Joiner installed on your computer. Then it’s up to you to upload the Xvid video. There are two options. Touch the Open File icon in the lower left corner, or drag directly in bulk as needed.
Step 2:
Finish setting the output format
When all the Xvid video files are loaded, click Format in the lower right corner of the main screen and select the output format. Formatting can be set in “Fast Mode” or “Encode Mode”. The only difference between the two modes is that the former is a lossless mode, which provides a 60x speed solution that stitches multiple Xvid files in their original quality, but the output format must be the same as the source video. The latter is a customizable mockup that allows you to choose any format as the output format and customize the output quality by simply clicking on the gear icon.
Step 3:
Cut Xvid Video File When you have finished setting the
output format, tap OK to save and you will be returned to the first interface. You can now crop Xvid videos as needed by simply dragging the timeline.
Step 4
Editing a Xvid file in encode mode
The Joyoshare Video Joiner is equipped with a video editor that works only in encode mode. Therefore, if you want to combine Xvid files, then click the Edit icon next to the Xvid file you just added to crop, crop, mirror, adjust brightness, watermark, apply effects, subtitles, etc. You can edit the video.
2 Ways to Merge/Combine Xvid Files on Android using Wave.video (paid software)
Wave.video allows you to easily combine two or more video clips or images to create longer videos.
To do this, go to https: //wave.video, click the New Video button and select Blank Video.
This will open a video editor and ask you to select a format.
You can then select the Upload Media (from your computer) or Select from Library (Go to Stock Library, Favorites, Purchased, Previous Uploads, and Read My Video Folders) option. The video clip is added to the editor. You can add a second clip by clicking the + sign on the timeline.
Not only can you merge original video clips, but you can also merge with stock footage, video clips, image merges or merges. Multiple images in the video.
If you add multiple video clips or images to your timeline, you can add transitions between them to “glue” them into your story. If you’re happy with how to combine video clips, go to the publishing steps to download the video or share it directly with your social media account.
2 Ways to Merge/Combine Xvid Files on Android using InShot (unpaid software)
How to merge videos on your smartphone
Smartphone apps are less functional and slower on handheld devices, so it’s usually best to edit videos on your computer.
But if you’re trying to make a simple video on the go, your smartphone will do the job. Combining videos on Android phones.
Android users, InShot is a great option for combining multiple videos.
Transitions, effects, stickers, etc. are limited by the free version of the app.
How to get started:
- Open the app and select a video option.
Other options are not related to video.
- Select the videos you want to combine from the library.
Select the videos in the order you want them to appear.
- Crop the clip to crop and polish the video
Tap the video clip section to crop the clip.
- Add a transition effect between video clips
To add a Transition, simply select the white icon on the timeline that ends one video clip and starts another.
Click to see the transitions. Only basic transitions are available in the free version. Super and glitch are available to professional users.
- Insert text to add stickers
The sticker options available in the free version of the app are limited.
- Correct the color of the clip Select the clip and click the Filter option.
Go to the Adjustment tab and modify the lighting, saturation, etc. of the clip.
- Save Video
Click Save in the upper right corner of the screen and select the desired video quality.
Merge/Combine Xvid Files on iPhone using iMovie (unpaid software)
Merge videos with iMovie on iPhone
iMovie is already installed on your iPhone.
Combine multiple video clips into one project in a few simple steps.
The method is as follows:
- Open the app and create a new project
Select Movie from the options displayed on the screen.
2nd Click Media in the upper left.
Select the video files in the order you want them to appear.
- Start editing
Click the white icon in the center of the clip to add a transition effect.
- Select Finish in the upper left corner of the screen.
Video is stored.
Note: You can apply a filter to make all video clips look the same.
Merge/Combine Xvid Files on iPhone using Biteable (paid software)
Merge videos like an expert
Biteable’s video combiner allows you to quickly merge footage and add transition effects.
From flashy dissolves to smoother slide-ins than Barry White eating ice cream, merging videos has never been easier.
Method is as follows:
- Upload video footage
First, log in to Biteable and create a new video project. Alternatively, click this link to sign up and get started in seconds.
Then select Start with Blank Video on the toolbar to start a new project or select a template. The Biteable Video Editor launches.
To add your first footage, tap the canvas, then tap Add Scene> Upload. Select the video you want to add. Then repeat this process to upload the second video.
- Merge and add transitions
This will merge the footage on the timeline. If you want to add a transition, move the mouse pointer to the area between the video clips on the timeline.
Tap the white arrow that appears and swipe up, swipe left, or select a dreamy crossfade effect.
- Click the Preview button to export the merged video
Immediately export the video and later upgrade to a premium membership to remove the small watermark.
https://biteable.com/tools/merge-videos/
Merge/Combine Xvid Files Online using ClipChamp (paid software)
Step 1. Create an account on Clipchamp
Log into your Clipchamp Create account, or join up without spending a dime to get started.
Step 2. Create a brand new task
Click on Create a Video button withinside the pinnacle proper corner. We provide plenty of codecs and templates to pick from.
Before you choose a layout or a template have a clean concept of ways you need to continue consistent with your requirement. Select an element ratio that fits the pleasant in your video.
Your element ratio can vary primarily based totally upon the platform that you`re aiming to submit the video.
Step 3. Add the motion pictures you need to merge
Now that you`ve created a brand new task at the video merger, click on the Add Media button withinside the left toolbar to import video documents into the empty task.
You can pick to tug and drop motion pictures out of your difficult drive, your phone, dropbox, google drive, or different on line storage. You may even upload inventory photos or Gifs from the inventory button at the left toolbar.
Once you`ve imported your media documents they`ll seem withinside the video merger.
Step 4. Add your motion pictures to the video merger timeline
Select the 2 movies and drag them to the editor`s timeline. After adjusting the clips to their accurate positions a inexperienced spotlight will seem round them
indicating that those documents will drop to the timeline in case you allow pass of your click on. You may also upload extra clips sequentially on your timeline relying at the requirement.
You may want to scroll beyond the clips at the timeline to alter them into areas in case your video receives longer. Your clips at the moment are located at the timeline!
Step 5. Resize and rearrange your motion pictures
We have selected a nine:sixteen ratio however our inventory photos is sixteen:nine ratio. You will want to resize your video photos. Click at the preview display then click on Crop to fill.
Drag the video throughout the display to put the video. Repeat this technique for each motion pictures. Since the motion pictures won’t be withinside the series you need them to be in,
you may have to tug and drop them to the favored series. You can trim the video without a doubt through transferring your mouse over to both give up of a clip and dragging them as consistent with your want.
Step 6. Recheck and export
Often even as enhancing or merging our motion pictures we export in a rush and recognize that we had to trim a segment a tad bit more.
This takes place to maximum folks however does now no longer fear as Clipchamp robotically saves your task and you could re-take a look at the complete video earlier than exporting it.
If you are happy with the merge of the two videos, you can click the export button in the upper right corner of the video editor.
Select the resolution for which you want to export the video file and click Next.
You can also change the aspect ratio to suit the needs of other platforms and repeat the export process.
Merge/Combine Xvid Files Online using Kapwing (unpaid software)
Step 1: Upload the video
First, upload the video to Kapwing’s video merging tool. This free tool is available for iPhone, Android, PC, or tablet in Chrome or Safari browser. Click Upload to add the videos one at a time, or select multiple clips to import them all at once.
Kapwing supports major video file types such as MP4, .FLV, .3PG. To embed a video from the web, just copy and paste the link. You can upload photos and GIFs and combine them with videos.
Think of a video that looks great when spliced together into two consecutive videos. This can be a similar color palette, an event or travel video, or a video of the same person. When
videos are uploaded, the video preview shows how they look combined. Kapwing highlights each scene with a purple box during playback.
Step 2: Place the video /photo in the desired order.
Think about which clips are next to each other and work best, and arrange them accordingly. You can drag clips to rearrange them and delete them when you no longer need them.
In the menu on the left, you can choose the format of the finished video (choose 1: 1 (square)), whether to crop the video (choose Fit to Border), and the length.
The video should be a montage photo Kapwing also has the option to crop the video clip to shorten the required section.
Creators can crop videos and remove sections from the center. To crop a clip, first select it and click Edit to open Kapwing Studio.
Drag both ends of the layer to change the timing of the start and end of the clip, or click the timing and use the arrow keys to make fine adjustments.
Besides trimming, you can look at other edits. To remove a section or add a clip in the center, use the split tool above the timeline or type “s” on your keyboard and use the shortcut.
Next, delete the layers you no longer need, drag the clips to combine them, and display them side by side on the timeline.
creators have more control over the montage by editing the scene in Studio. In Studio, you can add music to your montage,
insert title slides, attach endings, watermark corners, and animate.
Step 3: Save the merged video
When you have finished merging the video into the merged video, click Export Video in the upper right corner. Once the video is processed, you will be taken to the download page.
From here, you can save the video to your device or create a free account with your Google or Facebook login credentials to remove the watermark first.
Also read:
- Updated TXT to SRT 3 Effective Ways to Convert TXT to SRT
- Updated 2024 Approved 100 Workable How to Mask Track with Adobe Premiere Pro
- 2024 Approved VSCO Slow Motion
- New Transform Your Videos Into 90S VHS Nostalgia for Free! Learn Where to Get Overlays and Use Filmoras Built-In Presets. Dive Into the Retro Realm Now
- Updated 2024 Approved Top 10 Mp3 Visualizers Windows, Mac, Android, iPhone & Online
- Updated Which 10 Best Video Editing Online Makers Is Worth Your Attention, In 2024
- New 3 Actionable Ways to Create Countdown Animation for Videos for 2024
- In 2024, Fixing The Slow Playback Issues in DaVinci Resolve
- Updated In 2024, How to Make Strobe Light Text Effect?
- Updated In 2024, Do You Often Feel Fascinated to Try Hands at Anime Character Design to Spark up Your Editing Skills, or Just for a Fun-Filled Activity? Stay Here for the Best Inspirations You Can Ever Get
- New In 2024, How To Fade Audio In Kinemaster
- How to Remove or Mute Audio in Video with Android Phones?
- New Learn How to Add Dynamic Shake Effects to Your Videos Using Alight Motion. Our Step-by-Step Guide Makes It Easy to Create Cinematic Footage for 2024
- Updated What Is the Top Filmora Slideshow Templates? Experts Choice for 2024
- Updated In 2024, How to Make Censor Effects with Filmora
- In 2024, This Guide Will Help You to Understand Everything About the Zoho Show. Also, Know What the Zoho Show Slide Is, Why It Is Used and All Related Information
- New Getting Into The Details A Review of Kodak LUTs for 2024
- New 2024 Approved Recording Slow-Motion Videos Is Not More Difficult Using a Smartphone. Learn Everything From How to Record Slow-Motion Video and Edit a Video to Slow Down It
- New In 2024, How to Create an Aesthetic Slideshow Presentation
- 2024 Approved Are You Looking to Make Subscribe Channel Graphics? Here Is a Complete Guide on How to Make One on Your Own
- New Funny Content Ideas for YouTube Videos for 2024
- Looking Into The Top Free Slow Motion Apps (Android & iOS)
- New “Create. Edit. Share. Transform Your Videos with KineMaster! Powerful Tools, Easy to Use.” – a Few Words We Read when We Come up with the Official Web-Site of KineMaster, a Mobile Video Editing Application for 2024
- New Make Transparent Background Video Today
- New Easiest Fix Included! Top 5 Ways to Convert HDR to SDR Videos
- Updated In 2024, Add Neon Effects to Your Dance Videos with the Help of Wondershare Filmora After Reading This Article. It Will Give a More Thrilling and Exciting Appearance
- Updated In 2024, 15 Best Video Editing Courses Online with Certificate Free $ Paid
- Updated In 2024, TXT to SRT 3 Effective Ways to Convert TXT to SRT
- New How to Make Coin Magic With Filmora
- Updated 2024 Approved How To Synchronize Your Audio And Videos Properly?
- New Converting Files Is Easy with the Right Tools, and Likewise, GIF to JPG Conversion Is. Choose the Best Tool and Get the Expected Results Within the Blink of an Eye for 2024
- Ways to Find Free Online Slideshow Maker with No Watermark
- Updated 10+ Best Unlimited FCPX Slideshow Templates
- Updated Do You Need to Make Your Video More Immersive? You Can Make It 60 FPS to Achieve That. And Here Are the 5 Best Tools that You Can Use
- Updated If You Are Looking for an Open-Source, Cross-Platform Video Editor, Shotcut Is a Great Choice for 2024 But Is It Truly the Best Video Editor or Is There a Better Alternative Available?
- 2024 Approved Are You Looking to Freeze-Frame in FCP? If Yes, Read One, as Here Is a Guide About How to Freeze-Frame in Final Cut Pro (FCP) with Ease
- New 2024 Approved Best Tips for Camtasia Freeze-Frame
- New 2024 Approved OBS Studio Is a Free and Open-Source App for Screen-Casting and Live Streaming
- Updated Looking for the Simple Steps to Add a Filter to Your Video in Premiere Pro? Here Are the Complete Steps Along with the List of Free Premiere Filter Presets to Use
- 2024 Approved You May Want to Change the Speed of Certain Portions of Your Video. This Article Enlightens You on How to Splice and Speed up the Video in Simple Ways
- It Is Crucial to Introduce Your Kids to the Different Colors and Practice the Color Matching Game. So, Here Are the Various Factors Related to Color Matching for Your Child with a Tool to Help You in It Ideally for 2024
- How to Turn On/Off Motion Blur in Fortnite? Is It Good for Fortnite?
- Updated 2024 Approved Using the Best Templates to Create Slow Motion Videos on CapCut
- New How to Loop a Video in PowerPoint
- New How to Add Green Screen in OBS
- New 2024 Approved Green Screen YouTube Videos
- In 2024, How to Unlock iPhone 13? | Dr.fone
- Read This Guide to Find a Reliable Alternative to Fake GPS On Oppo A78 | Dr.fone
- In 2024, How To Delete iCloud Account Remove Your Apple ID Permanently On Apple iPhone 12 Pro Max
- 3 Ways to Change Location on Facebook Marketplace for Oppo A58 4G | Dr.fone
- Vivo V29 Camera Not Working Unexpected Error? Fix It Now | Dr.fone
- How To Reset iPhone 15 Pro Max? | Dr.fone
- Here are Some of the Best Pokemon Discord Servers to Join On Honor Magic 5 | Dr.fone
- 10 Easy-to-Use FRP Bypass Tools for Unlocking Google Accounts On Honor X50i+
- Easy steps to recover deleted messages from Honor Play 8T
- 3 Solutions to Find Your Nokia C12 Current Location of a Mobile Number | Dr.fone
- How To Remove Screen Lock PIN On Realme 12+ 5G Like A Pro 5 Easy Ways
- In 2024, iPogo will be the new iSpoofer On Realme GT 3? | Dr.fone
- Title: New Top 10 Fun Discord Bots You Need for 2024
- Author: Morgan
- Created at : 2024-04-24 01:03:52
- Updated at : 2024-04-25 01:03:52
- Link: https://ai-video-editing.techidaily.com/new-top-10-fun-discord-bots-you-need-for-2024/
- License: This work is licensed under CC BY-NC-SA 4.0.
