
:max_bytes(150000):strip_icc():format(webp)/GettyImages-14050070541-0fc96b82fdc54287bf3bbce3ba323342.jpg)
New Top Animated Title Makers for 2024
Top Animated Title Makers
You know that your video needs a title, but rather than just type in some bland text to introduce the video, you can create an animated title page that is far more attractive. Animated titles make a video more attractive and when done correctly, they can even guarantee that your target audience will stick around long enough to watch the entire video. They can also be very useful for introducing the content of the video.
But to make an effective animated title, you need a tool that is designed to do just that. In this article, we look at some of the top animated title makers that you can use to create the perfect animated title for your video.
Part 1. Animated Title Maker Online
If you don’t want to install software on your computer to create the animated title, the following are the top online tools to choose from;
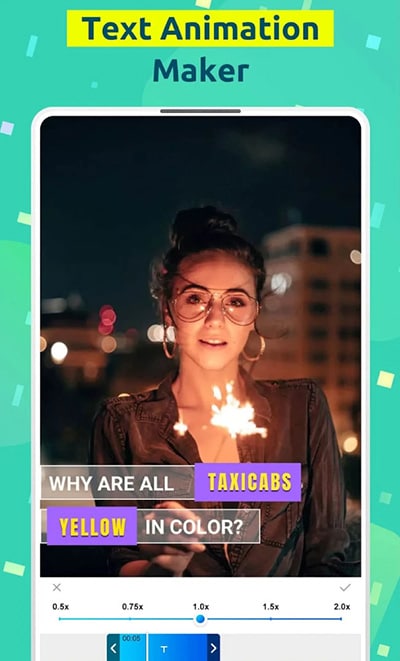
Animaker
Link: https://www.animaker.com/text-animation-maker
Rating: 4.5/5
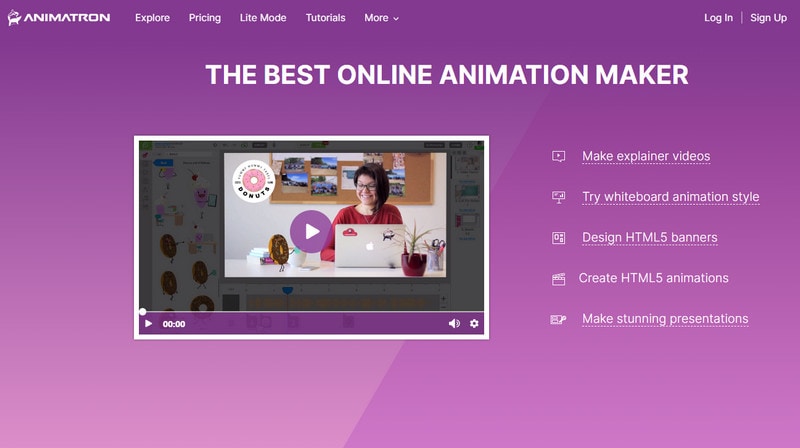
Animaker is an online tool that is specifically designed to help you create text animations that you can then add to your video project. Available online on all browsers, Animaker has a simple user interface that makes it easy to create text animations in a matter of minutes. It is so easy to use that even the average beginner can create stunning text animations.
If you don’t want to create the animations from scratch, Animaker has numerous pre-designed templates for you to choose from that you can then just edit to fit your design. It also has a lot of customizable infographics that you can repurpose.

Animatron Studio
Link: https://www.animatron.com/studio
Rating: 4.5/5
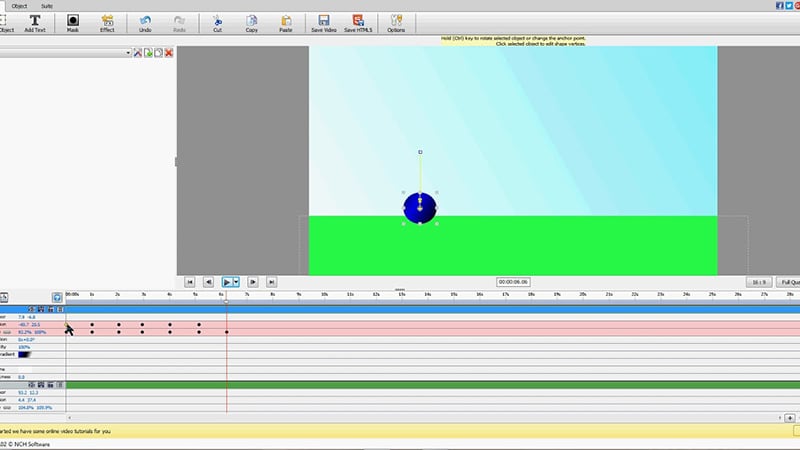
The Animatron Studio is a one-stop solution for generating all types of animated texts. You can use it to create the perfect animated title for your video, but its numerous features also mean that it is one of the best ways to create attention-grabbing animated banner ads that can be posted on various ad sites,
It has a wealth of resources that you can use to create the title including more than 500,000 royalty-free images, videos, and audio to include in your project. If you don’t want to build the animated content from the ground up, you can select from the 200 pre-animated sets that Animatron Studio provides.
Kapwing Title Maker
Link: https://www.kapwing.com/animated-text-video-maker
Rating: 4.5/5
If your goal is to do more than just create an animated title for your video, Kapwing is a good solution. It is a complete online video editor that can also be used to create animated titles. As such, you can expect Kapwing to have more advanced features that allow you to customize the animated title in various ways.
For instance, it has a huge selection of animations that you can apply to the text. But you also get the option to upload your own animations, colors, and fonts. But please note that the free version of Kapwing will add a watermark to the video.

Biteable Animated Text Maker
Link: https://biteable.com/animated/text/
Rating: 4.5/5
Biteable is one of the most popular solutions that you can use to create all kinds of animated texts. It is simple enough to use that it is useful to both professionals and amateur video creators. It has numerous useful features including custom scenes, foundations, backgrounds, and characters all of which can work together to create the perfect animated title.
One of the main benefits of choosing Biteable is that you can share the videos you edit directly on social media without having to download the video.

Flexclip Video Maker
Link: https://www.flexclip.com/editor/
Rating: 4.5/5
Flexclip is another very easy-to-use and easily accessible solution to create animated texts for videos. Rather than create the texts from scratch, Flexclip allows you to create stunning animated texts just by selecting several parameters.
There are also a lot of pre-made designer text templates that are fully customizable. All you have to do is select one of the templates, and change the text, font, and any images to make it unique to you and your video.

Part 2. Animated Title Maker for Computer
Online tools can be useful, especially since they are more easily accessible. But if you want additional features and more ways to customize your animated title, the following desktop solutions may be more applicable to you;
Filmora
Rating: 4.5/5
Wondershare Filmora is a complete suite of video editing tools that can also come in handy when creating animated titles for videos. It is a very simple video editor with a simple user interface, making it an ideal solution even for beginner users. Adding a title to your video is easy and you get to choose from more than 200 different animations that you can apply to bring the text to life.
Filmora is also very useful because it comes with advanced editing features for the professional editor. You can use it to edit all aspects of the video including the clips and even any audio that may be on the project.

Adobe Animate
Rating: 4.5/5
Adobe Animate is a great option to create various animations for your video project, including animated texts. Used by animators to create 2D animated content, Adobe Animate has a lot of features designed to facilitate this kind of animation and is, therefore, one of the go-to solutions for designers looking to create illustrations like logos and infographics.
But like other Adobe programs, Adobe Animate is not very easy to use and the beginner may find that it takes quite a long time to figure out how it works. But once you figure it out, the 800+ web fonts can make it very easy for you to customize your animated title in various ways.

Express Animate
Rating: 4.5/5
Express Animate is a completely free program that you can download on your computer. It is a complete video editor which means that you can use it to animate text and characters, but it is also a great way to edit other aspects of the video including the audio tracks and adding digital effects.
With a simple user interface, Express Animate allows users to create 2D animations that can be used to create unique videos. It is also a good way to create GIFs and memes.
Movavi Video Editor
Rating: 4.5/5
Movavi Video Editor is another complete suite of editing tools that can also come in handy when you want to create an animated title for your video. Designed for both professionals and beginners, this video has all the advanced features you will need to edit all aspects of your video, including a built-in audio editor.
When it comes to animation, Movavi has a lot of effects and transitions as well as pre-made title templates to choose from. Once you have selected the title, you can easily customize the font and color to fit into your project.

Windows Movie Maker
Rating: 4.5/5
For PC users Windows Movie Maker is a simple to use and free way to edit videos. Included with the Windows OS, you likely don’t need to install any software to use and even though it is a free solution, Windows Movie Maker does have the necessary features to create and add animated titles to any video.
It comes with numerous effects, transitions, and templates to choose from when animating text. And it can also be used to edit videos in other ways including trimming and merging clips.

Part 3. Animated Title Maker Apps
If you are editing your videos on your mobile device, the following are the top animated title-making apps to choose from;
Tomo
Rating: 4.5/5
Link: https://m.apkpure.com/tomo-animate-text-in-video/com.entzeners.app.tomo
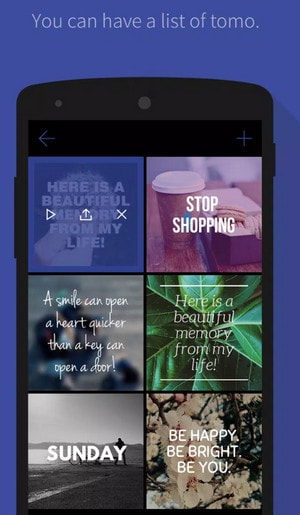
Tomo is one of the best apps that you can use to animate text in a video. It has robust features that allow you to easily add text to the video and then animate the text using various transitions and effects. Once the edits are complete, Tomo allows you to share the completed video directly on social media apps like Instagram and Twitter.
Adobe Spark
Rating: 4.5/5
Link:https://apps.apple.com/us/app/adobe-spark-post-design-maker/id1051937863
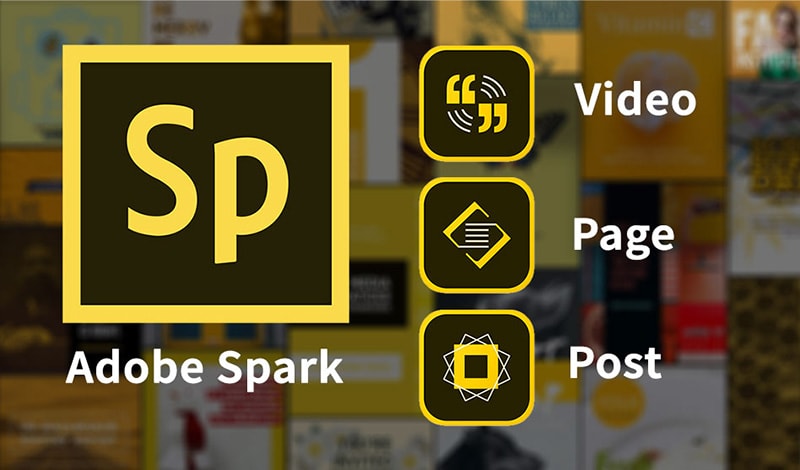
Available for both Android and iOS devices, Adobe Spark is a video editing tool that has numerous tools to add and edit texts on videos. You can use the professionally designed templates that you have access to when using Adobe Spark to create stunning animation titles. And since it easily integrates with other apps on the device, sharing the videos is very easy.
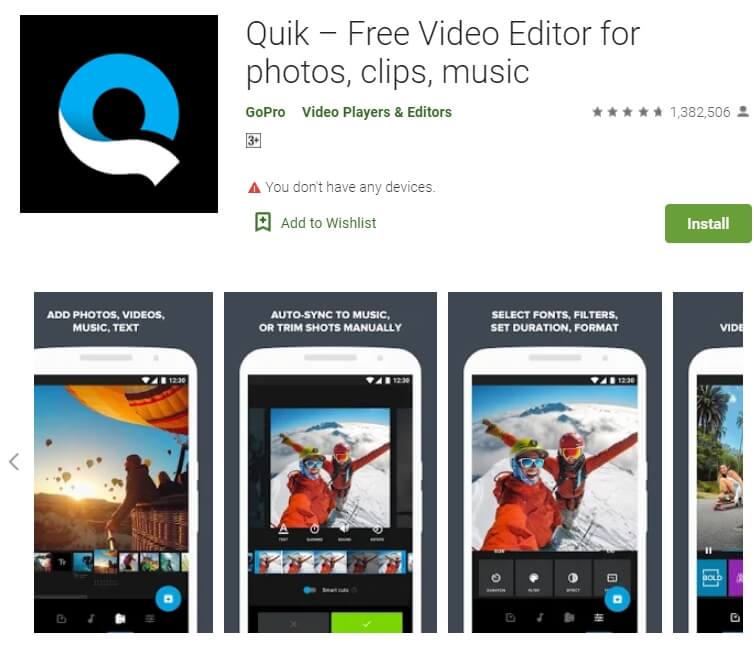
Quik
Rating: 4.5/5
Link: https://play.google.com/store/apps/details?id=com.gopro.smarty&hl=en&gl=US
Quik is an app that is dedicated to text animations and therefore one of the best solutions when you want to add and edit texts on videos. It is available for both iOS and Android and although the free version of the app is slightly limited, its basic editing features are still better than what you find on other more expensive solutions.
Hyper-type Animated Text Videos
Rating: 4.5/5
Link: https://itunes.apple.com/us/app/hype-type-animated-text-videos
This app gives you two options when it comes to animating the text on your video; auto-motion and typography. It focuses on just adding and editing text on a video and as such may not have any of the other video editing features you will find on some of the other apps. But if your goal is to create an interactive animated video title, Hyper-type Animated Text Videos is a great solution.
Vimeo
Rating: 4.5/5
Link: https://play.google.com/store/apps/details?id=com.vimeo.android.videoapp&hl=en&gl=US
Also available for both iOS and Android devices, Vimeo can also be a handy solution for the creation and editing of animated titles for videos. It has a lot of features to edit not just the text in videos, but also all other elements including audio. You even get a wide selection of royalty-free music that you can add to the video and motion stickers to make your title stand out even more. But the free version of Vimeo will add a watermark to the video.

Free Download For Win 7 or later(64-bit)
Free Download For macOS 10.14 or later
Looking for the Best Way to Create Stunning Video Animations? Here, We Look at some of the Best Animated Video Maker Solutions to Use
Animations can be a great way to get your work to stand out and the best animated video maker can help you get this effect very easily. Here, we will be helping you find the best way to create animated videos for your particular project.
It is important to point out that there are very many animation programs in the market and choosing the best one will depend on your needs, your style, the feature and tools you need, the cost of the program, and even the export options that each tool gives you.
Before we look at the best ways to create animated videos, let’s start by examining why you would need to use an animated video maker in the first place.
When to Use an Animated Video Maker
There are several reasons why you would want to create an animated video, rather than use traditional video solutions. The following are the most important from a digital marketing standpoint;
Improve Conversion and Sales
Animated videos are engaging enough to improve your conversion and sales. Studies have shown that an animated video can increase both conversion and sales by up to 80%. It may therefore be a good idea to use an animated explainer video to show your potential customers how to purchase a product or service on your website.
Increase Brand Awareness
Because they can be very entertaining and engaging, animated videos can also be a great way to increase brand awareness. And since they can be created very easily and cheaply, they can be a good way to reach potential customers.
Generate Online Leads
Because of the engaging nature of animated videos, you can use them to introduce yourself to potential customers and generate online leads. They have a very high conversion rate, as we have seen before, making them one of the best ways to reach people who would otherwise have never heard of you and your brand.
Explain Complex Processes
It can be very difficult to try to explain very complex ideas such as the mechanical aspect of a certain tool using words. But a well-crafted animated video gives you the chance to explain complex ideas in a fun and engaging way, making it easier for your customers to understand and engage with your brand.
Best Animated Video Makers
The following are the best animated video makers in the market to choose from;
1. Filmora
Created by Wondershare, one of the most popular software companies in the world, you can be certain that Filmora will deliver one of the best video creation and animation experiences you can find anywhere. It is a very easy-to-use, very effective way of creating animated videos that will intrigue your audiences and engage with them in ways traditional video cannot.

To accomplish this, Filmora has numerous features and effects that are not just meant to help you create the perfect video, but also make the process simple, allowing you to create stunning videos in just a few minutes.
For Win 7 or later (64-bit)
For macOS 10.12 or later
The following are some of the key features you can expect when using Filmora;
- Motion Tracking is a feature that you can use to attach an element to a moving object. The auto motion tracking feature ensures that the elements you attach move smoothly as the object moves.
- You can also use Filmora to customize an animation by adding keyframes to change various aspects including the positions, scale, rotations, and even the opacity of a clip.
- The color match feature allows you to match a selected clip’s color to a separate clip from another clip.
- The auto-ducking feature allows you to choose to fade away background music and make foreground narration or dialogue clearer.
- You can also add plain text to any section of the video
- The advanced title editing feature allows you to change the position, rotation, and scale of the video’s title while it is playing.
- You can also create and edit keyboard shortcut keys that you can then use to edit the video more easily.
2. Animaker
Price: Free with limited features. Paid plans from $10 a month
Best For: marketers, presenters, and freelancers
Link: https://www.animaker.com/
If you are looking for a simple way to create interactive presentations and videos, Animaker is a simple solution to choose. It is a particularly simple solution to use as it comes with numerous ways to create and edit the video, including a huge library of templates and elements that include illustrations, gestures, and characters.

The fact that you don’t have to create these animations from scratch makes it an ideal solution even if you have never used this kind of software before. It also comes with more than 200 music tracks and sound effects that you can add to the video.
Pros
- It can be used to create all kinds of animations for all kinds of use including business and personal uses
- It supports the creation of a variety of video styles
- It can be used to create whiteboard videos
- It has numerous animation options to choose from including illustrations, characters, and gestures
- It comes with a free plan
Cons
- You can only create 5 watermarked videos with the free plan
- It is only ideal for creating videos and not animated images
3. Visme
Price: Free plan with limited features. Paid plans start from $15 per month
Best For: Marketers, corporate teams, trainers, teachers, and personal use
Link: https://www.visme.co/
Visme is a cloud-based solution that can be used to create all sorts of animated media including animated videos, animated images, presentations, ads, banners, and more. It has numerous interactive features that are aimed at allowing you to create the perfect designs in a matter of minutes.

Since it is a cloud-based solution, you don’t need to download any software on your computer to use it. it also comes with thousands of premade templates and lots of stock-free images and videos that you can use to create your design.
Pros
- It is an all-in-one solution to create both animated images and videos
- It is a simple soliton even for beginner users
- You get thousands of different resources that can be used to create unique designs limited only by your imagination
- You don’t need to download any software to use it
Cons
- The numerous resources can make it a confusing solution for beginners
- The free plan is very limited
4. Adobe Animate
Price: Starts at $20.99 per month
Best For: Cartoon makers, YouTubers, and game designers
Link: https://www.adobe.com/africa/products/animate.html
Adobe Animate is an improvement on Adobe Flash Professional in every way. It is one of the best ways to create interactive graphics a 2D animations that can then be added to whatever project you are working on.
You can use the numerous tools in Adobe Animate to animate various aspects of your design including characters, shapes, avatars, and other assets. The animations can then be exported in various formats including Flash, HTML5, WebGL, SVG, and more.
Pros
- You have a lot of options when it comes to exporting and sharing the animations you create.
- It allows you to animate elements in numerous ways
- It has an extensive library of tools that can be used to create unique animations
Cons
- Like most Adobe tools, it can be very difficult to use, especially for beginner users
- There is no free trial version
5. Crello
Price: Free plan with limited features. Paid plan starts at $10 a month
Best For: Marketers, freelancers, and business owners
Link: https://create.vista.com/
Also known as VistaCreate, this is a simple solution for creating both animated videos and images. It makes this animation process quick and easy by providing you with a veritable library of templates and thousands of pre-animated characters and objects. It is therefore one of the best solutions to choose even if you don’t have the necessary technical skills to create a credible animated video.

One of the things VistaCreate can do so well is combining videos and animated GIFs with images to create short animated videos that you can share on social media.
Pros
- Create animated videos and export them in various formats, ideal for all devices
- It is one of the best ways to create animated social media posts
- It has a mobile app that allows you to create designs on your device
Cons
- The free version is very limited in creative assets and storage capacity
6. Biteable
Price: Free plan with limited features: Paid plans start from $49 a month
Best For: Marketers, Educators, and Trainers
Link: https://biteable.com/
Biteable is the best option when you want to create simple small animated videos that can be used as Ads or videos that you post to social media. It has numerous premade templates that make creating these simple videos a matter of simply editing one of the templates.
If you feel uninspired, it has thousands of stock footage clips and scenes that you can put together to create a complete. It also has collaborative features that can allow a team to work on the same project.
Pros
- It can be used to make all kinds of marketing videos
- It is an ideal choice for explainer and demo videos
- It provides a wealth of resources to create your videos including stock footage
- It has a free plan
Cons
- The free plan places a watermark on the video
- You can only export the videos in MP4 format.
- At $49 a month, it is a very expensive option.
7. PixTeller
Price: Basic free plan with no animation features. Paid plans start at $12 per month
Best For: Freelancers, marketers, and bloggers
Link: https://pixteller.com/
PixTeller is a great way to animate videos and images for both professional and personal use. if you don’t want the complications that come with a dedicated video editing software, PixTeller is a good option to consider as it is very simple to use.

You can use it to create simple animated short videos by setting frame-by-frame motions and then editing the attributes in each frame. Some of the attributes that you can use PixTeller to edit include colors, opacity, rotation, and more.
Pros
- Editing frame by frame on a timeline makes video creation very easy
- The free version has various editing features
- It can be used to create both animated videos and images
Cons
- It lacks the advanced editing features that you will find on some of the other options on this list
- You can only download the videos in MP4 format
- The free plan doesn’t have animation features
8. Blender
Price: Free
Best For: Scientists, Students, Engineers, Animators, and Artists
Link: https://www.blender.org/download/
If you want to create stunning animations for free, Blender is the open-source software to use. This free program allows users to use the command line to create, render and model 3D animations. It can be used on all platforms including Linux, Windows, and Mac.

Even though it is free, it comes with numerous features including the ability to draw and edit in 3D mode, advanced video editing in VFX, motion tracking, masking, and compositing. But because it uses command-line programming, it may not be an ideal solution for most users.
Pros
- It is a completely free solution
- It has pretty advanced animation and rendering features to create all kinds of videos
Cons
- It may not be the most ideal solution for beginner users even though there are hours of video tutorials to refer to.
Related FAQs
1. How Do I Turn my Video into Animation?
The best way to turn a video into animation is to use one of the animation software solutions that we have outlined above. Each tool has its features and you should choose one that has the necessary features to fit into your video project.
2. How Do I Make an Animated Video for Free?
The only way to make an animated video is to use animation software. And although most programs are not free, there are some open-source solutions like Blender that may be able to help you make an animated video for free.
3. How Do You Animate in PowerPoint?
PowerPoint allows you to add animation to objects and text. To do that, select the object or text that you want to animate and select “Animations.” From the options presented, select the animation that you would like to use and it will be added to the selected object or text. If you would like to add an effect, choose “Effect Options.”
For macOS 10.12 or later
The following are some of the key features you can expect when using Filmora;
- Motion Tracking is a feature that you can use to attach an element to a moving object. The auto motion tracking feature ensures that the elements you attach move smoothly as the object moves.
- You can also use Filmora to customize an animation by adding keyframes to change various aspects including the positions, scale, rotations, and even the opacity of a clip.
- The color match feature allows you to match a selected clip’s color to a separate clip from another clip.
- The auto-ducking feature allows you to choose to fade away background music and make foreground narration or dialogue clearer.
- You can also add plain text to any section of the video
- The advanced title editing feature allows you to change the position, rotation, and scale of the video’s title while it is playing.
- You can also create and edit keyboard shortcut keys that you can then use to edit the video more easily.
2. Animaker
Price: Free with limited features. Paid plans from $10 a month
Best For: marketers, presenters, and freelancers
Link: https://www.animaker.com/
If you are looking for a simple way to create interactive presentations and videos, Animaker is a simple solution to choose. It is a particularly simple solution to use as it comes with numerous ways to create and edit the video, including a huge library of templates and elements that include illustrations, gestures, and characters.
The fact that you don’t have to create these animations from scratch makes it an ideal solution even if you have never used this kind of software before. It also comes with more than 200 music tracks and sound effects that you can add to the video.
Pros
- It can be used to create all kinds of animations for all kinds of use including business and personal uses
- It supports the creation of a variety of video styles
- It can be used to create whiteboard videos
- It has numerous animation options to choose from including illustrations, characters, and gestures
- It comes with a free plan
Cons
- You can only create 5 watermarked videos with the free plan
- It is only ideal for creating videos and not animated images
3. Visme
Price: Free plan with limited features. Paid plans start from $15 per month
Best For: Marketers, corporate teams, trainers, teachers, and personal use
Link: https://www.visme.co/
Visme is a cloud-based solution that can be used to create all sorts of animated media including animated videos, animated images, presentations, ads, banners, and more. It has numerous interactive features that are aimed at allowing you to create the perfect designs in a matter of minutes.
Since it is a cloud-based solution, you don’t need to download any software on your computer to use it. it also comes with thousands of premade templates and lots of stock-free images and videos that you can use to create your design.
Pros
- It is an all-in-one solution to create both animated images and videos
- It is a simple soliton even for beginner users
- You get thousands of different resources that can be used to create unique designs limited only by your imagination
- You don’t need to download any software to use it
Cons
- The numerous resources can make it a confusing solution for beginners
- The free plan is very limited
4. Adobe Animate
Price: Starts at $20.99 per month
Best For: Cartoon makers, YouTubers, and game designers
Link: https://www.adobe.com/africa/products/animate.html
Adobe Animate is an improvement on Adobe Flash Professional in every way. It is one of the best ways to create interactive graphics a 2D animations that can then be added to whatever project you are working on.
You can use the numerous tools in Adobe Animate to animate various aspects of your design including characters, shapes, avatars, and other assets. The animations can then be exported in various formats including Flash, HTML5, WebGL, SVG, and more.
Pros
- You have a lot of options when it comes to exporting and sharing the animations you create.
- It allows you to animate elements in numerous ways
- It has an extensive library of tools that can be used to create unique animations
Cons
- Like most Adobe tools, it can be very difficult to use, especially for beginner users
- There is no free trial version
5. Crello
Price: Free plan with limited features. Paid plan starts at $10 a month
Best For: Marketers, freelancers, and business owners
Link: https://create.vista.com/
Also known as VistaCreate, this is a simple solution for creating both animated videos and images. It makes this animation process quick and easy by providing you with a veritable library of templates and thousands of pre-animated characters and objects. It is therefore one of the best solutions to choose even if you don’t have the necessary technical skills to create a credible animated video.
One of the things VistaCreate can do so well is combining videos and animated GIFs with images to create short animated videos that you can share on social media.
Pros
- Create animated videos and export them in various formats, ideal for all devices
- It is one of the best ways to create animated social media posts
- It has a mobile app that allows you to create designs on your device
Cons
- The free version is very limited in creative assets and storage capacity
6. Biteable
Price: Free plan with limited features: Paid plans start from $49 a month
Best For: Marketers, Educators, and Trainers
Link: https://biteable.com/
Biteable is the best option when you want to create simple small animated videos that can be used as Ads or videos that you post to social media. It has numerous premade templates that make creating these simple videos a matter of simply editing one of the templates.
If you feel uninspired, it has thousands of stock footage clips and scenes that you can put together to create a complete. It also has collaborative features that can allow a team to work on the same project.
Pros
- It can be used to make all kinds of marketing videos
- It is an ideal choice for explainer and demo videos
- It provides a wealth of resources to create your videos including stock footage
- It has a free plan
Cons
- The free plan places a watermark on the video
- You can only export the videos in MP4 format.
- At $49 a month, it is a very expensive option.
7. PixTeller
Price: Basic free plan with no animation features. Paid plans start at $12 per month
Best For: Freelancers, marketers, and bloggers
Link: https://pixteller.com/
PixTeller is a great way to animate videos and images for both professional and personal use. if you don’t want the complications that come with a dedicated video editing software, PixTeller is a good option to consider as it is very simple to use.
You can use it to create simple animated short videos by setting frame-by-frame motions and then editing the attributes in each frame. Some of the attributes that you can use PixTeller to edit include colors, opacity, rotation, and more.
Pros
- Editing frame by frame on a timeline makes video creation very easy
- The free version has various editing features
- It can be used to create both animated videos and images
Cons
- It lacks the advanced editing features that you will find on some of the other options on this list
- You can only download the videos in MP4 format
- The free plan doesn’t have animation features
8. Blender
Price: Free
Best For: Scientists, Students, Engineers, Animators, and Artists
Link: https://www.blender.org/download/
If you want to create stunning animations for free, Blender is the open-source software to use. This free program allows users to use the command line to create, render and model 3D animations. It can be used on all platforms including Linux, Windows, and Mac.
Even though it is free, it comes with numerous features including the ability to draw and edit in 3D mode, advanced video editing in VFX, motion tracking, masking, and compositing. But because it uses command-line programming, it may not be an ideal solution for most users.
Pros
- It is a completely free solution
- It has pretty advanced animation and rendering features to create all kinds of videos
Cons
- It may not be the most ideal solution for beginner users even though there are hours of video tutorials to refer to.
Related FAQs
1. How Do I Turn my Video into Animation?
The best way to turn a video into animation is to use one of the animation software solutions that we have outlined above. Each tool has its features and you should choose one that has the necessary features to fit into your video project.
2. How Do I Make an Animated Video for Free?
The only way to make an animated video is to use animation software. And although most programs are not free, there are some open-source solutions like Blender that may be able to help you make an animated video for free.
3. How Do You Animate in PowerPoint?
PowerPoint allows you to add animation to objects and text. To do that, select the object or text that you want to animate and select “Animations.” From the options presented, select the animation that you would like to use and it will be added to the selected object or text. If you would like to add an effect, choose “Effect Options.”
The Best Cinematic LUTs in The Market
With the development of new editing tools and apps, we all want our content to look different and better from others. Moreover, increasing social media usage has also made people more concerned about their photos and videos. However, besides editing tools, you can add layers of adjustments and apply LUTs, filters, and more to your content.
With different LUTs, such as cinematic LUTs, you can give your digital content a professional look. These LUTs also give a dramatic feel and add depth to your photos and videos.
Part 1: What are Cinematic LUTs Used for?
Cinematic LUTs have several uses, including creating a specific mood or look. They can be used to make the footage look vintage or retro or to create a dark, moody atmosphere or a bright, colorful tone. Furthermore, these cinematic LUTs can match the footage’s colors and tones so they all look the same. They can also be used to contrast and color your photos and images.
It can also make your media files look like they were filmed on a real film camera, giving them a more natural, organic feel. These are useful tools for making videos or images look a certain way. They can improve the color quality and make the story more interesting.
Empower your videos with a new mood using different LUTs. Filmora now offers 100+ top-quality 3D LUTs cover a broad range of scenarios. Transform your videos with Filmora’s powerful 3D LUTs.
Apply LUT on Videos Apply LUT on Videos Learn More


Part 2: Top Cinematic LUT Pack to Consider for Your Media
Many LUTs give a cinematic feel when applied to your digital content. These LUTs add depth and emotion to your images and videos. There are many cinematic LUT packs that you can download and use them.
1. Cinematic LUTs Pack 2023
Many free cinematic LUTs are available to download, but this one differs. The Cinematic LUTs Pack 2023 has various Hollywood-style color grading options available. This pack has different color correction layers that give you a modern cinematic feel. Moreover, you can darken the highlights to enhance the subject in your content.

2. Cinematic LUT
Another LUT that gives your content the cinematic feel you want is this exceptional collection. This LUT fades the colors in your photos and videos to give a rusty look. It gives your media files a West Hollywood-style look to give them a cinematic look. Furthermore, it also enhances certain colors to improve the color grading in your video footage or images.

3. 20 FREE Travel LUTs for Cinematic Looks
It is a great LUT pack if you want multiple options to add cinematic-style LUTs to your digital media content. You get 20 different cinematic LUTs for your travel photos and videos. With the right amount of tan, shadows, highlights, and grains, your videos will look like they are from a movie clip. It improves your travel videos and photos by giving them movie-like color adjustments.

4. Sandstorm
As the name suggests, it gives your media files the golden cinematic shade. It is a LUT, which highlights golden, orange, and brown colors to add a warm tone to your files. This LUT will give your pictures and videos a warm cinematic feel. You can use your photos and videos to apply this adjustment layer to make them look like Hollywood content.

5. Vintage Vibe
Last but not least, Vintage Vibe is a great LUT that adds depth to your photos and videos. It creates an ambiance of an old-style cinematic touch to your digital files. You can improve your story by adding emotion and depth to your content with this LUT. Moreover, you can add this vintage color correction layer to give your content a unique and creative style.

Part 3: 3D LUT Creator: An Effective Cinematic LUTs Software
3D LUT Creator is a powerful tool packed with amazing color correction features for photo and video editing. This tool offers different cinematic LUTs to use and apply to your content. Moreover, users can create their LUTs according to their style and preference. Another impressive feature is its plugin support for different editing software.
Furthermore, the tool also comes with seven color gradients, a color wheel option, and A/B and C/L grids. These options allow you to change and distribute colors to their media files. Additionally, its AI retouching plugin can retouch and beautify your image. With all these features, you can create one of the best cinematic LUTs without hassle.

Part 4: Wondershare Filmora: A Good Platform to Consume Cinematic LUTs
Wondershare Filmora is a great professional editing software. You can easily achieve a cinematic look for your videos with its color grading upgrades and LUT intensity adjustments. Furthermore, the color wheel feature allows you to make professional-looking color grading adjustments. It even offers a cinematic LUTs download option to the users.
Add LUTs on Video For Win 7 or later(64-bit)
Add LUTs on Video For macOS 10.14 or later
Additionally, it has a sharpening tool that sharpens your digital media files. With its new update, you can have many editing options, including over 200 LUTs and other color correction features. Besides this, you have so many different color grading options that you can choose from the LUTs library.

Key Features of Wondershare Filmora To Keep Notice of
- It has a unique feature that lets you denoise any background sounds or voices in your video file. This useful feature removes background noise distortion from a video file.
- Furthermore, silent detection is another unique feature that you can use. It analyzes your video content and removes unnecessary pauses. You can automatically remove awkward pauses and silent moments from your video to make it look professional.
- Additionally, you can access and use its free stock media library. This library has over 10 billion free stock media files you can use in your content.
Conclusion
In conclusion, cinematic LUTs have become essential. With multiple options available in the market, selecting the best cinematic LUT pack can be difficult. However, 3D LUT Creator is a great tool offering plugin options for multiple editing software. In contrast, Wondershare Filmora is an excellent option for creating and consuming cinematic LUTs.
Add LUTs on Video For Win 7 or later(64-bit)
Add LUTs on Video For macOS 10.14 or later
Apply LUT on Videos Apply LUT on Videos Learn More
Part 2: Top Cinematic LUT Pack to Consider for Your Media
Many LUTs give a cinematic feel when applied to your digital content. These LUTs add depth and emotion to your images and videos. There are many cinematic LUT packs that you can download and use them.
1. Cinematic LUTs Pack 2023
Many free cinematic LUTs are available to download, but this one differs. The Cinematic LUTs Pack 2023 has various Hollywood-style color grading options available. This pack has different color correction layers that give you a modern cinematic feel. Moreover, you can darken the highlights to enhance the subject in your content.
2. Cinematic LUT
Another LUT that gives your content the cinematic feel you want is this exceptional collection. This LUT fades the colors in your photos and videos to give a rusty look. It gives your media files a West Hollywood-style look to give them a cinematic look. Furthermore, it also enhances certain colors to improve the color grading in your video footage or images.
3. 20 FREE Travel LUTs for Cinematic Looks
It is a great LUT pack if you want multiple options to add cinematic-style LUTs to your digital media content. You get 20 different cinematic LUTs for your travel photos and videos. With the right amount of tan, shadows, highlights, and grains, your videos will look like they are from a movie clip. It improves your travel videos and photos by giving them movie-like color adjustments.
4. Sandstorm
As the name suggests, it gives your media files the golden cinematic shade. It is a LUT, which highlights golden, orange, and brown colors to add a warm tone to your files. This LUT will give your pictures and videos a warm cinematic feel. You can use your photos and videos to apply this adjustment layer to make them look like Hollywood content.
5. Vintage Vibe
Last but not least, Vintage Vibe is a great LUT that adds depth to your photos and videos. It creates an ambiance of an old-style cinematic touch to your digital files. You can improve your story by adding emotion and depth to your content with this LUT. Moreover, you can add this vintage color correction layer to give your content a unique and creative style.
Part 3: 3D LUT Creator: An Effective Cinematic LUTs Software
3D LUT Creator is a powerful tool packed with amazing color correction features for photo and video editing. This tool offers different cinematic LUTs to use and apply to your content. Moreover, users can create their LUTs according to their style and preference. Another impressive feature is its plugin support for different editing software.
Furthermore, the tool also comes with seven color gradients, a color wheel option, and A/B and C/L grids. These options allow you to change and distribute colors to their media files. Additionally, its AI retouching plugin can retouch and beautify your image. With all these features, you can create one of the best cinematic LUTs without hassle.
Part 4: Wondershare Filmora: A Good Platform to Consume Cinematic LUTs
Wondershare Filmora is a great professional editing software. You can easily achieve a cinematic look for your videos with its color grading upgrades and LUT intensity adjustments. Furthermore, the color wheel feature allows you to make professional-looking color grading adjustments. It even offers a cinematic LUTs download option to the users.
Add LUTs on Video For Win 7 or later(64-bit)
Add LUTs on Video For macOS 10.14 or later
Additionally, it has a sharpening tool that sharpens your digital media files. With its new update, you can have many editing options, including over 200 LUTs and other color correction features. Besides this, you have so many different color grading options that you can choose from the LUTs library.
Key Features of Wondershare Filmora To Keep Notice of
- It has a unique feature that lets you denoise any background sounds or voices in your video file. This useful feature removes background noise distortion from a video file.
- Furthermore, silent detection is another unique feature that you can use. It analyzes your video content and removes unnecessary pauses. You can automatically remove awkward pauses and silent moments from your video to make it look professional.
- Additionally, you can access and use its free stock media library. This library has over 10 billion free stock media files you can use in your content.
Conclusion
In conclusion, cinematic LUTs have become essential. With multiple options available in the market, selecting the best cinematic LUT pack can be difficult. However, 3D LUT Creator is a great tool offering plugin options for multiple editing software. In contrast, Wondershare Filmora is an excellent option for creating and consuming cinematic LUTs.
Add LUTs on Video For Win 7 or later(64-bit)
Add LUTs on Video For macOS 10.14 or later
Exploring Tools to Integrate Special Mask Effects Into Your Content. Read the Following Article to Master some Tools Experts in Mask Tracking
Mask tracking refers to editing a specific part of a video without overlapping. Masking helps with creative transitions and background removal with ease. The integration of AI technology in masking tools has made masking more accessible. They help with masking an object or landscape with precision.
In addition, you can correct the colors of a specific part through a motion tracking mask. In this article, we’ll discuss masker tracking using three different software. Two of those software are renowned for their professionalism and precision. We’ll discuss masking in Adobe After Effects , Adobe Premiere Pro , and an alternative.
AI Smart Masking Spice up your video content with the endless possibilities of AI masking functions!
Free Download Free Download Learn More
Part 1: Working Out the Comprehensive Methods to Perform Mask Tracking on Adobe After Effects
Adobe After Effects is a powerful tool for mask tracking and other functions. The interface of this tool tailors your content to your needs with precision. The process of masking is convenient and accessible and provides accurate results. Its advanced masking options, like filling up the mask, add a realistic touch. Before learning about masking in After Effects, let’s discuss some of its features:
- Text Animations: Animating your text in Adobe After Effects is a comprehensive experience. It is because the software has amazing text fonts and animation options. You can also set the appearance settings like opacity, color, and more text. In addition, the software has pre-installed effects and presets to ease the process.
- VFX/Visual Effects: Elevate your images and videos using Adobe’s amazing visual elements. It can eliminate mistakes, and results are so promising that they become invisible. You can use the mask tracking effect to hide and fill objects. In addition, you can turn your transitions into high-resolution 3D or 4D videos.
- Motion Graphics: It moves anything with its motion graphics functionality and advanced keyframing. Along with animating text, the feature allows you to move the logos. You can move a logo on any background from top to bottom or left to right. With its flickering and wiggling effects, make animations without keyframing.
- Rotoscoping: This After Effects function eliminates using green screens in your videos. Using the pen tool, you can merge a different object in a different footage. Afterward, you can polish the mask by resizing and adjusting opacity values.
- Motion Tracking: Elevate the graphics of your videos using the motion tracking feature. This function connects any image with an object’s motion. Therefore, your images become animated and add a creative element to the content. Its cloud collaboration with other software allows users to download assets.
Step-by-Step Procedure for Masking in Adobe After Effects
Now that you know the After Effects masker line tracking feature, let’s move forward. Read the following guide to learn more about masking:
Step 1
After importing your clip into the timeline, select it in the timeline panel. Navigate towards the upper toolbar and select the “Pen Tool” option. Afterward, create a mask around the object that you want to remove.
![]()
Step 2
You’ll see a mask around the object, and the rest of the screen will disappear. Navigate to the timeline panel, expand the video track options, and select “Mask.” Click the “Mask” navigation arrow and select “None.”
![]()
Step 3
Click the “Mask” button and select the “Track Mask” option. A mask tracker window will appear on the right side; expand the “Method” option. Following that, select the type of masking you want, like “Position.” Play the video from beginning to end for motion detection. Afterward, change the “Mask” mode to “Add” to apply masking.
![]()
Step 4
Afterward, change the Mask mode to “Subtract” from the timeline. Now, navigate towards the topmost toolbar and expand the “Window” tab. From the expansion menu, click the “Content-Aware Fill” option.
![]()
Step 5
Move towards the “Mask” option, expand “Mask Path,” and change the values below. Now, go to the right side, increase “Alpha Expansion,” and click “Generate Fill Layer.” Once the mask tracking completes, download your video.
![]()
Part 2: Providing a Detailed Guide on How to Do Mask Tracking with Adobe Premiere Pro
Adobe Premiere Pro is one of the industry’s leading tools for editing videos. It offers a wide range of features and built-in effects to elevate content. The software offers precise editing capabilities for mask tracking and other enhancements. In addition, it has many visual, video, and audio effects and presets to apply. Let’s discuss some key features of this tool that make it worthy of being top:
- Motion Graphics Templates: With its seamless After Effect collaboration, it offers built-in templates. These templates include multiple text, shapes, and graphics. You can also customize these templates as per content relevancy and taste.
- Edit Audio: Premiere Pro has multiple audio editing options to maintain audio quality. The tool allows you to decrease the volume of one track while increasing others. In addition, you can make audio adjustments that fit a sound.
- Color Correction: Enhance the graphical element in your videos using this feature. It offers both color correction and enhancing capabilities. You can employ this color correction if you have overexposed or underexposed videos.
- Movie and Film Editing: A professional editor offers applications in the media industry. The Premiere Pro offers seamless collaboration with all video and audio formats. In addition, it can import files from all sources like DSLRs and more.
- Speech to Text: It doesn’t just limit you to video editing but also offers transcript creation. The software analyzes your footage’s audio and creates transcripts. Afterward, you can use them as subtitles and captions.
Step-by-Step Procedure for Masking in Premiere Pro
After introducing mask tracking in Adobe Premiere Pro, let’s progress further. Continue reading the following guide to gain a deeper understanding of masking:
Step 1
After importing your video in the timeline, select it and navigate towards the toolbar. In the “Edit > Effect” section, select “Lumetri Color” under “Video Effects.” Then, select the mask option under Lumetri colors and set it on the screen.
![]()
Step 2
Then, apply the color correction options on the masked areas.
![]()
Step 3
Select “Mask Path” under the Mask section and play it upon color correcting. This will start the mask tracking throughout the clip. The color corrections will be applied to the masked area throughout the video.
![]()
Part 3: Make Mask Tracking Easy with Wondershare Filmora: Working Out the Details
The above-mentioned mask tracking software is professional but is difficult to comprehend. This software is not compatible in terms of convenience. This was when users needed software with easy access and an editing interface. Wondershare Filmora performs diverse creation and editing tasks with expertise. The software assists in diverse audio, video, and text-editing tasks.
The AI-backed algorithms have made achieving perfection in your editing task seamless. In Filmora’s new V13 upgrade, it has introduced an AI masking feature. This feature offers to mask character or subject and auto-analyzes the selected area. In addition, for manual motion tracking masks, users can also resize the mask brush.
Step-by-Step Guide to AI Masking in Filmora
To understand this mask tracking feature better, we have assembled the steps of it. In the following guide, you will learn about accessing and applying this tool:
Step 1Place Media to the Timeline
Upon entering Filmora, click the “New Project” button and access its editing interface. Go to the Project Media section and click the “Import” button. Afterward, import your file and bring it to the timeline using your cursor.
![]()
Step 2Access and Employ AI Masking
Select the video in the timeline and navigate towards the right-side settings panel. In the “Video” tab, you’ll find the “Mask” section. Under this section, select the “AI Mask” option and scroll down to adjust its settings. Expand the “AI Mask” section, and choose the options you want masking for. Once you see the masked results on the preview screen, adjust the other settings below.
![]()
Step 3Save the Settings and Export
Afterward, click the “Save as custom” button to save these settings as a preset for later use. Further, make other adjustments and click on the “Export” button to finalize.
![]()
Free Download For Win 7 or later(64-bit)
Free Download For macOS 10.14 or later
Additional Editing Features of Wondershare Filmora
Along with masker line tracking, there are other video editing and AI features of Filmora. Keep reading the below section to know more about them:
1. AI Text-to-Video
Turn your words into graphics using this generative AI of Filmora. It transforms your textual directions into videos, along with images and voices. Using this AI will save you the effort of creating or hiring a professional.
2. AI Copilot Editing
Why spend hours exploring Filmora’s interface when you can have your guide? The AI Copilot acts like your personal chatbot assistant. You can converse with it like regular people, and it will show you directions on the feature. In addition, it features buttons to employ a specific effect or function.
3. Screen Recorder
Are you a creator who uploads video tutorials and educational videos? You can use Filmora’s screen recorder to create content in a seamless manner. It offers microphone recording and webcam recording for maximum interactivity. In addition, you can adjust custom screen resolution settings and more.
4. Video Background Remover
Leave the effort of adding a green screen in your background during video creation. Filmora’s AI technology can remove video backgrounds without any flaws. Users can replace the background with solid colors, gradients, and more afterward.
5. Silence Detection
Those long or short pauses during video recording are annoying for your audience. They decline the quality of the video and ultimately decline audience engagement. To remove such pauses, use Filmora silence detection AI to auto-eliminate them.
Free Download For Win 7 or later(64-bit)
Free Download For macOS 10.14 or later
Conclusion
In this article, users have gained insights into top mask tracking software. Along with their applications, the article discussed how to access and apply masking. However, masking in the first two tools can be difficult for some people. Hence, we introduced Wondershare Filmora as an easy desktop alternative. If you want to employ an easy motion tracking mask, use this versatile software.
Also read:
- New Premiere Pro Best Slow Motion Effects To Use
- Updated 2024 Approved This Article Covers a Lot of Information About the Freeze-Frame Effect. It Includes Its Power, Its Usage in Films, and How to Create It in Your Videos Using Filmora. It Will Get You a Super Exciting Cinematic Effect
- New 2024 Approved How to Create Discord Logo GIF
- Make Super Easy Coin Magic With Filmora for 2024
- New Do You Know that You Can Apply Different LUTs and Create Your Own? There Are Many LUT Online and Offline Generators that You Can Use to Create Your LUT for 2024
- In 2024, How to Create Loop Videos Using Filmora
- New Do You Want Your Video Footage to Resemble Kodak Films? You Can Get the Old Kodak Film Look by Searching for Kodak 2383 LUT Free Download on the Internet for 2024
- New In 2024, Best 6 WMV to GIF Converters
- How to Create Sports Intro and Outro for YouTube Video?
- Updated Minecraft Pixel Art A Complete Guide for Die-Hard Fans for 2024
- In 2024, Create Photoshop GIFs with Zero Hustle
- New In 2024, Complete Tutorial on After Effects Countdown Timer Adding
- Updated In 2024, Leveraging the Vectorscope for Better Color Correction in Premiere Pro
- New In 2024, Learn How to Make a Gaming Montage - Guide & Tips
- In 2024, Color Lut in Video -How to Color Grade Your Video
- Updated 2024 Approved How to Create Freeze Frame Clone Effect
- In 2024, | Top GIF to MP4 Converters
- 2024 Approved Do You Use Premiere Pro and Want to Learn How to Change a Videos Frame Rate Using the Tool? Here Are the Steps that You Need to Follow
- In 2024, Leveraging the Vectorscope for Better Color Correction in Premiere Pro
- New In 2024, How to Add Text in Adobe Rush
- Best Free Video Editing Software to Boost Your Content Creation
- Updated 2024 Approved Using the Best Templates to Create Slow Motion Videos on CapCut
- New How to Use LUTS to Color Grade on Your iPhone for 2024
- In 2024, How to Add Text to Video
- New 2024 Approved 8 Top Premiere Pro Slideshow Templates
- New In 2024, How To Create Transparent Background On Picsart
- Updated Hyperlapse VS Timelapse Videos
- Quick Fixes for Why Is My Vivo V27 Black and White | Dr.fone
- How to remove Google FRP Lock on Realme 10T 5G
- How can I get more stardust in pokemon go On OnePlus 11R? | Dr.fone
- Updated In 2024, 15 Iconic Cartoon Characters of All Time
- In 2024, How To Leave a Life360 Group On Oppo Find X6 Pro Without Anyone Knowing? | Dr.fone
- In 2024, How to Track WhatsApp Messages on Xiaomi Redmi 12 5G Without Them Knowing? | Dr.fone
- How Do You Remove Restricted Mode on iPhone 8 Plus
- In 2024, How to Unlock SIM Card on Oppo F25 Pro 5G online without jailbreak
- In 2024, Disabling Apple iPhone XR Parental Restrictions With/Without Password
- In 2024, How to Reset your Oppo A79 5G Lock Screen Password
- Title: New Top Animated Title Makers for 2024
- Author: Morgan
- Created at : 2024-04-24 01:07:45
- Updated at : 2024-04-25 01:07:45
- Link: https://ai-video-editing.techidaily.com/new-top-animated-title-makers-for-2024/
- License: This work is licensed under CC BY-NC-SA 4.0.
