
:max_bytes(150000):strip_icc():format(webp)/tesla-bot-f6353f76ae214924916445da1da620ca.png)
New Video Editing Tips to Know Before Editing First Draft
Video Editing Tips to Know Before Editing First Draft
Whether your video is short or long, you may want to make it better and appealing. Video editing involves the manipulation of your videos through which the desired transformation is achieved and you can flaunt every move of your video in a more preferable way. Video editing involves cutting the video short, changing the speed, organizing the video in a seamless flow. In short, the better the cuts of your videos, the better your message/story is conveyed.
Part 1: Things to Learn Before Editing First Draft
You have shot your video and now you’re stuck on the post-processing of that video. Don’t worry! We got you covered through this article which will guide you through the different things which you must learn before editing the first draft of your video.
Start a video project
Your smartphone and digital camera can let you record multiple videos but what now? You head out to edit your first draft by choosing a suitable platform or software and then you can surely lay back and see the software doing wonders to your raw videos. By starting off with editing, you choose your video editing preferences and then you just let the video editing tools do the magic.
Get to know the video editing software workspace
Video editing software offer customizable workspaces for different editing tasks. The software workspace streamlines routine actions you take with clips, like editing clips, making DVD and Blu-ray menus, and sharing movies. By placing panels in the layout that best matches your working style, you can personalize your workspace. The additional panels adjust automatically to fit the window as you rearrange them. For various jobs, such as one for editing and one for preview, you can build and store multiple workspaces.
Understand the timeline
The timeline of your video is the backbone of your digital video editing process. It’s called a timeline because the various pieces of video will be lined up horizontally. In a video editing software, the timeline is where you arrange your video clips and plan out all the modifications you want to do. As you work, you will see every single one of your video and audio clips, effects, and transitions sorted chronologically from beginning to end. All the fundamentals of video editing, including reordering, trimming, and enhancing your footage, are available. To preview how your adjustments will turn out, you can also play your project at any point in the timeline.
Add clips to timeline
When you have grasped the idea behind a timeline, the next step you need to follow is to add clips into your timeline. Before adding clips to your timeline, it is suggested that you label each clip. Although it does seem like a lot of work, it will be easier to locate all of the clips later on if you’re working on a large project. after the footages are gathered and named, add important clips in the beginning of the timeline to begin establishing the video’s overall structure and order.
Editing tools
Besides basic cutting, trimming and cropping, video editing software offer multiple professional editing tools which enhance the outlook your videos and make them 10x better. For example, instead of cutting up a clip into a bunch of small clips and unwanted gaps, use the Ripple Edit tool keep your timeline clean. This means when a clip is trimmed, it causes a ripple effect throughout the rest of your timeline, shifting all other clips into a new timeline position.
Similarly, when working with lengthy timelines, the Razor tool is also really helpful because you can select the clip you wish to cut by dragging your razor over it. So, the Razor cut is the tool to use if you need to make a lot of cuts in your videos quickly.
Syncing audio and video
You already know how annoying it can be if audio and video don’t sync while you’re listening to a podcast or viewing a YouTube vlog. The video editing software offer helpful manual and auto sync tools. It can be though a bit of hard work for beginners, but the ‘Lights, Camera, Action’ approach works best in syncing your audio with your video. To sync audio, you need to record audio first and then through matching the wavelengths displayed on your timeline, you can sync the audio with your video.
Edit download talking head/interview footage
Now with professional video editing tools, you can make ‘talking head videos’ if you want to share your expertise as a YouTube vlogger or if you want to do employee training. Talking head films are a fantastic way to stimulate the mind and the heart while increasing learner retention in this digital age.
Additionally, with other video editing tools, you can edit your interview footages and for that, you don’t have to mess with timestamps, cutting or splicing videos, or creating transitions between clips, you just edit the transcript of the video and the video edits itself to match.
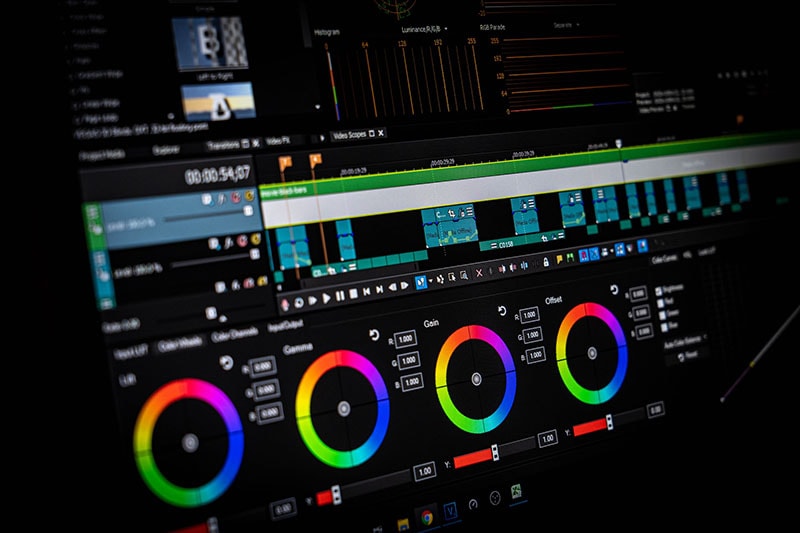
Video properties: Scale, position, opacity
Any screen recording, camera-based video, imported video clips, and text picture clips can have their visuals altered using video properties. In video editing software, multiple video properties are offered which include scaling, positioning, rotating, changing the opacity, changing level of reflection and shadow. Additionally, Video properties also include editing the video as a whole or just altering a clip from the video.
Types of cuts: Straight, J-Cut, L-Cut etc
The different types of cuts used in the video editing process is an effective way to make the transitions in your video pop. Basically, these cuts join two or more clips together via audio. Professional editors call these cuts as ‘split edits. The most common cuts are called J-Cut and L-Cut. They help to mix the content’s flow and keep the on-screen narrative in motion. In essence, these edits are necessary to make your scenes feel warm and more authentic.
Part 2: Practical Video Editing Tips
Choose right software
The push start of video editing for beginners is based on one common step: know your software or workspace. Selecting the appropriate software for editing your video is the first step in streamlining your video editing process. Although all software often includes the tools that you need to make ordinary video edits, you could favor one over the others based on its usefulness, digital interface, and features. Instead of just using the latest and trending video editing software available, the key is to choose what functions for you and your editing style.
Use a fast computer
Slow rendering hinders video editing process and other commands given to a computer. From a practical point of view, it is recommended that irrespective of the model of the computer or version of your software; your computer must be efficient to help you to access your files and software easily and to speed up your export time. With a slow computer, you will definitely feel stuck and the video editing complications will haunt you in your dreams.
Watch video editing tutorials
None of us is a pro until we’ve practiced something enough to know everything about it. Video editing requires both; technical knowledge as well as your creativity, so it is better not to do try things on your own. A little guidance can surely help you get through the basics of the video editing process. There are tons of helpful tutorials for making excellent videos on YouTube, vlogs, and educational websites. The majority of tutorials you’ll discover online are free, making the readily available at the tip of your fingers.
Get the project files
Most of the beginner video editors prefer to use the same project files as the tutorial instructors when they are following along. Your work will exactly resemble the demo’s sample, which will aid in your understanding of the steps. For precisely this reason, many tutorials let you download the project files. You can repeat a process with your own video files once you’ve mastered this technique.
Edit for a story
Remembering your creative objective to create a wonderful story or message through your edited video is one of the most crucial lessons you should learn from this article. It is critically important that you make your film visually appealing and dramatically engaging to effectively evoke the right emotions and to communicate your desired message. Instead of merely adding a huge amount of effects to wow your audience, use your practical and technical skills to do this.
Maintain an efficient workflow
You’ll need to be systematic and organized in addition to having an editing software if you want to become a more competent editor. Putting your projects and files in folders that you may use repeatedly is one method to streamline your process. Besides this, organizing your projects and files into an external hard drive or USB is recommended in case of losing access to your intricately designed projects.
Utilize keyboard shortcuts
Keyboard shortcuts speed up the process of video editing and save you ample time. Different keyboard shortcuts are compatible with different video editing software; leaving a few which are mutual in every software. Don’t attempt to put all of these shortcuts into action at once. Pick a small number to begin with, and as they become instinctive, add more. You’ll progress more quickly if you use less mouse while editing your video.
Learn important terms
As a beginner, you may not want to feel a lump in the throat caused by the complicated dictionary of video editing software. There are some broad video editing terms that refer to videography as a whole as well as video editing terms specific to the process of editing footage. You must first learn what these terms means for example you may want to know what the terms like ‘aspect ratio, B-roll, bit rate, close up, compression, crop and compositing’ mean.
Color correct your clips
Do you own a rather boring video? Perhaps it’s a little too dull or the colors don’t stand out as much as they should? A crucial step is to modify the video’s color. This will assist in reducing the saturation and revive your video. Yet, there are some color correcting presets which can be easily accessed in different video editing apps.
Select good music
You ever saw an ad on YouTube or other social media platforms without an audio background. You may just want to skip it because the video, which may apparently be appealing, fails to strike you. Coordinating and complimenting your video with a music in the background is like cherry on top. It’s a huge plus to attract viewers’ attention. Though it is necessary that the music you choose must be relevant to your video file and should target the majority. So, choose good music to adorn your videos and trigger emotions in your target audience.
Add text and graphics
Some people are attracted more towards textual descriptions rather visual representation of content. It is crucial that considering the preferences of majority, you add significant details to your video which can target your audience in a multidimension. You might need to include more text in addition to the title, opening/closing billboards (for broadcasting), and film credits, depending on the type of film you’re making. However, you can make dazzling visuals using your editing program if you feel the urge to do so.
Export web versions
When your film is finished and is ready to be exported, you would have a natural urge to export it at the highest video resolution possible. If it’s going to be shown in theatres and on ultra-HD screens, this is unquestionably the best course of action. However, you should also export smaller, higher-quality versions for simpler viewing in the modern day where video projects are typically promoted online and on social media.
The objective of creating a file for the web is to keep its high quality while not making it too large for upload and online viewing. Don’t worry if you’re unsure of the export settings to utilize. Websites like Facebook, YouTube, and Vimeo all provide suggested export settings to assist you in correctly resizing your content.
Part 3: 10 Advanced Editing Tips for Professionals
We all definitely have experimented with video editing tools to some extent. But now, it is definitely time to become a pro. Don’t worry, the process isn’t as scary as we imagine it to be. This article is your best stop to grab some fine guidelines about how to become a video editor, in fact, a Pro video editor.
- Make titles stand out
You’re skilled in video editing, but do your titles seem a little…unfinished? Do those lower thirds strike you as being monotonous and boring? Is your typography competing for attention against your pictures? It appears that you would benefit from some basic title design advice, and lucky for you, we have some. Your title must be readable by majority and always choose your safe way in selecting texts for example, a sans-serif typeface is usually going to be a safe choice for video. You can also animate text to highlight it so that it is more captivating.
- Put video inside text or logos effects
Videos resonate with your brand and content if you add a specific logo or text effects to it. Almost all the video editors allow this featuring so that the identification of your work is maintained and copyright claim can be imposed if you see your content being copied or manipulated.
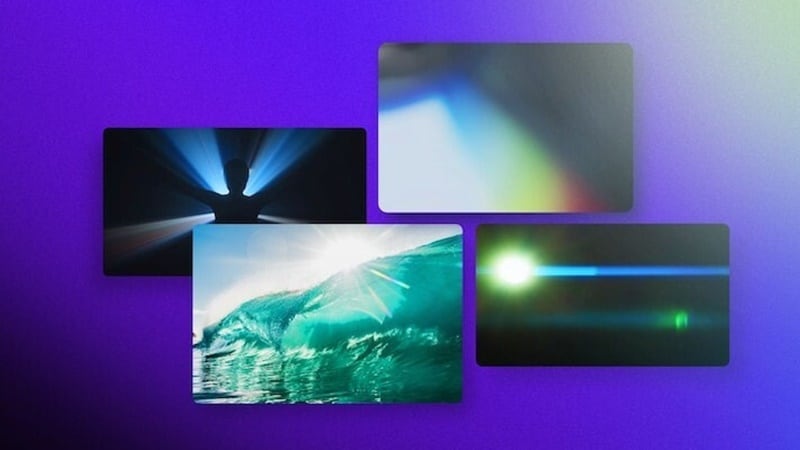
- Add light leaks, film burns and lens flares
Incorporating unique transitions into your monotonous videos can get you your viewer’s attention in a go. Lens flares, light leaks, and film burns can result in a unique look, but are not always easy to add naturally in-camera. Some of the best video editing software which allow access to adding lens flares, light leaks and film burns include: Free 4K Light Leaks – RocketStock, Motion Array Free Light Leaks, WZZLY Free Light Leaks, LIGHT LEAK FILM OVERLAY and many more.
- Add the vintage old film look
The quick Instagram-category of filters are common today but what makes your videos more natural and appealing is the addition of some presets which almost every video editor offers. These presets add a classic vintage old film look to your videos by manipulating color correction effects, framerate settings, overlays, and aspect ratio hacks. Some popular vintage old film effects are found in software namely VSDC, VEED, Adobe Premium Pro and many others in list.
- Add type-on effect
A type-on effect added to your videos comprehend your content more firmly. Simply by tabbing on ‘Add text effect’ in any video editor, you can add type-on effect to your videos and to add ravishing component to the overall structure of your video.
- Zoom in or out effect
The zoom-in or out feature (if available) in your video editing software can allow you to magnify any part of your video quickly and easily. Some of the best video editors featuring this specification include: Wondershare DemoCreator Zoom in Video Effect, DaVinci Resolve, Wondershare Filmora , Windows Movie Maker and Apowersoft Screen Recorder.
- Custom wipe on/off reveal effect
The wipe on/off reveal transition or effect is one of the earliest ways of transitioning from one scene to another. An object (usually a line) moves across the screen, revealing the next scene, while simultaneously removing (or wiping) the previous scene and when used properly, they can create a very powerful effect. It involves creative fading in and out transitions to give a more dramatic look.
- 4k, 8k, HD resolution
The latest video editing software offer the export your edited video in multiple formats, out of which 4k, 8k and HD resolution formats are preferable for majority of the professional video editors. It is necessary that even after the video is uploaded to a platform, the pixels do not decrease and the quality of the video is maintained. Although attractive to the viewers, the higher the resolution, the more the data with which you must deal. It is suggested that a standard or default resolution is chosen to play and replay the video in different computers.
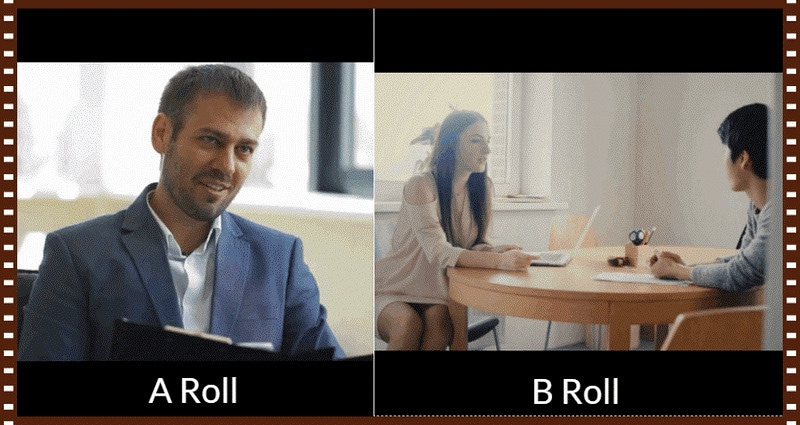
- B-roll
B-roll is secondary video that is frequently used as cutaway video to add context and visual interest to your story. The term is originated from the early days of Hollywood when there used to be an A-roll which was the primary video and B-roll which served as a secondary video footage. This can help you visualize your video from different dimensions, giving it a more realistic look for captivating viewers.
- Compression rate, bit depth, bit
The amount of data the camera records each second is referred to as bit rate. Every single second of a video is subject to significant data processing by cameras. The higher the quality of the video, the more is the bit rate. Bit depth refers to the number of colors your camera can read per pixel. Common bit depths are 8-bit and 10-bit, which enable a camera to read 256 million or 1.07 billion colors respectively. To upload your edited video, a compression is usually required to convert your resolution to internet quality so that the upload can be made simpler, without distorting the video resolution.
Whether your video is short or long, you may want to make it better and appealing. Video editing involves the manipulation of your videos through which the desired transformation is achieved and you can flaunt every move of your video in a more preferable way. Video editing involves cutting the video short, changing the speed, organizing the video in a seamless flow. In short, the better the cuts of your videos, the better your message/story is conveyed.
Part 1: Things to Learn Before Editing First Draft
You have shot your video and now you’re stuck on the post-processing of that video. Don’t worry! We got you covered through this article which will guide you through the different things which you must learn before editing the first draft of your video.
Start a video project
Your smartphone and digital camera can let you record multiple videos but what now? You head out to edit your first draft by choosing a suitable platform or software and then you can surely lay back and see the software doing wonders to your raw videos. By starting off with editing, you choose your video editing preferences and then you just let the video editing tools do the magic.
Get to know the video editing software workspace
Video editing software offer customizable workspaces for different editing tasks. The software workspace streamlines routine actions you take with clips, like editing clips, making DVD and Blu-ray menus, and sharing movies. By placing panels in the layout that best matches your working style, you can personalize your workspace. The additional panels adjust automatically to fit the window as you rearrange them. For various jobs, such as one for editing and one for preview, you can build and store multiple workspaces.
Understand the timeline
The timeline of your video is the backbone of your digital video editing process. It’s called a timeline because the various pieces of video will be lined up horizontally. In a video editing software, the timeline is where you arrange your video clips and plan out all the modifications you want to do. As you work, you will see every single one of your video and audio clips, effects, and transitions sorted chronologically from beginning to end. All the fundamentals of video editing, including reordering, trimming, and enhancing your footage, are available. To preview how your adjustments will turn out, you can also play your project at any point in the timeline.
Add clips to timeline
When you have grasped the idea behind a timeline, the next step you need to follow is to add clips into your timeline. Before adding clips to your timeline, it is suggested that you label each clip. Although it does seem like a lot of work, it will be easier to locate all of the clips later on if you’re working on a large project. after the footages are gathered and named, add important clips in the beginning of the timeline to begin establishing the video’s overall structure and order.
Editing tools
Besides basic cutting, trimming and cropping, video editing software offer multiple professional editing tools which enhance the outlook your videos and make them 10x better. For example, instead of cutting up a clip into a bunch of small clips and unwanted gaps, use the Ripple Edit tool keep your timeline clean. This means when a clip is trimmed, it causes a ripple effect throughout the rest of your timeline, shifting all other clips into a new timeline position.
Similarly, when working with lengthy timelines, the Razor tool is also really helpful because you can select the clip you wish to cut by dragging your razor over it. So, the Razor cut is the tool to use if you need to make a lot of cuts in your videos quickly.
Syncing audio and video
You already know how annoying it can be if audio and video don’t sync while you’re listening to a podcast or viewing a YouTube vlog. The video editing software offer helpful manual and auto sync tools. It can be though a bit of hard work for beginners, but the ‘Lights, Camera, Action’ approach works best in syncing your audio with your video. To sync audio, you need to record audio first and then through matching the wavelengths displayed on your timeline, you can sync the audio with your video.
Edit download talking head/interview footage
Now with professional video editing tools, you can make ‘talking head videos’ if you want to share your expertise as a YouTube vlogger or if you want to do employee training. Talking head films are a fantastic way to stimulate the mind and the heart while increasing learner retention in this digital age.
Additionally, with other video editing tools, you can edit your interview footages and for that, you don’t have to mess with timestamps, cutting or splicing videos, or creating transitions between clips, you just edit the transcript of the video and the video edits itself to match.
Video properties: Scale, position, opacity
Any screen recording, camera-based video, imported video clips, and text picture clips can have their visuals altered using video properties. In video editing software, multiple video properties are offered which include scaling, positioning, rotating, changing the opacity, changing level of reflection and shadow. Additionally, Video properties also include editing the video as a whole or just altering a clip from the video.
Types of cuts: Straight, J-Cut, L-Cut etc
The different types of cuts used in the video editing process is an effective way to make the transitions in your video pop. Basically, these cuts join two or more clips together via audio. Professional editors call these cuts as ‘split edits. The most common cuts are called J-Cut and L-Cut. They help to mix the content’s flow and keep the on-screen narrative in motion. In essence, these edits are necessary to make your scenes feel warm and more authentic.
Part 2: Practical Video Editing Tips
Choose right software
The push start of video editing for beginners is based on one common step: know your software or workspace. Selecting the appropriate software for editing your video is the first step in streamlining your video editing process. Although all software often includes the tools that you need to make ordinary video edits, you could favor one over the others based on its usefulness, digital interface, and features. Instead of just using the latest and trending video editing software available, the key is to choose what functions for you and your editing style.
Use a fast computer
Slow rendering hinders video editing process and other commands given to a computer. From a practical point of view, it is recommended that irrespective of the model of the computer or version of your software; your computer must be efficient to help you to access your files and software easily and to speed up your export time. With a slow computer, you will definitely feel stuck and the video editing complications will haunt you in your dreams.
Watch video editing tutorials
None of us is a pro until we’ve practiced something enough to know everything about it. Video editing requires both; technical knowledge as well as your creativity, so it is better not to do try things on your own. A little guidance can surely help you get through the basics of the video editing process. There are tons of helpful tutorials for making excellent videos on YouTube, vlogs, and educational websites. The majority of tutorials you’ll discover online are free, making the readily available at the tip of your fingers.
Get the project files
Most of the beginner video editors prefer to use the same project files as the tutorial instructors when they are following along. Your work will exactly resemble the demo’s sample, which will aid in your understanding of the steps. For precisely this reason, many tutorials let you download the project files. You can repeat a process with your own video files once you’ve mastered this technique.
Edit for a story
Remembering your creative objective to create a wonderful story or message through your edited video is one of the most crucial lessons you should learn from this article. It is critically important that you make your film visually appealing and dramatically engaging to effectively evoke the right emotions and to communicate your desired message. Instead of merely adding a huge amount of effects to wow your audience, use your practical and technical skills to do this.
Maintain an efficient workflow
You’ll need to be systematic and organized in addition to having an editing software if you want to become a more competent editor. Putting your projects and files in folders that you may use repeatedly is one method to streamline your process. Besides this, organizing your projects and files into an external hard drive or USB is recommended in case of losing access to your intricately designed projects.
Utilize keyboard shortcuts
Keyboard shortcuts speed up the process of video editing and save you ample time. Different keyboard shortcuts are compatible with different video editing software; leaving a few which are mutual in every software. Don’t attempt to put all of these shortcuts into action at once. Pick a small number to begin with, and as they become instinctive, add more. You’ll progress more quickly if you use less mouse while editing your video.
Learn important terms
As a beginner, you may not want to feel a lump in the throat caused by the complicated dictionary of video editing software. There are some broad video editing terms that refer to videography as a whole as well as video editing terms specific to the process of editing footage. You must first learn what these terms means for example you may want to know what the terms like ‘aspect ratio, B-roll, bit rate, close up, compression, crop and compositing’ mean.
Color correct your clips
Do you own a rather boring video? Perhaps it’s a little too dull or the colors don’t stand out as much as they should? A crucial step is to modify the video’s color. This will assist in reducing the saturation and revive your video. Yet, there are some color correcting presets which can be easily accessed in different video editing apps.
Select good music
You ever saw an ad on YouTube or other social media platforms without an audio background. You may just want to skip it because the video, which may apparently be appealing, fails to strike you. Coordinating and complimenting your video with a music in the background is like cherry on top. It’s a huge plus to attract viewers’ attention. Though it is necessary that the music you choose must be relevant to your video file and should target the majority. So, choose good music to adorn your videos and trigger emotions in your target audience.
Add text and graphics
Some people are attracted more towards textual descriptions rather visual representation of content. It is crucial that considering the preferences of majority, you add significant details to your video which can target your audience in a multidimension. You might need to include more text in addition to the title, opening/closing billboards (for broadcasting), and film credits, depending on the type of film you’re making. However, you can make dazzling visuals using your editing program if you feel the urge to do so.
Export web versions
When your film is finished and is ready to be exported, you would have a natural urge to export it at the highest video resolution possible. If it’s going to be shown in theatres and on ultra-HD screens, this is unquestionably the best course of action. However, you should also export smaller, higher-quality versions for simpler viewing in the modern day where video projects are typically promoted online and on social media.
The objective of creating a file for the web is to keep its high quality while not making it too large for upload and online viewing. Don’t worry if you’re unsure of the export settings to utilize. Websites like Facebook, YouTube, and Vimeo all provide suggested export settings to assist you in correctly resizing your content.
Part 3: 10 Advanced Editing Tips for Professionals
We all definitely have experimented with video editing tools to some extent. But now, it is definitely time to become a pro. Don’t worry, the process isn’t as scary as we imagine it to be. This article is your best stop to grab some fine guidelines about how to become a video editor, in fact, a Pro video editor.
- Make titles stand out
You’re skilled in video editing, but do your titles seem a little…unfinished? Do those lower thirds strike you as being monotonous and boring? Is your typography competing for attention against your pictures? It appears that you would benefit from some basic title design advice, and lucky for you, we have some. Your title must be readable by majority and always choose your safe way in selecting texts for example, a sans-serif typeface is usually going to be a safe choice for video. You can also animate text to highlight it so that it is more captivating.
- Put video inside text or logos effects
Videos resonate with your brand and content if you add a specific logo or text effects to it. Almost all the video editors allow this featuring so that the identification of your work is maintained and copyright claim can be imposed if you see your content being copied or manipulated.
- Add light leaks, film burns and lens flares
Incorporating unique transitions into your monotonous videos can get you your viewer’s attention in a go. Lens flares, light leaks, and film burns can result in a unique look, but are not always easy to add naturally in-camera. Some of the best video editing software which allow access to adding lens flares, light leaks and film burns include: Free 4K Light Leaks – RocketStock, Motion Array Free Light Leaks, WZZLY Free Light Leaks, LIGHT LEAK FILM OVERLAY and many more.
- Add the vintage old film look
The quick Instagram-category of filters are common today but what makes your videos more natural and appealing is the addition of some presets which almost every video editor offers. These presets add a classic vintage old film look to your videos by manipulating color correction effects, framerate settings, overlays, and aspect ratio hacks. Some popular vintage old film effects are found in software namely VSDC, VEED, Adobe Premium Pro and many others in list.
- Add type-on effect
A type-on effect added to your videos comprehend your content more firmly. Simply by tabbing on ‘Add text effect’ in any video editor, you can add type-on effect to your videos and to add ravishing component to the overall structure of your video.
- Zoom in or out effect
The zoom-in or out feature (if available) in your video editing software can allow you to magnify any part of your video quickly and easily. Some of the best video editors featuring this specification include: Wondershare DemoCreator Zoom in Video Effect, DaVinci Resolve, Wondershare Filmora , Windows Movie Maker and Apowersoft Screen Recorder.
- Custom wipe on/off reveal effect
The wipe on/off reveal transition or effect is one of the earliest ways of transitioning from one scene to another. An object (usually a line) moves across the screen, revealing the next scene, while simultaneously removing (or wiping) the previous scene and when used properly, they can create a very powerful effect. It involves creative fading in and out transitions to give a more dramatic look.
- 4k, 8k, HD resolution
The latest video editing software offer the export your edited video in multiple formats, out of which 4k, 8k and HD resolution formats are preferable for majority of the professional video editors. It is necessary that even after the video is uploaded to a platform, the pixels do not decrease and the quality of the video is maintained. Although attractive to the viewers, the higher the resolution, the more the data with which you must deal. It is suggested that a standard or default resolution is chosen to play and replay the video in different computers.
- B-roll
B-roll is secondary video that is frequently used as cutaway video to add context and visual interest to your story. The term is originated from the early days of Hollywood when there used to be an A-roll which was the primary video and B-roll which served as a secondary video footage. This can help you visualize your video from different dimensions, giving it a more realistic look for captivating viewers.
- Compression rate, bit depth, bit
The amount of data the camera records each second is referred to as bit rate. Every single second of a video is subject to significant data processing by cameras. The higher the quality of the video, the more is the bit rate. Bit depth refers to the number of colors your camera can read per pixel. Common bit depths are 8-bit and 10-bit, which enable a camera to read 256 million or 1.07 billion colors respectively. To upload your edited video, a compression is usually required to convert your resolution to internet quality so that the upload can be made simpler, without distorting the video resolution.
Guide To Slowing Down Videos in Snapchat: Discussing the Details
Applying slow-motion effects using sophisticated cameras or apps was a matter of the past. In this digital era, mobile technology makes all kinds of video editing right in your palm. Snapchat is one such exciting application that combines editing and social interaction. Primarily, it’s a social media platform to share your moments in one-time played snaps.
Some of its features also include speed modifiers for creating slow-motion videos on Snapchat. The slow-motion Snapchat option is pretty simple to apply to your pre-recorded videos. This guide will teach you how to slow down a Snapchat video to avoid ambiguity. Keep reading and get some mobile apps for slow-motion videos other than Snapchat.
Slow Motion Video Maker Slow your video’s speed with better control of your keyframes to create unique cinematic effects!
Make A Slow Motion Video Make A Slow Motion Video More Features

Part 1: How Are Slow-Motion Videos Used by Social Media Users?
Snapchat offers creative sets of features to enhance the impact of captured media. This social media app can instantly slow down your video without any effort. Such videos can retain the viewers’ attention and urge them to explore the details. Plus, slow-motion videos encourage the audience to stay tuned to the upcoming content. Look at the below point to explore the uses of slow motion in Snapchat:
- Creating Comedy: Sometimes, people use slow-motion to turn their captured moments into comedy. For instance, you can add slow motion to your friend’s video of eating noodles. This way, a playful, hilarious, and entertaining element will be added to your content.
- Emphasizing Detail: Social media users usually slow down the video to enhance details. At normal speed, such details can easily be missed. Slowing down the sports, action shots, and fast-paced activities can reveal interesting details.
- Showcasing Skills: Dance and performance art videos can be slowed down with Snapchat. Social media users use slow-motion Snapchat to show talent and skills. Such footage allows viewers to appreciate the performance after watching the details.
- Capturing Nature: Aesthetic lovers use slow-motion effects to make their content appealing. They slow down the falling raindrops, clouds movements, and fluttering of butterfly wings. Capturing the beauty of nature this way resonates with social media users.
- Product Demonstration: Social media influencers showcase the product’s features in slow-motion videos. Snapchat assists them in making detailed and engaging videos with just a swap. Fashion and technology industries are influencing purchasing decisions through such videos.
Part 2: How to Slow Down Videos on Snapchat? A Simple Guide
You might be familiar with this famous social media app. If not, then let us simply tell you that it’s a platform to share fleeting pictures and videos. This top social media app was introduced in 2011, and according to stats, it grows 23% each year.
Some of its essential features include taking pictures and videos by adding filters and lenses. Now, let’s come to the point and learn how to make slow-motion videos on Snapchat:
Step 1
After getting Snapchat on your mobile phone, log in to an account. Open the app and record a video. To record, tap and hold down the “Capture” button at the lower part of the screen. Let it go when you are done recording a suitable clip.

Step 2
You can crop the video by clicking on the “Loop” button on the right side. Otherwise, just swipe the screen from left to right until you get a “Snail” icon. It will be the slow-motion effect that will reduce the speed of your video.

Step 3
Optionally, you can decorate or edit the clip using the right-side toolbar. When you are done editing, touch the “Save” icon at the bottom-left side. It will save the video in your camera roll or Snapchat Memories. Besides using the “Save” icon, you can click the “Next” button to share the video with your friends.

Part 3: Other Ways to Slow Down Videos to Post on Snapchat
The slow-motion effect is no more challenging as many apps are available online to do this. If you are unsatisfied with Snapchat’s motion video, this part is for you. Here, you can pick any app to make slow-motion videos and use plenty of editing features. These apps are useful for creating professional slow-mo videos right with your iOS or Android.
1. CapCut (Android | iOS )
This tool has made video creation effortless with video assets and flexible editing. It contains a cloud storage system that allows users to collaborate on projects freely. With its powerful features, users can remove background, split audio, and insert sounds. CapCut offers a feature to turn your normal videos into slow motion and alter the duration of clips.

Key Features
- It enables you to customize the pace of your video scenes separately. You can make slow-motion videos by using its “Speed” slider. Users can also track the previous and the latest video durations.
- The speed ramping features allow you to ensure a smooth transition in slow motions. To do so, you can choose the bullet, montage, and hero presets.
- Apart from making slow-motion videos, users can extract audio from videos. They just have to upload a video, and CapCut will extract original quality sound.
2. InShot (Android | iOS )
InShot claims to release your creativity through its video editing features. It offers seamless video trimming, splitting, and merging to get desired media. Users can adjust the speed of clips and add slow-motion or fast motions. Besides, they can insert sound effects, voice-overs, and popular music in their vlogs.

Key Features
- Despite slow-motion Snapchat, you can make a smooth slow motion in this editing app. It offers a speed option from which you can choose any Speed rate for your video.
- InShot tries to make your content breathe with its text and stickers. Users can add animated stickers and text using the timeline functions.
- Another specialty of this app is its aesthetic filters, such as Film and Cinema. Moreover, there are AI effects to provide a professional look to projects.
3. Videoshop (Android | iOS )
If you find slowing down videos on Snapchat difficult, try this video editing app. With its advanced editing tools, this versatile app can level up your social media expression. Some of its essential editing features involve rotation, merging, and flipping clips. Users can perform color correction, reverse, and slow down video functions.

Key Features
- Turning videos into fast motion, slow motion, and the reverse is quicker on Videoshop. You can swipe the speed slider towards the left and make a personalized slow-motion video.
- After getting a slow-mo, users can share it on popular social media apps. Some platforms include Snapchat, TikTok, WhatsApp, YouTube, etc.
- Besides, there are unlimited editing features to fine-tune your editing. It offers special effects, lip sync, animated titles, and GIFs to meet diverse needs.
Bonus Part: Guide made to Make Slow Motion Videos Easy with Wondershare Filmora
No doubt, the apps mentioned above are handy video editing tools. Such apps facilitate smartphone users, but what about PC users? For them, Wondershare Filmora is designed as an efficient video editing platform. This application is easy for all users and provides a wide range of editing tools. Beginners or non-tech persons can utilize an AI copilot editor for assistance in editing.
Free Download For Win 7 or later(64-bit)
Free Download For macOS 10.14 or later
How to Make Slow Motion Video with Optical Flow in Filmora
This editing platform can make slow-motion Snapchat videos of high quality. Users can adjust the slow-motion speed, apply speed ramping, or reverse the videos. Let’s explore all these features and get a slow-motion video by following the given steps:
Step 1Access Filmora and Import Media to Start a Project
Go to the official site of Filmora and ensure you install the latest version. Launch and enter the main interface. Click “New Project” and look for “Import” in the media panel. Browse and bring media to Filmora to start editing in the timeline section.

Step 2Discover the Uniform Speed Option
Place your cursor on the media and right-click on it. Look for the “Uniform Speed” option from the list and navigate toward the right-side panel. Alternatively, you can press the “Ctrl + R” key using your keyboard.

Step 3Adjust Speed for Slow Motion video with optical Flow
From Uniform Speed, move the “Speed” slider to the left. Keep moving until you set the desired “Duration” of the video. Afterward, head to the “AI Frame Interpolation” and extend the menu. Choose the “Optical Flow” option from the menu and get a preview of the results.

Step 4Continue Editing or Exporting the File
Lastly, shift to the top right corner and press “Export” if you are done editing. Otherwise, explore other features of Filmora.

Filmora is more than just a simple tool with cutting, trimming, and merging features. It is an AI platform that can generate music, scripts, and images for diverse needs. With its cloud storage, you can start editing where you left off. Smartphone users don’t have to worry because Filmora is now available as a mobile app.
Some Smart and Unique Features of Filmora
Completely exploring Filmora is not possible without knowing its key features. Thus, head down here and get a brief introduction to Filmora’s powerful functionalities.
AI Vocal Remover: Try this hot feature of Filmora to separate vocals from any song. This way, you can effortlessly remove vocals from audio and soundtracks. It enables you to dub videos with fresh and high-quality sound.
AI Copywriting: No more internet surfing for unique content when Filmora is here to help. With the ChatGPT plug-in, Filmora generates YouTube Titles and scripts. The AI-generated content proves engaging and perfectly aligns with your requirements.
Instant Mode: Like other editing apps, Filmora is also equipped with Instant mode. It provides video assets where you just have to upload clips in predesigned video templates. One thing Filmora has done differently is the editing options available until the last moment.
AI Smart Cutout: Who needs to record content with a green screen in this tech-based era? Enable this feature and remove unwanted objects and people with accuracy. Thus, users can make a clean video even when not recorded with a clean background.
Conclusion
Ultimately, the slow-motion filter is one of the options in Snapchat to make attractive snaps. In this guide, you’ve learned how to slow down videos on Snapchat. Besides, there were a few alternatives in the form of mobile apps. In search of a reliable platform, you can trust Filmora to make slow-motion videos easily.
Make A Slow Motion Video Make A Slow Motion Video More Features
Part 1: How Are Slow-Motion Videos Used by Social Media Users?
Snapchat offers creative sets of features to enhance the impact of captured media. This social media app can instantly slow down your video without any effort. Such videos can retain the viewers’ attention and urge them to explore the details. Plus, slow-motion videos encourage the audience to stay tuned to the upcoming content. Look at the below point to explore the uses of slow motion in Snapchat:
- Creating Comedy: Sometimes, people use slow-motion to turn their captured moments into comedy. For instance, you can add slow motion to your friend’s video of eating noodles. This way, a playful, hilarious, and entertaining element will be added to your content.
- Emphasizing Detail: Social media users usually slow down the video to enhance details. At normal speed, such details can easily be missed. Slowing down the sports, action shots, and fast-paced activities can reveal interesting details.
- Showcasing Skills: Dance and performance art videos can be slowed down with Snapchat. Social media users use slow-motion Snapchat to show talent and skills. Such footage allows viewers to appreciate the performance after watching the details.
- Capturing Nature: Aesthetic lovers use slow-motion effects to make their content appealing. They slow down the falling raindrops, clouds movements, and fluttering of butterfly wings. Capturing the beauty of nature this way resonates with social media users.
- Product Demonstration: Social media influencers showcase the product’s features in slow-motion videos. Snapchat assists them in making detailed and engaging videos with just a swap. Fashion and technology industries are influencing purchasing decisions through such videos.
Part 2: How to Slow Down Videos on Snapchat? A Simple Guide
You might be familiar with this famous social media app. If not, then let us simply tell you that it’s a platform to share fleeting pictures and videos. This top social media app was introduced in 2011, and according to stats, it grows 23% each year.
Some of its essential features include taking pictures and videos by adding filters and lenses. Now, let’s come to the point and learn how to make slow-motion videos on Snapchat:
Step 1
After getting Snapchat on your mobile phone, log in to an account. Open the app and record a video. To record, tap and hold down the “Capture” button at the lower part of the screen. Let it go when you are done recording a suitable clip.
Step 2
You can crop the video by clicking on the “Loop” button on the right side. Otherwise, just swipe the screen from left to right until you get a “Snail” icon. It will be the slow-motion effect that will reduce the speed of your video.
Step 3
Optionally, you can decorate or edit the clip using the right-side toolbar. When you are done editing, touch the “Save” icon at the bottom-left side. It will save the video in your camera roll or Snapchat Memories. Besides using the “Save” icon, you can click the “Next” button to share the video with your friends.
Part 3: Other Ways to Slow Down Videos to Post on Snapchat
The slow-motion effect is no more challenging as many apps are available online to do this. If you are unsatisfied with Snapchat’s motion video, this part is for you. Here, you can pick any app to make slow-motion videos and use plenty of editing features. These apps are useful for creating professional slow-mo videos right with your iOS or Android.
1. CapCut (Android | iOS )
This tool has made video creation effortless with video assets and flexible editing. It contains a cloud storage system that allows users to collaborate on projects freely. With its powerful features, users can remove background, split audio, and insert sounds. CapCut offers a feature to turn your normal videos into slow motion and alter the duration of clips.
Key Features
- It enables you to customize the pace of your video scenes separately. You can make slow-motion videos by using its “Speed” slider. Users can also track the previous and the latest video durations.
- The speed ramping features allow you to ensure a smooth transition in slow motions. To do so, you can choose the bullet, montage, and hero presets.
- Apart from making slow-motion videos, users can extract audio from videos. They just have to upload a video, and CapCut will extract original quality sound.
2. InShot (Android | iOS )
InShot claims to release your creativity through its video editing features. It offers seamless video trimming, splitting, and merging to get desired media. Users can adjust the speed of clips and add slow-motion or fast motions. Besides, they can insert sound effects, voice-overs, and popular music in their vlogs.
Key Features
- Despite slow-motion Snapchat, you can make a smooth slow motion in this editing app. It offers a speed option from which you can choose any Speed rate for your video.
- InShot tries to make your content breathe with its text and stickers. Users can add animated stickers and text using the timeline functions.
- Another specialty of this app is its aesthetic filters, such as Film and Cinema. Moreover, there are AI effects to provide a professional look to projects.
3. Videoshop (Android | iOS )
If you find slowing down videos on Snapchat difficult, try this video editing app. With its advanced editing tools, this versatile app can level up your social media expression. Some of its essential editing features involve rotation, merging, and flipping clips. Users can perform color correction, reverse, and slow down video functions.
Key Features
- Turning videos into fast motion, slow motion, and the reverse is quicker on Videoshop. You can swipe the speed slider towards the left and make a personalized slow-motion video.
- After getting a slow-mo, users can share it on popular social media apps. Some platforms include Snapchat, TikTok, WhatsApp, YouTube, etc.
- Besides, there are unlimited editing features to fine-tune your editing. It offers special effects, lip sync, animated titles, and GIFs to meet diverse needs.
Bonus Part: Guide made to Make Slow Motion Videos Easy with Wondershare Filmora
No doubt, the apps mentioned above are handy video editing tools. Such apps facilitate smartphone users, but what about PC users? For them, Wondershare Filmora is designed as an efficient video editing platform. This application is easy for all users and provides a wide range of editing tools. Beginners or non-tech persons can utilize an AI copilot editor for assistance in editing.
Free Download For Win 7 or later(64-bit)
Free Download For macOS 10.14 or later
How to Make Slow Motion Video with Optical Flow in Filmora
This editing platform can make slow-motion Snapchat videos of high quality. Users can adjust the slow-motion speed, apply speed ramping, or reverse the videos. Let’s explore all these features and get a slow-motion video by following the given steps:
Step 1Access Filmora and Import Media to Start a Project
Go to the official site of Filmora and ensure you install the latest version. Launch and enter the main interface. Click “New Project” and look for “Import” in the media panel. Browse and bring media to Filmora to start editing in the timeline section.
Step 2Discover the Uniform Speed Option
Place your cursor on the media and right-click on it. Look for the “Uniform Speed” option from the list and navigate toward the right-side panel. Alternatively, you can press the “Ctrl + R” key using your keyboard.
Step 3Adjust Speed for Slow Motion video with optical Flow
From Uniform Speed, move the “Speed” slider to the left. Keep moving until you set the desired “Duration” of the video. Afterward, head to the “AI Frame Interpolation” and extend the menu. Choose the “Optical Flow” option from the menu and get a preview of the results.
Step 4Continue Editing or Exporting the File
Lastly, shift to the top right corner and press “Export” if you are done editing. Otherwise, explore other features of Filmora.
Filmora is more than just a simple tool with cutting, trimming, and merging features. It is an AI platform that can generate music, scripts, and images for diverse needs. With its cloud storage, you can start editing where you left off. Smartphone users don’t have to worry because Filmora is now available as a mobile app.
Some Smart and Unique Features of Filmora
Completely exploring Filmora is not possible without knowing its key features. Thus, head down here and get a brief introduction to Filmora’s powerful functionalities.
AI Vocal Remover: Try this hot feature of Filmora to separate vocals from any song. This way, you can effortlessly remove vocals from audio and soundtracks. It enables you to dub videos with fresh and high-quality sound.
AI Copywriting: No more internet surfing for unique content when Filmora is here to help. With the ChatGPT plug-in, Filmora generates YouTube Titles and scripts. The AI-generated content proves engaging and perfectly aligns with your requirements.
Instant Mode: Like other editing apps, Filmora is also equipped with Instant mode. It provides video assets where you just have to upload clips in predesigned video templates. One thing Filmora has done differently is the editing options available until the last moment.
AI Smart Cutout: Who needs to record content with a green screen in this tech-based era? Enable this feature and remove unwanted objects and people with accuracy. Thus, users can make a clean video even when not recorded with a clean background.
Conclusion
Ultimately, the slow-motion filter is one of the options in Snapchat to make attractive snaps. In this guide, you’ve learned how to slow down videos on Snapchat. Besides, there were a few alternatives in the form of mobile apps. In search of a reliable platform, you can trust Filmora to make slow-motion videos easily.
Is Augmented Reality Conferencing the Future of Workplace Collaboratio
Is Augmented Reality Conferencing the Future of Workplace Collaboration?
An easy yet powerful editor
Numerous effects to choose from
Detailed tutorials provided by the official channel
AR or Augmented Reality and VR or Virtual Reality are quite a common discussion in the world of technology. Similarly, the technology-driven workspaces demand a seamless workspace collaboration post-pandemic. People are used to working from home and the workspace culture is changing rapidly due to such habits. 59% of the US workers want to continue WFH according to a study by TalentLyft. To cut the cost of daily travel and dedicate more quality time to work, employees are prioritizing online offices. On the other hand, employers are willing to save office space and other expenses with such a professional routine. That’s where the idea of augmented reality video conferencing is hitting to keep the collaboration between workers alive for a synchronized workflow.

How AR and VR can assist professional collaboration and lift the operations to a better place is the current question. Also, what would be the system through which employees can be habituated to the use? All of the answers are explained in this article.
In this article
01 [What is Augmented Reality Conferencing and What’s VR Video Streaming Workflow](#Part 1)
02 [Pros and Cons of AR and VR Conferencing](#Part 2)
03 [How does Filmora assists AR video conference?](#Part 3)
Part 1 What is Augmented Reality Conferencing and What’s VR Video Streaming Workflow
Before jumping to the application of AR and VR, it’s important to clarify the concept of the two different technologies. While AR is an enhanced version of the real world, VR is totally virtual. As a basic concept, note that, augmented reality is an arrangement of the user’s real-world view whereas virtual reality is totally an illusion based on a video. AR can be accessed from a phone to set the camera with a view and a virtual arrangement would be present within it. For example, if there’s a room in the real world, with an AR video conference, people can be adjusted virtually.

Virtual reality, as the name suggests, is totally in control of the system. With goggles or headsets, one can view computer-generated video with 360 degrees of technical effects to be seemed as real. This technology is mainly applicable for a video currently and there’re more scopes to experiment further.

Here comes the question, how these technologies can be merged with a permanent business structure that can be as effective as the older system, and there’s scope for even better results? Well, according to a study by FinancesOnline, 72% of the US customers find AR for better collaboration and 69% think it increases the efficiency in the workspace. Also, 49% of the IT experts believe that AR can access real-time information sooner.
The key idea behind augmented reality conferencing is to omit the parameters like distance, time, and space expenses and motivate positive collaboration in business workflow. There are multiple advantages of this technology for both employees and employers. As people are getting accustomed to the virtual setting in any professional or personal work from home, the plan to shift to a semi-virtual or virtual office structure is not vague now. In fact, this adaptation might take place sooner than expected as a long-term effect of the pandemic.
How augmented reality conferencing and virtual reality video streaming will be working?
AR and VR can be implemented through different technologies and hardware devices. As a result, employees can attend a meeting from home, just with a mobile application that enables the office structure in the room. Or, 2-3 members can be present physically in a meeting room while others are joining from remote places through VR. A 3D video streaming would overshadow the physical absence of the teammates. At the same time, the resources can be shared in no time for reference and transparent communication.
So, how exactly a business can be affected by augmented reality video conferencing on a large scale? Here’s a keen observation from both perspectives.
Part 2 Pros and Cons of AR and VR Conferencing

01Pros of AR and VR Conferencing
● This technology has an initial purpose to save time and energy for the workers including daily travel and balancing personal and professional commitments.
● Employers can hire people from remote places based on their skills and without worrying about the distance and timezone gap.
● Additional resources like bigger office space, electricity, and water can be saved if augmented reality video conferencing is in a complete performance.
● Positive collaboration can be expected while the employees have more energy and a comfortable environment to work in. As a result, productivity might take a boost as well.
● AR video conference serves a better experience than normal video conference in Zoom or Google meeting.
02Cons of AR and VR Conferencing
● The whole process is still under experiment and there’s no confirmed news about its beginning. So, there’s no practical feedback on the process of installation, usage, and maintenance.
● It would be expensive and time-consuming to set up a virtual reality conference system in a big office with n number of people.
● Technical fault from the office or from employees’ home can cost serious penalties in the business workflow.
● Hardware limitations like limited battery life, expensive headsets, and wireless connection are required and these things can cause problems while implementation.
● It can be uncomfortable to wear headsets for a long time during augmented reality conferencing andpeople can experience motion sickness due to this.
Part 3 How does Wondershare Filmora Video Editor assists AR video conference?
To use AR and VR professionally at a larger scale, the videos need to be seamless and follow some standard parameters. With Filmora, it would be easier to manage all the videos during an augmented reality video conferencing. There are multiple effects like “Motion Tracking”, “Keyframing”, “Audio ducking”, “Speed Control”, and “Color matching” that are required while managing a virtual conference with multiple people. It’s important to match the environment thoroughly so there’s no lack of concentration and inferiority in the system.
For Win 7 or later (64-bit)
For macOS 10.12 or later
From a business perspective, a video editor has many roles to play. Similarly, for a modern integration like AR and VR video conferencing, the required tools cannot be compromised. With facilities like “Green screen”, “Audio equalizer”, “Split screen”, “3D Lut”, etc. augmented reality would be presented smartly. To match the whole office environment as effectively as the real (present) one and to boost collaboration in the workspace, new generation video editing tools like Filmora is a must. With minimal effort, virtual meetings can be arranged and presented with the key goal to work at a global level and minimize the distance barrier.
● Ending Thoughts →
● Augmented reality conferencing is at an experiment level now and it is expected to be integrated with the real-life workflow sooner.
● As discussed, there’re both advantages and disadvantages of this technology right now. To enhance the facilities and diminish the cons, a smart video editor can be the gamechanger. In this article, you can find all the current news about AR adaptation for workspace collaboration in detail.
AR or Augmented Reality and VR or Virtual Reality are quite a common discussion in the world of technology. Similarly, the technology-driven workspaces demand a seamless workspace collaboration post-pandemic. People are used to working from home and the workspace culture is changing rapidly due to such habits. 59% of the US workers want to continue WFH according to a study by TalentLyft. To cut the cost of daily travel and dedicate more quality time to work, employees are prioritizing online offices. On the other hand, employers are willing to save office space and other expenses with such a professional routine. That’s where the idea of augmented reality video conferencing is hitting to keep the collaboration between workers alive for a synchronized workflow.
How AR and VR can assist professional collaboration and lift the operations to a better place is the current question. Also, what would be the system through which employees can be habituated to the use? All of the answers are explained in this article.
In this article
01 [What is Augmented Reality Conferencing and What’s VR Video Streaming Workflow](#Part 1)
02 [Pros and Cons of AR and VR Conferencing](#Part 2)
03 [How does Filmora assists AR video conference?](#Part 3)
Part 1 What is Augmented Reality Conferencing and What’s VR Video Streaming Workflow
Before jumping to the application of AR and VR, it’s important to clarify the concept of the two different technologies. While AR is an enhanced version of the real world, VR is totally virtual. As a basic concept, note that, augmented reality is an arrangement of the user’s real-world view whereas virtual reality is totally an illusion based on a video. AR can be accessed from a phone to set the camera with a view and a virtual arrangement would be present within it. For example, if there’s a room in the real world, with an AR video conference, people can be adjusted virtually.
Virtual reality, as the name suggests, is totally in control of the system. With goggles or headsets, one can view computer-generated video with 360 degrees of technical effects to be seemed as real. This technology is mainly applicable for a video currently and there’re more scopes to experiment further.
Here comes the question, how these technologies can be merged with a permanent business structure that can be as effective as the older system, and there’s scope for even better results? Well, according to a study by FinancesOnline, 72% of the US customers find AR for better collaboration and 69% think it increases the efficiency in the workspace. Also, 49% of the IT experts believe that AR can access real-time information sooner.
The key idea behind augmented reality conferencing is to omit the parameters like distance, time, and space expenses and motivate positive collaboration in business workflow. There are multiple advantages of this technology for both employees and employers. As people are getting accustomed to the virtual setting in any professional or personal work from home, the plan to shift to a semi-virtual or virtual office structure is not vague now. In fact, this adaptation might take place sooner than expected as a long-term effect of the pandemic.
How augmented reality conferencing and virtual reality video streaming will be working?
AR and VR can be implemented through different technologies and hardware devices. As a result, employees can attend a meeting from home, just with a mobile application that enables the office structure in the room. Or, 2-3 members can be present physically in a meeting room while others are joining from remote places through VR. A 3D video streaming would overshadow the physical absence of the teammates. At the same time, the resources can be shared in no time for reference and transparent communication.
So, how exactly a business can be affected by augmented reality video conferencing on a large scale? Here’s a keen observation from both perspectives.
Part 2 Pros and Cons of AR and VR Conferencing
01Pros of AR and VR Conferencing
● This technology has an initial purpose to save time and energy for the workers including daily travel and balancing personal and professional commitments.
● Employers can hire people from remote places based on their skills and without worrying about the distance and timezone gap.
● Additional resources like bigger office space, electricity, and water can be saved if augmented reality video conferencing is in a complete performance.
● Positive collaboration can be expected while the employees have more energy and a comfortable environment to work in. As a result, productivity might take a boost as well.
● AR video conference serves a better experience than normal video conference in Zoom or Google meeting.
02Cons of AR and VR Conferencing
● The whole process is still under experiment and there’s no confirmed news about its beginning. So, there’s no practical feedback on the process of installation, usage, and maintenance.
● It would be expensive and time-consuming to set up a virtual reality conference system in a big office with n number of people.
● Technical fault from the office or from employees’ home can cost serious penalties in the business workflow.
● Hardware limitations like limited battery life, expensive headsets, and wireless connection are required and these things can cause problems while implementation.
● It can be uncomfortable to wear headsets for a long time during augmented reality conferencing andpeople can experience motion sickness due to this.
Part 3 How does Wondershare Filmora Video Editor assists AR video conference?
To use AR and VR professionally at a larger scale, the videos need to be seamless and follow some standard parameters. With Filmora, it would be easier to manage all the videos during an augmented reality video conferencing. There are multiple effects like “Motion Tracking”, “Keyframing”, “Audio ducking”, “Speed Control”, and “Color matching” that are required while managing a virtual conference with multiple people. It’s important to match the environment thoroughly so there’s no lack of concentration and inferiority in the system.
For Win 7 or later (64-bit)
For macOS 10.12 or later
From a business perspective, a video editor has many roles to play. Similarly, for a modern integration like AR and VR video conferencing, the required tools cannot be compromised. With facilities like “Green screen”, “Audio equalizer”, “Split screen”, “3D Lut”, etc. augmented reality would be presented smartly. To match the whole office environment as effectively as the real (present) one and to boost collaboration in the workspace, new generation video editing tools like Filmora is a must. With minimal effort, virtual meetings can be arranged and presented with the key goal to work at a global level and minimize the distance barrier.
● Ending Thoughts →
● Augmented reality conferencing is at an experiment level now and it is expected to be integrated with the real-life workflow sooner.
● As discussed, there’re both advantages and disadvantages of this technology right now. To enhance the facilities and diminish the cons, a smart video editor can be the gamechanger. In this article, you can find all the current news about AR adaptation for workspace collaboration in detail.
How to Upload Videos to Twitch? Here’s a Guide for Beginner
Recently, Twitch announced that its users can now upload video to Twitch, and there is no need to broadcast or live stream on Twitch anymore. Uploading videos to Twitch can be an excellent way to share your videos with your audience.

Besides this, you don’t need to upload videos on other video-sharing sites. But if you are using this platform for the first time, then you must be wondering how to upload video to Twitch. Don’t worry, as we have got your back. Keep reading to explore the process, and it is quite easy.
Part 1: How to Upload Videos to Twitch?
- First of all, you need to open Twitch in any browser. Just type twitch.tv in the browser’s address bar and click on Enter. Then you need to log into your account.
- Once done, you can see your account with your profile picture in the screen’s top-right corner. You can find it next to the Get Bits option. Click on it to access the drop-down menu.

- Then you need to choose the Video Producer option available in the drop-down menu. A new page will open, and you can see the Creator Dashboard from where you can begin uploading your video or hosting a channel on twitch. If this option is unavailable, then you can’t upload your videos.
- Now, you need to click on the upload option. If you have not uploaded any video, you will find this area blank. You can just drag and drop your desired video to upload video to twitch.

- Choose the video that you want to upload and click on the Open option.
- Now, the upload process will begin. Wait for a few seconds to finish the process. Once done, click on the video, and the details window will come up.
- Here you need to edit your video’s metadata information. You can set a title, the category and a description for your video. Besides you can also edit the language and thumbnail here.
- After that, you can click on the Save Changes option that you can find in the upper right corner.
- Now you need to click on the Publish button to post your video on your channel. You can follow the process while hosting a channel on twitch to upload the videos.
Part 2: Why can’t you upload videos to twitch?
Well, it may be noted that not all Twitch users can upload video to twitch. For now, this feature is only available for Twitch partners and affiliates. So, first, you need to become an affiliate or partner, and then you can easily upload your videos. Besides, you should also keep the video upload guidelines in mind to avoid any issues.
- You can only upload video formats like 1080P videos, videos with up to 190mbps bit rate. The platform supports FLV, MOV, AVI and MP4 file formats.
- Besides, using one account, you can upload only 5 videos simultaneously. And within 24 hours, you can do a maximum of 100 uploads.
Now you know that only Twitch partners or affiliates can upload video to twitch, it is crucial for you to know how to become a Twitch affiliate or partner. Have a look at the below-given section for your answer.
Part 3: How to be a twitch affiliate or partner?
In general, streamers on Twitch can’t earn money from their content, and they can only make money from donations. However, if you have more followers, consistent viewers and hosting a channel on twitch regularly, then you can try to become a Twitch affiliate or partner. Some benefits that you can enjoy with this are:
- You will be able to sell your games
- You can get subscriptions.
- You will enjoy chargeback protection.
- It will be easier for you to get Twitch Bits.
- You can now earn revenue through advertisements.
To become an affiliate on Twitch, first of all, you need to monetize your content, i.e., stream. Now, let’s have a look at some requirements to become an affiliate.

- You must have at least 50 followers.
- Make sure you have completed a minimum of 500 total minutes broadcast within one month or in the last 30 days.
- In the last 30 days, you should have at least seven unique broadcast days.
- At least 3 viewers per stream in the last 30 days.
Steps to Become an Affiliate
- Visit the Twitch website and log into your account.
- Find the Notifications icon and click on it.
- There you can see the Get Started option. Click on it.
- Sign the affiliate agreement and then give your tax information.
- Then choose your payment location to complete the procedure.
Requirements For Becoming a Partner
Once you receive your affiliate status, you can become a partner. But there are some requirements that you need to keep in your mind.
- You must have 75 average unique viewers per day in the last 30 days.
- Have streamed or hosting a channel on twitch for 12 days in the last 30 days.
- You need to stream for 25 hours in 30 days.
Steps to Follow
- Visit Twitch and log into your account.
- Now click on your Profile icon and then click on the Creator Dashboard option.
- Click on the arrow mark located near Insights and then click on Achievements.
- Click on the Apply option located under the Patch to Partner tab.
Once applied, Twitch will reply to your application within 7 business days. Well, if you face rejection, then you need to build a stronger audience and apply for it again later.
What Do You Mean Stay Active?
Chat is an important part of Twitch, and it lets you interact with your fellow members of the community as well as streamers. By keeping your chat active, you can let others know that you are ready to interact with them. This, in turn, can help you to increase your followers.
Part 4: What’s The Alternative to Twitch for Creators?
1. YouTube Gaming
Well, even though YouTube Gaming lacks in-game overlays, it offers other features. The platform offers live gaming broadcasts, channels, chat rooms and more. Here the viewers don’t need to subscribe to watch the content.
2. Smashcast
If you are a gaming fan, you must have heard about Hitbox and Azubu. They came together to form Smashcast. This provides the users with perfect JavaScript and HTML integration. If you are a gaming partner, esports team, viewer, organizer or streamer, then this platform will be an excellent option for you. Compared to Twitch, Smashcast offers better quality esports streams.
3. Facebook Gaming

Facebook also has introduced its own gaming and streaming platform. Facebook Gaming comes with an easy-to-navigate interface. It has a chat room and also allows you to watch videos from different social media platforms, like Twitter, Instagram, and YouTube. Besides, it offers some amazing features, such as different monetization options, interactive live-streaming, simple streaming setup, stream analytics and more.
4. DLive
While YouTube and Twitch have some high bars for monetization, they don’t offer sufficient profit to the creators. DLive is here to solve that issue. This platform rewards content creators as well as viewers. It charges a flat fee and takes around 20 percent of total revenue. On the other hand, viewers also get rewards for their engagement.
5. Ustream
This platform offers more than just gaming video streams, such as sports news, live streams, talk shows, podcasts and more. Some reviews say Ustream provides users with a better and faster streaming service. Besides, it is available for different platforms, such as PS4, Mac, Windows, iOS, and Android.
6. Vimeo

Vimeo has all the features, such as a live chat system and other features that a streaming platform must have. You can easily access its analytic dashboard to know your audience in a better way. It also has many integrations such as Figma, Meta, WordPress, Shopify and more. So, uploading videos directly from your website to Vimeo will not be a challenging task.
FAQs
How Long Do My Videos Stay on Twitch?
The answer is that it depends. If you are a Twitch Prime user, Turbo user or a Twitch partner, then once you upload video to twitch, it will stay for 60 days. For regular broadcasters, their videos will remain active for 14 days. Just follow the above-mentioned steps to successfully upload your videos.
Can I Upload Videos to Twitch?
You can upload your video to twitch if you become a Twitch affiliate or Partner. Regular streamers don’t have this feature for now. Just meet the criteria required for this and apply for an affiliate. This can be a great way to promote your brand as you can leverage this amazing form of influenced marketing.
Free Download For Win 7 or later(64-bit)
Free Download For macOS 10.14 or later
Free Download For macOS 10.14 or later
Also read:
- New How to Reduce the Size of Video Files Online? In This Article, Well Share the Top 10 Free Online Video Compressors that You Can Use Anywhere at Any Time and on Any Device for 2024
- Updated 2024 Approved How to Create a Makeup Video
- Tactics to Make Transparent Image in Minimal Steps for 2024
- 2024 Approved Guide To Slowing Down Videos in Snapchat Discussing the Details
- New 12 Impressive AI Video Ideas for Creating Engaging Video Content
- 2024 Approved Learn How to Use Face Tracking in After Effects to Quickly Mask Out Faces, Animate Objects on Faces, and More
- New Looking for Efficient Ways to Create a Slow-Motion Video? Read the Article for Reliable Solutions that Provide Excellent Results for 2024
- Updated | How to Change Quicktime Player Speed on Mac for 2024
- Updated What Is the Selective Color Effect, and How Can You Add This Effect to Your Videos Using Wondershare Filmora? A Complete Guide for Beginners
- 2024 Approved Want to Convert MP4 Video To 60 FPS GIF? Read This
- Updated Best Ways to Merge FLV Files Windows, Mac,Android, iPhone & Online
- How to Share YouTube Video on Zoom, In 2024
- New 2024 Approved Top Tips for Camtasia Freeze-Frame
- Step by Step to Add Border to Video Using Premiere Pro for 2024
- In 2024, In This Article, We Will Show You How to Rotate Videos Using Obs
- New 2024 Approved How to Save As MP4 File on Windows Movie Maker?
- New Tutorial | How to Make a Smooth Speed Ramping in Premiere Pro, In 2024
- New 2024 Approved There Are Several Video Players that You Can Use to Watch Videos on Your PC. To Have a Better Experience Viewing Videos and Enhancing Them Across a Similar Platform, You Can Try Out VLC Media Player for PC
- New 6 Ways to Mimic Professional Filming Gears for 2024
- Confused About Deciding the Next Destination for Your Trip? This Article Features some of the Best Vloggers You Can Find for Gaining Inspiration for Traveling
- New In 2024, How to Create Your Own LUTs for Your Video with Filmora
- Do You Wish to Create the Best Video Collages ? No Problem, because Wondershare Filmora Will Help You Make the Best Video Collages
- Updated Timeline Template Is a Visual Representation Showing the Passage of Time. It Includes Text, Diagrams, Images and Icons. They Are Perfect for Telling Stories, Events Etc for 2024
- Updated In 2024, 10 Matching Color Combination That Works Together Greatly
- New Are You Interested in the Best LUTs ? Do You Want to Enhance Your Photos and Images with High-End Quality? Then, Quickly Step Into This Article for Mind-Blowing Facts on It
- New How to Change Quicktime Player Speed on Mac, In 2024
- Updated There Are Many Vlogging Cameras You Can Find in the Market. However, to Get a Good Start in Vlogging, some Sony Vlogging Cameras and Canon Vlog Cameras Are to Consider. This Article Introduces You to the Respective List for 2024
- Updated How to Record Super Slow Motion Videos on Your Phone, In 2024
- Updated In 2024, Deep Learning of AI Video Recognition - Guide
- New In 2024, How to Add Freeze Frame to Your Video From Any Device?
- Updated In 2024, DVD Slideshow Builder Review and Tutorial
- New AR, or Augmented Reality, Is One of the Most Significant Technological Inventions. This Technology Is Used in Many Applications that We Use Daily, Like, Maps, Music, Video Games, Tourism, Sightseeing, Etc
- Updated Do You Want to Professionally Blur the Background in Your Video? Read This Article to Find Out the Easiest Way to Blur the Background in Videos Using Adobe After Effects
- Updated In 2024, Finding The Best LUTs for Wondershare Filmora
- 2024 Approved How to Create Glowing Edge Effect in TikTok Dancing Video
- Updated In 2024, How to Create a Smooth Cut Transition Effect?
- New In 2024, Are You a Videographer or Video Content Creator? Is Enhancing Your Videography Skills Your Priority? Do You Want to Learn the Basics of LumaFusion Color Grading? Read on to Find All the Information You Need
- New In 2024, When It Comes to Video Editing, There Are Countless Software Options Available on the Market. However, Not All of Them Come with Useful Masking Tools. In This Article, We Will Be Discussing the Top 8 Video Editor with Useful Masking Tools
- LumaFusion Offers Various Look Up Table Presets, or LUTs, Such as FiLMiC deLog and FiLMiC DeFlat, and Several Stylistic LUTs for Use with Neutral Use Video. You Can Also Manually Add the LUTs for 2024
- In 2024, This Blog Post Shows How to Create an Eye-Catching Paper Rip Effect for Your Videos Using Wondershare Filmora with These Easy-to-Follow Steps
- In 2024, How To Use Special Features - Virtual Location On Apple iPhone 8? | Dr.fone
- In 2024, Why Your WhatsApp Live Location is Not Updating and How to Fix on your Poco M6 5G | Dr.fone
- Android Screen Stuck General Realme 11 5G Partly Screen Unresponsive | Dr.fone
- How to Fix Android App Not Installed Error on Tecno Spark 10 Pro Quickly? | Dr.fone
- In 2024, How to Bypass FRP on Honor 90?
- How To Track IMEI Number Of Samsung Galaxy S24+ Through Google Earth?
- 3 Effective Methods to Fake GPS location on Android For your Vivo T2 5G | Dr.fone
- In 2024, How to Unlock iCloud lock from your iPhone 11 Pro Max and iPad?
- New The Best Text-to-Speech Online Tools To Use
- Full Guide How To Fix Connection Is Not Private on Vivo T2 5G | Dr.fone
- In 2024, How PGSharp Save You from Ban While Spoofing Pokemon Go On Honor 90 Pro? | Dr.fone
- In 2024, iSpoofer is not working On Apple iPhone 15 Pro Max? Fixed | Dr.fone
- 6 Proven Ways to Unlock Poco M6 5G Phone When You Forget the Password
- Reset iTunes Backup Password Of iPhone 6s Plus Prevention & Solution
- Ultimate Guide on iPhone 7 iCloud Activation Lock Bypass
- In 2024, Ultimate Guide to Catch the Regional-Located Pokemon For OnePlus Nord CE 3 5G | Dr.fone
- How to Upgrade iPhone 15 Plus to the Latest iOS/iPadOS Version? | Dr.fone
- In 2024, How To Enable USB Debugging on a Locked Poco X5 Pro Phone
- How to Unlock Samsung Galaxy A25 5G Phone without PIN
- Top 5 Tracking Apps to Track Motorola Edge 40 Pro without Them Knowing | Dr.fone
- How To Transfer Data From iPhone 11 Pro To Other iPhone 15 Pro devices? | Dr.fone
- In 2024, The Top 5 Android Apps That Use Fingerprint Sensor to Lock Your Apps On Infinix Smart 7
- In 2024, Two Ways to Track My Boyfriends Samsung Galaxy S23+ without Him Knowing | Dr.fone
- How to Factory Reset Sony Xperia 5 V without Losing Data | Dr.fone
- In 2024, 3 Easy Methods to Unlock iCloud Locked Apple iPhone 12 Pro Max/iPad/iPod
- 4 Solutions to Fix Unfortunately Your App Has Stopped Error on Samsung Galaxy S24 Ultra | Dr.fone
- In 2024, How to Unlock Xiaomi 14 Ultra PIN Code/Pattern Lock/Password
- How to Transfer Photos From Oppo F23 5G to Samsung Galaxy S21 Ultra | Dr.fone
- In 2024, 3 Methods to Mirror Xiaomi 14 to Roku | Dr.fone
- Best Ways on How to Unlock/Bypass/Swipe/Remove OnePlus Nord CE 3 5G Fingerprint Lock
- Everything You Need to Know about Lock Screen Settings on your Xiaomi Redmi 12
- In 2024, How to Detect and Stop mSpy from Spying on Your Vivo X90S | Dr.fone
- In 2024, How to Unlock SIM Card on Apple iPhone 13 Pro Max online without jailbreak
- Title: New Video Editing Tips to Know Before Editing First Draft
- Author: Morgan
- Created at : 2024-05-19 05:12:09
- Updated at : 2024-05-20 05:12:09
- Link: https://ai-video-editing.techidaily.com/new-video-editing-tips-to-know-before-editing-first-draft/
- License: This work is licensed under CC BY-NC-SA 4.0.
