
:max_bytes(150000):strip_icc():format(webp)/GettyImages-541916248-593842a43df78c537be2cf44.jpg)
New Want to Buy a Drone for Better Videography Creating? This Article Will Review 6 of the Best Drones on the Market for You to Consider
Want to Buy a Drone for Better Videography Creating? This Article Will Review 6 of the Best Drones on the Market for You to Consider
Drones are all the rage these days and for good reason. They’re a lot of fun to fly, and they can be a great addition to your toolkit for capturing aerial footage. But with so many different drones on the market, it can be tough to know which one is right for you.

That’s why we’ve put together this guide to the best drones on the market for every budget. Whether you’re looking for an entry-level drone that won’t break the bank or a top-of-the-line model that will let you capture stunning 4K footage, we’ve got you covered. So read on to find the perfect drone for you!
Buyers Guide: The Best 6 Drones on the Market for Every Budget
#1. DJI Air 2S: Among the best options for most people.

The DJI’s new Air 2S is our top pick. It finds the ideal compromise in terms of size, weight, picture quality, intelligent features, and price. The camera on the Air 2S isn’t as nice as the Mavic 2 Pro’s, which has a variable aperture for more flexible shooting in sunny conditions and includes neutral density filters to help make up for it.
1.3 pounds might not seem like much, but the Air 2S is a force to be reckoned with- it’s durable enough to fly in light winds and can stay up for 30 minutes! Plus, the new collision-avoidance system will keep you safe even when there are trees around, and the 1 inch 20 mp sensor captures amazing 5K video or still photos.
#2. Skydio 2+ Drone: If you want your flights to be handled automatically.

The Skydio 2+ has the best collision-avoidance system, far outperforming any other drone on the market. If you want a drone that can follow your mountain bike off-road or quickly maneuver through obstacles without your help, this is it. Its 27-minute flight time and 6-mile range make it restrictions for some people, but plenty for most. The 1/2.3-inch sensor on this camera is good enough for 4K footage at 60 frames per second, but it’s not as great as the 1-inch sensor in the Air 2S and Evo Lite+. D-log support is also absent, so video professionals might want to keep that in mind.
However, if you can live without D-log and don’t mind the slower sensor, this drone is capable of flying in places where other drones can’t. For certain applications, a smaller sensor may be preferable to having a great one.
#3. DJI Mini 3 Pro: The Best Ultralight Drone for Most People

The DJI Mavic Mini 3 Pro is the third version of the name, and it has been greatly improved from its original state. It features a 4K/60p footage with 1/1.3” sensor as well capture 12.1 megapixel RAW photographs. The Mini 3 Pro also has a 48-megapixel mode that improves image quality, but loses some camera functions. A faster F/1.7 lens is now on the front of the drone, and it also incorporates three-direction obstacle avoidance and a gimbal that allows for vertical shooting–all while weighing in at less than 250 grams. This number is important because, in many areas, a drone under 250 grams does not need to be registered (however, you should always check your local laws).
I was ecstatic about the performance of the Mini 3 Pro. It can fly in an impressive 45 minutes when using its extended battery–which is a dramatic improvement from the 32 minutes I got with the standard battery. Not to mention, it’s delightful to fly because it maneuvers so effortlessly in even high winds. The only issue I have with it is that its price has risen since DJI released Mini 2; however, they still sell both models.
#4. DJI Mini 2: Most Affordable Drone

The Mavic Air 2S has advanced collision-avoidance tech, but at a high cost. Even the new Mini 3 Pro sells for $750. If budget is more important to you than features, DJI’s Mini 2 would be your best bet. It flies compared to its larger siblings, though wind gusts that wouldn’t bother bigger drones like the Mavic 2 Pro will ground the Mini. The lack of collision-avoidance sensors makes it better suited for experienced pilots.
Even with those minor drawbacks, the Mini 2 is still a great beginner drone. It’s enjoyable to fly, captures 4K video footage, and can be stored in smaller spaces than many smartphones. And that last part is essential because the best drones are ones that you’ll actually bring with you instead of leaving at home. The Mini 2 only weighs 249 grams so it’s easy to transport, and you don’t even need to register it with the Federal Aviation Administration
#5. DJI Mavic 3: The Most Luxurious Drone

The DJI Mavic 3 Pro is a cut above the rest. It’s the finest drone on the market right now. The new 20-megapixel Four Thirds sensor produces outstanding image and video quality, and 45 miles per hour mobility allows you to follow and track objects without missing a beat.
If you’re willing to spend the money, this drone is definitely worth it. It has a 45-minute flying time and can avoid obstacles in all directions. The Cine model also supports Pro Res video and comes with 1TB of storage space- perfect for filmmakers or anyone who wants to capture high-quality footage.
#6. Autel Evo Lite+: Great for Long Flights

The Evo Lite+ is your best bet if you want to stay airborne as long as possible. Its massive battery provides a 40-minute flight duration, and the additional weight makes it more stable in the wind (though not by much). The Evo Lite+ features a fantastic camera with variable aperture controls, a 1-inch sensor, and night mode for better low-light photos.
The control does resemble an Xbox controller, which is nice, but it lacks the storage capacity for detachable joysticks that you get with DJI drones. It’s still perfectly functional, and Autel’s software will be familiar to anyone who has used a DJI drone.
Some Final Suggestions
Drones can be used for a variety of purposes, from shooting landscapes and cityscapes to capturing footage of sporting events or outdoor activities. They can also be used for wedding videos, real estate videos, and other types of commercial work. And if you’re just looking for some fun footage to add to your home movies, drones are the perfect way to do it.
Of course, not all drones are created equal. If you’re looking for a drone that can shoot high-quality video on a budget, there are a few things you need to keep in mind.
- First, make sure the drone has a high-resolution camera.
- Second, make sure the drone has a long battery life so that you can get plenty of shots without having to recharge.
- Third, make sure the drone is lightweight and easy to control so that you can get the perfect shot every time.
So, what’s the best drone for you? It depends on your budget and your needs. If you want a high-quality camera that can shoot in low light, the DJI Mavic 3 Pro is a perfect choice. If you’re looking for a long-flight drone, the Autel Evo Lite+ is a great option. And if you’re just starting out, the DJI Mini 2 is an affordable and easy-to-use drone that anyone can fly. With that said, happy flying!
Free Download For Win 7 or later(64-bit)
Free Download For macOS 10.14 or later
Free Download For macOS 10.14 or later
Create the Night-to-Day Effect Videos
Do you wish you could control when it’s nighttime to daytime? It would make getting ready in the morning much faster! This tutorial will show you how to use the keyframe and mask feature in Filmora to make a remarkable night-to-day transition.
How-to Guide
1) Preparation
For this effect, you will need to shoot two footage shots with the same frame. The first is for the daytime clip, and the second is for nighttime.
But before that, you need to prepare some things, such as:
- Tripod to ensure your camera stays at the same point, so the frame doesn’t change.
- Mark the place where you want to shoot the scene. You can put a marker on the floor to ensure that you perform at the same spot in different shots.
Once done, let’s start shooting to get the footage.
2) Steps
Shooting footages
First, get the daytime shot. For this tutorial, we will pretend that you are walking and transitioning into nighttime at the spot you have marked.

Now, let’s film the nighttime clip. You will walk through the living room and do the same movement again at the same spot. You can dim the light and change the camera’s white balance settings to bluer to create a night feeling.

After you have both clips that you need, let’s go to Filmora and start editing.
Night-to-day transition
Step1 Launch Filmora and import the footage into the program. If you haven’t installed it, you can download Filmora on their website here: https://filmora.wondershare.com
Step2 Place the nighttime video clip on the first video track of the timeline and place the daytime clip on the top.

Step3 Find the spot where you want to create a transition between the day and nighttime. Then, you can delete the unwanted part.

Step4 Since the transition for this tutorial is where the subject started waving, make sure to place the daytime clip at the same time the subject started waving in the nighttime clip. Hence, the timing in both clips syncs.
Masking transition
For the next step, we will make a masking transition with the Filmora mask feature.
Step1 Double-click the daytime clip on the timeline. In the Filmora setting, find the Mask section > Circle. You can see the mask is applied in the preview screen.

Step2 Scroll down the setting and click add a keyframe at the beginning of the clip.

Step3 Change the scale of the mask to the smallest number and adjust the Width and Height down to 0. You can set the blur strength to 15 to make the transition edge smoother.

Step4 Move the play head to find the spot where you want the mask fully opens up, then add another keyframe. Change the scale of the mask to 2 and the Width and Height to 50. Make sure the mask occupies the whole frame.

Now, if you play back, you can see the nighttime becomes daytime through the mask.

If the movement in the two clips is a bit off, you can fix it by adding more keyframes on the mask.
3) Pro tips
You can add one more effect in Filmora to make it more magical. To do this, open the Effects window on the top left and find “Heartbeat” under the Basic section.

Drag and drop it onto the third video track and start the effect when the mask opens up. Then, trim the effect length to match the movement. Adjust the speed of this effect if needed.

The final result will look like this:

Summary
That is how to do this night-to-day transition night-to-day time shift effect in Filmora. By the end of this tutorial, you should be able to use the masking transition technique. You can apply and adjust it based on your needs.
Free Download For Win 7 or later(64-bit)
Free Download For macOS 10.14 or later
Free Download For macOS 10.14 or later
How to Record Super Slow Motion Videos on Your Huawei/Samsung/iPhone?
Super Slow Motion has long been among the finest (and most exploited) video effects. The method was initially limited to high-end lenses, but super slo-mo has become increasingly superior as smartphone technology advances.
Super slo-mo is a terrific technique to learn how to use if you want to accentuate a dramatic moment or extend the humiliation of a friend you captured in an embarrassing scenario. This article has stepwise guides and tips for recording super slo-mo on your phone. Let’s get going!
In this article
01 What’s the Difference Between Slow-Mo and Super Slow-Mo?
02 How to Record Super Slo-Mo Videos with Samsung Galaxy S20 and Later models?
03 How to Edit Super Slow Motion Video in Samsung Galaxy S21?
04 How to Record Super Slow Motion Video with Huawei Mate 20 and Later Phones?
05 How to Shoot Slo-Mo Videos on iPhone?
06 Tips for Recording Super Slow Motion Video
Part 1: What’s the Difference Between Slow-Mo and Super Slow-Mo?
Super Slow-Mo (960fps) is a technology that allows users to shoot films at 960fps using a top-speed lens, capturing events that the naked eye cannot ordinarily notice by viewing them 32 times slower than regular videos (30fps) and four times slower than videos produced using the current Slow Motion feature (240fps).
Super Slow-mo movie may be displayed as 6-12 sec long on old smartphones, such as Galaxy S9/S9+ and Note9. However, the newer versions, such as Galaxy S10 Series, can play super slow-mo movies up to 14.8 sec.
You’ll understand the difference between the Slow-Mo and Super Slow-Mo better after reading the below information:
Slow Motion
Video is produced at an 8-times slower rate than usual, equivalent to the speed of a movie, advertisement, or sporting event.
Super Slow Motion
Videos are played 32 times slower than usual, catching minute changes in facial gestures and fast-moving elements.
Part 2: How to Record Super Slo-Mo Videos with Samsung Galaxy S20 and Later models?
Models That Support Super Slow-Mo: Galaxy S20, Galaxy S20+, Galaxy S20+ Ultra, Galaxy Z Flip, and later models.
Slow-motion video is often created by filming at a fast frame per second (fps) speed and then playing back at a far slower pace. This results in intriguing videos with slowed-down motion. The event is captured at 960 frames per second with the Super Slow-mo function, four times quicker than conventional slow motion. When it’s replayed at 30 frames per second, it’s 32 times slower, making mundane moments appear spectacular.
To capture super slow-motion videos with your Samsung Galaxy S20 and later models, follow the instructions below:
Step 1: Launch the camera on your phone by tapping the Camera app.
Step 2: Now, click on the Super Slow-Mo option to proceed.
Step 3: Press the White Circle in the center to start the recording and press it again to stop when you are done.
Note: Make sure that your phone’s video resolution is already on HD because Super Slow-Mo only supports HD resolutions.
Part 3: How to Edit Super Slow Motion Video in Samsung Galaxy S21?
Only capturing the super slow-motion videos is not enough, especially if you are a content creator. Even in the super slow-mo, there might be some unnecessary parts (since it is more detailed) that you need to cut out or the parts that need some enhancements to make the video look captivating.
However, not every phone is eligible to edit super slow-mo videos by not degrading the video resolutions. But Samsung Galaxy S21 allows you to do that by keeping the video resolution intact. You can edit the Super Slow-Mo videos with Galaxy S21 by following these instructions:
Step 1: Open the Camera app and navigate the super slow-mo video you wish to edit.
Step 2: Now, play it and tap the screen. You will see three vertical dots in the right corner. Click on them.
Step 3: Select the Editor option from the dropdown menu that appears.
Step 4: After that, you can adjust the length, crop the video, add effects, add stickers, add music, etc., by selecting from the bottom menu.
Step 5: After you’re done editing, click on the Save option at the top to save the video to your Gallery.

Part 4: How to Record Super Slow Motion Video with Huawei Mate 20 and Later Phones?
Models That Support Super Slow-Mo: Huawei Mate 20/20 Pro/20 X and later Mate models.
Before we demonstrate how to capture a super slow-mo with a Huawei Mate 20 and later models, we’ll explain this popular capture mode.
To begin, you should be aware that a camera/camera sensor collects a specific number of frames per second. The movie becomes legible by combining these pictures; the more images there are, the more fluent the video will be. The naked eye is thought to decipher about 60 pictures every second.
The benefit of improved camera sensors is that you can capture a maximum number of photos per second (some smartphones can record up to 960 / second) and slow down the sampling rate to produce a super slow-motion effect on the Huawei Mate 20 or later models.
Now, follow the stepwise guide to record super slow-mo with Huawei Mate 40 or later models:
Step 1: Launch your phone’s Camera go to More to select the Slow-Mo option.
Step 2: By default, you will see 4x on the slow-mo capture mode, which means the video will be recorded at 120FPS. Huawei Mate 40 allows you to capture up to 128X, i.e, 3840FPS for fast moving objects. To enable the Super Slo-Mo feature, select the 32X or 128X in this mode.
Step 3: Click on the Circle in the center to start and stop the recording. The video will be saved in your Gallery.
Part 5: How to Shoot Slo-Mo Videos on iPhone?
Slow-motion film on your iPhone essentially means slowing the fps so that everything appears to move slower inside the video. It is a popular effect employed by artists to produce one-of-a-kind video clips of sports footage, natural scenes, or sequences with a lot of dramatic motion.
Slow-motion films are supported by all iPhones, beginning with the 5S model, and the capability gets more robust and more stable with each successive generation. Shooting slow-motion films with your iPhone are addicting and enjoyable, and it adds drama to various settings.
Here is a step-by-step method for filming slow-mo with an iPhone, regardless of model.
Step 1: Launch the Camera app on your iPhone and go to the Slow-Mo effect by sliding from the options above. Change the frame rate on the upper right corner to 120, 240, 720, depending on the iPhone models you’re using.
Step 2: Now, start the recording by clicking the Red Circle in the center or either of the Volume button.
Step 3: After you’re done recording, press the Red Circle again and head towards the Gallery to view the recorded video.

For more details, check: How to make slo-mo video on your iPhone.
Part 6: Tips for Recording Super Slow Motion Video
Although super slow-motion videos are easy to record, they can be challenging for a content creator. But don’t worry, with the following tips, we have got you covered:
Utilize A Tripod
It’s critical to keep your phone as steady as possible when filming in Super Slow-mo since shaking might conflict with your video and hinder it from recognizing motions when set to auto-record. To get the most out of Super Slow-mo, we recommend using a tripod whenever feasible.
You can check these tripods for iPhone
Transition Between Single and Multi-Takes
To boost your chances of catching the ideal timing in Super Slow-mo, your phone allows you to record in Multi-Take mode, which can capture many bursts of Super Slow-mo in one video.
When combined with an auto record, additional Super Slow-mo videos will be captured as much as the focus box senses activity and will end only when you end filming. The manual record works similarly. However, you’ll have to physically hit the trigger each time you wish to record a picture in Super Slow-mo.
As the name indicates, Single-Take will record a single Super Slow-mo clip and then cease recording a moment or two later. Because Multi-Take clips are often more extensive, this could save a large storage capacity.
Readjust the Focus
The focus or auto-recording is tiny by default. Fortunately, you can enlarge it to improve its odds of recognizing movement. To adjust the size of the box, hold it until only its edges are visible, then move any corner from the others to expand the box’s area. Simply tap anywhere outside the borders to verify the adjustment when you’re happy with the size.
Capture in Natural Light
Because of the large number of frames it collects, Super Slow-mo works the best in natural daylight situations. Though not visible to the human eye, indoor lighting, especially LED bulbs and tiny fluorescents, seems to flash at very high rates. Even if the environment is well-lit, Super Slow-mo detects this and shows your subject in a substantially darker tone.
View the Video at Normal Speed
If you wish to watch your Super Slow-mo movies at regular speed, deactivate Super Slow-mo playing by tapping on the option directly below the video. This will give you a greater understanding of your phone’s incredible capacity to bring the world to a halt.
Learn more about : How to Convert normal video to slo-mo video?
Besides the tips mentioned above, you can also watch this video to get some tips and tricks in recording slo-mo video with iPhone.
Conclusion
Super Slow Motion videos are excellent for showcasing the action and conveying tales, and they are also entertaining and straightforward to create. Your only constraints are time and imagination. However, your Android or iPhone’s camera has many more tricks in its sleeve: Live images, time-lapse, Panoramas, and Portrait mode let you express yourself freely!
02 How to Record Super Slo-Mo Videos with Samsung Galaxy S20 and Later models?
03 How to Edit Super Slow Motion Video in Samsung Galaxy S21?
04 How to Record Super Slow Motion Video with Huawei Mate 20 and Later Phones?
05 How to Shoot Slo-Mo Videos on iPhone?
06 Tips for Recording Super Slow Motion Video
Part 1: What’s the Difference Between Slow-Mo and Super Slow-Mo?
Super Slow-Mo (960fps) is a technology that allows users to shoot films at 960fps using a top-speed lens, capturing events that the naked eye cannot ordinarily notice by viewing them 32 times slower than regular videos (30fps) and four times slower than videos produced using the current Slow Motion feature (240fps).
Super Slow-mo movie may be displayed as 6-12 sec long on old smartphones, such as Galaxy S9/S9+ and Note9. However, the newer versions, such as Galaxy S10 Series, can play super slow-mo movies up to 14.8 sec.
You’ll understand the difference between the Slow-Mo and Super Slow-Mo better after reading the below information:
Slow Motion
Video is produced at an 8-times slower rate than usual, equivalent to the speed of a movie, advertisement, or sporting event.
Super Slow Motion
Videos are played 32 times slower than usual, catching minute changes in facial gestures and fast-moving elements.
Part 2: How to Record Super Slo-Mo Videos with Samsung Galaxy S20 and Later models?
Models That Support Super Slow-Mo: Galaxy S20, Galaxy S20+, Galaxy S20+ Ultra, Galaxy Z Flip, and later models.
Slow-motion video is often created by filming at a fast frame per second (fps) speed and then playing back at a far slower pace. This results in intriguing videos with slowed-down motion. The event is captured at 960 frames per second with the Super Slow-mo function, four times quicker than conventional slow motion. When it’s replayed at 30 frames per second, it’s 32 times slower, making mundane moments appear spectacular.
To capture super slow-motion videos with your Samsung Galaxy S20 and later models, follow the instructions below:
Step 1: Launch the camera on your phone by tapping the Camera app.
Step 2: Now, click on the Super Slow-Mo option to proceed.
Step 3: Press the White Circle in the center to start the recording and press it again to stop when you are done.
Note: Make sure that your phone’s video resolution is already on HD because Super Slow-Mo only supports HD resolutions.
Part 3: How to Edit Super Slow Motion Video in Samsung Galaxy S21?
Only capturing the super slow-motion videos is not enough, especially if you are a content creator. Even in the super slow-mo, there might be some unnecessary parts (since it is more detailed) that you need to cut out or the parts that need some enhancements to make the video look captivating.
However, not every phone is eligible to edit super slow-mo videos by not degrading the video resolutions. But Samsung Galaxy S21 allows you to do that by keeping the video resolution intact. You can edit the Super Slow-Mo videos with Galaxy S21 by following these instructions:
Step 1: Open the Camera app and navigate the super slow-mo video you wish to edit.
Step 2: Now, play it and tap the screen. You will see three vertical dots in the right corner. Click on them.
Step 3: Select the Editor option from the dropdown menu that appears.
Step 4: After that, you can adjust the length, crop the video, add effects, add stickers, add music, etc., by selecting from the bottom menu.
Step 5: After you’re done editing, click on the Save option at the top to save the video to your Gallery.
Part 4: How to Record Super Slow Motion Video with Huawei Mate 20 and Later Phones?
Models That Support Super Slow-Mo: Huawei Mate 20/20 Pro/20 X and later Mate models.
Before we demonstrate how to capture a super slow-mo with a Huawei Mate 20 and later models, we’ll explain this popular capture mode.
To begin, you should be aware that a camera/camera sensor collects a specific number of frames per second. The movie becomes legible by combining these pictures; the more images there are, the more fluent the video will be. The naked eye is thought to decipher about 60 pictures every second.
The benefit of improved camera sensors is that you can capture a maximum number of photos per second (some smartphones can record up to 960 / second) and slow down the sampling rate to produce a super slow-motion effect on the Huawei Mate 20 or later models.
Now, follow the stepwise guide to record super slow-mo with Huawei Mate 40 or later models:
Step 1: Launch your phone’s Camera go to More to select the Slow-Mo option.
Step 2: By default, you will see 4x on the slow-mo capture mode, which means the video will be recorded at 120FPS. Huawei Mate 40 allows you to capture up to 128X, i.e, 3840FPS for fast moving objects. To enable the Super Slo-Mo feature, select the 32X or 128X in this mode.
Step 3: Click on the Circle in the center to start and stop the recording. The video will be saved in your Gallery.
Part 5: How to Shoot Slo-Mo Videos on iPhone?
Slow-motion film on your iPhone essentially means slowing the fps so that everything appears to move slower inside the video. It is a popular effect employed by artists to produce one-of-a-kind video clips of sports footage, natural scenes, or sequences with a lot of dramatic motion.
Slow-motion films are supported by all iPhones, beginning with the 5S model, and the capability gets more robust and more stable with each successive generation. Shooting slow-motion films with your iPhone are addicting and enjoyable, and it adds drama to various settings.
Here is a step-by-step method for filming slow-mo with an iPhone, regardless of model.
Step 1: Launch the Camera app on your iPhone and go to the Slow-Mo effect by sliding from the options above. Change the frame rate on the upper right corner to 120, 240, 720, depending on the iPhone models you’re using.
Step 2: Now, start the recording by clicking the Red Circle in the center or either of the Volume button.
Step 3: After you’re done recording, press the Red Circle again and head towards the Gallery to view the recorded video.
For more details, check: How to make slo-mo video on your iPhone.
Part 6: Tips for Recording Super Slow Motion Video
Although super slow-motion videos are easy to record, they can be challenging for a content creator. But don’t worry, with the following tips, we have got you covered:
Utilize A Tripod
It’s critical to keep your phone as steady as possible when filming in Super Slow-mo since shaking might conflict with your video and hinder it from recognizing motions when set to auto-record. To get the most out of Super Slow-mo, we recommend using a tripod whenever feasible.
You can check these tripods for iPhone
Transition Between Single and Multi-Takes
To boost your chances of catching the ideal timing in Super Slow-mo, your phone allows you to record in Multi-Take mode, which can capture many bursts of Super Slow-mo in one video.
When combined with an auto record, additional Super Slow-mo videos will be captured as much as the focus box senses activity and will end only when you end filming. The manual record works similarly. However, you’ll have to physically hit the trigger each time you wish to record a picture in Super Slow-mo.
As the name indicates, Single-Take will record a single Super Slow-mo clip and then cease recording a moment or two later. Because Multi-Take clips are often more extensive, this could save a large storage capacity.
Readjust the Focus
The focus or auto-recording is tiny by default. Fortunately, you can enlarge it to improve its odds of recognizing movement. To adjust the size of the box, hold it until only its edges are visible, then move any corner from the others to expand the box’s area. Simply tap anywhere outside the borders to verify the adjustment when you’re happy with the size.
Capture in Natural Light
Because of the large number of frames it collects, Super Slow-mo works the best in natural daylight situations. Though not visible to the human eye, indoor lighting, especially LED bulbs and tiny fluorescents, seems to flash at very high rates. Even if the environment is well-lit, Super Slow-mo detects this and shows your subject in a substantially darker tone.
View the Video at Normal Speed
If you wish to watch your Super Slow-mo movies at regular speed, deactivate Super Slow-mo playing by tapping on the option directly below the video. This will give you a greater understanding of your phone’s incredible capacity to bring the world to a halt.
Learn more about : How to Convert normal video to slo-mo video?
Besides the tips mentioned above, you can also watch this video to get some tips and tricks in recording slo-mo video with iPhone.
Conclusion
Super Slow Motion videos are excellent for showcasing the action and conveying tales, and they are also entertaining and straightforward to create. Your only constraints are time and imagination. However, your Android or iPhone’s camera has many more tricks in its sleeve: Live images, time-lapse, Panoramas, and Portrait mode let you express yourself freely!
15 Must-Use Gifs Editors
15 Must-Use Gifs Editors in 2024
An easy yet powerful editor
Numerous effects to choose from
Detailed tutorials provided by the official channel
Several websites and companies use the graphics interchange format that is the GIF. It can be seen to be used by a wide number of people on the internet and its format is supported by all platforms. The common goal of all the users can be satisfied.
Are you looking to create and edit gifs online or on your laptop but cannot find a suitable way out?
Finding the best and most user friendly GIF maker is not very hard, especially considering that free gif editor software is offered by so many providers. But if you’re only starting your journey with apps to make GIFs, it can be a difficult choice.
In this article
01 [How to Make GIF Interesting?](#Part 1)
02 [Top 5 Editors for Windows](#Part 2)
03 [Top 5 Editors for iPhone/Android](#Part 3)
04 [Top 5 Editors for Animated GIF Editing](#Part 4)
Part 1 How to Make GIF Interesting?
There are several ways by which a GIF can be made interesting. You can use colorful graphics and drop duplicate frames. Using fewer colors lets you make longer and more involved gifs.
Part 2 Top 5 Editors for Windows
Below are the top 5 editors which will help you to form GIFs for Windows: -
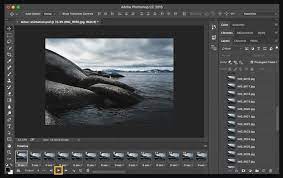
01Adobe Photoshop
Adobe Photoshop could be a useful device for making videos, image redaction, and GIF editing. This GIF code for Windows can allow you to import a GIF file so begin with the modification process.
Therefore, GIF editing is a breeze as you’ll alter the effects, modification the frame animation within the Timeline section, and do plenty a lot with this tool. You’ll simply utilize the free trial version to urge accustomed to the tool initial and then opt for the premium version to try to a lot more.
02EaseUS Video Editor
In the context of GIF makers, EaseUS Video Editor can also be said as one of the best. Free templates of texts, filters, elements, overlays, transitions, and music are available here which its users create GIF images with easily. You can also create lively and fully animated images, convert MP4 to GIFs and share it on YouTube, or other social media platforms.
The capabilities of this animated GIF maker for Windows are not restrained to this alone, as it can be used to edit all kinds of images, audio, and videos.
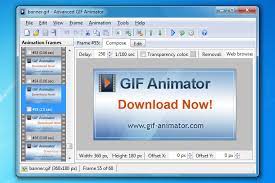
03GIF Animator
GIF animator editor is one of the first-rate GIF makers and is an awesome device for you if you desire to create GIF images, banners, buttons, and GIF videos. The device is very convenient to use and is a favorite of animators and designers.
The measurement of the photo can be modified and alongside that, it is feasible to control the frames, hastily cross texts, and enhance. Corrections to the movies can be brought and the built-in photograph editor can be used to rectify photographs and pictures, you can draw on them and you can convert movies to GIFs by the usage of the fragmented section of the video files.
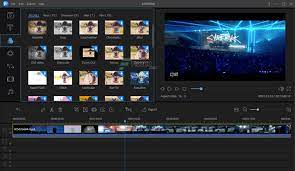
04**Wondershare Filmora Video Editor **
If you are searching for nice animated GIF makers for Windows computers, then Wondershare Filmora’s animated movies and GIF editor device may want to be a brilliant choice. That’s due to the fact with this GIF maker Windows device lets you add a video, convert it to the GIF structure and then edit it later with its super features.
The interactive UI helps customers manner greater than one hundred fifty file codecs easily. With this device, you can crop, pace up a video, alter the body size, and caption it. Additionally, you add texts, add animation consequences to the images, and alter the pictures and movies in a few steps.

Wondershare Filmora - Best Video Editor for Mac/Windows
5,481,435 people have downloaded it.
Build unique custom animations without breaking a sweat.
Focus on creating epic stories and leave the details to Filmora’s auto features.
Start a creative adventure with drag & drop effects and endless possibilities.
Filmora simplifies advanced features to save you time and effort.
Filmora cuts out repetition so you can move on to your next creative breakthrough.
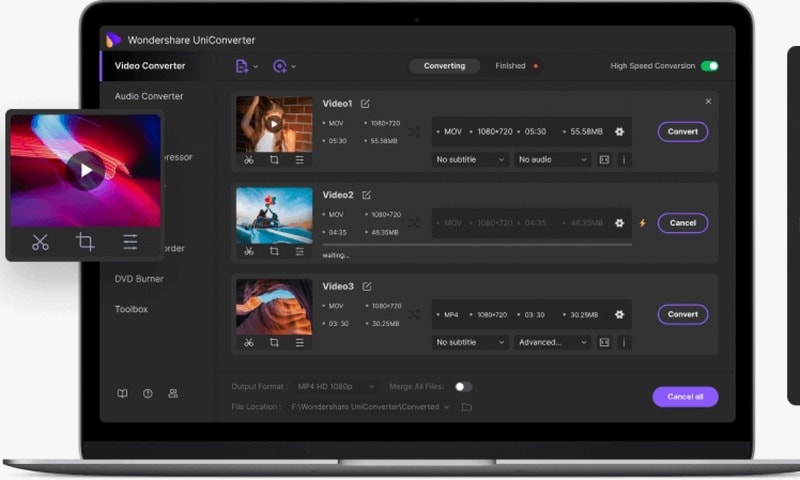
05Wondershare UniConverter
Wondershare UniConverter is one of the fine image, audio, and video editor and converter out there, and ranked the excellent GIF maker here. This GIF editor app is easy for customers and will furnish a pleasant platform for novices to operate their tasks. And when performed to create and edit GIF files, a person can export the GIF archives to both Android or iPhone barring having to use iTunes.
Part 3 Top 5 Editors for iPhone/Android
01PixelStudio
Pixel Studio is an animation app for pixel artwork fans. You can draw your little creations with pixel art. It additionally comes with a textual content tool, aid for matters like Samsung S-Pen, and it auto-saves so you don’t lose work. You can export your creations to GIF as nicely and that makes Pixel Studio one of the quality apps for customized GIFs. It’s normally an artwork app so meme lords may additionally want to put in a little greater effort than usual, however, the consequences are normally well worth it.
02Giphy Cam
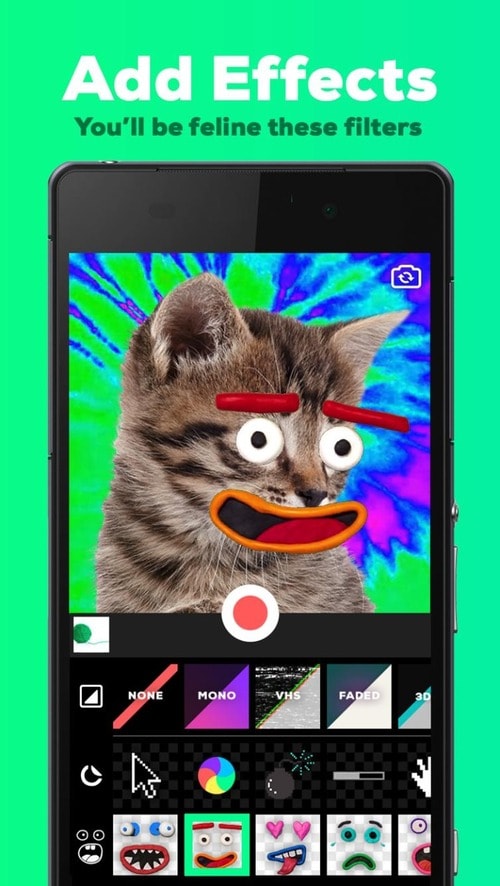
Giphy Cam is one of the more recent gif editing apps. The digicam data is a brief phase of video. You can alter that video with lots of filters, different effects, stickers, text, and more. It additionally has a five-shot burst mode alongside its video mode. This is likely the excellent GIF/camera app hybrid. It doesn’t have any digital camera features; however, it does GIFs higher than the others by way of a large margin. It’s free with no in-app purchases.
03PowerDirector
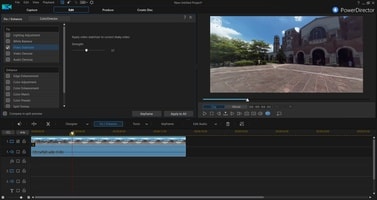
PowerDirector is one of many videos modifying apps with GIF support. This one simply takes place to be higher than most of the different ones. It’s a video editor app. Thus, it’ll have comparable features. However, two of the export codecs encompass GIF nonetheless pix and animated GIFs. This will work first-class for turning a video into a shorter GIF. The app is free to download and play with. You may additionally want to buy extra aspects by using in-app purchases.
04ImgPlay – GIF Maker
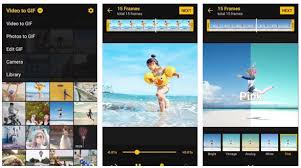
ImgPlay is a popular GIF editing app that is available for Android and iOS. You have the option of using an existing video or shooting one using your phone’s camera. In GIFs, you can apply 30 effects, crop a portion of your choice, and modify the frame rate.
05Motion Stills
Motion Stills is a Google app that allows you to record short films and turn them into looping GIFs. You can use the app to take a short 3s clip with a single tap or utilize the Fast Forward feature to condense an existing video into a short one. To make yips GIFs even better, you may add motion text and emoticons. After that, save it as a GIF and send it to your friends.
Part 4 Top 5 Editors for Animated GIF Editing
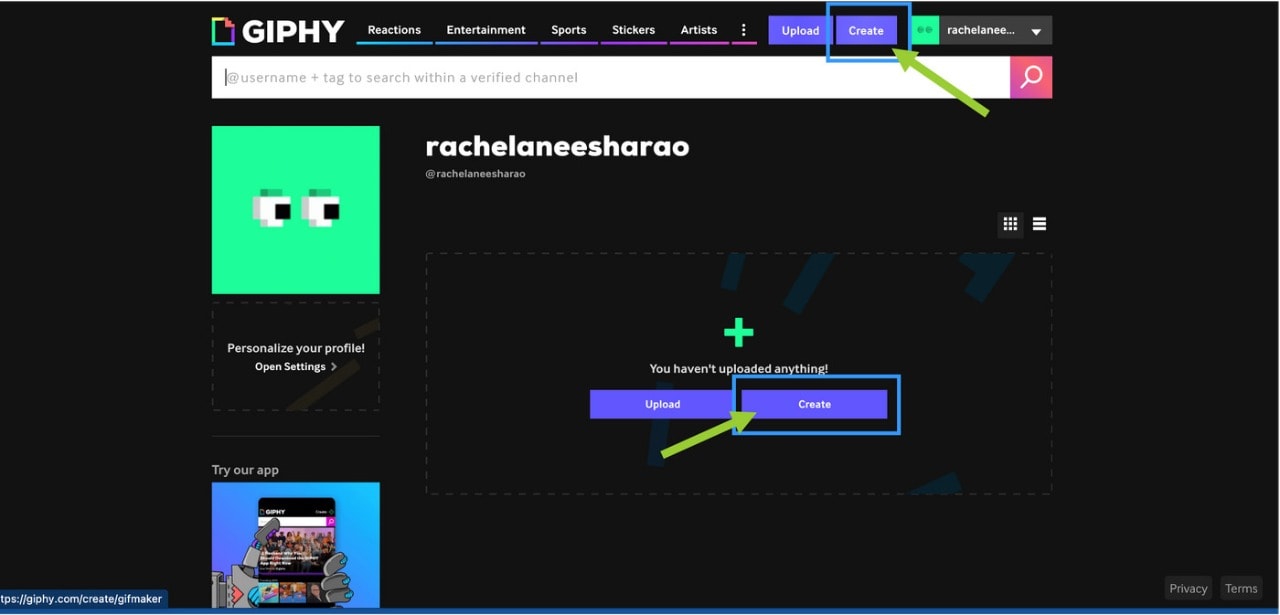
01Giphy
GIPHY is a designing tool that helps customers to create extraordinary GIFs, stickers, and backdrops. You can edit your plan with filters, captions, stickers, and different plan elements. The popular codecs for GIF uploads are JPG, PNG, GIF, MP4, or MOV, whilst the conventional file codecs to convert to stickers are JPG or PNG.
GIPHY permits you to paste URLs from specific sources such as Vimeo, YouTube, GIPHY, and others. The animated GIF maker software program makes it convenient for customers to edit and organize the uploaded archives in the favored order.
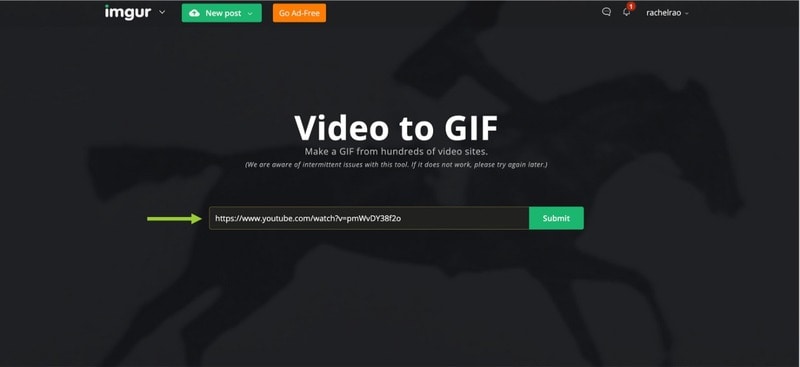
02Imgur
It’s a website that makes it simple to make GIFs. Simply paste the video URL into the web app and wait for it to process. After that, all you must do now is set the start time and duration of your GIF.
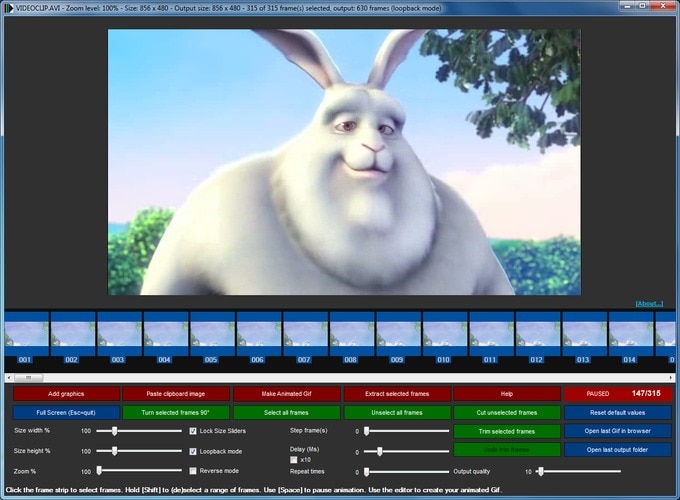
03KickMyGraphics
The utility comes with a humble person interface and it approves you to create animated GIFs from neighborhood images. In addition, you can additionally paste snapshots from your clipboard at once to the application. The utility additionally helps video files; however, you want to convert the video earlier than you can edit it. The utility affords a stay preview so you can see how your animation appears at any time. You can additionally see all handy frames and dispose of useless frames with ease.
As for editing, you can’t add your textual content or alter the brightness of your frames, however, you can trade their width, peak, and zoom level. You can additionally allow Loopback or Reverse mode and set delay, step frames, and a variety of repeats. You can additionally configure output first-class right from the application.
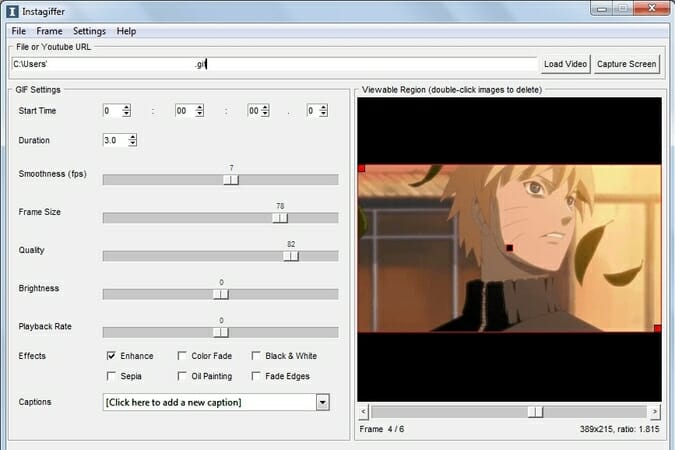
04Instagiffer
Instagiffer is some other easy software that lets you create animated GIFs on your PC. This utility affords a humble consumer interface; however, it makes up for it with an extensive variety of features. The software approves you to convert nearby movies to GIFs, however, you can additionally paste a YouTube URL and convert an online video to GIF with ease. According to the developer, the software additionally works with different video web hosting websites.
05GIMP
The software is free, so you can download and use it except for any restrictions. GIMP is best for picture designers and it comes with all preferences that an image editor needs. You can without problems edit your images, exchange their color, hue, saturation, or brightness, and add exceptional outcomes to them.
In addition, you can create special creations thanks to the built-in layer system. It’s worth citing that the software additionally helps programming algorithms so you can effortlessly edit your photos with the use of scripts.

● Key Takeaways from This Episode →
● If you are typically worried about how you can be able to come up with fascinating GIFs, you ought to hold in thought that you don’t have to create them from scratch.
● You can be capable to advance inspiring GIFs from current movies and photos eight after GIF editor software program free download.
● Hopefully, you are now capable to pick out a perfect GIF creator to use for your modifying tasks.
Several websites and companies use the graphics interchange format that is the GIF. It can be seen to be used by a wide number of people on the internet and its format is supported by all platforms. The common goal of all the users can be satisfied.
Are you looking to create and edit gifs online or on your laptop but cannot find a suitable way out?
Finding the best and most user friendly GIF maker is not very hard, especially considering that free gif editor software is offered by so many providers. But if you’re only starting your journey with apps to make GIFs, it can be a difficult choice.
In this article
01 [How to Make GIF Interesting?](#Part 1)
02 [Top 5 Editors for Windows](#Part 2)
03 [Top 5 Editors for iPhone/Android](#Part 3)
04 [Top 5 Editors for Animated GIF Editing](#Part 4)
Part 1 How to Make GIF Interesting?
There are several ways by which a GIF can be made interesting. You can use colorful graphics and drop duplicate frames. Using fewer colors lets you make longer and more involved gifs.
Part 2 Top 5 Editors for Windows
Below are the top 5 editors which will help you to form GIFs for Windows: -
01Adobe Photoshop
Adobe Photoshop could be a useful device for making videos, image redaction, and GIF editing. This GIF code for Windows can allow you to import a GIF file so begin with the modification process.
Therefore, GIF editing is a breeze as you’ll alter the effects, modification the frame animation within the Timeline section, and do plenty a lot with this tool. You’ll simply utilize the free trial version to urge accustomed to the tool initial and then opt for the premium version to try to a lot more.
02EaseUS Video Editor
In the context of GIF makers, EaseUS Video Editor can also be said as one of the best. Free templates of texts, filters, elements, overlays, transitions, and music are available here which its users create GIF images with easily. You can also create lively and fully animated images, convert MP4 to GIFs and share it on YouTube, or other social media platforms.
The capabilities of this animated GIF maker for Windows are not restrained to this alone, as it can be used to edit all kinds of images, audio, and videos.
03GIF Animator
GIF animator editor is one of the first-rate GIF makers and is an awesome device for you if you desire to create GIF images, banners, buttons, and GIF videos. The device is very convenient to use and is a favorite of animators and designers.
The measurement of the photo can be modified and alongside that, it is feasible to control the frames, hastily cross texts, and enhance. Corrections to the movies can be brought and the built-in photograph editor can be used to rectify photographs and pictures, you can draw on them and you can convert movies to GIFs by the usage of the fragmented section of the video files.
04**Wondershare Filmora Video Editor **
If you are searching for nice animated GIF makers for Windows computers, then Wondershare Filmora’s animated movies and GIF editor device may want to be a brilliant choice. That’s due to the fact with this GIF maker Windows device lets you add a video, convert it to the GIF structure and then edit it later with its super features.
The interactive UI helps customers manner greater than one hundred fifty file codecs easily. With this device, you can crop, pace up a video, alter the body size, and caption it. Additionally, you add texts, add animation consequences to the images, and alter the pictures and movies in a few steps.
Wondershare Filmora - Best Video Editor for Mac/Windows
5,481,435 people have downloaded it.
Build unique custom animations without breaking a sweat.
Focus on creating epic stories and leave the details to Filmora’s auto features.
Start a creative adventure with drag & drop effects and endless possibilities.
Filmora simplifies advanced features to save you time and effort.
Filmora cuts out repetition so you can move on to your next creative breakthrough.
05Wondershare UniConverter
Wondershare UniConverter is one of the fine image, audio, and video editor and converter out there, and ranked the excellent GIF maker here. This GIF editor app is easy for customers and will furnish a pleasant platform for novices to operate their tasks. And when performed to create and edit GIF files, a person can export the GIF archives to both Android or iPhone barring having to use iTunes.
Part 3 Top 5 Editors for iPhone/Android
01PixelStudio
Pixel Studio is an animation app for pixel artwork fans. You can draw your little creations with pixel art. It additionally comes with a textual content tool, aid for matters like Samsung S-Pen, and it auto-saves so you don’t lose work. You can export your creations to GIF as nicely and that makes Pixel Studio one of the quality apps for customized GIFs. It’s normally an artwork app so meme lords may additionally want to put in a little greater effort than usual, however, the consequences are normally well worth it.
02Giphy Cam
Giphy Cam is one of the more recent gif editing apps. The digicam data is a brief phase of video. You can alter that video with lots of filters, different effects, stickers, text, and more. It additionally has a five-shot burst mode alongside its video mode. This is likely the excellent GIF/camera app hybrid. It doesn’t have any digital camera features; however, it does GIFs higher than the others by way of a large margin. It’s free with no in-app purchases.
03PowerDirector
PowerDirector is one of many videos modifying apps with GIF support. This one simply takes place to be higher than most of the different ones. It’s a video editor app. Thus, it’ll have comparable features. However, two of the export codecs encompass GIF nonetheless pix and animated GIFs. This will work first-class for turning a video into a shorter GIF. The app is free to download and play with. You may additionally want to buy extra aspects by using in-app purchases.
04ImgPlay – GIF Maker
ImgPlay is a popular GIF editing app that is available for Android and iOS. You have the option of using an existing video or shooting one using your phone’s camera. In GIFs, you can apply 30 effects, crop a portion of your choice, and modify the frame rate.
05Motion Stills
Motion Stills is a Google app that allows you to record short films and turn them into looping GIFs. You can use the app to take a short 3s clip with a single tap or utilize the Fast Forward feature to condense an existing video into a short one. To make yips GIFs even better, you may add motion text and emoticons. After that, save it as a GIF and send it to your friends.
Part 4 Top 5 Editors for Animated GIF Editing
01Giphy
GIPHY is a designing tool that helps customers to create extraordinary GIFs, stickers, and backdrops. You can edit your plan with filters, captions, stickers, and different plan elements. The popular codecs for GIF uploads are JPG, PNG, GIF, MP4, or MOV, whilst the conventional file codecs to convert to stickers are JPG or PNG.
GIPHY permits you to paste URLs from specific sources such as Vimeo, YouTube, GIPHY, and others. The animated GIF maker software program makes it convenient for customers to edit and organize the uploaded archives in the favored order.
02Imgur
It’s a website that makes it simple to make GIFs. Simply paste the video URL into the web app and wait for it to process. After that, all you must do now is set the start time and duration of your GIF.
03KickMyGraphics
The utility comes with a humble person interface and it approves you to create animated GIFs from neighborhood images. In addition, you can additionally paste snapshots from your clipboard at once to the application. The utility additionally helps video files; however, you want to convert the video earlier than you can edit it. The utility affords a stay preview so you can see how your animation appears at any time. You can additionally see all handy frames and dispose of useless frames with ease.
As for editing, you can’t add your textual content or alter the brightness of your frames, however, you can trade their width, peak, and zoom level. You can additionally allow Loopback or Reverse mode and set delay, step frames, and a variety of repeats. You can additionally configure output first-class right from the application.
04Instagiffer
Instagiffer is some other easy software that lets you create animated GIFs on your PC. This utility affords a humble consumer interface; however, it makes up for it with an extensive variety of features. The software approves you to convert nearby movies to GIFs, however, you can additionally paste a YouTube URL and convert an online video to GIF with ease. According to the developer, the software additionally works with different video web hosting websites.
05GIMP
The software is free, so you can download and use it except for any restrictions. GIMP is best for picture designers and it comes with all preferences that an image editor needs. You can without problems edit your images, exchange their color, hue, saturation, or brightness, and add exceptional outcomes to them.
In addition, you can create special creations thanks to the built-in layer system. It’s worth citing that the software additionally helps programming algorithms so you can effortlessly edit your photos with the use of scripts.
● Key Takeaways from This Episode →
● If you are typically worried about how you can be able to come up with fascinating GIFs, you ought to hold in thought that you don’t have to create them from scratch.
● You can be capable to advance inspiring GIFs from current movies and photos eight after GIF editor software program free download.
● Hopefully, you are now capable to pick out a perfect GIF creator to use for your modifying tasks.
Also read:
- An Introduction to LUTs | Their Overview and Benefits
- Updated Best PDF to GIF Converters for 2024
- Replacing the Sky in Adobe After Effects An Extensive Guide for 2024
- Updated 2024 Approved A Detailed Guide to Do Color Correction in OBS
- New In 2024, Converting VTT to SRT, or in Other Words, Converting a Document File Format Web to Subtitles File with the SRT Format Can Be a Cumbersome Process for Many. It Becomes Difficult when You Are New to This and Dont Have Prior Guidance
- In 2024, This Article Talks in Detail About How to Convert Time-Lapse to Normal Video Using Certain Methods on iPhone, Online Tools, and so On. It Further Discusses Converting Time-Lapse Video to Normal on the Computer. Check Out
- Updated How to Record Clips Using Your Camera and Edit Them Using Wondershare Filmora to Make a Loop Video? A Complete Guide for Beginners for 2024
- 2024 Approved Easy Way to Combine Several Xvid Files Into One Windows, Mac,Android
- New How to Create a Smooth Cut Transition Effect, In 2024
- New 2024 Approved Progressive Solutions to Adding VHS Effects to Video with Ease
- How to Add Text in Adobe Rush
- Updated Something That You Should Know About MP4 Video Format
- Updated This Article Is a Guide on How to Download and Install Final Cut Pro, Its Key Features, and More. It Also Discusses an Alternative Option to It so the Creators or Editors Can Opt for Editing Videos Accordingly for 2024
- New 2024 Approved With Everything Centered Around Videos on the Digital Platform, the Use and the Need for AI-Based Editing Tools Have Also Increased Manifold. We Have Curated a List of the Top Programs that Can Help You with AI Video Editing
- In 2024, Things About Transparent PNG Remove and Convert
- New Focusing On The Best Ways To Convert Slow-Motion Video to Normal for 2024
- New 2024 Approved Everything That You Need to Know About Video Montages- Ideas, Techniques, and Software
- Why does the pokemon go battle league not available On Honor 70 Lite 5G | Dr.fone
- In 2024, The 10 Best Tools to Bypass iCloud Activation Lock From Apple iPhone 11 Pro You Should Try Out
- Easy steps to recover deleted videos from A60s
- Top 15 Augmented Reality Games Like Pokémon GO To Play On Tecno Spark 20 Pro | Dr.fone
- 3 Easy Solutions to Hard Reset Samsung Galaxy A15 4G | Dr.fone
- Why is iPogo not working On Samsung Galaxy F04? Fixed | Dr.fone
- In 2024, How to Bypass Android Lock Screen Using Emergency Call On Samsung?
- How to Change Lock Screen Wallpaper on Realme GT 5 Pro
- In 2024, Top 4 SIM Location Trackers To Easily Find Your Lost Poco X5 Device
- Why Is My Samsung Galaxy M34 Offline? Troubleshooting Guide | Dr.fone
- How to Fix the Soft Bricked Vivo Y100i? | Dr.fone
- Title: New Want to Buy a Drone for Better Videography Creating? This Article Will Review 6 of the Best Drones on the Market for You to Consider
- Author: Morgan
- Created at : 2024-05-19 05:12:44
- Updated at : 2024-05-20 05:12:44
- Link: https://ai-video-editing.techidaily.com/new-want-to-buy-a-drone-for-better-videography-creating-this-article-will-review-6-of-the-best-drones-on-the-market-for-you-to-consider/
- License: This work is licensed under CC BY-NC-SA 4.0.
