
:max_bytes(150000):strip_icc():format(webp)/coverjointwitter-6f13b51d1be04d8bb3f5221ef5a057c7.jpg)
New Why Did Filmora AI Portrait Attract People, In 2024
Why Did Filmora AI Portrait Attract People?
Quick Answer: Why Did Filmora AI Portrait Attract People?
An easy yet powerful editor
Numerous effects to choose from
Detailed tutorials provided by the official channel
In the recent few years, video editing has become one of the most-sought after professions, all thanks to the popularity of various video sharing platforms like YouTube. Today, creators don’t need big budgets to share their stories with the world. They can simply grab the camera, shoot the video, and use editing software to compile their brainchild into a dedicated movie. And, once the movie is ready, these creators can simply upload it to YouTube and gain the desired viewership. However, it’s worth noting that YouTube isn’t the only element that has helped content creators excel in their careers and follow their passion.
Editing software like Wondershare Filmora also play an equal role in the success of a creator in today’s digital world. These editing tools are equipped with a plethora of features that allow creators to unleash their creativity and compile high-quality videos for their viewers. What’s more interesting is that these tools keep receiving new updates that further streamlines the entire video editing process to help creators edit videos more conveniently.
Today, we are here to talk about one such feature - known as Filmora AI portrait - that recently got introduced to Wondershare Filmora and became an all-time favorite of many creators. We’ll be going in detail about Filmora AI portrait and how you can use it in your videos to uplift the production quality of your videos. We’ll also share some of the alternatives of this cool feature so that you can bring variety to your videos and keep the viewers engaged throughout the video.
In this article
01 [Why Did AI Portrait Become More and More Popular](#Part 1)
02 [What Scenes Apply to AI Portrait?](#Part 2)
03 [What Scenes Do Not Apply to AI Portrait?](#Part 3)
04 [Why Filmora AI Portrait Deserves to Try?](#Part 4)
05 [A Comparison to Other AI Portrait Software](#Part 5)
Part 1 Why Did AI Portrait Become More and More Popular
Let’s start with the basics first! What is Filmora AI portrait and why it has gained an immense popularity in the editing community. It’s basically an add-on effect in Wondershare Filmora X that was introduced with the latest Filmora X version 10.5.
By integrating this add-on into their video, editors can remove/change the background without losing any details of the main subject. So, let’s say if you don’t have green screen footage and still want to remove the background without affecting the foreground (a single subject), Filmora AI portrait will help you get the job done without any hassle.
Being an AI-powered feature, Filmora AI portrait automatically detects the shape and structure of the main subject and separates it from the background. This way even if you don’t have used a green screen or don’t know how to apply the Chroma key in your videos, you’ll be able to remove the background from the RAW footage and replace it with a custom background. This will allow you to make your videos more appealing and add a funny element for better engagement. For example, you can add a moving background to uplift the entire storyline to your videos.
Filmora AI portrait is a great feature for different types of creators such as gaming streamers, YouTube content creators, and daily vloggers. Regardless of your editing style, by integrating the Filmora AI portrait add-on, you’ll have the liberty to remove unwanted backgrounds from various shots and keep the production quality high.
In addition to removing the background, Filmora AI portrait is also a great tool to design thumbnails for your videos. Also, you can use this feature to apply borders, glitch effects, pixelated, noise, or segmentation video effects to your videos. All these elements will allow you to eliminate dull and low quality things from your videos and make the main characters pop-out in every frame.
Here are a few situations where one can implement the Filmora AI portrait and make the most out of its functions.
● If you livestream videos on YouTube, but don’t have a green screen yet, you can use the AI portrait feature in Filmora to remove the background and make your streaming setup look more elegant and professional.
● With the Filmora AI portrait feature, you can also design high-quality and captivating thumbnails for your videos and draw the maximum attention within YouTube’s rabbithole. Any new viewer is more likely to click on your videos when the thumbnail is engaging.
● You can also use Filmora AI portrait effect to remove background from interviews. Usually, when someone shoots an interview, they usually place a green screen behind the person. But, in case you don’t have green screen footage, you can easily make your interviews look more professional with the Filmora AI portrait effect.
● Finally, you can also use the Filmora AI portrait feature in regular YouTube vlogs. This would be applicable when there are unnecessary elements in the background of a clip that are ruining the entire frame. In this case by simply erasing the background and replacing it with a custom one, you’ll be able to keep the production quality high and keep the viewers engaged throughout the vlog.
Part 2 What Scenes Apply to AI Portrait?
While the AI portrait effect can work for all frames, there are a few situations when it delivers the best results. The designers at Wondershare Filmora claim that AI Portrait works like a charm when the frame has a single subject talking directly to the camera.
When there’s a single individual or subject in front of the camera, it’s relatively easier for the AI-algorithm to detect the edges and separate the background with high precision. Moreover, when the main subject is static, you are most likely to witness the best output in terms of background removal. Why? The reason being when there’s a single static subject, an AI-powered algorithm can precisely mark its edges and achieve relatively better results.
Let’s understand this with the help of a few examples.
One-Person Interview
Going back to the interview example - let’s say you are interviewing a person who’s sitting in a chair and talking directly to the camera in front of him. Now, since there isn’t too much movement on his side, the AI-algorithm will be able to detect his edges and remove the background accordingly. In fact, in such ideal cases, the tool will even be able to detect the hair of the subject with high precision.
Shot of a Monologue
Monologues are no longer limited to high-budget Hollywood movies only. They have become a regular part of conventional videos such as daily YouTube vlogs. Monologues boast better authenticity as the entire clip is shot in one go.
Since there are no random cuts, the presenter can easily convey his views to the viewers. But, for a monologue to work, it’s extremely crucial that it has a high-quality background otherwise it’ll fail to grab the viewer’s attention. In case you are also stuck with a monologue that has a bad background, you can use Filmora AI portrait to remove it and make the primary character of the video pop-up more effectively.
YouTube Vlogs
Again, YouTube vlogs are another great example where editors could really benefit from Filmora’s AI portrait effect. For daily vloggers, getting the perfect shot is always a challenge. And, more often than you think, they end up taking shots that have bad backgrounds. But, thanks to Filmora’s AI portrait effect, one could easily remove background from such shots and use them to convey the storyline more effectively. This won’t waste your efforts and you’ll be able to use the shot that would have otherwise gone to Trash.
So, these are a few situations where the AI portrait effect in Filmora can do wonders for your video editing process.
Part 3 What Scenes Do Not Apply to AI Portrait?
Now, as we mentioned in the previous part, the Filmora AI portrait effect works better in scenarios where there’s only a single subject in the frame. This means the effect isn’t applicable in all the situations.
If there is a lot of movement in the frame, the AI-algorithm may fail to detect the edges of the subject(s) and not deliver the expected results. For example if you are working on a vlog where you are moving the camera really fast, the AI effect will struggle to separate the background from the foreground and fail to achieve the desired precision while removing background.
Some of the other situations where you won’t be able to make the most out of the AI portrait effect include:
Shots With Multiple Moving Subjects
If you have a shot of a crowded place where too many people are moving in the frame, it’ll be challenging to detect the background properly. The movement of multiple subjects will interfere with the overall functionality of the algorithm, restricting users from achieving a background-free shot. In such a situation, you’ll either have to use the shot without removing the background or dump into the Trash folder.
Videos With Special Effects and Filters
Here’s the deal; special effects and filters have become an inevitable part of today’s social media-influenced world. People apply filters and visual effects to make their videos more appealing and grab more likes and comments on Instagram, Facebook, and Snapchat.
But, these filters are often a nightmare for video editors as it’s pretty challenging to process them in any video editing software. If you have a clip with filters or video effects, you’ll struggle to implement the Filmora AI portrait effect properly. In fact, the effect will not work as expected and you’ll be stuck with a shot that would be pretty useless for the entire storyline. So, do not apply unnecessary filters to your videos if you are planning to apply the AI portrait effect in the long run.
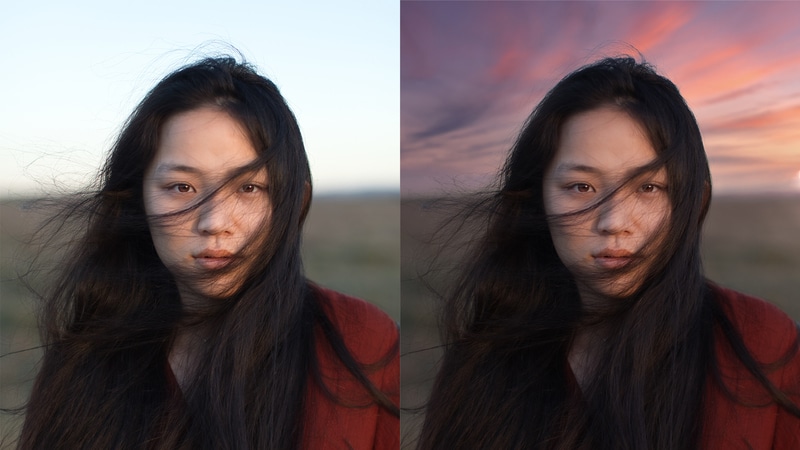
Videos With Backlights
The lighting setup of any video has a huge influence on how it will look at the end. Just like a human being, even the AI algorithm struggles to detect the background in a video that has poor lighting conditions or bad backlight. In such videos, it’s challenging for the algorithm to detect the main subject and then identify its edges.
To avoid such scenarios, it would be better to plan your shots in advance and shoot them when there are proper lighting conditions. In case you are going to shoot indoors, you can use a dedicated lighting setup. If anything, this will make it much easier to apply the Filmora AI portrait effect and achieve the best results in terms of background removal.
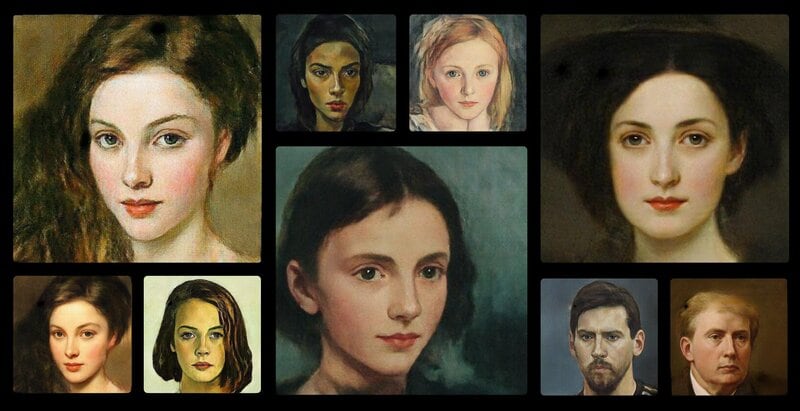
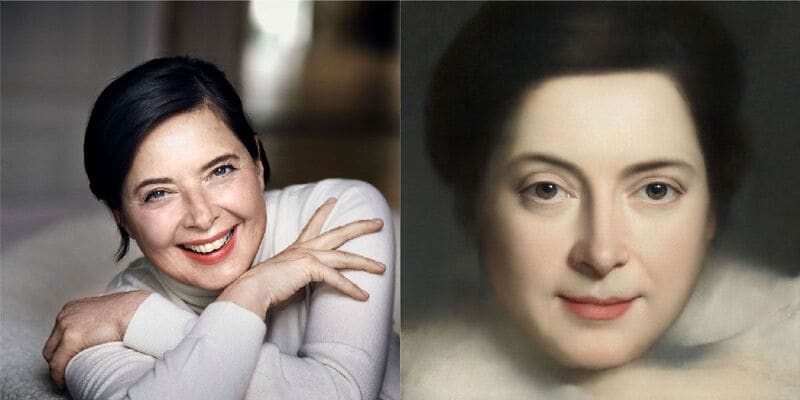
Paintings
Paintings aren’t like traditional videos. The color scheme is entirely different and it’s much challenging to identify the background and the foreground. So, if there are any images of paintings that you want to use as a thumbnail, it might get a bit challenging to remove the background. In such a scenario, it would be much better to either choose a different image for the thumbnail and use the painting without removing its background.
So, these are a few scenarios where using the Filmora AI portrait won’t be an effective solution for you. We would recommend to plan your shots in advance so that you don’t end up with random shots where it’s challenging to apply the AI portrait effect.
Part 4 Why Filmora AI Portrait Deserves to Try?
If you’ve come this far, you are most likely to be serious about video editing. So, now that we have clarified all the situations where using ****Wondershare Filmora Video Editor AI portrait** will be effective, let’s understand how you can use it in your videos.
01Are the Subscription Periods for Wondershare Filmora and the AI Portrait Add-on the Same?
So, first things first, will you get direct access to the AI portrait add-on along with your Filmora license? The answer is No! THe AI portrait add-on is available as a separate item and you’ll have to pay additional charges to use it on your videos. The default Filmora license will not give you access to the AI portrait mode whatsoever. In terms of pricing, the Filmora AI portrait is available at a pocket-friendly price.
For Win 7 or later (64-bit)
For macOS 10.12 or later
You can get this add-on by paying a minimal fee of $5.99 per month. One of the best things about choosing this add-on is that you can discontinue it whenever you want. So, let’s say you no longer need to remove backgrounds from your videos - in this situation, you can directly discontinue your subscription without affecting your regular Filmora subscription.
02How to Add AI Portrait Effects?
Now, coming to the real reason why you’ve come this far - the process to use the AI portrait effect in Filmora. To be honest, it’s a relatively easier process to add the AI portrait effect in Filmora. Even if you are not a Filmora user, you’ll be able to get the job done without any hassle. Let me quickly walk you through the step-by-step procedure of adding the AI portrait effect in Wondershare Filmora.
Step 1 - If you are not an existing user of Filmora, start by purchasing its license and install the software on your system to get started. On the other hand, if you’ve been using Filmora for a while, directly move to the next step to proceed further.
Step 2 - Now, launch the software and create a new project. You’ll be prompted to Filmora’s editing panel. At this point, you’ll have to drag the video clip (that you want to edit) to the timeline.
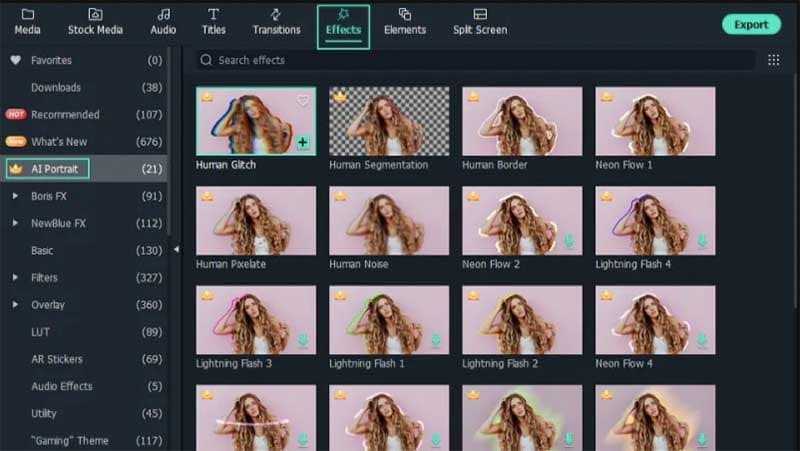
Step 3 - Once the video is successfully imported, switch to the “Effects” tab and search for “AI Portrait”. You’ll see a “premium” icon next to its name. Double-click on the effect and follow the on-screen instructions to complete the payment procedure.
Step 4 - After you have bought the effect, just drag it to the timeline and place it above your video.

Step 5 - Based on how long you want to keep this effect, you can elongate or shorten its duration by simply stretching its duration.
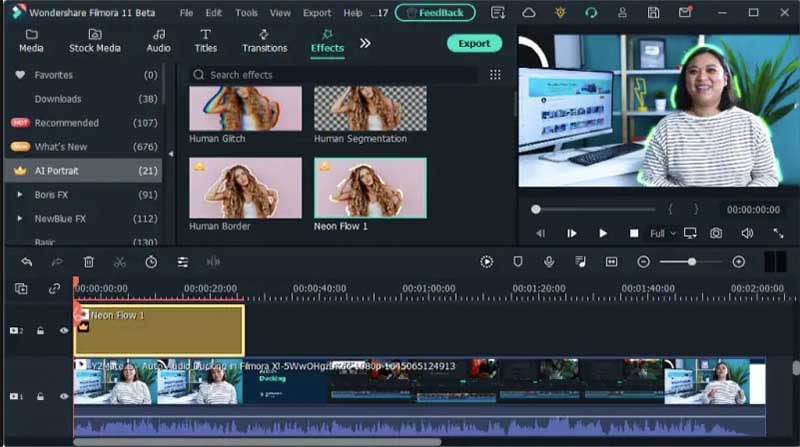
That’s it; the AI portrait effect will automatically detect and remove the background without requiring you to even lift a finger. After the background is removed, you can tap the “Export” button and choose the desired output format to save the file on your system.
03How to Adjust AI Portrait Effects?
Apart from its core ability to remove the background from a video/image, the another advantage of choosing Filmora AI portrait add-on is its fully customization support. Based on your requirements, you can adjust different parameters such as percentage, edge thickness, edge feather, etc. to achieve the desired results in the output.
Let’s have a closer look at all these parameters to understand their overall functionality more precisely.
● Percentage: By adjusting the percentage, you can decide how effective you want the AI portrait effect to appear in your videos. If you drag the slider all the way to the end, the background will be removed completely and you might not even recognize the main subject properly. On the other hand, if you keep it at a lower percentage, there will be a little bit of transparency in the background.
● Alpha: The alpha slider will decide the transparency of the portrait effect itself. You can drag this slider left or right until you have the perfect frame in front of you.
● Edge Thickness: As the name implies, edge thickness decides how thick the edges of the subject would appear in the video. A smaller percentage would mean thinner edges whereas a higher percentage would mean larger edges.
● Edge Feather: With Edge feather, you can define the blurriness of the edges themselves. The higher the value of the edge feather, the blurier the edges would appear in your videos.
Now, to access all these features, all you have to do is double-tap on the AI portrait effect within FIlmora’s timeline. This will automatically prompt you to the editing panel for this particular effect where you’ll be able to manipulate all these parameters and achieve the desired portrait results accordingly.
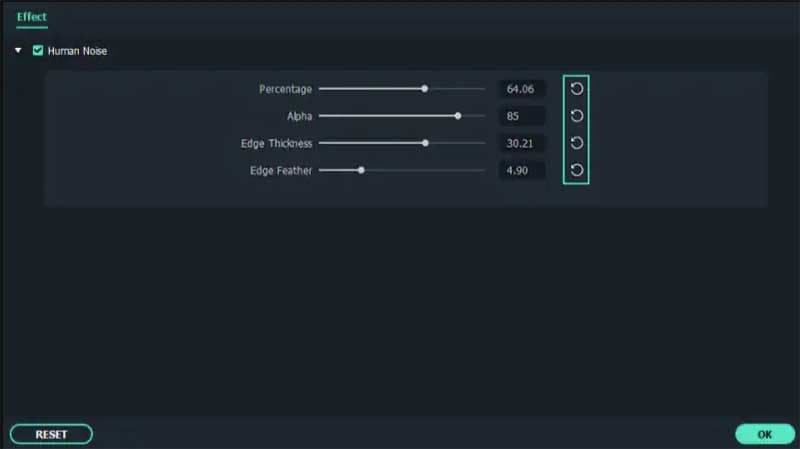
In case you are not happy with your customization, you can also tap the “Restore” button next to each parameter to restore the default value. Once you are happy with the results, just tap the “Ok” button to implement your changes.
04Why Did Filmora AI Portrait Attract People?
Apart from attracting editors, what makes Filmora AI portrait one of the best video effects that you can apply to your videos to engage viewers. Well, the answer is pretty simple; AI portrait effect makes the background of a video transparent.
It means the editors have the liberty to replace the dull boring background with a custom one and keep the engagement level high. This becomes really useful when you are trying to compile a long documentary and have a few shots with bad backgrounds. Since using such shots directly might affect the production quality of your videos, it would be better to first replace the background using the AI portrait effect.
So, regardless of your editing setup, production goals, or the type of video you want to compile at the end, you can use the AI portrait effect in Wondershare Filmora in different situations and protect the end results from becoming a failure. This will help you maximize the reach of your videos and attract more viewers more effectively. So, install Filmora today and sign up for its AI portrait effect to uplift the overall video quality of your projects.
Part 5 A Comparison to Other AI Portrait Software
Now, before saying goodbye, we also believe that it would be unfair if we only talk about a single tool and a single effect in this guide. Of course, Filmora’s AI portrait effect works like a charm in different situations, there are other tools in the market that you can try to achieve similar results. As a video editor, it’s always great to keep trying new things as it will add variation to your portfolio and make it much easier to attract new clients.
So, here’s a list of top 5 video editing software that you can use to get similar functionality like the AI portrait effect in Wondershare Filmora.
01Adobe Premiere Pro
Adobe Premiere Pro is undoubtedly one of the most popular video editing software with a strong fan base. Many industry leaders including Sam Kolder and Rory Kramer use Premier Pro to compile high-quality Hollywood-style videos for musicians as well as other clients.
Premiere Pro is more of an advanced video editing tool, which means even though it can help you remove background from portraits, you’ll have to do all the work manually. There’s no predefined add-on or effect that you can apply to the video to erase the background. Instead, you’ll have to manually mark the edges of the subject, erase the background and then, replace it with a different one to achieve the desired results.
In general, Premiere Pro is a great option for skilled editors who want to take things in their own hands to achieve the best results. If you are a beginner, you would be better off with a more user-friendly tool such as Wondershare Filmora.
Key Features:
● Extreme precision while erasing the background
● Achieve the desired results without compromising the quality of the main subject in the portrait
● An industry-preferred software
Pros:
● Existing Premiere Pro users will find it much easier to replicate the AI portrait effect
● Complete flexibility over your project
Cons:
● It can take several hours to precisely remove the background
● The entire process will be manual
02Final Cut Pro
Like Premiere Pro, Final Cut Pro is another famous video editing software that can help you replicate the results of the Filmora AI portrait effect and remove the background from different videos, images, and motion graphics. Keep in mind that Final Cut Pro is only available for macOS, which means if you own a Windows system, you won’t be able to use the software whatsoever.
Again, the only downside of using Final Cut Pro is the amount of manual effort you’ll have to put in to achieve the expected results. Being a full-scale video editing tool, there aren’t too many add-ons or predefined video effects.
Instead, you’ll have to rely on conventional methods such as keyframing to remove the background frame by frame and make your videos look professional. On the major side, Final Cut Pro will work in all situations. Even if you have a clip with too many moving objects, you’ll be able to mark the edges frame-by-frame and remove the background without losing any details from the foreground.
Key Features:
● Timeline-based interface for rapid video editing
● Exclusive macOS compatibility ensures high performance
● Ideal for experienced editors and designers
Pros:
● Final Cut Pro has an easy-to-use interface
● It’s easier to process each frame individually
Cons:
● Unlike Wondershare Filmora, there aren’t any ready-to-use add-ons
● While working on complex shots, it can take several hours to remove the background
03Unscreen Online
Unscreen is an online video background remover that’s specifically designed to remove background from videos with a single click. Being an online application, Unscreen is an ideal choice for short videos (up to 20 seconds) because longer-duration videos will likely take forever to upload. If you want to edit a video for Instagram Reels or YouTube shorts, Unscreen Online would be worth the consideration.
It’ll allow you to remove the background with one click and you won’t even need high-performance software to get the job done. The only drawback of Unscreen online is its lack of video format compatibility. Since it’s an online application, not all video formats are compatible with Unscreen Online.
Moreover, you can only use the tool to process shorter videos. In general, this is an ideal choice for an average Joe who doesn’t want to go through the hassle of installing and using a dedicated video editing software. So, if you are a professional, it would be far beneficial to stick to other premium tools like Filmora, Premiere Pro, and Final Cut Pro.
Key Features:
● You can access Unscreen Online on any device you want
● The edge detection is quite precise for videos with a single subject
● As compared to other premium options, Unscreen Online is relatively cheaper
Pros:
● Cross-platform compatibility
● Perfect for Instagram content creators
● Affordable pricing
Cons:
● Doesn’t achieve the expected results for more complex videos having too many subjects
● Can’t process videos having longer durations
04MOVAVI Video Editor
MOVAVI is another desktop-based video editing software that offers all the basic functionality one looks for in a video editing tool. The software is compatible with Windows and is an ideal choice for beginners who are just getting started on their video editing journey. You’ll find all the basic features along with a few advanced functions such as background removal. Like Filmora, MOVAVI also has a built-in add-on to remove the background from your clips. However, you might not be able to achieve the same precision, especially when we are talking about more complex frames.
Key Features:
● An ideal choice for beginners
● Compatible with Windows
● Can remove background from videos with a single subject
Pros:
● The user interface is pretty straightforward
● It’s easier to edit the videos, thanks to a timeline-based interface
Cons:
● For a beginner editing tool, the price is on the higher side
● You won’t be able to remove background from complex shots with multiple subjects in the foreground
05Kinemaster
Kinemaster is a video editing tool that’s only available on mobile devices, Android to be more specific. It boasts a plethora of features that make it one of the most sought-after editing tools among mobile users. Apart from the basic editing features, Kinemaster also has Chroma key and green screen functionality that allow users to remove background from the videos. Though it’s not as same as a professional-level video editing tool like Filmora Pro, you can still use Kinemaster to erase the background from your green screen footage to achieve the desired portrait look.
Features:
● Kinemaster is beginner-friendly
● Compatible with all Android devices
Pros:
● Green screen compatibility
● Offers advanced features such as chroma key
● Idea choice for novice video editors
Cons:
● It’s quite challenging to edit longer videos on a phone, making Kinemaster less reliable for large documentary-type videos
● Ending Thoughts →
● Wondershare Filmora has introduced a new AI Portrait feature that allows users to remove background from different video clips to shift the entire focus on the main subject.
● Filmora AI Portrait is applicable in different situations and can help editors maximize the production quality of their videos
● Apart from Filmora AI Portrait, there are several video editing tools that editors can give a try to replicate the AI portrait effect. Though, the results of such tools may differ as well.
In the recent few years, video editing has become one of the most-sought after professions, all thanks to the popularity of various video sharing platforms like YouTube. Today, creators don’t need big budgets to share their stories with the world. They can simply grab the camera, shoot the video, and use editing software to compile their brainchild into a dedicated movie. And, once the movie is ready, these creators can simply upload it to YouTube and gain the desired viewership. However, it’s worth noting that YouTube isn’t the only element that has helped content creators excel in their careers and follow their passion.
Editing software like Wondershare Filmora also play an equal role in the success of a creator in today’s digital world. These editing tools are equipped with a plethora of features that allow creators to unleash their creativity and compile high-quality videos for their viewers. What’s more interesting is that these tools keep receiving new updates that further streamlines the entire video editing process to help creators edit videos more conveniently.
Today, we are here to talk about one such feature - known as Filmora AI portrait - that recently got introduced to Wondershare Filmora and became an all-time favorite of many creators. We’ll be going in detail about Filmora AI portrait and how you can use it in your videos to uplift the production quality of your videos. We’ll also share some of the alternatives of this cool feature so that you can bring variety to your videos and keep the viewers engaged throughout the video.
In this article
01 [Why Did AI Portrait Become More and More Popular](#Part 1)
02 [What Scenes Apply to AI Portrait?](#Part 2)
03 [What Scenes Do Not Apply to AI Portrait?](#Part 3)
04 [Why Filmora AI Portrait Deserves to Try?](#Part 4)
05 [A Comparison to Other AI Portrait Software](#Part 5)
Part 1 Why Did AI Portrait Become More and More Popular
Let’s start with the basics first! What is Filmora AI portrait and why it has gained an immense popularity in the editing community. It’s basically an add-on effect in Wondershare Filmora X that was introduced with the latest Filmora X version 10.5.
By integrating this add-on into their video, editors can remove/change the background without losing any details of the main subject. So, let’s say if you don’t have green screen footage and still want to remove the background without affecting the foreground (a single subject), Filmora AI portrait will help you get the job done without any hassle.
Being an AI-powered feature, Filmora AI portrait automatically detects the shape and structure of the main subject and separates it from the background. This way even if you don’t have used a green screen or don’t know how to apply the Chroma key in your videos, you’ll be able to remove the background from the RAW footage and replace it with a custom background. This will allow you to make your videos more appealing and add a funny element for better engagement. For example, you can add a moving background to uplift the entire storyline to your videos.
Filmora AI portrait is a great feature for different types of creators such as gaming streamers, YouTube content creators, and daily vloggers. Regardless of your editing style, by integrating the Filmora AI portrait add-on, you’ll have the liberty to remove unwanted backgrounds from various shots and keep the production quality high.
In addition to removing the background, Filmora AI portrait is also a great tool to design thumbnails for your videos. Also, you can use this feature to apply borders, glitch effects, pixelated, noise, or segmentation video effects to your videos. All these elements will allow you to eliminate dull and low quality things from your videos and make the main characters pop-out in every frame.
Here are a few situations where one can implement the Filmora AI portrait and make the most out of its functions.
● If you livestream videos on YouTube, but don’t have a green screen yet, you can use the AI portrait feature in Filmora to remove the background and make your streaming setup look more elegant and professional.
● With the Filmora AI portrait feature, you can also design high-quality and captivating thumbnails for your videos and draw the maximum attention within YouTube’s rabbithole. Any new viewer is more likely to click on your videos when the thumbnail is engaging.
● You can also use Filmora AI portrait effect to remove background from interviews. Usually, when someone shoots an interview, they usually place a green screen behind the person. But, in case you don’t have green screen footage, you can easily make your interviews look more professional with the Filmora AI portrait effect.
● Finally, you can also use the Filmora AI portrait feature in regular YouTube vlogs. This would be applicable when there are unnecessary elements in the background of a clip that are ruining the entire frame. In this case by simply erasing the background and replacing it with a custom one, you’ll be able to keep the production quality high and keep the viewers engaged throughout the vlog.
Part 2 What Scenes Apply to AI Portrait?
While the AI portrait effect can work for all frames, there are a few situations when it delivers the best results. The designers at Wondershare Filmora claim that AI Portrait works like a charm when the frame has a single subject talking directly to the camera.
When there’s a single individual or subject in front of the camera, it’s relatively easier for the AI-algorithm to detect the edges and separate the background with high precision. Moreover, when the main subject is static, you are most likely to witness the best output in terms of background removal. Why? The reason being when there’s a single static subject, an AI-powered algorithm can precisely mark its edges and achieve relatively better results.
Let’s understand this with the help of a few examples.
One-Person Interview
Going back to the interview example - let’s say you are interviewing a person who’s sitting in a chair and talking directly to the camera in front of him. Now, since there isn’t too much movement on his side, the AI-algorithm will be able to detect his edges and remove the background accordingly. In fact, in such ideal cases, the tool will even be able to detect the hair of the subject with high precision.
Shot of a Monologue
Monologues are no longer limited to high-budget Hollywood movies only. They have become a regular part of conventional videos such as daily YouTube vlogs. Monologues boast better authenticity as the entire clip is shot in one go.
Since there are no random cuts, the presenter can easily convey his views to the viewers. But, for a monologue to work, it’s extremely crucial that it has a high-quality background otherwise it’ll fail to grab the viewer’s attention. In case you are also stuck with a monologue that has a bad background, you can use Filmora AI portrait to remove it and make the primary character of the video pop-up more effectively.
YouTube Vlogs
Again, YouTube vlogs are another great example where editors could really benefit from Filmora’s AI portrait effect. For daily vloggers, getting the perfect shot is always a challenge. And, more often than you think, they end up taking shots that have bad backgrounds. But, thanks to Filmora’s AI portrait effect, one could easily remove background from such shots and use them to convey the storyline more effectively. This won’t waste your efforts and you’ll be able to use the shot that would have otherwise gone to Trash.
So, these are a few situations where the AI portrait effect in Filmora can do wonders for your video editing process.
Part 3 What Scenes Do Not Apply to AI Portrait?
Now, as we mentioned in the previous part, the Filmora AI portrait effect works better in scenarios where there’s only a single subject in the frame. This means the effect isn’t applicable in all the situations.
If there is a lot of movement in the frame, the AI-algorithm may fail to detect the edges of the subject(s) and not deliver the expected results. For example if you are working on a vlog where you are moving the camera really fast, the AI effect will struggle to separate the background from the foreground and fail to achieve the desired precision while removing background.
Some of the other situations where you won’t be able to make the most out of the AI portrait effect include:
Shots With Multiple Moving Subjects
If you have a shot of a crowded place where too many people are moving in the frame, it’ll be challenging to detect the background properly. The movement of multiple subjects will interfere with the overall functionality of the algorithm, restricting users from achieving a background-free shot. In such a situation, you’ll either have to use the shot without removing the background or dump into the Trash folder.
Videos With Special Effects and Filters
Here’s the deal; special effects and filters have become an inevitable part of today’s social media-influenced world. People apply filters and visual effects to make their videos more appealing and grab more likes and comments on Instagram, Facebook, and Snapchat.
But, these filters are often a nightmare for video editors as it’s pretty challenging to process them in any video editing software. If you have a clip with filters or video effects, you’ll struggle to implement the Filmora AI portrait effect properly. In fact, the effect will not work as expected and you’ll be stuck with a shot that would be pretty useless for the entire storyline. So, do not apply unnecessary filters to your videos if you are planning to apply the AI portrait effect in the long run.
Videos With Backlights
The lighting setup of any video has a huge influence on how it will look at the end. Just like a human being, even the AI algorithm struggles to detect the background in a video that has poor lighting conditions or bad backlight. In such videos, it’s challenging for the algorithm to detect the main subject and then identify its edges.
To avoid such scenarios, it would be better to plan your shots in advance and shoot them when there are proper lighting conditions. In case you are going to shoot indoors, you can use a dedicated lighting setup. If anything, this will make it much easier to apply the Filmora AI portrait effect and achieve the best results in terms of background removal.
Paintings
Paintings aren’t like traditional videos. The color scheme is entirely different and it’s much challenging to identify the background and the foreground. So, if there are any images of paintings that you want to use as a thumbnail, it might get a bit challenging to remove the background. In such a scenario, it would be much better to either choose a different image for the thumbnail and use the painting without removing its background.
So, these are a few scenarios where using the Filmora AI portrait won’t be an effective solution for you. We would recommend to plan your shots in advance so that you don’t end up with random shots where it’s challenging to apply the AI portrait effect.
Part 4 Why Filmora AI Portrait Deserves to Try?
If you’ve come this far, you are most likely to be serious about video editing. So, now that we have clarified all the situations where using ****Wondershare Filmora Video Editor AI portrait** will be effective, let’s understand how you can use it in your videos.
01Are the Subscription Periods for Wondershare Filmora and the AI Portrait Add-on the Same?
So, first things first, will you get direct access to the AI portrait add-on along with your Filmora license? The answer is No! THe AI portrait add-on is available as a separate item and you’ll have to pay additional charges to use it on your videos. The default Filmora license will not give you access to the AI portrait mode whatsoever. In terms of pricing, the Filmora AI portrait is available at a pocket-friendly price.
For Win 7 or later (64-bit)
For macOS 10.12 or later
You can get this add-on by paying a minimal fee of $5.99 per month. One of the best things about choosing this add-on is that you can discontinue it whenever you want. So, let’s say you no longer need to remove backgrounds from your videos - in this situation, you can directly discontinue your subscription without affecting your regular Filmora subscription.
02How to Add AI Portrait Effects?
Now, coming to the real reason why you’ve come this far - the process to use the AI portrait effect in Filmora. To be honest, it’s a relatively easier process to add the AI portrait effect in Filmora. Even if you are not a Filmora user, you’ll be able to get the job done without any hassle. Let me quickly walk you through the step-by-step procedure of adding the AI portrait effect in Wondershare Filmora.
Step 1 - If you are not an existing user of Filmora, start by purchasing its license and install the software on your system to get started. On the other hand, if you’ve been using Filmora for a while, directly move to the next step to proceed further.
Step 2 - Now, launch the software and create a new project. You’ll be prompted to Filmora’s editing panel. At this point, you’ll have to drag the video clip (that you want to edit) to the timeline.
Step 3 - Once the video is successfully imported, switch to the “Effects” tab and search for “AI Portrait”. You’ll see a “premium” icon next to its name. Double-click on the effect and follow the on-screen instructions to complete the payment procedure.
Step 4 - After you have bought the effect, just drag it to the timeline and place it above your video.
Step 5 - Based on how long you want to keep this effect, you can elongate or shorten its duration by simply stretching its duration.
That’s it; the AI portrait effect will automatically detect and remove the background without requiring you to even lift a finger. After the background is removed, you can tap the “Export” button and choose the desired output format to save the file on your system.
03How to Adjust AI Portrait Effects?
Apart from its core ability to remove the background from a video/image, the another advantage of choosing Filmora AI portrait add-on is its fully customization support. Based on your requirements, you can adjust different parameters such as percentage, edge thickness, edge feather, etc. to achieve the desired results in the output.
Let’s have a closer look at all these parameters to understand their overall functionality more precisely.
● Percentage: By adjusting the percentage, you can decide how effective you want the AI portrait effect to appear in your videos. If you drag the slider all the way to the end, the background will be removed completely and you might not even recognize the main subject properly. On the other hand, if you keep it at a lower percentage, there will be a little bit of transparency in the background.
● Alpha: The alpha slider will decide the transparency of the portrait effect itself. You can drag this slider left or right until you have the perfect frame in front of you.
● Edge Thickness: As the name implies, edge thickness decides how thick the edges of the subject would appear in the video. A smaller percentage would mean thinner edges whereas a higher percentage would mean larger edges.
● Edge Feather: With Edge feather, you can define the blurriness of the edges themselves. The higher the value of the edge feather, the blurier the edges would appear in your videos.
Now, to access all these features, all you have to do is double-tap on the AI portrait effect within FIlmora’s timeline. This will automatically prompt you to the editing panel for this particular effect where you’ll be able to manipulate all these parameters and achieve the desired portrait results accordingly.
In case you are not happy with your customization, you can also tap the “Restore” button next to each parameter to restore the default value. Once you are happy with the results, just tap the “Ok” button to implement your changes.
04Why Did Filmora AI Portrait Attract People?
Apart from attracting editors, what makes Filmora AI portrait one of the best video effects that you can apply to your videos to engage viewers. Well, the answer is pretty simple; AI portrait effect makes the background of a video transparent.
It means the editors have the liberty to replace the dull boring background with a custom one and keep the engagement level high. This becomes really useful when you are trying to compile a long documentary and have a few shots with bad backgrounds. Since using such shots directly might affect the production quality of your videos, it would be better to first replace the background using the AI portrait effect.
So, regardless of your editing setup, production goals, or the type of video you want to compile at the end, you can use the AI portrait effect in Wondershare Filmora in different situations and protect the end results from becoming a failure. This will help you maximize the reach of your videos and attract more viewers more effectively. So, install Filmora today and sign up for its AI portrait effect to uplift the overall video quality of your projects.
Part 5 A Comparison to Other AI Portrait Software
Now, before saying goodbye, we also believe that it would be unfair if we only talk about a single tool and a single effect in this guide. Of course, Filmora’s AI portrait effect works like a charm in different situations, there are other tools in the market that you can try to achieve similar results. As a video editor, it’s always great to keep trying new things as it will add variation to your portfolio and make it much easier to attract new clients.
So, here’s a list of top 5 video editing software that you can use to get similar functionality like the AI portrait effect in Wondershare Filmora.
01Adobe Premiere Pro
Adobe Premiere Pro is undoubtedly one of the most popular video editing software with a strong fan base. Many industry leaders including Sam Kolder and Rory Kramer use Premier Pro to compile high-quality Hollywood-style videos for musicians as well as other clients.
Premiere Pro is more of an advanced video editing tool, which means even though it can help you remove background from portraits, you’ll have to do all the work manually. There’s no predefined add-on or effect that you can apply to the video to erase the background. Instead, you’ll have to manually mark the edges of the subject, erase the background and then, replace it with a different one to achieve the desired results.
In general, Premiere Pro is a great option for skilled editors who want to take things in their own hands to achieve the best results. If you are a beginner, you would be better off with a more user-friendly tool such as Wondershare Filmora.
Key Features:
● Extreme precision while erasing the background
● Achieve the desired results without compromising the quality of the main subject in the portrait
● An industry-preferred software
Pros:
● Existing Premiere Pro users will find it much easier to replicate the AI portrait effect
● Complete flexibility over your project
Cons:
● It can take several hours to precisely remove the background
● The entire process will be manual
02Final Cut Pro
Like Premiere Pro, Final Cut Pro is another famous video editing software that can help you replicate the results of the Filmora AI portrait effect and remove the background from different videos, images, and motion graphics. Keep in mind that Final Cut Pro is only available for macOS, which means if you own a Windows system, you won’t be able to use the software whatsoever.
Again, the only downside of using Final Cut Pro is the amount of manual effort you’ll have to put in to achieve the expected results. Being a full-scale video editing tool, there aren’t too many add-ons or predefined video effects.
Instead, you’ll have to rely on conventional methods such as keyframing to remove the background frame by frame and make your videos look professional. On the major side, Final Cut Pro will work in all situations. Even if you have a clip with too many moving objects, you’ll be able to mark the edges frame-by-frame and remove the background without losing any details from the foreground.
Key Features:
● Timeline-based interface for rapid video editing
● Exclusive macOS compatibility ensures high performance
● Ideal for experienced editors and designers
Pros:
● Final Cut Pro has an easy-to-use interface
● It’s easier to process each frame individually
Cons:
● Unlike Wondershare Filmora, there aren’t any ready-to-use add-ons
● While working on complex shots, it can take several hours to remove the background
03Unscreen Online
Unscreen is an online video background remover that’s specifically designed to remove background from videos with a single click. Being an online application, Unscreen is an ideal choice for short videos (up to 20 seconds) because longer-duration videos will likely take forever to upload. If you want to edit a video for Instagram Reels or YouTube shorts, Unscreen Online would be worth the consideration.
It’ll allow you to remove the background with one click and you won’t even need high-performance software to get the job done. The only drawback of Unscreen online is its lack of video format compatibility. Since it’s an online application, not all video formats are compatible with Unscreen Online.
Moreover, you can only use the tool to process shorter videos. In general, this is an ideal choice for an average Joe who doesn’t want to go through the hassle of installing and using a dedicated video editing software. So, if you are a professional, it would be far beneficial to stick to other premium tools like Filmora, Premiere Pro, and Final Cut Pro.
Key Features:
● You can access Unscreen Online on any device you want
● The edge detection is quite precise for videos with a single subject
● As compared to other premium options, Unscreen Online is relatively cheaper
Pros:
● Cross-platform compatibility
● Perfect for Instagram content creators
● Affordable pricing
Cons:
● Doesn’t achieve the expected results for more complex videos having too many subjects
● Can’t process videos having longer durations
04MOVAVI Video Editor
MOVAVI is another desktop-based video editing software that offers all the basic functionality one looks for in a video editing tool. The software is compatible with Windows and is an ideal choice for beginners who are just getting started on their video editing journey. You’ll find all the basic features along with a few advanced functions such as background removal. Like Filmora, MOVAVI also has a built-in add-on to remove the background from your clips. However, you might not be able to achieve the same precision, especially when we are talking about more complex frames.
Key Features:
● An ideal choice for beginners
● Compatible with Windows
● Can remove background from videos with a single subject
Pros:
● The user interface is pretty straightforward
● It’s easier to edit the videos, thanks to a timeline-based interface
Cons:
● For a beginner editing tool, the price is on the higher side
● You won’t be able to remove background from complex shots with multiple subjects in the foreground
05Kinemaster
Kinemaster is a video editing tool that’s only available on mobile devices, Android to be more specific. It boasts a plethora of features that make it one of the most sought-after editing tools among mobile users. Apart from the basic editing features, Kinemaster also has Chroma key and green screen functionality that allow users to remove background from the videos. Though it’s not as same as a professional-level video editing tool like Filmora Pro, you can still use Kinemaster to erase the background from your green screen footage to achieve the desired portrait look.
Features:
● Kinemaster is beginner-friendly
● Compatible with all Android devices
Pros:
● Green screen compatibility
● Offers advanced features such as chroma key
● Idea choice for novice video editors
Cons:
● It’s quite challenging to edit longer videos on a phone, making Kinemaster less reliable for large documentary-type videos
● Ending Thoughts →
● Wondershare Filmora has introduced a new AI Portrait feature that allows users to remove background from different video clips to shift the entire focus on the main subject.
● Filmora AI Portrait is applicable in different situations and can help editors maximize the production quality of their videos
● Apart from Filmora AI Portrait, there are several video editing tools that editors can give a try to replicate the AI portrait effect. Though, the results of such tools may differ as well.
Learn Color Correction in After Effects with These YouTube Videos
Create High-Quality Video - Wondershare Filmora
An easy and powerful YouTube video editor
Numerous video and audio effects to choose from
Detailed tutorials provided by the official channel
When it comes to understanding and mastery of information, videos are always the best. Research carried out by Wyzwol, a marketing research institute, states that 68% of people like to learn about services through videos.
Color correction in After Effects involves a wide range of tools, including Lumetri color, Hue saturation, and RGB curves. It involves extensive reading and interpretation of graphs and histograms – A thing not for the faint-hearted. To better your understanding of color correction in After Effects, you not only need to rely on blogs but also videos. Therefore from this article, you will learn about color correction in After Effects with videos.
Let’s dive in!

In this article
01 What is Color Correction in After Effects
02 Learn Color Correction in After Effects with These Videos
What is Color Correction in After Effects
Color correction is a functionality feature in Adobe After effects that fixes all the color complications in an image or a video. This functionality feature alters a clip of footage to match a constant appearance.
Most colorists and editors use After Effects to adjust color, saturation, and contrast in clips that look unreal and make them appear natural and unprocessed.
When you want to color correct your footage, you first need to establish your video clip and then determine the colors needs for your clip. With this, color grading will become an absolute breeze for you.
Learn Color Correction in After Effects with These Videos
1. Pro Tip - Cinematic Color Grade in After Effects - After Effects Tutorial by Dope Motions
One of the top-notch videos we will use to learn color correcting is one produced by Dope Motions. Dope Motions is a YouTube channel that is managed by Nick Pawar. Nick creates high-quality graphics and VFX tutorials where he shares insightful ideas on how to carry out various cinematic edits to videos – This includes color correction.
In this video, Nick gives his voice on color grid videos giving it that cinematic look with much ease. His method is relatively simpler since one need not use plugins to do color correction. Though it is much easier to carry out color correction with plugins, Nick emphasizes more on color correction without plugins since you will be able to extensively customize your video based on your preference.
In this video, Nick spotlights various topics, including how to use lumetri color, color correction, cinematic color grading, how to make presets, color effects, among many more. All in After Effects.
Besides, with these techniques, you cannot not only use color correction in After Effects but also in premiere pro. Beginners, as well as intermediate video editors, will significantly benefit from this exemplary video. Learn from Nick and create splendid videos that will leave your clients and viewers all rooted to the ground.
2. Create a Cinematic Look with After Effects Tricks! by Kriscoart
Another enlightening video that talks about color correction in After Effect are this one from Kriscoart. Kriscoart is a fast-growing YouTube channel developed by managed by Kris Truini. Some of the core values of this channel are to learn, create and share content. From his channel, Truini does not centralize his focus to only video editing; he goes to the extremes of edifying on VFX tutorials, lighting workshops, and short film breakdowns.
In this video, Truini shares some simple tricks with his subscribers as well as new visitors on how to carry out a color correction in After Effects. He elaborates on manipulating lights and adding dramatic atmospheres and cinematic looks to your video shots by using some simple masks, solids, and adjustment layers.
Truini uses the project he is working on to flesh out various color correction tools and how to put them into use authentically. He targets not only beginner video editors but also intermediate ones who are looking forward to increasing their skill set.
Through his YouTube channels, Truini aims at educating the masses so that they can be well conversant with most of the video editing tools. He wants the voice of every filmmaker and prospective to be heard by their prospective audiences.
3. Advanced Color Grading in After Effects - NO PLUGINS by the VFX Show
Color correcting and Color grading without plugins is something that is a back-breaking activity to beginner video editors. Here, Collin Black of @ The VFX Show tends to break that misconception. Collin Black, the manager of The VFX Show, teaches his subscribers and new visitors to his channel how to carry out color correction without necessarily using plugins.
Collin Black states that even though plugins are very easy to use in color correction, you cannot carry out a wide range of customizable activities. It makes color correction without plugins be something to use to create neck-breaking video clips.
In this video, Collin uses a photo that he took while driving. The image appears to be faulty with lousy lighting. He uses a wide range of tools while elaborating every single step. When compared to the start, the final result of his work can be said to be “something out of this world.”
The target audience is beginner video editors with the zeal and zest of learning and wanting to get to know more about color correction without plugins.
4. Easy Colour Correction - After Effects Tutorial by DM Design
Are there scenarios where you come across a simple-looking video clip that is perfectly edited with ideal visual colors and has a sensational cinematic appearance? Debra Mayer, the founder, and owner of DM Designs, a renowned YouTube channel, simplify the processes required to get stunning videos.
Debra Mayer, in her YouTube channel, does all in her powers to teach all the Adobe techniques. She simplifies it and makes every single step to be somewhat relatable. In her channel, she does say much but expounds on tons of tools and activities.
Debra uses footage of a deserted land occupied by trees and grassland in this video. Everything in the picture looks dull and dusty. Debra expounds on how to create some cinematic appearance on clips with straightforward steps. Her after video appears to be something unreal due to extensive editing.
Her target audience for this video is beginner video editors. She can explain color correction in the easiest way possible from her immerse skillset. With that, beginner editors will significantly benefit from it.
5. Make Cinematic Looks with After Effects Color Correction Tricks! by Black Mixture
Paying for the After Effects subscription and again paying for color correction is something most people cannot wish to do. Even though you are not good at color correction, you need to stress yourself since Nate and Chriselle of Black Mixture will make things easy for you. Black Mixture is a YouTube account managed by Nate and Chriselle, a couple. In their channel, they expound on topics surrounding filmmaking, graphic design, motion design, and photography.
In this video, Nate elaborates on various steps on how to carry out a color correction in Adobe After Effects without plugins. He even goes to the extent of showing how to add music video effects as well as cinematic effects.
Nate uniquely uses only three color correction effects to carry out all the color correction needed to his footage – A super-fast driving car on a highway – And comes up with stunning results. He uses various customizable Adobe Effects settings such as hue, contrast, saturation.
Furthermore, Nate explains how to interpret and use histograms and graphs in adjusting various customizable settings. He also emphasizes the glow, a unique functionality feature that alters the lighting of clips to make his background appear super cool. Most editors do not commonly use glow, but it creates outstanding videos when used.
Nate does not only target beginner video editors but also intermediate ones. There is something new that intermediate editors will also learn.
6. Color Correction in After Effects - Tutorial by Kenneth Moore
This is the last YouTube video that we are going to learn about color correcting from. It is a video produced by Kenneth Moore, A prime owner of Kenneth Moore’s YouTube Channel. Even though his channel, Kenneth Moore channel, is still on the grow, he straightforwardly brought out every step to carry out when doing color correction in After Effects.
In this video, Moore uses a shot of a drown to elaborate color correction. The initial footage appears to be dull with indistinct features. With the color corrections tools, Moore is able to liven the footage giving it that outstanding look.
Moore unfolds on how to use various functionality tools in After Effects. In his video, he incorporates contrast, curves, RGB Parade, color balancing, color wheels, Vectorscope, and HSL Secondary functionalities. He used another footage, a car, to elaborate on HSL secondary.
In the video, Moore targets beginner and intermediate video editors to throw light on other color correction functionalities that video editors need to learn.
Conclusion
● Supplement your reading about color correction in After Effects with these videos. The above six videos evidently explain how to carry out a color correction in Adobe After Effects with ease. The videos are created with established producers and video editors; therefore they give professional insights and teachings.
● Color correction in After Effects should no longer stress you out. All you have to do is watch any of the above videos, or you can watch all of them and have a better grip of color correction. You will be able to create exceptional footage.
When it comes to understanding and mastery of information, videos are always the best. Research carried out by Wyzwol, a marketing research institute, states that 68% of people like to learn about services through videos.
Color correction in After Effects involves a wide range of tools, including Lumetri color, Hue saturation, and RGB curves. It involves extensive reading and interpretation of graphs and histograms – A thing not for the faint-hearted. To better your understanding of color correction in After Effects, you not only need to rely on blogs but also videos. Therefore from this article, you will learn about color correction in After Effects with videos.
Let’s dive in!
In this article
01 What is Color Correction in After Effects
02 Learn Color Correction in After Effects with These Videos
What is Color Correction in After Effects
Color correction is a functionality feature in Adobe After effects that fixes all the color complications in an image or a video. This functionality feature alters a clip of footage to match a constant appearance.
Most colorists and editors use After Effects to adjust color, saturation, and contrast in clips that look unreal and make them appear natural and unprocessed.
When you want to color correct your footage, you first need to establish your video clip and then determine the colors needs for your clip. With this, color grading will become an absolute breeze for you.
Learn Color Correction in After Effects with These Videos
1. Pro Tip - Cinematic Color Grade in After Effects - After Effects Tutorial by Dope Motions
One of the top-notch videos we will use to learn color correcting is one produced by Dope Motions. Dope Motions is a YouTube channel that is managed by Nick Pawar. Nick creates high-quality graphics and VFX tutorials where he shares insightful ideas on how to carry out various cinematic edits to videos – This includes color correction.
In this video, Nick gives his voice on color grid videos giving it that cinematic look with much ease. His method is relatively simpler since one need not use plugins to do color correction. Though it is much easier to carry out color correction with plugins, Nick emphasizes more on color correction without plugins since you will be able to extensively customize your video based on your preference.
In this video, Nick spotlights various topics, including how to use lumetri color, color correction, cinematic color grading, how to make presets, color effects, among many more. All in After Effects.
Besides, with these techniques, you cannot not only use color correction in After Effects but also in premiere pro. Beginners, as well as intermediate video editors, will significantly benefit from this exemplary video. Learn from Nick and create splendid videos that will leave your clients and viewers all rooted to the ground.
2. Create a Cinematic Look with After Effects Tricks! by Kriscoart
Another enlightening video that talks about color correction in After Effect are this one from Kriscoart. Kriscoart is a fast-growing YouTube channel developed by managed by Kris Truini. Some of the core values of this channel are to learn, create and share content. From his channel, Truini does not centralize his focus to only video editing; he goes to the extremes of edifying on VFX tutorials, lighting workshops, and short film breakdowns.
In this video, Truini shares some simple tricks with his subscribers as well as new visitors on how to carry out a color correction in After Effects. He elaborates on manipulating lights and adding dramatic atmospheres and cinematic looks to your video shots by using some simple masks, solids, and adjustment layers.
Truini uses the project he is working on to flesh out various color correction tools and how to put them into use authentically. He targets not only beginner video editors but also intermediate ones who are looking forward to increasing their skill set.
Through his YouTube channels, Truini aims at educating the masses so that they can be well conversant with most of the video editing tools. He wants the voice of every filmmaker and prospective to be heard by their prospective audiences.
3. Advanced Color Grading in After Effects - NO PLUGINS by the VFX Show
Color correcting and Color grading without plugins is something that is a back-breaking activity to beginner video editors. Here, Collin Black of @ The VFX Show tends to break that misconception. Collin Black, the manager of The VFX Show, teaches his subscribers and new visitors to his channel how to carry out color correction without necessarily using plugins.
Collin Black states that even though plugins are very easy to use in color correction, you cannot carry out a wide range of customizable activities. It makes color correction without plugins be something to use to create neck-breaking video clips.
In this video, Collin uses a photo that he took while driving. The image appears to be faulty with lousy lighting. He uses a wide range of tools while elaborating every single step. When compared to the start, the final result of his work can be said to be “something out of this world.”
The target audience is beginner video editors with the zeal and zest of learning and wanting to get to know more about color correction without plugins.
4. Easy Colour Correction - After Effects Tutorial by DM Design
Are there scenarios where you come across a simple-looking video clip that is perfectly edited with ideal visual colors and has a sensational cinematic appearance? Debra Mayer, the founder, and owner of DM Designs, a renowned YouTube channel, simplify the processes required to get stunning videos.
Debra Mayer, in her YouTube channel, does all in her powers to teach all the Adobe techniques. She simplifies it and makes every single step to be somewhat relatable. In her channel, she does say much but expounds on tons of tools and activities.
Debra uses footage of a deserted land occupied by trees and grassland in this video. Everything in the picture looks dull and dusty. Debra expounds on how to create some cinematic appearance on clips with straightforward steps. Her after video appears to be something unreal due to extensive editing.
Her target audience for this video is beginner video editors. She can explain color correction in the easiest way possible from her immerse skillset. With that, beginner editors will significantly benefit from it.
5. Make Cinematic Looks with After Effects Color Correction Tricks! by Black Mixture
Paying for the After Effects subscription and again paying for color correction is something most people cannot wish to do. Even though you are not good at color correction, you need to stress yourself since Nate and Chriselle of Black Mixture will make things easy for you. Black Mixture is a YouTube account managed by Nate and Chriselle, a couple. In their channel, they expound on topics surrounding filmmaking, graphic design, motion design, and photography.
In this video, Nate elaborates on various steps on how to carry out a color correction in Adobe After Effects without plugins. He even goes to the extent of showing how to add music video effects as well as cinematic effects.
Nate uniquely uses only three color correction effects to carry out all the color correction needed to his footage – A super-fast driving car on a highway – And comes up with stunning results. He uses various customizable Adobe Effects settings such as hue, contrast, saturation.
Furthermore, Nate explains how to interpret and use histograms and graphs in adjusting various customizable settings. He also emphasizes the glow, a unique functionality feature that alters the lighting of clips to make his background appear super cool. Most editors do not commonly use glow, but it creates outstanding videos when used.
Nate does not only target beginner video editors but also intermediate ones. There is something new that intermediate editors will also learn.
6. Color Correction in After Effects - Tutorial by Kenneth Moore
This is the last YouTube video that we are going to learn about color correcting from. It is a video produced by Kenneth Moore, A prime owner of Kenneth Moore’s YouTube Channel. Even though his channel, Kenneth Moore channel, is still on the grow, he straightforwardly brought out every step to carry out when doing color correction in After Effects.
In this video, Moore uses a shot of a drown to elaborate color correction. The initial footage appears to be dull with indistinct features. With the color corrections tools, Moore is able to liven the footage giving it that outstanding look.
Moore unfolds on how to use various functionality tools in After Effects. In his video, he incorporates contrast, curves, RGB Parade, color balancing, color wheels, Vectorscope, and HSL Secondary functionalities. He used another footage, a car, to elaborate on HSL secondary.
In the video, Moore targets beginner and intermediate video editors to throw light on other color correction functionalities that video editors need to learn.
Conclusion
● Supplement your reading about color correction in After Effects with these videos. The above six videos evidently explain how to carry out a color correction in Adobe After Effects with ease. The videos are created with established producers and video editors; therefore they give professional insights and teachings.
● Color correction in After Effects should no longer stress you out. All you have to do is watch any of the above videos, or you can watch all of them and have a better grip of color correction. You will be able to create exceptional footage.
Best 10 iPad Slideshow Apps to Create a Slideshow
Top 10 iPad Slideshow Apps to Create a Slideshow
An easy yet powerful editor
Numerous effects to choose from
Detailed tutorials provided by the official channel
Creating slideshow presentations on iPads can be a real excitement and fun with the correct slideshow creator program. Keep reading to learn about the most feasible software choices!
In this article
01 [Common Solutions of Making Slideshow for iPad](#Part 1)
02 [Best 10 iPad Slideshow Apps to Create a Slideshow](#Part 2)
03 [5 Hot FAQs About Creating Slideshow](#Part 3)
Part 1 Common Solutions of Making Slideshow for iPad
Slideshows are an expressive and immersive media of delivering important information in a captivating manner. After all, who does not appreciate a catchy presentation of otherwise customary facts and figures? While there are tons of alternatives and utilities to create and share slideshow presentations on almost any platform, let us pay a special attention towards designing amazing slideshows on an iPad in the following section:
User’s Guide to Create Slideshow Presentations on an iPad
Step 1: Launch the Photos Application
Start with navigating to your iPad’s app gallery and tap on the ‘Photos’ icon frame to launch the application in your device.
Step 2: Creating Automatic Slideshows from Local Images
● Random Selection
In the app’s opening screen, navigate to and hit the left sidebar to access the different commands and media locations of the app. From the list that appears, click on the ‘Library’ tab. Once within the application’s image library, you can browse through and select the desired images according to a particular day, month and year. All the images can also be selected altogether.

● Using the Memory Album
If you wish to make a slideshow of the still memories of your recent vacation, or a cherished family event, you need to head to the left sidebar and click on the ‘For You’ tab. A gallery of a set of images related to a specific date will open up, and you can select the photos that are required to be included in the slideshow by tapping on their respective thumbnails.
You can even watch a slideshow at this very stage within the aforesaid ‘Memories’ image gallery. You just need to hit the ‘Play’ button at the bottom right corner of a specific memory thumbnail.

Slideshow presentations can additionally be created from other albums like, People & Places, in a similar manner. You can further watch slideshows within a variety of media types, like, selfies, panoramas, videos and portraits. All you need to do is, head to the left sidebar and click on ‘Media Types’ within the list of available image categories.

Next, you can pick any of the subcategories, followed by tapping on the ‘Ellipsis’ icon at the top right corner of the app screen. Choose the ‘Slideshow’ option from the dropdown menu that follows and the automatically created slideshow presentation will start playing.

● Select Some Images of Your Own
Before proceeding to choose your own list of images, it is a smart step to save them in an album. In the left sidebar, navigate to and hit the ‘All Albums’ tab. Now head to and tap the ‘+’ icon at the top ribbon on the app screen, followed by choosing the ‘New Album’ option from the menu that drops down.

Assign a name to the created album and proceed to select images while browsing through the app gallery. Tap an image to add it to the album and click on ‘Done’ when you have made your selections. To run your automatic slideshow, navigate to the newly created album in the left sidebar and open it.

Now hit the ‘Ellipses’ icon at the top; right corner of the app screen and select the ‘Slideshow’ option from the list that appears next.

Step 3: Editing the Presentation
To add customizations to a running slideshow, you will need to pause it and tap the ‘Options’ button at the bottom right corner of the app screen. In the dropdown that follows, you can change the theme and background music of the slideshow by selecting respectively, the ‘Theme’ and ‘Music’ options. You can also set a transition effect and adjust the play duration of the presentation.
D

To increase the duration of your slideshow, drag the slider to the left or move the same to the left to decrease the play duration. You can enable the ‘Repeat’ option to watch the slideshow in a loop.

Step 4: Time to Play!
When you are done with making all the effort, click on the ‘Start Slideshow’ button to run the presentation in your iPad.

Part 2 Best 10 iPad Slideshow Apps to Create a Slideshow
iPad compatible software programs to design professional quality slideshows are among the commonest requirements of the graphic design fraternity in today’s times. Having learnt about the fundamental solutions to create awesome slideshow presentations on iPad, let us move ahead to talk about the most preferred and top rated software applications for making an iPad slide show in the following section:
01PicPlayPost
Standing ahead in the list is the aforesaid slideshow creator application that lets you create intuitive, professionally sound iPad slideshow presentations with utmost ease. Working with the program, you can experiment with creating graphic masterpieces by sticking together images, videos, GIFs and audio elements. The software’s high end and easy to use editing features make the latter a convenient slideshow creator alternative even for the newbies of the design world.
The software facilitates an easy and quick clutching of images and video clips and create amazing slideshows with an appreciable output resolution. You can add up to 9 media files and customize the same with a range of filters, effects and features. The music compilation is however, limited and the software leaves a customizable watermark on the slides. The program is available for a free usage in its basic version and greets you with a welcoming interface.

02SlideLab
If you are explicitly concerned about creating image centered slideshow presentations on your iPad, SlideLab can certainly be your go to application. It is hardly a matter of a few minutes with a counted number of clicks for the software program to deliver top quality photo slideshows. No doubt, the aforesaid graphic designer program is an absolute favorite of creative experts around the world.
Talking of the feature rich editor library of the program, you can play with graphic skills to your heart’s content and edit the slideshow media in cohesion with your diverse creation needs. You can customize the images and add background music to the slides, both from your iPad and the SlideLab audio library.
The program further allows you to retain the original aspect ratio of the images and video clips, along with the flexibility to directly share your creation across a variety of media sharing platforms, such as, Instagram, Vine, etc. There are thousands of filters and transitions in the editor library, which you can select from to imbibe your presentations with.
However, if you prefer an Instagram or Facebook export of your slideshow with SlideLab, you will be devoid of importing audio files from your iTunes storage account.

03Photo Slideshow Director
Moving ahead with the list, you have the aforesaid slideshow iPad program, which is conveniently regarded as the most affordable graphic editor package for creating photo slideshow presentations in almost all iOS devices by users across the globe. Not only can you play with a diversity of editing features and effects, but also save and share your presentations as HD movies across all popular media sharing platforms with the software.
The program further assists you in the slideshow creation process through its interactive interface that guides you at every step via intuitive, on screen design instructions. Another appeals of the software include, a full HD display, HD format file export and the flexibility to create and share music videos. The user reviews of the app however, talk of frequent software glitches and variations in the operational speed in relation to the iPad memory space.

04PicFlow
PicFlow is known to exhibit a mix of slideshow features that you may normally get in a series of creator alternatives, but there are a few additional characteristics as well, which make the aforesaid program stand ahead of other graphic creator applications in the line. Working with the software, you are permitted to fix the screen time of your presentation media, while complimenting the same with a subtle audio track of your choice.
The program further allows you to import audio fil.es from your iPod, while promoting the easiest image editing process through positional photo dragging, swipe and pinch tools for image cropping, recording the image screen play, a decent transition library with more than 18 unique transition styles, local device export to the ‘Camera Roll’ folder.
The application a quick slideshow sharing mechanism to upload your artwork on popular social media platforms, like, Instagram and Facebook. The software however, encompasses a restricted number of creation features and editing utilities in its no cost version, and can generate slideshows with a video codec of only 30 frames per second.

05iMovie
This one is undeniably the best slideshow creator alternative you can ever get to make professionally sound iPad photo slideshow presentations. The app has an extensive global fan base on account of the trendy graphic editing features that it seeks to offer. Within the domain of image presentations, you can play with tons of customization choices to transform your otherwise customary slideshows into graphic masterpieces.
Using the application, you can work to add a different background audio to every image, experiment with including a variety of audio-visual effects, titles and transitions, apply movie centered themes and play the slides in line with the perfect music tune.
The program however, has a limited scope of flexibility within its utilities that are mostly rigid in terms of parametric changes, is an iOS and Mac exclusive software and requires a comprehensive understanding of the workflow to begin with the slideshow creation process.

06PIXGRAM- Music Photo Slideshow
PIXGRAM is affordably the most loved slideshow maker program by amateurs in the graphic design realm. You can safely rely on the software to create good quality image and video presentations, even without any creative design experience at all. The application permits you to add your most cherished images and music to the presentation slides and customize them with video filters, audio-visual effects and transitions.
You are further granted the liberty to save your creation locally to the iPad in probably any file size and export them across various social media handles, like, Twitter, Facebook, etc. The software interface is specifically designed in line with the creation abilities of novel users.
While the application lacks advanced features to address the needs of experienced creators, you are additionally left with selecting from the local music tracks on your device, since the program does not support a premade audio library.

07Movavi Clips
Moving ahead with the list, the aforesaid slideshow maker program is an affordable pick to create high end, image centered, iPad photos slideshow presentations. The design process is simple enough, with you just having to work on importing media files from your device, include suitable transition effects to ensure a smooth presentation flow and pick cohesive background music.
You can further choose to overlay the added music in the software’s audio mixer and make volume adjustments. The app is also supportive of direct media share on platforms like, YouTube, Facebook, Instagram stories, etc. The program however, leaves a watermark in its free version, which can be resolved by upgrading to the premium one.
While experienced users may find a miss out of some utilities, the app is otherwise, easy to use, has no cost updates, latest sticker packs, high end technical utilities and does not support ads.

08Animoto Slideshow Creator
If you want to transform the cherished images of your most celebrated events into a quick and classic slideshow movie, you can choose to work with this program. Working with the app, you are allowed to access a vast and licensed library of background audio and over 100 distinguished slideshow themes and styles. There is additionally, a decent range of text customization effects, which you can use to spark up your presentations with elusive and catchy titles, captions, etc.
The software further, houses a diversity of advanced editing features that are greatly preferred by experienced graphic editors; and facilitates a high quality slideshow output, that can be downloaded in HD format. The program is however, not available free of cost and has an expensive purchase license.
Animoto Slideshow Creator Official Download Link: https://animoto.com/

09EverChanging
Creating a slideshow on iPad was never so easy as with the EverChanging slideshow builder program. To begin with, the software comes with the most responsive and clean working interface, allowing users to continently navigate through and access the various software features, elements and utilities.
Talking of the creation process, the application lets you quickly deign awesome presentation with good quality image effects, elaborative themes and subtle background music. You can also adjust the screen time of individual slides and include animated transitions to seamlessly fade images in and out for a smooth presentation flow. While the design time is hardly a few minutes, but the editing features though classy, are limited in number.

10Slide Maker
Last in the list, comes the Slide Maker application, which you can rely on to create professional and personal slideshow presentations in premium quality. The software houses an inbuilt image editor program that you can use exclusively for adding life to your ordinary photos before making them a part of your slideshow. You can try hands at rotating, cropping, and zooming the photos, along with customizing them with expressive filters.
Drop your background music concerns if you have any, because the aforesaid program is a storehouse of royalty free audio tracks that suit almost any and every presentation theme. If that’s not enough, you are free to select a track from the ones on your device or an online storage account. The software additionally works to fine tune the aspect ratio and output quality of the slideshow for a convenient export to social media handles.
The app’s free version is however, restricted to a selection of 10 media files for each presentation, but you can always upgrade to the paid subscription of the program to overcome the same. Also, the working interface of the software may be a bit tricky to understand and use.

Part 3 Hot FAQs About Creating Slideshow
Aiming to create slideshow on iPad is both, fun and exciting, along with catering to the diverse range of information delivery concerns. However, this creative aspect of the graphic design domain is often stacked with a variety of development queries. Focusing on the same, let us try hands at sorting some of the commonest ones in the following section:
01What should you keep in mind before starting the creation?
Before you actually start working on designing the presentation, take time to set a clear objective of your presentation. Decide on the significant elements of the slideshow in line with the main theme, while ensuring that they appear in a sequential flow, lest your slideshow will look like a bundle of stuffed elements.
02What is the right proportion of text based contents?
Including text annotations in your presentation is an elusive way of drawing the viewers’ attention towards precise information. However, you should take care of the aspects like, text size, font, color, orientation, etc., to make sure that the added text enhances the credibility of the slideshow and does not indicate unnecessary inclusion.
03What is the feasible number of slides?
The slide count of your presentation largely depends on the type of information you are aiming to deliver. Make sure that all the included slides have a relevant content and you are not missing out on any specific element of the presentation objective.
04What are the constraints of image selection?
Pay considerable attention to the resolution and quality of the images when adding the same to your presentation, Avoid working with blurry and vague stills, along with keeping the professional aspect of your slideshow in mind, lest you end up putting a hoard of uncanny clips.
05What are the prerequisites of adding audio and video elements?
If you need to supplement the presentation with audio tracks and video footage, take the first step to save them locally or on a USB device to escape the glitches of long buffering and playback issues. Secondly, quality is the thing that matters the most and you should be sure of a high resolution audio-visual inclusion to avoid viewer distraction.
Creating High End Slideshow Presentations in Wondershare Filmora
When aiming to create a slideshow presentation in your iPad, the in-built ‘Photos’ app within the device is a feasible option. However, if you are keen on picking an alternative, choosing the Wondershare Filmora Video Editor graphic editor package would not be a regret. Speaking in the light of slideshow creation processes and utilities, the software has a lot of appeals to attract its users.
For Win 7 or later (64-bit)
For macOS 10.12 or later
Slideshow Centered Features of Wondershare Filmora
● Working with the aforesaid graphic and audio editor software, you are rescued from the notch of sticking to a particular file format to import and use your media. The program works well with all popular image, video and music file formats to ensure a convenient media import and usage.
● You are allowed to pan, zoom and crop the slideshow portions, both, manually and automatically for an enhanced and clear presentation view.
● The program’s inbuilt library lets you explore and play with an enormous range of effects, transitions, audio-visual elements and filters, preset background themes and music templates to spark up your slideshow presentations.
● You can also work with recording your own voiceover and device screen, while customizing the same with a plethora of cohesive editing features and effects.
● Ending Thoughts →
● The process to create slide show on iPad is quite an easy and interesting task when working with the device’s inbuilt ‘Photos’ application.
● Surfing through the software market, you can pick from a diversity of slideshow creator programs that have extensive compatibility with iPad.
● If you are pondering over the best choice from the available software solutions, the Wondershare Filmora slideshow creator program is an affordable selection.
Creating slideshow presentations on iPads can be a real excitement and fun with the correct slideshow creator program. Keep reading to learn about the most feasible software choices!
In this article
01 [Common Solutions of Making Slideshow for iPad](#Part 1)
02 [Best 10 iPad Slideshow Apps to Create a Slideshow](#Part 2)
03 [5 Hot FAQs About Creating Slideshow](#Part 3)
Part 1 Common Solutions of Making Slideshow for iPad
Slideshows are an expressive and immersive media of delivering important information in a captivating manner. After all, who does not appreciate a catchy presentation of otherwise customary facts and figures? While there are tons of alternatives and utilities to create and share slideshow presentations on almost any platform, let us pay a special attention towards designing amazing slideshows on an iPad in the following section:
User’s Guide to Create Slideshow Presentations on an iPad
Step 1: Launch the Photos Application
Start with navigating to your iPad’s app gallery and tap on the ‘Photos’ icon frame to launch the application in your device.
Step 2: Creating Automatic Slideshows from Local Images
● Random Selection
In the app’s opening screen, navigate to and hit the left sidebar to access the different commands and media locations of the app. From the list that appears, click on the ‘Library’ tab. Once within the application’s image library, you can browse through and select the desired images according to a particular day, month and year. All the images can also be selected altogether.
● Using the Memory Album
If you wish to make a slideshow of the still memories of your recent vacation, or a cherished family event, you need to head to the left sidebar and click on the ‘For You’ tab. A gallery of a set of images related to a specific date will open up, and you can select the photos that are required to be included in the slideshow by tapping on their respective thumbnails.
You can even watch a slideshow at this very stage within the aforesaid ‘Memories’ image gallery. You just need to hit the ‘Play’ button at the bottom right corner of a specific memory thumbnail.
Slideshow presentations can additionally be created from other albums like, People & Places, in a similar manner. You can further watch slideshows within a variety of media types, like, selfies, panoramas, videos and portraits. All you need to do is, head to the left sidebar and click on ‘Media Types’ within the list of available image categories.
Next, you can pick any of the subcategories, followed by tapping on the ‘Ellipsis’ icon at the top right corner of the app screen. Choose the ‘Slideshow’ option from the dropdown menu that follows and the automatically created slideshow presentation will start playing.
● Select Some Images of Your Own
Before proceeding to choose your own list of images, it is a smart step to save them in an album. In the left sidebar, navigate to and hit the ‘All Albums’ tab. Now head to and tap the ‘+’ icon at the top ribbon on the app screen, followed by choosing the ‘New Album’ option from the menu that drops down.
Assign a name to the created album and proceed to select images while browsing through the app gallery. Tap an image to add it to the album and click on ‘Done’ when you have made your selections. To run your automatic slideshow, navigate to the newly created album in the left sidebar and open it.
Now hit the ‘Ellipses’ icon at the top; right corner of the app screen and select the ‘Slideshow’ option from the list that appears next.
Step 3: Editing the Presentation
To add customizations to a running slideshow, you will need to pause it and tap the ‘Options’ button at the bottom right corner of the app screen. In the dropdown that follows, you can change the theme and background music of the slideshow by selecting respectively, the ‘Theme’ and ‘Music’ options. You can also set a transition effect and adjust the play duration of the presentation.
D
To increase the duration of your slideshow, drag the slider to the left or move the same to the left to decrease the play duration. You can enable the ‘Repeat’ option to watch the slideshow in a loop.
Step 4: Time to Play!
When you are done with making all the effort, click on the ‘Start Slideshow’ button to run the presentation in your iPad.
Part 2 Best 10 iPad Slideshow Apps to Create a Slideshow
iPad compatible software programs to design professional quality slideshows are among the commonest requirements of the graphic design fraternity in today’s times. Having learnt about the fundamental solutions to create awesome slideshow presentations on iPad, let us move ahead to talk about the most preferred and top rated software applications for making an iPad slide show in the following section:
01PicPlayPost
Standing ahead in the list is the aforesaid slideshow creator application that lets you create intuitive, professionally sound iPad slideshow presentations with utmost ease. Working with the program, you can experiment with creating graphic masterpieces by sticking together images, videos, GIFs and audio elements. The software’s high end and easy to use editing features make the latter a convenient slideshow creator alternative even for the newbies of the design world.
The software facilitates an easy and quick clutching of images and video clips and create amazing slideshows with an appreciable output resolution. You can add up to 9 media files and customize the same with a range of filters, effects and features. The music compilation is however, limited and the software leaves a customizable watermark on the slides. The program is available for a free usage in its basic version and greets you with a welcoming interface.
02SlideLab
If you are explicitly concerned about creating image centered slideshow presentations on your iPad, SlideLab can certainly be your go to application. It is hardly a matter of a few minutes with a counted number of clicks for the software program to deliver top quality photo slideshows. No doubt, the aforesaid graphic designer program is an absolute favorite of creative experts around the world.
Talking of the feature rich editor library of the program, you can play with graphic skills to your heart’s content and edit the slideshow media in cohesion with your diverse creation needs. You can customize the images and add background music to the slides, both from your iPad and the SlideLab audio library.
The program further allows you to retain the original aspect ratio of the images and video clips, along with the flexibility to directly share your creation across a variety of media sharing platforms, such as, Instagram, Vine, etc. There are thousands of filters and transitions in the editor library, which you can select from to imbibe your presentations with.
However, if you prefer an Instagram or Facebook export of your slideshow with SlideLab, you will be devoid of importing audio files from your iTunes storage account.
03Photo Slideshow Director
Moving ahead with the list, you have the aforesaid slideshow iPad program, which is conveniently regarded as the most affordable graphic editor package for creating photo slideshow presentations in almost all iOS devices by users across the globe. Not only can you play with a diversity of editing features and effects, but also save and share your presentations as HD movies across all popular media sharing platforms with the software.
The program further assists you in the slideshow creation process through its interactive interface that guides you at every step via intuitive, on screen design instructions. Another appeals of the software include, a full HD display, HD format file export and the flexibility to create and share music videos. The user reviews of the app however, talk of frequent software glitches and variations in the operational speed in relation to the iPad memory space.
04PicFlow
PicFlow is known to exhibit a mix of slideshow features that you may normally get in a series of creator alternatives, but there are a few additional characteristics as well, which make the aforesaid program stand ahead of other graphic creator applications in the line. Working with the software, you are permitted to fix the screen time of your presentation media, while complimenting the same with a subtle audio track of your choice.
The program further allows you to import audio fil.es from your iPod, while promoting the easiest image editing process through positional photo dragging, swipe and pinch tools for image cropping, recording the image screen play, a decent transition library with more than 18 unique transition styles, local device export to the ‘Camera Roll’ folder.
The application a quick slideshow sharing mechanism to upload your artwork on popular social media platforms, like, Instagram and Facebook. The software however, encompasses a restricted number of creation features and editing utilities in its no cost version, and can generate slideshows with a video codec of only 30 frames per second.
05iMovie
This one is undeniably the best slideshow creator alternative you can ever get to make professionally sound iPad photo slideshow presentations. The app has an extensive global fan base on account of the trendy graphic editing features that it seeks to offer. Within the domain of image presentations, you can play with tons of customization choices to transform your otherwise customary slideshows into graphic masterpieces.
Using the application, you can work to add a different background audio to every image, experiment with including a variety of audio-visual effects, titles and transitions, apply movie centered themes and play the slides in line with the perfect music tune.
The program however, has a limited scope of flexibility within its utilities that are mostly rigid in terms of parametric changes, is an iOS and Mac exclusive software and requires a comprehensive understanding of the workflow to begin with the slideshow creation process.
06PIXGRAM- Music Photo Slideshow
PIXGRAM is affordably the most loved slideshow maker program by amateurs in the graphic design realm. You can safely rely on the software to create good quality image and video presentations, even without any creative design experience at all. The application permits you to add your most cherished images and music to the presentation slides and customize them with video filters, audio-visual effects and transitions.
You are further granted the liberty to save your creation locally to the iPad in probably any file size and export them across various social media handles, like, Twitter, Facebook, etc. The software interface is specifically designed in line with the creation abilities of novel users.
While the application lacks advanced features to address the needs of experienced creators, you are additionally left with selecting from the local music tracks on your device, since the program does not support a premade audio library.
07Movavi Clips
Moving ahead with the list, the aforesaid slideshow maker program is an affordable pick to create high end, image centered, iPad photos slideshow presentations. The design process is simple enough, with you just having to work on importing media files from your device, include suitable transition effects to ensure a smooth presentation flow and pick cohesive background music.
You can further choose to overlay the added music in the software’s audio mixer and make volume adjustments. The app is also supportive of direct media share on platforms like, YouTube, Facebook, Instagram stories, etc. The program however, leaves a watermark in its free version, which can be resolved by upgrading to the premium one.
While experienced users may find a miss out of some utilities, the app is otherwise, easy to use, has no cost updates, latest sticker packs, high end technical utilities and does not support ads.
08Animoto Slideshow Creator
If you want to transform the cherished images of your most celebrated events into a quick and classic slideshow movie, you can choose to work with this program. Working with the app, you are allowed to access a vast and licensed library of background audio and over 100 distinguished slideshow themes and styles. There is additionally, a decent range of text customization effects, which you can use to spark up your presentations with elusive and catchy titles, captions, etc.
The software further, houses a diversity of advanced editing features that are greatly preferred by experienced graphic editors; and facilitates a high quality slideshow output, that can be downloaded in HD format. The program is however, not available free of cost and has an expensive purchase license.
Animoto Slideshow Creator Official Download Link: https://animoto.com/
09EverChanging
Creating a slideshow on iPad was never so easy as with the EverChanging slideshow builder program. To begin with, the software comes with the most responsive and clean working interface, allowing users to continently navigate through and access the various software features, elements and utilities.
Talking of the creation process, the application lets you quickly deign awesome presentation with good quality image effects, elaborative themes and subtle background music. You can also adjust the screen time of individual slides and include animated transitions to seamlessly fade images in and out for a smooth presentation flow. While the design time is hardly a few minutes, but the editing features though classy, are limited in number.
10Slide Maker
Last in the list, comes the Slide Maker application, which you can rely on to create professional and personal slideshow presentations in premium quality. The software houses an inbuilt image editor program that you can use exclusively for adding life to your ordinary photos before making them a part of your slideshow. You can try hands at rotating, cropping, and zooming the photos, along with customizing them with expressive filters.
Drop your background music concerns if you have any, because the aforesaid program is a storehouse of royalty free audio tracks that suit almost any and every presentation theme. If that’s not enough, you are free to select a track from the ones on your device or an online storage account. The software additionally works to fine tune the aspect ratio and output quality of the slideshow for a convenient export to social media handles.
The app’s free version is however, restricted to a selection of 10 media files for each presentation, but you can always upgrade to the paid subscription of the program to overcome the same. Also, the working interface of the software may be a bit tricky to understand and use.
Part 3 Hot FAQs About Creating Slideshow
Aiming to create slideshow on iPad is both, fun and exciting, along with catering to the diverse range of information delivery concerns. However, this creative aspect of the graphic design domain is often stacked with a variety of development queries. Focusing on the same, let us try hands at sorting some of the commonest ones in the following section:
01What should you keep in mind before starting the creation?
Before you actually start working on designing the presentation, take time to set a clear objective of your presentation. Decide on the significant elements of the slideshow in line with the main theme, while ensuring that they appear in a sequential flow, lest your slideshow will look like a bundle of stuffed elements.
02What is the right proportion of text based contents?
Including text annotations in your presentation is an elusive way of drawing the viewers’ attention towards precise information. However, you should take care of the aspects like, text size, font, color, orientation, etc., to make sure that the added text enhances the credibility of the slideshow and does not indicate unnecessary inclusion.
03What is the feasible number of slides?
The slide count of your presentation largely depends on the type of information you are aiming to deliver. Make sure that all the included slides have a relevant content and you are not missing out on any specific element of the presentation objective.
04What are the constraints of image selection?
Pay considerable attention to the resolution and quality of the images when adding the same to your presentation, Avoid working with blurry and vague stills, along with keeping the professional aspect of your slideshow in mind, lest you end up putting a hoard of uncanny clips.
05What are the prerequisites of adding audio and video elements?
If you need to supplement the presentation with audio tracks and video footage, take the first step to save them locally or on a USB device to escape the glitches of long buffering and playback issues. Secondly, quality is the thing that matters the most and you should be sure of a high resolution audio-visual inclusion to avoid viewer distraction.
Creating High End Slideshow Presentations in Wondershare Filmora
When aiming to create a slideshow presentation in your iPad, the in-built ‘Photos’ app within the device is a feasible option. However, if you are keen on picking an alternative, choosing the Wondershare Filmora Video Editor graphic editor package would not be a regret. Speaking in the light of slideshow creation processes and utilities, the software has a lot of appeals to attract its users.
For Win 7 or later (64-bit)
For macOS 10.12 or later
Slideshow Centered Features of Wondershare Filmora
● Working with the aforesaid graphic and audio editor software, you are rescued from the notch of sticking to a particular file format to import and use your media. The program works well with all popular image, video and music file formats to ensure a convenient media import and usage.
● You are allowed to pan, zoom and crop the slideshow portions, both, manually and automatically for an enhanced and clear presentation view.
● The program’s inbuilt library lets you explore and play with an enormous range of effects, transitions, audio-visual elements and filters, preset background themes and music templates to spark up your slideshow presentations.
● You can also work with recording your own voiceover and device screen, while customizing the same with a plethora of cohesive editing features and effects.
● Ending Thoughts →
● The process to create slide show on iPad is quite an easy and interesting task when working with the device’s inbuilt ‘Photos’ application.
● Surfing through the software market, you can pick from a diversity of slideshow creator programs that have extensive compatibility with iPad.
● If you are pondering over the best choice from the available software solutions, the Wondershare Filmora slideshow creator program is an affordable selection.
How to Add Custom Filters in VN App: 2024 Quick Guide
In the colorful world of video editing, the ability to personalize and enhance your clips with unique looks is what stands your work out. Enter the VN app, the game-changer in mobile video editing, bursting with user-friendly features.
If you’ve been searching for a simple way to dive into the realm of video filters, you’re in luck. Today, we’ll decode how to jazz up your videos using the VN app’s built-in and custom video filter features. Ready to elevate your video content game? Let’s get started!
- Step 2: Save the Filter Preset and Use It Directly Next Time
- Part 3: Best Alternatives
- Part 4: Summary
Part 1: Use VN App Built-in Video Filters (LUTs)
Step 1: Locate the Filters Feature
You must know where the magic happens before you go Spielberg on your videos. Upon launching the VN app, you’ll see a range of editing tools. Look for an icon resembling a magic wand or palette – your gateway to the wonderful world of video filters.
Step 2: Preview and Apply Effects
This step is all about experimenting and having fun. Tap on the filter icon, and voilà! You’re greeted with various preset looks, waiting for your videos to don them. Glide through the options; VN has got it all from vintage vibes to futuristic glow. Found one that catches your eye?
Tap on it and watch your video transform instantly. Not sure about your pick? No worries; simply swipe left or right to preview other effects. Once you’re satisfied, tap ‘apply.’
Step 3: Adjust Details with Color Settings
Okay, young director, you’ve chosen your filter. But what if you want to tweak it just a bit? VN’s got your back.
Once a filter is applied, you’ll notice sliders or dials – these are your video filter editor tools. Play around with them! You can adjust the filter’s intensity, making it as subtle or dramatic as you like. Tweak the brightness, contrast, and saturation until your video looks like you envisioned.
Part 2: Download External Filter Installation Package
Step 1: Locate the My Filters Feature
The VN app is awesome, but can you add even more flair to your videos with custom filters? Yup! These aren’t just your regular video presets – they’re unique styles you can download and add to your VN arsenal.
To begin, tap on the “My Filters” section within the app. If you’re wondering where this is, it’s usually nestled beside the built-in filter options, represented by a ‘+’ or ‘Add’ icon. This personal space is ready to be filled with your downloaded filter goodies.
Step 2: Import the Downloaded VN Filter APK
Here comes the cool part! To get new custom filters:
- Visit the website or store where the VN filters are available for download. (Hint: Search for “vn filter download APK” or “vn iPhone filter download” based on your device.)
- Once downloaded, head back to the VN app and click the ‘Add’ or ‘+’ icon in the “My Filters”
- Navigate to your device’s download folder or wherever the vn filter apk is saved.
- Select the filter file (it should have a .apk or similar extension for Android users and a different format for iPhone users).
- Tap on ‘Import’ and wait for the magic to happen. Your brand-new filter will now be housed in “My Filters”!
Step 2: Save the Filter Preset and Use It Directly Next Time
After importing your snazzy new filter, the next step is super easy. Simply apply it to your video, and if you love how it looks, save it as a preset. This way, the next time you’re editing, you can head straight to “My Filters,” find your favorite custom filter and slap it onto your video without a hitch. Talk about convenience!
Part 3: Best Alternatives
Though VN offers many fantastic filter options, it’s always nice to have alternatives, right? Meet Filmora, another stellar video editing tool known for its expansive video filter collection.
Filmora is more than just an editor; it’s a canvas for videographers. One of its most raved-about features is its extensive range of video filters. With Filmora, you can transport your audience from a sun-kissed beach to a moody, rain-soaked alley in just a tap. Whether you’re going for a documentary feel, a Hollywood movie vibe, or something out of a dream, Filmora’s filters have covered you.
Getting started is a breeze:
- Launch Filmora and import your video.
- Head to the “Effects” tab and immerse yourself in the filter options.
- Preview, select, and apply – it’s that simple!
- Like VN, Filmora allows you to tweak the filter settings for that perfect look.
While Filmora is a great tool, the best fit depends on personal preferences and specific project needs. However, it’s always good to have choices in your editing toolkit. Variety is, after all, the spice of life (and video editing)!
Part 4: Summary
The beauty of video editing lies in the limitless possibilities it offers. With every video filter, editor tweak, and custom preset, you’re not just editing – you’re storytelling. And with tools like VN and Filmora at your fingertips, you have everything you need to tell your story your way.
Remember, whether you’re a seasoned videographer or someone just starting, there’s no ‘right’ or ‘wrong’ regarding creativity. Play around, experiment, and, most importantly, have fun with the process. In the vast universe of video editing, every filter is a star waiting to shine on your masterpiece.
Also read:
- Updated In 2024, The Glitch Effect Shows Errors and Flaws in the Image or a Video. The Write-Up Presents the Complete Procedure of Adding Premiere Pros Glitch Effect and Introduces Eight Free Glitch Effects
- New In 2024, How To Be A Successful YouTuber
- Updated 2024 Approved Do You Want Your Photo and Video Edits to Look Like Peter McKinnons? Color-Grade Your Media Files with Peter McKinnon LUTs to Make Your Content Stand Out
- Updated Do You Want to Enable the Motion Blur Effect While Playing Dying Light 2? Read This Article to Find Out How to Use Dying Light 2 Motion Blur for a Great Gaming Experience for 2024
- Updated How to Create a Smooth Cut Transition Effect, In 2024
- New 2024 Approved An Intro Video Describing You and Your Content Is the First and the Foremost Thing Which a Viewer Sees. Thinking of How to Make an Interesting Intro Video, This Blog Is Surely a Supportive Guide for You. Learn More Here
- 2024 Approved Create Realistic Fire Effects by Filmora
- Updated Are You Searching for the Best Canon LUT Download? This Article Provides the Best Recommendations for Creating the Best Professional Videos
- This Article Has a Detailed Description of How You Can Split the Videos in Lightworks Including the the Discussion of Splitting the Wondershare Filmora as an Alternative. It Is Also a Suitable Choice for 2024
- Updated Discord Is the Future of Networking. After All, It Is Here to Stay. Have You Heard of the Discord Animated Avatar? If Yes, You Understand Its Power and if Not, Ensure You Study This Article for More Information
- New 2024 Approved Step-by-Step Guide to Storyboard
- New How to Make Double Exposure Effect in Filmora for 2024
- Updated In 2024, Heres All About GIF Keyboard Youll Ever Want to Know
- Add Amazing Filters and Effects for Fun to Watch GIFs Using Adobe After Effects. Read on to Discover an Easy-to-Learn After Effects Alternative
- Step by Step to Cut Videos in Adobe Premiere Pro
- New Adjust Background to Black for Your Product Review Video for 2024
- Best 10 Free AI Video Generators with Innovative/Advanced Algorithms for 2024
- In 2024, 3 Methods to Mirror OnePlus Nord 3 5G to Roku | Dr.fone
- In 2024, Android to Apple How To Transfer Photos From Itel P55T to iPad Easily | Dr.fone
- The way to get back lost data from Lava Storm 5G
- Why does the pokemon go battle league not available On Vivo S17 Pro | Dr.fone
- How To Upgrade or Downgrade Apple iPhone 12 mini Without Data Loss? | Dr.fone
- Best Methods for Realme Narzo N53 Wont Turn On | Dr.fone
- How does the stardust trade cost In pokemon go On Realme Narzo N53? | Dr.fone
- How To Repair iPhone X iOS System Issues? | Dr.fone
- In 2024, Ultimate Guide from Infinix Hot 40i FRP Bypass
- 10 Easy-to-Use FRP Bypass Tools for Unlocking Google Accounts On Oppo K11 5G
- Recommended Best Applications for Mirroring Your Motorola Edge 2023 Screen | Dr.fone
- Title: New Why Did Filmora AI Portrait Attract People, In 2024
- Author: Morgan
- Created at : 2024-04-24 01:08:07
- Updated at : 2024-04-25 01:08:07
- Link: https://ai-video-editing.techidaily.com/new-why-did-filmora-ai-portrait-attract-people-in-2024/
- License: This work is licensed under CC BY-NC-SA 4.0.
