
:max_bytes(150000):strip_icc():format(webp)/GettyImages-678913139-58a4ece73df78c345bcd781b.jpg)
New Zoom In and Out on Discord (Desktop + App + Browser Solutions)
Zoom In and Out on Discord (Desktop + App + Browser Solutions)
Abundant Video Effects - Wondershare Filmora
Provide abundant video effects - A creative video editor
Powerful color correction and grading
Detailed tutorials are provided by the official channel
Discord has gained much popularity in recent years owing to its versatility and wide range of customization options available. It is an innovative program that allows users to communicate via text messages, voice and video calls, media files, and more.
One of the main reasons for Discord’s growing popularity is its multipurpose resources that allow people to stay in touch with their communities. As Discord features are customizable, you can alter the zoom settings on the servers and chat screens to increase visibility and ease.
Not sure how to do that? You can head over to the article below to find easy step-by-step guides on how to zoom in Discord desktop and mobile applications and the official website.
In this article
Part 1: Zoom In and Out on Discord Software
Part 2: Zoom In and Out in Discord Mobile App
Part 3: Zoom In and Out on Discord Website
Part 4: Frequently Asked Questions (FAQs)
Part 1: Zoom In and Out on Discord Software
The Discord desktop software is available for Windows 7 and above, Linux, and Mac computers. If you want to know how to zoom in on Discord desktop software, you have landed on the right page. The following steps indicate how to zoom in or out on Discord’s desktop version by accessing the software’s settings.
Step 1: To begin with, launch the Discord desktop application on your computer. Sign in to your Discord profile if asked.
Step 2: On Discord’s homepage, in the left corner at the bottom, you will see your profile name along with the headphones and microphone icons. Next to these, a cog-shaped icon for Settings will be visible. Tap on it to launch user settings.

Step 3: Under “User Settings,” locate the “App Settings” category from the sidebar at the left. Find and click on the “Appearance” option from here.

Step 4: When you scroll down under the “Appearance” settings, you will find the sliders to change the “Chant Font Scaling,” “Space between Message Groups,” and the “Zoom Level” settings at the bottom.

Step 5: The sliders are set on a highlighted percentage visible in green by default. If you wish to increase the chat font size, drag that particular slider to the right and check the preview until you arrive at the size you want. To decrease the font size, you have to drag the slider to the left and look for the desired result in the preview section.

Step 6: If you wish to change the zoom levels of all the elements in a chat screen, you can change the “Zoom Level” slider’s position until you reach your desired result. Now exit the Settings window to apply your changes.

Part 2: Zoom In and Out in Discord Mobile App
Discord offers its mobile applications for Android and iOS devices. You can easily change the Discord app’s built-in settings to change the zoom level. To know how to zoom in on the Discord mobile app, take a look at the comprehensive step-by-step guide below:
Step 1: Firstly, install and launch the Discord app on your mobile and sign in to your profile.
Step 2: Go to the app’s homepage and search for your profile icon at the bottom-right corner of the screen. Click on it to access “User Settings.”

Step 3: Now, look for the “Appearance” settings by scrolling down and tapping on it. You will see the “Chat Font Scaling” option and a slider under it. You can drag the slider to adjust the font size on the Discord application.

Step 4: You can drag the slider to the right to increase the font scale across the app and check for your desired preview. To decrease the font size, you will need to drag the slider to the left. Now exit your Settings and restart the app to make your changes effective.

Step 5: If you want to restore the zoom settings to default, you can click the “Reset” button at the bottom left corner of the screen.

Part 3: Zoom In and Out on Discord Website
If you are using the web version of Discord, there are multiple ways to zoom in. On your native web browser, you can access the ellipses icon at the right and find the “Zoom” option. From here, you can simply click on the “+” icon to zoom in and the “-” icon to zoom out on the page you have opened at the moment.
If you prefer to change the Zoom settings using Discord’s native settings, you can easily do so in the web version using keyboard shortcuts. Here is an in-depth guide indicating how to zoom out in Discord for the online version.
Step 1: Launch the web browser on your computer and open the online version of the Discord software. You might be asked to sign in to your profile at this point.

Step 2: Once you are at the homepage of your Discord profile, you can access the keyboard shortcuts to zoom in or out. To zoom in on Discord, simply hold the “CTRL” key on your keyboard and click the “+” icon key. Each click of the key will result in a 10% increase in the zoom level of the screen.

Step 3: If you want to zoom out on Discord’s screen, you can use your keyboard. Similar to the step mentioned above, tap the “-” key on your keyboard while holding down the “Ctrl” key to make your screen and chat appear smaller.

Step 4: You can reset the zoom settings to default by holding down the “Ctrl” key and hitting “0” on the keyboard. This will restore the settings back to the default 100%.
Part 4: Frequently Asked Questions (FAQs)
Are Discord zoom and text size settings different?
Yes, there is a difference between the zoom levels and the text size settings on Discord. By changing the zoom levels of the software, you alter the zoom level of all the elements, including icons, images, windows, and more, across the Discord application. Changing the text size settings will simply alter the chat font scale in a specific chat window.
Does changing the Discord zoom on my PC affect the settings on my mobile app?
No, all the changes made on the zoom level or text size of Discord remain limited to the version of the software you are currently using. If you change the zoom settings on your PC, the change will not be reflected on your mobile application.
Conclusion
Digital chatting applications such as Discord have made it exceedingly easy to stay in touch with friends and family over long distances. From sending and receiving messages to voice and video calls, you can do a lot with Discord.
If you are a Discord user, knowing how to alter the zoom level on the app can prove to be incredibly beneficial. By changing the zoom settings on Discord, you can make the text, images, and other items present on the screen appear bigger or smaller. With the guide mentioned above, you now know how to zoom in on Discord across the mobile, desktop, and web.
Discord has gained much popularity in recent years owing to its versatility and wide range of customization options available. It is an innovative program that allows users to communicate via text messages, voice and video calls, media files, and more.
One of the main reasons for Discord’s growing popularity is its multipurpose resources that allow people to stay in touch with their communities. As Discord features are customizable, you can alter the zoom settings on the servers and chat screens to increase visibility and ease.
Not sure how to do that? You can head over to the article below to find easy step-by-step guides on how to zoom in Discord desktop and mobile applications and the official website.
In this article
Part 1: Zoom In and Out on Discord Software
Part 2: Zoom In and Out in Discord Mobile App
Part 3: Zoom In and Out on Discord Website
Part 4: Frequently Asked Questions (FAQs)
Part 1: Zoom In and Out on Discord Software
The Discord desktop software is available for Windows 7 and above, Linux, and Mac computers. If you want to know how to zoom in on Discord desktop software, you have landed on the right page. The following steps indicate how to zoom in or out on Discord’s desktop version by accessing the software’s settings.
Step 1: To begin with, launch the Discord desktop application on your computer. Sign in to your Discord profile if asked.
Step 2: On Discord’s homepage, in the left corner at the bottom, you will see your profile name along with the headphones and microphone icons. Next to these, a cog-shaped icon for Settings will be visible. Tap on it to launch user settings.
Step 3: Under “User Settings,” locate the “App Settings” category from the sidebar at the left. Find and click on the “Appearance” option from here.
Step 4: When you scroll down under the “Appearance” settings, you will find the sliders to change the “Chant Font Scaling,” “Space between Message Groups,” and the “Zoom Level” settings at the bottom.
Step 5: The sliders are set on a highlighted percentage visible in green by default. If you wish to increase the chat font size, drag that particular slider to the right and check the preview until you arrive at the size you want. To decrease the font size, you have to drag the slider to the left and look for the desired result in the preview section.
Step 6: If you wish to change the zoom levels of all the elements in a chat screen, you can change the “Zoom Level” slider’s position until you reach your desired result. Now exit the Settings window to apply your changes.
Part 2: Zoom In and Out in Discord Mobile App
Discord offers its mobile applications for Android and iOS devices. You can easily change the Discord app’s built-in settings to change the zoom level. To know how to zoom in on the Discord mobile app, take a look at the comprehensive step-by-step guide below:
Step 1: Firstly, install and launch the Discord app on your mobile and sign in to your profile.
Step 2: Go to the app’s homepage and search for your profile icon at the bottom-right corner of the screen. Click on it to access “User Settings.”
Step 3: Now, look for the “Appearance” settings by scrolling down and tapping on it. You will see the “Chat Font Scaling” option and a slider under it. You can drag the slider to adjust the font size on the Discord application.
Step 4: You can drag the slider to the right to increase the font scale across the app and check for your desired preview. To decrease the font size, you will need to drag the slider to the left. Now exit your Settings and restart the app to make your changes effective.
Step 5: If you want to restore the zoom settings to default, you can click the “Reset” button at the bottom left corner of the screen.
Part 3: Zoom In and Out on Discord Website
If you are using the web version of Discord, there are multiple ways to zoom in. On your native web browser, you can access the ellipses icon at the right and find the “Zoom” option. From here, you can simply click on the “+” icon to zoom in and the “-” icon to zoom out on the page you have opened at the moment.
If you prefer to change the Zoom settings using Discord’s native settings, you can easily do so in the web version using keyboard shortcuts. Here is an in-depth guide indicating how to zoom out in Discord for the online version.
Step 1: Launch the web browser on your computer and open the online version of the Discord software. You might be asked to sign in to your profile at this point.
Step 2: Once you are at the homepage of your Discord profile, you can access the keyboard shortcuts to zoom in or out. To zoom in on Discord, simply hold the “CTRL” key on your keyboard and click the “+” icon key. Each click of the key will result in a 10% increase in the zoom level of the screen.
Step 3: If you want to zoom out on Discord’s screen, you can use your keyboard. Similar to the step mentioned above, tap the “-” key on your keyboard while holding down the “Ctrl” key to make your screen and chat appear smaller.
Step 4: You can reset the zoom settings to default by holding down the “Ctrl” key and hitting “0” on the keyboard. This will restore the settings back to the default 100%.
Part 4: Frequently Asked Questions (FAQs)
Are Discord zoom and text size settings different?
Yes, there is a difference between the zoom levels and the text size settings on Discord. By changing the zoom levels of the software, you alter the zoom level of all the elements, including icons, images, windows, and more, across the Discord application. Changing the text size settings will simply alter the chat font scale in a specific chat window.
Does changing the Discord zoom on my PC affect the settings on my mobile app?
No, all the changes made on the zoom level or text size of Discord remain limited to the version of the software you are currently using. If you change the zoom settings on your PC, the change will not be reflected on your mobile application.
Conclusion
Digital chatting applications such as Discord have made it exceedingly easy to stay in touch with friends and family over long distances. From sending and receiving messages to voice and video calls, you can do a lot with Discord.
If you are a Discord user, knowing how to alter the zoom level on the app can prove to be incredibly beneficial. By changing the zoom settings on Discord, you can make the text, images, and other items present on the screen appear bigger or smaller. With the guide mentioned above, you now know how to zoom in on Discord across the mobile, desktop, and web.
How to Make A Jaw-Dropping Time Lapse Video? [Full Guide]
Are you looking for a handy tutorial that will give you a full-fledged time lapse video? Well, here’s some two cents of what would be the ideal guide that you shall refer to! Learn more about the complete steps involved in making your time lapse video. Find out more here:
Part 1: What is Time Lapse?
1. Technical basics of Time Lapse Photography and Videography
Time-lapse is a specialized type of shot that can be achieved in-camera, through editing, or a combination of both. Time-lapse is a technique where frames are shot much slower than a normal rate (e.g., 24 frames per minute instead of per second).
Professional time-lapses are a series of raw photos even though they are sometimes perceived as videos. In a nutshell, a time-lapse is a short video that processes by revealing the evolution of a series of events, invisible to the eye.
The simplest and most useful formula is time per frame (TPF), multiplied by frames per second (FPS), multiplied by 60 seconds. Using this formula will tell you how long to record to end up with your desired time lapse length or “recording time” (RT). TPF x FPS x 60 = RT
2. What is a Time-lapse video used for?
The use of time-lapse photography and video is an excellent storytelling technique since compelling stories are essential to effective marketing. A time-lapse can also offer excellent insight into the advancement of developmental projects.
① Scientific research
- Time-lapses may be utilized to spread the word about scientific investigations to a wide audience. You can use time-lapse photography to gain money by selling the material of interesting scientific investigations to documentary makers or instructional websites.
- Scientists can visualize processes that would be challenging or sometimes even impossible to study in real life, thanks to time-lapse photography
② Individual enjoyment
Time-lapses are also utilized by filmmakers for scenes requiring extended durations of time with little significant activity occurring during the shot (such as night slowly turning into day).
③ Commercial use
- Time-lapse videos are a wonderful instrument for enhancing the perception of your brand because they are. As a result, many consumers find it interesting.
- Time-lapse videos are the epitome of the old saying that “good things come in small packages” for any brand.
3. How to Make a Time-lapse video?
Start with a stable tripod or surface and adjust the settings on your phone camera or DSLR. Use slow shutter speed, use still mode, and don’t forget to use the timer. Find a stable surface and place your camera this way, you can get your hands on a creative time-lapse video.
Part 2: Record or Shoot Your Time-Lapse Video
1. Select Your Subject
The best way to create a time-lapse video is to pick your subject very carefully. Movement is the most crucial factor to consider while selecting a time-lapse subject. Any movement—whether it be caused by people, animals, vehicles, water, clouds, or anything else—can create an exciting and captivating time-lapse.
- Some of the iconic ideas of filming a time-lapse include:
- A stunning glimpse of the day and night cycle of life at sea.
- Construction of a building from ground till its completion
- Capturing the traffic movement
- Ice melting
- Sun setting
- A great shot of a galaxy
2. Prepare Right Equipment
Choose your equipment before heading out to capture time lapses. There are several options available for time-lapse cameras and applications, ranging from basic and affordable to sophisticated and pricy.
① Camera
You cannot make a time-lapse without owning a camera, whether it is a mobile phone, a compact, or a DSLR. The quality of the final result will be as good as the quality of the equipment you use.
- Smartphone camera apps (iPhone/Android)
All good smartphones now possess a built-in camera with good optical quality, for example: recently Apple Company launched its new iPhone 14 with a magnificent 48-megapixel camera. By using such cameras we have been able to produce really good pictures, although not in negative conditions, such as those with low-light, etc.
For apple: use IguanaLapse or TimeLapse to create your great time-lapses
For Android: use Time-Lapse – Lite
- Point-and-shoot cameras
Even though smartphone cameras have taken over in this digital era, it is still not possible to say that point-and-shoot cameras are not doing their magic. A point-and-shoot camera is really handy.
Some examples of point-and-shoot cameras which are best for creating fun time-lapse videos include Olympus Tough TG-6, Nikon Coolpix W300, Fujifilm XP140, Panasonic Lumix ZS70 / TZ90, and many others in the list.
- Action cameras
Action cameras, also known as action cams are compact, rugged, handheld, or mountable digital cameras that are designed to capture what you see when you are immersing in a movement. The action camera is usually mounted to your helmet, chest, handlebars of a bike or motorcycle, or tripod to record life.
The best action cameras for creating time-lapses include GoPro Hero11 Black, Insta360 ONE RS Twin Edition, DJI Action 2, DJI Pocket 2, and GoPro Hero9 Black.
- DSLR cameras
This is the best choice in terms of cost/benefit: it produces excellent results and high image quality. The best and top-rated DSLRs for creating terrific time-lapses include Nikon D850, Canon 80D, Canon EOS 90D, Sony A7 III, and others.
② Tripod/Gimbal/other stabilizers
Owning a solid and stable tripod is essential for the success of a time-lapse video. A good tripod will support the load without any problems and will keep the arsenal stable for the duration of the shooting session. The best way to use a tripod for filming a time-lapse is to use orient on a tripod that is quite high (at least 170cm).
Some best tripods used to record time-lapses include BONFOTO B671c, Patekfly Flexible Tripod, Sirui Easy Traveler ET-2204, and Vanguard Alta Pro 263AB 100.
A gimbal is a tool that uses motors and intelligent sensors to support and stabilize a camera. The best gimbal and other stabilizers used to film time-lapses include Moza Air 2, DJI RS 2, Zhiyun Crane-2S, Benro RedDog R1, iKan EC1 Beholder, and Feiyu AK4500.
③ Intervalometer/other camera shutter triggers
An intervalometer is a small device able to trigger the shutter of your camera every ‘n’ second, ‘n’ times (also infinite). It can be external, or as we saw earlier, integrated into the camera.
Some of the best intervalometer include Nikon Integrated Intervalometer. With a Nikon D3, you can go into Shooting Menu, and then activate” Interval Timer Shooting”.
3. List Pro Tips for Time-lapse Recording
- Make sure batteries are fully charged
- Set interval to match the movement in the scene
- Select music before shooting the time-lapse
- Use your backup camera
- Shoot in manual mode to avoid flicker
- Lock down focus
- Shoot in RAW format
- Add motion to the time-lapse
- Get comfortable, shoot longer
- Avoid bumping or moving the tripod
- Show shadow movement
- Use apps to plan your shots
- Shoot lots of images
Part 3: Edit Your Time Lapse Video
1. 3 Best Ways to Create Time Lapse from Photos
① Windows Photos App (Windows)
If you are using Windows, you probably are familiar with the general features of the Photos App. One of its distinguishing features is to import the photos and create a mind-blowing time-lapse out of those photos. To create time-lapse on your Windows Photos App, you must follow some simple steps:
- Open the Windows Photos app and import the pictures which you want to transform into a time-lapse.
- Go to Menu > Edit > Speed. For proper time-lapse, select a speed between 4x and 12x.
- Go to Save movie > save the video on your desktop or other device and you’re done with filming a great time-lapse video.
② QuickTime Player (Mac)
In your Apple devices (iPhones, iPads, and MacBook), you can create time-lapses by converting an image sequence to a movie or time-lapse video in QuickTime Player. For this, follow the simple steps and you will get a great time-lapse at the tip of your fingertips.
- Go to QuickTime App on your mac devices and open File > open image sequence.
- Select the image sequence folder and choose media.
- Adjust the quality of the movie by clicking on the options and choosing the resolution, frame rate, and video format.
- Click ‘open’ and time-lapse will be ready for access.
③ Filmora (Windows & Mac)
Through Wondershare Filmora software, it is now possible to drag your favorite image sequence into the timeline and transform it into a cool-looking time-lapse. If you’re looking for easy and efficient software to create attractive time-lapses, Filmora is your best go-to software. Using drag-and-drop, you can create time-lapse effects with Filmora’s built-in slow/fast motion effects. Filmora has over 150 free filters available for you if you wish to apply filters to your movie.
Filmora Video Editor creates a masterpiece for your video with the easiest interface for Windows & Mac users. Wondershare created the Filmora family of video editing and production software. Products on Filmora are available for a variety of users, from novice to expert. A timeline, preview window, and effects library are some of Filmora’s common features. These may all be accessed and managed using a drag-and-drop interface. Both Windows and macOS machines can use the Filmora software library.
How to Create a Time-lapse using Filmora
To create a time-lapse from photos in Filmora software, follow the mentioned steps:
Step 1: Download and install Wondershare Filmora
Go to google chrome and download the setup for Filmora. Install into your desktop.
Free Download For Win 7 or later(64-bit)
Free Download For macOS 10.14 or later
Step 2: Launch Filmora video editor
After downloading and installing, launch the Filmora timeline and import the photos to the media library.
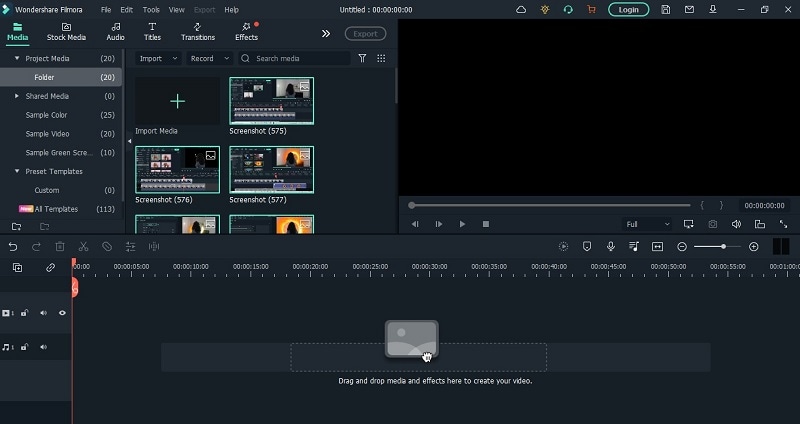
Step 3: Preview and adjust the photos.
Drag the images down to the timeline and move the pointer to reset and order the images according to your required time-lapse video. Don’t forget to resize and match the sizes of all the pictures so make a uniform time-lapse.

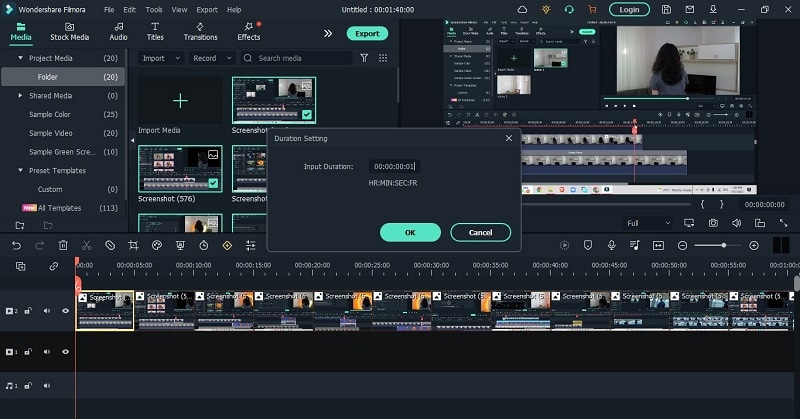
Step 4: Adjust the Speed
Select one of the photos in the timeline and right-click. Click on Speed and Duration > Custom Speed panel > Duration > change the duration of the photo to 00:00:00:01 and hit OK.
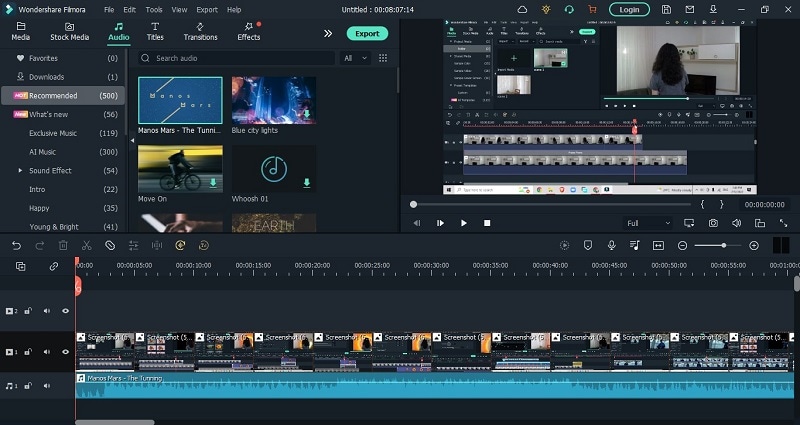
Step 5: Add effects and audio
Even though this step is optional, still it is recommended that to make your time-lapse more presentable, go to effects and choose your favorite pre-set. Go to Audio menu to choose from the music library or add your own custom audio by importing audio file into the timeline.
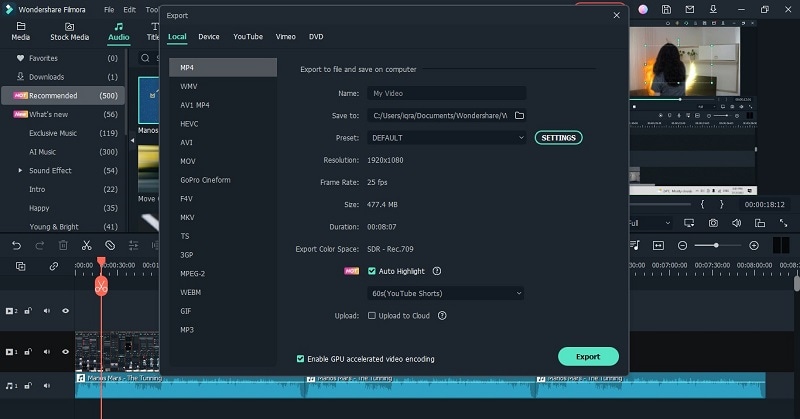
Step 6 Render and Export media
Export your file after rendering it in the full screen. Always check if there are any additional changes required before exporting the media file.

Step 7: Save into your desktop
Change the video format and video and audio parameters such as Bit Rate, Encoder, and Resolution of the video.
Other software for creating time-lapse
Besides Filmora, there are some interesting options for the users which involve:
o iMovie
o LRTimelapse
o Lightroom
o Adobe Premiere Pro
o After Effects
o Photoshop
2. 3 Best Ways to Convert Video to Time Lapse
① Filmora(Windows & Mac)
Filmora offers yet another very distinguishing feature through which it can convert video footage into an excellent time-lapse video. This feature of Filmora empowers the users and boosts their content and increases audience engagement as well.
In a few simple steps, you can get a creative time-lapse on your windows and mac devices.
- Download and install Filmora 11
- Launch Filmora timeline on your device and import the footage to the media library
- Drag your video onto the video column in the timeline. Select the loaded video and click the “Play” button. While playing the video, drag the slider bar at the start time and hit the “Split” icon to cut out the part you want to do time-lapse editing.
- Right-click on the video clip in the timeline to select Speed and Duration. Find the Speed option and drag the slider bar to the right to increase the speed.
- Click the Play button to preview the result. Filmora now supports up to 100x fast motion and 0.01x slow mo.
- Export your video
② Lapse It Pro (Android & iPhone)
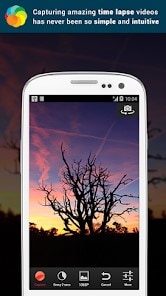
One of the top apps for time-lapse photography is Lapse It Pro. A collection of further time lapses made by other people is available on Lapse It. You can post your videos and favorite those of others while using this social function, which also lets you watch other people’s videos. Through user control, the software makes the smartphone’s capacity to record time lapses as effective as possible.
The lapse It pro version is currently not free, although the Lapse its app is free and it is available on both, Android and Apple.
Steps to Use Lapse It Pro:
- Download the app on your android or apple device
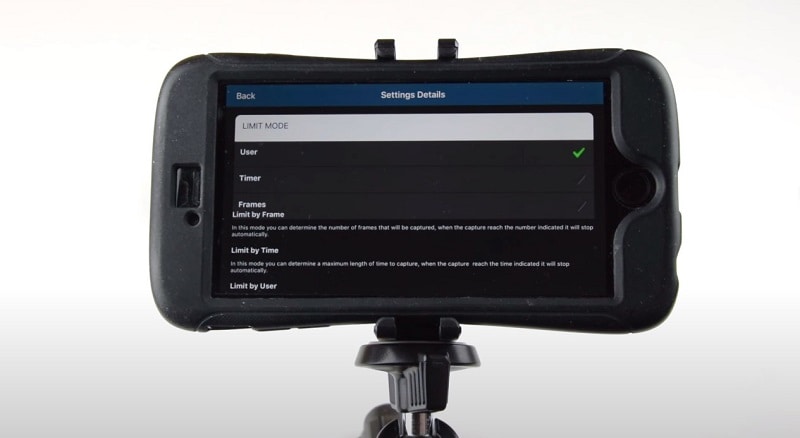
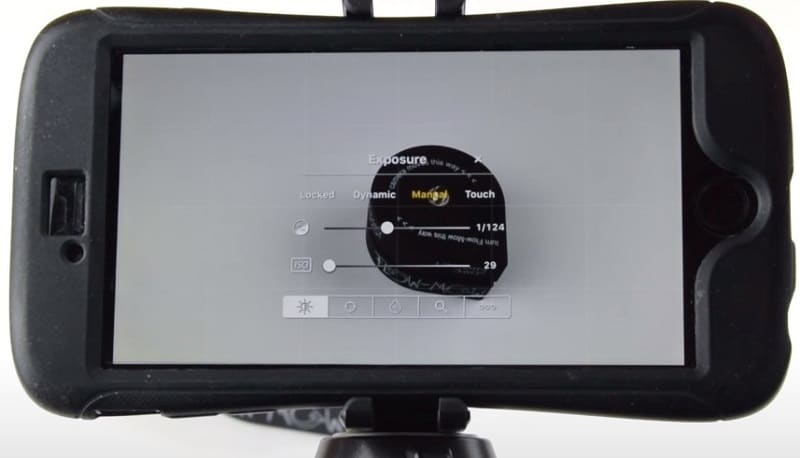
- Configure the time interval between the shots and set a time or photo-based limit while clicking pictures.
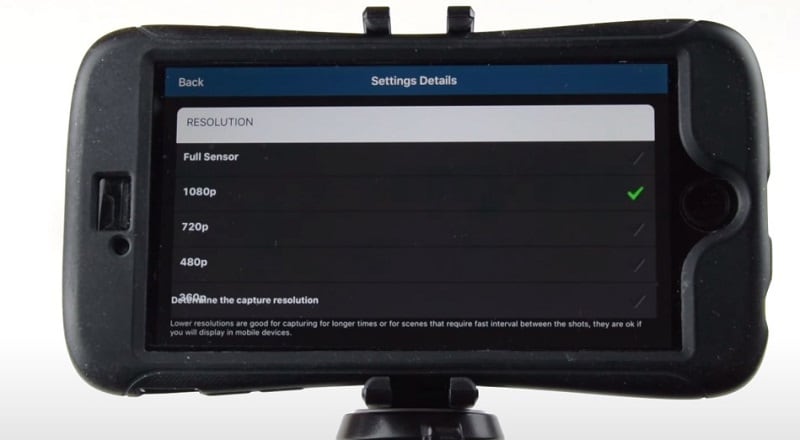
- Adjust the resolution of your camera before taking pictures.
- Take a lot of pictures through the app using your device’s inbuilt camera
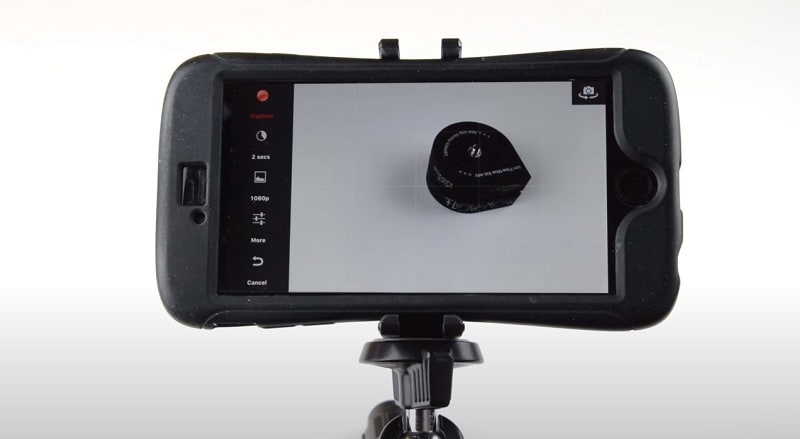
- Edit the order of the pictures
- Stitch the pictures together to form a time-lapse
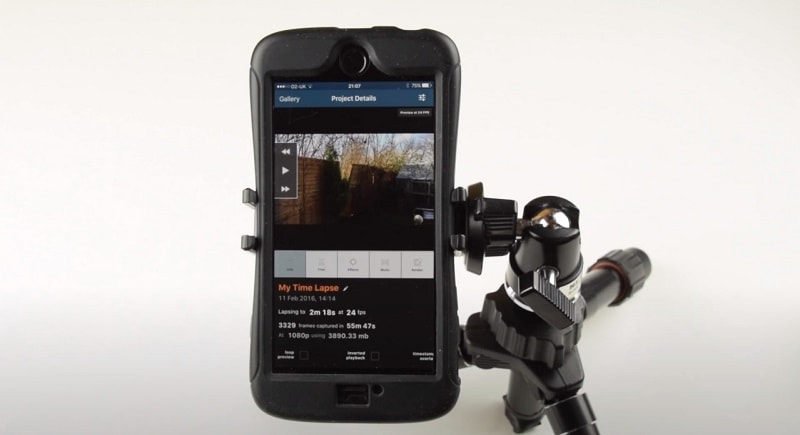
- Add filters and adjust color settings
- Render and preview
- Export the file to your device
③ Invideo (Online)
InVideo is a do-it-yourself (DIY) video creation platform that enables users to turn their ideas into videos in real time. The platform lets users create, edit, preview, and share videos with team members. It’s a fantastic solution for combining your time-lapse footage into an amazing video project.
InVideo provides three distinct methods for creating videos:
- Text-to-Video: Upload your footage and let InVideo turn it into a series of scenes that you can customize
- Blank Templates: Start with a stripped-down template and craft an amazing video from scratch
- Premade Templates: Pick a template from an extensive library of premade templates
Steps to Use InVideo:
To create a time-lapse through InVideo, follow the mentioned steps:
Step 1. Download and install InVideo
Step 2. Sign up and sign in to your InVideo account
Step 3. Upload your footage to the ‘Add your media files here’ tab.
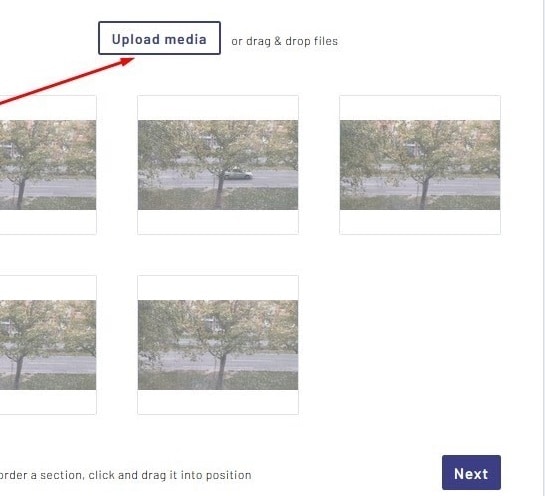
Step 4. Do not upload footage exceeding 200 MBs.
Step 5. Click ‘Next’ and you will be redirected to the Storyboard.
Step 6. Preview all your scenes in Storyboard mode. Rearrange them, add new ones in between, and delete any that you don’t want to use in your project. You can also duplicate scenes if necessary.
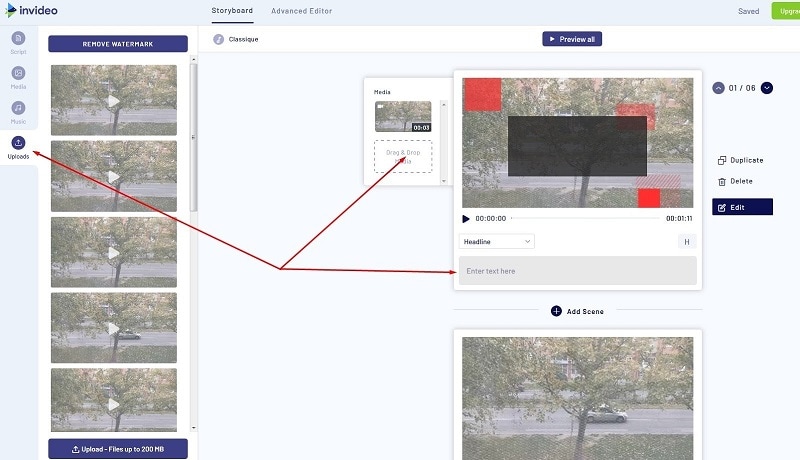
Step 7: You can also add captions to your scenes. To view all the captions you’ve created, go to the Scripts tab. You’ll be able to customize your captions further in the Advanced Editor mode.
Step 8. To add audio files to your video, go to the Music tab.
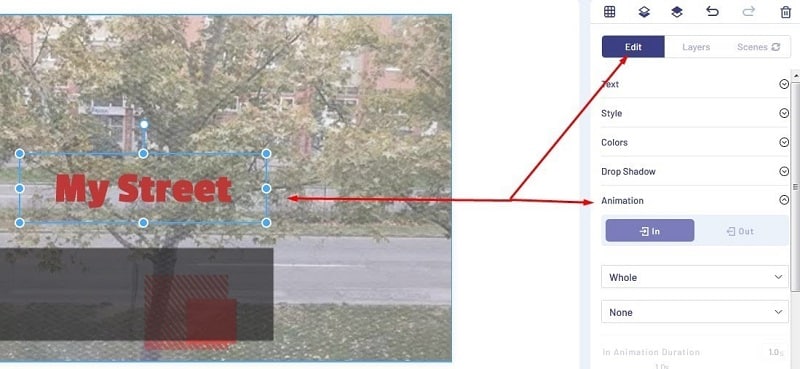
Step 9. Edit your video by clicking on Advanced Editor.

Step 10. Apply filters and review the timeline, export, save the video and you’re good to go.
3. Which Way is Right for You to Edit a Time-Lapse Video?
There are many ways to edit a time-lapse video, with varying degrees of success. Each application and software has its pros and cons. Although some best and most useful methods to create and edit time-lapse videos have been discussed earlier in this essay it is crucial to highlight that Filmora is regarded as software that possesses almost all the assets that we need while we edit our time-lapse videos.
Through Filmora, you can effortlessly make a pro-level time-lapse video either from still images or existing video. Most of the software would offer only one feature at a time so it is tremendous that Filmora lets you easily access multiple options to create a seamless time-lapse video in a spur of some minutes.
Besides multiple ways to create time-lapse, Filmora also offers basic & advanced editing features for time-lapse production. After creating a time-lapse in Filmora, you can drag through the multiple post-production editing features which include: Split Screen, Keyframing, Motion Tracking, Speed Ramping, Screen Recorder, Instant Mode, Pre-set Templates, and Auto Beat Sync. And many others.
Besides these ways of editing your time-lapses, Filmora also offers no disturbing pop-up ad experience while editing which provides a smooth editing platform for editors.
Part 4: Share & Enjoy the Best Time-Lapse Video
1. Share Your Quality Time-Lapse Video Across Social Platforms
Time-lapse & social media serve as the perfect combination in today’s times when social media publicity has become an incredibly important avenue for businesses. You can share your time lapses on different social media platforms including:
- YouTube
When people talk about today’s most popular social sharing websites, YouTube often gets left out of the conversation in favor of sites like Facebook and Twitter. But don’t be fooled: YouTube has a lot going for it.
By uploading your time-lapses on YouTube, you can create a YouTube link and share it with your friends and social circle so they can easily access your content, you can get found in search by uploading your own written transcript about the time-lapse, adding an end screen or cards to promote your time-lapse video, and add creative effects to your time-lapses with YouTube Enhancements.
- TikTok
TikTok is a social media platform for creating, sharing, and discovering short videos. The app is used by young people as an outlet to express themselves through singing, dancing, comedy, and lip-syncing, and allows users to create videos and share them across a community.
Since the duration of the time-lapse videos is mostly kept short, TikTok is the best app to approach if you want to increase your audience engagement.
The Meta app, Instagram is the most used app as per 2022 statistics. Through this app, people used to update their day-to-day routine and check-ins by uploading pictures. Now, the platform has added a ‘Reels’ section which plays the short videos to keep the audience hooked to the app, more than ever.
Upload your time-lapses on Instagram as Reels and see your content boost within hours.
2. Promote Your Time-Lapse Video on Popular Websites
Professional video editors and photographers who are looking for a paid platform to promote their business can access the most widely used and reliable websites which include the following:
- Shutterstock
With this app on your mobile phones and other devices, you can Transform Your Marketing Campaigns, Social Media, Websites, and Designs. Uploading your time-lapse content to earn good money on Shutterstock will work best in your favor.
- Pond5
Pond5 is the world’s largest marketplace for HD & 4K stock video, plus millions of music tracks, SFX, motion graphics, and images. Signing up and posting your time-lapse to promote your digital work can be a good choice if you’re looking for earning money online.
- Adobe Stock
Adobe Stock is a new service that provides designers and businesses with access to millions of high-quality, curated, royalty-free images and videos. This is also a good choice for professional photographers and videographers to post their time-lapses.
- Getty
Getty is an American visual media company and is a supplier of stock images, editorial photography, video, and music for business. By uploading your time lapses on this platform, you can be provided with exceptional opportunities to engage employees, entertain clients, and promote your brand.
3. Enjoy the Attractive Time-Lapse Video Examples
Over the internet, you will find numerous creatively designed time-lapses but a few of them still top the list. Some of the iconic time-lapses created to date include the following:
- Multiverse By Hiroshi Kondo, a mind-bending TimeLapse video of Taiwan
- Paris Day & Night by Teeter-Totter-Tam is a 5-minutes TimeLapse journey through one of the prettiest cities in the world, Paris from day to night.
- Solar Panel Installation from a Crane - David Dupuy
- Death Is the Road to Awe is a sample of TimeLapse video footage from that film shot in the American Southwest.
Part 5: FAQs – Time-Lapse Video Creation
① How to easily make a time-lapse video like a pro?
Most smartphone cameras have their time-lapse feature built in. To shoot your time-lapse video, simply open up the camera on your phone and select the “Time-Lapse” feature.
Place your phone in a secure spot where it won’t move around a lot. Then, tap the record button to start recording your time-lapse. When you’re done, tap it again. Your video will play back compressed into a shorter period for a time lapse effect.
PRO TIP: If you’re planning to make a landscape video, turn your phone so your time-lapse video is wide instead of tall
② What are the best time lapse editors or software?
The top five Best Free TimeLapse Software include:
- Wondershare Filmora- Windows and Mac
- Adobe Premiere Pro – Professional software
- Final Cut Pro – Mac software for time-lapse videos
- iMovie – User-friendly
- LRTimelapse – Sophisticated tool for more experienced users
③ Can I speed up or slow down a time-lapse video using Filmora?
Filmora also allows you to adjust the duration of the video clip to change the video speed. After importing the video clip to the timeline, right-click it and choose Speed and Duration to open the custom speed pop-up. Go to the Duration section and you will see the original duration of the video. Adjusting the duration of the video longer will add a slow-motion effect to the video. Changing the duration of the video to a shorter time will speed up the playback speed of the video. Just directly input the number in the field to speed up/slow down the video.
④ How to make my time-lapse video look better?
- Using a Slow Shutter
One solution to making your time lapses look more natural is to use a slow shutter so that each frame has a bit of motion.
- Blend in Video
Capture a time-lapse with fast movement and then mask in video with slow movement, maybe I could have the best of both worlds.
- Use filters
You can use Filters to spruce up the content with the time-lapse.
- Add Audio
Audio is an essential part if you want to leverage the content reach of your time-lapse video.
Conclusion
Time lapse videos are among the most powerful marketing tactics available in the mass media age of today. Similar to aerial photography, time-lapse videos can tell an engaging story for a low production cost, and they can be viewed fast by the audience. Filmora has helped the professionals as well as the beginners in the photography and videography to boost their content through online platforms.
This article will guide you through the most useful software and ways to promote your content and boost your audience engagement through creating mind-blowing time-lapses. Software like above mentioned ones take extremely little time and focus to comprehend the tale in a time lapse, which is a huge advantage in today’s competitive industry.
Free Download For macOS 10.14 or later
Step 2: Launch Filmora video editor
After downloading and installing, launch the Filmora timeline and import the photos to the media library.
Step 3: Preview and adjust the photos.
Drag the images down to the timeline and move the pointer to reset and order the images according to your required time-lapse video. Don’t forget to resize and match the sizes of all the pictures so make a uniform time-lapse.
Step 4: Adjust the Speed
Select one of the photos in the timeline and right-click. Click on Speed and Duration > Custom Speed panel > Duration > change the duration of the photo to 00:00:00:01 and hit OK.
Step 5: Add effects and audio
Even though this step is optional, still it is recommended that to make your time-lapse more presentable, go to effects and choose your favorite pre-set. Go to Audio menu to choose from the music library or add your own custom audio by importing audio file into the timeline.
Step 6 Render and Export media
Export your file after rendering it in the full screen. Always check if there are any additional changes required before exporting the media file.
Step 7: Save into your desktop
Change the video format and video and audio parameters such as Bit Rate, Encoder, and Resolution of the video.
Other software for creating time-lapse
Besides Filmora, there are some interesting options for the users which involve:
o iMovie
o LRTimelapse
o Lightroom
o Adobe Premiere Pro
o After Effects
o Photoshop
2. 3 Best Ways to Convert Video to Time Lapse
① Filmora(Windows & Mac)
Filmora offers yet another very distinguishing feature through which it can convert video footage into an excellent time-lapse video. This feature of Filmora empowers the users and boosts their content and increases audience engagement as well.
In a few simple steps, you can get a creative time-lapse on your windows and mac devices.
- Download and install Filmora 11
- Launch Filmora timeline on your device and import the footage to the media library
- Drag your video onto the video column in the timeline. Select the loaded video and click the “Play” button. While playing the video, drag the slider bar at the start time and hit the “Split” icon to cut out the part you want to do time-lapse editing.
- Right-click on the video clip in the timeline to select Speed and Duration. Find the Speed option and drag the slider bar to the right to increase the speed.
- Click the Play button to preview the result. Filmora now supports up to 100x fast motion and 0.01x slow mo.
- Export your video
② Lapse It Pro (Android & iPhone)
One of the top apps for time-lapse photography is Lapse It Pro. A collection of further time lapses made by other people is available on Lapse It. You can post your videos and favorite those of others while using this social function, which also lets you watch other people’s videos. Through user control, the software makes the smartphone’s capacity to record time lapses as effective as possible.
The lapse It pro version is currently not free, although the Lapse its app is free and it is available on both, Android and Apple.
Steps to Use Lapse It Pro:
- Download the app on your android or apple device
- Configure the time interval between the shots and set a time or photo-based limit while clicking pictures.
- Adjust the resolution of your camera before taking pictures.
- Take a lot of pictures through the app using your device’s inbuilt camera
- Edit the order of the pictures
- Stitch the pictures together to form a time-lapse
- Add filters and adjust color settings
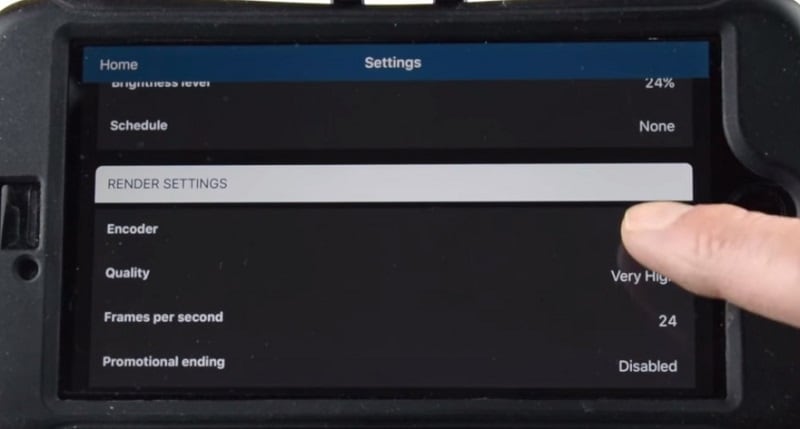
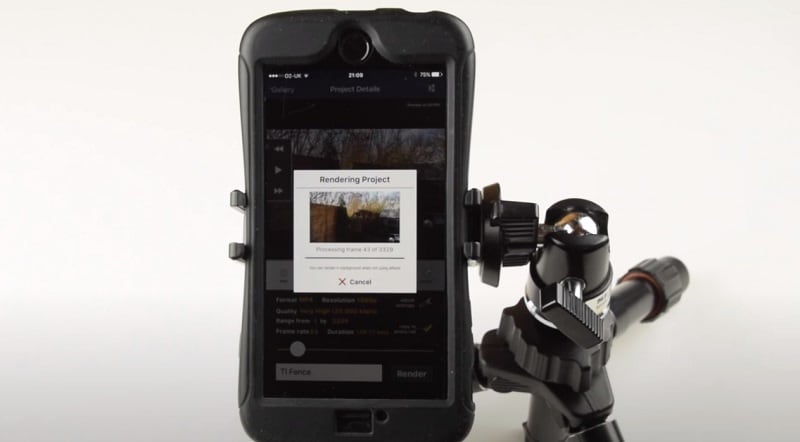
- Render and preview
- Export the file to your device
③ Invideo (Online)
InVideo is a do-it-yourself (DIY) video creation platform that enables users to turn their ideas into videos in real time. The platform lets users create, edit, preview, and share videos with team members. It’s a fantastic solution for combining your time-lapse footage into an amazing video project.
InVideo provides three distinct methods for creating videos:
- Text-to-Video: Upload your footage and let InVideo turn it into a series of scenes that you can customize
- Blank Templates: Start with a stripped-down template and craft an amazing video from scratch
- Premade Templates: Pick a template from an extensive library of premade templates
Steps to Use InVideo:
To create a time-lapse through InVideo, follow the mentioned steps:
Step 1. Download and install InVideo
Step 2. Sign up and sign in to your InVideo account
Step 3. Upload your footage to the ‘Add your media files here’ tab.
Step 4. Do not upload footage exceeding 200 MBs.
Step 5. Click ‘Next’ and you will be redirected to the Storyboard.
Step 6. Preview all your scenes in Storyboard mode. Rearrange them, add new ones in between, and delete any that you don’t want to use in your project. You can also duplicate scenes if necessary.
Step 7: You can also add captions to your scenes. To view all the captions you’ve created, go to the Scripts tab. You’ll be able to customize your captions further in the Advanced Editor mode.
Step 8. To add audio files to your video, go to the Music tab.
Step 9. Edit your video by clicking on Advanced Editor.
Step 10. Apply filters and review the timeline, export, save the video and you’re good to go.
3. Which Way is Right for You to Edit a Time-Lapse Video?
There are many ways to edit a time-lapse video, with varying degrees of success. Each application and software has its pros and cons. Although some best and most useful methods to create and edit time-lapse videos have been discussed earlier in this essay it is crucial to highlight that Filmora is regarded as software that possesses almost all the assets that we need while we edit our time-lapse videos.
Through Filmora, you can effortlessly make a pro-level time-lapse video either from still images or existing video. Most of the software would offer only one feature at a time so it is tremendous that Filmora lets you easily access multiple options to create a seamless time-lapse video in a spur of some minutes.
Besides multiple ways to create time-lapse, Filmora also offers basic & advanced editing features for time-lapse production. After creating a time-lapse in Filmora, you can drag through the multiple post-production editing features which include: Split Screen, Keyframing, Motion Tracking, Speed Ramping, Screen Recorder, Instant Mode, Pre-set Templates, and Auto Beat Sync. And many others.
Besides these ways of editing your time-lapses, Filmora also offers no disturbing pop-up ad experience while editing which provides a smooth editing platform for editors.
Part 4: Share & Enjoy the Best Time-Lapse Video
1. Share Your Quality Time-Lapse Video Across Social Platforms
Time-lapse & social media serve as the perfect combination in today’s times when social media publicity has become an incredibly important avenue for businesses. You can share your time lapses on different social media platforms including:
- YouTube
When people talk about today’s most popular social sharing websites, YouTube often gets left out of the conversation in favor of sites like Facebook and Twitter. But don’t be fooled: YouTube has a lot going for it.
By uploading your time-lapses on YouTube, you can create a YouTube link and share it with your friends and social circle so they can easily access your content, you can get found in search by uploading your own written transcript about the time-lapse, adding an end screen or cards to promote your time-lapse video, and add creative effects to your time-lapses with YouTube Enhancements.
- TikTok
TikTok is a social media platform for creating, sharing, and discovering short videos. The app is used by young people as an outlet to express themselves through singing, dancing, comedy, and lip-syncing, and allows users to create videos and share them across a community.
Since the duration of the time-lapse videos is mostly kept short, TikTok is the best app to approach if you want to increase your audience engagement.
The Meta app, Instagram is the most used app as per 2022 statistics. Through this app, people used to update their day-to-day routine and check-ins by uploading pictures. Now, the platform has added a ‘Reels’ section which plays the short videos to keep the audience hooked to the app, more than ever.
Upload your time-lapses on Instagram as Reels and see your content boost within hours.
2. Promote Your Time-Lapse Video on Popular Websites
Professional video editors and photographers who are looking for a paid platform to promote their business can access the most widely used and reliable websites which include the following:
- Shutterstock
With this app on your mobile phones and other devices, you can Transform Your Marketing Campaigns, Social Media, Websites, and Designs. Uploading your time-lapse content to earn good money on Shutterstock will work best in your favor.
- Pond5
Pond5 is the world’s largest marketplace for HD & 4K stock video, plus millions of music tracks, SFX, motion graphics, and images. Signing up and posting your time-lapse to promote your digital work can be a good choice if you’re looking for earning money online.
- Adobe Stock
Adobe Stock is a new service that provides designers and businesses with access to millions of high-quality, curated, royalty-free images and videos. This is also a good choice for professional photographers and videographers to post their time-lapses.
- Getty
Getty is an American visual media company and is a supplier of stock images, editorial photography, video, and music for business. By uploading your time lapses on this platform, you can be provided with exceptional opportunities to engage employees, entertain clients, and promote your brand.
3. Enjoy the Attractive Time-Lapse Video Examples
Over the internet, you will find numerous creatively designed time-lapses but a few of them still top the list. Some of the iconic time-lapses created to date include the following:
- Multiverse By Hiroshi Kondo, a mind-bending TimeLapse video of Taiwan
- Paris Day & Night by Teeter-Totter-Tam is a 5-minutes TimeLapse journey through one of the prettiest cities in the world, Paris from day to night.
- Solar Panel Installation from a Crane - David Dupuy
- Death Is the Road to Awe is a sample of TimeLapse video footage from that film shot in the American Southwest.
Part 5: FAQs – Time-Lapse Video Creation
① How to easily make a time-lapse video like a pro?
Most smartphone cameras have their time-lapse feature built in. To shoot your time-lapse video, simply open up the camera on your phone and select the “Time-Lapse” feature.
Place your phone in a secure spot where it won’t move around a lot. Then, tap the record button to start recording your time-lapse. When you’re done, tap it again. Your video will play back compressed into a shorter period for a time lapse effect.
PRO TIP: If you’re planning to make a landscape video, turn your phone so your time-lapse video is wide instead of tall
② What are the best time lapse editors or software?
The top five Best Free TimeLapse Software include:
- Wondershare Filmora- Windows and Mac
- Adobe Premiere Pro – Professional software
- Final Cut Pro – Mac software for time-lapse videos
- iMovie – User-friendly
- LRTimelapse – Sophisticated tool for more experienced users
③ Can I speed up or slow down a time-lapse video using Filmora?
Filmora also allows you to adjust the duration of the video clip to change the video speed. After importing the video clip to the timeline, right-click it and choose Speed and Duration to open the custom speed pop-up. Go to the Duration section and you will see the original duration of the video. Adjusting the duration of the video longer will add a slow-motion effect to the video. Changing the duration of the video to a shorter time will speed up the playback speed of the video. Just directly input the number in the field to speed up/slow down the video.
④ How to make my time-lapse video look better?
- Using a Slow Shutter
One solution to making your time lapses look more natural is to use a slow shutter so that each frame has a bit of motion.
- Blend in Video
Capture a time-lapse with fast movement and then mask in video with slow movement, maybe I could have the best of both worlds.
- Use filters
You can use Filters to spruce up the content with the time-lapse.
- Add Audio
Audio is an essential part if you want to leverage the content reach of your time-lapse video.
Conclusion
Time lapse videos are among the most powerful marketing tactics available in the mass media age of today. Similar to aerial photography, time-lapse videos can tell an engaging story for a low production cost, and they can be viewed fast by the audience. Filmora has helped the professionals as well as the beginners in the photography and videography to boost their content through online platforms.
This article will guide you through the most useful software and ways to promote your content and boost your audience engagement through creating mind-blowing time-lapses. Software like above mentioned ones take extremely little time and focus to comprehend the tale in a time lapse, which is a huge advantage in today’s competitive industry.
Free Download For macOS 10.14 or later
Step 2: Launch Filmora video editor
After downloading and installing, launch the Filmora timeline and import the photos to the media library.
Step 3: Preview and adjust the photos.
Drag the images down to the timeline and move the pointer to reset and order the images according to your required time-lapse video. Don’t forget to resize and match the sizes of all the pictures so make a uniform time-lapse.
Step 4: Adjust the Speed
Select one of the photos in the timeline and right-click. Click on Speed and Duration > Custom Speed panel > Duration > change the duration of the photo to 00:00:00:01 and hit OK.
Step 5: Add effects and audio
Even though this step is optional, still it is recommended that to make your time-lapse more presentable, go to effects and choose your favorite pre-set. Go to Audio menu to choose from the music library or add your own custom audio by importing audio file into the timeline.
Step 6 Render and Export media
Export your file after rendering it in the full screen. Always check if there are any additional changes required before exporting the media file.
Step 7: Save into your desktop
Change the video format and video and audio parameters such as Bit Rate, Encoder, and Resolution of the video.
Other software for creating time-lapse
Besides Filmora, there are some interesting options for the users which involve:
o iMovie
o LRTimelapse
o Lightroom
o Adobe Premiere Pro
o After Effects
o Photoshop
2. 3 Best Ways to Convert Video to Time Lapse
① Filmora(Windows & Mac)
Filmora offers yet another very distinguishing feature through which it can convert video footage into an excellent time-lapse video. This feature of Filmora empowers the users and boosts their content and increases audience engagement as well.
In a few simple steps, you can get a creative time-lapse on your windows and mac devices.
- Download and install Filmora 11
- Launch Filmora timeline on your device and import the footage to the media library
- Drag your video onto the video column in the timeline. Select the loaded video and click the “Play” button. While playing the video, drag the slider bar at the start time and hit the “Split” icon to cut out the part you want to do time-lapse editing.
- Right-click on the video clip in the timeline to select Speed and Duration. Find the Speed option and drag the slider bar to the right to increase the speed.
- Click the Play button to preview the result. Filmora now supports up to 100x fast motion and 0.01x slow mo.
- Export your video
② Lapse It Pro (Android & iPhone)
One of the top apps for time-lapse photography is Lapse It Pro. A collection of further time lapses made by other people is available on Lapse It. You can post your videos and favorite those of others while using this social function, which also lets you watch other people’s videos. Through user control, the software makes the smartphone’s capacity to record time lapses as effective as possible.
The lapse It pro version is currently not free, although the Lapse its app is free and it is available on both, Android and Apple.
Steps to Use Lapse It Pro:
- Download the app on your android or apple device
- Configure the time interval between the shots and set a time or photo-based limit while clicking pictures.
- Adjust the resolution of your camera before taking pictures.
- Take a lot of pictures through the app using your device’s inbuilt camera
- Edit the order of the pictures
- Stitch the pictures together to form a time-lapse
- Add filters and adjust color settings
- Render and preview
- Export the file to your device
③ Invideo (Online)
InVideo is a do-it-yourself (DIY) video creation platform that enables users to turn their ideas into videos in real time. The platform lets users create, edit, preview, and share videos with team members. It’s a fantastic solution for combining your time-lapse footage into an amazing video project.
InVideo provides three distinct methods for creating videos:
- Text-to-Video: Upload your footage and let InVideo turn it into a series of scenes that you can customize
- Blank Templates: Start with a stripped-down template and craft an amazing video from scratch
- Premade Templates: Pick a template from an extensive library of premade templates
Steps to Use InVideo:
To create a time-lapse through InVideo, follow the mentioned steps:
Step 1. Download and install InVideo
Step 2. Sign up and sign in to your InVideo account
Step 3. Upload your footage to the ‘Add your media files here’ tab.
Step 4. Do not upload footage exceeding 200 MBs.
Step 5. Click ‘Next’ and you will be redirected to the Storyboard.
Step 6. Preview all your scenes in Storyboard mode. Rearrange them, add new ones in between, and delete any that you don’t want to use in your project. You can also duplicate scenes if necessary.
Step 7: You can also add captions to your scenes. To view all the captions you’ve created, go to the Scripts tab. You’ll be able to customize your captions further in the Advanced Editor mode.
Step 8. To add audio files to your video, go to the Music tab.
Step 9. Edit your video by clicking on Advanced Editor.
Step 10. Apply filters and review the timeline, export, save the video and you’re good to go.
3. Which Way is Right for You to Edit a Time-Lapse Video?
There are many ways to edit a time-lapse video, with varying degrees of success. Each application and software has its pros and cons. Although some best and most useful methods to create and edit time-lapse videos have been discussed earlier in this essay it is crucial to highlight that Filmora is regarded as software that possesses almost all the assets that we need while we edit our time-lapse videos.
Through Filmora, you can effortlessly make a pro-level time-lapse video either from still images or existing video. Most of the software would offer only one feature at a time so it is tremendous that Filmora lets you easily access multiple options to create a seamless time-lapse video in a spur of some minutes.
Besides multiple ways to create time-lapse, Filmora also offers basic & advanced editing features for time-lapse production. After creating a time-lapse in Filmora, you can drag through the multiple post-production editing features which include: Split Screen, Keyframing, Motion Tracking, Speed Ramping, Screen Recorder, Instant Mode, Pre-set Templates, and Auto Beat Sync. And many others.
Besides these ways of editing your time-lapses, Filmora also offers no disturbing pop-up ad experience while editing which provides a smooth editing platform for editors.
Part 4: Share & Enjoy the Best Time-Lapse Video
1. Share Your Quality Time-Lapse Video Across Social Platforms
Time-lapse & social media serve as the perfect combination in today’s times when social media publicity has become an incredibly important avenue for businesses. You can share your time lapses on different social media platforms including:
- YouTube
When people talk about today’s most popular social sharing websites, YouTube often gets left out of the conversation in favor of sites like Facebook and Twitter. But don’t be fooled: YouTube has a lot going for it.
By uploading your time-lapses on YouTube, you can create a YouTube link and share it with your friends and social circle so they can easily access your content, you can get found in search by uploading your own written transcript about the time-lapse, adding an end screen or cards to promote your time-lapse video, and add creative effects to your time-lapses with YouTube Enhancements.
- TikTok
TikTok is a social media platform for creating, sharing, and discovering short videos. The app is used by young people as an outlet to express themselves through singing, dancing, comedy, and lip-syncing, and allows users to create videos and share them across a community.
Since the duration of the time-lapse videos is mostly kept short, TikTok is the best app to approach if you want to increase your audience engagement.
The Meta app, Instagram is the most used app as per 2022 statistics. Through this app, people used to update their day-to-day routine and check-ins by uploading pictures. Now, the platform has added a ‘Reels’ section which plays the short videos to keep the audience hooked to the app, more than ever.
Upload your time-lapses on Instagram as Reels and see your content boost within hours.
2. Promote Your Time-Lapse Video on Popular Websites
Professional video editors and photographers who are looking for a paid platform to promote their business can access the most widely used and reliable websites which include the following:
- Shutterstock
With this app on your mobile phones and other devices, you can Transform Your Marketing Campaigns, Social Media, Websites, and Designs. Uploading your time-lapse content to earn good money on Shutterstock will work best in your favor.
- Pond5
Pond5 is the world’s largest marketplace for HD & 4K stock video, plus millions of music tracks, SFX, motion graphics, and images. Signing up and posting your time-lapse to promote your digital work can be a good choice if you’re looking for earning money online.
- Adobe Stock
Adobe Stock is a new service that provides designers and businesses with access to millions of high-quality, curated, royalty-free images and videos. This is also a good choice for professional photographers and videographers to post their time-lapses.
- Getty
Getty is an American visual media company and is a supplier of stock images, editorial photography, video, and music for business. By uploading your time lapses on this platform, you can be provided with exceptional opportunities to engage employees, entertain clients, and promote your brand.
3. Enjoy the Attractive Time-Lapse Video Examples
Over the internet, you will find numerous creatively designed time-lapses but a few of them still top the list. Some of the iconic time-lapses created to date include the following:
- Multiverse By Hiroshi Kondo, a mind-bending TimeLapse video of Taiwan
- Paris Day & Night by Teeter-Totter-Tam is a 5-minutes TimeLapse journey through one of the prettiest cities in the world, Paris from day to night.
- Solar Panel Installation from a Crane - David Dupuy
- Death Is the Road to Awe is a sample of TimeLapse video footage from that film shot in the American Southwest.
Part 5: FAQs – Time-Lapse Video Creation
① How to easily make a time-lapse video like a pro?
Most smartphone cameras have their time-lapse feature built in. To shoot your time-lapse video, simply open up the camera on your phone and select the “Time-Lapse” feature.
Place your phone in a secure spot where it won’t move around a lot. Then, tap the record button to start recording your time-lapse. When you’re done, tap it again. Your video will play back compressed into a shorter period for a time lapse effect.
PRO TIP: If you’re planning to make a landscape video, turn your phone so your time-lapse video is wide instead of tall
② What are the best time lapse editors or software?
The top five Best Free TimeLapse Software include:
- Wondershare Filmora- Windows and Mac
- Adobe Premiere Pro – Professional software
- Final Cut Pro – Mac software for time-lapse videos
- iMovie – User-friendly
- LRTimelapse – Sophisticated tool for more experienced users
③ Can I speed up or slow down a time-lapse video using Filmora?
Filmora also allows you to adjust the duration of the video clip to change the video speed. After importing the video clip to the timeline, right-click it and choose Speed and Duration to open the custom speed pop-up. Go to the Duration section and you will see the original duration of the video. Adjusting the duration of the video longer will add a slow-motion effect to the video. Changing the duration of the video to a shorter time will speed up the playback speed of the video. Just directly input the number in the field to speed up/slow down the video.
④ How to make my time-lapse video look better?
- Using a Slow Shutter
One solution to making your time lapses look more natural is to use a slow shutter so that each frame has a bit of motion.
- Blend in Video
Capture a time-lapse with fast movement and then mask in video with slow movement, maybe I could have the best of both worlds.
- Use filters
You can use Filters to spruce up the content with the time-lapse.
- Add Audio
Audio is an essential part if you want to leverage the content reach of your time-lapse video.
Conclusion
Time lapse videos are among the most powerful marketing tactics available in the mass media age of today. Similar to aerial photography, time-lapse videos can tell an engaging story for a low production cost, and they can be viewed fast by the audience. Filmora has helped the professionals as well as the beginners in the photography and videography to boost their content through online platforms.
This article will guide you through the most useful software and ways to promote your content and boost your audience engagement through creating mind-blowing time-lapses. Software like above mentioned ones take extremely little time and focus to comprehend the tale in a time lapse, which is a huge advantage in today’s competitive industry.
How to Make A Fantastic Café Vlog
Cafes are believed to be an inclusive part of a society that interconnects people with each other. As it is considered a spot for long sittings, café vlogs are considered relatively common among such individuals.
With some specialty in the menu for specials, a café vlog can be helpful in pointing out the greatness in this individual. This article will portray how to make a perfect café vlog without putting yourself in difficulty.
In this article
01 What Does an Attractive Café Vlog Look Like?
02 Inspiration for Creating a Café Vlog
04 5 Most Popular Café Vlog on YouTube
Part 1: What Does an Attractive Café Vlog Look Like?
A perfect café vlog needs to have the traits that would make it be accounted as one attractive piece of work. This, however, does not always depend on the elements used across developing a vlog. It can also vary in the form of any particular announcement of operation, which lets it become creative and attractive in the eyes of other users. To make your café vlogs look attractive like this, you need to:

Follow the Theme of the Café
Your café vlog should be highly relevant to the theme of your café. Everything represented should be done under professional terms and would reflect a similar idea. This would bring up the attention of the fans of such themes, leading towards a better attractive viewership.
Highlights the Reality
People do believe that “Everything that glitters is not gold!” You should realize that the selection of content and the extent of highlighting it will present an attractive image of the café if presented perfectly.
Perfect Deals to Associate With
To make your vlogs exciting and interesting, it is considered to be perfect that the vlog should mainly give some special discount to enjoy from. These deals and discounts can bring and allure more viewers into the vlog.
Set up Competitions
Rewarding customers for being part of a greater cause is a perfect way of attracting viewers into watching your content. Café vlogs should be induced with such competitions that show the brighter side of the picture and show what brings greater loads of people into the abode.
Themed Campaigns
It is considered that the best thing to follow a professional way of interacting with such platforms is through themed campaigns. Any idea or belief backed with the platform set across the café will help the vlog target the region to the fullest.
Part 2: Inspiration for Creating a Café Vlog
How to make the perfect café vlog? This question can be covered coherently with an answer that would provoke you into making one yourself. This part shall provide some inspirations that need recognition for creating a café vlog to perfection.
Set Yourselves As a Brand
Before you put yourself in as an inspiration to the people, it is essential to develop a brand that would showcase its idea. An identity that helps people recognize the vlog; branding is believed to be the sole settlement of any particular motive that is started on different levels.
A Good Gear Is Equal to Good Video
Without a doubt, good gear would help a creator build a unique system for recording a café vlog. Rather than recording it from a primary mobile phone, a vlog is recorded with the best tools in mind, which initiate from the vlogging cameras. You need to be quite selective with your gear and select the best ones available in the market for the least possible price.
Always Look Out for Trends
If something new is being covered across cafes and is observed across other videos, you should realize the importance of adopting such trends on a bigger scale. Café vlogs should definitely follow a particular trend that would increase the presence of users within the premises of the café.
Using Good Elements
Once you are done recording the café vlog, the next step towards vlog excellency is how the user has edited it. If the elements used across the vlogs are catchy and attractive to watch, it will induce an increased number of views across the vlog too.
Part 3: How to Make a Café Vlog?
If you are making a café vlog for your channel, you need to figure out the editing tool that would assist your work to perfection. This editing environment is presented by Wondershare Filmora , a tool that combines uniqueness with ease of use. Along with presenting such an expressive environment, Filmora is quite effective in editing a vlog perfectly. To understand the process, look into the steps as shown below:
Step 1: Import Café Vlog Video
Launch Wondershare Filmora on your device and click on “New Project” to start a new project across the platform. Access the “Media Tab” and import the video you’ve recorded on your camera to start editing by clicking on the “Arrow Head” icon.

For Win 7 or later (64-bit)
For macOS 10.12 or later
Step 2: Make Changes in Videos
Once you’ve added the video, drag it across the timeline to start editing. You can find the tabs of “Effects,” “Transitions,” and “Elements” that you can add within the vlog to make it more entertaining and attractive. The use of effects, filters, and transitions is believed to be catchy for the viewer’s eye. Along with that, you can include different stickers and emojis to bring the video to life with exceptional elements.

Step 3: Add & Edit Audio
You can also add catchy audio effects to your vlog by clicking on the “Audio” tab of the Filmora. In this tab, you can get the audio effect of all categories and can also access the premium audio effects of Filmstock. For editing the video’s audio, you have to double-click on the audio track present on the timeline.

Step 4: Export File
As you complete the editing across the platform, click on “Export” to open a new window. You can set up effective settings for your video before finalizing it and successfully rendering it across your device.

Part 4: 5 Most Popular Café Vlog on YouTube
If you are out there searching for the popular café vlogs that have gained a lot of traction in society, this part will offer you a list of some popular options that you can view and get inspiration from.
RealChrisBaca
Subscribers: 76K+
This individual has been around the corner for a while, where his love for coffee and barista has brought him into vlogging and sharing all ideas across social media. He has considered the use of different mediums for showcasing the idea of café and the elements that make up one.

Coffictures
Subscribers: 307K+
A cafe vlog known for its recipes, Coffictures has presented an exceptional set of recipes to its viewers across the vlogs and other videos it has posted. Being one of the most popular channels for baristas, they have included many café vlog for the sake of the user to enjoy their environment.

Zoe’s
Subscribers: 2.4M+
This Korean YouTuber works across her mother’s café and sets up café vlogs that outline everything that happens behind in a café. As many users are curious about the technical considerations, Zoe helps them figure out multiple things.

European Coffee Trip
Subscribers: 212K+
As this presents a new narrative to café vlogs, The European Coffee Trip showcases different coffee used across different cafés. To provide users with cognitive information, this project aims to induce vlogs with subtle information.

Nebokgom
Subscribers: 549K+
This YouTuber has provided a quite different perspective of café vlogs to the viewers. With immersive recipes of different types that can be used across cafes, this channel presents a complete story to its users, combined with aesthetic stuff.

Closing Words
Are you sure on how to create a café vlog? We hope that the tips and directions provided in the article were significant in guiding the users towards an excellent future. If you are looking forward to starting your own venture, you should definitely look across this.
02 Inspiration for Creating a Café Vlog
04 5 Most Popular Café Vlog on YouTube
Part 1: What Does an Attractive Café Vlog Look Like?
A perfect café vlog needs to have the traits that would make it be accounted as one attractive piece of work. This, however, does not always depend on the elements used across developing a vlog. It can also vary in the form of any particular announcement of operation, which lets it become creative and attractive in the eyes of other users. To make your café vlogs look attractive like this, you need to:
Follow the Theme of the Café
Your café vlog should be highly relevant to the theme of your café. Everything represented should be done under professional terms and would reflect a similar idea. This would bring up the attention of the fans of such themes, leading towards a better attractive viewership.
Highlights the Reality
People do believe that “Everything that glitters is not gold!” You should realize that the selection of content and the extent of highlighting it will present an attractive image of the café if presented perfectly.
Perfect Deals to Associate With
To make your vlogs exciting and interesting, it is considered to be perfect that the vlog should mainly give some special discount to enjoy from. These deals and discounts can bring and allure more viewers into the vlog.
Set up Competitions
Rewarding customers for being part of a greater cause is a perfect way of attracting viewers into watching your content. Café vlogs should be induced with such competitions that show the brighter side of the picture and show what brings greater loads of people into the abode.
Themed Campaigns
It is considered that the best thing to follow a professional way of interacting with such platforms is through themed campaigns. Any idea or belief backed with the platform set across the café will help the vlog target the region to the fullest.
Part 2: Inspiration for Creating a Café Vlog
How to make the perfect café vlog? This question can be covered coherently with an answer that would provoke you into making one yourself. This part shall provide some inspirations that need recognition for creating a café vlog to perfection.
Set Yourselves As a Brand
Before you put yourself in as an inspiration to the people, it is essential to develop a brand that would showcase its idea. An identity that helps people recognize the vlog; branding is believed to be the sole settlement of any particular motive that is started on different levels.
A Good Gear Is Equal to Good Video
Without a doubt, good gear would help a creator build a unique system for recording a café vlog. Rather than recording it from a primary mobile phone, a vlog is recorded with the best tools in mind, which initiate from the vlogging cameras. You need to be quite selective with your gear and select the best ones available in the market for the least possible price.
Always Look Out for Trends
If something new is being covered across cafes and is observed across other videos, you should realize the importance of adopting such trends on a bigger scale. Café vlogs should definitely follow a particular trend that would increase the presence of users within the premises of the café.
Using Good Elements
Once you are done recording the café vlog, the next step towards vlog excellency is how the user has edited it. If the elements used across the vlogs are catchy and attractive to watch, it will induce an increased number of views across the vlog too.
Part 3: How to Make a Café Vlog?
If you are making a café vlog for your channel, you need to figure out the editing tool that would assist your work to perfection. This editing environment is presented by Wondershare Filmora , a tool that combines uniqueness with ease of use. Along with presenting such an expressive environment, Filmora is quite effective in editing a vlog perfectly. To understand the process, look into the steps as shown below:
Step 1: Import Café Vlog Video
Launch Wondershare Filmora on your device and click on “New Project” to start a new project across the platform. Access the “Media Tab” and import the video you’ve recorded on your camera to start editing by clicking on the “Arrow Head” icon.
For Win 7 or later (64-bit)
For macOS 10.12 or later
Step 2: Make Changes in Videos
Once you’ve added the video, drag it across the timeline to start editing. You can find the tabs of “Effects,” “Transitions,” and “Elements” that you can add within the vlog to make it more entertaining and attractive. The use of effects, filters, and transitions is believed to be catchy for the viewer’s eye. Along with that, you can include different stickers and emojis to bring the video to life with exceptional elements.
Step 3: Add & Edit Audio
You can also add catchy audio effects to your vlog by clicking on the “Audio” tab of the Filmora. In this tab, you can get the audio effect of all categories and can also access the premium audio effects of Filmstock. For editing the video’s audio, you have to double-click on the audio track present on the timeline.
Step 4: Export File
As you complete the editing across the platform, click on “Export” to open a new window. You can set up effective settings for your video before finalizing it and successfully rendering it across your device.
Part 4: 5 Most Popular Café Vlog on YouTube
If you are out there searching for the popular café vlogs that have gained a lot of traction in society, this part will offer you a list of some popular options that you can view and get inspiration from.
RealChrisBaca
Subscribers: 76K+
This individual has been around the corner for a while, where his love for coffee and barista has brought him into vlogging and sharing all ideas across social media. He has considered the use of different mediums for showcasing the idea of café and the elements that make up one.
Coffictures
Subscribers: 307K+
A cafe vlog known for its recipes, Coffictures has presented an exceptional set of recipes to its viewers across the vlogs and other videos it has posted. Being one of the most popular channels for baristas, they have included many café vlog for the sake of the user to enjoy their environment.
Zoe’s
Subscribers: 2.4M+
This Korean YouTuber works across her mother’s café and sets up café vlogs that outline everything that happens behind in a café. As many users are curious about the technical considerations, Zoe helps them figure out multiple things.
European Coffee Trip
Subscribers: 212K+
As this presents a new narrative to café vlogs, The European Coffee Trip showcases different coffee used across different cafés. To provide users with cognitive information, this project aims to induce vlogs with subtle information.
Nebokgom
Subscribers: 549K+
This YouTuber has provided a quite different perspective of café vlogs to the viewers. With immersive recipes of different types that can be used across cafes, this channel presents a complete story to its users, combined with aesthetic stuff.
Closing Words
Are you sure on how to create a café vlog? We hope that the tips and directions provided in the article were significant in guiding the users towards an excellent future. If you are looking forward to starting your own venture, you should definitely look across this.
Ways to Find Free Online Slideshow Maker with No Watermark
How to Find Free Online Slideshow Maker with No Watermark
An easy yet powerful editor
Numerous effects to choose from
Detailed tutorials provided by the official channel
Finding the best free online slideshow maker no watermar becomes challenging, especially if you are dealing with this matter for the first time. If you want to create instant slideshow without any watermark, check this page out.

There is no lack of good, reliable and easy to use slide show makers in the internet that offer you the chance of creating slide show or presentations for free. Moreover, they don’t leave any watermark in the final work.
In this article
01 [What is the Best Free Slideshow Maker?](#Part 1)
02 [Step-by-step Guide to Make Slideshow](#Part 2)
Part 1 What is the Best Free Slideshow Maker?
Check out the list of following recommendable slideshow maker online free no watermark for easy job –
01PhotoStage

Small, simple and flexible; yes, this is how we can define Photo Stage slideshow maker. The developer NCH software wanted the clients to have something that can give them instant slideshow without so many obstacles. PhtoStage is the result.
How to use – Add photos in the slideshow template and adjust the duration for slides. Reorder, add and remove the slides if required. Add audio and text, caption etc. and save the video.
Pros
● Compatible with Mac and Windows
● Video can be saved in different formats
● User friendly interface
Cons
● Video duration can’t be changed as per choice
● Thumbnail edges can’t be dragged.
02LightMV

Being one of the free slideshow makers no watermark, LightMV has its special place in the world of slideshow makers. There are several creative and trendy themes in this app to allow you make interesting videos. The operation is simple but the result is powerful.
Pros
● One click share of the final result.
● Variety of Beautiful themes
● Can be launched directly without installation
Cons
● Filters, texts and other custom options are not available
● Text can be added only at the first and the last picture
How to use – Select template and add photos for slide show making. Use the vast media library
and theme for making your video attractive.
03IceCream

Another lovable free slideshow maker without watermark online is IceCream which allows user to save their work without watermark. You can create memorable slideshows of your holidays or make good presentations for business meeting.
How to use – Install, run and explore the application. Upload the photos for making slideshow and use the effect you want. You can adjust the slides by zooming them in and out. Give final touch to the video with filters and transitions and download it.
Pros
● Supports 45 languages and 4K quality videos
● Variety of effects and zoom function
● Facility of adding background music
● Direct share to social media and
● Feature of burning the prepared video directly into CD/DVD
Cons
● Incompatible to Mac
04Slideful

We cannot forget slideful while discussing the list of online slideshow maker no watermark. The application is perfect to be used by educators who want to create simple but funny slide shows. The created video can be accessed directly online too.
How to Use – Upload images of your choice in the app and start making slides. You can create animated slides with this application.
Pros
● User friendly program
● Beautiful and coloured slide can be created
● Educational slides can be created
Cons
● Offline mode is not available
● Only 25 photos can be added
● Big files upload slowly
05Adobe Spark

Another excellent slideshow maker without watermark is Adobe Spark. It is a professional tool that gives you premium results when it comes to slideshow presentations using videos, pictures, and other multimedia items.
How to use – The user friendly application allows you to select the pictures of your choice and convert them into slideshow. Music, text, filters, effects, transitions and stickers can be used as per demand.
Pros
● Supportive to third party plug ins
● Forty available templates with creative theme
● Spark video component for creating attractive slideshows with effects and music.
Cons
● Limited templates
● No freedom to design your post
06Wondershare Filmora
For Win 7 or later (64-bit)
For macOS 10.12 or later
Who doesn’t know about Wondershare Filmora Video Editor ? But do you know that Filmora comes with a feature of removing watermark from your video. The vast library of attractive themes, transitions and option of adding text makes the application special.
Pros
● Supportive to Mac and windows
● Advance video editor with easy to use interface
Cons
● It can be confusing to pick effects and templates due to vast library.
● Advance features are available in premium version.
How to use – After making the slideshow in Filmora, you may not get the chance for removing watermark but you can use free watermark remover to delete watermark.
07InVideo

Invideo is the best free slideshow maker without watermark with drag and drop user interface. The vast collection of templates and copyright free music library makes it outstanding. You need nothing but to choose an attractive template and uploading the file of choice. Add transitions and effects to make your video beautiful.
How to Use – Go to ‘blank canvas’ in the application and pick the size of the template. Then
continue making slideshow simply like mentioned for other slideshow makers.
Pros
● Multi-layer and advance editing features
● Variety of captions and overlays
● Templates are customizable
Cons
● Free version is limited
● Technical glitch
08Wondershare Vidair

Want to create impressive videos for any platform? If yes, wondershare Vidair is the best free online slideshow maker with easy to use interface. Watermark can be deleted or customized as per your choice. You can do so many playful things here such as adding music sharing in social media and adding text to the video etc.
How to use – as mentioned, the user-friendly interface of the product will help you to create the
slideshow easily. Make it simple and short to save time.
Pros
● High quality video export system
● Templates with attractive themes
● Rich music library and interesting captions
Cons
● No advance features for video editing
09Aiseesoft

It’s not possible to ignore Aiseesoft while discussing online slideshow maker without watermark. When you want a free video editor for creating slideshow with stylish theme, this lovable slideshow creator comes in limelight.
How to use - You need nothing but to choose a theme, upload the media and customize the
Video. Save it for your use and that’s it.
Pros
● More than 30 font styles with custom texts
● Customizable theme and templates
● Trendy filters, stickers and animations
Cons
● Limited editing features in free version
Part 2 Part-2 Step-by-step Guide to Make Slideshow
Making a slideshow online is not a big deal and you can easily learn to create presentation like a pro. The all you need to understand is the basic procedure of video making in slideshow maker online free no watermark. The process of slideshow making is almost same in every slideshow maker and you need to utilize the features and designs available in them. If you are using a particular slideshow creator, it will be better to learn about it first online and know the advance features in the program that can be used for making your slideshow more attractive.

More or less, the process of making slideshow is same in all slideshow makers. Basic steps are as follows –
Install the application
First of all, you need to install the slideshow maker no watermark that you want. Pick a slideshow maker of your choice as per the features you need to work with. After choosing the slideshow maker, install it from internet and allow your device to run the application.
Pick a template
After installing the slideshow maker, explore it. See the features available, template and media library and themes you can use. After going through the templates and themes, pick a template with them you want to make your slideshow on and go to the next step.
Upload your files
Upload your photos and arrange them in the order you want. In most of the slideshow makers, you will get the option of sliding pictures and rearranging them. You can also insert text on pictures after this step.
Apply effects, filters and transitions
Your basic slideshow is ready. Now apply effects, filters and transitions to make your slideshow beautiful. The theme itself comes with the effects sometimes; for example; if you choose holiday theme, romance or party, the theme will come with effects and filters accordingly. But you can customize it as per your choice and apply filters and effects according to your preference. Then check transition library and apply the one that attract you. You can also use different transitions for different set of pictures.

Insert music
Now it’s time to make your work musical and insert music. There are online tracks available with almost every slideshow maker but they come with the option of customizing or inserting your own soundtracks if you want. So, you can customize the slideshow accordingly.
Remove watermark
The most important step is removing the watermark of the product. The procedure of removing watermark can vary product to product. For instance, some comes without watermark while some offers watching free promotional video of a few second to remove watermark. In some products watermark can be removed by cracking the product while in others, watermark can be removed with the help of online watermark remover. The procedure of removing watermark depends totally upon the slideshow maker you choose.
Export and save video
After removing the watermark, you need nothing but to export the video and saving it into your device.
Share with friends
Your slideshow is completely ready to be shared with your friends.
● Ending Thoughts →
● Prefer basics if you are a beginner.
● Pick a slideshow maker with advance features and apply them all to present your work like a pro.
● Make slideshow of your memorable trips and occasions to avoid hassles of saving all the pictures from the same trip.
Finding the best free online slideshow maker no watermar becomes challenging, especially if you are dealing with this matter for the first time. If you want to create instant slideshow without any watermark, check this page out.
There is no lack of good, reliable and easy to use slide show makers in the internet that offer you the chance of creating slide show or presentations for free. Moreover, they don’t leave any watermark in the final work.
In this article
01 [What is the Best Free Slideshow Maker?](#Part 1)
02 [Step-by-step Guide to Make Slideshow](#Part 2)
Part 1 What is the Best Free Slideshow Maker?
Check out the list of following recommendable slideshow maker online free no watermark for easy job –
01PhotoStage
Small, simple and flexible; yes, this is how we can define Photo Stage slideshow maker. The developer NCH software wanted the clients to have something that can give them instant slideshow without so many obstacles. PhtoStage is the result.
How to use – Add photos in the slideshow template and adjust the duration for slides. Reorder, add and remove the slides if required. Add audio and text, caption etc. and save the video.
Pros
● Compatible with Mac and Windows
● Video can be saved in different formats
● User friendly interface
Cons
● Video duration can’t be changed as per choice
● Thumbnail edges can’t be dragged.
02LightMV
Being one of the free slideshow makers no watermark, LightMV has its special place in the world of slideshow makers. There are several creative and trendy themes in this app to allow you make interesting videos. The operation is simple but the result is powerful.
Pros
● One click share of the final result.
● Variety of Beautiful themes
● Can be launched directly without installation
Cons
● Filters, texts and other custom options are not available
● Text can be added only at the first and the last picture
How to use – Select template and add photos for slide show making. Use the vast media library
and theme for making your video attractive.
03IceCream
Another lovable free slideshow maker without watermark online is IceCream which allows user to save their work without watermark. You can create memorable slideshows of your holidays or make good presentations for business meeting.
How to use – Install, run and explore the application. Upload the photos for making slideshow and use the effect you want. You can adjust the slides by zooming them in and out. Give final touch to the video with filters and transitions and download it.
Pros
● Supports 45 languages and 4K quality videos
● Variety of effects and zoom function
● Facility of adding background music
● Direct share to social media and
● Feature of burning the prepared video directly into CD/DVD
Cons
● Incompatible to Mac
04Slideful
We cannot forget slideful while discussing the list of online slideshow maker no watermark. The application is perfect to be used by educators who want to create simple but funny slide shows. The created video can be accessed directly online too.
How to Use – Upload images of your choice in the app and start making slides. You can create animated slides with this application.
Pros
● User friendly program
● Beautiful and coloured slide can be created
● Educational slides can be created
Cons
● Offline mode is not available
● Only 25 photos can be added
● Big files upload slowly
05Adobe Spark
Another excellent slideshow maker without watermark is Adobe Spark. It is a professional tool that gives you premium results when it comes to slideshow presentations using videos, pictures, and other multimedia items.
How to use – The user friendly application allows you to select the pictures of your choice and convert them into slideshow. Music, text, filters, effects, transitions and stickers can be used as per demand.
Pros
● Supportive to third party plug ins
● Forty available templates with creative theme
● Spark video component for creating attractive slideshows with effects and music.
Cons
● Limited templates
● No freedom to design your post
06Wondershare Filmora
For Win 7 or later (64-bit)
For macOS 10.12 or later
Who doesn’t know about Wondershare Filmora Video Editor ? But do you know that Filmora comes with a feature of removing watermark from your video. The vast library of attractive themes, transitions and option of adding text makes the application special.
Pros
● Supportive to Mac and windows
● Advance video editor with easy to use interface
Cons
● It can be confusing to pick effects and templates due to vast library.
● Advance features are available in premium version.
How to use – After making the slideshow in Filmora, you may not get the chance for removing watermark but you can use free watermark remover to delete watermark.
07InVideo
Invideo is the best free slideshow maker without watermark with drag and drop user interface. The vast collection of templates and copyright free music library makes it outstanding. You need nothing but to choose an attractive template and uploading the file of choice. Add transitions and effects to make your video beautiful.
How to Use – Go to ‘blank canvas’ in the application and pick the size of the template. Then
continue making slideshow simply like mentioned for other slideshow makers.
Pros
● Multi-layer and advance editing features
● Variety of captions and overlays
● Templates are customizable
Cons
● Free version is limited
● Technical glitch
08Wondershare Vidair
Want to create impressive videos for any platform? If yes, wondershare Vidair is the best free online slideshow maker with easy to use interface. Watermark can be deleted or customized as per your choice. You can do so many playful things here such as adding music sharing in social media and adding text to the video etc.
How to use – as mentioned, the user-friendly interface of the product will help you to create the
slideshow easily. Make it simple and short to save time.
Pros
● High quality video export system
● Templates with attractive themes
● Rich music library and interesting captions
Cons
● No advance features for video editing
09Aiseesoft
It’s not possible to ignore Aiseesoft while discussing online slideshow maker without watermark. When you want a free video editor for creating slideshow with stylish theme, this lovable slideshow creator comes in limelight.
How to use - You need nothing but to choose a theme, upload the media and customize the
Video. Save it for your use and that’s it.
Pros
● More than 30 font styles with custom texts
● Customizable theme and templates
● Trendy filters, stickers and animations
Cons
● Limited editing features in free version
Part 2 Part-2 Step-by-step Guide to Make Slideshow
Making a slideshow online is not a big deal and you can easily learn to create presentation like a pro. The all you need to understand is the basic procedure of video making in slideshow maker online free no watermark. The process of slideshow making is almost same in every slideshow maker and you need to utilize the features and designs available in them. If you are using a particular slideshow creator, it will be better to learn about it first online and know the advance features in the program that can be used for making your slideshow more attractive.
More or less, the process of making slideshow is same in all slideshow makers. Basic steps are as follows –
Install the application
First of all, you need to install the slideshow maker no watermark that you want. Pick a slideshow maker of your choice as per the features you need to work with. After choosing the slideshow maker, install it from internet and allow your device to run the application.
Pick a template
After installing the slideshow maker, explore it. See the features available, template and media library and themes you can use. After going through the templates and themes, pick a template with them you want to make your slideshow on and go to the next step.
Upload your files
Upload your photos and arrange them in the order you want. In most of the slideshow makers, you will get the option of sliding pictures and rearranging them. You can also insert text on pictures after this step.
Apply effects, filters and transitions
Your basic slideshow is ready. Now apply effects, filters and transitions to make your slideshow beautiful. The theme itself comes with the effects sometimes; for example; if you choose holiday theme, romance or party, the theme will come with effects and filters accordingly. But you can customize it as per your choice and apply filters and effects according to your preference. Then check transition library and apply the one that attract you. You can also use different transitions for different set of pictures.
Insert music
Now it’s time to make your work musical and insert music. There are online tracks available with almost every slideshow maker but they come with the option of customizing or inserting your own soundtracks if you want. So, you can customize the slideshow accordingly.
Remove watermark
The most important step is removing the watermark of the product. The procedure of removing watermark can vary product to product. For instance, some comes without watermark while some offers watching free promotional video of a few second to remove watermark. In some products watermark can be removed by cracking the product while in others, watermark can be removed with the help of online watermark remover. The procedure of removing watermark depends totally upon the slideshow maker you choose.
Export and save video
After removing the watermark, you need nothing but to export the video and saving it into your device.
Share with friends
Your slideshow is completely ready to be shared with your friends.
● Ending Thoughts →
● Prefer basics if you are a beginner.
● Pick a slideshow maker with advance features and apply them all to present your work like a pro.
● Make slideshow of your memorable trips and occasions to avoid hassles of saving all the pictures from the same trip.
Also read:
- New Can You Get Free After Effects Templates Slideshow? Yes, You Definitely Can! Follow the Given Discussion to Learn About a Simple Trick and More About Getting Free Effects Template for Slideshows for 2024
- Hey! Are You Looking for Video Reverse Effects in Your Videos? Then, You Are at the Right Place. This Article Will Guide You in Creating a Video Reverse Effect for 2024
- Updated Learn How to Seamlessly Merge Audio and Video in VLC Media Player with This Easy-to-Follow Guide. Step-by-Step Instructions Are Included for 2024
- In 2024, You Can Easily Cut or Crop a Part of Your Video by Using Its Editing Tools Such as Crop (To Remove Unwanted Black Borders), Trim (To Remove the Unwanted Front and End Parts of Your Video Clip)
- Looking Into The Top Free Slow Motion Apps (Android & iOS)
- Top 5 Ways To Convert Hdr To Sdr Videos
- Updated It Is Crucial to Introduce Your Kids to the Different Colors and Practice the Color Matching Game. So, Here Are the Various Factors Related to Color Matching for Your Child with a Tool to Help You in It Ideally for 2024
- 2024 Approved Do You Want to Create Adjustment Layers in Final Cut Pro? This Article Will Discuss a Simple yet Efficient Method to Generate Adjustment Layers in Final Cut Pro
- The Only Guide Youll Ever Need to Learn GIF Design That Get Shared Like Crazy
- New 2024 Approved How to Use LUTs in Adobe Premiere Pro
- Updated | How to Livestream Zoom on Facebook?
- New 2024 Approved How to Create Cinematic Style Videos?
- 2024 Approved Finding the Best GIF Websites Was Never Easier
- New In 2024, Do You Want to Apply LUTs Using Open Broadcaster Software? You Can Download Free LUTs for OBS and Apply Them to Your Files. There Are Many LUTs Available
- 2024 Approved Learn About some of the Best Photo Collage with Music Tools
- 2024 Approved Do You Wish to Create High-Quality Videos and Experience Effective Videos with Editing? No Problem at All because the Keyboard Shortcuts Listed Here Will Assist You
- New 2 Methods to Crop Video in VLC for 2024
- 2024 Approved How To Change Text In Premiere Pro
- Updated In 2024, How to Start a Vlog
- New In 2024, Perfectly Use the Audio Mixer in Filmora
- New Mastering DaVinci Resolve Scopes A Comprehensive Guide
- Updated Mastering OpenCV Object Tracking A Comprehensive Guide for Beginners and Experts
- 2024 Approved Detailed Guide to Resize Your Video in VLC
- Updated Learn How to Perform Velocity Edits on Your PC
- Updated In 2024, Ll About GIF Keyboard That You Want to Know
- 2024 Approved How to Edit Recorded Video
- New Learn How to Feather Shapes in After Effects and Add a Professional Touch to Your Designs. This Comprehensive Guide Covers Everything From the Basics to Advanced Techniques. Perfect for Beginners and Experts Alike for 2024
- Updated Exploring the Best Slow-Motion App
- New Leading Applications to Create Fast Motion in iPhone for 2024
- Updated In 2024, Follow a Few Simple Steps and Learn How to Create a Professional Glowing Edge Effect to Your Videos in Filmora
- 2024 Approved How to Make an Aesthetic Slideshow
- New In 2024, Top 10 Transparent Image Online Tools That Help You A Lot
- 2024 Approved Best Voice Changers for WhatsApp Free Included
- Updated In 2024, Blender Is a 3D Animation Software that Can Be Used to Create Stunning 3D Models and Videos
- Learn Color Correction in After Effects with These Videos
- New Learning Unique Ways to Slow Down Time Lapse on iPhone for 2024
- New How To Zoom In On TikTok Videos for 2024
- 2024 Approved Camtasia Review – Is It The Best Video Editor?
- Updated Guide To Using Luts Perfectly in Final Cut Pro
- How to retrieve erased messages from OnePlus
- In 2024, How to Remove iPhone XS SIM Lock?
- How to Remove a Previously Synced Google Account from Your Oppo F25 Pro 5G
- In 2024, How to Unlock iPhone 13 Passcode Screen? | Dr.fone
- Pokémon Go Cooldown Chart On Vivo Y77t | Dr.fone
- In 2024, Top 10 Fingerprint Lock Apps to Lock Your Nokia C32 Phone
- In 2024, How Can I Use a Fake GPS Without Mock Location On Asus ROG Phone 7? | Dr.fone
- How to recover deleted photos from Android Gallery after format on Poco
- The Easiest Methods to Hard Reset Honor Magic 5 | Dr.fone
- Updated In 2024, Latest Top Darth Vader Voice Generators for All Platforms
- 2024 Approved 5 Best Apps for Voice Translation From English to Bangla
- In 2024, Why is iPogo not working On Oppo A1x 5G? Fixed | Dr.fone
- CatchEmAll Celebrate National Pokémon Day with Virtual Location On Honor Play 7T | Dr.fone
- Complete Review & Guide to Techeligible FRP Bypass and More For Tecno Pop 7 Pro
- In 2024, 8 Safe and Effective Methods to Unlock Your iPhone 12 Without a Passcode
- In 2024, AddROM Bypass An Android Tool to Unlock FRP Lock Screen For your Tecno Spark 20C
- Top 10 AI Avatar Generators for 2024
- 3 Ways to Fake GPS Without Root On OnePlus Open | Dr.fone
- Reasons for Oppo Reno 8T Stuck on Startup Screen and Ways To Fix Them | Dr.fone
- Top 11 Free Apps to Check IMEI on Oppo Phones
- 8 Solutions to Fix Find My Friends Location Not Available On Samsung Galaxy M14 4G | Dr.fone
- 4 Easy Ways for Your Vivo Y56 5G Hard Reset | Dr.fone
- In 2024, Can I Remove the Apple Watch Activation Lock By Apple iPhone 14 Pro Max without the Previous Owner?
- In 2024, Complete Tutorial Sending Photos From Apple iPhone 6s to iPad | Dr.fone
- In 2024, Best Anti Tracker Software For Vivo Y77t | Dr.fone
- How To Remove or Bypass Knox Enrollment Service On Itel S23+
- In 2024, OBS Animated Lower Thirds Alternatives
- In 2024, How To Fix Apple ID Verification Code Not Working From Apple iPhone 14 Plus
- Updated In 2024, Live Deepfakes Made Easy How to Download and Make Your Own Live Model
- Title: New Zoom In and Out on Discord (Desktop + App + Browser Solutions)
- Author: Morgan
- Created at : 2024-05-19 05:12:28
- Updated at : 2024-05-20 05:12:28
- Link: https://ai-video-editing.techidaily.com/new-zoom-in-and-out-on-discord-desktop-plus-app-plus-browser-solutions/
- License: This work is licensed under CC BY-NC-SA 4.0.
