:max_bytes(150000):strip_icc():format(webp)/preaknessstakes-5c804f1b46e0fb00019b8ee0.jpg)
Now, You Can Also Apply the Stranger Things Upside Down Effect to Your Video! This Effect Combines Camera Tricks and Video Editing Within Filmora to Transition From the Normal World Into the Upside Down

Now, You Can Also Apply the Stranger Things Upside Down Effect to Your Video! This Effect Combines Camera Tricks and Video Editing Within Filmora to Transition From the Normal World Into the Upside Down
With stranger things season 4 ending, it seems like great timing to make a stranger things style transition to the Upside Down. In the Netflix series Stranger Things, there is an opposite version of our world called the Upside Down. The Upside Down is dark, creepy, and possibly filled with aliens, monsters, creatures, and other things.
Now, you can also apply the Stranger Things Upside Down Effect to your video! This effect combines camera tricks and video editing within Filmora to transition from the normal world into the Upside Down.
How-to Guide
1) Preparation
To make this effect, you will need two footage shots: one with the camera moving down and one with the camera coming back up.
When shooting for the footage, follow the steps below:
First shot
- Find any item close enough to the ground that we can block our frame with.

- Once you have your talent lined up, rotate your camera while lowering it below the foreground item at a constant speed and leaving the camera there. The key is making sure when you go behind the object, the frame is nothing but black.

For the next scene, have your actor change positions, or you can change the set around to look like the Upside Down. For instance, adding fake plants and flickering lights.
Second shot
Start bringing your camera back up at the same speed and rotate it again in the direction it was moving.

2) Steps
After you have all the footage, you can start editing it on Filmora. If you haven’t installed it yet, you can download Filmora at their official website at https://filmora.wondershare.com .
Free Download For Win 7 or later(64-bit)
Free Download For macOS 10.14 or later
Now, launch Filmora on your PC and follow the steps below:
Step1 Take your first clip in the “normal” world and drag it down to a video track on the timeline. Trim the edge of the clip, so it ends on pure black and in a downward motion.

Step2 Drag the second clip (in the Upside Down) onto the video track on the timeline after the first clip. Trim this video, so it begins in pure black and an upward motion.

Cut the clips to get the timing right since it should be a very fast transition. You can cut in the black frames so they won’t be too apparent.
If you don’t have a perfectly smooth transition, you can add a dissolve by going to Transitions > Basic > Dissolve.

Color Grading and Effects
After the transition, you can make the clip look a lot more like the Upside Down from the show with a color grade and Filmora effects. Follow the steps below:
Step1 Double-click on your second clip, then go to Color > Advanced. For a quick edit, you can try one of the presets available, such as “cool film.” It will give you the colder blue tones that Stranger Things used for the Upside Down.

Step2 You can further edit the color grading in the white balance menu. Drag the slider to the left to get a blue, cold vibe for the Upside Down.
The “cool” or “warm” color grading technically talks about color temperature. A “warmer” look will be more orange, and a “colder” look will be bluer. You can also use the tint slider to fine-tune the look.

Step3 Next, move down to the color, lower the brightness and increase contrast. It makes the scene darker and more sinister than the normal world.

Step4 Finally, go down to the vignette and drag the amount slider a tiny bit to give a Vinnette around your clip.

3) Pro Tips
You can still make your clip look even more like Upside Down with some Filmora elements.
Go to Elements > Smoke > Smokescreen 2. Drag this element on top of your Upside Down clip and trim it, so it starts at the same time the clip leaves the black frame.

You can adjust the opacity by double-clicking the smoke effect to open the setting.
Finally, go to the Transition > Basic > Dissolve to the start of the smoke and adjust it when the smoke gradually appears.

Resources from Filmostock
You can also use filmstock effects to bring our video to the next level. Go to Elements > Fire > Large Scale 12 and drag it down on top of your clip and the smoke.

Double-click the clip and change the scale of the effect to your needs. Then, go to compositing to change the blending mode to the screen to help the effect blend in more.

Now, go to color and open the white balance menu. Drag the two sliders to change the color of the particles to match your clip.

Summary
That is all you need to make a Stranger Things Upside Down effects to your video. Let us know if there are any other effects from tv shows you want to learn how to make.
Free Download For macOS 10.14 or later
Now, launch Filmora on your PC and follow the steps below:
Step1 Take your first clip in the “normal” world and drag it down to a video track on the timeline. Trim the edge of the clip, so it ends on pure black and in a downward motion.

Step2 Drag the second clip (in the Upside Down) onto the video track on the timeline after the first clip. Trim this video, so it begins in pure black and an upward motion.

Cut the clips to get the timing right since it should be a very fast transition. You can cut in the black frames so they won’t be too apparent.
If you don’t have a perfectly smooth transition, you can add a dissolve by going to Transitions > Basic > Dissolve.

Color Grading and Effects
After the transition, you can make the clip look a lot more like the Upside Down from the show with a color grade and Filmora effects. Follow the steps below:
Step1 Double-click on your second clip, then go to Color > Advanced. For a quick edit, you can try one of the presets available, such as “cool film.” It will give you the colder blue tones that Stranger Things used for the Upside Down.

Step2 You can further edit the color grading in the white balance menu. Drag the slider to the left to get a blue, cold vibe for the Upside Down.
The “cool” or “warm” color grading technically talks about color temperature. A “warmer” look will be more orange, and a “colder” look will be bluer. You can also use the tint slider to fine-tune the look.

Step3 Next, move down to the color, lower the brightness and increase contrast. It makes the scene darker and more sinister than the normal world.

Step4 Finally, go down to the vignette and drag the amount slider a tiny bit to give a Vinnette around your clip.

3) Pro Tips
You can still make your clip look even more like Upside Down with some Filmora elements.
Go to Elements > Smoke > Smokescreen 2. Drag this element on top of your Upside Down clip and trim it, so it starts at the same time the clip leaves the black frame.

You can adjust the opacity by double-clicking the smoke effect to open the setting.
Finally, go to the Transition > Basic > Dissolve to the start of the smoke and adjust it when the smoke gradually appears.

Resources from Filmostock
You can also use filmstock effects to bring our video to the next level. Go to Elements > Fire > Large Scale 12 and drag it down on top of your clip and the smoke.

Double-click the clip and change the scale of the effect to your needs. Then, go to compositing to change the blending mode to the screen to help the effect blend in more.

Now, go to color and open the white balance menu. Drag the two sliders to change the color of the particles to match your clip.

Summary
That is all you need to make a Stranger Things Upside Down effects to your video. Let us know if there are any other effects from tv shows you want to learn how to make.
Best Filmic Pro LUTs For Video Editing
Video editing involves rearranging and upscaling video content for improved quality. Meanwhile, video editing can consume a lot of time and resources. For video editing, you need to have expertise in using the software. The ideal solution is using Filmic Tone LUTs for free download. These LUTs can extend the quality of your videos in a hassle-free environment. This article will discuss important Filmic Pro LUTs.
- Part 2: Discussing Some Practical Uses of LUTs in Video Editing
- Part 3: Best Filmic Pro LUTs To Use
- Part 4: Getting To Know Wondershare Filmora and Its Use in LUTs
Part 1: How Can LUTs Benefit Video Editors?
Video editors are professionals that are tasked to edit and customize videos. Their main objective is to enhance video quality with necessary manual upscaling. Making things more accessible, find how LUTs can benefit these professionals:
- Increased Efficiency: With LUTs, video editors can optimize their workflows with ready-made filters. So they don’t need to spend hours on video editing. By applying filters, video colors are upgraded.
- Consistent Grading: During manual editing, multiple frames are left out during color correction. With LUTs, the colors are applied in a consistent way in all frames. This way, you will experience effective color enhancement.
- Professional Quality: The quality of applied LUTs is amazing. After all, LUTs provide dedicated filter presets to optimize color saturation and brightness. With professional color grading, experience a top-quality video.
- Creative Colors: LUTs are ideal for adding premium yet stylish color schemas into videos. The color gradients are creative as well as sleek and luxurious. You will not regret using creative color presets in LUTs.
Part 2: Discussing Some Practical Uses of LUTs in Video Editing
LUTs, also known as look-up tables, are unique video editing tools. They use mathematical instructions to map input color values into output color values. This way, consistent color gradings are applied across video content. In video editing, LUTs can be used for a variety of practical uses:
1. Special Effects
By using LUTs, you can add special effects to your videos. This includes different effects, including dreamy, moody, or surreal. The videos will look more professional and enchanting with attractive looks. So you don’t need to pursue video editing in a deep way.
2. HDR Display
With LUTs, users can add a dynamic touch of HDR display to the videos. After all, they can convert SDR footage to HDR footage using special filter presets. This allows for different color contrasts within the video.
3. Color Enhancement
Enhancing color schemas is easier and more convenient using LUTs. These editing tools can adjust color contrast, balance, and saturation. Hence, your video is upscaled with an improved color display for vintage or cinematic looks.
4. Match Footages
Different cameras produce videos with diverse quality, which is unsatisfying. Through LUTs, you can match the color of your footage with a consistent appearance. The color schemes and tone contrasts are optimized in a collective way.
Part 3: Best Filmic Pro LUTs To Use
Using LUTs in video editing can save a lot of time. For video editors, LUTs can be revolutionizing because of less effort with amazing output. In general, using Filmic Pro LUTs is in great demand. Let’s discover some of them:
1. Filmic LUT Support
Bring Filmic looks to your videos using this Filmic Pro LUTs download pack. There are up to 7 different LUT preset filters that you can import. With Filmic touch, you can add unique cinematic looks to your visual content. LUT Quick Action Modal (QAM) is also introduced to switch into preview mode or apply LUT to the video.

2. Richard Lackey FREE Filmic Pro LOGv2 LUT for FilmConvert
Add a cinematic touch to your videos with this Filmic Tone LUTs free download pack. This special LUTs pack lets you add attractive film interaction to your video. The provided color schemes are exceptional because they offer unique color presentations. Meanwhile, the LUT equips solutions to correct imbalances and noise.

3. Free LUT Filmic
Make your photo or video more special with this Free LUT Filmic pack. Meanwhile, there are special effects for transforming color schemas within visual content. So, if you have film or photography, the provided LUT filters are amazing. This way, you can spark creativity like a professional editor. The video content will become more appealing.

4. Film Slog3 And Standard LUTs
Enhance your visual creativity by blending premium looks into your videos. After all, this Filmic Pro LUT download pack has fantastic color upscaling solutions. It contains a collection of 20 Film REC 709 LUTs and 20 Film Slog3 LUTs to adapt. This way, you can improve the color gradients of your social media videos and presentations.
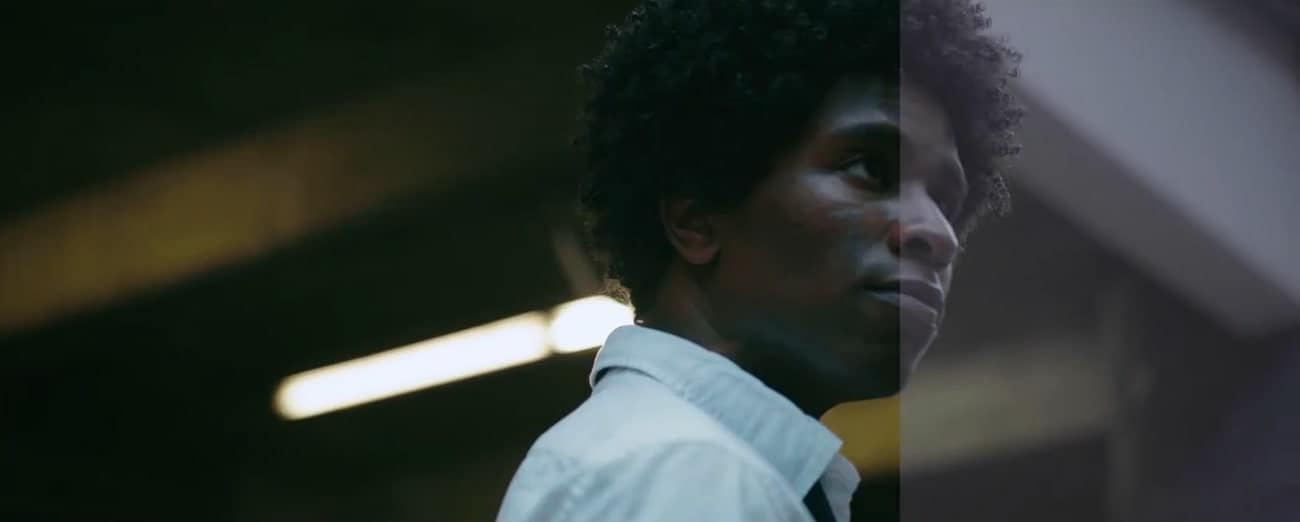
5.FILMIC PRO SUPER-BUNDLE LUTS PACK
Enhancing video quality is now easier with this color-grading Filmic Pro pack. This is a specialized LUTs bundle that incorporates 50 cinematic filter presets. The available LUTs can generally optimize color gradients with the right contrasts. So if you have flat or log footage, using this LUT can be ideal. Meanwhile, the LUT is designed explicitly for mobile-captured videos.

6.Filmic Tone LUTs
Upgrade your preset library with this amazing Filmic Tone LUTs pack. While featuring 10 preset filters, this LUTs pack provides an aesthetic dark, moody tone. LUTs are easily applied to your videos with the right color upscaling. You will also receive a VLOG - Rec709 LUT and Sony SLOG2/3 - Rec709 LUT. The supported file format is .cube.

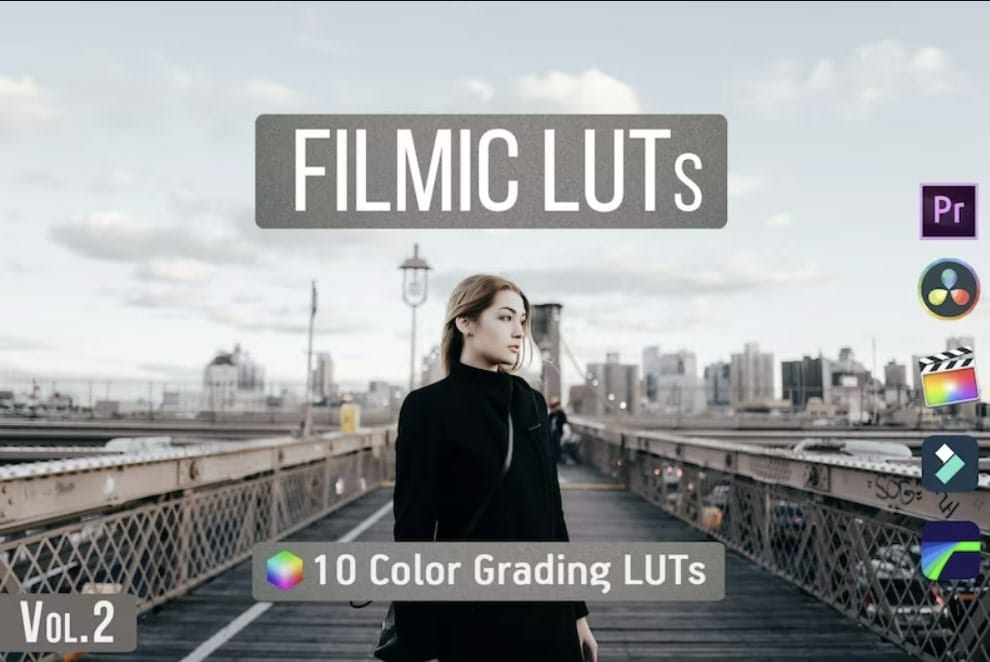
7. 7. Filmic LUTs Vol.2
Working with LUTs has never been this easy. So when you use Filmic LUTs Vol.2, you will get 10 creative LUT preset filters. Integrate these LUTs into your visual content to upscale their quality. Meanwhile, the LUTs can be used on different editing platforms. In most instances, you will get upscaling results within seconds. There is also an option to adjust intensity, contrast, and more.
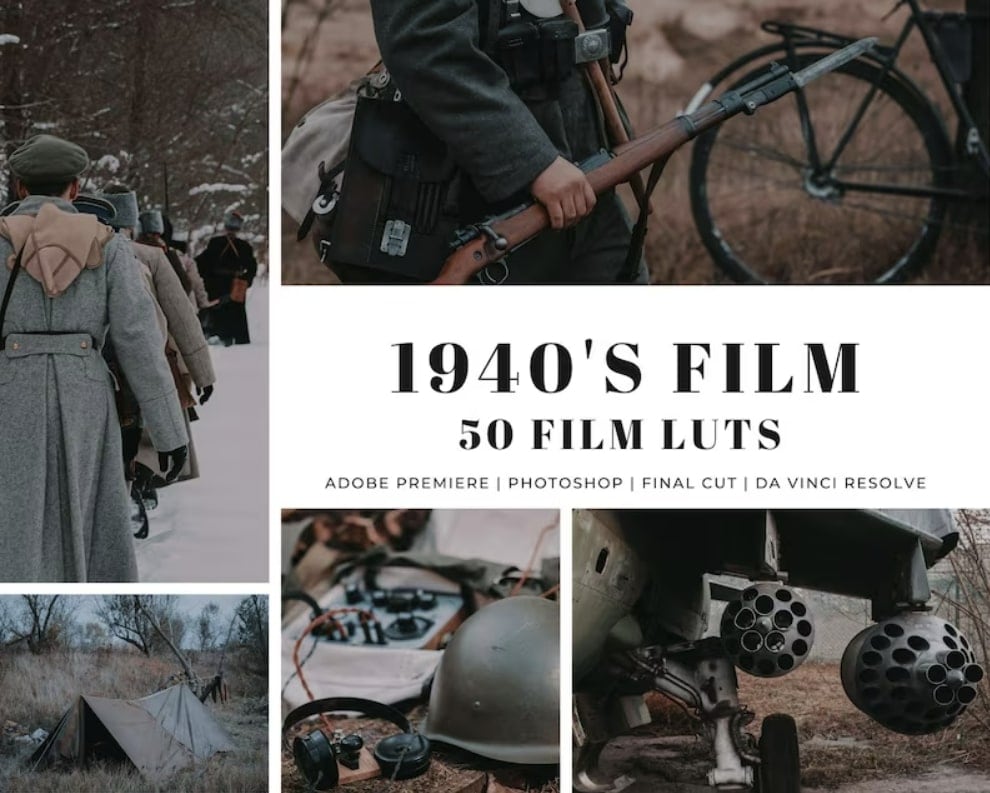
8. 50 Cinematic Retro Film LUTs Pack
Add a retro touch to your videos with this Filmic Pro LUT download pack. After all, there are 50 retro-styled Filmic LUT presets. When you apply these LUTs to your video, special color grading is applied. Every specific LUT has a unique color schema with a styled theme. In this LUTs pack, you will also receive a PDF guide with step-by-step instructions.
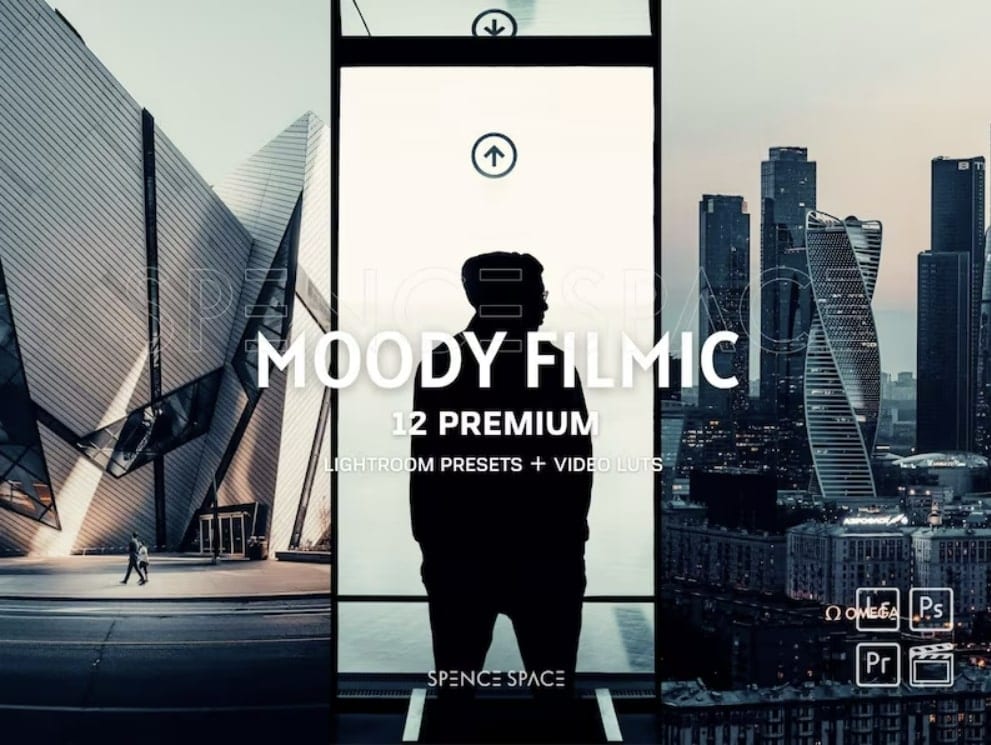
9. Moody Filmic Cityscape LR Presets
Moody Filmic retouches are always special and exciting. When adding them to visual content, you can extend quality in an optimal way. After all, this Filmic Tone LUTs free download pack has 12 filter presets. This way, you can enhance color grading with the right correction standards. You can use these filter presets on both mobile and the web.
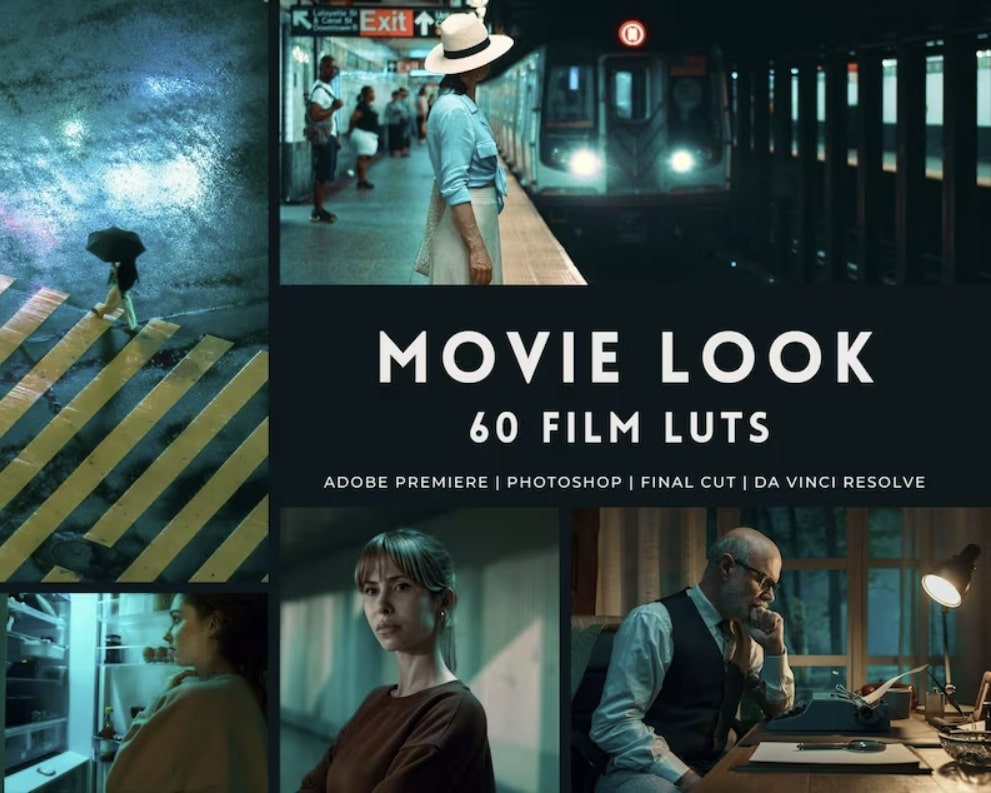
10. Movie Cinematic Film LUTs
Transform color grading within your visual content with this cinematic film LUTs pack. To sum up, there are 50 different cinematic LUTs in this pack. So, while using these LUTs, color saturation and brightness will upgrade your visual content. The good thing is the LUTs are compatible with both video and image formats.
Part 4: Getting To Know Wondershare Filmora and Its Use in LUTs
Wondershare Filmora is an industrial-standard video editing software. Meanwhile, this software is ideal for all video editors because it offers various video enhancements. There are 200+ LUTs in this editing tool which includes color grading Filmic Pro. Thus, you can upscale video colors in an optimized way in different styles.
![]()
Note: Filmora has AI tools like AI Smart Cutout, AI Audio Denoise, and Auto Reframe. Moreover, you can also enjoy the perks of AI copywriting for ready-made video scripts. With motion tracking, speed ramping, and keyframing, video editing becomes simpler. In addition, there are several options for effects, transitions, and stickers. This makes it a complete and comprehensive video editing solution for the masses.
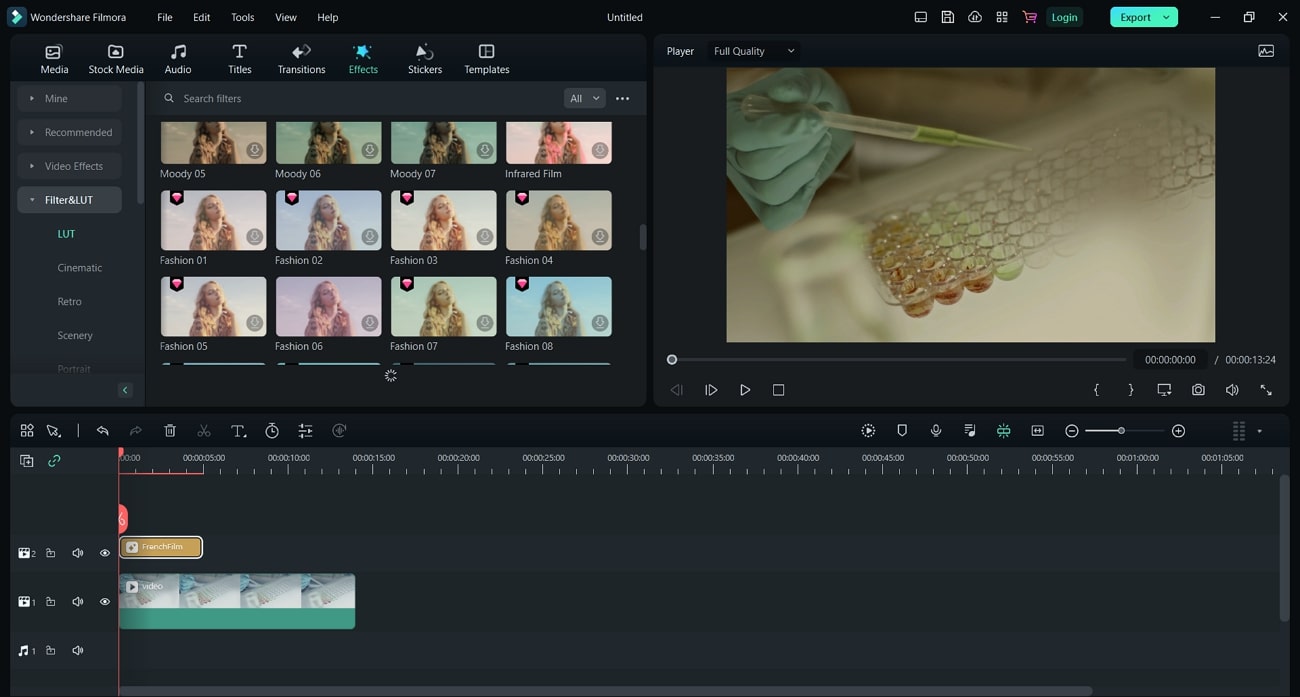
Empower your videos with a new mood using different LUTs. Filmora now offers 100+ top-quality 3D LUTs cover a broad range of scenarios. Transform your videos with Filmora’s powerful 3D LUTs.
Apply LUT on Videos Apply LUT on Videos Learn More

Conclusion
LUTs are pre-defined color gradients that work in an instant way. Meanwhile, they make video editing simpler and smarter. This article illustrated 10 top Filmic Pro LUTs free download. By using these LUTs, you can upscale your important videos with improved color schemas. In addition, you discovered a vital editing tool, Wondershare Filmora. Within this software, you can upscale videos with multiple functionalities.
Part 1: How Can LUTs Benefit Video Editors?
Video editors are professionals that are tasked to edit and customize videos. Their main objective is to enhance video quality with necessary manual upscaling. Making things more accessible, find how LUTs can benefit these professionals:
- Increased Efficiency: With LUTs, video editors can optimize their workflows with ready-made filters. So they don’t need to spend hours on video editing. By applying filters, video colors are upgraded.
- Consistent Grading: During manual editing, multiple frames are left out during color correction. With LUTs, the colors are applied in a consistent way in all frames. This way, you will experience effective color enhancement.
- Professional Quality: The quality of applied LUTs is amazing. After all, LUTs provide dedicated filter presets to optimize color saturation and brightness. With professional color grading, experience a top-quality video.
- Creative Colors: LUTs are ideal for adding premium yet stylish color schemas into videos. The color gradients are creative as well as sleek and luxurious. You will not regret using creative color presets in LUTs.
Part 2: Discussing Some Practical Uses of LUTs in Video Editing
LUTs, also known as look-up tables, are unique video editing tools. They use mathematical instructions to map input color values into output color values. This way, consistent color gradings are applied across video content. In video editing, LUTs can be used for a variety of practical uses:
1. Special Effects
By using LUTs, you can add special effects to your videos. This includes different effects, including dreamy, moody, or surreal. The videos will look more professional and enchanting with attractive looks. So you don’t need to pursue video editing in a deep way.
2. HDR Display
With LUTs, users can add a dynamic touch of HDR display to the videos. After all, they can convert SDR footage to HDR footage using special filter presets. This allows for different color contrasts within the video.
3. Color Enhancement
Enhancing color schemas is easier and more convenient using LUTs. These editing tools can adjust color contrast, balance, and saturation. Hence, your video is upscaled with an improved color display for vintage or cinematic looks.
4. Match Footages
Different cameras produce videos with diverse quality, which is unsatisfying. Through LUTs, you can match the color of your footage with a consistent appearance. The color schemes and tone contrasts are optimized in a collective way.
Part 3: Best Filmic Pro LUTs To Use
Using LUTs in video editing can save a lot of time. For video editors, LUTs can be revolutionizing because of less effort with amazing output. In general, using Filmic Pro LUTs is in great demand. Let’s discover some of them:
1. Filmic LUT Support
Bring Filmic looks to your videos using this Filmic Pro LUTs download pack. There are up to 7 different LUT preset filters that you can import. With Filmic touch, you can add unique cinematic looks to your visual content. LUT Quick Action Modal (QAM) is also introduced to switch into preview mode or apply LUT to the video.

2. Richard Lackey FREE Filmic Pro LOGv2 LUT for FilmConvert
Add a cinematic touch to your videos with this Filmic Tone LUTs free download pack. This special LUTs pack lets you add attractive film interaction to your video. The provided color schemes are exceptional because they offer unique color presentations. Meanwhile, the LUT equips solutions to correct imbalances and noise.

3. Free LUT Filmic
Make your photo or video more special with this Free LUT Filmic pack. Meanwhile, there are special effects for transforming color schemas within visual content. So, if you have film or photography, the provided LUT filters are amazing. This way, you can spark creativity like a professional editor. The video content will become more appealing.

4. Film Slog3 And Standard LUTs
Enhance your visual creativity by blending premium looks into your videos. After all, this Filmic Pro LUT download pack has fantastic color upscaling solutions. It contains a collection of 20 Film REC 709 LUTs and 20 Film Slog3 LUTs to adapt. This way, you can improve the color gradients of your social media videos and presentations.

5.FILMIC PRO SUPER-BUNDLE LUTS PACK
Enhancing video quality is now easier with this color-grading Filmic Pro pack. This is a specialized LUTs bundle that incorporates 50 cinematic filter presets. The available LUTs can generally optimize color gradients with the right contrasts. So if you have flat or log footage, using this LUT can be ideal. Meanwhile, the LUT is designed explicitly for mobile-captured videos.

6.Filmic Tone LUTs
Upgrade your preset library with this amazing Filmic Tone LUTs pack. While featuring 10 preset filters, this LUTs pack provides an aesthetic dark, moody tone. LUTs are easily applied to your videos with the right color upscaling. You will also receive a VLOG - Rec709 LUT and Sony SLOG2/3 - Rec709 LUT. The supported file format is .cube.

7. 7. Filmic LUTs Vol.2
Working with LUTs has never been this easy. So when you use Filmic LUTs Vol.2, you will get 10 creative LUT preset filters. Integrate these LUTs into your visual content to upscale their quality. Meanwhile, the LUTs can be used on different editing platforms. In most instances, you will get upscaling results within seconds. There is also an option to adjust intensity, contrast, and more.

8. 50 Cinematic Retro Film LUTs Pack
Add a retro touch to your videos with this Filmic Pro LUT download pack. After all, there are 50 retro-styled Filmic LUT presets. When you apply these LUTs to your video, special color grading is applied. Every specific LUT has a unique color schema with a styled theme. In this LUTs pack, you will also receive a PDF guide with step-by-step instructions.

9. Moody Filmic Cityscape LR Presets
Moody Filmic retouches are always special and exciting. When adding them to visual content, you can extend quality in an optimal way. After all, this Filmic Tone LUTs free download pack has 12 filter presets. This way, you can enhance color grading with the right correction standards. You can use these filter presets on both mobile and the web.

10. Movie Cinematic Film LUTs
Transform color grading within your visual content with this cinematic film LUTs pack. To sum up, there are 50 different cinematic LUTs in this pack. So, while using these LUTs, color saturation and brightness will upgrade your visual content. The good thing is the LUTs are compatible with both video and image formats.

Part 4: Getting To Know Wondershare Filmora and Its Use in LUTs
Wondershare Filmora is an industrial-standard video editing software. Meanwhile, this software is ideal for all video editors because it offers various video enhancements. There are 200+ LUTs in this editing tool which includes color grading Filmic Pro. Thus, you can upscale video colors in an optimized way in different styles.
![]()
Note: Filmora has AI tools like AI Smart Cutout, AI Audio Denoise, and Auto Reframe. Moreover, you can also enjoy the perks of AI copywriting for ready-made video scripts. With motion tracking, speed ramping, and keyframing, video editing becomes simpler. In addition, there are several options for effects, transitions, and stickers. This makes it a complete and comprehensive video editing solution for the masses.

Empower your videos with a new mood using different LUTs. Filmora now offers 100+ top-quality 3D LUTs cover a broad range of scenarios. Transform your videos with Filmora’s powerful 3D LUTs.
Apply LUT on Videos Apply LUT on Videos Learn More

Conclusion
LUTs are pre-defined color gradients that work in an instant way. Meanwhile, they make video editing simpler and smarter. This article illustrated 10 top Filmic Pro LUTs free download. By using these LUTs, you can upscale your important videos with improved color schemas. In addition, you discovered a vital editing tool, Wondershare Filmora. Within this software, you can upscale videos with multiple functionalities.
Movavi Video Editor Plus Review
The Movavi Video Editor Plus is one of the most prominent video editors. It has always been a favorite software for professional video editors because of its simplicity and advanced features. A new version of Movavi Video Editor Plus 2022 was launched recently, creating a lot of buzz. Now let us review and see what new features they have added this time and whether they are worth buying. The following article is a detailed review of Movavi Video Editor Plus 2022.

An Overview
Influencers, who post videos on social media and on other video streaming platforms, need to use the best video editing apps. One such program, the Movavi Video Editor, makes video editing easy for both Windows and Mac users.
Video editors can easily become proficient using this application. Learn the common elements of video editing with Movavi before investing in more expensive tools.
Furthermore, you can download and use the video editing tool for free for the first seven days. Using Movavi Video Editor’s filters, transitions, and captions, you can create an appealing and memorable video. Editing video with Movavi isn’t difficult at all. With just a few minutes of practice, you can become an expert in video editing and edit videos like a pro.
You can make your video look more beautiful with its artistic filters, animated transitions, and stunning titles. The other features are stylization, picture-in-picture, pan, and zoom. Moreover, these additional features make it attractive compared to other video editors on the market.
Pros
Animations and objects built-in
The title, effect, and transition galleries are just a click away
Tools for editing audio that are excellent
Easy-to-use interface with a modern feel
Cons
It is not possible to import Custom Objects
For advanced professionals, color grading options are somewhat limited
What Makes Movavi Video Editor Plus Appealing To Consumers?
Movavi Video Editor Plus 2022 has a lot to offer in terms of features. Object Animation, Automatic Video Creation, and more built-in media are the highlights of Video Editor Plus 2022. Let’s see how they work together!
Interface
The Movavi Video Editor Plus 2022 is one of Movavi’s aesthetically pleasing apps. When selecting different tabs on the upper part of the interface, toolbars and tabs can be found at the top or on the left, and the tools will expand. Right on the right is a player that lets you preview samples of videos, transitions, titles, and so on. Even dozens of tracks can be added and edited at once to create your video, as you can add video, audio, and images to the timeline at the bottom.
Quick Video Creation
This is one of the best features of this video editor. Adding a video, selecting a template, then adding loyalty-free audios will quickly create a video with the help of the video creation wizard.
Editing Tools
You can edit your videos with all the editing tools necessary to make them more personal, such as Rotate, Crop, Trim, Split, Stabilize, Adjust colors, Combine, Stabilize, Pan and Zoom, Slow motion, Chroma key, Scene detection, Animate, Highlight & Concealed, Add logo, Overlay, etc. Applying an editing tool is as simple as selecting a video, choosing a tool, and configuring the settings.
In addition, it allows editing of video and audio properties, providing excellent detail treatment. A video can be sped up or lowered, normalized, changed opacity, reversed, faded in or out, and synchronized, equalized, noise removed, audio effects added, and the beat detected.
Creativity: Filters, Transitions, Titles and Stickers
To make your video more personal, you will need to add filters, titles, transitions, and stickers. Movavi video editor offers free templates built-in and templates that can be purchased from its store. It has all the templates organized into themes, the design is very pleasing to the eye, and we are more likely to try these effects.
Sharing and output
Unless you’re actively streaming videos on video streaming platforms, this sharing feature may be helpful for you. Logging in allows you to upload videos directly to YouTube, YouTube Video, and Google Drive.
The export feature supports a wide range of video and audio formats that are highly frequently used. Leave them alone if you don’t have a good reason to change the output settings. The program will display the current file size when you choose a different video quality, which is useful if you have limited storage space.
Tutorials
It isn’t easy to edit videos, unlike other tasks. An online video tutorial will be of great help if you wish to learn how to effectively use a video editor and perform specific video editing tasks.
Movi’s instructions explain how to add files to the program and how to edit videos when you first run it. Additionally, it organizes all video tutorials in one place in the Notification panel for performing specific video editing tasks. You can play a tutorial by scrolling down. Every week, the tutorials are updated, greatly reducing the time it takes to get started with this tool and inspiring us to create amazing videos we would never have dreamed of.
Final Verdict
There is no doubt that Movavi is a great video editor. It is often compared with the Movavi video suite, but they have their usage. It is feature-rich and comes with a variety of options. Overall, it is good, but if you are looking for something very professional and easy to use, it might not be the right option. Over the years, the Movavi downloads have increased rapidly, but if you want to create professional and eye-catching videos, then we recommend you to use the Filmora X video editor.
If you compare both these video editors, then you will find that Filmora is the more suitable option. It surpasses movavi video editor plus by every means whether you compare the features, video editing tools, or audio tools. It has a more intuitive interface, and you can try it for free for as long as you want. As soon as you are ready, you can purchase a subscription. So, what are you waiting for? Download it right now and give it a try.
For Win 7 or later (64-bit)
For macOS 10.12 or later
How to Convert Images Into Video - Kapwing Tutorial
There are effortless ways to turn images into a video with stylish text and transitions, plus licensed music for any occasion. Simply add your photos to our online video creation software and quickly rearrange your pictures to tell your story. Drag and drop your way to a stunning video in minutes. Which software can help you? Find it in this article.
Part 1. What is Kapwing?
Kapwing is a collaborative video editing solution designed to help users create creative content online. With Kawing, users can upload, edit and share files with other team members in one place. Just share the link with other users and work on the content together in real-time.
Kapwing allows users to create videos from scratch with Kapwing’s extensive library of pre-made templates, stock content, and assets. Users can add layers of images, videos, and audio to create the desired video. Because Kapwing is a cloud-based solution, all projects and work are automatically saved to the cloud. However, Kapwing only allows the first 3 projects to be free, after that the image or video will be automatically watermarked, and you need to purchase kapwing premium access for the best image or video quality.
Part 2. How to convert image to video with Kapwing?
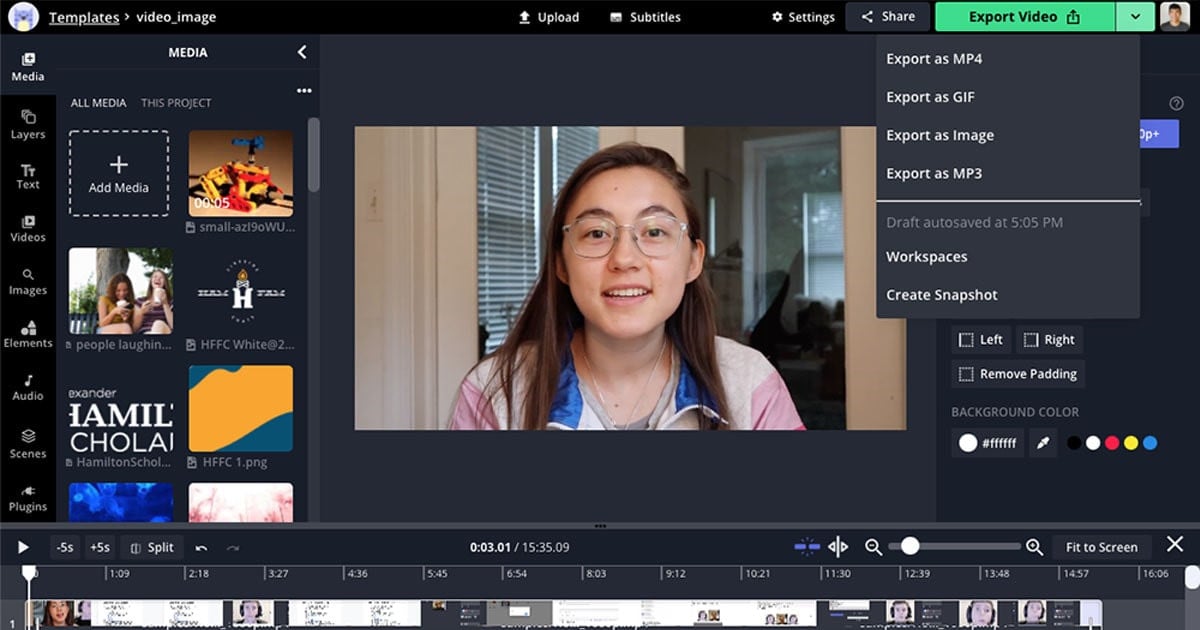
Easily convert images and GIFs to videos with music and stop scrolling with Kapwing’s image-to-video tool. With kapwing, you can turn your photos into a dynamic slideshow for a presentation or an engaging video for social media and YouTube. Even with minimal editing experience, you can turn a single image into a professional video.
Kapwing supports turning a single image into a video, as well as joining multiple images one by one into a slideshow-style video. With an intuitive timeline and the ability to specify the duration of each image, you won’t need to read a long tutorial to convert an image to a video with this easy online tool. Follow the steps below to convert your images to videos using kapwing.
Step1Upload your image or images
Upload an image or set of images directly to Kapwing. You can also embed a link to a .png or .jpg on the web. Once uploaded, your images will appear on the canvas as a collage.
Step2Select time and size
Select the image and find the duration dropdown in the right edit menu. Use the “adjust duration“ dropdown to choose how long you want your output video to be. You can also resize the image to a different aspect ratio. Crop, add music, set the background color, and more with Kapwing’s simple editor. If you have uploaded multiple images, arrange the photos in the correct order to make the presentation perfect.
Step3Export and share
Just click Export and your final video will be created. The output file is MP4. Kapwing is completely free and requires no downloads. Enjoy the new video you created with your image or images.
Part 3. Other 3 ways to convert image to video online
Even though an online image-to-video maker is not as powerful as photo and video editing software products like Filmora , you can still use this online image-to-video maker to create videos effortlessly. However, to save time, you should prepare all the material you want to use in your video in advance so that you can upload it to the platform of your choice and have your video ready in minutes. Let’s take a look at the image-to-video maker that you can use to create captivating social media videos.
2. Image to video

This website offers a lot of different tools that you can use to create videos from your photos, crop videos, or add 3D transitions between frames. Keep in mind that the maximum number of photos you can use in one video is limited to thirty. Once you get to the home page of this platform, just upload your photos and arrange them in any way you want.
You can also add text, music, or your company logo to the video, then follow the on-screen instructions to complete the process. You can preview the video after the platform has generated it and decide whether you want to download it or start over if you didn’t like the result.
3. Mp3Care
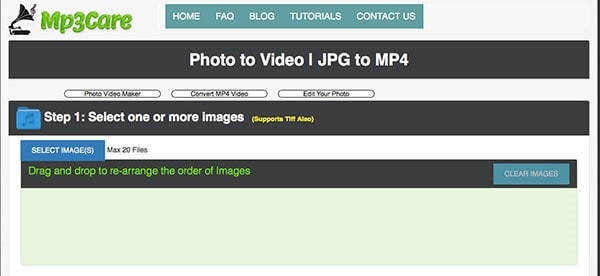
This web application makes converting JPEG files to MP4 video files a simple two-step process that only requires uploading photos and then selecting the time between the two images. The maximum number of photos you can use in a video is limited to just twenty, with the maximum duration of each image in the video not exceeding the 20-second mark. Adding transitions between images is also on the list of options this platform provides, but Mp3 Care Photo to Video lacks any other video editing features. Despite some obvious drawbacks, this online photo-to-video maker is still a great choice if you want to convert your photos to videos quickly and for free.
How to convert image to video on desktop using Filmora
Free Download For Win 7 or later(64-bit)
Free Download For macOS 10.14 or later
First, download and install Filmora on your Windows or Mac computer. In the following section, I will cover how to add photos to a video using Filmora on Windows. The procedure for adding photos to a video on Mac is similar.
Step1Import both photos and video files into Filmora
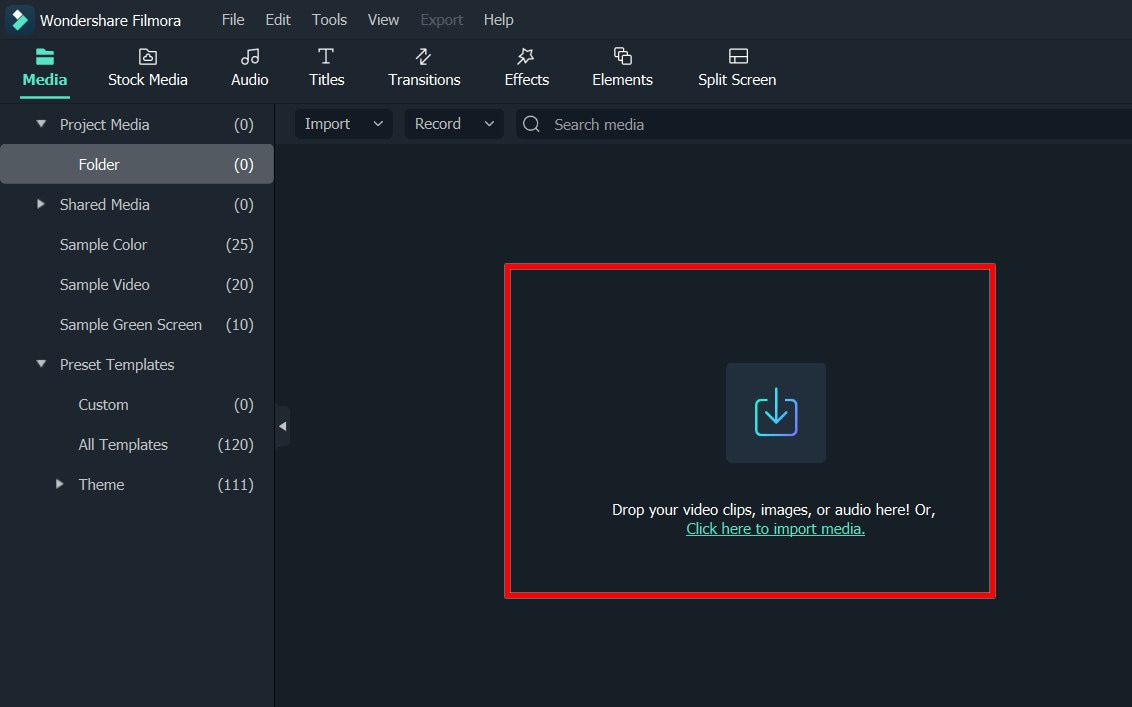
Launch Filmora Video Editor and click “New Project“ to get started. Click “Import“ and then “Import media files“ or click “Import media files here“ to find your video and photos on your computer. Double-click the files and they will be imported into the program. You can also directly drag and drop photo and video files into the video editing program. Then you need to set up the project such as aspect ratio and resolution.
Step2Add a photo to the video and apply some effects
After importing the files into the program, drag the video clip to the video editor timeline at the bottom of the screen. Then drag the photo to the track above the video. Click the “Play“ icon to preview the video. Move the photo on the track to the point where you want to view it and drag the end to shorten or increase the duration of the photo.
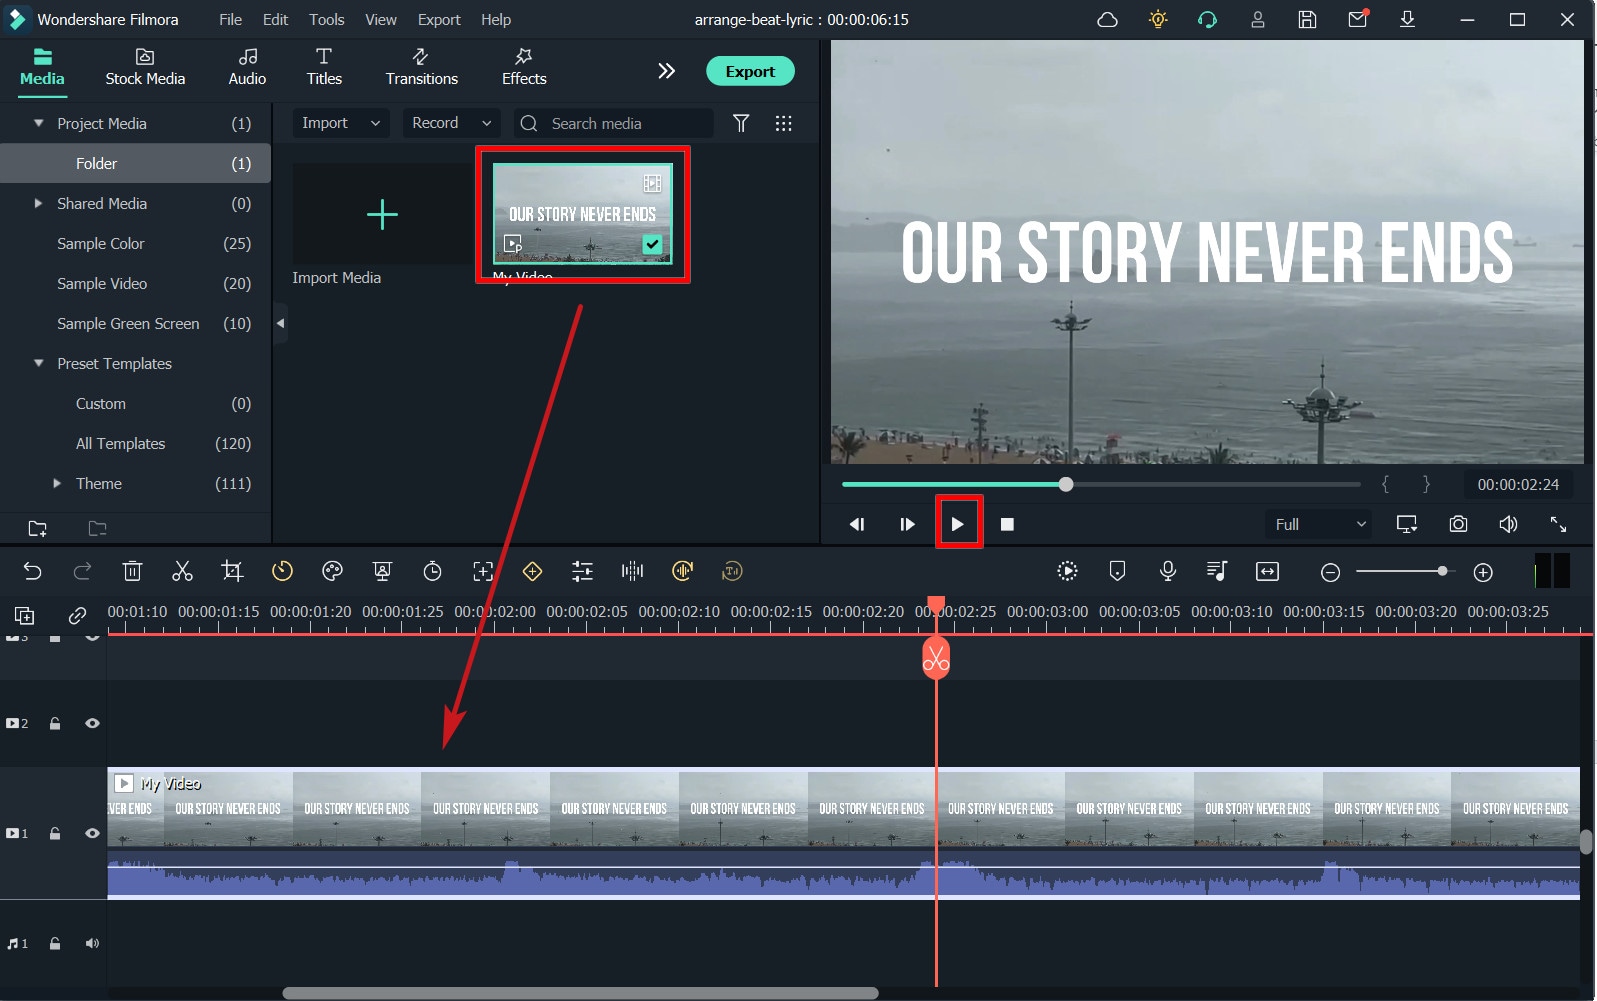
After that, edit your photo as you choose. Place the image anywhere you want, then drag its edge to change the size of the playing windows. The picture-in-picture track can also be customized using a variety of customizable settings provided by Filmora. To access the picture, color, and motion panel, double-click the additional image on the track. Here, you can select from more than 30 motion effects to animate the added photo, alter its saturation and hue, perform some color correction, or alter its transformation.
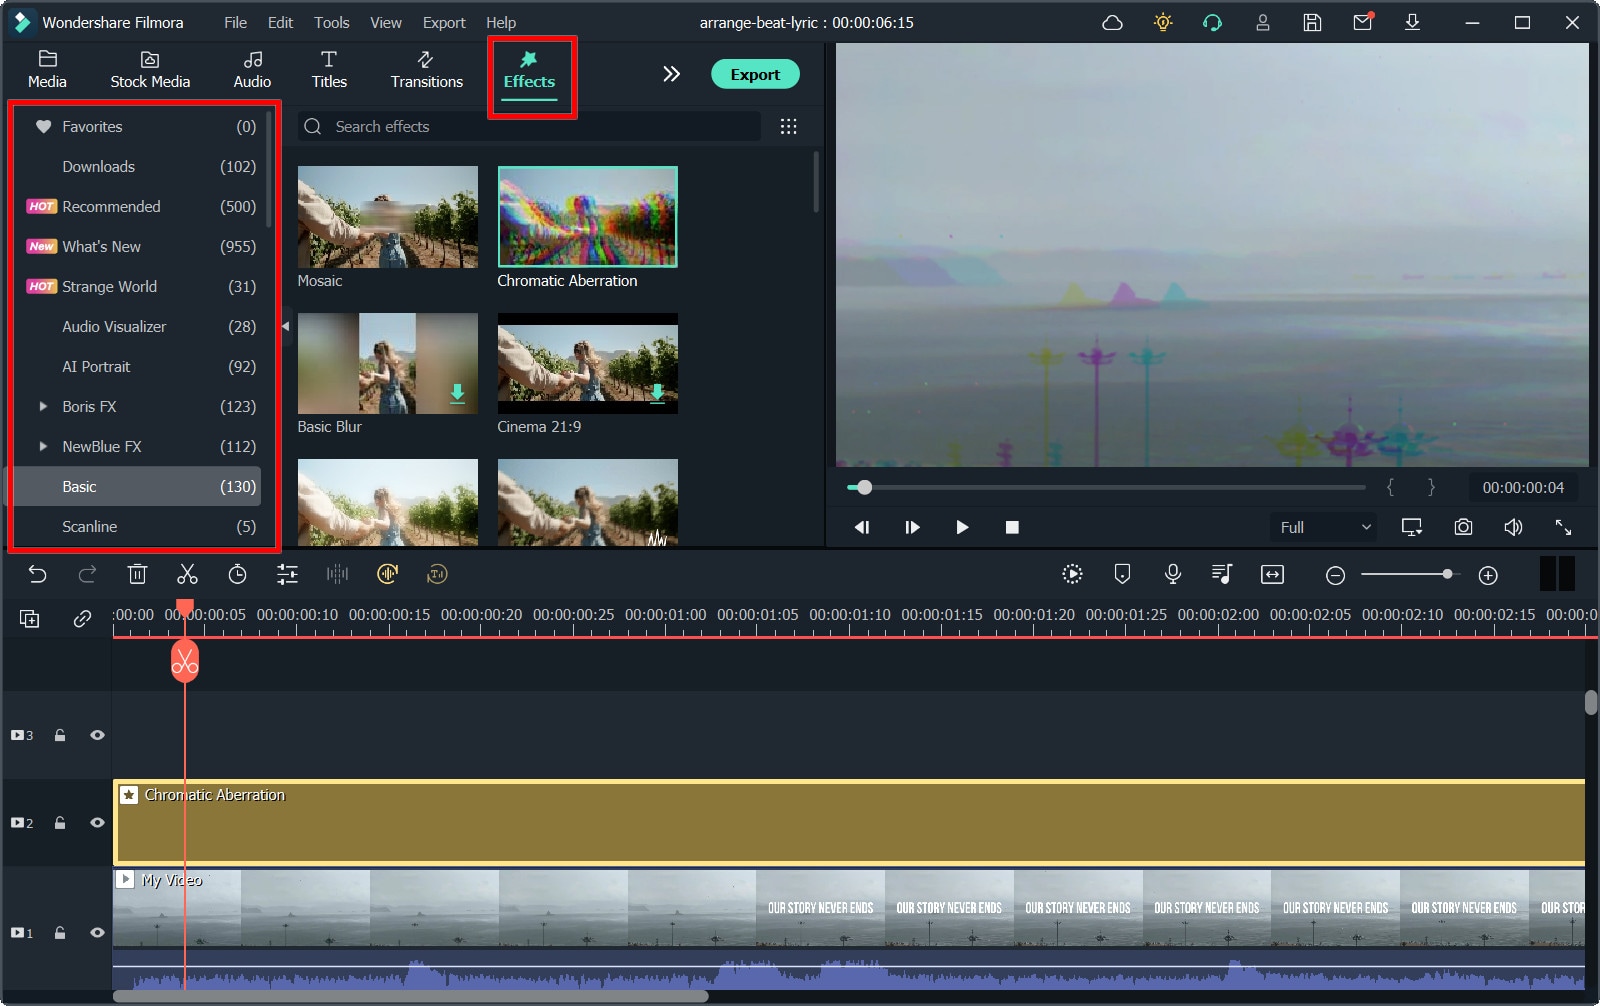
Then click the “Effects“ button for more mask and effect options. Go to the Utility option under Filters and then drag the image mask onto the photo on the timeline. Double click on the photo and then you can change the shape, height, width, and blending of the image mask. On the mask tab, you can shape the photo with a single click. You can also invert the mask to create a new shape. Choose one of the effects according to your wish to make your video more unique.
Step3Save the new video file
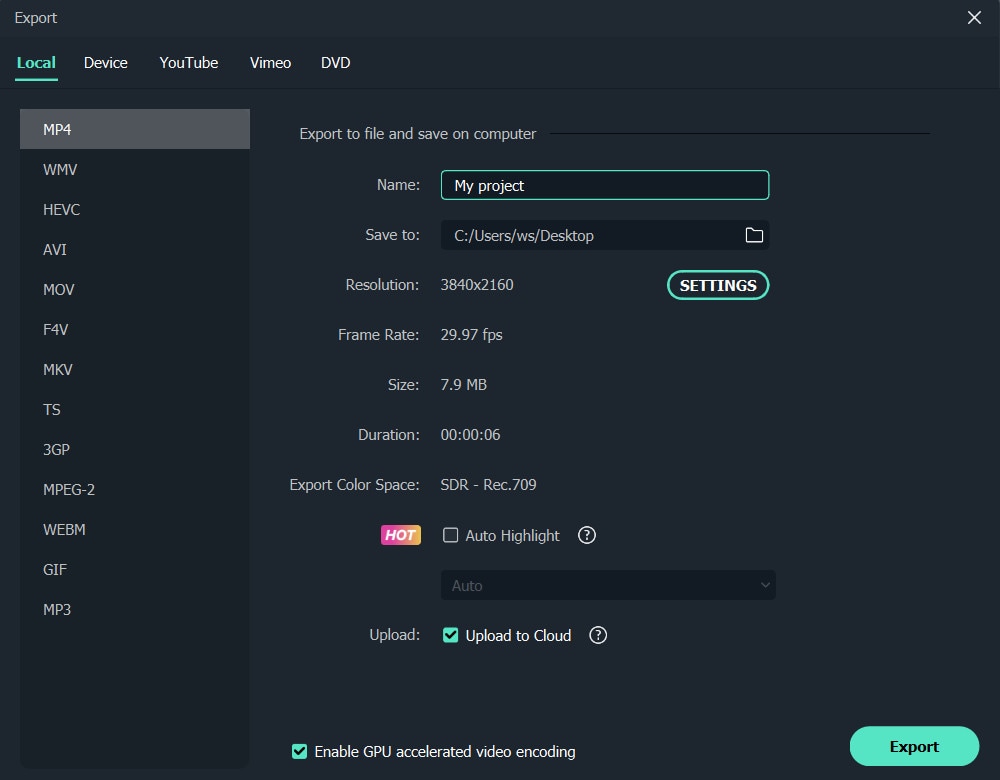
After adding a photo to a video and making basic adjustments, you can export it in various ways by pressing the “Export“ button. You can save it in different formats in the Format tab. If you want to play the video creation on iPod, iPhone, or iPad, click “Device“ and select the device from the list. You can also upload your video directly to YouTube or burn it to DVDs for playback on your TV using a DVD player. You can also share the video directly on social networks.
Conclusion
The above article talks about different software that can convert images to videos, hope it is helpful if you were wondering how to do that. As we can see above, using Filmora video editor, you will be more creative in making videos with fun or using Kapwing online software to convert your images to videos.
Free Download For Win 7 or later(64-bit)
Free Download For macOS 10.14 or later
Free Download For macOS 10.14 or later
First, download and install Filmora on your Windows or Mac computer. In the following section, I will cover how to add photos to a video using Filmora on Windows. The procedure for adding photos to a video on Mac is similar.
Step1Import both photos and video files into Filmora

Launch Filmora Video Editor and click “New Project“ to get started. Click “Import“ and then “Import media files“ or click “Import media files here“ to find your video and photos on your computer. Double-click the files and they will be imported into the program. You can also directly drag and drop photo and video files into the video editing program. Then you need to set up the project such as aspect ratio and resolution.
Step2Add a photo to the video and apply some effects
After importing the files into the program, drag the video clip to the video editor timeline at the bottom of the screen. Then drag the photo to the track above the video. Click the “Play“ icon to preview the video. Move the photo on the track to the point where you want to view it and drag the end to shorten or increase the duration of the photo.

After that, edit your photo as you choose. Place the image anywhere you want, then drag its edge to change the size of the playing windows. The picture-in-picture track can also be customized using a variety of customizable settings provided by Filmora. To access the picture, color, and motion panel, double-click the additional image on the track. Here, you can select from more than 30 motion effects to animate the added photo, alter its saturation and hue, perform some color correction, or alter its transformation.

Then click the “Effects“ button for more mask and effect options. Go to the Utility option under Filters and then drag the image mask onto the photo on the timeline. Double click on the photo and then you can change the shape, height, width, and blending of the image mask. On the mask tab, you can shape the photo with a single click. You can also invert the mask to create a new shape. Choose one of the effects according to your wish to make your video more unique.
Step3Save the new video file

After adding a photo to a video and making basic adjustments, you can export it in various ways by pressing the “Export“ button. You can save it in different formats in the Format tab. If you want to play the video creation on iPod, iPhone, or iPad, click “Device“ and select the device from the list. You can also upload your video directly to YouTube or burn it to DVDs for playback on your TV using a DVD player. You can also share the video directly on social networks.
Conclusion
The above article talks about different software that can convert images to videos, hope it is helpful if you were wondering how to do that. As we can see above, using Filmora video editor, you will be more creative in making videos with fun or using Kapwing online software to convert your images to videos.
Free Download For Win 7 or later(64-bit)
Free Download For macOS 10.14 or later
Also read:
- In 2024, Detailed Steps to Resize Video in Davinci Resolve
- Updated In 2024, Want to Know the Simplest Way to Match the Colors of Your Photos in Photoshop? The Following Discussion Will Help Match Color in Photoshop, Almost Effortlessly
- Updated In 2024, 10 Best Meme Text to Speech Tools Windows, Mac, Android, iPhone
- With Looping Videos, People Stay on Your Site Longer, Boosting Engagement. With Video Being Watched on Mobile over 3X More than Any Other Content, Its an Essential Part of Mobile Advertising for 2024
- Something That You Should Know About MP4 Video Format for 2024
- 100 Working Methods to Learn How to Rotate TikTok Video for 2024
- Updated In 2024, Add Zoom Blur Effect In Photoshop Step by Step
- New Guide To Make a YouTube Intro by Filmora for 2024
- Updated In 2024, In This Article, We Will Cover the Stages of Film Production You Need to Keep in Mind.Without Further Ado, Lets Get Started
- How to Upload the Video to Twitch? Well, if You Dont Know the Process, This Detailed Guide Will Help You. While Explaining the Process, This Article Will Also Let You Know some Twitch Video Upload Guidelines
- Updated Spooky Halloween Best 15+ Halloween Countdown Video Clips for 2024
- 2024 Approved You Need to Follow Certain Steps to Complete Your Project. In the Section Below, We Will Discuss in Detail the Steps to Make a Movie From Windows Movie Maker
- New How to Make Falling Text Effect in Filmora, In 2024
- Updated How to Remove or Mute Audio in Video with Android Phones, In 2024
- How to Export iMovie?
- How to Save As MP4 File on Windows Movie Maker, In 2024
- In 2024, The Best Android Unlock Software For Vivo Y100A Device Top 5 Picks to Remove Android Locks
- Oppo Find X6 Pro Camera Not Working Unexpected Error? Fix It Now | Dr.fone
- How to Factory Reset Xiaomi Redmi Note 12 4G If I Forgot Security Code or Password? | Dr.fone
- How To Reset Your Apple iPhone 6 Plus? | Dr.fone
- 6 Ways to Change Spotify Location On Your Xiaomi Redmi Note 12 Pro 5G | Dr.fone
- Top 10 AirPlay Apps in Infinix Zero 30 5G for Streaming | Dr.fone
- In 2024, How to Remove Apple iPhone 7 Activation Lock
- In 2024, The Magnificent Art of Pokemon Go Streaming On Poco M6 5G? | Dr.fone
- Best Ways on How to Unlock/Bypass/Swipe/Remove Vivo V30 Lite 5G Fingerprint Lock
- 3 Easy Ways to Factory Reset a Locked iPhone 11 Pro Max Without iTunes
- Title: Now, You Can Also Apply the Stranger Things Upside Down Effect to Your Video! This Effect Combines Camera Tricks and Video Editing Within Filmora to Transition From the Normal World Into the Upside Down
- Author: Morgan
- Created at : 2024-05-19 05:11:42
- Updated at : 2024-05-20 05:11:42
- Link: https://ai-video-editing.techidaily.com/now-you-can-also-apply-the-stranger-things-upside-down-effect-to-your-video-this-effect-combines-camera-tricks-and-video-editing-within-filmora-to-transitio/
- License: This work is licensed under CC BY-NC-SA 4.0.


