:max_bytes(150000):strip_icc():format(webp)/GettyImages-597071115-37c5865742de421eafc8b7da4cc5a618.jpg)
OBS Green Screen Guide

OBS Green Screen Guide
OBS Studio is a free and open-source app for screen-casting and live streaming. Written in C/C++ and built with Qt, OBS Studio provides real-time capture, scene composition, recording, encoding, and broadcasting via the Real Time Messaging Protocol (RTMP).It can stream Videos to any RTMP supporting destination including YouTube, Twitch, Instagram and Facebook.
You only need one green screen software – OBS. The reason why OBS is the most recommended for streaming is because once you have set it up properly, you can do literally anything you can think of with the software (either with or without added plug-ins).
Chroma Key Settings in OBS
Chroma keying has become incredibly popular nowadays. People use it not just for gaming, but also in Zoom conferences, live interviews, talk shows, etc. Although it may feel complicated at first glance, setting up Chroma Key in OBS Studio is actually incredibly easy.
Have a look at the simple steps you need to take to set up a green screen in OBS:
- Make sure you have the following equipment prepared: a solid green background, webcam or video camera, lighting, and OBS Studio.
- Download the latest stable version of OBS Studio from the official website and install the software. Open OBS and let the Auto-Configuration Wizard optimize the software’s settings based on your hardware.
- Now you can add a video source.
- Right-click on the video source you’ve created and select Filter.
- Click the + button under the Effects Filters section and select Chroma Key.
- Type in a name for this effect layer.
- After you add a chroma key, OBS will automatically create and adjust the baseline settings for the filter. You can experiment with the sliders and settle when you are satisfied with the result.
- Make sure you aren’t wearing any green or reflective material. You can double-check the performance on the preview screen.
- If things are working smoothly, you are all set to start streaming with the green screen on.
Pro tip:
You can follow the instructions above and live stream to multiple platforms at once with Restream. Multistreaming to platforms like YouTube, Facebook, Twitter, Twitch, and LinkedIn allows you to drastically increase the audience reach and grow your followers.
How to make OBS green screen settings better
Using green screens for filmmaking isn’t the most complicated or difficult thing in the world but it certainly has its pitfalls. If you ask any experienced filmmaker what to look out for when using a green screen, chances are they’re going to mention lighting about a billion times and that’s for good reason.
Tips on How to make OBS green screen settings better
- Evenly light your green screen so you can get a good key.
- Watch out for light flares. Use some a matte box or your trusty paw to block out any unwanted light.
- When lighting, try to create as much separation between your subject and the green screen as you can.
- Shutter speed: Minimize motion blur by raising your shutter speed to 1/80 or 1/100
- Aperture: Setting your aperture to f4 or f5.6 will give you slightly more depth of field, which will blur and smooth out your green screen.
- Format: Set your camera to the best recording format it has.
- ISO: Try to avoid high ISOs.
Filmora
If you’re just starting out with video editing, or just want a simple program that works, Wondershare Filmora might be what you’re looking for. It has the essential tools, and anyone can learn to use it easily.
Wondershare Filmora is the one of best video editing software with cool features that compares to other competing video editing Softwares. Many video editing programs claim to offer professional results; Filmora is one of a few consumer-level tools that actually delivers.
For Win 7 or later (64-bit)
For macOS 10.12 or later
Installation Steps
- Click the icon in the center of the Media Library to add files directly.
- Go File > Import Media > Import Media Files.
- Drag and drop to the Media Library directly.
While importing a media file, Wondershar Filmora may ask you if you wish to create a proxy file to accelerate the editing process. Select “Yes” to have a fast video editing experience.
You can also import video clips using your Touch Bar controls if your computer has Touch Bar.

Record a media file
Apart from the videos shot by your digital devices, you can also directly import media files by recording video from your webcam, capturing the computer screen, or recording a voice-over.
Record computer screen:
Click the “Record” option, and choose “Record PC Screen” to get the built-in Wondershare Screen Recorder. Hit the red button to get started. If you want to stop the recording, you can hit F9.
Record videos from webcam:
Also, click the “Record” option, and choose “Record from Webcam”. In the pop-up Video Recording window, click the red button to start recording and click it again to stop recording. Then click OK to save the recorded video file.
Record voice-over:
Choose “Record a voiceover” under the Record menu. It would be better to connect a microphone to your Mac for a better result. Hit the Record button, and it leaves you 3 seconds to get ready.
All the recorded media files will be saved into Media Library automatically and you can drag them to the Timeline for editing.
Pro tip:
You can follow the instructions above and live stream to multiple platforms at once with Restream. Multistreaming to platforms like YouTube, Facebook, Twitter, Twitch, and LinkedIn allows you to drastically increase the audience reach and grow your followers.
How to make OBS green screen settings better
Using green screens for filmmaking isn’t the most complicated or difficult thing in the world but it certainly has its pitfalls. If you ask any experienced filmmaker what to look out for when using a green screen, chances are they’re going to mention lighting about a billion times and that’s for good reason.
Tips on How to make OBS green screen settings better
- Evenly light your green screen so you can get a good key.
- Watch out for light flares. Use some a matte box or your trusty paw to block out any unwanted light.
- When lighting, try to create as much separation between your subject and the green screen as you can.
- Shutter speed: Minimize motion blur by raising your shutter speed to 1/80 or 1/100
- Aperture: Setting your aperture to f4 or f5.6 will give you slightly more depth of field, which will blur and smooth out your green screen.
- Format: Set your camera to the best recording format it has.
- ISO: Try to avoid high ISOs.
Filmora
If you’re just starting out with video editing, or just want a simple program that works, Wondershare Filmora might be what you’re looking for. It has the essential tools, and anyone can learn to use it easily.
Wondershare Filmora is the one of best video editing software with cool features that compares to other competing video editing Softwares. Many video editing programs claim to offer professional results; Filmora is one of a few consumer-level tools that actually delivers.
For Win 7 or later (64-bit)
For macOS 10.12 or later
Installation Steps
- Click the icon in the center of the Media Library to add files directly.
- Go File > Import Media > Import Media Files.
- Drag and drop to the Media Library directly.
While importing a media file, Wondershar Filmora may ask you if you wish to create a proxy file to accelerate the editing process. Select “Yes” to have a fast video editing experience.
You can also import video clips using your Touch Bar controls if your computer has Touch Bar.

Record a media file
Apart from the videos shot by your digital devices, you can also directly import media files by recording video from your webcam, capturing the computer screen, or recording a voice-over.
Record computer screen:
Click the “Record” option, and choose “Record PC Screen” to get the built-in Wondershare Screen Recorder. Hit the red button to get started. If you want to stop the recording, you can hit F9.
Record videos from webcam:
Also, click the “Record” option, and choose “Record from Webcam”. In the pop-up Video Recording window, click the red button to start recording and click it again to stop recording. Then click OK to save the recorded video file.
Record voice-over:
Choose “Record a voiceover” under the Record menu. It would be better to connect a microphone to your Mac for a better result. Hit the Record button, and it leaves you 3 seconds to get ready.
All the recorded media files will be saved into Media Library automatically and you can drag them to the Timeline for editing.
Pro tip:
You can follow the instructions above and live stream to multiple platforms at once with Restream. Multistreaming to platforms like YouTube, Facebook, Twitter, Twitch, and LinkedIn allows you to drastically increase the audience reach and grow your followers.
How to make OBS green screen settings better
Using green screens for filmmaking isn’t the most complicated or difficult thing in the world but it certainly has its pitfalls. If you ask any experienced filmmaker what to look out for when using a green screen, chances are they’re going to mention lighting about a billion times and that’s for good reason.
Tips on How to make OBS green screen settings better
- Evenly light your green screen so you can get a good key.
- Watch out for light flares. Use some a matte box or your trusty paw to block out any unwanted light.
- When lighting, try to create as much separation between your subject and the green screen as you can.
- Shutter speed: Minimize motion blur by raising your shutter speed to 1/80 or 1/100
- Aperture: Setting your aperture to f4 or f5.6 will give you slightly more depth of field, which will blur and smooth out your green screen.
- Format: Set your camera to the best recording format it has.
- ISO: Try to avoid high ISOs.
Filmora
If you’re just starting out with video editing, or just want a simple program that works, Wondershare Filmora might be what you’re looking for. It has the essential tools, and anyone can learn to use it easily.
Wondershare Filmora is the one of best video editing software with cool features that compares to other competing video editing Softwares. Many video editing programs claim to offer professional results; Filmora is one of a few consumer-level tools that actually delivers.
For Win 7 or later (64-bit)
For macOS 10.12 or later
Installation Steps
- Click the icon in the center of the Media Library to add files directly.
- Go File > Import Media > Import Media Files.
- Drag and drop to the Media Library directly.
While importing a media file, Wondershar Filmora may ask you if you wish to create a proxy file to accelerate the editing process. Select “Yes” to have a fast video editing experience.
You can also import video clips using your Touch Bar controls if your computer has Touch Bar.

Record a media file
Apart from the videos shot by your digital devices, you can also directly import media files by recording video from your webcam, capturing the computer screen, or recording a voice-over.
Record computer screen:
Click the “Record” option, and choose “Record PC Screen” to get the built-in Wondershare Screen Recorder. Hit the red button to get started. If you want to stop the recording, you can hit F9.
Record videos from webcam:
Also, click the “Record” option, and choose “Record from Webcam”. In the pop-up Video Recording window, click the red button to start recording and click it again to stop recording. Then click OK to save the recorded video file.
Record voice-over:
Choose “Record a voiceover” under the Record menu. It would be better to connect a microphone to your Mac for a better result. Hit the Record button, and it leaves you 3 seconds to get ready.
All the recorded media files will be saved into Media Library automatically and you can drag them to the Timeline for editing.
Pro tip:
You can follow the instructions above and live stream to multiple platforms at once with Restream. Multistreaming to platforms like YouTube, Facebook, Twitter, Twitch, and LinkedIn allows you to drastically increase the audience reach and grow your followers.
How to make OBS green screen settings better
Using green screens for filmmaking isn’t the most complicated or difficult thing in the world but it certainly has its pitfalls. If you ask any experienced filmmaker what to look out for when using a green screen, chances are they’re going to mention lighting about a billion times and that’s for good reason.
Tips on How to make OBS green screen settings better
- Evenly light your green screen so you can get a good key.
- Watch out for light flares. Use some a matte box or your trusty paw to block out any unwanted light.
- When lighting, try to create as much separation between your subject and the green screen as you can.
- Shutter speed: Minimize motion blur by raising your shutter speed to 1/80 or 1/100
- Aperture: Setting your aperture to f4 or f5.6 will give you slightly more depth of field, which will blur and smooth out your green screen.
- Format: Set your camera to the best recording format it has.
- ISO: Try to avoid high ISOs.
Filmora
If you’re just starting out with video editing, or just want a simple program that works, Wondershare Filmora might be what you’re looking for. It has the essential tools, and anyone can learn to use it easily.
Wondershare Filmora is the one of best video editing software with cool features that compares to other competing video editing Softwares. Many video editing programs claim to offer professional results; Filmora is one of a few consumer-level tools that actually delivers.
For Win 7 or later (64-bit)
For macOS 10.12 or later
Installation Steps
- Click the icon in the center of the Media Library to add files directly.
- Go File > Import Media > Import Media Files.
- Drag and drop to the Media Library directly.
While importing a media file, Wondershar Filmora may ask you if you wish to create a proxy file to accelerate the editing process. Select “Yes” to have a fast video editing experience.
You can also import video clips using your Touch Bar controls if your computer has Touch Bar.

Record a media file
Apart from the videos shot by your digital devices, you can also directly import media files by recording video from your webcam, capturing the computer screen, or recording a voice-over.
Record computer screen:
Click the “Record” option, and choose “Record PC Screen” to get the built-in Wondershare Screen Recorder. Hit the red button to get started. If you want to stop the recording, you can hit F9.
Record videos from webcam:
Also, click the “Record” option, and choose “Record from Webcam”. In the pop-up Video Recording window, click the red button to start recording and click it again to stop recording. Then click OK to save the recorded video file.
Record voice-over:
Choose “Record a voiceover” under the Record menu. It would be better to connect a microphone to your Mac for a better result. Hit the Record button, and it leaves you 3 seconds to get ready.
All the recorded media files will be saved into Media Library automatically and you can drag them to the Timeline for editing.
Techniques You Never Heard of for Learning AI Marketing YouTube
Techniques You Never Heard of for Learning AI Marketing YouTube
An easy yet powerful editor
Numerous effects to choose from
Detailed tutorials provided by the official channel
YouTube is one of the largest entertainment websites, where you can watch, share, and create videos. Millions of active users on YouTube have taken premium subscriptions on YouTube to enjoy hassle-free entertainment. YouTube was launched back in 2005. With the passage of time and advancements in technology, YouTube has also evolved.

Artificial intelligence is one of the recent and most famous advancements in technology. The introduction of artificial intelligence in the industry has proved to be a boon. The introduction of artificial intelligence has made things easy to manage in every industry. AI can easily be applied in any industry be it manufacturing or the IT sector. Artificial intelligence has made work easier and increased the efficiency of people working in different areas. Even YouTube has started using AI techniques for many tasks. In this article, we have listed some of the applications of AI on YouTube.
In this article
01 [How Is YouTube Using Artificial Intelligence?](#Part 1)
02 [How Is YouTube Using AI to Recommend Videos?](#Part 2)
Part 1 How Is YouTube Using Artificial Intelligence?
Tools like artificial intelligence and machine learning have made things easier to manage. Even the introduction of Artificial Intelligence on YouTube has helped a lot to smoothen its procedure. YouTube being one of the most engaging websites has applied YouTube Intelligence to manage all its activities smoothly. Read further to know how YouTube is using artificial intelligence currently!
01Automatic Removal of Inappropriate Content
One of the main applications of AI on YouTube is to remove inappropriate content automatically. YouTube uses artificial intelligence and machine learning to remove the violative and inappropriate content from the platform. As this content was one of the main reasons for the rise in racism and terrorism. To avoid all these harmful after effects, YouTube introduced the “Trashy Video Classifier” to scan and examine the feedback.
Although these algorithms might not be 100% accurate, they can perform the task more easily and efficiently than the manual examination of the content. Due to these algorithms, it has become easier to automatically remove the controversial content from the platform immediately. AI aided feature helps in determining the inappropriate content faster. However, it doesn’t provide 100% accurate results. This is the reason why YouTube has a large team of human specialists to check the accuracy of determining violative content.
02Add New Video Effects
The introduction of artificial intelligence and machine learning in the market has made it easier to add new video effects without the use of any external equipment. You can now swap out backgrounds from videos with just one click due to the in-built AI features on YouTube. This AI neural feature is prepared by Google’s AI YouTube researchers to make it easier for the AI algorithms to understand video patterns. This feature makes it easier for the system to maintain the correct pace with the video.
03Maintain Age Restrictions
Being an online platform, YouTube is open to everyone. There are many creators and viewers on the platform with different interests. Moreover, it is accessible to all age groups, which makes it necessary to optimize the content according to the age groups. YouTube has always been very particular about the age-restricted content. A lot of content is published on the platform that can be harmful to the children’s minds and growth. YouTube uses different AI tools and algorithms to maintain the age restrictions of adult content.
YouTube has guaranteed that the mature content will not be accessible to the kids and youngsters aged below 13 years. It has also created a separate application for the kids to maintain the age restrictions from the matured content.
Earlier, the YouTubers used to flag their content as mature themselves, but now the platform is planning to flag the content using machine learning technology. YouTube had also used machine learning technology to thwart the age-restricted content automatically in 2017.
04”Up Next” Feature
The “Up Next” feature of YouTube is also a result of artificial intelligence. With many creators uploading a large number of videos every minute, it was becoming difficult for the platform to manage the suggestion engine properly. So, YouTube has introduced the AI technique to streamline the recommendation process to maintain the real-time and latest suggestion.
This feature is a mix of two algorithms, one is used to optimize the suggestion engine according to the search history and watch history of the user, and the other is to determine according to the ranking. As the main aim is to provide the content so that the user can spend his/her maximum time watching YouTube videos. This helps in creating a better sidebar full of user-specific recommendations. YouTube’s special recommendation feature ensures to recommend different videos to the different viewers as per their interests.
05Training on Depth Prediction
YouTube has a lot of data stored that provides easy knowledge of AI algorithms. According to the recent data and announcement, it is now clear that Google’s AI YouTube researchers used the “mannequin challenge” to understand depth predictions.
In this challenge, they researched around 2000 groups, with 1 group in each video. Video had many people standing still like they have been frozen and one person was going through the scene to shoot the video. A better understanding of depth prediction can further help in generating the development of Augmented Reality (AR).
06Tackle Fake News
Among the different features of the most engaging online platform comes the ability to detect and tackle fake news and misleading content. YouTube can understand and detect fake news. With so many users on different social media platforms, it has now become common to spread fake and false news. Unlike other platforms, YouTube is using artificial intelligence to detect and remove misleading content that is against YouTube’s privacy policy.
YouTube understands that this type of content can be harmful to the audience and can be the reason for disputes among different communities. Hence, giving rise to racism and terrorism. To reduce its wrong impact on society, YouTube is using AI technology and removing this type of fake and misleading content. Around 11 million videos were removed from the platform within a single quarter. The introduction of AI has also proved that the technology works more effectively and efficiently rather than the manual removal of such content.
Part 2 How Is YouTube Using AI to Recommend Videos?
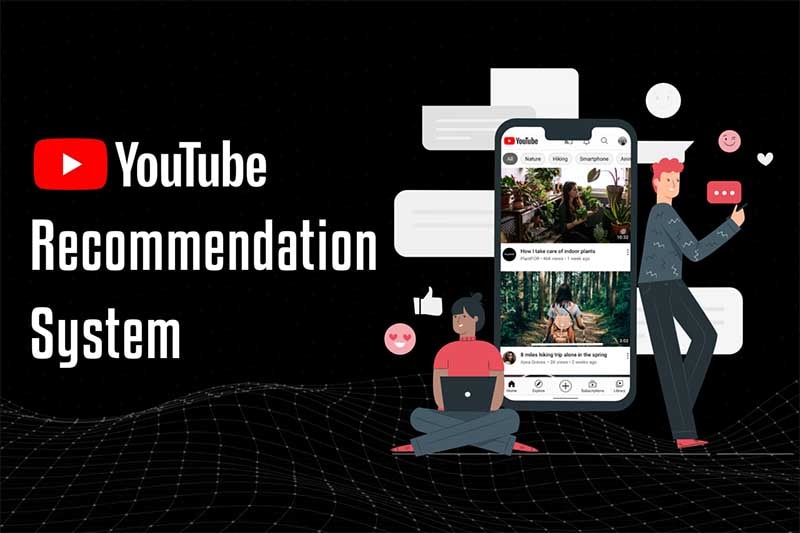
YouTube aims at finding the perfect video for each user separately and anticipating the users to spend more time on the platform. Keeping both these things in mind, it decided to use AI technology to recommend videos and optimize the suggestion panel. Just like Netflix, AI technology makes it easier for the platform to determine the best suggestions for different viewers. It recommends the videos after researching the user’s age, interests, watch time, etc.
YouTube generally focuses on increasing the watch time of the viewer, that’s why it recommends the videos keeping the user’s interests on priority. The goal is to watch more rather than watch the best.
YouTube uses different AI algorithms to understand things and recommend optimized videos to stand out from the crowd. First of all, it uses AI algorithms to understand the user’s interest by scanning his/her search history and watching history. It creates a list based on the findings and then ranks the videos as per the google rankings. Each video on YouTube has a different ranking.
YouTube has been changing its algorithms over time. Earlier, it used to rank videos according to view counts. But soon people understood the technique and started using the eye-catchy title and thumbnail to gain a large number of views. Due to this, viewers even started complaining about the content and YouTube changed its algorithms to resolve this issue.
YouTube introduced AI and ML technology to customize the recommendations in 2016. This introduction has made things easier for YouTube as well as its viewers. It has now announced to ban the “borderline content”.
For Win 7 or later (64-bit)
For macOS 10.12 or later
● Ending Thoughts →
● Applying AI on YouTube has made it easier for the platform to manage activities more effectively and efficiently. As a result, many new features are added to enhance the convenience and maintain the quality of the user experience.
● Moreover, YouTube is now experimenting with AI and ML for automatically adding video chapters. This feature will be beneficial for the content creators.
● It will assist them in creating and uploading, resulting in the elimination of the time used in adding timestamps manually. Even the creators are uploading AI-generated YouTube videos that are created with the help of an AI YouTube video maker.
● You can even learn about the different applications of AI and ML from different YouTube channels. Many accessible YouTube channels for machine learning are available on the platform.
● YouTube intelligence can also be seen on the homepage, recommendations, notifications, and subscriptions. The latest trending videos are also ranked with the help of artificial intelligence and machine learning.
YouTube is one of the largest entertainment websites, where you can watch, share, and create videos. Millions of active users on YouTube have taken premium subscriptions on YouTube to enjoy hassle-free entertainment. YouTube was launched back in 2005. With the passage of time and advancements in technology, YouTube has also evolved.

Artificial intelligence is one of the recent and most famous advancements in technology. The introduction of artificial intelligence in the industry has proved to be a boon. The introduction of artificial intelligence has made things easy to manage in every industry. AI can easily be applied in any industry be it manufacturing or the IT sector. Artificial intelligence has made work easier and increased the efficiency of people working in different areas. Even YouTube has started using AI techniques for many tasks. In this article, we have listed some of the applications of AI on YouTube.
In this article
01 [How Is YouTube Using Artificial Intelligence?](#Part 1)
02 [How Is YouTube Using AI to Recommend Videos?](#Part 2)
Part 1 How Is YouTube Using Artificial Intelligence?
Tools like artificial intelligence and machine learning have made things easier to manage. Even the introduction of Artificial Intelligence on YouTube has helped a lot to smoothen its procedure. YouTube being one of the most engaging websites has applied YouTube Intelligence to manage all its activities smoothly. Read further to know how YouTube is using artificial intelligence currently!

01Automatic Removal of Inappropriate Content
One of the main applications of AI on YouTube is to remove inappropriate content automatically. YouTube uses artificial intelligence and machine learning to remove the violative and inappropriate content from the platform. As this content was one of the main reasons for the rise in racism and terrorism. To avoid all these harmful after effects, YouTube introduced the “Trashy Video Classifier” to scan and examine the feedback.
Although these algorithms might not be 100% accurate, they can perform the task more easily and efficiently than the manual examination of the content. Due to these algorithms, it has become easier to automatically remove the controversial content from the platform immediately. AI aided feature helps in determining the inappropriate content faster. However, it doesn’t provide 100% accurate results. This is the reason why YouTube has a large team of human specialists to check the accuracy of determining violative content.
02Add New Video Effects
The introduction of artificial intelligence and machine learning in the market has made it easier to add new video effects without the use of any external equipment. You can now swap out backgrounds from videos with just one click due to the in-built AI features on YouTube. This AI neural feature is prepared by Google’s AI YouTube researchers to make it easier for the AI algorithms to understand video patterns. This feature makes it easier for the system to maintain the correct pace with the video.
03Maintain Age Restrictions
Being an online platform, YouTube is open to everyone. There are many creators and viewers on the platform with different interests. Moreover, it is accessible to all age groups, which makes it necessary to optimize the content according to the age groups. YouTube has always been very particular about the age-restricted content. A lot of content is published on the platform that can be harmful to the children’s minds and growth. YouTube uses different AI tools and algorithms to maintain the age restrictions of adult content.
YouTube has guaranteed that the mature content will not be accessible to the kids and youngsters aged below 13 years. It has also created a separate application for the kids to maintain the age restrictions from the matured content.
Earlier, the YouTubers used to flag their content as mature themselves, but now the platform is planning to flag the content using machine learning technology. YouTube had also used machine learning technology to thwart the age-restricted content automatically in 2017.
04”Up Next” Feature
The “Up Next” feature of YouTube is also a result of artificial intelligence. With many creators uploading a large number of videos every minute, it was becoming difficult for the platform to manage the suggestion engine properly. So, YouTube has introduced the AI technique to streamline the recommendation process to maintain the real-time and latest suggestion.
This feature is a mix of two algorithms, one is used to optimize the suggestion engine according to the search history and watch history of the user, and the other is to determine according to the ranking. As the main aim is to provide the content so that the user can spend his/her maximum time watching YouTube videos. This helps in creating a better sidebar full of user-specific recommendations. YouTube’s special recommendation feature ensures to recommend different videos to the different viewers as per their interests.
05Training on Depth Prediction
YouTube has a lot of data stored that provides easy knowledge of AI algorithms. According to the recent data and announcement, it is now clear that Google’s AI YouTube researchers used the “mannequin challenge” to understand depth predictions.
In this challenge, they researched around 2000 groups, with 1 group in each video. Video had many people standing still like they have been frozen and one person was going through the scene to shoot the video. A better understanding of depth prediction can further help in generating the development of Augmented Reality (AR).
06Tackle Fake News
Among the different features of the most engaging online platform comes the ability to detect and tackle fake news and misleading content. YouTube can understand and detect fake news. With so many users on different social media platforms, it has now become common to spread fake and false news. Unlike other platforms, YouTube is using artificial intelligence to detect and remove misleading content that is against YouTube’s privacy policy.
YouTube understands that this type of content can be harmful to the audience and can be the reason for disputes among different communities. Hence, giving rise to racism and terrorism. To reduce its wrong impact on society, YouTube is using AI technology and removing this type of fake and misleading content. Around 11 million videos were removed from the platform within a single quarter. The introduction of AI has also proved that the technology works more effectively and efficiently rather than the manual removal of such content.
Part 2 How Is YouTube Using AI to Recommend Videos?

YouTube aims at finding the perfect video for each user separately and anticipating the users to spend more time on the platform. Keeping both these things in mind, it decided to use AI technology to recommend videos and optimize the suggestion panel. Just like Netflix, AI technology makes it easier for the platform to determine the best suggestions for different viewers. It recommends the videos after researching the user’s age, interests, watch time, etc.
YouTube generally focuses on increasing the watch time of the viewer, that’s why it recommends the videos keeping the user’s interests on priority. The goal is to watch more rather than watch the best.
YouTube uses different AI algorithms to understand things and recommend optimized videos to stand out from the crowd. First of all, it uses AI algorithms to understand the user’s interest by scanning his/her search history and watching history. It creates a list based on the findings and then ranks the videos as per the google rankings. Each video on YouTube has a different ranking.
YouTube has been changing its algorithms over time. Earlier, it used to rank videos according to view counts. But soon people understood the technique and started using the eye-catchy title and thumbnail to gain a large number of views. Due to this, viewers even started complaining about the content and YouTube changed its algorithms to resolve this issue.
YouTube introduced AI and ML technology to customize the recommendations in 2016. This introduction has made things easier for YouTube as well as its viewers. It has now announced to ban the “borderline content”.
For Win 7 or later (64-bit)
For macOS 10.12 or later
● Ending Thoughts →
● Applying AI on YouTube has made it easier for the platform to manage activities more effectively and efficiently. As a result, many new features are added to enhance the convenience and maintain the quality of the user experience.
● Moreover, YouTube is now experimenting with AI and ML for automatically adding video chapters. This feature will be beneficial for the content creators.
● It will assist them in creating and uploading, resulting in the elimination of the time used in adding timestamps manually. Even the creators are uploading AI-generated YouTube videos that are created with the help of an AI YouTube video maker.
● You can even learn about the different applications of AI and ML from different YouTube channels. Many accessible YouTube channels for machine learning are available on the platform.
● YouTube intelligence can also be seen on the homepage, recommendations, notifications, and subscriptions. The latest trending videos are also ranked with the help of artificial intelligence and machine learning.
YouTube is one of the largest entertainment websites, where you can watch, share, and create videos. Millions of active users on YouTube have taken premium subscriptions on YouTube to enjoy hassle-free entertainment. YouTube was launched back in 2005. With the passage of time and advancements in technology, YouTube has also evolved.

Artificial intelligence is one of the recent and most famous advancements in technology. The introduction of artificial intelligence in the industry has proved to be a boon. The introduction of artificial intelligence has made things easy to manage in every industry. AI can easily be applied in any industry be it manufacturing or the IT sector. Artificial intelligence has made work easier and increased the efficiency of people working in different areas. Even YouTube has started using AI techniques for many tasks. In this article, we have listed some of the applications of AI on YouTube.
In this article
01 [How Is YouTube Using Artificial Intelligence?](#Part 1)
02 [How Is YouTube Using AI to Recommend Videos?](#Part 2)
Part 1 How Is YouTube Using Artificial Intelligence?
Tools like artificial intelligence and machine learning have made things easier to manage. Even the introduction of Artificial Intelligence on YouTube has helped a lot to smoothen its procedure. YouTube being one of the most engaging websites has applied YouTube Intelligence to manage all its activities smoothly. Read further to know how YouTube is using artificial intelligence currently!

01Automatic Removal of Inappropriate Content
One of the main applications of AI on YouTube is to remove inappropriate content automatically. YouTube uses artificial intelligence and machine learning to remove the violative and inappropriate content from the platform. As this content was one of the main reasons for the rise in racism and terrorism. To avoid all these harmful after effects, YouTube introduced the “Trashy Video Classifier” to scan and examine the feedback.
Although these algorithms might not be 100% accurate, they can perform the task more easily and efficiently than the manual examination of the content. Due to these algorithms, it has become easier to automatically remove the controversial content from the platform immediately. AI aided feature helps in determining the inappropriate content faster. However, it doesn’t provide 100% accurate results. This is the reason why YouTube has a large team of human specialists to check the accuracy of determining violative content.
02Add New Video Effects
The introduction of artificial intelligence and machine learning in the market has made it easier to add new video effects without the use of any external equipment. You can now swap out backgrounds from videos with just one click due to the in-built AI features on YouTube. This AI neural feature is prepared by Google’s AI YouTube researchers to make it easier for the AI algorithms to understand video patterns. This feature makes it easier for the system to maintain the correct pace with the video.
03Maintain Age Restrictions
Being an online platform, YouTube is open to everyone. There are many creators and viewers on the platform with different interests. Moreover, it is accessible to all age groups, which makes it necessary to optimize the content according to the age groups. YouTube has always been very particular about the age-restricted content. A lot of content is published on the platform that can be harmful to the children’s minds and growth. YouTube uses different AI tools and algorithms to maintain the age restrictions of adult content.
YouTube has guaranteed that the mature content will not be accessible to the kids and youngsters aged below 13 years. It has also created a separate application for the kids to maintain the age restrictions from the matured content.
Earlier, the YouTubers used to flag their content as mature themselves, but now the platform is planning to flag the content using machine learning technology. YouTube had also used machine learning technology to thwart the age-restricted content automatically in 2017.
04”Up Next” Feature
The “Up Next” feature of YouTube is also a result of artificial intelligence. With many creators uploading a large number of videos every minute, it was becoming difficult for the platform to manage the suggestion engine properly. So, YouTube has introduced the AI technique to streamline the recommendation process to maintain the real-time and latest suggestion.
This feature is a mix of two algorithms, one is used to optimize the suggestion engine according to the search history and watch history of the user, and the other is to determine according to the ranking. As the main aim is to provide the content so that the user can spend his/her maximum time watching YouTube videos. This helps in creating a better sidebar full of user-specific recommendations. YouTube’s special recommendation feature ensures to recommend different videos to the different viewers as per their interests.
05Training on Depth Prediction
YouTube has a lot of data stored that provides easy knowledge of AI algorithms. According to the recent data and announcement, it is now clear that Google’s AI YouTube researchers used the “mannequin challenge” to understand depth predictions.
In this challenge, they researched around 2000 groups, with 1 group in each video. Video had many people standing still like they have been frozen and one person was going through the scene to shoot the video. A better understanding of depth prediction can further help in generating the development of Augmented Reality (AR).
06Tackle Fake News
Among the different features of the most engaging online platform comes the ability to detect and tackle fake news and misleading content. YouTube can understand and detect fake news. With so many users on different social media platforms, it has now become common to spread fake and false news. Unlike other platforms, YouTube is using artificial intelligence to detect and remove misleading content that is against YouTube’s privacy policy.
YouTube understands that this type of content can be harmful to the audience and can be the reason for disputes among different communities. Hence, giving rise to racism and terrorism. To reduce its wrong impact on society, YouTube is using AI technology and removing this type of fake and misleading content. Around 11 million videos were removed from the platform within a single quarter. The introduction of AI has also proved that the technology works more effectively and efficiently rather than the manual removal of such content.
Part 2 How Is YouTube Using AI to Recommend Videos?

YouTube aims at finding the perfect video for each user separately and anticipating the users to spend more time on the platform. Keeping both these things in mind, it decided to use AI technology to recommend videos and optimize the suggestion panel. Just like Netflix, AI technology makes it easier for the platform to determine the best suggestions for different viewers. It recommends the videos after researching the user’s age, interests, watch time, etc.
YouTube generally focuses on increasing the watch time of the viewer, that’s why it recommends the videos keeping the user’s interests on priority. The goal is to watch more rather than watch the best.
YouTube uses different AI algorithms to understand things and recommend optimized videos to stand out from the crowd. First of all, it uses AI algorithms to understand the user’s interest by scanning his/her search history and watching history. It creates a list based on the findings and then ranks the videos as per the google rankings. Each video on YouTube has a different ranking.
YouTube has been changing its algorithms over time. Earlier, it used to rank videos according to view counts. But soon people understood the technique and started using the eye-catchy title and thumbnail to gain a large number of views. Due to this, viewers even started complaining about the content and YouTube changed its algorithms to resolve this issue.
YouTube introduced AI and ML technology to customize the recommendations in 2016. This introduction has made things easier for YouTube as well as its viewers. It has now announced to ban the “borderline content”.
For Win 7 or later (64-bit)
For macOS 10.12 or later
● Ending Thoughts →
● Applying AI on YouTube has made it easier for the platform to manage activities more effectively and efficiently. As a result, many new features are added to enhance the convenience and maintain the quality of the user experience.
● Moreover, YouTube is now experimenting with AI and ML for automatically adding video chapters. This feature will be beneficial for the content creators.
● It will assist them in creating and uploading, resulting in the elimination of the time used in adding timestamps manually. Even the creators are uploading AI-generated YouTube videos that are created with the help of an AI YouTube video maker.
● You can even learn about the different applications of AI and ML from different YouTube channels. Many accessible YouTube channels for machine learning are available on the platform.
● YouTube intelligence can also be seen on the homepage, recommendations, notifications, and subscriptions. The latest trending videos are also ranked with the help of artificial intelligence and machine learning.
YouTube is one of the largest entertainment websites, where you can watch, share, and create videos. Millions of active users on YouTube have taken premium subscriptions on YouTube to enjoy hassle-free entertainment. YouTube was launched back in 2005. With the passage of time and advancements in technology, YouTube has also evolved.

Artificial intelligence is one of the recent and most famous advancements in technology. The introduction of artificial intelligence in the industry has proved to be a boon. The introduction of artificial intelligence has made things easy to manage in every industry. AI can easily be applied in any industry be it manufacturing or the IT sector. Artificial intelligence has made work easier and increased the efficiency of people working in different areas. Even YouTube has started using AI techniques for many tasks. In this article, we have listed some of the applications of AI on YouTube.
In this article
01 [How Is YouTube Using Artificial Intelligence?](#Part 1)
02 [How Is YouTube Using AI to Recommend Videos?](#Part 2)
Part 1 How Is YouTube Using Artificial Intelligence?
Tools like artificial intelligence and machine learning have made things easier to manage. Even the introduction of Artificial Intelligence on YouTube has helped a lot to smoothen its procedure. YouTube being one of the most engaging websites has applied YouTube Intelligence to manage all its activities smoothly. Read further to know how YouTube is using artificial intelligence currently!

01Automatic Removal of Inappropriate Content
One of the main applications of AI on YouTube is to remove inappropriate content automatically. YouTube uses artificial intelligence and machine learning to remove the violative and inappropriate content from the platform. As this content was one of the main reasons for the rise in racism and terrorism. To avoid all these harmful after effects, YouTube introduced the “Trashy Video Classifier” to scan and examine the feedback.
Although these algorithms might not be 100% accurate, they can perform the task more easily and efficiently than the manual examination of the content. Due to these algorithms, it has become easier to automatically remove the controversial content from the platform immediately. AI aided feature helps in determining the inappropriate content faster. However, it doesn’t provide 100% accurate results. This is the reason why YouTube has a large team of human specialists to check the accuracy of determining violative content.
02Add New Video Effects
The introduction of artificial intelligence and machine learning in the market has made it easier to add new video effects without the use of any external equipment. You can now swap out backgrounds from videos with just one click due to the in-built AI features on YouTube. This AI neural feature is prepared by Google’s AI YouTube researchers to make it easier for the AI algorithms to understand video patterns. This feature makes it easier for the system to maintain the correct pace with the video.
03Maintain Age Restrictions
Being an online platform, YouTube is open to everyone. There are many creators and viewers on the platform with different interests. Moreover, it is accessible to all age groups, which makes it necessary to optimize the content according to the age groups. YouTube has always been very particular about the age-restricted content. A lot of content is published on the platform that can be harmful to the children’s minds and growth. YouTube uses different AI tools and algorithms to maintain the age restrictions of adult content.
YouTube has guaranteed that the mature content will not be accessible to the kids and youngsters aged below 13 years. It has also created a separate application for the kids to maintain the age restrictions from the matured content.
Earlier, the YouTubers used to flag their content as mature themselves, but now the platform is planning to flag the content using machine learning technology. YouTube had also used machine learning technology to thwart the age-restricted content automatically in 2017.
04”Up Next” Feature
The “Up Next” feature of YouTube is also a result of artificial intelligence. With many creators uploading a large number of videos every minute, it was becoming difficult for the platform to manage the suggestion engine properly. So, YouTube has introduced the AI technique to streamline the recommendation process to maintain the real-time and latest suggestion.
This feature is a mix of two algorithms, one is used to optimize the suggestion engine according to the search history and watch history of the user, and the other is to determine according to the ranking. As the main aim is to provide the content so that the user can spend his/her maximum time watching YouTube videos. This helps in creating a better sidebar full of user-specific recommendations. YouTube’s special recommendation feature ensures to recommend different videos to the different viewers as per their interests.
05Training on Depth Prediction
YouTube has a lot of data stored that provides easy knowledge of AI algorithms. According to the recent data and announcement, it is now clear that Google’s AI YouTube researchers used the “mannequin challenge” to understand depth predictions.
In this challenge, they researched around 2000 groups, with 1 group in each video. Video had many people standing still like they have been frozen and one person was going through the scene to shoot the video. A better understanding of depth prediction can further help in generating the development of Augmented Reality (AR).
06Tackle Fake News
Among the different features of the most engaging online platform comes the ability to detect and tackle fake news and misleading content. YouTube can understand and detect fake news. With so many users on different social media platforms, it has now become common to spread fake and false news. Unlike other platforms, YouTube is using artificial intelligence to detect and remove misleading content that is against YouTube’s privacy policy.
YouTube understands that this type of content can be harmful to the audience and can be the reason for disputes among different communities. Hence, giving rise to racism and terrorism. To reduce its wrong impact on society, YouTube is using AI technology and removing this type of fake and misleading content. Around 11 million videos were removed from the platform within a single quarter. The introduction of AI has also proved that the technology works more effectively and efficiently rather than the manual removal of such content.
Part 2 How Is YouTube Using AI to Recommend Videos?

YouTube aims at finding the perfect video for each user separately and anticipating the users to spend more time on the platform. Keeping both these things in mind, it decided to use AI technology to recommend videos and optimize the suggestion panel. Just like Netflix, AI technology makes it easier for the platform to determine the best suggestions for different viewers. It recommends the videos after researching the user’s age, interests, watch time, etc.
YouTube generally focuses on increasing the watch time of the viewer, that’s why it recommends the videos keeping the user’s interests on priority. The goal is to watch more rather than watch the best.
YouTube uses different AI algorithms to understand things and recommend optimized videos to stand out from the crowd. First of all, it uses AI algorithms to understand the user’s interest by scanning his/her search history and watching history. It creates a list based on the findings and then ranks the videos as per the google rankings. Each video on YouTube has a different ranking.
YouTube has been changing its algorithms over time. Earlier, it used to rank videos according to view counts. But soon people understood the technique and started using the eye-catchy title and thumbnail to gain a large number of views. Due to this, viewers even started complaining about the content and YouTube changed its algorithms to resolve this issue.
YouTube introduced AI and ML technology to customize the recommendations in 2016. This introduction has made things easier for YouTube as well as its viewers. It has now announced to ban the “borderline content”.
For Win 7 or later (64-bit)
For macOS 10.12 or later
● Ending Thoughts →
● Applying AI on YouTube has made it easier for the platform to manage activities more effectively and efficiently. As a result, many new features are added to enhance the convenience and maintain the quality of the user experience.
● Moreover, YouTube is now experimenting with AI and ML for automatically adding video chapters. This feature will be beneficial for the content creators.
● It will assist them in creating and uploading, resulting in the elimination of the time used in adding timestamps manually. Even the creators are uploading AI-generated YouTube videos that are created with the help of an AI YouTube video maker.
● You can even learn about the different applications of AI and ML from different YouTube channels. Many accessible YouTube channels for machine learning are available on the platform.
● YouTube intelligence can also be seen on the homepage, recommendations, notifications, and subscriptions. The latest trending videos are also ranked with the help of artificial intelligence and machine learning.
3 Methods to Combine 2 or 3 Videos Into 1
You’ll need to combine the video segments you just recorded to create a beautiful video most of the time. You may mix and merge multiple video clips using a variety of desktop applications, smartphone apps, and web resources. You don’t have to try each one to see which one is the best for merging video clips in multiple formats, frame rates, or even aspect ratios.
This guide is to help you select the ways that meet your needs, and it is easy for you to combine 2 or more videos into one video. Therefore, the four ways to combine 2 or 3 videos or more into one include the following with a step-by-step guide:
Combining 2 or 3 Videos into 1 Using Filmora
Filmora Video Editor is a video editing software which allows you to merge multiple videos and edit them in the best way you can. Filmora Video Merger makes adding videos, audio files, and images simple. You can effortlessly combine numerous films into one with Filmora video editing software and apply transitions, overlays, filters, and many other features.
For Win 7 or later (64-bit)
For macOS 10.14 or later
Follow the step-by-step guide to merge videos using filmora:
Step 1: Import Video Files
You must load the video clips into Filmora after it has been installed. Then, to upload your video files, click Import or drag them directly to the media library. They’ll appear as thumbnails in the left pane when you’ve imported all of them.

Step 2: Drag and Drop
Drag & drop the files you wish to merge from the media library to the timeline, and the merged video will appear in real-time. The Preview window can be viewed by pressing the Play button. You can export it immediately if you’re happy with it, but you can also improve it by adding transitions, filters, or overlays.

Step 3: Trim or Add Transition (Optional)
Please click the video clip in the timeline to cut your videos. To cut, first, move the play head to the desired location, then click the slipt icon in the toolbar. After that, shift the play to a different frame. Then, finally, click the split icon again.

Select Transition from the top menu and drag your preferred transition effect between two clips. You can also Apply to Favourite any transition by right-clicking on it.

Step 4: Export Combined Video File
After making all the adjustments, click the EXPORT tab to export your videos. You may export or convert your original video formats to iPhone, iPad, HTC, Samsung Galaxy, and other portable devices. On your devices, they’ll run without a hitch.

Combining 2 or 3 Videos into 1 Using Photos App on Windows 10
Photos App on Windows 10 empowers you to experiment with the photos and videos to make them look better. It allows you to merge multiple videos and edit the video content, compare videos, and create films. It is easy to use and offers all basic viewing and fixing options.
Follow the step-by-step guide to merge videos using Photos App on Windows 10:
Step 1: Lauch the Photos App
You might wish to put all of the films or photographs you want to merge into one folder on your computer before going to the Photos app. It will aid in the speeding up of the entire procedure.
Type ‘Photos’ into your computer’s search bar, then click on the program that appears.

Step 2: Start a New Video Project
You want to start your video production after launching the Photos app. To do so, go to the top right corner of your screen and select New Video Project, which will take you to the editor mode.
The second part of this procedure is known by several titles in different versions of Windows 10’s Photos app, such as creating a video with music, creating a film with text, and a new video project.
Launching the editor mode directly from the photo if you’re using photos in your video project is also possible. In that case, consider the following:
- Open your file in the Photos app
- Select Edit & Create
- Select Create a movie with text from the drop-down menu.

You can name the project by typing it in the name tab in the top left corner of your screen. Then, by clicking the pencil icon next to your project’s name, you can alter your title at any moment.
The video editor in the Photos app won’t allow you to upload files until you’ve given your project a title. When you try to add a file, a pop-up choice will display, and you may write in the project’s name and then click OK or Create a Video to continue.
Step 3: Import Files
To add files to your video project, go to the Project Library portion of your screen and click the + icon that you see in the top left corner.
If you have all of the files you wish to merge into one video in one folder, you can select them all and add them to your project using the ‘This PC’ option. Alternatively, you can add the files one by one.
The tool will automatically combine all of your files into a single video. Then, you can alter the video order in the Storyboard and edit them.
Go to your Project Library and drag all of the files you added to the video editor into the Storyboard section to get started on your project.

Step 4: Trim Video Clips
You can also trim your clip in the Photos app if necessary. Here’s how to do it:
- On your Storyboard, select the Trim icon.
- Using the handlebar, shorten or prolong the duration of your clip as desired.
- Select “Done” from the drop-down menu.

Step 5: Remove/Add Sound
You can now select numerous music options from the Windows library or upload your own.
Select the Background Music option in the top-right corner of the screen. Then, mute or adjust the volume of your video.
Or select Add an audio file from the Custom Audio menu in the top-right corner of your screen, select the file you want to Import, click Open, make any necessary changes to the audio file, and select Done.

Step 6: Add Text
You can add text to your video project using the Windows video editor, but there aren’t many font styles to choose from. You’ll also have to add and optimize your text for each clip separately, which isn’t the most time-efficient approach.
To add text to your clips, follow these steps:
- Choose Text
- Select the small box icon on the clip you want to add text to
- In the empty box, type the text you wish to add.
- Select the font style you want to use.
- Choose where your text should show in the video.

Step 7: Export/Save Merged File
You can save your video project to your computer after being happy with it. To do so, follow these steps:
- Click the Export, Share, or Finish movie option in the top right corner of your screen.
- Select the video resolution in which you want your video to be saved.
Combining 2 or 3 Videos into 1 Using VLC
VLC is a widely used media player that is free to download and use on various platforms, including Linux, Mac OS X, Windows, and others. In addition, this open-source utility includes a wide range of editing tools, including converting, combining, and others, in addition to video playing. As a result, VLC is an excellent program to use if you’re seeking a cheap way to merge videos quickly and efficiently.
Step 1: Import files
VLC Media Player is a free media player that you can download, install, and use on your computer. First, click the Media tab on the main screen, then pick Open Multiple Files from the drop-down menu.

Step 2: Open Video Files
Select the File tab from the pop-up box, then click the +Add button to browse and load the videos to be merged. Here you can upload multiple files.
You can upload as many videos as you want. There are no such limitations to merge video files.

Step 3: Convert
Go to the Play menu and select the Convert option from the drop-down menu.

Step 4: Save Merged Video Files
You’ll be taken to a new Convert window, where you can save the merged file to your desktop. Finally, Click on the Play button to begin the VLC video merge process.
Once the process is completed, you can export your merged video files to any platform you like.

FAQs
Q1. How to merge two MP4 videos into 1?
Whether you have two MP4 clips or videos with different extensions, you can easily merge them into one with Filmora. To do that, position both videos on the same track without space. Then, export the project in your desired output format, such as MP4.
Q2. What is the best app for combining videos?
For fast video joining, you can choose Filmora or Adobe Premiere Pro. Both apps are available on Windows and Mac operating systems. Moreover, the combining process is also trouble-free.
Q3. How to merge two videos without losing quality?
Professionals with years of video editing experience choose Premiere Pro to maintain the quality of the merged videos. But remember, any mistakes in the export settings can reduce the calibre. Contrarily, Filmora offers user-friendly and uncomplicated export options so you can save combined videos in the highest quality possible.
The Bottom Line
Different methods of merging videos depend primarily on the type of program you intend to use. The step-by-step guide is to help beginners move ahead in their careers and choose the best method that they find easy. Each method is easy-to-use and accessible by all users. Also, it doesn’t require you to invest money to purchase premium versions of video merging softwares.
However, there are some other softwares that can also be used to merge videos. But they are complex and makes it challenging for a beginner to merge videos easily.
For macOS 10.14 or later
Follow the step-by-step guide to merge videos using filmora:
Step 1: Import Video Files
You must load the video clips into Filmora after it has been installed. Then, to upload your video files, click Import or drag them directly to the media library. They’ll appear as thumbnails in the left pane when you’ve imported all of them.

Step 2: Drag and Drop
Drag & drop the files you wish to merge from the media library to the timeline, and the merged video will appear in real-time. The Preview window can be viewed by pressing the Play button. You can export it immediately if you’re happy with it, but you can also improve it by adding transitions, filters, or overlays.

Step 3: Trim or Add Transition (Optional)
Please click the video clip in the timeline to cut your videos. To cut, first, move the play head to the desired location, then click the slipt icon in the toolbar. After that, shift the play to a different frame. Then, finally, click the split icon again.

Select Transition from the top menu and drag your preferred transition effect between two clips. You can also Apply to Favourite any transition by right-clicking on it.

Step 4: Export Combined Video File
After making all the adjustments, click the EXPORT tab to export your videos. You may export or convert your original video formats to iPhone, iPad, HTC, Samsung Galaxy, and other portable devices. On your devices, they’ll run without a hitch.

Combining 2 or 3 Videos into 1 Using Photos App on Windows 10
Photos App on Windows 10 empowers you to experiment with the photos and videos to make them look better. It allows you to merge multiple videos and edit the video content, compare videos, and create films. It is easy to use and offers all basic viewing and fixing options.
Follow the step-by-step guide to merge videos using Photos App on Windows 10:
Step 1: Lauch the Photos App
You might wish to put all of the films or photographs you want to merge into one folder on your computer before going to the Photos app. It will aid in the speeding up of the entire procedure.
Type ‘Photos’ into your computer’s search bar, then click on the program that appears.

Step 2: Start a New Video Project
You want to start your video production after launching the Photos app. To do so, go to the top right corner of your screen and select New Video Project, which will take you to the editor mode.
The second part of this procedure is known by several titles in different versions of Windows 10’s Photos app, such as creating a video with music, creating a film with text, and a new video project.
Launching the editor mode directly from the photo if you’re using photos in your video project is also possible. In that case, consider the following:
- Open your file in the Photos app
- Select Edit & Create
- Select Create a movie with text from the drop-down menu.

You can name the project by typing it in the name tab in the top left corner of your screen. Then, by clicking the pencil icon next to your project’s name, you can alter your title at any moment.
The video editor in the Photos app won’t allow you to upload files until you’ve given your project a title. When you try to add a file, a pop-up choice will display, and you may write in the project’s name and then click OK or Create a Video to continue.
Step 3: Import Files
To add files to your video project, go to the Project Library portion of your screen and click the + icon that you see in the top left corner.
If you have all of the files you wish to merge into one video in one folder, you can select them all and add them to your project using the ‘This PC’ option. Alternatively, you can add the files one by one.
The tool will automatically combine all of your files into a single video. Then, you can alter the video order in the Storyboard and edit them.
Go to your Project Library and drag all of the files you added to the video editor into the Storyboard section to get started on your project.

Step 4: Trim Video Clips
You can also trim your clip in the Photos app if necessary. Here’s how to do it:
- On your Storyboard, select the Trim icon.
- Using the handlebar, shorten or prolong the duration of your clip as desired.
- Select “Done” from the drop-down menu.

Step 5: Remove/Add Sound
You can now select numerous music options from the Windows library or upload your own.
Select the Background Music option in the top-right corner of the screen. Then, mute or adjust the volume of your video.
Or select Add an audio file from the Custom Audio menu in the top-right corner of your screen, select the file you want to Import, click Open, make any necessary changes to the audio file, and select Done.

Step 6: Add Text
You can add text to your video project using the Windows video editor, but there aren’t many font styles to choose from. You’ll also have to add and optimize your text for each clip separately, which isn’t the most time-efficient approach.
To add text to your clips, follow these steps:
- Choose Text
- Select the small box icon on the clip you want to add text to
- In the empty box, type the text you wish to add.
- Select the font style you want to use.
- Choose where your text should show in the video.

Step 7: Export/Save Merged File
You can save your video project to your computer after being happy with it. To do so, follow these steps:
- Click the Export, Share, or Finish movie option in the top right corner of your screen.
- Select the video resolution in which you want your video to be saved.
Combining 2 or 3 Videos into 1 Using VLC
VLC is a widely used media player that is free to download and use on various platforms, including Linux, Mac OS X, Windows, and others. In addition, this open-source utility includes a wide range of editing tools, including converting, combining, and others, in addition to video playing. As a result, VLC is an excellent program to use if you’re seeking a cheap way to merge videos quickly and efficiently.
Step 1: Import files
VLC Media Player is a free media player that you can download, install, and use on your computer. First, click the Media tab on the main screen, then pick Open Multiple Files from the drop-down menu.

Step 2: Open Video Files
Select the File tab from the pop-up box, then click the +Add button to browse and load the videos to be merged. Here you can upload multiple files.
You can upload as many videos as you want. There are no such limitations to merge video files.

Step 3: Convert
Go to the Play menu and select the Convert option from the drop-down menu.

Step 4: Save Merged Video Files
You’ll be taken to a new Convert window, where you can save the merged file to your desktop. Finally, Click on the Play button to begin the VLC video merge process.
Once the process is completed, you can export your merged video files to any platform you like.

FAQs
Q1. How to merge two MP4 videos into 1?
Whether you have two MP4 clips or videos with different extensions, you can easily merge them into one with Filmora. To do that, position both videos on the same track without space. Then, export the project in your desired output format, such as MP4.
Q2. What is the best app for combining videos?
For fast video joining, you can choose Filmora or Adobe Premiere Pro. Both apps are available on Windows and Mac operating systems. Moreover, the combining process is also trouble-free.
Q3. How to merge two videos without losing quality?
Professionals with years of video editing experience choose Premiere Pro to maintain the quality of the merged videos. But remember, any mistakes in the export settings can reduce the calibre. Contrarily, Filmora offers user-friendly and uncomplicated export options so you can save combined videos in the highest quality possible.
The Bottom Line
Different methods of merging videos depend primarily on the type of program you intend to use. The step-by-step guide is to help beginners move ahead in their careers and choose the best method that they find easy. Each method is easy-to-use and accessible by all users. Also, it doesn’t require you to invest money to purchase premium versions of video merging softwares.
However, there are some other softwares that can also be used to merge videos. But they are complex and makes it challenging for a beginner to merge videos easily.
For macOS 10.14 or later
Follow the step-by-step guide to merge videos using filmora:
Step 1: Import Video Files
You must load the video clips into Filmora after it has been installed. Then, to upload your video files, click Import or drag them directly to the media library. They’ll appear as thumbnails in the left pane when you’ve imported all of them.

Step 2: Drag and Drop
Drag & drop the files you wish to merge from the media library to the timeline, and the merged video will appear in real-time. The Preview window can be viewed by pressing the Play button. You can export it immediately if you’re happy with it, but you can also improve it by adding transitions, filters, or overlays.

Step 3: Trim or Add Transition (Optional)
Please click the video clip in the timeline to cut your videos. To cut, first, move the play head to the desired location, then click the slipt icon in the toolbar. After that, shift the play to a different frame. Then, finally, click the split icon again.

Select Transition from the top menu and drag your preferred transition effect between two clips. You can also Apply to Favourite any transition by right-clicking on it.

Step 4: Export Combined Video File
After making all the adjustments, click the EXPORT tab to export your videos. You may export or convert your original video formats to iPhone, iPad, HTC, Samsung Galaxy, and other portable devices. On your devices, they’ll run without a hitch.

Combining 2 or 3 Videos into 1 Using Photos App on Windows 10
Photos App on Windows 10 empowers you to experiment with the photos and videos to make them look better. It allows you to merge multiple videos and edit the video content, compare videos, and create films. It is easy to use and offers all basic viewing and fixing options.
Follow the step-by-step guide to merge videos using Photos App on Windows 10:
Step 1: Lauch the Photos App
You might wish to put all of the films or photographs you want to merge into one folder on your computer before going to the Photos app. It will aid in the speeding up of the entire procedure.
Type ‘Photos’ into your computer’s search bar, then click on the program that appears.

Step 2: Start a New Video Project
You want to start your video production after launching the Photos app. To do so, go to the top right corner of your screen and select New Video Project, which will take you to the editor mode.
The second part of this procedure is known by several titles in different versions of Windows 10’s Photos app, such as creating a video with music, creating a film with text, and a new video project.
Launching the editor mode directly from the photo if you’re using photos in your video project is also possible. In that case, consider the following:
- Open your file in the Photos app
- Select Edit & Create
- Select Create a movie with text from the drop-down menu.

You can name the project by typing it in the name tab in the top left corner of your screen. Then, by clicking the pencil icon next to your project’s name, you can alter your title at any moment.
The video editor in the Photos app won’t allow you to upload files until you’ve given your project a title. When you try to add a file, a pop-up choice will display, and you may write in the project’s name and then click OK or Create a Video to continue.
Step 3: Import Files
To add files to your video project, go to the Project Library portion of your screen and click the + icon that you see in the top left corner.
If you have all of the files you wish to merge into one video in one folder, you can select them all and add them to your project using the ‘This PC’ option. Alternatively, you can add the files one by one.
The tool will automatically combine all of your files into a single video. Then, you can alter the video order in the Storyboard and edit them.
Go to your Project Library and drag all of the files you added to the video editor into the Storyboard section to get started on your project.

Step 4: Trim Video Clips
You can also trim your clip in the Photos app if necessary. Here’s how to do it:
- On your Storyboard, select the Trim icon.
- Using the handlebar, shorten or prolong the duration of your clip as desired.
- Select “Done” from the drop-down menu.

Step 5: Remove/Add Sound
You can now select numerous music options from the Windows library or upload your own.
Select the Background Music option in the top-right corner of the screen. Then, mute or adjust the volume of your video.
Or select Add an audio file from the Custom Audio menu in the top-right corner of your screen, select the file you want to Import, click Open, make any necessary changes to the audio file, and select Done.

Step 6: Add Text
You can add text to your video project using the Windows video editor, but there aren’t many font styles to choose from. You’ll also have to add and optimize your text for each clip separately, which isn’t the most time-efficient approach.
To add text to your clips, follow these steps:
- Choose Text
- Select the small box icon on the clip you want to add text to
- In the empty box, type the text you wish to add.
- Select the font style you want to use.
- Choose where your text should show in the video.

Step 7: Export/Save Merged File
You can save your video project to your computer after being happy with it. To do so, follow these steps:
- Click the Export, Share, or Finish movie option in the top right corner of your screen.
- Select the video resolution in which you want your video to be saved.
Combining 2 or 3 Videos into 1 Using VLC
VLC is a widely used media player that is free to download and use on various platforms, including Linux, Mac OS X, Windows, and others. In addition, this open-source utility includes a wide range of editing tools, including converting, combining, and others, in addition to video playing. As a result, VLC is an excellent program to use if you’re seeking a cheap way to merge videos quickly and efficiently.
Step 1: Import files
VLC Media Player is a free media player that you can download, install, and use on your computer. First, click the Media tab on the main screen, then pick Open Multiple Files from the drop-down menu.

Step 2: Open Video Files
Select the File tab from the pop-up box, then click the +Add button to browse and load the videos to be merged. Here you can upload multiple files.
You can upload as many videos as you want. There are no such limitations to merge video files.

Step 3: Convert
Go to the Play menu and select the Convert option from the drop-down menu.

Step 4: Save Merged Video Files
You’ll be taken to a new Convert window, where you can save the merged file to your desktop. Finally, Click on the Play button to begin the VLC video merge process.
Once the process is completed, you can export your merged video files to any platform you like.

FAQs
Q1. How to merge two MP4 videos into 1?
Whether you have two MP4 clips or videos with different extensions, you can easily merge them into one with Filmora. To do that, position both videos on the same track without space. Then, export the project in your desired output format, such as MP4.
Q2. What is the best app for combining videos?
For fast video joining, you can choose Filmora or Adobe Premiere Pro. Both apps are available on Windows and Mac operating systems. Moreover, the combining process is also trouble-free.
Q3. How to merge two videos without losing quality?
Professionals with years of video editing experience choose Premiere Pro to maintain the quality of the merged videos. But remember, any mistakes in the export settings can reduce the calibre. Contrarily, Filmora offers user-friendly and uncomplicated export options so you can save combined videos in the highest quality possible.
The Bottom Line
Different methods of merging videos depend primarily on the type of program you intend to use. The step-by-step guide is to help beginners move ahead in their careers and choose the best method that they find easy. Each method is easy-to-use and accessible by all users. Also, it doesn’t require you to invest money to purchase premium versions of video merging softwares.
However, there are some other softwares that can also be used to merge videos. But they are complex and makes it challenging for a beginner to merge videos easily.
For macOS 10.14 or later
Follow the step-by-step guide to merge videos using filmora:
Step 1: Import Video Files
You must load the video clips into Filmora after it has been installed. Then, to upload your video files, click Import or drag them directly to the media library. They’ll appear as thumbnails in the left pane when you’ve imported all of them.

Step 2: Drag and Drop
Drag & drop the files you wish to merge from the media library to the timeline, and the merged video will appear in real-time. The Preview window can be viewed by pressing the Play button. You can export it immediately if you’re happy with it, but you can also improve it by adding transitions, filters, or overlays.

Step 3: Trim or Add Transition (Optional)
Please click the video clip in the timeline to cut your videos. To cut, first, move the play head to the desired location, then click the slipt icon in the toolbar. After that, shift the play to a different frame. Then, finally, click the split icon again.

Select Transition from the top menu and drag your preferred transition effect between two clips. You can also Apply to Favourite any transition by right-clicking on it.

Step 4: Export Combined Video File
After making all the adjustments, click the EXPORT tab to export your videos. You may export or convert your original video formats to iPhone, iPad, HTC, Samsung Galaxy, and other portable devices. On your devices, they’ll run without a hitch.

Combining 2 or 3 Videos into 1 Using Photos App on Windows 10
Photos App on Windows 10 empowers you to experiment with the photos and videos to make them look better. It allows you to merge multiple videos and edit the video content, compare videos, and create films. It is easy to use and offers all basic viewing and fixing options.
Follow the step-by-step guide to merge videos using Photos App on Windows 10:
Step 1: Lauch the Photos App
You might wish to put all of the films or photographs you want to merge into one folder on your computer before going to the Photos app. It will aid in the speeding up of the entire procedure.
Type ‘Photos’ into your computer’s search bar, then click on the program that appears.

Step 2: Start a New Video Project
You want to start your video production after launching the Photos app. To do so, go to the top right corner of your screen and select New Video Project, which will take you to the editor mode.
The second part of this procedure is known by several titles in different versions of Windows 10’s Photos app, such as creating a video with music, creating a film with text, and a new video project.
Launching the editor mode directly from the photo if you’re using photos in your video project is also possible. In that case, consider the following:
- Open your file in the Photos app
- Select Edit & Create
- Select Create a movie with text from the drop-down menu.

You can name the project by typing it in the name tab in the top left corner of your screen. Then, by clicking the pencil icon next to your project’s name, you can alter your title at any moment.
The video editor in the Photos app won’t allow you to upload files until you’ve given your project a title. When you try to add a file, a pop-up choice will display, and you may write in the project’s name and then click OK or Create a Video to continue.
Step 3: Import Files
To add files to your video project, go to the Project Library portion of your screen and click the + icon that you see in the top left corner.
If you have all of the files you wish to merge into one video in one folder, you can select them all and add them to your project using the ‘This PC’ option. Alternatively, you can add the files one by one.
The tool will automatically combine all of your files into a single video. Then, you can alter the video order in the Storyboard and edit them.
Go to your Project Library and drag all of the files you added to the video editor into the Storyboard section to get started on your project.

Step 4: Trim Video Clips
You can also trim your clip in the Photos app if necessary. Here’s how to do it:
- On your Storyboard, select the Trim icon.
- Using the handlebar, shorten or prolong the duration of your clip as desired.
- Select “Done” from the drop-down menu.

Step 5: Remove/Add Sound
You can now select numerous music options from the Windows library or upload your own.
Select the Background Music option in the top-right corner of the screen. Then, mute or adjust the volume of your video.
Or select Add an audio file from the Custom Audio menu in the top-right corner of your screen, select the file you want to Import, click Open, make any necessary changes to the audio file, and select Done.

Step 6: Add Text
You can add text to your video project using the Windows video editor, but there aren’t many font styles to choose from. You’ll also have to add and optimize your text for each clip separately, which isn’t the most time-efficient approach.
To add text to your clips, follow these steps:
- Choose Text
- Select the small box icon on the clip you want to add text to
- In the empty box, type the text you wish to add.
- Select the font style you want to use.
- Choose where your text should show in the video.

Step 7: Export/Save Merged File
You can save your video project to your computer after being happy with it. To do so, follow these steps:
- Click the Export, Share, or Finish movie option in the top right corner of your screen.
- Select the video resolution in which you want your video to be saved.
Combining 2 or 3 Videos into 1 Using VLC
VLC is a widely used media player that is free to download and use on various platforms, including Linux, Mac OS X, Windows, and others. In addition, this open-source utility includes a wide range of editing tools, including converting, combining, and others, in addition to video playing. As a result, VLC is an excellent program to use if you’re seeking a cheap way to merge videos quickly and efficiently.
Step 1: Import files
VLC Media Player is a free media player that you can download, install, and use on your computer. First, click the Media tab on the main screen, then pick Open Multiple Files from the drop-down menu.

Step 2: Open Video Files
Select the File tab from the pop-up box, then click the +Add button to browse and load the videos to be merged. Here you can upload multiple files.
You can upload as many videos as you want. There are no such limitations to merge video files.

Step 3: Convert
Go to the Play menu and select the Convert option from the drop-down menu.

Step 4: Save Merged Video Files
You’ll be taken to a new Convert window, where you can save the merged file to your desktop. Finally, Click on the Play button to begin the VLC video merge process.
Once the process is completed, you can export your merged video files to any platform you like.

FAQs
Q1. How to merge two MP4 videos into 1?
Whether you have two MP4 clips or videos with different extensions, you can easily merge them into one with Filmora. To do that, position both videos on the same track without space. Then, export the project in your desired output format, such as MP4.
Q2. What is the best app for combining videos?
For fast video joining, you can choose Filmora or Adobe Premiere Pro. Both apps are available on Windows and Mac operating systems. Moreover, the combining process is also trouble-free.
Q3. How to merge two videos without losing quality?
Professionals with years of video editing experience choose Premiere Pro to maintain the quality of the merged videos. But remember, any mistakes in the export settings can reduce the calibre. Contrarily, Filmora offers user-friendly and uncomplicated export options so you can save combined videos in the highest quality possible.
The Bottom Line
Different methods of merging videos depend primarily on the type of program you intend to use. The step-by-step guide is to help beginners move ahead in their careers and choose the best method that they find easy. Each method is easy-to-use and accessible by all users. Also, it doesn’t require you to invest money to purchase premium versions of video merging softwares.
However, there are some other softwares that can also be used to merge videos. But they are complex and makes it challenging for a beginner to merge videos easily.
This Article Covers a Lot of Information About the Freeze-Frame Effect. It Includes Its Power, Its Usage in Films, and How to Create It in Your Videos Using Filmora. It Will Get You a Super Exciting Cinematic Effect
Are you considering getting your video editing skills to a new high level? Are you worried about spicing your videos with stylish shots and bringing attention to particular aspects of your video?
Freeze frame sequence is one the most stunning effects that can help you greatly. The freeze frame sequence has been used in many classic and present-day movies. And it will never go out of fashion.
Here, we will guide you on creating freeze frame sequences in your videos using Filmora. It is critical here to know what exactly the freeze frame sequence is. So let’s jump right into it!
Part 1. What Is A Freeze Frame?
A freeze frame is a specific single frame of the video clip shown repeatedly in the video. It gives the illusion of a static picture. It is used to draw the viewers’ attention to the minute details of a specific moment, to set up a powerful narrative, or to introduce your main characters.
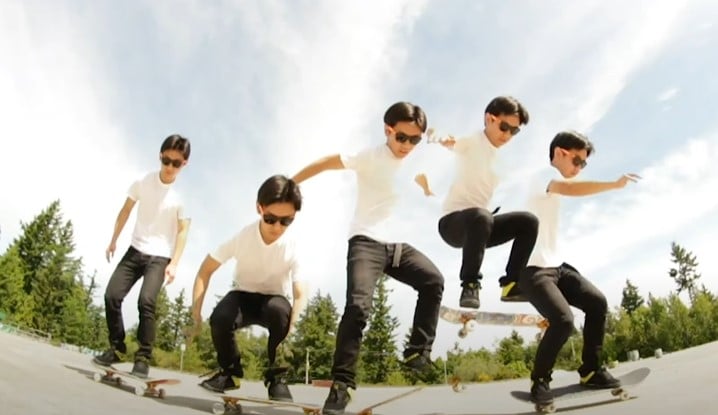
Content creators can also use the freeze-frame effect on fast-moving objects to draw the viewers’ attention. Have a few examples of the most popular freeze frames used in the movies.
Examples of freeze frames in popular movies
Alfred Hitchcock used the first-ever freeze-frame in his film Champagne (1928). There is a long list of many famous tv shows and movies in which the freeze frame effect has been used since then. But to count a few, three examples are given here.
1. Pulp Fiction (1994)
In the beginning scene of Pulp Fiction, where robbery is about to occur, a freeze-frame effect is used to engage the audience. Later in the movie, it was relieved what would happen next. It was a dramatic pause to draw attention. It is a strong example of the freeze-frame effect.
2. The Breakfast Club (1985)
The ending of Breakfast Club is an iconic example of the freeze-frame effect. With a powerful narration, the freeze frame conveys the movie’s central idea to the audience.

3. Suicide Squad (2016)
In the trailer of Suicide Squad, freeze frames were used by the director to introduce the characters. This trailer used stylish animations to give relevant information about the film’s main characters.

Having discussed the famous examples, let’s learn about the power of freeze frames.
The power of freeze frame
The old freeze frames give a retro vibe. However, with the advancement in editing technology, this special effect has proved that there is no end. Furthermore, it has shown that you can do many things with pauses.
Especially when you are a content creator, this effect empowers you by advertising your skills impressively. It also conveys your message convincingly.
Being a content creator, you always want to reach the maximum audience. This special effect will serve this too. It will ultimately get you more viewership, more likes, and more subscriptions. But how to create a freeze frame?
Part 2. How To Create Freeze Frame Sequence? [Step-Wise Guide]
Let’s see how to add a freeze frame sequence in your video step-wise and get started.
Step1 Download Wondershare Filmora
Wondershare Filmora is an all-in-one video editing platform. It is enhanced with multiple practical media resources. You can head to Wondershare Filmora official site to download or upgrade your Filmora.
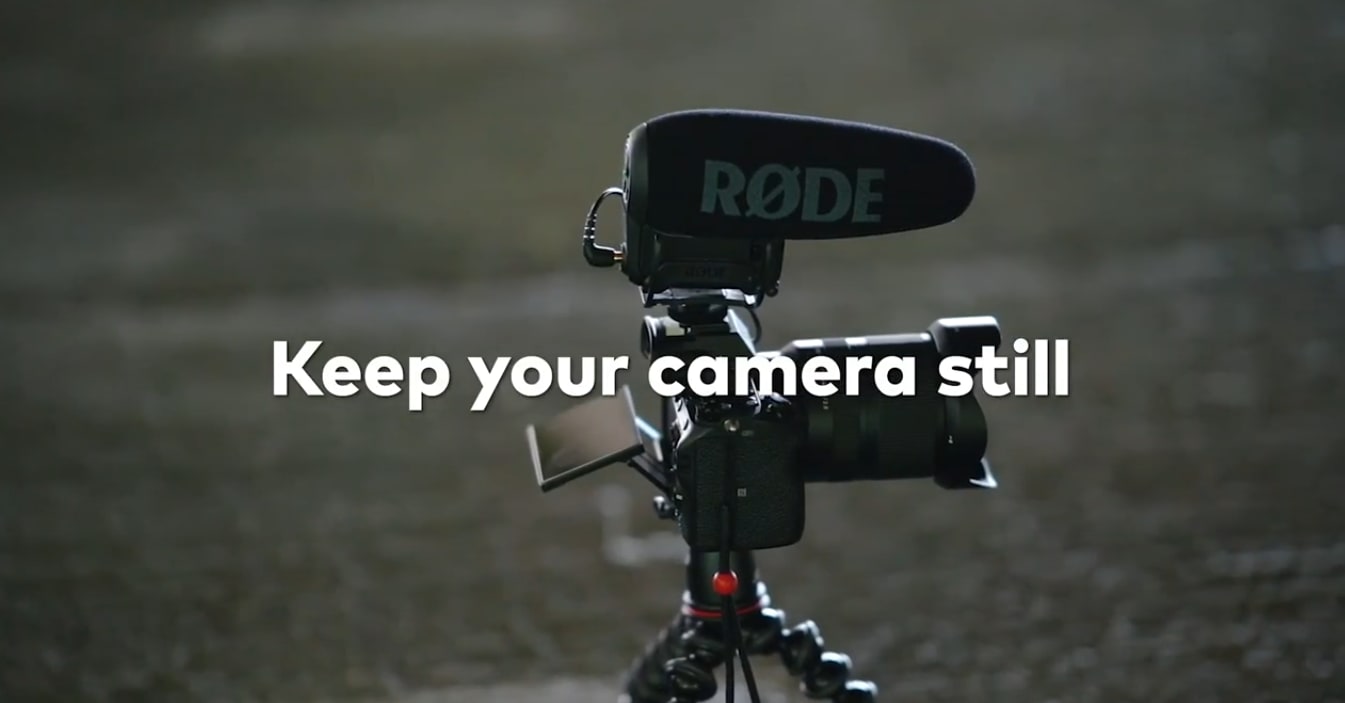
Free Download For Win 7 or later(64-bit)
Free Download For macOS 10.14 or later
Step2 Import your clips and add them to the timeline
Open Filmora and create a new project. Import your clip into the media library. Add your clips to the first video layer on the timeline.
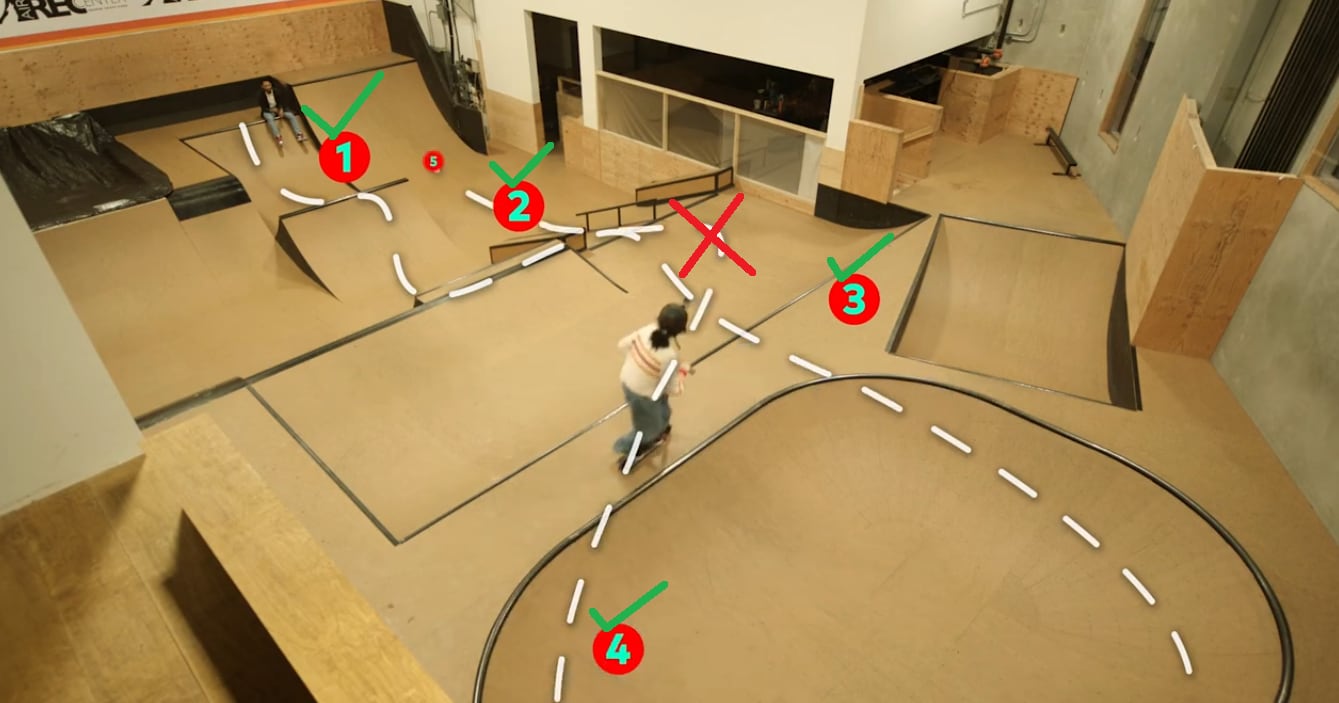
Step3 Apply color correction to the footage
Before we start our edit, let’s color correct our footage, so the corrected color is already applied when we take the screenshots.
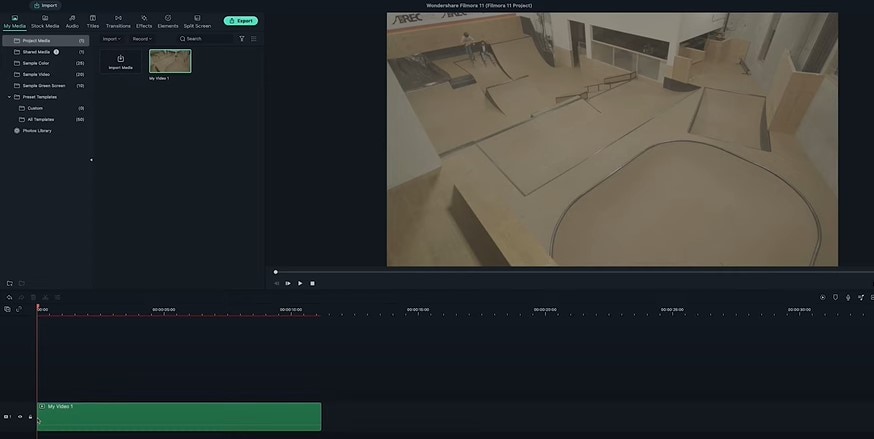
Step4 Find your first action frame
Next, scrub through the clip to find your first action frame. For example, in this video, this is our first action frame.
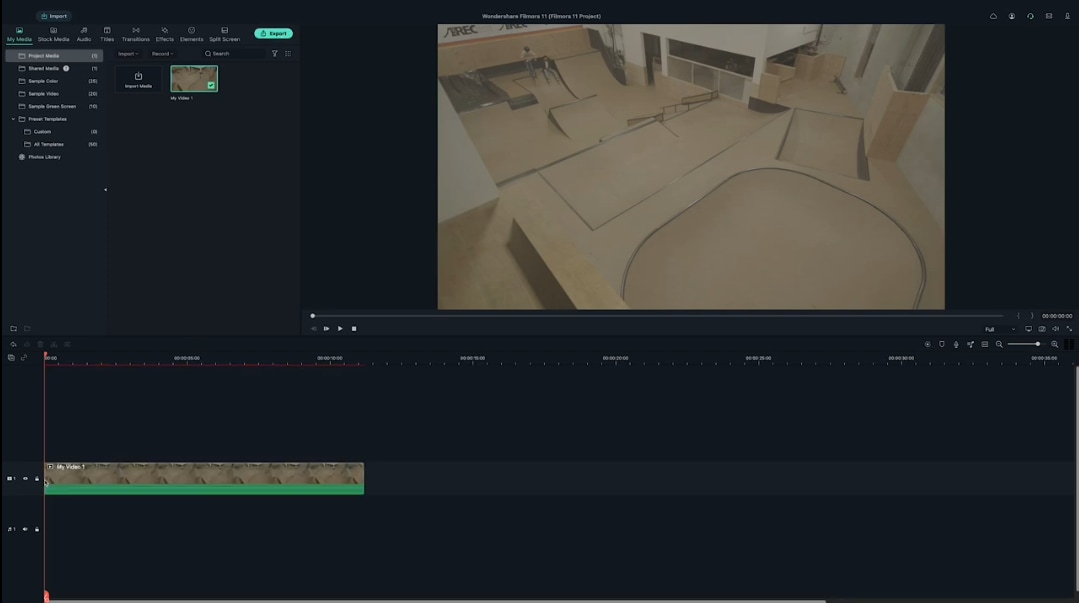
Step5 Take a screenshot of the action frame
Let’s head to the camera icon under the preview screen and click the icon. It will take a screenshot of the current frame that the playhead is on the timeline.
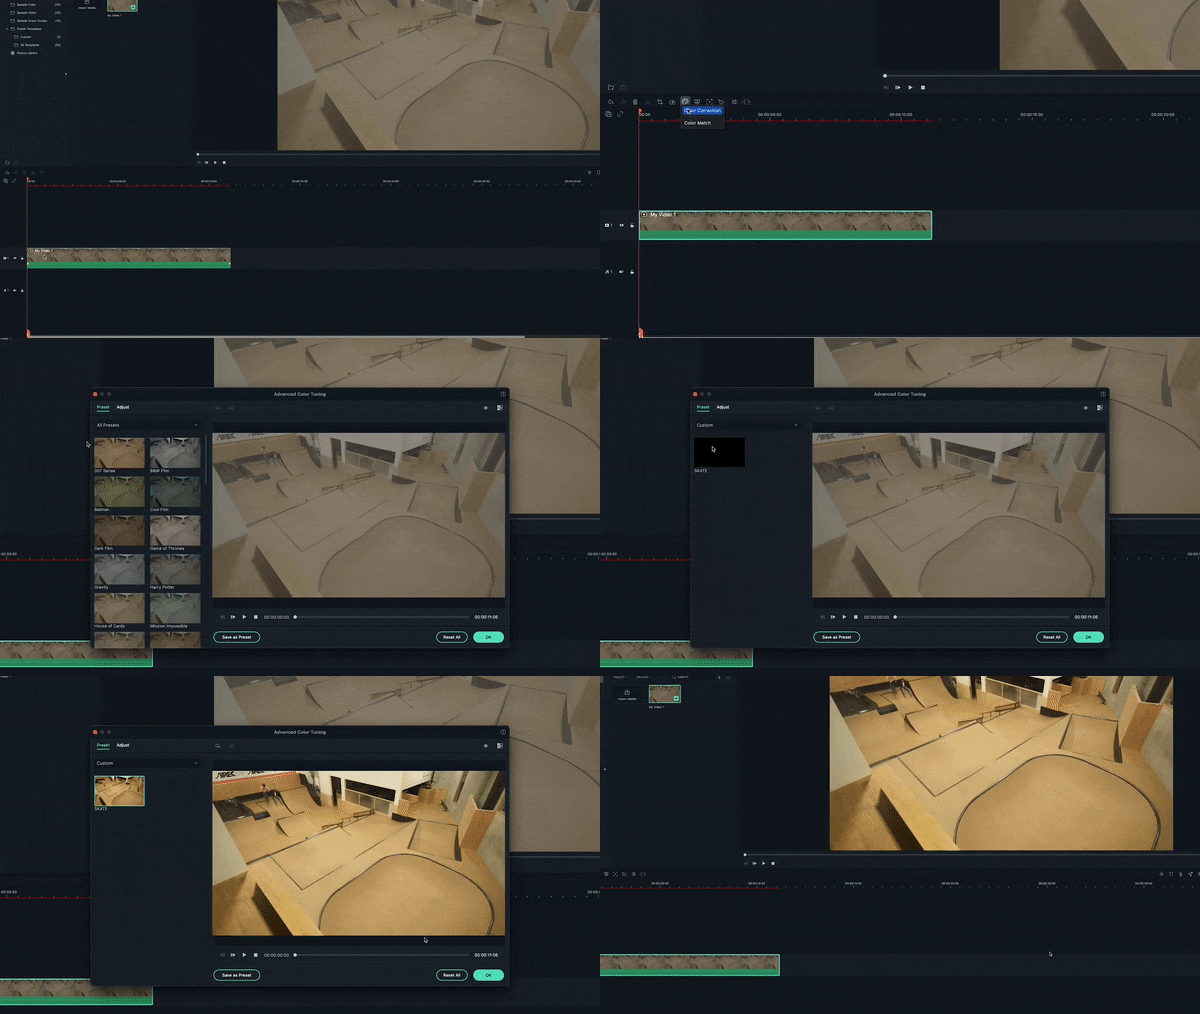
Make sure to keep the playhead the same after you’ve taken the snapshot. You can find your screenshot in the media tab.
Step6 Add the screenshot to timeline
Let’s drag your screenshot onto video layer 2 and align it on the right side of the playhead. Then extend the screenshot so it lasts as long as your central clip.

Step7 Apply masks to the screenshot
Now, double-click on the screenshot. It will open the “Video” menu, then go into the “Mask” menu. Choose a mask shape and edit it so that it only covers where your subject is in the screenshot. For example, we choose the **”**Circle” mask shape in this video.
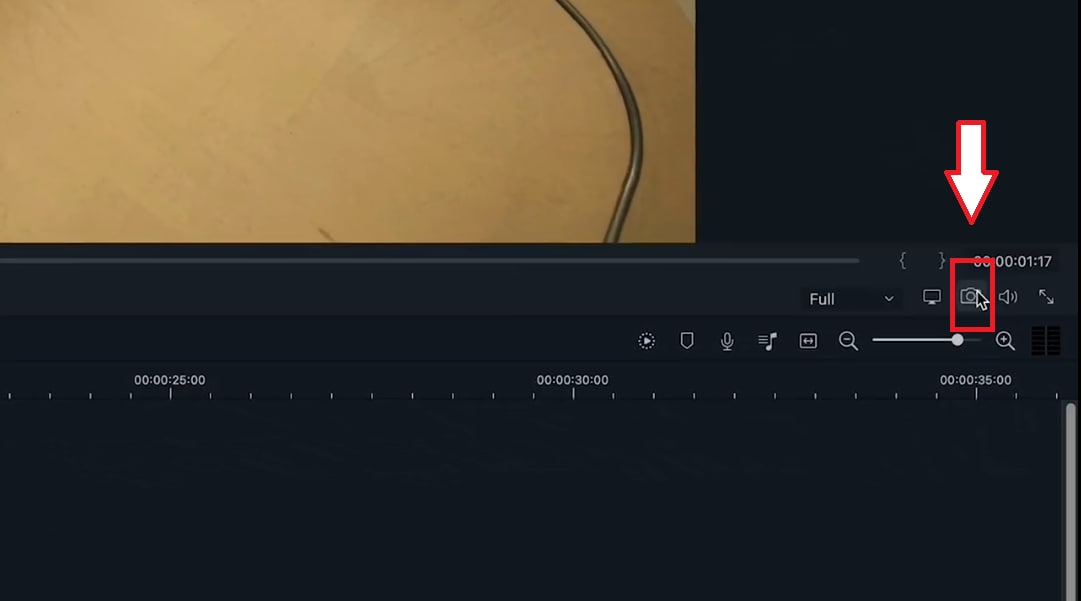
If you need help seeing what you’re masking, hide the main video layer and edit your mask like this.
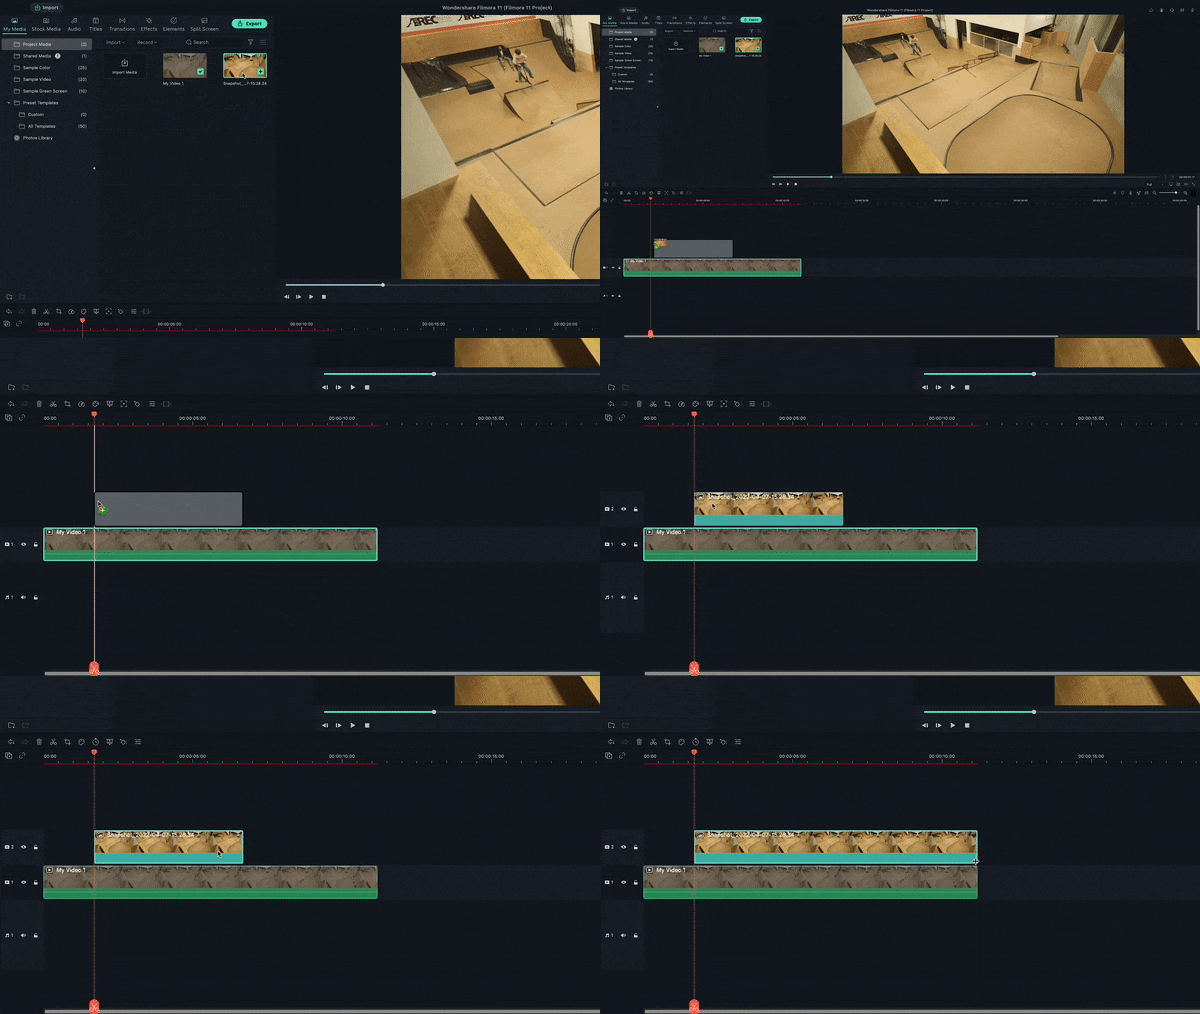
Move the playhead forward and clean up your “mask.” Next, Increase the blur to soften the edges. But not too much because it may become visible on your subject.
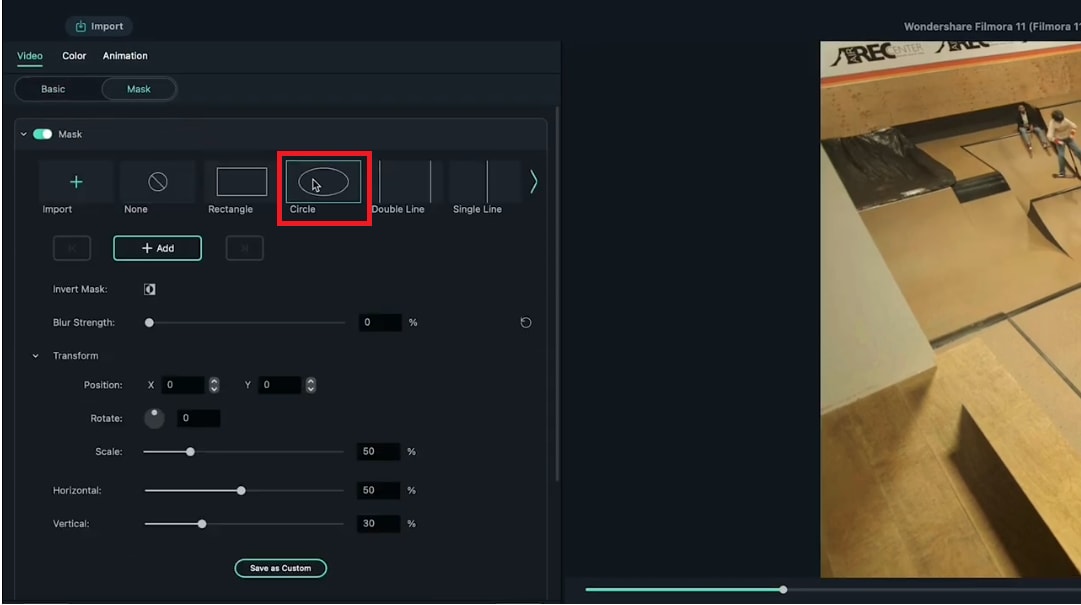
Step8 Hide the first screenshot
Let’s layer a couple more action frames! First, hide the first screenshot so it doesn’t appear in your new screenshot.
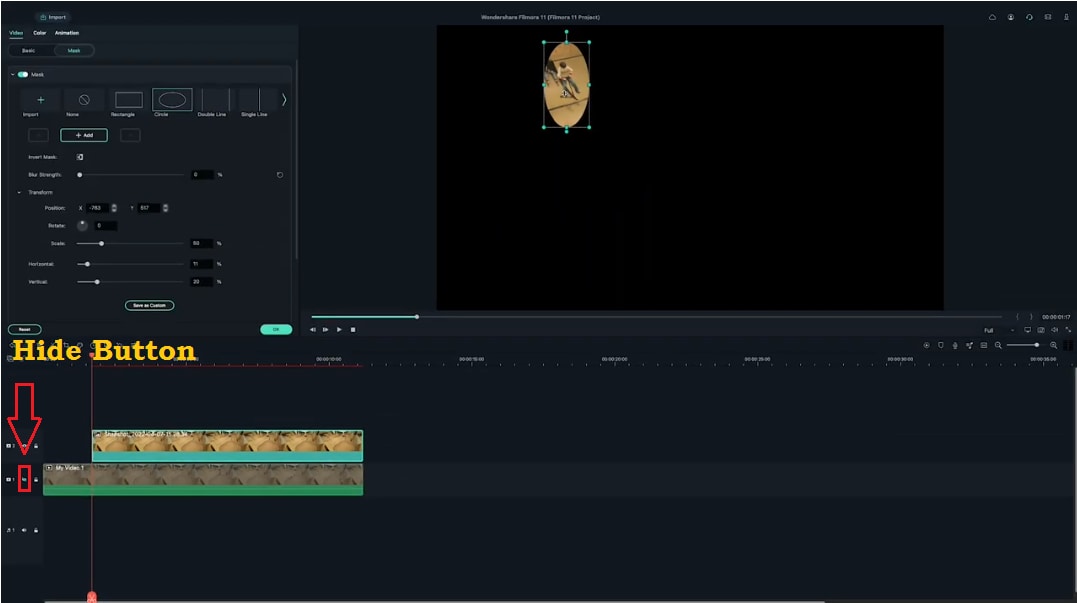
Step9 Select your second action frame
Then, pick a new frame.
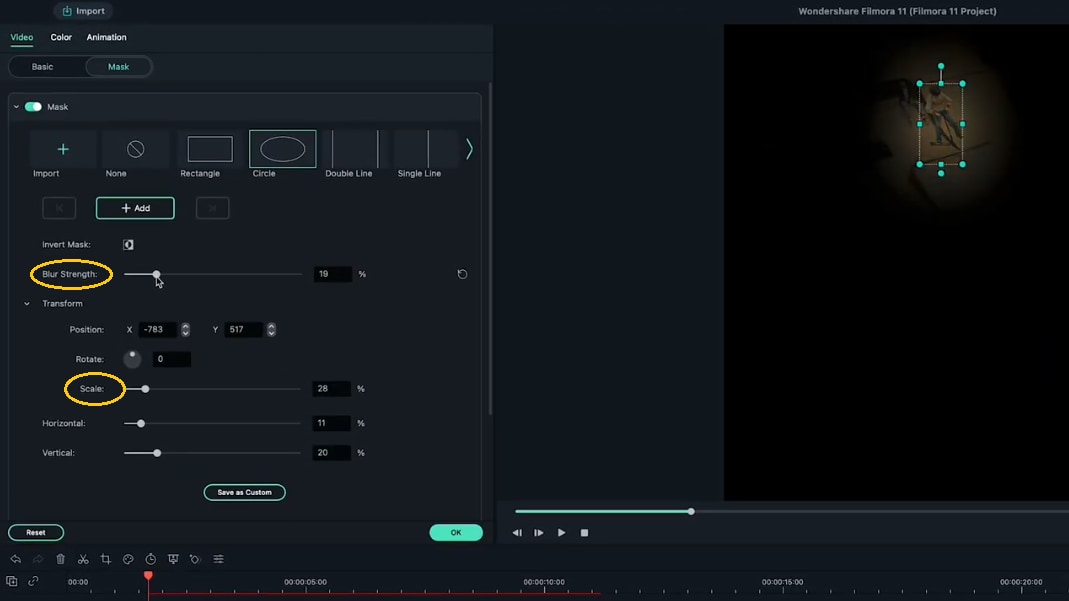
- Click the camera icon.
- Drag the screenshot at the new playhead spot.
- Extend the clip.
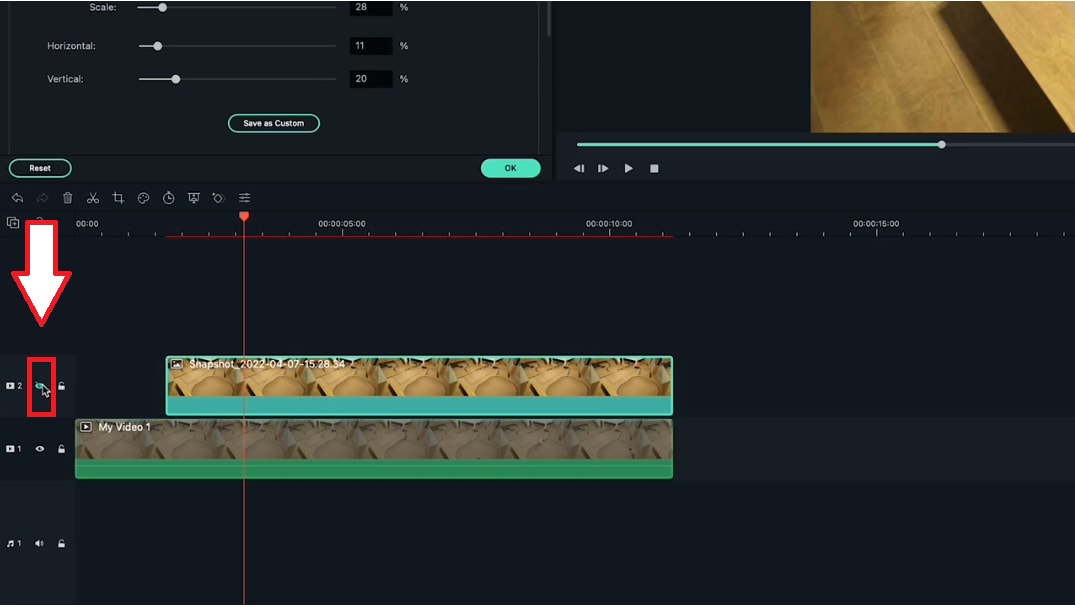
- Double-click to mask this frame.
- And play it back to make sure it looks good.
- It would help if you did this a couple more times until you have several frames.
Please have a look at the final product and how it looks!
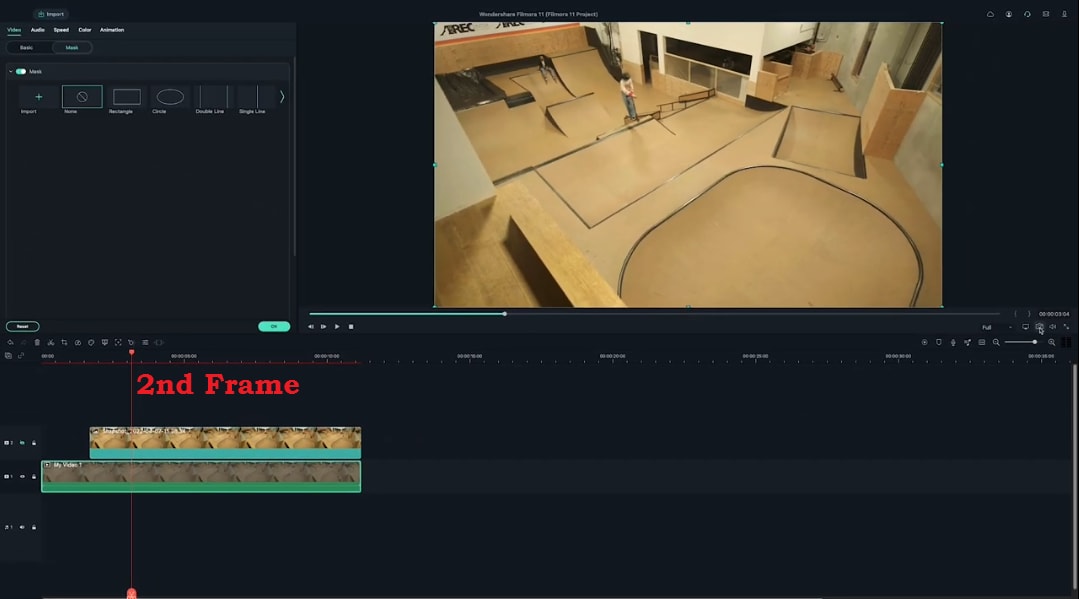
And that’s how you create a freeze-frame video effect in Filmora.
Part 3. Tips To Use Freeze Frame Sequence
You’ve known how to make the freeze frame sequence. However, don’t miss essential tips to improve your video at the next stage.
Tip 1: Making a steady shot is important
First, ensure a steady shot with no camera shake while filming. You can use a tripod or a stable surface to keep your camera still.
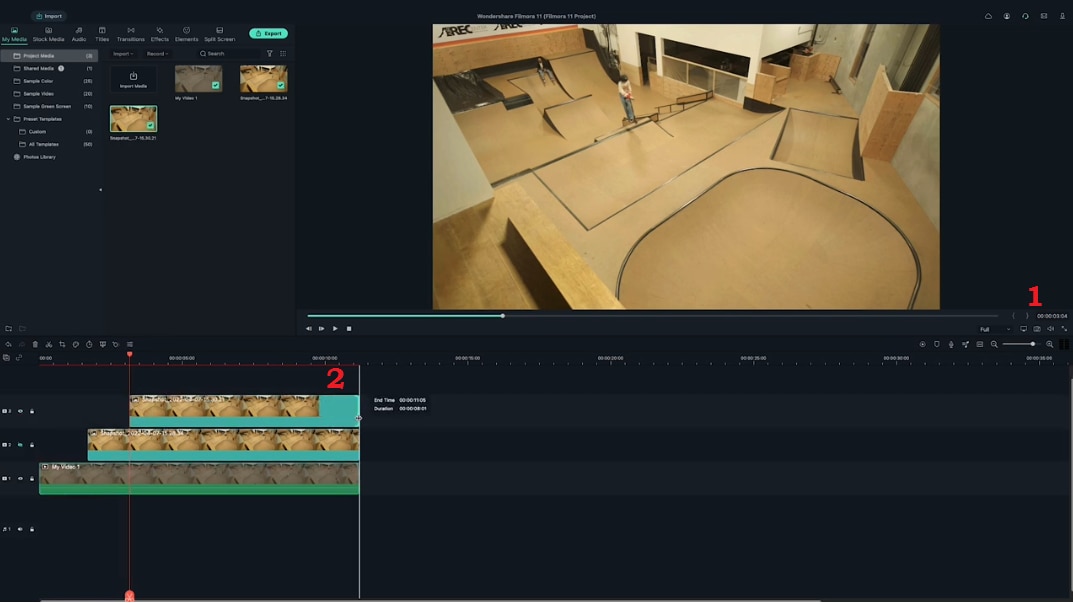
Why is it necessary to make a steady shot?
- It helps you to make smooth, fluid shots.
- It is much more professional.
- It will take your editing skills to a new level.
- It grabs the attention of the viewers.
- It makes your editing easier.
Tip 2: No crossing over
Make sure your subject only crosses the same spot once. Otherwise, you would need help editing the video.
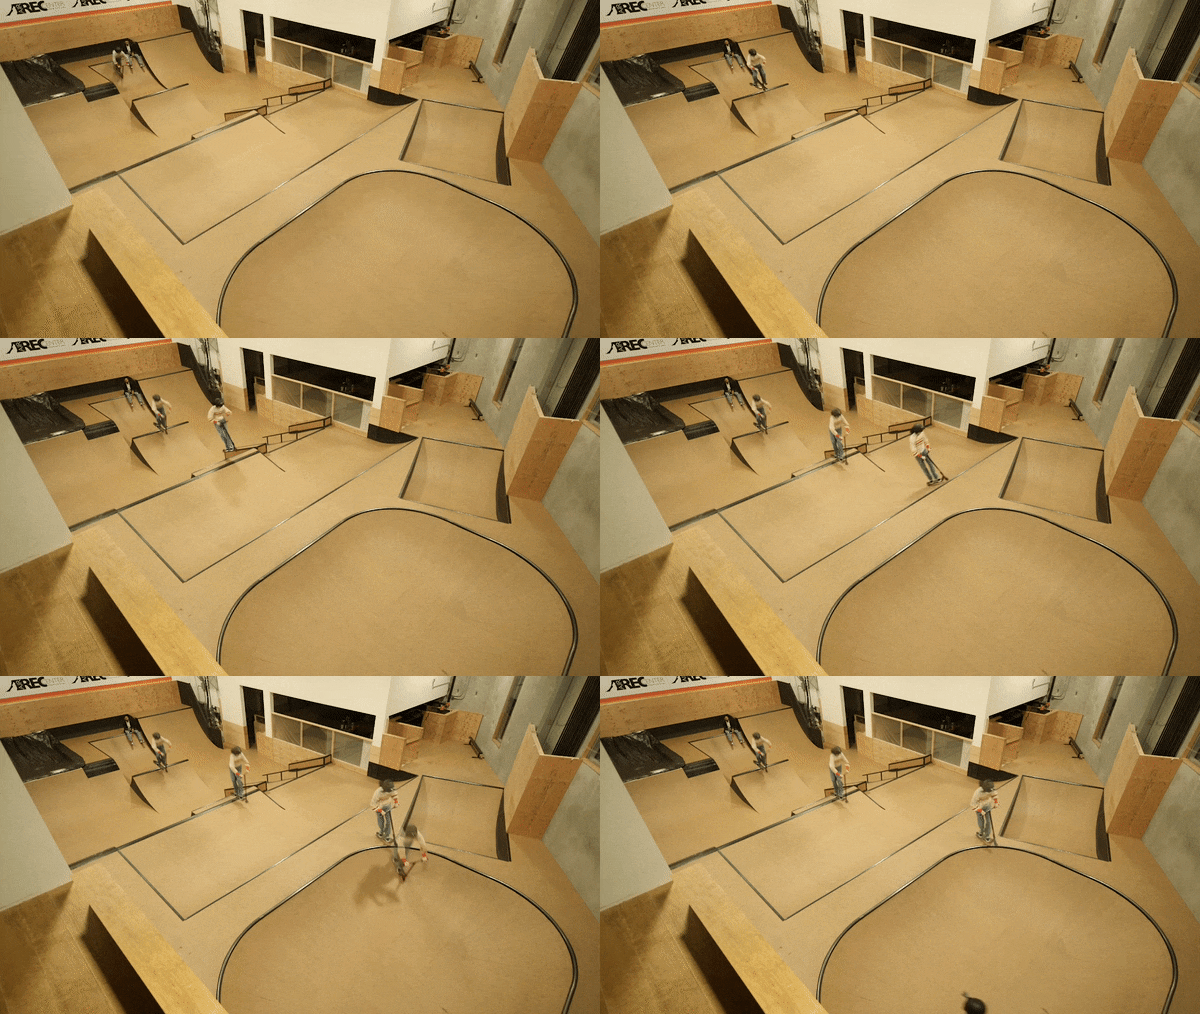
Why is it necessary to avoid crossing the same spot?
- It prevents misalignment of the shots, and your print won’t get damaged, primarily when you use pieces of the same image.
- It helps to create an illusion of holding specific moments.
Final Words
The Freeze Frame Sequence looks professional but much more manageable. The creator’s confidence gets to the next level when they learn how to create it. This step-wise guide using Wondershare Filmora is all for your ease.
Free Download For macOS 10.14 or later
Step2 Import your clips and add them to the timeline
Open Filmora and create a new project. Import your clip into the media library. Add your clips to the first video layer on the timeline.

Step3 Apply color correction to the footage
Before we start our edit, let’s color correct our footage, so the corrected color is already applied when we take the screenshots.

Step4 Find your first action frame
Next, scrub through the clip to find your first action frame. For example, in this video, this is our first action frame.

Step5 Take a screenshot of the action frame
Let’s head to the camera icon under the preview screen and click the icon. It will take a screenshot of the current frame that the playhead is on the timeline.

Make sure to keep the playhead the same after you’ve taken the snapshot. You can find your screenshot in the media tab.
Step6 Add the screenshot to timeline
Let’s drag your screenshot onto video layer 2 and align it on the right side of the playhead. Then extend the screenshot so it lasts as long as your central clip.

Step7 Apply masks to the screenshot
Now, double-click on the screenshot. It will open the “Video” menu, then go into the “Mask” menu. Choose a mask shape and edit it so that it only covers where your subject is in the screenshot. For example, we choose the **”**Circle” mask shape in this video.

If you need help seeing what you’re masking, hide the main video layer and edit your mask like this.

Move the playhead forward and clean up your “mask.” Next, Increase the blur to soften the edges. But not too much because it may become visible on your subject.

Step8 Hide the first screenshot
Let’s layer a couple more action frames! First, hide the first screenshot so it doesn’t appear in your new screenshot.

Step9 Select your second action frame
Then, pick a new frame.

- Click the camera icon.
- Drag the screenshot at the new playhead spot.
- Extend the clip.

- Double-click to mask this frame.
- And play it back to make sure it looks good.
- It would help if you did this a couple more times until you have several frames.
Please have a look at the final product and how it looks!

And that’s how you create a freeze-frame video effect in Filmora.
Part 3. Tips To Use Freeze Frame Sequence
You’ve known how to make the freeze frame sequence. However, don’t miss essential tips to improve your video at the next stage.
Tip 1: Making a steady shot is important
First, ensure a steady shot with no camera shake while filming. You can use a tripod or a stable surface to keep your camera still.

Why is it necessary to make a steady shot?
- It helps you to make smooth, fluid shots.
- It is much more professional.
- It will take your editing skills to a new level.
- It grabs the attention of the viewers.
- It makes your editing easier.
Tip 2: No crossing over
Make sure your subject only crosses the same spot once. Otherwise, you would need help editing the video.

Why is it necessary to avoid crossing the same spot?
- It prevents misalignment of the shots, and your print won’t get damaged, primarily when you use pieces of the same image.
- It helps to create an illusion of holding specific moments.
Final Words
The Freeze Frame Sequence looks professional but much more manageable. The creator’s confidence gets to the next level when they learn how to create it. This step-wise guide using Wondershare Filmora is all for your ease.
Also read:
- Updated 2024 Approved Having GoPro Accessories Is Easy, but Editing on GoPro Quik Is Challenging. Read This Guide and, Stepwise, Learn to Use GoPro Slow-Motion for Perfect Shots
- Updated In 2024, Stop Worrying if Your Adobe Premiere Playback Slows Down. This Guide Will Show You the Best Solutions to Resolve This Issue and a Perfect Alternative
- 2024 Approved 20 Best Text To Speech Software Windows, Mac, Android, iPhone & O
- With Everything Centered Around Videos on the Digital Platform, the Use and the Need for AI-Based Editing Tools Have Also Increased Manifold. We Have Curated a List of the Top Programs that Can Help You with AI Video Editing for 2024
- New 2024 Approved 2 Solutions to Cut Video in VLC on Windows
- Updated 2024 Approved Top 10 Audio Visualizers Windows, Mac, Android, iPhone & Online
- When It Comes to Video Editing, There Are Countless Software Options Available on the Market. However, Not All of Them Come with Useful Masking Tools. In This Article, We Will Be Discussing the Top 8 Video Editor with Useful Masking Tools
- New 2024 Approved Complete Guide to Converting GIF to SVG With Ease
- 2024 Approved You May Want to Change the Speed of Certain Portions of Your Video. This Article Enlightens You on How to Splice and Speed up the Video in Simple Ways
- New In 2024, When It Comes to Video Editing, There Are Countless Software Options Available on the Market. However, Not All of Them Come with Useful Masking Tools. In This Article, We Will Be Discussing the Top 8 Video Editor with Useful Masking Tools
- 4K Videos Are the in Thing because of Their Flexibility and High Resolution. Stick Around to Learn How to Choose the Best Frame Rate for 4K Videos
- If You Are a Beginner and Want to Familiarise Yourself with Steps and Terms Used in Video Editing, in This Article, We Will Go Through the Steps You Will Need to Cut Your Video File in Adobe Premiere Pro and Wondershare Filmora for 2024
- Updated How to Create a Bokeh Effect for 2024
- Mastering FFmpeg How to Merge Audio and Video with Ease for 2024
- 2024 Approved MP3 CUTTER DOWNLOADMP3 Cutter Download Is One of the Most Reliable Tools for Editing of Music Files in a Fast and Friendly Way
- Updated AVI Editors for Windows 11/10/8.1/8/7 Easily Edit AVI Files on PC
- In 2024, Expolring Top 6 Best Alternatives to Clownfish Voice Changer
- New 2024 Approved 11 Tips to Make Product Ad Videos
- New Step by Step to Crop Videos Using Lightworks for 2024
- New The Quicktime Software with Its Latest Version Gives You an Option to Change the Speed of an Audio or Video File. It Makes It Easy to Watch the Slow-Motion Video or Fast-Forward the Audio for 2024
- Updated 10 BEST TEXT TO SPEECH VIDEO MAKERS for 2024
- New 2024 Approved Do You Want to Create a Zoom Motion Blur Effect Using Photoshop? If You Are Unaware of How to Do This, Read This Article to Learn Simple yet Authentic Instructions
- New 2024 Approved Best 10 Tools To Make Quiz Videos
- In 2024, Reasons why Pokémon GPS does not Work On Lava Yuva 2 Pro? | Dr.fone
- In 2024, Top 10 Password Cracking Tools For Honor X9b
- How to Transfer Photos From Tecno Camon 20 Pro 5G to Samsung Galaxy S21 Ultra | Dr.fone
- In 2024, How to Mirror Your Vivo X100 Pro Screen to PC with Chromecast | Dr.fone
- 5 Solutions For Itel S23 Unlock Without Password
- In 2024, How to Fix Locked Apple ID from Apple iPhone 12 Pro
- How to Use Pokémon Emerald Master Ball Cheat On Vivo Y02T | Dr.fone
- Easy Guide How To Bypass Huawei P60 FRP Android 10/11/12/13
- In 2024, How To Use Special Features - Virtual Location On Apple iPhone X? | Dr.fone
- In 2024, Is Your iPhone 7 in Security Lockout? Proper Ways To Unlock
- Authentication Error Occurred on Itel S23? Here Are 10 Proven Fixes | Dr.fone
- Three methods to recover lost data on Samsung Galaxy A25 5G
- Full Guide to Fix iToolab AnyGO Not Working On Samsung Galaxy A15 4G | Dr.fone
- Updated In 2024, How to Make a Talking AI Avatar From Photos Easy Guide
- How to Change Your Nokia 130 Music Location on life360 Without Anyone Knowing? | Dr.fone
- In 2024, How to Successfully Bypass iCloud Activation Lock on Apple iPhone 14 Plus
- Title: OBS Green Screen Guide
- Author: Morgan
- Created at : 2024-05-19 05:11:36
- Updated at : 2024-05-20 05:11:36
- Link: https://ai-video-editing.techidaily.com/obs-green-screen-guide/
- License: This work is licensed under CC BY-NC-SA 4.0.

