
:max_bytes(150000):strip_icc():format(webp)/duetinslides-fd2c11f1a91a4d7388cc25f2f4719cca.jpg)
Step by Step Guide on Make Gimp Transparent Background PNG
Step by Step Guide on Make Gimp Transparent Background PNG
Step by Step Guide on Make Gimp Transparent Background PNG
An easy yet powerful editor
Numerous effects to choose from
Detailed tutorials provided by the official channel
Removing background of images and making them transparent is a really very tough task for the newbies. Sometimes you may need to learn lots of software to get the work done and most of the programs are paid over the internet. There are many reasons why you need to remove the background of images such as you don’t like the background and replace with the new one. Here, in this article we will share the information about the GIMP which is a free and open source programs and can help you to remove background from the images and make the transparent.
In this article
01 [What’s Gimp?](#Part 1)
02 [How to Create a Transparent Background in GIMP](#Part 2)
03 [How to Turn the Complex Image Background Transparent](#Part 3)
04 [How to Turn a One-Color Background Transparent](#Part 4)
Part 1 What’s Gimp?
GIMP is open source software which allows you to do image manipulations. The program is distributed over the internet for free of cost the beginners to learn the photography skills. GIMP software can be used for photo retouching, image authoring and image compositions. GIMP supports all features of photo editing even it can be used for GIMP remove background to transparent. You can also use it as a paint program, online batch processing system, image format converter and as an image renderer.
Part 2 How to Create a Transparent Background in GIMP
With the help of GIMP software you can easily remove background from image and make it transparent. Here, we are going to tell you that how you can remove background with the help of GIMP. Let’s learn it step by step.
Step 1:
Install and launch GIMP program on your system. Now click the “File > Open” or you can also use “File > Open as Layers” option.

Step 2:
Now, you have to use the Fuzzy tool. The Fuzzy tool is mainly designed to select the current layer area and the image on the basis of color. Using this tool you can easily select the background which you want to remove with just one click.

Step 3:
On your image, now you will see a channel dialog when you add a second layer on it. This layer will tell the transparency of the image you have added to remove background. So, click the “Layer > Transparency > Add Alpha Channel option.

Step 4:
On your keyboard now you need to hit the “Delete” button to remove background. You may need to repeat the steps 2 to 4 if the background is not completely removed else there is no problem. We have removed blue background here for example.

Step 5:
Finally, you can click the “File > Export As” and then select the PNG format and save it on your computer in the PNG format. This is the way about GIMP remove background to transparent.

Part 3 How to Turn the Complex Image Background Transparent
The above part was about removing the simple and easy background from the image. Here we will share about GIMP transparent background PNG when you have the complex background. For, GIMP create transparent background in the complex images you need to add a transparent layer on the image.
Step 1:
Open the image in GIMP and then right click on the layer of image. Now, click the “Add Alpha Chanel” option.

Step 2:
After making a layer for background now you have to select the foreground of the image which you want to keep using the select tool of GIMP. To start, first you need to make sure the in the settings you have selected “Draw foreground option” is selected.
After doing all adjustments of the settings you need to draw outline of the object and finally press the enter button on keyboard.

Step 3:
After doing all the settings you have to adjust the stroke width from settings panel of GIMP. Use your mouse now and start dragging and drawing the image just like you are painting with a brush. Once your drawing is finished and you leave your mouse the image will look like the below screenshot.

Step 4:
You can also fine tune your selection now with the help of draw background option in the GIMP. This will help you to adjust the rough outline you created previously. Once you are happy then simply press the enter button.

Step 5:
Still, if you want to refine your results more than you can refine your outlines by using the path nodes option. You can view the path nodes by following the below steps.
● Keep your mouse cursor at paths dialog.
● Now, hit selection.
● To view the path you can click the CTRL+Shift+A button.
● Now, select the paths tool.
● Finally click the “Path”.

Step 6:
Now, it’s a time to adjust the outlines according to the output of your foreground image. You can zoom the image and add or adjust the previous nodes. To adjust node you can click the CTRL button on keyboard and drag the node using your mouse. If you need to remove a node then you can use CTRL+Shift button and then click on the node.

Step 7:
Once the path is refined according to your need hit the “Selection from Path” option at the left side.

Step 8:
You will have to add the layer mask on the image now to which will reveal the transparency. Right click the Current layer > Add Layer Mask > Selection and finally click “Add” button.

Step 9:
Now, if you have followed all the previous steps perfectly then your background will be removed now and you can also add a new background to the image. This is way about GIMP delete background to transparent for the complex images.

Part 4 How to Turn a One-Color Background Transparent
While using the GIMP you can also run the one color images background in the transparent. This method helps you to make the transparent background in case if you have the single color in the background of your image. In this method you just need to select the background by the color and it will be removed in the seconds. For GIMP create transparent background image in the single color background image you can follow the below steps.
Steps to Follow:
● Open the image using “File > Open” in the GIMP program.
● Once image is opened you have to select the image layer at the right side corner of the screen. Now right click and select the Add Alpha Channel option.
● Now, you have to choose the select by color tool.

Step 2:
After selecting the color tool you can select the area of the background image which you need to make transparent by clicking on the image. You can also select it manually by clicking and dragging using your mouse pointer. To increase the selection press Shift button on keyboard and then select the different area which you want to select.

Step 3:
Finally, when you have selected the complete area which you want to make transparent then simply select the delete button. This is the way about GIMP set transparent background for one color background images.

Learn New Ways to Make Transparent Background
GIMP software is a free program for newbie users to expand their skills. With the help of GIMP software you can easily remove background from mostly any kind of images. If you like to go for pro software to make the video from the images you have created then you can try the Wondershare Filmora Video Editor which allows you to make the beautiful videos and edit them quickly.
For Win 7 or later (64-bit)
For macOS 10.12 or later
Wondershare Filmora program is video editor software which also offers you some of the photo editing options as well. It is compatible with the windows as well as the Mac operating system devices. The program comes with a very easy to use interface and allows you to edit the videos and design them from scratch. It comes with the premade templates in it so you can directly use them for your videos to make the process faster. You can do keyframing, speed ramping, splitting screen, motion tracking etc for editing your videos.
Filmora offers you an inbuilt screen recorder which is the best for recording the gaming videos. it also offers you the effects to apply on the videos, color correction, color matching and many more others features which can be used for making the best quality videos.

● Ending Thoughts →
● Well, this is all about making transparent background in the GIMP. GIMP is really a very helpful program that comes with most all features what you need to edit the images and change the background of your images.
● If you need to edit the videos as well or you want to make videos with the images edited using GIMP then you can simply use Wondershare Filmora which the best in the video editing Era.
Removing background of images and making them transparent is a really very tough task for the newbies. Sometimes you may need to learn lots of software to get the work done and most of the programs are paid over the internet. There are many reasons why you need to remove the background of images such as you don’t like the background and replace with the new one. Here, in this article we will share the information about the GIMP which is a free and open source programs and can help you to remove background from the images and make the transparent.
In this article
01 [What’s Gimp?](#Part 1)
02 [How to Create a Transparent Background in GIMP](#Part 2)
03 [How to Turn the Complex Image Background Transparent](#Part 3)
04 [How to Turn a One-Color Background Transparent](#Part 4)
Part 1 What’s Gimp?
GIMP is open source software which allows you to do image manipulations. The program is distributed over the internet for free of cost the beginners to learn the photography skills. GIMP software can be used for photo retouching, image authoring and image compositions. GIMP supports all features of photo editing even it can be used for GIMP remove background to transparent. You can also use it as a paint program, online batch processing system, image format converter and as an image renderer.
Part 2 How to Create a Transparent Background in GIMP
With the help of GIMP software you can easily remove background from image and make it transparent. Here, we are going to tell you that how you can remove background with the help of GIMP. Let’s learn it step by step.
Step 1:
Install and launch GIMP program on your system. Now click the “File > Open” or you can also use “File > Open as Layers” option.
Step 2:
Now, you have to use the Fuzzy tool. The Fuzzy tool is mainly designed to select the current layer area and the image on the basis of color. Using this tool you can easily select the background which you want to remove with just one click.
Step 3:
On your image, now you will see a channel dialog when you add a second layer on it. This layer will tell the transparency of the image you have added to remove background. So, click the “Layer > Transparency > Add Alpha Channel option.
Step 4:
On your keyboard now you need to hit the “Delete” button to remove background. You may need to repeat the steps 2 to 4 if the background is not completely removed else there is no problem. We have removed blue background here for example.
Step 5:
Finally, you can click the “File > Export As” and then select the PNG format and save it on your computer in the PNG format. This is the way about GIMP remove background to transparent.
Part 3 How to Turn the Complex Image Background Transparent
The above part was about removing the simple and easy background from the image. Here we will share about GIMP transparent background PNG when you have the complex background. For, GIMP create transparent background in the complex images you need to add a transparent layer on the image.
Step 1:
Open the image in GIMP and then right click on the layer of image. Now, click the “Add Alpha Chanel” option.
Step 2:
After making a layer for background now you have to select the foreground of the image which you want to keep using the select tool of GIMP. To start, first you need to make sure the in the settings you have selected “Draw foreground option” is selected.
After doing all adjustments of the settings you need to draw outline of the object and finally press the enter button on keyboard.
Step 3:
After doing all the settings you have to adjust the stroke width from settings panel of GIMP. Use your mouse now and start dragging and drawing the image just like you are painting with a brush. Once your drawing is finished and you leave your mouse the image will look like the below screenshot.
Step 4:
You can also fine tune your selection now with the help of draw background option in the GIMP. This will help you to adjust the rough outline you created previously. Once you are happy then simply press the enter button.
Step 5:
Still, if you want to refine your results more than you can refine your outlines by using the path nodes option. You can view the path nodes by following the below steps.
● Keep your mouse cursor at paths dialog.
● Now, hit selection.
● To view the path you can click the CTRL+Shift+A button.
● Now, select the paths tool.
● Finally click the “Path”.
Step 6:
Now, it’s a time to adjust the outlines according to the output of your foreground image. You can zoom the image and add or adjust the previous nodes. To adjust node you can click the CTRL button on keyboard and drag the node using your mouse. If you need to remove a node then you can use CTRL+Shift button and then click on the node.
Step 7:
Once the path is refined according to your need hit the “Selection from Path” option at the left side.
Step 8:
You will have to add the layer mask on the image now to which will reveal the transparency. Right click the Current layer > Add Layer Mask > Selection and finally click “Add” button.
Step 9:
Now, if you have followed all the previous steps perfectly then your background will be removed now and you can also add a new background to the image. This is way about GIMP delete background to transparent for the complex images.
Part 4 How to Turn a One-Color Background Transparent
While using the GIMP you can also run the one color images background in the transparent. This method helps you to make the transparent background in case if you have the single color in the background of your image. In this method you just need to select the background by the color and it will be removed in the seconds. For GIMP create transparent background image in the single color background image you can follow the below steps.
Steps to Follow:
● Open the image using “File > Open” in the GIMP program.
● Once image is opened you have to select the image layer at the right side corner of the screen. Now right click and select the Add Alpha Channel option.
● Now, you have to choose the select by color tool.
Step 2:
After selecting the color tool you can select the area of the background image which you need to make transparent by clicking on the image. You can also select it manually by clicking and dragging using your mouse pointer. To increase the selection press Shift button on keyboard and then select the different area which you want to select.
Step 3:
Finally, when you have selected the complete area which you want to make transparent then simply select the delete button. This is the way about GIMP set transparent background for one color background images.
Learn New Ways to Make Transparent Background
GIMP software is a free program for newbie users to expand their skills. With the help of GIMP software you can easily remove background from mostly any kind of images. If you like to go for pro software to make the video from the images you have created then you can try the Wondershare Filmora Video Editor which allows you to make the beautiful videos and edit them quickly.
For Win 7 or later (64-bit)
For macOS 10.12 or later
Wondershare Filmora program is video editor software which also offers you some of the photo editing options as well. It is compatible with the windows as well as the Mac operating system devices. The program comes with a very easy to use interface and allows you to edit the videos and design them from scratch. It comes with the premade templates in it so you can directly use them for your videos to make the process faster. You can do keyframing, speed ramping, splitting screen, motion tracking etc for editing your videos.
Filmora offers you an inbuilt screen recorder which is the best for recording the gaming videos. it also offers you the effects to apply on the videos, color correction, color matching and many more others features which can be used for making the best quality videos.
● Ending Thoughts →
● Well, this is all about making transparent background in the GIMP. GIMP is really a very helpful program that comes with most all features what you need to edit the images and change the background of your images.
● If you need to edit the videos as well or you want to make videos with the images edited using GIMP then you can simply use Wondershare Filmora which the best in the video editing Era.
Top Animated Title Makers
You know that your video needs a title, but rather than just type in some bland text to introduce the video, you can create an animated title page that is far more attractive. Animated titles make a video more attractive and when done correctly, they can even guarantee that your target audience will stick around long enough to watch the entire video. They can also be very useful for introducing the content of the video.
But to make an effective animated title, you need a tool that is designed to do just that. In this article, we look at some of the top animated title makers that you can use to create the perfect animated title for your video.
Part 1. Animated Title Maker Online
If you don’t want to install software on your computer to create the animated title, the following are the top online tools to choose from;
Animaker
Link: https://www.animaker.com/text-animation-maker
Rating: 4.5/5
Animaker is an online tool that is specifically designed to help you create text animations that you can then add to your video project. Available online on all browsers, Animaker has a simple user interface that makes it easy to create text animations in a matter of minutes. It is so easy to use that even the average beginner can create stunning text animations.
If you don’t want to create the animations from scratch, Animaker has numerous pre-designed templates for you to choose from that you can then just edit to fit your design. It also has a lot of customizable infographics that you can repurpose.

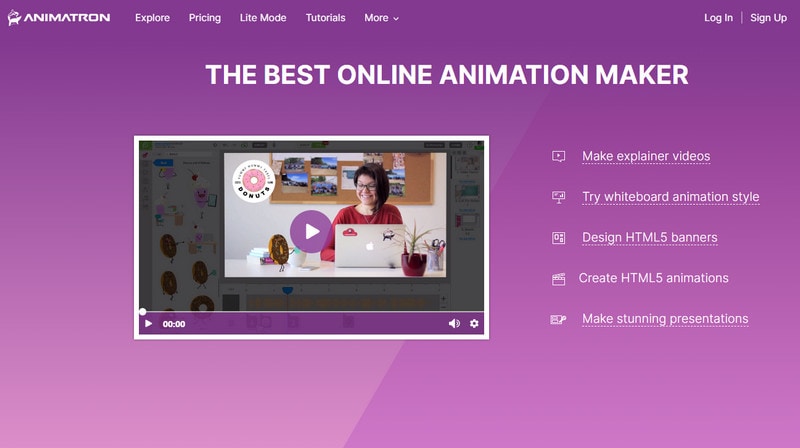
Animatron Studio
Link: https://www.animatron.com/studio
Rating: 4.5/5
The Animatron Studio is a one-stop solution for generating all types of animated texts. You can use it to create the perfect animated title for your video, but its numerous features also mean that it is one of the best ways to create attention-grabbing animated banner ads that can be posted on various ad sites,
It has a wealth of resources that you can use to create the title including more than 500,000 royalty-free images, videos, and audio to include in your project. If you don’t want to build the animated content from the ground up, you can select from the 200 pre-animated sets that Animatron Studio provides.
Kapwing Title Maker
Link: https://www.kapwing.com/animated-text-video-maker
Rating: 4.5/5
If your goal is to do more than just create an animated title for your video, Kapwing is a good solution. It is a complete online video editor that can also be used to create animated titles. As such, you can expect Kapwing to have more advanced features that allow you to customize the animated title in various ways.
For instance, it has a huge selection of animations that you can apply to the text. But you also get the option to upload your own animations, colors, and fonts. But please note that the free version of Kapwing will add a watermark to the video.

Biteable Animated Text Maker
Link: https://biteable.com/animated/text/
Rating: 4.5/5
Biteable is one of the most popular solutions that you can use to create all kinds of animated texts. It is simple enough to use that it is useful to both professionals and amateur video creators. It has numerous useful features including custom scenes, foundations, backgrounds, and characters all of which can work together to create the perfect animated title.
One of the main benefits of choosing Biteable is that you can share the videos you edit directly on social media without having to download the video.

Flexclip Video Maker
Link: https://www.flexclip.com/editor/
Rating: 4.5/5
Flexclip is another very easy-to-use and easily accessible solution to create animated texts for videos. Rather than create the texts from scratch, Flexclip allows you to create stunning animated texts just by selecting several parameters.
There are also a lot of pre-made designer text templates that are fully customizable. All you have to do is select one of the templates, and change the text, font, and any images to make it unique to you and your video.

Part 2. Animated Title Maker for Computer
Online tools can be useful, especially since they are more easily accessible. But if you want additional features and more ways to customize your animated title, the following desktop solutions may be more applicable to you;
Filmora
Rating: 4.5/5
Wondershare Filmora is a complete suite of video editing tools that can also come in handy when creating animated titles for videos. It is a very simple video editor with a simple user interface, making it an ideal solution even for beginner users. Adding a title to your video is easy and you get to choose from more than 200 different animations that you can apply to bring the text to life.
Filmora is also very useful because it comes with advanced editing features for the professional editor. You can use it to edit all aspects of the video including the clips and even any audio that may be on the project.

Adobe Animate
Rating: 4.5/5
Adobe Animate is a great option to create various animations for your video project, including animated texts. Used by animators to create 2D animated content, Adobe Animate has a lot of features designed to facilitate this kind of animation and is, therefore, one of the go-to solutions for designers looking to create illustrations like logos and infographics.
But like other Adobe programs, Adobe Animate is not very easy to use and the beginner may find that it takes quite a long time to figure out how it works. But once you figure it out, the 800+ web fonts can make it very easy for you to customize your animated title in various ways.

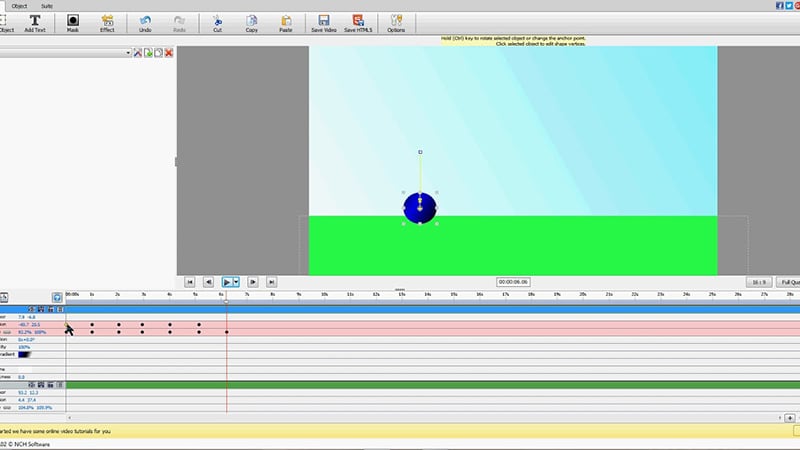
Express Animate
Rating: 4.5/5
Express Animate is a completely free program that you can download on your computer. It is a complete video editor which means that you can use it to animate text and characters, but it is also a great way to edit other aspects of the video including the audio tracks and adding digital effects.
With a simple user interface, Express Animate allows users to create 2D animations that can be used to create unique videos. It is also a good way to create GIFs and memes.
Movavi Video Editor
Rating: 4.5/5
Movavi Video Editor is another complete suite of editing tools that can also come in handy when you want to create an animated title for your video. Designed for both professionals and beginners, this video has all the advanced features you will need to edit all aspects of your video, including a built-in audio editor.
When it comes to animation, Movavi has a lot of effects and transitions as well as pre-made title templates to choose from. Once you have selected the title, you can easily customize the font and color to fit into your project.

Windows Movie Maker
Rating: 4.5/5
For PC users Windows Movie Maker is a simple to use and free way to edit videos. Included with the Windows OS, you likely don’t need to install any software to use and even though it is a free solution, Windows Movie Maker does have the necessary features to create and add animated titles to any video.
It comes with numerous effects, transitions, and templates to choose from when animating text. And it can also be used to edit videos in other ways including trimming and merging clips.

Part 3. Animated Title Maker Apps
If you are editing your videos on your mobile device, the following are the top animated title-making apps to choose from;
Tomo
Rating: 4.5/5
Link: https://m.apkpure.com/tomo-animate-text-in-video/com.entzeners.app.tomo
Tomo is one of the best apps that you can use to animate text in a video. It has robust features that allow you to easily add text to the video and then animate the text using various transitions and effects. Once the edits are complete, Tomo allows you to share the completed video directly on social media apps like Instagram and Twitter.

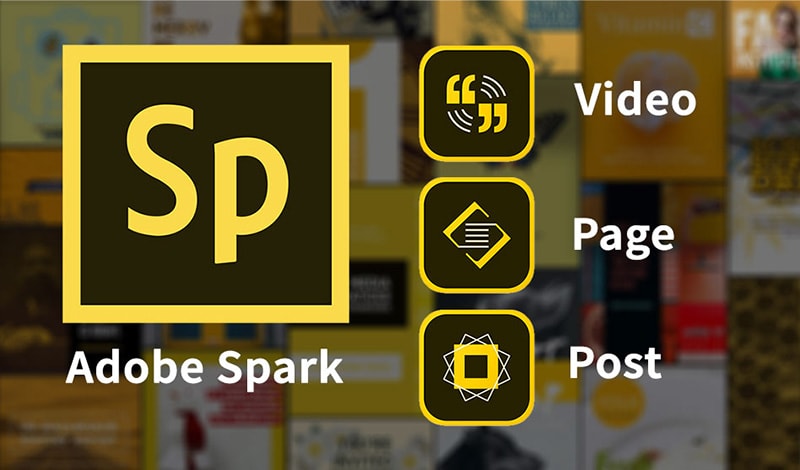
Adobe Spark
Rating: 4.5/5
Link:https://apps.apple.com/us/app/adobe-spark-post-design-maker/id1051937863
Available for both Android and iOS devices, Adobe Spark is a video editing tool that has numerous tools to add and edit texts on videos. You can use the professionally designed templates that you have access to when using Adobe Spark to create stunning animation titles. And since it easily integrates with other apps on the device, sharing the videos is very easy.
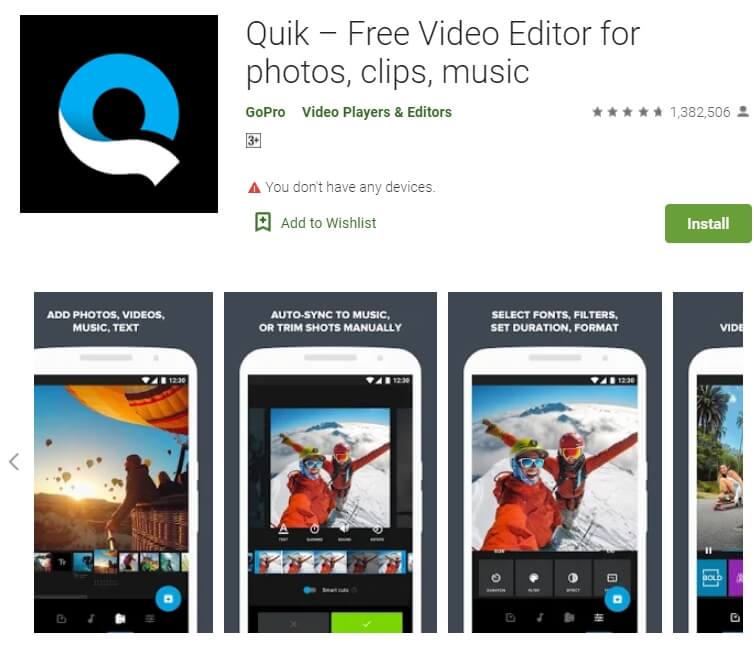
Quik
Rating: 4.5/5
Link: https://play.google.com/store/apps/details?id=com.gopro.smarty&hl=en&gl=US
Quik is an app that is dedicated to text animations and therefore one of the best solutions when you want to add and edit texts on videos. It is available for both iOS and Android and although the free version of the app is slightly limited, its basic editing features are still better than what you find on other more expensive solutions.
Hyper-type Animated Text Videos
Rating: 4.5/5
Link: https://itunes.apple.com/us/app/hype-type-animated-text-videos
This app gives you two options when it comes to animating the text on your video; auto-motion and typography. It focuses on just adding and editing text on a video and as such may not have any of the other video editing features you will find on some of the other apps. But if your goal is to create an interactive animated video title, Hyper-type Animated Text Videos is a great solution.
Vimeo
Rating: 4.5/5
Link: https://play.google.com/store/apps/details?id=com.vimeo.android.videoapp&hl=en&gl=US
Also available for both iOS and Android devices, Vimeo can also be a handy solution for the creation and editing of animated titles for videos. It has a lot of features to edit not just the text in videos, but also all other elements including audio. You even get a wide selection of royalty-free music that you can add to the video and motion stickers to make your title stand out even more. But the free version of Vimeo will add a watermark to the video.

Free Download For Win 7 or later(64-bit)
Free Download For macOS 10.14 or later
This Article Will Focus on Understanding the Secret Tips in Wondershare Filmora that You Can Use to Edit Videos Faster and More Efficiently
Wondershare Filmora is a great video editing software with millions of users worldwide. It has many features that it provides to its users. However, there are some other features hidden up its sleeve.
This article will share some “secrets” of Wondershare Filmora features you may not know that they exist in Filmora. Scroll below to see the features that level up your editing skills.
Part 1. Shared Media Folder
You might have had the hassle of importing the same videos for a considerable time in a different project. It can become a problem for you. It may be fine if you have organized your videos from the start.
Shared Media Folder in Filmora, now called the Global Media Folder, can store video and audio that you’ve imported for future projects. So you don’t have to keep re-importing your media for future videos.

Moreover, when you have imported files into the Shared Media Folder, you can create new Sub-Folders. You can name these folders according to the types of media you are going to use.
Suppose you are a content creator and want to spice up your content with memes. You can create a meme folder to import recent memes into your videos.
Once you have imported them into the Wondershare Filmora’s Shared Media Folder, you can access them anytime. Doing so will allow you to save time and build a base for your future projects.
Free Download For Win 7 or later(64-bit)
Free Download For macOS 10.14 or later
Part 2. Customize Proxy Files
Before understanding the custom proxy settings, let us know what proxy files are.
Proxy Files
Proxy files in Wondershare Filmora allow you to render and edit 4K and other higher-resolution videos easily, regardless of your computer’s processing power.
No one wants to compromise PC performance when editing videos. But if you are importing a video with a higher resolution than your PC, you can only play it sometimes. Other than that, your PC might get stuck and slow down.
If your PC has a built-in resolution of 1080p, but the video you are going to import is 2160p, you can encounter rendering and performance problems. But in the case of Wondershare Filmora Proxy files, you can smoothly edit your videos without any trouble.
How to Customize Proxy Files in Filmora
Although Wondershare Filmora automatically creates proxy files when it encounters resolutions more significant than the PC performance. But you can also set them to your preference.
And customize your proxy files takes some simple and easy steps. But first, follow the steps mentioned below.
Step1 Find the File option on the top left corner of the Wonderhsare Filmora home interface.
Step2 Click on Files and go to Preferences.
Step3 A window will pop up, and here you can see multiple options.
Step4 Go to the performance.
Step5 In the performance tab, scroll down till your see Proxy.
Step6 Here check the box that says, “Automatically create proxies when resolution higher than:”

Step7 Below you can see multiple options. In these options, select the resolution that you want.
Step8 You can also click on the box below to automatically delete the proxies when you close your project.
Now, whenever you encounter a resolution of a higher video than the one you selected, Wondershare Filmora will do its magic.
Part 3. Delete Project Render Cache
Another hack you can use to save space on your hard drive is Deleting the Render cache. But before we do that, let us understand what Render cache is!
What is Render Cache?
Rendering can be a giant leap to give you a smooth performance experience. However, when you import your videos into the timeline, you can always render to have an uninterrupted playback experience.
Doing so will allow you to work in your zone quickly and efficiently. You can do a manual rendering before you begin the editing process. Or you can also opt to choose automatic rendering. In the automatic rendering option, you can continue your editing process. In the meantime, your timeline will be rendered.
How to Delete Render Cache in Filmora
To save up storage space on your computer, you can delete your render cache by following the steps.
Step1 Click on files in the top left corner of the Wondershare Filmora home interface.
Step2 Go to Preferences.
Step3 A window will pop up and go to Performance.
Step4 In the performance tab, scroll down below to the Preview Render.
Step5 Check the box saying, “Automatically delete render files when a project is closed.”

Step6 Click on OK to save your changes.
Now, whenever you close your project, your render cache will be deleted and would have given you extra space on your computer.
Part 4. Remove Split Button on Playhead
In some instances, when you are moving the playhead on the timelines, it can distract you from doing your editing. Or even more, you can mistakenly click on the Split button to split the clips you don’t want them to.
Well, no worries at all! Wondershare Filmora takes care of that for you. You can hide or remove the Split button on the playhead. It only takes a few simple and easy steps. Follow the steps mentioned below to remove the Split button:
Step1 You will notice the File option on the top left corner of the Wonderhsare Filmora home interface.
Step2 Click on Files and go to Preferences.
Step3 A window will pop up, and here you can see multiple options.
Step4 Go to the editing
Step5 In the editing tab, scroll down till your see the Split button.

Step6 Check the box. Then, click OK to save your changes.
Doing so would have removed the Split button from your playhead. So now you can edit your videos without any distractions.
Part 5. Copy and Paste Effects
Copy and paste are one of the oldest tricks in editing procedures. Wondershare Filmora comes with a range of commands and features that allow you to save time and be reliable.
Suppose you want to add an effect to a video clip in the timeline. Then, after adding the effect to your video, make custom changes to make it look more closely to the style you want. You can now use the copy-and-paste function to add the same effect to another clip. That helps you save a lot of time from tedious and time-consuming work.
How to Copy and Paste Effects
While editing, you will need to ensure that your editing process is as clean as possible and that you have all the time on hand.
But there is a solution! You can easily copy and paste the effects you placed on one video clip to another. Just follow the steps mentioned, and you will be good to go:
Step1 Right-click on the video to you added the effects too.
Step2 A drop-down column will pop up.
Step3 In the options below, you will notice an option called “Copy Effects.”
Step4 Click on the “Copy Effects” option.
Step5 Now move the playhead to the video clip on which you want to paste the effects.
Step6 Right-click on the video that you want to place the effect on.
Step7 In the pop-up column, select the Paste Effect
Step8 It adjusts the video clip according to the changes of the prior one.
You can save editing time by simply copying and pasting video effects.

Part 6. Timeline Snap
You might have added multiple videos in the same timeline track. If you removed the video ahead of the video clip, you have to close the gap in between.
So, arranging and moving clips in the timeline are hectic and time-consuming. However, that is the case without timeline snapping.
How to Apply Timeline Snap in Filmora
Timeline snapping will allow you to arrange video clips side by side without any breaks and cut-offs. Also, it will enable you to place it precisely above other video and audio gaps in the timeline.
In most cases, Timeline snapping is enabled from the start. But if you are encountering some problems managing your videos. Or if you want to remove the Timeline snap feature. Follow the steps mentioned below:
Step1 Right-click on the Timeline.
Step2 A pop will open up, giving you multiple options.
Step3 Click on timeline Snapping to either enable it or disable it.

Now you can easily enable and disable timeline snapping according to your choice!
Part 7. Color Code Video Clips
When editing footage from multiple cameras, you might want to organize which media is from which source in the timeline. You can do this by color coding your clips.
Steps to Color Code Your Videos
Color coding allows you to edit all the clips marked with a particular color to be selected simultaneously without selecting them manually in the timeline.
To color code a video, follow the steps as mentioned:
Step1 Select the clips you want to color code, right-click, and choose from the available colors.
Step2 Once you’ve color coded your clips, you can right-click on the clip again and choose to select all clips from the color mark option.
Step3 And all the clips marked with that color will be selected.

Part 8. Group Clips Together
Now in an editing timeline, you might encounter a situation where you want to arrange a video clip with specific audio. Again, it allows you to stay organized and save up a lot of time.
Grouping clips together can also be helpful when you want to edit multiple clips in the timeline but want to maintain a particular order. The group will remain in its place and allow you to edit your other video clips quickly.
Stepwise Guide to Grouping the Clips in Filmora
You can group video and audio clips in straightforward steps. Just follow the actions ahead, and you will be good to go:
Step1 Hold Left-click and drag across the clips that you want to select.
Step2 When you are done, Right-click on the clip to open the options tab.
Step3 Scroll down, and you will see a “” option.
Step4 Select Group, and that’s done.

Your whole group will be selected whenever you select a video clip or an audio clip.
Part 9. Pan and Zoom Shortcut
Editing shortcuts are excellent. They allow you to save up a lot of time. Some people prefer to use a mouse only to edit their videos, but professionals always use a keyboard.
But there are some other shortcuts too! In these shortcuts, you would not necessarily need a keyboard; only a mouse will work and give a good outcome.
You might have seen those videos in which a specific screen ratio moves over a picture. Or, in some cases when you have to pan and zoom to create a flow effect.
Instead of manually adjusting the ratio of your videos and photos, Pan and Zoom shortcuts will allow you to use multiple features. These features allow you to select where your video or photo will start, zoom, and end.
These shortcuts are so easy to apply. Just go through the steps below, and you will accomplish the following:
Step1 Right-click on a photo or a video clip.
Step2 Go to the crop and zoom tab above the timeline.
Step3 In the window that opens up, you will see a pan and zoom option in the top left corner. Click on it.
Step4 And on the bottom right corner of the window, you can see the pan and zoom shortcuts available.
Step5 Please select any of them you want and then click on OK.

Part 10. New Feature Request
One of the significant features of Wondershare Filmora that sets it among the best is its capability to listen to the users. When you have been using Wondershare Filmora for a long time, there will come a time when you wish for a feature. You can also do so in a few simple steps. Just follow the steps mentioned:
Step1 Multiple options are available on the top left corner of the Wondershare Filmora home interface. Click on help.
Step2 A drop-down box will open up.
Step3 In the options offered to you, select suggest a feature.

Step4 It automatically directs you to your default browser, where you can see the multiple feature requests.
Step5 You can vote for a feature you want in the next update.
Step6 Or you can also create a request for another particular feature.

Summing Up
Wondershare Filmora is the best in the business regarding editing your videos. It has such creative and easy-to-use software that even a beginner efficiently edits videos.
There are a lot of features that Wondershare Filmora provides. But now, with these secret and hidden tips, you can edit your videos more creatively.
Free Download For macOS 10.14 or later
Part 2. Customize Proxy Files
Before understanding the custom proxy settings, let us know what proxy files are.
Proxy Files
Proxy files in Wondershare Filmora allow you to render and edit 4K and other higher-resolution videos easily, regardless of your computer’s processing power.
No one wants to compromise PC performance when editing videos. But if you are importing a video with a higher resolution than your PC, you can only play it sometimes. Other than that, your PC might get stuck and slow down.
If your PC has a built-in resolution of 1080p, but the video you are going to import is 2160p, you can encounter rendering and performance problems. But in the case of Wondershare Filmora Proxy files, you can smoothly edit your videos without any trouble.
How to Customize Proxy Files in Filmora
Although Wondershare Filmora automatically creates proxy files when it encounters resolutions more significant than the PC performance. But you can also set them to your preference.
And customize your proxy files takes some simple and easy steps. But first, follow the steps mentioned below.
Step1 Find the File option on the top left corner of the Wonderhsare Filmora home interface.
Step2 Click on Files and go to Preferences.
Step3 A window will pop up, and here you can see multiple options.
Step4 Go to the performance.
Step5 In the performance tab, scroll down till your see Proxy.
Step6 Here check the box that says, “Automatically create proxies when resolution higher than:”
Step7 Below you can see multiple options. In these options, select the resolution that you want.
Step8 You can also click on the box below to automatically delete the proxies when you close your project.
Now, whenever you encounter a resolution of a higher video than the one you selected, Wondershare Filmora will do its magic.
Part 3. Delete Project Render Cache
Another hack you can use to save space on your hard drive is Deleting the Render cache. But before we do that, let us understand what Render cache is!
What is Render Cache?
Rendering can be a giant leap to give you a smooth performance experience. However, when you import your videos into the timeline, you can always render to have an uninterrupted playback experience.
Doing so will allow you to work in your zone quickly and efficiently. You can do a manual rendering before you begin the editing process. Or you can also opt to choose automatic rendering. In the automatic rendering option, you can continue your editing process. In the meantime, your timeline will be rendered.
How to Delete Render Cache in Filmora
To save up storage space on your computer, you can delete your render cache by following the steps.
Step1 Click on files in the top left corner of the Wondershare Filmora home interface.
Step2 Go to Preferences.
Step3 A window will pop up and go to Performance.
Step4 In the performance tab, scroll down below to the Preview Render.
Step5 Check the box saying, “Automatically delete render files when a project is closed.”
Step6 Click on OK to save your changes.
Now, whenever you close your project, your render cache will be deleted and would have given you extra space on your computer.
Part 4. Remove Split Button on Playhead
In some instances, when you are moving the playhead on the timelines, it can distract you from doing your editing. Or even more, you can mistakenly click on the Split button to split the clips you don’t want them to.
Well, no worries at all! Wondershare Filmora takes care of that for you. You can hide or remove the Split button on the playhead. It only takes a few simple and easy steps. Follow the steps mentioned below to remove the Split button:
Step1 You will notice the File option on the top left corner of the Wonderhsare Filmora home interface.
Step2 Click on Files and go to Preferences.
Step3 A window will pop up, and here you can see multiple options.
Step4 Go to the editing
Step5 In the editing tab, scroll down till your see the Split button.
Step6 Check the box. Then, click OK to save your changes.
Doing so would have removed the Split button from your playhead. So now you can edit your videos without any distractions.
Part 5. Copy and Paste Effects
Copy and paste are one of the oldest tricks in editing procedures. Wondershare Filmora comes with a range of commands and features that allow you to save time and be reliable.
Suppose you want to add an effect to a video clip in the timeline. Then, after adding the effect to your video, make custom changes to make it look more closely to the style you want. You can now use the copy-and-paste function to add the same effect to another clip. That helps you save a lot of time from tedious and time-consuming work.
How to Copy and Paste Effects
While editing, you will need to ensure that your editing process is as clean as possible and that you have all the time on hand.
But there is a solution! You can easily copy and paste the effects you placed on one video clip to another. Just follow the steps mentioned, and you will be good to go:
Step1 Right-click on the video to you added the effects too.
Step2 A drop-down column will pop up.
Step3 In the options below, you will notice an option called “Copy Effects.”
Step4 Click on the “Copy Effects” option.
Step5 Now move the playhead to the video clip on which you want to paste the effects.
Step6 Right-click on the video that you want to place the effect on.
Step7 In the pop-up column, select the Paste Effect
Step8 It adjusts the video clip according to the changes of the prior one.
You can save editing time by simply copying and pasting video effects.
Part 6. Timeline Snap
You might have added multiple videos in the same timeline track. If you removed the video ahead of the video clip, you have to close the gap in between.
So, arranging and moving clips in the timeline are hectic and time-consuming. However, that is the case without timeline snapping.
How to Apply Timeline Snap in Filmora
Timeline snapping will allow you to arrange video clips side by side without any breaks and cut-offs. Also, it will enable you to place it precisely above other video and audio gaps in the timeline.
In most cases, Timeline snapping is enabled from the start. But if you are encountering some problems managing your videos. Or if you want to remove the Timeline snap feature. Follow the steps mentioned below:
Step1 Right-click on the Timeline.
Step2 A pop will open up, giving you multiple options.
Step3 Click on timeline Snapping to either enable it or disable it.
Now you can easily enable and disable timeline snapping according to your choice!
Part 7. Color Code Video Clips
When editing footage from multiple cameras, you might want to organize which media is from which source in the timeline. You can do this by color coding your clips.
Steps to Color Code Your Videos
Color coding allows you to edit all the clips marked with a particular color to be selected simultaneously without selecting them manually in the timeline.
To color code a video, follow the steps as mentioned:
Step1 Select the clips you want to color code, right-click, and choose from the available colors.
Step2 Once you’ve color coded your clips, you can right-click on the clip again and choose to select all clips from the color mark option.
Step3 And all the clips marked with that color will be selected.
Part 8. Group Clips Together
Now in an editing timeline, you might encounter a situation where you want to arrange a video clip with specific audio. Again, it allows you to stay organized and save up a lot of time.
Grouping clips together can also be helpful when you want to edit multiple clips in the timeline but want to maintain a particular order. The group will remain in its place and allow you to edit your other video clips quickly.
Stepwise Guide to Grouping the Clips in Filmora
You can group video and audio clips in straightforward steps. Just follow the actions ahead, and you will be good to go:
Step1 Hold Left-click and drag across the clips that you want to select.
Step2 When you are done, Right-click on the clip to open the options tab.
Step3 Scroll down, and you will see a “” option.
Step4 Select Group, and that’s done.
Your whole group will be selected whenever you select a video clip or an audio clip.
Part 9. Pan and Zoom Shortcut
Editing shortcuts are excellent. They allow you to save up a lot of time. Some people prefer to use a mouse only to edit their videos, but professionals always use a keyboard.
But there are some other shortcuts too! In these shortcuts, you would not necessarily need a keyboard; only a mouse will work and give a good outcome.
You might have seen those videos in which a specific screen ratio moves over a picture. Or, in some cases when you have to pan and zoom to create a flow effect.
Instead of manually adjusting the ratio of your videos and photos, Pan and Zoom shortcuts will allow you to use multiple features. These features allow you to select where your video or photo will start, zoom, and end.
These shortcuts are so easy to apply. Just go through the steps below, and you will accomplish the following:
Step1 Right-click on a photo or a video clip.
Step2 Go to the crop and zoom tab above the timeline.
Step3 In the window that opens up, you will see a pan and zoom option in the top left corner. Click on it.
Step4 And on the bottom right corner of the window, you can see the pan and zoom shortcuts available.
Step5 Please select any of them you want and then click on OK.
Part 10. New Feature Request
One of the significant features of Wondershare Filmora that sets it among the best is its capability to listen to the users. When you have been using Wondershare Filmora for a long time, there will come a time when you wish for a feature. You can also do so in a few simple steps. Just follow the steps mentioned:
Step1 Multiple options are available on the top left corner of the Wondershare Filmora home interface. Click on help.
Step2 A drop-down box will open up.
Step3 In the options offered to you, select suggest a feature.
Step4 It automatically directs you to your default browser, where you can see the multiple feature requests.
Step5 You can vote for a feature you want in the next update.
Step6 Or you can also create a request for another particular feature.
Summing Up
Wondershare Filmora is the best in the business regarding editing your videos. It has such creative and easy-to-use software that even a beginner efficiently edits videos.
There are a lot of features that Wondershare Filmora provides. But now, with these secret and hidden tips, you can edit your videos more creatively.
Ultimate Guide on Magic Effects Video Making
Magic inspires and fascinates everyone. Editors often rely on it to create suspense and attraction in their films. With an all-in-one video editor, Filmora, you can get creative and use ample stupefying effects to amuse your viewers. Before delving into the details of step-by-step guides of some magic effects, let’s examine these effects.
Part 1. What Are Magic Effects?
In terms of video editing, visual effects which imply the presence of supernatural forces (the ones having power over natural forces) are called magic effects. They could belong to any of the effects of charm, i.e., sudden appearance, vanishing, transposition, transformation, etc. For example, in Harry Potter’s classic scene, everyone waves a lit magic wand. To make this kinetic effect ourselves at home, read on.

Part 2. How to Create a Magic Effect with Filmora
An easy-to-use and all-in-one video editing software is necessary to realize this magic fully. Here, we use Wondershare Filmora . It can personalize anything in detail. You can also use footage from its stock media with unlimited options. By using this platform for editing, you can reduce your lengthy hours.
Free Download For Win 7 or later(64-bit)
Free Download For macOS 10.14 or later
There are many different ways you can do spellbound editing on Filmora. To learn the complete step-by-step instructions, continue scrolling.
Step1 Download and Install Wondershare Filmora
Launch the most recent version of the software on your computer to produce an outstanding film. To do this, take the following actions:
- You must first download Wondershare Filmora and open it on your PC or Mac.

Step2 Import Your Photos and Videos
When you open Wondershare Filmora, you will notice the main import window in the top left corner.
- Click in the center of the import window upon the import icon.
- After clicking, Wondershare Filmora will automatically direct you to your PC library.
- Browse to where your target Clips or Images are stored.
- Select all the objects you want to import.
- Click on Open, and you will have imported files.

Step3 Add Your Photos and Videos to the Timeline
Your next step will be to add the imported videos and images to the timeline. When you have many videos and photos imported into the timeline, you can add them simultaneously.
Or you can also add them one by one wherever you need. To add an item to your timeline, follow the steps mentioned.
- Right-click on the photo or video you want to add to the timeline.
- Keep holding the right-click and drag it down to the timeline.

Step4 Adding the Magic Imitating Effect
After these initial setups, you must add the effects from filmstock to our clips. These are pre-made presets of different clipart and graphics, executing unique movements and effects. For their introduction in the video, read along with the following procedure:
- After dragging and dropping the clip onto the first track on the timeline, go to the stickers tab on the top left ribbon, click it, and scroll down to the filmstock dropdown.

- From there, open the Bling Bling Effect Pack and choose the bling light effect of your liking. Then, drag and drop that effect onto the second video track on the timeline.

- Adjust the element’s scale according to your required size from the editing menu after double-clicking the element.

- Move the playhead to locate the brightest moment of the element. Now, right-click and select Add Freeze Frame. It will freeze the element at that exact frame

- Find the spot on the base clip’s timeline where the corresponding LED used while shooting turns on. Then, bring the element to the second track and adjust its position.
![]()
Note: ensure the element’s freeze frame starts when the anticipated magic wand light is glowing.

- Adjust the duration to match the end of the two clips on the timeline.

Step5 Adding Keyframe Movement to the Element
It is time to add some keyframes. Once you have successfully added the effect element onto your editing workspace, you have to make it do the magic. Attaching the magic effect bling to the base (background) video is like painting your canvas for the magic to occur. It is a crucial step for bringing out those Harry Potter-like magical feats. Continue scrolling for step-by-step instructions.
- Double-click the effect element and open the Editing Menu.

- In the basic tab, as visible above, Check the key-shaped button in front of the Transform button. It will create a Keyframe in the default form of your motion element. Then adjust the element’s position at the wand’s tip on the preview window.

Step6 Detailing the Effect Through Keyframing
This part of the procedure is iterative. You will see how keyframing can open several doors of creative freedom in front of you and how many motion effects are possible through it.
- Move the playhead further right and stop where the element is not on top of the magic wand’s tip. Then, add another keyframe following the same procedure and adjust the element’s position onto the wand’s tip.

Repeat the above step for as long as the wand is in motion in the clip. Feel free to spend more time on this step. The more keyframes you add, the more seamless your stunt will look.
Finally, it is time to look at the results. Witness how you have curated a magical masterpiece.

Conclusion
Magic amazes us all, and experiencing it while being creative with your projects makes it even more exciting. Filmora provides multiple tips and tricks to build the supernatural realm onto your screens. Whatever you wish to bring to the screen from the unrealistic realm, Wondershare Filmora is your genie friend. Here’s to every Filmora enthusiast casting spells onto their screens. We are eager to witness the tricks and wonders you have up your sleeves. Happy creating!
Free Download For macOS 10.14 or later
There are many different ways you can do spellbound editing on Filmora. To learn the complete step-by-step instructions, continue scrolling.
Step1 Download and Install Wondershare Filmora
Launch the most recent version of the software on your computer to produce an outstanding film. To do this, take the following actions:
- You must first download Wondershare Filmora and open it on your PC or Mac.
Step2 Import Your Photos and Videos
When you open Wondershare Filmora, you will notice the main import window in the top left corner.
- Click in the center of the import window upon the import icon.
- After clicking, Wondershare Filmora will automatically direct you to your PC library.
- Browse to where your target Clips or Images are stored.
- Select all the objects you want to import.
- Click on Open, and you will have imported files.
Step3 Add Your Photos and Videos to the Timeline
Your next step will be to add the imported videos and images to the timeline. When you have many videos and photos imported into the timeline, you can add them simultaneously.
Or you can also add them one by one wherever you need. To add an item to your timeline, follow the steps mentioned.
- Right-click on the photo or video you want to add to the timeline.
- Keep holding the right-click and drag it down to the timeline.
Step4 Adding the Magic Imitating Effect
After these initial setups, you must add the effects from filmstock to our clips. These are pre-made presets of different clipart and graphics, executing unique movements and effects. For their introduction in the video, read along with the following procedure:
- After dragging and dropping the clip onto the first track on the timeline, go to the stickers tab on the top left ribbon, click it, and scroll down to the filmstock dropdown.
- From there, open the Bling Bling Effect Pack and choose the bling light effect of your liking. Then, drag and drop that effect onto the second video track on the timeline.
- Adjust the element’s scale according to your required size from the editing menu after double-clicking the element.
- Move the playhead to locate the brightest moment of the element. Now, right-click and select Add Freeze Frame. It will freeze the element at that exact frame
- Find the spot on the base clip’s timeline where the corresponding LED used while shooting turns on. Then, bring the element to the second track and adjust its position.
![]()
Note: ensure the element’s freeze frame starts when the anticipated magic wand light is glowing.
- Adjust the duration to match the end of the two clips on the timeline.
Step5 Adding Keyframe Movement to the Element
It is time to add some keyframes. Once you have successfully added the effect element onto your editing workspace, you have to make it do the magic. Attaching the magic effect bling to the base (background) video is like painting your canvas for the magic to occur. It is a crucial step for bringing out those Harry Potter-like magical feats. Continue scrolling for step-by-step instructions.
- Double-click the effect element and open the Editing Menu.
- In the basic tab, as visible above, Check the key-shaped button in front of the Transform button. It will create a Keyframe in the default form of your motion element. Then adjust the element’s position at the wand’s tip on the preview window.
Step6 Detailing the Effect Through Keyframing
This part of the procedure is iterative. You will see how keyframing can open several doors of creative freedom in front of you and how many motion effects are possible through it.
- Move the playhead further right and stop where the element is not on top of the magic wand’s tip. Then, add another keyframe following the same procedure and adjust the element’s position onto the wand’s tip.
Repeat the above step for as long as the wand is in motion in the clip. Feel free to spend more time on this step. The more keyframes you add, the more seamless your stunt will look.
Finally, it is time to look at the results. Witness how you have curated a magical masterpiece.
Conclusion
Magic amazes us all, and experiencing it while being creative with your projects makes it even more exciting. Filmora provides multiple tips and tricks to build the supernatural realm onto your screens. Whatever you wish to bring to the screen from the unrealistic realm, Wondershare Filmora is your genie friend. Here’s to every Filmora enthusiast casting spells onto their screens. We are eager to witness the tricks and wonders you have up your sleeves. Happy creating!
Also read:
- Updated A Guide to Find a High-Quality Video Marketing Agency for 2024
- Updated Discover Vintage LUTs Premiere Pro Free and Paid Options Available
- 2024 Approved Detailed Tutorial to Merge Videos in VLC Media Player
- Are You Looking for the Best Way to Add Subtitles to Your Video? The Top SRT File Creators Can Help You Do That for 2024
- Updated Mastering OpenCV Object Tracking A Comprehensive Guide for Beginners and Experts for 2024
- Updated How to Create a Custom Sequence Preset in Premiere Pro
- New The Ultimate Guide to GIF for Discord Profile for 2024
- New In 2024, 4 Solutions to Crop a Video on Android Easily
- New 2024 Approved Adjust Background to Black for Your Product Review Video
- How to Vlog? A Beginners Guide to Start Vlogging
- In 2024, This Article Aims to Provide a Step-by-Step Guide to Changing a Videos Speed by Using the Speed Adjustment Panel and Duration Panel on Wondershare Filmora
- Updated 4 Solutions to Add White Border to Video on Mobile and Desktop
- Updated 2024 Approved TikTok Slow Zoom | Create Your Slow Zoom TikTok in Minutes
- New 2024 Approved Slowing Down GIF With The Best Available Methods
- How to Resize FLV Videos Efficiently Windows, Mac,Android, iPhone & Online for 2024
- New Blender Tips - How to Make Blender Render Transparent Background
- New 2024 Approved 11 Tips to Make Product Ad Videos
- Updated How to Make a Video Loop in QuickTime
- New 2024 Approved Top Tools To Create Blend Image Collage
- Updated 2024 Approved How to Delete White Background in Photoshop. How to Create a Transparent Background in Photoshop? Steps to Get Rid of White Background in Photoshop
- New 2024 Approved In This Article, We Will Introduce You Our Top 5 Picks of Websites and Software Converter Online to Convert Powerpoint to Mp4
- Updated 2024 Approved How Much Wedding Videographer Cost
- New The Ultimate Guide to Countdown Animation in Videos
- New 2024 Approved Are You Seeking an Answer for What Is a LUT in the Video? In This Article, We Will Provide You with Detailed Information About LUTs and Their Utility
- | Best WMV to GIF Converters for 2024
- Cropping Videos in Final Cut Pro Step by Step for 2024
- Updated How to Make Vintage Film Effect 1950S for 2024
- New In 2024, How to Create a Custom Slide Show in PowerPoint
- Updated 2024 Approved Best Software or Website to Convert Video Format
- How to Mirror Your Google Pixel Fold Screen to PC with Chromecast | Dr.fone
- In 2024, Unlock Your Boost Mobile Apple iPhone 13 Pro Max Before the Plan Expires
- Best Pokemons for PVP Matches in Pokemon Go For Tecno Camon 20 Pro 5G | Dr.fone
- In 2024, Edit and Send Fake Location on Telegram For your Vivo Y02T in 3 Ways | Dr.fone
- Lock Your Vivo Y78 5G Phone in Style The Top 5 Gesture Lock Screen Apps
- Fixing Persistent Pandora Crashes on Xiaomi Redmi Note 12 5G | Dr.fone
- How to Show Wi-Fi Password on Vivo S17e
- In 2024, Which Pokémon can Evolve with a Moon Stone For Oppo A18? | Dr.fone
- In 2024, How To Generate Speech From Text | The Best Text-to-Speech Converters
- iPogo will be the new iSpoofer On Samsung Galaxy S24+? | Dr.fone
- In 2024, How and Where to Find a Shiny Stone Pokémon For Vivo Y100A? | Dr.fone
- Title: Step by Step Guide on Make Gimp Transparent Background PNG
- Author: Morgan
- Created at : 2024-05-19 05:11:36
- Updated at : 2024-05-20 05:11:36
- Link: https://ai-video-editing.techidaily.com/step-by-step-guide-on-make-gimp-transparent-background-png/
- License: This work is licensed under CC BY-NC-SA 4.0.
