
:max_bytes(150000):strip_icc():format(webp)/tropical-beach-wallpaper-beach-backgrounds-587fbb765f9b584db3241860.jpg)
The Only Guide Youll Ever Need to Learn GIF Design That Get Shared Like Crazy
The Only Guide You’ll Ever Need to Learn GIF Design That Get Shared Like Crazy
The Only Guide You’ll Ever Need to Learn GIF Design That Get Shared Like Crazy
An easy yet powerful editor
Numerous effects to choose from
Detailed tutorials provided by the official channel
The Only Guide You’ll Ever Need to Learn GIF Design That Get Shared Like Crazy
In this article
01 [8 Principles for Great GIF Design](#Part 1)
02 [6 Amazing Examples of Animated Gifs in Web Design](#Part 2)
03 [Learn How to Create and Add Gifs to Interactive Layouts in Filmora](#Part 3)
Part 1 Principles for Great GIF Design
Creating GIFs for infotainment or casual information sharing is the current talk of the trend. You might have visibly landed across a heap of tantalizing GIFs in blogs, social media posts, product promotion websites and almost every other domain you can possibly think of. Using GIFs for any type of content promotion is bound to captivate the target audience in impressive multiplicities. Ever wondered what’s the cue behind the mass appeal that GIFs create? Well, an obvious answer is the stunning GIF design.
When going for GIF creation and selection, design plays the key role in creating considerable buzz about the information being transmitted. To add impact to your creation, you need to pay considerable attention to its design implications, thus ensuring that the right things get presented in the right way. Outlined below are some amazing principles you can use to enhance your GIF design to the next level:
01Ensure Accuracy and Preciseness
The primary concern you need to be attentive about while designing a GIF is its preciseness. Ensure ban exactness of information and confine your creation to the theme and requirement of your creation, like, the message you want to deliver or the impact you want to create through the GIF. Balance your creativity within specific content parameters and avoid getting carried away or overdoing on the beautifying aspect.
As an example, it is visibly not appealing to add a wholesome mix of 15 shades and 20 different elements in a nature-based GIF. You will end up getting too harsh on the viewers’ eyes, confusing them with a hoard of speeding elements and banging colors. You can instead stick to 2 or 3 frames with an intelligent mix of 2 complementary shades.
02Maintain Visual Identity
An important aspect to keep in mind while attempting to design GIF is, it should visually relate to the underlying content. For instance, if you are intending a brand promotion through your GIF, lay stress on adding elements like, brand definition, product specifications, know-how of your work patterns, etc. ensure that your content flows naturally and has exactness.
Other alternatives are, using your product logo as the GIF background, character representation of your brand or using some explicit product oriented themes. While, you are free to pick anything that suits your preferences and needs, just make sure that using it in your GIF adds value to your brand instead of giving an out of the box feel.
Image Name: The-only-guide-you’ll-ever-need-to-learn-gif-design-that-get-shared-like-crazy-1

03Cut Down on Unnecessary Frames
Have you ever encountered a halt in the natural loop of your GIF out of nowhere? While pondering over the underlying cause, it is a common assumption to take this as an animation fallacy, but that’s evidently not the case. The actual culprits behind this glitch are those extra frames that contribute towards nothing but adding weight to an already heavy file.
To set this straight, you should switch to removing any extra frames, while saving a particular one which you may stretch to a desired duration according to the break point of your contents in the GIF. However, take caution to maintain the visual quality of your GIF while you remove those extra frames.
04Make Your GIF Accessible
You should always adhere to the concern of accessibility while creating a GIF. The reason being, your content is visibly going to get mass attention across the web and you cannot filter out visitors, make sure your GIF is easily accessible to all kind of users, particularly those with vision limitations, like, epileptic patients or the ones using screen readers.
Focus on describing your GIF content with alt text and using a limited blinking and flashing rate. In case your GIF content is primarily text based, take care to limit the effective color and image movement and adjust the frames rates to avoid constant and quick movement of image frames when adding many clips on a single page.
Pay additional heed to the auto play feature of your GIFs. It can be visibly annoying to be welcomed on a site homepage with GIFs enjoying an auto play session of their own. You can alternatively, incorporate a ‘Click to Play’ option or grant your site visitors the liberty to decide on what is to be played when.

05Use Storyboards
When aiming to create visibly appealing GIFs, you need to lay considerable stress on choosing an apt background story. Don’t get misled by the wrong assumption of using any random background, owing to the short play duration of GIFs. An impressive solution to this concern is taking the help of a storyboard to keep track of your GIF’s content flow.
Using a storyboard is quite effective means of being in line with the direction of content movement, rescuing you from the hustle of going off the track. This comes explicitly handy when you are working with a team of creators. The storyboard is there to keep everything at the exact place, thus improving member communications and boosting up the design process.

06Focus on Creating Loops
Consider creating an animated motion loop for your GIF allowing a repeated and comprehensive view of your content. Looping projects a deeper observation of the clip and its contents in a seamless transition. However, creating an infinite motion loop in GIFs is quite tricky, as you need to pay utmost concern to ensure a smooth content flow and chances of even the slightest errors are not entertained.
Any loopholes in placement of your GIF elements will get noticed within a blink and lead to an unsatisfactory user experience. Hence, you need to check each of your content frames separately to eliminate chances of possible errors. If you are a beginner, try working with geometrical animations to get the initial pickup. This will be advantageous in deciding the exact element positions at the start and end of the GIF.
07Make Use of Motion Blur
Using the concept of motion blur is pivotal in providing a natural flow and feel to your GIF, which, in an otherwise case would ordinarily appear as a mere collection of static images clubbed together. This would give a wobbling feel with unsteady frame movements to your viewers. The motion blur effect potentially ensures a smooth content flow, and your GIF looks like a short video captured from a camera.
08Stick to a Reduced File Size
Creating GIF of within a standard size range is quite difficult, owing to the fact that these are shared across a variety of media platforms, each having a different file size constraint. It is, however, recommended to stick to a file size as low as possible to escape the notch of modifying the same, ener5y time you need to work with the GIF on a different platform.
Listed below are a few ways to limit your GIF to a lower file size:
● Restrict your GIF to a frame count under 150, exceeding which, it will get difficult to export the GIF to most of the commonly visited social media and content sharing platforms.
● When your GIF is ready to export, adjust its lossy parameter between 5 and 10 to boost the file compression rate. Look for a setting that decreases the effective file size without compromising with the overall GIF design.
● Restrict to a minimum possible color usage. This will not only intensify the GIF design, but also contribute in maintaining a decreased file size. You can instead, focus on playing with animations or adjusting your image frames to longer play durations.
● Don’t experiment with multiple background gradients in your GIF. You can select from either a completely opaque, or a totally transparent background. Adding unnecessary gradients will end up giving your GIF a hazy look, along with a visibly large file that will be difficult to export non any platform.
Part 2 Amazing Examples of Animated Gifs in Web Design
GIFs are an effective means of adding appeal to brand promotions and achieving improved market buildup by delivering just the right content in the most captivating and interesting ways. You can use them as creative web design tools to add spark to your product sites, which can potentially boost the market value and reach of your product by multiplying the number of visitors to your site.
Discussed below are some stunning examples of using animated GIFs to enhance commercial web design, which you can use to create a significant buzz about your product among a target audience:
01Marie Weber
This is a shoe designer company in France, famous for its classy, handmade shoes. On visiting the company’s site, you are welcomed by a simple and subtle, animated product logo on each page. This animated logo is a masterpiece in itself, telling you the about the lavishness of the associated product.
On navigating further, you will find animated elements, like; shoe images and collection names, which appear on the screen before a zoom out. There are underlined links that pop up to animate beneath the name, indicating the link you are going to visit.

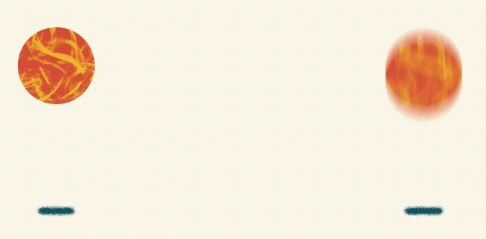
02Wonderful Weekends Festival
This is an absolute animation delight, where the welcome page of the site greets you with vibrant pieces in motion, and a pop up box informs you of the festival’s arrival time and asks you to select one from the options of ‘Play Now’ or ‘Show Me the Festival’.
As you click to make a choice, the Google brand shines with associated colors. As you continue to browse through the site, pages open up with brand color animations, along with colored active links flashing on the pages.
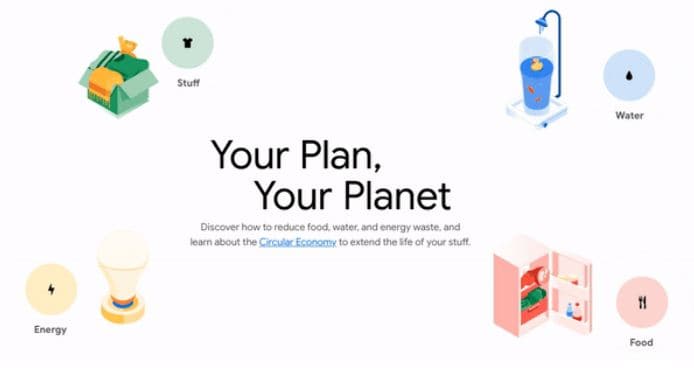
03Google
This is a brand name that needs no introduction. Google has launched its ‘Your Plan, Your Planet’ site to infuse awareness about environment conservation and eco friendly lifestyles, guiding visitors on ways and means of introducing related changes. The site greets you with a simple layout, with a short text moving in and getting still. Click on ‘Let’s Get Started’ and you will see 4 amazingly animated icons that open up to more vibrant animations.
Tap any one of the swinging refrigerator door, the illuminated light bulb, the running faucet or the teddy bear waving at you, to land on a schema that informs you about effective means of improving on conservation in within your selected section. This is a perfect example of using animations as a marketing strategy to captivate people’s attention on a subject that evidently turns them off.
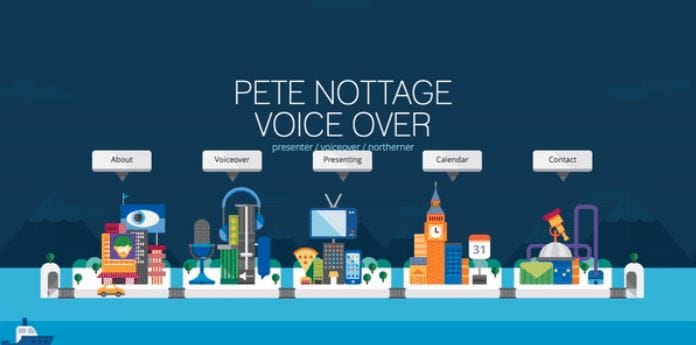
04Pete Nottage
Designed explicitly as a hiring site for voice presenter Pete Nottage, this website tells you everything about the actor and the credibility of hiring him. The site lands among the best examples of web animation usage. The welcome page of the site greets you with the brand logo. Tap on the red swipe and you will get to know that the brand infuses vibrancy to something that’s originally dull.
Next, you will find a plethora of dynamic and elegant animations in a plying plane, cityscape, flowing sea and sailing boats, moving cars and excusive motion graphics on each building. Visiting the animated site links provides you an insight of the actor’s personality. In the ‘About’ section, you can find a headshot animation, that disappears on clicking, and is followed by a more dynamic motion snippet.
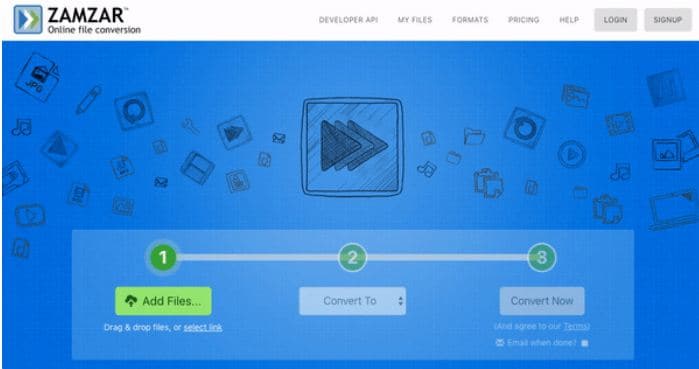
05Zamzar
This one is an online file conversion site and lives up to its tagline ‘File Conversion Made Easy’ through a concrete animation on the welcome page. The file conversion on this site is quick, 3-step process, with a blinking animation indicating the current conversion stage.
For instance, when you are at the first step of selecting a file to convert, the animation shoes a blinking glow on number 1. This continues for the rest of the steps, till your file is finally converted into the desired file format.
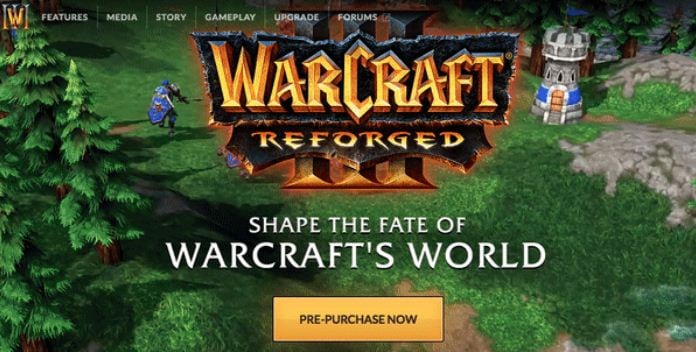
06Blizzard: Warcraft III Reforged
Warcraft was one complete heaven of adventure and thrill for console gamers. While the enticing cutscenes with stunning motion graphics were an absolute favorite, the game had a plenty of other exciting elements.
The relaunched game (Warcraft III Reforged) website has a mix of gaming adventures and cutscenes running in the site’s background with the game title and pitch appearing as an overlaid animation. On navigating through the site, you will find classy animated elements that take you on a nostalgic trip of the original game.
Part 3 Learn How to Create and Add Gifs to Interactive Layouts in Filmora
Now that you are quite familiar with the utility of GIFs in almost every market field, and have seen stunning examples of GIF design and usage for an impressive brand promotion, let’s take a dive into creating and using these motion clips to make interactive graphic layouts for websites, social media blogs and posts, and a variety of other applications that require some brilliant imagery for market promotion.
When looking for the perfect GIF designer software, Wondershare Filmora Video Editor is the most affordable pick. This is a free and an enhanced GIF design tool, packed with world class and premium quality features that are most suitable for giving the much appreciated professional touch to your graphic artwork. Here’s how you can work with Filmora to make alluring graphic layouts:
Step 1: Launch Filmora
The software is readily compatible to your Windows and MacOS devices and you don’t even require a signup to use the application. Just download and install the software in your preferred device and launch the same to reach the software’s welcome interface.
Filmora Free Download Link:
Step 2: Upload Media Files
Select and import the desired media files from your device to upload them to the Filmora timeline. You can either pick a video or choose a series of static images.
Step 3: Add to Timeline
Once imported, you need to add the selected files to the software’s editor timeline. You can use the ‘Drag and Drop’ method to get this done.

Wondershare Filmora - Best Video Editor for Mac/Windows
5,481,435 people have downloaded it.
Build unique custom animations without breaking a sweat.
Focus on creating epic stories and leave the details to Filmora’s auto features.
Start a creative adventure with drag & drop effects and endless possibilities.
Filmora simplifies advanced features to save you time and effort.
Filmora cuts out repetition so you can move on to your next creative breakthrough.
Step 4: Explore Your Editing Skills
As already stated, the Filmora effects library is an extensive inventory of stunning features to compliment your artwork with matchless class. You are free to choose from tons of image and video editing effects and filters suited to your GIF content to create excellent pieces of graphic art.
When starting to customize your GIF in Filmora, you can begin with cropping and trimming your images or video to the perfect part, or even cut and split them to ward off unwanted portions, or rotate and flip the images to set them in the perfect orientation.
You can further add elements like, graphic transitions, overlays, animations and texts, and etc., to customize your artwork to your heart’s content. The software’s audio-visual library facilitates you with around 300 audio-visual effects and music choices to supplement your creation with a conducive sound feel. You can also make adjustments in frame speed and play durations to get the best most snippet ever!
You are granted the liberty to choose almost any common file format to create and customize GIFs in Filmora. A more convincing feature is, the software does not leave a watermark on your artwork and you can easily share your creation across media platforms.

Step 5: Save and Export
Once your creation satisfies you, save it to your device with a .gif extension, from where it can be exported to various media sharing platforms with ease.
● Key Takeaways from This Episode →
● When planning a perfect and appealing product marketing strategy, you can consider using GIFs to enhance the feel. Complement your product site with suitable GIF design and graphic transitions can prove pivotal to target and hold your related audience.
● Looking for the best GIF creator and customization software, you can rely on Filmora to create and customize professional quality GIFs with utmost convenience.
The Only Guide You’ll Ever Need to Learn GIF Design That Get Shared Like Crazy
In this article
01 [8 Principles for Great GIF Design](#Part 1)
02 [6 Amazing Examples of Animated Gifs in Web Design](#Part 2)
03 [Learn How to Create and Add Gifs to Interactive Layouts in Filmora](#Part 3)
Part 1 Principles for Great GIF Design
Creating GIFs for infotainment or casual information sharing is the current talk of the trend. You might have visibly landed across a heap of tantalizing GIFs in blogs, social media posts, product promotion websites and almost every other domain you can possibly think of. Using GIFs for any type of content promotion is bound to captivate the target audience in impressive multiplicities. Ever wondered what’s the cue behind the mass appeal that GIFs create? Well, an obvious answer is the stunning GIF design.
When going for GIF creation and selection, design plays the key role in creating considerable buzz about the information being transmitted. To add impact to your creation, you need to pay considerable attention to its design implications, thus ensuring that the right things get presented in the right way. Outlined below are some amazing principles you can use to enhance your GIF design to the next level:
01Ensure Accuracy and Preciseness
The primary concern you need to be attentive about while designing a GIF is its preciseness. Ensure ban exactness of information and confine your creation to the theme and requirement of your creation, like, the message you want to deliver or the impact you want to create through the GIF. Balance your creativity within specific content parameters and avoid getting carried away or overdoing on the beautifying aspect.
As an example, it is visibly not appealing to add a wholesome mix of 15 shades and 20 different elements in a nature-based GIF. You will end up getting too harsh on the viewers’ eyes, confusing them with a hoard of speeding elements and banging colors. You can instead stick to 2 or 3 frames with an intelligent mix of 2 complementary shades.
02Maintain Visual Identity
An important aspect to keep in mind while attempting to design GIF is, it should visually relate to the underlying content. For instance, if you are intending a brand promotion through your GIF, lay stress on adding elements like, brand definition, product specifications, know-how of your work patterns, etc. ensure that your content flows naturally and has exactness.
Other alternatives are, using your product logo as the GIF background, character representation of your brand or using some explicit product oriented themes. While, you are free to pick anything that suits your preferences and needs, just make sure that using it in your GIF adds value to your brand instead of giving an out of the box feel.
Image Name: The-only-guide-you’ll-ever-need-to-learn-gif-design-that-get-shared-like-crazy-1
03Cut Down on Unnecessary Frames
Have you ever encountered a halt in the natural loop of your GIF out of nowhere? While pondering over the underlying cause, it is a common assumption to take this as an animation fallacy, but that’s evidently not the case. The actual culprits behind this glitch are those extra frames that contribute towards nothing but adding weight to an already heavy file.
To set this straight, you should switch to removing any extra frames, while saving a particular one which you may stretch to a desired duration according to the break point of your contents in the GIF. However, take caution to maintain the visual quality of your GIF while you remove those extra frames.
04Make Your GIF Accessible
You should always adhere to the concern of accessibility while creating a GIF. The reason being, your content is visibly going to get mass attention across the web and you cannot filter out visitors, make sure your GIF is easily accessible to all kind of users, particularly those with vision limitations, like, epileptic patients or the ones using screen readers.
Focus on describing your GIF content with alt text and using a limited blinking and flashing rate. In case your GIF content is primarily text based, take care to limit the effective color and image movement and adjust the frames rates to avoid constant and quick movement of image frames when adding many clips on a single page.
Pay additional heed to the auto play feature of your GIFs. It can be visibly annoying to be welcomed on a site homepage with GIFs enjoying an auto play session of their own. You can alternatively, incorporate a ‘Click to Play’ option or grant your site visitors the liberty to decide on what is to be played when.
05Use Storyboards
When aiming to create visibly appealing GIFs, you need to lay considerable stress on choosing an apt background story. Don’t get misled by the wrong assumption of using any random background, owing to the short play duration of GIFs. An impressive solution to this concern is taking the help of a storyboard to keep track of your GIF’s content flow.
Using a storyboard is quite effective means of being in line with the direction of content movement, rescuing you from the hustle of going off the track. This comes explicitly handy when you are working with a team of creators. The storyboard is there to keep everything at the exact place, thus improving member communications and boosting up the design process.
06Focus on Creating Loops
Consider creating an animated motion loop for your GIF allowing a repeated and comprehensive view of your content. Looping projects a deeper observation of the clip and its contents in a seamless transition. However, creating an infinite motion loop in GIFs is quite tricky, as you need to pay utmost concern to ensure a smooth content flow and chances of even the slightest errors are not entertained.
Any loopholes in placement of your GIF elements will get noticed within a blink and lead to an unsatisfactory user experience. Hence, you need to check each of your content frames separately to eliminate chances of possible errors. If you are a beginner, try working with geometrical animations to get the initial pickup. This will be advantageous in deciding the exact element positions at the start and end of the GIF.
07Make Use of Motion Blur
Using the concept of motion blur is pivotal in providing a natural flow and feel to your GIF, which, in an otherwise case would ordinarily appear as a mere collection of static images clubbed together. This would give a wobbling feel with unsteady frame movements to your viewers. The motion blur effect potentially ensures a smooth content flow, and your GIF looks like a short video captured from a camera.
08Stick to a Reduced File Size
Creating GIF of within a standard size range is quite difficult, owing to the fact that these are shared across a variety of media platforms, each having a different file size constraint. It is, however, recommended to stick to a file size as low as possible to escape the notch of modifying the same, ener5y time you need to work with the GIF on a different platform.
Listed below are a few ways to limit your GIF to a lower file size:
● Restrict your GIF to a frame count under 150, exceeding which, it will get difficult to export the GIF to most of the commonly visited social media and content sharing platforms.
● When your GIF is ready to export, adjust its lossy parameter between 5 and 10 to boost the file compression rate. Look for a setting that decreases the effective file size without compromising with the overall GIF design.
● Restrict to a minimum possible color usage. This will not only intensify the GIF design, but also contribute in maintaining a decreased file size. You can instead, focus on playing with animations or adjusting your image frames to longer play durations.
● Don’t experiment with multiple background gradients in your GIF. You can select from either a completely opaque, or a totally transparent background. Adding unnecessary gradients will end up giving your GIF a hazy look, along with a visibly large file that will be difficult to export non any platform.
Part 2 Amazing Examples of Animated Gifs in Web Design
GIFs are an effective means of adding appeal to brand promotions and achieving improved market buildup by delivering just the right content in the most captivating and interesting ways. You can use them as creative web design tools to add spark to your product sites, which can potentially boost the market value and reach of your product by multiplying the number of visitors to your site.
Discussed below are some stunning examples of using animated GIFs to enhance commercial web design, which you can use to create a significant buzz about your product among a target audience:
01Marie Weber
This is a shoe designer company in France, famous for its classy, handmade shoes. On visiting the company’s site, you are welcomed by a simple and subtle, animated product logo on each page. This animated logo is a masterpiece in itself, telling you the about the lavishness of the associated product.
On navigating further, you will find animated elements, like; shoe images and collection names, which appear on the screen before a zoom out. There are underlined links that pop up to animate beneath the name, indicating the link you are going to visit.
02Wonderful Weekends Festival
This is an absolute animation delight, where the welcome page of the site greets you with vibrant pieces in motion, and a pop up box informs you of the festival’s arrival time and asks you to select one from the options of ‘Play Now’ or ‘Show Me the Festival’.
As you click to make a choice, the Google brand shines with associated colors. As you continue to browse through the site, pages open up with brand color animations, along with colored active links flashing on the pages.
03Google
This is a brand name that needs no introduction. Google has launched its ‘Your Plan, Your Planet’ site to infuse awareness about environment conservation and eco friendly lifestyles, guiding visitors on ways and means of introducing related changes. The site greets you with a simple layout, with a short text moving in and getting still. Click on ‘Let’s Get Started’ and you will see 4 amazingly animated icons that open up to more vibrant animations.
Tap any one of the swinging refrigerator door, the illuminated light bulb, the running faucet or the teddy bear waving at you, to land on a schema that informs you about effective means of improving on conservation in within your selected section. This is a perfect example of using animations as a marketing strategy to captivate people’s attention on a subject that evidently turns them off.
04Pete Nottage
Designed explicitly as a hiring site for voice presenter Pete Nottage, this website tells you everything about the actor and the credibility of hiring him. The site lands among the best examples of web animation usage. The welcome page of the site greets you with the brand logo. Tap on the red swipe and you will get to know that the brand infuses vibrancy to something that’s originally dull.
Next, you will find a plethora of dynamic and elegant animations in a plying plane, cityscape, flowing sea and sailing boats, moving cars and excusive motion graphics on each building. Visiting the animated site links provides you an insight of the actor’s personality. In the ‘About’ section, you can find a headshot animation, that disappears on clicking, and is followed by a more dynamic motion snippet.
05Zamzar
This one is an online file conversion site and lives up to its tagline ‘File Conversion Made Easy’ through a concrete animation on the welcome page. The file conversion on this site is quick, 3-step process, with a blinking animation indicating the current conversion stage.
For instance, when you are at the first step of selecting a file to convert, the animation shoes a blinking glow on number 1. This continues for the rest of the steps, till your file is finally converted into the desired file format.
06Blizzard: Warcraft III Reforged
Warcraft was one complete heaven of adventure and thrill for console gamers. While the enticing cutscenes with stunning motion graphics were an absolute favorite, the game had a plenty of other exciting elements.
The relaunched game (Warcraft III Reforged) website has a mix of gaming adventures and cutscenes running in the site’s background with the game title and pitch appearing as an overlaid animation. On navigating through the site, you will find classy animated elements that take you on a nostalgic trip of the original game.
Part 3 Learn How to Create and Add Gifs to Interactive Layouts in Filmora
Now that you are quite familiar with the utility of GIFs in almost every market field, and have seen stunning examples of GIF design and usage for an impressive brand promotion, let’s take a dive into creating and using these motion clips to make interactive graphic layouts for websites, social media blogs and posts, and a variety of other applications that require some brilliant imagery for market promotion.
When looking for the perfect GIF designer software, Wondershare Filmora Video Editor is the most affordable pick. This is a free and an enhanced GIF design tool, packed with world class and premium quality features that are most suitable for giving the much appreciated professional touch to your graphic artwork. Here’s how you can work with Filmora to make alluring graphic layouts:
Step 1: Launch Filmora
The software is readily compatible to your Windows and MacOS devices and you don’t even require a signup to use the application. Just download and install the software in your preferred device and launch the same to reach the software’s welcome interface.
Filmora Free Download Link:
Step 2: Upload Media Files
Select and import the desired media files from your device to upload them to the Filmora timeline. You can either pick a video or choose a series of static images.
Step 3: Add to Timeline
Once imported, you need to add the selected files to the software’s editor timeline. You can use the ‘Drag and Drop’ method to get this done.
Wondershare Filmora - Best Video Editor for Mac/Windows
5,481,435 people have downloaded it.
Build unique custom animations without breaking a sweat.
Focus on creating epic stories and leave the details to Filmora’s auto features.
Start a creative adventure with drag & drop effects and endless possibilities.
Filmora simplifies advanced features to save you time and effort.
Filmora cuts out repetition so you can move on to your next creative breakthrough.
Step 4: Explore Your Editing Skills
As already stated, the Filmora effects library is an extensive inventory of stunning features to compliment your artwork with matchless class. You are free to choose from tons of image and video editing effects and filters suited to your GIF content to create excellent pieces of graphic art.
When starting to customize your GIF in Filmora, you can begin with cropping and trimming your images or video to the perfect part, or even cut and split them to ward off unwanted portions, or rotate and flip the images to set them in the perfect orientation.
You can further add elements like, graphic transitions, overlays, animations and texts, and etc., to customize your artwork to your heart’s content. The software’s audio-visual library facilitates you with around 300 audio-visual effects and music choices to supplement your creation with a conducive sound feel. You can also make adjustments in frame speed and play durations to get the best most snippet ever!
You are granted the liberty to choose almost any common file format to create and customize GIFs in Filmora. A more convincing feature is, the software does not leave a watermark on your artwork and you can easily share your creation across media platforms.
Step 5: Save and Export
Once your creation satisfies you, save it to your device with a .gif extension, from where it can be exported to various media sharing platforms with ease.
● Key Takeaways from This Episode →
● When planning a perfect and appealing product marketing strategy, you can consider using GIFs to enhance the feel. Complement your product site with suitable GIF design and graphic transitions can prove pivotal to target and hold your related audience.
● Looking for the best GIF creator and customization software, you can rely on Filmora to create and customize professional quality GIFs with utmost convenience.
How To Add Motion Blur Effect To Photos in GIMP
GIMP is a cross-platform image editing software that you can use to edit photos and create graphics. The software is available for Linux, Windows, and macOS and can add a motion blur effect (A sense of movement in the photo), making your pictures look more realistic and professional.
So to help you tone your skills, we’ve written a comprehensive guide on how to apply the GIMP motion blur effect to your photos!
Part I. What Is GIMP?
GIMP software, a GNU Image Manipulation Program, is an open-source raster graphics editor used for image editing and retouching, converting between different image formats, free-form drawing, and more.
GIMP is frequently used as a Photoshop alternative. The software boasts a wide range of features, including support for layers, masks, color management, and third-party plugins.
Key Features
Here are some key features of the GIMP software:
- Quickly hide panels and menus to let you switch to a full-screen mode to preview pictures
- Fixes distorted images
- Available for Windows, Linux, Mac OS, and other operating systems
- Automatic image enhancement tool
- Lets you remove all the panels and tools from the workflow except the one you are working with.
- Released under a license called GNU General Public License v3 and later, which makes it free to use and distribute
- Add overlays and crop or resize an image
- Wide range of file formats that it can read and write, making it a versatile tool for working with images
Part II. How To Add The Motion Blur Effect To Your Photos in GIMP?
Below we’ve provided the step-by-step tutorial to add a motion blur effect to your photos in GIMP:
Step1 In the first step, launch a browser on your device, head to the GIMP website , and download the installation file according to your operating system. Now, click the downloaded installer, install the software on your system and launch it.

Step2 In the next step, click “File” on the GIMP dashboard, and select “Open” to access the Open Image window. Select your image file from your system and click “Open” to import the file.

Step3 Next, click the “Filters” option from the top toolbar, select “Blur,” and choose “Motion Blur” from the drop-down menu. A dialogue box will now open where you can preview the effect and adjust the settings, including Blur Type, Blur Center, and Blur Parameters.

Step4 Once you are satisfied with your changes, click “OK” to apply the effect to the image, and make some other edits if needed. Finally, click “File” from the top toolbar, choose “Export As,” click “File Type” to select the format, and select the “Export” option to save your file.
Bonus Tips – The Alternative To GIMP To Create Motion Blur Effect
GIMP is a popular image editor that you can use to create motion blur effects. However, some users find it difficult to use the software for this purpose.
To simplify the process, we recommend usingWondershare Filmora an all-in-one editing software that offers multiple advanced features to help you quickly enhance your project.
Free Download For Win 7 or later(64-bit)
Free Download For macOS 10.14 or later
Here’s why Filmora is the best alternative to GIMP for creating motion blur effects:
- A user-friendly interface where you can quickly create the motion blur effect without spending hours learning the process
- Advanced video editing tools, such as keyframing, speed ramping, green screen, title editing, motion tracking, screen recorder, and preset templates
- Royalty-free music library where you can access millions of music and soundtracks
- Adds the motion blur effect to your videos as well as images
- Comes with multiple parameters to adjust the effect on your clip or image
To add the radial blur effect to images using Filmora, here are the quick and easy-to-follow steps:
Step1 Download the Filmora software on your PC, launch it, and click “Create New Project” on the main panel. Use the “Click Here to Import your Media File” option to import your photo and drag and drop it into the timeline.

Step2 Now, head to the “Effects” tab from the taskbar. Use the search option to find the Blur effect. Afterward, drag & drop it in the timeline and adjust it on your selected clip.

Step3 Please note that motion blur is now a dynamic effect on the image. That means you can add multiple photos and make them into a slideshow with a blur effect transition. Or, press the “Play” icon to preview your photo and pause the clip where you think motion blur works best.
Step4 Click the effect in the timeline to open its settings. Now, play your clip to preview and adjust the parameters as you want to smooth down the motion effect.
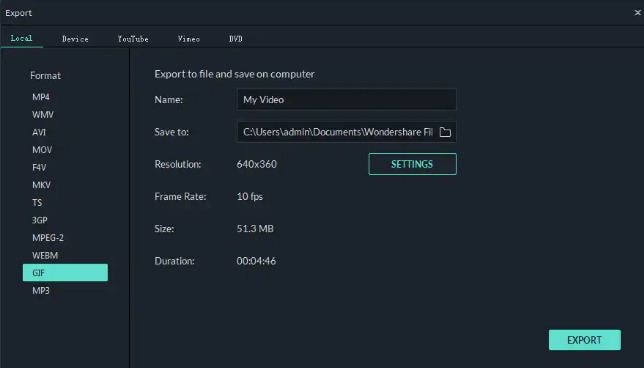
Step5 Once satisfied with the outcome, click the “Export” option, go to the “Local” tab, select a file format to save the images, and click “Export” again to save your project.

Filmora offers many export options, such as your device, YouTube, Vimeo, and DVD, with just a few clicks.
Last Words
In this detailed tutorial, we’ve discussed what GIMP is and its key features. We’ve provided a step-by-step guide to walk you through the process of creating the motion blur effect using the GIMP software.
In addition, we’ve provided a bonus tip to recommend Filmora as the best alternative to GIMP for creating the motion blur effect.
Hopefully, you found this article helpful in resolving your queries, and you can now add a smooth motion blur effect to your images.
Free Download For macOS 10.14 or later
Here’s why Filmora is the best alternative to GIMP for creating motion blur effects:
- A user-friendly interface where you can quickly create the motion blur effect without spending hours learning the process
- Advanced video editing tools, such as keyframing, speed ramping, green screen, title editing, motion tracking, screen recorder, and preset templates
- Royalty-free music library where you can access millions of music and soundtracks
- Adds the motion blur effect to your videos as well as images
- Comes with multiple parameters to adjust the effect on your clip or image
To add the radial blur effect to images using Filmora, here are the quick and easy-to-follow steps:
Step1 Download the Filmora software on your PC, launch it, and click “Create New Project” on the main panel. Use the “Click Here to Import your Media File” option to import your photo and drag and drop it into the timeline.
Step2 Now, head to the “Effects” tab from the taskbar. Use the search option to find the Blur effect. Afterward, drag & drop it in the timeline and adjust it on your selected clip.
Step3 Please note that motion blur is now a dynamic effect on the image. That means you can add multiple photos and make them into a slideshow with a blur effect transition. Or, press the “Play” icon to preview your photo and pause the clip where you think motion blur works best.
Step4 Click the effect in the timeline to open its settings. Now, play your clip to preview and adjust the parameters as you want to smooth down the motion effect.
Step5 Once satisfied with the outcome, click the “Export” option, go to the “Local” tab, select a file format to save the images, and click “Export” again to save your project.
Filmora offers many export options, such as your device, YouTube, Vimeo, and DVD, with just a few clicks.
Last Words
In this detailed tutorial, we’ve discussed what GIMP is and its key features. We’ve provided a step-by-step guide to walk you through the process of creating the motion blur effect using the GIMP software.
In addition, we’ve provided a bonus tip to recommend Filmora as the best alternative to GIMP for creating the motion blur effect.
Hopefully, you found this article helpful in resolving your queries, and you can now add a smooth motion blur effect to your images.
How to Be a Good Podcast Host
You may be a blogger who has the habit of writing long articles. Or you may be a YouTuber with a hi-fi channel with many subscribers, but a podcast is a different thing in general.
This article will look at how to prepare, call guests, warm them up, and give practical ideas about how to host a podcast. Let’s start the article by learning how to get prepared to host a podcast.
#1 Get prepared to host a podcast
A good podcast host always gets prepared, sets up his goals, and gets easy tips to set apart from everyone in the marketplace. For this, you have to follow the below instructions and tips:
1. A proper pre-interview process
Before starting the podcast, the host should have quality and organic content. The content is related to the guest or any foremost personality related to the topic.
The host should be confident and relaxed to kill the anxiety process. If the host has low confidence, he may suffer from nervousness. This will kill the authenticity.
2. Share questions with the audience
A good understanding of how to pan out a situation makes you a good host. You must share the question on and off during podcasts to build engaging criteria with the audience.
You don’t need to sound the script on the screen like a robot. Scripts can be helpful but only if read in a conversational mood.
3. Find the right location
A good location means good conversation. A proper set prepared for the guest and the podcast will help you boost your conversation skills and get yourself and the guest into the mood of your show.
Before the show, you can change the settings or have a monotone set that fits every mood.
#2 Warm up the audience
Warming up is a necessary part of the show. A warmup works just like gas in a car before a long drive. You have to do this by asking any question or by telling them an inspirational or motivational story.
A good host must realize that a warm show has a high chance of becoming viral, and you won’t get that if the guest is nervous, tired, or not in the mood.
Tip 1. Setting the mood
Your goal is to set the mood of the audience according to the topic. Warming up the audience before getting to the guest.
You have to set the tone according to the topic of your podcast to warm them up. In this way, you need to make the connection between the guest, you, and your voice.
Tip 2. Build an emotional connection
Building an emotional connection helps to engage the audience till the end of the show. To make this possible, you can share a funny story with them or about a recent event or any recent incident.
Tip 3. Polls and questionnaires
Modern media has connected everything through the internet. You need to interact with the audience by asking questions from them and giving them a chance to answer them by live calling or on social media.
You can also do this on Instagram polls or by posting a story and asking them to select an upcoming topic for the podcast. Introducing this concept will boost your podcast views and help you engage more followers on your other social media platforms.
#3 Try to be authenticity
You need to have authenticity if you want your podcast to be successful. An authentic show attracts a larger audience, while a show whose mood resembles a person with a multiple personality disorder will throw off the whole vibe of the podcast. And the listeners will eventually press back buttons to escape the colossal wreck.
Tips to have authentic content
- Your topic may be emotional, happy, or of any other information.
- A good host needs to have the skills of a good actor to convey the emotions that the audience will perceive more efficiently.
- An idea of how the audience will perceive you and how to make your voice tone with emotions on podcasts.
- Don’t go for a more serious tone.
Things to Avoid
- What you should opt away from is, faking
- Don’t try to get excited about something that you’re not.
- Do not pretend to care about something when you do not.
- The fakeness will only result in the downfall of your podcast, as the listeners will eventually grow tired and leave.
- You must act well and sell yourself more efficiently to develop that trust with the audience.
The more the audience trusts you, the more authentic you seem.
#4 Storytelling
Tales are as old as time. As time moves on, more and more stories pile up. Your podcast has the potential to be the best if you know how to utilize those storytelling skills of yours. It’s never about information alone!
You may have a bland topic to discuss or a guest who is tough to break character. These are the situations where your charm and concern will play their part. So you also want to learn how to make your podcasts enjoyable through stories? Then check out the short tips below:
How to add stories to your podcasts
- First, you should have the skill to read the room and the mood.
- If you start telling a story about yourself that has no relation to the topic whatsoever will only lead to the guest being annoyed.
- You may have called the guest for a reason. This reason should tally with your topic as it will make you ask about their experience.
- Asking the right questions is important.
- You’d better not begin with leading statements such as, “Obi-wan Kenobi is a good TV show.” the guest may simply reply, “I do not care.”
- You should approach with question statements such as, “Did you know that your son is a big fan of the Obi-wan Kenobi TV show.” These are indulging questions to help your audience be more involved in your podcasts.
The audience and the guest will also develop an interest in the conversation that will lead to a successful show for the day.
#5 Transcribe your episodes
A good podcast also looks to give you quality content for each episode. You may call on guests upon guests and promote your podcasts in many ways. One of the ways you can also allow your podcasts to be recognized more is by the use of transcribing.
What is transcribing?
Transcribing means converting the speech in the audio of your podcasts to a text format. Your podcast may raise some eyes if the content is desirable to the audience.
It may happen your podcast gets around a person whose brother suffers from hearing loss. By a transcription, you offer a chance to let them involved in your podcast. You can accomplish this feat in one of two ways.
- Either use an AI-powered audio editing program, like Wondershare Filmora , to get you through the speech-to-text transcription by default or a more auto way.
- Convert your text into audio, but this article will not look at it.
Free Download For Win 7 or later(64-bit)
Free Download For macOS 10.14 or later
Our main focus would be manually converting speech to text using a human transcriber. And we will be doing so by using the Wondershare Filmora app.
Transcribing podcasts with Wondershare Filmora
Filmora is an all-in-one video editing tool. In the following steps, we will learn the step-by-step process of transcribing podcast by using Wondershare Filmora.
Step1Add audio files or footage
- First of all, drag the imported audio files or footage into the timeline.

Step2Add subtitles
To show the transcription of the podcast’s audio, you have to add sbtitles for better understanding. For this, perform these steps:
- Select the tile icon on the bar above.
- In the window that pops up, select your favorite subtitle format.

Step3Adjust the size
For better playout and matching the audio with subtitles, you have to adjust the size of the video as:
- Add a subtitle tile above the video.
- Then adjust the size of the video.

Step4Convert speech into text
- At last, type the speech into text in the subtitle box.

In this way, you have created speech-to-text using a human transcriber rather than an AI. Doing this will ensure no mistakes are recorded and make it even more efficient.
#6 Put yourself in audiences’ shoes
And if you feel like the general audience would want to make sense of a particular statement, ask the guest about it. This is what differentiates a good host from a bad one! A general understanding of the audience’s point of view would always allow you to process your podcast accordingly.
- You should understand the general sentiments of the audience.
- When you feel a particular subject will attract more audience, do the process accordingly.
- Maybe they like how you process a story and evaluate it. Do that!
All qualities of a good podcast are there, and it’s your job to identify them and make the most of them.
#7 Understand why the guest is here
You are the host of the podcast. Your job is to be sincere with the guest. Moreover, useful information or a valued thought might be a reason why the guest has come to your show. Understand that reason and try to make the most of it.
- The guest might have heard about your podcast, or they could be a constant
- Your approach to the guest should tally with the topic of the podcast.
- The guest might be going through a tough time that makes them a suitable guest for that particular episode.
- Or it could be that your podcast attracted them, and now they want to use your interview to promote a book or any other service they think is best.
- As a host, you should allow the guest to have some control over the podcast.
- Develop a sense of trust between the host and the guest.
- The more you allow the guest to speak freely about themselves, the more they will feel interested in your podcast.
Your goal should be to captivate the guest as much as you can. If the guest is entertained, the more chances are that they will recommend you to other guests. An experience gone wrong will be bad for the podcast.
#8 Invite the right guest
A podcast can be an excellent tool for attracting the audience to your content. And as podcast hosts guests, your first step is finding the right guests for your audience.
Is it necessary to search for a host before calling? Yes! It’s quite a complicated and sensitive step to call out guests. A guest is the only one who can make or break the Podcast show. It’s important to study the nature of guests too. Because a guest is also considered as a co-host of the show.
If a guest is bored and doesn’t take much interest, then there are 100% chance that the show will fail. To find who is more compatible, we have to take assistance from a tool.
You can do this by plugging your podcast into a tool like Sparktoro. Sparktoro allows you to see what your audience is engaging with. It could be other platforms of podcasts such as youtube or other social media platforms.
For example, If we search for “the art of product podcast” on the Sparktoro website. It will direct us to demographic data, providing information about the content the audience is interacting with.
- It will show different hashtags and frequently used phrases.

- Here you can see the top words in bios, hashtags, and frequent phrases.
- On the left window, you can search for other related podcasts your viewers are watching.

- Similarly, you can also use the YouTube option to look at what kind of content your audience watches on youtube.
Following the above methods could give you 50-100 potential clients. Your main goal will be creating a list allowing you to call guests on your show. You can divide the list according to the priorities.
- Close friends: the ones who are going to be available whenever you call upon them.
- The probable list: the ones who would most probably agree to come on your podcast.
- The premium list: these guests will resemble a dream list of guests you want to call on your podcast.
Start by writing emails and promoting content that will attract these guests. Your chances are increased by how much you polish your podcast into creating premium content. The more premium the content is, the more premium your chances are of inviting those dream guests.
The Bottom Line
Podcasts are tricky to promote. Many other alternatives are available in the market that provides a more Visual representation. And it’s no lie; an audience like to sit and watch rather than sit and listen.
Following the steps, tips, and tricks mentioned above, you can build a strong base for being a good podcast host. Although it will take time to set off on your dreams, consistency and determination will eventually bear fruit.
Free Download For macOS 10.14 or later
Our main focus would be manually converting speech to text using a human transcriber. And we will be doing so by using the Wondershare Filmora app.
Transcribing podcasts with Wondershare Filmora
Filmora is an all-in-one video editing tool. In the following steps, we will learn the step-by-step process of transcribing podcast by using Wondershare Filmora.
Step1Add audio files or footage
- First of all, drag the imported audio files or footage into the timeline.
Step2Add subtitles
To show the transcription of the podcast’s audio, you have to add sbtitles for better understanding. For this, perform these steps:
- Select the tile icon on the bar above.
- In the window that pops up, select your favorite subtitle format.
Step3Adjust the size
For better playout and matching the audio with subtitles, you have to adjust the size of the video as:
- Add a subtitle tile above the video.
- Then adjust the size of the video.
Step4Convert speech into text
- At last, type the speech into text in the subtitle box.
In this way, you have created speech-to-text using a human transcriber rather than an AI. Doing this will ensure no mistakes are recorded and make it even more efficient.
#6 Put yourself in audiences’ shoes
And if you feel like the general audience would want to make sense of a particular statement, ask the guest about it. This is what differentiates a good host from a bad one! A general understanding of the audience’s point of view would always allow you to process your podcast accordingly.
- You should understand the general sentiments of the audience.
- When you feel a particular subject will attract more audience, do the process accordingly.
- Maybe they like how you process a story and evaluate it. Do that!
All qualities of a good podcast are there, and it’s your job to identify them and make the most of them.
#7 Understand why the guest is here
You are the host of the podcast. Your job is to be sincere with the guest. Moreover, useful information or a valued thought might be a reason why the guest has come to your show. Understand that reason and try to make the most of it.
- The guest might have heard about your podcast, or they could be a constant
- Your approach to the guest should tally with the topic of the podcast.
- The guest might be going through a tough time that makes them a suitable guest for that particular episode.
- Or it could be that your podcast attracted them, and now they want to use your interview to promote a book or any other service they think is best.
- As a host, you should allow the guest to have some control over the podcast.
- Develop a sense of trust between the host and the guest.
- The more you allow the guest to speak freely about themselves, the more they will feel interested in your podcast.
Your goal should be to captivate the guest as much as you can. If the guest is entertained, the more chances are that they will recommend you to other guests. An experience gone wrong will be bad for the podcast.
#8 Invite the right guest
A podcast can be an excellent tool for attracting the audience to your content. And as podcast hosts guests, your first step is finding the right guests for your audience.
Is it necessary to search for a host before calling? Yes! It’s quite a complicated and sensitive step to call out guests. A guest is the only one who can make or break the Podcast show. It’s important to study the nature of guests too. Because a guest is also considered as a co-host of the show.
If a guest is bored and doesn’t take much interest, then there are 100% chance that the show will fail. To find who is more compatible, we have to take assistance from a tool.
You can do this by plugging your podcast into a tool like Sparktoro. Sparktoro allows you to see what your audience is engaging with. It could be other platforms of podcasts such as youtube or other social media platforms.
For example, If we search for “the art of product podcast” on the Sparktoro website. It will direct us to demographic data, providing information about the content the audience is interacting with.
- It will show different hashtags and frequently used phrases.
- Here you can see the top words in bios, hashtags, and frequent phrases.
- On the left window, you can search for other related podcasts your viewers are watching.
- Similarly, you can also use the YouTube option to look at what kind of content your audience watches on youtube.
Following the above methods could give you 50-100 potential clients. Your main goal will be creating a list allowing you to call guests on your show. You can divide the list according to the priorities.
- Close friends: the ones who are going to be available whenever you call upon them.
- The probable list: the ones who would most probably agree to come on your podcast.
- The premium list: these guests will resemble a dream list of guests you want to call on your podcast.
Start by writing emails and promoting content that will attract these guests. Your chances are increased by how much you polish your podcast into creating premium content. The more premium the content is, the more premium your chances are of inviting those dream guests.
The Bottom Line
Podcasts are tricky to promote. Many other alternatives are available in the market that provides a more Visual representation. And it’s no lie; an audience like to sit and watch rather than sit and listen.
Following the steps, tips, and tricks mentioned above, you can build a strong base for being a good podcast host. Although it will take time to set off on your dreams, consistency and determination will eventually bear fruit.
How to Perfectly Use Canva Color Match?
How to Perfectly Use Canva Color Match?
An easy yet powerful editor
Numerous effects to choose from
Detailed tutorials provided by the official channel
Color combination is the essential thing that you need to keep in mind designing. It helps create eye-catchy designs and can create a positive impact on the target audience.

This is the greatest secret of creating attractive and wonderful designs. Reading further will help you to understand the Canva color match in detail. So, without any further dues, let’s get started!
In this article
01 [What is the Canva Color Picker?](#Part 1)
02 [Why Use the Color Match Tool?](#Part 2)
03 [How to Use Color Match in Canva to Match Your Brand](#Part 3)
04 [Alternative to Canva Color Match](#Part 4)
Part 1 What is the Canva Color Picker?
Canva is one of the simplest and easiest ways of creating great and eye-catchy graphic designs. Color combinations help us to make these designs more attractive. But earlier, there were some limitations in Canva regarding the color picker tool; designers had to use browser extensions like ColorZilla to match the color combinations perfectly. They faced many problems while selecting the perfect color of their choice while designing their pins, social media content, logos, online invitations, etc. They had to find the perfect color code of their choice from an external source and paste it into the Canva, which was simply very time-consuming.
The most-awaited color picker tool was introduced in Canva at the end of November 202This new design tool makes the design very convenient while using Canva for graphic designing. With this tool, you don’t need to spend hours searching for the right color that matches the background. Color picker helps you to find a perfect color match according to the image, logo, or anything else uploaded on Canva.

But before using this new color match tool, you must ensure that:
● You are using the updated version of the Canva desktop app.
● You have the latest version of the browsers like Chrome, Mozilla, Internet Explorer, etc.
Part 2 Why Use the Color Match Tool?

This color match tool is the most-demanded feature that has been updated on Canva. It helps choose the perfect color match very efficiently without wasting time and effort. It works like an eyedropper tool available in graphic designing software like Photoshop. It is elementary and valuable to use, and it saves a lot of time in creating attractive and wonderful designs.
It helps determine the different colors available in a particular image uploaded on the Canva app. You can easily choose the appropriate color by placing the tool in the place that has your desired color. It is a compassionate tool, so you should be very careful while choosing the color of your choice. You can press the ‘Esc’ button to exit the command without choosing any color.
This color match tool magically helps select the desired color in seconds without using any external color picker browser extension. This tool is readily available on the color pallet in the updated version of the Canva desktop app.
Part 3 How to Use Color Match in Canva to Match Your Brand
The color match tool is now inbuilt in the Canva desktop app, which is very easy and convenient. You need to download the Canva desktop app to use this feature from the official website of Canva.

The designers need to follow the simple steps given below to use the color match tool (eyedropper tool) in the updated version of the Canva desktop app:
● First of all, open the Canva desktop app.
● After this, open any design or image of your choice that you want to edit. This color match tool can work on any type of image, regardless of the shape and size.
● Now, select the particular part of the image whose color you want to change.
● After this, click on the color block available at the top corner to open the color customization options.
● A color pallet will open.
● On the top of the color pallet, you will see a ‘+’ (add new color) button, this button has a colorful square outline.
● After this, a color chart will appear under that button. You will see the color code written over there and an eyedropper tool will be available next to that color code (hex code).
● Click on this eyedropper tool and select the color of your choice either from the image or any other color available in Canva.
● After selecting the color tap on the particular part of the image whose color you want to change.
This is how you can change the color using the new color picker tool available in Canva and enjoy editing your images using the new Canva desktop app.
Part 4 Alternative to Canva Color Match
As we all know, Canva is the most accessible online graphic designing platform used for image editing and video editing. But there are certain limitations of using it, so here we have listed some of the other graphic designing tools for both image and video editing that can be used as an alternative to the Canva app:
● Visme: It is a drag and drops editing and graphic designing tool. Using; this tool is effortless to use, and you can easily create attractive presentations, infographics, social media graphics, logos, etc. This tool can be used by anyone like students (to create their school activities), educators (to create easy to learn infographics), business people (to create attractive presentations), graphic designers (to create different content), etc.
It contains a lot of features like:
● Data Visualization Tools
● Variety of Professionally Designed Easy to Use Templates
● Infographic Maker
● A Large Number of Editing Tools
● Animation Feature with Hover Effects
● Analytics Feature
● Adobe Spark: It is an online tool launched by Adobe. Although it can’t compete with professional software like Photoshop and Illustrator, it can be treated as the best alternative for Canva. It is used to create social media posts, logos, and graphic designs easily and efficiently. The only limitation it has is that non-designers and newcomers can’t use it without any knowledge of graphic design.
● PicMonkey: PicMonkey is another great alternative to Canva, just like Visme. It has many features that help both professional and non-professional designers create attractive and wonderful designs very easily and efficiently. It has many exciting features like photo re-toucher, pattern & effects tools, etc., just like Photoshop, but it is relatively easier to use and can be used by anyone who wants to create beautiful and creative graphic designs.
● ****Wondershare Filmora Video Editor **: Filmora is a video editing software and can be used as an alternative to Canva if you create and edit the videos to medium & advanced levels. It is used to create and edit short videos for social media and ad campaigns very quickly, with many features available in professional software like Adobe Premiere Pro. It is easy-to-use with an intuitive user interface that is very helpful for non-professional and less experienced video editors.
For Win 7 or later (64-bit)
For macOS 10.12 or later
● Key Takeaways from This Episode →
● It can be concluded that Canva is a fantastic graphic designing tool for all the non-professionals and newcomers in the field of design. It helps people create attractive and creative designs with less effort and less time consumption.
● No doubt, everything has its pros and cons. Similarly, Canva also has certain limitations compared to the other professional graphic designing tools like Photoshop, Illustrator, etc.
● But still, it is continuously updating and removing those limitations. For example- the new color match tool is introduced to this platform for easy and convenient graphic designing.
● This color match tool (eyedropper tool) was demanded by the designers who use Canva for their graphics and creating attractive social media posts, infographics, video editing, etc.
Color combination is the essential thing that you need to keep in mind designing. It helps create eye-catchy designs and can create a positive impact on the target audience.
This is the greatest secret of creating attractive and wonderful designs. Reading further will help you to understand the Canva color match in detail. So, without any further dues, let’s get started!
In this article
01 [What is the Canva Color Picker?](#Part 1)
02 [Why Use the Color Match Tool?](#Part 2)
03 [How to Use Color Match in Canva to Match Your Brand](#Part 3)
04 [Alternative to Canva Color Match](#Part 4)
Part 1 What is the Canva Color Picker?
Canva is one of the simplest and easiest ways of creating great and eye-catchy graphic designs. Color combinations help us to make these designs more attractive. But earlier, there were some limitations in Canva regarding the color picker tool; designers had to use browser extensions like ColorZilla to match the color combinations perfectly. They faced many problems while selecting the perfect color of their choice while designing their pins, social media content, logos, online invitations, etc. They had to find the perfect color code of their choice from an external source and paste it into the Canva, which was simply very time-consuming.
The most-awaited color picker tool was introduced in Canva at the end of November 202This new design tool makes the design very convenient while using Canva for graphic designing. With this tool, you don’t need to spend hours searching for the right color that matches the background. Color picker helps you to find a perfect color match according to the image, logo, or anything else uploaded on Canva.
But before using this new color match tool, you must ensure that:
● You are using the updated version of the Canva desktop app.
● You have the latest version of the browsers like Chrome, Mozilla, Internet Explorer, etc.
Part 2 Why Use the Color Match Tool?
This color match tool is the most-demanded feature that has been updated on Canva. It helps choose the perfect color match very efficiently without wasting time and effort. It works like an eyedropper tool available in graphic designing software like Photoshop. It is elementary and valuable to use, and it saves a lot of time in creating attractive and wonderful designs.
It helps determine the different colors available in a particular image uploaded on the Canva app. You can easily choose the appropriate color by placing the tool in the place that has your desired color. It is a compassionate tool, so you should be very careful while choosing the color of your choice. You can press the ‘Esc’ button to exit the command without choosing any color.
This color match tool magically helps select the desired color in seconds without using any external color picker browser extension. This tool is readily available on the color pallet in the updated version of the Canva desktop app.
Part 3 How to Use Color Match in Canva to Match Your Brand
The color match tool is now inbuilt in the Canva desktop app, which is very easy and convenient. You need to download the Canva desktop app to use this feature from the official website of Canva.
The designers need to follow the simple steps given below to use the color match tool (eyedropper tool) in the updated version of the Canva desktop app:
● First of all, open the Canva desktop app.
● After this, open any design or image of your choice that you want to edit. This color match tool can work on any type of image, regardless of the shape and size.
● Now, select the particular part of the image whose color you want to change.
● After this, click on the color block available at the top corner to open the color customization options.
● A color pallet will open.
● On the top of the color pallet, you will see a ‘+’ (add new color) button, this button has a colorful square outline.
● After this, a color chart will appear under that button. You will see the color code written over there and an eyedropper tool will be available next to that color code (hex code).
● Click on this eyedropper tool and select the color of your choice either from the image or any other color available in Canva.
● After selecting the color tap on the particular part of the image whose color you want to change.
This is how you can change the color using the new color picker tool available in Canva and enjoy editing your images using the new Canva desktop app.
Part 4 Alternative to Canva Color Match
As we all know, Canva is the most accessible online graphic designing platform used for image editing and video editing. But there are certain limitations of using it, so here we have listed some of the other graphic designing tools for both image and video editing that can be used as an alternative to the Canva app:
● Visme: It is a drag and drops editing and graphic designing tool. Using; this tool is effortless to use, and you can easily create attractive presentations, infographics, social media graphics, logos, etc. This tool can be used by anyone like students (to create their school activities), educators (to create easy to learn infographics), business people (to create attractive presentations), graphic designers (to create different content), etc.
It contains a lot of features like:
● Data Visualization Tools
● Variety of Professionally Designed Easy to Use Templates
● Infographic Maker
● A Large Number of Editing Tools
● Animation Feature with Hover Effects
● Analytics Feature
● Adobe Spark: It is an online tool launched by Adobe. Although it can’t compete with professional software like Photoshop and Illustrator, it can be treated as the best alternative for Canva. It is used to create social media posts, logos, and graphic designs easily and efficiently. The only limitation it has is that non-designers and newcomers can’t use it without any knowledge of graphic design.
● PicMonkey: PicMonkey is another great alternative to Canva, just like Visme. It has many features that help both professional and non-professional designers create attractive and wonderful designs very easily and efficiently. It has many exciting features like photo re-toucher, pattern & effects tools, etc., just like Photoshop, but it is relatively easier to use and can be used by anyone who wants to create beautiful and creative graphic designs.
● ****Wondershare Filmora Video Editor **: Filmora is a video editing software and can be used as an alternative to Canva if you create and edit the videos to medium & advanced levels. It is used to create and edit short videos for social media and ad campaigns very quickly, with many features available in professional software like Adobe Premiere Pro. It is easy-to-use with an intuitive user interface that is very helpful for non-professional and less experienced video editors.
For Win 7 or later (64-bit)
For macOS 10.12 or later
● Key Takeaways from This Episode →
● It can be concluded that Canva is a fantastic graphic designing tool for all the non-professionals and newcomers in the field of design. It helps people create attractive and creative designs with less effort and less time consumption.
● No doubt, everything has its pros and cons. Similarly, Canva also has certain limitations compared to the other professional graphic designing tools like Photoshop, Illustrator, etc.
● But still, it is continuously updating and removing those limitations. For example- the new color match tool is introduced to this platform for easy and convenient graphic designing.
● This color match tool (eyedropper tool) was demanded by the designers who use Canva for their graphics and creating attractive social media posts, infographics, video editing, etc.
Also read:
- New Easy Steps to Make Glitch Effect with Filmora for 2024
- 2024 Approved Detailed Steps to Resize Video in Davinci Resolve
- Updated 2024 Approved How to Change Aspect Ratio of Video?
- Updated 2024 Approved Step by Step to Rotate Videos in Davinci Resolve
- Are You Interested in the Best LUTs ? Do You Want to Enhance Your Photos and Images with High-End Quality? Then, Quickly Step Into This Article for Mind-Blowing Facts on It for 2024
- 10 Best Meme Text to Speech Tools Windows, Mac, Android, iPhone&Online
- Updated Why You Should Master Slideshows In Lightroom?
- In 2024, Do You Need to Make Your Video More Immersive? You Can Make It 60 FPS to Achieve That. And Here Are the 5 Best Tools that You Can Use
- New 2024 Approved How to Start a Vlog
- New 2024 Approved Are You Working on Editing a Video and Youd Like to Add Text to It? Learn the Various Ways that You Can Add Text to a Video
- New 2024 Approved M31 LUT (Teal and Orange LUT) Free Download
- 2024 Approved Camtasia Vs Captivate Which Is Better
- You Must Be Wondering Which the Best Online Transparent Image-Maker Is! Well, There Is No Need to Get Confused as Here; You Will Get a Curated List for the Same for 2024
- New How To Track and Blur Faces in Premiere Pro
- Updated 2024 Approved Competitive Guide To Use Slow Motion in After Effects
- Updated Do You Waste Time Making Transparent Background in Paint
- 3 Ways to Fake GPS Without Root On Realme Narzo N53 | Dr.fone
- In 2024, Latest Guide How To Bypass Vivo Y27s FRP Without Computer
- In 2024, What is the best Pokemon for pokemon pvp ranking On Poco X5? | Dr.fone
- Easy steps to recover deleted videos from 12 Pro+ 5G
- In 2024, A Quick Guide to Gionee F3 Pro FRP Bypass Instantly
- In 2024, Dose Life360 Notify Me When Someone Checks My Location On Apple iPhone 15? | Dr.fone
- How to Unlock Your Apple iPhone 14 Pro Max Passcode 4 Easy Methods (With or Without iTunes)
- In 2024, How to Fix iPad or Apple iPhone 6 Plus Stuck On Activation Lock?
- In 2024, Top 10 Password Cracking Tools For Xiaomi 14
- Full Guide to Bypass Vivo S18 Pro FRP
- How to Unlock iPhone 15 Passcode without Computer? | Dr.fone
- Which Pokémon can Evolve with a Moon Stone For Apple iPhone SE? | Dr.fone
- In 2024, How To Create an Apple Developer Account On Apple iPhone 7 Plus
- In 2024, Android Unlock Code Sim Unlock Your Samsung Galaxy XCover 7 Phone and Remove Locked Screen
- Title: The Only Guide Youll Ever Need to Learn GIF Design That Get Shared Like Crazy
- Author: Morgan
- Created at : 2024-05-19 05:11:36
- Updated at : 2024-05-20 05:11:36
- Link: https://ai-video-editing.techidaily.com/the-only-guide-youll-ever-need-to-learn-gif-design-that-get-shared-like-crazy/
- License: This work is licensed under CC BY-NC-SA 4.0.
