
:max_bytes(150000):strip_icc():format(webp)/samsung-unveils-new-products-at-its-annual-unpacked-event-1200186175-0a17180ae84e47f488f43d3afbb7daa6.jpg)
Things About Transparent PNG Remove and Convert
Things About Transparent PNG Remove and Convert
Things You Need to Know About Transparent PNG Remove and Convert
An easy yet powerful editor
Numerous effects to choose from
Detailed tutorials provided by the official channel
Are you thinking of merging two photos together with an identical background and no loss of quality? Or, do you have to remove the background color in a design? In such cases, PNG images work best for all.
PNG images are used at a broad level by web designers, graphic designers, and many other professionals around the world. It enables them to have a transparent background along with the finest image quality. It’s even possible to convert a JPG image to PNG transparent using any image editor. However, the process can seem a bit tedious and become complex if you are not using the right tool.
So, to help you out, we will reveal here the best way to remove the background of a photo and convert JPG image to PNG transparent.
In this article
01 [How to Remove the Background of a Photo in PowerPoint](#Part 1)
02 [How to Convert JPG to Transparent PNG](#Part 2)
Part 1 How to Remove the Background of a Photo in PowerPoint
If there is anything that a designer hates in his precious photo, then it’s the background. It hides and distracts from the main subject at hand. You can use various photo editing tools to remove the background from PNG images or JPG. However, they may not do the job as easily as you are thinking.
Yes, we know that you may be wondering about Adobe Photoshop now. It can be used for removing the background too but are you ready to pay for it? No, right? This is when you can depend on PowerPoint to erase the background of a photo without any hassle. Make sure you have PowerPoint 2010 or a later version installed before beginning. Because the earlier Microsoft PowerPoint versions don’t have a background removal feature.
Step 1: Open the image in a new tab
Launch PowerPoint on your desktop or Mac and change the layout of the slide to “Blank”. Next, insert your image, which has a solid or high-contrast background. Such pictures are easier to transform and edit.

Step 2: Select the “Remove Background” option
Click on your image to get the “Picture Format” in the menu toolbar. On the left top side, choose the “Remove Background” option. Now, PowerPoint will try to remove the background automatically. If the final picture that you are getting is not satisfactory, move to the next step.

Step 3: Select the Area
From the given options in the toolbar, mark the areas that you want to keep or remove in the final result. As you can view, how some parts of the pictures have been cut. So, spread the box to cover the entire area of the image, which you want to keep. Remember, purple-highlighted areas are removed automatically.

If you want to ensure a better result, use the cursor. Start hovering over the background and the main subject to get the plus and minus sign. These signs are useful for getting a precise image at the end. The Minus sign allows you to mark the areas to be removed. The plus sign can be used to keep the marked areas in the final picture.
Step 4: Finishing Touches
Check your image carefully and see whether any area is left to be removed or not. You can zoom in to find the tiniest spot. When you are satisfied with every detail, click anywhere outside of the image to stop further edits. Congratulations! Your transparent PNG is ready to save. Go to “File”>”Save As” and find the option to save your picture in PNG transparent format.
Part 2 How to Convert JPG to Transparent PNG
Ever wondered how logos in a graphic match with the background image color? It’s possible with transparent PNG images only. The transparent PNG images format contains superior quality and no background. Hence, it is pretty helpful for the designers to add them to graphics and videos.
In case you have some JPG images but you want it in PNG images format, don’t worry. You can use Kapwing as it’s a trusted content creation and video editing platform. It can bring your idea to life. It can convert JPG to PNG transparent easily. With the AI-powered facility, you can enjoy a seamless editing and conversion experience. Kapwing makes it really simple and fast, but the best part is that you can get it done for free.
Step 1: Add Your JPG
Launch Kapwing in any browser of your choice. Log in using your account or sign up with a new one. Now, you will be redirected to the Kapwing studio, where you can do all the editing and conversion. Upload your image to the “Kapwing Studio” and use the “Remove Image from Background” tool.

If the image is already saved on your device, simply hit “Click to Upload” or, if you wish, drag and drop the JPG image to initiate the conversion. On the other hand, in case the image is not available, you can copy and paste from a URL in the “Paste an image or video URL” box.
Step 2: Pick a Tool
After the image upload finishes, the next thing is to start removing its background. Go to the right side of the “Image” tab and click on the “Erase” button. Otherwise, you can use the “Remove Background from Image” tool to start.

You have two options to choose from – Erase and Magic Wand. The first tool gives you full control over what you want to remove or keep. Adjust the “eraser size” by sliding right on the dial. This way, you can remove the background precisely.
Apart from that, the Magic Wand tool is amazing for removing a particular area at once. You can remove the picture background in less time and effort. If you want to remove a certain area of the same color, then the Magic Wand is the best tool to use. It eliminates similar groups of pixels together. To modify the sensitivity, move the same dial to the right as you did while selecting the “Erase” tool.
For some impressive results, adjust the zoom and choose “Move” to select the pixels you want to remove.
Step 3: Make the PNG and Download
After everything has been set, it’s time to download your PNG transparent file. Click “Done” and then move back to the Kapwing Studio for additional features. You can add watermarks, text, and a lot more. Finally, hit the “Publish” button placed at the top right and “Download” to save the PNG file to your desktop.
You can do more with Wondershare Filmora Video Editor !
For Win 7 or later (64-bit)
For macOS 10.12 or later
Have you ever tried to extract images from a video file? Well, many of us wish to do so but lack the right tools or don’t have any idea of how to do it. Some people just take a screenshot of the video and crop it for use in memes, images, etc. However, doing this will reduce its overall resolution and quality.
If you want to preserve quality during the extraction of images from a video, use Wondershare Filmora. It lets you take images out of a video file frame by frame without any compromise on quality. It features many other tools to show your creativity.
It’s the latest update. Filmora V11 is here! Find out what’s new in this latest video editing software release and how it can help you create incredible videos and images. You can remove any unwanted object from an image, add filters and overlays, all on the go.
● Ending Thoughts →
● So there you have it: the full story on transparent PNGs, removing background, and conversion from JPG to PNG file format. As you can see, it’s not too hard to combine one image in your design. However, we don’t want you to forget anything. Hence, remember these things when you try to convert JPG to PNG transparent.
● Whichever method you choose to turn a PNG image into a JPG, make sure you are familiar with the tool. If not, first spend time figuring out the features. Seek out what suits you and then start. We would recommend following the above tips carefully instead of using any other tool.
● Beware of using third-party websites for background removal from a PNG. Many will store your pictures, which can be accessed by other users. They are not safe for you by any means.
● It’s not an easy job to convert JPG to transparent PNG using PowerPoint, especially when an image contains multiple images and colors. For such pictures, you can use Kapwing. It has plenty of additional features that you can use for creative work.
● If you have any questions or have different ways of accomplishing this, feel free to comment below. Thanks for reading.
Are you thinking of merging two photos together with an identical background and no loss of quality? Or, do you have to remove the background color in a design? In such cases, PNG images work best for all.
PNG images are used at a broad level by web designers, graphic designers, and many other professionals around the world. It enables them to have a transparent background along with the finest image quality. It’s even possible to convert a JPG image to PNG transparent using any image editor. However, the process can seem a bit tedious and become complex if you are not using the right tool.
So, to help you out, we will reveal here the best way to remove the background of a photo and convert JPG image to PNG transparent.
In this article
01 [How to Remove the Background of a Photo in PowerPoint](#Part 1)
02 [How to Convert JPG to Transparent PNG](#Part 2)
Part 1 How to Remove the Background of a Photo in PowerPoint
If there is anything that a designer hates in his precious photo, then it’s the background. It hides and distracts from the main subject at hand. You can use various photo editing tools to remove the background from PNG images or JPG. However, they may not do the job as easily as you are thinking.
Yes, we know that you may be wondering about Adobe Photoshop now. It can be used for removing the background too but are you ready to pay for it? No, right? This is when you can depend on PowerPoint to erase the background of a photo without any hassle. Make sure you have PowerPoint 2010 or a later version installed before beginning. Because the earlier Microsoft PowerPoint versions don’t have a background removal feature.
Step 1: Open the image in a new tab
Launch PowerPoint on your desktop or Mac and change the layout of the slide to “Blank”. Next, insert your image, which has a solid or high-contrast background. Such pictures are easier to transform and edit.
Step 2: Select the “Remove Background” option
Click on your image to get the “Picture Format” in the menu toolbar. On the left top side, choose the “Remove Background” option. Now, PowerPoint will try to remove the background automatically. If the final picture that you are getting is not satisfactory, move to the next step.
Step 3: Select the Area
From the given options in the toolbar, mark the areas that you want to keep or remove in the final result. As you can view, how some parts of the pictures have been cut. So, spread the box to cover the entire area of the image, which you want to keep. Remember, purple-highlighted areas are removed automatically.
If you want to ensure a better result, use the cursor. Start hovering over the background and the main subject to get the plus and minus sign. These signs are useful for getting a precise image at the end. The Minus sign allows you to mark the areas to be removed. The plus sign can be used to keep the marked areas in the final picture.
Step 4: Finishing Touches
Check your image carefully and see whether any area is left to be removed or not. You can zoom in to find the tiniest spot. When you are satisfied with every detail, click anywhere outside of the image to stop further edits. Congratulations! Your transparent PNG is ready to save. Go to “File”>”Save As” and find the option to save your picture in PNG transparent format.
Part 2 How to Convert JPG to Transparent PNG
Ever wondered how logos in a graphic match with the background image color? It’s possible with transparent PNG images only. The transparent PNG images format contains superior quality and no background. Hence, it is pretty helpful for the designers to add them to graphics and videos.
In case you have some JPG images but you want it in PNG images format, don’t worry. You can use Kapwing as it’s a trusted content creation and video editing platform. It can bring your idea to life. It can convert JPG to PNG transparent easily. With the AI-powered facility, you can enjoy a seamless editing and conversion experience. Kapwing makes it really simple and fast, but the best part is that you can get it done for free.
Step 1: Add Your JPG
Launch Kapwing in any browser of your choice. Log in using your account or sign up with a new one. Now, you will be redirected to the Kapwing studio, where you can do all the editing and conversion. Upload your image to the “Kapwing Studio” and use the “Remove Image from Background” tool.
If the image is already saved on your device, simply hit “Click to Upload” or, if you wish, drag and drop the JPG image to initiate the conversion. On the other hand, in case the image is not available, you can copy and paste from a URL in the “Paste an image or video URL” box.
Step 2: Pick a Tool
After the image upload finishes, the next thing is to start removing its background. Go to the right side of the “Image” tab and click on the “Erase” button. Otherwise, you can use the “Remove Background from Image” tool to start.
You have two options to choose from – Erase and Magic Wand. The first tool gives you full control over what you want to remove or keep. Adjust the “eraser size” by sliding right on the dial. This way, you can remove the background precisely.
Apart from that, the Magic Wand tool is amazing for removing a particular area at once. You can remove the picture background in less time and effort. If you want to remove a certain area of the same color, then the Magic Wand is the best tool to use. It eliminates similar groups of pixels together. To modify the sensitivity, move the same dial to the right as you did while selecting the “Erase” tool.
For some impressive results, adjust the zoom and choose “Move” to select the pixels you want to remove.
Step 3: Make the PNG and Download
After everything has been set, it’s time to download your PNG transparent file. Click “Done” and then move back to the Kapwing Studio for additional features. You can add watermarks, text, and a lot more. Finally, hit the “Publish” button placed at the top right and “Download” to save the PNG file to your desktop.
You can do more with Wondershare Filmora Video Editor !
For Win 7 or later (64-bit)
For macOS 10.12 or later
Have you ever tried to extract images from a video file? Well, many of us wish to do so but lack the right tools or don’t have any idea of how to do it. Some people just take a screenshot of the video and crop it for use in memes, images, etc. However, doing this will reduce its overall resolution and quality.
If you want to preserve quality during the extraction of images from a video, use Wondershare Filmora. It lets you take images out of a video file frame by frame without any compromise on quality. It features many other tools to show your creativity.
It’s the latest update. Filmora V11 is here! Find out what’s new in this latest video editing software release and how it can help you create incredible videos and images. You can remove any unwanted object from an image, add filters and overlays, all on the go.
● Ending Thoughts →
● So there you have it: the full story on transparent PNGs, removing background, and conversion from JPG to PNG file format. As you can see, it’s not too hard to combine one image in your design. However, we don’t want you to forget anything. Hence, remember these things when you try to convert JPG to PNG transparent.
● Whichever method you choose to turn a PNG image into a JPG, make sure you are familiar with the tool. If not, first spend time figuring out the features. Seek out what suits you and then start. We would recommend following the above tips carefully instead of using any other tool.
● Beware of using third-party websites for background removal from a PNG. Many will store your pictures, which can be accessed by other users. They are not safe for you by any means.
● It’s not an easy job to convert JPG to transparent PNG using PowerPoint, especially when an image contains multiple images and colors. For such pictures, you can use Kapwing. It has plenty of additional features that you can use for creative work.
● If you have any questions or have different ways of accomplishing this, feel free to comment below. Thanks for reading.
Do You Use Premiere Pro and Want to Learn How to Change a Video’s Frame Rate Using the Tool? Here Are the Steps that You Need to Follow
The video’s frame rate is an important aspect of it. Too high of a frame rate makes the video seem unnatural. On the other hand, too low can make some videos choppy. You can fix that by changing the frame rate using a video editor. And we are here to help you learn how to do that. Here’s how to change the frame rate in Premiere Pro.
The frame rate sometimes makes or breaks the video. So it is important to get this setting right. Suppose you made a mistake and recorded your video in the wrong setting. You can follow this guide to solve your problem.

How To Check Video Frame Rate in Premiere Pro
Before we teach you how to change a video’s frame rate in Premiere Pro, let’s first make sure you know how to check. Maybe you don’t need to modify the video because it is already in the correct setting.
So how do you do that in Premiere Pro?
- Import the video to Adobe Premiere Pro.
- Check the “Media” window. Next to the video file name is its frame rate. It is written in the format x.00 fps. FPS stands for “frames per second,” which is used interchangeably with the term frame rate.

Reasons for Changing Frame Rate
Suppose you have an action-packed video. It would not look great at 30 fps - it will look too choppy. That will give your audience a rotten viewing experience. By increasing the frames, you can make the motion more fluid and smoother.
Increasing the frames per second also results in better slow-motion videos. A 30 fps one would not look good with this effect because it does not show smooth motion. Thus, we recommend making the video at least 60 fps.
However, a higher frame rate does not always mean better videos. It can result in what they call the “soap opera effect.” It means the video shows too many details. That makes the videos seem “unnatural” or less cinematic.
High frame rates make videos look more realistic since there is less stuttering and motion blur between frames. That’s great. But for older audiences - the ones used to watching videos at 24 fps, it can be off-putting. So it’s also important to consider your target audience when deciding the right frame rate for your video.
With these reasons in mind, you may want to change your video’s frame rate.
How To Change FPS in Premiere Pro
Let’s dilly-dally no more. Here’s a quick guide on how to change fps in Adobe Premiere Pro. This program gives you two different ways to change fps. One is changing the frame rate of a sequence; the other is changing the frame rate of the video clip. We will teach you how to do both.
l Change the Frame Rate of a Sequence
Suppose you want to keep the frame rate of most of the video the same. Only some parts need adjusting. You can change the frame rate of the sequences that need changing instead. Here are the steps to follow to achieve this:
- Open your project in Adobe Premiere Pro.
- In the Project panel, select the sequence whose frame rate you want to change. Right-click on that sequence.
- Choose “Sequence Settings” from the menu that appears.

- Click the drop-down menu for “Timebase.”
- Select the frame rate you want the sequence to be in.

- Click “OK.”
l Change the Frame Rate of a Video Clip
Here are the steps you should follow if you want to change the frame rate of an entire video clip.
- Import your video clip to Premiere Pro and drag it to the timeline.
- Go to the “Effects” tab. It’s in the options at the bottom left of the screen.

- Select “Video Effects” > “Time” > “Posterize Time.”

- Drag and drop the Posterize Time effect to the clip whose frame rate you want to change.
- Click “Effect Controls” at the top left of the screen.
- Select the small “arrow” button next to the “Frame Rate” text under “Posterize Time.”
- Change the frame rate to your preferred setting. For example, type “60” to make the video 60 fps.

- Click “Sequence” > “Render Selection.”
And that’s it! That is how you change a video clip’s frame rate in Adobe Premiere Pro.
How To Make 120 FPS Videos With Premiere Pro
Videos that are 120 fps are very popular now. If you are a gaming content creator on YouTube, you probably record videos at this frame rate. You’d want to edit that footage and export it at the same frame rate.
Adobe Premiere Pro allows you to do that. But it’s a little bit of a hidden feature. When creating a sequence, you may notice that the highest the frame rate can go is 60 frames per second. That’s obviously not the number that we want. Don’t worry. There is a workaround. The best thing is that it’s super easy.
Follow these steps to change your video to 120 fps:
- Import your 120 fps video to Adobe Premiere Pro.
- Select your footage. Drag it to your timeline or the tab where the text says, “Drop media here to create sequence.”

- Select the timeline panel. Click “Sequence” > “Sequence Settings.”
- Check the “Timebase” section. It should say “119.88 frames/second,” 120 fps when rounded off.

- Edit the video as needed and render it. The output should stay at 120 fps.
How To Change Video From 30 FPS to 60 FPS in Premiere Pro
Do you have a video recorded at 30 frames per second, and do you want it at 60? Here’s a simple solution to that. Follow these steps in Adobe Premiere Pro to double the video’s frame rate.
- Open Adobe Premiere Pro. Click “File” > “New” > “Sequence.”

- Click “AVCHD” > “1080p” > “AVCHD 1080p60” > “OK.”

- Import your 30 fps video into Adobe Premiere Pro.
- Drag the video into the timeline.
- Click “Keep existing settings.”

- Right-click the video in the timeline. Select “Time interpolation” > “Optical Flow.”

- Press the “Enter” key. Wait for the processing to finish. This can take hours.
- Click “File” > “Export” > “Media.”

- Select a preset.
- Scroll down to the “Effects” section to check if the frame rate is at 60 fps. If not, change it to 60 fps.

- Click “Export.”
[Bonus] Wondershare Filmora - Premiere Pro’s Alternative
Free Download For Win 7 or later(64-bit)
Free Download For macOS 10.14 or later
What if you don’t have Adobe Premiere Pro or don’t like this tool? What’s a good alternative? That would be Wondershare Filmora.

Why use Filmora as a substitute for Premiere Pro? This video editor offers lots of great features, basic or advanced. With these at your fingertips, you can bring your videos to the next level and wow your audiences.
Among Filmora’s handy features is the ability to quickly change a video’s frame rate. You don’t even need to be a video editing expert to do it with this software! That’s how straightforward the process is.
How To Change the Frame Rate in Wondershare Filmora
Changing a video’s frame rate in Wondershare Filmora is super easy. Even a child can do it due to how simple the steps are. Here, read this 5-step guide to change a video’s frame rate using this amazing video editor.
- Launch Wondershare Filmora and create a new project.

- Import the video whose frame rate you want to change.
- Drag the video into the timeline.
![]()
- Click “Export.”
- Select the format you want the output file to be in. Find the “Frame Rate” in the options, click the drop-down menu, and select the frame rate that you want. Click “Export.”

Conclusion
Getting the frame rate of a video right is important, so you should not neglect it. It greatly affects your audience’s viewing experience. Thankfully, if you make mistakes, you can correct them with video editors like Premiere Pro. If it’s not to your liking, you can use Wondershare Filmora instead - it’s the best alternative.
Filmora lets you change a video’s frame rate very easily. Also, it gives you a bunch of other features you might enjoy using. And here’s some good news: this software app is affordable! You can also download the free trial to give it a shot.
Free Download For macOS 10.14 or later
What if you don’t have Adobe Premiere Pro or don’t like this tool? What’s a good alternative? That would be Wondershare Filmora.
Why use Filmora as a substitute for Premiere Pro? This video editor offers lots of great features, basic or advanced. With these at your fingertips, you can bring your videos to the next level and wow your audiences.
Among Filmora’s handy features is the ability to quickly change a video’s frame rate. You don’t even need to be a video editing expert to do it with this software! That’s how straightforward the process is.
How To Change the Frame Rate in Wondershare Filmora
Changing a video’s frame rate in Wondershare Filmora is super easy. Even a child can do it due to how simple the steps are. Here, read this 5-step guide to change a video’s frame rate using this amazing video editor.
- Launch Wondershare Filmora and create a new project.
- Import the video whose frame rate you want to change.
- Drag the video into the timeline.
![]()
- Click “Export.”
- Select the format you want the output file to be in. Find the “Frame Rate” in the options, click the drop-down menu, and select the frame rate that you want. Click “Export.”
Conclusion
Getting the frame rate of a video right is important, so you should not neglect it. It greatly affects your audience’s viewing experience. Thankfully, if you make mistakes, you can correct them with video editors like Premiere Pro. If it’s not to your liking, you can use Wondershare Filmora instead - it’s the best alternative.
Filmora lets you change a video’s frame rate very easily. Also, it gives you a bunch of other features you might enjoy using. And here’s some good news: this software app is affordable! You can also download the free trial to give it a shot.
Top 12 AI Video Generators to Pick
Top 12 AI Video Generators to Pick
An easy yet powerful editor
Numerous effects to choose from
Detailed tutorials provided by the official channel
It is a fact that video editing can sometimes be laborious and time-consuming. Even when using the best video editing software, it still requires human effort to get an impressive result. But luckily for us, the invention of the AI video generator has now made a lot of things easier. The AI video generators are the next level as they allow users to automate video creation and editing without compromising quality.
This article will discuss the best AI text to video generators for free that will help make your life easier. Thus, this will soon help you create engaging videos for your personal or business use in just a few clicks.
In this article
01 [What Is an AI Video Generator](#Part 1)
02 [How Does the AI Video Maker Work](#Part 2)
03 [The 12 Best AI Video Generator](#Part 3)
Part 1 What Is an AI Video Generator
AI video generator is the process of using artificial intelligence (AI) to create professional videos. With an AI video generator for free, you do not need any equipment, an editing studio, or a premium video editing application to be able to create a video.
All that is required is that you feed input to the AI tool, and it will automatically help you generate a video. You can edit a blog post into a video within a few minutes with any of these tools listed. In addition, it won’t incur any high costs for video productions because the AI tool will help you carry out most of the tasks.
Part 2 How Does the AI Video Maker Work
Professional AI video editors, are trained by showing them various examples and then providing them feedback by telling them what is wrong and good. The machine then takes note of it and remembers it. However, as the machine continues to learn, it picks the results and then improves itself based on the feedback. Ultimately the device becomes very good or even better than the human that creates it. Here are some breakdowns of the ways video editors work:
● The AI video maker tool, can augment your videos with AR effects, including AR masks, face and color filters, face touch-ups, etc. The tool uses neural networks and computer vision to interrupt, extract, and understand the video content.
● This AI subtitle generator can allow interviews to be delivered and analyzed to the editor fully transcribed, searchable by word or even sentences. Video editors can use AI for keyword extraction, speech-to-text conversion, facial recognition, sentiment analysis, image recognition, and emotion detection.
● AI-video editors can pull sections of a video clip from any source automatically. These AI systems can also detect emotions that allow the creation of warm, appealing videos.
Part 3 The 12 Best AI Video Generator
There are top AI video generators for free that you can choose from for your video editing. These video editors complete work quickly and easily. In addition, if you need video editing software to help you edit your generated videos after generating them, we recommend that you try out Filmora from Wondershare. Wondershare Filmora Video Editor is a perfect video editing software with tons of new features, like keyframing, split video, and adding animations and effects to help you carry out your video editing seamlessly.
For Win 7 or later (64-bit)
For macOS 10.12 or later
01Sora
Sora is an artificial intelligence model that generates videos with textual descriptions, developed by OpenAI. It is a US-based artificial intelligence research organization. Sora stands out as a game-changing platform. It can seamlessly convert text into captivating videos, blending convenience with creativity.
Features
● With Sora, transforming written content into engaging videos is swift and efficient.
● Unlike traditional video editing tools, Sora is designed for users of all levels, eliminating the need for prior video production experience.
● Sora offers a plethora of customization options.
● Generates videos up to 60 seconds long
● Generates complex scenes with multiple characters, motions, and accurate details of the subject
● Creates multiple shots within a single generated video
● Generating videos from text instructions by utilizing the recaptioning technique from DALL·E 3
Pros
● Highly realistic video generation with impressive visual quality
● Text-based control over the content of the video, allowing for precise video generation
● A highly versatile tool that handles a wide range of prompts and styles
Cons
● Lacks implicit understanding of the rules of physics
This software is best realistic and imaginative scenes.
02Wondershare Filmora
Wondershare Filmora is a highly efficient video editing software that comes with AI text to video generation. The software is friendly to both beginner and intermediate creations, offering you a wide range of intuitive features.
Pricing
● Subscription Plan: US$19.99 per month
● Cross-Platform Plan: US$69.99 per year
● Perpetual Plan: US$19.99 Onetime Payment
Features
● User-friendly interface that is easy to learn and use
● Wide range of features for creating and editing videos, including transitions, effects, and text overlays.
● Large stock library of royalty-free music and stock footage
● Readily available templates and presets to quickly generate videos
● Easily export videos directly to popular platforms like YouTube and TikTok
Pros
● User-friendly interface with a learning curve suitable for all kinds of creators
● Extensive library of free and paid assets to enhance your videos
● Wide range of features for video editing
Cons
● Lacks advanced features for AI video prompt generation
This software is best for video creation and editing for freelancers, SMBs, markters.
For Win 7 or later (64-bit)
For macOS 10.12 or later
How to Use Filmora’s AI to Video Feature : AI Video Prompt Sample
Here is a brief step-by-step guide on how to use Filmora to generate AI videos. The process is as simple as writing a text prompt and getting the video ready:
Step 1: Lauch Filmora AI Text-to-Video Features
Once you launch on your PC Filmora, click the AI Text-to-Video option to start the video generation process.
Step 2: Add a Text Prompt or Video Script
On the AI Text-to-Video video, add your text prompt. You can also modify other settings such as text language and video voice. Then click the Text to Video button at the bottom to prompt Filmora to generate the video.
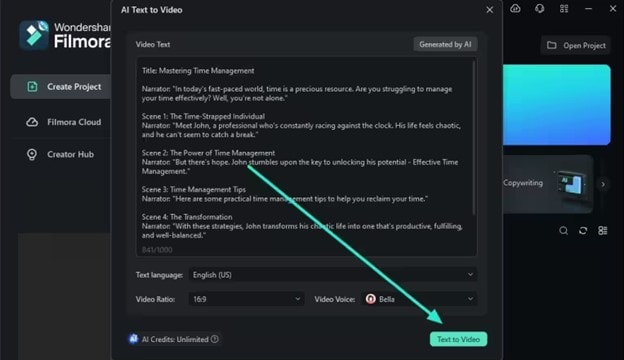
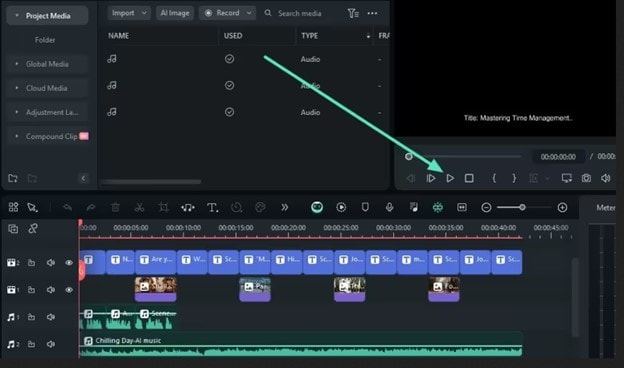
Step 3: Preview the Generated Video
Filmora generates the video based on your prompt and a new editing window. You can now a preview video and make any further editing needed.
AI Video Prompt Sample Using Filmora
Prompt: A young man at his 20s is sitting on a piece of cloud in the sky, reading a book.
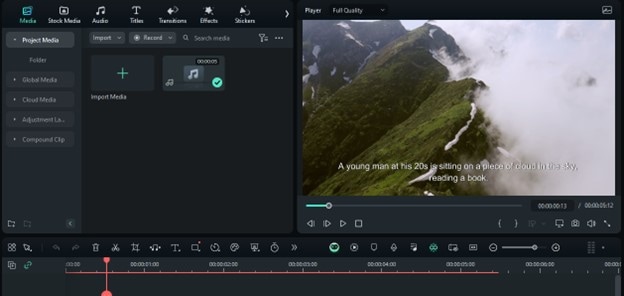
When prompted to generate a video of a young man in his 20s sitting on a piece of cloud in the sky, reading a book, Filmora generated a narration video from the point of view of the young man as shown above.
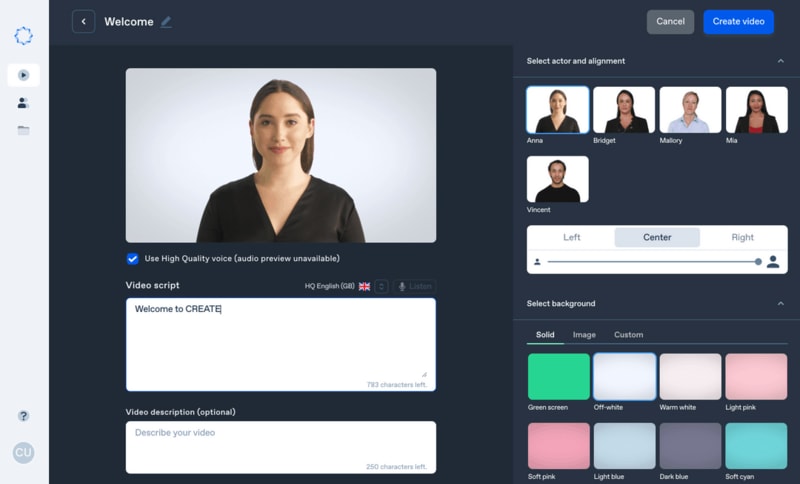
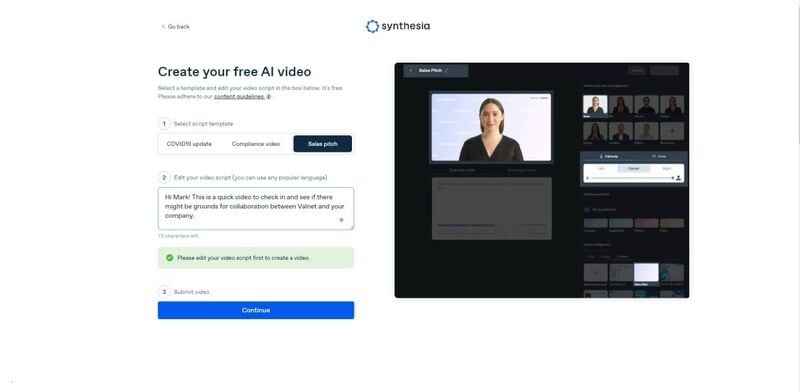
03Synthesia
This is a web-app video generator AI from a text supporting AI-driven video creation used by experts and beginners. Rather than filming content utilizing a microphone and camera, this software AI technology helps to simulate human presenters and real-life videos. Thus, it saves video creators hours of work.
Pricing
● Personal Plan: $30 monthly
● Corporate Plan: custom pricing
Features
● Over 40 supported languages
● Allows template customizations
● Allows users to make their avatars
● It has 50 built-in presenters
● Allows you to create realistic AI videos
● Offers live chat support
● Allows download in Mp4
● Enables users to create videos automatically using integrations with APIs
● Allows the addition of backgrounds
● Users can share their videos on other social media platforms
● Allows the addition of images, shapes, and texts to videos
Pros
● Great for beginners are you do not need prior knowledge
Cons
● It supports only front-facing poses
This software is best for freelancers, agencies, marketers, and content creators looking to create high-quality video content.
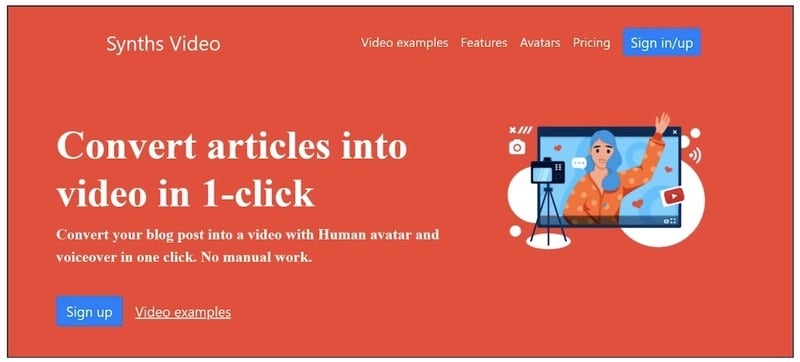
04Synths Video
This is an AI video-generating tool primarily concerned with helping users drive leads and traffic from YouTube. It is an AI YouTube title generator that allows users to create professional-looking videos from blog posts on YouTube.
Pricing
● YouTube Start: $399 monthly.
● Premium Custom Package: Custom Pricing.
Features
● Video generation from URLs
● It has built-in integration with YouTube
● 20+ avatars are available
● Allows video upload in HD quality
● Over 40+ languages supported
Cons
● No free plan is available
Best for the owners of YouTube channels.
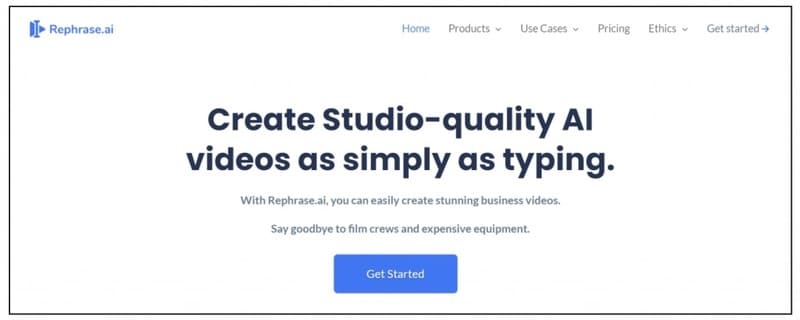
05Rephrase.ai
Rephrase.ai is a video editing software that uses a sophisticated deep learning engine to create professional videos.
Pricing
● Starter plan: $25 monthly
● Enterprise plan: Custom Pricing
Features
● Produces high-resolution videos
● Supports functionality for presenter customization
● Multiple-use cases supported
● Allows users to select their preferred AI voice
● Support varieties of video editing tools
Cons
● It has a complex pricing plan
It is best for agencies seeking to create customizable and personalized professional videos for marketing and advertising.
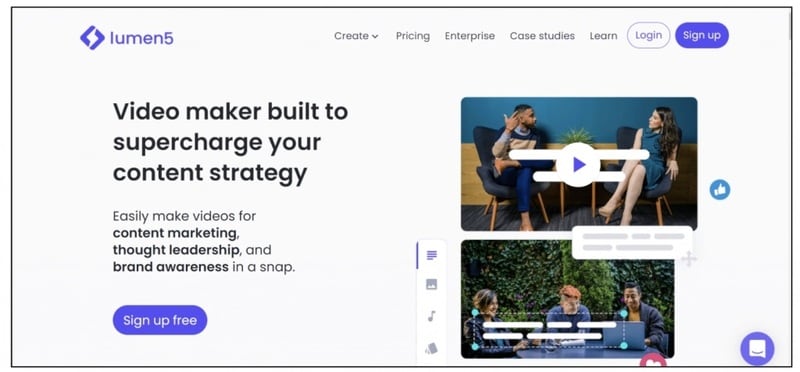
06Lumen5
Lumen5 is one of the top AI video-creating tools available for beginners and uses Natural Language Processing algorithms to convert text into high-quality videos.
Pricing
● Free Plan
● Creator plan: $15 monthly.
● Premium plan: $79 monthly.
● Business plan: $199 monthly.
● Enterprise plan: Custom Pricing.
Features
● Transforms text to video within minutes
● Numerous templates are available
● Allows customization of videos resolution, color, and font
Cons
● Limited features in the free plan
Best for beginners who are looking to generate short-duration of videos for social media platforms.
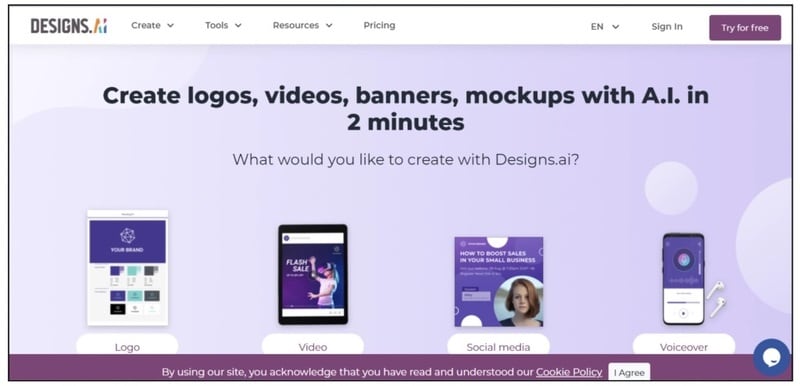
07Designs.ai
This is an AI-powered video maker that is useful for users that do not have any experience in design.
Pricing
● Basic plan: $29 monthly
● Pro plan: $69 monthly
● Enterprise plan: Custom Pricing
Features
● It has an attractive and modern user interface
● Allows the creation of videos from pre-designed templates
● Helps video creation from your custom video files
● Over 20 languages supported
● Coverts texts to video
Cons
● Only allows video download in a paid plan.
This tool is best for creators and designers who are willing to create quick AI videos.
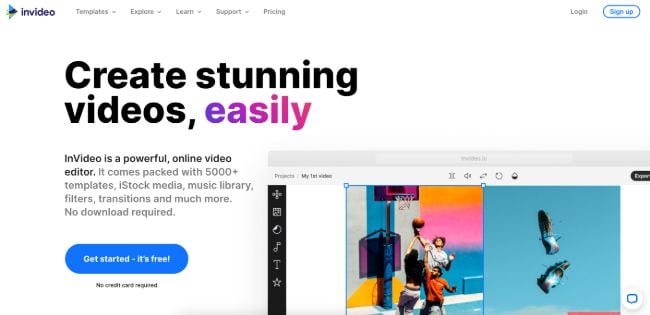
08InVideo
This is a perfect AI generator used for creating explainers or marketing videos easily and quickly. The platform helps produce high-quality videos with varieties of style options to make the ideal video according to your requirements.
Pricing
● Free: Free with watermarks on your videos.
● Business: $15 monthly with no watermarks.
● Unlimited: $30 monthly with unlimited video exports.
Features
● Very affordable
● Comprises an online drag-and-drop video editor
● Over 50 AI-powered themes that help to convert text to video in 3 minutes
● Full iStock media library available in all plans
Cons
● Requires internet connection to use
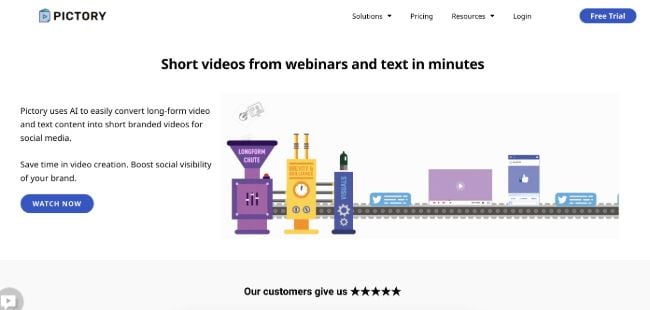
09Pictory.ai
This AI subtitle generator converts your text and turns it into an AI-generated video. This program is simple and easy to get started, requiring no software download. Paste your text into the editor and get started.
Pricing
● Free trial: Only use 3 videos.
● Standard Plan: $29 per month.
● Premium Plan: $59 per month.
Features
● It has a simple user interface.
● Over 6M licensed Shutterstock available
● Unlimited and affordable videos in the premium plan
Cons
● It is quite expensive compared to other tools
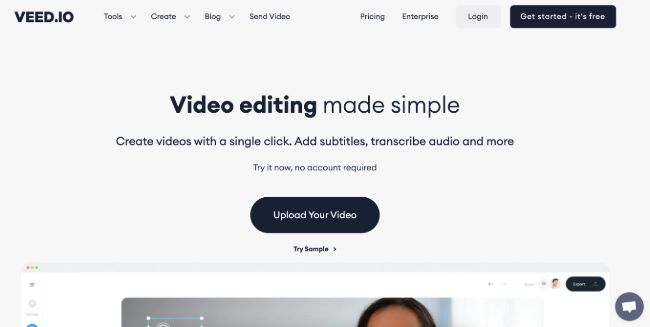
10Veed.io
Veed.io is not specifically an AI video generator but a video editing tool that utilizes AI to simplify the entire process and allows users to create high-quality videos within seconds.
Pricing
● Free: Free with watermarks!
● Basic: $18 monthly.
● Pro: $30 monthly
Features
● It has lots of video templates and a music library to choose
● Easy to learn, user-friendly interface
● Video rendering times are quite fast
● The basic plan has a high-quality resolution
Cons
● Not a typical AI video generator
● Not for beginners
11Wisecut
This free AI video generator platform allows you to turn your text into video. Type in your text and choose a voice actor, and then Wisecut will take care of the rest. It offers excellent editing tools for users to tweak your video until it’s just right.
Pricing
● Basic: Free.
● Professional: $57 per month.
Features
● This platform is easy to use
● It has a simple drag and drops user-interface
● Allows auto subtitles and auto cut silences
● Allows integration with YouTube
● Subtitles auto-translation
● Excellent video quality
Cons
● Has limited effects

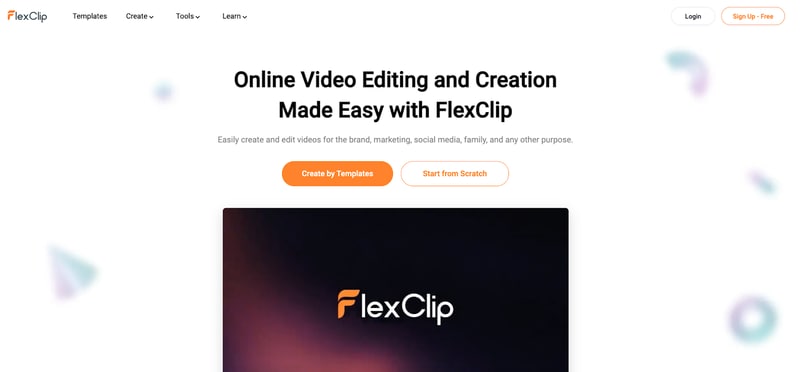
12Flexclip
FlexClip makes video creation and editing easy with-it millions of royalty-free stock media and thousands of templates for you to choose from.
Pricing
● Free
● Basic: $5.99 per month.
● Plus: $9.99 per month
● Business: $19.99 per month.
Features
● Thousands of available templates
● Simple tool for creating and editing videos
● Use for creating engaging videos
● Provides millions of royalty stock media
● Versatile and Flexible
Cons
● Not for beginners
● Ending Thoughts →
● In this post, we have listed the top text to video generators that you can choose from to help you perform tasks within minutes.
● The report also explains all you need to know about video AI generators and recommends Filmora as a perfect tool for editing your videos.
It is a fact that video editing can sometimes be laborious and time-consuming. Even when using the best video editing software, it still requires human effort to get an impressive result. But luckily for us, the invention of the AI video generator has now made a lot of things easier. The AI video generators are the next level as they allow users to automate video creation and editing without compromising quality.
This article will discuss the best AI text to video generators for free that will help make your life easier. Thus, this will soon help you create engaging videos for your personal or business use in just a few clicks.
In this article
01 [What Is an AI Video Generator](#Part 1)
02 [How Does the AI Video Maker Work](#Part 2)
03 [The 12 Best AI Video Generator](#Part 3)
Part 1 What Is an AI Video Generator
AI video generator is the process of using artificial intelligence (AI) to create professional videos. With an AI video generator for free, you do not need any equipment, an editing studio, or a premium video editing application to be able to create a video.
All that is required is that you feed input to the AI tool, and it will automatically help you generate a video. You can edit a blog post into a video within a few minutes with any of these tools listed. In addition, it won’t incur any high costs for video productions because the AI tool will help you carry out most of the tasks.
Part 2 How Does the AI Video Maker Work
Professional AI video editors, are trained by showing them various examples and then providing them feedback by telling them what is wrong and good. The machine then takes note of it and remembers it. However, as the machine continues to learn, it picks the results and then improves itself based on the feedback. Ultimately the device becomes very good or even better than the human that creates it. Here are some breakdowns of the ways video editors work:
● The AI video maker tool, can augment your videos with AR effects, including AR masks, face and color filters, face touch-ups, etc. The tool uses neural networks and computer vision to interrupt, extract, and understand the video content.
● This AI subtitle generator can allow interviews to be delivered and analyzed to the editor fully transcribed, searchable by word or even sentences. Video editors can use AI for keyword extraction, speech-to-text conversion, facial recognition, sentiment analysis, image recognition, and emotion detection.
● AI-video editors can pull sections of a video clip from any source automatically. These AI systems can also detect emotions that allow the creation of warm, appealing videos.
Part 3 The 12 Best AI Video Generator
There are top AI video generators for free that you can choose from for your video editing. These video editors complete work quickly and easily. In addition, if you need video editing software to help you edit your generated videos after generating them, we recommend that you try out Filmora from Wondershare. Wondershare Filmora Video Editor is a perfect video editing software with tons of new features, like keyframing, split video, and adding animations and effects to help you carry out your video editing seamlessly.
For Win 7 or later (64-bit)
For macOS 10.12 or later
01Sora
Sora is an artificial intelligence model that generates videos with textual descriptions, developed by OpenAI. It is a US-based artificial intelligence research organization. Sora stands out as a game-changing platform. It can seamlessly convert text into captivating videos, blending convenience with creativity.
Features
● With Sora, transforming written content into engaging videos is swift and efficient.
● Unlike traditional video editing tools, Sora is designed for users of all levels, eliminating the need for prior video production experience.
● Sora offers a plethora of customization options.
● Generates videos up to 60 seconds long
● Generates complex scenes with multiple characters, motions, and accurate details of the subject
● Creates multiple shots within a single generated video
● Generating videos from text instructions by utilizing the recaptioning technique from DALL·E 3
Pros
● Highly realistic video generation with impressive visual quality
● Text-based control over the content of the video, allowing for precise video generation
● A highly versatile tool that handles a wide range of prompts and styles
Cons
● Lacks implicit understanding of the rules of physics
This software is best realistic and imaginative scenes.
02Wondershare Filmora
Wondershare Filmora is a highly efficient video editing software that comes with AI text to video generation. The software is friendly to both beginner and intermediate creations, offering you a wide range of intuitive features.
Pricing
● Subscription Plan: US$19.99 per month
● Cross-Platform Plan: US$69.99 per year
● Perpetual Plan: US$19.99 Onetime Payment
Features
● User-friendly interface that is easy to learn and use
● Wide range of features for creating and editing videos, including transitions, effects, and text overlays.
● Large stock library of royalty-free music and stock footage
● Readily available templates and presets to quickly generate videos
● Easily export videos directly to popular platforms like YouTube and TikTok
Pros
● User-friendly interface with a learning curve suitable for all kinds of creators
● Extensive library of free and paid assets to enhance your videos
● Wide range of features for video editing
Cons
● Lacks advanced features for AI video prompt generation
This software is best for video creation and editing for freelancers, SMBs, markters.
For Win 7 or later (64-bit)
For macOS 10.12 or later
How to Use Filmora’s AI to Video Feature : AI Video Prompt Sample
Here is a brief step-by-step guide on how to use Filmora to generate AI videos. The process is as simple as writing a text prompt and getting the video ready:
Step 1: Lauch Filmora AI Text-to-Video Features
Once you launch on your PC Filmora, click the AI Text-to-Video option to start the video generation process.
Step 2: Add a Text Prompt or Video Script
On the AI Text-to-Video video, add your text prompt. You can also modify other settings such as text language and video voice. Then click the Text to Video button at the bottom to prompt Filmora to generate the video.
Step 3: Preview the Generated Video
Filmora generates the video based on your prompt and a new editing window. You can now a preview video and make any further editing needed.
AI Video Prompt Sample Using Filmora
Prompt: A young man at his 20s is sitting on a piece of cloud in the sky, reading a book.
When prompted to generate a video of a young man in his 20s sitting on a piece of cloud in the sky, reading a book, Filmora generated a narration video from the point of view of the young man as shown above.
03Synthesia
This is a web-app video generator AI from a text supporting AI-driven video creation used by experts and beginners. Rather than filming content utilizing a microphone and camera, this software AI technology helps to simulate human presenters and real-life videos. Thus, it saves video creators hours of work.
Pricing
● Personal Plan: $30 monthly
● Corporate Plan: custom pricing
Features
● Over 40 supported languages
● Allows template customizations
● Allows users to make their avatars
● It has 50 built-in presenters
● Allows you to create realistic AI videos
● Offers live chat support
● Allows download in Mp4
● Enables users to create videos automatically using integrations with APIs
● Allows the addition of backgrounds
● Users can share their videos on other social media platforms
● Allows the addition of images, shapes, and texts to videos
Pros
● Great for beginners are you do not need prior knowledge
Cons
● It supports only front-facing poses
This software is best for freelancers, agencies, marketers, and content creators looking to create high-quality video content.
04Synths Video
This is an AI video-generating tool primarily concerned with helping users drive leads and traffic from YouTube. It is an AI YouTube title generator that allows users to create professional-looking videos from blog posts on YouTube.
Pricing
● YouTube Start: $399 monthly.
● Premium Custom Package: Custom Pricing.
Features
● Video generation from URLs
● It has built-in integration with YouTube
● 20+ avatars are available
● Allows video upload in HD quality
● Over 40+ languages supported
Cons
● No free plan is available
Best for the owners of YouTube channels.
05Rephrase.ai
Rephrase.ai is a video editing software that uses a sophisticated deep learning engine to create professional videos.
Pricing
● Starter plan: $25 monthly
● Enterprise plan: Custom Pricing
Features
● Produces high-resolution videos
● Supports functionality for presenter customization
● Multiple-use cases supported
● Allows users to select their preferred AI voice
● Support varieties of video editing tools
Cons
● It has a complex pricing plan
It is best for agencies seeking to create customizable and personalized professional videos for marketing and advertising.
06Lumen5
Lumen5 is one of the top AI video-creating tools available for beginners and uses Natural Language Processing algorithms to convert text into high-quality videos.
Pricing
● Free Plan
● Creator plan: $15 monthly.
● Premium plan: $79 monthly.
● Business plan: $199 monthly.
● Enterprise plan: Custom Pricing.
Features
● Transforms text to video within minutes
● Numerous templates are available
● Allows customization of videos resolution, color, and font
Cons
● Limited features in the free plan
Best for beginners who are looking to generate short-duration of videos for social media platforms.
07Designs.ai
This is an AI-powered video maker that is useful for users that do not have any experience in design.
Pricing
● Basic plan: $29 monthly
● Pro plan: $69 monthly
● Enterprise plan: Custom Pricing
Features
● It has an attractive and modern user interface
● Allows the creation of videos from pre-designed templates
● Helps video creation from your custom video files
● Over 20 languages supported
● Coverts texts to video
Cons
● Only allows video download in a paid plan.
This tool is best for creators and designers who are willing to create quick AI videos.
08InVideo
This is a perfect AI generator used for creating explainers or marketing videos easily and quickly. The platform helps produce high-quality videos with varieties of style options to make the ideal video according to your requirements.
Pricing
● Free: Free with watermarks on your videos.
● Business: $15 monthly with no watermarks.
● Unlimited: $30 monthly with unlimited video exports.
Features
● Very affordable
● Comprises an online drag-and-drop video editor
● Over 50 AI-powered themes that help to convert text to video in 3 minutes
● Full iStock media library available in all plans
Cons
● Requires internet connection to use
09Pictory.ai
This AI subtitle generator converts your text and turns it into an AI-generated video. This program is simple and easy to get started, requiring no software download. Paste your text into the editor and get started.
Pricing
● Free trial: Only use 3 videos.
● Standard Plan: $29 per month.
● Premium Plan: $59 per month.
Features
● It has a simple user interface.
● Over 6M licensed Shutterstock available
● Unlimited and affordable videos in the premium plan
Cons
● It is quite expensive compared to other tools
10Veed.io
Veed.io is not specifically an AI video generator but a video editing tool that utilizes AI to simplify the entire process and allows users to create high-quality videos within seconds.
Pricing
● Free: Free with watermarks!
● Basic: $18 monthly.
● Pro: $30 monthly
Features
● It has lots of video templates and a music library to choose
● Easy to learn, user-friendly interface
● Video rendering times are quite fast
● The basic plan has a high-quality resolution
Cons
● Not a typical AI video generator
● Not for beginners
11Wisecut
This free AI video generator platform allows you to turn your text into video. Type in your text and choose a voice actor, and then Wisecut will take care of the rest. It offers excellent editing tools for users to tweak your video until it’s just right.
Pricing
● Basic: Free.
● Professional: $57 per month.
Features
● This platform is easy to use
● It has a simple drag and drops user-interface
● Allows auto subtitles and auto cut silences
● Allows integration with YouTube
● Subtitles auto-translation
● Excellent video quality
Cons
● Has limited effects
12Flexclip
FlexClip makes video creation and editing easy with-it millions of royalty-free stock media and thousands of templates for you to choose from.
Pricing
● Free
● Basic: $5.99 per month.
● Plus: $9.99 per month
● Business: $19.99 per month.
Features
● Thousands of available templates
● Simple tool for creating and editing videos
● Use for creating engaging videos
● Provides millions of royalty stock media
● Versatile and Flexible
Cons
● Not for beginners
● Ending Thoughts →
● In this post, we have listed the top text to video generators that you can choose from to help you perform tasks within minutes.
● The report also explains all you need to know about video AI generators and recommends Filmora as a perfect tool for editing your videos.
Guide: Create The Perfect VHS Effect Look in Premiere Pro
Adobe Premiere Pro is an excellent tool for video editing. It is a tool that can edit, create effects and filters, and do much more. In addition to this, you can even add different effects, such as VHS. The VHS effect in recent years has become significantly important due to its usage. This effect creates an old and jittery look to your video.
VHS effect has characteristics of old video tapes with lines and scales. It also adds distortion, noise, and color shifting to your videos. There are many filters and overlays that you can apply to get the VHS look. However, if you are using a PC tool, such as Premiere Pro, then you have to learn how to apply it. You can easily create a VHS effect Premiere look once you learn to add the effect to your video.
Part 1: What Are The Benefits of Using VHS Effects in Video?
Using VHS effects in your videos can bring several benefits. You can easily use multiple VHS effects in Premiere Pro. However, firstly, explore why incorporating VHS effects can be advantageous:
- Nostalgic Appeal: VHS effects can take your audience back to the era of VHS tapes. It creates a feeling of nostalgia and familiarity. Such effects also take you back to the 90s era by creating a similar look.
- Authenticity: Applying such effects mimics the characteristics of old tapes by adding imperfections. These effects also add color bleeding, distortion, and noise to your videos. It creates a sense of authenticity, looking like the video was recorded on genuine VHS tapes.
- Creative Style: These effects offer a unique style in terms of the video’s appeal. It further enhances the storytelling and allows for artistic expression. They can set a particular mood, add decay, and contribute to specific genres like retro.
- Enhancing Period Settings: If your video is set in a specific time period, then these effects can help. By using VHS effects, you can make the video more authentic. Additionally, this reinforces the historical context of the narrative.
- Attention-Grabbing: In a world of crisp and high-definition visuals, uniqueness matters. Intentionally using VHS effects for your video, you can make your video stand out. The distinct and unconventional look captures viewers’ attention.
- Cost-Effective Solution: You can use such effects to cut down your cost. Instead of investing in expensive props, VHS effects offer a more cost-effective solution. Digital software and plugins can apply these effects, eliminating the need for physical equipment.
Add VHS Effect to Video
Simply add video effects on Video with Filmora Video Effect Editor ! Experience the magic of cool yet outstanding video effects, where your videos come to life in beautiful visuals.
Apply VHS Effect Apply VHS Effect Learn More >


Part 2: How To Add VHS Effect in Premiere Pro: An Overview
Do you know how you can add the VHS effect in Premiere Pro? Don’t worry because this guideline will provide you with the required information. These simple steps will let you add your favorite VHS look to your video using Premiere Pro.
Step 1: Import your video into Adobe Premiere Pro. Open the “Lumetri Color” panel by clicking “Color” in the main toolbar. Further, choose “Lumetri Scopes” to access the graph window. Then, adjust the basic settings in the “Lumetri Color” panel. Continue to decrease the value of “Whites,” increase the “Contrast,” and set the “Blacks” to 10 on the graph.

Step 2: Navigate to the “Creative” tab in the “Lumetri Color” panel. Increase the “Faded Film” and decrease the “Sharpness,” “Saturation,” and “Vibrance” to your liking. Use the color wheels in the “Color Wheels & Match” section to give the right tone. Further, proceed to increase the “Vignette” value from the same tab.

Step 3: Enable editing mode by selecting “Editing” in the main bar. Choose “Edit” from the lower section and search for the “Channel Blur” effect. Apply the effect by dragging and dropping it onto your video clip. Place the effect above previous adjustments and effects.

Step 4: In the “Channel Blur” effect tab, enable “Repeat Edge Pixel” and increase “Red Blurriness” to 30. Repeat the same step but this time increase “Blue Blurriness” to 30 and “Red Blurriness” to 15 and change “Blur Dimensions” to “Vertical.”

Step 5: Continue to add the “Unsharp Mask” and “Color Emboss” effects from the “Effect” tab. Proceed and change “Amount” and “Radius” for “Unsharp Mask” to 85 and 20, respectively. Slightly increase the “Relief” values for the “Color Emboss” effect.

Proceed to apply the “Noise” effect from the “Noise & Grain” section and further adjust the “Amount of Noise” to your preference. Induce the “Wave Warp” effect and set the parameters of “Wave Height” to 2 and “Wave Width” to 1000. Change “Direction” to 0 and “Pinning” to “Horizontal Edges.”

Step 6: You can crop your video to a 4:3 aspect ratio to give your video more authenticity. To do this, create two “Color Matte” layers using the “New Item” icon. Name and place them over the video clip. Apply the “Crop” effect to both layers. Set the “Left” option to 86 for the first layer and the “Right” option to 86 for the second layer. Set the “Edge Feather” to 30 for both layers.

Make sure to save your VHS effect as a preset for future use by right-clicking and selecting “Save Preset.” Finally, export your VHS effect Premiere Pro video to your desired format.

Part 3: Using Wondershare Filmora to Add The Perfect VHS Effect in No Time
Wondershare has provided us with so many tools and applications for different purposes. It has provided an amazing video editing tool called Filmora. Wondershare Filmora Video Editor provides easy editing options for the user. You can create highly professional videos with impressive results using Filmora. This tool offers multiple overlays, video effects , and filters to use.
Add VHS Effect For Win 7 or later(64-bit)
Add VHS Effect For macOS 10.14 or later
If you want to add VHS effect Vegas Pro overlays using Filmora, you can. In order to apply such effects to your videos, you need to follow the guide. There are 4 simple steps to add the perfect VHS look to your video in no time.
Step 1xxx
To apply a similar VHS overlay Premiere effect to your video, first access Wondershare Filmora on your computer. Then, click on the “New Project” tab in the main interface, which will take you to a new window.

Step 2Import and Arrange Your Video
Next, import your video by either dragging and dropping it into the software or using the import media option. Once imported, drag and drop your video into the timeline area to begin working with it.

Step 3Apply VHS Effects
Access the “Effects” option from the top bar of the software. Search for “VHS” in the Effects panel to explore the various VHS effects available. Choose the desired effect that fits your style, then drag and drop your video on top of the timeline.

Step 4Adjust Opacity and Export
To refine the intensity of the VHS effect, go to the “Effects” tab located on the right side of the screen. From there, you can adjust the effect’s opacity by changing its transparency. Then, click “Export” at the top left of the screen to save your video with the applied VHS effects.

Conclusion
To conclude, there are many different overlays, effects, and filters that you can use. However, VHS effects are some of the most popular ones. People use different VHS filters in Premiere Pro to give their content a distinctive look. You can add these effects using different online and offline tools. One of the most popular tools is Wondershare Filmora which helps you add the VHS look to your video.
Apply VHS Effect Apply VHS Effect Learn More >
Part 2: How To Add VHS Effect in Premiere Pro: An Overview
Do you know how you can add the VHS effect in Premiere Pro? Don’t worry because this guideline will provide you with the required information. These simple steps will let you add your favorite VHS look to your video using Premiere Pro.
Step 1: Import your video into Adobe Premiere Pro. Open the “Lumetri Color” panel by clicking “Color” in the main toolbar. Further, choose “Lumetri Scopes” to access the graph window. Then, adjust the basic settings in the “Lumetri Color” panel. Continue to decrease the value of “Whites,” increase the “Contrast,” and set the “Blacks” to 10 on the graph.
Step 2: Navigate to the “Creative” tab in the “Lumetri Color” panel. Increase the “Faded Film” and decrease the “Sharpness,” “Saturation,” and “Vibrance” to your liking. Use the color wheels in the “Color Wheels & Match” section to give the right tone. Further, proceed to increase the “Vignette” value from the same tab.
Step 3: Enable editing mode by selecting “Editing” in the main bar. Choose “Edit” from the lower section and search for the “Channel Blur” effect. Apply the effect by dragging and dropping it onto your video clip. Place the effect above previous adjustments and effects.
Step 4: In the “Channel Blur” effect tab, enable “Repeat Edge Pixel” and increase “Red Blurriness” to 30. Repeat the same step but this time increase “Blue Blurriness” to 30 and “Red Blurriness” to 15 and change “Blur Dimensions” to “Vertical.”
Step 5: Continue to add the “Unsharp Mask” and “Color Emboss” effects from the “Effect” tab. Proceed and change “Amount” and “Radius” for “Unsharp Mask” to 85 and 20, respectively. Slightly increase the “Relief” values for the “Color Emboss” effect.
Proceed to apply the “Noise” effect from the “Noise & Grain” section and further adjust the “Amount of Noise” to your preference. Induce the “Wave Warp” effect and set the parameters of “Wave Height” to 2 and “Wave Width” to 1000. Change “Direction” to 0 and “Pinning” to “Horizontal Edges.”
Step 6: You can crop your video to a 4:3 aspect ratio to give your video more authenticity. To do this, create two “Color Matte” layers using the “New Item” icon. Name and place them over the video clip. Apply the “Crop” effect to both layers. Set the “Left” option to 86 for the first layer and the “Right” option to 86 for the second layer. Set the “Edge Feather” to 30 for both layers.
Make sure to save your VHS effect as a preset for future use by right-clicking and selecting “Save Preset.” Finally, export your VHS effect Premiere Pro video to your desired format.
Part 3: Using Wondershare Filmora to Add The Perfect VHS Effect in No Time
Wondershare has provided us with so many tools and applications for different purposes. It has provided an amazing video editing tool called Filmora. Wondershare Filmora Video Editor provides easy editing options for the user. You can create highly professional videos with impressive results using Filmora. This tool offers multiple overlays, video effects , and filters to use.
Add VHS Effect For Win 7 or later(64-bit)
Add VHS Effect For macOS 10.14 or later
If you want to add VHS effect Vegas Pro overlays using Filmora, you can. In order to apply such effects to your videos, you need to follow the guide. There are 4 simple steps to add the perfect VHS look to your video in no time.
Step 1xxx
To apply a similar VHS overlay Premiere effect to your video, first access Wondershare Filmora on your computer. Then, click on the “New Project” tab in the main interface, which will take you to a new window.
Step 2Import and Arrange Your Video
Next, import your video by either dragging and dropping it into the software or using the import media option. Once imported, drag and drop your video into the timeline area to begin working with it.
Step 3Apply VHS Effects
Access the “Effects” option from the top bar of the software. Search for “VHS” in the Effects panel to explore the various VHS effects available. Choose the desired effect that fits your style, then drag and drop your video on top of the timeline.
Step 4Adjust Opacity and Export
To refine the intensity of the VHS effect, go to the “Effects” tab located on the right side of the screen. From there, you can adjust the effect’s opacity by changing its transparency. Then, click “Export” at the top left of the screen to save your video with the applied VHS effects.
Conclusion
To conclude, there are many different overlays, effects, and filters that you can use. However, VHS effects are some of the most popular ones. People use different VHS filters in Premiere Pro to give their content a distinctive look. You can add these effects using different online and offline tools. One of the most popular tools is Wondershare Filmora which helps you add the VHS look to your video.
Also read:
- 2024 Approved Do You Wish to Create High-Quality Videos and Experience Effective Videos with Editing? No Problem at All because the Keyboard Shortcuts Listed Here Will Assist You
- 2024 Approved Instagram Doesnt Offer Native Support for GIF Files. So, in This Post, Well Learn How to Convert a GIF to a Video for Instagram Using Multiple Methods.
- Updated In 2024, How to Add Effects in Premiere Pro
- New In 2024, Best GIF to Video Converters
- 2024 Approved Easily Combine Videos and Audios with 5 Simple Online Tools
- This Article Will Reveal the Secrets of Choosing a Location to Shoot Your Viral Music Video. As Well as Tips to Make an Energetic Schedule for Shooting Days for 2024
- Updated How D AI Video Games Act More Human Than Human for 2024
- New In 2024, Easy Guide to Apply Slow Zoom Effects to Videos
- Updated | How to Change Quicktime Player Speed on Mac for 2024
- New Best 10 Tools to Convert a GIF Into a PDF
- Updated Do You Want to Create Slow-Motion Videos? This Article Shows Methods to Create Slow-Mo Videos without Changing the Medias Quality
- New Top Way to Freeze-Frame in Final Cut Pro
- In This Article Ill Share to You some of the Skin Care Vlog Ideas for You to Start Doing a Skin Care Review on Your YouTube Channel. But Before that Ill Share with You How Important Is Skin Care, In 2024
- End This Problem! Make Transparent Background Video Today
- Updated Do You Seek a Guide to Add Motion in Blender? This Article Explains the Blender Motion Blur Effect in Detail and Helps You Master It
- Updated 2024 Approved Learn How to Extract Sound From Video Using the Different Online and Software Tools. Details About Their Features, Pros/Cons, and More Are Given
- New Looking for a Great Way to Make Your Own Anime Music Video? The Following Are the Top AMV Makers to Choose From
- New Guide To Scaling and Setting Videos in Filmora | Tutorial for 2024
- Updated How To Add Motion Blur In Davinci Resolve, In 2024
- Updated 2024 Approved A Guide to Create Your Own LOL Montage Video
- Updated M31 LUT (Teal and Orange LUT) Free Download for 2024
- New Slowing Down GIF With The Best Available Methods for 2024
- New In 2024, Camtasia Video Editor Review
- In 2024, This Article Discusses the Splitting of the Video Clips in DaVinci Resolve Explicitly. There Is Also a Brief Description of Its Best Alternative, Wondershare Filmora. This Is Also Practically Relevant and Reasonable as Well
- 2024 Approved KineMaster Templates 101 How to Get the Most Out of Video Templates
- Updated In 2024, Backup and Organize Your Footage in Minutes
- Updated How To Change Text In Premiere Pro for 2024
- 2024 Approved You Can Create Interaction Videos with Friends and Family by Sitting Far Away, Which Seems Innovative. In This Article, Youll Get a Guide to Edit a Split-Screen Video on Filmora
- Updated Top LUTs for Sony HLG for 2024
- New Exploring the Best Slow-Motion App for 2024
- New In 2024, How to Create LUTs with LUTs Generator
- Updated 2024 Approved Best 8 AI Video Denoise Software
- New 2024 Approved How to Create a Light Sweep (Shine) Effect
- Updated 2024 Approved How-To Tutorials of Kapwing Collage Maker
- Are You Curious About Finding a Good iPhone Slow-Motion App? Discover the Top-Rated Applications in the Market that Will Help You Create the Perfect Video
- New 2024 Approved Ways to Make Sure Your Recording Slideshow in Powerpoint Is Not Wrong
- New Are You Aware that You Can Create Your Own Lower Thirds for Video? Read This Article for a Tutorial on How to Customize One for 2024
- New In 2024, Best Shortcut Towards Timeline Template
- New In 2024, How Can You Import and Adjust the Video Clips on Wondershare Filmora?
- Updated How to Turn On/Off Motion Blur in Minecraft, In 2024
- Updated In 2024, How to Turn On/Off Motion Blur in Fortnite? Is It Good for Fortnite?
- 2024 Approved Explore the List of the Top Six Online Video Speed Controllers for Chrome, Safari, and Firefox
- App Wont Open on Your Poco X5 Pro? Here Are All Fixes | Dr.fone
- How Google Pixel 8 Pro Mirror Screen to PC? | Dr.fone
- Simple Solutions to Fix Android SystemUI Has Stopped Error For Oppo Find X7 Ultra | Dr.fone
- How to restore wiped call history on Xiaomi Redmi Note 13 5G?
- In 2024, Fake the Location to Get Around the MLB Blackouts on Huawei Nova Y91 | Dr.fone
- In 2024, How To Unlink Your Apple iPhone 14 Pro From Your Apple ID
- Repair broken or corrupt video files of Oppo Reno 9A
- In 2024, Getting the Pokemon Go GPS Signal Not Found 11 Error in Oppo A56s 5G | Dr.fone
- Recover iPhone 12 Pro Data From iOS iTunes | Dr.fone
- In 2024, How Can We Bypass Motorola Moto G23 FRP?
- How To Exit Recovery Mode on iPhone 8? | Dr.fone
- In 2024, 3 Ways for Android Pokemon Go Spoofing On Poco C65 | Dr.fone
- In 2024, How To Unlock iPhone 12 mini Without Passcode? 4 Easy Methods | Dr.fone
- How to Lock Apps on Itel A60 to Protect Your Individual Information
- Apple ID Unlock From iPhone 14 Plus? How to Fix it?
- How To Change Samsung Galaxy S23 Tactical Edition Lock Screen Clock in Seconds
- In 2024, How to Unlock Samsung Galaxy A25 5G Pattern Lock if Forgotten? 6 Ways
- 3 Ways to Track Apple iPhone 14 without Them Knowing | Dr.fone
- In 2024, 5 Solutions For Vivo X Flip Unlock Without Password
- In 2024, How to Bypass FRP from Samsung Galaxy F04?
- In 2024, Process of Screen Sharing Vivo Y27 4G to PC- Detailed Steps | Dr.fone
- How to Fix Corrupt video files of Xiaomi Redmi A2 using Video Repair Utility?
- How to Fix Honor Play 40C Find My Friends No Location Found? | Dr.fone
- In 2024, 10 Free Location Spoofers to Fake GPS Location on your Poco X6 Pro | Dr.fone
- How to Reset your Vivo S17 Pro Lock Screen Password
- In 2024, How To Unlock A Found iPhone 15 Pro Max? | Dr.fone
- Easily Unlock Your Nubia Red Magic 8S Pro+ Device SIM
- Title: Things About Transparent PNG Remove and Convert
- Author: Morgan
- Created at : 2024-05-19 05:11:40
- Updated at : 2024-05-20 05:11:40
- Link: https://ai-video-editing.techidaily.com/things-about-transparent-png-remove-and-convert/
- License: This work is licensed under CC BY-NC-SA 4.0.
