
:max_bytes(150000):strip_icc():format(webp)/how-to-turn-on-microphone-on-an-android-phone-5184530-372d01459baa44978ef72242d007992a.jpg)
This Easy Hack Using Wondershare Filmora New Masking Feature Will Be a Great Addition to Your Next Horror Video Content for 2024
This Easy Hack Using Wondershare Filmora New Masking Feature Will Be a Great Addition to Your Next Horror Video Content
Wondershare Filmora’s main purpose is the empowerment of content creators. The latest updates to the program are one of the pieces of evidence.
Whether you’re a horror content creator or simply living the Halloween vibe 24/7, continue reading to know how to use its latest masking feature to create a cool shadow effect for your next mind-blowing social media video.
How to Use The Masking Effect
Wondershare Filmora’s latest Masking feature allows its users to select a specific clip that they can overlay on other parts of the video or other clips.
Free Download For Win 7 or later(64-bit)
Free Download For macOS 10.14 or later
The feature allows you to insert the mask in any shape, such as a rectangle, circle, or triangle. You can also import any shapes you like if you can’t find them in the presets library. You can also adjust the mask placement, width, height, and feather effect.
Without further ado, let’s see the detailed step-by-step guide for this effect.
a. Preparation
You will need at least three shots of the same frame to get the shadow effect to work. The first is the main video, the second is the shadow clip, and the last would be a clip portraying just a plain background.
Make sure that your camera stays at the same point and angle. You can use a tripod for assurance.
Take the first main video and don’t forget to mark the positioning of the object for the next take. Then, you can shoot the shadow clip following the marking of the object to match its position in the main clip.
Finally, shoot the final clip without the object on the frame.

b. Steps to add the shadow effect to your videos using Masking
Step 1: Place the main clip on the timeline and find the start of the segment that you want to use. Press M on the keyboard to set a marker.

Step 2: Place the shadow clip on top of the main clip on the timeline. Trim and adjust until the shadow clip ends right at the marker of the main clip.

Step 3: Move the play head to the start of the shadow clip. Trim the main clip right on that mark so both clips have the same start by clicking the scissor icon and deleting the unused part.

Step 4: Double-click the shadow clip. OpenSettings > Mask Section > Rectangle to apply the mask. Adjust the blur strength to smooth out the edge.

Step 5: Play the result to see if there’s any part you need to block out. When you find them, repeat steps 1 to 4 but with the background clip. Try to conceal all things you need to hide using the masks. Make sure that you get the timings right.

Step6 Trim the length of the masking clips to match the main clip by sliding the play head and clicking the Split button.
Adjust the audio and preview the effect before you save the result. You can also add extra features like slow motion for maximum effect.

Summary
It is so easy to use this shadow effect on your video using Wondershare Filmora. The handy masking feature also comes with additional keyframe control and easy composite adjustment.
Wondershare Filmora is also packed with other powerful new features. This includes Auto Beat Sync, Speed Ramping, Quick Split Mode, and the upgraded Denoise feature. Update today to add more quirk to your content.
Free Download For macOS 10.14 or later
The feature allows you to insert the mask in any shape, such as a rectangle, circle, or triangle. You can also import any shapes you like if you can’t find them in the presets library. You can also adjust the mask placement, width, height, and feather effect.
Without further ado, let’s see the detailed step-by-step guide for this effect.
a. Preparation
You will need at least three shots of the same frame to get the shadow effect to work. The first is the main video, the second is the shadow clip, and the last would be a clip portraying just a plain background.
Make sure that your camera stays at the same point and angle. You can use a tripod for assurance.
Take the first main video and don’t forget to mark the positioning of the object for the next take. Then, you can shoot the shadow clip following the marking of the object to match its position in the main clip.
Finally, shoot the final clip without the object on the frame.
b. Steps to add the shadow effect to your videos using Masking
Step 1: Place the main clip on the timeline and find the start of the segment that you want to use. Press M on the keyboard to set a marker.
Step 2: Place the shadow clip on top of the main clip on the timeline. Trim and adjust until the shadow clip ends right at the marker of the main clip.
Step 3: Move the play head to the start of the shadow clip. Trim the main clip right on that mark so both clips have the same start by clicking the scissor icon and deleting the unused part.
Step 4: Double-click the shadow clip. OpenSettings > Mask Section > Rectangle to apply the mask. Adjust the blur strength to smooth out the edge.
Step 5: Play the result to see if there’s any part you need to block out. When you find them, repeat steps 1 to 4 but with the background clip. Try to conceal all things you need to hide using the masks. Make sure that you get the timings right.
Step6 Trim the length of the masking clips to match the main clip by sliding the play head and clicking the Split button.
Adjust the audio and preview the effect before you save the result. You can also add extra features like slow motion for maximum effect.
Summary
It is so easy to use this shadow effect on your video using Wondershare Filmora. The handy masking feature also comes with additional keyframe control and easy composite adjustment.
Wondershare Filmora is also packed with other powerful new features. This includes Auto Beat Sync, Speed Ramping, Quick Split Mode, and the upgraded Denoise feature. Update today to add more quirk to your content.
How to Change Video Thumbnail in Google Drive
What is a Google drive?
“Google drive is a self-hosted cloud-based site that provides free space to store your files and pictures to share them with your friends and family”.
Google Drive is also used to promote businesses or websites. You can upload a video to Google Drive and embed the file in your blog or any other website.
What is a Thumbnail?
“A Thumbnail is a still image that acts as
a preview image of your video.”
A thumbnail is the first thing seen by the viewers while watching videos. It is the only thing that forces the viewer either to watch the video or not because it previews the video content. It is also shown in the search results. A thumbnail is just like the cover or title of a book. You will read a book by its cover. In the same way, a video is viewed by its thumbnail.
Google drive is also used for the promotion of websites and businesses. It does not offer to add a thumbnail or cover image like YouTube has the option to set and can change the thumbnail of the video. As we all know Google drive is not a streaming platform and has its own boundaries.
Normally, the google drive can generate a thumbnail from the video and uses the generated thumbnail ignoring the one you have uploaded. But on the other hand, if it cannot generate a thumbnail the uploaded thumbnail will be displayed. Usually, the default thumbnail may have weird facial expressions or may not be attractive for the viewers to open the video.
Here we are discussing a few alternatives to change the thumbnail of the video in Google drive.
Select a separate image to be housed in a separate column to set as a thumbnail image and then go into the details, title, and Image settings.

How to Add Thumbnails to the Video Using Wonder Share Filmora 11
Wonder Share Filmora 11 is an all-in-one video editing platform that provides powerful, creative, and simple interphase to edit videos and images in a few clicks. It has a ton of amazing features that make your videos, images, and audio stands out. You can edit your videos and images in a great cinematic form using its effects, transitions, overlays, text, and a lot more. Do not wait, go and download Filmora 11 and there are more tools for you to discover.
I am going to show you how to create a thumbnail of the video in Filmora11.
Let us get started!
- Open Wonder Share Filmora 11 and click on New Project.

- Drag the image of your choice into the timeline.

- Drag the image of your choice into the timeline.
- Click on the AI-Portrait option from the Effects
- Drag the Human Segmentation effect over the clip into the timeline.
Now you see that the subject of the video thumbnail is selected and the background has been removed.
The AI-Portrait is a very useful effect, it allows you to quickly remove the background through artificial intelligence.

Now you can see the subject has been selected and the background has been removed.
- Now Scale up the photo to be visible on the screen.
- You can set the border settings here to make it more smooth and attractive.

I have dragged my image to the left as I want my text to the right side.
- Let’s drag the desired background into the timeline. ( I got this background from Pexel.com)

- Click on sample colors under the media option to add the gradient overlay.
- Drag your favorite Gradient and drop it below the background layer.

- Now select the Overlay option under the Effects tab and then Hit Frames.
- Add your desired frame between a photo layer and a background layer to show depth in your thumbnail.

So, I choose cinema 21.9 frames to add two black bars behind our subject.
Let’s choose your desired Title from the Library. Here are tons of title packs, you can choose from.
- Select the Titles option under the Titles tab then select your desired Title.
- Drag and locate the title in the place of your taste and then write the text you want.
- Adjust your text accordingly, you can change the font size, color, style, and much more

- Now simply click the snapshot button below the preview screen and the snapshot will be saved in default directory and automatically imported to the medium room.
- Right-click on the snapshot in the media pool and click on Reveal in explorer.
- Your thumbnail will be saved in the folder, you can upload it on the Google drive.

Unfortunately, there is no way to change the thumbnail of the video on Google drive. But we can take help from other websites to customize the thumbnail image and then upload it to Google drive. Let us discuss a few free websites used for the thumbnail of a video on Google drive.
Here are the best possible ways to change the thumbnail of the video stored in the Google drive.
1. Change the Thumbnails of Google drive using the Wix.
The Wix editor is a platform that is used to edit and make your own website. It provides easy interphase to customize the site using its amazing features. There are hundreds of features to build your own site or image by adding customizing elements and choosing color and text theme.

You can use the Wix to set or change your thumbnail to make your video attractive and eye-catching. The cover image can be by uploading and a frame can be selected from the video.
Let’s get started!
- Open the Wix editor from the browser.
- Select a video from your video library.
- Hit the Edit icon at the video

- Click on change cover under the cover image.

- Select the desired frame from the list, or you can upload your own by clicking the “+”
- Click on the Set as Cover

- Now upload the video on Google drive.

- If the file fails to upload, clear your cache and cookies and check your internet connection.
2. Change the Thumbnails of Google drive using Canvas.
Canvas is an online graphic design platform that allows and provides you with user-friendly interphase to make eye-catching logos, thumbnails, posters, and a ton of other visual content. You need not download any application and moreover, it is free to use. It saves your previous tasks and has hundreds of frames, and designs to select according to your taste or you can make your own design by editing.
So let’s start!
- Select a template of your choice from the library.
- Canvas provides you with more than 2 million images in the library but you can also upload your own image for Thumbnail.
- Click on the placeholder text to write your own text.
- You can change your image fonts, color, size, and
- You can easily customize your video thumbnail and upload it on Google drive.
- Download the video thumbnail.
- Now upload the Thumbnail on Google Drive.

3. Change the Thumbnails of Google drive using VLC Media Player.
VLC Media Player is a free and open-source media player that plays wide range of media files like images, video files as well as audio and DVDs. It is 100% free software and safe from viruses.

Here are the steps used to change the cover photo of your video using the VLC Media Player.
Let’s dive in…
- Go to the tools and select information from the drop-down list.
- The Current Media Information tab will be shown.
- There will be a picture or VLC icon at the bottom-right corner.
- Right-click on that picture or icon and select the download cover art or add cover art from file.
- Download cover art; if you want to add pictures from the album from the internet.
- Add cover art from file; if you want to put your own thumbnail image and browse from the storage.

The information will be saved automatically and the thumbnail will be changed when you open the file.
Important points.
You can use any other video editor to change the thumbnail of the video but keep a few points in mind.
- Thumbnails should be added at the start of the video.
- The Thumbnail should be a few seconds long so that google drive considers it as a cover image.
- It works for short videos but it can be applied for long videos.
- Use a high-quality HD image for the thumbnail so that Google Drive can accept it as valuable for the thumbnail image.
- Thumbnails should be uploaded in PNG, GIF, or JPG
- The image ratio should be 16:9 and resolution of 1920x1080 pixels for PNG and JPG and 960x480 pixels for GIFs.
- The maximum file size should be
- The minimum width should be 220 pixels.

Even after keeping an eye on these important points, google drive sometimes does not show the thumbnail as a cover photo.
Conclusion.
In the above article, I have discussed a couple of different ways to add a thumbnail of the video and upload it on Google drive. I personally recommend Wonder Share Filmora 11 to make and change thumbnail image of the video as it is a very powerful as well as simple tool.
How to Add Thumbnails to the Video Using Wonder Share Filmora 11
Wonder Share Filmora 11 is an all-in-one video editing platform that provides powerful, creative, and simple interphase to edit videos and images in a few clicks. It has a ton of amazing features that make your videos, images, and audio stands out. You can edit your videos and images in a great cinematic form using its effects, transitions, overlays, text, and a lot more. Do not wait, go and download Filmora 11 and there are more tools for you to discover.
I am going to show you how to create a thumbnail of the video in Filmora11.
Let us get started!
- Open Wonder Share Filmora 11 and click on New Project.
- Drag the image of your choice into the timeline.
- Drag the image of your choice into the timeline.
- Click on the AI-Portrait option from the Effects
- Drag the Human Segmentation effect over the clip into the timeline.
Now you see that the subject of the video thumbnail is selected and the background has been removed.
The AI-Portrait is a very useful effect, it allows you to quickly remove the background through artificial intelligence.
Now you can see the subject has been selected and the background has been removed.
- Now Scale up the photo to be visible on the screen.
- You can set the border settings here to make it more smooth and attractive.
I have dragged my image to the left as I want my text to the right side.
- Let’s drag the desired background into the timeline. ( I got this background from Pexel.com)
- Click on sample colors under the media option to add the gradient overlay.
- Drag your favorite Gradient and drop it below the background layer.
- Now select the Overlay option under the Effects tab and then Hit Frames.
- Add your desired frame between a photo layer and a background layer to show depth in your thumbnail.
So, I choose cinema 21.9 frames to add two black bars behind our subject.
Let’s choose your desired Title from the Library. Here are tons of title packs, you can choose from.
- Select the Titles option under the Titles tab then select your desired Title.
- Drag and locate the title in the place of your taste and then write the text you want.
- Adjust your text accordingly, you can change the font size, color, style, and much more
- Now simply click the snapshot button below the preview screen and the snapshot will be saved in default directory and automatically imported to the medium room.
- Right-click on the snapshot in the media pool and click on Reveal in explorer.
- Your thumbnail will be saved in the folder, you can upload it on the Google drive.
Unfortunately, there is no way to change the thumbnail of the video on Google drive. But we can take help from other websites to customize the thumbnail image and then upload it to Google drive. Let us discuss a few free websites used for the thumbnail of a video on Google drive.
Here are the best possible ways to change the thumbnail of the video stored in the Google drive.
1. Change the Thumbnails of Google drive using the Wix.
The Wix editor is a platform that is used to edit and make your own website. It provides easy interphase to customize the site using its amazing features. There are hundreds of features to build your own site or image by adding customizing elements and choosing color and text theme.
You can use the Wix to set or change your thumbnail to make your video attractive and eye-catching. The cover image can be by uploading and a frame can be selected from the video.
Let’s get started!
- Open the Wix editor from the browser.
- Select a video from your video library.
- Hit the Edit icon at the video
- Click on change cover under the cover image.
- Select the desired frame from the list, or you can upload your own by clicking the “+”
- Click on the Set as Cover
- Now upload the video on Google drive.
- If the file fails to upload, clear your cache and cookies and check your internet connection.
2. Change the Thumbnails of Google drive using Canvas.
Canvas is an online graphic design platform that allows and provides you with user-friendly interphase to make eye-catching logos, thumbnails, posters, and a ton of other visual content. You need not download any application and moreover, it is free to use. It saves your previous tasks and has hundreds of frames, and designs to select according to your taste or you can make your own design by editing.
So let’s start!
- Select a template of your choice from the library.
- Canvas provides you with more than 2 million images in the library but you can also upload your own image for Thumbnail.
- Click on the placeholder text to write your own text.
- You can change your image fonts, color, size, and
- You can easily customize your video thumbnail and upload it on Google drive.
- Download the video thumbnail.
- Now upload the Thumbnail on Google Drive.
3. Change the Thumbnails of Google drive using VLC Media Player.
VLC Media Player is a free and open-source media player that plays wide range of media files like images, video files as well as audio and DVDs. It is 100% free software and safe from viruses.
Here are the steps used to change the cover photo of your video using the VLC Media Player.
Let’s dive in…
- Go to the tools and select information from the drop-down list.
- The Current Media Information tab will be shown.
- There will be a picture or VLC icon at the bottom-right corner.
- Right-click on that picture or icon and select the download cover art or add cover art from file.
- Download cover art; if you want to add pictures from the album from the internet.
- Add cover art from file; if you want to put your own thumbnail image and browse from the storage.
The information will be saved automatically and the thumbnail will be changed when you open the file.
Important points.
You can use any other video editor to change the thumbnail of the video but keep a few points in mind.
- Thumbnails should be added at the start of the video.
- The Thumbnail should be a few seconds long so that google drive considers it as a cover image.
- It works for short videos but it can be applied for long videos.
- Use a high-quality HD image for the thumbnail so that Google Drive can accept it as valuable for the thumbnail image.
- Thumbnails should be uploaded in PNG, GIF, or JPG
- The image ratio should be 16:9 and resolution of 1920x1080 pixels for PNG and JPG and 960x480 pixels for GIFs.
- The maximum file size should be
- The minimum width should be 220 pixels.
Even after keeping an eye on these important points, google drive sometimes does not show the thumbnail as a cover photo.
Conclusion.
In the above article, I have discussed a couple of different ways to add a thumbnail of the video and upload it on Google drive. I personally recommend Wonder Share Filmora 11 to make and change thumbnail image of the video as it is a very powerful as well as simple tool.
How to Windows Online Movie Maker [Complete Guide]
The likelihood is that video will soon play a significant role in your content marketing approach, if it hasn’t already – and for that using windows online movie maker is inevitable. You are an emerging brand, a sole proprietor, or even a podcaster. Knowing the importance of video marketing to content producers and agencies is second nature if you’re an astute digital marketer It may be costly and challenging to utilize video editing software. Fortunately, there are free online video editors available.
Before very recently, video editing needed highly specialized skills and was done manually using different tools. Windows Movie Maker used to be a standard component of every Windows user’s toolbox and was a highly recommended video editing product for novices. With the windows movie maker online, the application was well-liked for its ease of use and entertaining special effects, but most significantly - it was free. It came pre-installed on all Windows machines. You may do that with the help of our handy list of the top three online video creators.
Part 1. How to Make a Video Online [Use Movie Maker Windows Online]
Using the help of Movie Maker, you may create videos online with your browser. It enables you to create professional-caliber videos without having to purchase video editing tools at professional-caliber costs. For every genre and need, this web program includes stock video, animated text, audio tracks, and on-screen effects. Your own video clips are uploaded. Then, use the simple drag-and-drop online video editor in Movie Maker to edit footage and add special effects and music to make your movie shine.
Making fantastic compilation films from your already-existing photographs and videos doesn’t need you to be a skilled editor. Even for amateur video makers, the platform’s UI is simple to use and straightforward to navigate. The customizing choices in Movie Maker are many. You have the option of uploading your own fonts and logos. You may also watermark your films and alter the text’s color. Additionally, there are a ton of very unique components like stickers, vector shapes, and masks that may enhance the visual appeal of your video productions and widen your creative boundaries.
Steps to Make Video with Movie Maker Online
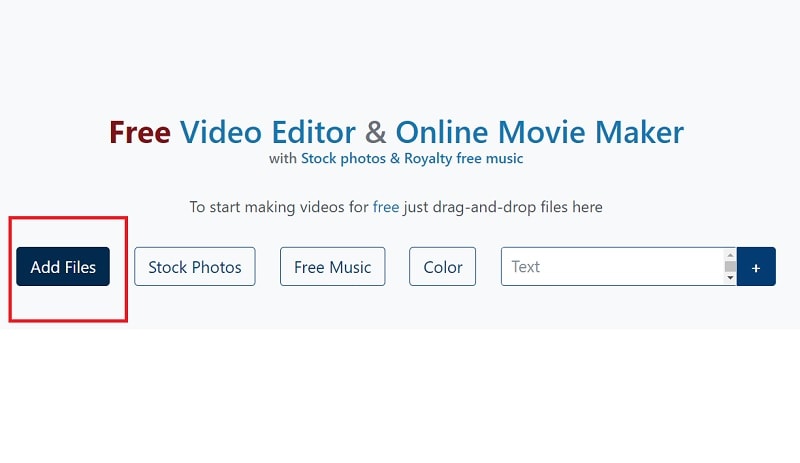
Step1 Go to Movie Maker Online
Using Movie Maker Online, you can quickly and easily make incredibly interesting compilation films using your already-posted photographs and videos. You’ll immediately be sent to the editor, where you can begin organizing your films. Here’s the official link to the toolkit:
Step2 Upload Files to Web
Your photographs, videos, and text may all be uploaded. If you like the default music, you may skip the step to change it; otherwise, you can choose another song from our library or upload your own MP3 file. Files from a variety of sources and devices may be added. Click the Import Media button to start importing your own media. Click Open after locating the video you wish to modify.
Step3 Create an online video
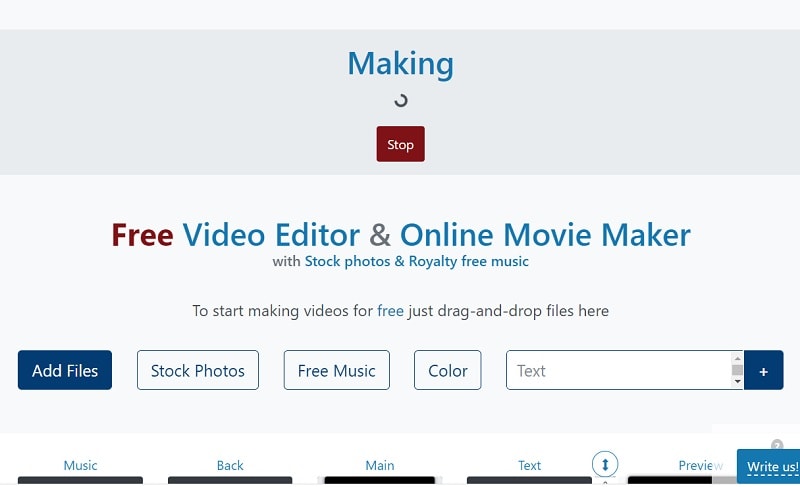
Add your music to your video compilation after all of your clips have been placed on the timeline. To accomplish that, choose a song depending on the genre or mood you want by clicking on the Music option on the left menu panel. To listen to the music track, click the little icon to the left of it. Text, colors, pictures, and video may all be customized to your heart’s delight. Add effects, drag, cut, etc. Press the Make Video button.
Step4 Save and Share with Others
Sharing your films on Facebook, Instagram, YouTube, and other platforms is made effortless. You may also send your loved ones the URLs to your videos. When you are happy with the changes, click the Save & Share option in the upper right corner, choose the quality you want to download your movie in, and then click the Export button. Download the updated video, then post it.
Part 2. Other Windows Online Movie Makers to Use [Top 3]
1. Kizoa
Link: Kizoa
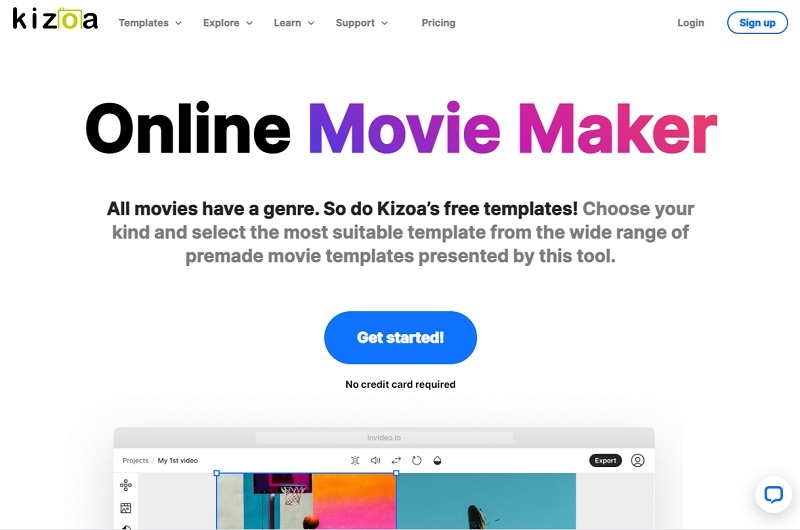
Customizing the appearance of your film is one of the finest ways to make it seem like it is your own. With the Kizoa tool, you may trim, apply a crossfade effect, choose the required resolution, and format for an output video in addition to merging files. Utilize Kizoa’s online video creator to produce eye-catching videos that will hold your audience’s attention. Create any kind of video, from personal family video slideshows to expert films to advertise your company. With the drag-and-drop movie production tool from Kizoa, you can create your very own video in a matter of minutes.
Use a video template as your starting point if you need inspiration. Key framing, animated overlays, noise reduction, transitions, and titles are just a few of the features it provides to help you produce excellent footage. For rapid video editing, there is a video production wizard. Windows Movie Maker’s auto movie themes pale in comparison to those provided by this program. Its extensive collection of stock footage and audio tracks helps you to concentrate on the crucial elements without having to drastically decrease the length of your film or the number of scenes.
2. FlexClip
Link: FlexClip
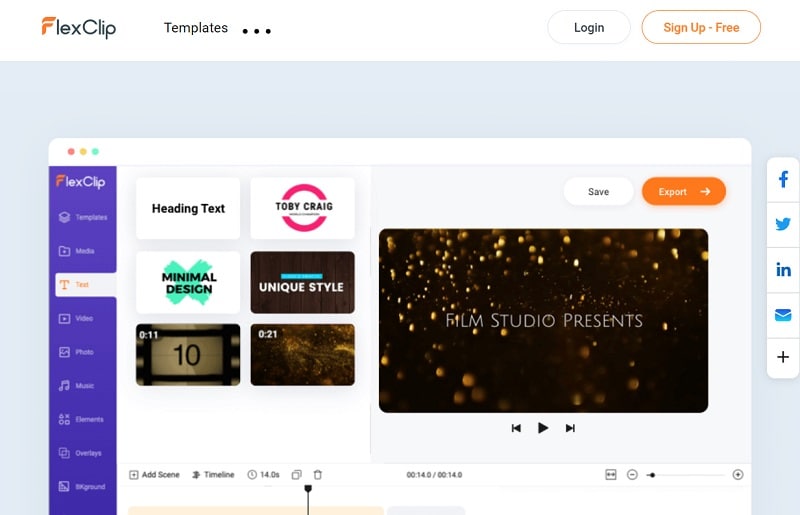
With the aid of the online video effects tool FlexClip, you may quickly and easily make entertaining short films. It has a ton of video editing features that you may use without logging in or creating an account, like merging, compressing, compiling, adding text, creating memes, etc. For those that are muted, you may use FlexClip to add animated text that blends in with the style of your film. Additionally, you may add your logo so that everyone is aware of who created the masterpiece they just saw.
An online video editor called FlexClip is mainly focused on producing high-quality marketing, advertising, and promotional films for companies. Recording a single video that will function on all social networking and video-sharing websites is almost impossible. Instagram, YouTube, and Facebook Marketing are among the partners of FlexClip that have received expert approval. It is used by marketers and enthusiasts to quickly create looping movies and stop motion animation. But as it only provides very basic functionality, it may not be the greatest choice for more intricate, demanding editing.
3. Veed.Io
Link: Veed.Io
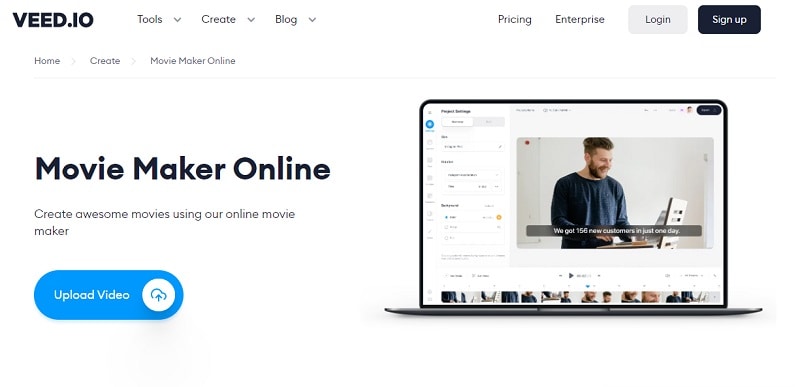
With only a few mouse clicks, users of the browser-based video editing program VEED may create professional-caliber movies. The greatest movie-making tools, including filters, effects, and stickers, are available on VEED. There are no intricate timelines, layers, or intricacy since it is a simple program that runs in your web browser. Simple drag-and-drop functionality is all you need to convey your tales. You may modify your video using its features. Using the video track below, you may combine, divide, or cut your files. Visit our website to see all of our filters, stickers, add-ons, and other tools.
Any device, whether an iPhone or Android phone, a MacBook, a Windows or Linux computer, may use VEED’s online video editor. You have access to all the resources you need to make amazing videos using VEED’s online video editor. Our user-friendly interface is very simple to use and is contemporary and intuitive. The native video sizes on each of the publishing sites, including Facebook, YouTube, and Vimeo, may all be altered using Veed. Finally, click “Export” in the editor’s upper-right corner, and your video will render quickly. Share some!
Conclusion
Use this editing list to produce more compelling video mashups for YouTube and other social media platforms in order to expand your audience, cultivate real connections with them, and eventually increase conversion rates. Because they combine the complex capabilities of the expensive, professional video suites with the user-friendliness and cost that appeal to novices, these online makers are a popular among editors of all skill levels. Make an investment in one of these video editing tools and own it.
Free Download For Win 7 or later(64-bit)
Free Download For macOS 10.14 or later
Part 1. How to Make a Video Online [Use Movie Maker Windows Online]
Using the help of Movie Maker, you may create videos online with your browser. It enables you to create professional-caliber videos without having to purchase video editing tools at professional-caliber costs. For every genre and need, this web program includes stock video, animated text, audio tracks, and on-screen effects. Your own video clips are uploaded. Then, use the simple drag-and-drop online video editor in Movie Maker to edit footage and add special effects and music to make your movie shine.
Making fantastic compilation films from your already-existing photographs and videos doesn’t need you to be a skilled editor. Even for amateur video makers, the platform’s UI is simple to use and straightforward to navigate. The customizing choices in Movie Maker are many. You have the option of uploading your own fonts and logos. You may also watermark your films and alter the text’s color. Additionally, there are a ton of very unique components like stickers, vector shapes, and masks that may enhance the visual appeal of your video productions and widen your creative boundaries.
Steps to Make Video with Movie Maker Online
Step1 Go to Movie Maker Online
Using Movie Maker Online, you can quickly and easily make incredibly interesting compilation films using your already-posted photographs and videos. You’ll immediately be sent to the editor, where you can begin organizing your films. Here’s the official link to the toolkit:
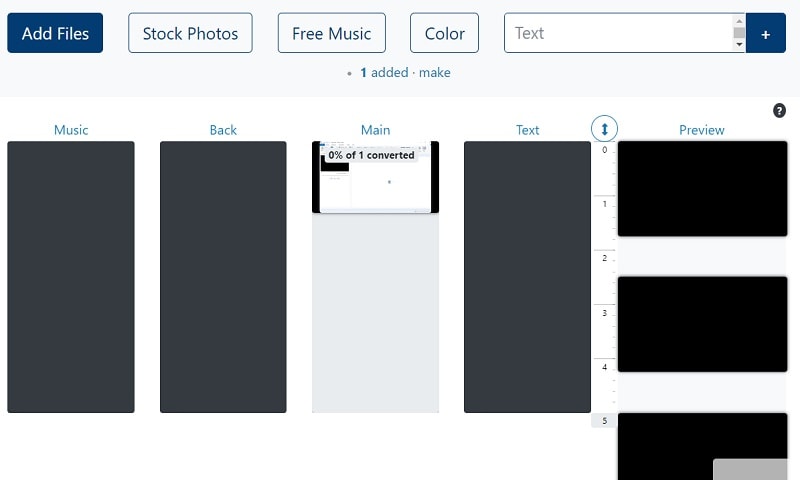
Step2 Upload Files to Web
Your photographs, videos, and text may all be uploaded. If you like the default music, you may skip the step to change it; otherwise, you can choose another song from our library or upload your own MP3 file. Files from a variety of sources and devices may be added. Click the Import Media button to start importing your own media. Click Open after locating the video you wish to modify.
Step3 Create an online video
Add your music to your video compilation after all of your clips have been placed on the timeline. To accomplish that, choose a song depending on the genre or mood you want by clicking on the Music option on the left menu panel. To listen to the music track, click the little icon to the left of it. Text, colors, pictures, and video may all be customized to your heart’s delight. Add effects, drag, cut, etc. Press the Make Video button.
Step4 Save and Share with Others
Sharing your films on Facebook, Instagram, YouTube, and other platforms is made effortless. You may also send your loved ones the URLs to your videos. When you are happy with the changes, click the Save & Share option in the upper right corner, choose the quality you want to download your movie in, and then click the Export button. Download the updated video, then post it.
Part 2. Other Windows Online Movie Makers to Use [Top 3]
1. Kizoa
Link: Kizoa
Customizing the appearance of your film is one of the finest ways to make it seem like it is your own. With the Kizoa tool, you may trim, apply a crossfade effect, choose the required resolution, and format for an output video in addition to merging files. Utilize Kizoa’s online video creator to produce eye-catching videos that will hold your audience’s attention. Create any kind of video, from personal family video slideshows to expert films to advertise your company. With the drag-and-drop movie production tool from Kizoa, you can create your very own video in a matter of minutes.
Use a video template as your starting point if you need inspiration. Key framing, animated overlays, noise reduction, transitions, and titles are just a few of the features it provides to help you produce excellent footage. For rapid video editing, there is a video production wizard. Windows Movie Maker’s auto movie themes pale in comparison to those provided by this program. Its extensive collection of stock footage and audio tracks helps you to concentrate on the crucial elements without having to drastically decrease the length of your film or the number of scenes.
2. FlexClip
Link: FlexClip
With the aid of the online video effects tool FlexClip, you may quickly and easily make entertaining short films. It has a ton of video editing features that you may use without logging in or creating an account, like merging, compressing, compiling, adding text, creating memes, etc. For those that are muted, you may use FlexClip to add animated text that blends in with the style of your film. Additionally, you may add your logo so that everyone is aware of who created the masterpiece they just saw.
An online video editor called FlexClip is mainly focused on producing high-quality marketing, advertising, and promotional films for companies. Recording a single video that will function on all social networking and video-sharing websites is almost impossible. Instagram, YouTube, and Facebook Marketing are among the partners of FlexClip that have received expert approval. It is used by marketers and enthusiasts to quickly create looping movies and stop motion animation. But as it only provides very basic functionality, it may not be the greatest choice for more intricate, demanding editing.
3. Veed.Io
Link: Veed.Io
With only a few mouse clicks, users of the browser-based video editing program VEED may create professional-caliber movies. The greatest movie-making tools, including filters, effects, and stickers, are available on VEED. There are no intricate timelines, layers, or intricacy since it is a simple program that runs in your web browser. Simple drag-and-drop functionality is all you need to convey your tales. You may modify your video using its features. Using the video track below, you may combine, divide, or cut your files. Visit our website to see all of our filters, stickers, add-ons, and other tools.
Any device, whether an iPhone or Android phone, a MacBook, a Windows or Linux computer, may use VEED’s online video editor. You have access to all the resources you need to make amazing videos using VEED’s online video editor. Our user-friendly interface is very simple to use and is contemporary and intuitive. The native video sizes on each of the publishing sites, including Facebook, YouTube, and Vimeo, may all be altered using Veed. Finally, click “Export” in the editor’s upper-right corner, and your video will render quickly. Share some!
Conclusion
Use this editing list to produce more compelling video mashups for YouTube and other social media platforms in order to expand your audience, cultivate real connections with them, and eventually increase conversion rates. Because they combine the complex capabilities of the expensive, professional video suites with the user-friendliness and cost that appeal to novices, these online makers are a popular among editors of all skill levels. Make an investment in one of these video editing tools and own it.
Free Download For Win 7 or later(64-bit)
Free Download For macOS 10.14 or later
Best Applications That Can Help Apply The Best VHS Camera Effect
Nowadays, tools available on the internet make it easy to apply effects and overlays. These effects can give your videos a whole new look and feel. It wasn’t easy to apply effects in the past, but it has become much simpler with the advancements. Each video effect offers a unique style and can completely transform the video.
Even if you want to create a vintage look or add glitches, these tools can do it for you. There are many popular video filters that you use today. One such popular filter is the camcorder effect that you can apply to your video. This effect creates an old VCR video look with noise and distortion. You can try many apps, which are mentioned in this article, to use such effects.
Part 1: How Can the VHS Effect Be Beneficial in the Current Film Industry?
VHS camcorder overlay is not just a filter to apply to your videos for fun. There are many advantages of VHS effects that are discussed in the portion below.
1. Retro Aesthetics
The VHS effect taps into nostalgia and retro aesthetics. This effect captures the interest of viewers who have a fondness for the past. It creates a sense of familiarity and nostalgia in your video. Such effects further add emotions by connecting with audiences on an emotional level.
2. Differentiation and Uniqueness
In a crowded media landscape, the VHS look helps films and videos stand out. Its distinct visual style catches the eye and makes content more memorable. Furthermore, it increases the likelihood of being noticed and shared by people on the internet.
3. Genre-Specific Atmosphere
These effects are closely associated with specific genres like horror and retro. By using these effects, you can enhance the atmosphere and mood of the video. Additionally, improving the overall storytelling and engagement in the intended genre experience.
4. Historical Context
When films are set in specific time periods, this effect mimics the visual aesthetics of that era. It helps establish and reinforce the historical context of your video. Moreover, it provides an authentic representation that enhances the audience’s engagement.
5. Budget-Friendly
The VHS camera effect offers a budget-friendly way to achieve a vintage look. Additionally, without requiring post-production resources, you can achieve the look. It is particularly valuable for independent filmmakers and artists with limited budgets. These effects allow them to create visually appealing content within their budget.
6. Experimental and Creative
VHS effects provide a unique canvas for artistic expression and creativity. Filmmakers and video artists can distort reality and challenge traditional aesthetics. Moreover, enthusiasts can go creative and experiment with these effects in a new way.
Part 2: Some Top Applications For Creating The Best VHS Camera Effect
You don’t have to worry, as there are many apps that can apply your favorite effects to your video. Moreover, if you are specifically looking to apply a camcorder vintage effect, try one of these.
- 1 - Camcorder - Record VHS Home Videos [iOS]
- 2 - True VHS - 90s Vintage Camera [iOS]
- 3 - Vaporgram Glitch Photo Editor [Android]
- 4 - Film Cam -Vintage Roll Camera [Android]
- 5 - Rarevision VHS Lite - 80s Cam [Android | iOS]
- 6 - Glitch Video Effect - Live VHS [iOS]
- 7 - VHS Video Editor, Vintage Cam [iOS]
1. Camcorder - Record VHS Home Videos [iOS ]
Camcorder – Record VHS Home Videos is a camcorder video maker app, as its name suggests. You can upload your video and give it the old 80s feel. It gives your videos the authentic camcorder feel by adding the date and other details in your video. The good part about this app is that it is free for a while, which means there are no annoying ads. You can apply your favorite VHS camera effects to your videos ad-free.
Compatibility: iOS 7.0 and newer

2. True VHS - 90s Vintage Camera [iOS ]
True VHS is an application to give your videos the early 90s look. It is a vintage camera app replicating the old footage and creating a similar ambiance. This app adds distortion and RGB effects to your videos. Moreover, it adds PLAY SP to give more authenticity to your video clips. True VHS also offers different effects and aspect ratios that you can choose for your edits.
Compatibility: iOS 11.0 and newer

3. Vaporgram Glitch Photo Editor [Android ]
Another amazing tool that gives you the original feel of VHS footage is Vaporgram. This Android app adds glitch effects and RGB to your media files. To create a more original VHS look of your video, this tool also adds scanlines and distorted 3D effects. It is a fun app with multiple textures and filters to add to your media. This app will surely take you back to the 20th century.
Compatibility: Android 5.0 and newer

4. Film Cam -Vintage Roll Camera [Android ]
Do you want to give your videos the old vintage camera film look? Film Cam gives your videos a retro Kodak or Fujifilm look, making it a unique feature of this application. Editing your videos using this app will give your clips the exact feel of an old film look. People will surely be surprised when they know edited videos are not captured using a Kodak camera.
Compatibility: Android 6.0 and newer

5. Rarevision VHS Lite - 80s Cam [Android | iOS ]
If you wish to hold a camcorder and record a video, thinking it’s the 80s, you’re in luck. This app is for you, as Rarevision offers you the same thing you want. It will let you imagine you are in the last quarter of the 20th century. Your videos look jittery, with glitches and lines in them. Furthermore, the colors of your videos will be distorted with decreased saturation.
Compatibility: Android 5.0 and newer, iOS 9.0 and newer

6. Glitch Video Effect - Live VHS [iOS ]
You are in the right place because this is an amazing VHS camera overlay editor. Glitch Video Effect is an app available on iOS that creates a perfect retro look. This app is loaded with over 100 VHS overlays and glitch effects that you can apply to your videos. It has everything from distortion, noise, and faded colors to create a perfect VHS look. Take back your videos to the old school and create a vintage feel.
Compatibility: iOS 12.0 and newer

7. VHS Video Editor, Vintage Cam [iOS ]
Don’t confuse yourself with retro, 90s, VHS, and vintage looks. All these looks are different from each other, and this iOS app has it all. From light leaks to the original VHS look, you can add any effect to your video. With over 100 effects and overlay options, VHS Video Editor has much to offer. Your videos will look dusty, with grains and increased noise, creating an old vintage look.
Compatibility: iOS 13.0 and newer

Part 3: Introducing Wondershare Filmora: An Explicit Solution To Easy VHS Camera Filters
Wondershare Filmora Video Editor , like always, brings newer and better features to the user. This powerful tool lets you edit, adjust, and correct your video. Nevertheless, this tool can do much more than you expect. You can create your overlays, effects, and filters using this tool. It is a solution for professionals and beginners both. You can apply the existing presets to your video using Wondershare Filmora.
Apply VHS Camera Effect For Win 7 or later(64-bit)
Apply VHS Camera Effect For macOS 10.14 or later


As discussed, Filmora lets you easily open the doors of creative expression. If you think creating an overlay is difficult, apply an effect from the library. You will find many effects and overlays in the built-in library, including a VHS camera filter. You can find these specific filters in good numbers, which exceed more than 100 effects. To apply this filter to your video, you can follow the guided instructions provided.
Step 1 Create a New Project
To begin, open Wondershare Filmora on your system and click on the “New Project” tab in the main interface. This will lead you to a new window where you can start your project.

Step 2 Import and Arrange Your Video
Import your file from the system using the import media option. Next, drag and drop your video into the timeline area to organize and prepare it for editing.

Step 3 Apply VHS Overlay
Now, it’s time to apply the VHS effects to your video. Locate the “Effects” option in the top bar of the software and click on it. In the Effects panel, search for “VHS” to find a range of VHS overlays to choose from. Select the effect that suits your style and drag it onto the timeline, placing it over your video.

Step 4 Adjust the Overlay
Change the intensity of the VHS overlay by adjusting its opacity. Go to the “Effects” tab on the right side of the screen and find the effect you applied. From there, modify its transparency to achieve the desired look. Once you’re satisfied, click on the “Export” button located at the top left of the screen to save your video with the applied VHS effects.

Conclusion
In conclusion, the internet offers many video effects that can enhance the look of your videos. With the help of such tools, you can easily apply these effects and overlays to your videos. However, if you want to apply a specific effect like the VHS camera effect, you can. Wondershare Filmora is a platform where you can edit and apply different effects to your video.
1. Camcorder - Record VHS Home Videos [iOS ]
Camcorder – Record VHS Home Videos is a camcorder video maker app, as its name suggests. You can upload your video and give it the old 80s feel. It gives your videos the authentic camcorder feel by adding the date and other details in your video. The good part about this app is that it is free for a while, which means there are no annoying ads. You can apply your favorite VHS camera effects to your videos ad-free.
Compatibility: iOS 7.0 and newer
2. True VHS - 90s Vintage Camera [iOS ]
True VHS is an application to give your videos the early 90s look. It is a vintage camera app replicating the old footage and creating a similar ambiance. This app adds distortion and RGB effects to your videos. Moreover, it adds PLAY SP to give more authenticity to your video clips. True VHS also offers different effects and aspect ratios that you can choose for your edits.
Compatibility: iOS 11.0 and newer
3. Vaporgram Glitch Photo Editor [Android ]
Another amazing tool that gives you the original feel of VHS footage is Vaporgram. This Android app adds glitch effects and RGB to your media files. To create a more original VHS look of your video, this tool also adds scanlines and distorted 3D effects. It is a fun app with multiple textures and filters to add to your media. This app will surely take you back to the 20th century.
Compatibility: Android 5.0 and newer
4. Film Cam -Vintage Roll Camera [Android ]
Do you want to give your videos the old vintage camera film look? Film Cam gives your videos a retro Kodak or Fujifilm look, making it a unique feature of this application. Editing your videos using this app will give your clips the exact feel of an old film look. People will surely be surprised when they know edited videos are not captured using a Kodak camera.
Compatibility: Android 6.0 and newer
5. Rarevision VHS Lite - 80s Cam [Android | iOS ]
If you wish to hold a camcorder and record a video, thinking it’s the 80s, you’re in luck. This app is for you, as Rarevision offers you the same thing you want. It will let you imagine you are in the last quarter of the 20th century. Your videos look jittery, with glitches and lines in them. Furthermore, the colors of your videos will be distorted with decreased saturation.
Compatibility: Android 5.0 and newer, iOS 9.0 and newer
6. Glitch Video Effect - Live VHS [iOS ]
You are in the right place because this is an amazing VHS camera overlay editor. Glitch Video Effect is an app available on iOS that creates a perfect retro look. This app is loaded with over 100 VHS overlays and glitch effects that you can apply to your videos. It has everything from distortion, noise, and faded colors to create a perfect VHS look. Take back your videos to the old school and create a vintage feel.
Compatibility: iOS 12.0 and newer
7. VHS Video Editor, Vintage Cam [iOS ]
Don’t confuse yourself with retro, 90s, VHS, and vintage looks. All these looks are different from each other, and this iOS app has it all. From light leaks to the original VHS look, you can add any effect to your video. With over 100 effects and overlay options, VHS Video Editor has much to offer. Your videos will look dusty, with grains and increased noise, creating an old vintage look.
Compatibility: iOS 13.0 and newer
Part 3: Introducing Wondershare Filmora: An Explicit Solution To Easy VHS Camera Filters
Wondershare Filmora Video Editor , like always, brings newer and better features to the user. This powerful tool lets you edit, adjust, and correct your video. Nevertheless, this tool can do much more than you expect. You can create your overlays, effects, and filters using this tool. It is a solution for professionals and beginners both. You can apply the existing presets to your video using Wondershare Filmora.
Apply VHS Camera Effect For Win 7 or later(64-bit)
Apply VHS Camera Effect For macOS 10.14 or later
As discussed, Filmora lets you easily open the doors of creative expression. If you think creating an overlay is difficult, apply an effect from the library. You will find many effects and overlays in the built-in library, including a VHS camera filter. You can find these specific filters in good numbers, which exceed more than 100 effects. To apply this filter to your video, you can follow the guided instructions provided.
Step 1 Create a New Project
To begin, open Wondershare Filmora on your system and click on the “New Project” tab in the main interface. This will lead you to a new window where you can start your project.
Step 2 Import and Arrange Your Video
Import your file from the system using the import media option. Next, drag and drop your video into the timeline area to organize and prepare it for editing.
Step 3 Apply VHS Overlay
Now, it’s time to apply the VHS effects to your video. Locate the “Effects” option in the top bar of the software and click on it. In the Effects panel, search for “VHS” to find a range of VHS overlays to choose from. Select the effect that suits your style and drag it onto the timeline, placing it over your video.
Step 4 Adjust the Overlay
Change the intensity of the VHS overlay by adjusting its opacity. Go to the “Effects” tab on the right side of the screen and find the effect you applied. From there, modify its transparency to achieve the desired look. Once you’re satisfied, click on the “Export” button located at the top left of the screen to save your video with the applied VHS effects.
Conclusion
In conclusion, the internet offers many video effects that can enhance the look of your videos. With the help of such tools, you can easily apply these effects and overlays to your videos. However, if you want to apply a specific effect like the VHS camera effect, you can. Wondershare Filmora is a platform where you can edit and apply different effects to your video.
Also read:
- Updated 2024 Approved Create Your Slow Zoom TikTok in Minutes
- New 2024 Approved Have You Ever Watched a Movie Where You Felt the Filmmakers Left You Hanging? Yea, Thats What Freeze Frame Does. Here We Will Enlighten You on What It Is, Freeze Frame Examples Where It Has Been Helpful to Drive Our Point Home
- Updated In 2024, Guaranteed 10 Storyboard Creators To Make Animation Easier For You
- Learn How Video Montages Were Used over Film History with Examples and the Types of Videos for Shorter Montages. Plus, Learn About the Best Software for It
- 3GP Video Format What Is 3GP Format And How To Open It?
- New In 2024, 5 Tools to Create a Time-Lapse Video Online
- New How To Make Split Screen Videos in Filmora
- In 2024, LUTs Can Make Ordinary-Looking Footage Look More Attractive. Read This Guide to Learn How You Can Easily Create Your Own LUTs Using Filmora
- Easily Cut Large Video Faster on Mac for 2024
- Start Making Procreate GIFs and Take Your Editing Creativity to the Next Level for 2024
- New In 2024, How to Make a Super Easy Rotating Video Effect
- How Does Sonys S&Q Feature Help Recording Slow-Motion Video
- Create A Freeze Frame Sequence In Your Videos for 2024
- Blender Is a 3D Animation Software that Can Be Used to Create Stunning 3D Models and Videos for 2024
- Updated In 2024, How to Use LUTs Perfectly in Final Cut Pro
- Updated It Is Crucial to Introduce Your Kids to the Different Colors and Practice the Color Matching Game. So, Here Are the Various Factors Related to Color Matching for Your Child with a Tool to Help You in It Ideally
- New Some Top Methods to Create AI Slow Motion Videos for 2024
- New LumaFusion – What Is It and the Best Alternative to Use
- New Best iPhone LUTs App to Use
- In 2024, How to Uue Adobe Lightroom Color Grading
- 2024 Approved Freeze Frame Clone Effect Is a Creative Effect to Use for Many Video Creators. This Article Will Show You How to Use Filmora to Make a Frozen Frame Clone Video Effect
- Updated How To Quickly Create A Screen Print Effect In Photoshop Detailed Gui for 2024
- Transfer your Apple iPhone 15 Apps to New iPhone | Dr.fone
- How To Fix Apple iPhone 8 Unavailable Issue With Ease | Dr.fone
- In 2024, 3 Ways to Change Location on Facebook Marketplace for Vivo Y100 5G | Dr.fone
- A Complete Guide To OEM Unlocking on Realme C67 5G
- Hacks to do pokemon go trainer battles For Nokia C12 Pro | Dr.fone
- In 2024, Turning Off Two Factor Authentication From Apple iPhone SE? 5 Tips You Must Know
- How to Change GPS Location on Tecno Camon 20 Easily & Safely | Dr.fone
- How to Cast Nokia C02 Screen to PC Using WiFi | Dr.fone
- How to Transfer Data After Switching From OnePlus Nord 3 5G to Latest Samsung | Dr.fone
- How to Get and Use Pokemon Go Promo Codes On Vivo T2 5G | Dr.fone
- 9 Best Phone Monitoring Apps for Infinix Note 30i | Dr.fone
- How To Transfer Data From iPhone 11 Pro To Others ios devices? | Dr.fone
- New 2024 Approved Top 10 AI-Talking Avatars Revolutionizing Communication
- Title: This Easy Hack Using Wondershare Filmora New Masking Feature Will Be a Great Addition to Your Next Horror Video Content for 2024
- Author: Morgan
- Created at : 2024-05-19 05:12:43
- Updated at : 2024-05-20 05:12:43
- Link: https://ai-video-editing.techidaily.com/this-easy-hack-using-wondershare-filmora-new-masking-feature-will-be-a-great-addition-to-your-next-horror-video-content-for-2024/
- License: This work is licensed under CC BY-NC-SA 4.0.
