
:max_bytes(150000):strip_icc():format(webp)/GettyImages-77744394-e5f79596e54a4ba6a914eed31be7efc4.jpg)
Top 9 Best Solutions To Go For When Creating an AI Thumbnail for 2024
[Top 9] Best Solutions To Go For When Creating an AI Thumbnail
Thumbnails are a small visual preview of the images, videos, and documents to represent the linked content. They are mostly used in web pages, video playlists, and photo galleries to offer a visual preview to the users. Furthermore, professional YouTube content creators put extra effort into making captivating thumbnails for the videos. Such thumbnails help in click-baiting and gaining maximum viewership on YouTube.
In this article, we will highlight some competent AI thumbnail makers in detail. With such AI tools, you can create desired AI thumbnails in the best visual quality. Hence, consider this guide to use AI thumbnail creator for your YouTube videos without putting in manual effort.
AI Thumbnail Creator Generate template-driven video thumbnails with the help of AI in Filmora.
Free Download Free Download Learn More

Part 1: Some Other Top-Rated Solutions For Generating AI Thumbnails (Online)
Although Filmora provides a wonderful experience creating thumbnails, you must know about other online options. In this section, we will highlight some reliable online AI thumbnail generators with their key features.
1. VEED.io
VEED.io is an efficient tool that uses AI-powered algorithms to create thumbnails. These intelligent algorithms bring authentic results within a few minutes. To use this thumbnail generator AI, describe the thumbnail through the text field. You can write multiple words by adding commas to provide a comprehensive description. Once done, click the “Generate” button to craft the AI thumbnail.

Key Features
- io can function as a video editor to alter the settings of your video. Using this tool, you can add subtitles to your video in your preferred language.
- It includes a screen recorder to capture your screen activities in high resolution. Afterward, modify the screen recording with its editing tools.
- To generate vibrant images for your work projects, try its AI image generator. With this tool, describe your imagination through words to craft convincing images.
2. Simplified
Simplified is a famous platform offering unique features to generate videos and images. By navigating to its AI thumbnail maker, you can select the size of your thumbnail. Once done, explain your video content in the given box. Moreover, you can add personalized colors, text, and images without hassle. This online thumbnail maker AI also offers different options for thumbnail templates to generate attractive results.

Key Features
- This tool offers an AI Writer through which you can create outlines and scripts for the videos. Craft compelling captions for your social media posts with this feature.
- It contains a free graphic design tool on which you can create posts and illustrations in real time. Once done, publish the created design on this online platform.
- To make excellent presentations within a few minutes, try its AI presentation maker. Describe your topic in the text field, and the tool will use AI technology to create presentations.
3. Thumbnail.AI
Thumbnail.AI is a basic tool with a beginner-friendly interface. It’s a specialized tool in which you can make both manual and AI thumbnails. For AI generation, you have to add text and additional explanations in the given boxes. Moreover, it offers three thumbnail sizes: square, rectangle, and vertical. To craft more captivating thumbnails, insert images relevant to your content. Thus, this thumbnail generator is the best option for beginners.

Key Features
- To add images to your thumbnail, this tool provides three options. You can search, link, or upload images on this thumbnail AI tool easily.
- While creating thumbnails, the tool allows you to incorporate different elements. You can add icons, shapes, people, and social media banners.
- The customization options let you change the background color of the thumbnail. It also displays multiple options for font presets.
4. Hotpot.AI
If you want a comprehensive tool to create AI YouTube thumbnails, try Hotpot. It’s a free tool containing hundreds of YouTube thumbnail templates. After choosing the template, you can edit it without any skills. On the editing window, alter the width, height, and background color of the template. Furthermore, apply unique patterns and brand logos to the thumbnail for more effective results.

Key Features
- Are you annoyed by the unwanted people in the background of your videos? If yes, use the AI background remover of this tool to eradicate unnecessary objects from the background in an effective way.
- If you have a collection of vintage or old photos, colorize them with this online tool. With its colorizer feature, you can apply natural colors and shades to old images.
- This tool also includes an option to enhance the quality of facial images. It can remove blurriness, scratches, and tears from the uploaded images.
5. Canva
Canva is an all-one tool providing a robust interface to create designs, photos, and videos. By accessing its interface, you can find thousands of templates of multiple categories. You can filter the templates by choosing a specific style and theme. There are different themes for YouTube thumbnails on Canva, such as illustration, company, and business. Furthermore, select a thumbnail designed in your favorite color.

Key Features
- On this thumbnail AI generator, the thumbnail templates are 100% customizable. After editing them, you can download them quickly.
- Canva offers a PDF editor to edit and manage your PDF documents. Perform basic and advanced editing on your PDF files through this tool.
- Using this tool, make photo collages by combining desired photos. You can select attractive borders and styling boards to create collages.
6. Appy Pie
This AI thumbnail generator offers up to 47 thumbnail templates for your YouTube channel. You can preview and edit the thumbnail template within a few clicks. Furthermore, you can also design your own thumbnail by entering the text prompt. On its interface, it gives you the option to drag and drop the relevant images. By doing so, the tool will insert the relevant images on your thumbnail to generate the best results.

Key Features
- Do you want to create captivating avatars? You can try the AI avatar generator of this tool to create a personalized avatar by uploading your own photo.
- This tool consists of an AI text-to-video generator to craft stunning visuals. By using your textual prompt, generate a flawless video. Afterward, you can customize it from the given options.
- Using this online platform, add voiceovers to the videos with AI technology. You can write the narration in text and choose a preferred language. The tool will create a voiceover in natural voices.
7. AI YouTube Thumbnails
Do you want a professional and expert tool for creating AI thumbnails? This online tool is able to create 5 thumbnails for your video within five minutes. You can enter your video’s title or description in the text field as instructions. Afterward, the tool will email you with five attractive and relevant thumbnails for your video. Hence, it’s an easy-to-use tool to generate eye-catching thumbnails in minimal time.

Key Features
- Using advanced algorithms, this tool can convert the text into AI slides in an efficient manner. You can copy-paste the text, and the tool will generate an AI presentation with a single click.
- It offers advanced options to edit your Google slides to generate compelling results. You can remix layouts and content to create astonishing slides.
- This tool can help you collaborate with your team by sharing custom themes and styles. This will help you to stay on board while designing for your brand or company.
8. Snappa
Snappa is widely used to craft high-resolution images in desired colors and styles. Using this AI platform, create YouTube thumbnails with many templates. You can also start from scratch to display your creativity to the world. Moreover, upload a frame from your video to add a background in the thumbnail. It also offers thousands of royalty-free images, which you can utilize in the creation of thumbnails.

Key Features
- In this AI thumbnail creator, choose different dimensions to create images for social media posts. You can create Facebook, Instagram, LinkedIn, and other posts through this tool.
- To customize the template, add different elements from the options. You can add background, shapes, and effects to personalize the template.
- It provides multiple options to add graphics while designing a thumbnail. Add icons, vectors, photos, and uploads from your PC.
9. Picmaker
Picmaker offers the easiest way to create YouTube thumbnails in the desired manner. In this thumbnail AI maker, you can get perfectly sized YouTube thumbnails in the correct dimensions. You can use fancy colors and stylish text fonts in personalizing the thumbnail templates. Furthermore, download the thumbnail in many formats, such as SVG, PNG, PDF, and JPEG.

Key Features
- To create perfect online graphics, try its image resizer tool. Using this tool, you can resize the created digital designs according to the requirements of a particular platform.
- This AI thumbnail generator allows you to create customized brand kits. Create a brand kit by uploading fonts, colors, and logos effectively.
- By using its free photo editor, enhance the visual appearance of your images. You can apply captivating effects to the photos from the listed options. Also, blur the specific parts of the photo to add an aesthetic appeal.
Part 2: What Are The Benefits of Using Thumbnails in Generating Online Content?
Using thumbnails in creating online content can bring you many benefits. More specifically, if you want to generate thumbnails for YouTube videos, it can help you gain massive viewership. To know more about the benefits of thumbnail AI tools, read the below part:
1. Promotion of Brand
If you want to do your brand marketing, adding thumbnails in the videos can make an impact. You can add logos associated with your brand colors and fonts. This will help in gaining trust and credibility from your audience. Furthermore, it will display your professionalism by adding thumbnails relevant to your brand or company.
2. Enhanced Visual Representation
Thumbnails in a video help users browse and locate the content. With improved visibility of the content, users would be able to identify the content of your video. Moreover, it can increase your click-through rate (CTR), which can positively influence your viewership.
3. Offering Aesthetic Value
If you want to grow your YouTube channel or a website, YouTube thumbnail AI can help. They add an aesthetic appeal to your content, which can grasp the attention of viewers. Additionally, it will compel the viewers to explore your channel. As a result, build a strong community on your platform that can influence future progress.
4. Making Your Content Stands Out
In this competitive era, there are millions of channels and websites on online platforms. To gain a competitive edge among other channels, adding professional thumbnails is essential. Hence, make a prominent identity in the crowded online space through thumbnails.
5. Better SEO Ranking
Some online sites encourage the usage of thumbnails in the content. The reason is that thumbnails provide a preview to the users before clicking the video. In such a way, users can browse the content effortlessly. Hence, it can provide an improved SEO ranking that can highlight your content.
Part 3: Wondershare Filmora: The First-Base Solution To AI Thumbnail Making
If you want to experience a desktop-based solution for thumbnail AI creation, Wondershare Filmora is there for you. By launching this tool on Windows or macOS, you can execute professional video editing in its robust interface. Along with basic editing features like trimming and rearranging, utilize its AI tools.
It uses AI technology to provide the best performance in editing videos. It not only boosts your overall productivity but also brings perfection in editing videos. With the latest Filmora V13 launch, you can avail yourself of many game-changing features for video editing.
After this launch, you can modify your videos with the upgraded interface and intuitive controls. The new features include AI Copilot editing, AI copywriting, AI vocal remover, etc. Furthermore, it has also introduced an AI thumbnail maker to craft aesthetic thumbnails for the videos smartly.
Free Download For Win 7 or later(64-bit)
Free Download For macOS 10.14 or later
AI Thumbnail Creator Feature of Filmora
The AI Thumbnail feature of Filmora uses advanced algorithms to recognize the best shots from your video. By doing so, it can capture three thumbnails from your video that are linked to your video content. It also provides many customization options to meet your requirements for generating thumbnails. You can apply desired color schemes, fonts, and design elements.
Filmora also consists of up to 58 thumbnail templates to provide you with inspiring ideas. Moreover, it also supports advanced text and image editing to create flawless thumbnails. Thus, you must try the AI thumbnail generator of this tool for automated results.
Step-by-Step Guide To Use the AI Thumbnail Feature
Do you know how to use the AI thumbnail maker of Filmora? Here are the relevant instructions that can help you in this regard:
Step 1: Access the Thumbnail Generator
Launch Filmora on your PC and import the desired video. Once done with editing your video, hit the “Export” option. It will instantly open the Export window on your screen. From there, click the “Edit” option in the top left corner. This will open the thumbnail generator of Filmora on your screen.

Step 2: Determine the Desired Video Frame
After accessing the thumbnail generator, you can see the best frames of your video on the left side. These frames are gathered by AI technology to bring you the best frame options. While keeping in the “From Video” section, choose your preferred frame and then tap on “Edit.”

Step 3: Choose a Suitable Template
Now, the tool will display the thumbnail templates of different categories. Specify your category and then select the required thumbnail template from the listed options. Once done, tap on the “Save” button.

Step 4: Convert the Frame into a Thumbnail
Once you have saved the thumbnail template, the “Export” window will appear. From this window, click “Export” to convert the video frame into a thumbnail. After the conversion, check the AI-generated thumbnail by clicking the “Open Folder” option.

Conclusion
To make your YouTube videos look aesthetic, you should add relevant thumbnails. This will engage the viewers and help them to locate your content. Thus, being a content creator, you should know about some compelling thumbnail AI tools. By using AI-supported thumbnail creators, you can make attractive and high-quality thumbnails with little effort. Therefore, we highly recommend Filmora, which can create flawless thumbnails with up to 58 templates.
Free Download Free Download Learn More
Part 1: Some Other Top-Rated Solutions For Generating AI Thumbnails (Online)
Although Filmora provides a wonderful experience creating thumbnails, you must know about other online options. In this section, we will highlight some reliable online AI thumbnail generators with their key features.
1. VEED.io
VEED.io is an efficient tool that uses AI-powered algorithms to create thumbnails. These intelligent algorithms bring authentic results within a few minutes. To use this thumbnail generator AI, describe the thumbnail through the text field. You can write multiple words by adding commas to provide a comprehensive description. Once done, click the “Generate” button to craft the AI thumbnail.
Key Features
- io can function as a video editor to alter the settings of your video. Using this tool, you can add subtitles to your video in your preferred language.
- It includes a screen recorder to capture your screen activities in high resolution. Afterward, modify the screen recording with its editing tools.
- To generate vibrant images for your work projects, try its AI image generator. With this tool, describe your imagination through words to craft convincing images.
2. Simplified
Simplified is a famous platform offering unique features to generate videos and images. By navigating to its AI thumbnail maker, you can select the size of your thumbnail. Once done, explain your video content in the given box. Moreover, you can add personalized colors, text, and images without hassle. This online thumbnail maker AI also offers different options for thumbnail templates to generate attractive results.
Key Features
- This tool offers an AI Writer through which you can create outlines and scripts for the videos. Craft compelling captions for your social media posts with this feature.
- It contains a free graphic design tool on which you can create posts and illustrations in real time. Once done, publish the created design on this online platform.
- To make excellent presentations within a few minutes, try its AI presentation maker. Describe your topic in the text field, and the tool will use AI technology to create presentations.
3. Thumbnail.AI
Thumbnail.AI is a basic tool with a beginner-friendly interface. It’s a specialized tool in which you can make both manual and AI thumbnails. For AI generation, you have to add text and additional explanations in the given boxes. Moreover, it offers three thumbnail sizes: square, rectangle, and vertical. To craft more captivating thumbnails, insert images relevant to your content. Thus, this thumbnail generator is the best option for beginners.
Key Features
- To add images to your thumbnail, this tool provides three options. You can search, link, or upload images on this thumbnail AI tool easily.
- While creating thumbnails, the tool allows you to incorporate different elements. You can add icons, shapes, people, and social media banners.
- The customization options let you change the background color of the thumbnail. It also displays multiple options for font presets.
4. Hotpot.AI
If you want a comprehensive tool to create AI YouTube thumbnails, try Hotpot. It’s a free tool containing hundreds of YouTube thumbnail templates. After choosing the template, you can edit it without any skills. On the editing window, alter the width, height, and background color of the template. Furthermore, apply unique patterns and brand logos to the thumbnail for more effective results.
Key Features
- Are you annoyed by the unwanted people in the background of your videos? If yes, use the AI background remover of this tool to eradicate unnecessary objects from the background in an effective way.
- If you have a collection of vintage or old photos, colorize them with this online tool. With its colorizer feature, you can apply natural colors and shades to old images.
- This tool also includes an option to enhance the quality of facial images. It can remove blurriness, scratches, and tears from the uploaded images.
5. Canva
Canva is an all-one tool providing a robust interface to create designs, photos, and videos. By accessing its interface, you can find thousands of templates of multiple categories. You can filter the templates by choosing a specific style and theme. There are different themes for YouTube thumbnails on Canva, such as illustration, company, and business. Furthermore, select a thumbnail designed in your favorite color.
Key Features
- On this thumbnail AI generator, the thumbnail templates are 100% customizable. After editing them, you can download them quickly.
- Canva offers a PDF editor to edit and manage your PDF documents. Perform basic and advanced editing on your PDF files through this tool.
- Using this tool, make photo collages by combining desired photos. You can select attractive borders and styling boards to create collages.
6. Appy Pie
This AI thumbnail generator offers up to 47 thumbnail templates for your YouTube channel. You can preview and edit the thumbnail template within a few clicks. Furthermore, you can also design your own thumbnail by entering the text prompt. On its interface, it gives you the option to drag and drop the relevant images. By doing so, the tool will insert the relevant images on your thumbnail to generate the best results.
Key Features
- Do you want to create captivating avatars? You can try the AI avatar generator of this tool to create a personalized avatar by uploading your own photo.
- This tool consists of an AI text-to-video generator to craft stunning visuals. By using your textual prompt, generate a flawless video. Afterward, you can customize it from the given options.
- Using this online platform, add voiceovers to the videos with AI technology. You can write the narration in text and choose a preferred language. The tool will create a voiceover in natural voices.
7. AI YouTube Thumbnails
Do you want a professional and expert tool for creating AI thumbnails? This online tool is able to create 5 thumbnails for your video within five minutes. You can enter your video’s title or description in the text field as instructions. Afterward, the tool will email you with five attractive and relevant thumbnails for your video. Hence, it’s an easy-to-use tool to generate eye-catching thumbnails in minimal time.
Key Features
- Using advanced algorithms, this tool can convert the text into AI slides in an efficient manner. You can copy-paste the text, and the tool will generate an AI presentation with a single click.
- It offers advanced options to edit your Google slides to generate compelling results. You can remix layouts and content to create astonishing slides.
- This tool can help you collaborate with your team by sharing custom themes and styles. This will help you to stay on board while designing for your brand or company.
8. Snappa
Snappa is widely used to craft high-resolution images in desired colors and styles. Using this AI platform, create YouTube thumbnails with many templates. You can also start from scratch to display your creativity to the world. Moreover, upload a frame from your video to add a background in the thumbnail. It also offers thousands of royalty-free images, which you can utilize in the creation of thumbnails.
Key Features
- In this AI thumbnail creator, choose different dimensions to create images for social media posts. You can create Facebook, Instagram, LinkedIn, and other posts through this tool.
- To customize the template, add different elements from the options. You can add background, shapes, and effects to personalize the template.
- It provides multiple options to add graphics while designing a thumbnail. Add icons, vectors, photos, and uploads from your PC.
9. Picmaker
Picmaker offers the easiest way to create YouTube thumbnails in the desired manner. In this thumbnail AI maker, you can get perfectly sized YouTube thumbnails in the correct dimensions. You can use fancy colors and stylish text fonts in personalizing the thumbnail templates. Furthermore, download the thumbnail in many formats, such as SVG, PNG, PDF, and JPEG.
Key Features
- To create perfect online graphics, try its image resizer tool. Using this tool, you can resize the created digital designs according to the requirements of a particular platform.
- This AI thumbnail generator allows you to create customized brand kits. Create a brand kit by uploading fonts, colors, and logos effectively.
- By using its free photo editor, enhance the visual appearance of your images. You can apply captivating effects to the photos from the listed options. Also, blur the specific parts of the photo to add an aesthetic appeal.
Part 2: What Are The Benefits of Using Thumbnails in Generating Online Content?
Using thumbnails in creating online content can bring you many benefits. More specifically, if you want to generate thumbnails for YouTube videos, it can help you gain massive viewership. To know more about the benefits of thumbnail AI tools, read the below part:
1. Promotion of Brand
If you want to do your brand marketing, adding thumbnails in the videos can make an impact. You can add logos associated with your brand colors and fonts. This will help in gaining trust and credibility from your audience. Furthermore, it will display your professionalism by adding thumbnails relevant to your brand or company.
2. Enhanced Visual Representation
Thumbnails in a video help users browse and locate the content. With improved visibility of the content, users would be able to identify the content of your video. Moreover, it can increase your click-through rate (CTR), which can positively influence your viewership.
3. Offering Aesthetic Value
If you want to grow your YouTube channel or a website, YouTube thumbnail AI can help. They add an aesthetic appeal to your content, which can grasp the attention of viewers. Additionally, it will compel the viewers to explore your channel. As a result, build a strong community on your platform that can influence future progress.
4. Making Your Content Stands Out
In this competitive era, there are millions of channels and websites on online platforms. To gain a competitive edge among other channels, adding professional thumbnails is essential. Hence, make a prominent identity in the crowded online space through thumbnails.
5. Better SEO Ranking
Some online sites encourage the usage of thumbnails in the content. The reason is that thumbnails provide a preview to the users before clicking the video. In such a way, users can browse the content effortlessly. Hence, it can provide an improved SEO ranking that can highlight your content.
Part 3: Wondershare Filmora: The First-Base Solution To AI Thumbnail Making
If you want to experience a desktop-based solution for thumbnail AI creation, Wondershare Filmora is there for you. By launching this tool on Windows or macOS, you can execute professional video editing in its robust interface. Along with basic editing features like trimming and rearranging, utilize its AI tools.
It uses AI technology to provide the best performance in editing videos. It not only boosts your overall productivity but also brings perfection in editing videos. With the latest Filmora V13 launch, you can avail yourself of many game-changing features for video editing.
After this launch, you can modify your videos with the upgraded interface and intuitive controls. The new features include AI Copilot editing, AI copywriting, AI vocal remover, etc. Furthermore, it has also introduced an AI thumbnail maker to craft aesthetic thumbnails for the videos smartly.
Free Download For Win 7 or later(64-bit)
Free Download For macOS 10.14 or later
AI Thumbnail Creator Feature of Filmora
The AI Thumbnail feature of Filmora uses advanced algorithms to recognize the best shots from your video. By doing so, it can capture three thumbnails from your video that are linked to your video content. It also provides many customization options to meet your requirements for generating thumbnails. You can apply desired color schemes, fonts, and design elements.
Filmora also consists of up to 58 thumbnail templates to provide you with inspiring ideas. Moreover, it also supports advanced text and image editing to create flawless thumbnails. Thus, you must try the AI thumbnail generator of this tool for automated results.
Step-by-Step Guide To Use the AI Thumbnail Feature
Do you know how to use the AI thumbnail maker of Filmora? Here are the relevant instructions that can help you in this regard:
Step 1: Access the Thumbnail Generator
Launch Filmora on your PC and import the desired video. Once done with editing your video, hit the “Export” option. It will instantly open the Export window on your screen. From there, click the “Edit” option in the top left corner. This will open the thumbnail generator of Filmora on your screen.
Step 2: Determine the Desired Video Frame
After accessing the thumbnail generator, you can see the best frames of your video on the left side. These frames are gathered by AI technology to bring you the best frame options. While keeping in the “From Video” section, choose your preferred frame and then tap on “Edit.”
Step 3: Choose a Suitable Template
Now, the tool will display the thumbnail templates of different categories. Specify your category and then select the required thumbnail template from the listed options. Once done, tap on the “Save” button.
Step 4: Convert the Frame into a Thumbnail
Once you have saved the thumbnail template, the “Export” window will appear. From this window, click “Export” to convert the video frame into a thumbnail. After the conversion, check the AI-generated thumbnail by clicking the “Open Folder” option.
Conclusion
To make your YouTube videos look aesthetic, you should add relevant thumbnails. This will engage the viewers and help them to locate your content. Thus, being a content creator, you should know about some compelling thumbnail AI tools. By using AI-supported thumbnail creators, you can make attractive and high-quality thumbnails with little effort. Therefore, we highly recommend Filmora, which can create flawless thumbnails with up to 58 templates.
6 Best Text to Speech Generators for YouTube Videos [Windows, Mac, Android, iPhone & Online]
Best Text To Speech Converter and Video Editor
Filmora’s Text to Speech (TTS) function allows you to convert your text files to voiceover and bring more elements to enrich your video.
Free Download Free Download Free Download Learn More >

Speech has a significant impact on the success rate of the entire YouTube adventure, whether storytelling or a standard sales pitch. It helps to have a decent voice and speaking abilities. However, not everyone gets both simultaneously; many individuals employ voice artists to provide voice-overs.
Some freelancers charge $5-$100 for a 5-minute voice-over. However, not everyone can afford an expensive voice artist, especially for longer films or just starting. Here are other options that I discovered as the most acceptable free text to voice generators for YouTube videos.
Let’s take a deeper look at the most excellent free text to speech software for YouTube videos.
Getting Started
Text to speech is a speech synthesis software that speaks aloud digital and textual content. The software offers a wide range of applications and is utilized by everyone from professionals and students to toddlers and adults.
Viewers are emotionally attached to documents such as PDFs, books, novels, and e-learning courses when they hear narration with a human voice. Text-to-speech systems are ideal for multitasking by busy professionals.
It’s no surprise that there are numerous text-to-speech options available. Audiobooks are also becoming more popular for the same reasons.
We’ll go over the best text-to-speech tools available in this guide. We’ve gathered a detailed list of the most exemplary free and commercial text-to-speech applications to help you choose the best option for your needs:
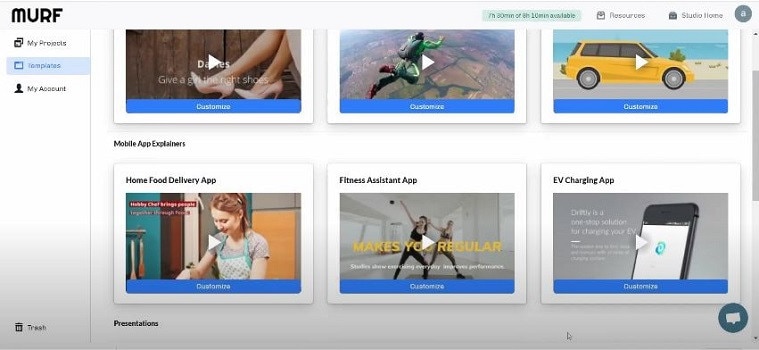
#1: Murf
It is available on Windows, Mac, Android, iPhone, and Online
Murf is a text-based voice-over maker. You can either compose your script or submit a voice clip to convert it into hyper-realistic AI voices. Murf delivers expert voice-over artists with experienced voices. You can check multiple parameters in the voices. You can use Murf to signify a brand, a product, a company, a presentation, and many more.
Features:
- Murf allows you to create voice-overs from the text. It also allows you to transform your speech into editable text, which you can subsequently edit or convert into AI voice.
- Murf Studio provides the ability to synchronize your speech with visuals.
- Murf provides over 100 authentic voices in 19 languages.
- It also gives options for inserting pauses, altering narration tempo, and emphasizing certain points.
- It also includes features such as script checking with grammar assistance, free background music, video and music cutting, and more.
- Murf offers comprehensive communication and collaboration tools, access control, a pronunciation library, and a service level agreement (SLA) for enterprises wishing to develop voice-overs in bulk.
Price
| Free | Basic | Pro | Enterprise |
|---|---|---|---|
| $0 / Month | $13 / Month | $26 / Month | $166 / Month |
| Try all 120+ voices 10 mins of voice generation 10 mins of transcription Share link for audio/video output No downloads Single User No credit card required | Unlimited Downloads 24 hours of voice generation/year Access to 60 voices (10 languages) Commercial Usage rights Chat and Email support Single User | Unlimited Downloads 96 hours of voice generation/year 48 hours of transcription/year Access 120+ voices (20 languages) Commercial Usage rights Recorded voice editing Voice changer Up to 3 users Priority Support | 5+ Users Unlimited Voice Generation Time Unlimited Transcription time Custom Voices Single-sign on (SSO) Collaboration and Access Control Dedicated Account Representative Centralized invoicing Service Agreement Deletion recovery Unlimited Storage |
Cons
- You may experience frequent technical glitches.
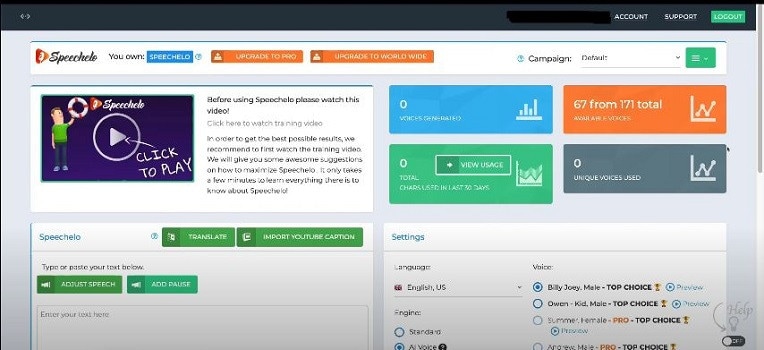
#2: Speechelo
It is available on Windows, Mac, Android, iPhone, and Online
Speechelo gives a realistic voice tone and expressions. This gets people more interested in voice-overs. You can use Speechelo to create sales videos, training films, and instructive videos, among other things. It includes attributes such as breathing and pauses, vocal tones, changing speed and pitch, and compatibility for 23 languages.
Features
- The text-to-speech engine in Speechelo can add intonation to the voice.
- It contains over 30 voices that sound natural.
- It has both male and female voices.
- It works with various video editing tools, including Camatasia, Adobe, Premier, and iMovie.
- Ordinary tone, cheerful tone, and serious tone are the three tones you may use to read your text.
Price
| Premium |
|---|
| $47 (Discount price) |
| One-time payment With 60-day money-back guarantee |
Cons
- The output of Speechelo will be 48kbps. If you’re familiar with sound production, you’ll see that this is a very low output.
- It might produce inaccurate output if you input long voice-overs.
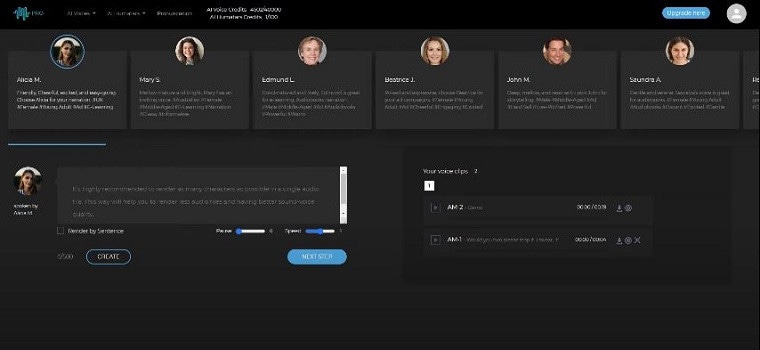
#3: Synthesys
It is available on Windows, Mac, Android, iPhone, and Online
Synthesys helps to convert text into a natural-sounding voice. With Synthesis, you can choose from various tones, accents, male and female voices, languages, and reading speeds. Moreover, It simply takes three steps to create a natural-sounding artificial speech that you may use for a variety of commercial applications.
- To begin, select the gender, style, accent, and tone you want the created voice to have.
- You can paste or type the content you want to turn into speech into Synthesys’ AI voice-producing platform.
- Lastly, click ‘create’ to start creating your artificial speech in minutes. You may adjust the reading speed and pause length from here.
Features
- Cloud-based software.
- Expert and natural-sounding voices are available in an extensive collection.
- There are over 35 female voices and 30 male voices.
- You can create and sell unlimited voices.
- Extremely user-friendly interface.
Price
| Audio Synthesys | Human Studio Synthesys | Audio and Human Studio Synthesys |
|---|---|---|
| $29 / Month | #39 / Month | $59 / Month |
| Unlimited voice-overs downloads Access to 30 Real Human Voices Access to 66 Languages & 254 General Voices Fully Web-Based | Unlimited Videos Access to 73 Humatars (Extra Outfits included) Access to 66 Languages & 254 General Voices Upload Your Own Voice Full Video Customization Fully Web-Based | Unlimited Videos & Voice Overs Access to both Software All features included 20% OFF |
Cons
- It has character limitations when making a voice-over.
- It does not have a free trial version.
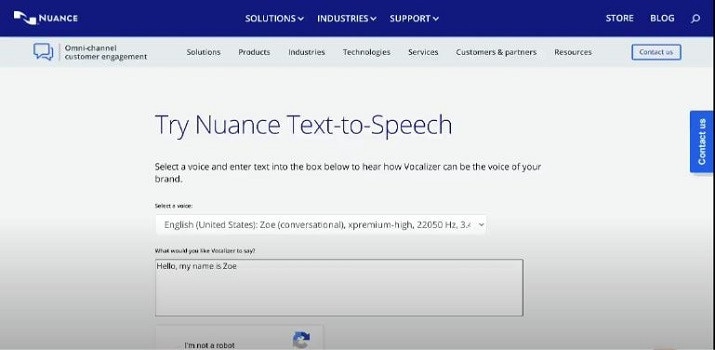
#4: Nuance Dragon
It is available in Windows only
Nuance Dragon is an artificial intelligence-powered voice recognition system. It offers both residential and commercial solutions. It spans across various data centers and delivers cloud services.
Its hosting platform is Microsoft Azure, which is HITRUST CSF-approved. All of their solutions follow industry-standard guidelines. Nuance Dragon protects data in transit and at rest with 256-bit encryption.
Features
- Nuance Dragon complies with HIPAA regulations, which are critical for public sector security and confidentiality.
- It applies to a wide range of professions.
- It offers complete protection.
Price
| Home | Professional |
|---|---|
| $200 | $500 |
| It has 99% recognition accuracy Immediate access to your dictation. One-time payment. | It has 99% recognition accuracy Share documents Sync custom words and commands Immediate access to your dictation. One-time payment. |
Cons
- It works only on Windows, and it is not available on Mac.
- It does not have a free trial version.
- It does not include Premium Consulting or Integration Services.
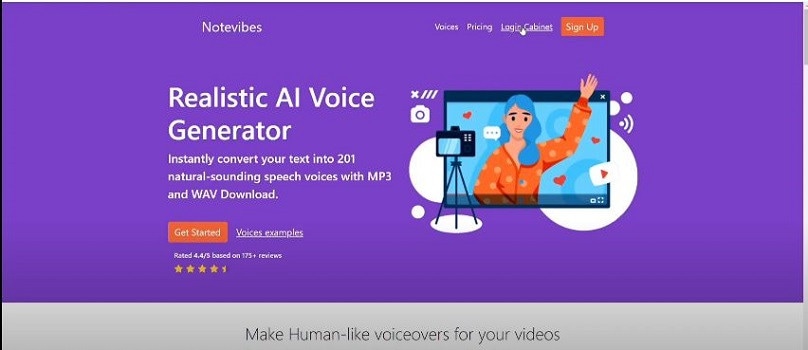
#5: Notevibes
It is available on Windows, Mac, Android, iPhone, and Online
Notevibes is a tremendous text-to-speech tool that comes in both a free and a commercial edition with many features. It offers customers over five hundred translation characters while also allowing them to modify the pronunciation.
As a result, users have access to all of their resources to learn a new language and significantly increase their reading skills. Furthermore, Notevibes features 177 distinct voices speaking in 18 different languages.
Users appreciate the natural-sounding voices that assist them in pronouncing words correctly. Users from many walks of life can profit from the tool because it has many functions.
Features
- Realistic voice generator
- Aloud Speaking
- Make an MP3 of your audio speech.
- 47 Individual Voices
- Characters: 200 – 1,000,000
Price
| Personal Pack | Commercial Pack | Corporate Pack |
|---|---|---|
| $9 / Month ($107 per year) | $90 / Month ($1080 per year) | $4,000 / Year |
| For personal use only: private listening, personal e-learning 1,200,000 characters pack per year 201 Premium Voices available 18 Languages (EN, ES, DE, FR, VT, RU, PT, IT, NL, TR, JP, KO, HI and etc) MP3 Download 1 Account License | For Commercial use: YouTube, broadcasts, TV, IVR voiceover and other businesses 12,000,000 characters pack per year Advanced voice editor new 201 Premium Voices available 18 Languages (EN, ES, DE, FR, VT, RU, PT, IT, NL, TR, JP, KO, HI and etc.) SSML tags support MP3, Wav Download Audio files history You 100% own intellectual property for all files | For Corporate Users All in Commercial and 50,000,000 characters pack per year Master account for management Team License (up to 10 users) Priority email support |
Cons
- It does not have a preview. You have to generate the voice-over to listen.
- You can’t combine a single audio file out of many audio files.
- The Voiceover & Editor Page is unique in that it has two sections: one for creating the voice-over and another for obtaining audio files. Switching between them will take some time. If you’re working on a large project, moving between bot sites will be a hassle.
- No project-based organization
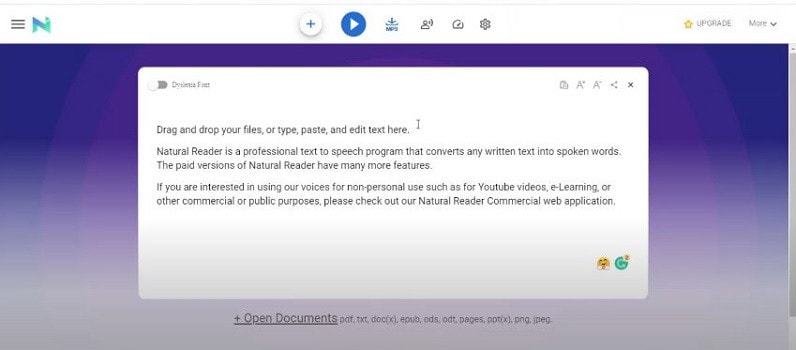
#6: Natural Reader
It is available on Windows, Mac, Android, iPhone, and Online
Natural Reader is among the few free text-to-speech programs with several exciting features. It’s pretty easy to use, and you can get started right away by loading texts into its library.
Furthermore, the tool allows users to manage several files in various formats. Lastly, the built-in OCR will enable you to submit images or text scans and have them read aloud.
Features
- Built-in OCR
- Choice of interfaces
- Built-in browser
- Dyslexic-friendly font
Price
| Free | Personal | Professional | Ultimate |
|---|---|---|---|
| $0 (Free to use) | $99.50 (One-time payment) | $129.50 (One-time payment) | $199.50 (One-time payment) |
| Unlimited use with Free Voices Miniboard to read text in other applications Pronunciation Editor Works with PDF, Docx, TXT and ePub | 2 natural voices included All features of Free Version included Convert to MP3 | 4 natural voices included All features of Personal Version included | 6 natural voices included All features of Professional Version included 5000 images/year for OCR to read from images & scanned PDFs |
Cons
- There is no way to skip or jump around any text on the page.
- You will need internet access in the free software to access the voices.
- The paid version is very expensive in comparison to others.
- Long-term use is complex.
Pro Tip:
If you just use text-to-speech software sometimes, it’s best to utilize one of the many free options available. On the other hand, paid versions are great if you want extensive functionality and don’t mind limitations on usage.
You should check for text-to-speech software with natural voices enabled in commercial applications. A top-rated system should include real-time speech capabilities and a user-friendly UI.
Text to Speech Services’ Advantages
TTS systems can help content owners such as corporations, YouTubers, institutions, media houses, mobile app developers, e-learning solution providers, and others in comparable fields in the following ways:
- Global Reach: TTS voices that sound human, are clear, and can be customized can let you communicate with people worldwide. You can even incorporate translations in multiple languages to read the text in their own language.
- Improve User Experience: Allowing speech in pre-sales and after-sales can reduce human agent burden, provide individualized services, lower operating expenses, and speed up productivity.
- Saves Money and Time: Companies can quickly and easily implement TTS systems with little maintenance.
- Improves Productivity: E-learning experts and HR departments can create learning modules for staff training using TTS. This will allow employees to learn the information while working anywhere and at any time.
Text to speech solutions can also help online students, researchers, teachers, device users, app users, website visitors, machine users, and others in the following ways:
- People with Reading Difficulties: A considerable portion of the global population suffers from learning or reading disabilities, including language-based learning disabilities. TTS solutions in your documents might assist them in better understanding the document. It can also aid persons with vision problems and literacy issues.
- Multitasking: Listening to something allows you to execute multiple physical duties at once, such as cooking, cleaning, exercising, etc. It’s a welcome break for busy professionals who can’t find time to read the stacks of books that have accumulated on their desks for years. They can just put on their headphones and listen to them while doing other things.
- Great for Kids: Instead of being glued to their computers or phones all day, your children can listen to audio files, including their books and other study materials. It will safeguard their priceless sight. It will also increase word recognition, cognitive skills, make finding and correcting problems in their writing easier.
- Journey Mate: People can listen to information while traveling by using speech to text. You may always listen to the noises and enjoy them while riding without having to strain your eyes, regardless of how rocky the road is.
Frequently Asked Questions
What is Text to Speech Software?
TTS (text-to-speech) is an assistive technology that reads text aloud. TTS systems provide computer-generated sound, and we may vary the reading speed by increasing the speed or slowing things down.
Is Text-To-Speech Technology Handy?
According to studies, text-to-speech technology helps viewers concentrate on the content rather than the process of reading, resulting in a greater understanding of the topic and more engagement.
While some argue that audiobooks, or scripts read by paid voice actors, are superior to computer-generated voices, there is compelling proof that text to speech can be a handy tool for YouTube content creators.
Is The Voice Quality Consistent Across All Text to Speech Programs?
Voice quality ultimately depends on the service. However, some use human voices, while premium solutions employ the voices of well-known narrators like David Attenborough and Morgan Freeman.
You can even mimic the sound of youngsters speaking. Many gadgets, particularly online web page scanners and even audiobooks emphasize the text they are scanning.
What Are the Benefits of Using Text to Speech Software?
You can use this type of technology in a variety of ways. Some programs read text from a digital document or an interactive online page for users. Some programs can even convert handwritten text into speech using modern technology such as Optical Character Recognition (OCR).
Text-to-speech software is compatible with various devices and applies to all kinds of individual digital devices, including laptops, PCs, tablets, and smartphones.
What Is the Process of Converting Speech in Text to Speech Software?
The majority of text-to-speech software works in the same way. Users can either upload or input the content to convert to audio. Then they choose from the different voices to evaluate which sound is best for the voice-over.
Many TTS solutions rely on OCR technology in some form. OCR allows us to obtain text from documents and photos by recognizing written and digital text. If you click an image of a street sign, the program will read the words printed on it.
Is it possible to use Text to Speech on YouTube?
Absolutely, you can get them in YouTube videos, but to prevent advertising strikes, make sure you post videos with authentic human voices somewhere between.
What Text-To-Speech Software Does YouTube Content Creators Use?
To incorporate voice-overs on their sales pitches and informative videos, most YouTubers pay for text-to-speech software like Synthesys and Speechelo.
Is It Possible to Monetize YouTube Videos Using Text to Speech?
It varies on the text to speech engine you’re using; some TTS engines support YouTube monetization while others don’t.
Speech has a significant impact on the success rate of the entire YouTube adventure, whether storytelling or a standard sales pitch. It helps to have a decent voice and speaking abilities. However, not everyone gets both simultaneously; many individuals employ voice artists to provide voice-overs.
Some freelancers charge $5-$100 for a 5-minute voice-over. However, not everyone can afford an expensive voice artist, especially for longer films or just starting. Here are other options that I discovered as the most acceptable free text to voice generators for YouTube videos.
Let’s take a deeper look at the most excellent free text to speech software for YouTube videos.
Getting Started
Text to speech is a speech synthesis software that speaks aloud digital and textual content. The software offers a wide range of applications and is utilized by everyone from professionals and students to toddlers and adults.
Viewers are emotionally attached to documents such as PDFs, books, novels, and e-learning courses when they hear narration with a human voice. Text-to-speech systems are ideal for multitasking by busy professionals.
It’s no surprise that there are numerous text-to-speech options available. Audiobooks are also becoming more popular for the same reasons.
We’ll go over the best text-to-speech tools available in this guide. We’ve gathered a detailed list of the most exemplary free and commercial text-to-speech applications to help you choose the best option for your needs:
#1: Murf
It is available on Windows, Mac, Android, iPhone, and Online
Murf is a text-based voice-over maker. You can either compose your script or submit a voice clip to convert it into hyper-realistic AI voices. Murf delivers expert voice-over artists with experienced voices. You can check multiple parameters in the voices. You can use Murf to signify a brand, a product, a company, a presentation, and many more.
Features:
- Murf allows you to create voice-overs from the text. It also allows you to transform your speech into editable text, which you can subsequently edit or convert into AI voice.
- Murf Studio provides the ability to synchronize your speech with visuals.
- Murf provides over 100 authentic voices in 19 languages.
- It also gives options for inserting pauses, altering narration tempo, and emphasizing certain points.
- It also includes features such as script checking with grammar assistance, free background music, video and music cutting, and more.
- Murf offers comprehensive communication and collaboration tools, access control, a pronunciation library, and a service level agreement (SLA) for enterprises wishing to develop voice-overs in bulk.
Price
| Free | Basic | Pro | Enterprise |
|---|---|---|---|
| $0 / Month | $13 / Month | $26 / Month | $166 / Month |
| Try all 120+ voices 10 mins of voice generation 10 mins of transcription Share link for audio/video output No downloads Single User No credit card required | Unlimited Downloads 24 hours of voice generation/year Access to 60 voices (10 languages) Commercial Usage rights Chat and Email support Single User | Unlimited Downloads 96 hours of voice generation/year 48 hours of transcription/year Access 120+ voices (20 languages) Commercial Usage rights Recorded voice editing Voice changer Up to 3 users Priority Support | 5+ Users Unlimited Voice Generation Time Unlimited Transcription time Custom Voices Single-sign on (SSO) Collaboration and Access Control Dedicated Account Representative Centralized invoicing Service Agreement Deletion recovery Unlimited Storage |
Cons
- You may experience frequent technical glitches.
#2: Speechelo
It is available on Windows, Mac, Android, iPhone, and Online
Speechelo gives a realistic voice tone and expressions. This gets people more interested in voice-overs. You can use Speechelo to create sales videos, training films, and instructive videos, among other things. It includes attributes such as breathing and pauses, vocal tones, changing speed and pitch, and compatibility for 23 languages.
Features
- The text-to-speech engine in Speechelo can add intonation to the voice.
- It contains over 30 voices that sound natural.
- It has both male and female voices.
- It works with various video editing tools, including Camatasia, Adobe, Premier, and iMovie.
- Ordinary tone, cheerful tone, and serious tone are the three tones you may use to read your text.
Price
| Premium |
|---|
| $47 (Discount price) |
| One-time payment With 60-day money-back guarantee |
Cons
- The output of Speechelo will be 48kbps. If you’re familiar with sound production, you’ll see that this is a very low output.
- It might produce inaccurate output if you input long voice-overs.
#3: Synthesys
It is available on Windows, Mac, Android, iPhone, and Online
Synthesys helps to convert text into a natural-sounding voice. With Synthesis, you can choose from various tones, accents, male and female voices, languages, and reading speeds. Moreover, It simply takes three steps to create a natural-sounding artificial speech that you may use for a variety of commercial applications.
- To begin, select the gender, style, accent, and tone you want the created voice to have.
- You can paste or type the content you want to turn into speech into Synthesys’ AI voice-producing platform.
- Lastly, click ‘create’ to start creating your artificial speech in minutes. You may adjust the reading speed and pause length from here.
Features
- Cloud-based software.
- Expert and natural-sounding voices are available in an extensive collection.
- There are over 35 female voices and 30 male voices.
- You can create and sell unlimited voices.
- Extremely user-friendly interface.
Price
| Audio Synthesys | Human Studio Synthesys | Audio and Human Studio Synthesys |
|---|---|---|
| $29 / Month | #39 / Month | $59 / Month |
| Unlimited voice-overs downloads Access to 30 Real Human Voices Access to 66 Languages & 254 General Voices Fully Web-Based | Unlimited Videos Access to 73 Humatars (Extra Outfits included) Access to 66 Languages & 254 General Voices Upload Your Own Voice Full Video Customization Fully Web-Based | Unlimited Videos & Voice Overs Access to both Software All features included 20% OFF |
Cons
- It has character limitations when making a voice-over.
- It does not have a free trial version.
#4: Nuance Dragon
It is available in Windows only
Nuance Dragon is an artificial intelligence-powered voice recognition system. It offers both residential and commercial solutions. It spans across various data centers and delivers cloud services.
Its hosting platform is Microsoft Azure, which is HITRUST CSF-approved. All of their solutions follow industry-standard guidelines. Nuance Dragon protects data in transit and at rest with 256-bit encryption.
Features
- Nuance Dragon complies with HIPAA regulations, which are critical for public sector security and confidentiality.
- It applies to a wide range of professions.
- It offers complete protection.
Price
| Home | Professional |
|---|---|
| $200 | $500 |
| It has 99% recognition accuracy Immediate access to your dictation. One-time payment. | It has 99% recognition accuracy Share documents Sync custom words and commands Immediate access to your dictation. One-time payment. |
Cons
- It works only on Windows, and it is not available on Mac.
- It does not have a free trial version.
- It does not include Premium Consulting or Integration Services.
#5: Notevibes
It is available on Windows, Mac, Android, iPhone, and Online
Notevibes is a tremendous text-to-speech tool that comes in both a free and a commercial edition with many features. It offers customers over five hundred translation characters while also allowing them to modify the pronunciation.
As a result, users have access to all of their resources to learn a new language and significantly increase their reading skills. Furthermore, Notevibes features 177 distinct voices speaking in 18 different languages.
Users appreciate the natural-sounding voices that assist them in pronouncing words correctly. Users from many walks of life can profit from the tool because it has many functions.
Features
- Realistic voice generator
- Aloud Speaking
- Make an MP3 of your audio speech.
- 47 Individual Voices
- Characters: 200 – 1,000,000
Price
| Personal Pack | Commercial Pack | Corporate Pack |
|---|---|---|
| $9 / Month ($107 per year) | $90 / Month ($1080 per year) | $4,000 / Year |
| For personal use only: private listening, personal e-learning 1,200,000 characters pack per year 201 Premium Voices available 18 Languages (EN, ES, DE, FR, VT, RU, PT, IT, NL, TR, JP, KO, HI and etc) MP3 Download 1 Account License | For Commercial use: YouTube, broadcasts, TV, IVR voiceover and other businesses 12,000,000 characters pack per year Advanced voice editor new 201 Premium Voices available 18 Languages (EN, ES, DE, FR, VT, RU, PT, IT, NL, TR, JP, KO, HI and etc.) SSML tags support MP3, Wav Download Audio files history You 100% own intellectual property for all files | For Corporate Users All in Commercial and 50,000,000 characters pack per year Master account for management Team License (up to 10 users) Priority email support |
Cons
- It does not have a preview. You have to generate the voice-over to listen.
- You can’t combine a single audio file out of many audio files.
- The Voiceover & Editor Page is unique in that it has two sections: one for creating the voice-over and another for obtaining audio files. Switching between them will take some time. If you’re working on a large project, moving between bot sites will be a hassle.
- No project-based organization
#6: Natural Reader
It is available on Windows, Mac, Android, iPhone, and Online
Natural Reader is among the few free text-to-speech programs with several exciting features. It’s pretty easy to use, and you can get started right away by loading texts into its library.
Furthermore, the tool allows users to manage several files in various formats. Lastly, the built-in OCR will enable you to submit images or text scans and have them read aloud.
Features
- Built-in OCR
- Choice of interfaces
- Built-in browser
- Dyslexic-friendly font
Price
| Free | Personal | Professional | Ultimate |
|---|---|---|---|
| $0 (Free to use) | $99.50 (One-time payment) | $129.50 (One-time payment) | $199.50 (One-time payment) |
| Unlimited use with Free Voices Miniboard to read text in other applications Pronunciation Editor Works with PDF, Docx, TXT and ePub | 2 natural voices included All features of Free Version included Convert to MP3 | 4 natural voices included All features of Personal Version included | 6 natural voices included All features of Professional Version included 5000 images/year for OCR to read from images & scanned PDFs |
Cons
- There is no way to skip or jump around any text on the page.
- You will need internet access in the free software to access the voices.
- The paid version is very expensive in comparison to others.
- Long-term use is complex.
Pro Tip:
If you just use text-to-speech software sometimes, it’s best to utilize one of the many free options available. On the other hand, paid versions are great if you want extensive functionality and don’t mind limitations on usage.
You should check for text-to-speech software with natural voices enabled in commercial applications. A top-rated system should include real-time speech capabilities and a user-friendly UI.
Text to Speech Services’ Advantages
TTS systems can help content owners such as corporations, YouTubers, institutions, media houses, mobile app developers, e-learning solution providers, and others in comparable fields in the following ways:
- Global Reach: TTS voices that sound human, are clear, and can be customized can let you communicate with people worldwide. You can even incorporate translations in multiple languages to read the text in their own language.
- Improve User Experience: Allowing speech in pre-sales and after-sales can reduce human agent burden, provide individualized services, lower operating expenses, and speed up productivity.
- Saves Money and Time: Companies can quickly and easily implement TTS systems with little maintenance.
- Improves Productivity: E-learning experts and HR departments can create learning modules for staff training using TTS. This will allow employees to learn the information while working anywhere and at any time.
Text to speech solutions can also help online students, researchers, teachers, device users, app users, website visitors, machine users, and others in the following ways:
- People with Reading Difficulties: A considerable portion of the global population suffers from learning or reading disabilities, including language-based learning disabilities. TTS solutions in your documents might assist them in better understanding the document. It can also aid persons with vision problems and literacy issues.
- Multitasking: Listening to something allows you to execute multiple physical duties at once, such as cooking, cleaning, exercising, etc. It’s a welcome break for busy professionals who can’t find time to read the stacks of books that have accumulated on their desks for years. They can just put on their headphones and listen to them while doing other things.
- Great for Kids: Instead of being glued to their computers or phones all day, your children can listen to audio files, including their books and other study materials. It will safeguard their priceless sight. It will also increase word recognition, cognitive skills, make finding and correcting problems in their writing easier.
- Journey Mate: People can listen to information while traveling by using speech to text. You may always listen to the noises and enjoy them while riding without having to strain your eyes, regardless of how rocky the road is.
Frequently Asked Questions
What is Text to Speech Software?
TTS (text-to-speech) is an assistive technology that reads text aloud. TTS systems provide computer-generated sound, and we may vary the reading speed by increasing the speed or slowing things down.
Is Text-To-Speech Technology Handy?
According to studies, text-to-speech technology helps viewers concentrate on the content rather than the process of reading, resulting in a greater understanding of the topic and more engagement.
While some argue that audiobooks, or scripts read by paid voice actors, are superior to computer-generated voices, there is compelling proof that text to speech can be a handy tool for YouTube content creators.
Is The Voice Quality Consistent Across All Text to Speech Programs?
Voice quality ultimately depends on the service. However, some use human voices, while premium solutions employ the voices of well-known narrators like David Attenborough and Morgan Freeman.
You can even mimic the sound of youngsters speaking. Many gadgets, particularly online web page scanners and even audiobooks emphasize the text they are scanning.
What Are the Benefits of Using Text to Speech Software?
You can use this type of technology in a variety of ways. Some programs read text from a digital document or an interactive online page for users. Some programs can even convert handwritten text into speech using modern technology such as Optical Character Recognition (OCR).
Text-to-speech software is compatible with various devices and applies to all kinds of individual digital devices, including laptops, PCs, tablets, and smartphones.
What Is the Process of Converting Speech in Text to Speech Software?
The majority of text-to-speech software works in the same way. Users can either upload or input the content to convert to audio. Then they choose from the different voices to evaluate which sound is best for the voice-over.
Many TTS solutions rely on OCR technology in some form. OCR allows us to obtain text from documents and photos by recognizing written and digital text. If you click an image of a street sign, the program will read the words printed on it.
Is it possible to use Text to Speech on YouTube?
Absolutely, you can get them in YouTube videos, but to prevent advertising strikes, make sure you post videos with authentic human voices somewhere between.
What Text-To-Speech Software Does YouTube Content Creators Use?
To incorporate voice-overs on their sales pitches and informative videos, most YouTubers pay for text-to-speech software like Synthesys and Speechelo.
Is It Possible to Monetize YouTube Videos Using Text to Speech?
It varies on the text to speech engine you’re using; some TTS engines support YouTube monetization while others don’t.
33 Best Video Splitter Recommended
A video splitter is necessary when you need to extract a crucial or particular portion of a video file. Many users trim or reduce video segments by deleting superfluous or undesired elements. While splitting a video into smaller clips is a challenging task in and of itself, don’t overlook the importance of keeping the quality of the video clip you plan to obtain. While there are various online video splitter software available today, most of them do not achieve what they claim. We’ve put together a compelling list of the best video splitters in this post, including full-featured software and lightweight editing solutions. Continue reading to learn more about them and choose the one that most appeals to you.
- Filmora
- Boilsoft Video Splitter
- Solveigmm Video Splitter
- BandiCut
- Free Video Cutter
- Easy Video Splitter
- Avidemux
- Ultra Video Splitter
- VideoPad Video Editor
- Windows Movie Maker
- Windows Photos
- VLC
- iMovie
- Format Factory
- 7 Best Free Video Splitter Online
- 10 Best Video Splitter for Mobile Phone
- Filmora
- AndroVid Video Editor
- Easy Video Cutter
- Video Editor
- VideoShow – Video Editor
- Trim Video
- Video Splitter
- Crop video
- Video Crop
- Video Trim & Cut
Part 1: Backup Your Original Video
Making several backups is perhaps the most critical thing you can do for your project. Whether your computer dies suddenly or your editing application crashes, you’ll have a point to fall back on if you have a backup. Making this a habit will save you a lot of time and work in the long term. How many copies of your data should you make? You should create at least three project duplicates in the best-case scenario. Also, make sure they’re preserved in various formats and places—one on an SD card, another on a hard drive, or a USB drive.
14 Best Video Splitter for Windows/Mac
1. Filmora
Wondershare Filmora Video Editor is a superb video editor for those seeking software that can split videos and has a lot of functions. It was originally only accessible for Windows, but thanks to the developers, Mac users may now use this high-quality video splitter. Using this program to split and join videos is pretty basic and straightforward. It’s an intriguing tool since it allows users to produce high-quality films using filters, effects, and other features in an easier method than employing professional editors. This program also lets you export video at a breakneck speed, up to 4k quality.
![]()
Platform: Windows/Mac
Price: Free Trial
Features
- Editing is intuitive and quick.
- Export video in 4k quality.
- There are several graphic effects and transitions.
- Footage from the internet.
- Regularly upgraded features.
Pros
- Large films can be easily cut, trimmed, and combined without compromising quality.
- On the exported video, there is no watermark.
- Both Windows and Mac computers are supported.
- Splitting a video is such a breeze.
- For novices, it has a lot of handy options that will help you create a stunning film.
Cons
- Large-scale content editing might be slow at times.
2. Boilsoft Video Splitter
Boilsoft Video Splitter can divide, edit, or trim a big AVI, MPEG, RM, ASF, WMV, 3GP, MKV, FLV, or MP4 video file without re-encoding smaller video segments. It has a built-in player that allows you to effortlessly split/cut video files according to time or selection.
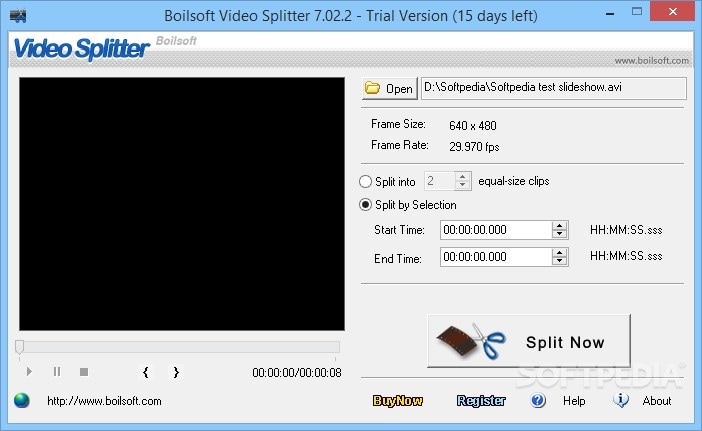
Platform: Windows/Mac
Price:$34.95 one-time payment
Features
- Split Video
- Cut video
- Built-in player
Pros
- It supports lots of video format.
- User-friendly software.
Cons
- Because you can’t adjust the program window, using the slider for selection becomes increasingly difficult as your video becomes longer.
3. Solveigmm Video Splitter
SolveigMM Video Splitter is suitable for simple editing processes such as removing an extra section from a video, removing an advertisement from a movie, muting the sound on a selected video fragment, saving only a video or audio track from a file, cutting a video into parts, saving segments into separate files, and so on. The editing procedure takes just a few seconds.
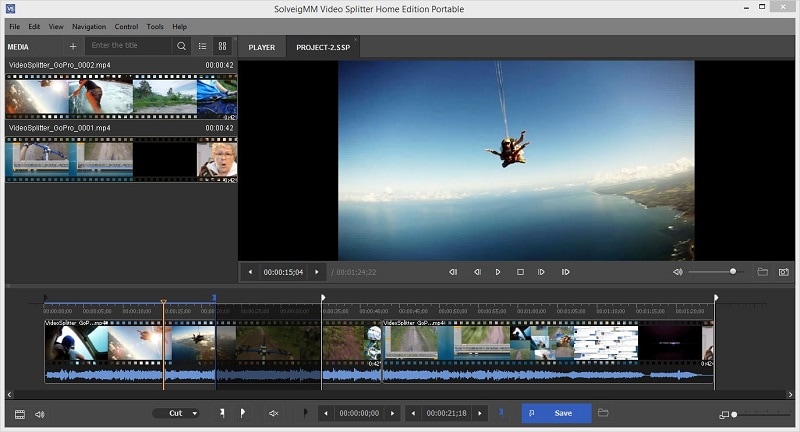
Platform: Windows/Mac
Price:$7.99 per month
Features
- Video cutter
- Video editor
- Video Joiner
Pros
- No previous training or knowledge is necessary to understand how to use the software.
- All major file formats are supported.
- The output file quality is unaffected.
Cons
- It sometimes crashes depending on the file size.
4. BandiCut
Bandicut is a video splitting and joining program for Windows systems only. It has a straightforward UI and simple settings. It may also be used as a video converter, allowing you to modify the format of the output clips. The tool is useful for both newcomers and seasoned users.
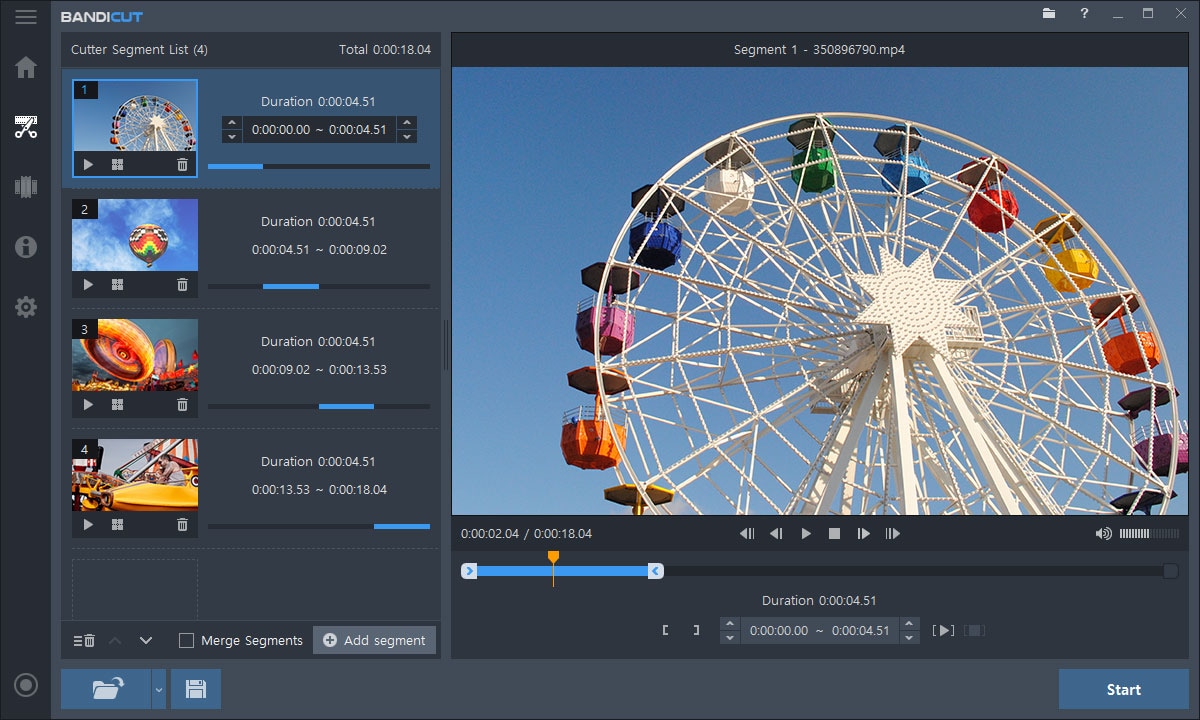
Platform: Windows
Price:$29.95 per user per month
Features
- Easy and fast video cutter
- Video splitter
Pros
- The interface is pleasing to the eye, and the functions are simple.
- High-capacity mode
Cons
- There isn’t a fully working free version available.
5. Free Video Cutter
This is a basic tool for reducing the size of large video files. It allows you to cut a clip from a movie or video in various formats and save it in four other formats. The hand-drawn interface, by the way, is incredibly charming.
Platform: Windows
**Price:**a free version and premium version ($17.99 per month)
Features
- An irregularly shaped hand-drawn art style interface.
- Videos in a variety of formats are accepted.
- The control panel is small, with just three major buttons.
Pros
- Save as new videos in a variety of formats without compromising quality.
- It may be used to trim lengthy movies, mobile videos, and camera recordings, among other things.
Cons
- For huge files, there are a lot of crashes.
- For Mac users, this tool is not accessible.
6. Easy Video Splitter
Easy Video Splitter is a simple video editing application that allows you to divide your video into many segments. It can play AVI, MPEG, WMV, and ASF files. The scroll bats may be used to cut the movie precisely where you want it to be cut or to divide the film at certain intervals.
**Platform:**Windows/Mac
**Price:**free with ads
Features
- Has a batch processor
- Multiple file support
- Easy to use
Pros
- Batch processing is supported.
Cons
- Only one frame at a time may be fine-tuned.
7. Avidemux
Avidemux is perfect if you have a video to encode or arrange for a certain speaker system. It’s also an ideal choice if you just require a basic video editor, although there are many more extensive applications available that may be better appropriate.
**Platform:**Windows/Mac
**Price:**free
Features
- This program can handle a variety of subtitle formats, including SUB and SRT.
- They also provide a variety of filtering options.
- You may export videos in various formats, including MKV, MPEG, and MP4.
Pros
- A user-friendly interface
- Excellent alternatives for encoding
- Filters for sharpening and de-noising
Cons
- There is no timeline.
- There are no innovative transitions or effects.
8. Ultra Video Splitter
Ultra Video Splitter is an excellent solution for people who just need to complete this one operation and hence do not need the usage of sophisticated video editing software. The tool enables you to choose from a variety of parameters for the final file or files, such as file size, final format, and bitrate.
**Platform:**Windows/Mac
Price:$25.00 one-time payment
Features
- Supports videos in WMV, XviD, MPEG, ASF, AVI, RM, MOV, 3GP, Divx, and MP4 format.
- Can export the final video in VCD, SVCD, DVD, AVI, DivX, MPEG, or WMV format.
Pros
- Video trimming and exporting are both quick.
- Multiple video formats are supported.
Cons
- Has just a few video editing options.
9. VideoPad Video Editor
On Mac and Windows, the VideoPad video editor allows you to edit clips and produce professional-quality films. Its divide and merge functions are also straightforward to utilize. VideoPad editing software can be used to create visually appealing videos. As a result, the video splitter software for Mac can rapidly and efficiently manipulate video streams.
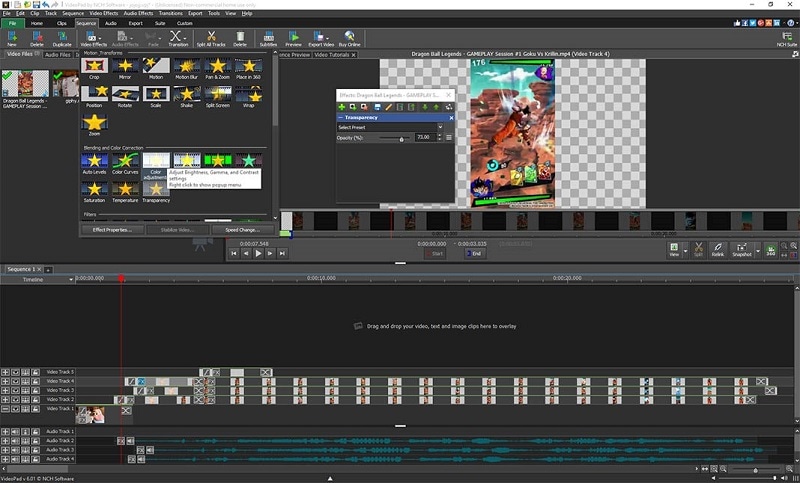
**Platform:**Windows/Mac
Price:$60.00 one-time payment
Features
- It supports a variety of file formats, offering users additional choices for how to utilize the tool with different file kinds.
Pros
- The cost of a professional business video is surprisingly low.
- Importing video is as simple as dragging and dropping.
Cons
- The free edition offers a restricted number of functions.
10. Windows Movie Maker
This video editing software comes with Windows OS and is focused on simplicity: There’s no easier method to split videos and save into lossless codecs with titles, transitions, background music, and effects than this. Earlier versions of the application were so basic that they couldn’t accomplish what most people required. Still, over time, features like voiceover recording and even anti-shake have crept into what is today a highly useful free video splitter.
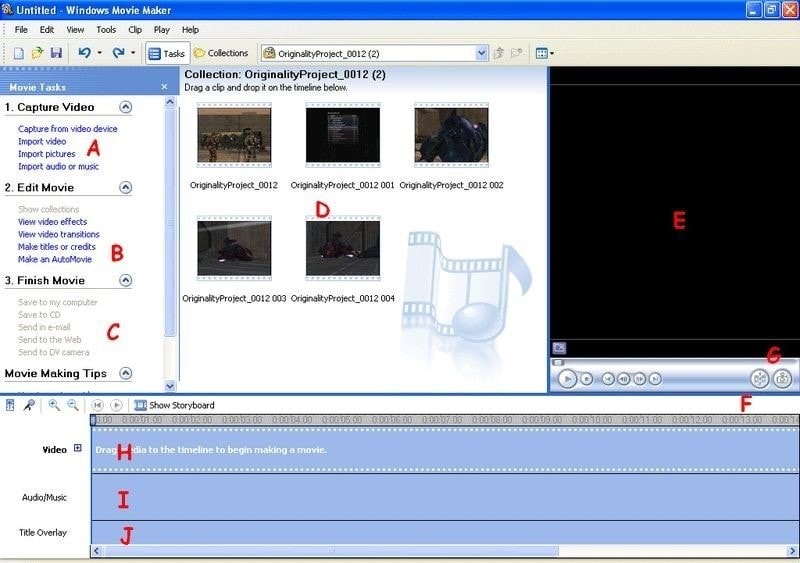
**Platform:**Windows
**Price:**free
Features
- Cool transitions
- Effects on video
- Voiceovers are some of the audio features
Pros
- Effects are automatically previewed.
- Audio features such as voiceovers and other audio enhancements.
- Excellent choices for sharing.
- Simple to use
- Stabilization.
Cons
- There are no modifications to the contrast or saturation.
- The effects aren’t flexible.
11. Windows Photos
Many users will never require more than Windows 10’s built-in picture and video editor . It is an automatic video splitter with sophisticated effects like 3D overlays and animated titles are among the extras.
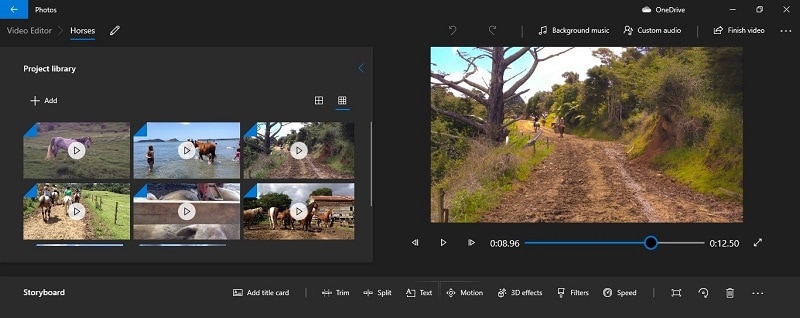
**Platform:**Windows
**Price:**free
Features
- Face recognition
- Video cutter
- 3D overlays
Pros
- A simple interface.
- Detecting faces and objects.
- Album creation is done automatically.
- It works with OneDrive.
- Soundtracks, text, and transitions are all used in video editing.
Cons
- There isn’t a before-and-after comparison.
- Panorama stitching and selective focus are not supported.
- There is no geometry correction or chromatic aberration correction.
12. VLC
VLC Media Player , for good reasons, is a hugely popular video splitter. It is completely free, supports almost everything without the need to download additional codecs, supports streaming, can enhance video and audio playback for your chosen device, and can be extended almost infinitely with plugins downloadable from the internet.
**Platform:**Windows/Mac
**Price:**free
Features
- Allows streaming of MPEG and DivX files
- Excellent video and audio playback modifying tools
Pros
- It can play all kinds of music and video formats, even compressed ones.
Cons
- It is GPU-dependent and may crash at random moments.
13. iMovie
If you’re using a Mac,iMovie video editing program can help you split videos. Mac users will find this to be one of the finest video splitters available. It contains a wide range of capabilities that may improve the quality of your video in a variety of ways. The video may be trimmed and enhanced with many features, such as text, special effects, and audio. Video quality may be improved with this software’s special effects and video upgrades. In addition, the interface is so user-friendly that even novices may generate stunning results. On the other hand, iMovie is capable of storing 4K films.
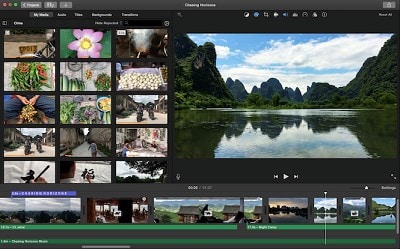
**Platform:**Mac
**Price:**free
Features
- An easy-to-use video splitter that is already built-in
- It’s simple to use
Pros
- An easy-to-use video splitter that is already built-in
- It’s simple to use
Cons
- Uploading and exporting videos takes a long time.
14. Format Factory
Multifunctional document and multimedia processing software -Format Factory - is only available for Windows. It’s meticulously designed to keep you from getting lost in the weeds when working on any project. It is designed to be a stand-alone file management application, and judging by the wealth of options available, it has done an excellent job.

**Platform:**Windows
**Price:**free
Features
- Video joining and muxing are available.
- It has a screen recorder built right in.
- A built-in video player and downloader are included.
- Allows for hardware acceleration.
- Disk ripping options are provided.
- Processing may be done in a batch.
Pros
- Removes watermarks and logos.
- File formats supported include video, audio, images, and documents.
Cons
- Unnecessary software is installed when installing the program.
7 Best Free Video Splitter Online
2. VEED.IO
Veed.io is a free online video editing tool that allows anybody to make powerful movies and expand their audiences. It has several useful features, such as cutting and filtering films based on their appearance. Users may cut, add text, and draw on the videos. Veed may also be used to generate videos on social media channels.

**Price:**free
Features
- Video splitter and joiner
Pros
- Simple and quick.
- A preview of the cutting result is available.
Cons
- The maximum file size is 50 MB.
3. Flixier
Flixier is a web-based video editor that offers 1-minute exports to any device, easy collaboration, and lots of cloud storage. Flixier enables customers to export whatever video they want, independent of their technology. It keeps all stakeholders in the loop by allowing each team member and contributor to remain in sync across all platforms. Teams may interact in real time without fear of losing track of the project. Cloud storage, version history, feedback comments, sophisticated exports, and email alerts are all available. The tool supports Windows, Mac, Linux, and Chromebooks.
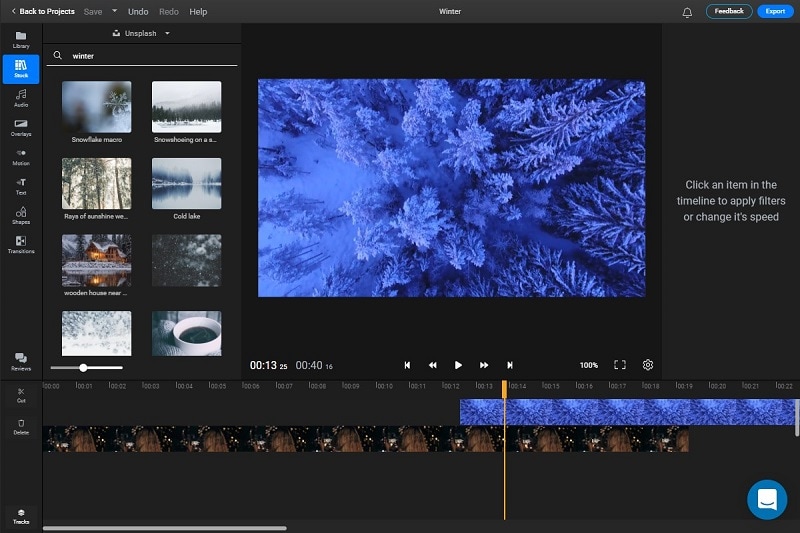
**Price:**free
Features
- Video splitter and joiner
Pros
- iPhone version is available.
- Automatic sound amplification.
Cons
- May seem too overloaded with functions.
4. Split Video
Split Video program may also be used to edit and split huge videos into smaller segments. It’s quite simple to work with. All you have to do now is choose the video to divide. Tell the app how you’d want the video to be divided. Choose how many parts you want in your video. You may watch the app-split clips before sharing them.
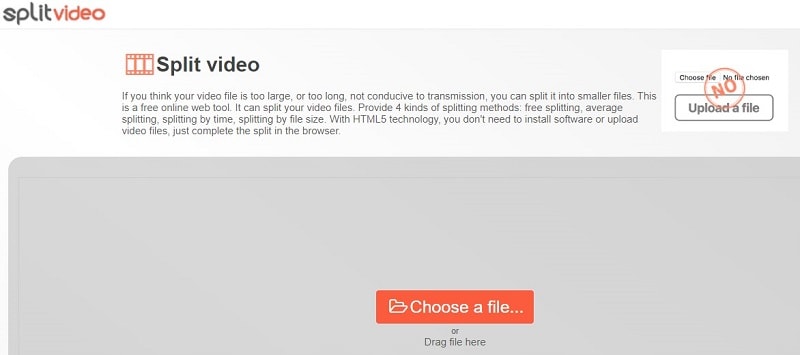
**Price:**free
Features
- Video splitter and joiner
Pros
- Interface that is easy to use.
Cons
- The maximum file size is 200 MB.
5. Kapwing
This application primarily advertises itself as a video trimmer. It lets you edit films by removing unwanted bits and trimming them to the appropriate length. It also has some basic settings, such as utilizing it as a free online MP4 splitter. The user interface is simple, and uploading a movie takes just a few moments. The primary drawback is that your film may only be 300 MB in size and must be under 30 minutes in length.
**Price:**free
Features
- Video splitter and joiner
Pros
- Interface that is simple to use.
Cons
- A little watermark appears in the corner of your video with the free version.
- Only supports films up to 300 MB in size and up to half an hour in length.
6. Typito
Typito is a video collaboration tool that allows you and your team to work together to make better films for your business. Typito allows you to make and utilize professionally created graphic overlays for free, as well as generate full-length HR movies in both square and portrait formats. It enables you to produce movies consistent with your brand, allowing you to change and customize elements like font, color, and logo with a few mouse clicks. You may save time for your organization by producing videos quicker and working with your team to publish professional-looking films while previewing them on the move. Inviting team members to the project and assigning responsibilities for editing and reviewing videos are just a few collaboration tools.
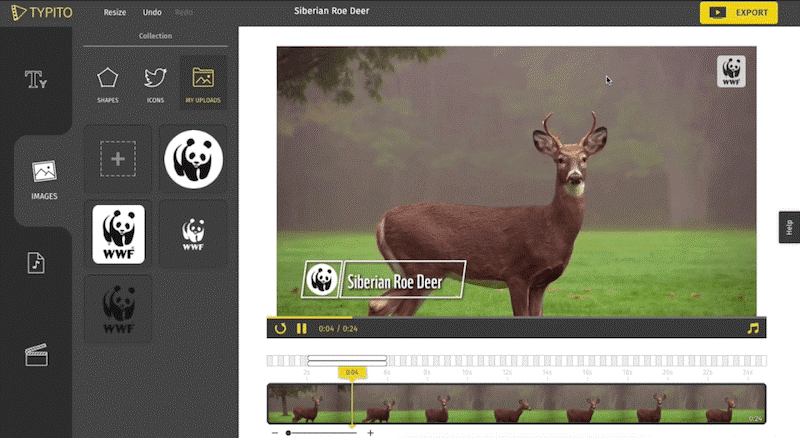
**Price:**free
Features
- Video splitter and joiner
Pros
- Simple features to use
Cons
- Few transition templates.
7. Clideo
Clideo is a one-of-a-kind platform that allows you to easily produce and modify any video, GIFS, and picture files in one spot. Merging, compressing, resizing, slideshow, cropping, rotation, and other video editing tools are included in the program. Users may add music or text to videos to help them stand out and draw in the right audience. The video editing platform supports various video formats such as MP4, AVI, MPG, VOB, WMV, MOV, and others. There is no need to download or install any applications since everything may be done entirely online. The premium security encryption that comes with it ensures that all video files are always well-protected.
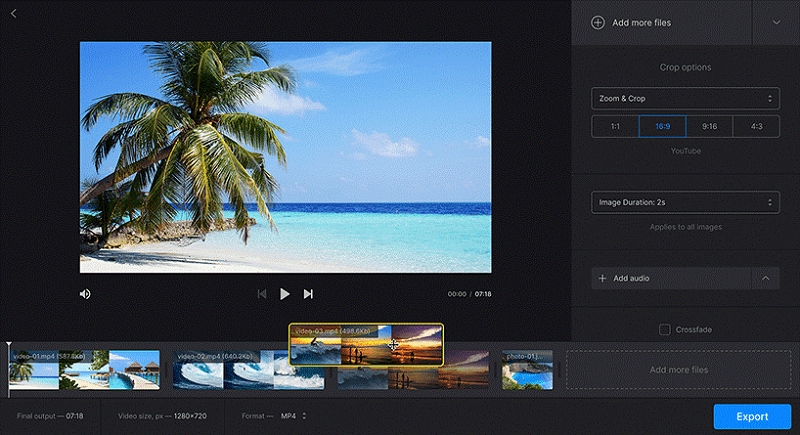
**Price:**free
Features
- Video splitter and joiner
Pros
- Much easier to use than other video editing software.
- Projects are stored on the cloud, so they don’t take up any computer resources.
- There is no need to download any program.
Cons
- The feature set is limited in comparison to other video editing suites.
- Visual artistry is required.
- Some undertakings need a significant amount of time to complete.
10 Best Video Splitter for Mobile Phone
1. Filmora
A good video editor is required to split a video qualitatively.Filmora Video Editor & Maker might be the answer. It works with high-definition videos. It comes with all of the necessary editing tools. As a result, you will not be sorry for installing this software. Not only will you be able to edit and divide films effortlessly, but you’ll also be able to add fun filters.
The sticker library in Filmora Video Editor & Maker is extensive. The number is in the thousands. You’ll be able to apply both realistic and humorous animated stickers. Use video transitions such as Flash, Page Cut, Cross Zoom, Blurry Roll, and Cube. You have complete control over the speed of your edited video.
**Price:**free
Features
- Video splitter and joiner
- Video editor
Pros
- Files may be readily exported and imported.
Cons
- Compatibility of exported videos is limited.
2. AndroVid Video Editor
AndroVid is a video-splitting program with all the tools you’ll ever need. This program is jam-packed with editing tools, allowing you to create a polished video quickly. The program is also quite user-friendly, so even if this is your first time splitting a video, you will be able to handle it.
**Platform:**Android
**Price:**free
Features
- Video splitter and joiner
- Video editor
Pros
- Simple video cutting tool; can extract single-frame pictures from videos.
Cons
- There are no sophisticated editing choices, and the audio options are quite restricted.
- There is no tool for full-screen graphics, and the user interface is a little complicated.
- The ad-free version is nearly as expensive as KineMaster Pro, which is more sophisticated.
3. Easy Video Cutter
Becausethis program is only devoted to video editing, it can handle a wide range of tasks. The program, for example, may clip videos, combine them, rotate them, and so on. You may also adjust the pace of the videos as needed. It should be noted that trimming the video in this program is quite simple — just pick the range with the slider instrument, and that’s it. Because this program is only devoted to video editing, it can handle a wide range of tasks. The program, for example, may clip videos, combine them, rotate them, and so on. You may also adjust the pace of the videos as needed. It should be noted that trimming the video in this program is quite simple — just pick the range with the slider instrument and that’s it.

**Platform:**Android
**Price:**free
Features
- Video splitter and joiner
- Video editor
Pros
- It’s quite simple to use.
- It’s ideal for simple video cutting tasks.
Cons
- There are no additional editing options available.
4. Video Editor
Video Editor is a fantastic app for Android users who want to edit and enhance their videos. It can break a video into segments, combine several films, crop videos, and adjust the video’s size. You may also add audio to the video of your choosing.
**Platform:**Android
**Price:**free
Features
- Video splitter and joiner
- Video editor
Pros
- You may rearrange your clips in any order you choose.
- Many older file types are supported by the program.
Cons
- The video scroll bar might be a little tricky to use.
- It’s quite basic.
5. VideoShow – Video Editor
On the Google Play market,VideoShow is one of the most popular video editing applications. There are several themes, filters, music, and audio to choose from while creating great videos. It’s a fantastic video trimming software.
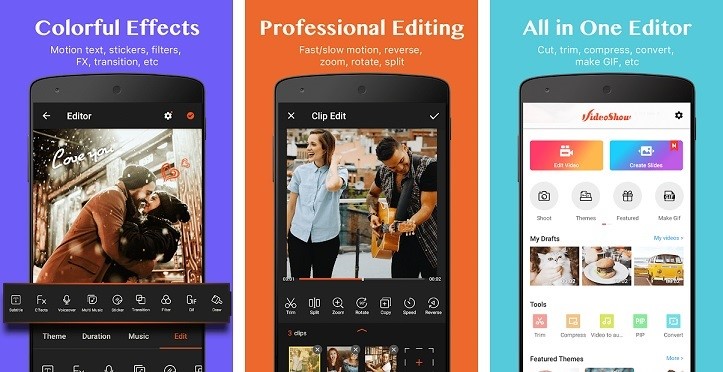
**Platform:**Android/iPhone
**Price:**free
Features
- Video splitter and joiner
- Video editor
Pros
- It has the ability to both connect and cut clips.
- It’ll run on almost any android phone.
Cons
- Video Scissors has taken the place of the iPhone version.
- Cutting is fast, but re-encoding might take a long time.
6. Trim Video
Trim Video is the greatest app for iPhone video editing and cutting of huge videos. From the huge file, you may easily crop a video clip. Although the program is highly useful and entertaining for video makers, it is not free and costs $0.99.
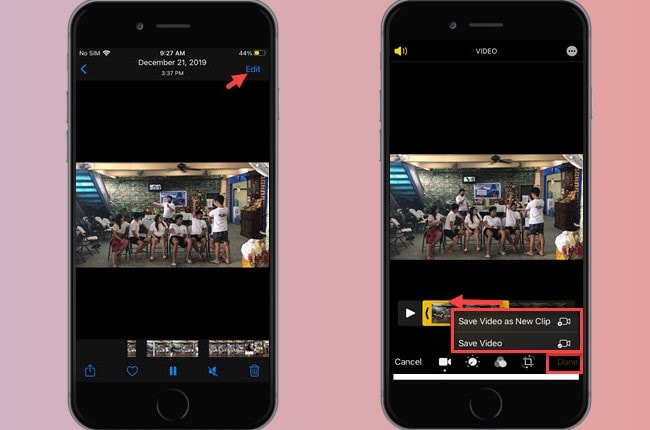
**Platform:**iPhone
Price:$0.99 per month
Features
- Video splitter
Pros
- All major video and audio formats are supported.
- When you’re finished, there’s no need to re-render the video.
- There are no watermarks.
Cons
- This software does not include video joining; it must be downloaded separately.
- This app’s main purpose is to cut.
7. Video Splitter
Video Splitter is an iPhone software that allows you to edit and divide videos into segments. It’s a free program that combines all of your editing tools into one application. The tool successfully splits a huge video into little chunks, which can be quickly texted or uploaded to social media.
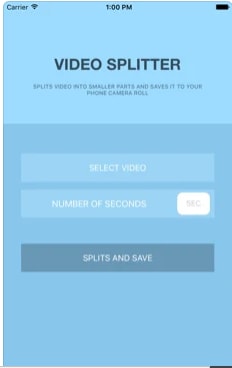
**Platform:**iPhone
**Price:**free
Features
- Video splitter and joiner
- Video editor
Pros
- A broad number of formats, including audio, are supported.
- It’s a breeze to use.
Cons
- There are no choices for video converting.
- It’s been a long time since it’s been updated.
8. Crop video
Crop Video is another handy iPhone app if you wish to cut your movie to a lesser size. It is one of the most popular tools for cutting videos and altering them for a better impact. It contains several features that boost the app’s versatility. It’ll set you back $2.99.
**Platform:**iPhone
Price:$2.99 per month
Features
- Video splitter and joiner
- Video editor
Pros
- The video cutter is helpful for novices.
- It works with every iPhone version.
Cons
- The free version has a lot of limitations.
- The videos of free users are watermarked.
9. Video Crop
Video Crop is a free iPhone software that allows you to crop videos. There are many more options in the software that may be used to modify and improve a video. This program has a lot of flexibility when it comes to video editing and other video settings. This program may also be used to split videos.
**Platform:**iPhone
**Price:**free
Features
- Video splitter and joiner
- Video editor
Pros
- Splitting and joining MP4 files is simple and effective.
Cons
- It’s only compatible with MP4 files.
- The UI is really sluggish.
10. Video Trim & Cut
Video Trim & Cut is an iPhone software that allows you to divide or trim videos. Adding effects, cropping, altering color, and changing themes are just a few things you can do with the app.
**Platform:**iPhone
**Price:**free
Features
- Video splitter and joiner
- Video editor
Pros
- Excellent templates.
- It has the appearance and functionality of a more costly app.
Cons
- It’s only available on iPhone.
- It might take a long time for a video to render.
Part 5: How to Split Video with Filmora
Step1Import your videos to Filmora Video Cutter
Launch the video cutter once it has been installed and click New Project to access the video editing interface. Now you must import the video, which must be divided into numerous portions.
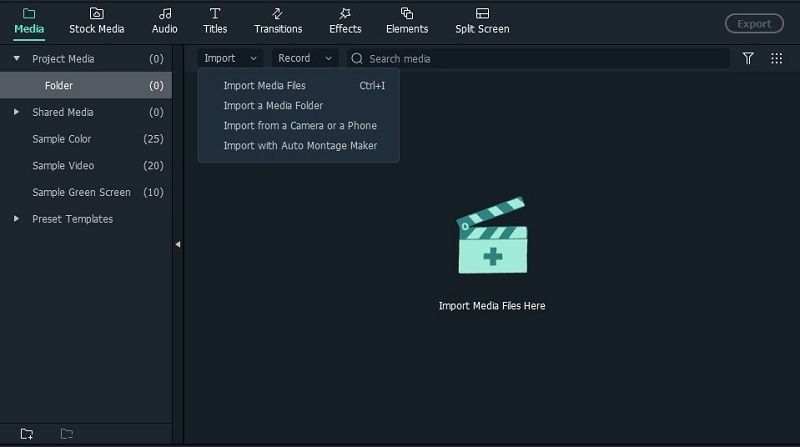
Upload files
You can either drag and drop files to the media library before adding them to the timeline for editing, or you can click “Import” on the main interface and choose files from your computer.
VOB, 3GP, 3G2, MP4, FLV, AVI, MOV, F4V, M4V, TRP, M2TS, MTS, TP, DAT, WMV, MPG, MPEG, TS, MKV, ASF, DV, EVO, MOD, NSV, and TOD files are all supported by Filmora video cutter.
If your video contains a lot of distinct sequences, Filmora can help you discover the clip you want to trim. The “Scene Detection” tool will assist you in rapidly locating the part you wish to clip. To open the Scene Detection window, choose the video in the media library (not the timeline), right-click it, and select “Scene Detection.”

Detect video
When you click Detect, Filmora will automatically split your films into multiple segments depending on scene changes.
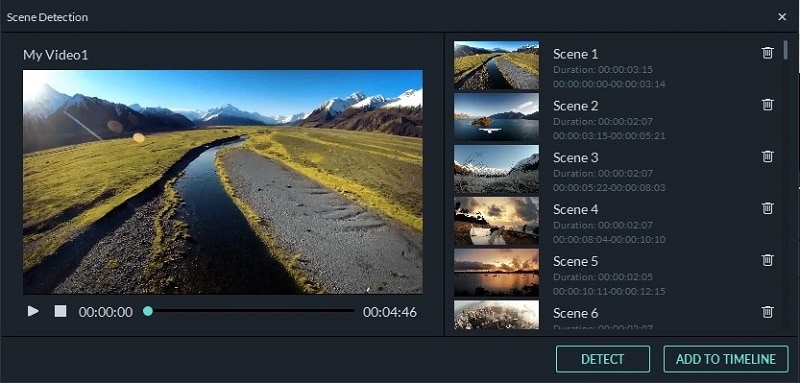
Scenes detected automatically
By clicking the Delete symbol next to the clip, you may delete the undesired sequences and quickly get to the section you want. When you click the Add to Timeline button, all of the segmented video sections will be instantly imported into the timeline, which you can then modify.
Step2Manually trim/split/cut/delete videos
To trim video files, drag clips from the media library to the video track on the timeline and follow these steps. You may use the trim option to chop off the beginning or conclusion of a video swiftly.
Trim video using filmora
- i.Zoom in on the frames you wish to remove from the timeline. Drag the trim symbol to the right to remove the video’s beginning segments from the timeline or to the left to remove the video’s undesired ending segments. You may use the trim tool to cut the beginning and end parts of a sentence with a single drag.
- ii.You may edit a movie into portions, eliminate unnecessary aspects, and combine them into a new film, in addition to chopping off segments at the beginning or conclusion.
- iii.Move the play head to the beginning of the video part you want to cut, then click the Split icon (scissor icon) on the toolbar or the Split button on the play head to split the video. You will get the starting frame, then move the play head to the ending frame and click the Split button again to get the ending part.
- iv.To cut a video into many sections, repeat the procedure. You will get multiple clipped portions, which you may either remove or re-order and alter further.
- v.You may edit out an undesirable cut video by hitting the Delete symbol on the toolbar.
Add trim start and end
Step3Export your video
Click the Export button on the screen after you’ve completed cutting and basic editing. By choosing “Format” and specifying the essential options such as frame rate and resolution, you may save the video in different formats on your local computer.
If you wish to see your video production on your iPod, iPhone, or iPad, go to “Device” and choose your device’s thumbnail. You may also instantly post your films on YouTube or Vimeo, or burn them to DVDs for long-term storage.
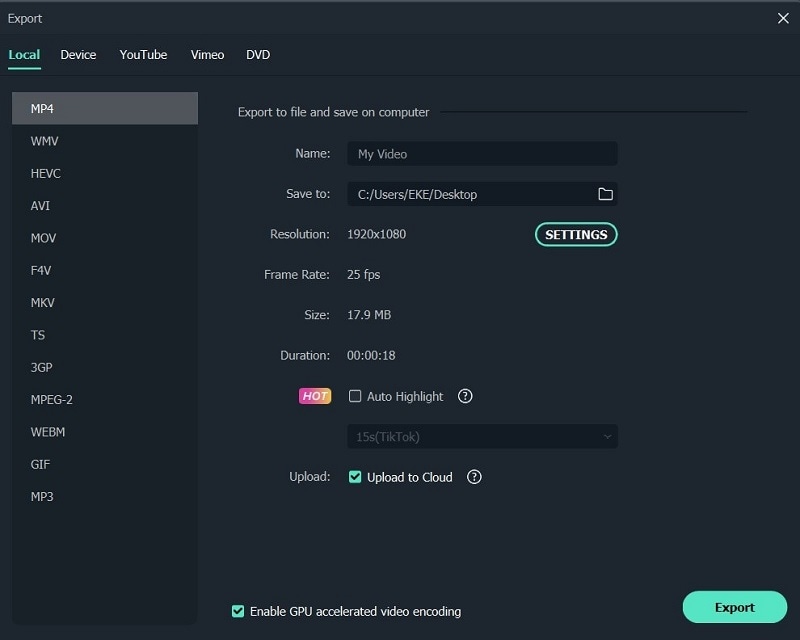
Export video after splitting
Bottom Line
Video splitting can be a daunting task when you don’t have the right tools to help you. If you are a Windows or a Mac user then Wondershare Filmora will help you split videos in just few clicks. The software is completely free with an option to go pro for a cheaper price compared to other premium apps. If you prefer splitting your video online then still Filmora online editor will help you in this. Moreover, some good news for android and iPhone users as Filmora comes with all features to split and join videos. With all these tools you can take your video creation process to the next level.
- Filmora
- AndroVid Video Editor
- Easy Video Cutter
- Video Editor
- VideoShow – Video Editor
- Trim Video
- Video Splitter
- Crop video
- Video Crop
- Video Trim & Cut
Part 1: Backup Your Original Video
Making several backups is perhaps the most critical thing you can do for your project. Whether your computer dies suddenly or your editing application crashes, you’ll have a point to fall back on if you have a backup. Making this a habit will save you a lot of time and work in the long term. How many copies of your data should you make? You should create at least three project duplicates in the best-case scenario. Also, make sure they’re preserved in various formats and places—one on an SD card, another on a hard drive, or a USB drive.
14 Best Video Splitter for Windows/Mac
1. Filmora
Wondershare Filmora Video Editor is a superb video editor for those seeking software that can split videos and has a lot of functions. It was originally only accessible for Windows, but thanks to the developers, Mac users may now use this high-quality video splitter. Using this program to split and join videos is pretty basic and straightforward. It’s an intriguing tool since it allows users to produce high-quality films using filters, effects, and other features in an easier method than employing professional editors. This program also lets you export video at a breakneck speed, up to 4k quality.
![]()
Platform: Windows/Mac
Price: Free Trial
Features
- Editing is intuitive and quick.
- Export video in 4k quality.
- There are several graphic effects and transitions.
- Footage from the internet.
- Regularly upgraded features.
Pros
- Large films can be easily cut, trimmed, and combined without compromising quality.
- On the exported video, there is no watermark.
- Both Windows and Mac computers are supported.
- Splitting a video is such a breeze.
- For novices, it has a lot of handy options that will help you create a stunning film.
Cons
- Large-scale content editing might be slow at times.
2. Boilsoft Video Splitter
Boilsoft Video Splitter can divide, edit, or trim a big AVI, MPEG, RM, ASF, WMV, 3GP, MKV, FLV, or MP4 video file without re-encoding smaller video segments. It has a built-in player that allows you to effortlessly split/cut video files according to time or selection.
Platform: Windows/Mac
Price:$34.95 one-time payment
Features
- Split Video
- Cut video
- Built-in player
Pros
- It supports lots of video format.
- User-friendly software.
Cons
- Because you can’t adjust the program window, using the slider for selection becomes increasingly difficult as your video becomes longer.
3. Solveigmm Video Splitter
SolveigMM Video Splitter is suitable for simple editing processes such as removing an extra section from a video, removing an advertisement from a movie, muting the sound on a selected video fragment, saving only a video or audio track from a file, cutting a video into parts, saving segments into separate files, and so on. The editing procedure takes just a few seconds.
Platform: Windows/Mac
Price:$7.99 per month
Features
- Video cutter
- Video editor
- Video Joiner
Pros
- No previous training or knowledge is necessary to understand how to use the software.
- All major file formats are supported.
- The output file quality is unaffected.
Cons
- It sometimes crashes depending on the file size.
4. BandiCut
Bandicut is a video splitting and joining program for Windows systems only. It has a straightforward UI and simple settings. It may also be used as a video converter, allowing you to modify the format of the output clips. The tool is useful for both newcomers and seasoned users.
Platform: Windows
Price:$29.95 per user per month
Features
- Easy and fast video cutter
- Video splitter
Pros
- The interface is pleasing to the eye, and the functions are simple.
- High-capacity mode
Cons
- There isn’t a fully working free version available.
5. Free Video Cutter
This is a basic tool for reducing the size of large video files. It allows you to cut a clip from a movie or video in various formats and save it in four other formats. The hand-drawn interface, by the way, is incredibly charming.
Platform: Windows
**Price:**a free version and premium version ($17.99 per month)
Features
- An irregularly shaped hand-drawn art style interface.
- Videos in a variety of formats are accepted.
- The control panel is small, with just three major buttons.
Pros
- Save as new videos in a variety of formats without compromising quality.
- It may be used to trim lengthy movies, mobile videos, and camera recordings, among other things.
Cons
- For huge files, there are a lot of crashes.
- For Mac users, this tool is not accessible.
6. Easy Video Splitter
Easy Video Splitter is a simple video editing application that allows you to divide your video into many segments. It can play AVI, MPEG, WMV, and ASF files. The scroll bats may be used to cut the movie precisely where you want it to be cut or to divide the film at certain intervals.
**Platform:**Windows/Mac
**Price:**free with ads
Features
- Has a batch processor
- Multiple file support
- Easy to use
Pros
- Batch processing is supported.
Cons
- Only one frame at a time may be fine-tuned.
7. Avidemux
Avidemux is perfect if you have a video to encode or arrange for a certain speaker system. It’s also an ideal choice if you just require a basic video editor, although there are many more extensive applications available that may be better appropriate.
**Platform:**Windows/Mac
**Price:**free
Features
- This program can handle a variety of subtitle formats, including SUB and SRT.
- They also provide a variety of filtering options.
- You may export videos in various formats, including MKV, MPEG, and MP4.
Pros
- A user-friendly interface
- Excellent alternatives for encoding
- Filters for sharpening and de-noising
Cons
- There is no timeline.
- There are no innovative transitions or effects.
8. Ultra Video Splitter
Ultra Video Splitter is an excellent solution for people who just need to complete this one operation and hence do not need the usage of sophisticated video editing software. The tool enables you to choose from a variety of parameters for the final file or files, such as file size, final format, and bitrate.
**Platform:**Windows/Mac
Price:$25.00 one-time payment
Features
- Supports videos in WMV, XviD, MPEG, ASF, AVI, RM, MOV, 3GP, Divx, and MP4 format.
- Can export the final video in VCD, SVCD, DVD, AVI, DivX, MPEG, or WMV format.
Pros
- Video trimming and exporting are both quick.
- Multiple video formats are supported.
Cons
- Has just a few video editing options.
9. VideoPad Video Editor
On Mac and Windows, the VideoPad video editor allows you to edit clips and produce professional-quality films. Its divide and merge functions are also straightforward to utilize. VideoPad editing software can be used to create visually appealing videos. As a result, the video splitter software for Mac can rapidly and efficiently manipulate video streams.
**Platform:**Windows/Mac
Price:$60.00 one-time payment
Features
- It supports a variety of file formats, offering users additional choices for how to utilize the tool with different file kinds.
Pros
- The cost of a professional business video is surprisingly low.
- Importing video is as simple as dragging and dropping.
Cons
- The free edition offers a restricted number of functions.
10. Windows Movie Maker
This video editing software comes with Windows OS and is focused on simplicity: There’s no easier method to split videos and save into lossless codecs with titles, transitions, background music, and effects than this. Earlier versions of the application were so basic that they couldn’t accomplish what most people required. Still, over time, features like voiceover recording and even anti-shake have crept into what is today a highly useful free video splitter.
**Platform:**Windows
**Price:**free
Features
- Cool transitions
- Effects on video
- Voiceovers are some of the audio features
Pros
- Effects are automatically previewed.
- Audio features such as voiceovers and other audio enhancements.
- Excellent choices for sharing.
- Simple to use
- Stabilization.
Cons
- There are no modifications to the contrast or saturation.
- The effects aren’t flexible.
11. Windows Photos
Many users will never require more than Windows 10’s built-in picture and video editor . It is an automatic video splitter with sophisticated effects like 3D overlays and animated titles are among the extras.
**Platform:**Windows
**Price:**free
Features
- Face recognition
- Video cutter
- 3D overlays
Pros
- A simple interface.
- Detecting faces and objects.
- Album creation is done automatically.
- It works with OneDrive.
- Soundtracks, text, and transitions are all used in video editing.
Cons
- There isn’t a before-and-after comparison.
- Panorama stitching and selective focus are not supported.
- There is no geometry correction or chromatic aberration correction.
12. VLC
VLC Media Player , for good reasons, is a hugely popular video splitter. It is completely free, supports almost everything without the need to download additional codecs, supports streaming, can enhance video and audio playback for your chosen device, and can be extended almost infinitely with plugins downloadable from the internet.
**Platform:**Windows/Mac
**Price:**free
Features
- Allows streaming of MPEG and DivX files
- Excellent video and audio playback modifying tools
Pros
- It can play all kinds of music and video formats, even compressed ones.
Cons
- It is GPU-dependent and may crash at random moments.
13. iMovie
If you’re using a Mac,iMovie video editing program can help you split videos. Mac users will find this to be one of the finest video splitters available. It contains a wide range of capabilities that may improve the quality of your video in a variety of ways. The video may be trimmed and enhanced with many features, such as text, special effects, and audio. Video quality may be improved with this software’s special effects and video upgrades. In addition, the interface is so user-friendly that even novices may generate stunning results. On the other hand, iMovie is capable of storing 4K films.
**Platform:**Mac
**Price:**free
Features
- An easy-to-use video splitter that is already built-in
- It’s simple to use
Pros
- An easy-to-use video splitter that is already built-in
- It’s simple to use
Cons
- Uploading and exporting videos takes a long time.
14. Format Factory
Multifunctional document and multimedia processing software -Format Factory - is only available for Windows. It’s meticulously designed to keep you from getting lost in the weeds when working on any project. It is designed to be a stand-alone file management application, and judging by the wealth of options available, it has done an excellent job.
**Platform:**Windows
**Price:**free
Features
- Video joining and muxing are available.
- It has a screen recorder built right in.
- A built-in video player and downloader are included.
- Allows for hardware acceleration.
- Disk ripping options are provided.
- Processing may be done in a batch.
Pros
- Removes watermarks and logos.
- File formats supported include video, audio, images, and documents.
Cons
- Unnecessary software is installed when installing the program.
7 Best Free Video Splitter Online
2. VEED.IO
Veed.io is a free online video editing tool that allows anybody to make powerful movies and expand their audiences. It has several useful features, such as cutting and filtering films based on their appearance. Users may cut, add text, and draw on the videos. Veed may also be used to generate videos on social media channels.
**Price:**free
Features
- Video splitter and joiner
Pros
- Simple and quick.
- A preview of the cutting result is available.
Cons
- The maximum file size is 50 MB.
3. Flixier
Flixier is a web-based video editor that offers 1-minute exports to any device, easy collaboration, and lots of cloud storage. Flixier enables customers to export whatever video they want, independent of their technology. It keeps all stakeholders in the loop by allowing each team member and contributor to remain in sync across all platforms. Teams may interact in real time without fear of losing track of the project. Cloud storage, version history, feedback comments, sophisticated exports, and email alerts are all available. The tool supports Windows, Mac, Linux, and Chromebooks.
**Price:**free
Features
- Video splitter and joiner
Pros
- iPhone version is available.
- Automatic sound amplification.
Cons
- May seem too overloaded with functions.
4. Split Video
Split Video program may also be used to edit and split huge videos into smaller segments. It’s quite simple to work with. All you have to do now is choose the video to divide. Tell the app how you’d want the video to be divided. Choose how many parts you want in your video. You may watch the app-split clips before sharing them.
**Price:**free
Features
- Video splitter and joiner
Pros
- Interface that is easy to use.
Cons
- The maximum file size is 200 MB.
5. Kapwing
This application primarily advertises itself as a video trimmer. It lets you edit films by removing unwanted bits and trimming them to the appropriate length. It also has some basic settings, such as utilizing it as a free online MP4 splitter. The user interface is simple, and uploading a movie takes just a few moments. The primary drawback is that your film may only be 300 MB in size and must be under 30 minutes in length.
**Price:**free
Features
- Video splitter and joiner
Pros
- Interface that is simple to use.
Cons
- A little watermark appears in the corner of your video with the free version.
- Only supports films up to 300 MB in size and up to half an hour in length.
6. Typito
Typito is a video collaboration tool that allows you and your team to work together to make better films for your business. Typito allows you to make and utilize professionally created graphic overlays for free, as well as generate full-length HR movies in both square and portrait formats. It enables you to produce movies consistent with your brand, allowing you to change and customize elements like font, color, and logo with a few mouse clicks. You may save time for your organization by producing videos quicker and working with your team to publish professional-looking films while previewing them on the move. Inviting team members to the project and assigning responsibilities for editing and reviewing videos are just a few collaboration tools.
**Price:**free
Features
- Video splitter and joiner
Pros
- Simple features to use
Cons
- Few transition templates.
7. Clideo
Clideo is a one-of-a-kind platform that allows you to easily produce and modify any video, GIFS, and picture files in one spot. Merging, compressing, resizing, slideshow, cropping, rotation, and other video editing tools are included in the program. Users may add music or text to videos to help them stand out and draw in the right audience. The video editing platform supports various video formats such as MP4, AVI, MPG, VOB, WMV, MOV, and others. There is no need to download or install any applications since everything may be done entirely online. The premium security encryption that comes with it ensures that all video files are always well-protected.
**Price:**free
Features
- Video splitter and joiner
Pros
- Much easier to use than other video editing software.
- Projects are stored on the cloud, so they don’t take up any computer resources.
- There is no need to download any program.
Cons
- The feature set is limited in comparison to other video editing suites.
- Visual artistry is required.
- Some undertakings need a significant amount of time to complete.
10 Best Video Splitter for Mobile Phone
1. Filmora
A good video editor is required to split a video qualitatively.Filmora Video Editor & Maker might be the answer. It works with high-definition videos. It comes with all of the necessary editing tools. As a result, you will not be sorry for installing this software. Not only will you be able to edit and divide films effortlessly, but you’ll also be able to add fun filters.
The sticker library in Filmora Video Editor & Maker is extensive. The number is in the thousands. You’ll be able to apply both realistic and humorous animated stickers. Use video transitions such as Flash, Page Cut, Cross Zoom, Blurry Roll, and Cube. You have complete control over the speed of your edited video.
**Price:**free
Features
- Video splitter and joiner
- Video editor
Pros
- Files may be readily exported and imported.
Cons
- Compatibility of exported videos is limited.
2. AndroVid Video Editor
AndroVid is a video-splitting program with all the tools you’ll ever need. This program is jam-packed with editing tools, allowing you to create a polished video quickly. The program is also quite user-friendly, so even if this is your first time splitting a video, you will be able to handle it.
**Platform:**Android
**Price:**free
Features
- Video splitter and joiner
- Video editor
Pros
- Simple video cutting tool; can extract single-frame pictures from videos.
Cons
- There are no sophisticated editing choices, and the audio options are quite restricted.
- There is no tool for full-screen graphics, and the user interface is a little complicated.
- The ad-free version is nearly as expensive as KineMaster Pro, which is more sophisticated.
3. Easy Video Cutter
Becausethis program is only devoted to video editing, it can handle a wide range of tasks. The program, for example, may clip videos, combine them, rotate them, and so on. You may also adjust the pace of the videos as needed. It should be noted that trimming the video in this program is quite simple — just pick the range with the slider instrument, and that’s it. Because this program is only devoted to video editing, it can handle a wide range of tasks. The program, for example, may clip videos, combine them, rotate them, and so on. You may also adjust the pace of the videos as needed. It should be noted that trimming the video in this program is quite simple — just pick the range with the slider instrument and that’s it.
**Platform:**Android
**Price:**free
Features
- Video splitter and joiner
- Video editor
Pros
- It’s quite simple to use.
- It’s ideal for simple video cutting tasks.
Cons
- There are no additional editing options available.
4. Video Editor
Video Editor is a fantastic app for Android users who want to edit and enhance their videos. It can break a video into segments, combine several films, crop videos, and adjust the video’s size. You may also add audio to the video of your choosing.
**Platform:**Android
**Price:**free
Features
- Video splitter and joiner
- Video editor
Pros
- You may rearrange your clips in any order you choose.
- Many older file types are supported by the program.
Cons
- The video scroll bar might be a little tricky to use.
- It’s quite basic.
5. VideoShow – Video Editor
On the Google Play market,VideoShow is one of the most popular video editing applications. There are several themes, filters, music, and audio to choose from while creating great videos. It’s a fantastic video trimming software.
**Platform:**Android/iPhone
**Price:**free
Features
- Video splitter and joiner
- Video editor
Pros
- It has the ability to both connect and cut clips.
- It’ll run on almost any android phone.
Cons
- Video Scissors has taken the place of the iPhone version.
- Cutting is fast, but re-encoding might take a long time.
6. Trim Video
Trim Video is the greatest app for iPhone video editing and cutting of huge videos. From the huge file, you may easily crop a video clip. Although the program is highly useful and entertaining for video makers, it is not free and costs $0.99.
**Platform:**iPhone
Price:$0.99 per month
Features
- Video splitter
Pros
- All major video and audio formats are supported.
- When you’re finished, there’s no need to re-render the video.
- There are no watermarks.
Cons
- This software does not include video joining; it must be downloaded separately.
- This app’s main purpose is to cut.
7. Video Splitter
Video Splitter is an iPhone software that allows you to edit and divide videos into segments. It’s a free program that combines all of your editing tools into one application. The tool successfully splits a huge video into little chunks, which can be quickly texted or uploaded to social media.
**Platform:**iPhone
**Price:**free
Features
- Video splitter and joiner
- Video editor
Pros
- A broad number of formats, including audio, are supported.
- It’s a breeze to use.
Cons
- There are no choices for video converting.
- It’s been a long time since it’s been updated.
8. Crop video
Crop Video is another handy iPhone app if you wish to cut your movie to a lesser size. It is one of the most popular tools for cutting videos and altering them for a better impact. It contains several features that boost the app’s versatility. It’ll set you back $2.99.
**Platform:**iPhone
Price:$2.99 per month
Features
- Video splitter and joiner
- Video editor
Pros
- The video cutter is helpful for novices.
- It works with every iPhone version.
Cons
- The free version has a lot of limitations.
- The videos of free users are watermarked.
9. Video Crop
Video Crop is a free iPhone software that allows you to crop videos. There are many more options in the software that may be used to modify and improve a video. This program has a lot of flexibility when it comes to video editing and other video settings. This program may also be used to split videos.
**Platform:**iPhone
**Price:**free
Features
- Video splitter and joiner
- Video editor
Pros
- Splitting and joining MP4 files is simple and effective.
Cons
- It’s only compatible with MP4 files.
- The UI is really sluggish.
10. Video Trim & Cut
Video Trim & Cut is an iPhone software that allows you to divide or trim videos. Adding effects, cropping, altering color, and changing themes are just a few things you can do with the app.
**Platform:**iPhone
**Price:**free
Features
- Video splitter and joiner
- Video editor
Pros
- Excellent templates.
- It has the appearance and functionality of a more costly app.
Cons
- It’s only available on iPhone.
- It might take a long time for a video to render.
Part 5: How to Split Video with Filmora
Step1Import your videos to Filmora Video Cutter
Launch the video cutter once it has been installed and click New Project to access the video editing interface. Now you must import the video, which must be divided into numerous portions.
Upload files
You can either drag and drop files to the media library before adding them to the timeline for editing, or you can click “Import” on the main interface and choose files from your computer.
VOB, 3GP, 3G2, MP4, FLV, AVI, MOV, F4V, M4V, TRP, M2TS, MTS, TP, DAT, WMV, MPG, MPEG, TS, MKV, ASF, DV, EVO, MOD, NSV, and TOD files are all supported by Filmora video cutter.
If your video contains a lot of distinct sequences, Filmora can help you discover the clip you want to trim. The “Scene Detection” tool will assist you in rapidly locating the part you wish to clip. To open the Scene Detection window, choose the video in the media library (not the timeline), right-click it, and select “Scene Detection.”
Detect video
When you click Detect, Filmora will automatically split your films into multiple segments depending on scene changes.
Scenes detected automatically
By clicking the Delete symbol next to the clip, you may delete the undesired sequences and quickly get to the section you want. When you click the Add to Timeline button, all of the segmented video sections will be instantly imported into the timeline, which you can then modify.
Step2Manually trim/split/cut/delete videos
To trim video files, drag clips from the media library to the video track on the timeline and follow these steps. You may use the trim option to chop off the beginning or conclusion of a video swiftly.
Trim video using filmora
- i.Zoom in on the frames you wish to remove from the timeline. Drag the trim symbol to the right to remove the video’s beginning segments from the timeline or to the left to remove the video’s undesired ending segments. You may use the trim tool to cut the beginning and end parts of a sentence with a single drag.
- ii.You may edit a movie into portions, eliminate unnecessary aspects, and combine them into a new film, in addition to chopping off segments at the beginning or conclusion.
- iii.Move the play head to the beginning of the video part you want to cut, then click the Split icon (scissor icon) on the toolbar or the Split button on the play head to split the video. You will get the starting frame, then move the play head to the ending frame and click the Split button again to get the ending part.
- iv.To cut a video into many sections, repeat the procedure. You will get multiple clipped portions, which you may either remove or re-order and alter further.
- v.You may edit out an undesirable cut video by hitting the Delete symbol on the toolbar.
Add trim start and end
Step3Export your video
Click the Export button on the screen after you’ve completed cutting and basic editing. By choosing “Format” and specifying the essential options such as frame rate and resolution, you may save the video in different formats on your local computer.
If you wish to see your video production on your iPod, iPhone, or iPad, go to “Device” and choose your device’s thumbnail. You may also instantly post your films on YouTube or Vimeo, or burn them to DVDs for long-term storage.
Export video after splitting
Bottom Line
Video splitting can be a daunting task when you don’t have the right tools to help you. If you are a Windows or a Mac user then Wondershare Filmora will help you split videos in just few clicks. The software is completely free with an option to go pro for a cheaper price compared to other premium apps. If you prefer splitting your video online then still Filmora online editor will help you in this. Moreover, some good news for android and iPhone users as Filmora comes with all features to split and join videos. With all these tools you can take your video creation process to the next level.
How to Create a Clideo Slideshow Simply
How to Create a Clideo Slideshow
An easy yet powerful editor
Numerous effects to choose from
Detailed tutorials provided by the official channel
A clideo slideshow is an interesting trend of precise content delivery. Stay here to understand the working essentials of creating Clideo presentations with utmost ease!
In this article
01 [How Do You Make a Slideshow on Clideo?](#Part 1)
02 [Best 5 Tip to Make a Slideshow with Music](#Part 2)
03 [How to Make a Photo Slideshow on Mac?](#Part 3)
Part 1 How Do You Make a Slideshow on Clideo?
Deciding to create slideshow presentations for a graphic design oriented personal or professional concern lands you across a plethora of choices in the IT market in the shape of high end application software program and tools. No doubt, these are leaders in their task; however, the online slideshow makers available across the web are no less.
Paying attention to the same, let us focus our discussion on how does the Clideo slideshow maker tool work to adhere the aforesaid concern. Talking a bit about the credibility of the online program, the tool grants you the flexibility of creating amazing slideshow movies and presentations from images, video clips and recordings, while allowing you to complement the same with the most upbeat and suitable background music.
Additional appeals of the online include the latter’s free availability and extensive device compatibility to work affordably well with all your Windows and MacOS supported desktops, laptops and PCs, along with Android and iOS compatible smartphones and tablets. All you need is an internet connection to launch the tool in your favorite web browser and that’s how you can step into the creation process right away.
Let us now look through the process of creating slideshows in the Clideo tool using a set of still images in the following section:
Step 1: Launch the Tool
Start with navigating to the official Clideo website in any of your preferred web browsers and launch the online slideshow maker tool in your device.

Step 2: Upload Image Files
The tool’s launch screen displays the ‘Choose Files’ tab in blue, which you can click on to upload the desired image files to the Clideo timeline while selecting them from your device gallery. To select and upload images from your Dropbox or Google Drive accounts, click on the ‘Upside Arrow’ in the ‘Choose Files’ tab.

The tool supports a decent variety of image formats to work with, like, JPG, JPEG, PNG, GIF, TIFF, etc., thus letting you escape the notch of sticking to a specific file format. You can also choose to either upload the image files all at once, or add them at a later stage, as per your requirement.
Step 3: Let’s Get Creating!
Once the selected images get uploaded on the editor timeline of the tool, you can preview them in the editor workspace. You can change the sequence of appearance of the images by dragging and dropping their thumbnails at respective places within the editor timeline or delete them by selecting the image and clicking the ‘X’ symbol.
You can additionally, choose to add extra clips by tapping the ‘Add More Videos’ option in the timeline. As an alternative, navigate to the panel at the right and hit the ‘Add More Files’ button at the top.

Step 4: Crop the Media Files
Below the ‘Add More Files’ option in the right panel, you can see the ‘Crop Options’ tab. You can work with the crop tool to adjust the size of the added videos and images so that they fit in the borders of the media frames. You are further allowed to select a suitable aspect ratio and zoom the media files in and out to obtain the affordable screen size. This would come handy when you proceed to share your slideshow across various media platforms, like, Instagram, Facebook, YouTube, etc., each of which has a different screen resolution and size.

Step 5: Time Your Slides
You can decide play duration for your media files by navigating to the same right panel and hitting the ‘Image Duration’ tab and setting the required parameters in the dropdown list that appears next. Here, you can adjust the time settings of the images in your slideshow presentations, however, the video play durations are preset and you are not allowed to change them. If you wish to have a smooth play of the presentation slides, do not forget to tick the ‘Crossfade’ checkbox.

Step 6: Add a Suitable Background Music
The last one in the right panel is the ‘Add Audio’ option which you can use to supplement your presentation with the coolest and the most suitable background music. All you need to do is, hit the aforesaid tab and browse through your device’s media gallery to select an audio file of your choice. To add a music file that’s belongs to your online storage, click on the ‘Upside Arrow’ in the tab and proceed to make a selection or add a link of the desired audio file.

Once you have added the track, you are permitted to trim, adjust volume settings and loop the track if required under the ‘Audio Options’ tab.

Step 7: Duration, Size and Format Adjustments
Navigate to the left side ‘Options Panel’ at the bottom of the editor workspace, where you can set the different parameters of your slideshow size and run time. You can also choose to generate the output presentation in a specific file format if required, using the ‘Format Picker’ tool. When you are satisfied with everything, reach to and hit the ‘Export’ button at the extreme right.

Step 8: Save Your Creation
Completion of Step 7 will take you to the ‘Slideshow Save’ interface of the video editor tool. Here, you can preview your slideshow and save it to your device if everything seems fine. To save your output file, click on the ‘Download’ tab. If however, you need to make any further changes to the presentation, hit the ‘Edit’ tab to get directed back to the editor workspace.

Part 2 Best 5 Tip to Make a Slideshow with Music
While the visual elements count to be the major attractions of a slideshow presentation, subtle background music can work to bind the audience with the rhythm and flow of the presentation. Having learnt about the fundamentals of creating over the top slideshows with Clideo, let us move ahead with working on some of the best tips to complement your already awesome graphic slideshow artwork with the most appealing audio in the following section:
01Select a Royalty Free Music Plan
Adding suitable background music can uplift the appeal of your slideshow presentation to greater extents. While most of the slideshow creator programs available today are equipped with extensive varieties of inbuilt audio for visibly any presentation setting, you can also opt to choose your own music plan in case you don’t get anything specific.
However, you do need to take care of certain factors when deciding on your music plan, most importantly, the pricing concerns. Go for selecting a royalty free, unlimited audio license via an affordable paid subscription from recognized and leading music hubs and online audio websites.
02Browse the Recommended Audio Choices
When looking through the diversity of music options available on any audio website, do not forget to pay attention to the user and website recommended playlists and music categories. These tend to have a collection of the most preferred audio choices and there are high chances of you getting your exact music piece from within these playlists.
You can further, refine your search within these categories by setting filters of genre and style, in case you have a clear idea of what you exactly need, thus rescuing you from the hustle of browsing through a never ending list of audio files.

03Synchronize the Slideshow Music and the Contents
The credibility of your background audio lies in adding additional spark and integrity to the stills and videos of the presentation. When selecting the music elements for your slideshow, make sure that your choices are well in accordance with the content and mood of your creation. The most important aspect here is that the music you choose to add should complement the story being depicted, while captivating the viewer’s attention.
Avoid choosing a random audio just because you have heard a buzz of the same on popular platforms or a peer recommendation, lest the contents and background score of your presentation may take opposite paths and disrupt the information flow, while resulting in a distracted audience. To escape the hustle, you may seek help from the diversity of stock audio websites for a keyword and category oriented music search.
If you are interested in adding depth to your background audio, consider using the stem files of a selected song to obtain the latter’s instrumental note recordings. This will help to add a unique layer to the song, while uplifting its mood to a different level.

04Curate and Test
When you are done with creating the perfect soundtrack for your presentation with the choicest of music, proceed to narrow down your list to a finer selection via curating the elements of the soundtrack. All you need to do is, add each track to the presentation elements, while taking care that every inclusion matches with the content it is supposed to complement.
Take care to restrict your choices in line with the length of the slideshow; else you may end up stuffing the footage with too many music pieces, leading to a miscoordinated arrangement. Check if you need just a single song or a complete soundtrack.

● Sound Proof the Final Selection
When you are happy with your work, move ahead with running a mock slideshow to have an assurance of everything being at its respective place. Take note of the music flow to be in cohesion with the other elements of the presentation, check the audio quality, resolution, etc., properties and make changes where necessary. When all seems well, you are ready to share your Clideo slideshow with friends and family on social media handles and communities.
Part 3 How to Make a Photo Slideshow on Mac?
Creating a slideshow is among the most recent trends of infotainment and content sharing. Talking of the creation tools, while most of them turn to be platform specific, others tend to have limitless device compatibility. The Clideo Slideshow maker online tool is one such utility that allows you to design slideshow presentations on any device of your exclusive preference.
Having said that, let us try hands at understanding the slideshow creation process of the aforesaid tool on a MacOs supported device in the following section:
Step 1: Launch the Clideo Online Tool
In any of your preferred Mac supported device, navigate to the home site of the Clideo slideshow maker tool using your desired web browser and move ahead with launching the same in your system.

Step 2: Upload Your Media
In the aforesaid slideshow maker’s opening interface, click on the ‘Choose Files’ tab to select and add the required media files from your Mac device’s local gallery. You can also opt for a ‘Drag and Drop’ of the desired files from your system to the tool’s editor workspace. However, if you wish to make an upload from your online storage accounts like that of Google Drive or Dropbox, hover to the ‘Upside Arrow within the ‘Choose Files’ tab.

Step 3: Adding Extra Files
If you want to add some more media files to the slideshow, navigate to the ‘Options Panel’ to the right of the editing workspace and click on ‘Add More Files’ at the top. Repeat Step 1 here to upload the image and video files in a similar way. Once finished, you can proceed to change the file sequence, delete any unwanted selection or click on ‘Add More Videos’ in the timeline to directly add more video files to your presentation.

Step 4: Crop Your Selections
The left side ‘Options Panel’ further consists of ‘Crop Options’ from where you can adjust the size of your images and videos to a particular aspect ratio, or fit them to a custom screen size using the ‘Crop and Zoom’ option. To add borders to the sides of your slideshow images, click on the ‘Fit With Border’ option.

Step 5: Play Duration Adjustments
Below the ‘Crop Options’, lies the ‘Image Duration’ tab, which you can click on to set the time frames of at will be applicable to all the media files. Also, click within the ‘Crossfade’ checkbox to ensure a seamless transition between successive slides.

Step 6: Add a Background Audio
Once again, navigate to the left side ‘Options Panel’ and tap the ‘Add Audio’ tab at the bottom to upload the desired audio files from your system to the editor timeline. You can also add music files from your online storage accounts, such as, Dropbox, Google Drive, etc.

To extract a piece of the audio for slideshow inclusion, click on the ‘Trim Audio’ tab under ‘Audio Options’. You can now select the desired audio fragment either by adjusting the yellow markers at the ends of the music clip, or specify the time stamps of the required fragment in the respective fields. The volume adjustments for both audio as well as video tracks can be made using the ‘Volume Bars’ icon.

Step 7: Output Format Selection and Export
Navigate to the format options beneath the editor timeline to select a desired output format for your slideshow. You can choose from MOV, API, MKV, MP4, WMV, and a number of other file formats. When you are happy with your work, navigate to and tap the ‘Export’ button at the extreme right corner of the editor workspace.

Step 8: Preview and Download Your Presentation
When you are done with everything, move ahead to watch a preview of your work to ascertain that all the aspects of the slideshow are just perfect. If you need to add further changes, hit the ‘Edit’ tab to head back to the editing workspace. In an otherwsise case, proceed to tap the ‘Download’ button for saving the slideshow either to your device gallery or an online storage account.

Designing Stunning Slideshow Presentataions in Filmora
When browsing through reliable software alternatiaves ez start your slideshow creation streak, picking any member of the Wondershare Filmora Video Editor franchise would indeed be a smart choice, owing tso the fact that, the aforesaid program promises to adhere to the most specificuser needs and the large scale disverity in creator preferences.
For Win 7 or later (64-bit)
For macOS 10.12 or later
Diving into the feature rich library of the software, you get to access a plethora of preset and custsomizable audio-visual effects, transitions, filters, background themes and templates; and a huge storehouse of additional elements, that are all set to add the jaw dropping spark to your otherwise customary slideshows.
The later versions of the editor program are upgraged to include a divserity of high end editing effects, like the Green Screen and AI based transitions that wosrk towards delivering a high quality professional slideshow output to enure an auadience appraisal that is simply wow!
● Ending Thoughts →
● The Clideo slideshow maker tool is anexcellent choice to design over the top slideshow presentations on an online platform.
●> Using Clideo, you can choose to create slideshows on any of your preferred devices, like, Mac, Windows, etc.
● If you are interested in looking for additional alternatives of slideshow creator software, the Wondershare Filmora franchise is something to count upon.
A clideo slideshow is an interesting trend of precise content delivery. Stay here to understand the working essentials of creating Clideo presentations with utmost ease!
In this article
01 [How Do You Make a Slideshow on Clideo?](#Part 1)
02 [Best 5 Tip to Make a Slideshow with Music](#Part 2)
03 [How to Make a Photo Slideshow on Mac?](#Part 3)
Part 1 How Do You Make a Slideshow on Clideo?
Deciding to create slideshow presentations for a graphic design oriented personal or professional concern lands you across a plethora of choices in the IT market in the shape of high end application software program and tools. No doubt, these are leaders in their task; however, the online slideshow makers available across the web are no less.
Paying attention to the same, let us focus our discussion on how does the Clideo slideshow maker tool work to adhere the aforesaid concern. Talking a bit about the credibility of the online program, the tool grants you the flexibility of creating amazing slideshow movies and presentations from images, video clips and recordings, while allowing you to complement the same with the most upbeat and suitable background music.
Additional appeals of the online include the latter’s free availability and extensive device compatibility to work affordably well with all your Windows and MacOS supported desktops, laptops and PCs, along with Android and iOS compatible smartphones and tablets. All you need is an internet connection to launch the tool in your favorite web browser and that’s how you can step into the creation process right away.
Let us now look through the process of creating slideshows in the Clideo tool using a set of still images in the following section:
Step 1: Launch the Tool
Start with navigating to the official Clideo website in any of your preferred web browsers and launch the online slideshow maker tool in your device.
Step 2: Upload Image Files
The tool’s launch screen displays the ‘Choose Files’ tab in blue, which you can click on to upload the desired image files to the Clideo timeline while selecting them from your device gallery. To select and upload images from your Dropbox or Google Drive accounts, click on the ‘Upside Arrow’ in the ‘Choose Files’ tab.
The tool supports a decent variety of image formats to work with, like, JPG, JPEG, PNG, GIF, TIFF, etc., thus letting you escape the notch of sticking to a specific file format. You can also choose to either upload the image files all at once, or add them at a later stage, as per your requirement.
Step 3: Let’s Get Creating!
Once the selected images get uploaded on the editor timeline of the tool, you can preview them in the editor workspace. You can change the sequence of appearance of the images by dragging and dropping their thumbnails at respective places within the editor timeline or delete them by selecting the image and clicking the ‘X’ symbol.
You can additionally, choose to add extra clips by tapping the ‘Add More Videos’ option in the timeline. As an alternative, navigate to the panel at the right and hit the ‘Add More Files’ button at the top.
Step 4: Crop the Media Files
Below the ‘Add More Files’ option in the right panel, you can see the ‘Crop Options’ tab. You can work with the crop tool to adjust the size of the added videos and images so that they fit in the borders of the media frames. You are further allowed to select a suitable aspect ratio and zoom the media files in and out to obtain the affordable screen size. This would come handy when you proceed to share your slideshow across various media platforms, like, Instagram, Facebook, YouTube, etc., each of which has a different screen resolution and size.
Step 5: Time Your Slides
You can decide play duration for your media files by navigating to the same right panel and hitting the ‘Image Duration’ tab and setting the required parameters in the dropdown list that appears next. Here, you can adjust the time settings of the images in your slideshow presentations, however, the video play durations are preset and you are not allowed to change them. If you wish to have a smooth play of the presentation slides, do not forget to tick the ‘Crossfade’ checkbox.
Step 6: Add a Suitable Background Music
The last one in the right panel is the ‘Add Audio’ option which you can use to supplement your presentation with the coolest and the most suitable background music. All you need to do is, hit the aforesaid tab and browse through your device’s media gallery to select an audio file of your choice. To add a music file that’s belongs to your online storage, click on the ‘Upside Arrow’ in the tab and proceed to make a selection or add a link of the desired audio file.
Once you have added the track, you are permitted to trim, adjust volume settings and loop the track if required under the ‘Audio Options’ tab.
Step 7: Duration, Size and Format Adjustments
Navigate to the left side ‘Options Panel’ at the bottom of the editor workspace, where you can set the different parameters of your slideshow size and run time. You can also choose to generate the output presentation in a specific file format if required, using the ‘Format Picker’ tool. When you are satisfied with everything, reach to and hit the ‘Export’ button at the extreme right.
Step 8: Save Your Creation
Completion of Step 7 will take you to the ‘Slideshow Save’ interface of the video editor tool. Here, you can preview your slideshow and save it to your device if everything seems fine. To save your output file, click on the ‘Download’ tab. If however, you need to make any further changes to the presentation, hit the ‘Edit’ tab to get directed back to the editor workspace.
Part 2 Best 5 Tip to Make a Slideshow with Music
While the visual elements count to be the major attractions of a slideshow presentation, subtle background music can work to bind the audience with the rhythm and flow of the presentation. Having learnt about the fundamentals of creating over the top slideshows with Clideo, let us move ahead with working on some of the best tips to complement your already awesome graphic slideshow artwork with the most appealing audio in the following section:
01Select a Royalty Free Music Plan
Adding suitable background music can uplift the appeal of your slideshow presentation to greater extents. While most of the slideshow creator programs available today are equipped with extensive varieties of inbuilt audio for visibly any presentation setting, you can also opt to choose your own music plan in case you don’t get anything specific.
However, you do need to take care of certain factors when deciding on your music plan, most importantly, the pricing concerns. Go for selecting a royalty free, unlimited audio license via an affordable paid subscription from recognized and leading music hubs and online audio websites.
02Browse the Recommended Audio Choices
When looking through the diversity of music options available on any audio website, do not forget to pay attention to the user and website recommended playlists and music categories. These tend to have a collection of the most preferred audio choices and there are high chances of you getting your exact music piece from within these playlists.
You can further, refine your search within these categories by setting filters of genre and style, in case you have a clear idea of what you exactly need, thus rescuing you from the hustle of browsing through a never ending list of audio files.
03Synchronize the Slideshow Music and the Contents
The credibility of your background audio lies in adding additional spark and integrity to the stills and videos of the presentation. When selecting the music elements for your slideshow, make sure that your choices are well in accordance with the content and mood of your creation. The most important aspect here is that the music you choose to add should complement the story being depicted, while captivating the viewer’s attention.
Avoid choosing a random audio just because you have heard a buzz of the same on popular platforms or a peer recommendation, lest the contents and background score of your presentation may take opposite paths and disrupt the information flow, while resulting in a distracted audience. To escape the hustle, you may seek help from the diversity of stock audio websites for a keyword and category oriented music search.
If you are interested in adding depth to your background audio, consider using the stem files of a selected song to obtain the latter’s instrumental note recordings. This will help to add a unique layer to the song, while uplifting its mood to a different level.
04Curate and Test
When you are done with creating the perfect soundtrack for your presentation with the choicest of music, proceed to narrow down your list to a finer selection via curating the elements of the soundtrack. All you need to do is, add each track to the presentation elements, while taking care that every inclusion matches with the content it is supposed to complement.
Take care to restrict your choices in line with the length of the slideshow; else you may end up stuffing the footage with too many music pieces, leading to a miscoordinated arrangement. Check if you need just a single song or a complete soundtrack.
● Sound Proof the Final Selection
When you are happy with your work, move ahead with running a mock slideshow to have an assurance of everything being at its respective place. Take note of the music flow to be in cohesion with the other elements of the presentation, check the audio quality, resolution, etc., properties and make changes where necessary. When all seems well, you are ready to share your Clideo slideshow with friends and family on social media handles and communities.
Part 3 How to Make a Photo Slideshow on Mac?
Creating a slideshow is among the most recent trends of infotainment and content sharing. Talking of the creation tools, while most of them turn to be platform specific, others tend to have limitless device compatibility. The Clideo Slideshow maker online tool is one such utility that allows you to design slideshow presentations on any device of your exclusive preference.
Having said that, let us try hands at understanding the slideshow creation process of the aforesaid tool on a MacOs supported device in the following section:
Step 1: Launch the Clideo Online Tool
In any of your preferred Mac supported device, navigate to the home site of the Clideo slideshow maker tool using your desired web browser and move ahead with launching the same in your system.
Step 2: Upload Your Media
In the aforesaid slideshow maker’s opening interface, click on the ‘Choose Files’ tab to select and add the required media files from your Mac device’s local gallery. You can also opt for a ‘Drag and Drop’ of the desired files from your system to the tool’s editor workspace. However, if you wish to make an upload from your online storage accounts like that of Google Drive or Dropbox, hover to the ‘Upside Arrow within the ‘Choose Files’ tab.
Step 3: Adding Extra Files
If you want to add some more media files to the slideshow, navigate to the ‘Options Panel’ to the right of the editing workspace and click on ‘Add More Files’ at the top. Repeat Step 1 here to upload the image and video files in a similar way. Once finished, you can proceed to change the file sequence, delete any unwanted selection or click on ‘Add More Videos’ in the timeline to directly add more video files to your presentation.
Step 4: Crop Your Selections
The left side ‘Options Panel’ further consists of ‘Crop Options’ from where you can adjust the size of your images and videos to a particular aspect ratio, or fit them to a custom screen size using the ‘Crop and Zoom’ option. To add borders to the sides of your slideshow images, click on the ‘Fit With Border’ option.
Step 5: Play Duration Adjustments
Below the ‘Crop Options’, lies the ‘Image Duration’ tab, which you can click on to set the time frames of at will be applicable to all the media files. Also, click within the ‘Crossfade’ checkbox to ensure a seamless transition between successive slides.
Step 6: Add a Background Audio
Once again, navigate to the left side ‘Options Panel’ and tap the ‘Add Audio’ tab at the bottom to upload the desired audio files from your system to the editor timeline. You can also add music files from your online storage accounts, such as, Dropbox, Google Drive, etc.
To extract a piece of the audio for slideshow inclusion, click on the ‘Trim Audio’ tab under ‘Audio Options’. You can now select the desired audio fragment either by adjusting the yellow markers at the ends of the music clip, or specify the time stamps of the required fragment in the respective fields. The volume adjustments for both audio as well as video tracks can be made using the ‘Volume Bars’ icon.
Step 7: Output Format Selection and Export
Navigate to the format options beneath the editor timeline to select a desired output format for your slideshow. You can choose from MOV, API, MKV, MP4, WMV, and a number of other file formats. When you are happy with your work, navigate to and tap the ‘Export’ button at the extreme right corner of the editor workspace.
Step 8: Preview and Download Your Presentation
When you are done with everything, move ahead to watch a preview of your work to ascertain that all the aspects of the slideshow are just perfect. If you need to add further changes, hit the ‘Edit’ tab to head back to the editing workspace. In an otherwsise case, proceed to tap the ‘Download’ button for saving the slideshow either to your device gallery or an online storage account.
Designing Stunning Slideshow Presentataions in Filmora
When browsing through reliable software alternatiaves ez start your slideshow creation streak, picking any member of the Wondershare Filmora Video Editor franchise would indeed be a smart choice, owing tso the fact that, the aforesaid program promises to adhere to the most specificuser needs and the large scale disverity in creator preferences.
For Win 7 or later (64-bit)
For macOS 10.12 or later
Diving into the feature rich library of the software, you get to access a plethora of preset and custsomizable audio-visual effects, transitions, filters, background themes and templates; and a huge storehouse of additional elements, that are all set to add the jaw dropping spark to your otherwise customary slideshows.
The later versions of the editor program are upgraged to include a divserity of high end editing effects, like the Green Screen and AI based transitions that wosrk towards delivering a high quality professional slideshow output to enure an auadience appraisal that is simply wow!
● Ending Thoughts →
● The Clideo slideshow maker tool is anexcellent choice to design over the top slideshow presentations on an online platform.
●> Using Clideo, you can choose to create slideshows on any of your preferred devices, like, Mac, Windows, etc.
● If you are interested in looking for additional alternatives of slideshow creator software, the Wondershare Filmora franchise is something to count upon.
Also read:
- Updated In 2024, How to Create an Alternate Reality Effect
- New Does the Customary Speed of Your TikTok Slideshow Appear to Be Slow Enough of Late? If Yes, Drop Your Worries Here with the Know-How of Increasing the TikTok Slideshow Speed for 2024
- In 2024, Do You Know What Is Motion Blur in Fortnite? Read This Article to Find Out How to Apply Motion Blur in Fortnite Efficiently and with Ease
- Updated Step by Step to Rotate Video in Google Photos
- New In 2024, 10 Best Mp3 Visualizers Windows, Mac, Android, iPhone & Online
- Updated 2024 Approved How to Delete White Background in Photoshop. How to Create a Transparent Background in Photoshop? Steps to Get Rid of White Background in Photoshop
- Updated In This Article We Will Be Covering the Most Important Topics You Have to Remember when Becoming a Successful YouTube-Star for 2024
- 2024 Approved How Can You Make a Slideshow Look Aesthetic? Follow the Given Discussion to Learn About Creating an Aesthetic Slideshow All by Yourself
- New CapCut Lenta Template How It Benefits Slow Motion Video for 2024
- New How to Add Subtitles in QuickTime Player?
- Updated A Complete Guide to the Best Brand Story Videos
- Updated In 2024, Learn Eight Simple Steps that Will Allow You to Create a Stunning Text Reveal Animation in Filmora. Simple yet Very Professional
- Updated Camtasia Vs. Final Cut Pro
- 2024 Approved Best 5 Tips to Freeze-Frame in After Effects
- New In 2024, Best Ways to Convert Video Frame Rate to 60FPS Software and Online Choices
- New In 2024, An Intro Video Describing You and Your Content Is the First and the Foremost Thing Which a Viewer Sees. Thinking of How to Make an Interesting Intro Video, This Blog Is Surely a Supportive Guide for You. Learn More Here
- Updated In 2024, Sync Audio With Video With Filmora
- Updated In 2024, 11 Ways To Speed Up A Video On iPhone
- How to Fade in Text in Adobe Premiere Pro
- Sign a PDF v1.7 document with electronic signature tool
- How to sign a PDF v1.6 document with electronic signature software
- In 2024, How Can We Unlock Our ZTE Axon 40 Lite Phone Screen?
- New Boost Sales with Live Shopping Learn Winning Strategies From Top Brands for 2024
- In 2024, How to Cast Oppo A79 5G Screen to PC Using WiFi | Dr.fone
- In 2024, How PGSharp Save You from Ban While Spoofing Pokemon Go On Lava Blaze Pro 5G? | Dr.fone
- How to Unlock Infinix Note 30 VIP PIN Code/Pattern Lock/Password
- 6 Fixes to Unfortunately WhatsApp has stopped Error Popups On Oppo F25 Pro 5G | Dr.fone
- In 2024, Unlock Apple ID without Phone Number On iPhone 11 Pro
- 6 Proven Ways to Unlock Realme Narzo N55 Phone When You Forget the Password
- Learn How To Lock Stolen Your Apple iPhone 6s Properly | Dr.fone
- In 2024, 5 Easy Ways to Copy Contacts from Nubia Red Magic 8S Pro to iPhone 14 and 15 | Dr.fone
- In 2024, What Does Enter PUK Code Mean And Why Did The Sim Get PUK Blocked On Motorola G54 5G Device
- 4 Feasible Ways to Fake Location on Facebook For your Oppo A56s 5G | Dr.fone
- In 2024, How to Transfer Apps from Tecno Spark 20C to Another | Dr.fone
- Updated In 2024, Tips for Canva Animated Elements
- How to Stop My Spouse from Spying on My Xiaomi Redmi A2 | Dr.fone
- In 2024, Ultimate guide to get the meltan box pokemon go For Honor Magic 5 Lite | Dr.fone
- How to Transfer Photos from Honor X50 GT to Laptop Without USB | Dr.fone
- Title: Top 9 Best Solutions To Go For When Creating an AI Thumbnail for 2024
- Author: Morgan
- Created at : 2024-05-19 05:12:08
- Updated at : 2024-05-20 05:12:08
- Link: https://ai-video-editing.techidaily.com/top-9-best-solutions-to-go-for-when-creating-an-ai-thumbnail-for-2024/
- License: This work is licensed under CC BY-NC-SA 4.0.
