
:max_bytes(150000):strip_icc():format(webp)/the-best-instagram-filters-for-2018-4177148-1-5bc5e4b6c9e77c00517f198d.jpg)
Updated 2024 Approved A Comprehensive Guide on VHS Technology and Its Influence on Video Editing
A Comprehensive Guide on VHS Technology and Its Influence on Video Editing
Videos are a person’s crucial and cherished memory, and no one wants to compromise their quality. People tend to rely on several effects to exceed the quality of the beloved videos. VHS is the most used effect, popular in professional and personal videos. It stands for “Video Home System” and is often integrated with noises, color bleeding, and smooth glitches.
With VHS-style videos, you can not only make videos more high-class but can also intuitively define their worth. If you are new to this field, you should get familiar with the VHS effects in video. This context will provide basic information about VHS tapes and how to add VHS effects to videos.
Part 1: What Is VHS Technology? An Overview of the 70s Sensation
From definition to usability, every piece of information plays an important role in your videography journey. Don’t worry if you don’t have video editing skills or know what VHS means. This section will provide you with reliable information about this:
What Do You Mean by VHS Technology?
VHS, also known as Video Home System, are the auditory artifacts and visual glitches you see in the pictures. It creates a sense of distortion in the video, making the viewer think the camera equipment is malfunctioning. From the 1980s to the 1990s, this effect gained considerable popularity among video creators and viewers.
In recent years, retro lovers have brought this intuitive effect again into a trend to create a perfect flashback scene. The nostalgic and vintage appeal of these effects is insane. VHS is not just one effect because it divides into further categories. You are also free to select the VHS effects according to the theme of your video and the scene you are going to create.
Key Aspects of The VHS Effects
Several key aspects are crucial to making high-quality VHS effects in the videos. You can see some of the key aspects listed and discussed here:
- **Tracking Lines of VHS:**The VHS tapes are integrated with magnetic strips to sort audio and video signals. However, over time, these tapes degraded, leading to glitches in playback with noticeable distortion.
- **Video Color Bleeding:**You must have noticed that color is bleeding in the VHS videos. In this, the colors in the videos are quite smudged and mixed. This together adds the unique yet smoother distortion in the videos.
- **Vintage and Glitching:**Vintage and glitches are essential to videos with VHS effects. This was initially caused by the limitations of playback equipment and signal interference. At this time, people add glitch VHS to the videos in a manual manner to add a sense of interference in the scene.
- **Noise and Jitters:**VHS tapes are known to be susceptible to wrappings and jitters. It causes a slightly unstable effect in the videos in the form of distorted objects. Moreover, the grainy and noisy appearance due to analog recording technology is also a part of this effect.

Add VHS Effect to Video
Simply add video effects on Video with Filmora Video Effect Editor ! Experience the magic of cool yet outstanding video effects, where your videos come to life in beautiful visuals.
Apply VHS Effect Apply VHS Effect Learn More >


Part 2: What are VHS Effects and What Is Its Use?
Now that you have learned what VHS technology is and what are its key aspects, you must be eager to learn about the VHS effects. Moreover, knowing the proper and effective usage of VHS effects is also an important thing. The below-given information will help you regarding this issue:
What are VHS Effects?
Video Home System, which is famous as VHS, is the type of effect that is used in videos to create manual distortion. It was initially developed by the Victor Company in Japan and was introduced in the 1970s. From then to now, VHS tapes gained reliable popularity across the world. The purpose of creating this effect was to give video recording capabilities to consumers.
In addition to this, the video format in which you can apply this effect was also recognized by potential marketers. The aim of creating this effect was to make affordable yet user-friendly videos. With the help of VHS effects, people could watch cinematic quality movies in their living rooms. The popularity of VHS never stops growing, and even now, video editors love to add this intuitive effect to their videos.
What is the Use of the VHS Effect?
You can use the VHS effects in several creative contexts to achieve artistic goals. Some of the uses of the VHS style are listed below for you:
Video Production
You are free to use the glitch VHS effect in filmmaking and video production projects. It is perfect for retro and vintage-themed movies. This effect also has the capability to add the old fashion sense to engage more users.
Motion and Designing Graphics
The VHS effects are also very helpful in graphic and motion designing. You can add eye-catching visual composition elements to every type of video. This may include scan lines, glitches, and, of course, distortion.
Social Media Content Creation
If you plan to share your past life with your followers, don’t forget to add the old life-themed VHS effects in the videos. This makes your video more retro-friendly and adds a sense of consistency to the videos.
Editing and Experimentations
Getting something new without losing the video quality is the dream of every video editor. The VHS effects can help you in making this dream come true. You can use this effect while editing your videos and can also use it as an experiment.

Part 3: Legacy and Influence of VHS in Video Making
The legacy and influence of this preliminary effect will continue to take hold in every age of digitalization. Here are some of the key points which will guide you about this to a further extent:
Democratization of VHS in Videos
You will never fail to see the pivotal role of VHS in democratizing video productions. It helps to make the video more accessible to a wider amount of audience. Before the introduction of VHS, video production was limited to professional studios. However, now every person can use this to make independent files and share their creativity with the world.
Editing Techniques and Influence
VHS has introduced a wide array of editing techniques and manuals to the users to manipulate video content. Moreover, the VHS editing system and techniques also encourage experimentation. You also get a sense of trying the latest editing skills. It is also known to explore and add a sense of storytelling through simple procedures.
Aesthetics and Pop Culture
In recent years, VHS has experienced several revivals of pop culture themes. It can add aesthetics and a sense of nostalgia to every type of video. You will also see VHS integrations on several music, ads, and events videos. You can also use this effect to preserve the digitalized content without extra effort.
Documentation and Accessibility
With the help of the VHS effect, you can formulate several types of documentation in lossless quality. It helps you to add retro appeal to all your formatted documentaries and make them easily accessible. Above all, you can also distribute the video content at an optimized speed without using any non-mainstream server.
Part 4: Wondershare Filmora: A Great Video Editor Influencing the Use of VHS Effects
You cannot apply the VHS effect to the videos without a reliable video editor. The most known and significant video editor that can help you apply the glitch VHS effect in videos is Filmora Video Editor . Using this premium-grade tool, you can create new projects at any time and customize its visual metrics.
Add VHS Effect For Win 7 or later(64-bit)
Add VHS Effect For macOS 10.14 or later
This premium-grade video editor understands the VHS definition and offers you a wide array of VHS effects. This includes VHS Distortion, VHS Static 1, Vintage Viewfinder, and more. You can drag any effect of your choice to the video in the timeline and apply it to the whole video or a personalized part of the video. One of the best things about Filmora is that it integrates versatile built-in templates. Through this, you can make videos without any issues.

Conclusion
To wrap things up, this discussion has guided you about VHS style and technology. Now, you know what VHS technology is, its key aspects, and what scenarios you can use it. Other than this, the legacy and influence of this effect are also mentioned above. For applying the VHS effects, you can use the industry standard video editor named Wondershare Filmora.
This video editor supports multiple VHS effects, and you can also customize its size and opacity. More valuable information about Filmora is listed above for you.
Add VHS Effect For Win 7 or later(64-bit)
Add VHS Effect For macOS 10.14 or later
Apply VHS Effect Apply VHS Effect Learn More >
Part 2: What are VHS Effects and What Is Its Use?
Now that you have learned what VHS technology is and what are its key aspects, you must be eager to learn about the VHS effects. Moreover, knowing the proper and effective usage of VHS effects is also an important thing. The below-given information will help you regarding this issue:
What are VHS Effects?
Video Home System, which is famous as VHS, is the type of effect that is used in videos to create manual distortion. It was initially developed by the Victor Company in Japan and was introduced in the 1970s. From then to now, VHS tapes gained reliable popularity across the world. The purpose of creating this effect was to give video recording capabilities to consumers.
In addition to this, the video format in which you can apply this effect was also recognized by potential marketers. The aim of creating this effect was to make affordable yet user-friendly videos. With the help of VHS effects, people could watch cinematic quality movies in their living rooms. The popularity of VHS never stops growing, and even now, video editors love to add this intuitive effect to their videos.
What is the Use of the VHS Effect?
You can use the VHS effects in several creative contexts to achieve artistic goals. Some of the uses of the VHS style are listed below for you:
Video Production
You are free to use the glitch VHS effect in filmmaking and video production projects. It is perfect for retro and vintage-themed movies. This effect also has the capability to add the old fashion sense to engage more users.
Motion and Designing Graphics
The VHS effects are also very helpful in graphic and motion designing. You can add eye-catching visual composition elements to every type of video. This may include scan lines, glitches, and, of course, distortion.
Social Media Content Creation
If you plan to share your past life with your followers, don’t forget to add the old life-themed VHS effects in the videos. This makes your video more retro-friendly and adds a sense of consistency to the videos.
Editing and Experimentations
Getting something new without losing the video quality is the dream of every video editor. The VHS effects can help you in making this dream come true. You can use this effect while editing your videos and can also use it as an experiment.
Part 3: Legacy and Influence of VHS in Video Making
The legacy and influence of this preliminary effect will continue to take hold in every age of digitalization. Here are some of the key points which will guide you about this to a further extent:
Democratization of VHS in Videos
You will never fail to see the pivotal role of VHS in democratizing video productions. It helps to make the video more accessible to a wider amount of audience. Before the introduction of VHS, video production was limited to professional studios. However, now every person can use this to make independent files and share their creativity with the world.
Editing Techniques and Influence
VHS has introduced a wide array of editing techniques and manuals to the users to manipulate video content. Moreover, the VHS editing system and techniques also encourage experimentation. You also get a sense of trying the latest editing skills. It is also known to explore and add a sense of storytelling through simple procedures.
Aesthetics and Pop Culture
In recent years, VHS has experienced several revivals of pop culture themes. It can add aesthetics and a sense of nostalgia to every type of video. You will also see VHS integrations on several music, ads, and events videos. You can also use this effect to preserve the digitalized content without extra effort.
Documentation and Accessibility
With the help of the VHS effect, you can formulate several types of documentation in lossless quality. It helps you to add retro appeal to all your formatted documentaries and make them easily accessible. Above all, you can also distribute the video content at an optimized speed without using any non-mainstream server.
Part 4: Wondershare Filmora: A Great Video Editor Influencing the Use of VHS Effects
You cannot apply the VHS effect to the videos without a reliable video editor. The most known and significant video editor that can help you apply the glitch VHS effect in videos is Filmora Video Editor . Using this premium-grade tool, you can create new projects at any time and customize its visual metrics.
Add VHS Effect For Win 7 or later(64-bit)
Add VHS Effect For macOS 10.14 or later
This premium-grade video editor understands the VHS definition and offers you a wide array of VHS effects. This includes VHS Distortion, VHS Static 1, Vintage Viewfinder, and more. You can drag any effect of your choice to the video in the timeline and apply it to the whole video or a personalized part of the video. One of the best things about Filmora is that it integrates versatile built-in templates. Through this, you can make videos without any issues.
Conclusion
To wrap things up, this discussion has guided you about VHS style and technology. Now, you know what VHS technology is, its key aspects, and what scenarios you can use it. Other than this, the legacy and influence of this effect are also mentioned above. For applying the VHS effects, you can use the industry standard video editor named Wondershare Filmora.
This video editor supports multiple VHS effects, and you can also customize its size and opacity. More valuable information about Filmora is listed above for you.
Add VHS Effect For Win 7 or later(64-bit)
Add VHS Effect For macOS 10.14 or later
Five Thoughts on Discord Create Account’s How-To Questions
Five Thoughts on Discord Create Account
An easy yet powerful editor
Numerous effects to choose from
Detailed tutorials provided by the official channel
Discord was a great alternative to voice chat systems such as TeamSpeak, Mumble, and Ventrilo for online gamers. Gamers make discord accounts for these services to play together rather than the voice communication facilities integrated into games, which are frequently of poor quality and lack functionality.
Founded in 2015, discord allowed individuals to talk while playing PC games seamlessly. Users may utilize the service to establish servers that can include many text and audio channels. A typical discord account server may feature chat rooms dedicated to specific themes (such as “gaming” and “anime x manga”), as well as voice channels devoted to specific games or activities. The service’s high-quality, low-latency audio chat is a popular tool for Twitch broadcasters and podcasters. It has also expanded to accommodate massive video conversations to compete with Zoom.
In this article
01 [How Does Discord Work and What is it Used for?](#Part 1)
02 [How to Make a Discord Signup in the Browser?](#Part 2)
03 [How to Make a Discord Signup with Desktop?](#Part 3)
04 [How to Make a Signup Discord with App?](#Part 4)
05 [Discord Create Account FAQs](#Part 5)
Part 1 How Does Discord Work and What is it Used for?
Discord account allows friends to communicate with one another one-on-one or in groups via a server. You may use it to send direct messages to pals, as well as video calls, audio chat, and screen sharing. Once on a server, you can join a voice chat channel to communicate with other gamers who are playing certain games.
You can share many things on discord, including media files like images, gifs, audio, and videos. Speaking of videos, video editing doesn’t get any better than Filmora. Wondershare Filmora Video Editor is a sophisticated editing application for Windows and Mac users. It was initially known as Wondershare Video Editor, but following its fifth release, it got renamed Filmora. The video editor’s primary features include animation, overlays, audio control, on-screen recording, and multi-editing modes. The video editor is well-known for its feature-rich but the simple interface, making it suited for both novice and experienced users.
For Win 7 or later (64-bit)
For macOS 10.12 or later
Filmora’s standout features
● Editing Audio Equalizer 4K Resolution Support
● Support for GIFs
● Screen Dividers
● Controls For Video And Audio
● Multiple Video Clips Can Be Layered
● Stabilization of Video
● Presets for Color Grading
● Text Editing Expertise
● Tilt-Shift
● The mosaic (Blurring)
● Noise Elimination
● Importance in Social Life
● Preview of Each Frame
● Controlling the Speed
● Audio-Mixer
● Backgrounds in Chroma Key
● Screen Capture
● Separation of audio
● Scene Recognition
You can make your discord account and use it on almost any platform, including discord desktop software for Windows and Mac and iOS and Android apps for talking and calling on the move. If you prefer not to download anything, it also works in a web browser. You can link your discord account app to various popular services, such as Twitch and Spotify, so your friends can see your actions. While there is no discord Xbox app, you may link your discord and Xbox accounts so that others can see what you’re up to on your Xbox Series X or Xbox Series S.
Part 2 How to Make a Discord Signup in the Browser
Don’t have the discord account?
You can quickly sign up using your preferred web browser, i.e., Chrome, Microsoft Edge, Firefox, or Safari.
Follow the steps below to make a discord account using your web browser:
Step 1: Go to <www.discord.com> and click the “Login” button in the upper right corner.
Step 2: To establish a new discord account, click “Register” underneath the login page.
Step 3:
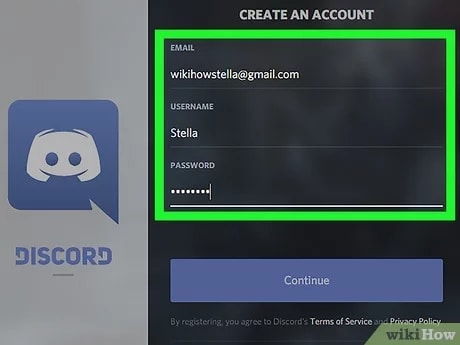
● Enter your email, a username, and a strong password.
● Date of birth.
● Accept the terms of service.
After entering the above, click the “Continue” button.
Step 4: Check the box besides “I am human” to enable the captcha.
Step 5: You will receive an email asking you to confirm your information. Select the “Verify email” option.
Once you’ve signed up for discord, you may access it via the Discord website or the mobile app. The program is free to download for Windows, Linux, Mac, Android, and iOS.
Follow the steps above to sign up on discord account successfully. Easy right? Let’s proceed!
Part 3 How to Make a Discord Signup with Desktop?
The discord creating account on your desktop is pretty much the same as using your browser.
Follow the steps below to make a discord account using your desktop.
Step 1: Click “Login” on the Discord website (top right).
Step 2: Underneath the sign-in box, click “Register.”
Step 3: Enter the email address, username, password, and birth date.
Step 4: Agree to the terms of service and then click “Continue.”
Step 5: Use the captcha to prove that you are not a robot.
Step 6: You will get an email to confirm your data; click on the link in the email to confirm.
See that? No big deal, right?
Part 4 How to Make a Signup Discord with App
Signing up for a discord account through the app is relatively easy, like the procedures above, you will not break a sweat.
Follow the easy steps below for discord create account on your smartphone device:
Step 1: Install and launch the Discord app on your smartphone
Step 2: Select the Register option.
Step 3: Choose whether to register by cellphone number or email address and input either one.
Step 4: You will get a message with a confirmation code or an email with a link.
Step 5: Enter the code or navigate to the URL.
Step 6: Enter your username and password here.
Step 7: Enter your birth date.
Step 8: Accept the terms of the agreement.
Step 9: Click “Next” to finish the Discord registration.
What Happens When You Disable your Discord Account?
When you deactivate your account, it goes to suspension mode. You may reactivate it by signing in and following the on-screen instructions. Keep in mind that discord accounts dormant for two years are removed, so if you want to keep yours, you must reactivate it (but you can disable it after this if you like).
After you deactivate an account, users will no longer get discord alerts. Users may, however, still receive friend requests, and any friend requests users get while their account is blocked will be ready for when they reactivate it. However, when a user decides to delete their account, the said account will get permanently deleted.
Tip: If you want to stay away from your discord account for a while with a plan to return to it later, it is advisable to log out or deactivate rather than delete it.
Part 5 Discord Create Account FAQs
Q. Is discord free, or do I have to pay?
A. Yes and no. The premium edition of discord is not free. If you don’t want to utilize the premium features, you may still download and make a discord account for free.
Q. Is there anything I cannot do on discord?
A. Do not organize, promote, or participate in any unlawful or possibly dangerous activities, such as sexual solicitation, human trafficking, or selling or enabling the sale of forbidden or potentially harmful products (firearms, ammunition, drugs, and controlled substances).
Q. Do messages disappear on discord?
A. Your messages are only destroyed: 1. if they are deleted individually (by you or a user with proper rights), 2. if you get banned, and the person banning you decides to delete all of your messages at once.
Q. Does discord account keep a record of interactions?
A. Yes, discord will track every discussion you have on discord acount, record everything you say on discord, and examine all photographs you transmit over discord.
Q. How will I know when someone blocks me on discord?
A. When you block someone, their online status on discord account changes to “offline” until unblocked and vice versa. They will also show offline in mutual servers or your chat history.
Q. How do I permanently delete my discord account?
A. To delete your discord created account for good, head to user settings, then tap on ‘my account.’ From there, tap on ‘Account Removal’ then tap on ‘Delete Account.’
If you are a server owner, you will have to delete the server or pass ownership of the server.
Q. How do I find servers to join on discord?
A. If you have a buddy who has a discord server you’d want to join, request an invite. If you’re a member of a discord community, ask for an invite or check on the community website.
By tapping the magnifying glass in the left window of the discord account app, you may also search for public servers that anybody can join.
● Ending Thoughts →
● Discord is a web program that works in most browsers. A desktop version is available for Windows, macOS, Linux, iOS, and Android. Discord’s desktop and browser versions are functionally and visually identical in practically every regard if you want to make a discord account. So, re-read the article and the FAQs on discord create account, and start your journey.
● Finally, for the creatives, boost your discord create account and usage experience by using Filmora to edit videos and make cool animations.
Discord was a great alternative to voice chat systems such as TeamSpeak, Mumble, and Ventrilo for online gamers. Gamers make discord accounts for these services to play together rather than the voice communication facilities integrated into games, which are frequently of poor quality and lack functionality.
Founded in 2015, discord allowed individuals to talk while playing PC games seamlessly. Users may utilize the service to establish servers that can include many text and audio channels. A typical discord account server may feature chat rooms dedicated to specific themes (such as “gaming” and “anime x manga”), as well as voice channels devoted to specific games or activities. The service’s high-quality, low-latency audio chat is a popular tool for Twitch broadcasters and podcasters. It has also expanded to accommodate massive video conversations to compete with Zoom.
In this article
01 [How Does Discord Work and What is it Used for?](#Part 1)
02 [How to Make a Discord Signup in the Browser?](#Part 2)
03 [How to Make a Discord Signup with Desktop?](#Part 3)
04 [How to Make a Signup Discord with App?](#Part 4)
05 [Discord Create Account FAQs](#Part 5)
Part 1 How Does Discord Work and What is it Used for?
Discord account allows friends to communicate with one another one-on-one or in groups via a server. You may use it to send direct messages to pals, as well as video calls, audio chat, and screen sharing. Once on a server, you can join a voice chat channel to communicate with other gamers who are playing certain games.
You can share many things on discord, including media files like images, gifs, audio, and videos. Speaking of videos, video editing doesn’t get any better than Filmora. Wondershare Filmora Video Editor is a sophisticated editing application for Windows and Mac users. It was initially known as Wondershare Video Editor, but following its fifth release, it got renamed Filmora. The video editor’s primary features include animation, overlays, audio control, on-screen recording, and multi-editing modes. The video editor is well-known for its feature-rich but the simple interface, making it suited for both novice and experienced users.
For Win 7 or later (64-bit)
For macOS 10.12 or later
Filmora’s standout features
● Editing Audio Equalizer 4K Resolution Support
● Support for GIFs
● Screen Dividers
● Controls For Video And Audio
● Multiple Video Clips Can Be Layered
● Stabilization of Video
● Presets for Color Grading
● Text Editing Expertise
● Tilt-Shift
● The mosaic (Blurring)
● Noise Elimination
● Importance in Social Life
● Preview of Each Frame
● Controlling the Speed
● Audio-Mixer
● Backgrounds in Chroma Key
● Screen Capture
● Separation of audio
● Scene Recognition
You can make your discord account and use it on almost any platform, including discord desktop software for Windows and Mac and iOS and Android apps for talking and calling on the move. If you prefer not to download anything, it also works in a web browser. You can link your discord account app to various popular services, such as Twitch and Spotify, so your friends can see your actions. While there is no discord Xbox app, you may link your discord and Xbox accounts so that others can see what you’re up to on your Xbox Series X or Xbox Series S.
Part 2 How to Make a Discord Signup in the Browser
Don’t have the discord account?
You can quickly sign up using your preferred web browser, i.e., Chrome, Microsoft Edge, Firefox, or Safari.
Follow the steps below to make a discord account using your web browser:
Step 1: Go to <www.discord.com> and click the “Login” button in the upper right corner.
Step 2: To establish a new discord account, click “Register” underneath the login page.
Step 3:
● Enter your email, a username, and a strong password.
● Date of birth.
● Accept the terms of service.
After entering the above, click the “Continue” button.
Step 4: Check the box besides “I am human” to enable the captcha.
Step 5: You will receive an email asking you to confirm your information. Select the “Verify email” option.
Once you’ve signed up for discord, you may access it via the Discord website or the mobile app. The program is free to download for Windows, Linux, Mac, Android, and iOS.
Follow the steps above to sign up on discord account successfully. Easy right? Let’s proceed!
Part 3 How to Make a Discord Signup with Desktop?
The discord creating account on your desktop is pretty much the same as using your browser.
Follow the steps below to make a discord account using your desktop.
Step 1: Click “Login” on the Discord website (top right).
Step 2: Underneath the sign-in box, click “Register.”
Step 3: Enter the email address, username, password, and birth date.
Step 4: Agree to the terms of service and then click “Continue.”
Step 5: Use the captcha to prove that you are not a robot.
Step 6: You will get an email to confirm your data; click on the link in the email to confirm.
See that? No big deal, right?
Part 4 How to Make a Signup Discord with App
Signing up for a discord account through the app is relatively easy, like the procedures above, you will not break a sweat.
Follow the easy steps below for discord create account on your smartphone device:
Step 1: Install and launch the Discord app on your smartphone
Step 2: Select the Register option.
Step 3: Choose whether to register by cellphone number or email address and input either one.
Step 4: You will get a message with a confirmation code or an email with a link.
Step 5: Enter the code or navigate to the URL.
Step 6: Enter your username and password here.
Step 7: Enter your birth date.
Step 8: Accept the terms of the agreement.
Step 9: Click “Next” to finish the Discord registration.
What Happens When You Disable your Discord Account?
When you deactivate your account, it goes to suspension mode. You may reactivate it by signing in and following the on-screen instructions. Keep in mind that discord accounts dormant for two years are removed, so if you want to keep yours, you must reactivate it (but you can disable it after this if you like).
After you deactivate an account, users will no longer get discord alerts. Users may, however, still receive friend requests, and any friend requests users get while their account is blocked will be ready for when they reactivate it. However, when a user decides to delete their account, the said account will get permanently deleted.
Tip: If you want to stay away from your discord account for a while with a plan to return to it later, it is advisable to log out or deactivate rather than delete it.
Part 5 Discord Create Account FAQs
Q. Is discord free, or do I have to pay?
A. Yes and no. The premium edition of discord is not free. If you don’t want to utilize the premium features, you may still download and make a discord account for free.
Q. Is there anything I cannot do on discord?
A. Do not organize, promote, or participate in any unlawful or possibly dangerous activities, such as sexual solicitation, human trafficking, or selling or enabling the sale of forbidden or potentially harmful products (firearms, ammunition, drugs, and controlled substances).
Q. Do messages disappear on discord?
A. Your messages are only destroyed: 1. if they are deleted individually (by you or a user with proper rights), 2. if you get banned, and the person banning you decides to delete all of your messages at once.
Q. Does discord account keep a record of interactions?
A. Yes, discord will track every discussion you have on discord acount, record everything you say on discord, and examine all photographs you transmit over discord.
Q. How will I know when someone blocks me on discord?
A. When you block someone, their online status on discord account changes to “offline” until unblocked and vice versa. They will also show offline in mutual servers or your chat history.
Q. How do I permanently delete my discord account?
A. To delete your discord created account for good, head to user settings, then tap on ‘my account.’ From there, tap on ‘Account Removal’ then tap on ‘Delete Account.’
If you are a server owner, you will have to delete the server or pass ownership of the server.
Q. How do I find servers to join on discord?
A. If you have a buddy who has a discord server you’d want to join, request an invite. If you’re a member of a discord community, ask for an invite or check on the community website.
By tapping the magnifying glass in the left window of the discord account app, you may also search for public servers that anybody can join.
● Ending Thoughts →
● Discord is a web program that works in most browsers. A desktop version is available for Windows, macOS, Linux, iOS, and Android. Discord’s desktop and browser versions are functionally and visually identical in practically every regard if you want to make a discord account. So, re-read the article and the FAQs on discord create account, and start your journey.
● Finally, for the creatives, boost your discord create account and usage experience by using Filmora to edit videos and make cool animations.
A Guide to Use Distortion Effect in Premeiere Pro
Create High-Quality Video - Wondershare Filmora
An easy and powerful YouTube video editor
Numerous video and audio effects to choose from
Detailed tutorials are provided by the official channel
Premiere Pro is one of the most popular timeline-based video editing software, with over 9 million users. It’s the successor to Adobe Premiere, and it comes with cool distortion effects. We’ll look at Premiere Pro distortion effects and how to use them.
In this article
01 How to Use Distortion Effect in Premiere Pro?
02 Bonus! Free Distortion Effects for Premiere Pro
Adobe Premiere Pro offers a wide variety of beneficial editing tools and effects. Below are some of the impressive distortion effects you’ll find in Premiere Pro and how to use them in your project.
1. Corner Pin Effect
This effect distorts your image by simply changing the position of its corners. You can use the Corner pin effect to twist, skew, shrink, or stretch an image. Additionally, you can use it to simulate movement or perspective pivoting from the edge of your clip like a door opening.
You can directly manipulate the properties of the Corner Pin effect in the Program monitor by clicking the Transform right next to Corner Pin. To adjust the properties, drag one of the corner handles.
- To use this effect, open Premiere Pro and click File. Choose Import from the drop-down menu. The File Explorer window will open and allow you to find your footage. Select the video file you want to import, then click Open.
- Go to Effects Control and click Distortion. Choose Corner Pin Effect from the drop-down menu.

- You can now pin each corner from its original point to another specific point by adjusting the slider on the Upper Left, Upper Right, Lower Left, and Lower Right. You can also highlight your selection tool when working with the Corner Pin effect.

2. Lens Distortion Effect
This distortion effect Premiere Pro simulates the distorted lens through which people view the clip.
1. Go to Effects Control>Distortion>Lens Distortion Effect.
2. Choose the settings you want to use from the available options and adjust the slider.
- The Vertical and Horizontal Decentering control displaces the lens’ focal and makes the image bend and smear. The image will wrap in on itself at extreme settings.
- The Curvature setting alters the curvature of the lens. You can specify a positive value to make the image convex, while the negative value makes the image concave.
- The Vertical and Horizontal Prism FX setting created results similar to horizontal decentering and vertical, but the image does not wrap in on itself at extreme values.
- Use the Fill Color option to specify the background color, and Fill Alpha to make your background transparent.

3. Magnify Effect
This effect allows you to enlarge a selected area of your clip. The Magnify effect acts as a magnifying glass set over an area of an image. You can also use this effect to scale the whole image far beyond 100 percent and still maintain resolution.
1. To use this effect, go to Effect Control>Distortion>Magnify.
2. Next, go to the left side of the Effects Control panel and make the necessary adjustments to suit your preferences.
- Shape: This control specifies the magnified area shape.
- Center: The Center control allows you to specify the center of the magnified section.
- Magnification: This setting lets users specify the percentage of the magnification of the area they have selected, while the values represent the scale percentage.
- Link: The Link control allows you to specify how the effect will link the Size, Feather, and Magnification amount, to enable them to decrease or increase proportionally. You will disable the Resize Layer option if you set the Link control to any of the available settings except None. Setting the Link control to any setting except None disables Resize Layer. Size & Feather To Magnification allows you to specify that the edge feather and size of the magnified section decrease or increase proportionally regarding the magnification adjustment.
- Size: This control allows you to specify the magnified area size in pixels.
- Feather: With the Feather option, you can specify the amount of feather the effect applies to the magnified area edge. Lower values will sharpen the edge. Higher values will soften the edge while blending the edge with the layer that’s behind it.
- Opacity: This control allows you to specify the transparency of the magnified region.
- Scaling: Use this option to specify the kind of scaling the effect is using to magnify an image.
- Blending Mode: Use this control to specify the blend mode the effect will use to combine the original clip with the magnified area. The None option shows transparent pixels around the magnified section.
- Resize Layer: Selecting this option means the effect will only use the boundaries as the clip’s edge when the magnified region extends beyond the original boundaries of the clip. Deselecting the Resize Layer means that the boundaries of the clip will crop any area of your image outside the bounding box of the original clip.

4. Mirror Effect
This distortion Premiere Pro effect splits an image along a line while reflecting one side onto the other. Where the reflection appears and which side will be reflected is determined by the reflection angles.
1. Head over to Effect Control>Distortion>Mirror to use this effect.
2. Adjust the controls until you get the results you desire.
- Reflection Angle: With the Reflection Angle control, you can specify the angle of reflection and where it appears on the clip. A zero-degree angle reflects the left-hand side on the right.
- Reflection Center: This control allows you to specify the position of the line. You need to click the box, then drag the resulting crosshair up to the area in the image where you would like to place the line.

5. Offset Effect
This effect pans your image within a clip, and visual details pushed off one side of this image will appear on the opposite side. You have to perform the offset with subpixel precision at the best quality.
Also, you can use Offset with a combination of other effects. Head over to Effect Control>Distortion>Offset to use this effect.

6. Spherize Effect
The Spherize effect allows users to wrap a video clip around a spherical shape. You can use it to give texts and objects a three-dimensional effect. Go to Effect Control>Distortion>Spherize and adjust the radius and center of the sphere.

7. Transform Effect
This effect applies 2-dimensional geometric transformations to your clip. You can use this effect to skew clips along any axis.
1. Go to Effect Control>Distortion>Transform to apply this effect to your clip.
2. Use Transform settings to adjust Opacity, Skew, Rotation, Scale, Anchor Point, and more.

8. Turbulent Displace Effect
This fun effect utilizes fractal noise to create turbulent Premiere Pro distortion effects in your image. You can use the Turbulent Displace effect to add movement to your clip.
1. Head to Effect Control>Distortion>Turbulent Displace.
2. Adjust the following controls:
- Displacement
- Amount
- Size
- Offset (Turbulence)
- Complexity
- Evolution
- Pinning
- Resize Layer
- Antialiasing For Best Quality

9. Twirl Effect
The Twirl effect allows you to rotate your clip around its center. It rotates the image more sharply in the middle than at the edge. You can use it on faces to make a funny clip. Navigate to Effect Control>Distortion>Twirl to start using this effect. Next, use the settings to adjust how much angle it twirls and the radius.

10. Wave Warp Effect
This effect is one of the most popular Premiere Pro distortion effects. It generates the appearance of a wave as it’s traveling across an image. The Wave Warp effect allows you to produce various wave shapes, including sine, circular, and square waves.
It’s automatically animated at a steady speed across the time range, and that’s without frames. You need to set keyframes to vary speeds.
1. Head to Effect Control>Distortion>Wave Warp to apply this effect in your video clip.
2. Now, change the wave speed, direction, height, width, and type to suit your preference.

Bonus! Free Distortion Effects for Premiere Pro
1. Liquid Distortion Effect
This effect can distort the content in a clip and can be used to shift into the next clip. It could be utilized in editing or used as a transition.

2. Earthquake Effect
This effect adds a shaking motion to the video clip you add it to; it works as a transition but could also be a useful editing tool.

3. Glass Effect
This effect can add various blurs to the video clip and be used to transition from one clip to the next.

4. TV Effect
This effect imitates the view of a television being turned on or off. You can use it to introduce a new video clip. It would also be a great start or end to the entire video.

5. Glitch Effect
This effect adds a glitch to the video clip. You can use it in editing or as a transition from one clip to the next.

Conclusion
● You can add any of these Premiere Pro distortion effects to make your videos more catchy. In turn, they will get more attention and views. Premiere Pro comes with tons of distortion effects and a responsive interface.
Premiere Pro is one of the most popular timeline-based video editing software, with over 9 million users. It’s the successor to Adobe Premiere, and it comes with cool distortion effects. We’ll look at Premiere Pro distortion effects and how to use them.
In this article
01 How to Use Distortion Effect in Premiere Pro?
02 Bonus! Free Distortion Effects for Premiere Pro
Adobe Premiere Pro offers a wide variety of beneficial editing tools and effects. Below are some of the impressive distortion effects you’ll find in Premiere Pro and how to use them in your project.
1. Corner Pin Effect
This effect distorts your image by simply changing the position of its corners. You can use the Corner pin effect to twist, skew, shrink, or stretch an image. Additionally, you can use it to simulate movement or perspective pivoting from the edge of your clip like a door opening.
You can directly manipulate the properties of the Corner Pin effect in the Program monitor by clicking the Transform right next to Corner Pin. To adjust the properties, drag one of the corner handles.
- To use this effect, open Premiere Pro and click File. Choose Import from the drop-down menu. The File Explorer window will open and allow you to find your footage. Select the video file you want to import, then click Open.
- Go to Effects Control and click Distortion. Choose Corner Pin Effect from the drop-down menu.
- You can now pin each corner from its original point to another specific point by adjusting the slider on the Upper Left, Upper Right, Lower Left, and Lower Right. You can also highlight your selection tool when working with the Corner Pin effect.
2. Lens Distortion Effect
This distortion effect Premiere Pro simulates the distorted lens through which people view the clip.
1. Go to Effects Control>Distortion>Lens Distortion Effect.
2. Choose the settings you want to use from the available options and adjust the slider.
- The Vertical and Horizontal Decentering control displaces the lens’ focal and makes the image bend and smear. The image will wrap in on itself at extreme settings.
- The Curvature setting alters the curvature of the lens. You can specify a positive value to make the image convex, while the negative value makes the image concave.
- The Vertical and Horizontal Prism FX setting created results similar to horizontal decentering and vertical, but the image does not wrap in on itself at extreme values.
- Use the Fill Color option to specify the background color, and Fill Alpha to make your background transparent.
3. Magnify Effect
This effect allows you to enlarge a selected area of your clip. The Magnify effect acts as a magnifying glass set over an area of an image. You can also use this effect to scale the whole image far beyond 100 percent and still maintain resolution.
1. To use this effect, go to Effect Control>Distortion>Magnify.
2. Next, go to the left side of the Effects Control panel and make the necessary adjustments to suit your preferences.
- Shape: This control specifies the magnified area shape.
- Center: The Center control allows you to specify the center of the magnified section.
- Magnification: This setting lets users specify the percentage of the magnification of the area they have selected, while the values represent the scale percentage.
- Link: The Link control allows you to specify how the effect will link the Size, Feather, and Magnification amount, to enable them to decrease or increase proportionally. You will disable the Resize Layer option if you set the Link control to any of the available settings except None. Setting the Link control to any setting except None disables Resize Layer. Size & Feather To Magnification allows you to specify that the edge feather and size of the magnified section decrease or increase proportionally regarding the magnification adjustment.
- Size: This control allows you to specify the magnified area size in pixels.
- Feather: With the Feather option, you can specify the amount of feather the effect applies to the magnified area edge. Lower values will sharpen the edge. Higher values will soften the edge while blending the edge with the layer that’s behind it.
- Opacity: This control allows you to specify the transparency of the magnified region.
- Scaling: Use this option to specify the kind of scaling the effect is using to magnify an image.
- Blending Mode: Use this control to specify the blend mode the effect will use to combine the original clip with the magnified area. The None option shows transparent pixels around the magnified section.
- Resize Layer: Selecting this option means the effect will only use the boundaries as the clip’s edge when the magnified region extends beyond the original boundaries of the clip. Deselecting the Resize Layer means that the boundaries of the clip will crop any area of your image outside the bounding box of the original clip.
4. Mirror Effect
This distortion Premiere Pro effect splits an image along a line while reflecting one side onto the other. Where the reflection appears and which side will be reflected is determined by the reflection angles.
1. Head over to Effect Control>Distortion>Mirror to use this effect.
2. Adjust the controls until you get the results you desire.
- Reflection Angle: With the Reflection Angle control, you can specify the angle of reflection and where it appears on the clip. A zero-degree angle reflects the left-hand side on the right.
- Reflection Center: This control allows you to specify the position of the line. You need to click the box, then drag the resulting crosshair up to the area in the image where you would like to place the line.
5. Offset Effect
This effect pans your image within a clip, and visual details pushed off one side of this image will appear on the opposite side. You have to perform the offset with subpixel precision at the best quality.
Also, you can use Offset with a combination of other effects. Head over to Effect Control>Distortion>Offset to use this effect.
6. Spherize Effect
The Spherize effect allows users to wrap a video clip around a spherical shape. You can use it to give texts and objects a three-dimensional effect. Go to Effect Control>Distortion>Spherize and adjust the radius and center of the sphere.
7. Transform Effect
This effect applies 2-dimensional geometric transformations to your clip. You can use this effect to skew clips along any axis.
1. Go to Effect Control>Distortion>Transform to apply this effect to your clip.
2. Use Transform settings to adjust Opacity, Skew, Rotation, Scale, Anchor Point, and more.
8. Turbulent Displace Effect
This fun effect utilizes fractal noise to create turbulent Premiere Pro distortion effects in your image. You can use the Turbulent Displace effect to add movement to your clip.
1. Head to Effect Control>Distortion>Turbulent Displace.
2. Adjust the following controls:
- Displacement
- Amount
- Size
- Offset (Turbulence)
- Complexity
- Evolution
- Pinning
- Resize Layer
- Antialiasing For Best Quality
9. Twirl Effect
The Twirl effect allows you to rotate your clip around its center. It rotates the image more sharply in the middle than at the edge. You can use it on faces to make a funny clip. Navigate to Effect Control>Distortion>Twirl to start using this effect. Next, use the settings to adjust how much angle it twirls and the radius.
10. Wave Warp Effect
This effect is one of the most popular Premiere Pro distortion effects. It generates the appearance of a wave as it’s traveling across an image. The Wave Warp effect allows you to produce various wave shapes, including sine, circular, and square waves.
It’s automatically animated at a steady speed across the time range, and that’s without frames. You need to set keyframes to vary speeds.
1. Head to Effect Control>Distortion>Wave Warp to apply this effect in your video clip.
2. Now, change the wave speed, direction, height, width, and type to suit your preference.
Bonus! Free Distortion Effects for Premiere Pro
1. Liquid Distortion Effect
This effect can distort the content in a clip and can be used to shift into the next clip. It could be utilized in editing or used as a transition.
2. Earthquake Effect
This effect adds a shaking motion to the video clip you add it to; it works as a transition but could also be a useful editing tool.
3. Glass Effect
This effect can add various blurs to the video clip and be used to transition from one clip to the next.
4. TV Effect
This effect imitates the view of a television being turned on or off. You can use it to introduce a new video clip. It would also be a great start or end to the entire video.
5. Glitch Effect
This effect adds a glitch to the video clip. You can use it in editing or as a transition from one clip to the next.
Conclusion
● You can add any of these Premiere Pro distortion effects to make your videos more catchy. In turn, they will get more attention and views. Premiere Pro comes with tons of distortion effects and a responsive interface.
A Guide to Effective Video Marketing
Video marketing is the process of promoting a product, service, or brand using videos intended to attract audiences’ attention and prompt them to action. With marketers and communicators working increasingly with AI, automation, chatbots, and all sorts of generative technology in 2023 and beyond, video is one of the most common digital mediums for connecting with people.
What exactly does effective video marketing look like today? This guide will take a closer look.
- Part 2. 3 Typical Types of Marketing Videos
- Part 3. 6 Tips for Making Your Video Effective
- Part 4: Useful Video Editing Tool
- Conclusion
Part 1: How to Create a Video Marketing Campaign

Launching a video marketing campaign requires considerable planning and preparation. Follow these best practices for video campaign success:
1.Set Goals and Identify Your Audience
The aim of video marketing for small businesses or large businesses should be tied to business objectives, such as raising brand awareness, educating consumers, or driving conversions. First and foremost, define these goals.
Who are you trying to reach with video content? You need a clear picture of this. Collect insights about audiences with regard to demographics, interests, values, media habits, and existing brand impressions. With these insights, you can create unique content that appeals to your target viewers.
2.Conduct Market Research
Research what kinds of videos connect with your audiences by accounting for competitors and non-competitors successfully using video. Identify videos with the most hits, shares, subscribers generated, and other metrics through channels like YouTube Analytics, Tubular Labs or SEMrush.
From the data, conclude common themes around video length, preferred formats for content, production methodologies, and so on, which should then serve to guide your own content.
3.Craft a Compelling Story
Every great marketing video is a story. Draw a story plot with rising tension and emotion leading to resolution. The story’s exposition, rising action, climax, and denouement can be outlined by famous storytelling frameworks.
Narratives that keep viewers engaged from beginning to end result in better videos. Early validation for your script ideas can be gathered through focus groups, social listening, surveys, and interviews with members of your target audience.
4.Produce Video/Audio with Quality
Bring your story to life by investing in experienced video producers. Budgets may be wildly divergent, so always aim to achieve the best production quality.
Feature crisp, bright camerawork, professional editing, and transitions. Be sure to use intense music to underscore emotional peaks and simple but eye-catching visual effects where they make sense.
For audio, manage volumes between scenes at the same level; minimize background noise; have clear dialogue and smooth mixing. Good video and audio keep viewers glued to your content.
5. Select Suitable Video Platforms
Research where video marketing is most effective in your niche, and figure out which social platforms and media sites your target audiences use.
Being present on several different platforms is every strategy’s dream. However, the real key is finding out where your audiences are most engaged and directing them there with video content tailored for the individual user experience by the platform.
6.Implement a Strong Call-to-Action
The ending of every video narrative should take the viewer toward an action. Clicks to websites? Subscriptions to YouTube channels? Form fills? App downloads?
Your final message in your video clears CTA. Add supporting calls-to-action in the form of superimposed graphics, cards, or endscreens outside of the video to direct traffic beyond that medium and give more expression to the story.
7.Track and Optimize Performance
After videos are posted, collect data on performance. Such indicators include view counts, average % viewed, changes in viewership over time, referral traffic, subscribers gained (added), conversion rates, and so on.
Feed analytics insights into an optimization road map. To inform new video projects targeting the same KPIs, look at higher versus lower-converting videos. Test repetition of the same content on different media platforms at various time intervals, with varying images of thumbnails and so forth, to improve metrics.
Part 2: 3 Typical Types of Marketing Videos

There are some video formats that particularly suit certain marketing objectives. Let’s explore some of the most versatile, effective genres with real-world examples:
1. Explainer Videos
Knowing how to simplify and explain complex products, services, or concepts is precisely what Seasoned Explainers do. They use motion graphics, cartoons, live action–it’s all good. They express it interestingly and help audiences understand value offerings they may be unfamiliar with.
2. Tutorial Videos
A good video tutorial leads audiences through a process one can use to employ the product, carry out the method, or develop the skill. Hands-on learning material meets user information needs, indirectly promoting brand owners of the know-how.
3. Behind-the-Scenes Content
These videos give audiences an insider’s perspective on making popular products. Getting a peek behind the curtain helps pique viewer curiosity while humanizing brands through interviews, b-roll footage, and more.
Part 3: 6 Tips for making your video effective

Creating personalized video marketing strategies that effectively engage your target audience and achieve your marketing goals requires careful planning and execution. You need to grab viewer attention fast, communicate your key messages clearly, and provide strong calls to action.
The key is to keep it concise, optimize for sound-off viewing, build in interactivity, showcase user-generated content, partner with influencers, and more. Apply these best practices for getting your marketing videos noticed and acted upon:
1.Keep It Concise
With a sea of content competing for viewer attention getting longer daily, shorter is better. Videos under 1 minute perform far better for driving clicks, conversions, completes, and shares. Test even 6-second bumper ads on YouTube and Facebook.
2. Capture Attention Early
You have seconds to hook audiences scrolling feeds non-stop. Dynamically edited intros with eye-catching colors, quick cuts, and dramatic questions/facts immediately grab interest versus slow fades or titles.
3.Make Sound Optional
85% of videos are now watched without sound on mobile devices. While strong audio is still important for reeled-in viewers, ensure critical info is communicated visually as well.
4.Incorporate Interactive Elements
Leverage platform tools like YouTube cards, info cards, links, hashtags, Q&As and more to keep audiences actively engaged with video content instead of passively viewing.
5. Spotlight User-Generated Content
User videos reviewing products or demonstrating branded tutorials often outperform corporate studio content now. Repurpose this UGC via reaction videos, contest highlights, and “best of” community compilations.
6.Build Influencer Partnerships
Collaborations with influencers popular with your target demos lend video credibility. Support creators with gear, access, co-promotion, etc., in exchange for branded integration and affiliate sales.
Part 4: Useful Video Editing Tool

Video Editing Now For Win 7 or later(64-bit)
Video Editing Now For macOS 10.14 or later
In creating marketing videos, the right editing software should help cut together raw material gatherings and integrate graphic elements. It must also permit an easy handling of musical components and the application of effects, among other things. The final step, polishing the product into various forms for export to a multitude of servers, should all be done with minimal effort through intelligent operating interfaces (UI). Among the options used by amateurs and professionals alike, Wondershare’s Filmora is one of the most popular.
Advertisement Video Editing in Filmora
Free Download For Win 7 or later(64-bit)
Free Download For macOS 10.14 or later
More advanced video editing for veteran editors yet an easy-to-use, intuitive software for beginners. Key features of Filmora include:
- Simple Drag-and-Drop Timeline Interface
- Library Of Visual Effects and Transitions
- Built-In Title Templates
- Color Grading and Color Matching Tools
- Support For Keyframe Animation
- Background Audio Mixer
- The Free-Use Audio, Image, Video Library
- Instant Previews of Edits
- Export For All Types of Platforms
From planning and carrying out shooting to editing, rendering and output, Filmora speeds up all the steps of bringing video projects to life. For marketing teams constantly producing clips, an intriguing aspect of the software is that its wide appeal to video skill levels combines well with pro-grade tools.
Conclusion
In the future, video marketing will only grow more critical. With virtual reality moving from gaming to experiential e-commerce, it is up to marketers to drive adoption. With these strategies, your brand can get ahead of the curve and use groundbreaking video programs to win over audiences at this time and in the years that follow.
Part 1: How to Create a Video Marketing Campaign
Launching a video marketing campaign requires considerable planning and preparation. Follow these best practices for video campaign success:
1.Set Goals and Identify Your Audience
The aim of video marketing for small businesses or large businesses should be tied to business objectives, such as raising brand awareness, educating consumers, or driving conversions. First and foremost, define these goals.
Who are you trying to reach with video content? You need a clear picture of this. Collect insights about audiences with regard to demographics, interests, values, media habits, and existing brand impressions. With these insights, you can create unique content that appeals to your target viewers.
2.Conduct Market Research
Research what kinds of videos connect with your audiences by accounting for competitors and non-competitors successfully using video. Identify videos with the most hits, shares, subscribers generated, and other metrics through channels like YouTube Analytics, Tubular Labs or SEMrush.
From the data, conclude common themes around video length, preferred formats for content, production methodologies, and so on, which should then serve to guide your own content.
3.Craft a Compelling Story
Every great marketing video is a story. Draw a story plot with rising tension and emotion leading to resolution. The story’s exposition, rising action, climax, and denouement can be outlined by famous storytelling frameworks.
Narratives that keep viewers engaged from beginning to end result in better videos. Early validation for your script ideas can be gathered through focus groups, social listening, surveys, and interviews with members of your target audience.
4.Produce Video/Audio with Quality
Bring your story to life by investing in experienced video producers. Budgets may be wildly divergent, so always aim to achieve the best production quality.
Feature crisp, bright camerawork, professional editing, and transitions. Be sure to use intense music to underscore emotional peaks and simple but eye-catching visual effects where they make sense.
For audio, manage volumes between scenes at the same level; minimize background noise; have clear dialogue and smooth mixing. Good video and audio keep viewers glued to your content.
5. Select Suitable Video Platforms
Research where video marketing is most effective in your niche, and figure out which social platforms and media sites your target audiences use.
Being present on several different platforms is every strategy’s dream. However, the real key is finding out where your audiences are most engaged and directing them there with video content tailored for the individual user experience by the platform.
6.Implement a Strong Call-to-Action
The ending of every video narrative should take the viewer toward an action. Clicks to websites? Subscriptions to YouTube channels? Form fills? App downloads?
Your final message in your video clears CTA. Add supporting calls-to-action in the form of superimposed graphics, cards, or endscreens outside of the video to direct traffic beyond that medium and give more expression to the story.
7.Track and Optimize Performance
After videos are posted, collect data on performance. Such indicators include view counts, average % viewed, changes in viewership over time, referral traffic, subscribers gained (added), conversion rates, and so on.
Feed analytics insights into an optimization road map. To inform new video projects targeting the same KPIs, look at higher versus lower-converting videos. Test repetition of the same content on different media platforms at various time intervals, with varying images of thumbnails and so forth, to improve metrics.
Part 2: 3 Typical Types of Marketing Videos
There are some video formats that particularly suit certain marketing objectives. Let’s explore some of the most versatile, effective genres with real-world examples:
1. Explainer Videos
Knowing how to simplify and explain complex products, services, or concepts is precisely what Seasoned Explainers do. They use motion graphics, cartoons, live action–it’s all good. They express it interestingly and help audiences understand value offerings they may be unfamiliar with.
2. Tutorial Videos
A good video tutorial leads audiences through a process one can use to employ the product, carry out the method, or develop the skill. Hands-on learning material meets user information needs, indirectly promoting brand owners of the know-how.
3. Behind-the-Scenes Content
These videos give audiences an insider’s perspective on making popular products. Getting a peek behind the curtain helps pique viewer curiosity while humanizing brands through interviews, b-roll footage, and more.
Part 3: 6 Tips for making your video effective
Creating personalized video marketing strategies that effectively engage your target audience and achieve your marketing goals requires careful planning and execution. You need to grab viewer attention fast, communicate your key messages clearly, and provide strong calls to action.
The key is to keep it concise, optimize for sound-off viewing, build in interactivity, showcase user-generated content, partner with influencers, and more. Apply these best practices for getting your marketing videos noticed and acted upon:
1.Keep It Concise
With a sea of content competing for viewer attention getting longer daily, shorter is better. Videos under 1 minute perform far better for driving clicks, conversions, completes, and shares. Test even 6-second bumper ads on YouTube and Facebook.
2. Capture Attention Early
You have seconds to hook audiences scrolling feeds non-stop. Dynamically edited intros with eye-catching colors, quick cuts, and dramatic questions/facts immediately grab interest versus slow fades or titles.
3.Make Sound Optional
85% of videos are now watched without sound on mobile devices. While strong audio is still important for reeled-in viewers, ensure critical info is communicated visually as well.
4.Incorporate Interactive Elements
Leverage platform tools like YouTube cards, info cards, links, hashtags, Q&As and more to keep audiences actively engaged with video content instead of passively viewing.
5. Spotlight User-Generated Content
User videos reviewing products or demonstrating branded tutorials often outperform corporate studio content now. Repurpose this UGC via reaction videos, contest highlights, and “best of” community compilations.
6.Build Influencer Partnerships
Collaborations with influencers popular with your target demos lend video credibility. Support creators with gear, access, co-promotion, etc., in exchange for branded integration and affiliate sales.
Part 4: Useful Video Editing Tool
Video Editing Now For Win 7 or later(64-bit)
Video Editing Now For macOS 10.14 or later
In creating marketing videos, the right editing software should help cut together raw material gatherings and integrate graphic elements. It must also permit an easy handling of musical components and the application of effects, among other things. The final step, polishing the product into various forms for export to a multitude of servers, should all be done with minimal effort through intelligent operating interfaces (UI). Among the options used by amateurs and professionals alike, Wondershare’s Filmora is one of the most popular.
Advertisement Video Editing in Filmora
Free Download For Win 7 or later(64-bit)
Free Download For macOS 10.14 or later
More advanced video editing for veteran editors yet an easy-to-use, intuitive software for beginners. Key features of Filmora include:
- Simple Drag-and-Drop Timeline Interface
- Library Of Visual Effects and Transitions
- Built-In Title Templates
- Color Grading and Color Matching Tools
- Support For Keyframe Animation
- Background Audio Mixer
- The Free-Use Audio, Image, Video Library
- Instant Previews of Edits
- Export For All Types of Platforms
From planning and carrying out shooting to editing, rendering and output, Filmora speeds up all the steps of bringing video projects to life. For marketing teams constantly producing clips, an intriguing aspect of the software is that its wide appeal to video skill levels combines well with pro-grade tools.
Conclusion
In the future, video marketing will only grow more critical. With virtual reality moving from gaming to experiential e-commerce, it is up to marketers to drive adoption. With these strategies, your brand can get ahead of the curve and use groundbreaking video programs to win over audiences at this time and in the years that follow.
Also read:
- Speed Up/Down Videos in VLC
- 2024 Approved Change Aspect Ratio of Video
- Do You Want Your Photos and Videos to Give an Old and Vintage Feel? Here Are some Vintage LUTs Premiere Pro Free and Paid Options Available to Download
- New 12 Top Marketing Slideshow Templates
- Detailed Steps to Rotate Videos in Davinci Resolve
- Updated 2024 Approved Top 5 AI Music Video Examples and Makers to Make Them
- Discover the Top 10 Video Editing Apps with Templates for Professional-Grade Results. Edit Like a Pro with These Tools for 2024
- Updated How to Change Aspect Ratio of Video for 2024
- Updated Things You Need to Know About Transparent PNG Remove and Convert for 2024
- Updated In 2024, Updated 8 Ways to Merge SRT with MP4
- Make Videos with Pictures and Music-10 Apps
- New The Craziest 10 AI Editors Youve Ever Seen
- Updated In 2024, Want to Find a Good Camera for YouTube? This Article Brings You some of the Best Options of Different Varieties for Your Channel
- Use The Best LUTs for Lightroom
- New Slowing Down GIF With The Best Available Methods
- Updated In 2024, How To Add Fade In Windows Video Editor
- How to Make an Aesthetic Slideshow
- An Ultimate Guide to Edit a Music Video Aspect Ratio and First Cut
- Updated In 2024, Best 22 Video Editing Tips to Know
- New Easy Steps to Add Miniature Effect to Videos for 2024
- Updated In 2024, Do You Know How Boring a Video Can Be with Silent Moments? Some Tools with Silent Detection Features Help You Delete Those Moments
- New 2024 Approved Looking for the Best Way to Create Stunning Video Animations? Here, We Look at some of the Best Animated Video Maker Solutions to Use
- New In 2024, How to Use Canva Color Match
- New In 2024, Convert Your Videos to 60 FPS Using These Excellent Tools
- Still Using Pattern Locks with Samsung Galaxy F04? Tips, Tricks and Helpful Advice
- Updated Exploring The Best Text-to-Speech Online Tools To Use
- In 2024, Easy Ways to Manage Your Oppo F23 5G Location Settings | Dr.fone
- How To Transfer WhatsApp From iPhone 14 Plus to other iPhone 13 Pro Max devices? | Dr.fone
- In 2024, How to Reset your Realme 11X 5G Lock Screen Password
- Your Account Has Been Disabled in the App Store and iTunes On Apple iPhone 11 Pro?
- In 2024, A Quick Guide to Asus ROG Phone 8 FRP Bypass Instantly
- In 2024, How to Detect and Stop mSpy from Spying on Your Apple iPhone XS | Dr.fone
- List of Pokémon Go Joysticks On Realme 10T 5G | Dr.fone
- In 2024, Unlock Realme 12 Pro+ 5G Phone Password Without Factory Reset Full Guide Here
- In 2024, 4 Ways to Transfer Music from Oppo F23 5G to iPhone | Dr.fone
- How To Remove Screen Lock PIN On Vivo Y02T Like A Pro 5 Easy Ways
- How To Transfer Data From iPhone 12 mini To Other iPhone devices? | Dr.fone
- In 2024, Detailed Review of doctorSIM Unlock Service For Apple iPhone X
- How to Repair corrupt MP4 and MOV files of Nokia 105 Classic using Video Repair Utility on Windows?
- In 2024, 3 Ways for Android Pokemon Go Spoofing On Oppo Find X7 Ultra | Dr.fone
- 5 Easy Ways to Change Location on YouTube TV On Realme C33 2023 | Dr.fone
- In 2024, Overview of the Best Infinix Note 30 Screen Mirroring App | Dr.fone
- Ways To Find Unlocking Codes For Vivo Y100t Phones
- In 2024, Apple iPhone 15 Plus Screen Mirroring You Must Know | Dr.fone
- In 2024, Pokemon Go Error 12 Failed to Detect Location On Samsung Galaxy S23 Ultra? | Dr.fone
- Title: Updated 2024 Approved A Comprehensive Guide on VHS Technology and Its Influence on Video Editing
- Author: Morgan
- Created at : 2024-05-19 05:12:52
- Updated at : 2024-05-20 05:12:52
- Link: https://ai-video-editing.techidaily.com/updated-2024-approved-a-comprehensive-guide-on-vhs-technology-and-its-influence-on-video-editing/
- License: This work is licensed under CC BY-NC-SA 4.0.
