
:max_bytes(150000):strip_icc():format(webp)/ScreenShot2018-12-08at3.04.00PM-5c0c23f6c9e77c00018eae4e.png)
Updated 2024 Approved A Guide to Color Grade Your Picture in LightRoom
A Guide to Color Grade Your Picture in LightRoom
Create High-Quality Video - Wondershare Filmora
An easy and powerful YouTube video editor
Numerous video and audio effects to choose from
Detailed tutorials are provided by the official channel
Every budding photographer knows what Photoshop is Adobe Lightroom (officially Adobe Photoshop Lightroom) is the newer and more advanced version of Photoshop. Compared with other alternatives of Lightroom , Lightroom helps photographers import, modify, manipulate, find, organize, and manage their images as an image editing software. Lightroom combines photo management and photo editing in one.
One of the most amazing things about Lightroom is its autosave or nondestructive feature. Once you edit your photos, Lightroom instantly saves and stores them in your Lightroom catalog. With its inbuilt-presets, Lightroom makes working on your project so much easy and fun.
You can leverage Lightroom’s unique features to perform different types of tasks. However, in this article, you’ll learn color grading in Lightroom and how to make it work.
In this article
03 How To Color Grade Your Picture in LightRoom
What Is Color Grading?
Color grading is one of the essential processes for creating the perfect video and image content. Like with color correction, color grading helps enhance the appearance of your image or video and makes it appealing to viewers. However, unlike color correction, it focuses on creating stylistic or cinematic effects rather than rectifying mistakes in the image.
Color grading enhances an already edited or otherwise perfect image or video. So, in color grading, you are not trying to balance out colors or make your pictures look natural to the human eyes. Color correction does all that. Instead, with color grading, you aim to “paint over” a color-corrected content to evoke specific emotions or moods in the viewers.
Colors carry different emotions or visual tones. So, they’re essential in the post-production process to manipulate viewers into specific moods that tell your story best. In other words, color grading aligns your viewer’s emotions to the central theme in your story.

For example, if your image or video’s theme is passion, power, violence, or danger, red portrays them perfectly. Meanwhile, blue does it when you wish to evoke calmness and melancholy in your viewers.
Other examples include:
- pink for beauty, innocence, and femininity,
- Green for nature, darkness, and corruption
- Purple for fantasies, and the mystical
- Yellow for obsession, sickness, and naivety
- Orange for warmth, friendliness, youth, and happiness
Have you noticed that turning your pictures black and white makes them look timeless? That’s color grading in action.
Color Grading in LightRoom
Are you amazed by the thrilling power of color grading to manipulate viewers’ emotions? Are you wondering how you can achieve that effect seamlessly? Then, you don’t need to worry about it. With Adobe Photoshop Lightroom, you too can make magic.
Since Lightroom is an advanced photo editor, it has a lot to offer in features. Unfortunately, this may also mean that it can be complex to understand, especially if you’re new to photo editing. So, first things first, you must understand the color grading panel in Lightroom to appreciate it better.
Lightroom’s color grading panel is right beneath the HSL panel in the Develop Panel. It serves as a replacement for the Split Toning Panel from earlier versions, so it’s pretty easy to find.
The color grading panel comprises five small icons, three color wheels, and a blending/balance slider:
● The Five Small Icons
Lightroom’s small icons are a 3-way default layout, shadows, mid-tones, highlights, and global. With 3-way, you can manipulate the highlights, shadows, and mid-tones. Mid-tones, highlights, and shadows hide all color wheels, excluding the necessary ones that adjust them.
Meanwhile, Global combines and blends the highlights, mid-tones, and shadow adjustments no matter the luminosity. Global ensures that the color wheels work harmoniously.
When adjusting icons, it’s best to use each color wheel one after another one. You’ll get better and more precise outcomes that way compared to using them together.
● Lightroom’s Color Wheels
You can view Lightroom’s three-color wheels through the 3-way default layout. The color wheels help to enhance distinct image parts by providing various color hues. It also allows you to introduce saturation through an adjustable knob.
Each lightroom’s color wheels feature a luminance slide beneath them that adjusts color brightness. Between the luminance slide and the wheel is a visible eye icon that you can use to turn the effects on or off.
● The Blending and Balance Slider
The blending and balance sliders offer you advanced control over how your colors look after introducing them. With the blending slider, you can control the color distinctiveness between highlights and shadows. In other words, this feature helps to merge colors to produce a much more balanced and beautiful result.
The balance slider adjusts altered mid-tones, highlights, and shadows to balance the effects. By default, the slider is set at 0 in the middle and allows you to move it in opposite directions for distinct effects. For example, you can use this tool to balance shadows with over-concentrated colors.
While the above features are visible to everyone in the 3-way view, there are two more hidden sliders. You may only view them when editing highlights, shadows, mid-tones, or the global color wheels. They’re the hue and saturation sliders that you can only uncover by clicking on the arrow below the eye icon.
There’s no idea why the hue and saturation sliders aren’t visible in the 3-way view. That’s especially when you discover that they do the all-important job of making minor but precise changes to final adjustments. This produces an excellent fine-tuned outcome and gives your image a professional finish.

How To Color Grade Your Picture in LightRoom
If you wish to use the color grading Lightroom tool to enhance photos, here’s a comprehensive guide for you. You’ll learn the best practices to apply when using the specific Lightroom features to produce your desired effects:
● Pick Your Color Scheme
What’s color grading without the right colors? Choosing an appropriate color scheme is one of the essential steps in Lightroom color grading. That’s because it sets the tone for the next steps. If you choose the wrong colors, you won’t get the excellent result you desire no matter how hard you try.
First, take a good look at your picture and its visible colors. Then think of the colors that compliment or contrast with them. For example, you should base images with red highlights around red. You can also try colors close to red in the color wheel, like orange.
Once you’ve found the colors that suit your image, you’re ready for the next steps in your color grading process. However, more than just adding colors, you must also pay attention to contrasting colors during processing. If you find such unwanted colors, use the HSL panel to pale them out.
● Prioritize Precision
In earlier paragraphs, you learned that working with the highlights, shadows, and mid-tones individually is best. That’s because individual adjustments are a painstaking process that guarantees the most accurate results. This makes a lot of difference in the final product compared to when you work with the wheel.
Working on the shadows, highlights, and mid-tones individually also connects to the hue and saturation sliders. So you remember how vital these hidden sliders are? You wouldn’t be able to access them by working on the tools one after another. Take that as your reward for being detail-oriented.
● Increase Saturation Values
Sometimes, the effect of one tool tells on another. For example, leaving your saturation values below may render your hue slider ineffective. To avoid that confusion, it’s best to increase your saturation levels to some values higher than your preferred one.
Yes, it wouldn’t look nice initially as you adjust the hue. However, it will ensure that you get the perfect color for your image. You can always go back to adjust the saturation to your choice values later on.
● Use Color Wheels To Find Color, Use Shadows to Refine
When discussing how to choose your color scheme, you must have understood how vital the color wheel is in finding harmonious hues. However, picking your preferred color isn’t the complete process. You must learn to fine-tune your chosen color by using the hue slider. Do this after adjusting the saturation to your preferred level as in the previous step. The result is always mind-blowing.

● Learn the Short Cuts
There are some shortcuts to learn when color grading in Lightroom to enhance accuracy and convenience. For example, option (Mac)/Alt (Windows) gives you better control over your image’s outcomes. Option/Alt + Up will increase saturation by one while the shift key adjusts it. You can use Command (Mac)/Ctrl (Windows) to adjust the hue. Also, the reset button on the right side of your panel takes you back to your initial image.
● Extra Tips
These best practices will help you to achieve excellent results:
- Don’t color grade without understanding the psychology of colors. Know what colors convey different moods or emotions.
- Be sure to work with high-quality pictures. Color grading isn’t magic; it wouldn’t correct an already lousy image.
- Shooting your pictures in RAW gives you more color control.
Conclusion
● Now that you’ve learned how to color grade using Lightroom, there’s no limit to what you can achieve. You can now explore your creative side with so much fun. However, know that you will likely not get it right the first time. Perfection comes with consistent practice or trial and error.
Every budding photographer knows what Photoshop is Adobe Lightroom (officially Adobe Photoshop Lightroom) is the newer and more advanced version of Photoshop. Compared with other alternatives of Lightroom , Lightroom helps photographers import, modify, manipulate, find, organize, and manage their images as an image editing software. Lightroom combines photo management and photo editing in one.
One of the most amazing things about Lightroom is its autosave or nondestructive feature. Once you edit your photos, Lightroom instantly saves and stores them in your Lightroom catalog. With its inbuilt-presets, Lightroom makes working on your project so much easy and fun.
You can leverage Lightroom’s unique features to perform different types of tasks. However, in this article, you’ll learn color grading in Lightroom and how to make it work.
In this article
03 How To Color Grade Your Picture in LightRoom
What Is Color Grading?
Color grading is one of the essential processes for creating the perfect video and image content. Like with color correction, color grading helps enhance the appearance of your image or video and makes it appealing to viewers. However, unlike color correction, it focuses on creating stylistic or cinematic effects rather than rectifying mistakes in the image.
Color grading enhances an already edited or otherwise perfect image or video. So, in color grading, you are not trying to balance out colors or make your pictures look natural to the human eyes. Color correction does all that. Instead, with color grading, you aim to “paint over” a color-corrected content to evoke specific emotions or moods in the viewers.
Colors carry different emotions or visual tones. So, they’re essential in the post-production process to manipulate viewers into specific moods that tell your story best. In other words, color grading aligns your viewer’s emotions to the central theme in your story.
For example, if your image or video’s theme is passion, power, violence, or danger, red portrays them perfectly. Meanwhile, blue does it when you wish to evoke calmness and melancholy in your viewers.
Other examples include:
- pink for beauty, innocence, and femininity,
- Green for nature, darkness, and corruption
- Purple for fantasies, and the mystical
- Yellow for obsession, sickness, and naivety
- Orange for warmth, friendliness, youth, and happiness
Have you noticed that turning your pictures black and white makes them look timeless? That’s color grading in action.
Color Grading in LightRoom
Are you amazed by the thrilling power of color grading to manipulate viewers’ emotions? Are you wondering how you can achieve that effect seamlessly? Then, you don’t need to worry about it. With Adobe Photoshop Lightroom, you too can make magic.
Since Lightroom is an advanced photo editor, it has a lot to offer in features. Unfortunately, this may also mean that it can be complex to understand, especially if you’re new to photo editing. So, first things first, you must understand the color grading panel in Lightroom to appreciate it better.
Lightroom’s color grading panel is right beneath the HSL panel in the Develop Panel. It serves as a replacement for the Split Toning Panel from earlier versions, so it’s pretty easy to find.
The color grading panel comprises five small icons, three color wheels, and a blending/balance slider:
● The Five Small Icons
Lightroom’s small icons are a 3-way default layout, shadows, mid-tones, highlights, and global. With 3-way, you can manipulate the highlights, shadows, and mid-tones. Mid-tones, highlights, and shadows hide all color wheels, excluding the necessary ones that adjust them.
Meanwhile, Global combines and blends the highlights, mid-tones, and shadow adjustments no matter the luminosity. Global ensures that the color wheels work harmoniously.
When adjusting icons, it’s best to use each color wheel one after another one. You’ll get better and more precise outcomes that way compared to using them together.
● Lightroom’s Color Wheels
You can view Lightroom’s three-color wheels through the 3-way default layout. The color wheels help to enhance distinct image parts by providing various color hues. It also allows you to introduce saturation through an adjustable knob.
Each lightroom’s color wheels feature a luminance slide beneath them that adjusts color brightness. Between the luminance slide and the wheel is a visible eye icon that you can use to turn the effects on or off.
● The Blending and Balance Slider
The blending and balance sliders offer you advanced control over how your colors look after introducing them. With the blending slider, you can control the color distinctiveness between highlights and shadows. In other words, this feature helps to merge colors to produce a much more balanced and beautiful result.
The balance slider adjusts altered mid-tones, highlights, and shadows to balance the effects. By default, the slider is set at 0 in the middle and allows you to move it in opposite directions for distinct effects. For example, you can use this tool to balance shadows with over-concentrated colors.
While the above features are visible to everyone in the 3-way view, there are two more hidden sliders. You may only view them when editing highlights, shadows, mid-tones, or the global color wheels. They’re the hue and saturation sliders that you can only uncover by clicking on the arrow below the eye icon.
There’s no idea why the hue and saturation sliders aren’t visible in the 3-way view. That’s especially when you discover that they do the all-important job of making minor but precise changes to final adjustments. This produces an excellent fine-tuned outcome and gives your image a professional finish.
How To Color Grade Your Picture in LightRoom
If you wish to use the color grading Lightroom tool to enhance photos, here’s a comprehensive guide for you. You’ll learn the best practices to apply when using the specific Lightroom features to produce your desired effects:
● Pick Your Color Scheme
What’s color grading without the right colors? Choosing an appropriate color scheme is one of the essential steps in Lightroom color grading. That’s because it sets the tone for the next steps. If you choose the wrong colors, you won’t get the excellent result you desire no matter how hard you try.
First, take a good look at your picture and its visible colors. Then think of the colors that compliment or contrast with them. For example, you should base images with red highlights around red. You can also try colors close to red in the color wheel, like orange.
Once you’ve found the colors that suit your image, you’re ready for the next steps in your color grading process. However, more than just adding colors, you must also pay attention to contrasting colors during processing. If you find such unwanted colors, use the HSL panel to pale them out.
● Prioritize Precision
In earlier paragraphs, you learned that working with the highlights, shadows, and mid-tones individually is best. That’s because individual adjustments are a painstaking process that guarantees the most accurate results. This makes a lot of difference in the final product compared to when you work with the wheel.
Working on the shadows, highlights, and mid-tones individually also connects to the hue and saturation sliders. So you remember how vital these hidden sliders are? You wouldn’t be able to access them by working on the tools one after another. Take that as your reward for being detail-oriented.
● Increase Saturation Values
Sometimes, the effect of one tool tells on another. For example, leaving your saturation values below may render your hue slider ineffective. To avoid that confusion, it’s best to increase your saturation levels to some values higher than your preferred one.
Yes, it wouldn’t look nice initially as you adjust the hue. However, it will ensure that you get the perfect color for your image. You can always go back to adjust the saturation to your choice values later on.
● Use Color Wheels To Find Color, Use Shadows to Refine
When discussing how to choose your color scheme, you must have understood how vital the color wheel is in finding harmonious hues. However, picking your preferred color isn’t the complete process. You must learn to fine-tune your chosen color by using the hue slider. Do this after adjusting the saturation to your preferred level as in the previous step. The result is always mind-blowing.
● Learn the Short Cuts
There are some shortcuts to learn when color grading in Lightroom to enhance accuracy and convenience. For example, option (Mac)/Alt (Windows) gives you better control over your image’s outcomes. Option/Alt + Up will increase saturation by one while the shift key adjusts it. You can use Command (Mac)/Ctrl (Windows) to adjust the hue. Also, the reset button on the right side of your panel takes you back to your initial image.
● Extra Tips
These best practices will help you to achieve excellent results:
- Don’t color grade without understanding the psychology of colors. Know what colors convey different moods or emotions.
- Be sure to work with high-quality pictures. Color grading isn’t magic; it wouldn’t correct an already lousy image.
- Shooting your pictures in RAW gives you more color control.
Conclusion
● Now that you’ve learned how to color grade using Lightroom, there’s no limit to what you can achieve. You can now explore your creative side with so much fun. However, know that you will likely not get it right the first time. Perfection comes with consistent practice or trial and error.
Top Animated Title Makers
You know that your video needs a title, but rather than just type in some bland text to introduce the video, you can create an animated title page that is far more attractive. Animated titles make a video more attractive and when done correctly, they can even guarantee that your target audience will stick around long enough to watch the entire video. They can also be very useful for introducing the content of the video.
But to make an effective animated title, you need a tool that is designed to do just that. In this article, we look at some of the top animated title makers that you can use to create the perfect animated title for your video.
Part 1. Animated Title Maker Online
If you don’t want to install software on your computer to create the animated title, the following are the top online tools to choose from;
Animaker
Link: https://www.animaker.com/text-animation-maker
Rating: 4.5/5
Animaker is an online tool that is specifically designed to help you create text animations that you can then add to your video project. Available online on all browsers, Animaker has a simple user interface that makes it easy to create text animations in a matter of minutes. It is so easy to use that even the average beginner can create stunning text animations.
If you don’t want to create the animations from scratch, Animaker has numerous pre-designed templates for you to choose from that you can then just edit to fit your design. It also has a lot of customizable infographics that you can repurpose.

Animatron Studio
Link: https://www.animatron.com/studio
Rating: 4.5/5
The Animatron Studio is a one-stop solution for generating all types of animated texts. You can use it to create the perfect animated title for your video, but its numerous features also mean that it is one of the best ways to create attention-grabbing animated banner ads that can be posted on various ad sites,
It has a wealth of resources that you can use to create the title including more than 500,000 royalty-free images, videos, and audio to include in your project. If you don’t want to build the animated content from the ground up, you can select from the 200 pre-animated sets that Animatron Studio provides.
Kapwing Title Maker
Link: https://www.kapwing.com/animated-text-video-maker
Rating: 4.5/5
If your goal is to do more than just create an animated title for your video, Kapwing is a good solution. It is a complete online video editor that can also be used to create animated titles. As such, you can expect Kapwing to have more advanced features that allow you to customize the animated title in various ways.
For instance, it has a huge selection of animations that you can apply to the text. But you also get the option to upload your own animations, colors, and fonts. But please note that the free version of Kapwing will add a watermark to the video.

Biteable Animated Text Maker
Link: https://biteable.com/animated/text/
Rating: 4.5/5
Biteable is one of the most popular solutions that you can use to create all kinds of animated texts. It is simple enough to use that it is useful to both professionals and amateur video creators. It has numerous useful features including custom scenes, foundations, backgrounds, and characters all of which can work together to create the perfect animated title.
One of the main benefits of choosing Biteable is that you can share the videos you edit directly on social media without having to download the video.

Flexclip Video Maker
Link: https://www.flexclip.com/editor/
Rating: 4.5/5
Flexclip is another very easy-to-use and easily accessible solution to create animated texts for videos. Rather than create the texts from scratch, Flexclip allows you to create stunning animated texts just by selecting several parameters.
There are also a lot of pre-made designer text templates that are fully customizable. All you have to do is select one of the templates, and change the text, font, and any images to make it unique to you and your video.

Part 2. Animated Title Maker for Computer
Online tools can be useful, especially since they are more easily accessible. But if you want additional features and more ways to customize your animated title, the following desktop solutions may be more applicable to you;
Filmora
Rating: 4.5/5
Wondershare Filmora is a complete suite of video editing tools that can also come in handy when creating animated titles for videos. It is a very simple video editor with a simple user interface, making it an ideal solution even for beginner users. Adding a title to your video is easy and you get to choose from more than 200 different animations that you can apply to bring the text to life.
Filmora is also very useful because it comes with advanced editing features for the professional editor. You can use it to edit all aspects of the video including the clips and even any audio that may be on the project.

Adobe Animate
Rating: 4.5/5
Adobe Animate is a great option to create various animations for your video project, including animated texts. Used by animators to create 2D animated content, Adobe Animate has a lot of features designed to facilitate this kind of animation and is, therefore, one of the go-to solutions for designers looking to create illustrations like logos and infographics.
But like other Adobe programs, Adobe Animate is not very easy to use and the beginner may find that it takes quite a long time to figure out how it works. But once you figure it out, the 800+ web fonts can make it very easy for you to customize your animated title in various ways.

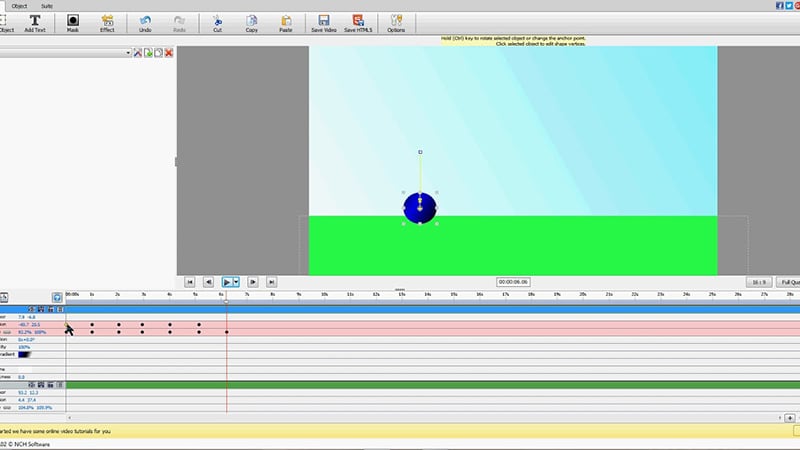
Express Animate
Rating: 4.5/5
Express Animate is a completely free program that you can download on your computer. It is a complete video editor which means that you can use it to animate text and characters, but it is also a great way to edit other aspects of the video including the audio tracks and adding digital effects.
With a simple user interface, Express Animate allows users to create 2D animations that can be used to create unique videos. It is also a good way to create GIFs and memes.
Movavi Video Editor
Rating: 4.5/5
Movavi Video Editor is another complete suite of editing tools that can also come in handy when you want to create an animated title for your video. Designed for both professionals and beginners, this video has all the advanced features you will need to edit all aspects of your video, including a built-in audio editor.
When it comes to animation, Movavi has a lot of effects and transitions as well as pre-made title templates to choose from. Once you have selected the title, you can easily customize the font and color to fit into your project.

Windows Movie Maker
Rating: 4.5/5
For PC users Windows Movie Maker is a simple to use and free way to edit videos. Included with the Windows OS, you likely don’t need to install any software to use and even though it is a free solution, Windows Movie Maker does have the necessary features to create and add animated titles to any video.
It comes with numerous effects, transitions, and templates to choose from when animating text. And it can also be used to edit videos in other ways including trimming and merging clips.

Part 3. Animated Title Maker Apps
If you are editing your videos on your mobile device, the following are the top animated title-making apps to choose from;
Tomo
Rating: 4.5/5
Link: https://m.apkpure.com/tomo-animate-text-in-video/com.entzeners.app.tomo
Tomo is one of the best apps that you can use to animate text in a video. It has robust features that allow you to easily add text to the video and then animate the text using various transitions and effects. Once the edits are complete, Tomo allows you to share the completed video directly on social media apps like Instagram and Twitter.

Adobe Spark
Rating: 4.5/5
Link:https://apps.apple.com/us/app/adobe-spark-post-design-maker/id1051937863
Available for both Android and iOS devices, Adobe Spark is a video editing tool that has numerous tools to add and edit texts on videos. You can use the professionally designed templates that you have access to when using Adobe Spark to create stunning animation titles. And since it easily integrates with other apps on the device, sharing the videos is very easy.
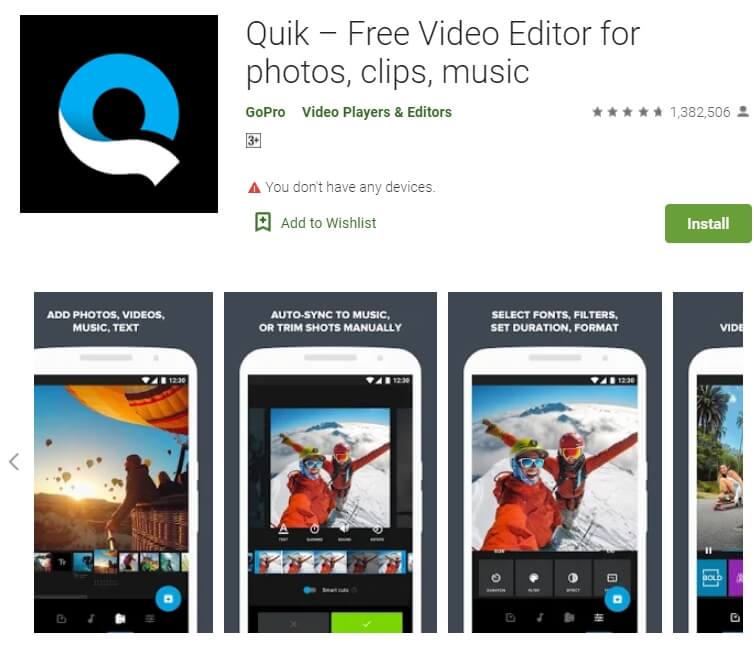
Quik
Rating: 4.5/5
Link: https://play.google.com/store/apps/details?id=com.gopro.smarty&hl=en&gl=US
Quik is an app that is dedicated to text animations and therefore one of the best solutions when you want to add and edit texts on videos. It is available for both iOS and Android and although the free version of the app is slightly limited, its basic editing features are still better than what you find on other more expensive solutions.
Hyper-type Animated Text Videos
Rating: 4.5/5
Link: https://itunes.apple.com/us/app/hype-type-animated-text-videos
This app gives you two options when it comes to animating the text on your video; auto-motion and typography. It focuses on just adding and editing text on a video and as such may not have any of the other video editing features you will find on some of the other apps. But if your goal is to create an interactive animated video title, Hyper-type Animated Text Videos is a great solution.
Vimeo
Rating: 4.5/5
Link: https://play.google.com/store/apps/details?id=com.vimeo.android.videoapp&hl=en&gl=US
Also available for both iOS and Android devices, Vimeo can also be a handy solution for the creation and editing of animated titles for videos. It has a lot of features to edit not just the text in videos, but also all other elements including audio. You even get a wide selection of royalty-free music that you can add to the video and motion stickers to make your title stand out even more. But the free version of Vimeo will add a watermark to the video.

Free Download For Win 7 or later(64-bit)
Free Download For macOS 10.14 or later
How to Concatenate Videos Using FFmpeg
Video editing is a crucial aspect of creating content for many people. Whether you’re a YouTuber, a marketer, or just someone who wants to share videos with friends and family, being able to edit and manipulate your videos is key. One of the most basic video editing tasks is concatenating videos, which combines multiple files to create one cohesive video.
FFmpeg is a powerful tool that allows you to do just that, and in this guide, we’ll walk you through the process of FFmpeg concatenate videos. Whether a beginner or an experienced video editor, this guide will provide you with all the information you need to seamlessly merge your videos. From installation to execution, we’ll cover it all so you can streamline your video editing process.

Overview and Installation of FFmpeg
FFmpeg is free, open-source project that allows you to record, convert, and stream digital audio and video. It is a command-line tool widely used in video editing and transcoding. FFmpeg can be used to concatenate videos and other tasks, such as adding subtitles, changing video resolution, and more. It is available for Windows, Mac, and Linux, making it a versatile and accessible tool for anyone to use.
Here’s how to install FFmpeg:
Step1 Log in to your Ubuntu server via SSH and update the package index.
$ sudo apt update
Step2 Install FFmpeg and all the required dependencies
$ sudo apt install ffmpeg
Step3 Verify the version of FFmpeg that you’ve installed.
$ ffmpeg -version
Prerequisite
Before we merge videos using FFmpeg, we must understand the various methods available to us. FFmpeg offers three ways to concatenate videos: a demuxer, a filter, or a protocol. However, each method has its own set of considerations, and the best method for you will depend on the properties of the videos you’re working with.
It’s crucial to ensure that all encoding-related properties align with your chosen method. This includes the timebase, height and width, codecs, and pixel format. Some methods require the videos you’re merging to have the same encoding, while others allow for different encodings. It’s essential to keep this in mind to ensure that the final video is seamless without any breaks. Remember that these prerequisites will help you have a smooth process.
Concatenate Videos With Same Codecs Using FFmpeg
If the videos you want to concatenate have the same codec, you can use the FFmpeg “concat” demuxer or protocol to join them together. This simple and efficient method doesn’t require re-encoding the videos, saving time and preserving the original quality. This section will review the steps to concatenate videos using the “concat” demuxer and “concat” protocols in FFmpeg.
Merge Videos With the “Concat” Demuxer
The concat demuxer in FFmpeg allows you to join together multiple video files with the same codecs by reading a list of file paths from a text file and demuxing them in sequence. Each video starts where the previous one finishes without needing to re-encode the videos. Here’s how to do it:
Step1 Create a .txt file and list the paths of the video files you want to merge.
Join_video.txt
file /Users/Video/input1.mp4
file /Users/Video/input2.mp4
![]()
Note: You can add more than two video files.
Step2 Run the FFmpeg command:
ffmpeg -f concat -safe 0 -i join_video.txt -c copy output_demuxer.mp4
![]()
Note: -safe 0 is added to accept any file name.
-c copy will copy all the streams.
As this method allows you to “stream copy” the files instead of re-encoding them, the concatenation is very fast. This can be a good option if you have videos with the same codecs and want to join them quickly without losing quality.
Join Videos With the “Concat” Protocol
The concat protocol in FFmpeg allows you to join together multiple video files in a specific format that supports file-level concatenation, such as MPEG-2 TS. However, it cannot be used for other video formats like MP4 and WEBM.
Here’s how to use the “concat protocol:
Step1 Run the FFmpeg command:
ffmpeg -i “concat:input1.ts|input2.ts” -c copy output_protocol.ts
![]()
Note: The concat protocol allows you to “stream copy” the files by adding the option -c copy.
Step2 Input the file name of the video using this code:
ffmpeg -i “concat:input1.mp4|input2.mp4” -c copy output_protocol.mp4
![]()
Note: If you try to use this method on video formats that are not supported, only the first input video will be saved in the output video. And the video ends after the first video.
Although this method is limited in terms of supported video formats, it’s very easy to use if you merge videos in the supported formats. It’s a single command in the terminal without needing a text file. Additionally, using the -c copy option makes it efficient as it doesn’t require re-encoding, saving time.
Concatenate MP4 Video Files of Different Codecs & Resolutions Using FFmpeg
If the videos you want to concatenate have different codecs or resolutions, you can still use FFmpeg to join them together. However, this method requires re-encoding the videos, which can take longer and may result in a loss of quality. This section will cover the steps to concatenate videos with different codecs or resolutions using FFmpeg.
Here’s how to do it:
Step1 Provide the names of the input files to FFmpeg.
ffmpeg -i file1.mp4 -i file2.mp4 -i file3.mp4 \
Step2 Use the filter_complex filtergraph parameter to instruct FFmpeg from where to take the audio and video.
-filter_complex “[0:v] [0:a] [1:v] [1:a] [2:v] [2:a]
![]()
Note: [0:v][0:a] means FFmpeg needs to take the video and audio from the 0th video (file1.mp4).
Step3 Tell FFmpeg to concatenate three files (n=3).
concat=n=3:v=1:a=1 [vv] [aa]“ \
![]()
Note: The v=1:a=1 implies one stream for the audio and one stream for the video.
Step4 Map these audio and video outputs to the final video container. This is done as follows:
-map “[vv]“ -map “[aa]“ mergedVideo.mp4
It is important to note that this method requires re-encoding the videos, which can take more time and may result in a loss of quality. However, it offers the flexibility of filtering the videos before concatenating them. The filter_complex method in FFmpeg allows you to concatenate videos of different codecs and resolutions. The final step is to map the audio and video outputs to the final video container. This can be done using the -map command.
Concatenate Videos With Multiple Audio Streams Using FFmpeg
Concatenating videos with multiple audio streams can be more complex than concatenating videos with a single audio stream. This section will cover the steps to concatenate videos with multiple audio streams using FFmpeg. We’ll be using the filter_complex method in FFmpeg, which allows you to manipulate and concatenate multiple audio and video streams in a single command. This method is more advanced but allows you to join videos with different audio streams and create a final video with multiple audio tracks.
Step1 Specify the input files and opening.mkv, episode.mkv, and ending.mkv:
$ ffmpeg -i opening.mkv -i episode.mkv -i ending.mkv -filter_complex
Step2 Use the filter_complex parameter in FFmpeg to specify the input streams for the video and audio.
[0:0] [0:1] [0:2] [1:0] [1:1] [1:2] [2:0] [2:1] [2:2]
![]()
Note: Single video stream ([0:0], [1:0], [2:0])
Dual audio streams ([0:1][0:2], [1:1][1:2], [2:1][2:2])
Step3 Use the concat filter to specify that you want to concatenate 3 files (n=3) with 1 video stream (v=1) and 2 audio streams (a=2). Specify the output streams as [v], [a1], [a2]:
concat=n=3:v=1:a=2 [v] [a1] [a2]
Step4 Use the -map option to map the output streams to the final video container:
-map ‘[v]‘ -map ‘[a1]‘ -map ‘[a2]‘ output.mkv
[Bonus] Join Videos Together With Filmora
While FFmpeg offers a wide range of options for joining videos together, it can have a steep learning curve for some users. An alternative method for joining videos is using Filmora. Wondershare Filmora is a user-friendly video editing software that allows you to easily join multiple videos. It’s a great option for users new to video editing or needing experience with command-line tools like FFmpeg.
Free Download For Win 7 or later(64-bit)
Free Download For macOS 10.14 or later
Filmora has a simple drag-and-drop interface, making adding, arranging, and editing videos and audio tracks easy. Additionally, it offers various features like split, trim, crop, merge, and more. It also has various effects, transitions, and animations to enhance the overall look of your video. With Filmora, you can create professional-looking videos with minimal effort.
How-to Steps
Here’s how to merge videos using Filmora:
Step1 Open Filmora and click “New Project.”

Step2 Go to “File“ > “Import Media“ > “Import Media Files“ to add your video files to the media library.

Step3 Drag and drop the files you want to merge from the media library to the timeline, and then you’ll get the merged video seamlessly.

Step4 Edit your video.

Step5 After editing, click the “Export“ tab to save your videos.

Conclusion
FFmpeg is a powerful tool that allows you to concatenate videos in various ways. Whether you’re working with videos of the same codecs and resolutions or videos with multiple audio streams, FFmpeg can handle it. However, for users new to video editing or needing experience with command-line tools, using Filmora can be a more user-friendly option. It offers a simple drag-and-drop interface and a variety of features and effects to enhance the overall look of your video.
Step2 Run the FFmpeg command:
ffmpeg -f concat -safe 0 -i join_video.txt -c copy output_demuxer.mp4
![]()
Note: -safe 0 is added to accept any file name.
-c copy will copy all the streams.
As this method allows you to “stream copy” the files instead of re-encoding them, the concatenation is very fast. This can be a good option if you have videos with the same codecs and want to join them quickly without losing quality.
Join Videos With the “Concat” Protocol
The concat protocol in FFmpeg allows you to join together multiple video files in a specific format that supports file-level concatenation, such as MPEG-2 TS. However, it cannot be used for other video formats like MP4 and WEBM.
Here’s how to use the “concat protocol:
Step1 Run the FFmpeg command:
ffmpeg -i “concat:input1.ts|input2.ts” -c copy output_protocol.ts
![]()
Note: The concat protocol allows you to “stream copy” the files by adding the option -c copy.
Step2 Input the file name of the video using this code:
ffmpeg -i “concat:input1.mp4|input2.mp4” -c copy output_protocol.mp4
![]()
Note: If you try to use this method on video formats that are not supported, only the first input video will be saved in the output video. And the video ends after the first video.
Although this method is limited in terms of supported video formats, it’s very easy to use if you merge videos in the supported formats. It’s a single command in the terminal without needing a text file. Additionally, using the -c copy option makes it efficient as it doesn’t require re-encoding, saving time.
Concatenate MP4 Video Files of Different Codecs & Resolutions Using FFmpeg
If the videos you want to concatenate have different codecs or resolutions, you can still use FFmpeg to join them together. However, this method requires re-encoding the videos, which can take longer and may result in a loss of quality. This section will cover the steps to concatenate videos with different codecs or resolutions using FFmpeg.
Here’s how to do it:
Step1 Provide the names of the input files to FFmpeg.
ffmpeg -i file1.mp4 -i file2.mp4 -i file3.mp4 \
Step2 Use the filter_complex filtergraph parameter to instruct FFmpeg from where to take the audio and video.
-filter_complex “[0:v] [0:a] [1:v] [1:a] [2:v] [2:a]
![]()
Note: [0:v][0:a] means FFmpeg needs to take the video and audio from the 0th video (file1.mp4).
Step3 Tell FFmpeg to concatenate three files (n=3).
concat=n=3:v=1:a=1 [vv] [aa]“ \
![]()
Note: The v=1:a=1 implies one stream for the audio and one stream for the video.
Step4 Map these audio and video outputs to the final video container. This is done as follows:
-map “[vv]“ -map “[aa]“ mergedVideo.mp4
It is important to note that this method requires re-encoding the videos, which can take more time and may result in a loss of quality. However, it offers the flexibility of filtering the videos before concatenating them. The filter_complex method in FFmpeg allows you to concatenate videos of different codecs and resolutions. The final step is to map the audio and video outputs to the final video container. This can be done using the -map command.
Concatenate Videos With Multiple Audio Streams Using FFmpeg
Concatenating videos with multiple audio streams can be more complex than concatenating videos with a single audio stream. This section will cover the steps to concatenate videos with multiple audio streams using FFmpeg. We’ll be using the filter_complex method in FFmpeg, which allows you to manipulate and concatenate multiple audio and video streams in a single command. This method is more advanced but allows you to join videos with different audio streams and create a final video with multiple audio tracks.
Step1 Specify the input files and opening.mkv, episode.mkv, and ending.mkv:
$ ffmpeg -i opening.mkv -i episode.mkv -i ending.mkv -filter_complex
Step2 Use the filter_complex parameter in FFmpeg to specify the input streams for the video and audio.
[0:0] [0:1] [0:2] [1:0] [1:1] [1:2] [2:0] [2:1] [2:2]
![]()
Note: Single video stream ([0:0], [1:0], [2:0])
Dual audio streams ([0:1][0:2], [1:1][1:2], [2:1][2:2])
Step3 Use the concat filter to specify that you want to concatenate 3 files (n=3) with 1 video stream (v=1) and 2 audio streams (a=2). Specify the output streams as [v], [a1], [a2]:
concat=n=3:v=1:a=2 [v] [a1] [a2]
Step4 Use the -map option to map the output streams to the final video container:
-map ‘[v]‘ -map ‘[a1]‘ -map ‘[a2]‘ output.mkv
[Bonus] Join Videos Together With Filmora
While FFmpeg offers a wide range of options for joining videos together, it can have a steep learning curve for some users. An alternative method for joining videos is using Filmora. Wondershare Filmora is a user-friendly video editing software that allows you to easily join multiple videos. It’s a great option for users new to video editing or needing experience with command-line tools like FFmpeg.
Free Download For Win 7 or later(64-bit)
Free Download For macOS 10.14 or later
Filmora has a simple drag-and-drop interface, making adding, arranging, and editing videos and audio tracks easy. Additionally, it offers various features like split, trim, crop, merge, and more. It also has various effects, transitions, and animations to enhance the overall look of your video. With Filmora, you can create professional-looking videos with minimal effort.
How-to Steps
Here’s how to merge videos using Filmora:
Step1 Open Filmora and click “New Project.”
Step2 Go to “File“ > “Import Media“ > “Import Media Files“ to add your video files to the media library.
Step3 Drag and drop the files you want to merge from the media library to the timeline, and then you’ll get the merged video seamlessly.
Step4 Edit your video.
Step5 After editing, click the “Export“ tab to save your videos.
Conclusion
FFmpeg is a powerful tool that allows you to concatenate videos in various ways. Whether you’re working with videos of the same codecs and resolutions or videos with multiple audio streams, FFmpeg can handle it. However, for users new to video editing or needing experience with command-line tools, using Filmora can be a more user-friendly option. It offers a simple drag-and-drop interface and a variety of features and effects to enhance the overall look of your video.
Looking For the Best VHS Video Effect Makers? Get To Know the Top List
VHS effects are the trendiest and most highly usable effects for videos through which you can add retro qualities in simple videos. You must have noticed the classical yet smooth distortion in the famous music videos. This smoother distortion that gives a retro vibe in the video is possible with the VHS effects. You don’t have to spend millions on this as many VHS effect online tools are at your disposal.
This discussion aims to familiarize you with the most known and reliable VHS filter online tools. You will also discover much-needed and significant knowledge of VHS effects. The offline tool through which you can add VHS effects in videos like never before will also be discussed here.
Part 1: What Do You Know About VHS Effects?
The VHS effects are the visual and auditory artifacts, along with smoother playback video distortion. The term VHS indicates the technology “Video Home System tapes.” From the 1980s-1990s, these effects were well-known and readily used in digital content. Moreover, in recent years, the vintage appeal of the videos has been achieved with these VHS effects. You can learn more about this from the provided information:
- Lines of VHS: The lines in VHS are tracking lines, and it is used to implement distortion effects in the videos. You can notice that these lines often run vertically in the video effects.
- Vintage Frames: You may have seen the darkening and faded effects on the edges in the VHS-integrated videos. The playback equipment limitation initially caused it; however, many videographers apply these effects in videos to give them a vintage look.
- Glitching Effects: VHS effects are not completed without comprehension of glitching effects. This includes rolling bars and sudden statics. This also gives the look of tape damage and signal interface and is perfect for flashbacks.
- Nostalgic Provocation: With this effect, you can add nostalgic feelings. If you are going to make movies regarding history, it can also help you by adding retro effects. It also replicates imperfections to give a unique look to videos.
Add VHS Effect to Video
Simply add video effects on Video with Filmora Video Effect Editor ! Experience the magic of cool yet outstanding video effects, where your videos come to life in beautiful visuals.
Apply VHS Effect Apply VHS Effect Learn More >


Part 2: Top VHS Video Effect Online Tools to Use in 2024
A substantial inventory of tools can confuse you and make it harder to select the best tool. We wish to bring peace and harmony to your videography career and wish you to get familiar with the VHS effect online video tools without getting confused. You can find the industry-grade tool for making videos visually appealing here:
| 1. Veed.io | 2. Kapwing |
|---|---|
| 3. Clideo | 4. FlexClip |
| 5. Fastreel | 6. CreatorKit |
1. Veed.io
Veed.io lets you transform simple-looking videos into a masterpiece of aesthetics and retros with its VHS overlays. With this online VHS effect tool, you can also add perfect flashbacks along with VHS to engage users. Creating the loops of videos and adding VHS overlays is also possible with this. It also helps to add customized subtitles to the videos to make it more understandable.
Some Prominent Characteristics of Veed.io
- It is an all-in-one video editor through which you can add modern modifications to create stunning and powerful videos. This tool can help in creating marketing, training, TikTok, and demos.
- You can also optimize the videos by trimming, cropping, rotating, and splitting them. Other than this, you can add customized audio in simple videos.
- Removing unnecessary background noises and awkward pauses is also possible with Veed.io. You can also upgrade your productivity by using its pre-built templates.

2. Kapwing
To add VHS effects to video online for free, you can get assistance from this premium grade tool - Kapwing . It also supports timeline-based nondestructive editing, which gives you a free hand in customization. Other than this, you can also create the layers in the videos and add VHS effects where needed. If you have some unique idea in mind, don’t hesitate to choose a blank canvas.
Some Prominent Characteristics of Kapwing
- Kapwing lets you import videos from different sources. You can use Google Drive, Google Photos, or your device’s gallery to add a video.
- Using its preset templates, you can create high-quality videos without investing extra time. It also supports diversified plugins to boost your productivity.
- There are versatile shapes, emojis, and elements in it that you can use as per your need. This also lets you add customized text and subtitles to videos.

3. Clideo
This fast and secure VHS effect online video tool helps you add realistic VHS effects to videos. You can not only add the effects but can also change the format of videos without any issues. Other than this, you also apply several intuitive filters to make videos more studio friendly. Clideo can edit diversified metrics of the videos and work as a reputable video editor.
Some Prominent Characteristics of Clideo
- With this tool, you can add text to a video, change its fonts and colors, or make a picture in a picture split screen.
- It also assists you in merging lengthy videos into smaller ones. You can also compress the large-sized videos to make them more shareable.
- Creating memes, managing the speed of videos, resizing their dimensions, or cropping unrequired parts is also possible with this.

4. FlexClip
Distorted video quality is much adored in today’s world, and you can also add these effects to your videos. You can deploy this effect to represent something in the past, and it can boost your engagement in the entertainment industry. If you are worried that the quality of the video will be compromised with FlexClip , you can use its duplicating feature so the original video is preserved.
Some Prominent Characteristics of FlexClip
- It supports the text-to-speech feature through which you can not only add voiceover but can also customize the voice style.
- If you want to make videos more engaging, you can use the previously existing soundtracks of FlexClip. You can also search for the required soundtrack through specific genres.
- There are versatile effects, logos, shapes, cooperative, decorative, and title overlays, so you can make videos more illustrative.

5. Fastreel
This online-based platform can escalate your user experience by adding VHS effects to the videos. You can add high-quality VHS effects in videos and create perfect slideshows. Not only personally, but you can also use the capabilities of this tool to expand your professional life. Fastreel also lets you merge multiple videos and then apply the VHS effects.
Some Prominent Characteristics of Fastreel
- This tool works like an all-in-one video editor, as you can reverse, crop, resize, flip, and loop videos.
- If you are a slow-motion video lover, you can also make slow and stop-motion videos with built-in features.
- Fastreel can also convert images into videos or make video collages for you. Other than this, you are also free to add music to videos.

6. CreatorKit
Along with hundreds of promotional templates for high-quality VHS effects, this VHS filter online tool never fails to amaze users with its higher functionality. CreatorKit can create engaging product videos with intuitive text styles. You can use its background removal if you want to create transparent-grade videos.
Some Prominent Characteristics of CreatorKit
- To create optimized videos, you can use its Shopify integrations to access more elements and other things.
- It can add animated price tags along with showcasing product features. You can also create intros and outros with this.
- There are several colors generated and gradient-generating bases that can assist you in showcasing the brand colors without any issues.

Part 3: Software Alternative: Insert Best VHS Effects Using Wondershare Filmora
It will not be inappropriate to say that Wondershare Filmora is the top-ranked video editor in the market. With Filmora, you can add several types of VHS effects in videos, such as horror filters, distortion bad, static, lines, vintage, and more. You can also search for customized effects by adding keywords and their subscription status.
Add VHS Video Effect For Win 7 or later(64-bit)
Add VHS Video Effect For macOS 10.14 or later
Wondershare Filmora is also a better option than other VHS effect online tools because you can also access versatile stock media files in it. There are tons of pre-built templates in Filmora, and you can also access all your previous projects from Filmora Cloud. Adding high-quality audio to videos is also possible with this tool.
Instructions to Add VHS Effects in Videos with Filmora
The instructions through which you can add the VHS effects in videos with any complications are given here:
Step 1Launch Filmora and Add a Video
To get started, install and launch Wondershare Filmora on your device. Make sure you use the updated version of Filmora. Next, click the “New Project” button and select “Click here to import media.” Next, add the video of your choice on which you wish to apply the VHS effect.

Step 2Add Video to Timeline and Apply Effect
Following this, drag the video to the “Timeline,” click on “Effects” from the above panel and go to “Search Bar.” From there, search for “VHS Effects” and select the effect from the available options. After selecting it, drag it on the video present in the timeline.

Step 3Download the VHS Effect Integrated Video
To continue, you can also modify it to a further extent by clicking on the added effect. There are several features that can help you with modification, such as Transitions, Stickers, and more. Afterward, click the “Export” button, customize the “Name,” “Save To,” “Format,” Quality,” and other metrics of videos. Finally, hit the “Export” button and save the video on your device.

Conclusion
To summarize, it can be said that you can use the VHS effect online video tools to create cinematic-level videos. VHS effects are smooth distortion effects that are used in several videos. You can learn more about this from the above information. Besides this, several online tools such as Veed.io, Clideo, FlexClip, and more can help you add VHS effects to videos.
To learn more about these tools, look at the information provided above. In case you wish to add the VHS effects to videos without facing any complications, don’t refrain from using the top-class tool named Wondershare Filmora. The steps to accomplish this task in a flawless manner are also discussed above for you.
Apply VHS Effect Apply VHS Effect Learn More >
Part 2: Top VHS Video Effect Online Tools to Use in 2024
A substantial inventory of tools can confuse you and make it harder to select the best tool. We wish to bring peace and harmony to your videography career and wish you to get familiar with the VHS effect online video tools without getting confused. You can find the industry-grade tool for making videos visually appealing here:
| 1. Veed.io | 2. Kapwing |
|---|---|
| 3. Clideo | 4. FlexClip |
| 5. Fastreel | 6. CreatorKit |
1. Veed.io
Veed.io lets you transform simple-looking videos into a masterpiece of aesthetics and retros with its VHS overlays. With this online VHS effect tool, you can also add perfect flashbacks along with VHS to engage users. Creating the loops of videos and adding VHS overlays is also possible with this. It also helps to add customized subtitles to the videos to make it more understandable.
Some Prominent Characteristics of Veed.io
- It is an all-in-one video editor through which you can add modern modifications to create stunning and powerful videos. This tool can help in creating marketing, training, TikTok, and demos.
- You can also optimize the videos by trimming, cropping, rotating, and splitting them. Other than this, you can add customized audio in simple videos.
- Removing unnecessary background noises and awkward pauses is also possible with Veed.io. You can also upgrade your productivity by using its pre-built templates.
2. Kapwing
To add VHS effects to video online for free, you can get assistance from this premium grade tool - Kapwing . It also supports timeline-based nondestructive editing, which gives you a free hand in customization. Other than this, you can also create the layers in the videos and add VHS effects where needed. If you have some unique idea in mind, don’t hesitate to choose a blank canvas.
Some Prominent Characteristics of Kapwing
- Kapwing lets you import videos from different sources. You can use Google Drive, Google Photos, or your device’s gallery to add a video.
- Using its preset templates, you can create high-quality videos without investing extra time. It also supports diversified plugins to boost your productivity.
- There are versatile shapes, emojis, and elements in it that you can use as per your need. This also lets you add customized text and subtitles to videos.
3. Clideo
This fast and secure VHS effect online video tool helps you add realistic VHS effects to videos. You can not only add the effects but can also change the format of videos without any issues. Other than this, you also apply several intuitive filters to make videos more studio friendly. Clideo can edit diversified metrics of the videos and work as a reputable video editor.
Some Prominent Characteristics of Clideo
- With this tool, you can add text to a video, change its fonts and colors, or make a picture in a picture split screen.
- It also assists you in merging lengthy videos into smaller ones. You can also compress the large-sized videos to make them more shareable.
- Creating memes, managing the speed of videos, resizing their dimensions, or cropping unrequired parts is also possible with this.
4. FlexClip
Distorted video quality is much adored in today’s world, and you can also add these effects to your videos. You can deploy this effect to represent something in the past, and it can boost your engagement in the entertainment industry. If you are worried that the quality of the video will be compromised with FlexClip , you can use its duplicating feature so the original video is preserved.
Some Prominent Characteristics of FlexClip
- It supports the text-to-speech feature through which you can not only add voiceover but can also customize the voice style.
- If you want to make videos more engaging, you can use the previously existing soundtracks of FlexClip. You can also search for the required soundtrack through specific genres.
- There are versatile effects, logos, shapes, cooperative, decorative, and title overlays, so you can make videos more illustrative.
5. Fastreel
This online-based platform can escalate your user experience by adding VHS effects to the videos. You can add high-quality VHS effects in videos and create perfect slideshows. Not only personally, but you can also use the capabilities of this tool to expand your professional life. Fastreel also lets you merge multiple videos and then apply the VHS effects.
Some Prominent Characteristics of Fastreel
- This tool works like an all-in-one video editor, as you can reverse, crop, resize, flip, and loop videos.
- If you are a slow-motion video lover, you can also make slow and stop-motion videos with built-in features.
- Fastreel can also convert images into videos or make video collages for you. Other than this, you are also free to add music to videos.
6. CreatorKit
Along with hundreds of promotional templates for high-quality VHS effects, this VHS filter online tool never fails to amaze users with its higher functionality. CreatorKit can create engaging product videos with intuitive text styles. You can use its background removal if you want to create transparent-grade videos.
Some Prominent Characteristics of CreatorKit
- To create optimized videos, you can use its Shopify integrations to access more elements and other things.
- It can add animated price tags along with showcasing product features. You can also create intros and outros with this.
- There are several colors generated and gradient-generating bases that can assist you in showcasing the brand colors without any issues.
Part 3: Software Alternative: Insert Best VHS Effects Using Wondershare Filmora
It will not be inappropriate to say that Wondershare Filmora is the top-ranked video editor in the market. With Filmora, you can add several types of VHS effects in videos, such as horror filters, distortion bad, static, lines, vintage, and more. You can also search for customized effects by adding keywords and their subscription status.
Add VHS Video Effect For Win 7 or later(64-bit)
Add VHS Video Effect For macOS 10.14 or later
Wondershare Filmora is also a better option than other VHS effect online tools because you can also access versatile stock media files in it. There are tons of pre-built templates in Filmora, and you can also access all your previous projects from Filmora Cloud. Adding high-quality audio to videos is also possible with this tool.
Instructions to Add VHS Effects in Videos with Filmora
The instructions through which you can add the VHS effects in videos with any complications are given here:
Step 1Launch Filmora and Add a Video
To get started, install and launch Wondershare Filmora on your device. Make sure you use the updated version of Filmora. Next, click the “New Project” button and select “Click here to import media.” Next, add the video of your choice on which you wish to apply the VHS effect.
Step 2Add Video to Timeline and Apply Effect
Following this, drag the video to the “Timeline,” click on “Effects” from the above panel and go to “Search Bar.” From there, search for “VHS Effects” and select the effect from the available options. After selecting it, drag it on the video present in the timeline.
Step 3Download the VHS Effect Integrated Video
To continue, you can also modify it to a further extent by clicking on the added effect. There are several features that can help you with modification, such as Transitions, Stickers, and more. Afterward, click the “Export” button, customize the “Name,” “Save To,” “Format,” Quality,” and other metrics of videos. Finally, hit the “Export” button and save the video on your device.
Conclusion
To summarize, it can be said that you can use the VHS effect online video tools to create cinematic-level videos. VHS effects are smooth distortion effects that are used in several videos. You can learn more about this from the above information. Besides this, several online tools such as Veed.io, Clideo, FlexClip, and more can help you add VHS effects to videos.
To learn more about these tools, look at the information provided above. In case you wish to add the VHS effects to videos without facing any complications, don’t refrain from using the top-class tool named Wondershare Filmora. The steps to accomplish this task in a flawless manner are also discussed above for you.
Also read:
- As an Online Marketer, It Is Important to Know the Algorithm of YouTube Platform. Ill Share You the History of Algorithm of YouTube and the New Changes in This Year
- Updated Are You Aware that You Can Create Your Own Lower Thirds for Video? Read This Article for a Tutorial on How to Customize One for 2024
- New In 2024, Finding the Best Voice Changers for WhatsApp Free and Paid
- New In 2024, Wondershare Filmora Has Introduced a New Feature - AI Portrait Effect that You Can Use to Remove Background From Various Videos and Images. Explore the Uses, Benefits, and Real-Life Scenarios of This Feature in a Comprehensive Guide
- Updated 2024 Approved Want to Make a Slide Show Video? Heres How
- Updated Want to Learn How to Create the Random Letter Reveal Intro? Read Through the Stages of Preparing This Effect via Filmora in This Guide for 2024
- Updated Learn How to Create Your Own Custom Animated Text Intro in the Filmora Video Editor. Follow a Few Simple Steps to Create Something that Looks Incredible for 2024
- Updated Interested in Adding a Cinematic Strobe Light Effect to Your Movie or Video Title? Follow the Steps Explained in Detail Here for 2024
- 2024 Approved How to Make Cool COD Warzone Thumbnail
- New 2024 Approved Looking for the Best Quiz-Making Tools? Read Our Full Review to Find Out the 10 Best Video Quiz Makers Available
- In 2024, Create Glitch Text Effect
- In 2024, Are You Excited to Find Out the Top-Class VHS Video Effects Maker? Put Your Worries at Rest because This Article Will Provide the Best VHS Effect Makers
- Updated To Find the Best Tool Out of Hundreds of Online and Offline GIF to Video Converters, You Need to Check These Specifications. Read This Review and Get the Best Out of the Best
- Updated What Anime Character Are You Look Like for 2024
- 2024 Approved 3D Ray Traced Settings In After Effects A Comprehensive Guide
- Updated In 2024, Storyboards Are Amazing Way if You Want to Present Your Story in a Visual Way, Like Explaining Any Process or Giving Any Information. It Is a Graphic Layout to Tell You a Story
- New Step by Step to Cut Videos in Adobe Premiere Pro for 2024
- Do You Know that Google Photos App Can Be Used to Edit and Stabilize Shaky Videos? In This Article, I Will Show You a Step by Step Tutorial About How to Use Google Photos to Stabilize Videos
- New In 2024, Best 5 Tools to Help You Know More Freeze-Frame Video Editing Skills
- Updated In 2024, Customize PowerPoint Slideshow Icon in 8 Simple Ways
- New How to Rotate a Video in Windows 10 for 2024
- Extracting Audio From Videos Is a Key to Better Storytelling. Learn How Filmoras Audio Removal Feature Can Enhance Your Video Stories for 2024
- Updated The Ultimate Guide to Using AR Emoji Stickers in Your Videos
- Updated 2024 Approved With This Article, We Will Be Looking at Steps to Rotate a Video in Cyberlink PowerDirector to Help You when Required. We Have Also Mentioned the Steps You Will Need to Follow in Wondershare Filmora
- Confused About Deciding the Next Destination for Your Trip? This Article Features some of the Best Vloggers You Can Find for Gaining Inspiration for Traveling
- Things About Transparent PNG Remove and Convert
- The Top Tips for Becoming a Good Podcast Host Are Presented in This Article. How to Start and End the Podcast Show Is All Set Below. You Can Also Learn About the Ways to Call Guests to Your Show for 2024
- New 2024 Approved ReVisionFX ReelSmart Motion Blur Plugin For Premiere Pro
- New In 2024, Easy Steps to Create Intro Video with After Effects
- 2024 Approved Whats The Best Laptops For Video Editing
- In 2024, Templates Increase the Editing Possibilities for Beginners and Professionals. Read This Article to Learn About some Customizable Slow-Motion CapCut Templates
- Updated Best Hatsune Miku AI Voice Generators for All Times for 2024
- In 2024, How To Bypass Samsung Galaxy A23 5G FRP In 3 Different Ways
- In 2024, Android Unlock Code Sim Unlock Your Vivo X100 Pro Phone and Remove Locked Screen
- Here are Some of the Best Pokemon Discord Servers to Join On Samsung Galaxy A54 5G | Dr.fone
- Gmail Not Working on Samsung Galaxy F54 5G 7 Common Problems & Fixes | Dr.fone
- How to Transfer Data After Switching From Honor 90 Pro to Latest Samsung | Dr.fone
- In 2024, iPogo will be the new iSpoofer On Motorola Moto G23? | Dr.fone
- 5 Ways to Reset Infinix Hot 40i Without Volume Buttons | Dr.fone
- How to Use Phone Clone to Migrate Your Itel A70 Data? | Dr.fone
- How to Fix Android App Not Installed Error on Asus ROG Phone 8 Quickly? | Dr.fone
- Can Life360 Track Or See Text Messages? What Can You Do with Life360 On Tecno Phantom V Fold? | Dr.fone
- How to Perform Hard Reset on Sony Xperia 10 V? | Dr.fone
- How to Reset iPhone 13 mini without Losing Data? | Stellar
- How to Create a Digital Signature Online for .odt file document
- How to play AVCHD MTS files on Motorola Moto G 5G (2023)?
- In 2024, Unlock iPhone 7 Without Passcode Easily
- Top 10 Best Spy Watches For your Oppo Reno 10 5G | Dr.fone
- In 2024, How to Make the Most of Your iPhone XR Lock Screen with Notifications?
- In 2024, Change Location on Yik Yak For your Oppo Find N3 Flip to Enjoy More Fun | Dr.fone
- Apple ID is Greyed Out On iPhone SE (2022) How to Bypass?
- In 2024, How to use Pokemon Go Joystick on Samsung Galaxy S24? | Dr.fone
- In 2024, How to Fix Locked Apple ID on iPhone 8 Plus
- Title: Updated 2024 Approved A Guide to Color Grade Your Picture in LightRoom
- Author: Morgan
- Created at : 2024-05-19 05:12:53
- Updated at : 2024-05-20 05:12:53
- Link: https://ai-video-editing.techidaily.com/updated-2024-approved-a-guide-to-color-grade-your-picture-in-lightroom/
- License: This work is licensed under CC BY-NC-SA 4.0.
