
:max_bytes(150000):strip_icc():format(webp)/GettyImages-98471373-56a9ff935f9b58b7d0006b1a.jpg)
Updated 2024 Approved How to Get Motion Blur in Valorant?
How to Get Motion Blur in Valorant?
Have you ever applied a motion blur effect to your games? Many game lovers like to add a motion blur effect in racing or fighting games to generate a sense of realism. This special effect also helps in creating a sense of speed in your games professionally. Moreover, if you are playing a game at a 30 FPS rate or greater, the motion blur effect can add a cinematic effect efficiently.
In this particular article, we will discuss how to get motion blur in the Valorant game. It’s a popular game as it manages to entertain the players thoroughly. To make your gaming experience more beautiful, continue reading this well-structured guide.

Part 1: What is Valorant?
Valorant is a famous competitive game that indulges the players in playing at least 13 different rounds to win. By using tactical strategies and gunplay, the player needs to defend himself to secure his chances of winning. Apart from choosing guns and bullets, you can also select a special agent armed that would comprise special capabilities.

With the help of this agent armed, you can easily strategize the gameplay to increase the chances of winning. There are different options for agents, such as Yoru, Skye, Raze, Breach, etc. This game also involves various maps that act like playgrounds. On these playgrounds, you can flaunt your gaming skills, creativity, and intellectual thinking.
It’s a 5 v.s. 5 multiplayer game in which one team is the attacker, and the other is the defender. The main aim of the attacking team is to plant a bomb called “Spike” against the other team. At the same time, the defenders strategize against the attackers to avoid and defuse the planted bomb. Valorant is a PC-based game and has some specific requirements. For your convenience, we have jotted down the essential requirements below:
PC Hardware Requirements
- Windows: 7/8/10 64-bit
- RAM: 4GB
- VRAM: 1GB
Minimum Specs / 30 FPS
- CPU: Intel Core 2 Duo E8400 (Intel), Athon 200GE (AMD)
- GPU: Intel HD 4000, Radeon R5 200
Recommended Specs / 60 FPS
- CPU: Intel i3-4150 (Intel), Ryzen 3 1200 (AMD)
- GPU: Geforce GT 730, Radeon R7 240
High-End Specs / 144+ FPS
- CPU: Intel i5-9400F 2.90GHz (Intel), Ryzen 5 2600X (AMD)
- GPU: GTX 1050 Ti, Radeon R7 370
Part 2: How to Get Motion Blur in Valorant?
In Valorant, you cannot add motion blur directly. Thus, to create motion blur Valorant, you can modify the settings of the recorder while recording your gameplay. To use the recording settings for creating a motion blur effect, here are useful instructions:
Step1 Before recording your gameplay, open your recorder and head to its settings. From there, go to the “Output” section and change the video format to MP4. Once done, make sure to select “NIVIDIA” as your encoder. Moreover, choose “CQP” as your rate control and set 20 as the value of the CQ level.

Step2 On the same window, select your preset as “Max Performance” and profile as “High.” Now go to the “Video” tab and select the value of base resolution and output resolution as “1920x1080”. Choose the numerator as 300 and the denominator as 1. Make sure that the minimum value of the numerator should not less than 180.

Step3 Now head to the “Advanced” tab and select process priority as “Below Normal.” Now head to the “Recording” section below and select the filename formatting according to your need. You can also adjust the settings of the stream display and automatically reconnect, preferably. Once done with all the recorder settings, click on the “OK” button.

Bonus Tips – How to Add Motion Blur to Your Valorant Gaming Video
If you are unable to set the proper settings for your recording software, you can try Wondershare Filmora to add a motion blur effect. Once you have recorded your gameplay through any recording software, you can easily edit it on Wondershare Filmora. It’s a professional tool that is compatible with Windows, Mac, Android, and iOS platforms. Using this tool, you can easily edit and create your videos without facing any inconvenience.
Free Download For Win 7 or later(64-bit)
Free Download For macOS 10.14 or later
Filmora provides different presets that you can use to create your video from scratch. You can also search for different types of effects and transitions on Filmora that can change the outlook of your video. Furthermore, you can also auto-reframe your video clips on Filmora to resize them automatically with great precision. Here are some of the key features of Filmora that can help you to perform professional video editing:
Key Features of Filmora
- Filmora contains various stock footage that you can pick and apply to your videos instantly. It offers a wide range of stock footage that you can easily use without paying any cost.
- It offers an option of a green screen through which you can easily change the backgrounds of your video by creating special effects.
- This tool offers more than 70 AI portrait effects that can dramatically remove the background from your videos.
- You can layer and edit multiple videos on this platform using the picture-in-picture feature.
Steps to Add Motion Blur Effect in Valorant Gameplay Video
Do you want to know how to turn on motion blur in Valorant using Filmora? Here are the simple steps that you can follow in this regard:
Step1 Import the Valorant Video
Once you have launched the main interface of Filmora, hit the “New Project” button. Afterward, select the “Import” icon and upload the Valorant gameplay video on this tool successfully.

Step2 Split the Valorant Video
Now drag and drop the uploaded video on the timeline of this tool. Once done, move the play head to the place where you want to add the motion blur effect. Now click on the “Scissors” icon to split the Valorant gameplay video.

Step3 Search for the Blur Effect
Once you have split the video, head to the “Effects” section and click on “Video Effects” from the left side. Now search “Blur” from the search bar and choose any of the blur effects from the results. Drag and apply the blur effect on the timeline.

Step4 Export the Edited Valorant Gameplay Video
After you have applied the blur effect, go to “Transitions” and search for the “Dissolve” transition. Once you have applied this particular transition to your video, it will generate a smooth look. Now you can easily share and save your video by hitting the “Export” button.

Conclusion
This article has shed light on how to get a motion blur in Valorant by modifying the recording settings. However, if you don’t want to change the recording settings of your recorder, you can use the tool known as Filmora. It’s a compatible and well-trusted tool through which you can easily craft a motion blur effect professionally.
Free Download For macOS 10.14 or later
Filmora provides different presets that you can use to create your video from scratch. You can also search for different types of effects and transitions on Filmora that can change the outlook of your video. Furthermore, you can also auto-reframe your video clips on Filmora to resize them automatically with great precision. Here are some of the key features of Filmora that can help you to perform professional video editing:
Key Features of Filmora
- Filmora contains various stock footage that you can pick and apply to your videos instantly. It offers a wide range of stock footage that you can easily use without paying any cost.
- It offers an option of a green screen through which you can easily change the backgrounds of your video by creating special effects.
- This tool offers more than 70 AI portrait effects that can dramatically remove the background from your videos.
- You can layer and edit multiple videos on this platform using the picture-in-picture feature.
Steps to Add Motion Blur Effect in Valorant Gameplay Video
Do you want to know how to turn on motion blur in Valorant using Filmora? Here are the simple steps that you can follow in this regard:
Step1 Import the Valorant Video
Once you have launched the main interface of Filmora, hit the “New Project” button. Afterward, select the “Import” icon and upload the Valorant gameplay video on this tool successfully.
Step2 Split the Valorant Video
Now drag and drop the uploaded video on the timeline of this tool. Once done, move the play head to the place where you want to add the motion blur effect. Now click on the “Scissors” icon to split the Valorant gameplay video.
Step3 Search for the Blur Effect
Once you have split the video, head to the “Effects” section and click on “Video Effects” from the left side. Now search “Blur” from the search bar and choose any of the blur effects from the results. Drag and apply the blur effect on the timeline.
Step4 Export the Edited Valorant Gameplay Video
After you have applied the blur effect, go to “Transitions” and search for the “Dissolve” transition. Once you have applied this particular transition to your video, it will generate a smooth look. Now you can easily share and save your video by hitting the “Export” button.
Conclusion
This article has shed light on how to get a motion blur in Valorant by modifying the recording settings. However, if you don’t want to change the recording settings of your recorder, you can use the tool known as Filmora. It’s a compatible and well-trusted tool through which you can easily craft a motion blur effect professionally.
15 Must-Use Gifs Editors
15 Must-Use Gifs Editors in 2024
An easy yet powerful editor
Numerous effects to choose from
Detailed tutorials provided by the official channel
Several websites and companies use the graphics interchange format that is the GIF. It can be seen to be used by a wide number of people on the internet and its format is supported by all platforms. The common goal of all the users can be satisfied.
Are you looking to create and edit gifs online or on your laptop but cannot find a suitable way out?
Finding the best and most user friendly GIF maker is not very hard, especially considering that free gif editor software is offered by so many providers. But if you’re only starting your journey with apps to make GIFs, it can be a difficult choice.
In this article
01 [How to Make GIF Interesting?](#Part 1)
02 [Top 5 Editors for Windows](#Part 2)
03 [Top 5 Editors for iPhone/Android](#Part 3)
04 [Top 5 Editors for Animated GIF Editing](#Part 4)
Part 1 How to Make GIF Interesting?
There are several ways by which a GIF can be made interesting. You can use colorful graphics and drop duplicate frames. Using fewer colors lets you make longer and more involved gifs.
Part 2 Top 5 Editors for Windows
Below are the top 5 editors which will help you to form GIFs for Windows: -
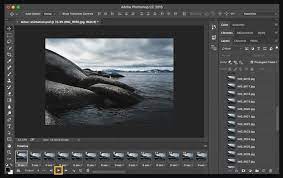
01Adobe Photoshop
Adobe Photoshop could be a useful device for making videos, image redaction, and GIF editing. This GIF code for Windows can allow you to import a GIF file so begin with the modification process.
Therefore, GIF editing is a breeze as you’ll alter the effects, modification the frame animation within the Timeline section, and do plenty a lot with this tool. You’ll simply utilize the free trial version to urge accustomed to the tool initial and then opt for the premium version to try to a lot more.
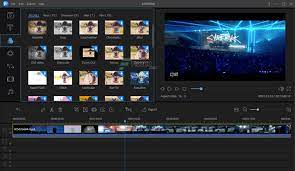
02EaseUS Video Editor
In the context of GIF makers, EaseUS Video Editor can also be said as one of the best. Free templates of texts, filters, elements, overlays, transitions, and music are available here which its users create GIF images with easily. You can also create lively and fully animated images, convert MP4 to GIFs and share it on YouTube, or other social media platforms.
The capabilities of this animated GIF maker for Windows are not restrained to this alone, as it can be used to edit all kinds of images, audio, and videos.
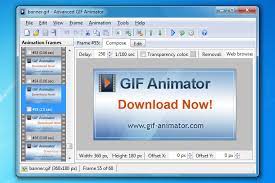
03GIF Animator
GIF animator editor is one of the first-rate GIF makers and is an awesome device for you if you desire to create GIF images, banners, buttons, and GIF videos. The device is very convenient to use and is a favorite of animators and designers.
The measurement of the photo can be modified and alongside that, it is feasible to control the frames, hastily cross texts, and enhance. Corrections to the movies can be brought and the built-in photograph editor can be used to rectify photographs and pictures, you can draw on them and you can convert movies to GIFs by the usage of the fragmented section of the video files.
04**Wondershare Filmora Video Editor **
If you are searching for nice animated GIF makers for Windows computers, then Wondershare Filmora’s animated movies and GIF editor device may want to be a brilliant choice. That’s due to the fact with this GIF maker Windows device lets you add a video, convert it to the GIF structure and then edit it later with its super features.
The interactive UI helps customers manner greater than one hundred fifty file codecs easily. With this device, you can crop, pace up a video, alter the body size, and caption it. Additionally, you add texts, add animation consequences to the images, and alter the pictures and movies in a few steps.

Wondershare Filmora - Best Video Editor for Mac/Windows
5,481,435 people have downloaded it.
Build unique custom animations without breaking a sweat.
Focus on creating epic stories and leave the details to Filmora’s auto features.
Start a creative adventure with drag & drop effects and endless possibilities.
Filmora simplifies advanced features to save you time and effort.
Filmora cuts out repetition so you can move on to your next creative breakthrough.
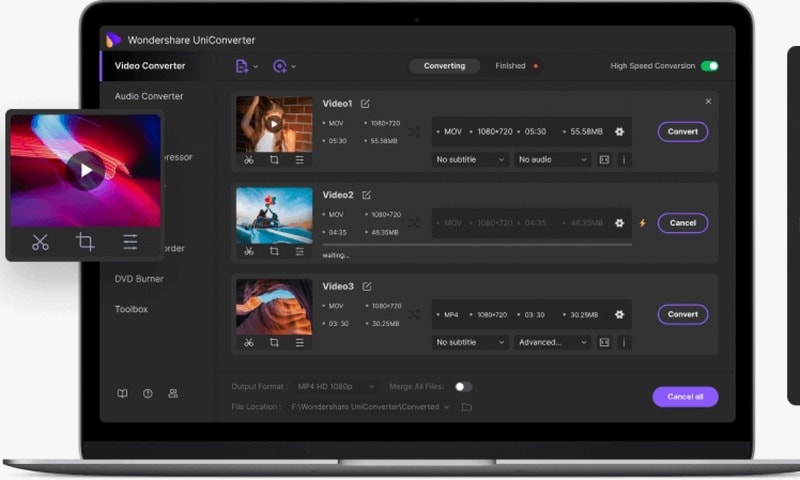
05Wondershare UniConverter
Wondershare UniConverter is one of the fine image, audio, and video editor and converter out there, and ranked the excellent GIF maker here. This GIF editor app is easy for customers and will furnish a pleasant platform for novices to operate their tasks. And when performed to create and edit GIF files, a person can export the GIF archives to both Android or iPhone barring having to use iTunes.
Part 3 Top 5 Editors for iPhone/Android
01PixelStudio
Pixel Studio is an animation app for pixel artwork fans. You can draw your little creations with pixel art. It additionally comes with a textual content tool, aid for matters like Samsung S-Pen, and it auto-saves so you don’t lose work. You can export your creations to GIF as nicely and that makes Pixel Studio one of the quality apps for customized GIFs. It’s normally an artwork app so meme lords may additionally want to put in a little greater effort than usual, however, the consequences are normally well worth it.
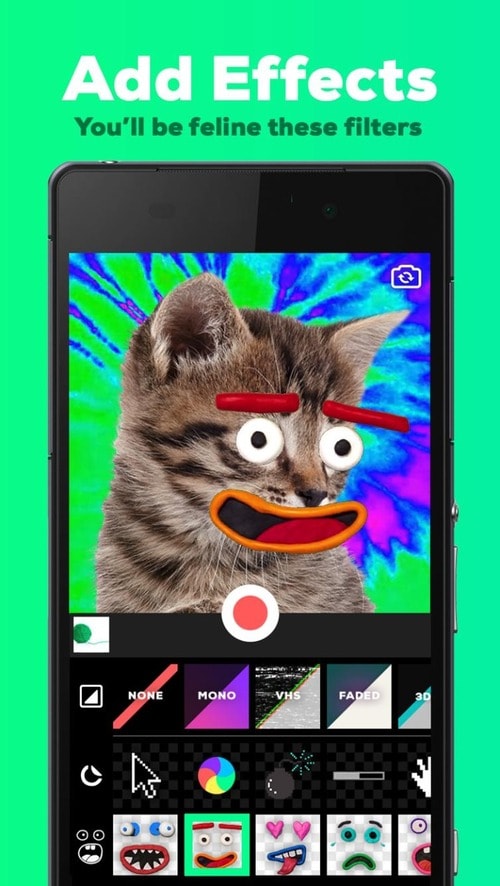
02Giphy Cam
Giphy Cam is one of the more recent gif editing apps. The digicam data is a brief phase of video. You can alter that video with lots of filters, different effects, stickers, text, and more. It additionally has a five-shot burst mode alongside its video mode. This is likely the excellent GIF/camera app hybrid. It doesn’t have any digital camera features; however, it does GIFs higher than the others by way of a large margin. It’s free with no in-app purchases.
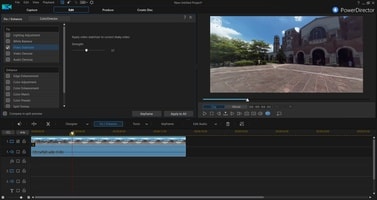
03PowerDirector
PowerDirector is one of many videos modifying apps with GIF support. This one simply takes place to be higher than most of the different ones. It’s a video editor app. Thus, it’ll have comparable features. However, two of the export codecs encompass GIF nonetheless pix and animated GIFs. This will work first-class for turning a video into a shorter GIF. The app is free to download and play with. You may additionally want to buy extra aspects by using in-app purchases.
04ImgPlay – GIF Maker
ImgPlay is a popular GIF editing app that is available for Android and iOS. You have the option of using an existing video or shooting one using your phone’s camera. In GIFs, you can apply 30 effects, crop a portion of your choice, and modify the frame rate.
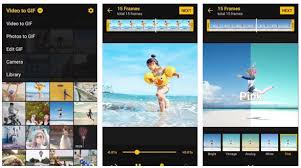
05Motion Stills
Motion Stills is a Google app that allows you to record short films and turn them into looping GIFs. You can use the app to take a short 3s clip with a single tap or utilize the Fast Forward feature to condense an existing video into a short one. To make yips GIFs even better, you may add motion text and emoticons. After that, save it as a GIF and send it to your friends.
Part 4 Top 5 Editors for Animated GIF Editing
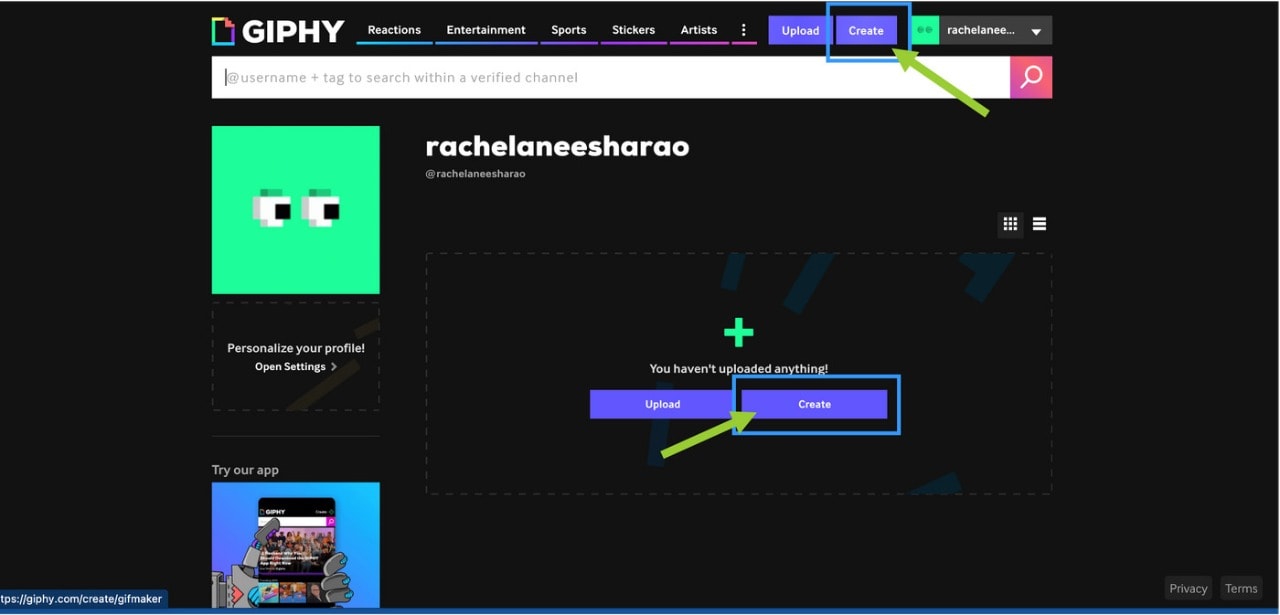
01Giphy
GIPHY is a designing tool that helps customers to create extraordinary GIFs, stickers, and backdrops. You can edit your plan with filters, captions, stickers, and different plan elements. The popular codecs for GIF uploads are JPG, PNG, GIF, MP4, or MOV, whilst the conventional file codecs to convert to stickers are JPG or PNG.
GIPHY permits you to paste URLs from specific sources such as Vimeo, YouTube, GIPHY, and others. The animated GIF maker software program makes it convenient for customers to edit and organize the uploaded archives in the favored order.
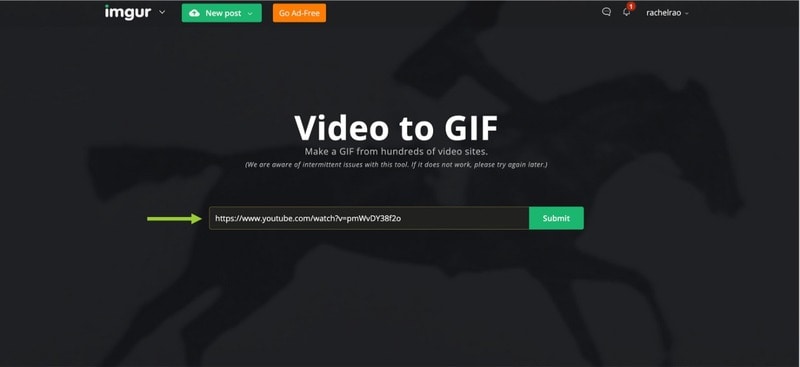
02Imgur
It’s a website that makes it simple to make GIFs. Simply paste the video URL into the web app and wait for it to process. After that, all you must do now is set the start time and duration of your GIF.
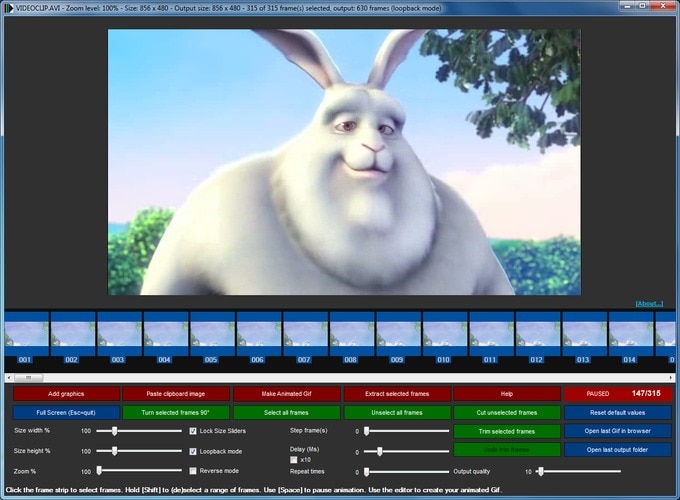
03KickMyGraphics
The utility comes with a humble person interface and it approves you to create animated GIFs from neighborhood images. In addition, you can additionally paste snapshots from your clipboard at once to the application. The utility additionally helps video files; however, you want to convert the video earlier than you can edit it. The utility affords a stay preview so you can see how your animation appears at any time. You can additionally see all handy frames and dispose of useless frames with ease.
As for editing, you can’t add your textual content or alter the brightness of your frames, however, you can trade their width, peak, and zoom level. You can additionally allow Loopback or Reverse mode and set delay, step frames, and a variety of repeats. You can additionally configure output first-class right from the application.
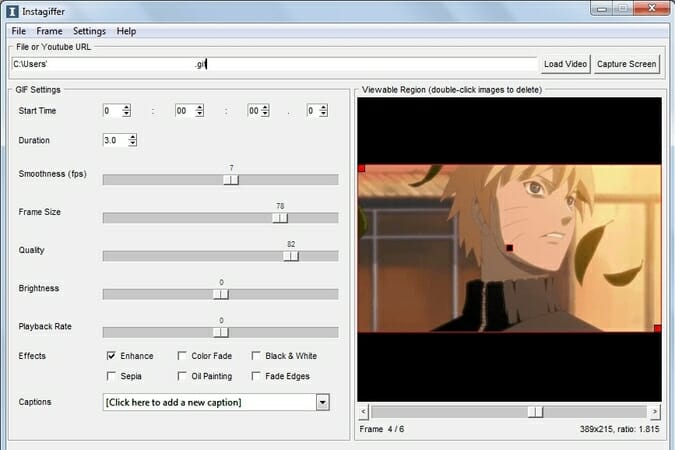
04Instagiffer
Instagiffer is some other easy software that lets you create animated GIFs on your PC. This utility affords a humble consumer interface; however, it makes up for it with an extensive variety of features. The software approves you to convert nearby movies to GIFs, however, you can additionally paste a YouTube URL and convert an online video to GIF with ease. According to the developer, the software additionally works with different video web hosting websites.
05GIMP
The software is free, so you can download and use it except for any restrictions. GIMP is best for picture designers and it comes with all preferences that an image editor needs. You can without problems edit your images, exchange their color, hue, saturation, or brightness, and add exceptional outcomes to them.
In addition, you can create special creations thanks to the built-in layer system. It’s worth citing that the software additionally helps programming algorithms so you can effortlessly edit your photos with the use of scripts.

● Key Takeaways from This Episode →
● If you are typically worried about how you can be able to come up with fascinating GIFs, you ought to hold in thought that you don’t have to create them from scratch.
● You can be capable to advance inspiring GIFs from current movies and photos eight after GIF editor software program free download.
● Hopefully, you are now capable to pick out a perfect GIF creator to use for your modifying tasks.
Several websites and companies use the graphics interchange format that is the GIF. It can be seen to be used by a wide number of people on the internet and its format is supported by all platforms. The common goal of all the users can be satisfied.
Are you looking to create and edit gifs online or on your laptop but cannot find a suitable way out?
Finding the best and most user friendly GIF maker is not very hard, especially considering that free gif editor software is offered by so many providers. But if you’re only starting your journey with apps to make GIFs, it can be a difficult choice.
In this article
01 [How to Make GIF Interesting?](#Part 1)
02 [Top 5 Editors for Windows](#Part 2)
03 [Top 5 Editors for iPhone/Android](#Part 3)
04 [Top 5 Editors for Animated GIF Editing](#Part 4)
Part 1 How to Make GIF Interesting?
There are several ways by which a GIF can be made interesting. You can use colorful graphics and drop duplicate frames. Using fewer colors lets you make longer and more involved gifs.
Part 2 Top 5 Editors for Windows
Below are the top 5 editors which will help you to form GIFs for Windows: -
01Adobe Photoshop
Adobe Photoshop could be a useful device for making videos, image redaction, and GIF editing. This GIF code for Windows can allow you to import a GIF file so begin with the modification process.
Therefore, GIF editing is a breeze as you’ll alter the effects, modification the frame animation within the Timeline section, and do plenty a lot with this tool. You’ll simply utilize the free trial version to urge accustomed to the tool initial and then opt for the premium version to try to a lot more.
02EaseUS Video Editor
In the context of GIF makers, EaseUS Video Editor can also be said as one of the best. Free templates of texts, filters, elements, overlays, transitions, and music are available here which its users create GIF images with easily. You can also create lively and fully animated images, convert MP4 to GIFs and share it on YouTube, or other social media platforms.
The capabilities of this animated GIF maker for Windows are not restrained to this alone, as it can be used to edit all kinds of images, audio, and videos.
03GIF Animator
GIF animator editor is one of the first-rate GIF makers and is an awesome device for you if you desire to create GIF images, banners, buttons, and GIF videos. The device is very convenient to use and is a favorite of animators and designers.
The measurement of the photo can be modified and alongside that, it is feasible to control the frames, hastily cross texts, and enhance. Corrections to the movies can be brought and the built-in photograph editor can be used to rectify photographs and pictures, you can draw on them and you can convert movies to GIFs by the usage of the fragmented section of the video files.
04**Wondershare Filmora Video Editor **
If you are searching for nice animated GIF makers for Windows computers, then Wondershare Filmora’s animated movies and GIF editor device may want to be a brilliant choice. That’s due to the fact with this GIF maker Windows device lets you add a video, convert it to the GIF structure and then edit it later with its super features.
The interactive UI helps customers manner greater than one hundred fifty file codecs easily. With this device, you can crop, pace up a video, alter the body size, and caption it. Additionally, you add texts, add animation consequences to the images, and alter the pictures and movies in a few steps.
Wondershare Filmora - Best Video Editor for Mac/Windows
5,481,435 people have downloaded it.
Build unique custom animations without breaking a sweat.
Focus on creating epic stories and leave the details to Filmora’s auto features.
Start a creative adventure with drag & drop effects and endless possibilities.
Filmora simplifies advanced features to save you time and effort.
Filmora cuts out repetition so you can move on to your next creative breakthrough.
05Wondershare UniConverter
Wondershare UniConverter is one of the fine image, audio, and video editor and converter out there, and ranked the excellent GIF maker here. This GIF editor app is easy for customers and will furnish a pleasant platform for novices to operate their tasks. And when performed to create and edit GIF files, a person can export the GIF archives to both Android or iPhone barring having to use iTunes.
Part 3 Top 5 Editors for iPhone/Android
01PixelStudio
Pixel Studio is an animation app for pixel artwork fans. You can draw your little creations with pixel art. It additionally comes with a textual content tool, aid for matters like Samsung S-Pen, and it auto-saves so you don’t lose work. You can export your creations to GIF as nicely and that makes Pixel Studio one of the quality apps for customized GIFs. It’s normally an artwork app so meme lords may additionally want to put in a little greater effort than usual, however, the consequences are normally well worth it.
02Giphy Cam
Giphy Cam is one of the more recent gif editing apps. The digicam data is a brief phase of video. You can alter that video with lots of filters, different effects, stickers, text, and more. It additionally has a five-shot burst mode alongside its video mode. This is likely the excellent GIF/camera app hybrid. It doesn’t have any digital camera features; however, it does GIFs higher than the others by way of a large margin. It’s free with no in-app purchases.
03PowerDirector
PowerDirector is one of many videos modifying apps with GIF support. This one simply takes place to be higher than most of the different ones. It’s a video editor app. Thus, it’ll have comparable features. However, two of the export codecs encompass GIF nonetheless pix and animated GIFs. This will work first-class for turning a video into a shorter GIF. The app is free to download and play with. You may additionally want to buy extra aspects by using in-app purchases.
04ImgPlay – GIF Maker
ImgPlay is a popular GIF editing app that is available for Android and iOS. You have the option of using an existing video or shooting one using your phone’s camera. In GIFs, you can apply 30 effects, crop a portion of your choice, and modify the frame rate.
05Motion Stills
Motion Stills is a Google app that allows you to record short films and turn them into looping GIFs. You can use the app to take a short 3s clip with a single tap or utilize the Fast Forward feature to condense an existing video into a short one. To make yips GIFs even better, you may add motion text and emoticons. After that, save it as a GIF and send it to your friends.
Part 4 Top 5 Editors for Animated GIF Editing
01Giphy
GIPHY is a designing tool that helps customers to create extraordinary GIFs, stickers, and backdrops. You can edit your plan with filters, captions, stickers, and different plan elements. The popular codecs for GIF uploads are JPG, PNG, GIF, MP4, or MOV, whilst the conventional file codecs to convert to stickers are JPG or PNG.
GIPHY permits you to paste URLs from specific sources such as Vimeo, YouTube, GIPHY, and others. The animated GIF maker software program makes it convenient for customers to edit and organize the uploaded archives in the favored order.
02Imgur
It’s a website that makes it simple to make GIFs. Simply paste the video URL into the web app and wait for it to process. After that, all you must do now is set the start time and duration of your GIF.
03KickMyGraphics
The utility comes with a humble person interface and it approves you to create animated GIFs from neighborhood images. In addition, you can additionally paste snapshots from your clipboard at once to the application. The utility additionally helps video files; however, you want to convert the video earlier than you can edit it. The utility affords a stay preview so you can see how your animation appears at any time. You can additionally see all handy frames and dispose of useless frames with ease.
As for editing, you can’t add your textual content or alter the brightness of your frames, however, you can trade their width, peak, and zoom level. You can additionally allow Loopback or Reverse mode and set delay, step frames, and a variety of repeats. You can additionally configure output first-class right from the application.
04Instagiffer
Instagiffer is some other easy software that lets you create animated GIFs on your PC. This utility affords a humble consumer interface; however, it makes up for it with an extensive variety of features. The software approves you to convert nearby movies to GIFs, however, you can additionally paste a YouTube URL and convert an online video to GIF with ease. According to the developer, the software additionally works with different video web hosting websites.
05GIMP
The software is free, so you can download and use it except for any restrictions. GIMP is best for picture designers and it comes with all preferences that an image editor needs. You can without problems edit your images, exchange their color, hue, saturation, or brightness, and add exceptional outcomes to them.
In addition, you can create special creations thanks to the built-in layer system. It’s worth citing that the software additionally helps programming algorithms so you can effortlessly edit your photos with the use of scripts.
● Key Takeaways from This Episode →
● If you are typically worried about how you can be able to come up with fascinating GIFs, you ought to hold in thought that you don’t have to create them from scratch.
● You can be capable to advance inspiring GIFs from current movies and photos eight after GIF editor software program free download.
● Hopefully, you are now capable to pick out a perfect GIF creator to use for your modifying tasks.
How to Trim Video in Quicktime Player on Mac
Create High-Quality Video - Wondershare Filmora
An easy and powerful YouTube video editor
Numerous video and audio effects to choose from
Detailed tutorials provided by the official channel
You have to trim videos to capture your viewer’s attention because the average attention span of human beings is eight seconds. As such, viewers will click away or keep on scrolling if the first few seconds of your video are in complete silence or a blank screen. Luckily, there is a simple way that Mac users can use to trim videos: QuickTime Player. This guide will give you the low-down on how to trim video in Quicktime to remove unwanted portions.
In this article
02 How to Trim a Video in Quicktime Player
03 Tips & Tricks to Use QuickTime Player
What Is QuickTime Player?
Developed by Apple, QuickTime Player is a software application designed to play, edit, record, and share video and audio files on your Mac. It was created in 1991, and QuickTime X is the latest Mac version available for users of Mac OS X Snow Leopard to macOS Mojave.
QuickTime Player is supported by MovieWorks, PowerPoint, HyperCard, Director, and other standard multimedia authoring apps. One of the exciting features that QuickTime brings to the internet is that it enables video streaming over networks.
In 2016, Apple ended support for the QuickTime Windows version. In 12018, they ceased support for QuickTime 7 version on macOS.
When it comes to OS X Lion, QTKit (the underlying QuickTime media) was deplored in favor of AVFoundation, which was the newer graphics framework and discontinued as of macOS Catalina.
How to Trim a Video in Quicktime Player
Trimming video is a breeze when you are using QuickTime. Follow the steps below to learn how to trim Quicktime video clips.
- Launch QuickTime Player on your Mac. You can find this application by using a Spotlight search. Alternatively, open the Finder app in your Dock and choose the Applications option from the left-hand side menu. You’ll then find QuickTime in the right-hand side menu.
- Once QuickTime has launched, hit the File tab, then click Open File.

- Select the video you would to trim.
- Navigate to the Edit tab on the top menu with your video open.
- Select Trim in the dropdown menu. Alternatively, use the keyboard shortcut command + T.

- You’ll see a yellow trimming bar around the length of the video at the bottom.

- To QuickTime trim video, drag the handles, and the app will remove everything outside the yellow bars.
- Once you have trimmed your video, click the Trim option on the right side of your screen.
- The play icon allows you to preview your video anytime you want during the editing process.
- Click File then Save to save your trimmed video.

- Name your trimmed video, and then select the location you want to save it. Click Save to complete this action.
Tips & Tricks to Use QuickTime Player
Now that you know how to QuickTime trim video, we have provided some helpful tips and tricks for those using this application.
How to Split and Combine Videos
QuickTime player allows you to split and combine two or more video clips. Follow the steps below to learn how to split and combine your videos.
- Open your file.
- Then, press Command-E or select View > Show Clips.
- Drag the Playhead to the area where you would like the video to split.
- Press Command-Y or select Edit > Split Clip. Both clips will be highlighted yellow.
- You can now insert another video clip or re-arrange the video clips by dragging them to the right or left.
- If you split the video clips thrice, you can select the one in the middle, where a yellow outline will appear around it, and then zap it by hitting Delete on your keyboard.

- To combine your video clips, open one of the clips and select Edit > Add Clip to End.
- Double click the video clip you would like to tack on in the Open dialog box.
- You can also drag the icons of video clips from the Finder and drop them into a video window. The application will add the clips to the end of your existing video. Repeat this process to combine several video clips.
- The second video can appear in the middle of your first one. All you have to do is split the video clip, then click on the clip that will appear before the area where the new video is supposed to go.
- Now, select Edit > Insert Clip After Selection.
- A dialog box will appear; double-click the video file you would like to bring in.
- Alternatively, drag a video from the Finder and take it into the gap between the two clips.

How to Record Audio and Videos
You can record a video using a USB webcam or Mac’s built-in camera. What’s more? You can record audio with the built-in microphone on your Mac, a musical instrument connected via a USB cable, or an external mic. Or maybe you would like to record something that’s happening on your screen, QuickTime Player can also do this. Follow the steps below to record audio and video with QuickTime.
- Select File > New Screen Recording, New Audio Recording, or New Movie Recording.
- The last two options need you to choose quality and an input source. You’ll then have to hit the red Record Button. The first option will summon a pane that features the record button and some audio options.
- Drag to specify an area you want to record or click once to record the whole screen.
- Once you have finished, hit the Record button again. A black screen will appear in your menu bar when you’re recording your screen.
- The file will open in QuickTime Player when you stop recording.
- To save it, choose File > Save.
How to Export and Share Videos
QuickTime allows you to export optimized content so that you can view it on other Apple devices, including Apple TV, iPod Touch, and iPhone. With that in mind, let’s look at how you can export and share your video once you have finished editing it.
- Select File > Export; you’ll get a roundup of resolution options (1080p, 720p, and 480p), settings for Apple TV and iOS devices, and an option for only exporting audio.
- If you go with the iTunes option, you’ll see the same Apple TV and iOS devices optimized settings; however, the video file will be sent to your iTunes library.
- • To export your video and share with other users, select File > Share, and the resulting menu will include AirDrop, Messages, Mail, and the social media sharing platforms YouTube, Flickr, Facebook, and Vimeo.

- Choose the option you want, and QuickTime will optimize your video for the service or program you have selected.
- To save the changes you have made to your video file, select File > Close. Name your edited video in the box that will appear, then click Save.
Flip or Rotate a Clip
QuickTime Player also allows you to rotate or flip clips and videos with a single click. Following these step to flip or rotate your video clip.
- Navigate to the Edit tab.
- Select the direction that you want your video to turn. The available options are Flip Vertical, Flip Horizontal, Rotate Right and Rotate Left.
You can apply the changes to your entire video or one of the clips if you had divided the video file.
Present or Record your iPad or iPhone Screen
QuickTime can record or show a live view of what is happening on your iPhone or iPad. If you are using Mac for a presentation, you can show the screen of your iOS devices centered within your Mac’s screen. You only need to follow the steps below:
- Use a USB cable to attach either your iPad or iPhone to your Mac.
- Open QuickTime, then click File > New Movie Recording.
- Now, you need to point the cursor at the QuickTime Player window for the record button to appear.
- Go to the menu next to the record button and pick your iOS device from the list of cameras.
- You’re now ready to enjoy the largest version of your iPhone or iPad with your audience.
- Click Record to record the action.
Conclusion
● Video editing is an essential part of creating video content that attracts viewers. QuickTime trim video allows you to remove unwanted scenes to make it engaging. Your viewers will get hooked on your videos if you trim boring sections, blank screens, and areas with silence. Once you master the art of cutting, your viewer retention and engagement will sky-rocket.
● Don’t forget to use the tips and tricks we have provided to get the most out of this application. You can export videos to various formats, such as FLC animations and image sequences, as well as AVI and DV Streams. You can also split and combine videos, present or record your iOS device screen, record audio and video, and much more.
You have to trim videos to capture your viewer’s attention because the average attention span of human beings is eight seconds. As such, viewers will click away or keep on scrolling if the first few seconds of your video are in complete silence or a blank screen. Luckily, there is a simple way that Mac users can use to trim videos: QuickTime Player. This guide will give you the low-down on how to trim video in Quicktime to remove unwanted portions.
In this article
02 How to Trim a Video in Quicktime Player
03 Tips & Tricks to Use QuickTime Player
What Is QuickTime Player?
Developed by Apple, QuickTime Player is a software application designed to play, edit, record, and share video and audio files on your Mac. It was created in 1991, and QuickTime X is the latest Mac version available for users of Mac OS X Snow Leopard to macOS Mojave.
QuickTime Player is supported by MovieWorks, PowerPoint, HyperCard, Director, and other standard multimedia authoring apps. One of the exciting features that QuickTime brings to the internet is that it enables video streaming over networks.
In 2016, Apple ended support for the QuickTime Windows version. In 12018, they ceased support for QuickTime 7 version on macOS.
When it comes to OS X Lion, QTKit (the underlying QuickTime media) was deplored in favor of AVFoundation, which was the newer graphics framework and discontinued as of macOS Catalina.
How to Trim a Video in Quicktime Player
Trimming video is a breeze when you are using QuickTime. Follow the steps below to learn how to trim Quicktime video clips.
- Launch QuickTime Player on your Mac. You can find this application by using a Spotlight search. Alternatively, open the Finder app in your Dock and choose the Applications option from the left-hand side menu. You’ll then find QuickTime in the right-hand side menu.
- Once QuickTime has launched, hit the File tab, then click Open File.
- Select the video you would to trim.
- Navigate to the Edit tab on the top menu with your video open.
- Select Trim in the dropdown menu. Alternatively, use the keyboard shortcut command + T.
- You’ll see a yellow trimming bar around the length of the video at the bottom.
- To QuickTime trim video, drag the handles, and the app will remove everything outside the yellow bars.
- Once you have trimmed your video, click the Trim option on the right side of your screen.
- The play icon allows you to preview your video anytime you want during the editing process.
- Click File then Save to save your trimmed video.
- Name your trimmed video, and then select the location you want to save it. Click Save to complete this action.
Tips & Tricks to Use QuickTime Player
Now that you know how to QuickTime trim video, we have provided some helpful tips and tricks for those using this application.
How to Split and Combine Videos
QuickTime player allows you to split and combine two or more video clips. Follow the steps below to learn how to split and combine your videos.
- Open your file.
- Then, press Command-E or select View > Show Clips.
- Drag the Playhead to the area where you would like the video to split.
- Press Command-Y or select Edit > Split Clip. Both clips will be highlighted yellow.
- You can now insert another video clip or re-arrange the video clips by dragging them to the right or left.
- If you split the video clips thrice, you can select the one in the middle, where a yellow outline will appear around it, and then zap it by hitting Delete on your keyboard.
- To combine your video clips, open one of the clips and select Edit > Add Clip to End.
- Double click the video clip you would like to tack on in the Open dialog box.
- You can also drag the icons of video clips from the Finder and drop them into a video window. The application will add the clips to the end of your existing video. Repeat this process to combine several video clips.
- The second video can appear in the middle of your first one. All you have to do is split the video clip, then click on the clip that will appear before the area where the new video is supposed to go.
- Now, select Edit > Insert Clip After Selection.
- A dialog box will appear; double-click the video file you would like to bring in.
- Alternatively, drag a video from the Finder and take it into the gap between the two clips.
How to Record Audio and Videos
You can record a video using a USB webcam or Mac’s built-in camera. What’s more? You can record audio with the built-in microphone on your Mac, a musical instrument connected via a USB cable, or an external mic. Or maybe you would like to record something that’s happening on your screen, QuickTime Player can also do this. Follow the steps below to record audio and video with QuickTime.
- Select File > New Screen Recording, New Audio Recording, or New Movie Recording.
- The last two options need you to choose quality and an input source. You’ll then have to hit the red Record Button. The first option will summon a pane that features the record button and some audio options.
- Drag to specify an area you want to record or click once to record the whole screen.
- Once you have finished, hit the Record button again. A black screen will appear in your menu bar when you’re recording your screen.
- The file will open in QuickTime Player when you stop recording.
- To save it, choose File > Save.
How to Export and Share Videos
QuickTime allows you to export optimized content so that you can view it on other Apple devices, including Apple TV, iPod Touch, and iPhone. With that in mind, let’s look at how you can export and share your video once you have finished editing it.
- Select File > Export; you’ll get a roundup of resolution options (1080p, 720p, and 480p), settings for Apple TV and iOS devices, and an option for only exporting audio.
- If you go with the iTunes option, you’ll see the same Apple TV and iOS devices optimized settings; however, the video file will be sent to your iTunes library.
- • To export your video and share with other users, select File > Share, and the resulting menu will include AirDrop, Messages, Mail, and the social media sharing platforms YouTube, Flickr, Facebook, and Vimeo.
- Choose the option you want, and QuickTime will optimize your video for the service or program you have selected.
- To save the changes you have made to your video file, select File > Close. Name your edited video in the box that will appear, then click Save.
Flip or Rotate a Clip
QuickTime Player also allows you to rotate or flip clips and videos with a single click. Following these step to flip or rotate your video clip.
- Navigate to the Edit tab.
- Select the direction that you want your video to turn. The available options are Flip Vertical, Flip Horizontal, Rotate Right and Rotate Left.
You can apply the changes to your entire video or one of the clips if you had divided the video file.
Present or Record your iPad or iPhone Screen
QuickTime can record or show a live view of what is happening on your iPhone or iPad. If you are using Mac for a presentation, you can show the screen of your iOS devices centered within your Mac’s screen. You only need to follow the steps below:
- Use a USB cable to attach either your iPad or iPhone to your Mac.
- Open QuickTime, then click File > New Movie Recording.
- Now, you need to point the cursor at the QuickTime Player window for the record button to appear.
- Go to the menu next to the record button and pick your iOS device from the list of cameras.
- You’re now ready to enjoy the largest version of your iPhone or iPad with your audience.
- Click Record to record the action.
Conclusion
● Video editing is an essential part of creating video content that attracts viewers. QuickTime trim video allows you to remove unwanted scenes to make it engaging. Your viewers will get hooked on your videos if you trim boring sections, blank screens, and areas with silence. Once you master the art of cutting, your viewer retention and engagement will sky-rocket.
● Don’t forget to use the tips and tricks we have provided to get the most out of this application. You can export videos to various formats, such as FLC animations and image sequences, as well as AVI and DV Streams. You can also split and combine videos, present or record your iOS device screen, record audio and video, and much more.
Unlock Your Video Editing Potential With Filmora From Wondershare
Are you looking to make a cool, fun video for a special occasion? Look no further than Wondershare Filmora.
With a range of video editing tools and effects, you can easily create stunning visuals and captivating stories. Whether you are making a video for a special occasion or a social media post, Filmora has the features to help you create the perfect video.
In this article, we will discuss the benefits of using Filmora and look further into some of its main features such as split screens, LUTs, keyframes, and more. So, let your creative juices flow and start making awesome videos with Wondershare Filmora today!
Why Choose Wondershare Filmora?
Wondershare Filmora is one of the most affordable video editors available in the market, with features that are usually very expensive to use. This tool is not only available for desktops but also for mobiles. So, you can also create content on the go!

Free Download For Win 7 or later(64-bit)
Free Download For macOS 10.14 or later
Let’s dig a little deeper to see how Filmora can benefit you.
Benefits of Using Filmora
Filmora, as compared to its contestants, has much more to offer. From a range of tools and effects to an easy-to-use interface to affordability, Filmora has it all!
1.Variety of Video Editing Tools and Effects
Wondershare Filmora has a variety of video editing tools and effects. Some of the advanced editing features to spice up your videos are available such as cropping, trimming, and adjusting the audio, as well as adding motion graphics, motion tracking, and more.
Furthermore, users can also access a library of royalty-free video clips, overlays, and sound effects to add the perfect touch to their videos.
2.Easy-to-Use Interface
Whether you are a beginner or a pro, Filmora’s easy-to-use interface will be your favorite! It is simple, plain, and easy to understand.
With its intuitive interface, you can also quickly and easily customize your videos with an array of special effects, including transitions, text, and music.
3.Affordable
Last but not least, the greatest catch of Wondershare Filmora is its affordability. With the wide variety of features that it offers, it has reasonable prices to offer.
With packages starting at just $49.99 per year to $79.99 perpetual, you can avail a multitude of features that update regularly and with every new version of Filmora. With these packages, you can get around 1GB of Filmora cloud storage.
So, what are you waiting for? Download Filmora now. And don’t worry; we have got you covered with some great tips to begin your Filmora journey.
Some Stunning Features in Filmora
Although Filmora is easy to use, and you can explore it on your own, it never hurts to know a few features before you dive in.
1.Split Screen Presets
Starting with split screens that are a great way of enhancing your videos. You can show multiple videos side by side, which gives a very chic look to your overall video. Here’s how to do it in Filmora.
Free Download For Win 7 or later(64-bit)
Free Download For macOS 10.14 or later
Step1Start a new project
Launch Filmora and click on “New Project.”

Step2Choose a split screen preset
On the top, go to “Templates” and then “Split Screen.”

Choose the preset that you need. You can also preview the layout.
Step3Add to timeline
Add the chosen preset to the timeline track.

Step4Add videos to the layout
Import media from your library or use stock media to add videos to your layout. Drag and drop your media on the layout.

Step5Edit the split screen
Once you have all the videos added to the layout, double-click on the split screen in the timeline panel. The edit options will appear on the left.

Choose how you want to edit your video and then save it.
2.Filters and LUTs
Another cool feature that Filmora offers is Filters and LUTs. In order to do so, follow these simple steps.
Free Download For Win 7 or later(64-bit)
Free Download For macOS 10.14 or later
Step1Add media
Import all the video or audio files that you want to edit to the media section.

Step2Go to “Filter & LUT”
Under the “Effects” tab, go to “Filter & LUT.” Choose the LUT that you want to add to your video.

Step3Add the LUT to your video
Add the LUT to your timeline by drag-n-drop.

Drag it to adjust it according to your video. In order to adjust the strength of the LUT, double-click on it.

You can adjust the opacity of the LUT according to your preference. You can make it as soft or as strong as you want.
3.Animated Keyframes
Moving on, another one of the cool Filmora features is keyframing. Filmora allows you to add animated keyframes in your videos to add moving text or such effects. Follow the steps below to do so.
Free Download For Win 7 or later(64-bit)
Free Download For macOS 10.14 or later
Step1Add videos to the timeline
Add a video to your timeline and double-click on it to open up the editing options. Go to the “Animation” tab.

Here, you have different preset animations that you can use for your video.
Step2Add a keyframe
Add your chosen preset and hit play. You will see how that keyframe works. You can also add multiple keyframes to your video to make it look cooler.

Once you play the video, it will look like this.

This is an easy way of making intros or outros of your videos.
4.Detach Audio
Suppose you have a video where you like the audio and want to use it for another video. How would you separate the audio? This is where the Detach Audio feature comes in.
Free Download For Win 7 or later(64-bit)
Free Download For macOS 10.14 or later
Step1Add video to the timeline
Drag and drop the video on the timeline.

Step2Detach audio
To separate the audio, right-click on the video and choose “Detach Audio.” The audio track will appear separately in the timeline. You can then use it as you wish.

5.Blur Effects
Next up, we have the feature of blurring your video or the background in your video. To do so, follow these simple steps.
Free Download For Win 7 or later(64-bit)
Free Download For macOS 10.14 or later
Step1Go to the effects tab
After adding the video to your timeline, go to the Effects tab on top.

Step2Search for blur effects
In the search bar, type “blur.” You will see several blur effects. Choose any effect and see a preview of it.

Step3Add effects to videos
Add the chosen effect to your video. Then adjust its position accordingly. Double-click on the blur effect in the timeline panel to change its size and opacity.

These are some of the most amazing features that we have listed here. FYI, this is just the brink of the iceberg. There is a whole lot more that Filmora has to offer.
Final Words
If you’re looking for a simple and intuitive video editing platform to help you create stunning videos, look no further than Filmora. It is packed with powerful features that let you turn your raw footage into captivating movies in no time.
With its user-friendly design, you can easily access all the tools you need to make amazing videos, no matter your skill level. Try Filmora today and create unforgettable videos that will leave viewers in awe.
Free Download For macOS 10.14 or later
Let’s dig a little deeper to see how Filmora can benefit you.
Benefits of Using Filmora
Filmora, as compared to its contestants, has much more to offer. From a range of tools and effects to an easy-to-use interface to affordability, Filmora has it all!
1.Variety of Video Editing Tools and Effects
Wondershare Filmora has a variety of video editing tools and effects. Some of the advanced editing features to spice up your videos are available such as cropping, trimming, and adjusting the audio, as well as adding motion graphics, motion tracking, and more.
Furthermore, users can also access a library of royalty-free video clips, overlays, and sound effects to add the perfect touch to their videos.
2.Easy-to-Use Interface
Whether you are a beginner or a pro, Filmora’s easy-to-use interface will be your favorite! It is simple, plain, and easy to understand.
With its intuitive interface, you can also quickly and easily customize your videos with an array of special effects, including transitions, text, and music.
3.Affordable
Last but not least, the greatest catch of Wondershare Filmora is its affordability. With the wide variety of features that it offers, it has reasonable prices to offer.
With packages starting at just $49.99 per year to $79.99 perpetual, you can avail a multitude of features that update regularly and with every new version of Filmora. With these packages, you can get around 1GB of Filmora cloud storage.
So, what are you waiting for? Download Filmora now. And don’t worry; we have got you covered with some great tips to begin your Filmora journey.
Some Stunning Features in Filmora
Although Filmora is easy to use, and you can explore it on your own, it never hurts to know a few features before you dive in.
1.Split Screen Presets
Starting with split screens that are a great way of enhancing your videos. You can show multiple videos side by side, which gives a very chic look to your overall video. Here’s how to do it in Filmora.
Free Download For Win 7 or later(64-bit)
Free Download For macOS 10.14 or later
Step1Start a new project
Launch Filmora and click on “New Project.”
Step2Choose a split screen preset
On the top, go to “Templates” and then “Split Screen.”
Choose the preset that you need. You can also preview the layout.
Step3Add to timeline
Add the chosen preset to the timeline track.
Step4Add videos to the layout
Import media from your library or use stock media to add videos to your layout. Drag and drop your media on the layout.
Step5Edit the split screen
Once you have all the videos added to the layout, double-click on the split screen in the timeline panel. The edit options will appear on the left.
Choose how you want to edit your video and then save it.
2.Filters and LUTs
Another cool feature that Filmora offers is Filters and LUTs. In order to do so, follow these simple steps.
Free Download For Win 7 or later(64-bit)
Free Download For macOS 10.14 or later
Step1Add media
Import all the video or audio files that you want to edit to the media section.
Step2Go to “Filter & LUT”
Under the “Effects” tab, go to “Filter & LUT.” Choose the LUT that you want to add to your video.
Step3Add the LUT to your video
Add the LUT to your timeline by drag-n-drop.
Drag it to adjust it according to your video. In order to adjust the strength of the LUT, double-click on it.
You can adjust the opacity of the LUT according to your preference. You can make it as soft or as strong as you want.
3.Animated Keyframes
Moving on, another one of the cool Filmora features is keyframing. Filmora allows you to add animated keyframes in your videos to add moving text or such effects. Follow the steps below to do so.
Free Download For Win 7 or later(64-bit)
Free Download For macOS 10.14 or later
Step1Add videos to the timeline
Add a video to your timeline and double-click on it to open up the editing options. Go to the “Animation” tab.
Here, you have different preset animations that you can use for your video.
Step2Add a keyframe
Add your chosen preset and hit play. You will see how that keyframe works. You can also add multiple keyframes to your video to make it look cooler.
Once you play the video, it will look like this.
This is an easy way of making intros or outros of your videos.
4.Detach Audio
Suppose you have a video where you like the audio and want to use it for another video. How would you separate the audio? This is where the Detach Audio feature comes in.
Free Download For Win 7 or later(64-bit)
Free Download For macOS 10.14 or later
Step1Add video to the timeline
Drag and drop the video on the timeline.
Step2Detach audio
To separate the audio, right-click on the video and choose “Detach Audio.” The audio track will appear separately in the timeline. You can then use it as you wish.
5.Blur Effects
Next up, we have the feature of blurring your video or the background in your video. To do so, follow these simple steps.
Free Download For Win 7 or later(64-bit)
Free Download For macOS 10.14 or later
Step1Go to the effects tab
After adding the video to your timeline, go to the Effects tab on top.
Step2Search for blur effects
In the search bar, type “blur.” You will see several blur effects. Choose any effect and see a preview of it.
Step3Add effects to videos
Add the chosen effect to your video. Then adjust its position accordingly. Double-click on the blur effect in the timeline panel to change its size and opacity.
These are some of the most amazing features that we have listed here. FYI, this is just the brink of the iceberg. There is a whole lot more that Filmora has to offer.
Final Words
If you’re looking for a simple and intuitive video editing platform to help you create stunning videos, look no further than Filmora. It is packed with powerful features that let you turn your raw footage into captivating movies in no time.
With its user-friendly design, you can easily access all the tools you need to make amazing videos, no matter your skill level. Try Filmora today and create unforgettable videos that will leave viewers in awe.
Also read:
- New Progressive Solutions to Adding VHS Effects to Video with Ease
- New 2024 Approved In This Article You Will Learn How to Crop a Video Through Windows Media Player and with Filmora Wondershare. Here Are Ways to Crop Your Video Clip
- Updated 2024 Approved How Important It Is to Perform Color Correction to Your Video? Here Is a Solution with After Effects Color Correction with Illustrative Videos
- Do You Have the Habit to Create Subtitle for Your Video? You Can Always Add Open and Close Subtitles to Your Video to Make It Perfect. Follow This Article to Learn More About It for 2024
- New Best Green Screen Software for Beginner on Mac for 2024
- New 2024 Approved Steps to Create Gold Text Effects After Effects
- New How To Make a Photo Collage in Microsoft Word for 2024
- Updated Dollar-Store DIY Hacks to Use for Filmmaking for 2024
- Recommended Video Background Online Changers for 2024
- Updated Ideas That Help You Out in Converting AVI to GIF
- Little Tricks to Make Canva Slideshow No One Is Telling You for 2024
- Updated Learn Color Correction in After Effects with These YouTube Videos
- New In 2024, The Audio You Produce Will Inevitably Be Flawed Throughout the Production Process. So, Learn How Adobe Audition Removes Echo to Sound Better Instead of Throwing It Away
- New 2024 Approved 7 Ways Add Subtitles to MKV Videos on All Platforms
- New Premiere Pro Tutorial How To Change Video Frame Rate for 2024
- A Roster of 8 Top Color Match Generators
- New In 2024, Learn How to Make Your CSGO Montage Impressive
- New Top List The Best Slow Motion Video Editors Available for 2024
- In 2024, Top 5 Best Video to PPT Converters You Should Know
- Updated In 2024, Best Voice Changers for WhatsApp Free Included
- New 2024 Approved Exploring the Top Professional Tools to Perform Mask Tracking
- 2024 Approved The Best Jump Cut Editing Tricks Make Your Videos Snappy!
- Updated 3 Actionable Ways to Create Countdown Animation for Videos
- Updated Step by Step to Rotate Video in Google Photos
- In 2024, How Have Game Recording Software Improved Their Stature in the Market? An Overview
- 2024 Approved Step by Step to Crop Videos with CyberLink PowerDirector
- How to Transfer Data from Infinix Hot 40 to Other Android Devices? | Dr.fone
- iSpoofer is not working On Nubia Red Magic 9 Pro+? Fixed | Dr.fone
- Hard Resetting an Realme Narzo 60 Pro 5G Device Made Easy | Dr.fone
- In 2024, FRP Hijacker by Hagard Download and Bypass your Vivo V30 Lite 5G FRP Locks
- 3 Ways for Android Pokemon Go Spoofing On Oppo Find X6 Pro | Dr.fone
- How To Fix Part of the Touch Screen Not Working on Realme C55 | Dr.fone
- In 2024, How to Transfer Everything from Apple iPhone 13 mini to iPhone | Dr.fone
- In 2024, Ultimate Guide to Catch the Regional-Located Pokemon For Motorola Moto G73 5G | Dr.fone
- New Multiple Ways How To Remove iCloud Activation Lock From your Apple iPhone 6s Plus
- How to use iSpoofer on Lava Yuva 3? | Dr.fone
- Stuck at Android System Recovery Of Oppo Find X6 Pro ? Fix It Easily | Dr.fone
- Title: Updated 2024 Approved How to Get Motion Blur in Valorant?
- Author: Morgan
- Created at : 2024-04-24 01:06:01
- Updated at : 2024-04-25 01:06:01
- Link: https://ai-video-editing.techidaily.com/updated-2024-approved-how-to-get-motion-blur-in-valorant/
- License: This work is licensed under CC BY-NC-SA 4.0.
