
:max_bytes(150000):strip_icc():format(webp)/podcasts-safeforkids-5b2f3dd4eb97de0036d9f87b.jpg)
Updated 2024 Approved How to Use LUTs in Lumafusion & Free LUTs Resource
How to Use LUTs in Lumafusion & Free LUTs Resource
LumaFusion is one of the most complex iPad and iPhone video editing apps. Many of its customers adore it, and it has some incredible capabilities that you’d find incompetent editing software. They’ve effectively opened up the realm of LUTs to iPhone and iPad users.
LumaFusion LUTs are individual files that act as containers in LumaFusion. This container file includes standard LUT data as well as LumaFusion-specific color preset data. A LumaFusion LUT Preset file is similar to a Super LUT. LumaFusion can only employ one standard LUT at a time; however, LumaFusion LUT presets enable simultaneous Color Grading and Color Corrections.
How will LUTs help with color correction in Lumafusion
Colors in today’s cameras are vibrant, but they may continuously be improved. Color correction corrects the color that’s already there, whether it’s boosting the exposure to brighten a darker photo or increasing the saturation to make the colors pop. Color correction in other NLEs can be difficult, but not in LumaFusion.
The Color Presets tab in the Color & Effects section is where you begin color correcting footage. There are various presets from which to pick. I wouldn’t use these settings on my videos because they’re too stylized, but they’re there. You may alter any of the presets to your taste, so some of the more dramatic ones can be toned down. By picking the original setting, purists can color-fix their raw footage without using LumaFusion. Moving the sliders till the color seems perfect is all that’s required from there.
Exposure, contrast, highlights, shadows, mid-tones, and saturation and hue are all controlled by sliders. The color sliders can be used for a more forceful approach. But proceed with caution. The sliders are delicate, and it’s easy to overdo them. Play around with the sliders until you get the look you want. If you don’t like it, toss it in the trashcan and start over.
Color grading and color correction are not interchangeable terms. Color correction is a technical requirement, but color grading is primarily creative. You’ll have no command over the color grading process if you’re working with film material where primary colors aren’t even visible. Before diving into the creative LUTs, make sure you complete adequate color correcting.
Color grading, unlike color correction, adjusts the shot’s color to modify the atmosphere or feel. The only way to do that in LumaFusion is to play around with the color sliders under the Color Presets tab, but that’s not ideal. As previously stated, the three sliders are sensitive and limited. LumaFusion isn’t designed for color grading, which is OK. Thankfully, LumaFusion allows you to use LUTs.
Always color correct your footage before utilizing any LUTS, which entails changing the White-balance, Highlights, Contrast, and Shadows. Do not apply the LUTS to your footage directly.
How to use LUTs in Lumafusion?
Videographers, colorists, and editors use LUTs because they are efficient. Rather than starting from zero every time you work on a video editing project, you may speed up the color grading process using a LUT with predefined color profiles. It’s elementary to import LUTs. Simply import the preset files into LumaFusion and add the preset to your footage like an Instagram filter.
The Import button in the Color & Effects editor is the easiest way to load LUTs.
- Double click on any video/photo clip on the timeline to access the Clip Editors.
- At the bottom of the Clip Editor UI, select the Color & Effects tab.
- The import button is located directly below the effect preset library.

How to use LUTs in Lumafuison
LUTs must be loaded via the LumaFX clip editor at the moment. Follow the steps below to accomplish this:
- To access the LumaFX UI, double-tap any video/photo clip in the timeline.
- At the bottom of the LumaFX UI, select the ‘Color & Effects’ tool.
- In the upper right panel, press the cube icon.
- The import button is located directly below the effect preset library.

Load LumaFX LUTs
- Once hit, it will display your transfer site options; select your desired transfer site and navigate to the folder where your LUTs are stored.
- Select and import all of the LUTs in the folder.

Import LUTs
Free LUTs Resource for Lumafusion
Choosing the appropriate LUT pack will boost your photography and videography immediately. With our quick guide to the top free LUTs available, you can find the appropriate one for you.
1. Jaun Melara free LUTs
LUTs aren’t simply for stylizing video. They’re frequently employed as a color correction tool to ensure that your colors are shown correctly in various formats. Juan Melara has provided a free LUT set to assist you in color correcting your footage for printing on film stock. These free LUTs will provide modest stylization to your footage if you don’t want to send it to print.
Melara developed this video to demonstrate his free LUTs in action. The colors are more subdued than in the other LUTs on this list. This free LUT pack is ideal if you’re looking to produce a modern-style cinematic color grade. Melara also has a great article about using LUTs to create a lovely color grade. DaVinci PowerGrades are available for several of these LUTs. They color correct your film in the same way as LUTs do, but you’ll have more flexibility over individual PowerGrade components.

Jaun Melara free LUTs
2. Small Hd free LUTs
SmallHD, a company that makes small, full HD on-camera monitors, is giving away a free set of color grades that reproduce the appearance of seven classic movies. The company is also releasing a series of video lessons that show how to get the most out of these effects throughout production and post-production. Everything is completely free. The color grades are provided as a.zip file and are in the form of 3D LUT files created in DaVinci Resolve. If you’re unfamiliar with SmallHD, the company offers free LUTs for on-set monitoring in real-time. This free set of Movie Look LUTs is inspired by seven recent films, including Apocalypse Now’s warmth and The Matrix’s green overtones. Take use of SmallHD’s free LUT set if you want to give your footage a dramatic and cinematic vibe.

Small Hd free LUTs
3. Color Grading Central free LUTs
Color Grading Central is essential knowledge for any aspiring colorist or video editor who takes color seriously. CGC is a company that specializes in color grading. Their website has a wide range of outstanding color-related products, from grain to LUTs. They also provide their email members with a wealth of free color grading information. Free trials of some LUTs are also available, so you may try them out before you buy. They’re giving away an array of color presets, grains, and burns exclusively to their email list and the seven free color LUTs. We strongly recommend them if you want to give your footage a shot-on-film look.

Color Grading Central free LUTs
4. PremiumBeat Free LUTs
PremiumBeat has freely given countless LUT packs as well as other assets to any video editor or filmmaker over the years. Todd Blankenship has designed a fresh new set of FREE LUTs for Shutterstock, which is their latest addition. Todd chose distinct looks from films and pictures that inspire his daily work to create this bundle with attention and love. There are many options, and these looks will offer you a great place to start when it comes to grading your footage. They recently published an in-depth evaluation of Photon.io, a new color grading tool. Todd Blankenship, who ended up utilizing the tool to create these LUTs, wrote the initial review. The pack has been fine-tuned to replicate some clean, cinematic looks that you may use as a jumping-off point for your video.

PremiumBeat Free LUTs
5. Frank Glencairn free LUT
Despite having access to the most advanced filming gear, there’s something about a vintage film aesthetic that looks fantastic. Frank Glencairn has made a nice K-Tone LUT that is meant to look like vintage Kodachrome film. This film grade, which was formerly popular among photographers and filmmakers, has fallen out of favor due to the rise of digital cameras. With this free LUT, you can get the appearance of retro-looking reds, blues, and yellows.

Frank Glencairn free LUT
6. Reverse Tree Media free LUTs
Reverse Tree Media is releasing a new LUTS bundle that is absolutely free. In addition to LUTS, this LUTS collection includes utility LUTS, film grains, and a Black-Bar layer. For the color-grading procedure, this is critical. This bundle contains 56 free LUTS for various scenarios like weddings, television commercials, travel films, landscapes, Rec.709, and so on. It also has several useful LUTS and film grain overlays for 8mm, 16mm, and 35mm video, as well as a cinematic black bar PNG file with a ratio of 2.35:1 to assist you in achieving a more cinematic appearance quickly and save time. Check out the link to learn more about LUTS and to obtain their previous cinematic LUTS bundle, which is also free.

Reverse Tree
Wondershare Filmora11 Express Better
Achieve More
Grow Together
Free Download Free Download Learn More

![]()
Closing Thoughts:
LUTs are most typically used to build and store color profiles that can be utilized in other film projects. By using contrast and design, you can bring logs and flat materials to life. Everything you need to know is right here. You can now rush to your desk and fix your video.
Free Download Free Download Learn More
![]()
Closing Thoughts:
LUTs are most typically used to build and store color profiles that can be utilized in other film projects. By using contrast and design, you can bring logs and flat materials to life. Everything you need to know is right here. You can now rush to your desk and fix your video.
How to Use Kahoot! On Zoom
In the educational game Kahoot! participants respond to multiple-choice questions based on trivia. Each participant uses their own controller to answer questions in the online game. There are several question kinds to pick from, allowing for complete customization of the test. Each player needs their own controller for Kahoot! The game questions will be shown in the Zoom/Google Meet window, but the answers must be entered using the controller. With the Kahoot!! app for Zoom, presenters may use play and friendly rivalry to increase participant engagement. Users may organize knowledge- and feedback-gathering pulse checks with staff members, encourage original thought with word clouds, and empower participants’ voices with surveys, open-ended questions, and other tools. Utilizing the brainstorm tool, organizations may crowdsource ideas and advance teamwork.
Engagement has emerged as a crucial component of successful learning, collaboration, and connection as the globe has increased the use of video communications in social and professional situations. Users may access, host, and play Kahoot!! games and educational information with other meeting participants using the Kahoot!! app for Zoom without ever leaving the Zoom Meeting or requiring a second device. Corporate executives may motivate their staff via speeches, meetings, and online activities. Meeting hosts will have immediate access to data and statistics from their Kahoot!! experience, allowing them to respond in real time to audience engagement with the material. Additionally, hosts may email the Kahoot!! games to all participants so they can practice and improve their scores, which will increase participant engagement and learning retention. Hosts can also distribute the Kahoot!! games as self-paced challenges with individuals who couldn’t attend in person.
Part 1: Key Features of Kahoot
What more is there to discuss, Kahoot!? Every pupil adores it. Many instructors and educators use it all around the world to make learning simple, enjoyable, and interesting. Everyone may use it since it is free and extremely simple to use. These are some of its attributes:
- Quizzes may be made in a matter of minutes.
- Develop games based on the abilities of the kids. Playing at home or in the Zoom is simple for them.
- Various templates are offered. You can choose one of them with confidence.
- Kahoot! has the ability to be organized into many folders according to topics or subjects.
- Additionally, multiple choice questions may be included by quiz makers.
- Teachers using Kahoot! may combine different questions into one format, such as quizzes, polls, riddles, and slides.
- Use Apple Schoolwork, Google Zooms, and Microsoft Teams to share student-centered tasks.
Part 2: How to Host a Kahoot! Session within a Zoom Meeting
With the Zoom app, Kahoot! may be viewed, hosted, and used. It’s amazing that Kahoot!!, one of the most well-known brands in quiz-based learning, still provides a free-to-use platform, making it very accessible to both instructors and students. It’s also a useful resource for a hybrid class that combines online and classroom instruction. Most devices will be able to use the cloud-based service using a web browser. This implies that students using computers, tablets, and cellphones in class or at home may access this. Participants in Zoom Meetings may play games and learn without having to leave the Zoom meeting or bring a second device.
Step1Sign up for Zoom ahead of time and get ready. On the other hand, launch the Kahoot! test in your web browser, then be ready to share your screen in Zoom.
Step2As the participants come, allow them in and check to see whether you and they can both hear each other. To access the Kahoot! quiz, make sure they have a device or another browser tab open.
Step3Open the Kahoot! test and share it using Zoom’s “Share Screen” feature. While your screen is shared, continue to host the Kahoot! as normal. To view participants next to your shared screen, we advise selecting Side-by-Side Mode.
Part 3: How to Participate in Kahoot! Sessions within a Zoom Meeting
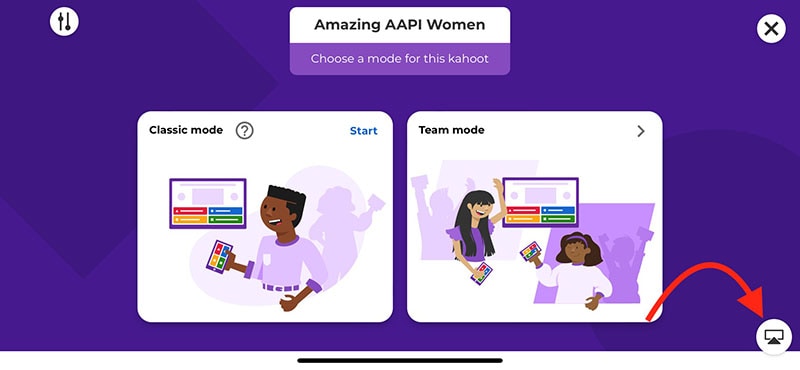
With more than 40 million ready-made games available on Kahoot!!, getting started is fast and simple. When time and resources are limited, hybrid or distant learning is ideal. After linking the Kahoot! to your Zoom account, you may utilize it. Use this app and start a meeting. Go to Apps on the toolbar and choose the program you wish to use. Select Who is Hosting to locate their host or to join a Kahoot! session being hosted by a friend or another player. Players may post a question to a shared screen on the Kahoot! platform. Kahoot!! just needs an account to be made in order to use it since it is free. Most devices may be used by students to access Kahoot!! from wherever there is an internet connection. This is how:
Step1Take the time to check that Zoom, Skype, Cisco Webex, or Google Hangout are operating and that your camera, microphone, and speaker are all operational.
Step2In the right-side panel, add the Kahoot!! app to your list of apps and click Join.
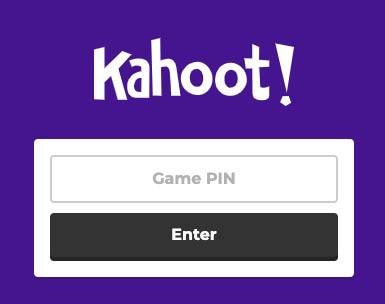
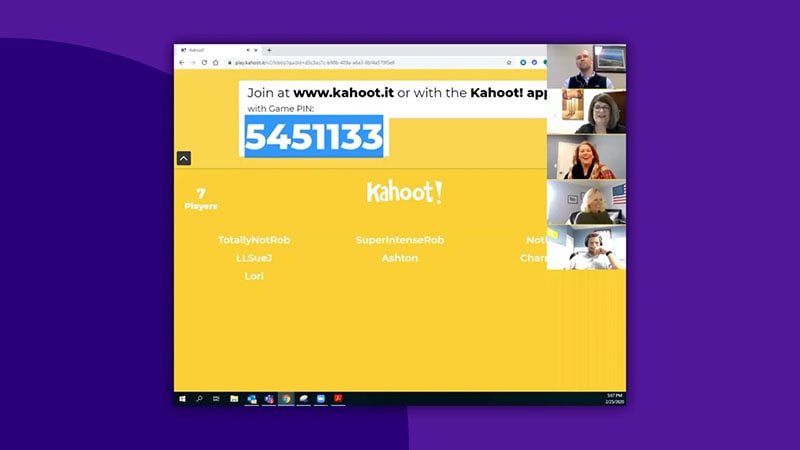
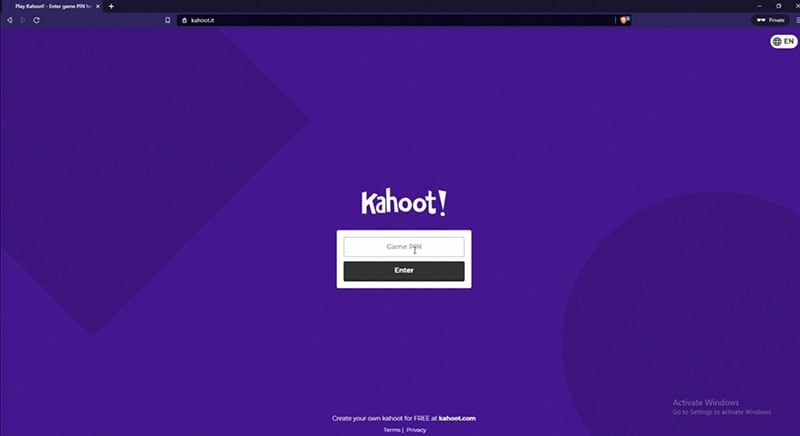
Step3The lobby will reveal your game PIN when you click the Play button, allowing the computer to show you a Kahoot! You may enter the game PIN and press Enter to join the Kahoot! session once the host shows their screen with you. To participate in a Kahoot! session, you don’t need a Kahoot! account.
Part 4: How to Record Zoom Meetings
Zoom is a conference tool that enables real-time, high-quality, low-latency communication. Filmora is an excellent video recorder for that reason, enabling users to capture on-screen activity such Zoom audio tracks and video conversations. Wondershare One of the most versatile and portable Zoom voice recorders is the Filmora. Even novices may easily utilize it due to its user-friendly UI. All you have to do is click the record button after choosing the proper audio source in the settings. The all-in-one video editing program Filmora allows you to record your screen with audio, a facecam, and a green screen effect. You can record the entire screen or just a portion of it, and you can perform a number of quick edits on your video using tools like trimming, cropping, changing the audio track’s volume, and so on.
How to Use Filmora to Record Zoom Lectures
Having said that, Filmora is a great Zoom recorder that can capture games, audio, and video conversations. This video recorder may be used to make video clip lessons in addition to recording movies, video games, and webcam footage. In addition to Zoom, it can also capture internet streaming audio. Here is information on how to record Zoom meetings using this software:
Step1Download and Install Filmora on your PC
To use this program for a number of tasks, including screen recording and recording editing, you must first download and install it on your computer. To achieve this, download the recording program by clicking the link below. Launch the program as soon as the download is finished to start the installation process, and then adhere to the on-screen directions to install and make this software available for usage.
Step2Choose the Record’s Ideal Position in the Zoom
Use it on your PC at this point. As soon as you start the program, a window interface with two choices for screen recording, editing already recorded videos, and generating videos will display. Choose the Recording option from the menu. When you click the record button, the program will direct you to the recording interface, where you can easily adjust the settings for your camera and audio. To add the microphone or Zoom sound in that particular field, use the necessary buttons as described below:
Step3Press the Record Button
It goes without saying that you must test your recording tools to ensure they are functional and capturing the highest quality audio. But once you’re ready, click the record button, which will allow you 3-5 seconds before starting to record the personalized screen of your PC as seen below:
Step4Export and Save Your Zoom Recording
You may now save the Zoom video for sharing on social media after making and modifying it. The following file types may be used to save the document: MP4, WMV, AVI, MOV, GIF, and MP3. The finest feature of Wondershare Filmora is the direct export and sharing of Zoom video recordings to YouTube; the only need is that you must be signed in to your YouTube account inside the application:
Because the MOV format is only available for online movies, you may also export your Zoom recordings to MP4 if you want to publish them to your YouTube channel. You are free to choose the format that best suits your needs. You may choose the encoder from a drop-down menu in the export options.
Conclusion
With the aid of several interesting tools and programs made accessible in this virtual environment, learning has now become enjoyable. Of them is Kahoot! In Zoom. It is an application that acts as a learning tool by providing fun games, tests, and a variety of other chances. In only a few minutes, quizzes may be made and distributed. Games and quizzes may be planned using this platform quite easily. The Kahoot! with Zoom will make it simpler than ever for corporate leaders to engage and encourage their team members with Kahoot!! engaging game-based learning experiences at a time when many organizations are staying virtual or planning for a hybrid model. Head towards recording Kahoot with Filmora to experience a smooth Kahoot! usage on Zoom. Plus, you can also share the gameplay afterwards.
In the educational game Kahoot! participants respond to multiple-choice questions based on trivia. Each participant uses their own controller to answer questions in the online game. There are several question kinds to pick from, allowing for complete customization of the test. Each player needs their own controller for Kahoot! The game questions will be shown in the Zoom/Google Meet window, but the answers must be entered using the controller. With the Kahoot!! app for Zoom, presenters may use play and friendly rivalry to increase participant engagement. Users may organize knowledge- and feedback-gathering pulse checks with staff members, encourage original thought with word clouds, and empower participants’ voices with surveys, open-ended questions, and other tools. Utilizing the brainstorm tool, organizations may crowdsource ideas and advance teamwork.
Engagement has emerged as a crucial component of successful learning, collaboration, and connection as the globe has increased the use of video communications in social and professional situations. Users may access, host, and play Kahoot!! games and educational information with other meeting participants using the Kahoot!! app for Zoom without ever leaving the Zoom Meeting or requiring a second device. Corporate executives may motivate their staff via speeches, meetings, and online activities. Meeting hosts will have immediate access to data and statistics from their Kahoot!! experience, allowing them to respond in real time to audience engagement with the material. Additionally, hosts may email the Kahoot!! games to all participants so they can practice and improve their scores, which will increase participant engagement and learning retention. Hosts can also distribute the Kahoot!! games as self-paced challenges with individuals who couldn’t attend in person.
Part 1: Key Features of Kahoot
What more is there to discuss, Kahoot!? Every pupil adores it. Many instructors and educators use it all around the world to make learning simple, enjoyable, and interesting. Everyone may use it since it is free and extremely simple to use. These are some of its attributes:
- Quizzes may be made in a matter of minutes.
- Develop games based on the abilities of the kids. Playing at home or in the Zoom is simple for them.
- Various templates are offered. You can choose one of them with confidence.
- Kahoot! has the ability to be organized into many folders according to topics or subjects.
- Additionally, multiple choice questions may be included by quiz makers.
- Teachers using Kahoot! may combine different questions into one format, such as quizzes, polls, riddles, and slides.
- Use Apple Schoolwork, Google Zooms, and Microsoft Teams to share student-centered tasks.
Part 2: How to Host a Kahoot! Session within a Zoom Meeting
With the Zoom app, Kahoot! may be viewed, hosted, and used. It’s amazing that Kahoot!!, one of the most well-known brands in quiz-based learning, still provides a free-to-use platform, making it very accessible to both instructors and students. It’s also a useful resource for a hybrid class that combines online and classroom instruction. Most devices will be able to use the cloud-based service using a web browser. This implies that students using computers, tablets, and cellphones in class or at home may access this. Participants in Zoom Meetings may play games and learn without having to leave the Zoom meeting or bring a second device.
Step1Sign up for Zoom ahead of time and get ready. On the other hand, launch the Kahoot! test in your web browser, then be ready to share your screen in Zoom.
Step2As the participants come, allow them in and check to see whether you and they can both hear each other. To access the Kahoot! quiz, make sure they have a device or another browser tab open.
Step3Open the Kahoot! test and share it using Zoom’s “Share Screen” feature. While your screen is shared, continue to host the Kahoot! as normal. To view participants next to your shared screen, we advise selecting Side-by-Side Mode.
Part 3: How to Participate in Kahoot! Sessions within a Zoom Meeting
With more than 40 million ready-made games available on Kahoot!!, getting started is fast and simple. When time and resources are limited, hybrid or distant learning is ideal. After linking the Kahoot! to your Zoom account, you may utilize it. Use this app and start a meeting. Go to Apps on the toolbar and choose the program you wish to use. Select Who is Hosting to locate their host or to join a Kahoot! session being hosted by a friend or another player. Players may post a question to a shared screen on the Kahoot! platform. Kahoot!! just needs an account to be made in order to use it since it is free. Most devices may be used by students to access Kahoot!! from wherever there is an internet connection. This is how:
Step1Take the time to check that Zoom, Skype, Cisco Webex, or Google Hangout are operating and that your camera, microphone, and speaker are all operational.
Step2In the right-side panel, add the Kahoot!! app to your list of apps and click Join.
Step3The lobby will reveal your game PIN when you click the Play button, allowing the computer to show you a Kahoot! You may enter the game PIN and press Enter to join the Kahoot! session once the host shows their screen with you. To participate in a Kahoot! session, you don’t need a Kahoot! account.
Part 4: How to Record Zoom Meetings
Zoom is a conference tool that enables real-time, high-quality, low-latency communication. Filmora is an excellent video recorder for that reason, enabling users to capture on-screen activity such Zoom audio tracks and video conversations. Wondershare One of the most versatile and portable Zoom voice recorders is the Filmora. Even novices may easily utilize it due to its user-friendly UI. All you have to do is click the record button after choosing the proper audio source in the settings. The all-in-one video editing program Filmora allows you to record your screen with audio, a facecam, and a green screen effect. You can record the entire screen or just a portion of it, and you can perform a number of quick edits on your video using tools like trimming, cropping, changing the audio track’s volume, and so on.
How to Use Filmora to Record Zoom Lectures
Having said that, Filmora is a great Zoom recorder that can capture games, audio, and video conversations. This video recorder may be used to make video clip lessons in addition to recording movies, video games, and webcam footage. In addition to Zoom, it can also capture internet streaming audio. Here is information on how to record Zoom meetings using this software:
Step1Download and Install Filmora on your PC
To use this program for a number of tasks, including screen recording and recording editing, you must first download and install it on your computer. To achieve this, download the recording program by clicking the link below. Launch the program as soon as the download is finished to start the installation process, and then adhere to the on-screen directions to install and make this software available for usage.
Step2Choose the Record’s Ideal Position in the Zoom
Use it on your PC at this point. As soon as you start the program, a window interface with two choices for screen recording, editing already recorded videos, and generating videos will display. Choose the Recording option from the menu. When you click the record button, the program will direct you to the recording interface, where you can easily adjust the settings for your camera and audio. To add the microphone or Zoom sound in that particular field, use the necessary buttons as described below:
Step3Press the Record Button
It goes without saying that you must test your recording tools to ensure they are functional and capturing the highest quality audio. But once you’re ready, click the record button, which will allow you 3-5 seconds before starting to record the personalized screen of your PC as seen below:
Step4Export and Save Your Zoom Recording
You may now save the Zoom video for sharing on social media after making and modifying it. The following file types may be used to save the document: MP4, WMV, AVI, MOV, GIF, and MP3. The finest feature of Wondershare Filmora is the direct export and sharing of Zoom video recordings to YouTube; the only need is that you must be signed in to your YouTube account inside the application:
Because the MOV format is only available for online movies, you may also export your Zoom recordings to MP4 if you want to publish them to your YouTube channel. You are free to choose the format that best suits your needs. You may choose the encoder from a drop-down menu in the export options.
Conclusion
With the aid of several interesting tools and programs made accessible in this virtual environment, learning has now become enjoyable. Of them is Kahoot! In Zoom. It is an application that acts as a learning tool by providing fun games, tests, and a variety of other chances. In only a few minutes, quizzes may be made and distributed. Games and quizzes may be planned using this platform quite easily. The Kahoot! with Zoom will make it simpler than ever for corporate leaders to engage and encourage their team members with Kahoot!! engaging game-based learning experiences at a time when many organizations are staying virtual or planning for a hybrid model. Head towards recording Kahoot with Filmora to experience a smooth Kahoot! usage on Zoom. Plus, you can also share the gameplay afterwards.
How To Fade Audio In Kinemaster
If you have been looking for video and audio editing tools then you have probably heard of Kinemaster. It is a great video editing app that allows users to edit all aspects of the video including any audio or music that may accompany the video. It has a lot of very useful features and the user interface is fairly easy to use.
One of the things that you can do with Kinemaster is to fade out audio, a useful feature that can help the ending of any video appear more authentic. In this article, we will be looking at how you can use Kinemaster to fade audio.
Kinemaster Fade Audio Steps
The following steps show you how you can easily fade audio in Kinemaster;
Step1If you don’t have Kinemaster already, start by downloading and installing the video editor on your computer.
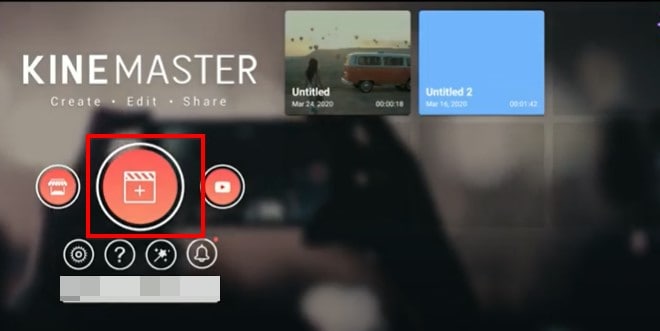
Step2Open Kinemaster on your computer and then click on the “New Project” icon to start. Select the aspect ratio that you would like to use. If you are not sure, we recommend choosing the “16:9” aspect ratio.
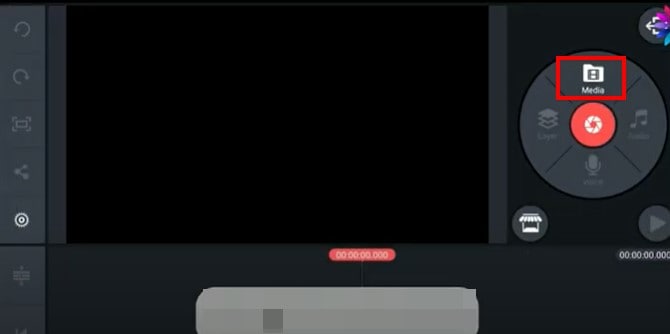
Step3In the next window, click on “Media” to select the clip you would like to add to the Kinemaster project that you have just created.
Step4To fade in and fade out the audio in the project, click on the gear icon from the options to the left of the screen.
![]()
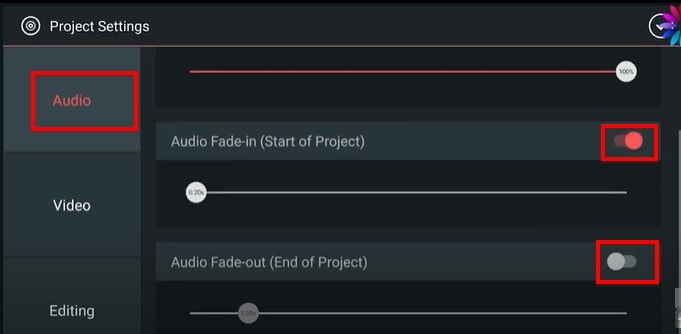
Step5Select the “Audio” tab on the next screen and then turn on the switch next to “Audio Fade-in (Start of Project)” and “Audio Fade-out (End of Project).” This will add a fade-in and fade-out effect at the beginning of the audio and at the end of it.
Step6You can then easily set the duration of the “Audio fade-in” and “Audio fade-out” by dragging the slider below each option. We recommend setting the duration to just a few seconds.
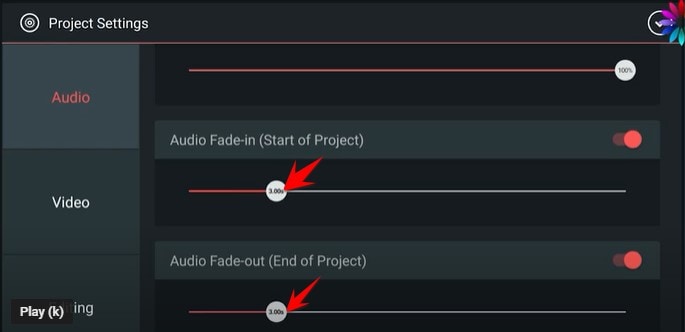
Don’t forget to save the project when you’re done.
Kinemaster Alternative to Edit Audio
Kinemaster is a good way to edit both audio and video on your computer, but the following options are just as good;
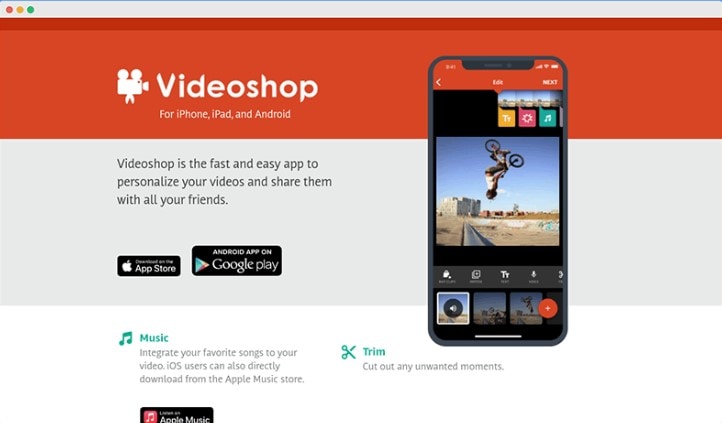
1. VideoShop
VideoShop is a simple to use and highly effective program that you can use to create and edit videos on your computer. The interface makes it easy to import any video project that you have into the program and the wealth of very useful features can help you edit the video in various ways.
For example, you can change the speed of the video, add transitions at various points in the video, add and remove text, add and remove music and so much more. Although there is a free trial version, you will only be able to access some of the more useful features when you purchase the premium version.
The Pro version of VideoShop goes for $3.99 a month, but you can get lifetime access to the program for only $39.99. One thing that VideoShop has over Kinemaster is that it is very easy to use, even beginner users find video editing a breeze with this tool.
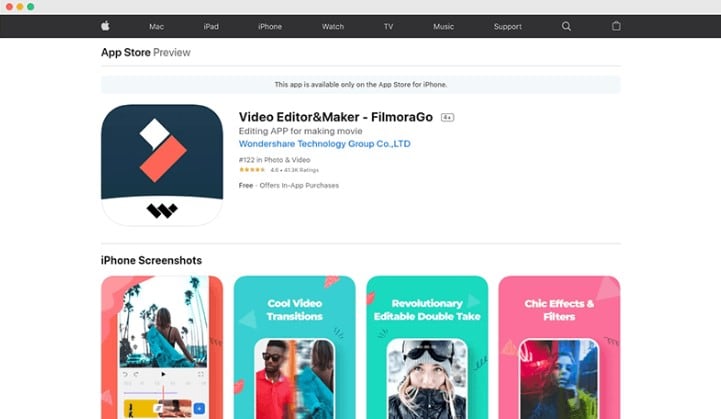
2. Filmora
If you are looking for a simple way to edit videos on Android or iOS devices, Filmora is one of the best options in the market. This mobile version of the very popular Filmora video editor is just as easy to use as its parent program. You can use it to create video projects from scratch or upload a video and make changes to it.
It offers you a lot of choices when it comes to editing features including trimming sections of the video, adding filters, adding music, adding or removing text, and even changing the canvas or the background of the video. Advanced options such as changing the speed of the video are also available.
One of the things that we love about Filmora is that you don’t even have to create an account to use it or remove the watermark added to the completed video project, watching a video ad can be enough. But this option is only available once every 24 hours, meaning that you can only remove a watermark on the free version once a day. Filmora is available for both iOS and Android and the yearly premium plan will cost you just $19.90.
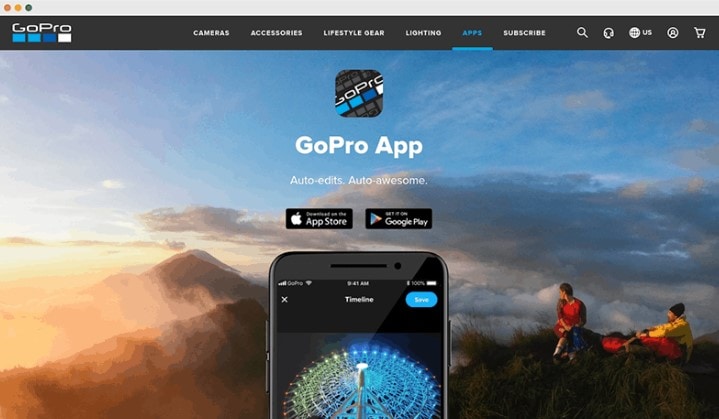
3. Quik
Quik is a video editing program created by GoPro for the purpose of editing GoPro videos, but that doesn’t mean that you will not be able to use it to edit other types of videos. You can use Quik to create a new project or edit an existing video and gives users a lot of different options when it comes to video editing.
One of the main benefits of using Quik is that you can easily add music, audio, and special effects to a video as well as change the length of the video, fade audio in and out and even change when the music starts. It is also one of the best ways to use images to create collages and slideshows very easily. There are a lot of slideshow and collage templates to choose from, and you can edit them easily by adding your music and images. Quik is completely free to use and you can upload your creation to the cloud ad share the link with others.
Conclusion
Kinemaster is one of the most popular video editing tools, especially since it simplifies the video editing process to make it very easy. All the alternative tools we have outlined here in this article are selected because they can make video editing quite simple.
Free Download For Win 7 or later(64-bit)
Free Download For macOS 10.14 or later
List of Whatsapp Video Format That You May Need to Know
Among the different communication platforms, WhatsApp is very famous. The application lets you communicate with your loved ones living far away via messages, audio, and video calls. Unlike other platforms, WhatsApp has a lot of happy users.
With WhatsApp, you can not only communicate but also offers media file sharing. You can share your favorite meme, funny videos, and other things through WhatsApp. If you want to share a video but can’t, the WhatsApp video format is not supported. To learn about WhatsApp-supported video formats, keep reading the article.
In this article
01 Introduction About WhatsApp Supported Video Formats
02 Tips About How to Convert Video for WhatsApp
03 Tricks About How to Edit Video for WhatsApp
Part 1. Introduction About WhatsApp Supported Video Formats
Are you facing trouble with WhatsApp videos and sharing them? It might be because of the video format WhatsApp as WhatsApp supports certain video formats. You should have the video in the supported format for using videos on WhatsApp and sharing them.

WhatsApp supports a maximum file size of 16MB is approximately a video of 90 seconds to 3 minutes. Whereas if we talk about WhatsApp status, it allows 30 seconds duration for the video. WhatsApp supports and MPEG-4 codec for videos and audio, and AC3.
Moving on, the WhatsApp-supported video formats include MP4, MKV, AVI, MOV, and also 3GP. Do you want to know more about these formats? Let’s help you.
MP4
This is the most commonly used format for both video and audio files. Other than this, MP4 also stores data like subtitles, still images, etc. Interesting, it also allows streaming.
MKV
MKV is an open container, free format. The format can hold videos, pictures, audio, and also an unlimited number of subtitles. Additionally, the format is universally used to store multimedia content like your favorite TV show or movies.
AVI
Audio Video Interleave is another video format supported by WhatsApp. Do you know that the AVI format supports synchronous audio-with-video playback? The file format stores both video and audio data in a file container.
MOV
Apple developed a MOV file format that can hold a wide range of media content like your audio, video, and even text. It stores data in the same file but on different tracks. The file format is commonly used in video editing software.
3GP
3GP is Third Generation Partnership Project (3GPP), a multimedia container for multimedia services. The format works great on 3G mobile phones, but it can also be used on 2G and 4G phones. 3GP is also a video format supported by WhatsApp.
Part 2. Tips About How to Convert Video for WhatsApp
Now that you know about video formats supported by WhatsApp, shall we introduce tips to convert the file format? In case you have a video that is not supported by WhatsApp, the following section of this article will assist as we are about to introduce Wondershare UniConverter . The video converter software is GPU accelerated, and it promises to maintain the original video quality.
UniConverter offers 90x faster conversion speed. You can convert video from and to different formats and also for different devices. Moreover, with UniConverter, you can convert multiple media files at once. Do you know what else UniConverter has to offer? The software is not just a video converter; it’s much more than that; you can use its Background Remover, Subtitle Editor, Smart Trimmer, etc.
Apart from converting your videos to WhatsApp video format, with UniConverter, you can also convert them into various popular web formats like Facebook, Instagram, Vimeo, YouTube, Amazon, and also eBay. Do you know an exciting thing about UniConverter? Well, it also supports various 4K and 3D files. If you are impressed with UniConverter, let’s move on and share the steps to use the software:
Step 1: To start, launch Wondershare UniConverter on your device and make sure that you have selected the ‘Converter’ option from the left menu. After this, from the right window, import the video files that you plan to work with.

Step 2: Now, head to the bottom of the main screen and look for the ‘Output Format’ option. Open it and go to the ‘Video’ section. There, from the list of various file formats, select the supported video format for WhatsApp from the left and the right, select a resolution.

Step 3: UniConverter is famous for its speedy conversion; for this, hit on the ‘High-Speed Conversion’ from the top right corner. Next, select your desired location to save the file from the bottom by using the ‘File Location’ field. Once done, hit the ‘Convert’ button to get the video format converted.

Part 3. Tricks About How to Edit Video for WhatsApp
Do you plan to edit your WhatsApp videos? If you do, then we have a little treat for you; let us introduce Wondershare Filmora Video Editor . The software can change your editing game with its phenomenal features and amazing editing elements.
Do you want to know what features and elements we are talking about? Let’s tell you. Wondershare Filmora offers high-quality effects and transitions that can transform your video. Along with this, you get a wide variety of titles and other editing elements that could be used.
Filmora has a clean and straight interface; users can understand the software very quickly and work with it. Moreover, the video editor lets you select your preferred output format and then export the file. You get various cool features like green screen background, split-screen, join video, and a lot more.
For Win 7 or later (64-bit)
For macOS 10.12 or later
Interestingly, the software offers elements according to the latest trends and events around, like Christmas, Valentine’s, birthday, etc. Do you want to use Filmora to edit your WhatsApp video? For guidance, follow the steps shared below:
Step 1: For editing, launch Wondershare Filmora on your device and import the video file by heading to the ‘File’ tab. After that, hover on to the ‘Import Media’ option and select the ‘Import Media Files’ option.

Step 2: After locating your desired file, import it. Once successfully imported, then drag the file from the ‘Project Media’ section to the ‘Timeline’ so that you can start the editing.

Step 3: Let the fun begins! You can edit and transform your video file by adding various sound effects to it that Filmora offers you. Users can access the effects from the ‘Audio’ tab.

Step 4: Are you worried about titles? Don’t worry because Filmora offers a wide range of title templates that you can select from and customize too. Just head to the ‘Titles’ tab from the top menu bar and enjoy.

Step 5: What is editing without cool transitions and effects? Filmora comes with unique and distinct video effects and transitions that you can use by accessing the ‘Effects’ and ‘Transitions’ tabs.

Step 6: Once you are satisfied with all the editing, it’s time to export the video file. Hit on the ‘Export’ button and select WhatsApp-supported video format to save the file.

Wrapping Up
If you have been struggling with WhatsApp videos, this article is for you. We have discussed in detail WhatsApp-supported video formats. Not just this, we also talked about a video converter that could be used to convert video formats. Moreover, we shared a video editor to edit your WhatsApp videos. Are you ready for a bit of surprise?
Let’s talk about Wondershare Filmora Video Editor, the editing king to drastically change your videos and make them shine. The software is not an ordinary editor; it lets you trim, cut, join, split your video along with other editing options.
Do you know any good software for motion tracking? Wondershare Filmora offers many brilliant features like Key Framing, Silence Detection, Green Screen, Color Match, and whatnot. If you want to create exciting videos with exciting effects and features, then Filmora is a must-try.
Wondershare Filmora
Get started easily with Filmora’s powerful performance, intuitive interface, and countless effects!
Try It Free Try It Free Try It Free Learn More >

02 Tips About How to Convert Video for WhatsApp
03 Tricks About How to Edit Video for WhatsApp
Part 1. Introduction About WhatsApp Supported Video Formats
Are you facing trouble with WhatsApp videos and sharing them? It might be because of the video format WhatsApp as WhatsApp supports certain video formats. You should have the video in the supported format for using videos on WhatsApp and sharing them.
WhatsApp supports a maximum file size of 16MB is approximately a video of 90 seconds to 3 minutes. Whereas if we talk about WhatsApp status, it allows 30 seconds duration for the video. WhatsApp supports and MPEG-4 codec for videos and audio, and AC3.
Moving on, the WhatsApp-supported video formats include MP4, MKV, AVI, MOV, and also 3GP. Do you want to know more about these formats? Let’s help you.
MP4
This is the most commonly used format for both video and audio files. Other than this, MP4 also stores data like subtitles, still images, etc. Interesting, it also allows streaming.
MKV
MKV is an open container, free format. The format can hold videos, pictures, audio, and also an unlimited number of subtitles. Additionally, the format is universally used to store multimedia content like your favorite TV show or movies.
AVI
Audio Video Interleave is another video format supported by WhatsApp. Do you know that the AVI format supports synchronous audio-with-video playback? The file format stores both video and audio data in a file container.
MOV
Apple developed a MOV file format that can hold a wide range of media content like your audio, video, and even text. It stores data in the same file but on different tracks. The file format is commonly used in video editing software.
3GP
3GP is Third Generation Partnership Project (3GPP), a multimedia container for multimedia services. The format works great on 3G mobile phones, but it can also be used on 2G and 4G phones. 3GP is also a video format supported by WhatsApp.
Part 2. Tips About How to Convert Video for WhatsApp
Now that you know about video formats supported by WhatsApp, shall we introduce tips to convert the file format? In case you have a video that is not supported by WhatsApp, the following section of this article will assist as we are about to introduce Wondershare UniConverter . The video converter software is GPU accelerated, and it promises to maintain the original video quality.
UniConverter offers 90x faster conversion speed. You can convert video from and to different formats and also for different devices. Moreover, with UniConverter, you can convert multiple media files at once. Do you know what else UniConverter has to offer? The software is not just a video converter; it’s much more than that; you can use its Background Remover, Subtitle Editor, Smart Trimmer, etc.
Apart from converting your videos to WhatsApp video format, with UniConverter, you can also convert them into various popular web formats like Facebook, Instagram, Vimeo, YouTube, Amazon, and also eBay. Do you know an exciting thing about UniConverter? Well, it also supports various 4K and 3D files. If you are impressed with UniConverter, let’s move on and share the steps to use the software:
Step 1: To start, launch Wondershare UniConverter on your device and make sure that you have selected the ‘Converter’ option from the left menu. After this, from the right window, import the video files that you plan to work with.
Step 2: Now, head to the bottom of the main screen and look for the ‘Output Format’ option. Open it and go to the ‘Video’ section. There, from the list of various file formats, select the supported video format for WhatsApp from the left and the right, select a resolution.
Step 3: UniConverter is famous for its speedy conversion; for this, hit on the ‘High-Speed Conversion’ from the top right corner. Next, select your desired location to save the file from the bottom by using the ‘File Location’ field. Once done, hit the ‘Convert’ button to get the video format converted.
Part 3. Tricks About How to Edit Video for WhatsApp
Do you plan to edit your WhatsApp videos? If you do, then we have a little treat for you; let us introduce Wondershare Filmora Video Editor . The software can change your editing game with its phenomenal features and amazing editing elements.
Do you want to know what features and elements we are talking about? Let’s tell you. Wondershare Filmora offers high-quality effects and transitions that can transform your video. Along with this, you get a wide variety of titles and other editing elements that could be used.
Filmora has a clean and straight interface; users can understand the software very quickly and work with it. Moreover, the video editor lets you select your preferred output format and then export the file. You get various cool features like green screen background, split-screen, join video, and a lot more.
For Win 7 or later (64-bit)
For macOS 10.12 or later
Interestingly, the software offers elements according to the latest trends and events around, like Christmas, Valentine’s, birthday, etc. Do you want to use Filmora to edit your WhatsApp video? For guidance, follow the steps shared below:
Step 1: For editing, launch Wondershare Filmora on your device and import the video file by heading to the ‘File’ tab. After that, hover on to the ‘Import Media’ option and select the ‘Import Media Files’ option.
Step 2: After locating your desired file, import it. Once successfully imported, then drag the file from the ‘Project Media’ section to the ‘Timeline’ so that you can start the editing.
Step 3: Let the fun begins! You can edit and transform your video file by adding various sound effects to it that Filmora offers you. Users can access the effects from the ‘Audio’ tab.
Step 4: Are you worried about titles? Don’t worry because Filmora offers a wide range of title templates that you can select from and customize too. Just head to the ‘Titles’ tab from the top menu bar and enjoy.
Step 5: What is editing without cool transitions and effects? Filmora comes with unique and distinct video effects and transitions that you can use by accessing the ‘Effects’ and ‘Transitions’ tabs.
Step 6: Once you are satisfied with all the editing, it’s time to export the video file. Hit on the ‘Export’ button and select WhatsApp-supported video format to save the file.
Wrapping Up
If you have been struggling with WhatsApp videos, this article is for you. We have discussed in detail WhatsApp-supported video formats. Not just this, we also talked about a video converter that could be used to convert video formats. Moreover, we shared a video editor to edit your WhatsApp videos. Are you ready for a bit of surprise?
Let’s talk about Wondershare Filmora Video Editor, the editing king to drastically change your videos and make them shine. The software is not an ordinary editor; it lets you trim, cut, join, split your video along with other editing options.
Do you know any good software for motion tracking? Wondershare Filmora offers many brilliant features like Key Framing, Silence Detection, Green Screen, Color Match, and whatnot. If you want to create exciting videos with exciting effects and features, then Filmora is a must-try.
Wondershare Filmora
Get started easily with Filmora’s powerful performance, intuitive interface, and countless effects!
Try It Free Try It Free Try It Free Learn More >
Also read:
- Updated 5 Ways to Denoise a Video
- Updated How to Make Subtitle Videos for 2024
- Updated Everything That You Need to Know About Video Montages- Ideas, Techniqu
- Updated In 2024, Video Editors Use the Loading Text Effect to Create Impressive and Descriptive Videos. Let Us Understand the Detailed Steps to Customize the Loading Text Effect in Wondershare Filmora
- Updated Are You Searching for the Best Cinematic LUTs for Premiere Pro? You Are in the Right Place because This Article Is Dedicated to LUTs for 2024
- New Are You Excited to Find Out the Top-Class VHS Video Effects Maker? Put Your Worries at Rest because This Article Will Provide the Best VHS Effect Makers
- Updated 2024 Approved How to Make a Bokeh Effect
- Browse the List of the Best 8 Scanners or Converters for Converting the Slides to Digital Images. Also, Know the Other Important Information of Slides to Digital Conversion for 2024
- New Frame Rates, Speed, and Wondershare Filmora An Overview
- Updated In 2024, Bandicut Video Editor Review
- Updated Discover the Top 10 Video Editing Apps with Templates for Professional-Grade Results. Edit Like a Pro with These Tools
- 2024 Approved Filmora Is a Great Video Editor that Many Users Are Making Intro Video with It. This Article Will Guide You How to Create an Intro Video with Filmora
- 2024 Approved How to Loop a Video on Android
- New In 2024, How To Achieve LumaFusion Color Grading Through LUTs
- New Guide To Creating The Perfect VHS Effect Look in Premiere Pro for 2024
- New In 2024, How to Denoise in After Effects – Audio and Video Noise Removal
- 2024 Approved So, without Further Dilly-Dallying, Lets Learn How to Create a Retro 1950-Style Video with This Simple Filmora Tutorial
- 15 Amazing GIF Splitter Examples You Need to Bookmark for 2024
- Updated Top 6 Text to Speech Generators for YouTube Videos Windows, Mac, And for 2024
- New In 2024, Top 10 Free WhatsApp Video Converter 2023
- New 2024 Approved Finding The Best LUTs for Wondershare Filmora
- Updated 2024 Approved Updated 8 Ways to Merge SRT with MP4
- Updated The Top 10 Effective SRT Editors Online for 2024
- New In 2024, Here Is a Guide on How You Can Resize Videos via Handbrake and Wondershare Filmora. The Former Is a Lightweight Tool Perfect for Batch Resizing Videos, While the Latter Is a Powerful Free Video Editing Software
- New Top 5 Best Video Denoisers
- New AVI Video Format How to Open, Play, Edit AVI File?
- In 2024, Step by Step to Rotate Videos in Davinci Resolve
- New Best 8 Educational Video Websites for Teachers for 2024
- In 2024, For Artists Who Are Making Videos for Show Their Knowledge or Projects, Add some Effects for the Video Can Always Provoke Interests and Attention. This Article Will Show You How to Do that Easily
- Updated Bandicut Video Editor Review
- Discover the Ultimate LUTs for Wondershare Filmora Uncover the Answer
- New Want to Learn How to Crop or Trim Video in PowerPoint? We Have Got You Covered; We Have Given a Step-by-Step Guide that Will Allow You to Trim and Crop Videos Using This Presentation Program
- Updated 2024 Approved Here Is a Step-by-Step Guide to Color Correct and Color Grade a Video Professionally with Wondershare Filmora. Lets Get Going
- New In 2024, How to Choose A Nice GoPro for Vlogging?
- Updated In 2024, Best Cinematic LUTs For Premiere Pro Recommendation
- 2024 Approved Are You Looking to Enhance Your Video or Photo Colors Using Premiere LUTs? Get to Know About the Best Free LUT Effects to Get Started
- New In 2024, Simple Step by Step Tutorial on Creating a Lightroom Collage
- Updated 10 Mind-Blowing Video Collage Maker for PC for 2024
- Updated Detailed Steps to Cut a Video in QuickTime for 2024
- New In 2024, You Can Make Attractive Videos by Adding Text Behind Objects. This Article Will Explain How to Use Wondershare Filmora to Create These Videos
- Updated 2024 Approved Exploring the Best Slow-Motion App
- Updated 2024 Approved Do You Want to Know Which Are the Best Wondershare Filmora LUTs to Use? There Are Many LUTs that You Can Download, Each with a Different Tone and Style
- 2024 Approved VSDC Free Video Editor Review
- Updated In 2024, How To Make a Video by Mouse in Filmora?
- In 2024, How to Unlock Your iPhone 14 Pro Passcode 4 Easy Methods (With or Without iTunes)
- In 2024, How to Transfer Contacts from OnePlus Nord CE 3 5G To Phone | Dr.fone
- 8 Ultimate Fixes for Google Play Your Samsung Galaxy A14 5G Isnt Compatible | Dr.fone
- How to Quickly Fix Bluetooth Not Working on Nokia 130 Music | Dr.fone
- Spotify Keeps Crashing A Complete List of Fixes You Can Use on Xiaomi Redmi Note 12T Pro | Dr.fone
- What is Geo-Blocking and How to Bypass it On Motorola G54 5G? | Dr.fone
- In 2024, Top 7 iCloud Activation Bypass Tools For your Apple iPhone XS
- Android Call History Recovery - recover deleted call logs from Nubia Red Magic 8S Pro
- How to Stream Apple iPhone 12 Pro Max Video to Computer? | Dr.fone
- Motorola Moto G24 won't play MOV videos, how to fix ?
- In 2024, 4 Ways to Transfer Music from Tecno Pova 6 Pro 5G to iPhone | Dr.fone
- Poco F5 Pro 5G Camera Not Working Unexpected Error? Fix It Now | Dr.fone
- In 2024, 9 Mind-Blowing Tricks to Hatch Eggs in Pokemon Go Without Walking On OnePlus 11 5G | Dr.fone
- Change Location on Yik Yak For your Samsung Galaxy S23 Tactical Edition to Enjoy More Fun | Dr.fone
- Two Ways to Track My Boyfriends Nokia C110 without Him Knowing | Dr.fone
- 7 Fixes for Unfortunately, Phone Has Stopped on Vivo Y77t | Dr.fone
- In 2024, 3 Effective Methods to Fake GPS location on Android For your Vivo X Fold 2 | Dr.fone
- How Do You Unlock your iPhone 13 Pro Max? Learn All 4 Methods
- 10 Easy-to-Use FRP Bypass Tools for Unlocking Google Accounts On Tecno Pova 6 Pro 5G
- Best Android Data Recovery - Retrieve Lost Pictures from Honor Magic Vs 2.
- In 2024, Recommended Best Applications for Mirroring Your Honor Magic 5 Pro Screen | Dr.fone
- In 2024, Process of Screen Sharing Tecno Spark 10 Pro to PC- Detailed Steps | Dr.fone
- Does Airplane Mode Turn off GPS Location On Tecno Spark Go (2023)? | Dr.fone
- Complete Guide to Hard Reset Your Google Pixel Fold | Dr.fone
- In 2024, How Do I Stop Someone From Tracking My OnePlus Nord 3 5G? | Dr.fone
- In 2024, 9 Best Free Android Monitoring Apps to Monitor Phone Remotely For your Vivo Y55s 5G (2023) | Dr.fone
- Can't play MP4 files on Redmi K70
- Best Anti Tracker Software For Honor Play 7T | Dr.fone
- Recover your photos after 90 has been deleted.
- Top 10 Telegram Spy Tools On Motorola Moto G73 5G for Parents | Dr.fone
- In 2024, How to use Pokemon Go Joystick on Apple iPhone 13 Pro Max? | Dr.fone
- In 2024, How to Change Google Play Location On Vivo T2 Pro 5G | Dr.fone
- Bypass/Reset Xiaomi Redmi K70 Pro Phone Screen Passcode/Pattern/Pin
- In 2024, Things You Must Know for Screen Mirroring Apple iPhone 12 | Dr.fone
- Simple and Effective Ways to Change Your Country on YouTube App Of your Realme C67 5G | Dr.fone
- 3 Methods to Mirror Honor 80 Pro Straight Screen Edition to Roku | Dr.fone
- In 2024, Forgot Locked iPhone XS Max Password? Learn the Best Methods To Unlock | Dr.fone
- In 2024, How to Unlock iPhone 13, Apples New iPhone
- In 2024, Ways to stop parent tracking your Nokia 150 (2023) | Dr.fone
- In 2024, Complete Tutorial to Use GPS Joystick to Fake GPS Location On Xiaomi Redmi Note 12T Pro | Dr.fone
- Reasons why Pokémon GPS does not Work On Oppo F23 5G? | Dr.fone
- Title: Updated 2024 Approved How to Use LUTs in Lumafusion & Free LUTs Resource
- Author: Morgan
- Created at : 2024-04-24 01:03:04
- Updated at : 2024-04-25 01:03:04
- Link: https://ai-video-editing.techidaily.com/updated-2024-approved-how-to-use-luts-in-lumafusion-and-free-luts-resource/
- License: This work is licensed under CC BY-NC-SA 4.0.
