

Updated 2024 Approved In This Article Ill Share to You some of the Skin Care Vlog Ideas for You to Start Doing a Skin Care Review on Your YouTube Channel. But Before that Ill Share with You How Important Is Skin Care?
In This Article I’ll Share to You some of the Skin Care Vlog Ideas for You to Start Doing a Skin Care Review on Your YouTube Channel. But Before that I’ll Share with You How Important Is Skin Care?
One of the best kinds of video ideas for all the beauty gurus that they can make and upload on their YouTube Channel is the Skin Care. Reviewing products such as cosmetics, skin care and hair care products or any kind of lifestyle grooming products can be really beneficial for your viewers. Product advertisement is all over there and people are really confused and they wonder whether it is worthy enough or not if it is effective or not. That is when they take the help of internet and video to find their answer.
In this Article I’ll share to you some of the Skin Care vlog ideas for you to start doing a skin care review on your YouTube channel. But before that I’ll share with you how important is skin care?
1. How Important is Skin Care?
Good skin care is important for the following reasons: It helps your skin stay in good condition
You’re shedding skin cells throughout the day, so it’s important to keep your skin glowing and in good condition. A skin care routine is not just to help you look good, it’s essential for your skin’s health
That is why most people now a days are looking for a video or a vlog about skin care.
Here are some ideas to make for Skin Care Vlogs
- Daily Skin Care Routine Vlogs
- Skin Care Product Reviewing Vlogs
- Skin Care Unboxing Vlogs
- Empty Skin Care Vlogs
- Skin Care recommendation Vlogs
2. Daily Skin Care Routine Vlogs
This vlog can give your viewers an information on what skin care you use daily. Here you can share how you use it step by step and you can also share what products you are using for them to have an idea.
This may share to your viewers how important a daily skin care to their skin because an effective skin care may help prevent acne, treat wrinkles and help keep skin looking best.
The goal of sharing your skin care routine is to inform your viewer or subscriber the importance of taking care of your skin daily and also the good product you may use.

Daily Skin Care Routine Vlogs
3. Skin Care Product Review Vlogs
This vlog will give your viewers more knowledge about the products.
Now a days most people get all the information they want in watching YouTube videos. People often watch skin care reviews on YouTube first before they decide to buy. So, you must clearly provide a correct and honest information about the product. In reviewing a product especially skin care, you need to help the viewers understand all the information contained in the products, you must be very specific when you explaining.

Skin Care Product Review Vlogs
4. Skin Care Unboxing Vlogs
For those unfamiliar with the format, unboxing videos are when YouTubers share the unpacking of a special products. Unboxing videos are one of several formats native to YouTube that have grown up along with the YouTube generation. People wanted to share their enthusiasm for their new purchases such as beauty products or skin care products. Influencer or content creator unpacks new consumer products on camera while discussing the respective product’s features, branding, packaging, and other relevant details.
From this Vlog your viewers will have an idea what products look like or what brand of products they will buy.
5. Empty Skin Care Vlogs
I have personally watch other content creator doing this kind of vlog and for me it helps viewers to know more about beauty guru favorites skin care or their thoughts after using this kind of products.
In this vlog you will share to your audience why did you run out of products? how is the product to you, your experience while using the products, is it worth it for them to buy and if given a chance will you buy this product again? Because it is also important for them to know if the products are ok with your skin, especially sometimes the brand owner is watching the vlogs for them to have an idea about your thoughts of their products.
6. Skin Care Recommendation Vlogs
As a skin care vlogger, I often make this kind of vlog, I really enjoy doing this vlog specially when the products are effective to me, I really excited to share this information to my viewers.
Here in this vlog, you can show or recommend products that have been effective for you. Just explain in every detail how you used it and why it was effective for you. Also don’t forget your proofs of using the products, specially show them the before and after photos.

Skin Care Recommendation Vlogs
7. Choosing a Video Editing Software for You
If you’re looking for editor software that can help your skin care vlogs stand out from your competition Wondershare Filmora is one the easy-to-use editing software, a beginner in video editing can easily create a stunning and creative video.
Wondershare Filmora Video Editor has action camera tools that can fix any problem with camera, share and add effects like slow motion and reverse. These tools can really help with product review vlogs especially when doing skin care reviews.
Free Download For Win 7 or later(64-bit)
Free Download For macOS 10.14 or later

Choosing a Video Editing Software for You
It allows noise cancellation in the background of your audio so that your viewers can better understand what you are saying about the products. Doing a skin care product review is in need a clear audio because viewers focus on what your thoughts or opinion about the product for them to have some ideas.

Doing A Skin Care Product Review
Filmora has the ability to blur video, which you can use especially when you display products in the viewer, you need to blur the background to focus on the products you are showing.

Focus On The Products You Are Showing
Filmora provide the user an extraordinary feature to edit and export videos up to a resolution of 4k.
Wrap Up
- When doing any skin care vlogs, don’t forget to advice your viewers to always do a skin test before using new products, because maybe this product is effective for me and not for you, so make it a habit to do a skin test first.
- Hope this skin care vlog ideas will help you to start your own skin care vlogs or to have an idea what content you may do to start a vlogging career.
Free Download For macOS 10.14 or later
Choosing a Video Editing Software for You
It allows noise cancellation in the background of your audio so that your viewers can better understand what you are saying about the products. Doing a skin care product review is in need a clear audio because viewers focus on what your thoughts or opinion about the product for them to have some ideas.
Doing A Skin Care Product Review
Filmora has the ability to blur video, which you can use especially when you display products in the viewer, you need to blur the background to focus on the products you are showing.
Focus On The Products You Are Showing
Filmora provide the user an extraordinary feature to edit and export videos up to a resolution of 4k.
Wrap Up
- When doing any skin care vlogs, don’t forget to advice your viewers to always do a skin test before using new products, because maybe this product is effective for me and not for you, so make it a habit to do a skin test first.
- Hope this skin care vlog ideas will help you to start your own skin care vlogs or to have an idea what content you may do to start a vlogging career.
How to Change Quicktime Player Speed on Mac?
Powerful Video Editor - Wondershare Filmora
An easy and powerful editor
Numerous effects to choose from
Detailed tutorials are provided by the official channel
Quicktime Player is an Apple Inc. software that is compatible with all current versions of macOS X as well as Windows.
The user interface of the Quicktime media player is straightforward to navigate. The majority of video formats may be supported, as well. Like VLC, you can quickly speed up or slow down videos with Quicktime player using specific hotkeys or by manually altering the speed of the video.

A broad number of formats may be handled by QuickTime, including music, graphics, and panoramic photography. All of your music and video files will play without a hitch, and it is a fully complete media player.
Many customers buy a Mac computer and instantly install QuickTime, the default video player, under the notion that it is a basic video player with few additional functions. In fact, the QuickTime player has a slew of hidden functions that are pretty useful, but only a few people are aware of it. The option to increase the Quicktime player speed is one of these hidden features’ which is most popular and helpful. This is particularly true if you have to sit through a presentation or lecture.
How to Speed up Videos in Quicktime Player?
If you want to watch your movies on Quicktime player as quickly as possible, go with a long-term solution. The pace of the clip may be raised or lowered from the toolbar, and the settings of the application can be altered.
Thus, in easy words when you download a video to your Mac, you can control the speed at which it plays back on your computer using Quicktime player.

There are two ways to achieve this goal, one is manually through settings whereas the second way is using hotkeys. Let’s discuss both by understanding how to increase QuickTime player speed manually.
Manually Setting Up Quicktime player speed
- Open the Quicktime player installed on your computer.
- Embedding video within the interface is recommended.
- Go to the Toolbar and choose the Windows tab from the drop-down menu.
- To access the A/V controls, press the A/V Controls button. There will be a dialogue box that appears.
- Locate the Playback Speed option and adjust the speed of the movie by increasing or decreasing it.
- Close the box and go to watch the video in its entirety.
Speeding Up playback Speed Quicktime Using Hotkeys
- There isn’t a special hotkey for Quicktime that allows you to speed up or slow down the video. Using your mouse and keyboard, on the other hand, you may do the task in an instant.
- Open the video in the Quicktime Player on your computer by clicking on it.
- Play the video clip, and then hit the “OPTIONS” key on your keyboard to stop it.
- Press the Fast Forward button on the player and the left mouse button at the same time. It will speed up the pace at which the video is played back.
- The tap will cause a 1.1x choice to appear at the top of the screen.

Increasing the speed is accomplished by repeatedly clicking until the desired speed is achieved.
However, keep in mind that there has been a glitch that has existed for years that causes the audio to stop working after you reach 2x speed. To get around this problem, just accelerate to 1.9x and then stop.
If you come across anything you like and want to view it again, you may stop the video by pressing the space bar twice. However, pressing the spacebar will cause the playing speed to be reset.
How to Slow Down Videos in Quicktime Player?
When viewing a movie on your Mac, you may discover that you need to slow it down on a frequent basis. You may discover a range of slow down video editing tools that can help you slow down a video on the internet. Furthermore, various video players may be able to let you quickly slow down your movie. QuickTime Player is one of those programs that may be customized to your individual needs.
We sometimes overlook the enormous capacity inherent inside the dependable and dependable QuickTime Player. QuickTime contains a number of key capabilities meant to help you deal with your media files and play video and audio files.
Steps to follow to slow down Quicktime Player speed
Like speeding up the QuickTime playback speed, the users can simultaneously slow down the playback speed as well. It can be done manually and through the use of specific keys already present on the keyboard.
Manual Setup
In order to manually slowdown QuickTime video, follow the below-mentioned steps:
- Launch the Quicktime player application
- Click on “File” and choose the video which is already saved or downloaded on your MAC.
- Once the video is loaded in the Quicktime player, click on “View” on the toolbar on the top.
- As you click on “View”, a drop-down menu will appear. Locate the “Playback speed” option from the drop-down menu.

- When you click on “Playback speed”, another dialogue box will appear right next to the drop-down menu, which will have options regarding the playback speed.

- Click on “Half speed” and press the play button to watch the video with a slower playback rate.

Slowdown QuickTime speed using Hotkeys
- Open the video or the clip you want to watch.
- If Quicktime is your default player, the video loads in it.
- Otherwise, launch the QuickTime application
- By clicking on “Open”, choose your specific clip or video.
- Once the video is loaded, press the ““OPTIONS”” key next to cmd and simultaneously press the rewind button on the task bar of Quicktime. It starts to slow down the playback speed of the video.
What If Quicktime Player Speed up With No Sound?
No sound may be heard when the video is played back if it was encoded in a format that QuickTime cannot understand. Verifying your QuickTime installation is the most obvious way to find out whether it has decoded all of the video files. Let’s investigate the issue to its root.
Updating Your Quicktime to the Latest Version
The user must carefully study the QuickTime player. For some reason, your QuickTime behaviour is out of whack.
People often neglect to keep their QuickTime software up-to-date, which results in problems with video playback, such as no sound or stuttering, among many other things. To fix this issue, just download and install the most latest release of QuickTime player.
Examine the System and Driver
Faulty speakers, audio issues in the system, and update failures will ultimately cause media playback difficulties.
To find the root cause, you should first check internally to see whether your speakers are working correctly. Speaking straight to Siri and hearing her reaction is the fastest and most straightforward option.
Another reason you may be hearing no sound on QuickTime is because of a recent system update. Apple, as we all know, often releases new operating systems, and you must keep track of the most current versions of updates in order to keep your system running effectively.
You just need to ensure that your machine is running the most recent version. As a result, your system will resume regular functioning, and QuickTime will be immediately fixed and restored.
Inspect if the File is Corrupted or not
Checking the file to see whether it has been corrupted is a good idea regardless of whether QuickTime and your system are up and running. To make matters worse, the lack of sound in QuickTime will be the consequence of a corrupted video file.
Try opening the file in a different programme or player to see if the issue may be resolved. If this is the case, your source video file is either destroyed or corrupted. You may wish to consider regaining access to the file in this situation. The likelihood of your file being corrupted by malware or a virus is relatively high. Remember to be patient if this does happen to you.
It is necessary to use third-party repair programmes to successfully fix the file. Consequently, using third-party software to recover and restore the source file should be considered if you are in a situation where the source file is crucial and do not have a backup. As we’ll see, there are a number of options available, including Filmora.
How to Play Videos at 2X Speed with Sound in Quicktime?
Follow the below-mentioned steps to play video at 2x speed with sound in Quicktime:
- Launch QuickTime.
- Click on Edit, which is located on the toolbar on the top. A drop-down menu will appear.
- From the drop-down menu, click on QuickTime Preferences.
- Then select Audio from the dialogue box.
- Then moving forward, change the music synthesizer to Promethean Audio Device, Promethean USB Audio or USB Audio Device. These options might vary depending on the user’s specific hardware.
- Click on Apply and then OK.
Use Quick Time Features in Filmora
What is Wondershare Filmora?
For users to quickly and easily create high-quality films using a variety of sophisticated editing tools, Wondershare Filmora provides an extensive set of powerful tools for video editors. Wondershare Filmora’s user-friendly interface makes it easy for anybody to become an expert video editor on Mac .
In addition to the usual video effects, Wondershare Filmora provides filters, animated components, and other video effects. In order to alter a movie, you may use filters and overlays to add a variety of effects and graphic overlays. There are several options for titles, openers, and bottom thirds to pick from in Wondershare Filmora.

Using Wondershare Filmora’s drag and drop, users may include moving graphics into their movies. Additionally, users may quickly combine many videos and photographs and choose the good royalty-free music from a wide range of options, all in one spot.
Among the many functions offered by Wondershare Filmora include the ability to edit in 4K and GIF format, noise reduction and colour correction, and an advanced text editor and an audio mixer. A wide range of operating systems can run Wondershare Filmora.
Although there are many other video editors out there vying for attention, Wondershare has been one of the few that has managed to stay relevant in an increasingly competitive industry saturated with old and new video editors all competing for the same consumer base.
Unique and Distinct Features of Filmora
Software is not nearly as good if it does not have the appropriate set of functionalities, and most users will not bother to use it if it does not include these features. Listed here are the most eagerly anticipated features of Filmora’s latest version:
Motion Tracking
The Motion Tracking module enables you to identify an object or point inside a video and then have the computer track that object or point to generate a moving path.
It allows you to capture the motion of a moving object in the frame and add text, subtitles, effects, and other components to the frame that follow the moving object’s motion as it moves around the screen. After you’ve constructed that path, you may link any other item to it and have it follow the initial object.
Colour Matching Feature
This team has always considered that Filmora’s colour grading and correction tools were excellent, but their most recent addition to the ‘Color Matching’ program has garnered them even more praise.
Colour matching is crucial when trying to merge several video images obtained by two different cameras. In this semi-automated module, you may match video from multiple sources or footage acquired at different times of day with one another.
Keyframing Feature
Keyframing is an essential feature for users who wish to boost the appeal of their video by incorporating critical animation sequences throughout the film.
It enables you to create custom animations and have fine-grained control over the effects you apply to your projects via the use of keyframes.
Keyframing becomes critical when creating special effects, custom title cards at the beginning or middle of a film or conjuring precise paths for visuals or picture-in-picture movies to follow.
Audio Ducking
Audio ducking is a method used in video editing and production that allows the narrator’s voice to be heard consistently and clearly over other sounds on the recording that are happening at the same time, such as background music, without being dominated.
Transitions and Vast Amount of Effects
Over 300 special effects, objects, overlays, transitions, and music and audio effects are available whenever and wherever you need them. The bundle includes 25 sound effects and 26 royalty-free recordings, making it a complete package.
Then there are 176 transitions, each of which may be customized to liven up your project. You may also alter and manipulate visuals and text to make your project more aesthetically appealing.
Hardcore Video Editing
Moving on to the heart of this application, Filmora latest version’s video editing features are both excellent and user-friendly. [pagebreak] The editing options in Filmora are comprehensive, with the most noticeable being cutting, audio manipulation, transition creation, visual effects, and a plethora of additional features and functions.
The above editing functions are simple to carry out by selecting a specific section of the video on your timeline, double-clicking it, waiting for it to appear in the preview section, and then applying effects and transitions, adding audio, stabilizing and correcting the video using any of the editing options available to you.
Simplified Exporting Of Your Masterpiece
Exporting a finished project is as simple as any other activity in Filmora latest version. Indeed, the option to export your completed project is clearly presented on the main page and instantly visible to the human eye. After you’ve completed making changes, all you have to do is click the ‘Export’ button.
How to change video playback speed in Filmora
When using fast-motion/slow-motion effects on a video, the clips are sped up or slowed down in comparison to their original speed.
If you’re looking for a “close up in time,” the slow-motion effect may be the best choice, while the fast-forward effect may be used to produce dramatic or amusing videos.
Filmora is widely praised and utilized by professionals throughout the globe because of its user-friendly design and uncomplicated editing features. For this, it is often chosen over other editing programs.
Steps
Follow the below-mentioned steps to change video speed in Filmora:
- A wide range of video formats is supported by Wondershare Filmora, including MP4 and AVI, WMV and MOV, and FLV and M4V, etc. Enter the media library and click Import to import videos from your PC. The software will use the video files on your computer. Drag and drop is also an option for adding files to the User’s Album.

- Right-click on the video track on the Timeline and then drag movies from your User’s Album into it to access the Speed and Duration choices.

- A pop-up window will be shown. The rapidity or sluggishness of the motion effects is denoted by speed numbers. Then you may go at your own speed. Just click on the preview box to test out effects like sped-up or slowed-down videos. 0.5 speed is a good choice if you think it’s too much.

Video playback speed similarly affects the audio playback speed. Delete the video’s audio if you want to maintain the original playing speed of the video’s audio.
You must first double-click the audio clip in the audio editing window in order to adjust it. Adding and deleting fade in/out effects and reducing background noise are all options.
After you’ve finished adjusting the video speed, click Export. To save your movie in a standard format, just choose Format from the File menu.

It’s also possible to publish your videos to YouTube and Vimeo or create a DVD if you’d like.
Choose Device from the drop-down box and choose the proper symbol to view your new video output on your iPod, iPhone, or iPad.
Conclusion
While watching a movie, you may want the audio to be slower or faster, and you may want to adjust the atmosphere with the help of the music track, either when merely a soundtrack is being played or while a movie is being watched. This article, which includes images, explains in great detail how Mac users can achieve this using playback speed Quicktime. It also explains how to alter the speed at which a video play by in Filmora. Filmora has a variety of easy and advanced editing options, as well as video effects like slow motion and fast motion.
Quicktime Player is an Apple Inc. software that is compatible with all current versions of macOS X as well as Windows.
The user interface of the Quicktime media player is straightforward to navigate. The majority of video formats may be supported, as well. Like VLC, you can quickly speed up or slow down videos with Quicktime player using specific hotkeys or by manually altering the speed of the video.
A broad number of formats may be handled by QuickTime, including music, graphics, and panoramic photography. All of your music and video files will play without a hitch, and it is a fully complete media player.
Many customers buy a Mac computer and instantly install QuickTime, the default video player, under the notion that it is a basic video player with few additional functions. In fact, the QuickTime player has a slew of hidden functions that are pretty useful, but only a few people are aware of it. The option to increase the Quicktime player speed is one of these hidden features’ which is most popular and helpful. This is particularly true if you have to sit through a presentation or lecture.
How to Speed up Videos in Quicktime Player?
If you want to watch your movies on Quicktime player as quickly as possible, go with a long-term solution. The pace of the clip may be raised or lowered from the toolbar, and the settings of the application can be altered.
Thus, in easy words when you download a video to your Mac, you can control the speed at which it plays back on your computer using Quicktime player.
There are two ways to achieve this goal, one is manually through settings whereas the second way is using hotkeys. Let’s discuss both by understanding how to increase QuickTime player speed manually.
Manually Setting Up Quicktime player speed
- Open the Quicktime player installed on your computer.
- Embedding video within the interface is recommended.
- Go to the Toolbar and choose the Windows tab from the drop-down menu.
- To access the A/V controls, press the A/V Controls button. There will be a dialogue box that appears.
- Locate the Playback Speed option and adjust the speed of the movie by increasing or decreasing it.
- Close the box and go to watch the video in its entirety.
Speeding Up playback Speed Quicktime Using Hotkeys
- There isn’t a special hotkey for Quicktime that allows you to speed up or slow down the video. Using your mouse and keyboard, on the other hand, you may do the task in an instant.
- Open the video in the Quicktime Player on your computer by clicking on it.
- Play the video clip, and then hit the “OPTIONS” key on your keyboard to stop it.
- Press the Fast Forward button on the player and the left mouse button at the same time. It will speed up the pace at which the video is played back.
- The tap will cause a 1.1x choice to appear at the top of the screen.
Increasing the speed is accomplished by repeatedly clicking until the desired speed is achieved.
However, keep in mind that there has been a glitch that has existed for years that causes the audio to stop working after you reach 2x speed. To get around this problem, just accelerate to 1.9x and then stop.
If you come across anything you like and want to view it again, you may stop the video by pressing the space bar twice. However, pressing the spacebar will cause the playing speed to be reset.
How to Slow Down Videos in Quicktime Player?
When viewing a movie on your Mac, you may discover that you need to slow it down on a frequent basis. You may discover a range of slow down video editing tools that can help you slow down a video on the internet. Furthermore, various video players may be able to let you quickly slow down your movie. QuickTime Player is one of those programs that may be customized to your individual needs.
We sometimes overlook the enormous capacity inherent inside the dependable and dependable QuickTime Player. QuickTime contains a number of key capabilities meant to help you deal with your media files and play video and audio files.
Steps to follow to slow down Quicktime Player speed
Like speeding up the QuickTime playback speed, the users can simultaneously slow down the playback speed as well. It can be done manually and through the use of specific keys already present on the keyboard.
Manual Setup
In order to manually slowdown QuickTime video, follow the below-mentioned steps:
- Launch the Quicktime player application
- Click on “File” and choose the video which is already saved or downloaded on your MAC.
- Once the video is loaded in the Quicktime player, click on “View” on the toolbar on the top.
- As you click on “View”, a drop-down menu will appear. Locate the “Playback speed” option from the drop-down menu.
- When you click on “Playback speed”, another dialogue box will appear right next to the drop-down menu, which will have options regarding the playback speed.
- Click on “Half speed” and press the play button to watch the video with a slower playback rate.
Slowdown QuickTime speed using Hotkeys
- Open the video or the clip you want to watch.
- If Quicktime is your default player, the video loads in it.
- Otherwise, launch the QuickTime application
- By clicking on “Open”, choose your specific clip or video.
- Once the video is loaded, press the ““OPTIONS”” key next to cmd and simultaneously press the rewind button on the task bar of Quicktime. It starts to slow down the playback speed of the video.
What If Quicktime Player Speed up With No Sound?
No sound may be heard when the video is played back if it was encoded in a format that QuickTime cannot understand. Verifying your QuickTime installation is the most obvious way to find out whether it has decoded all of the video files. Let’s investigate the issue to its root.
Updating Your Quicktime to the Latest Version
The user must carefully study the QuickTime player. For some reason, your QuickTime behaviour is out of whack.
People often neglect to keep their QuickTime software up-to-date, which results in problems with video playback, such as no sound or stuttering, among many other things. To fix this issue, just download and install the most latest release of QuickTime player.
Examine the System and Driver
Faulty speakers, audio issues in the system, and update failures will ultimately cause media playback difficulties.
To find the root cause, you should first check internally to see whether your speakers are working correctly. Speaking straight to Siri and hearing her reaction is the fastest and most straightforward option.
Another reason you may be hearing no sound on QuickTime is because of a recent system update. Apple, as we all know, often releases new operating systems, and you must keep track of the most current versions of updates in order to keep your system running effectively.
You just need to ensure that your machine is running the most recent version. As a result, your system will resume regular functioning, and QuickTime will be immediately fixed and restored.
Inspect if the File is Corrupted or not
Checking the file to see whether it has been corrupted is a good idea regardless of whether QuickTime and your system are up and running. To make matters worse, the lack of sound in QuickTime will be the consequence of a corrupted video file.
Try opening the file in a different programme or player to see if the issue may be resolved. If this is the case, your source video file is either destroyed or corrupted. You may wish to consider regaining access to the file in this situation. The likelihood of your file being corrupted by malware or a virus is relatively high. Remember to be patient if this does happen to you.
It is necessary to use third-party repair programmes to successfully fix the file. Consequently, using third-party software to recover and restore the source file should be considered if you are in a situation where the source file is crucial and do not have a backup. As we’ll see, there are a number of options available, including Filmora.
How to Play Videos at 2X Speed with Sound in Quicktime?
Follow the below-mentioned steps to play video at 2x speed with sound in Quicktime:
- Launch QuickTime.
- Click on Edit, which is located on the toolbar on the top. A drop-down menu will appear.
- From the drop-down menu, click on QuickTime Preferences.
- Then select Audio from the dialogue box.
- Then moving forward, change the music synthesizer to Promethean Audio Device, Promethean USB Audio or USB Audio Device. These options might vary depending on the user’s specific hardware.
- Click on Apply and then OK.
Use Quick Time Features in Filmora
What is Wondershare Filmora?
For users to quickly and easily create high-quality films using a variety of sophisticated editing tools, Wondershare Filmora provides an extensive set of powerful tools for video editors. Wondershare Filmora’s user-friendly interface makes it easy for anybody to become an expert video editor on Mac .
In addition to the usual video effects, Wondershare Filmora provides filters, animated components, and other video effects. In order to alter a movie, you may use filters and overlays to add a variety of effects and graphic overlays. There are several options for titles, openers, and bottom thirds to pick from in Wondershare Filmora.
Using Wondershare Filmora’s drag and drop, users may include moving graphics into their movies. Additionally, users may quickly combine many videos and photographs and choose the good royalty-free music from a wide range of options, all in one spot.
Among the many functions offered by Wondershare Filmora include the ability to edit in 4K and GIF format, noise reduction and colour correction, and an advanced text editor and an audio mixer. A wide range of operating systems can run Wondershare Filmora.
Although there are many other video editors out there vying for attention, Wondershare has been one of the few that has managed to stay relevant in an increasingly competitive industry saturated with old and new video editors all competing for the same consumer base.
Unique and Distinct Features of Filmora
Software is not nearly as good if it does not have the appropriate set of functionalities, and most users will not bother to use it if it does not include these features. Listed here are the most eagerly anticipated features of Filmora’s latest version:
Motion Tracking
The Motion Tracking module enables you to identify an object or point inside a video and then have the computer track that object or point to generate a moving path.
It allows you to capture the motion of a moving object in the frame and add text, subtitles, effects, and other components to the frame that follow the moving object’s motion as it moves around the screen. After you’ve constructed that path, you may link any other item to it and have it follow the initial object.
Colour Matching Feature
This team has always considered that Filmora’s colour grading and correction tools were excellent, but their most recent addition to the ‘Color Matching’ program has garnered them even more praise.
Colour matching is crucial when trying to merge several video images obtained by two different cameras. In this semi-automated module, you may match video from multiple sources or footage acquired at different times of day with one another.
Keyframing Feature
Keyframing is an essential feature for users who wish to boost the appeal of their video by incorporating critical animation sequences throughout the film.
It enables you to create custom animations and have fine-grained control over the effects you apply to your projects via the use of keyframes.
Keyframing becomes critical when creating special effects, custom title cards at the beginning or middle of a film or conjuring precise paths for visuals or picture-in-picture movies to follow.
Audio Ducking
Audio ducking is a method used in video editing and production that allows the narrator’s voice to be heard consistently and clearly over other sounds on the recording that are happening at the same time, such as background music, without being dominated.
Transitions and Vast Amount of Effects
Over 300 special effects, objects, overlays, transitions, and music and audio effects are available whenever and wherever you need them. The bundle includes 25 sound effects and 26 royalty-free recordings, making it a complete package.
Then there are 176 transitions, each of which may be customized to liven up your project. You may also alter and manipulate visuals and text to make your project more aesthetically appealing.
Hardcore Video Editing
Moving on to the heart of this application, Filmora latest version’s video editing features are both excellent and user-friendly. [pagebreak] The editing options in Filmora are comprehensive, with the most noticeable being cutting, audio manipulation, transition creation, visual effects, and a plethora of additional features and functions.
The above editing functions are simple to carry out by selecting a specific section of the video on your timeline, double-clicking it, waiting for it to appear in the preview section, and then applying effects and transitions, adding audio, stabilizing and correcting the video using any of the editing options available to you.
Simplified Exporting Of Your Masterpiece
Exporting a finished project is as simple as any other activity in Filmora latest version. Indeed, the option to export your completed project is clearly presented on the main page and instantly visible to the human eye. After you’ve completed making changes, all you have to do is click the ‘Export’ button.
How to change video playback speed in Filmora
When using fast-motion/slow-motion effects on a video, the clips are sped up or slowed down in comparison to their original speed.
If you’re looking for a “close up in time,” the slow-motion effect may be the best choice, while the fast-forward effect may be used to produce dramatic or amusing videos.
Filmora is widely praised and utilized by professionals throughout the globe because of its user-friendly design and uncomplicated editing features. For this, it is often chosen over other editing programs.
Steps
Follow the below-mentioned steps to change video speed in Filmora:
- A wide range of video formats is supported by Wondershare Filmora, including MP4 and AVI, WMV and MOV, and FLV and M4V, etc. Enter the media library and click Import to import videos from your PC. The software will use the video files on your computer. Drag and drop is also an option for adding files to the User’s Album.
- Right-click on the video track on the Timeline and then drag movies from your User’s Album into it to access the Speed and Duration choices.
- A pop-up window will be shown. The rapidity or sluggishness of the motion effects is denoted by speed numbers. Then you may go at your own speed. Just click on the preview box to test out effects like sped-up or slowed-down videos. 0.5 speed is a good choice if you think it’s too much.
Video playback speed similarly affects the audio playback speed. Delete the video’s audio if you want to maintain the original playing speed of the video’s audio.
You must first double-click the audio clip in the audio editing window in order to adjust it. Adding and deleting fade in/out effects and reducing background noise are all options.
After you’ve finished adjusting the video speed, click Export. To save your movie in a standard format, just choose Format from the File menu.
It’s also possible to publish your videos to YouTube and Vimeo or create a DVD if you’d like.
Choose Device from the drop-down box and choose the proper symbol to view your new video output on your iPod, iPhone, or iPad.
Conclusion
While watching a movie, you may want the audio to be slower or faster, and you may want to adjust the atmosphere with the help of the music track, either when merely a soundtrack is being played or while a movie is being watched. This article, which includes images, explains in great detail how Mac users can achieve this using playback speed Quicktime. It also explains how to alter the speed at which a video play by in Filmora. Filmora has a variety of easy and advanced editing options, as well as video effects like slow motion and fast motion.
How to Use OBS Chroma Key With/Without Green Screen
Whether you’re someone new to the world of streaming or just seeking to enhance the aesthetic of your existing stream, a green screen is a terrific way to add some quality to your broadcasts. A green screen is a terrific tool for broadcasters and video makers who wish to cover their backdrop or change it with something else completely. Once you have one, it might be tough to understand how to set up a green screen, but once you get the directions down, you’ll be able to seem like you are wherever you desire! The procedure of setting up your chroma key settings in OBS is pretty straightforward and can be done within a few minutes.
These days most live streaming software packages support chroma keying as a feature. The first thing to do with any live broadcast is to arrange your shot. Will the camera stay stationary, or will you be moving it? Once you’ve determined the shot, you can calculate approximately how much green screen you need. It’s recommended to provide for a little additional green screen around the subject to prevent having them clipped outside of the chroma keyed region. When inserting a chroma key OBS will automatically produce certain baseline settings. In most circumstances, you’ll need to fine-adjust these parameters. In this post, we’ll teach you how to accomplish this fantastic look using OBS. You should remember, however, that you will want to set up your equipment and switch on your illumination before modifying the settings in OBS Studio. This way, you won’t have to alter them again after you go live.
1. How to Add Green Screen with OBS
Learning to use chroma key in OBS allows you to remove and change backgrounds, giving your stream a Learning to utilize chroma key in OBS enables you to remove and modify backdrops, giving your broadcast a much better production quality and feel. If you are employing various backgrounds or a sequence of green things behind you. You may utilize the chroma key source more than once to remove various hues, enabling you to obtain better background removal. Not only can OBS Studio erase the backdrop of your live video streams, but you can also remove the backgrounds on pre-recorded movies and still photographs. Chroma keying has become quite popular lately. People utilize it not simply for gaming, but also in Zoom conferences, live interviews, talk shows, etc. Although it may appear hard, at first sight, setting up Chroma Key in OBS Studio is quite straightforward. Let’s look at the easy steps you need to follow to set up a green screen in OBS.
Steps to Add Green Screen with OBS
**Step 1: Install and open OBS. From your main screen, hit the “Plus” symbol situated beneath the sources box. Foremost things first, you need a green screen. If you already have one, skip this step and proceed.
A green screen is merely a backdrop of one single brilliant hue that may be taken off in post-processing. It offers a ‘canvas’ on which a topic may perform and will subsequently display with a translucent backdrop. Add it simply via your webcam.

**Step 2: Select “Video Capture Device from the available choices and then select the Filter as shown below. Name is anything you would want to keep track of your sources. Chroma keying is a visual effects method that eliminates a color backdrop from still or moving pictures and is also included as a filter in OBS.

**Step 3: If your camera is installed, it should auto-populate in the forms. If it doesn’t, or you have many cameras, choose the relevant camera manually. Select the color of your screen, then change the similarity and smoothness bars until you settle on the parameters you require. Adjustments will vary from person to person based on light, green screen quality, and the distance you are from the screen.

**Step 4: Ensure that the Video Capture Device is at the top of the Window capture scene. Use the up-down arrow to move it in the Source area after highlighting it. This will place the Video Capture Device scene at the top Save your settings when you’re done. You should be ready to start streaming.

2. Best Green Screen Video Editor to Use
Even while OBS Studio is stable and has a large variety of capabilities and tools, it may be better suitable for game recording. A program that is more comprehensive and supports video editing and chroma keying tools. This program features an easy-to-use interface and a lot more functions. You may also download films and distribute them immediately on social media or email. It provides more than simply a live streaming green screen software tool like OBS Studio. This program is more of a professional-grade green screen recorder and video editor, for both Mac and Windows platforms. Here we propose Filmora. It is a strong and excellent green screen video producer and editor with a professional touch to the animation video creating quality. Studio-quality movement used to be something only large businesses could accomplish. Today, due to Filmora, they’re easy, inexpensive, and enjoyable to produce.
Filmora features a well-designed user interface, a decent balance of control and would provide you high-quality output every time. It is better ideal for professional videographers and those who are online content creators due to its distinctive and professional appearing productions. It can handle all the contemporary video formats, including video editing and output for HD and 4K. It offers a broad selection of easy-to-use capabilities that may assist you to produce lesson films, editing action camera footage and building viral movies like those used on social networking websites, and more. If you have various shades of green, you may chroma key a source many times, each time specifying a distinct shade of green. Without any correction, merely putting on the Chroma Key filter will probably look quite horrible. But happily, there is a variety of options where you may fine-tune the chroma key removal. So, with Filmora, it is better appropriate for short films and it is giving you the most value for its pricing.
For Win 7 or later (64-bit)
For macOS 10.12 or later
**Step 1: Import the media document, including the Chroma Video
After the download and installation of this program, now you’re in the software interface. The next procedure is to import your media documents. To accomplish so, press the Import button on the left part of the screen as follows: In the following step, add the files to the timeline as shown above, which will also include them for your media records area.

**Step 2: Editing Video Project File
Presently as you’ve just placed that video clip within the media library of Filmora. You may also adjust the video clips using its convenient editing capabilities. To accomplish so, choose the specific video clip in the timeline and you will see the video changing options available on the interface as follows:

****Step 3:**Edit the Green Screen
Inside the Filmora, once you’ve integrated the green screen video into your project. Select the Chroma key effect as shown here:

**Step 4: Export the Project
After the successful creation and modification of your preferred video outro, now is the time to export it to your desired place or immediately post it to your YouTube channel, follow the instructions below to achieve so. Click on the Export button inside the Filmora Video Editor and you will see the Export window being launched as follows:
To submit your material straight to YouTube, hit your content directly to YouTube, Hit the YouTube menu at the menu bar of this window which brings you towards the YouTube export window as follow:

Conclusion
The usage of chroma keying has been increasingly popular in recent years, with various uses of this video effect employed for live streaming. Chroma keying is used to erase the backdrop of a video clip which is then composited over another scene or picture. The most apparent usage of this technology is for weather broadcasts when the presenter is composited over the top of a weather radar picture. In more recent times we’re seeing video game broadcasters chroma keying themselves into their live feeds. There are various sites to explore for streaming backdrops. Most come as overlay packages with distinct themes. A good location to look is Filmora. Else, if you want to add a new backdrop to your broadcast, you may simply add a new picture source to your scene in OBS. So, check out what best fits you and opt for the one.
For macOS 10.12 or later
**Step 1: Import the media document, including the Chroma Video
After the download and installation of this program, now you’re in the software interface. The next procedure is to import your media documents. To accomplish so, press the Import button on the left part of the screen as follows: In the following step, add the files to the timeline as shown above, which will also include them for your media records area.
**Step 2: Editing Video Project File
Presently as you’ve just placed that video clip within the media library of Filmora. You may also adjust the video clips using its convenient editing capabilities. To accomplish so, choose the specific video clip in the timeline and you will see the video changing options available on the interface as follows:
****Step 3:**Edit the Green Screen
Inside the Filmora, once you’ve integrated the green screen video into your project. Select the Chroma key effect as shown here:
**Step 4: Export the Project
After the successful creation and modification of your preferred video outro, now is the time to export it to your desired place or immediately post it to your YouTube channel, follow the instructions below to achieve so. Click on the Export button inside the Filmora Video Editor and you will see the Export window being launched as follows:
To submit your material straight to YouTube, hit your content directly to YouTube, Hit the YouTube menu at the menu bar of this window which brings you towards the YouTube export window as follow:
Conclusion
The usage of chroma keying has been increasingly popular in recent years, with various uses of this video effect employed for live streaming. Chroma keying is used to erase the backdrop of a video clip which is then composited over another scene or picture. The most apparent usage of this technology is for weather broadcasts when the presenter is composited over the top of a weather radar picture. In more recent times we’re seeing video game broadcasters chroma keying themselves into their live feeds. There are various sites to explore for streaming backdrops. Most come as overlay packages with distinct themes. A good location to look is Filmora. Else, if you want to add a new backdrop to your broadcast, you may simply add a new picture source to your scene in OBS. So, check out what best fits you and opt for the one.
How to Use Filmora Slideshow Maker for Making Slideshow? What Is Slideshow Filmora? Know the Steps to Make Filmora Slideshow. What Are Steps to Make Filmora Slideshow Template?
47. What is the Best Filmora Slideshow Templates Experts Choice
An easy yet powerful editor
Numerous effects to choose from
Detailed tutorials provided by the official channel
With Filmora software, present information and content through slideshows. Filmora slideshow templates are available on the website free for making effective slideshows.
Part 1 Why Filmora Slideshow Templates Are Popular?
Filmora Slideshow templates are widely used by the users for creating new and impressiveslideshows. The reason for popularity of this software is many such as:
● It is an affordable software/application available free of cost for making slideshows using templates.
● It can run on computers and cell phones also, so there is flexibility in its access.
● It is equipped with various tools and features for both video and audio applications.
● Background effects, picture effects and animation features further make it more popular than the rest of the software.
● It is a good pleasing interface suitable to all content creators whether they are beginners or professionals.
● Video and audio control and video stabilization features make it further popular.
● Advanced text-editing make it possible to add contents in the video slides.
● Templates can be created by adding titles, text, sound, filters, and transitions.
● Theme-based templates are designed and developed looking into the needs f every user for different occasions.
● It has better editing tools like split, merge, rotate, and more.
● Auto-create videos features give the users comfort for using the application by saving their time and energy. Further they can add royalty-free images, videos, and music.
● Aspect ratio for the video creation can be changed.
Part 2 Where to Download Free Filmora Slideshow Templates
To use unlimited and free Filmora slideshow templates, one is required to have the application downloaded from the website. And thereafter one can download the different styles and patterns of templates from section filmora slideshow template free download. Once you create an account in the Filmora platform, you can easily connect with various templates useful for various occasions.
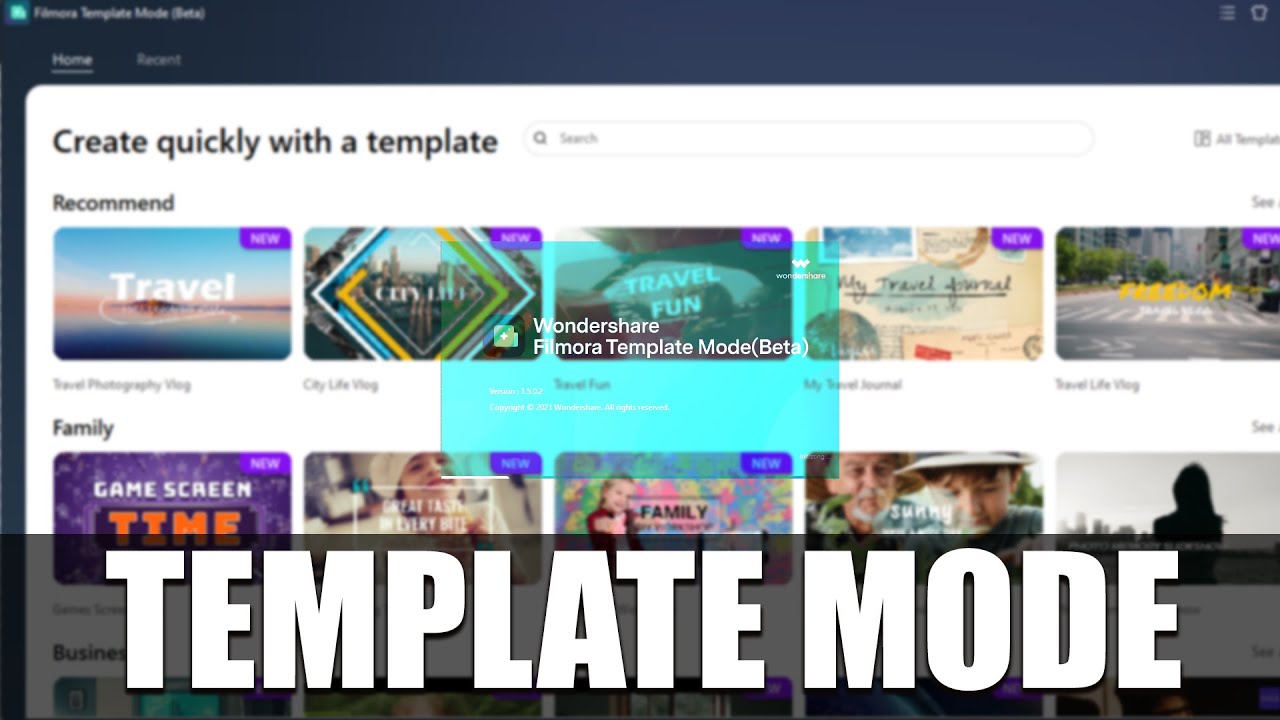
Filmora software or application is the only destination for having a bunch of various templates with many tools to improve the creation of slide shows. One can see the various templates available in the official website of Filmora. One can make slideshow with the help of video maker offered by Filmora. This software is free of cost. The easy-to-use interface feature of this software is good for beginners. It has various in-built customizable templates based in various themes like project, marketing, corporate, celebration, fun, natural, family, and business. It has auto-create mode which saves time and energy of the users as it automatically plays the slides when all media files, pictures or texts are placed over the various slides. For this one is just required to select the different files and click on “Auto-create” option.
Part 3 Best 10 Filmora Slideshow Templates
Filmora has many advanced templates for presentation and slideshow. One can find different kind of templates suitable for creating content and information for various applications. Filmora templates slideshow becomes more attractive when in-built Filmora templates are used. Some of the best 10 Filmora slideshow templates are:

01Business- Proposal Presentation Template
Looking into the business need of business users and marketing professionals, Filmora has developed Business-proposal presentation template with 45 unique custom slides. Business users can create impressive business proposals with various theme and color options. One can insert pictures and text easily in this template and can edit number of times.
02Pitch Deck Template
This template is used to design a pitch deck used by the companies to present at the stage and project about the company. These templates are well designed as they are handled by professionals.
03Company Profile Google Slides Template
It is mostly useful to business professionals to prepare business portfolios. The best thing with these templates is that they are unique, elegant, professional and creative. This template is multipurpose for different business applications.
04Clean Slideshow After Effects Templates
Those who want to make simple but impressive templates, clean slideshow after effect templates are best option. Through this template, one can focus on the main content and can add transitions. Photo slideshows can be easily created through this template.
05Minimal Corporate Presentation
This template is good for the beginners who desire to prepare a simple slideshow. The advantage of this template is that it is easy to use and text can be easily edited. One can insert picture for various corporate and business presentations.
06Corporate Event Promo
A business mostly does promotions and this needs a proper preparation. Corporate event promo presentation template is the best choice for such situations. One can create creative promo slides with such template by adding title and overlays in the template. They can also be edited easily.
07Business Marketing Presentation Layout
Most of the business organizations preferto choose such a template that can present their marketing plan in the best possible way. This Business Marketing Presentation is perfect for every business concern. It comes with nine designing options, through which one can easily replace images and text.
08Event Conference
For creating information and documents over template useful in an event conference, this template of filmora is very useful. The details of event and necessary information can be put in a systematic way through this template. However when played as slideshow, it can reach to maximum number of viewers.
09Mosaic Slideshow
Display of photographs, video albums or glimpse of any events can be impressively done with the help of Mosaic slideshow template. With increasing trends of photo sharing and video making, these templates are gaining popularity.
10Old Fashion Slides
As the name suggests, the templates is good for vintage slideshow. One can use this template for photo and video slideshows. Those who love to be creative, they can use this template.
These are some filmora template slideshow available at the website; however the users can also explore the other category of templates based on occasions at the website of Filmora. Every content creator will surely get desired template to present their information, data and pictures in a unique way.
Part 4 FAQ of Filmora Slideshow Templates
Wondershare Filmora Video Editor is a popular video editing application that also supports making slideshows through the use of various templates. It offers advance editing software for those who love to be creative and present their content in an artistic way. The various features of the software like elegant transitions, beautiful slides, video effects, text, audio and background effects make it more popular among beginners and professionals.
For Win 7 or later (64-bit)
For macOS 10.12 or later
Working with Filmora is easy and time saving. One can easily drag and drop the slides made and do editing on it. Making video through templates is an easy task. Just in few simple steps one can make and export the slides and play it. Photo video slideshows can also be made by using Filmora application. It runs smoothly over various operating systems.
● Whether Filmora has slideshow templates at its site?
Yes, the official website has various online free slideshow templates for the users.
● Whether I need to pay to get sample templates from Filmora?
The trial version of the software is free and you can download the slideshow templates free of cost.
● Whether the slideshow prepared in Flimora site can be edited with other application?
Yes, you can easily do editing on the slides made with Filmora application on other applications.
● What type of slideshare is available at Filmora?
All kind of slideshare and templates are available at Filmora that are useful for business, projects, marketing and personal purposes.
● Ending Thoughts →
● Filmora is a software/application widely used as video editing software and it is getting popular among the users due to its extraordinary features. It has great video editing tools, effects and transitions that give a complete package of video, slideshow and presentation making.
● Filmora has wide range of templates developed at its site for ease of making presentation and slideshows. These are developed looking to needs of every content creator. Some of templates available at the website are clean slideshow after effects templates, Mosaic slideshow, Business- proposal presentation template and many others.
● The filmora photo slideshow template free download and other templates can be searched on the official website of Filmora and can be downloaded from there in simple steps. It can edit and saved at any operating system.
With Filmora software, present information and content through slideshows. Filmora slideshow templates are available on the website free for making effective slideshows.
Part 1 Why Filmora Slideshow Templates Are Popular?
Filmora Slideshow templates are widely used by the users for creating new and impressiveslideshows. The reason for popularity of this software is many such as:
● It is an affordable software/application available free of cost for making slideshows using templates.
● It can run on computers and cell phones also, so there is flexibility in its access.
● It is equipped with various tools and features for both video and audio applications.
● Background effects, picture effects and animation features further make it more popular than the rest of the software.
● It is a good pleasing interface suitable to all content creators whether they are beginners or professionals.
● Video and audio control and video stabilization features make it further popular.
● Advanced text-editing make it possible to add contents in the video slides.
● Templates can be created by adding titles, text, sound, filters, and transitions.
● Theme-based templates are designed and developed looking into the needs f every user for different occasions.
● It has better editing tools like split, merge, rotate, and more.
● Auto-create videos features give the users comfort for using the application by saving their time and energy. Further they can add royalty-free images, videos, and music.
● Aspect ratio for the video creation can be changed.
Part 2 Where to Download Free Filmora Slideshow Templates
To use unlimited and free Filmora slideshow templates, one is required to have the application downloaded from the website. And thereafter one can download the different styles and patterns of templates from section filmora slideshow template free download. Once you create an account in the Filmora platform, you can easily connect with various templates useful for various occasions.
Filmora software or application is the only destination for having a bunch of various templates with many tools to improve the creation of slide shows. One can see the various templates available in the official website of Filmora. One can make slideshow with the help of video maker offered by Filmora. This software is free of cost. The easy-to-use interface feature of this software is good for beginners. It has various in-built customizable templates based in various themes like project, marketing, corporate, celebration, fun, natural, family, and business. It has auto-create mode which saves time and energy of the users as it automatically plays the slides when all media files, pictures or texts are placed over the various slides. For this one is just required to select the different files and click on “Auto-create” option.
Part 3 Best 10 Filmora Slideshow Templates
Filmora has many advanced templates for presentation and slideshow. One can find different kind of templates suitable for creating content and information for various applications. Filmora templates slideshow becomes more attractive when in-built Filmora templates are used. Some of the best 10 Filmora slideshow templates are:
01Business- Proposal Presentation Template
Looking into the business need of business users and marketing professionals, Filmora has developed Business-proposal presentation template with 45 unique custom slides. Business users can create impressive business proposals with various theme and color options. One can insert pictures and text easily in this template and can edit number of times.
02Pitch Deck Template
This template is used to design a pitch deck used by the companies to present at the stage and project about the company. These templates are well designed as they are handled by professionals.
03Company Profile Google Slides Template
It is mostly useful to business professionals to prepare business portfolios. The best thing with these templates is that they are unique, elegant, professional and creative. This template is multipurpose for different business applications.
04Clean Slideshow After Effects Templates
Those who want to make simple but impressive templates, clean slideshow after effect templates are best option. Through this template, one can focus on the main content and can add transitions. Photo slideshows can be easily created through this template.
05Minimal Corporate Presentation
This template is good for the beginners who desire to prepare a simple slideshow. The advantage of this template is that it is easy to use and text can be easily edited. One can insert picture for various corporate and business presentations.
06Corporate Event Promo
A business mostly does promotions and this needs a proper preparation. Corporate event promo presentation template is the best choice for such situations. One can create creative promo slides with such template by adding title and overlays in the template. They can also be edited easily.
07Business Marketing Presentation Layout
Most of the business organizations preferto choose such a template that can present their marketing plan in the best possible way. This Business Marketing Presentation is perfect for every business concern. It comes with nine designing options, through which one can easily replace images and text.
08Event Conference
For creating information and documents over template useful in an event conference, this template of filmora is very useful. The details of event and necessary information can be put in a systematic way through this template. However when played as slideshow, it can reach to maximum number of viewers.
09Mosaic Slideshow
Display of photographs, video albums or glimpse of any events can be impressively done with the help of Mosaic slideshow template. With increasing trends of photo sharing and video making, these templates are gaining popularity.
10Old Fashion Slides
As the name suggests, the templates is good for vintage slideshow. One can use this template for photo and video slideshows. Those who love to be creative, they can use this template.
These are some filmora template slideshow available at the website; however the users can also explore the other category of templates based on occasions at the website of Filmora. Every content creator will surely get desired template to present their information, data and pictures in a unique way.
Part 4 FAQ of Filmora Slideshow Templates
Wondershare Filmora Video Editor is a popular video editing application that also supports making slideshows through the use of various templates. It offers advance editing software for those who love to be creative and present their content in an artistic way. The various features of the software like elegant transitions, beautiful slides, video effects, text, audio and background effects make it more popular among beginners and professionals.
For Win 7 or later (64-bit)
For macOS 10.12 or later
Working with Filmora is easy and time saving. One can easily drag and drop the slides made and do editing on it. Making video through templates is an easy task. Just in few simple steps one can make and export the slides and play it. Photo video slideshows can also be made by using Filmora application. It runs smoothly over various operating systems.
● Whether Filmora has slideshow templates at its site?
Yes, the official website has various online free slideshow templates for the users.
● Whether I need to pay to get sample templates from Filmora?
The trial version of the software is free and you can download the slideshow templates free of cost.
● Whether the slideshow prepared in Flimora site can be edited with other application?
Yes, you can easily do editing on the slides made with Filmora application on other applications.
● What type of slideshare is available at Filmora?
All kind of slideshare and templates are available at Filmora that are useful for business, projects, marketing and personal purposes.
● Ending Thoughts →
● Filmora is a software/application widely used as video editing software and it is getting popular among the users due to its extraordinary features. It has great video editing tools, effects and transitions that give a complete package of video, slideshow and presentation making.
● Filmora has wide range of templates developed at its site for ease of making presentation and slideshows. These are developed looking to needs of every content creator. Some of templates available at the website are clean slideshow after effects templates, Mosaic slideshow, Business- proposal presentation template and many others.
● The filmora photo slideshow template free download and other templates can be searched on the official website of Filmora and can be downloaded from there in simple steps. It can edit and saved at any operating system.
Also read:
- Updated To Add SRT to MP4 Is Not as Hard as You Might Think. All You Just Need Is the Right Tool to Help You Get the Job Done. Read This Article and Learn the 8 Latest Methods to Merge SRT with MP4 Effortlessly
- Updated M31 LUT (Teal and Orange LUT) Free Download for 2024
- New The Complete Guide to Converting GIF to SVG With Ease
- Best Love Video Maker with Music
- Updated Splitting the Clips in Adobe After Effects Step by Step
- 5 Tips for Faster Editing in Filmora Video Editor
- Updated 2024 Approved How to DIY VHS Overlay in After Effects?
- What Are the Best Video Background Changers Online for 2024
- Updated Discord Is the Future of Networking. After All, It Is Here to Stay. Have You Heard of the Discord Animated Avatar? If Yes, You Understand Its Power and if Not, Ensure You Study This Article for More Information
- New How to Use Twixtor Effect to Create Super Slow-Motion Video for 2024
- Updated How to Add Subtitles in QuickTime Player for 2024
- Find Out The Best Dark Moody LUTs During Editing
- How to Resize FLV Videos EfficientlyWindows, Mac, Android, iPhone & Online for 2024
- Updated 2024 Approved Denoise a Video in Adobe Premiere Pro – Audio and Video Noise Removal
- Updated Converting an SRT (SRT/Sorted Reader) Into a DOCX File Is a Process. Here We Will Discuss Converting a Set File to a Docx File and More Details About This
- New How to Create a Freeze Frame Sequence Effect for 2024
- Updated How To Blur Background in Adobe Premiere Pro Detailed Guide
- New In 2024, How to Brighten a Video in Windows 10 | Step-By-Step Guide
- New In 2024, Enhance Your Film Production with These 5 Silence Detection Tools
- New Color Match Game Top Tips for You
- Updated This Well-Written Article Will Share a Descriptive Method on How to Stream Zoom to YouTube Quickly. By Doing so, You Can Share Your Zoom Session Live with Your YouTube Audience Effortlessly
- New This Article Will Show You How to Clone Yourslef in Videos with Filmora for 2024
- 2024 Approved How to Zoom In and Out on Mac
- 10 Mind-Blowing Video Collage Maker for PC for 2024
- New In 2024, Getting To Know More About the Video Editing Interface of Wondershare Filmora
- New Make Videos with Pictures and Music-10 Apps
- New How to Edit a TikTok Video After Posting for 2024
- Top 10 Best Slideshow Makers with Music
- 2024 Approved How to Get Zoom on TV Easy Solutions
- New How to Add a Lower Third to Your Video
- In 2024, How to Upload the Video to Twitch? Well, if You Dont Know the Process, This Detailed Guide Will Help You. While Explaining the Process, This Article Will Also Let You Know some Twitch Video Upload Guidelines
- Updated 2024 Approved Learn Topaz Video Enhance AI Review and Achieve Powerful Video Conversion
- The Ultimate Wedding Videography Checklist for 2024
- How to Create OBS Slideshow for 2024
- Updated 2024 Approved Camera Shake Effects in Videos Helps to Showcase Aesthetics and Vibes. Do You Wish to Add a Camera Shake in Videos? Consider Using the Video Editor Discussed Here for This
- Updated Top Best Free LUTs For Premiere Pro for 2024
- In 2024, Best 31 Video Trimmers for Computer, Phone and Online
- New Are You Seeking an Answer for What Is a LUT in the Video? In This Article, We Will Provide You with Detailed Information About LUTs and Their Utility
- Top 7 iCloud Activation Bypass Tools For your iPhone 12 Pro Max
- The Easiest Methods to Hard Reset Infinix Hot 30 5G | Dr.fone
- 4 Things You Must Know About Apple iPhone 12 Pro Activation Lock
- How to Lock Apps on Vivo Y100 to Protect Your Individual Information
- In 2024, How to Bypass FRP from Infinix Hot 40i?
- Updated Convert Video Voice to Text Online for Free Fast and Easy Ways
- The Best 8 VPN Hardware Devices Reviewed On Realme Narzo N55 | Dr.fone
- How to Unlock Apple iPhone 14 Plus Passcode without iTunes without Knowing Passcode?
- How To Simulate GPS Movement With Location Spoofer On Honor Magic 6 Pro? | Dr.fone
- In 2024, How To Stream Anything From Xiaomi 13T to Apple TV | Dr.fone
- Top 7 Skype Hacker to Hack Any Skype Account On your Sony Xperia 5 V | Dr.fone
- Why Your WhatsApp Live Location is Not Updating and How to Fix on your OnePlus 11 5G | Dr.fone
- In 2024, 9 Best Phone Monitoring Apps for Realme GT Neo 5 | Dr.fone
- In 2024, How to Fake GPS on Android without Mock Location For your Honor 80 Pro Straight Screen Edition | Dr.fone
- 3 Ways to Fake GPS Without Root On Realme GT 5 | Dr.fone
- 3 Facts You Need to Know about Screen Mirroring Sony Xperia 5 V | Dr.fone
- In 2024, A Full Review for iTools Virtual Location and Top 5 Alternatives For Apple iPhone 12/iPad | Dr.fone
- Title: Updated 2024 Approved In This Article Ill Share to You some of the Skin Care Vlog Ideas for You to Start Doing a Skin Care Review on Your YouTube Channel. But Before that Ill Share with You How Important Is Skin Care?
- Author: Morgan
- Created at : 2024-06-24 01:30:42
- Updated at : 2024-06-25 01:30:42
- Link: https://ai-video-editing.techidaily.com/updated-2024-approved-in-this-article-ill-share-to-you-some-of-the-skin-care-vlog-ideas-for-you-to-start-doing-a-skin-care-review-on-your-youtube-channel-bu/
- License: This work is licensed under CC BY-NC-SA 4.0.
